Embed Size (px)
Citation preview
July 20111725-61710-001
Polycom® RealPresence™ Ready Deployment Guide
This guide describes how to get started with the Polycom® RealPresence™ Ready solution for small and medium businesses (SMB). The solution helps you communicate effectively with external customers or partners, eliminate expensive travel costs, and tie your business together with face-to-face communications.
What’s in the Solution?The RealPresence Ready solution includes a Polycom® HDX® 7000 system, two Polycom® HDX® 6000 systems, five Polycom® Telepresence m100 desktop clients, and a multipoint license for the HDX 7000 system.
One HDX 7000 System Two HDX 6000 Systems Five Telepresence m100 System Licenses
Polycom® RealPresence™ Ready Deployment Guide
2 Polycom, Inc.
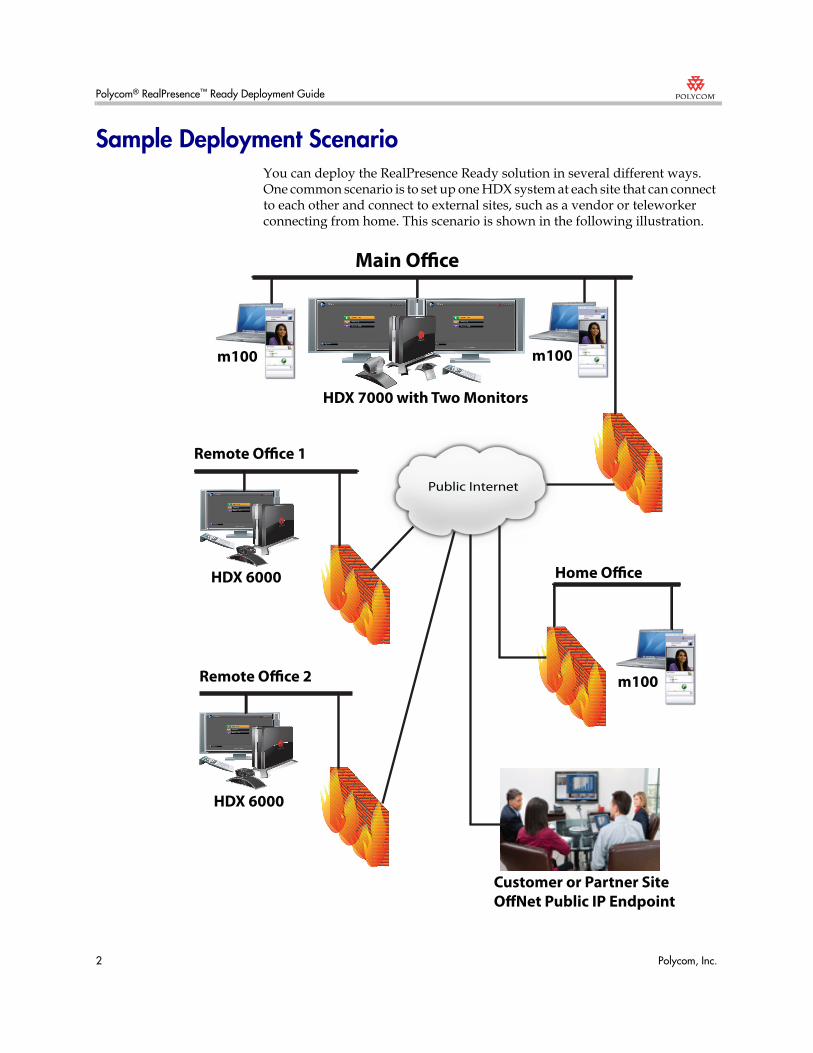
Sample Deployment ScenarioYou can deploy the RealPresence Ready solution in several different ways. One common scenario is to set up one HDX system at each site that can connect to each other and connect to external sites, such as a vendor or teleworker connecting from home. This scenario is shown in the following illustration.
Public Internet
Main Office
m100 m100
Home Office
m100
Customer or Partner SiteOffNet Public IP Endpoint
Remote Office 2
HDX 6000
HDX 7000 with Two MonitorsHDX 7000 with
Remote Office 1
HDX 6000
Polycom® RealPresence™ Ready Deployment Guide
Polycom, Inc. 3
For more scenario examples, refer to the SMB solutions page at www.polycom.com/smb.
Pre-Installation ChecklistUse the following checklist to ensure that you are ready to begin the installation process.
Firewall ConfigurationWhen configuring your firewalls, you have two options. If you have one HDX system at each site, the easiest to implement is Option 1. Otherwise, use Option 2.
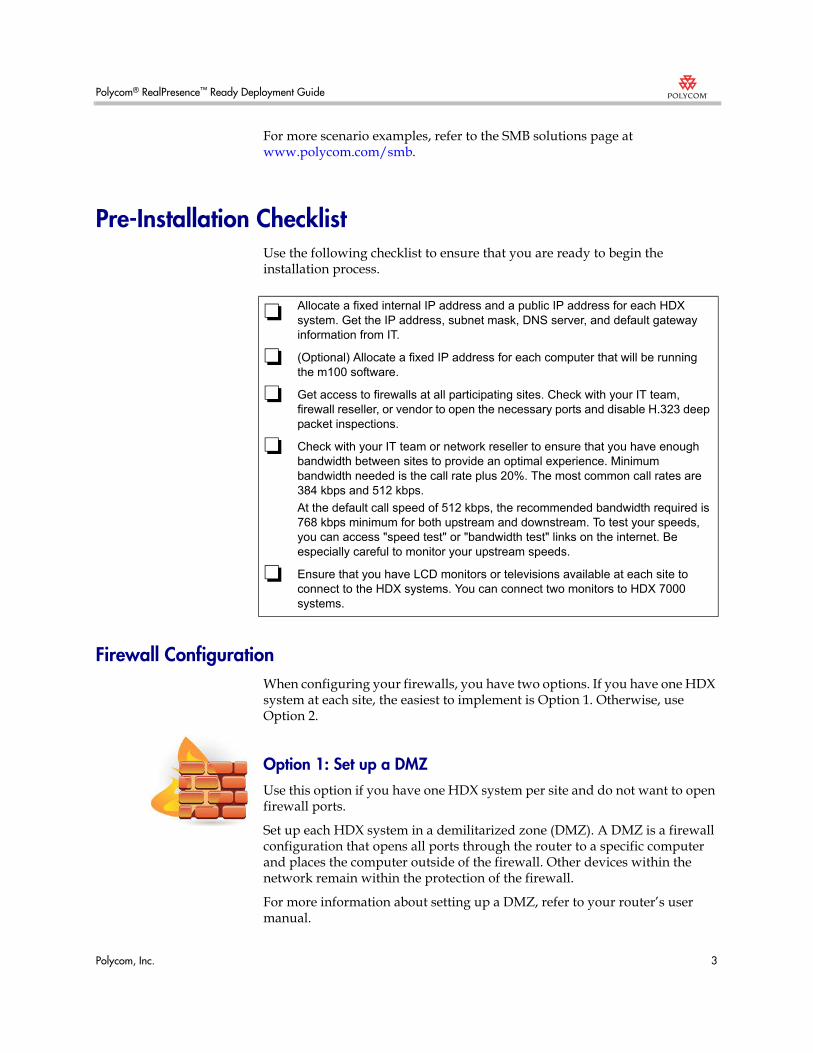
Option 1: Set up a DMZUse this option if you have one HDX system per site and do not want to open firewall ports.
Set up each HDX system in a demilitarized zone (DMZ). A DMZ is a firewall configuration that opens all ports through the router to a specific computer and places the computer outside of the firewall. Other devices within the network remain within the protection of the firewall.
For more information about setting up a DMZ, refer to your router’s user manual.
❏ Allocate a fixed internal IP address and a public IP address for each HDX system. Get the IP address, subnet mask, DNS server, and default gateway information from IT.
❏ (Optional) Allocate a fixed IP address for each computer that will be running the m100 software.
❏ Get access to firewalls at all participating sites. Check with your IT team, firewall reseller, or vendor to open the necessary ports and disable H.323 deep packet inspections.
❏ Check with your IT team or network reseller to ensure that you have enough bandwidth between sites to provide an optimal experience. Minimum bandwidth needed is the call rate plus 20%. The most common call rates are 384 kbps and 512 kbps.
At the default call speed of 512 kbps, the recommended bandwidth required is 768 kbps minimum for both upstream and downstream. To test your speeds, you can access "speed test" or "bandwidth test" links on the internet. Be especially careful to monitor your upstream speeds.
❏ Ensure that you have LCD monitors or televisions available at each site to connect to the HDX systems. You can connect two monitors to HDX 7000 systems.
Polycom® RealPresence™ Ready Deployment Guide
4 Polycom, Inc.
Option 2: Open Firewall PortsThis option is for sites that have more than one HDX system. Open the following firewall ports:
• Inbound TCP: 1720, 3230 – 3243
• Inbound UDP: 3230 – 3285
• Outbound TCP: ANY
• Outbound TCP: ANY
For more information about opening firewall ports, refer to your router’s user manual.
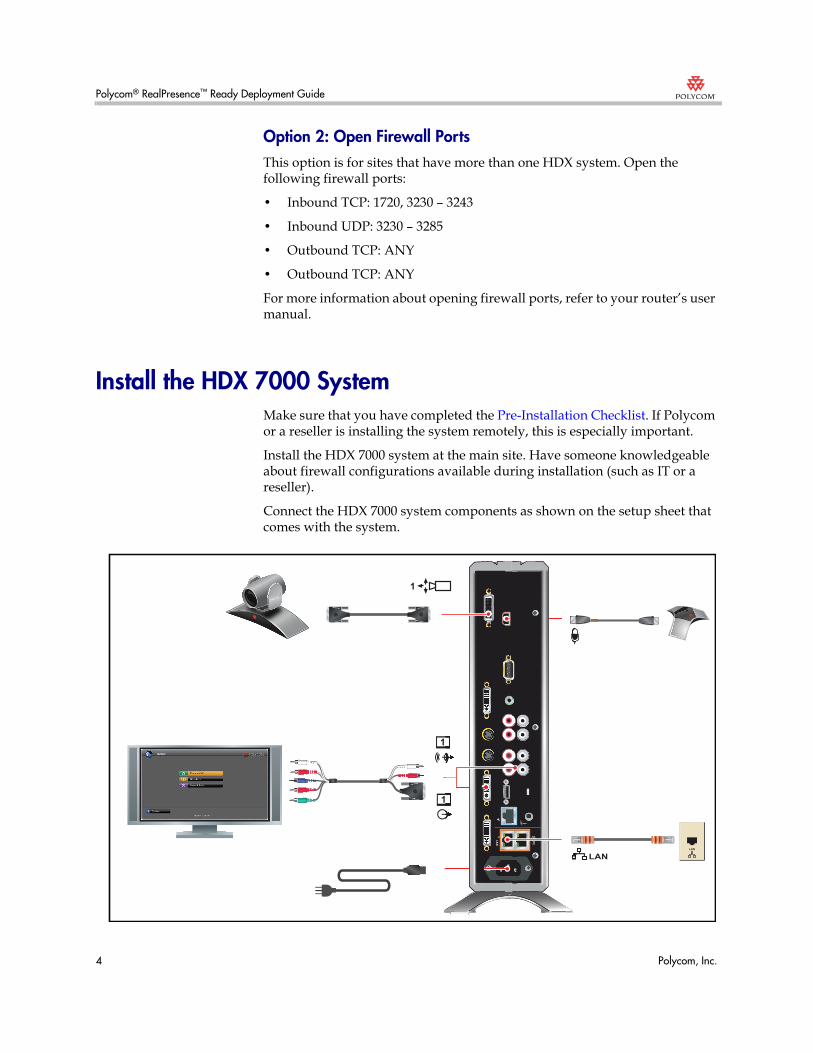
Install the HDX 7000 SystemMake sure that you have completed the Pre-Installation Checklist. If Polycom or a reseller is installing the system remotely, this is especially important.
Install the HDX 7000 system at the main site. Have someone knowledgeable about firewall configurations available during installation (such as IT or a reseller).
Connect the HDX 7000 system components as shown on the setup sheet that comes with the system.
Polycom® RealPresence™ Ready Deployment Guide
Polycom, Inc. 5
Configure the HDX 7000The first time you power up the HDX 7000 system, the setup wizard appears. You can leave most settings at their default values. Follow these steps when you see the setup wizard Language selection screen. To advance through the screens, click the Next button.
Use the Set Up Wizard
To use the wizard to configure your system:
1 Select your language and country.
2 When prompted, enter a name for the HDX system.
3 On the LAN Properties screen, set IP Address (IPv4) to Enter IP address manually. Enter the IP Address, Subnet Mask, and Default Gateway provided by IT.
4 On the Security screen, delete the Room Password or enter a new one. The default password is the system serial number.
5 On the Registration screen, enter your email address.
The system will restart.
Access the HDX System Web Interface
To access the HDX web interface:
1 On a computer, open a web browser.
2 In the browser address line, enter the system’s IP address. For example, go to the Polycom HDX web interface and enter:http://10.11.12.13
Configure the Network Address Translation (NAT) Use this 1-to-1 configuration only if you are not using VPN and your HDX system is inside a firewall.
To configure a 1-to-1 Network Address Translation (NAT):
1 In the web interface, go to Admin Settings > Network > IP Network.
2 In the Firewall section, enable Fixed Ports.
3 Set the NAT Configuration to one of the following:
Polycom® RealPresence™ Ready Deployment Guide
6 Polycom, Inc.
— If you set up a DMZ, set to Auto.
— If you opened firewall ports, set to Manual.
4 If you selected Manual in step 3, in the NAT Public (WAN) Address, enter the public IP address for this system. Example: 70.202.30.250.
5 For Address Displayed in Global Directory, select Public.
6 Click Update.
Enable the Multipoint OptionThe RealPresence Ready solution includes one multipoint option license for use on the HDX 7000 system.
To obtain the option key code:
1 On a computer, open Internet Explorer version 6.x, 7.x, or 8.x.
2 Log in at support.polycom.com.
3 Under Licensing & Product Registration, click Activation/Upgrade.
4 Click Single Activation/Upgrade.
Follow the onscreen instructions to request the option key code. Make a note of this number for use during installation.
5 In the Polycom HDX system’s web interface, go to Admin Settings > General Settings > Options and enter the option key.
6 Click Update.
Create and Save a Favorites ListAs a best practice, create your Favorites list on the HDX 7000, then download it to your computer so you can copy the Favorites to the HDX 6000 systems.
To create Favorites for Your Contacts:
1 In the Polycom HDX web interface, go to Place a Call > Directory.
2 Select +Favorites in the directory list.
3 Select Create Contact to create a new Favorite.
— Enter the Name and public IP Address of the Favorite contact, and then click Save.
— Repeat this step to create a Favorites entry for the HDX 7000 system and for both HDX 6000 systems.
— Repeat this step to create a Favorites entry for any other video endpoints you plan to call.
Polycom® RealPresence™ Ready Deployment Guide
Polycom, Inc. 7
To download Favorites to your computer using the Polycom HDX web interface:
1 In the Polycom HDX web interface, go to Utilities > Import/Export Directory.
2 Click HDX 7000 HD> PC to save the .xml file of Favorite contacts from the Polycom HDX system to your computer. Save the file to a location on your computer.
Place a Test Call to the Polycom Test System
To place a test call
1 From the HDX 7000 system Home screen, use the remote control to select Place a Call.
2 Enter this IP address: 140.242.250.205
3 Select Call.
If the call is successful, you see a recorded video, with audio, about Polycom solutions.
For more information on how to place calls, refer to www.polycom.com/videotest.
Install the HDX 6000 SystemsInstall the HDX 6000 systems at the remote office sites. Have someone knowledgeable about firewall configurations available during installation (such as IT or a reseller).
Polycom® RealPresence™ Ready Deployment Guide
8 Polycom, Inc.
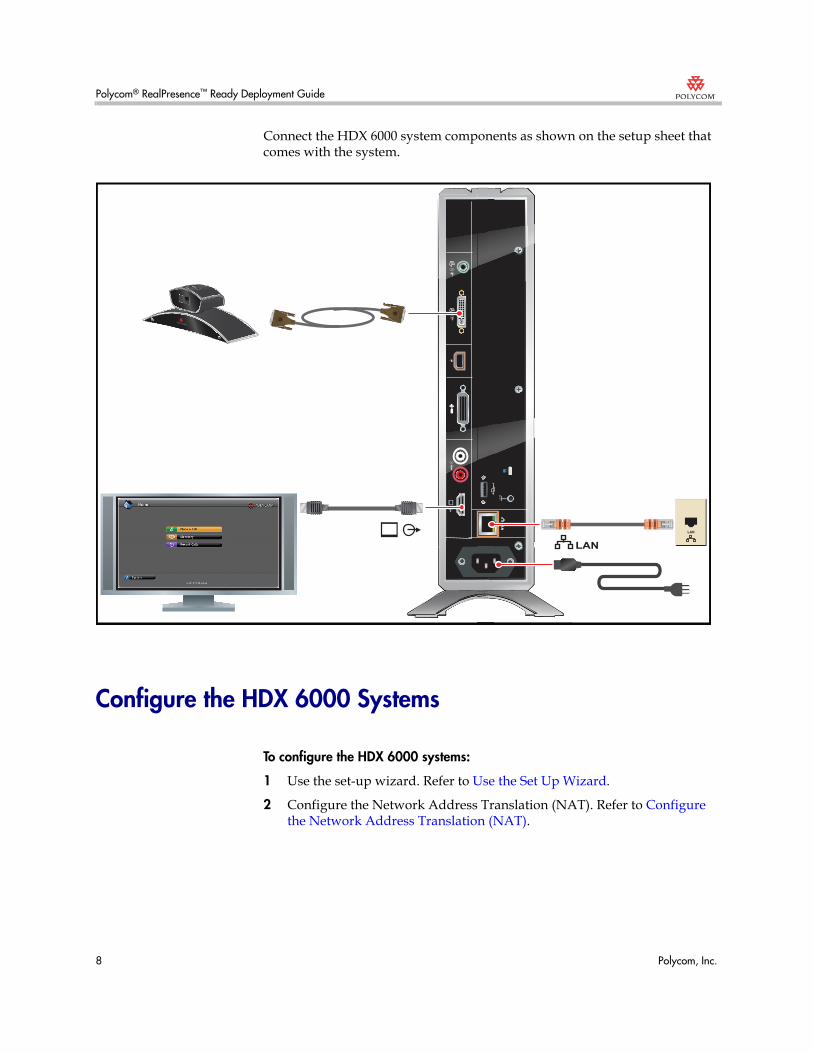
Connect the HDX 6000 system components as shown on the setup sheet that comes with the system.
Configure the HDX 6000 Systems
To configure the HDX 6000 systems:
1 Use the set-up wizard. Refer to Use the Set Up Wizard.
2 Configure the Network Address Translation (NAT). Refer to Configure the Network Address Translation (NAT).
Polycom® RealPresence™ Ready Deployment Guide
Polycom, Inc. 9
Import the Favorites List to Your HDX 6000 Systems
To download Favorites to your computer using the Polycom HDX web interface:
1 Obtain the .xml file of Favorite contacts saved from the HDX 7000 system.
2 In the Polycom HDX web interface, go to Utilities > Import/Export Directory.
3 Click PC > HDX 6000 to import the .xml file of Favorite contacts from your computer to the HDX 6000 system.
Place Test Calls
To place test calls to Polycom and to the HDX 7000 system:
1 From the HDX 6000 system Home screen, use the remote control to select Place a Call.
2 Enter this IP address: 140.242.250.205
3 Select Call.
If the call is successful, you should see a recorded video, with audio, about Polycom solutions.
4 As a final test on the HDX 6000 system, call the HDX 7000 system.
Install the Telepresence m100 Software
To prepare for Telepresence m100 software installation:
• Have someone knowledgeable about firewall configurations available during installation (such as IT or a reseller).
• If you are running on a laptop, be sure the AC power is plugged in before starting Windows to ensure the CPU is running in full power mode.
• This installation requires the Adobe AIR application. If you have not installed Adobe AIR, follow the prompts on the screen to install it.
To install Telepresence m100 software on desktop or laptop computers:
1 Double-click the Telepresence m100 setup file to start the installation.
2 When the first setup wizard starts, follow the steps to complete the installation and setup.
Polycom® RealPresence™ Ready Deployment Guide
10 Polycom, Inc.
To activate the Telepresence m100 software:
When prompted, do one of the following:
• Enter the license number provided with the software and the activation key code that you received when you registered the software.
• If you have the license file, select Import License File.
Configure the Telepresence m100 SystemsUse this configuration only if you meet two criteria: You are not using VPN and your system is inside a firewall.
To enable NAT and specify the external IP address:
1 From the main window, click Menu > Preferences > Call Settings.
2 Click Use NAT.
3 Enter the external IP address.
Callers outside the LAN use this external IP address to call your system.
Add Contacts
To create a new Contact:
1 From the main window, right-click on the Contacts list and select Create Contact.
2 Enter the display name and address, then click OK.
3 Repeat the steps above to create additional contact entries, such as the HDX systems at each site, the Telepresence m100 systems at each site, and any other video endpoints you plan to call.
Place Test CallsTo place test calls:
Call a name from your Contacts list and do one of the following:
— Double-click a Contact to place a video call. If the Contact's system does not support video, an audio call starts.
— Select a Contact, and then click the Call button to place a video call. Right-click a Contact and choose Place a Call.
Polycom® RealPresence™ Ready Deployment Guide
Polycom, Inc. 11
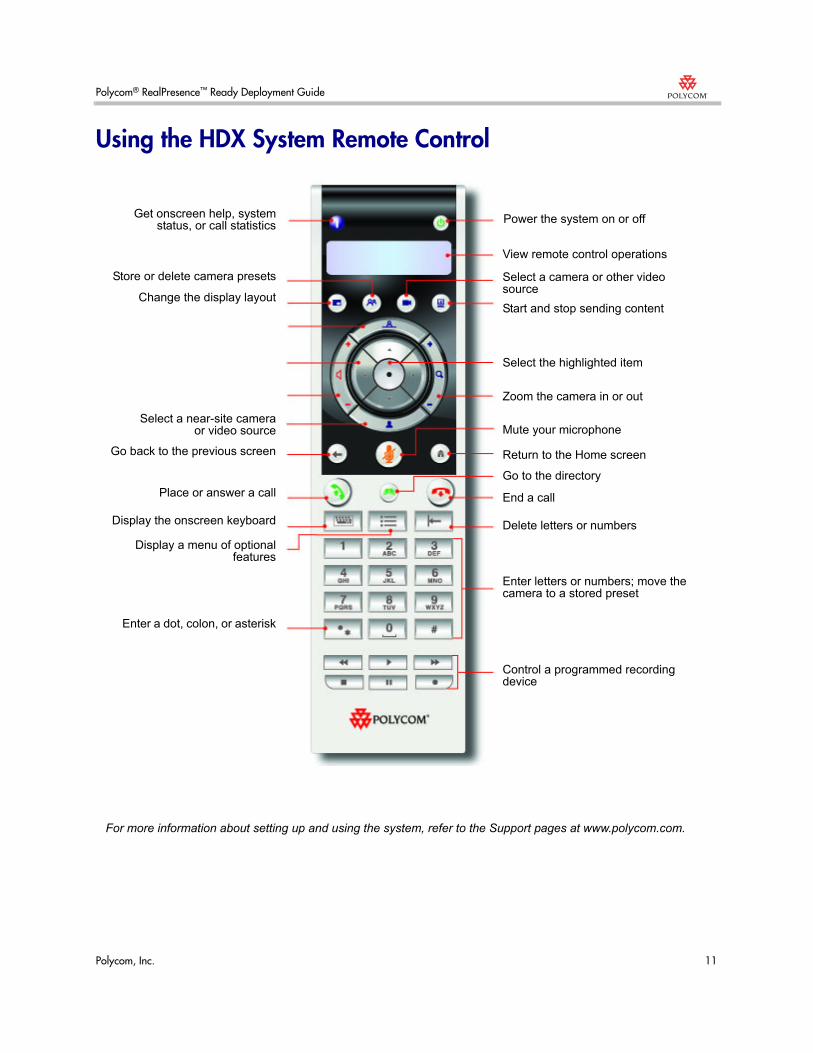
Using the HDX System Remote Control
Enter letters or numbers; move the camera to a stored preset
Control a programmed recording device
Select a camera or other video source
Power the system on or off
Start and stop sending content
Zoom the camera in or out
Mute your microphone
Delete letters or numbers
End a call
Go to the directory
Select the highlighted item
View remote control operations
Return to the Home screen
For more information about setting up and using the system, refer to the Support pages at www.polycom.com.
Get onscreen help, systemstatus, or call statistics
Select a near-site cameraor video source
Display a menu of optionalfeatures
Enter a dot, colon, or asterisk
Store or delete camera presets
Go back to the previous screen
Change the display layout
Place or answer a call
Display the onscreen keyboard
Polycom® RealPresence™ Ready Deployment Guide
12 Polycom, Inc.
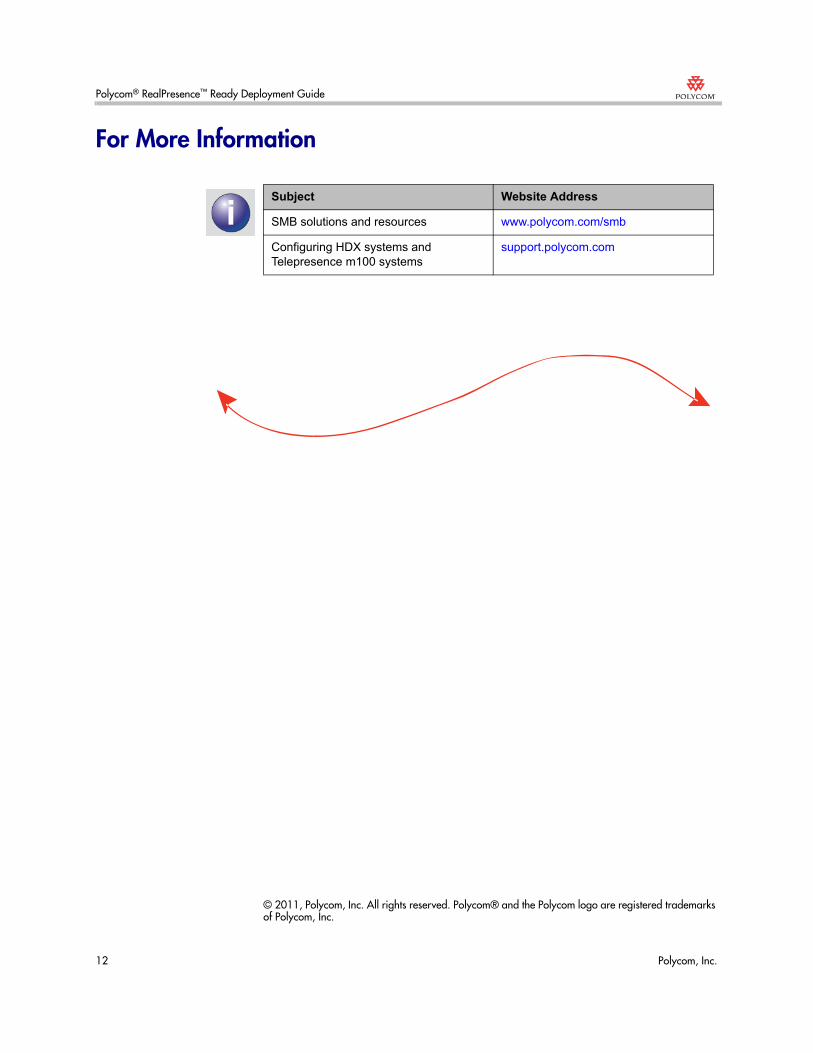
For More Information
© 2011, Polycom, Inc. All rights reserved. Polycom® and the Polycom logo are registered trademarks of Polycom, Inc.
Subject Website Address
SMB solutions and resources www.polycom.com/smb
Configuring HDX systems and Telepresence m100 systems
support.polycom.com