Embed Size (px)
Citation preview
USER GUIDE 2.8.2 | November 2017 | 3725-69597-002B
Polycom® RealPresence® Media Suite
Copyright© 2017, Polycom, Inc. All rights reserved. No part of this document may be reproduced, translated into another language or format, or transmitted in any form or by any means, electronic or mechanical, for any purpose, without the express written permission of Polycom, Inc.
6001 America Center Drive San Jose, CA 95002 USA
Trademarks Polycom®, the Polycom logo and the names and marks associated with Polycom products are trademarks and/or service marks of Polycom, Inc. and are registered and/or common law marks in the United States and various other countries.
All other trademarks are property of their respective owners. No portion hereof may be reproduced or transmitted in any form or by any means, for any purpose other than the recipient's personal use, without the express written permission of Polycom.
Disclaimer While Polycom uses reasonable efforts to include accurate and up-to-date information in this document, Polycom makes no warranties or representations as to its accuracy. Polycom assumes no liability or responsibility for any typographical or other errors or omissions in the content of this document.
Limitation of Liability Polycom and/or its respective suppliers make no representations about the suitability of the information contained in this document for any purpose. Information is provided "as is" without warranty of any kind and is subject to change without notice. The entire risk arising out of its use remains with the recipient. In no event shall Polycom and/or its respective suppliers be liable for any direct, consequential, incidental, special, punitive or other damages whatsoever (including without limitation, damages for loss of business profits, business interruption, or loss of business information), even if Polycom has been advised of the possibility of such damages.
End User License Agreement BY USING THIS PRODUCT, YOU ARE AGREEING TO THE TERMS OF THE END USER LICENSE AGREEMENT (EULA) . IF YOU DO NOT AGREE TO THE TERMS OF THE EULA, DO NOT USE THE PRODUCT, AND YOU MAY RETURN IT IN THE ORIGINAL PACKAGING TO THE SELLER FROM WHOM YOU PURCHASED THE PRODUCT.
Patent Information The accompanying product may be protected by one or more U.S. and foreign patents and/or pending patent applications held by Polycom, Inc.
Open Source Software Used in this Product This product may contain open source software. You may receive the open source software from Polycom up to three (3) years after the distribution date of the applicable product or software at a charge not greater than the cost to Polycom of shipping or distributing the software to you. To receive software information, as well as the open source software code used in this product, contact Polycom by email at [email protected] (for video products) or [email protected] (for voice products).
Customer Feedback We are striving to improve our documentation quality and we appreciate your feedback. Email your opinions and comments to [email protected].
Polycom Support Visit the Polycom Support Center for End User License Agreements, software downloads, product documents, product licenses, troubleshooting tips, service requests, and more.
Contents
Regulatory Notices for RealPresence Media Suite Appliance Edition..........6Important Safeguards..........................................................................................................6Regulatory Notices..............................................................................................................7
Russia Regulatory Information................................................................................. 7
Before You Begin............................................................................................... 9Audience, Purpose and Required Skills..............................................................................9Get Help.............................................................................................................................. 9
Polycom and Partner Resources..............................................................................9The Polycom Community....................................................................................... 10
Getting Started with RealPresence Media Suite............................................11Features and Capabilities................................................................................................. 11
User Portal............................................................................................................. 11Easy Capture Application....................................................................................... 11
Navigating the RealPresence Media Suite Web-Based User Portal.................................12User Roles and Permissions.................................................................................. 12User Portal Languages...........................................................................................12User Portal Home Page......................................................................................... 12Search and Sort Lists............................................................................................. 15
Screen Reader.................................................................................................................. 16
Live Streaming..................................................................................................18Conference Live Events.................................................................................................... 18
Schedule a Conference Live Event........................................................................ 18Start an Ad Hoc Live Event.................................................................................... 21
Easy Capture Live Events.................................................................................................23Schedule Easy Capture Live Event........................................................................23Start a Scheduled Easy Capture Event..................................................................24Start an Ad Hoc Easy Capture Live Event............................................................. 25
Skype for Business Live Events........................................................................................25Start a Live Event for Skype for Business Meeting................................................ 25
Dial in from an Endpoint....................................................................................................26Managing the Live Events.................................................................................................26
Open Live Event Control Room..............................................................................27Live Event Control Bar........................................................................................... 27Question and Answer............................................................................................. 27
Polycom, Inc. 1
Reconnect a Live Event......................................................................................... 28Add a New Participant............................................................................................28
View an Ongoing Live Event............................................................................................. 29View All Events................................................................................................................. 29Live Event Email Notifications...........................................................................................29
Email Notification for Created Live Events............................................................. 29Email Notification for Completed Live Events........................................................ 30
Recording Meetings......................................................................................... 31Conference Recording...................................................................................................... 31
Start an Ad Hoc Recording from a Conference......................................................31Schedule a Recording............................................................................................ 33Start a Point-to-Point Recording.............................................................................35
Easy Capture Recording................................................................................................... 37Download Easy Capture Application...................................................................... 37Sign into the Easy Capture Application.................................................................. 37Configure Basic Information................................................................................... 38Configure Resource Settings................................................................................. 38Record a Meeting with the Easy Capture Application............................................ 39
Skype for Business Meeting Recording............................................................................ 40Record a Skype for Business Meeting through Joining the Meeting......................40Record a Skype for Business Meeting through Dialing out from the User Portal...40
Managing Your Media in My Media Center.................................................... 42Channel.............................................................................................................................42
Create a Channel................................................................................................... 42Managing a Channel.............................................................................................. 43
Events............................................................................................................................... 47Events Icons...........................................................................................................47Create a New Event by Cloning............................................................................. 47View an Event........................................................................................................ 47Delete an Event......................................................................................................48Start a Scheduled Conference Event in Advance.................................................. 48Start a Scheduled Easy Capture Live Event in Advance....................................... 48Edit a Scheduled Event.......................................................................................... 48Check an Event Report.......................................................................................... 49
Media Archives..................................................................................................................49Managing Media Archives...................................................................................... 50Searching Media Archives......................................................................................52Sharing Media Archives......................................................................................... 52Uploading Attachment to Media Archive................................................................ 53
Contents
Polycom, Inc. 2
Playing Back Video................................................................................................ 54Video Call Play Back When Dialing in from an Endpoint....................................... 55Editing Media Archives...........................................................................................57Generating Closed Caption File............................................................................. 61Delete a Media Archive.......................................................................................... 63Upload Media to My Media Center.........................................................................64
Survey and Test................................................................................................................ 65Create a Survey..................................................................................................... 65Join a Survey..........................................................................................................66Manage Survey...................................................................................................... 66Create a Test..........................................................................................................67Join a Test..............................................................................................................68
Account............................................................................................................................. 68Set Default Meeting Room..................................................................................... 68Configure Account Level Content Expiration Rule................................................. 68
Play Media Using RealPresence Media Suite Player.................................... 70Show Closed Captioned Video......................................................................................... 71Vote for a Video................................................................................................................ 72Scan the QR Code and View a Video from a Mobile Phone.............................................72Get the Media Link............................................................................................................ 72Get the Media Embed Code..............................................................................................72Download the Media......................................................................................................... 73
Download the Media with Default Format.............................................................. 73Download the Media with Multiple Formats and Thumbnails................................. 73Download an Attachment from a Media Archive.................................................... 74
User Portal Administration..............................................................................75Access the User Portal Admin Section............................................................................. 75Customizing Beyond the Default Menus........................................................................... 76
Add New Menus on Home Page............................................................................ 76Change the Sequence of Menus Shown................................................................76Delete a Menu on the Home Page......................................................................... 77Change a Menu Name Displayed on the Home Page........................................... 77
Customizing Slider............................................................................................................ 77Edit the Existing Slider........................................................................................... 77Add a New Slider....................................................................................................78
Customizing Links on Home Page.................................................................................... 78Add New Link......................................................................................................... 78Edit or Delete the Existing Links.............................................................................79
Customize User Portal Login Screen Picture....................................................................79
Contents
Polycom, Inc. 3

Customize Test Certification Image.................................................................................. 80Customize User Portal Logo Icon..................................................................................... 80Managing Archives............................................................................................................80
Pin Archives on Home Page.................................................................................. 80Delete Archives...................................................................................................... 81Bulk Download Archives.........................................................................................81Edit the Archive Properties.....................................................................................81Edit the Archive Cover............................................................................................82Automatic Generate Closed Caption......................................................................83Upload Attachment to Media Archive..................................................................... 83Upload Closed Caption Files to a Archive..............................................................84Get the Archive Link............................................................................................... 84Get the Archive Embed Code.................................................................................85Assign Archives to the Specific User......................................................................85Check the Archive Report...................................................................................... 85Show Archives by Duration.................................................................................... 86Unpin an Archive.................................................................................................... 87Restore Archives in Trash Folder...........................................................................87Delete Archives in Trash Folder............................................................................. 87
Organizing Media Using Categories................................................................................. 88Add or Edit a Category........................................................................................... 88Check the Category Report....................................................................................88
Managing Channels.......................................................................................................... 88Reassign the Owner of the Channel...................................................................... 89Edit the Channel.....................................................................................................89Delete the Channel.................................................................................................92
Managing Events.............................................................................................................. 92Reassign the Owner of the Event...........................................................................92Colon the Event......................................................................................................92Delete the Event.....................................................................................................93
Managing Survey and Test............................................................................................... 93Assign a Survey or Test......................................................................................... 93Close the Survey or Test........................................................................................93Delete an Expired Survey or Test.......................................................................... 94
Configuring Recording Publish Rule................................................................................. 94Configure Recording Publish Rule based on VMR................................................ 94Configuring Recording Publish Rule based on VRR.............................................. 95
Configure Transcoding Profile...........................................................................................96Configuring Cielo24 Service Setting................................................................................. 96
Set the Cielo24 Service Setting..............................................................................96View Speech-to-Text Task List...............................................................................97
Configuring Other System Settings...................................................................................97
Contents
Polycom, Inc. 4
Set Dial-in Live Streaming Privacy......................................................................... 97Show Player Notification........................................................................................ 98Enable Secure Token for Streaming URL.............................................................. 98Enable Flash Player for Internet Explorer.............................................................. 99Configuring Content Expiration.............................................................................. 99
Configuring Roles and Permissions................................................................................ 100Role Permission Definition................................................................................... 101Create a New Role............................................................................................... 102Edit a Role............................................................................................................102Delete a Role........................................................................................................103Assign Role to User or Group.............................................................................. 103Assign Role to Active Directory User or Active Directory Group.......................... 103
Checking System Report................................................................................................ 104
TV User Interface............................................................................................106Understand the Main Menu.............................................................................................106
Troubleshooting............................................................................................. 108RealPresence Media Suite Player Cannot Display Video Properly................................ 108
Contents
Polycom, Inc. 5
Regulatory Notices for RealPresence Media Suite Appliance EditionTopics:
• Important Safeguards
• Regulatory Notices
This section introduces the important safeguards and regulatory notices.
Important SafeguardsRead and understand the following instructions before using the system:
• Close supervision is necessary when the system is used by or near children. Do not leave unattended while in use.
• Only use electrical extension cords with a current rating at least equal to that of the system.• Always disconnect the system from power before cleaning and servicing and when not in use.• Do not spray liquids directly onto the system when cleaning. Always apply the liquid first to a static-
free cloth.• Do not immerse the system in any liquid or place any liquids on it.• Do not disassemble this system. To reduce the risk of shock and to maintain the warranty on the
system, a qualified technician must perform service or repair work.• Connect this appliance to a grounded outlet.• Only connect the system to surge protected power outlets.• Keep ventilation openings free of any obstructions.• If the system or any accessories are installed in an enclosed space such as a cabinet, ensure that
the air temperature in the enclosure does not exceed 40°C (104° F). You may need to provide forced cooling to keep the equipment within its operating temperature range.
• Do not use this product near water.• Avoid using this product during an electrical storm. There may be a remote risk of electric shock
from lighting.• Only use this product below the altitude of 2000 meters.• Only for the non-tropical climate conditions for safe use. Refer to Special Safety Instructions for
more information.• No user serviceable parts are contained within the device.
Note: Replace lithium cell carefully.The device contains a lithium cell. Risk of explosion if battery is incorrectly replaced. Replace only with the same or equivalent type recommended by the manufacture. Dispose used batteries according to the manufacturer's instructions.
SAVE THESE INSTRUCTIONS.
Polycom, Inc. 6
Regulatory NoticesUSA and Canadian Regulatory Notices
This Class [A] digital apparatus complies with Canadian ICES-003.
Cet appareil numérique de la classe [A] est conforme à la norme NMB-003 du Canada.
This device complies with part 15 of the FCC Rules. Operation is subject to the following two conditions: This device may not cause harmful interference, and this device must accept any interference received, including interference that may cause undesired operation.
Note: This equipment has been tested and found to comply with the limits for a Class A digital device, pursuant to part 15 of the FCC Rules. These limits are designed to provide reasonable protection against harmful interference when the equipment is operated in a commercial environment. This equipment generates, uses, and can radiate radio frequency energy and, if not installed and used in accordance with the instruction manual, may cause harmful interference to radio communications. Operation of this equipment in a residential area is likely to cause harmful interference in which case the user will be required to correct the interference at his own expense
In accordance with part 15 of the FCC rules, the user is cautioned that any changes or modifications not expressly approved by Polycom Inc. could void the user's authority to operate the equipment.
EU Regulatory Notices
This RealPresence Media Suite system has been marked with the CE mark. This mark indicates compliance with EEC Directives 2006/95/EC and 2004/108/EC. A full copy of the Declaration of Conformity can be obtained from Polycom Ltd, 270 Bath Road, Slough, Berkshire, SL1 4DX, UK.
この装置は、情報処理装置等電波障害自主規制協議会(VCCI)の基準
に基づくクラス A 情報技術装置です。 この装置を家庭環境で使用すると電波
妨害を引き起こすことがあります。 この場合には使用者が適切な対策を講ず
るよう要求されることがあります。
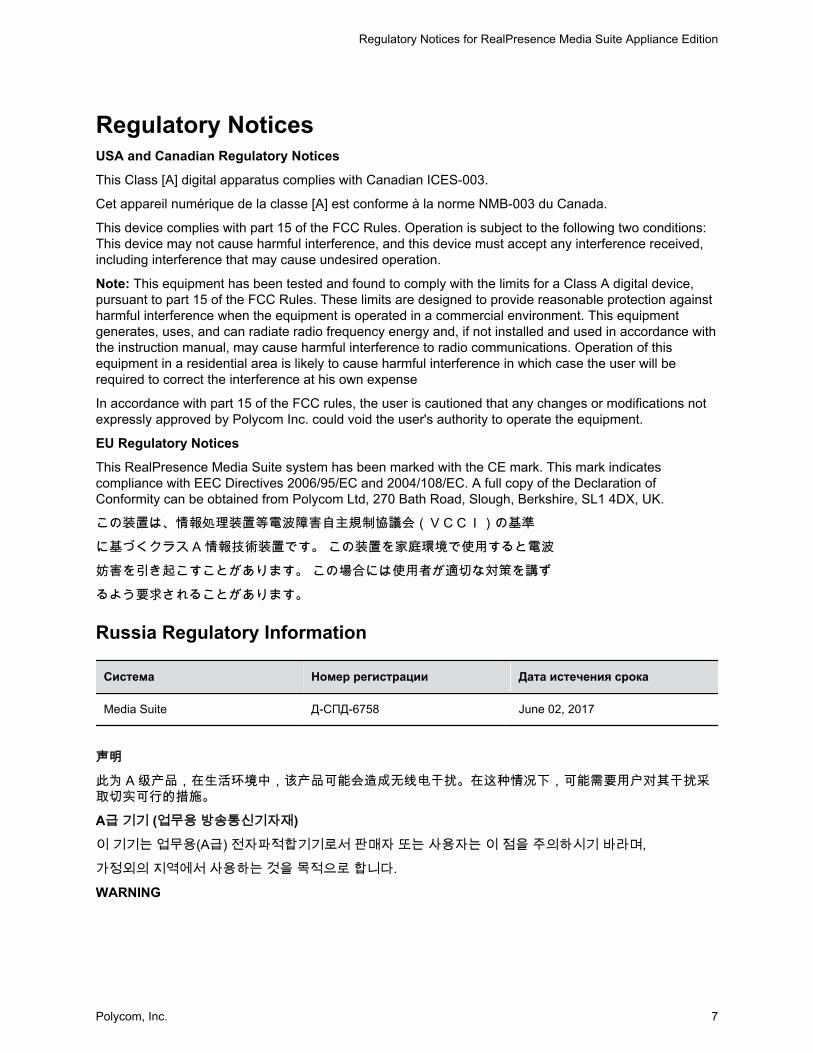
Russia Regulatory Information
Система Номер регистрации Дата истечения срока
Media Suite Д-СПД-6758 June 02, 2017
声明
此为 A 级产品,在生活环境中,该产品可能会造成无线电干扰。在这种情况下,可能需要用户对其干扰采取切实可行的措施。
A급 기기 (업무용 방송통신기자재)
이 기기는 업무용(A급) 전자파적합기기로서 판매자 또는 사용자는 이 점을 주의하시기 바라며,
가정외의 지역에서 사용하는 것을 목적으로 합니다.
WARNING
Regulatory Notices for RealPresence Media Suite Appliance Edition
Polycom, Inc. 7
This is a Class A product. In a domestic environment this product may cause radio interference in which case the user may be required to take adequate measures.
Safety Considerations and Storage
• RealPresence Media Suite has a 7 year period of life.• RealPresence Media Suite has a 7 year period of storage.
Electrical safety advisory
We recommend that you install an AC surge arrestor in the AC outlet to which this device is connected. This action will help to avoid damage to the equipment caused by local lighting strikes and other electrical surges.
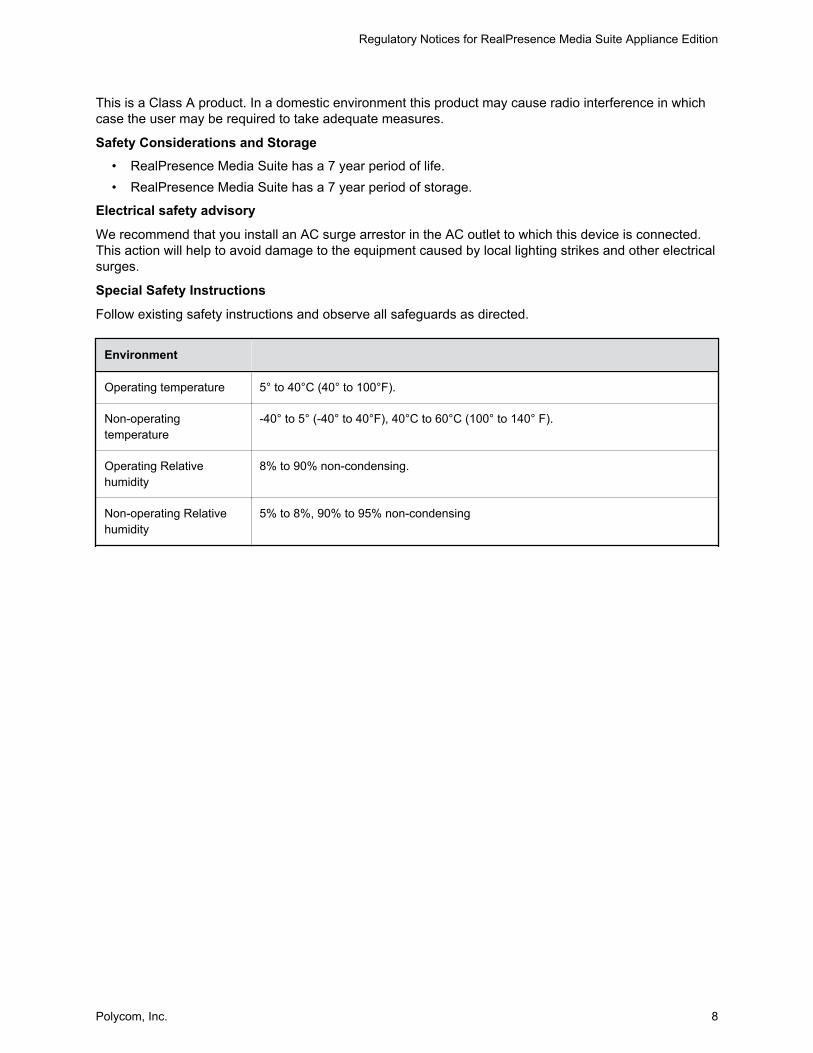
Special Safety Instructions
Follow existing safety instructions and observe all safeguards as directed.
Environment
Operating temperature 5° to 40°C (40° to 100°F).
Non-operating temperature
-40° to 5° (-40° to 40°F), 40°C to 60°C (100° to 140° F).
Operating Relative humidity
8% to 90% non-condensing.
Non-operating Relative humidity
5% to 8%, 90% to 95% non-condensing
Regulatory Notices for RealPresence Media Suite Appliance Edition
Polycom, Inc. 8

Before You BeginTopics:
• Audience, Purpose and Required Skills
• Get Help
This User Guide is for users who need to use the Polycom® RealPresence® Media Suite solution to record, live stream meetings, share, and manage video media.
The RealPresence Media Suite solution is available in an Appliance Edition (packaged with a system server) and a Virtual Edition (packaged as software only).
Most of the functionality described in this document applies to both. However, when information applies to a specific edition, the instructions refer to RealPresence Media Suite, Virtual Edition, or RealPresence Media Suite, Appliance Edition.
Audience, Purpose and Required SkillsThis document is for end users of the RealPresence Media Suite solution as a guide to record meetings, create live webcasts, share recordings and manage their video archives.
Get HelpFor more information about installing, configuring, and administering Polycom products, refer to Documents and Downloads at Polycom Support.
Polycom and Partner ResourcesIn addition to this guide, there is available documentation that describes the RealPresence Media Suite solution:
• Polycom RealPresence Media Suite Administrator Guide
Provides detailed information on system configuration, operation, and administration information the administrator needs to know when using the RealPresence Media Suite solution.
• Polycom RealPresence Media Suite Getting Started Guide
Provides system installation and first-time initialization information the administrator needs to know to get started quickly.
• Polycom RealPresence Media Suite Release Notes
Provides the information users need to know about the specific release of the system you're implementing.
To find all Polycom partner solutions, see Strategic Global Partner Solutions.
Polycom, Inc. 9

The Polycom CommunityThe Polycom Community gives you access to the latest developer and support information. Participate in discussion forums to share ideas and solve problems with your colleagues. To register with the Polycom Community, simply create a Polycom online account. When logged in, you can access Polycom support personnel and participate in developer and support forums to find the latest information on hardware, software, and partner solutions topics.
Before You Begin
Polycom, Inc. 10
Getting Started with RealPresence Media SuiteTopics:
• Features and Capabilities
• Navigating the RealPresence Media Suite Web-Based User Portal
▪ Screen Reader
The RealPresence Media Suite product is a video content management solution that integrates with standards-based and telepresence video conferencing systems. As a native part of the Polycom® RealPresence® Clariti™ solution, the RealPresence Media Suite product can record or live stream meetings, manage archives, and play back recordings on a variety of client devices including tablets, smartphones, desktop and laptop computers, and standards-based video endpoints.
Features and CapabilitiesThe RealPresence Media Suite solution can be used as a standalone solution to provide video content management functions with built-in tools or integrate with third-party systems to support recording, streaming, and various content editing and management functions.
The RealPresence Media Suite solution also introduces an easy-to-use User Portal where customers can easily start recording, create live events, and share media files.
By leveraging RealPresence Media Suite solution with existing telepresence systems, video conferencing endpoints and video infrastructure, or familiar unified communications (UC) tools, your organization can easily convert real-time conferences and events into reusable multimedia assets.
User PortalThe User Portal can be accessed by compatible devices or web browsers (PC/Mac, iOS, and Android), and offers the following major functionalities:
• Record and live stream conferences, point-to-point meetings, or Easy Capture events.• Manage and share video content with categories and channels.• Customize the look and feel of your user portal (Administrators only).• Easy search for and sort all items.• Play archives and live streams using RealPresence Media Suite Player.• Playback video to video endpoint or video conference.
Easy Capture ApplicationEasy Capture is a local recording and live event application which is installed on your own PC. You can use Easy Capture to record the screen content or video using a local USB camera, and to stream and record media that is broadcast from a local camera.
Polycom, Inc. 11
Navigating the RealPresence Media Suite Web-Based User PortalThe Polycom RealPresence Media Suite User Portal is intended for users who need to use Polycom RealPresence Media Suite to record, live stream meetings, share, or manage video media.
User Roles and PermissionsYou can log in to the User Portal as an administrator, a user, or a guest user. Administrator can create new role and define each role's permission.
User Portal LanguagesThe Polycom RealPresence Media Suite User Portal is available in the following languages, and you can change the User Portal language before you log in.
• English• Simplified Chinese• Portuguese
Procedure
1. At the bottom-right of the homepage, click the Language drop-down list and select a language.
User Portal Home PageYou can access menus, ongoing live events, featured content, featured channels, and links from the User Portal Home page.
Turn off Browser Pop-up BlockerTo turn off browser pop-up blocker to view archives and live stream content.
Procedure
1. To view archives and live streams, you must turn off the pop-up blocker on your computer or device.
• For iPad: From Settings > Safari, make sure the Block Pop-ups option is OFF.• For Android devices: From Browser > Settings > Advanced, make sure the Block Pop-
ups option is OFF.• For PC Internet Explorer (versions 9, 10, and 11): From Tools > Internet Options >
Privacy, make sure the Turn on Pop-up Blocker option is NOT selected.
Access the User Portal Home pageYou can access the User Portal Home page.
Procedure
1. Access the RealPresence Media Suite User Portal by its IP address or Fully Qualified Domain Name (FQDN) from a compatible browser.
Getting Started with RealPresence Media Suite
Polycom, Inc. 12
2. Click the Home menu at the top of the screen.
Return to the User Portal Home pageYou can return to the User Portal Home page.
Procedure
1. Click the Home icon , or click the company logo at the top of the screen.
Log in to the User PortalYou need to log in to be able to use the user portal. The options available to you are dependent on the user role your administrator has granted you.
Procedure
1. Access the RealPresence Media Suite User Portal by its IP address or FQDN from a compatible browser.
2. Click Sign In on the top-right corner to enter your User ID and Password.
Maximum length of a User ID is 128 letters or digits.
Change the User Portal PasswordYou can change your password.
Procedure
1. After logging in, hover your mouse above the .
From the pop-up menu, click Change Password.
2. Enter Old Password, New Password, and Confirm Password to change the password.
3. Click OK.
Finding Ongoing Live EventsWhether you are recording a meeting, an event, or just yourself, you can stream your event right to your audience live and directly.
Ongoing live events (if any) appear at the top of the Home page.
You can find the event title and meeting room from the live event list. You can also join a live event from the Home page.
Join an Ongoing Live Event from the User Portal Home PageYou can join an ongoing live event.
Procedure
1. On the home page, navigate to the Ongoing Live Events section.
2. Click Join for the desired live event.
Getting Started with RealPresence Media Suite
Polycom, Inc. 13
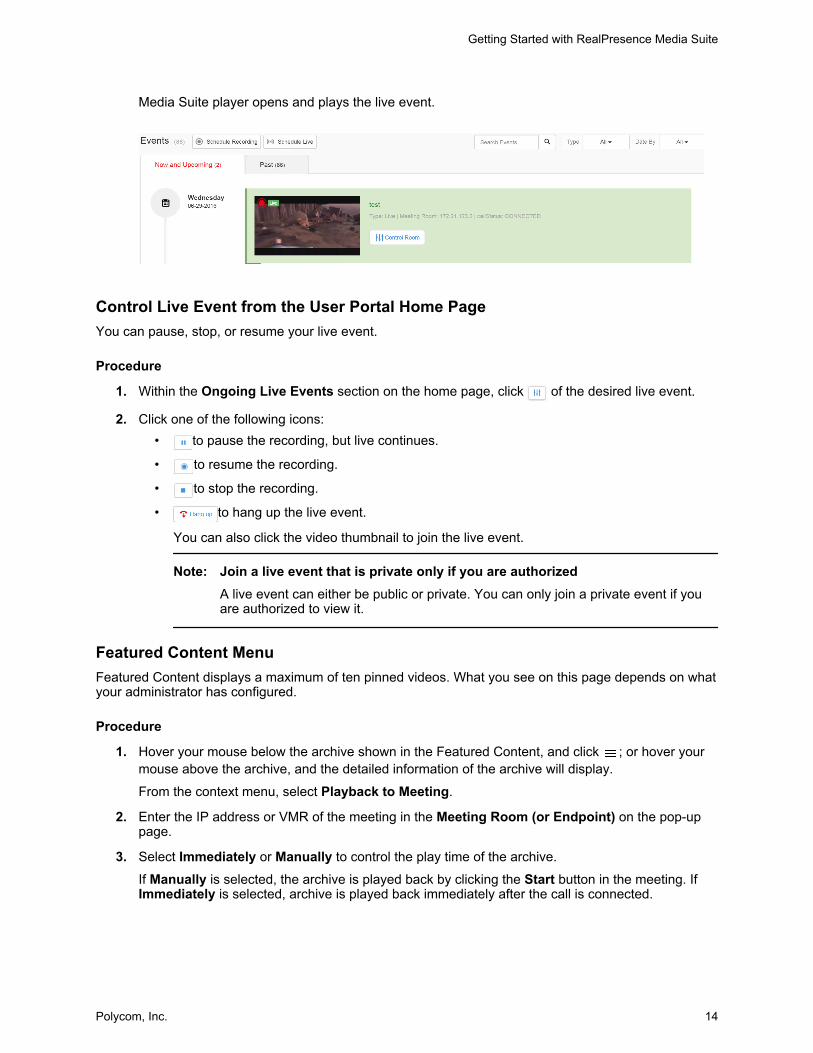
Media Suite player opens and plays the live event.
Control Live Event from the User Portal Home PageYou can pause, stop, or resume your live event.
Procedure
1. Within the Ongoing Live Events section on the home page, click of the desired live event.
2. Click one of the following icons:• to pause the recording, but live continues.
• to resume the recording.
• to stop the recording.
• to hang up the live event.
You can also click the video thumbnail to join the live event.
Note: Join a live event that is private only if you are authorizedA live event can either be public or private. You can only join a private event if you are authorized to view it.
Featured Content MenuFeatured Content displays a maximum of ten pinned videos. What you see on this page depends on what your administrator has configured.
Procedure
1. Hover your mouse below the archive shown in the Featured Content, and click ; or hover your mouse above the archive, and the detailed information of the archive will display.
From the context menu, select Playback to Meeting.
2. Enter the IP address or VMR of the meeting in the Meeting Room (or Endpoint) on the pop-up page.
3. Select Immediately or Manually to control the play time of the archive.
If Manually is selected, the archive is played back by clicking the Start button in the meeting. If Immediately is selected, archive is played back immediately after the call is connected.
Getting Started with RealPresence Media Suite
Polycom, Inc. 14
Note: Establish play back timingIf Manually is selected and the archive is not played back manually within 30 seconds, the archive will be played back automatically.
4. Set the H.323 or SIP signaling type for the playback.
The selection depends on the network environment.
5. Select the Conference Layout for the playback.
If Lecture is selected, the archive will be forced full screen when playing back to depending on your configuration.
6. Click OK to play back the archive to the meeting, and system plays the playback header for about five seconds before playing the archive.
If you select Immediately, the video will skip the playback header and play the archive immediately.
Note: The Playback to Meeting function consumes recording and live streaming ports.
ChannelsWhen someone published a new archive to a channel, it is automatically displayed within the Channel page. Click All to view all available channels, or Subscribed to view all subscribed channels.
LinksYou can access other Polycom websites from the Links section.
The administrator can customize the links users see.
Search and Sort ListsYou can search items listed on the User Portal, including archives, categories, and channels.
Two search options are available:• Global search: available at the top of the screen. All content, including video media, channels, live
events, and categories can be searched.• Local search: available within a content category. Only the content of the specified category is
searched.
Search all CategoriesYou can perform a global search that searches all content, including video media, channels, live events, and categories. Keyword searches are not case-sensitive.
Procedure
1. On the home page, enter the name or part of the name of the content you want to find.
2. Click .
Getting Started with RealPresence Media Suite
Polycom, Inc. 15
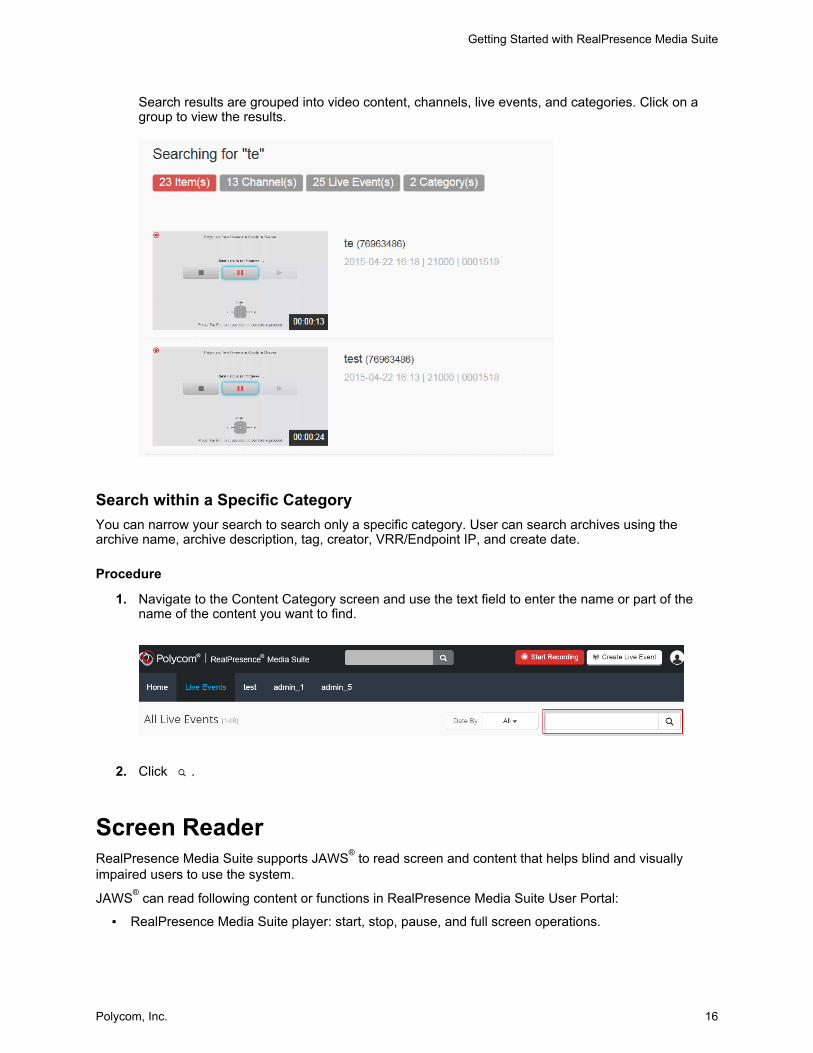
Search results are grouped into video content, channels, live events, and categories. Click on a group to view the results.
Search within a Specific CategoryYou can narrow your search to search only a specific category. User can search archives using the archive name, archive description, tag, creator, VRR/Endpoint IP, and create date.
Procedure
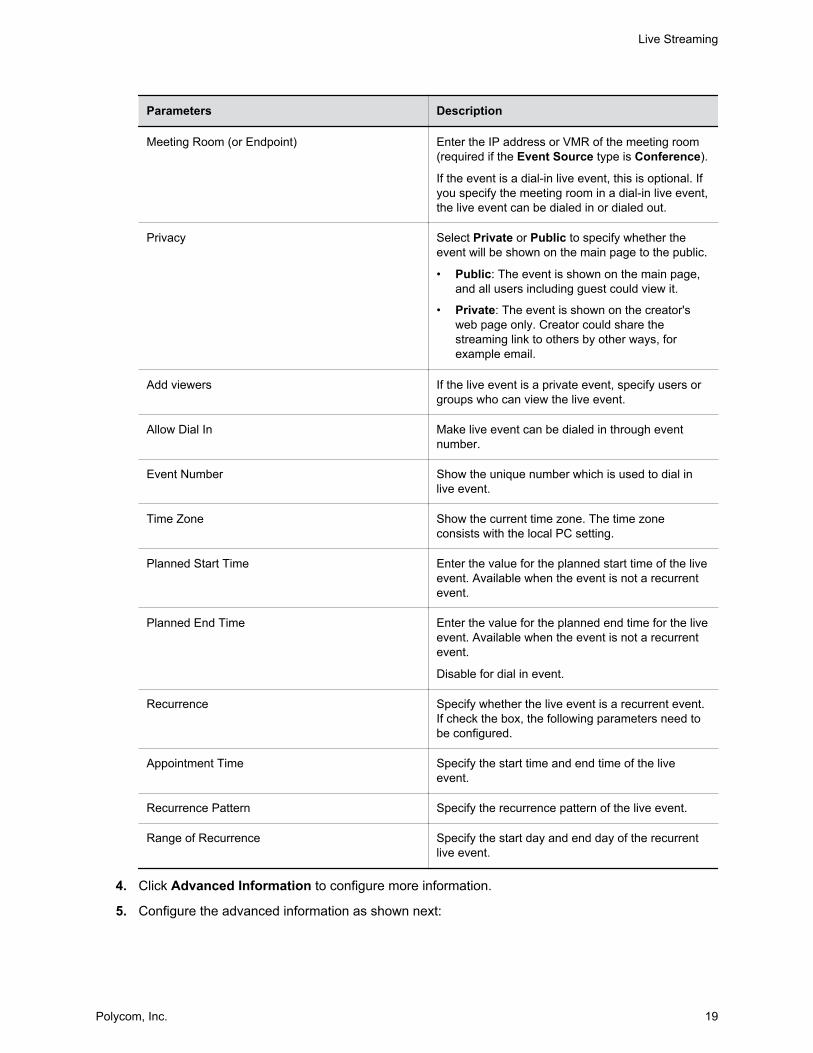
1. Navigate to the Content Category screen and use the text field to enter the name or part of the name of the content you want to find.
2. Click .
Screen ReaderRealPresence Media Suite supports JAWS® to read screen and content that helps blind and visually impaired users to use the system.
JAWS® can read following content or functions in RealPresence Media Suite User Portal:
▪ RealPresence Media Suite player: start, stop, pause, and full screen operations.
Getting Started with RealPresence Media Suite
Polycom, Inc. 16

▪ Home page button: home, start recording, live now, and events▪ My Media Center page button: Media, Events, Channel, Survey&Test, and Account.
Only Chrome browser and IE 11 can be supported to read the screen.
For more information about JAWS, refer to http://www.freedomscientific.com/.
Getting Started with RealPresence Media Suite
Polycom, Inc. 17
Live StreamingTopics:
• Conference Live Events
• Easy Capture Live Events
• Skype for Business Live Events
• Dial in from an Endpoint
• Managing the Live Events
• View an Ongoing Live Event
• View All Events
• Live Event Email Notifications
You can live stream two types of events: conference events and Easy Capture events. Use conference events to broadcast and record video conference calls that occur on your video infrastructure. You can use Easy Capture events to stream and record media that is broadcast from a local camera.
Note: You may not be able to create a live streaming event. Whether users can create live streaming events depends on your product license and if the administrator has granted users this permission. Contact your administrator if you have questions.
Conference Live EventsYou can create ad hoc live events as needed or schedule live events for a specific time and duration.
Schedule a Conference Live EventYou can schedule a live event for a specific time and duration.
Procedure
1. From the User Portal, go to My Media Center > Events.
2. Click Schedule Live on the top-left to start a scheduled live event.
3. Configure the basic information as shown in the next table.
Live Event Basic Information
Parameters Description
Title Specify a live event title.
Event Source Select either Conference or Easy Capture source type. Easy Capture enables a desktop originated live stream to network.
Polycom, Inc. 18
Parameters Description
Meeting Room (or Endpoint) Enter the IP address or VMR of the meeting room (required if the Event Source type is Conference).
If the event is a dial-in live event, this is optional. If you specify the meeting room in a dial-in live event, the live event can be dialed in or dialed out.
Privacy Select Private or Public to specify whether the event will be shown on the main page to the public.
• Public: The event is shown on the main page, and all users including guest could view it.
• Private: The event is shown on the creator's web page only. Creator could share the streaming link to others by other ways, for example email.
Add viewers If the live event is a private event, specify users or groups who can view the live event.
Allow Dial In Make live event can be dialed in through event number.
Event Number Show the unique number which is used to dial in live event.
Time Zone Show the current time zone. The time zone consists with the local PC setting.
Planned Start Time Enter the value for the planned start time of the live event. Available when the event is not a recurrent event.
Planned End Time Enter the value for the planned end time for the live event. Available when the event is not a recurrent event.
Disable for dial in event.
Recurrence Specify whether the live event is a recurrent event. If check the box, the following parameters need to be configured.
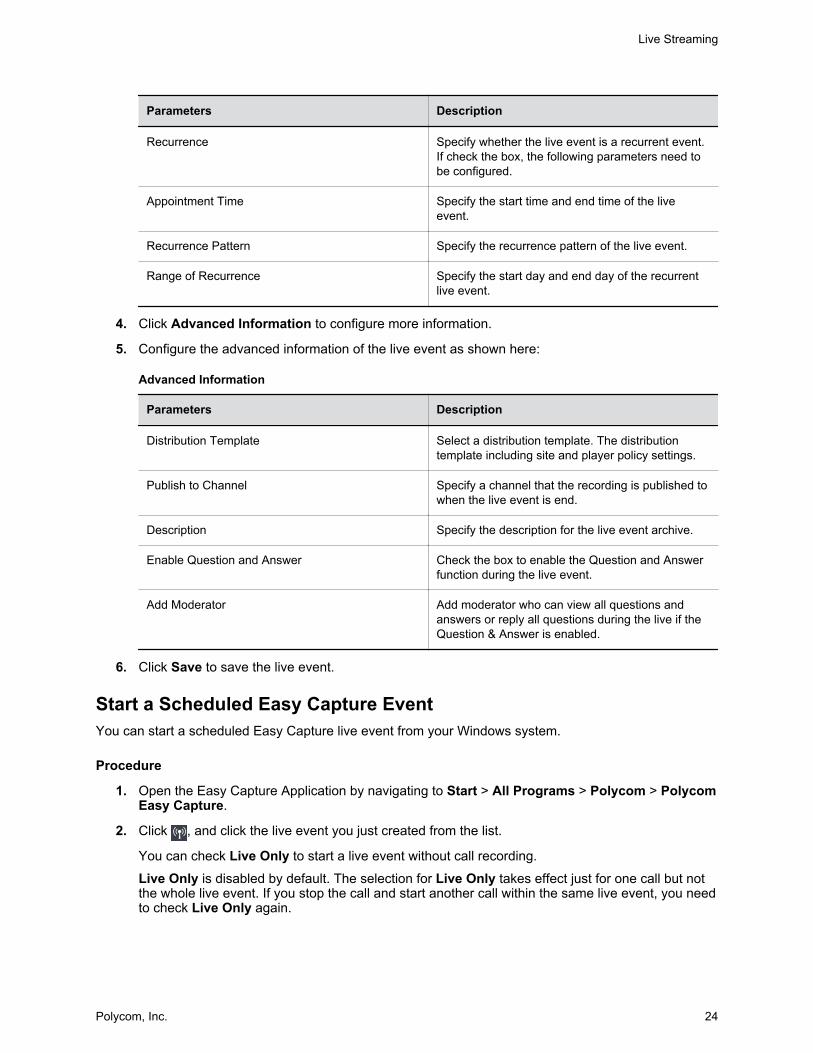
Appointment Time Specify the start time and end time of the live event.
Recurrence Pattern Specify the recurrence pattern of the live event.
Range of Recurrence Specify the start day and end day of the recurrent live event.
4. Click Advanced Information to configure more information.
5. Configure the advanced information as shown next:
Live Streaming
Polycom, Inc. 19
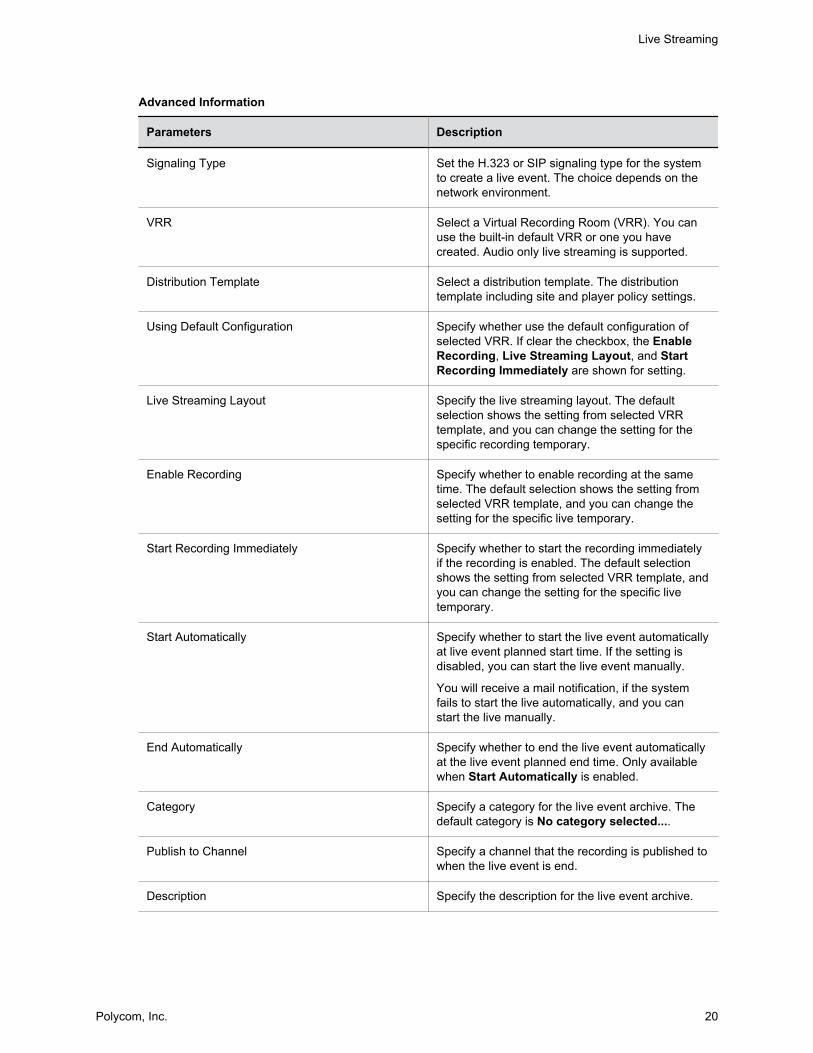
Advanced Information
Parameters Description
Signaling Type Set the H.323 or SIP signaling type for the system to create a live event. The choice depends on the network environment.
VRR Select a Virtual Recording Room (VRR). You can use the built-in default VRR or one you have created. Audio only live streaming is supported.
Distribution Template Select a distribution template. The distribution template including site and player policy settings.
Using Default Configuration Specify whether use the default configuration of selected VRR. If clear the checkbox, the Enable Recording, Live Streaming Layout, and Start Recording Immediately are shown for setting.
Live Streaming Layout Specify the live streaming layout. The default selection shows the setting from selected VRR template, and you can change the setting for the specific recording temporary.
Enable Recording Specify whether to enable recording at the same time. The default selection shows the setting from selected VRR template, and you can change the setting for the specific live temporary.
Start Recording Immediately Specify whether to start the recording immediately if the recording is enabled. The default selection shows the setting from selected VRR template, and you can change the setting for the specific live temporary.
Start Automatically Specify whether to start the live event automatically at live event planned start time. If the setting is disabled, you can start the live event manually.
You will receive a mail notification, if the system fails to start the live automatically, and you can start the live manually.
End Automatically Specify whether to end the live event automatically at the live event planned end time. Only available when Start Automatically is enabled.
Category Specify a category for the live event archive. The default category is No category selected....
Publish to Channel Specify a channel that the recording is published to when the live event is end.
Description Specify the description for the live event archive.
Live Streaming
Polycom, Inc. 20
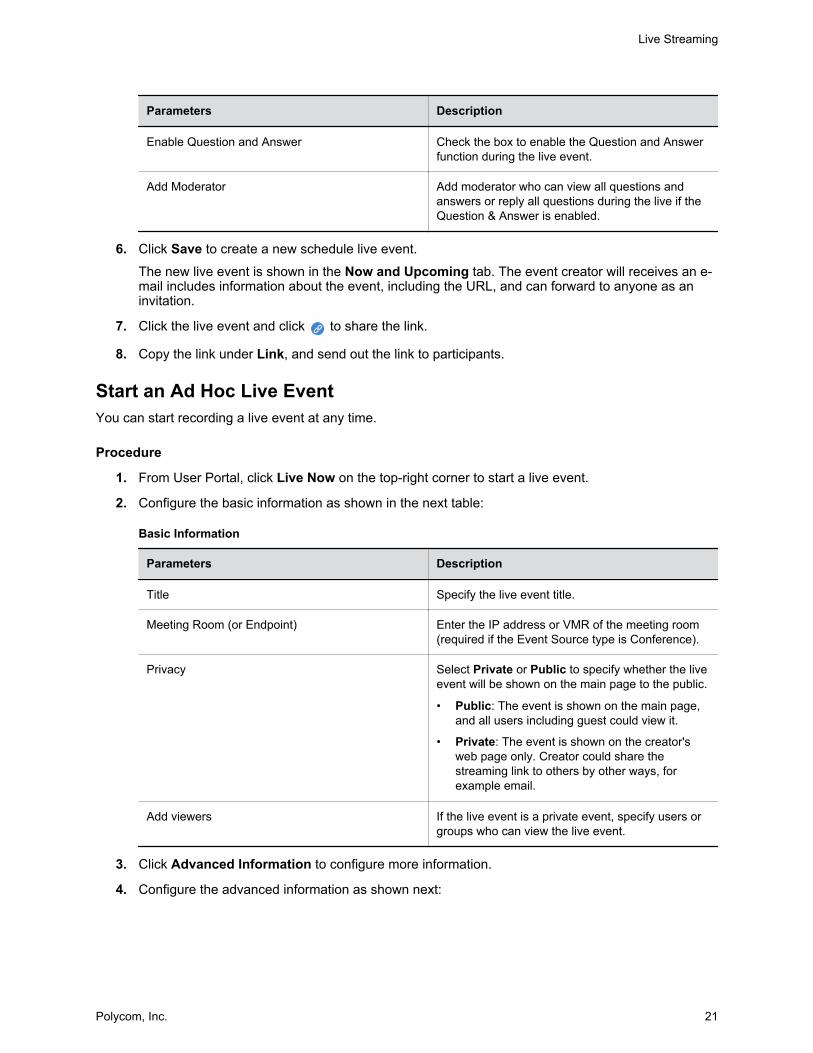
Parameters Description
Enable Question and Answer Check the box to enable the Question and Answer function during the live event.
Add Moderator Add moderator who can view all questions and answers or reply all questions during the live if the Question & Answer is enabled.
6. Click Save to create a new schedule live event.
The new live event is shown in the Now and Upcoming tab. The event creator will receives an e-mail includes information about the event, including the URL, and can forward to anyone as an invitation.
7. Click the live event and click to share the link.
8. Copy the link under Link, and send out the link to participants.
Start an Ad Hoc Live EventYou can start recording a live event at any time.
Procedure
1. From User Portal, click Live Now on the top-right corner to start a live event.
2. Configure the basic information as shown in the next table:
Basic Information
Parameters Description
Title Specify the live event title.
Meeting Room (or Endpoint) Enter the IP address or VMR of the meeting room (required if the Event Source type is Conference).
Privacy Select Private or Public to specify whether the live event will be shown on the main page to the public.
• Public: The event is shown on the main page, and all users including guest could view it.
• Private: The event is shown on the creator's web page only. Creator could share the streaming link to others by other ways, for example email.
Add viewers If the live event is a private event, specify users or groups who can view the live event.
3. Click Advanced Information to configure more information.
4. Configure the advanced information as shown next:
Live Streaming
Polycom, Inc. 21
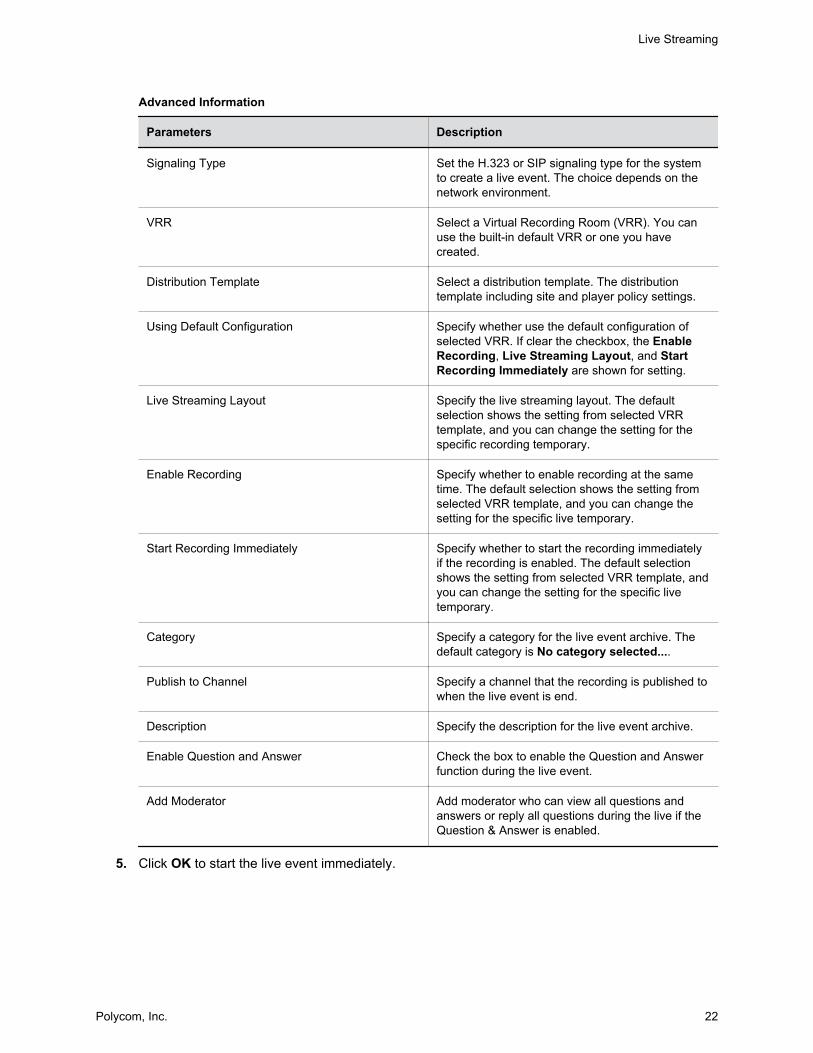
Advanced Information
Parameters Description
Signaling Type Set the H.323 or SIP signaling type for the system to create a live event. The choice depends on the network environment.
VRR Select a Virtual Recording Room (VRR). You can use the built-in default VRR or one you have created.
Distribution Template Select a distribution template. The distribution template including site and player policy settings.
Using Default Configuration Specify whether use the default configuration of selected VRR. If clear the checkbox, the Enable Recording, Live Streaming Layout, and Start Recording Immediately are shown for setting.
Live Streaming Layout Specify the live streaming layout. The default selection shows the setting from selected VRR template, and you can change the setting for the specific recording temporary.
Enable Recording Specify whether to enable recording at the same time. The default selection shows the setting from selected VRR template, and you can change the setting for the specific live temporary.
Start Recording Immediately Specify whether to start the recording immediately if the recording is enabled. The default selection shows the setting from selected VRR template, and you can change the setting for the specific live temporary.
Category Specify a category for the live event archive. The default category is No category selected....
Publish to Channel Specify a channel that the recording is published to when the live event is end.
Description Specify the description for the live event archive.
Enable Question and Answer Check the box to enable the Question and Answer function during the live event.
Add Moderator Add moderator who can view all questions and answers or reply all questions during the live if the Question & Answer is enabled.
5. Click OK to start the live event immediately.
Live Streaming
Polycom, Inc. 22
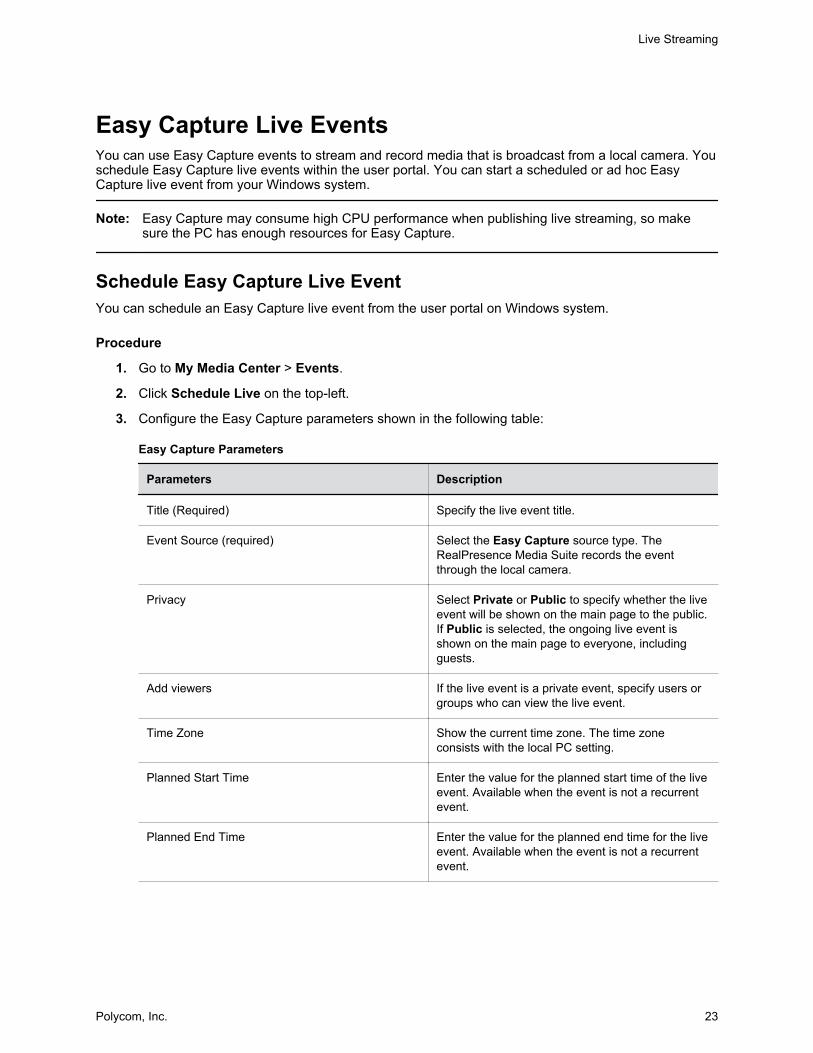
Easy Capture Live EventsYou can use Easy Capture events to stream and record media that is broadcast from a local camera. You schedule Easy Capture live events within the user portal. You can start a scheduled or ad hoc Easy Capture live event from your Windows system.
Note: Easy Capture may consume high CPU performance when publishing live streaming, so make sure the PC has enough resources for Easy Capture.
Schedule Easy Capture Live EventYou can schedule an Easy Capture live event from the user portal on Windows system.
Procedure
1. Go to My Media Center > Events.
2. Click Schedule Live on the top-left.
3. Configure the Easy Capture parameters shown in the following table:
Easy Capture Parameters
Parameters Description
Title (Required) Specify the live event title.
Event Source (required) Select the Easy Capture source type. The RealPresence Media Suite records the event through the local camera.
Privacy Select Private or Public to specify whether the live event will be shown on the main page to the public. If Public is selected, the ongoing live event is shown on the main page to everyone, including guests.
Add viewers If the live event is a private event, specify users or groups who can view the live event.
Time Zone Show the current time zone. The time zone consists with the local PC setting.
Planned Start Time Enter the value for the planned start time of the live event. Available when the event is not a recurrent event.
Planned End Time Enter the value for the planned end time for the live event. Available when the event is not a recurrent event.
Live Streaming
Polycom, Inc. 23
Parameters Description
Recurrence Specify whether the live event is a recurrent event. If check the box, the following parameters need to be configured.
Appointment Time Specify the start time and end time of the live event.
Recurrence Pattern Specify the recurrence pattern of the live event.
Range of Recurrence Specify the start day and end day of the recurrent live event.
4. Click Advanced Information to configure more information.
5. Configure the advanced information of the live event as shown here:
Advanced Information
Parameters Description
Distribution Template Select a distribution template. The distribution template including site and player policy settings.
Publish to Channel Specify a channel that the recording is published to when the live event is end.
Description Specify the description for the live event archive.
Enable Question and Answer Check the box to enable the Question and Answer function during the live event.
Add Moderator Add moderator who can view all questions and answers or reply all questions during the live if the Question & Answer is enabled.
6. Click Save to save the live event.
Start a Scheduled Easy Capture EventYou can start a scheduled Easy Capture live event from your Windows system.
Procedure
1. Open the Easy Capture Application by navigating to Start > All Programs > Polycom > Polycom Easy Capture.
2. Click , and click the live event you just created from the list.
You can check Live Only to start a live event without call recording.
Live Only is disabled by default. The selection for Live Only takes effect just for one call but not the whole live event. If you stop the call and start another call within the same live event, you need to check Live Only again.
Live Streaming
Polycom, Inc. 24
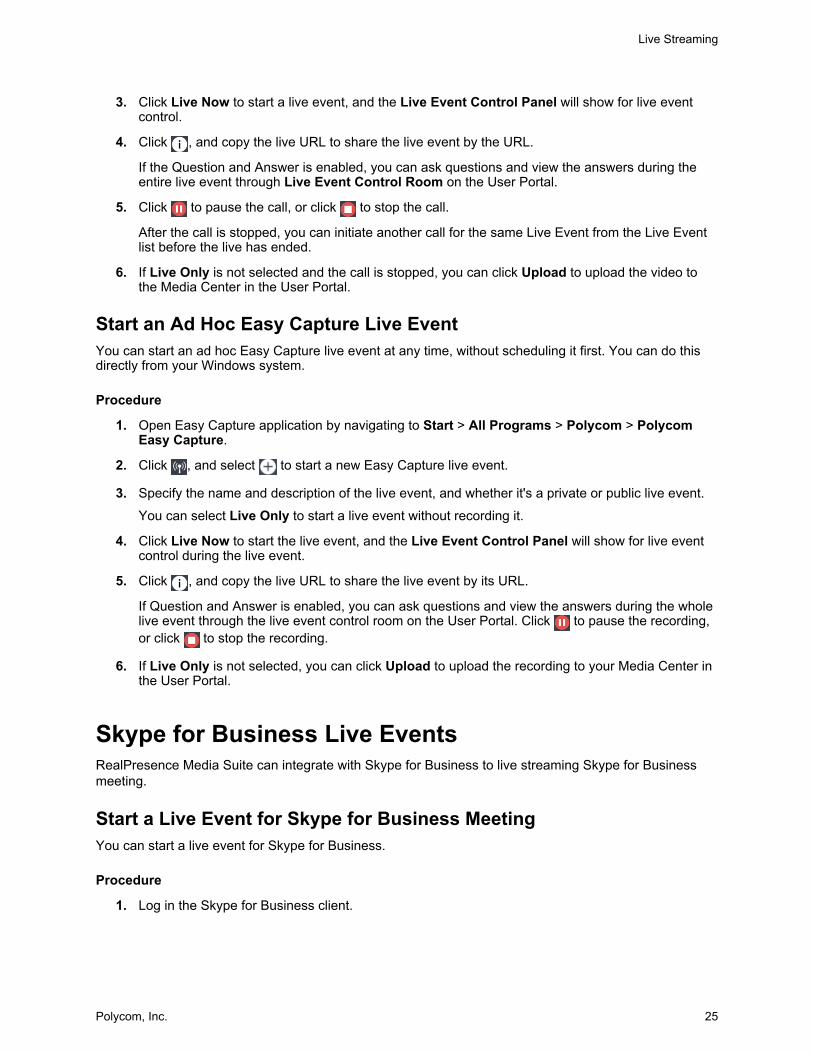
3. Click Live Now to start a live event, and the Live Event Control Panel will show for live event control.
4. Click , and copy the live URL to share the live event by the URL.
If the Question and Answer is enabled, you can ask questions and view the answers during the entire live event through Live Event Control Room on the User Portal.
5. Click to pause the call, or click to stop the call.
After the call is stopped, you can initiate another call for the same Live Event from the Live Event list before the live has ended.
6. If Live Only is not selected and the call is stopped, you can click Upload to upload the video to the Media Center in the User Portal.
Start an Ad Hoc Easy Capture Live EventYou can start an ad hoc Easy Capture live event at any time, without scheduling it first. You can do this directly from your Windows system.
Procedure
1. Open Easy Capture application by navigating to Start > All Programs > Polycom > Polycom Easy Capture.
2. Click , and select to start a new Easy Capture live event.
3. Specify the name and description of the live event, and whether it's a private or public live event.
You can select Live Only to start a live event without recording it.
4. Click Live Now to start the live event, and the Live Event Control Panel will show for live event control during the live event.
5. Click , and copy the live URL to share the live event by its URL.
If Question and Answer is enabled, you can ask questions and view the answers during the whole live event through the live event control room on the User Portal. Click to pause the recording, or click to stop the recording.
6. If Live Only is not selected, you can click Upload to upload the recording to your Media Center in the User Portal.
Skype for Business Live EventsRealPresence Media Suite can integrate with Skype for Business to live streaming Skype for Business meeting.
Start a Live Event for Skype for Business MeetingYou can start a live event for Skype for Business.
Procedure
1. Log in the Skype for Business client.
Live Streaming
Polycom, Inc. 25
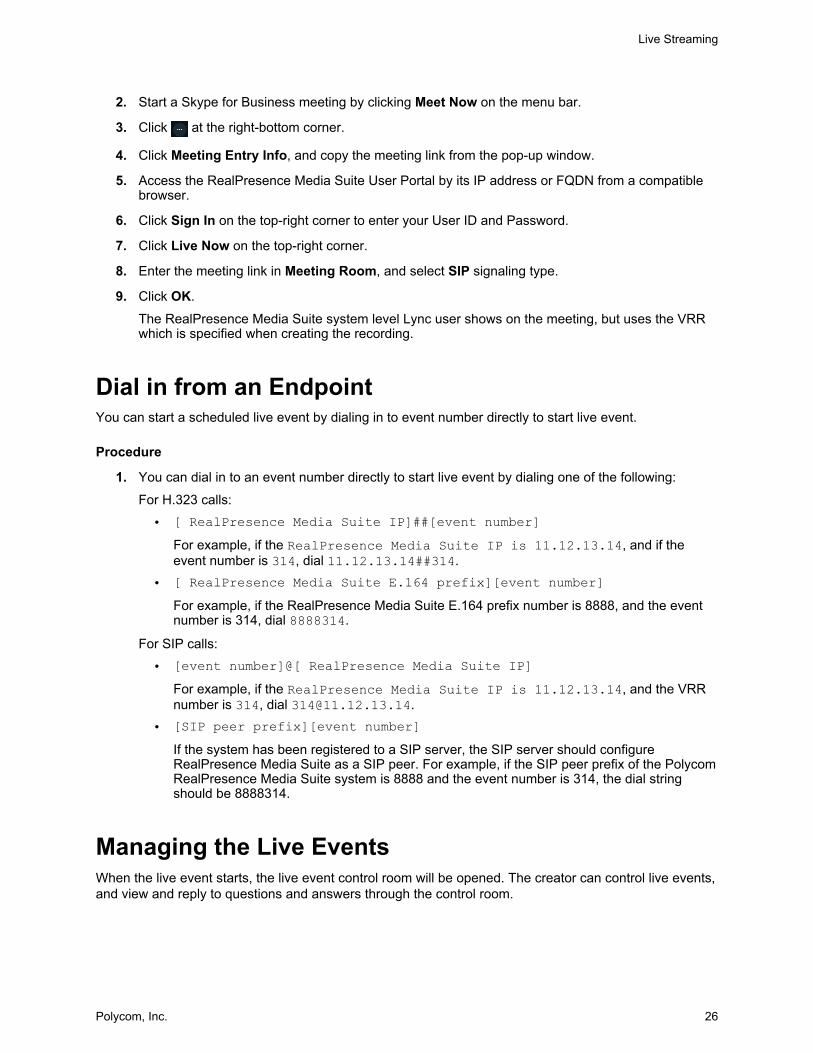
2. Start a Skype for Business meeting by clicking Meet Now on the menu bar.
3. Click at the right-bottom corner.
4. Click Meeting Entry Info, and copy the meeting link from the pop-up window.
5. Access the RealPresence Media Suite User Portal by its IP address or FQDN from a compatible browser.
6. Click Sign In on the top-right corner to enter your User ID and Password.
7. Click Live Now on the top-right corner.
8. Enter the meeting link in Meeting Room, and select SIP signaling type.
9. Click OK.
The RealPresence Media Suite system level Lync user shows on the meeting, but uses the VRR which is specified when creating the recording.
Dial in from an EndpointYou can start a scheduled live event by dialing in to event number directly to start live event.
Procedure
1. You can dial in to an event number directly to start live event by dialing one of the following:
For H.323 calls:
• [ RealPresence Media Suite IP]##[event number]For example, if the RealPresence Media Suite IP is 11.12.13.14, and if the event number is 314, dial 11.12.13.14##314.
• [ RealPresence Media Suite E.164 prefix][event number]For example, if the RealPresence Media Suite E.164 prefix number is 8888, and the event number is 314, dial 8888314.
For SIP calls:
• [event number]@[ RealPresence Media Suite IP]For example, if the RealPresence Media Suite IP is 11.12.13.14, and the VRR number is 314, dial [email protected].
• [SIP peer prefix][event number]If the system has been registered to a SIP server, the SIP server should configure RealPresence Media Suite as a SIP peer. For example, if the SIP peer prefix of the Polycom RealPresence Media Suite system is 8888 and the event number is 314, the dial string should be 8888314.
Managing the Live EventsWhen the live event starts, the live event control room will be opened. The creator can control live events, and view and reply to questions and answers through the control room.
Live Streaming
Polycom, Inc. 26
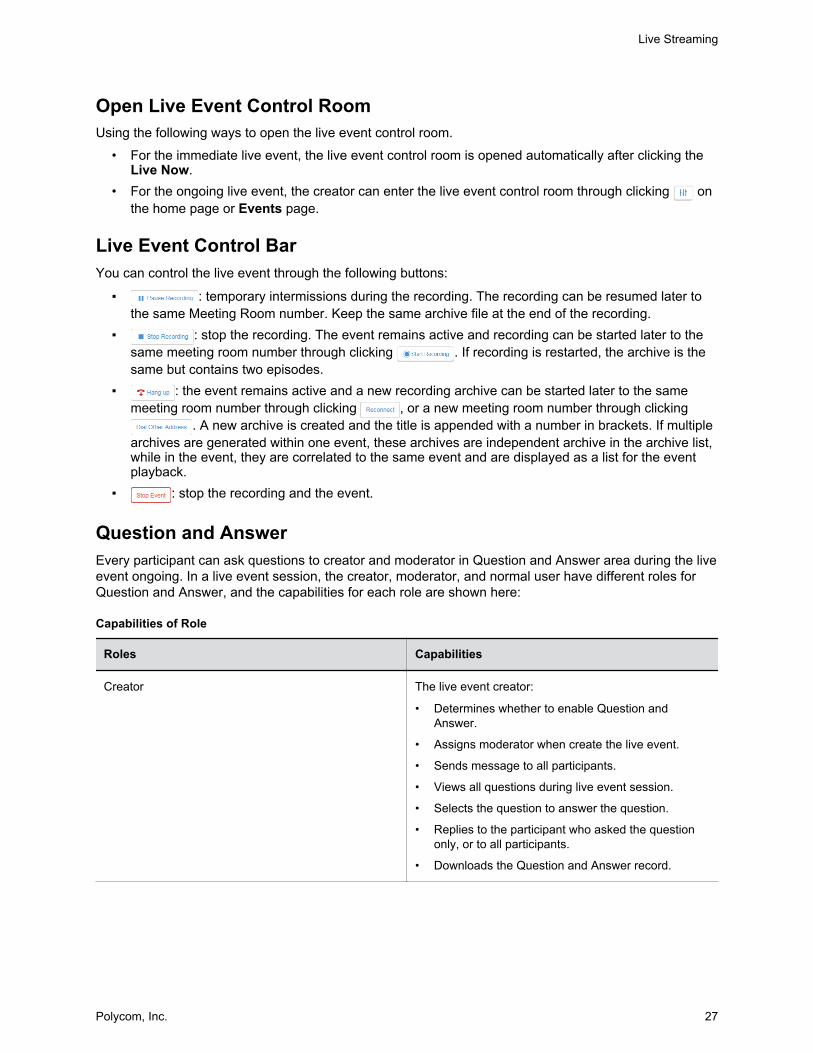
Open Live Event Control RoomUsing the following ways to open the live event control room.
• For the immediate live event, the live event control room is opened automatically after clicking the Live Now.
• For the ongoing live event, the creator can enter the live event control room through clicking on the home page or Events page.
Live Event Control BarYou can control the live event through the following buttons:
▪ : temporary intermissions during the recording. The recording can be resumed later to the same Meeting Room number. Keep the same archive file at the end of the recording.
▪ : stop the recording. The event remains active and recording can be started later to the same meeting room number through clicking . If recording is restarted, the archive is the same but contains two episodes.
▪ : the event remains active and a new recording archive can be started later to the same meeting room number through clicking , or a new meeting room number through clicking
. A new archive is created and the title is appended with a number in brackets. If multiple archives are generated within one event, these archives are independent archive in the archive list, while in the event, they are correlated to the same event and are displayed as a list for the event playback.
▪ : stop the recording and the event.
Question and AnswerEvery participant can ask questions to creator and moderator in Question and Answer area during the live event ongoing. In a live event session, the creator, moderator, and normal user have different roles for Question and Answer, and the capabilities for each role are shown here:
Capabilities of Role
Roles Capabilities
Creator The live event creator:
• Determines whether to enable Question and Answer.
• Assigns moderator when create the live event.
• Sends message to all participants.
• Views all questions during live event session.
• Selects the question to answer the question.
• Replies to the participant who asked the question only, or to all participants.
• Downloads the Question and Answer record.
Live Streaming
Polycom, Inc. 27
Roles Capabilities
Moderator Moderator is assigned by creator:
• Sends message to all participants.
• Views all questions during live event session.
• Selects the question to answer the question.
• Replies to the participant who asked the question only, or to all participants.
Normal User Normal user participant in the live event:
• Asks questions during live event session.
• Views answer during live event session.
Anonymous (a user who is not logged in) Views public questions and answers.
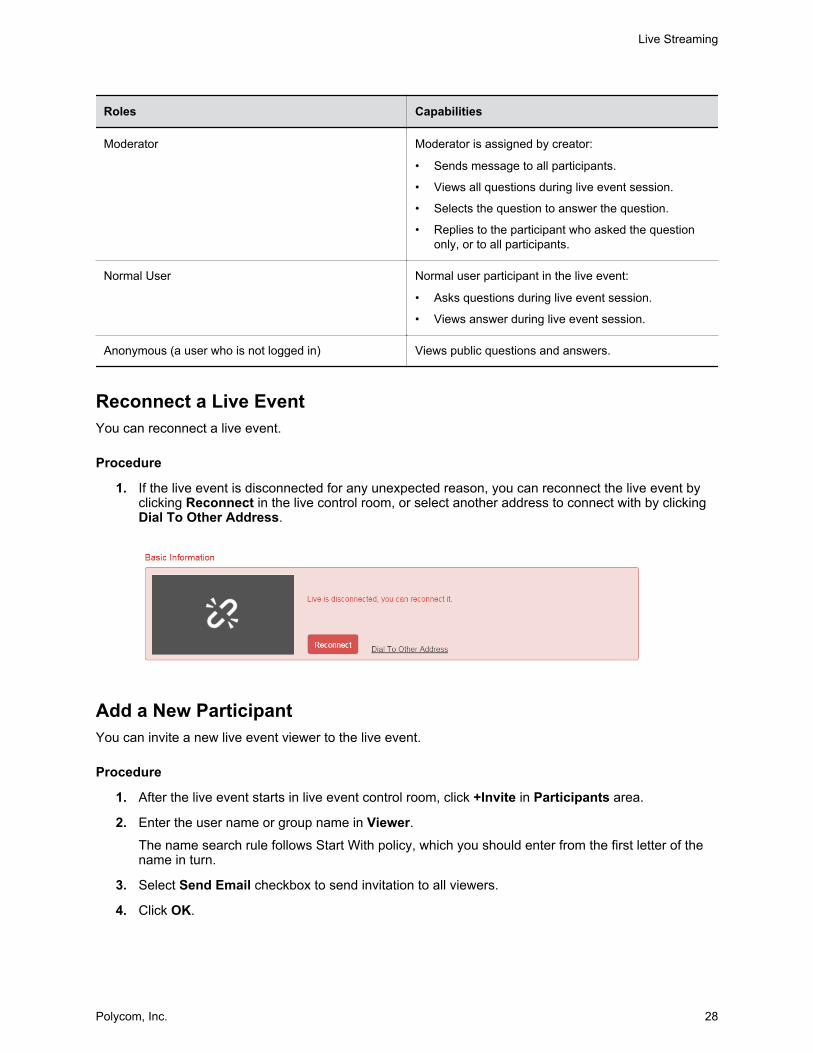
Reconnect a Live EventYou can reconnect a live event.
Procedure
1. If the live event is disconnected for any unexpected reason, you can reconnect the live event by clicking Reconnect in the live control room, or select another address to connect with by clicking Dial To Other Address.
Add a New ParticipantYou can invite a new live event viewer to the live event.
Procedure
1. After the live event starts in live event control room, click +Invite in Participants area.
2. Enter the user name or group name in Viewer.The name search rule follows Start With policy, which you should enter from the first letter of the name in turn.
3. Select Send Email checkbox to send invitation to all viewers.
4. Click OK.
Live Streaming
Polycom, Inc. 28
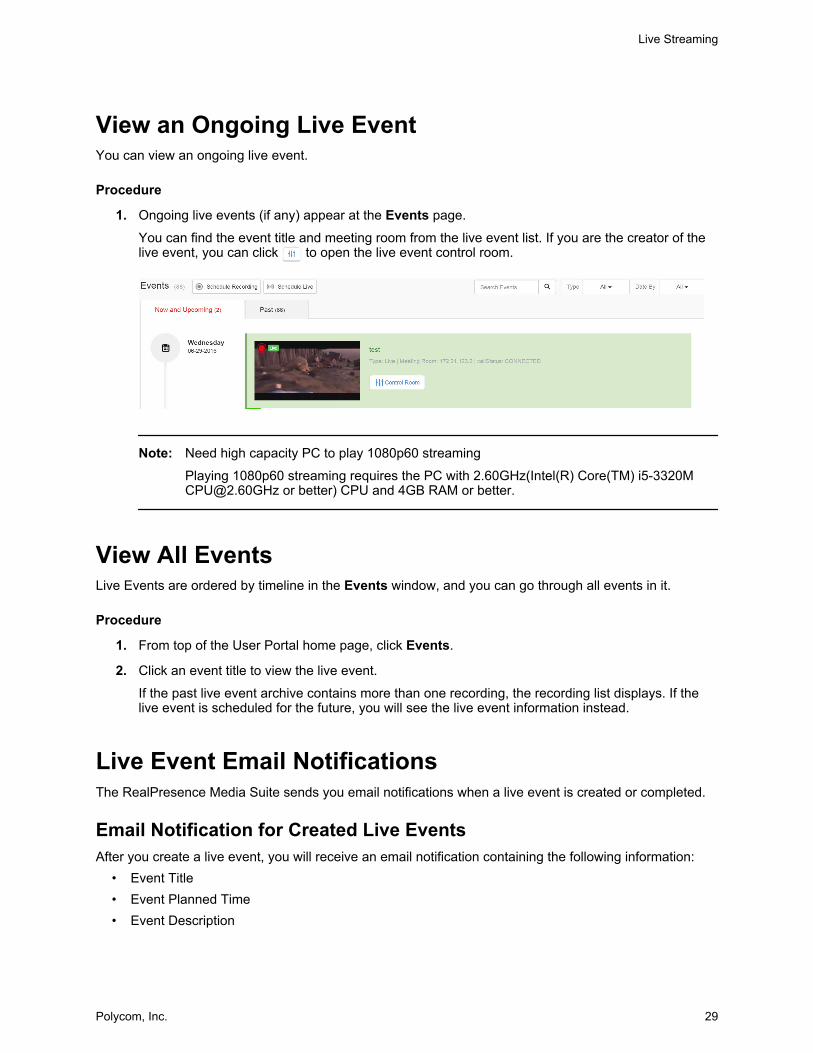
View an Ongoing Live EventYou can view an ongoing live event.
Procedure
1. Ongoing live events (if any) appear at the Events page.
You can find the event title and meeting room from the live event list. If you are the creator of the live event, you can click to open the live event control room.
Note: Need high capacity PC to play 1080p60 streaming
Playing 1080p60 streaming requires the PC with 2.60GHz(Intel(R) Core(TM) i5-3320M [email protected] or better) CPU and 4GB RAM or better.
View All EventsLive Events are ordered by timeline in the Events window, and you can go through all events in it.
Procedure
1. From top of the User Portal home page, click Events.
2. Click an event title to view the live event.
If the past live event archive contains more than one recording, the recording list displays. If the live event is scheduled for the future, you will see the live event information instead.
Live Event Email NotificationsThe RealPresence Media Suite sends you email notifications when a live event is created or completed.
Email Notification for Created Live EventsAfter you create a live event, you will receive an email notification containing the following information:
• Event Title• Event Planned Time• Event Description
Live Streaming
Polycom, Inc. 29
• Live URL
You can forward this email to your live event participants as a meeting invitation.
Depending on your system configuration, the email address where you receive the live event notifications may vary. Contact your system administrator for more information.
Procedure
1. Click the link in the invitation email.
2. Enter the user name and password for RealPresence Media Suite to access to the live event.
Email Notification for Completed Live EventsAfter the completion of your live event, you will receive another email notification with the following information:
• Archive Name• Quick Code for quick archive playback• Duration• Links to view the meeting recordings in different formats and bitrates.• Links to download the meeting recordings in different formats and bitrates.
Live Streaming
Polycom, Inc. 30
Recording MeetingsTopics:
• Conference Recording
• Easy Capture Recording
• Skype for Business Meeting Recording
You can start to record in the RealPresence Media Suite using one of the following methods:• Conference: call from the RealPresence Media Suite to a VMR or an endpoint, and record the
conference.• Point-to-Point: call two endpoints or VMRs from the RealPresence Media Suite, and record the
conference between the two sides without the need for a multipoint bridge.• Easy Capture: record the screen content or video using a local USB camera.• Microsoft Skye for Business: call from the RealPresence Media Suite to a Microsoft Skype for
Business meeting.
Conference RecordingYou can start an Ad Hoc recording and Point-to-Point recording, or schedule a recording.
Start an Ad Hoc Recording from a ConferenceYou can start an ad hoc recording from a conference.
Procedure
1. Access the RealPresence Media Suite user portal by its IP address or FQDN from a compatible browser.
2. Click Sign In on the top-right corner to enter your User ID and Password.
3. Click Start Recording on the top-right corner.
4. (Optional) Click Advanced Options in the Conference tab on the pop-up page.
5. Configure the recording parameters.
Recording Parameters
Parameters Description
Title Specify the recording title.
Polycom, Inc. 31
Parameters Description
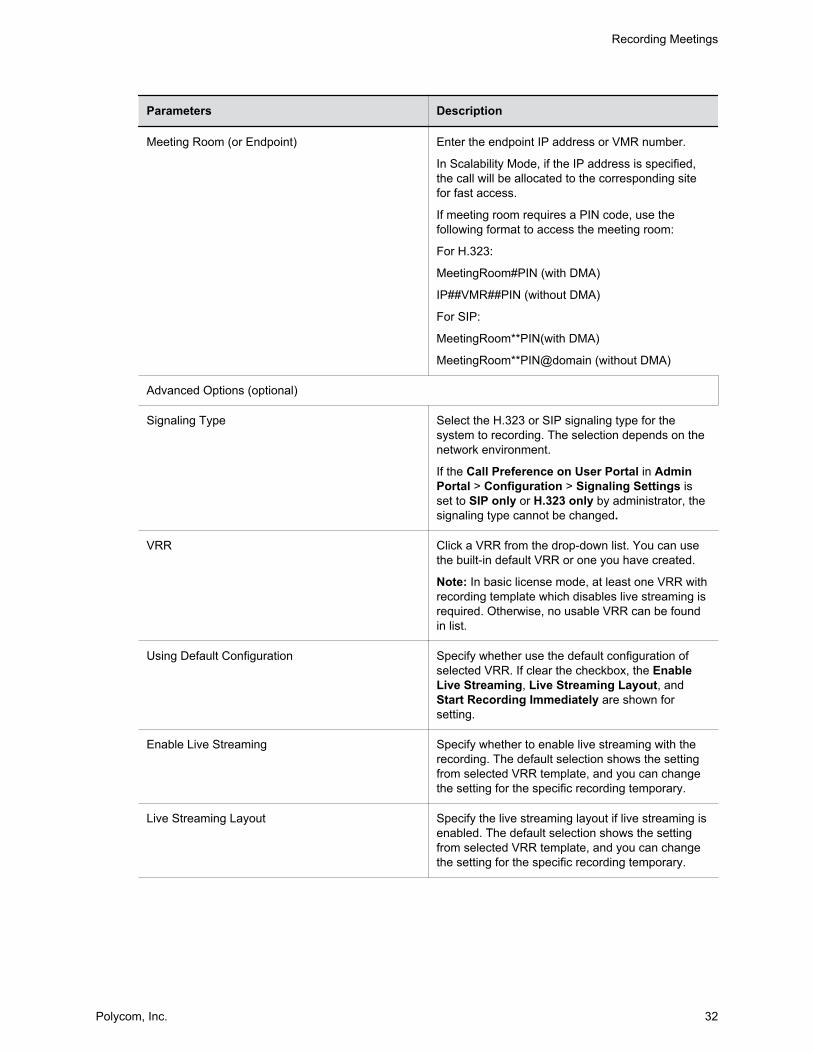
Meeting Room (or Endpoint) Enter the endpoint IP address or VMR number.
In Scalability Mode, if the IP address is specified, the call will be allocated to the corresponding site for fast access.
If meeting room requires a PIN code, use the following format to access the meeting room:
For H.323:
MeetingRoom#PIN (with DMA)
IP##VMR##PIN (without DMA)
For SIP:
MeetingRoom**PIN(with DMA)
MeetingRoom**PIN@domain (without DMA)
Advanced Options (optional)
Signaling Type Select the H.323 or SIP signaling type for the system to recording. The selection depends on the network environment.
If the Call Preference on User Portal in Admin Portal > Configuration > Signaling Settings is set to SIP only or H.323 only by administrator, the signaling type cannot be changed.
VRR Click a VRR from the drop-down list. You can use the built-in default VRR or one you have created.
Note: In basic license mode, at least one VRR with recording template which disables live streaming is required. Otherwise, no usable VRR can be found in list.
Using Default Configuration Specify whether use the default configuration of selected VRR. If clear the checkbox, the Enable Live Streaming, Live Streaming Layout, and Start Recording Immediately are shown for setting.
Enable Live Streaming Specify whether to enable live streaming with the recording. The default selection shows the setting from selected VRR template, and you can change the setting for the specific recording temporary.
Live Streaming Layout Specify the live streaming layout if live streaming is enabled. The default selection shows the setting from selected VRR template, and you can change the setting for the specific recording temporary.
Recording Meetings
Polycom, Inc. 32
Parameters Description
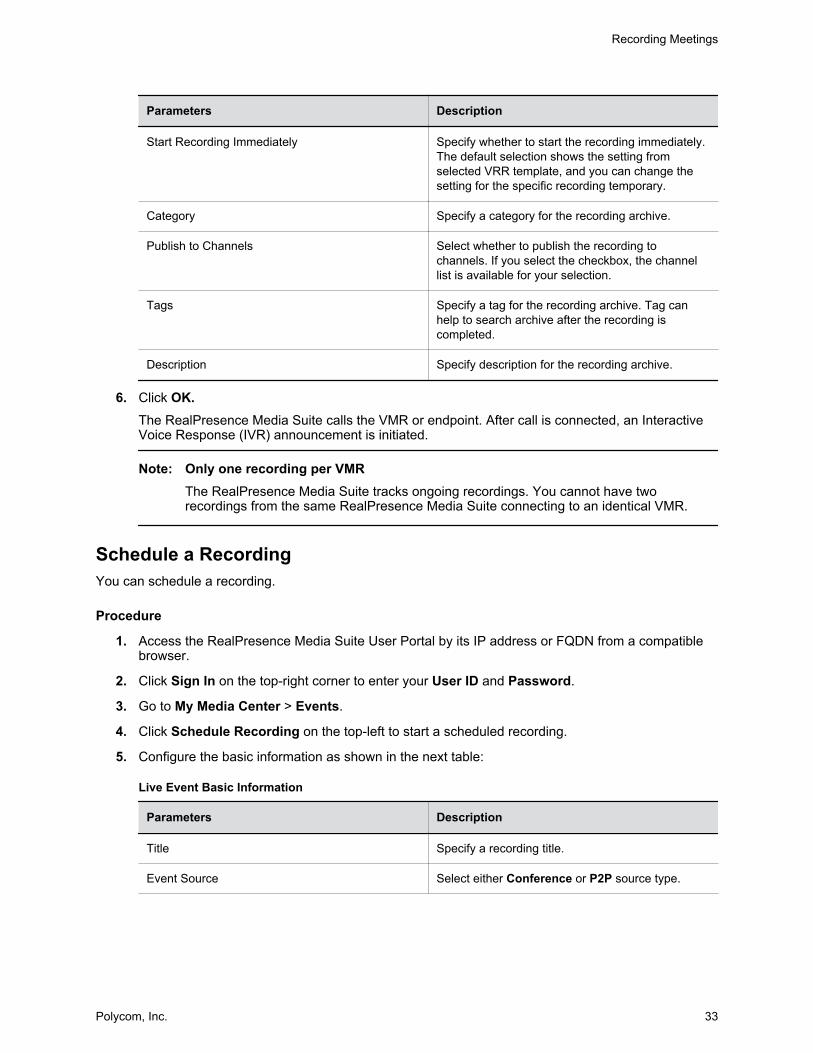
Start Recording Immediately Specify whether to start the recording immediately. The default selection shows the setting from selected VRR template, and you can change the setting for the specific recording temporary.
Category Specify a category for the recording archive.
Publish to Channels Select whether to publish the recording to channels. If you select the checkbox, the channel list is available for your selection.
Tags Specify a tag for the recording archive. Tag can help to search archive after the recording is completed.
Description Specify description for the recording archive.
6. Click OK.The RealPresence Media Suite calls the VMR or endpoint. After call is connected, an Interactive Voice Response (IVR) announcement is initiated.
Note: Only one recording per VMRThe RealPresence Media Suite tracks ongoing recordings. You cannot have two recordings from the same RealPresence Media Suite connecting to an identical VMR.
Schedule a RecordingYou can schedule a recording.
Procedure
1. Access the RealPresence Media Suite User Portal by its IP address or FQDN from a compatible browser.
2. Click Sign In on the top-right corner to enter your User ID and Password.
3. Go to My Media Center > Events.
4. Click Schedule Recording on the top-left to start a scheduled recording.
5. Configure the basic information as shown in the next table:
Live Event Basic Information
Parameters Description
Title Specify a recording title.
Event Source Select either Conference or P2P source type.
Recording Meetings
Polycom, Inc. 33

Parameters Description
Meeting Room (or Endpoint) Enter the IP address or VMR of the meeting room (required if the Event Source type is Conference).
Time Zone Show the current time zone. The time zone consists with the local PC setting.
Planned Start Time Enter the value for the planned start time of the recording. Available when the event is not a recurrent event.
Planned End Time Enter the value for the planned end time for the recording. Available when the event is not a recurrent event.
Recurrence Specify whether the recording is a recurrent event. If check the box, the following parameters need to be configured.
Appointment Time Specify the start time and end time of the recording.
Recurrence Pattern Specify the recurrence pattern of the recording.
Range of Recurrence Specify the start day and end day of the recurrent recording.
6. Click Advanced Information to configure more information.
7. Configure the advanced information as shown next:
Advanced Information
Parameters Description
Signaling Type Set the H.323 or SIP signaling type for the system to create a recording. The choice depends on the network environment.
VRR Select a Virtual Recording Room (VRR). You can use the built-in default VRR or one you have created.
Using Default Configuration Specify whether use the default configuration of selected VRR. If clear the checkbox, the Enable Recording, Live Streaming Layout, and Start Recording Immediately are shown for setting.
Enable Live Streaming Specify whether to enable live streaming with the recording. The default selection shows the setting from selected VRR template, and you can change the setting for the specific recording temporary.
Recording Meetings
Polycom, Inc. 34

Parameters Description
Live Streaming Layout Specify the live streaming layout. The default selection shows the setting from selected VRR template, and you can change the setting for the specific recording temporary.
Enable Recording Specify whether to enable recording at the same time. The default selection shows the setting from selected VRR template, and you can change the setting for the specific live temporary.
Start Recording Immediately Specify whether to start the recording immediately if the recording is enabled. The default selection shows the setting from selected VRR template, and you can change the setting for the specific live temporary.
Start Automatically Specify whether to start the recording automatically at recording planned start time. If the setting is disabled, you can start the recording manually.
You will receive a mail notification, if the system fails to start the live automatically, and you can start the live manually.
End Automatically Specify whether to end the recording automatically at the recording planned end time. Only available when Start Automatically is enabled.
Category Specify a category for the recording archive. The default category is No category selected....
Publish to Channel Specify a channel that the recording is published to when the recording is end.
Tags Specify a tag for the recording archive. Tag can help to search archive after the recording is completed.
Description Specify the description for the recording archive.
8. Click Save to create a new scheduled recording.
The new recording is shown in the Now and Upcoming tab.
Start a Point-to-Point RecordingYou can start a Point-to-Point recording.
Procedure
1. Access the RealPresence Media Suite User Portal by its IP address or FQDN from a compatible browser.
2. Click Sign In on the top-right corner to enter your User ID and Password.
Recording Meetings
Polycom, Inc. 35
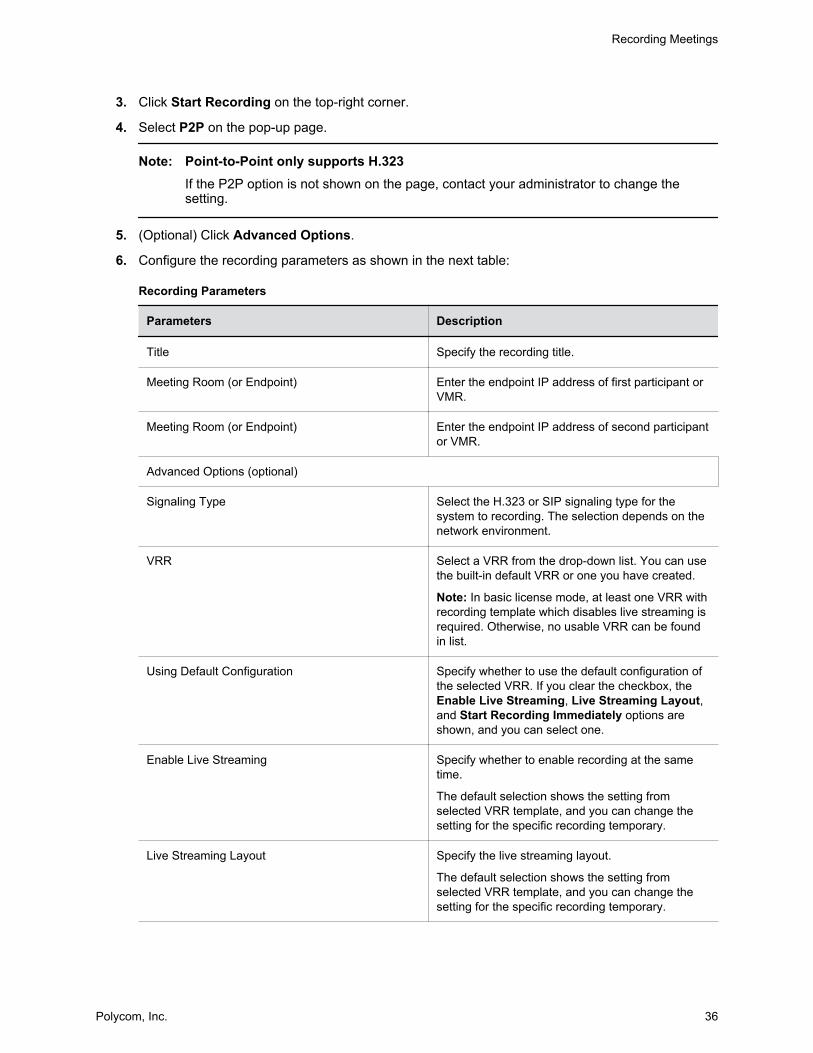
3. Click Start Recording on the top-right corner.
4. Select P2P on the pop-up page.
Note: Point-to-Point only supports H.323If the P2P option is not shown on the page, contact your administrator to change the setting.
5. (Optional) Click Advanced Options.
6. Configure the recording parameters as shown in the next table:
Recording Parameters
Parameters Description
Title Specify the recording title.
Meeting Room (or Endpoint) Enter the endpoint IP address of first participant or VMR.
Meeting Room (or Endpoint) Enter the endpoint IP address of second participant or VMR.
Advanced Options (optional)
Signaling Type Select the H.323 or SIP signaling type for the system to recording. The selection depends on the network environment.
VRR Select a VRR from the drop-down list. You can use the built-in default VRR or one you have created.
Note: In basic license mode, at least one VRR with recording template which disables live streaming is required. Otherwise, no usable VRR can be found in list.
Using Default Configuration Specify whether to use the default configuration of the selected VRR. If you clear the checkbox, the Enable Live Streaming, Live Streaming Layout, and Start Recording Immediately options are shown, and you can select one.
Enable Live Streaming Specify whether to enable recording at the same time.
The default selection shows the setting from selected VRR template, and you can change the setting for the specific recording temporary.
Live Streaming Layout Specify the live streaming layout.
The default selection shows the setting from selected VRR template, and you can change the setting for the specific recording temporary.
Recording Meetings
Polycom, Inc. 36
Parameters Description
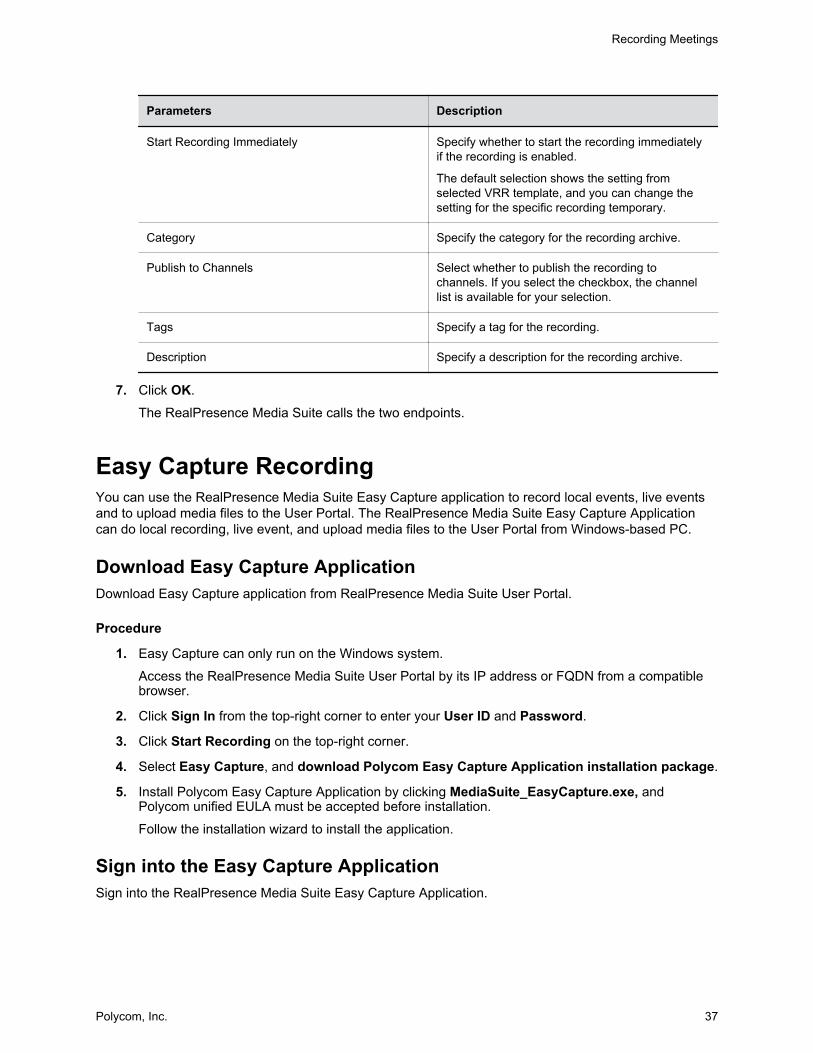
Start Recording Immediately Specify whether to start the recording immediately if the recording is enabled.
The default selection shows the setting from selected VRR template, and you can change the setting for the specific recording temporary.
Category Specify the category for the recording archive.
Publish to Channels Select whether to publish the recording to channels. If you select the checkbox, the channel list is available for your selection.
Tags Specify a tag for the recording.
Description Specify a description for the recording archive.
7. Click OK.
The RealPresence Media Suite calls the two endpoints.
Easy Capture RecordingYou can use the RealPresence Media Suite Easy Capture application to record local events, live events and to upload media files to the User Portal. The RealPresence Media Suite Easy Capture Application can do local recording, live event, and upload media files to the User Portal from Windows-based PC.
Download Easy Capture ApplicationDownload Easy Capture application from RealPresence Media Suite User Portal.
Procedure
1. Easy Capture can only run on the Windows system.
Access the RealPresence Media Suite User Portal by its IP address or FQDN from a compatible browser.
2. Click Sign In from the top-right corner to enter your User ID and Password.
3. Click Start Recording on the top-right corner.
4. Select Easy Capture, and download Polycom Easy Capture Application installation package.
5. Install Polycom Easy Capture Application by clicking MediaSuite_EasyCapture.exe, and Polycom unified EULA must be accepted before installation.
Follow the installation wizard to install the application.
Sign into the Easy Capture ApplicationSign into the RealPresence Media Suite Easy Capture Application.
Recording Meetings
Polycom, Inc. 37
Note: If you cannot sign in RealPresence Media Suite Easy Capture Application properly, download and install the latest version from RealPresence Media Suite User Portal.
Procedure
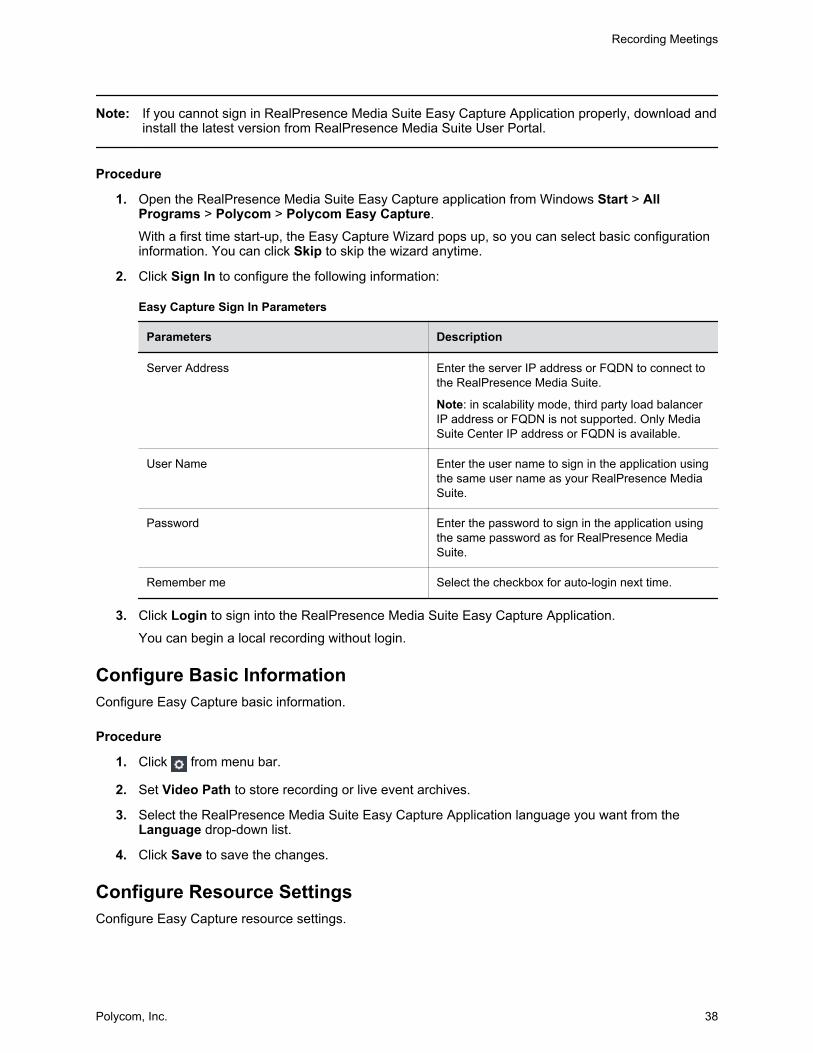
1. Open the RealPresence Media Suite Easy Capture application from Windows Start > All Programs > Polycom > Polycom Easy Capture.
With a first time start-up, the Easy Capture Wizard pops up, so you can select basic configuration information. You can click Skip to skip the wizard anytime.
2. Click Sign In to configure the following information:
Easy Capture Sign In Parameters
Parameters Description
Server Address Enter the server IP address or FQDN to connect to the RealPresence Media Suite.
Note: in scalability mode, third party load balancer IP address or FQDN is not supported. Only Media Suite Center IP address or FQDN is available.
User Name Enter the user name to sign in the application using the same user name as your RealPresence Media Suite.
Password Enter the password to sign in the application using the same password as for RealPresence Media Suite.
Remember me Select the checkbox for auto-login next time.
3. Click Login to sign into the RealPresence Media Suite Easy Capture Application.
You can begin a local recording without login.
Configure Basic InformationConfigure Easy Capture basic information.
Procedure
1. Click from menu bar.
2. Set Video Path to store recording or live event archives.
3. Select the RealPresence Media Suite Easy Capture Application language you want from the Language drop-down list.
4. Click Save to save the changes.
Configure Resource SettingsConfigure Easy Capture resource settings.
Recording Meetings
Polycom, Inc. 38
Procedure
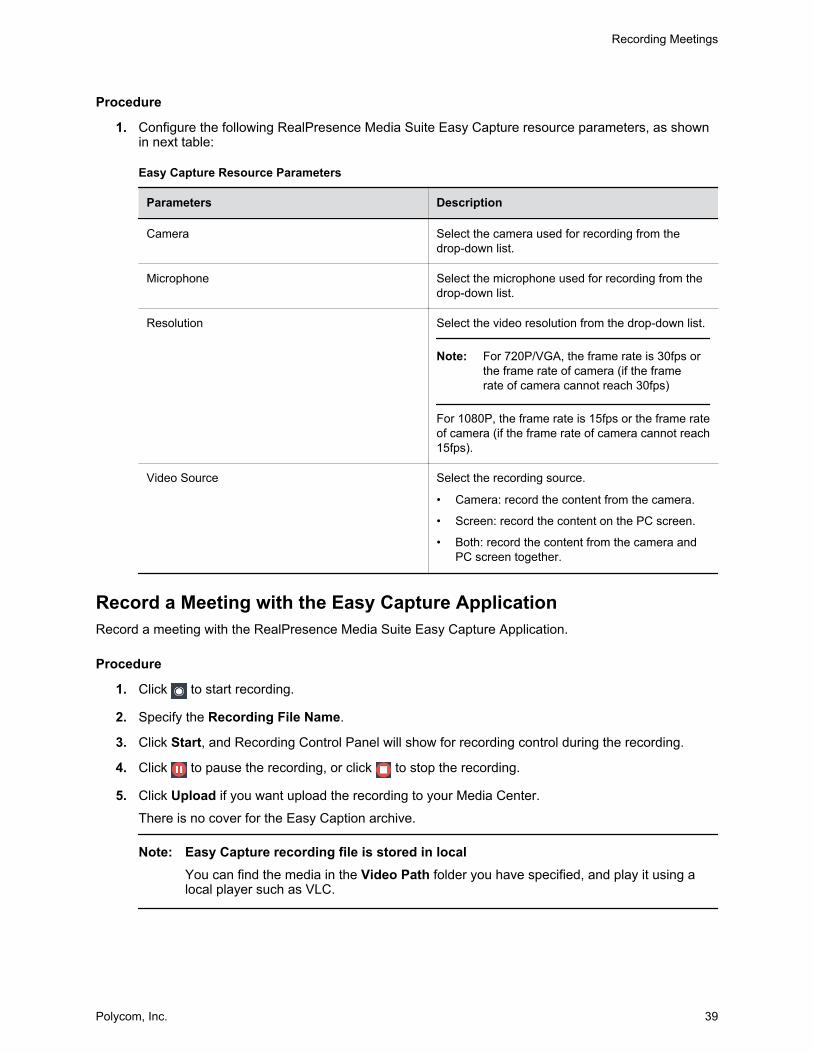
1. Configure the following RealPresence Media Suite Easy Capture resource parameters, as shown in next table:
Easy Capture Resource Parameters
Parameters Description
Camera Select the camera used for recording from the drop-down list.
Microphone Select the microphone used for recording from the drop-down list.
Resolution Select the video resolution from the drop-down list.
Note: For 720P/VGA, the frame rate is 30fps or the frame rate of camera (if the frame rate of camera cannot reach 30fps)
For 1080P, the frame rate is 15fps or the frame rate of camera (if the frame rate of camera cannot reach 15fps).
Video Source Select the recording source.
• Camera: record the content from the camera.
• Screen: record the content on the PC screen.
• Both: record the content from the camera and PC screen together.
Record a Meeting with the Easy Capture ApplicationRecord a meeting with the RealPresence Media Suite Easy Capture Application.
Procedure
1. Click to start recording.
2. Specify the Recording File Name.
3. Click Start, and Recording Control Panel will show for recording control during the recording.
4. Click to pause the recording, or click to stop the recording.
5. Click Upload if you want upload the recording to your Media Center.
There is no cover for the Easy Caption archive.
Note: Easy Capture recording file is stored in localYou can find the media in the Video Path folder you have specified, and play it using a local player such as VLC.
Recording Meetings
Polycom, Inc. 39
Skype for Business Meeting RecordingRealPresence Media Suite supports recording Skype for Business meetings in the following two ways:
• Connect to a Skype for Business meeting directly to record video, audio, and content.• Record a Polycom® RealConnect™ meeting, which enables both Lync and non-Lync endpoints to
participate in Lync-initiated meetings, even in scenarios where those endpoints reside in remote Lync organizations.
This section introduces the procedure for the first option. For more information about Polycom RealConnect, refer to the Polycom® Unified Communications Deployment Guide for Microsoft®
Environments.
Make sure the system is configured properly by your administrator to enable the Skype for Business meeting.
Record a Skype for Business Meeting through Joining the MeetingYou can record a Skype for Business meeting through joining the meeting.
Procedure
1. Start a Skype for Business meeting by clicking Meet Now on the menu bar from Skype for Business client.
The AD user who initiates the meeting by Meet Now is the owner of the recording or live streaming.
After the meeting ends, the recording archive is stored in meeting organizer's media center.
2. Click on the top-right corner, and add one RealPresence Media Suite Skype for Business user with specific VRR to join the meeting.
After RealPresence Media Suite joins the meeting, an IVR announcement is initiated. If the recording VRR used has live streaming enabled, you can find the corresponding live through the RealPresence Media Suite User Portal.
The desktop shared during the meeting will be recorded together with the audio and video.
Record a Skype for Business Meeting through Dialing out from the User PortalYou can record a Skype for Business meeting through dialing out from the User Portal
Procedure
1. Connect Skype for Business client to server.
2. Log in the Skype for Business client.
3. Start a Skype for Business meeting by clicking Meet Now on the menu bar.
4. Click on the bottom-right corner.
5. Click Meeting Entry Info, and copy the meeting link from the pop-up window.
Recording Meetings
Polycom, Inc. 40
6. Access the RealPresence Media Suite User Portal by its IP address or FQDN from a compatible browser.
7. Click Sign In on the top-right corner to enter your User ID and Password.
After the meeting ends, the recording archive is stored in the media center of the user who dialed out from the User Portal.
8. Click Start Recording on the top-right corner.
9. Enter the meeting link in Meeting Room, and select SIP signaling type.
10. Click OK.
RealPresence Media Suite calls the meeting. After the call is connected, an IVR announcement is initiated.
For the dial out recording to Skype for Business, the RealPresence Media Suite system level Lync user shows on the meeting but uses the VRR specified when creating the recording.
Recording Meetings
Polycom, Inc. 41
Managing Your Media in My Media CenterTopics:
• Channel
• Events
• Media Archives
• Survey and Test
▪ Account
The Polycom RealPresence Media Suite provides an easy way to manage your media through My Media Center. It provides the following functions:
• Media: archives all media including recorded videos, live event videos, and uploaded media under Archives. Ongoing activity is also shown on this page.
• Events: lists all your live events and recording sorted by time.• Channels: shows all existing channels.• Survey & Test: shows all existing surveys and tests.• Admin: manages portal appearance, media, and settings.
The Admin section is available to administrators only.• Account: set default Meeting Room or Endpoints of the current user.
ChannelChannels are an easy way to organize and share both private and public media. You can share the media in different channels to different viewers, and use the public channel to show your media to the public.
Create a ChannelCreate a channel.
Procedure
1. Within the RealPresence Media Suite user portal, click Sign In on the top-right corner to enter your User ID and Password.
2. Go to My Media Center > Channel.
3. Click + Create Channel to create a new channel.
4. Configure the channel parameters as shown in the next table:
Polycom, Inc. 42
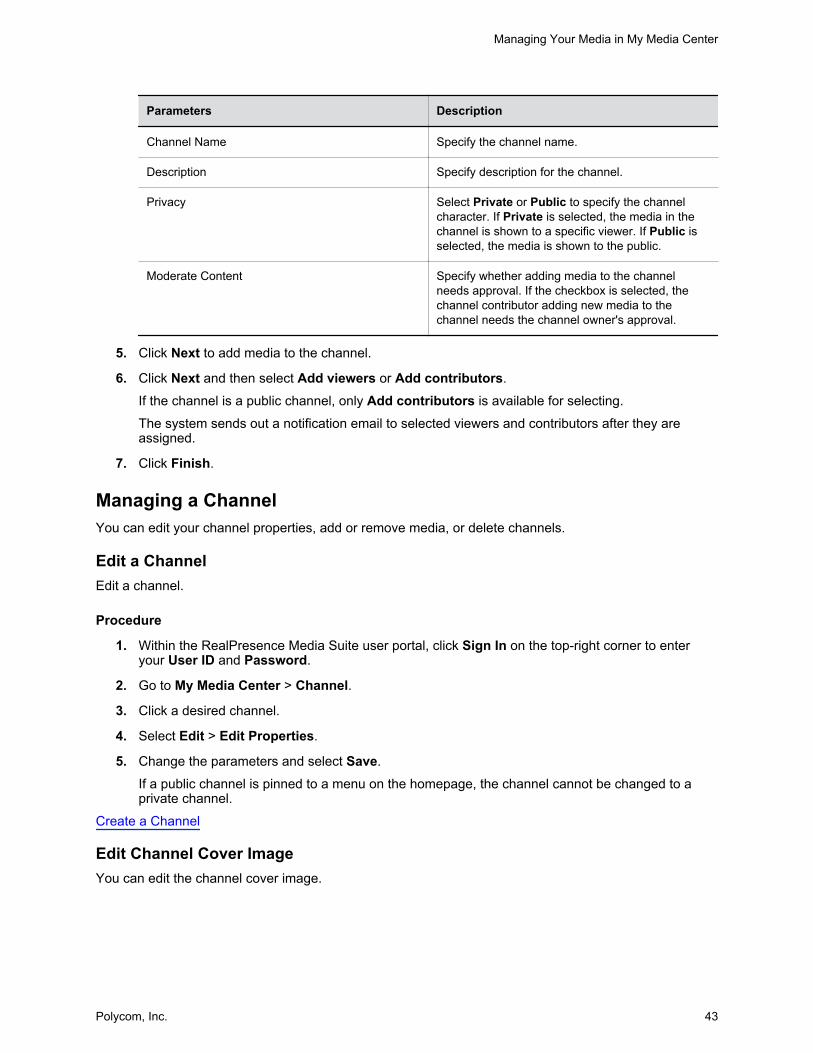
Parameters Description
Channel Name Specify the channel name.
Description Specify description for the channel.
Privacy Select Private or Public to specify the channel character. If Private is selected, the media in the channel is shown to a specific viewer. If Public is selected, the media is shown to the public.
Moderate Content Specify whether adding media to the channel needs approval. If the checkbox is selected, the channel contributor adding new media to the channel needs the channel owner's approval.
5. Click Next to add media to the channel.
6. Click Next and then select Add viewers or Add contributors.
If the channel is a public channel, only Add contributors is available for selecting.
The system sends out a notification email to selected viewers and contributors after they are assigned.
7. Click Finish.
Managing a ChannelYou can edit your channel properties, add or remove media, or delete channels.
Edit a ChannelEdit a channel.
Procedure
1. Within the RealPresence Media Suite user portal, click Sign In on the top-right corner to enter your User ID and Password.
2. Go to My Media Center > Channel.
3. Click a desired channel.
4. Select Edit > Edit Properties.
5. Change the parameters and select Save.
If a public channel is pinned to a menu on the homepage, the channel cannot be changed to a private channel.
Create a Channel
Edit Channel Cover ImageYou can edit the channel cover image.
Managing Your Media in My Media Center
Polycom, Inc. 43
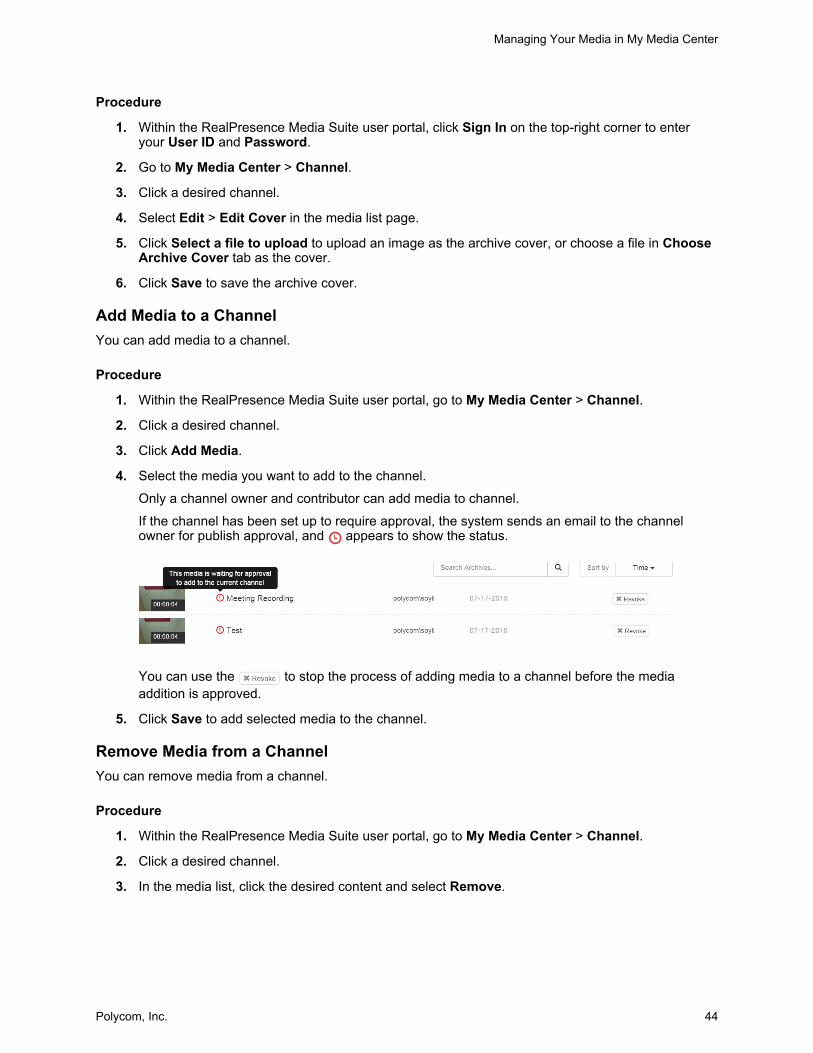
Procedure
1. Within the RealPresence Media Suite user portal, click Sign In on the top-right corner to enter your User ID and Password.
2. Go to My Media Center > Channel.
3. Click a desired channel.
4. Select Edit > Edit Cover in the media list page.
5. Click Select a file to upload to upload an image as the archive cover, or choose a file in Choose Archive Cover tab as the cover.
6. Click Save to save the archive cover.
Add Media to a ChannelYou can add media to a channel.
Procedure
1. Within the RealPresence Media Suite user portal, go to My Media Center > Channel.
2. Click a desired channel.
3. Click Add Media.
4. Select the media you want to add to the channel.
Only a channel owner and contributor can add media to channel.
If the channel has been set up to require approval, the system sends an email to the channel owner for publish approval, and appears to show the status.
You can use the to stop the process of adding media to a channel before the media addition is approved.
5. Click Save to add selected media to the channel.
Remove Media from a ChannelYou can remove media from a channel.
Procedure
1. Within the RealPresence Media Suite user portal, go to My Media Center > Channel.
2. Click a desired channel.
3. In the media list, click the desired content and select Remove.
Managing Your Media in My Media Center
Polycom, Inc. 44
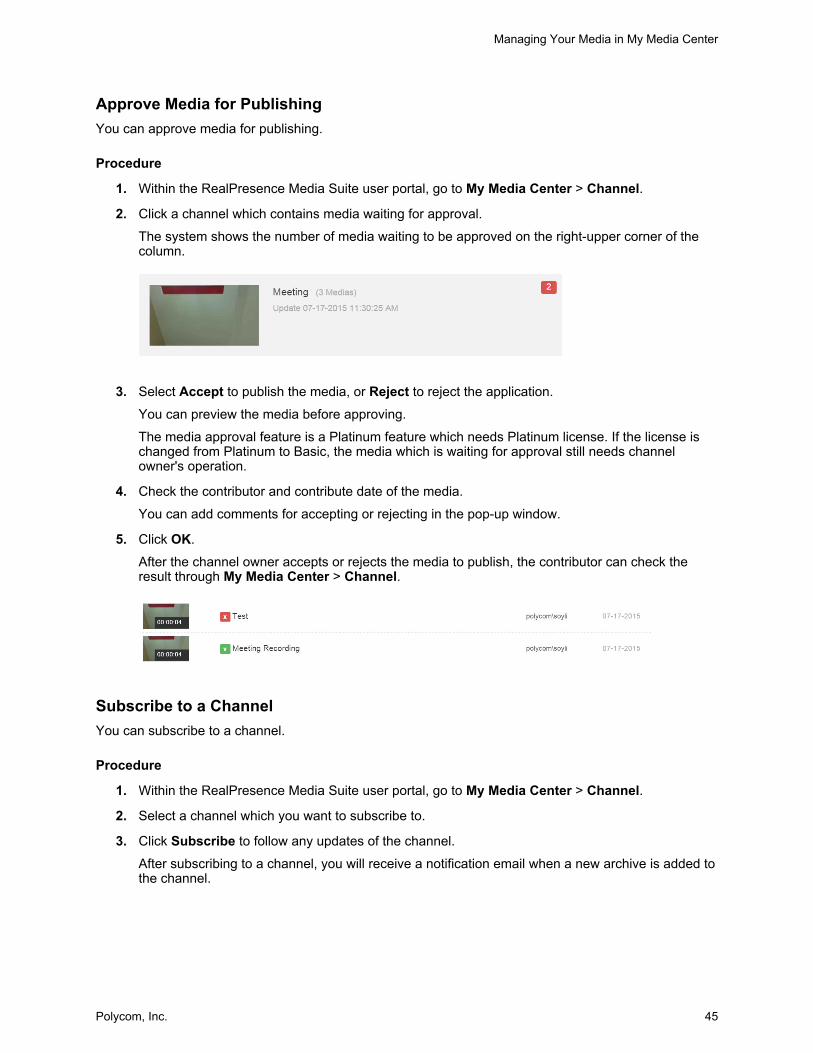
Approve Media for PublishingYou can approve media for publishing.
Procedure
1. Within the RealPresence Media Suite user portal, go to My Media Center > Channel.
2. Click a channel which contains media waiting for approval.
The system shows the number of media waiting to be approved on the right-upper corner of the column.
3. Select Accept to publish the media, or Reject to reject the application.
You can preview the media before approving.
The media approval feature is a Platinum feature which needs Platinum license. If the license is changed from Platinum to Basic, the media which is waiting for approval still needs channel owner's operation.
4. Check the contributor and contribute date of the media.
You can add comments for accepting or rejecting in the pop-up window.
5. Click OK.
After the channel owner accepts or rejects the media to publish, the contributor can check the result through My Media Center > Channel.
Subscribe to a ChannelYou can subscribe to a channel.
Procedure
1. Within the RealPresence Media Suite user portal, go to My Media Center > Channel.
2. Select a channel which you want to subscribe to.
3. Click Subscribe to follow any updates of the channel.
After subscribing to a channel, you will receive a notification email when a new archive is added to the channel.
Managing Your Media in My Media Center
Polycom, Inc. 45
Delete a ChannelYou can delete a channel.
Procedure
1. Within the RealPresence Media Suite user portal, go to My Media Center > Channel.
2. Click a desired channel and select .
3. When asked to confirm the deletion, select Yes, delete it.Deleting a channel does not delete media. You can find the media from My Media Center > Media.
Share a ChannelYou can share a channel through sending channel link to others.
Procedure
1. Within the RealPresence Media Suite user portal, go to My Media Center > Channel.
2. Click a desired channel and select Get Link.
3. Copy the channel link for sharing, and click Close.
Check the Channel ReportYou can check the channel report. RealPresence Media Suite provides the following statistics for the channel:
Channel Statistics
Items Description
Start Time / End Time Specifies the period for system statistics.
VOD Views Specifies the VOD viewed times in the specific time.
Total Media Specifies the total archive number, including the number of added archive and deleted archive in the specific time, in the channel.
Viewers & Contributors Specifies the number of viewer and contributor of the channel.
Likes & Dislikes Specifies the total like and dislike number of all archives in the channel.
Procedure
1. Within the RealPresence Media Suite user portal, go to My Media Center > Channel.
2. Click a desired channel and select .
Managing Your Media in My Media Center
Polycom, Inc. 46
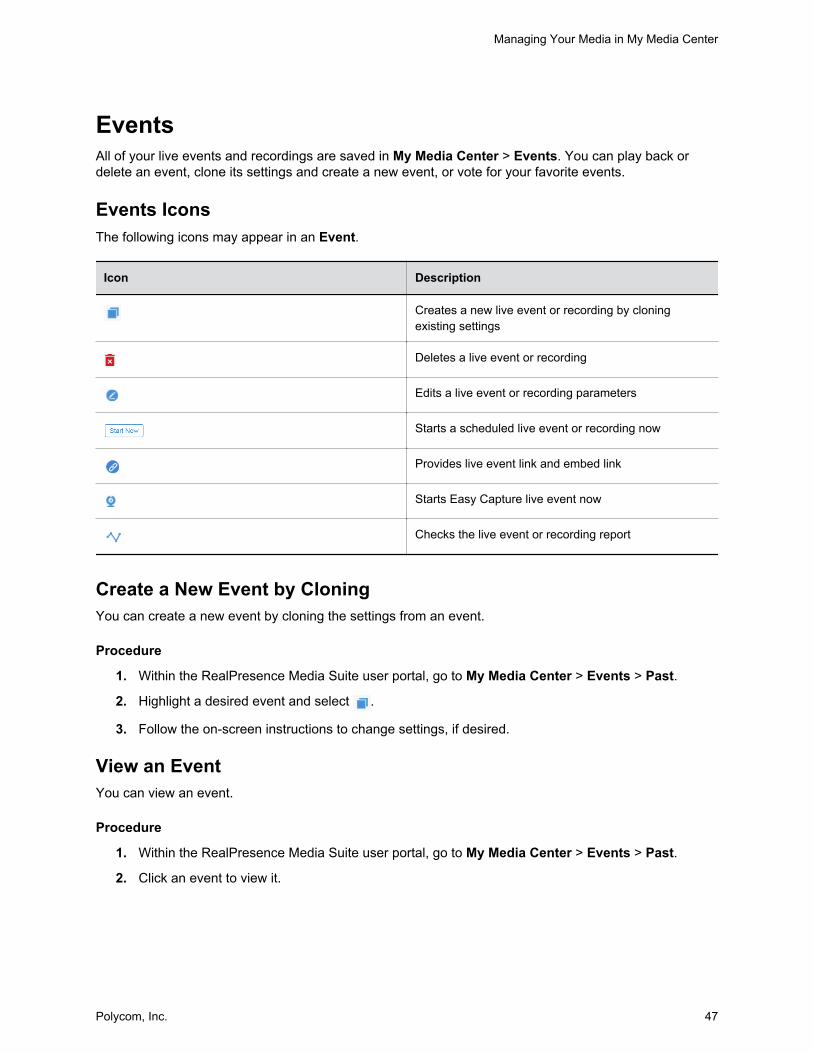
EventsAll of your live events and recordings are saved in My Media Center > Events. You can play back or delete an event, clone its settings and create a new event, or vote for your favorite events.
Events IconsThe following icons may appear in an Event.
Icon Description
Creates a new live event or recording by cloning existing settings
Deletes a live event or recording
Edits a live event or recording parameters
Starts a scheduled live event or recording now
Provides live event link and embed link
Starts Easy Capture live event now
Checks the live event or recording report
Create a New Event by CloningYou can create a new event by cloning the settings from an event.
Procedure
1. Within the RealPresence Media Suite user portal, go to My Media Center > Events > Past.
2. Highlight a desired event and select .
3. Follow the on-screen instructions to change settings, if desired.
View an EventYou can view an event.
Procedure
1. Within the RealPresence Media Suite user portal, go to My Media Center > Events > Past.
2. Click an event to view it.
Managing Your Media in My Media Center
Polycom, Inc. 47
Delete an EventYou can delete an event.
Procedure
1. Within the RealPresence Media Suite user portal, go to My Media Center > Events.
2. Highlight a desired event and select .
3. When asked to confirm the deletion, select Yes, delete it.
Note: You can delete only future or past events.
Start a Scheduled Conference Event in AdvanceYou can start a scheduled conference event in advance.
Procedure
1. Within the RealPresence Media Suite user portal, go to My Media Center > Events > Now and Upcoming.
2. Highlight a desired conference event, and select Start Now.
Start a Scheduled Easy Capture Live Event in AdvanceYou can start a scheduled Easy Capture live event in advance.
Procedure
1. Within the RealPresence Media Suite user portal, go to My Media Center > Events.
2. Highlight a desired Easy Capture live event under the Now and Upcoming tab, and then select .
3. Open the Easy Capture Application, and select live event from down-drop list in the Live tab.
4. Click Start Live to start the live event.
You can pause, resume, or stop the recording (the live event continues) using the controls at the bottom of the screen or on the mini control window.
Edit a Scheduled EventYou can edit a scheduled event.
Procedure
1. Within the RealPresence Media Suite user portal, go to My Media Center > Events.
2. Highlight a desired event under the Future section, and then select .
3. Follow the on-screen instructions to change settings, if desired.
Managing Your Media in My Media Center
Polycom, Inc. 48
Check an Event ReportYou can check an event report.
Procedure
1. Within the RealPresence Media Suite user portal, go to My Media Center > Events > Past.
2. Highlight a desired event and select .
RealPresence Media Suite provides the following statistics for the event:
Event Statistics
Items Description
Planed start time / Planed end time Planned start time and planned end time of the event.
Actual start time / Actual end time Actual start time and actual end time of the event.
Average view duration Average viewing time of all viewers.
Participants Number of total participants of the event.
Logon Participants Number of logged on participants of the event.
Anonymous Participants Number of participants who have not logged onto the system.
Questions Number of total questions during the live event.
Answers Number of questions answered by creator or moderator.
Layout
- Player Information
Layout information of the media player.
Resolution - Player Information Resolution information of the media player.
Join Time Join time and number of the viewers.
Leave Time Leave time and number of the viewers.
You also can download a report of the event statistics by clicking Download Details on the right-top corner.
Media ArchivesYou can find all your meeting recordings in the User Portal. You can play back, edit, share meeting archives, upload local video, or playback a meeting recording to a meeting.
Managing Your Media in My Media Center
Polycom, Inc. 49
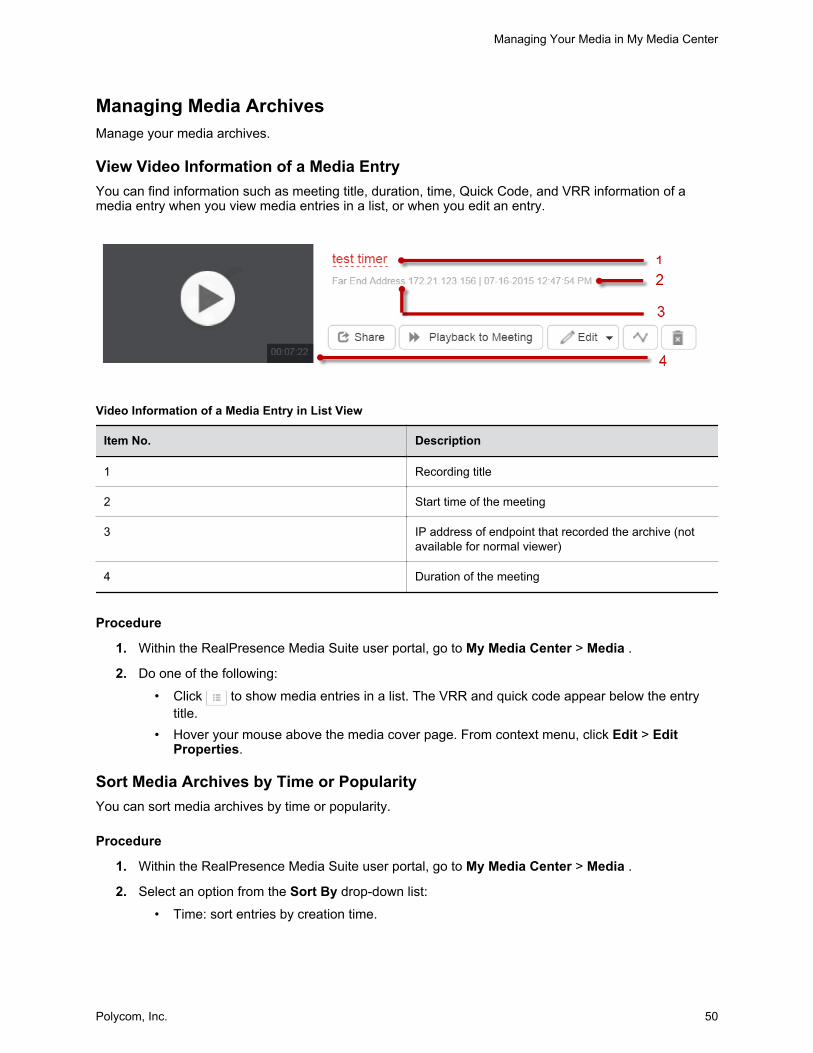
Managing Media ArchivesManage your media archives.
View Video Information of a Media EntryYou can find information such as meeting title, duration, time, Quick Code, and VRR information of a media entry when you view media entries in a list, or when you edit an entry.
Video Information of a Media Entry in List View
Item No. Description
1 Recording title
2 Start time of the meeting
3 IP address of endpoint that recorded the archive (not available for normal viewer)
4 Duration of the meeting
Procedure
1. Within the RealPresence Media Suite user portal, go to My Media Center > Media .
2. Do one of the following:
• Click to show media entries in a list. The VRR and quick code appear below the entry title.
• Hover your mouse above the media cover page. From context menu, click Edit > Edit Properties.
Sort Media Archives by Time or PopularityYou can sort media archives by time or popularity.
Procedure
1. Within the RealPresence Media Suite user portal, go to My Media Center > Media .
2. Select an option from the Sort By drop-down list:
• Time: sort entries by creation time.
Managing Your Media in My Media Center
Polycom, Inc. 50
• Most Liked: sort entries by the popularity.• Most Viewed: sort entries by the frequency they are viewed.
Change Media Entry ViewsYou can change media entry views.
Procedure
1. Within the RealPresence Media Suite user portal, go to My Media Center > Media.
2. Do one of the following:
• To show Media entries as large icons, click .
• To show Media entries in a list, click .
Manage Trash FolderThe archives that you manually delete or have reached their expiration date are moved to Trash folder first. Trash folder keeps the archives 30 days, and purge the archives automatically. You can restore or permanently delete the archive earlier from the Trash folder.
Procedure
1. Within the RealPresence Media Suite user portal, go to My Media Center > Media .
2. Click to enter the Trash folder.
The Trash folder keeps the archive 30 days before being deleted permanently.
3. Click to restore the archive, or click to delete the archive permanently.
Viewing Recording ActivityYou can view all recording activities on top of the User Portal home page. You can find the recording title, timer of the recording, and meeting room.
Check the Media ReportYou can check the statistic report for each archive.
Procedure
1. Within the RealPresence Media Suite user portal, go to My Media Center > Media.
2. Hover your mouse above the media cover page.
From the context menu, click .
RealPresence Media Suite provides the following statistics for the archive:
Archive Statistics
Items Description
Start Time / End Time Specifies the period for system statistics.
Managing Your Media in My Media Center
Polycom, Inc. 51
Items Description
VOD Views Specifies the VOD viewing times in the specific time.
Likes & Dislikes Specifies the total like and dislike number for the archive.
Total Duration Specifies the total viewing duration of the archive.
Time Average Specifies the percentage of the average viewing time.
VOD Views Specifies the total VOD viewing times for each day in the specific duration in line chart.
Client Information - Layout Specifies the layout information of the media player.
Client Information - Resolution Specifies the resolution information of the media player.
Note: Administrator can check the media report through Admin menuAdministrator can check the report of all archives through My Media Center > Admin > Media > Archives.
You also can download the report by click Download Details on the right-top corner of the page.
Searching Media ArchivesYou can search media archives.
Procedure
1. Perform one of the following:
• Enter the key words in the search box on the top of the main page.• Enter the key words in the search box on the top of the My Media Center page.
Sharing Media ArchivesYou can share the media archives to public, existing channels, or specific users by creating new channels.
Share an Archive to an Existing ChannelYou can share an archive to an existing channel.
Procedure
1. Within the RealPresence Media Suite user portal, go to My Media Center > Media.
Managing Your Media in My Media Center
Polycom, Inc. 52

2. Select an archive from Archives, and then click Share.
3. Select the Public channel from the down-drop list, and then click Share.
Share an Archive by Creating a New ChannelYou can share an archive by creating a new channel.
Procedure
1. Within the RealPresence Media Suite user portal, go to My Media Center > Media.
2. Select an archive from Archives, and then click Share.
3. Click + Create new channels in the pop-up window.
4. Select the Private or Public channel to share media with channel members.
Enter the user name of the person you want to share with, and a channel name for the new channel. If the archive is shared to the public, then you cannot restrict the audience who can view the archive and can only specify the new channel name.
5. Click Save to save the new channel.
6. Select the channel you just created from drop-down list, and then click Share.
Uploading Attachment to Media ArchiveYou can upload one or multiple documents to the media archive as attachments.
Upload Attachments to Media ArchiveYou can upload attachments to media archive.
Procedure
1. Within the RealPresence Media Suite user portal, go to My Media Center > Media.
2. Hover your mouse above the desired archive icon.
The context menu position varies with media views.
3. Select Edit > Attachment.
4. Click Select file to upload to select desired documents from local PC.
5. Select one or multiple documents, and click Open to upload documents.
The maximum number of attachments for one archive is 10, and the size for each document must equal or be less than 100 MB.
6. Click Close to finish the upload.
After documents upload successfully, is shown in the archive title.
Note: The Skype for Business meeting recording generates an attachment about meeting details automaticallyThe Skype for Business meeting recording archive includes an attachment which records the detailed meeting information.
Managing Your Media in My Media Center
Polycom, Inc. 53
Download Attachments in the ArchiveYou can download attachments in the archive.
Procedure
1. Within the RealPresence Media Suite user portal, go to My Media Center > Media.
2. Hover your mouse above the desired archive icon, and select Edit > Attachment to show the attachment page.
Or, click in the archive title to open the attachment page.
3. Select the desired attachment.
4. Click .to download the attachment.
Delete Attachments in the ArchiveYou can delete attachments in the archive.
Procedure
1. Within the RealPresence Media Suite user portal, go to My Media Center > Media.
2. Hover your mouse above the desired archive icon, and select Edit > Attachment to show the attachment page.
Or, click in the archive title to open the attachment page.
3. Select the desired attachment.
4. Click to delete the attachment.
Playing Back VideoYou can play back a video on the RealPresence Media Suite using the following methods:
• Play back a video to a browser.• Play back the video from RealPresence Media Suite to a meeting.
Note: Only the people video can be played when playing mulit-track MP4 fileOnly people video can be played when playing multi-track MP4 live streaming or archive from third party streaming server.
Play Back Archives to a BrowserYou can play back archives to a browser.
Procedure
1. Within the RealPresence Media Suite user portal, go to My Media Center > Media.
2. In the Archives, select the archive you want to play back.
3. Install the RealPresence Media Suite Player Plugin as required the first time you play back a video using the RealPresence Media Suite Player.
Managing Your Media in My Media Center
Polycom, Inc. 54
4. Refresh the browser and allow pop-ups on the browser.
5. Play back the selected media.
Note: If the bitrate of the media is more than 20Mbps, the media cannot be played back smoothly.
Play Back Media to a MeetingYou can play back media to a meeting.
Procedure
1. Within the RealPresence Media Suite user portal, go to My Media Center > Media.
2. Locate the video for playback in the Archives, and then click Playback to Meeting.
Note: If the bitrate of the media is more than 4Mbps, the media cannot be played back to a meeting.
3. Enter the IP address or VMR of the meeting in the Meeting Room (or Endpoint) field on the pop-up page.
4. Select Immediately or Manually to control the play time of the media.
If Manually is selected, you must click the Start button to play back the media in the meeting. If Immediately is selected, the media plays back immediately after the call is connected.
Note: If Manually is selected and the archive is not played back manually after 30 seconds, the archive will begin to play back automatically.
5. Set the H.323 or SIP signaling type for the playback.
The selection depends on the network environment.
6. Select the Conference Layout for the playback.
If Lecture is selected, the video will be forced full screen when playing back to RMX (v8.6.2 or later release). If Auto is selected, RMX will decide the conference layout.
7. Click OK to play back the video to the meeting.
The system plays playback header around five seconds before playing the video. If Immediately is selected and the video is played back to RMX, system will ignore the playback header and play the video immediately.
Note: The Playback to Meeting function consumes recording and live streaming ports.
Video Call Play Back When Dialing in from an EndpointYou can play back recorded media archives stored in RealPresence Media Suite using Quick Code. A quick code is generated automatically for every archive after the system completes a recording.
Managing Your Media in My Media Center
Polycom, Inc. 55
Note: Play back archive by quick code from endpoint is disabled by default. Enable playback by quick code for the archive before playing back archive from endpoint.
View the Quick Code of an ArchiveYou can view the quick code of an archive.
Procedure
1. Go to My Media Center > Media.
2. From context menu, select Edit > Edit Properties.
The quick code is displayed in the Quick Code column.
Enable Play Back by Quick CodeYou can enable play back by quick code.
Procedure
1. Go to My Media Center > Media.
2. From context menu, select Edit > Edit Properties.
3. Select Allow playback by quick code.
4. Select Enable PIN.
5. Click Set PIN to set PIN code to protect play back from endpoint.
Play Back Archives Using the Quick CodeYou can play back archives using the quick code.
Procedure
1. Dial using one of the following formats:
Tip: • A quick code consists of seven digits that start with the number 0. If the archive has multiple episodes, you can append the two-digit episode index to the seven-digit quick code in your dial string.
• If PIN code is enabled for the quick code, the input must be completed by #, or system will play the prompt again after 20 seconds. The call is disconnected if the input is not completed at the end of third time prompt. All your inputs are valid even if you enter them after different prompt, and all inputs are sent to Real Presence Media Suite after you enter the #.
a. Dialing through H.323.• If the system has been registered to a gatekeeper, dial [Media Suite E.164 prefix]
[Quick Code]
For example, if the E.164 prefix of the Polycom RealPresence Media Suite system is 1234 and the quick code of the file to be played back is 0123456, dial 12340123456
Managing Your Media in My Media Center
Polycom, Inc. 56
• If the system has not been registered to a gatekeeper, dial [Media Suite IP address]##[Quick Code]
For example, if the IP address of the Polycom RealPresence Media Suite system is 10.1.2.3 and the quick code of the file to be played back is 0123456, dial 10.1.2.3##0123456
If you want to play back the second episode of the archive, you can replace the quick code in above dial string by appending episode index, such as replace [email protected] with [email protected].
b. Dialing through SIP.• If the system has been registered to a SIP server, the SIP server should configure
RealPresence Media Suite as a SIP peer, dial [SIP Peer Prefix][Quick code].
For example, if the SIP peer prefix of the Polycom RealPresence Media Suite system is 1234 and the quick code of the file to be played back is 0123456, dial 12340123456.
• If the system has not been registered to a SIP server, dial [Quick Code]@[Media Suite IP address]
For example, if the IP address of the Polycom RealPresence Media Suite system is 10.1.2.3 and the quick code of the file to be played back is 0123456, dial [email protected]
If you want to play back the second episode of the archive, you can replace the quick code in above dial string by appending episode index, such as replace [email protected] with [email protected].
Note: Playback limitations• With no action, it will begin playing the next episode automatically, 30 seconds after
the end of the previous one.• Once the archive playback is completed, RealPresence Media Suite will drop from
the multipoint call within five minutes if no command is given.• RealPresence Media Suite will terminate the call five minutes after the playback is
paused.• If the capacity supports 40 recordings only, the Quick Code playback function is not
supported.
Editing Media ArchivesTo refine and streamline your media, you can trim the media, or add a text subtitle to the media.
Trim the MediaYou can trim the media.
Procedure
1. Within the RealPresence Media Suite user portal, go to My Media Center > Media.
2. Hover your mouse above the media cover page.
From the context menu, select Edit > Edit Media.
Managing Your Media in My Media Center
Polycom, Inc. 57
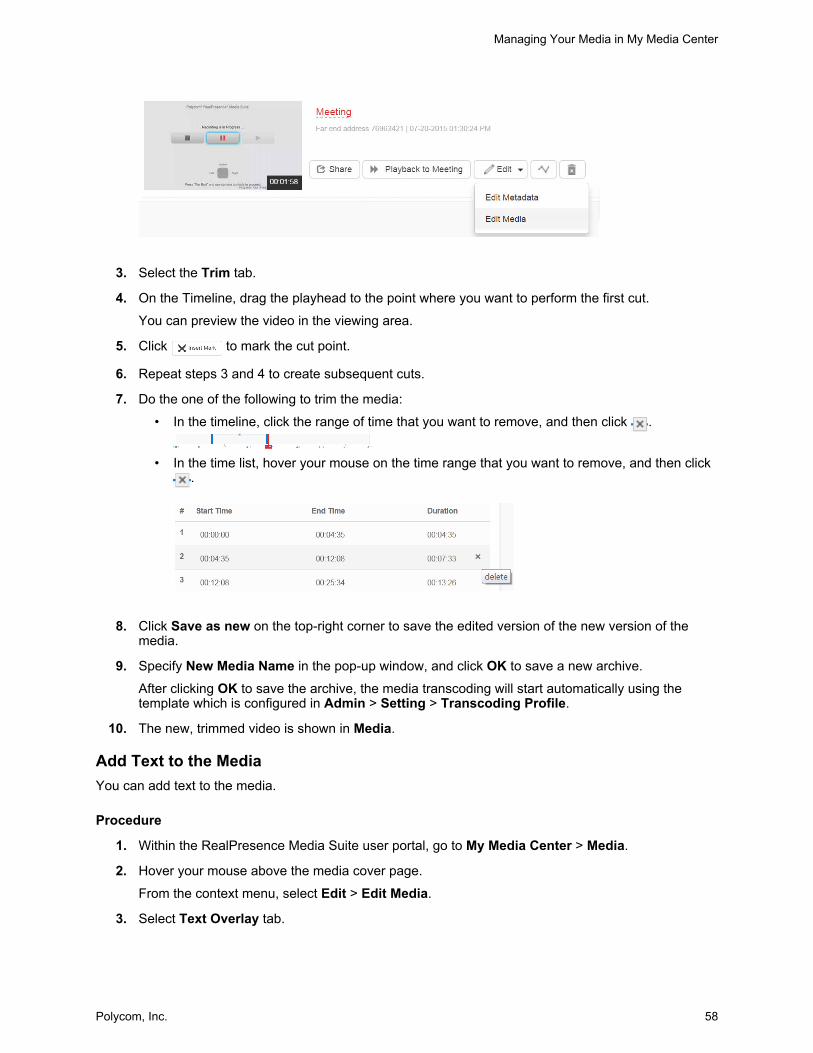
3. Select the Trim tab.
4. On the Timeline, drag the playhead to the point where you want to perform the first cut.
You can preview the video in the viewing area.
5. Click to mark the cut point.
6. Repeat steps 3 and 4 to create subsequent cuts.
7. Do the one of the following to trim the media:
• In the timeline, click the range of time that you want to remove, and then click .
• In the time list, hover your mouse on the time range that you want to remove, and then click .
8. Click Save as new on the top-right corner to save the edited version of the new version of the media.
9. Specify New Media Name in the pop-up window, and click OK to save a new archive.
After clicking OK to save the archive, the media transcoding will start automatically using the template which is configured in Admin > Setting > Transcoding Profile.
10. The new, trimmed video is shown in Media.
Add Text to the MediaYou can add text to the media.
Procedure
1. Within the RealPresence Media Suite user portal, go to My Media Center > Media.
2. Hover your mouse above the media cover page.
From the context menu, select Edit > Edit Media.
3. Select Text Overlay tab.
Managing Your Media in My Media Center
Polycom, Inc. 58
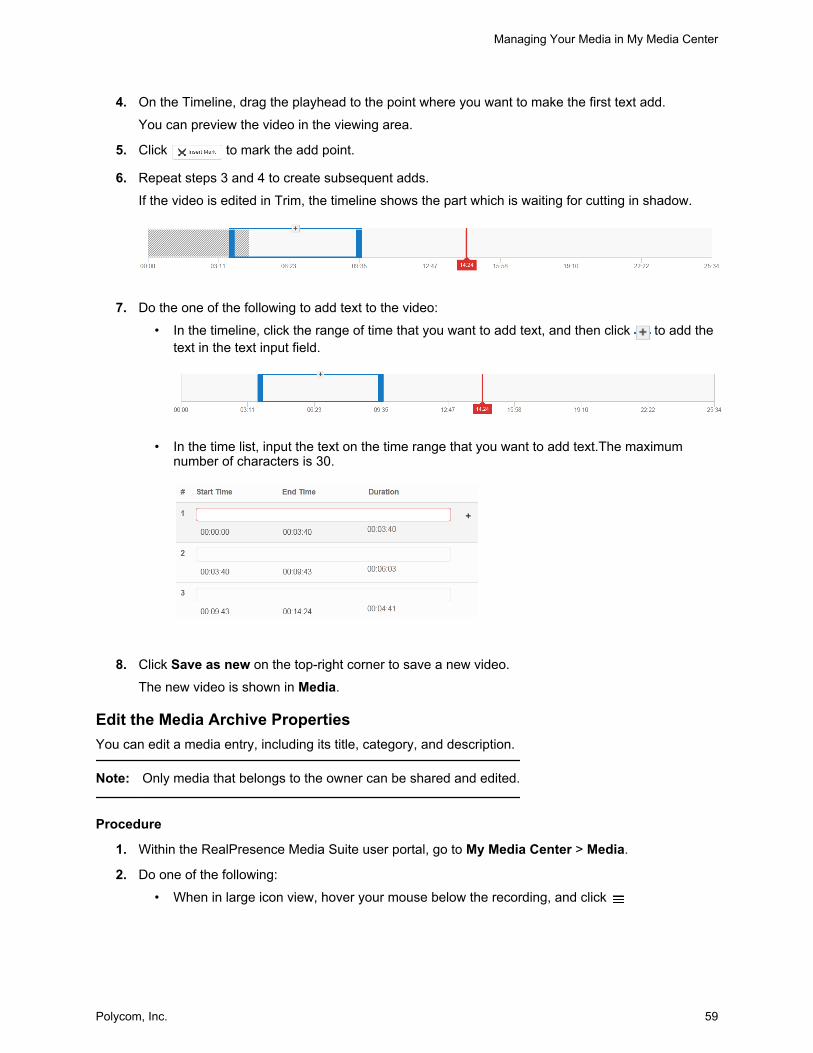
4. On the Timeline, drag the playhead to the point where you want to make the first text add.
You can preview the video in the viewing area.
5. Click to mark the add point.
6. Repeat steps 3 and 4 to create subsequent adds.
If the video is edited in Trim, the timeline shows the part which is waiting for cutting in shadow.
7. Do the one of the following to add text to the video:
• In the timeline, click the range of time that you want to add text, and then click to add the text in the text input field.
• In the time list, input the text on the time range that you want to add text.The maximum
number of characters is 30.
8. Click Save as new on the top-right corner to save a new video.
The new video is shown in Media.
Edit the Media Archive PropertiesYou can edit a media entry, including its title, category, and description.
Note: Only media that belongs to the owner can be shared and edited.
Procedure
1. Within the RealPresence Media Suite user portal, go to My Media Center > Media.
2. Do one of the following:
• When in large icon view, hover your mouse below the recording, and click
Managing Your Media in My Media Center
Polycom, Inc. 59
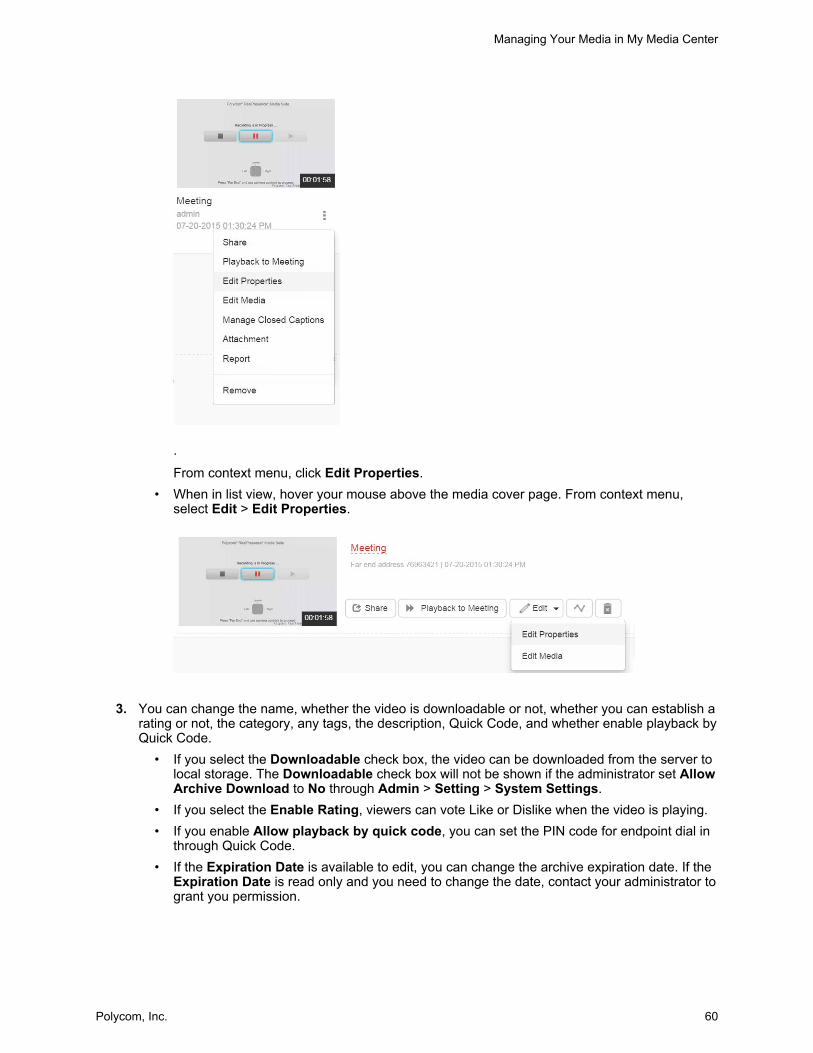
.
From context menu, click Edit Properties.• When in list view, hover your mouse above the media cover page. From context menu,
select Edit > Edit Properties.
3. You can change the name, whether the video is downloadable or not, whether you can establish a rating or not, the category, any tags, the description, Quick Code, and whether enable playback by Quick Code.
• If you select the Downloadable check box, the video can be downloaded from the server to local storage. The Downloadable check box will not be shown if the administrator set Allow Archive Download to No through Admin > Setting > System Settings.
• If you select the Enable Rating, viewers can vote Like or Dislike when the video is playing.• If you enable Allow playback by quick code, you can set the PIN code for endpoint dial in
through Quick Code.• If the Expiration Date is available to edit, you can change the archive expiration date. If the
Expiration Date is read only and you need to change the date, contact your administrator to grant you permission.
Managing Your Media in My Media Center
Polycom, Inc. 60
• If an archive has an expiration date, the date is shown as an alert from 14 days before expiration date. If you manually delete the archive or if it reaches its expiration date, the archive is moved to Trash folder. The Trash folder keeps the deleted archive 30 days. If the archive owner or administrator does not restore or delete the archive manually from the Trash folder, the archive is deleted permanently after being moved to Trash folder 30 days.
Edit Archive CoverYou can upload one image or choose one thumbnail as archive cover.
Procedure
1. Within the RealPresence Media Suite user portal, go to My Media Center > Media.
2. Hover your mouse above the desired archive icon.
The context menu position varies with media views.
3. Select Edit > Edit Cover.
4. Click Select a file to upload to upload an image as the archive cover, or choose a thumbnail from Choose Thumbnail tab as the cover.
Note: The Choose Thumbnail tab is only available when there is a thumbnail within the archive. The thumbnail can only be generated if it was transcoded with transcoding template with Snapshot Enabled. If there is no thumbnail within the archive, you can contact your administrator to retranscode the archive using the transcoding template with snapshot enabled.
5. Click Save to save the archive cover.
Generating Closed Caption FileYou can upload one or multiple closed caption (CC) files to the media file, or automatic generate closed caption files through third party server to enhance your video.
Upload Closed Caption FilesYou can upload closed caption files.
Procedure
1. Within the RealPresence Media Suite user portal, go to My Media Center > Media.
2. Hover your mouse above the media cover page.
From the context menu, select Edit > Manage Closed Captions.
3. Select Select a file to upload to upload closed caption files.
4. Select the Language Name of the closed caption file from down-drop list, or input the language name in the Language Name area.
5. If the video contains multiple episodes, select the episode to add closed captions to from the Episode down-drop list.
6. Click Select a file to upload, and select one closed caption file to upload.
One file can only contain one language.
Managing Your Media in My Media Center
Polycom, Inc. 61
The supported closed caption file formats are SRT and VTT, and RealPresence Media Suite supports up to 10 closed caption files per archive (episode).
Note: Closed Caption support limitations• Only support for MP4 format video.• Only supported in RealPresence Media Suite Player and HTML5 player (iOS/
Android), and cannot support flash player.• Only support VOD, and cannot support in live streaming.• Cannot support for video to third party server Wowza.• Cannot support for full screen video on Android mobile devices.
Automatically Generate Closed Caption FilesYou can automatically generate closed captions for your media archives, if your administrator has configured this feature.
Procedure
1. Within the RealPresence Media Suite user portal, go to My Media Center > Media.
2. Hover your mouse above the media cover page.
From the context menu, select Edit > Manage Closed Captions.
3. Select the Automatic Generation to generate closed captioned files automatically.
4. Select Fidelity and Priority for the task generation.
5. Check Enable Translation to translate the closed caption file to a specific language, and select language.
If Enable Translation is not selected, the closed caption is in English.
6. Click Generate.
Note: Closed Caption support limitations• Only MP4 format video supported.• Only RealPresence Media Suite Player and HTML5 player (iOS/Android) support.
Flash player not supported.• Only video on demand (VOD) supported. Live Streaming not supported.• Third-party Wowza server not supported.• Full screen video on Android mobile devices not supported.
Download Closed Caption FilesYou can download closed caption files.
Procedure
1. Within the RealPresence Media Suite user portal, go to My Media Center > Media.
2. Hover your mouse above the media cover page.
Managing Your Media in My Media Center
Polycom, Inc. 62
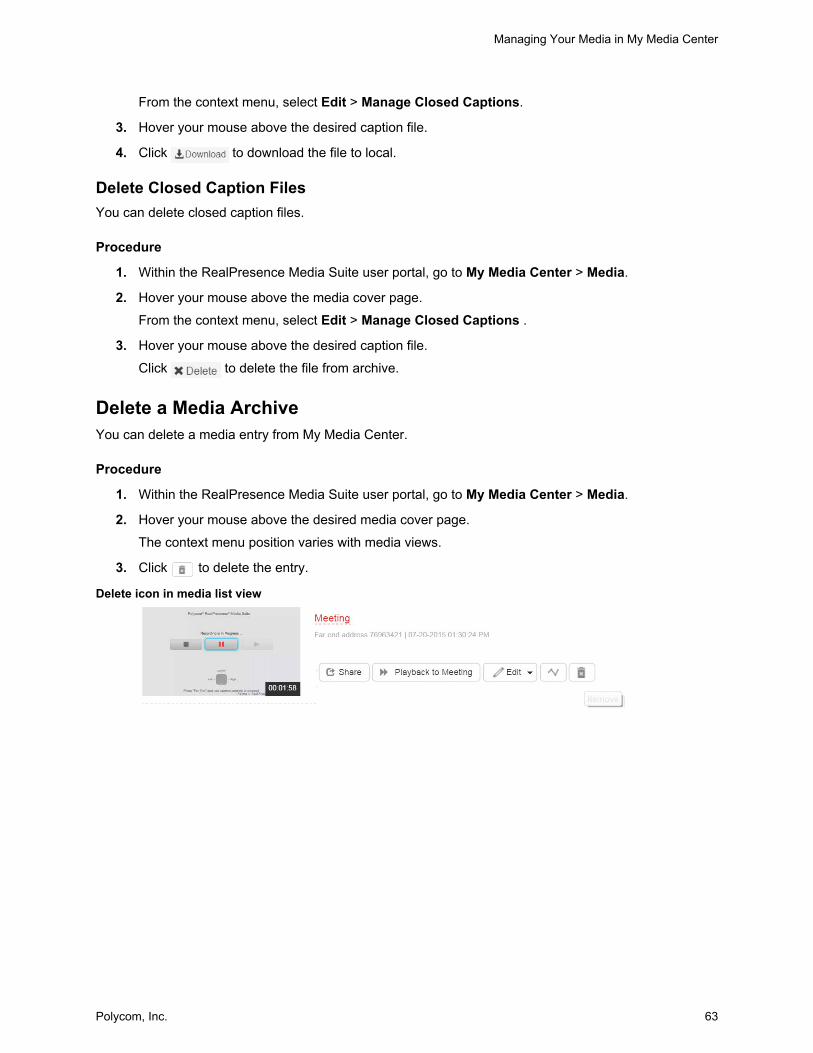
From the context menu, select Edit > Manage Closed Captions.
3. Hover your mouse above the desired caption file.
4. Click to download the file to local.
Delete Closed Caption FilesYou can delete closed caption files.
Procedure
1. Within the RealPresence Media Suite user portal, go to My Media Center > Media.
2. Hover your mouse above the media cover page.
From the context menu, select Edit > Manage Closed Captions .
3. Hover your mouse above the desired caption file.
Click to delete the file from archive.
Delete a Media ArchiveYou can delete a media entry from My Media Center.
Procedure
1. Within the RealPresence Media Suite user portal, go to My Media Center > Media.
2. Hover your mouse above the desired media cover page.
The context menu position varies with media views.
3. Click to delete the entry.
Delete icon in media list view
Managing Your Media in My Media Center
Polycom, Inc. 63
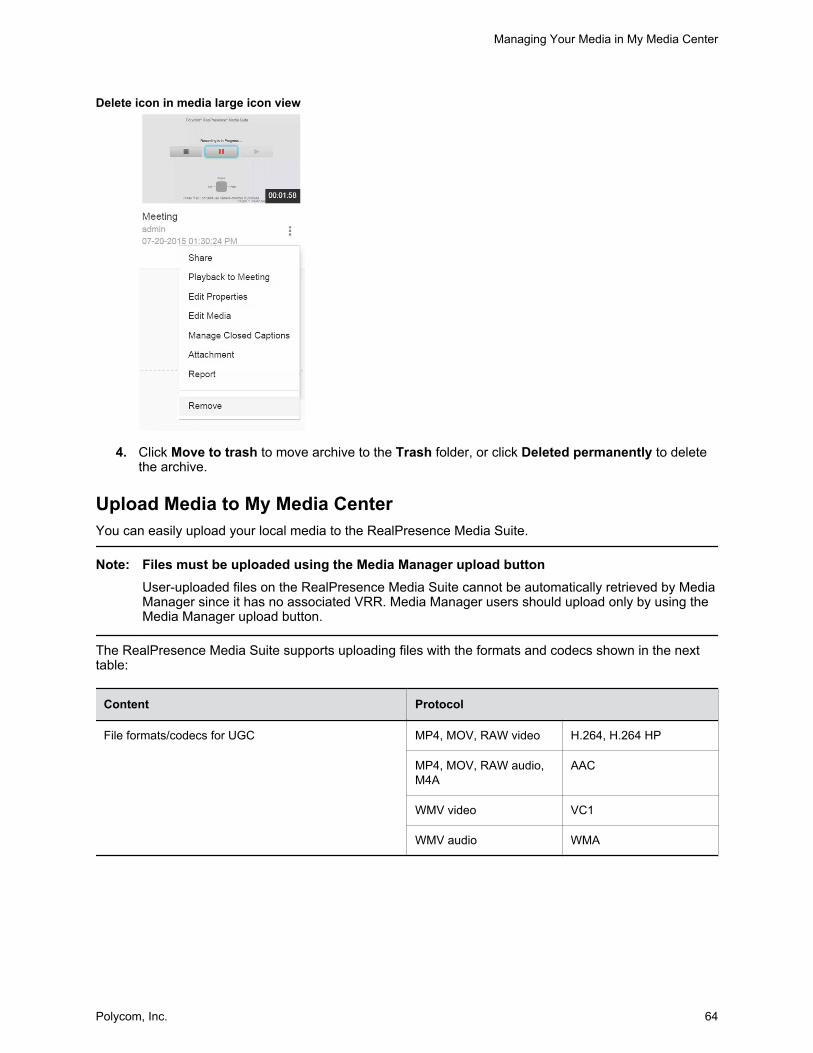
Delete icon in media large icon view
4. Click Move to trash to move archive to the Trash folder, or click Deleted permanently to delete the archive.
Upload Media to My Media CenterYou can easily upload your local media to the RealPresence Media Suite.
Note: Files must be uploaded using the Media Manager upload buttonUser-uploaded files on the RealPresence Media Suite cannot be automatically retrieved by Media Manager since it has no associated VRR. Media Manager users should upload only by using the Media Manager upload button.
The RealPresence Media Suite supports uploading files with the formats and codecs shown in the next table:
Content Protocol
File formats/codecs for UGC MP4, MOV, RAW video H.264, H.264 HP
MP4, MOV, RAW audio, M4A
AAC
WMV video VC1
WMV audio WMA
Managing Your Media in My Media Center
Polycom, Inc. 64

Note: File uploading limitations• The file must include an audio stream.• Video frame rate cannot be higher than 60 FPS.• For resolution of video, the pixels in width should not be higher than 1920, and the pixels in
height should not be higher than 1088.
If the file cannot meet the above requirements, use the third party tool to transcode the file based on the above requirements.
Procedure
1. Within the RealPresence Media Suite user portal, go to My Media Center > Media.
2. Click Upload Media to upload your local media to My Media Center.
3. Select an existing file, or drag and drop the file from PC to upload it to My Media Center.The maximum concurrent uploading files is 20.
4. Specify the name, downloadable or not, rateable or not, category, channel, tags, and description for the video.
If the Downloadable checkbox is selected, the media can be downloaded from the server to local storage. The Downloadable checkbox is not available unless configured by your administrator.
5. Click Upload to upload the video.
Survey and TestYou can create a test or a survey using RealPresence Media Suite to gather information for analysis or measure the test taker's skill and knowledge.
Create a SurveyYou can create a survey through RealPresence Media Suite.
Procedure
1. Within the RealPresence Media Suite user portal, go to My Media Center > Survey & Test.
2. Click + Add Survey to create a new survey.
3. Configure the survey basic information shown in the next table:
Survey Basic Parameters
Parameters Description
Title Specify the survey title.
Managing Your Media in My Media Center
Polycom, Inc. 65
Parameters Description
Privacy Select Private or Public to specify the survey character. If Private is selected, the
survey is shown to the specific invitees. If Public is selected, the survey is shown to the public.
Everyone can see the results Specify whether the survey report can be shown to everyone.
Set deadline Select the checkbox to set the deadline of the survey.
4. Click + Add Question Page or + Add Media Page to add each survey question:
• Click + Add Question Page, and enter survey question title and survey options for one survey question.
• Click + Add Media Page to insert media as part of the survey. Select the checkbox in Hide the control bar to hide the control bar when the media is played.
5. Click Save and Collect Invitee on the top-right corner to save all the survey questions and specify the survey invitees.
6. Click + Add, and enter the user name or group name of participant on the pop-up page.
7. Click OK to add the survey invitee.
8. Click Start to start the survey, or click Back to Design to design the survey questions again.
After the survey is started, your system sends out an invitation email to all participants that you have specified.
Join a SurveyYou can join a survey.
Procedure
1. Within the RealPresence Media Suite user portal, go to My Media Center > Survey & Test.
2. Click Take to join the survey.
You also can join the survey through the invitation email sent out by the system.
After the survey is finished, is shown in front of the survey title.
Manage SurveyYou can collect the result or close the survey.
• After the survey is started, survey owner can click to collect the response, to check the result and to close the survey.
• After the survey is closed or expired, the survey owner can check the results, or delete the survey.
Managing Your Media in My Media Center
Polycom, Inc. 66
Create a TestYou can create a test through RealPresence Media Suite.
Procedure
1. Within the RealPresence Media Suite user portal, go to My Media Center > Survey & Test.
2. Click + Add Test to create a new test.
3. Configure the test basic information shown in the next table:
Test Basic Parameters
Parameters Description
Title Specify the test title.
Pass Mark (1~100) Specify the pass mark of the test.
Privacy Select Private or Public to specify the test character. If Private is selected, the
test is shown to the specific invitees. If Public is selected, the test is shown to the public.
Everyone can see the results Specify whether the test report can be shown to everyone.
Set deadline Select the checkbox to set the deadline of the test.
4. Click + Add Question Page or + Add Media Page to add each test question:
a. Click + Add Question Page.
b. Enter the test question title and test options for one test question.
c. Select the checkbox of the correct answer.
d. Assign the points to the question to score the test.
The range of the points is from 1 to 10.
Click + Add Media Page to insert media as part of the test. Select the checkbox in Hide the control bar to hide the control bar when the media are played.
5. Click Save and Collect Invitee on the top-right corner to save all the test questions and specify the test invitees.
6. Click + Add, and enter the user name or group name of participant on the pop-up page.
7. Click OK to add the test invitee.
8. Click Start to start the test, or click Back to Design to design the test questions again.
After the test is started, the system will send out an invitation email to all participants you have specified.
Managing Your Media in My Media Center
Polycom, Inc. 67
Join a TestYou can join a test.
Procedure
1. Within the RealPresence Media Suite user portal, go to My Media Center > Survey & Test.
2. Click Take to join the test.
You also can join the test through the invitation email sent out by the system.
3. If you finish the test and achieve the score established as a Pass, you get a certificate for the test.
After you pass the test, is shown in front of the test title, and you can click it to show the certificate again.
If you do not pass the test, must retry again.
AccountAfter you log in to the RealPresence Media Suite system with your account, you can set the account level configuration to simplify your operation.
Set Default Meeting RoomYou can set your frequently used meeting room when creating recording or live streaming as the default meeting room in your account settings. After configuration, the default meeting room will be filled in automatically when you create a recording or live streaming.
Procedure
1. Within the RealPresence Media Suite user portal, go to My Media Center > Account.
2. Enter your frequently used meeting room or IP address in Default Meeting Room (or Endpoint).
3. Click Save to save the configuration.
Configure Account Level Content Expiration RuleYou can configure the account level content expiration rule which is applied to all archives created by your account. The configuration is available when you have permissions granted by administrator.
Procedure
1. Within the RealPresence Media Suite user portal, go to My Media Center > Account.
2. Select the expiration period from Content Expiration Setting.
If Never is selected for expiration period, the archive expiration date is the first day of the current year (year/01/01) + 10 years. For example, if Never is selected and the current year is 2016, the expiration date of all archives created by the account is set to 2016/01/01 + 10 years = 2026/01/01, but in the next year (2017), the expiration date will be changed to 2027/01/01.
3. Select the expiration date calculation method. You can select after create time or after last view time.
Managing Your Media in My Media Center
Polycom, Inc. 68
4. Select the Receive Alert Email checkbox. The option is disabled if the expiration date is Never.If Receive Alert Email is enabled, you receive the email triggered by:
▪ Fourteen days before archive expiration date.▪ Archives are deleted to Trash folder by system when archive reaches the expiration date. If
archive is deleted manually, email will not be triggered.▪ Archives are deleted permanently by system after being move to Trash folder 30 days. If
archive is deleted manually, email will not be triggered.
5. Click Save to save the configuration.
Managing Your Media in My Media Center
Polycom, Inc. 69
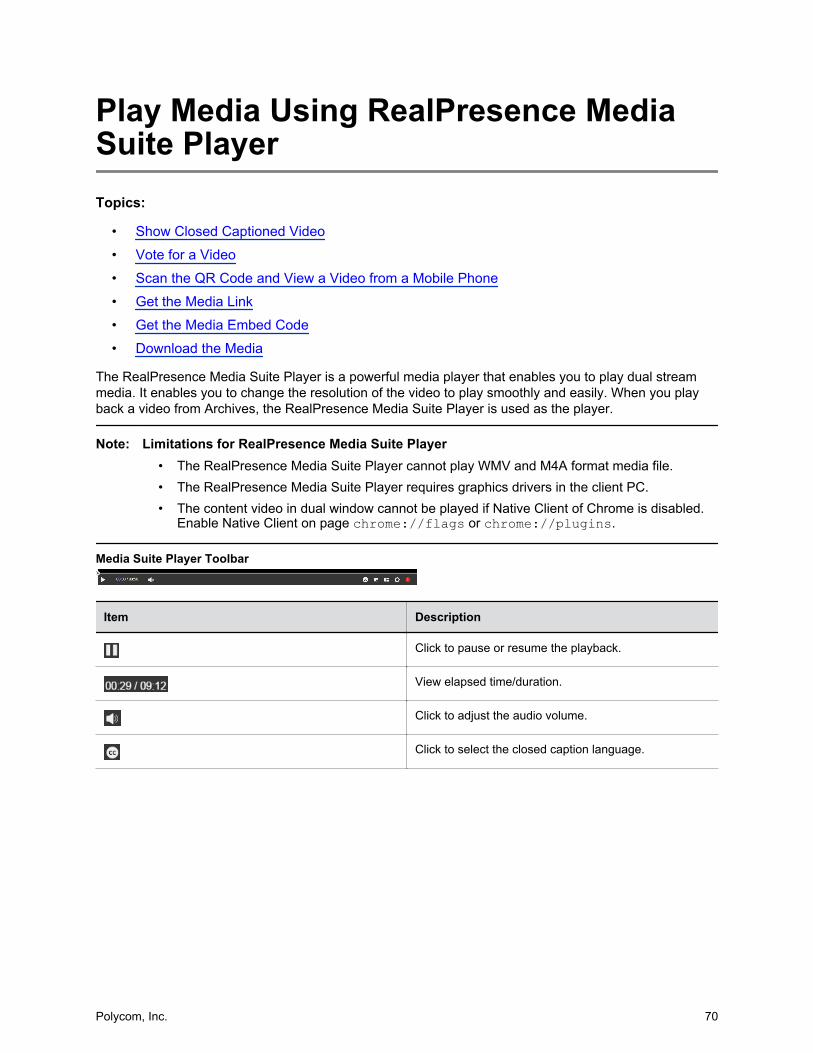
Play Media Using RealPresence Media Suite PlayerTopics:
• Show Closed Captioned Video
• Vote for a Video
• Scan the QR Code and View a Video from a Mobile Phone
• Get the Media Link
• Get the Media Embed Code
• Download the Media
The RealPresence Media Suite Player is a powerful media player that enables you to play dual stream media. It enables you to change the resolution of the video to play smoothly and easily. When you play back a video from Archives, the RealPresence Media Suite Player is used as the player.
Note: Limitations for RealPresence Media Suite Player• The RealPresence Media Suite Player cannot play WMV and M4A format media file.• The RealPresence Media Suite Player requires graphics drivers in the client PC.• The content video in dual window cannot be played if Native Client of Chrome is disabled.
Enable Native Client on page chrome://flags or chrome://plugins.
Media Suite Player Toolbar
Item Description
Click to pause or resume the playback.
View elapsed time/duration.
Click to adjust the audio volume.
Click to select the closed caption language.
Polycom, Inc. 70
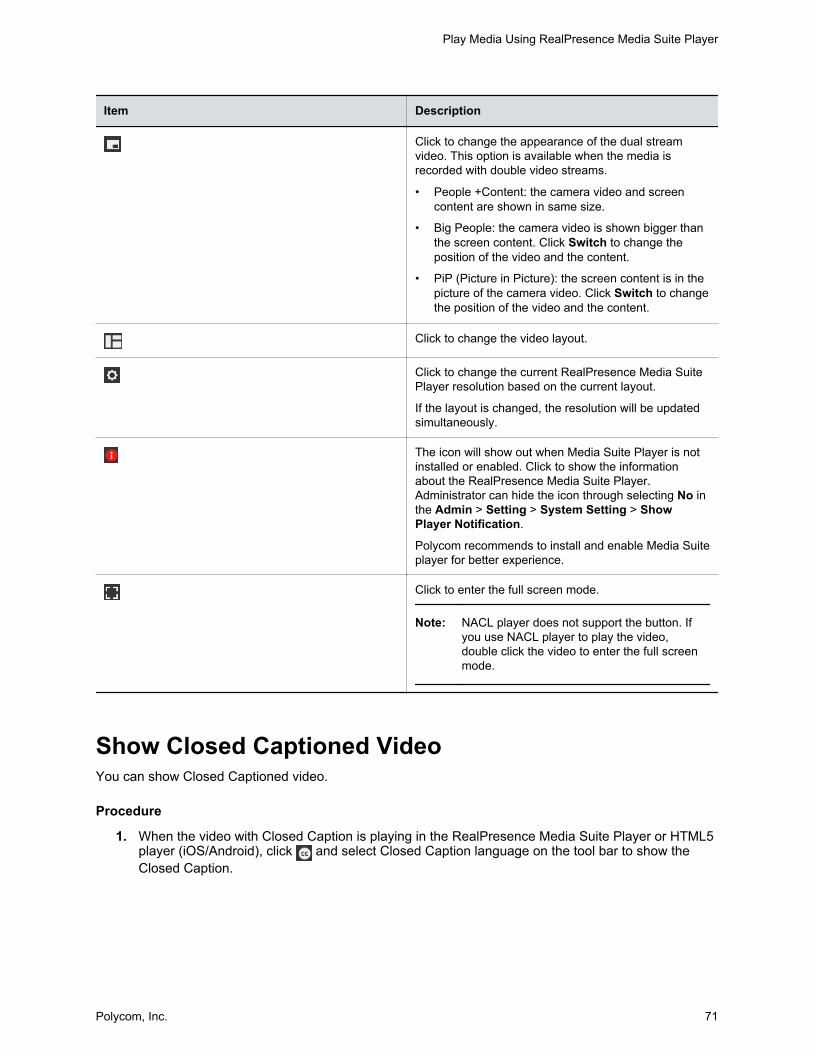
Item Description
Click to change the appearance of the dual stream video. This option is available when the media is recorded with double video streams.
• People +Content: the camera video and screen content are shown in same size.
• Big People: the camera video is shown bigger than the screen content. Click Switch to change the position of the video and the content.
• PiP (Picture in Picture): the screen content is in the picture of the camera video. Click Switch to change the position of the video and the content.
Click to change the video layout.
Click to change the current RealPresence Media Suite Player resolution based on the current layout.
If the layout is changed, the resolution will be updated simultaneously.
The icon will show out when Media Suite Player is not installed or enabled. Click to show the information about the RealPresence Media Suite Player. Administrator can hide the icon through selecting No in the Admin > Setting > System Setting > Show Player Notification.
Polycom recommends to install and enable Media Suite player for better experience.
Click to enter the full screen mode.
Note: NACL player does not support the button. If you use NACL player to play the video, double click the video to enter the full screen mode.
Show Closed Captioned VideoYou can show Closed Captioned video.
Procedure
1. When the video with Closed Caption is playing in the RealPresence Media Suite Player or HTML5 player (iOS/Android), click and select Closed Caption language on the tool bar to show the Closed Caption.
Play Media Using RealPresence Media Suite Player
Polycom, Inc. 71
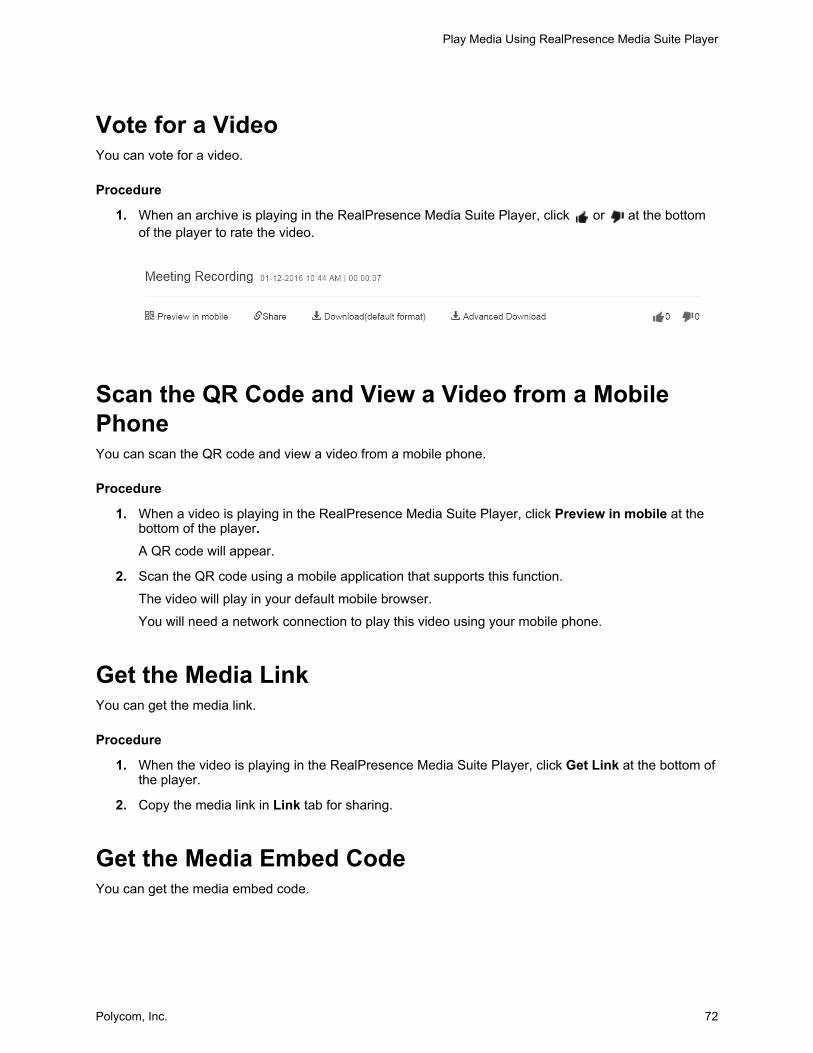
Vote for a VideoYou can vote for a video.
Procedure
1. When an archive is playing in the RealPresence Media Suite Player, click or at the bottom of the player to rate the video.
Scan the QR Code and View a Video from a Mobile PhoneYou can scan the QR code and view a video from a mobile phone.
Procedure
1. When a video is playing in the RealPresence Media Suite Player, click Preview in mobile at the bottom of the player.A QR code will appear.
2. Scan the QR code using a mobile application that supports this function.
The video will play in your default mobile browser.
You will need a network connection to play this video using your mobile phone.
Get the Media LinkYou can get the media link.
Procedure
1. When the video is playing in the RealPresence Media Suite Player, click Get Link at the bottom of the player.
2. Copy the media link in Link tab for sharing.
Get the Media Embed CodeYou can get the media embed code.
Play Media Using RealPresence Media Suite Player
Polycom, Inc. 72
Procedure
1. When the video is playing in the RealPresence Media Suite Player, click Get Link at the bottom of the player.
2. Click the Embed tab, and the video URL displays in embed code format, which can be used to embed the player in a third-party web page.
You can set the following three parameters for embed video:
• Video size: set the embedded video size.• Auto play after page loaded: enable this check box to have the video play automatically
after the page loaded.• Show player control bar: enable this check box to have the video control bar show up on
the embedded video.
Download the MediaYou can download the media.
Note: To enable media download function, Polycom recommends allowing the cookie from the browser.
Download the Media with Default FormatYou can download the media with default format
Procedure
1. When a video is playing in the RealPresence Media Suite Player and the video is downloadable, click Download (default format) at the bottom of the player.
Default format is decided by the system according to the media.
Download the Media with Multiple Formats and ThumbnailsYou can download the media with multiple formats and thumbnails
Procedure
1. When the video is playing in the RealPresence Media Suite Player and the video is downloadable, click Advanced Download at the bottom of the player.
You can download a thumbnail by clicking Thumbnail, or download the media in multiple formats.
Play Media Using RealPresence Media Suite Player
Polycom, Inc. 73
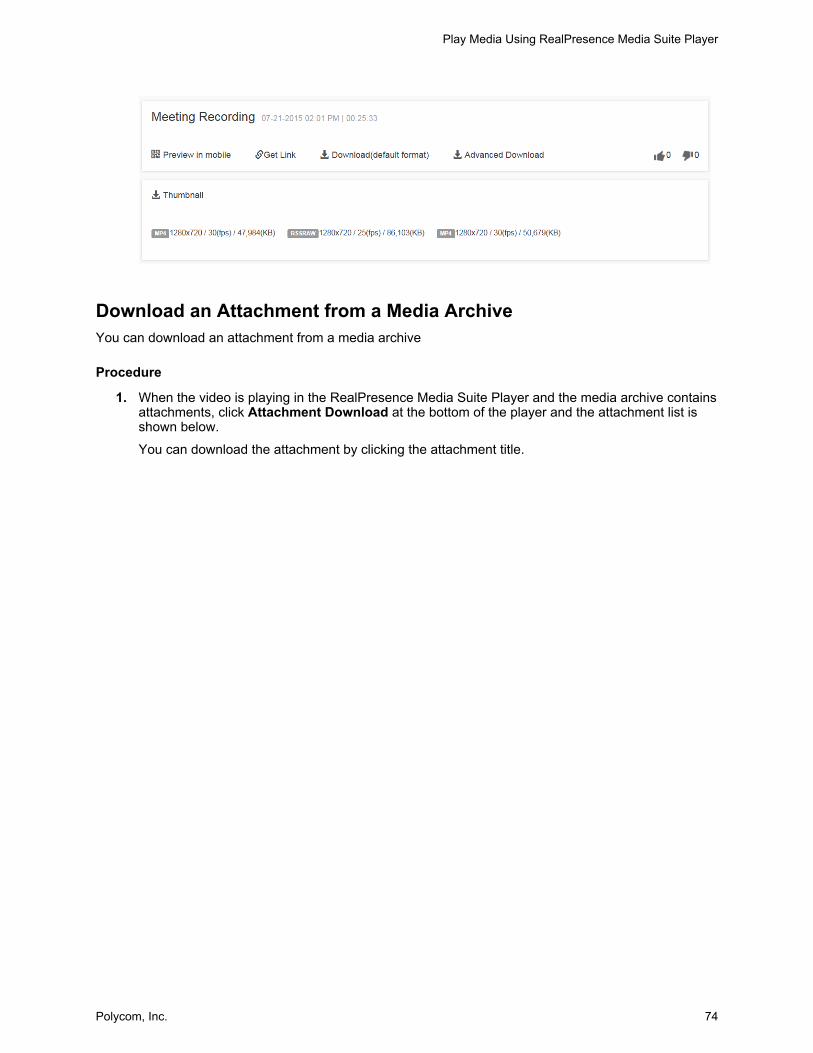
Download an Attachment from a Media ArchiveYou can download an attachment from a media archive
Procedure
1. When the video is playing in the RealPresence Media Suite Player and the media archive contains attachments, click Attachment Download at the bottom of the player and the attachment list is shown below.
You can download the attachment by clicking the attachment title.
Play Media Using RealPresence Media Suite Player
Polycom, Inc. 74
User Portal AdministrationTopics:
• Access the User Portal Admin Section
• Customizing Beyond the Default Menus
• Customizing Slider
• Customizing Links on Home Page
• Customize User Portal Login Screen Picture
• Customize Test Certification Image
• Customize User Portal Logo Icon
• Managing Archives
• Organizing Media Using Categories
• Managing Channels
• Managing Events
• Managing Survey and Test
• Configuring Recording Publish Rule
• Configure Transcoding Profile
• Configuring Cielo24 Service Setting
• Configuring Other System Settings
• Configuring Roles and Permissions
• Checking System Report
Administrators can log in to the RealPresence Media Suite User Portal to manage portal appearance, media, and settings.
Access the User Portal Admin SectionYou can access the User Portal Admin section.
Procedure
1. Access RealPresence Media Suite User Portal by its IP address or FQDN from a compatible browser.
2. Click Sign in on the top-right corner to sign in the system as administrator.
3. Go to My Media Center.
Polycom, Inc. 75
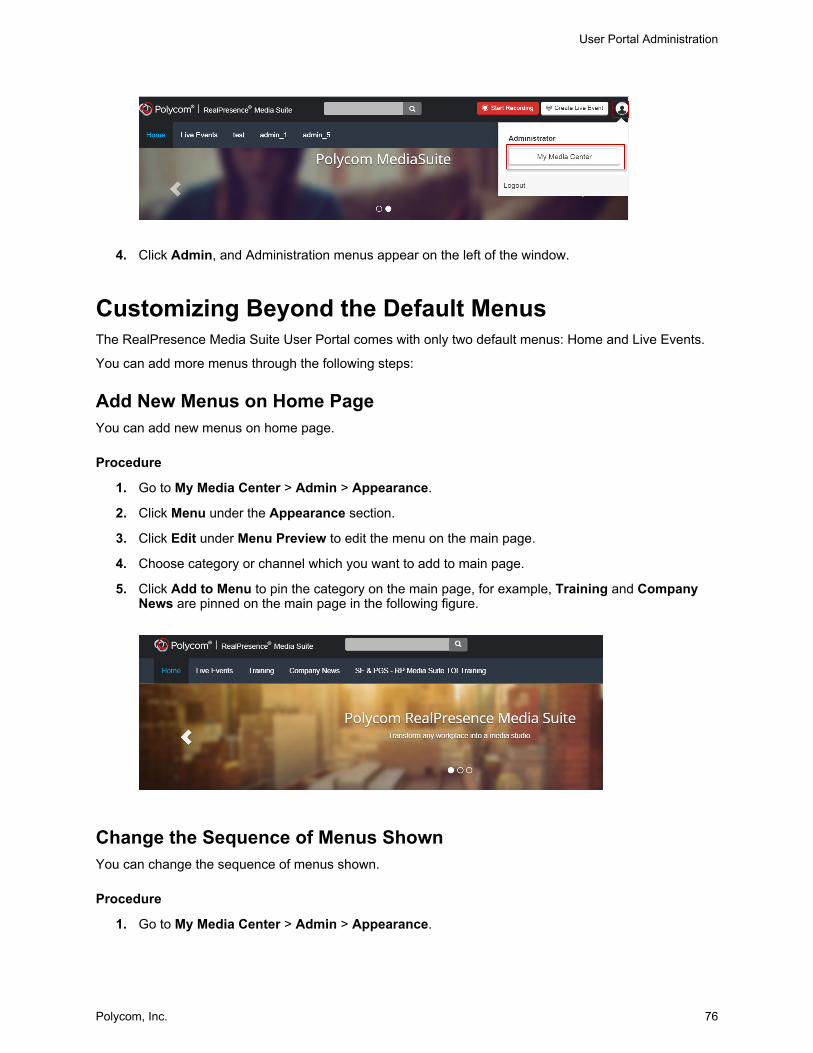
4. Click Admin, and Administration menus appear on the left of the window.
Customizing Beyond the Default MenusThe RealPresence Media Suite User Portal comes with only two default menus: Home and Live Events.
You can add more menus through the following steps:
Add New Menus on Home PageYou can add new menus on home page.
Procedure
1. Go to My Media Center > Admin > Appearance.
2. Click Menu under the Appearance section.
3. Click Edit under Menu Preview to edit the menu on the main page.
4. Choose category or channel which you want to add to main page.
5. Click Add to Menu to pin the category on the main page, for example, Training and Company News are pinned on the main page in the following figure.
Change the Sequence of Menus ShownYou can change the sequence of menus shown.
Procedure
1. Go to My Media Center > Admin > Appearance.
User Portal Administration
Polycom, Inc. 76
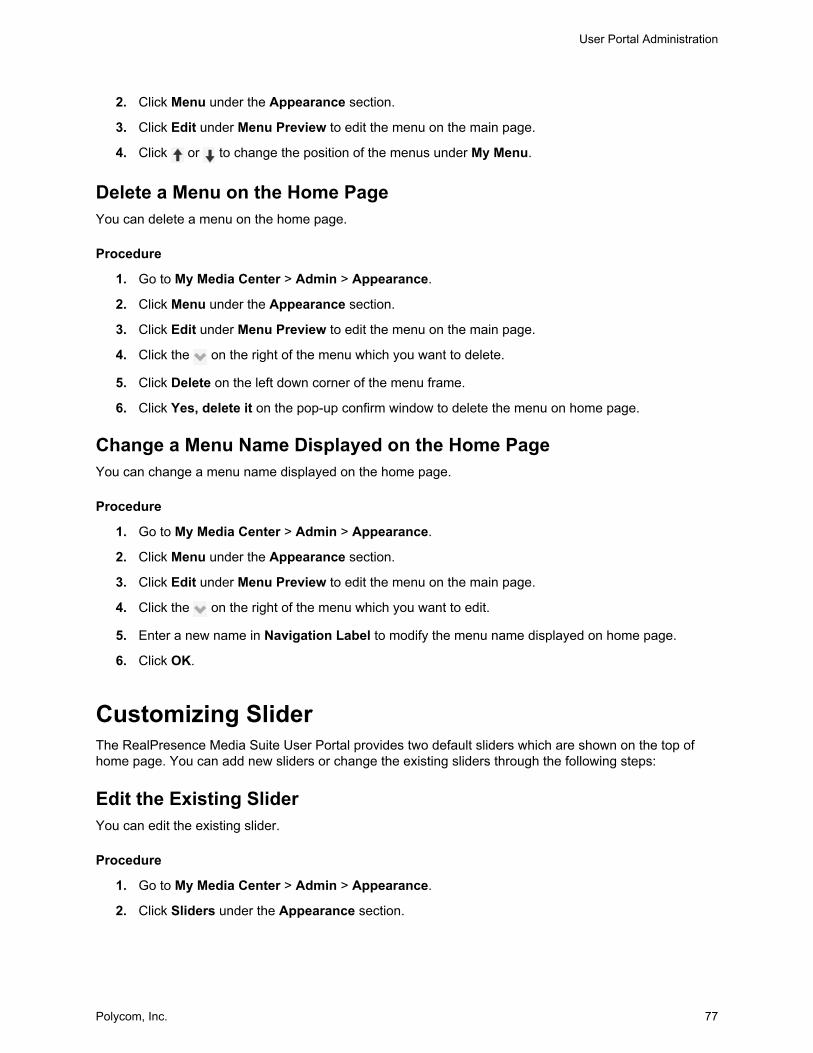
2. Click Menu under the Appearance section.
3. Click Edit under Menu Preview to edit the menu on the main page.
4. Click or to change the position of the menus under My Menu.
Delete a Menu on the Home PageYou can delete a menu on the home page.
Procedure
1. Go to My Media Center > Admin > Appearance.
2. Click Menu under the Appearance section.
3. Click Edit under Menu Preview to edit the menu on the main page.
4. Click the on the right of the menu which you want to delete.
5. Click Delete on the left down corner of the menu frame.
6. Click Yes, delete it on the pop-up confirm window to delete the menu on home page.
Change a Menu Name Displayed on the Home PageYou can change a menu name displayed on the home page.
Procedure
1. Go to My Media Center > Admin > Appearance.
2. Click Menu under the Appearance section.
3. Click Edit under Menu Preview to edit the menu on the main page.
4. Click the on the right of the menu which you want to edit.
5. Enter a new name in Navigation Label to modify the menu name displayed on home page.
6. Click OK.
Customizing SliderThe RealPresence Media Suite User Portal provides two default sliders which are shown on the top of home page. You can add new sliders or change the existing sliders through the following steps:
Edit the Existing SliderYou can edit the existing slider.
Procedure
1. Go to My Media Center > Admin > Appearance.
2. Click Sliders under the Appearance section.
User Portal Administration
Polycom, Inc. 77
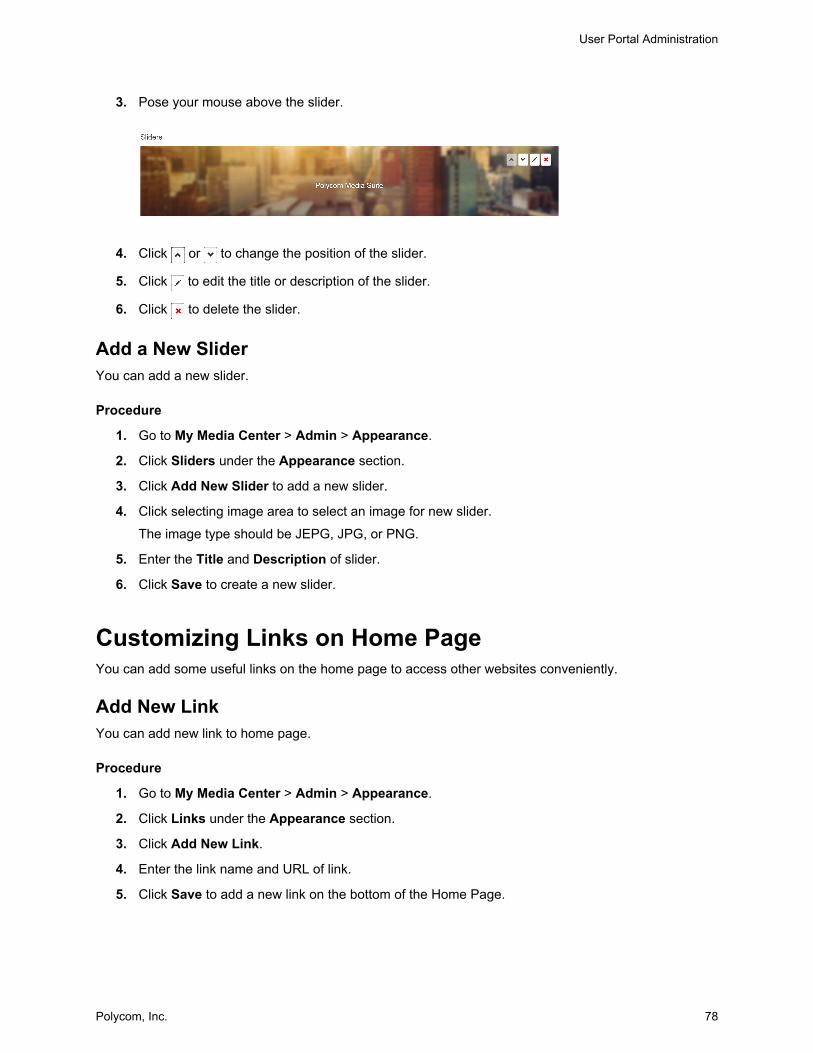
3. Pose your mouse above the slider.
4. Click or to change the position of the slider.
5. Click to edit the title or description of the slider.
6. Click to delete the slider.
Add a New SliderYou can add a new slider.
Procedure
1. Go to My Media Center > Admin > Appearance.
2. Click Sliders under the Appearance section.
3. Click Add New Slider to add a new slider.
4. Click selecting image area to select an image for new slider.
The image type should be JEPG, JPG, or PNG.
5. Enter the Title and Description of slider.
6. Click Save to create a new slider.
Customizing Links on Home PageYou can add some useful links on the home page to access other websites conveniently.
Add New LinkYou can add new link to home page.
Procedure
1. Go to My Media Center > Admin > Appearance.
2. Click Links under the Appearance section.
3. Click Add New Link.
4. Enter the link name and URL of link.
5. Click Save to add a new link on the bottom of the Home Page.
User Portal Administration
Polycom, Inc. 78
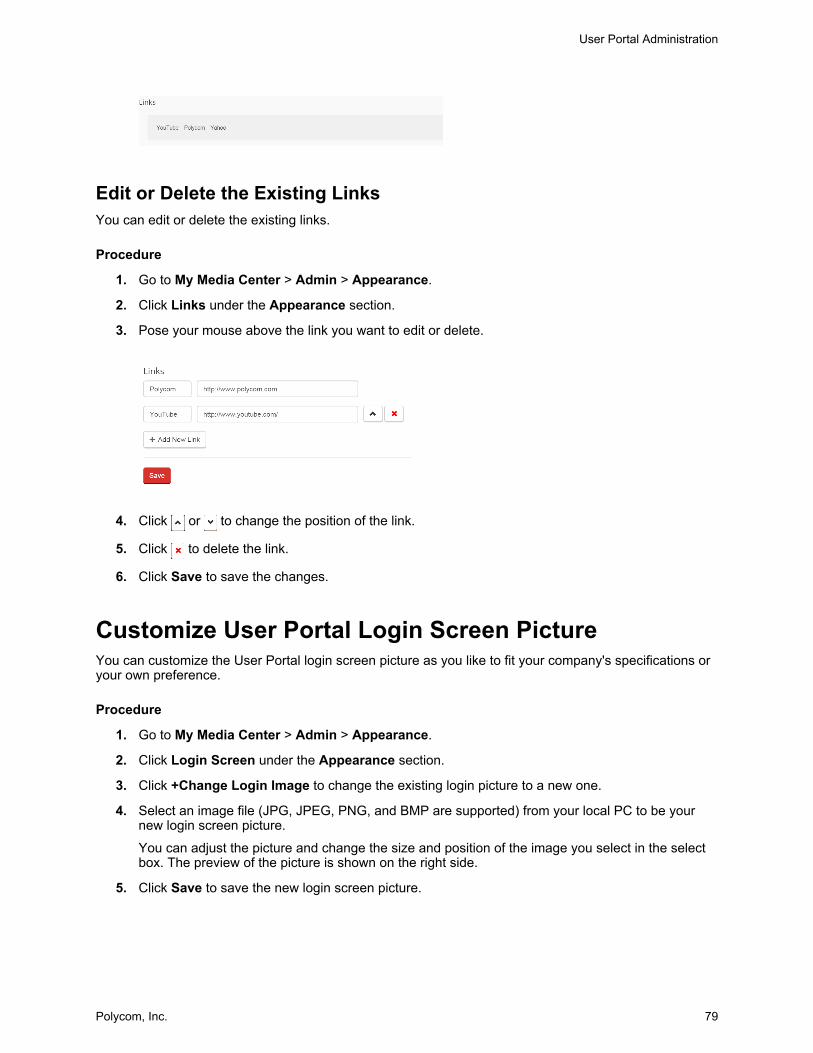
Edit or Delete the Existing LinksYou can edit or delete the existing links.
Procedure
1. Go to My Media Center > Admin > Appearance.
2. Click Links under the Appearance section.
3. Pose your mouse above the link you want to edit or delete.
4. Click or to change the position of the link.
5. Click to delete the link.
6. Click Save to save the changes.
Customize User Portal Login Screen PictureYou can customize the User Portal login screen picture as you like to fit your company's specifications or your own preference.
Procedure
1. Go to My Media Center > Admin > Appearance.
2. Click Login Screen under the Appearance section.
3. Click +Change Login Image to change the existing login picture to a new one.
4. Select an image file (JPG, JPEG, PNG, and BMP are supported) from your local PC to be your new login screen picture.
You can adjust the picture and change the size and position of the image you select in the select box. The preview of the picture is shown on the right side.
5. Click Save to save the new login screen picture.
User Portal Administration
Polycom, Inc. 79
Customize Test Certification ImageYou can customize the test certification background image as you like to fit your company's specifications or your own preference.
Procedure
1. Go to My Media Center > Admin > Appearance.
2. Click Test Certification under the Appearance section.
3. Click +Add Test Certification to add a background image to the test certification.
4. Select an image file (JPG, JPEG, PNG, and BMP are supported) from your local PC.
The recommended aspect ratio for the image is 16:9, and image file size must between 2 KB and 100 KB.
5. Click Save to save the new login screen picture.
Customize User Portal Logo IconYou can customize the User Portal tab icon as you like to fit your company's specifications or your own preference.
Procedure
1. Go to My Media Center > Admin > Appearance.
2. Click Logo Icon under the Appearance section.
3. Enter the new RealPresence Media Suite page tab title in the Title.
4. Click +Change Login Image to change the existing favicon (favorite icon) image to a new one.
The favicon is the icon shown on the RealPresence Media Suite page tab.
5. Select an image file (JPG, JPEG, PNG, and BMP are supported) from your local PC.
6. Click Save to save the new favicon image and tab title.
Managing ArchivesYou can pin archives, upload attachment and closed caption files to archive, and check the report of a specific archive.
Pin Archives on Home PageYou can pin archives on home page.
User Portal Administration
Polycom, Inc. 80

Procedure
1. Go to My Media Center > Admin > Content.
2. Click Archives under the Content section.
All archives on the server are displayed under All tab.
3. Click on to pin the archive in Featured Content on the home page.
Up to 10 archives can be pinned to Featured Content.
Delete ArchivesYou can delete archives.
Procedure
1. Go to My Media Center > Admin > Content.
2. Click Archives under the Content section.
All archives on the server are displayed under All tab.
3. Select the checkbox of archives which you want to delete.
4. Click Delete.
5. Click Move to trash to move archive to the Trash folder, or click Deleted permanently to delete the archive.
Bulk Download ArchivesYou can bulk download archives.
Procedure
1. Go to My Media Center > Admin > Content.
2. Click Archives under the Content section.
All archives on the server are displayed under All tab.
3. Select the checkbox of the archive or archives you want to download, and click Download.
4. Select your preferred format and resolution of the archives from the pop-up window.
Select the Include thumbnails to download the thumbnails at the same time.
If no file matches the selected format or resolution, the file with the closest resolution will be downloaded.
5. Click OK.
Edit the Archive PropertiesAdministrator can edit all archive's properties, including its title, category, and description.
Procedure
1. Go to My Media Center > Admin > Content.
User Portal Administration
Polycom, Inc. 81
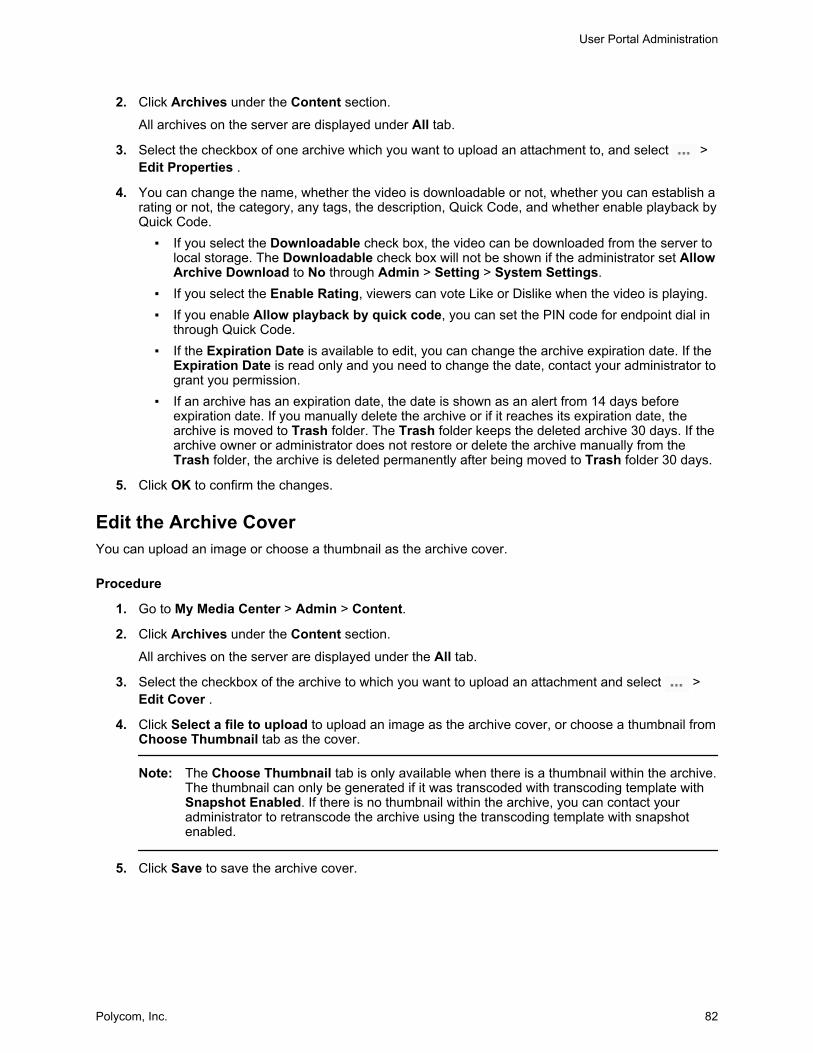
2. Click Archives under the Content section.
All archives on the server are displayed under All tab.
3. Select the checkbox of one archive which you want to upload an attachment to, and select > Edit Properties .
4. You can change the name, whether the video is downloadable or not, whether you can establish a rating or not, the category, any tags, the description, Quick Code, and whether enable playback by Quick Code.
▪ If you select the Downloadable check box, the video can be downloaded from the server to local storage. The Downloadable check box will not be shown if the administrator set Allow Archive Download to No through Admin > Setting > System Settings.
▪ If you select the Enable Rating, viewers can vote Like or Dislike when the video is playing.▪ If you enable Allow playback by quick code, you can set the PIN code for endpoint dial in
through Quick Code.▪ If the Expiration Date is available to edit, you can change the archive expiration date. If the
Expiration Date is read only and you need to change the date, contact your administrator to grant you permission.
▪ If an archive has an expiration date, the date is shown as an alert from 14 days before expiration date. If you manually delete the archive or if it reaches its expiration date, the archive is moved to Trash folder. The Trash folder keeps the deleted archive 30 days. If the archive owner or administrator does not restore or delete the archive manually from the Trash folder, the archive is deleted permanently after being moved to Trash folder 30 days.
5. Click OK to confirm the changes.
Edit the Archive CoverYou can upload an image or choose a thumbnail as the archive cover.
Procedure
1. Go to My Media Center > Admin > Content.
2. Click Archives under the Content section.
All archives on the server are displayed under the All tab.
3. Select the checkbox of the archive to which you want to upload an attachment and select > Edit Cover .
4. Click Select a file to upload to upload an image as the archive cover, or choose a thumbnail from Choose Thumbnail tab as the cover.
Note: The Choose Thumbnail tab is only available when there is a thumbnail within the archive. The thumbnail can only be generated if it was transcoded with transcoding template with Snapshot Enabled. If there is no thumbnail within the archive, you can contact your administrator to retranscode the archive using the transcoding template with snapshot enabled.
5. Click Save to save the archive cover.
User Portal Administration
Polycom, Inc. 82

Automatic Generate Closed CaptionYou can automatically generate closed caption.
Procedure
1. Go to My Media Center > Admin > Content.
2. Click Archives under the Content section.
All archives on the server are displayed under the All tab.
3. Select the checkbox for one or more archives for which you want to generate closed caption for, and click Automatic Generation.
This option is only available when Enable Speech-to-Text is selected Yes from Admin > System Setting > 3rd Party Integration.
4. Select Fidelity and Priority for the generation task.
Cielo24® charges different prices based on different fidelity and priority.
5. Check Enable Translation to translate closed caption file to a specific language, and select the language.
If Enable Translation is not selected, the closed caption is in English.
6. Click Generate to start the generation task.
Note: Closed Caption support limitations• Only MP4 format video supported.• Only RealPresence Media Suite Player and HTML5 player (iOS/Android) support.
Flash player not supported.• Only video on demand (VOD) supported. Live Streaming not supported.• Third-party Wowza server not supported.• Full screen video on Android mobile devices not supported.
Upload Attachment to Media ArchiveYou can upload attachments to the media archive.
Procedure
1. Go to My Media Center > Admin > Content.
2. Click Archives under the Content section.
All archives on the server are displayed under All tab.
3. Select the checkbox for the archive to which you want to upload an attachment, and select > Attachment .
4. Click Select file to upload to select the desired documents from your local PC.
5. Select one or multiple documents, and click Open to upload the documents.
The maximum number of attachments for one archive is 10, and the size for each document must equal or less than 100 MB.
User Portal Administration
Polycom, Inc. 83
6. Click Close to finish the upload.
Upload Closed Caption Files to a ArchiveYou can upload closed caption files to a archive.
Procedure
1. Go to My Media Center > Admin > Content.
2. Click Archives under the Content section.
All archives on the server are displayed under All tab.
3. Select the checkbox of one archive which you want to upload closed caption file to, and select > Manage Closed Captions .
4. Select the Language Name of the closed caption file from down-drop list, or input the language name in the Language Name area.
5. If the video contains multiple episodes, select the episode you want to add closed caption to from the Episode down-drop list.
6. Click Select a file to upload, and select one closed caption file to upload.
One file can only contain one language.
The supported closed caption file formats are SRT and VTT, and supports up to 10 closed caption files for one archive (episode).
Note: Closed Caption supported limitations• Only support for MP4 format video.• Only supported in RealPresence Media Suite Player and HTML5 player (iOS/
Android), and cannot support flash player.• Only support VOD, and cannot support in live streaming.• Cannot support for video to third party server Wowza.• Cannot support for full screen video on Android mobile devices.
Get the Archive LinkYou can get the archive link.
Procedure
1. Go to My Media Center > Admin > Content.
2. Click Archives under the Content section.
All archives on the server are displayed under the All tab.
3. Select the checkbox for the archive to which you want to upload an attachment, and select > Get Link .
4. Copy the media link in the Link tab for sharing.
User Portal Administration
Polycom, Inc. 84
Get the Archive Embed CodeYou can get the archive embed code.
Procedure
1. Go to My Media Center > Admin > Content.
2. Click Archives under the Content section.
All archives on the server are displayed under the All tab.
3. Select the checkbox of the archive to which you want to upload an attachment, and select > Get Link .
4. Click the Embed tab, and the video URL displays in embed code format, which can be used to embed the player in a third-party web page.
You can set the following three parameters for embed video:
▪ Video size: set the embedded video size.▪ Auto play after page loaded: enable this check box to have the video play automatically
after the page loaded.▪ Show player control bar: enable this check box to have the video control bar show up on
the embedded video.
Assign Archives to the Specific UserYou can assign archives to the specific user.
Procedure
1. Go to My Media Center > Admin > Content.
2. Click Archives under the Content section.
All archives on the server are displayed under All tab.
3. Select the checkbox of archive which you want to assign to the specific user.
4. Enter the user name you want to assign an archive to.
5. Click Save to assign the archives to the user.
After the assignment, the owner of the archives is changed to the user just assigned.
Check the Archive ReportYou can check the media report.
Procedure
1. Go to My Media Center > Admin > Content.
2. Click Archives under the Content section.
All archives on the server are displayed under All tab.
3. Click to check the report of one archive.
User Portal Administration
Polycom, Inc. 85
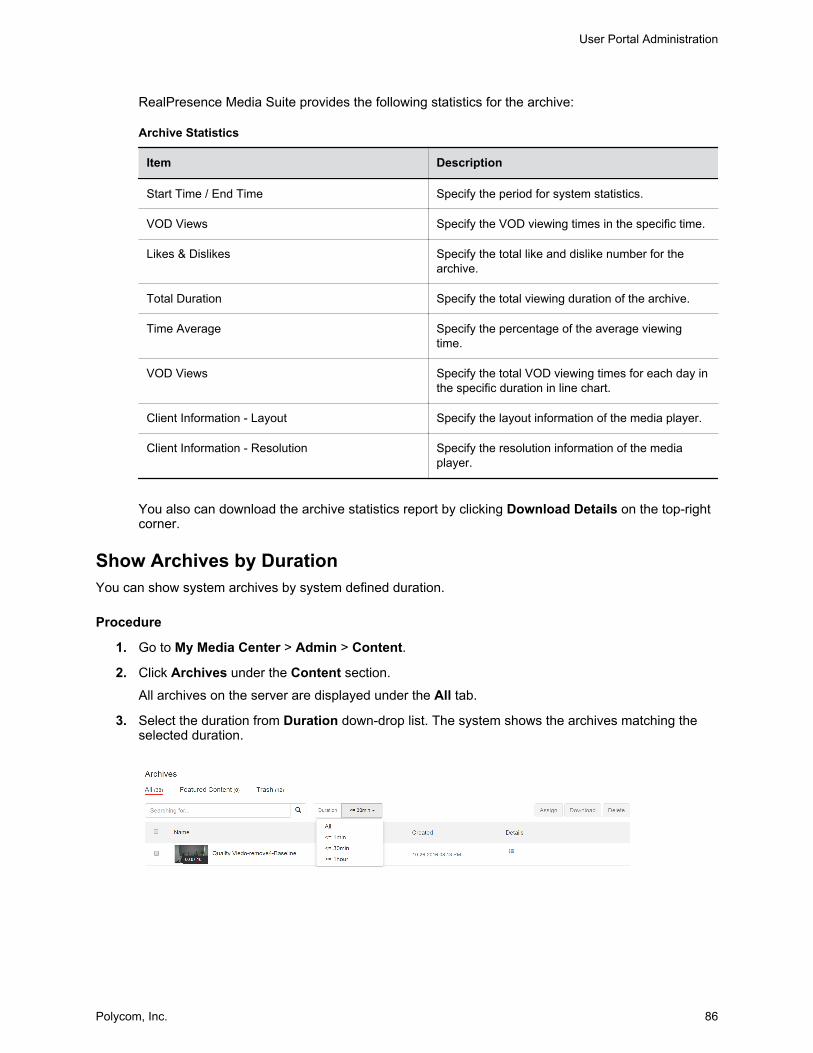
RealPresence Media Suite provides the following statistics for the archive:
Archive Statistics
Item Description
Start Time / End Time Specify the period for system statistics.
VOD Views Specify the VOD viewing times in the specific time.
Likes & Dislikes Specify the total like and dislike number for the archive.
Total Duration Specify the total viewing duration of the archive.
Time Average Specify the percentage of the average viewing time.
VOD Views Specify the total VOD viewing times for each day in the specific duration in line chart.
Client Information - Layout Specify the layout information of the media player.
Client Information - Resolution Specify the resolution information of the media player.
You also can download the archive statistics report by clicking Download Details on the top-right corner.
Show Archives by DurationYou can show system archives by system defined duration.
Procedure
1. Go to My Media Center > Admin > Content.
2. Click Archives under the Content section.
All archives on the server are displayed under the All tab.
3. Select the duration from Duration down-drop list. The system shows the archives matching the selected duration.
User Portal Administration
Polycom, Inc. 86
Unpin an ArchiveYou can unpin an archive.
Procedure
1. Go to My Media Center > Admin > Content.
2. Click the Archives under the Content section.
All archives on the server are displayed under All tab.
3. Click Featured Content tab.
All pinned archives are displayed.
4. Select the checkbox for the archive that you want to unpin.
5. Click Unpin to unpin the archive from home page.
Restore Archives in Trash FolderYou can restore archives in the Trash folder.
Procedure
1. Go to My Media Center > Admin > Content.
2. Click Archives under the Content section.
All archives on the server are displayed under the All tab.
3. Click the Trash tab.
All archives in the Trash folder are displayed.
4. Select the checkbox for the archive that you want to restore.
5. Click Restore to restore the archive from Trash folder.
Delete Archives in Trash FolderYou can delete archives in the Trash folder permanently.
Procedure
1. Go to My Media Center > Admin > Content.
2. Click Archives under the Content section.
All archives on the server are displayed under the All tab.
3. Click the Trash tab.
All archives in the Trash folder are displayed.
4. Select the checkbox for the archive that you want to delete.
5. Click Delete permanently to delete the archive from Trash folder.
User Portal Administration
Polycom, Inc. 87
Organizing Media Using CategoriesCategories provide the way to organize media through a category label. You can sort the media by category, and pin the category as a tab of menu on the home age.
Add or Edit a CategoryYou an add or edit a category.
Procedure
1. Go to My Media Center > Admin > Content.
2. Click Category under the Content section.
3. Click Add to add a new category, Edit to modify an existing category, or Delete to delete a category.
Check the Category ReportYou can check the category report.
Procedure
1. Go to My Media Center > Admin > Content.
2. Select Category under Content.
3. Click a desired category and select .
RealPresence Media Suite provides the following statistics for the category:
Category Statistics
Items Description
Start Time / End Time Specify the period for system statistics.
VOD Views Specify the VOD viewed times in the specific time.
Media Specify the total archive number, including the number of added archive and deleted archive in the specific time, in the category.
Likes & Dislikes Specify the total like and dislike number of all archives in the category.
Managing ChannelsYou can edit the channels properties and delete the channels on the user portal.
User Portal Administration
Polycom, Inc. 88
Reassign the Owner of the ChannelYou can reassign the owner of the channel.
Procedure
1. Go to My Media Center > Admin > Content.
2. Select Channel under Content.All channels on the server display.
3. Select the checkbox for the channel that you want to edit.
4. Click to assign the channel owner.
5. Enter the username of the new owner.
6. Click Save to assign the channel to the new owner.
Edit the ChannelYou can edit the channel properties, cover, and add media to channel.
Edit a ChannelYou can edit the channel properties.
Procedure
1. Go to My Media Center > Admin > Content.
2. Select Channel under Content.All channels on the server are shown.
3. Select the checkbox of channel which you want to edit.
4. Click to open channel page.
5. Select Edit > Edit Properties.
6. Change the parameters and select Save. You can change channel name, channel privacy, viewer, and contributor of the channel.
If a public channel is pinned to a menu on the homepage, the channel cannot be changed to a private channel.
Edit Channel Cover ImageYou can edit the channel cover image.
Procedure
1. Go to My Media Center > Admin > Content.
2. Select Channel under Content.All channels on the server display.
3. Select the checkbox for the channel that you want to edit.
User Portal Administration
Polycom, Inc. 89
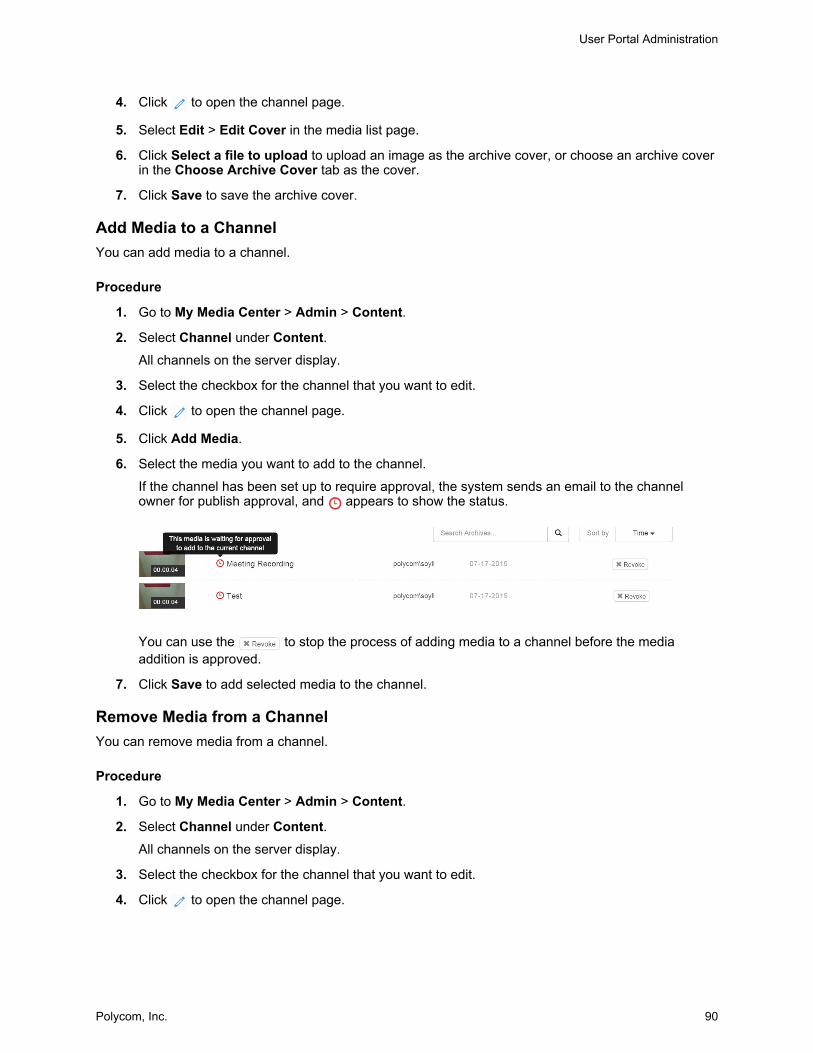
4. Click to open the channel page.
5. Select Edit > Edit Cover in the media list page.
6. Click Select a file to upload to upload an image as the archive cover, or choose an archive cover in the Choose Archive Cover tab as the cover.
7. Click Save to save the archive cover.
Add Media to a ChannelYou can add media to a channel.
Procedure
1. Go to My Media Center > Admin > Content.
2. Select Channel under Content.All channels on the server display.
3. Select the checkbox for the channel that you want to edit.
4. Click to open the channel page.
5. Click Add Media.
6. Select the media you want to add to the channel.
If the channel has been set up to require approval, the system sends an email to the channel owner for publish approval, and appears to show the status.
You can use the to stop the process of adding media to a channel before the media addition is approved.
7. Click Save to add selected media to the channel.
Remove Media from a ChannelYou can remove media from a channel.
Procedure
1. Go to My Media Center > Admin > Content.
2. Select Channel under Content.All channels on the server display.
3. Select the checkbox for the channel that you want to edit.
4. Click to open the channel page.
User Portal Administration
Polycom, Inc. 90
5. In the media list, click the desired content and select Remove.
Subscribe to a ChannelYou can subscribe to a channel.
Procedure
1. Go to My Media Center > Admin > Content.
2. Select Channel under Content.All channels on the server display.
3. Select the checkbox for the channel that you want to edit.
4. Click to open the channel page.
5. Click Subscribe to follow any updates of the channel.
After subscribing to a channel, you receive a notification email when a new archive is added to the channel.
Get Channel LinkYou can share a channel through sending channel link to others.
Procedure
1. Go to My Media Center > Admin > Content.
2. Select Channel under Content.All channels on the server display.
3. Select the checkbox for the channel that you want to edit.
4. Click to open the channel page.
5. Click a desired channel and select Get Link.
6. Copy the channel link for sharing, and click Close.
Check the Channel ReportYou can check the channel report.
Procedure
1. Go to My Media Center > Admin > Content.
2. Select Channel under Content.All channels on the server are shown.
3. Select the checkbox of channel which you want to edit.
4. Click to open channel page.
5. Click to check the channel report.
User Portal Administration
Polycom, Inc. 91
Delete the ChannelYou can delete the channel.
Procedure
1. Go to My Media Center > Admin > Content.
2. Select Channel under Content.All channels on the server are shown.
3. Select the checkbox of channels which you want to delete.
4. Click Delete.
5. Click Yes, delete them on the pop-up confirm window to delete the channels.
Managing EventsYou can edit the event properties and delete the events on the user portal.
Reassign the Owner of the EventYou can reassign the owner of the event.
Procedure
1. Go to My Media Center > Admin > Content.
2. Select Event under Content.All events on the server are shown.
3. Select the event which you want to edit.
4. Click to assign event owner.
5. Enter the username of the new owner.
6. Click Save to assign the event to the new owner.
Colon the EventYou can colon the event.
Procedure
1. Go to My Media Center > Admin > Content.
2. Select Event under Content.All events on the server are shown.
3. Select the event which you want to colon.
4. Click .
User Portal Administration
Polycom, Inc. 92
5. Edit the properties of the event.
6. Click Save to save the new event.
Delete the EventYou can delete the event
Procedure
1. Go to My Media Center > Admin > Content.
2. Select event under Content.All events on the server are shown.
3. Select the event which you want to delete.
4. Click .
5. Click Yes, delete it on the pop-up confirm window to delete the event.
Managing Survey and TestYou can edit the channels properties and delete the channels on the user portal.
Assign a Survey or TestYou can assign a survey or test to a specific user.
Procedure
1. Go to My Media Center > Admin > Content.
2. Select Survey & Test under Content.All surveys and tests on the server display.
3. Select the survey or test that you want to assign to a specific user, and click .
4. Enter the username to whom to assign survey or test.
5. Click Save to assign the survey or test.
Close the Survey or TestYou can close survey or test.
Procedure
1. Go to My Media Center > Admin > Content.
2. Select Survey & Test under Content.All surveys and tests on the server display.
3. Select the survey or test that you want to close, and click .
User Portal Administration
Polycom, Inc. 93
4. Click OK to close the survey or test.
Delete an Expired Survey or TestYou can delete an expired survey or test.
Procedure
1. Go to My Media Center > Admin > Content.
2. Select Survey & Test under Content.All surveys and tests on the server display.
3. Select the expired survey or test that you want to delete, and click .
4. Click Yes, delete it on the pop-up confirm window to delete the survey or test.
Configuring Recording Publish RuleYou can configure the dial-in call recording publishing rule based on a specific VRR or based on a VMR.
Configure Recording Publish Rule based on VMRYou can configure the dial-in call recording publishing rule based on conference VMR or Polycom RealConnect. For dial-in conferences, the system matches the VMR and assigns the dial-in call recording to the organizer of the conference. For Polycom RealConnect conferences, the system assigns the recording to the meeting organizer (Skype for Business Active Directory user). This feature requires RealPresence DMA API access permission, and RealPresence Media Suite and RealPresence DMA should share same Active Directory information.
Note: If the recording publish rule based on a VMR is enabled and based on a VRR rule is configured, the VMR rule has the higher priority than the VRR rule. For dial-in calls, the system first matches the VMR rule. If the VMR rule cannot be matched, then system checks the VRR rule.
Procedure
1. Go to My Media Center > Admin > System Settings.
2. Select Recording Publish > Conference Dial In Recording Auto Publish.
3. Select the checkbox to enable assigning owner for dial-in conference recording.
4. Enter the RealPresence DMA address and port.
If RealPresence DMA is an Appliance Edition, the license for RealPresence DMA API should be activated.
5. Enter the user name and password of a RealPresence DMA administrator, and the user must be an Active Directory user.
6. Click the Test to verify the configuration.
7. Click the Save.
User Portal Administration
Polycom, Inc. 94
For a dial-in conference based on a VMR, the system assigns the recording to the conference organizer automatically. In Polycom RealConnect-enabled conferences, the recording is assigned to the Skype for Business conference organizer.
Configuring Recording Publish Rule based on VRRYou can configure the dial-in call recording publishing rule based on a specific VRR or system default rules. Only one system default rule can be created. The system default rule based on a VRR that is applied for dial-in recordings with the VRR cannot match the custom rules. For dial-in call recordings based on a VRR, the system matches the custom rules first, and if no custom rule matches, the default rule is applied.
Note: Publish rule cannot be applied for dial in Skype for Business call
For a dial-in Skype for Business call with a specific user, the RealPresence Media Suite system assigns the archive to the user directly and does not apply the rule to the call.
Add a Custom Rule for Publishing a Dial-in Call RecordingYou can add a custom rule for publishing a dial-in call recording.
Procedure
1. Go to My Media Center > Admin > System Settings.
2. Select Recording Publish.
3. Select VRR Dial In Recording Auto Publish tab.
4. Click Create Custom Rule.
5. Select a VRR from the VRR down-drop list.
6. Enter the user name to whom you want to assign the recording in Assign To.
7. Select the channels to which you want to publish the recording from the Publish to Channels down-drop list.
8. Click OK.
After the rule is configured, all dial-in call recordings from an endpoint or MCU using the VRR configured in the rule is published to the selected channels and assigned to the specified user.
Add a Default Rule for Publishing a Dial-in Call RecordingYou can add a default rule for publishing a dial-in call recording.
Procedure
1. Go to My Media Center > Admin > System Settings.
2. Select Recording Publish.
3. Select VRR Dial In Recording Auto Publish tab.
4. Click Create Default Rule.
5. Enter the user name to whom you want to assign the recording in Assign To.
User Portal Administration
Polycom, Inc. 95
6. Select channels to which you want to publish the recording from the Publish to Channels down-drop list.
7. Click OK.
After the rule is configured, all dial-in call recording with the VRR that cannot be matched to the custom rule is published to the selected channels and assigned to the specified user.
Note: System upgrade impacts the rule configurationIf the Default Channel For Dial-in Call in System Settings is configured in RealPresence Media Suite v2.5, the configuration will be treated as default rule after the system upgrade to RealPresence Media Suite v2.6 or higher.
Configure Transcoding ProfileAn administrator can set the transcoding template which is used for automatic offline transcoding of UGC files in the User Portal.
Procedure
1. Go to My Media Center > Admin > System Settings.
2. Select Transcoding Profile.
3. Select the desired templates from Available Templates defined in Admin Portal.
4. Click to transfer the templates from Available Templates to Selected Templates.
The output of the template cannot be WMV format.
5. Click Save to save the configuration.
The selected transcoding templates are used for offline transcoding, for example, UGC and media edit, in the User Portal.
Note: The offline transcoding compares the file quality between UGC file and templateIf the transcoding template whose bitrate, resolution, and frame rate equal or higher than the UGC source file's, and the video type and layout of the transcoding template is the same with UGC source file's, the system will not transcode the file.
Configuring Cielo24 Service SettingCielo24 is a third-party service provider that provides a cloud-based online speech-to-text service. By integrating with this service, RealPresence Media Suite can automatically generate closed captions, indexes, and transcripts for any media in the system.
Set the Cielo24 Service SettingYou can set the Cielo24 service setting.
User Portal Administration
Polycom, Inc. 96
Procedure
1. Go to My Media Center > Admin > System Settings.
2. Select 3rd Party Integration.
3. Select Yes for Enable Speech-to-Text.
4. Click Settings.
5. Enter the Cielo24 API URL, Cielo24 user name and password.
6. Click Test Account to check whether the account information is correct.
7. Click Save to save the configuration.
View Speech-to-Text Task ListView speech-to-text task lists.
Procedure
1. Go to My Media Center > Admin > System Settings.
2. Select 3rd Party Integration.
3. Select Yes for Enable Speech-to-Text.
4. Click View Task List to view all speech-to-text task lists.
Configuring Other System SettingsYou can configure the other system settings through Admin menu.
Set Dial-in Live Streaming PrivacyYou can set dial-in live streaming privacy.
Procedure
1. Go to My Media Center > Admin > System Settings.
2. Select Other Settings.
3. Set the Privacy Setting of Dial-in Live Streaming via VRR.
If Public is select, the dial-in live streaming through the VRR is a public live event; if Private is select, the dial-in live streaming through the VRR is a private live event.
Whether the anonymous user can view the dial-in event is based on the configuration of Disable view permission of User Portal for anonymous user in the Admin Portal and Privacy Setting of Dial-in Live Streaming via VRR.
User Portal Administration
Polycom, Inc. 97
Dial-in VRR Live Privacy is Public
Dial-in VRR Live Privacy is Private
Disable view permission of User Portal for anonymous user is enabled (must to login first)
The dial-in VRR live streaming is visible and accessible to any valid users in home page after login.
The dial-in VRR live streaming cannot be visible and accessible to anonymous uses in home page.
The dial-in VRR live streaming is visible and accessible to the event owner in home page after login. The owner is the default Admin user, and in case the viewers are added to the event, then the viewer should also can view the event.
Disable view permission of User Portal for anonymous user is disabled (allow anonymous)
The dial-in VRR live streaming is visible and accessible to anonymous uses in home page without login.
The dial-in VRR live streaming is visible and accessible to any valid users in home page after login.
Show Player NotificationYou can show player notification.
Procedure
1. Go to My Media Center > Admin > System Settings.
2. Select Other Settings.
3. Select Yes from Show Player Notification to enable player notification.
If the player notification is enabled, the will show in the RealPresence Media Suite Player toolbar.
Enable Secure Token for Streaming URLYou can enable secure token for streaming URL.
Procedure
1. Go to My Media Center > Admin > System Settings.
2. Select Other Settings.
3. Select Yes from Secure Streaming to enable secure token for streaming URL to prevent unauthenticated access by link sharing.
After the secure streaming is enabled, user cannot play the video through other player by streaming URL.
4. Click Save to save the configuration.
If there is an unreachable Media Node in Scalability Mode, save configuration takes more than one minute.
User Portal Administration
Polycom, Inc. 98
Enable Flash Player for Internet ExplorerWhen RealPresence Media Suite plays a video or live streaming, RealPresence Media Suite player is the preferred player, HTML 5 player is the fallback player if RealPresence Media Suite is not installed. But the Internet Explorer cannot support HTML 5 player, Flash player is the fallback player. You can enable or disable Flash player by the following configuration. If Flash play is disabled and RealPresence Media Suite Player is not installed in the Internet Explorer, the videos cannot be played through the Internet Explorer.
Procedure
1. Go to My Media Center > Admin > System Settings.
2. Select Other Settings.
3. Select Yes from Enable Flash Player to enable Flash player as the player in the Internet Explorer.
Configuring Content ExpirationEvery archive in the system has expiration date.
Content Expiration LevelsThe content expiration date can be set for three levels:
▪ System level: Set the content expiration rule for the whole system. All archives in the system are applied the rule.
The system level content expiration rule can be configured from My Media Center > Admin > System Setting > Other Settings.
▪ Account level: Set the content expiration rule for the specific account. The archives created by the account are applied the account rule, and the system level rule is overwritten. The account level rule has the higher priority than system level rule.
The account level content expiration rule can be configured from My Media Center > Account.Account level expiration setting permission can be configured from My Media Center > Admin > Role & Permission > Role Definition.
▪ Archive level: Set the content expiration date for a specific archive. The archive rule has the highest priority. If the archive is set expiration date by archive owner or administration, the system level rule and account level rule cannot take effect on the archive any more.
User role's content expiration setting permission can be configured from My Media Center > Admin > Role & Permission > Role Definition.
Expiration AlertIf an archive is to be expired, an alert will be displayed starting at 14 days before expiration date.
Trash FolderIf the archive is deleted manually or by reaching the expiration date, the archive will be moved to Trash folder. The Trash folder keeps the deleted archive for 30 days. If the archive owner or administrator does not take action, the archive will be deleted permanently after being moved to Trash folder 30 days.
Administrator or archive owner can restore an archive from Trash folder, and the archive expiration date is recalculated as: restoration date + account level expiration period (if any).
User Portal Administration
Polycom, Inc. 99
Content Expiration Exception Rules▪ If the archive is pinned to Home page, the archive cannot be deleted.▪ The archives in the Trash folder cannot be backed up or exported.
Configure System Level Content Expiration RuleAdministrator can configure the system level content expiration rule, and the rule is applied to all archives.
Procedure
1. Go to My Media Center > Admin > System Settings.
2. Select Other Settings.
3. Select the expiration period from Content Expiration Setting.
If Never is selected for expiration period, the archive expiration date is the first day of the current year (year/01/01) + 10 years. For example, if Never is selected and the current year is 2016, the expiration date of all archives in the system is set to 2016/01/01 + 10 years = 2026/01/01, but in the next year (2017), the expiration date will be changed to 2027/01/01.
4. Select the expiration date calculation method. You can select after create time or after last view time.
Configure Email Alert Sending RuleThe administrator can set whether to send an email to inform a specific user about archive expiration.
If sending email is enabled, the email is triggered at the following points:
▪ Fourteen days before archive expiration date.▪ Archives are deleted to Trash folder.▪ Archives are deleted permanently.
Procedure
1. Go to My Media Center > Admin > System Settings.
2. Select Other Settings.
3. Select the checkbox for Receive Alert Email. The option is disabled if the expiration date is Never.
4. Specify the receiver email address in the Email List.
5. Click Save to save the configuration.
Configuring Roles and PermissionsYou can customize a new role or a default role for users and groups and assign a custom set of services features to each role.
User Portal Administration
Polycom, Inc. 100
User Permissions
Role Description
Administrator The default role.
Cannot be edited or deleted from User Portal.
User The default role.
Role permissions can be redefined through User Portal, but the role cannot be deleted.
Guest The default role.
Role permission can be redefined, and role can be deleted from User Portal.
Anonymous Administrator can disable the view permission of an Anonymous User from the Configuration > Portal Settings in the Admin Portal.
Custom The administrator can create new role for User Portal, and grant specific permissions to the role.
RealPresence Media Suite supports up to ten roles in User Portal.
Role Permission DefinitionYou can grant the following permission to the role.
Permission Description
Appearance The role can customize the portal settings, for example, menu, login screen and slider.
Content The role can manage the category, archives, call, channels, live event, survey, test and report of the system.
Role & Permission The role can manage user, role and permission setting for the system
System report The role can access the system report.
System setting The role can access the Admin menu.
Ad-Hoc recording The role can start a call from RealPresence Media Suite for recording.
Playback to meeting The role can start a media playback from RealPresence Media Suite to meeting or end point.
Schedule a recording The role can create a scheduling to start the recording at the scheduled time, and manage the recording.
User Portal Administration
Polycom, Inc. 101
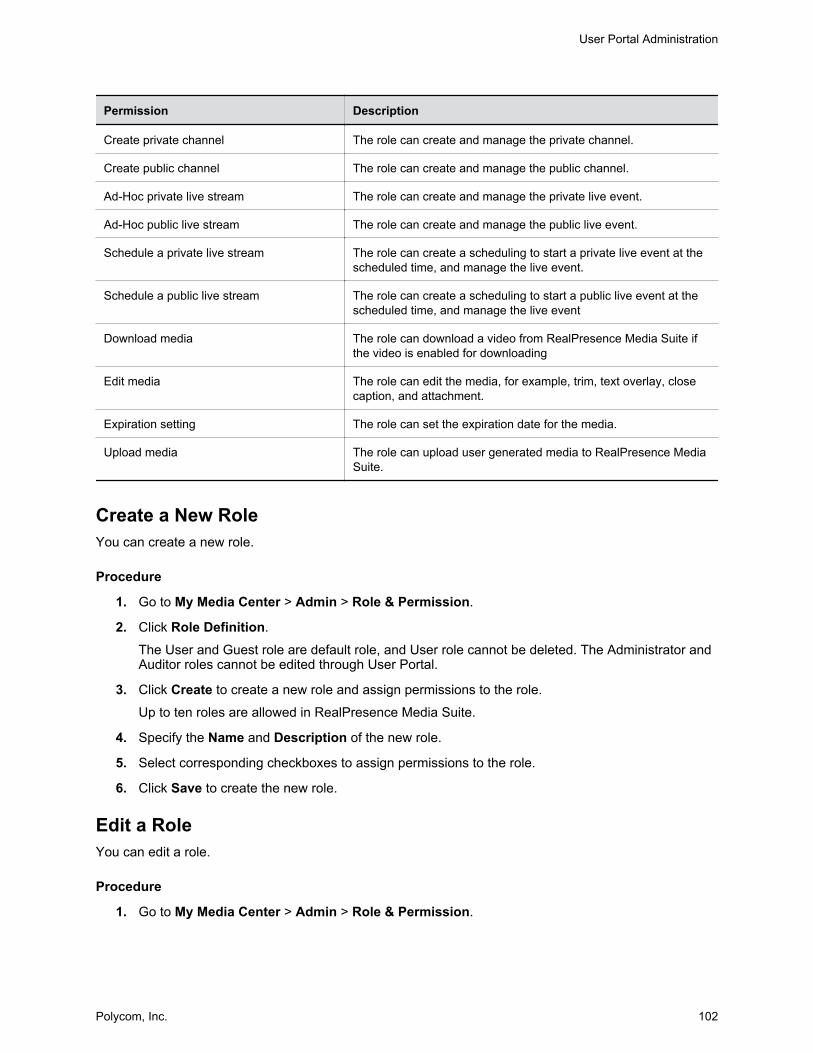
Permission Description
Create private channel The role can create and manage the private channel.
Create public channel The role can create and manage the public channel.
Ad-Hoc private live stream The role can create and manage the private live event.
Ad-Hoc public live stream The role can create and manage the public live event.
Schedule a private live stream The role can create a scheduling to start a private live event at the scheduled time, and manage the live event.
Schedule a public live stream The role can create a scheduling to start a public live event at the scheduled time, and manage the live event
Download media The role can download a video from RealPresence Media Suite if the video is enabled for downloading
Edit media The role can edit the media, for example, trim, text overlay, close caption, and attachment.
Expiration setting The role can set the expiration date for the media.
Upload media The role can upload user generated media to RealPresence Media Suite.
Create a New RoleYou can create a new role.
Procedure
1. Go to My Media Center > Admin > Role & Permission.
2. Click Role Definition.
The User and Guest role are default role, and User role cannot be deleted. The Administrator and Auditor roles cannot be edited through User Portal.
3. Click Create to create a new role and assign permissions to the role.
Up to ten roles are allowed in RealPresence Media Suite.
4. Specify the Name and Description of the new role.
5. Select corresponding checkboxes to assign permissions to the role.
6. Click Save to create the new role.
Edit a RoleYou can edit a role.
Procedure
1. Go to My Media Center > Admin > Role & Permission.
User Portal Administration
Polycom, Inc. 102
2. Click Role Definition.
All existing roles are shown.
3. Select the role you want to edit.
4. Click to edit the role.
The default User role can be edited, but cannot be deleted.
5. Redefine role permissions to the role by checking or unchecking the checkboxes of the permissions.If Media > Expiration setting is selected, the role has the permission to change the archive expiration date.
6. Click Save to save the changes.
Delete a RoleYou can delete a role.
Procedure
1. Go to My Media Center > Admin > Role & Permission.
2. Click Role Definition.
All existing roles are shown.
3. Select the role you want to delete.
4. Click to delete the role.
The default User role can be edited, but cannot be deleted.
5. Click Yes, delete it to confirm the operation.
Assign Role to User or GroupYou can assign role to user or group
Procedure
1. Go to My Media Center > Admin > Role & Permission.
2. Click User/Group's Role.
All local users and local groups are shown.
3. Select a role from Role column to assign role to the user or group.
4. Click OK to confirm the change.
Assign Role to Active Directory User or Active Directory GroupYou can assign role to Active Directory user or Active Directory group
Procedure
1. Go to My Media Center > Admin > Role & Permission.
User Portal Administration
Polycom, Inc. 103
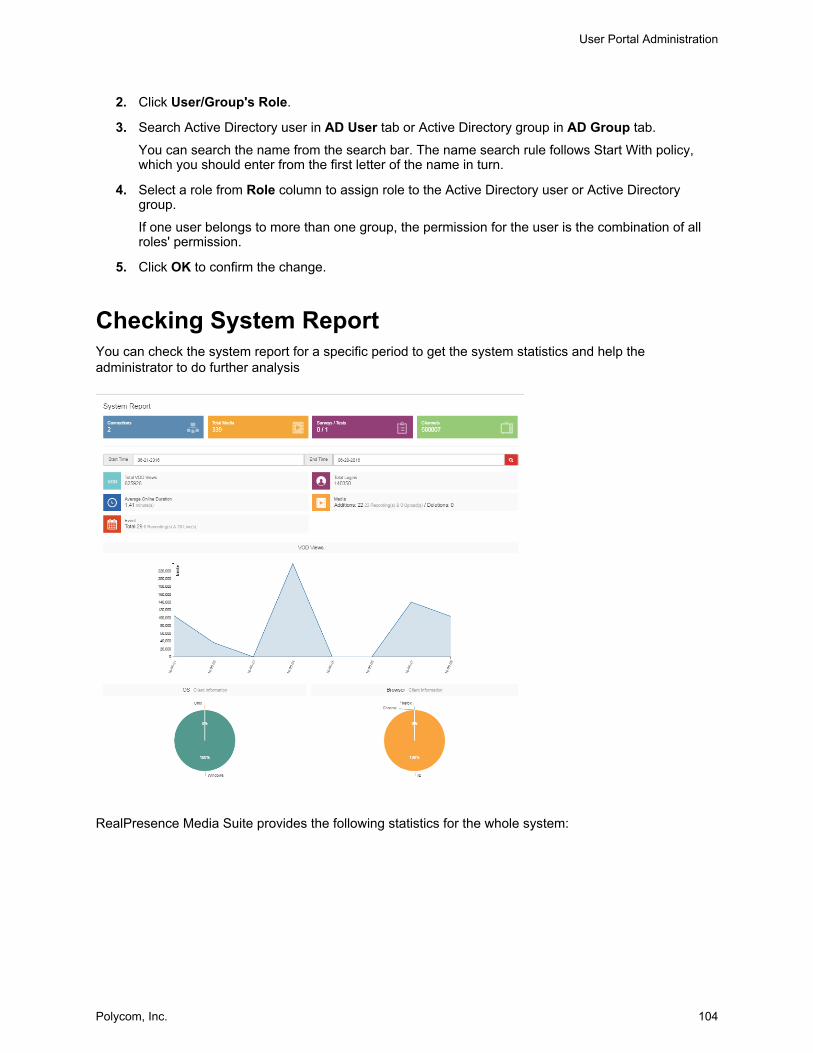
2. Click User/Group's Role.
3. Search Active Directory user in AD User tab or Active Directory group in AD Group tab.
You can search the name from the search bar. The name search rule follows Start With policy, which you should enter from the first letter of the name in turn.
4. Select a role from Role column to assign role to the Active Directory user or Active Directory group.
If one user belongs to more than one group, the permission for the user is the combination of all roles' permission.
5. Click OK to confirm the change.
Checking System ReportYou can check the system report for a specific period to get the system statistics and help the administrator to do further analysis
RealPresence Media Suite provides the following statistics for the whole system:
User Portal Administration
Polycom, Inc. 104
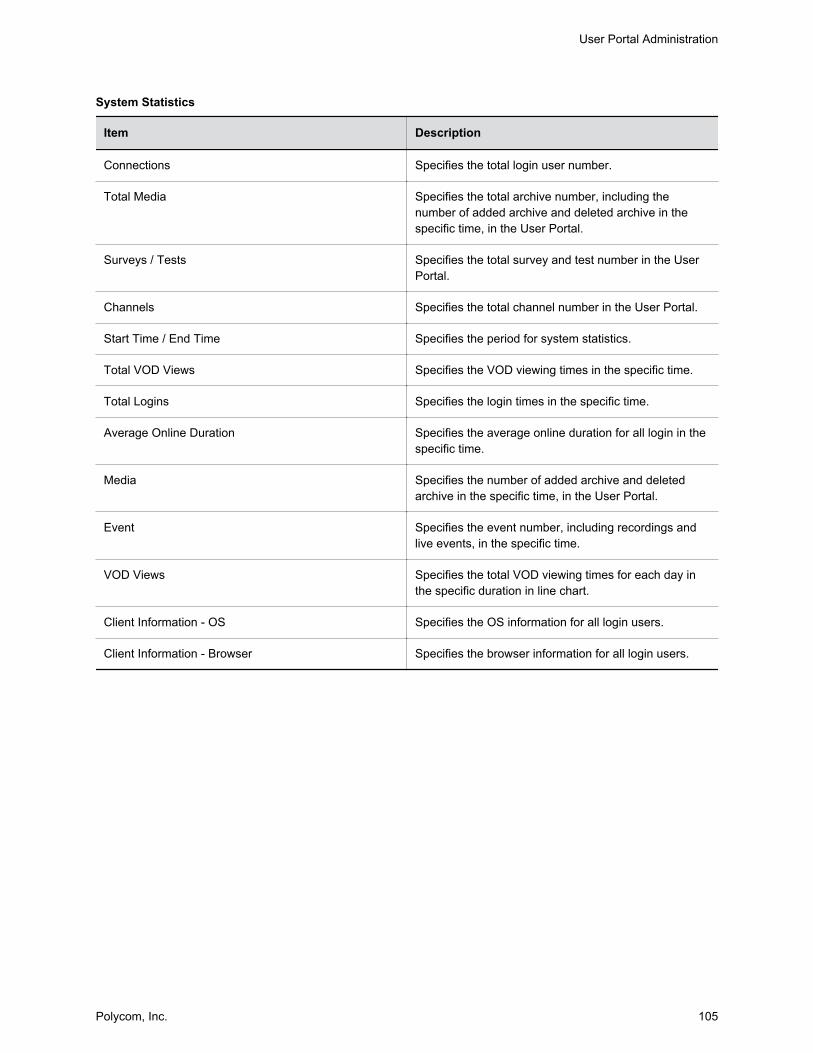
System Statistics
Item Description
Connections Specifies the total login user number.
Total Media Specifies the total archive number, including the number of added archive and deleted archive in the specific time, in the User Portal.
Surveys / Tests Specifies the total survey and test number in the User Portal.
Channels Specifies the total channel number in the User Portal.
Start Time / End Time Specifies the period for system statistics.
Total VOD Views Specifies the VOD viewing times in the specific time.
Total Logins Specifies the login times in the specific time.
Average Online Duration Specifies the average online duration for all login in the specific time.
Media Specifies the number of added archive and deleted archive in the specific time, in the User Portal.
Event Specifies the event number, including recordings and live events, in the specific time.
VOD Views Specifies the total VOD viewing times for each day in the specific duration in line chart.
Client Information - OS Specifies the OS information for all login users.
Client Information - Browser Specifies the browser information for all login users.
User Portal Administration
Polycom, Inc. 105
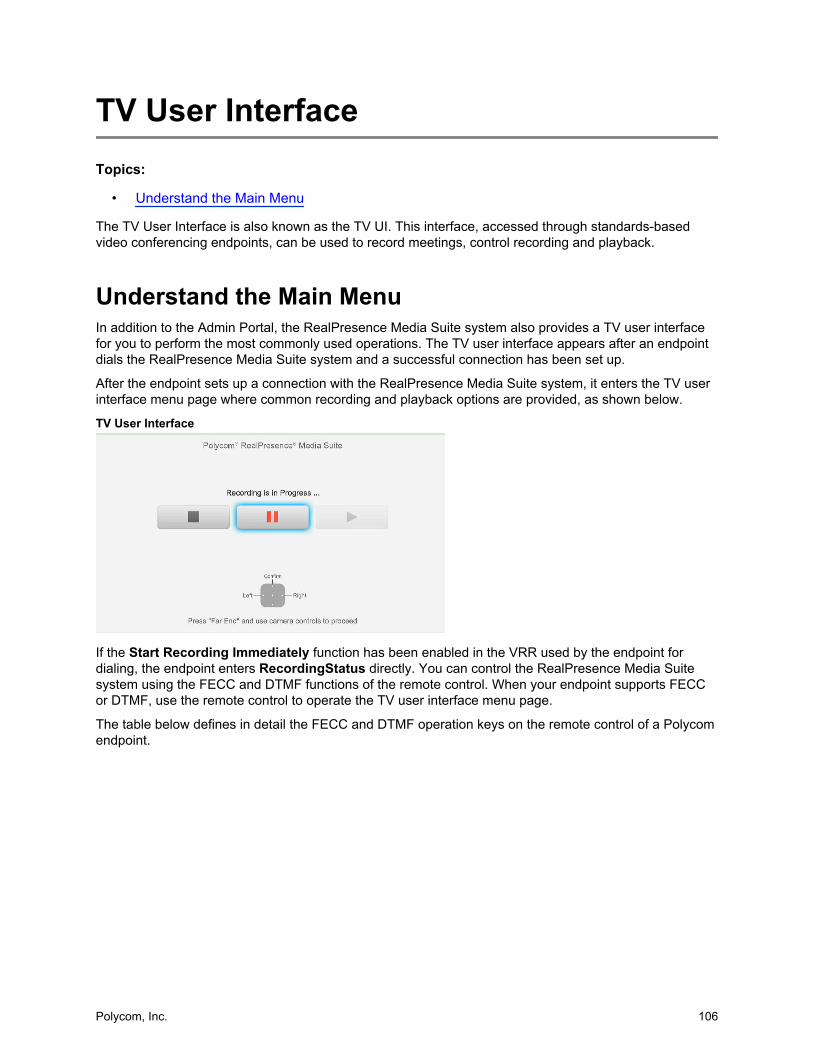
TV User InterfaceTopics:
• Understand the Main Menu
The TV User Interface is also known as the TV UI. This interface, accessed through standards-based video conferencing endpoints, can be used to record meetings, control recording and playback.
Understand the Main MenuIn addition to the Admin Portal, the RealPresence Media Suite system also provides a TV user interface for you to perform the most commonly used operations. The TV user interface appears after an endpoint dials the RealPresence Media Suite system and a successful connection has been set up.
After the endpoint sets up a connection with the RealPresence Media Suite system, it enters the TV user interface menu page where common recording and playback options are provided, as shown below.
TV User Interface
If the Start Recording Immediately function has been enabled in the VRR used by the endpoint for dialing, the endpoint enters RecordingStatus directly. You can control the RealPresence Media Suite system using the FECC and DTMF functions of the remote control. When your endpoint supports FECC or DTMF, use the remote control to operate the TV user interface menu page.
The table below defines in detail the FECC and DTMF operation keys on the remote control of a Polycom endpoint.
Polycom, Inc. 106
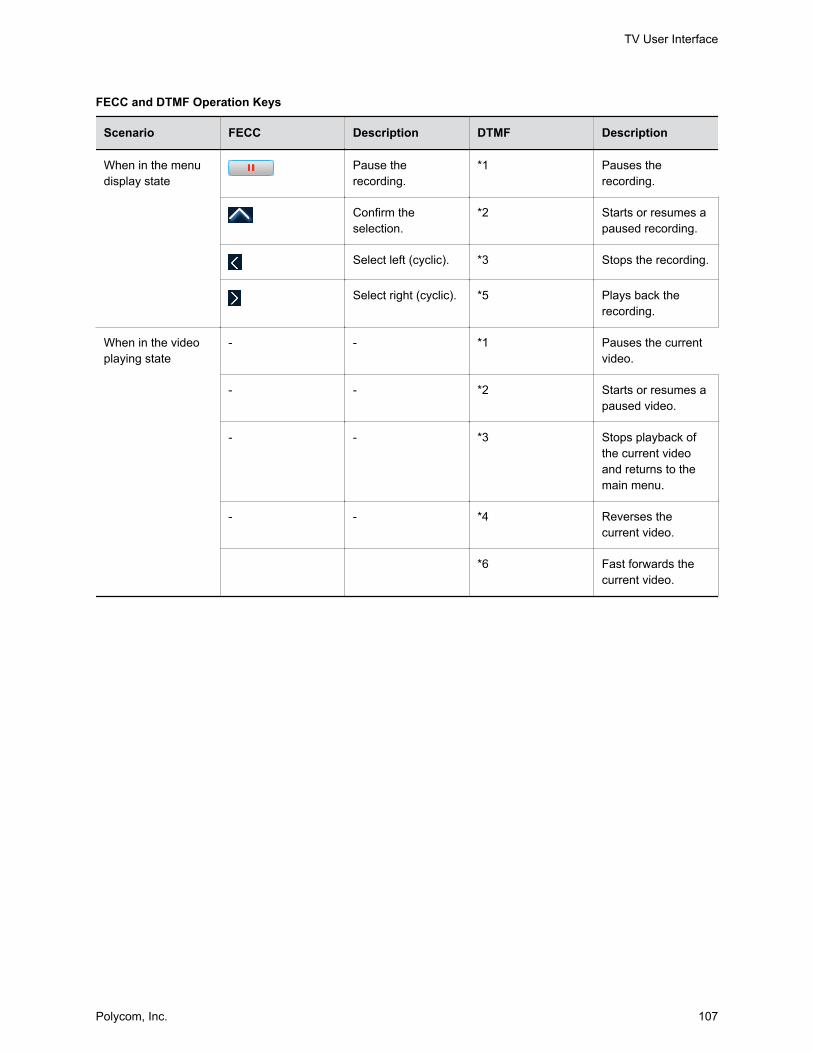
FECC and DTMF Operation Keys
Scenario FECC Description DTMF Description
When in the menu display state
Pause the recording.
*1 Pauses the recording.
Confirm the selection.
*2 Starts or resumes a paused recording.
Select left (cyclic). *3 Stops the recording.
Select right (cyclic). *5 Plays back the recording.
When in the video playing state
- - *1 Pauses the current video.
- - *2 Starts or resumes a paused video.
- - *3 Stops playback of the current video and returns to the main menu.
- - *4 Reverses the current video.
*6 Fast forwards the current video.
TV User Interface
Polycom, Inc. 107
TroubleshootingTopics:
• RealPresence Media Suite Player Cannot Display Video Properly
Introduce how to solve the problems on the User Portal.
RealPresence Media Suite Player Cannot Display Video ProperlyUse the following steps to solve the problem:
• Check whether the Operation System (OS) or the media player is supported. For the OS and media player supported lists, refer to the RealPresence Media Suite Release Notes.
Since Flash Player is widely supported to play the media file on User Portal, check if the flash player is installed.
We recommend to use RealPresence Media Suite Player for better user experience.• Check if the video format (MP4 or WMV) is supported by your media player. For the supported
media player list, refer to the RealPresence Media Suite Release Notes.
For example, WMV file can only be played by Windows Media Player on Windows OS.• If you can only see people video and cannot see content video, install RealPresence Media Suite
Player.
Note: Edge cannot support dual windowsEdge browser on Windows 10 can only support flash player, so the content window cannot be displayed.
• Check if the plugin is blocked by the security setting on browser or antivirus software.• Try another supported browser type. For the browser supported list, refer to the RealPresence
Media Suite Release Notes.
Polycom, Inc. 108