Embed Size (px)
Citation preview

[1.0] Play-Balance Rules................................................ 2 A. Allied Major Offensive Bonus .......................... 2 B. Early Co-Belligerent Arrival............................ 2 C. German Improvements ..................................... 2 D. Hitler Replaces Leader .................................... 2[2.0] Special Campaign Rules ........................................ 2 A. Corsica/Sardinia Box ........................................ 2 B. Rome Area ........................................................ 2[3.0] Campaign Games .................................................. 3 A. Standard ............................................................ 3 B. Historical .......................................................... 6
TABLE OF CONTENTS C. Mainland Italy ................................................... 6 D. Short ................................................................. 8[4.0] Scenarios ............................................................... 8 A. Operation Husky ............................................... 8 B. Operation Diadem ............................................. 10 C. The Gothic Line ................................................ 12[5.0] Three-Player Game................................................ 14[6.0] Designer’s Notes ................................................... 16[7.0] Players’ Notes ........................................................ 20[8.0] Historical Notes ..................................................... 24[9.0] Examples of Play ................................................... 29
GMT Games, LLCP.O. Box 1308, Hanford, CA 93232-1308www.GMTGames.com
PLAYB O O K
This is the “Living Rules” document for the game. It includes errata and clarifications to the original rules. To aid readability, errata is indicated in blue text.
May 2016Living Rules

No Retreat! The Italian Front Playbook2
© 2015 GMT Games, LLC
[1.0] Play-Balance RulesThese rules can be used with both players’ consent to adjust the game’s balance.
A. Allied Major Offensive BonusIf the Allied player declares a Major Offensive with an “Operation”-titled Event card, his Shock! markers will be worth two CRT shifts to the right (instead of one shift) on the first weekly turn of the offensive (14.6.2) when used in Allied Air Cover hexes (2.13).
This will help the Allied player crack the heavy moun-tain defense lines he’ll be sure to encounter later down the road. Historically this rule is warranted, but given the Allied player’s “hindsight” about the campaign, I judge it too much of a good thing to put in the game’s core rules. Strongly Pro-Allied.
B. Early Co-Belligerent ArrivalIf the Allied player captures the three hexes of Rome be-fore the “Rome” event on Turn 12, the following happens:• The four Italian co-belligerent army units are released as
reinforcements earlier. Their turn of entry now becomes six turns after Rome is captured.
• The Allied Italian “CIL” unit is not removed from the game on Turn 19.
Example: Rome is captured on Turn 10, so the three Allied-Italian units enter the game on Turn 16, and the “CIL” unit is not withdrawn.This will be of minor help to the Allied cause, but hey, every extra unit counts! Pro-Allied.
C. German ImprovementsGerman Robust units (21.6) cost only one card discard to put to their higher-strength sides, instead of two (see 9.2).
This eases the German player’s elite-unit replacement woes. These troops will be able to do more spoiling counterattacks of Allied spearheads, or Tenacious De-fense without the fear of expensive multi-card discard costs. Strongly Pro-German.
D. Hitler Replaces LeaderOnce during the game in the Victory Determination Phase at the end of any Turn in which the German player has the Strategic Advantage (2.4) and the Event VP marker is on its Allied side, he may replace his Main Leader (5.5.3) with one of the other three unused Leaders. • There is no Replacement VP adjustment cost for doing
this (see 5.6-E).
• From this point on it is considered that the German “Replacement Leader” is in play (see 5.6-B), and his “Main Leader” has been replaced (see 20.8-B).
This allows the German player to get some reinforce-ments released early at no cost if Rommel or Model is chosen. But from now on he could lose by Sudden Death right away if he does not control Rome. Pro-German.
[2.0] Special Campaign RulesThese rules are used in the Campaign games only, not in the scenarios.
A. Corsica/Sardinia Box• No units are ever set up in this box, only Port markers
can move there. • One Control marker is put there to show ownership
(German-side up at the start).• The box becomes Allied-controlled at the end of the
turn an Armistice is declared (see 26.2.1).• The Allied player can also take control of the island
by spending two Reserve Points and three Landings markers during the Deployment Phase of a Major Offensive.
• The Landings markers return as reinforcements two turns later.
• At the end of the Game Turn, flip the Control marker in the Corsica/Sardinia Box to display its Allied-side up, indicating the islands are now under Allied control (this is important for giving Air Cover around the Rome area during future turns; see 2.13.2). One or two Port markers can then be set up in the box, Active side up.
Example: The Allied player Invades on Turn 1, Limited Air Cover in the Rome area will start to be provided on Turn 2, and the Landing markers will come back on Turn 3.The capture of Corsica/Sicily might be of importance if the Allies want to first invade Mainland Italy in the Rome area as it gives Air Cover to that portion of the map.
B. Rome Area• German Rome Garrison: The German
player must keep at least five SP of square units within a three-hex range of any Rome hex at the end his Movement Phase—until
any Allied units enter the Central Italy map. Failure to do so costs him one Reserve Point or one Event VP per game turn (German player’s choice).

No Retreat! The Italian Front Playbook 3
© 2015 GMT Games, LLC
• Allied Rome Invasion: If an Italian Armistice (26.2.1-C) happens when the Allied player invades the Central Italy map, (instead of it arriving as a Turn 4 rein-
forcement) he may set up (face-down) the Allied co-belligerent CIL unit on any hex of that map that was occupied by a 2-SP Fascist Italian unit eliminated due to the Armistice.
[3.0] Campaign GamesEach of the three Campaign Games uses the standard Victory Conditions (see 20.0).
A. Standard Campaign Game The Standard Campaign Game uses all the non-historical options and leaders.
Set-Up Procedure 1. Maps: Properly arrange the Central Italy, Southern Italy and Sicilia mapboards between the two players. Put a Ger-man Control marker in the Corsica/Sardinia Holding Box.2. Track Markers: Place the round Game Turn marker in the “1” box of the Game Turn Track (Allied-side up), and the Week marker in the “0” box of the Major Offen-sive Track (Allied-side up). On the Victory Point Track, place the Event Points marker in the “0” box (for now, but see #10 Leader cards), the Map Points marker in the “25” box, and the VP Total marker in the “25” box—each German-side up.3. Italian War Status Track: Place the Italian War Status Track marker (German-side up) in the “Viva il Duce!” box of the Italian War Status Track.4. Strategic Map Display Cards: Each player takes his Strategic Map Display card and sets up his units/mark-ers as instructed on his display, and as per the following instructions.
5. Allied Set-Up: • All units on the display start in the Allied Reserves Box
(most are in North Africa). • Advanced Game: The Supply markers starts at 25
Supply Points on the Allied Shipping Track. 6. German/Italian Set-Up: The following restrictions apply when Axis units are set up on a map:• The two German units in the “Anywhere” box are set
up on any of the three maps. • The German units in the German Reserves Box and
Garrison Box are set up in those same-named holding boxes on the mapboard.
• The German units in the “Sicilia” box are put on the Sicilia map.
• The German units in the “Southern Italy” box are put on the Southern Italy map.
• The German units in the “Central Italy” box are put on the Central Italy map.
• The German units in the “Northern Italy” box are put in the Garrison Holding Box.
• The “Allies in Rome”, “1st Mainland Invasion” and “2nd Mainland Invasion” boxes represent units that will be released later when Italy is invaded.
• Some of the units in holding boxes will be released: a. per special events (21.12),b. when Rome is captured (2.10.1),c. when Mainland Italy is invaded (13.6.9), ord. when the Northern Italy map enters the game (7.3).
• During set-up, German units may only be placed in a road hex or a hex adjacent to a road—provided such hex is not a Beach, City or Town hex.
• The above-pictured Italian unit types enter play:
a. When the Allied player declares he will invade (13.6) their setup map, just before the Port/Landing Box to Map Deployment of the Deployment Phase (10.0.E).
b. Just before an Allied unit moves onto their map during the Movement Phase (13.0).
Randomly pick the Italian units from their draw cup until you get the right mix (or spread them on the table on their “Untried” sides, and deploy them on the map as per the Italian fixed set-up maps shown in the diagrams on pages 4, 5 and 9 of this manual.
If there are not enough Italian units in the draw cup to fulfill the needed set-up, or there is a German unit in their deployment hex they are lost and not deployed.
Exception: After the Armistice occurs all Italian units located in the Strategic Display Boxes never enter play this way anymore as they are all eliminated (see rule 26.2.1-C).7. Starting Allied Hand: The Allied Player draws the top card from the Draw Pile, plus card #10 (Attrition/ Avalanche).8. Starting German Hand: The German player draws one card from the top of the Draw Pile into his hand.

No Retreat! The Italian Front Playbook4
© 2015 GMT Games, LLC
Set up Italian units on the Southern Italy map as shown above.
Set up Italian units on the Central Italy map as shown above.

No Retreat! The Italian Front Playbook 5
© 2015 GMT Games, LLC
9. Operation Husky: The Allied player must start the Strategic Phase by playing the OperatiOn Husky Event. This Event is not represented by an actual game card and cannot be cancelled by any German card play (see rule 26.3.1).
10. Leader Cards:• The Allied player randomly picks one of
his three Main Leader cards as his active Leader and adjusts the Event VP marker (5.5.2).
• The German player randomly picks one of his three Main Leader cards as his active Leader and adjusts the Event VP marker (5.5.2).
Example: The Allied player draws Alexan-der (cost of one Allied VP) and the German draws Rommel (cost of four German VPs): The Event Point marker is thus put, Allied face up, in the 3 VP square on the track.Do not forget that the two “Replacement Leaders” cannot be drawn.11. Weather: The First Turn’s weather is automatically Sunny. Put the Sunny marker in the Game Turn “1” box of the Game Turn Track.12. Allied Initial Invasion: The Allied player must select one of the following three options:a. Invade the Corsica/Sardinia Box: The Allied player takes control of the box, as per the rules in section “A” of the 2.0 Spe-cial Campaign rules. The Allies cannot do any other invasions this Game Turn.b. Invade the Sicilia Map. The Allied player must do an Invasion (13.6) of Sicilia.c. Invade a Mainland Italy Map. The Al-lied players must do an Invasion (13.6) of the Central or Southern Italy map.
13. First Turn Surprise: • The German player cannot move any
units during the first turn Deployment Phase (10.0).
• The German player cannot use the road movement rate (½ MP) during his first Movement Phase (13.0).
• The German player cannot move any units during his first weekly turn Reserve Phase (16.0).
• Neither player may Improve (9.2) or Rebuild (9.4) units during the first Organization Phase (9.0).
14. Game Start: The game starts with the Game Turn Event Phase (see 4.0).15. Game End & Victory Conditions: All of rule 20.0 fully applies.
Note that if the Allied player decides to use the Initial Invasion option “A” he’ll have no units on the maps at the start of Turn 2; they will all be in the Allied Reserves Box.
Set up Italian units on the Northern Italy map as shown above.

No Retreat! The Italian Front Playbook6
© 2015 GMT Games, LLC
B. Historical Campaign GameThe Historical Campaign Game uses only the historical options and leaders.
Set-Up Procedure 1-9. Use the same procedures as for the Standard Cam-paign Game.Exception: The two German units shown in the “Any-where” box of the German Strategic Map display card are set up on the maps indicated by their boxes’ gray historical location text.
10. Leader Cards:• The Allied player automatically starts with the
alexander in COmmand Main Leader card #52 active.• The German player automatically starts with the
kesselring in COmmand Main Leader card #48 active.11. Weather: Use the same procedure as for the Standard Campaign Game.12. Allied Initial Sicily Invasion: The Allied player must do an Invasion (13.6) of Sicilia. Place the Italian units in the “Sicilia” box of the Strategic Map Display card on the Sicilia map following the Standard Campaign Game set-up procedure, “6. German/Italian Set-Up” (page 3 of this manual).13. First Turn Surprise: Use the same procedures as for the Standard Campaign Game.14. Game Start: The game starts with the Game Turn Event Phase (see 4.0).15. Game End & Victory Conditions: All of rule 20.0 fully applies.16. Flip-Flop Rule: Rule 7.4 (Flip-Flop) is not used in the Historical Campaign Game.
You have a bit less leeway in the Historical Campaign Game: a fixed invasion site, no optional Leaders and no possibility of a middle game side switch.
C. Mainland Italy Campaign GameThe Mainland Italy Campaign Game uses only the histori-cal options and starts with the Invasion of Mainland Italy.
Set-Up Procedure1. Maps: Properly arrange the Central Italy, Southern Italy and Sicilia mapboards between the two players. Put a German Control marker in the Corsica/Sardinia Holding Box.2. Track Markers: Place the round Game Turn marker in the “3” box of the Game Turn Track (Allied-side up), and the Week marker in the “0” box of the Major Offensive Track (Allied-side up). On the Victory Point Track place the Event Points marker in the “1” box (Allied-side up), the Map Points marker in the “19” box (German-side up), and the VP Total marker in the “18” box (German-side up).3. Italian War Status Track: Place the Italian War Status Track marker (Allied-side up) in the “Armistizio!” box of the Italian War Status Track.4. Strategic Map Display Cards: Each player takes his Strategic Map Display card and sets up his units/mark-ers as instructed on his display, and as per the following instructions.
5. Allied Set-Up: • The two U.S. units pictured above start in the Allied
Reserves Box or the island portion of the Sicilia map as well as the five Allied units depicted on Turn 2 and Turn 3 of the Reinforcements Track.
• The Allied player receives the number of Reserve markers as shown in the set-up boxes of the Allied Strategic Map Display card.
• Advanced Game: The Supply marker starts at 35 Supply Points on the Allied Shipping Track.

No Retreat! The Italian Front Playbook 7
© 2015 GMT Games, LLC
6. German/Italian Set-Up: • The Italian units shown in the Central Italy and Southern
Italy boxes on the German Strategic Map Display card are placed on their respective maps, as per the set-up maps (pages 4-5) of this booklet.
• The Italian units in the Northern Italy and Sicilia boxes never enter play.
• The German player receives the number of Reserve markers as shown on the Display Axis Strategic Map Display card.
• Set up the following eight German units on the named maps as indicated. The three “Anywhere” units can be set up on either of the two maps (Central and/or Southern) or in the German Reserves Box.
Central Central Southern Southern
Southern Anywhere Anywhere Anywhere
• During set-up, German units may only be placed in a road hex or a hex adjacent to a road—provided such hex is not a Beach, City or Town hex.
• The German units in the German Reserves Box and Garrison Box are set up in any of those same-named holding boxes on the mapboard.The German Player can add up to two extra KG (Kamp-fgruppes) on the map, by paying one RP (see 2.7) for each, or by Kampfgruppe Breakdown (21.7.2).
• The German units in the “Northern Italy” box are put in the Garrison Holding Box.
• The “Allies in Rome”, “1st Mainland Invasion” and “2nd Mainland Invasion” boxes represent units which will be released later when Italy is invaded.
• Units not on the mapboard will be released: a. Per special events (21.12),b. When Rome is captured (2.10.1)c. When Mainland Italy is invaded (13.6.9)d. When the Northern Italy map enters the game (7.3).
7. Starting Allied Hand: The Allied player temporarily removes card #10 (attritiOn/avalanCHe) from play, shuffles the deck of cards, and places the deck face-down next to the map.
He then draws one card from the top of the Draw Pile, plus card #10 (attritiOn/ avalanCHe). 8. Starting German Hand: The German player then draws one card from the top of the Draw Pile. He then reshuffles all the cards into one Draw Pile.9. Operation Avalanche: The Allied player must start the Strategic Phase by playing the OperatiOn avalanCHe card. This Event cannot be cancelled by any German card play (see rule 8.1).
10. Leader Cards:• The Allied player starts with the “alexander in
COmmand” Main Leader card #52 active.• The German player starts with the “kesselring in
COmmand” Main Leader card #49 active.11. Weather: The First Turn’s weather is automatically Sunny. Put the Sunny marker in the Game Turn “3” box of the Game Turn Track12. Allied Initial Italy Invasion: The Allied player must do an Invasion (13.6) of Mainland Italy. Note that the German units shown in the “1st Mainland Invasion” box on the German Strategic Map Display card arrive as reinforcements when the Allies Invade Mainland Italy as per 13.6.9.
13. First Turn Surprise: • The German player cannot move any units during the
first turn Deployment Phase (10.0).• The German player cannot move any units during his
first weekly turn Reserve Phase (16.0).• Neither player may Improve (9.2) or Rebuild (9.4) units
during the first Organization Phase (9.0).14. Game Start: The game starts with the Game Turn Event Phase (see 4.0).15. Game End & Victory Conditions: All of rule 20.0 fully applies. The game lasts 22 turns unless it ends by Sudden Death.16. Flip-Flop Rule: Rule 7.4 (Flip-Flop) is not used in the Mainland Italy Campaign Game.
This campaign supposes that, as historically hap-pened, the invasion of Sicily took place during Turns 1 and 2. Note that the Italian units on the map will instantly disappear as an Armistice will be declared as soon as the Allies have four units on the mainland (see rule 26.2.1-B).

No Retreat! The Italian Front Playbook8
© 2015 GMT Games, LLC
D. Short Campaign GameThe Short Campaign Game uses only the historical op-tions, starts with the Invasion of Mainland Italy and stops on June 1944.
Set-Up Procedure1-14. Maps: Use the same procedures and rules as the mainland Italy Campaign Game C but for section 15 below.15. Game End & Victory Conditions: The game ends at the end of Turn 12. The Allied or German player wins by Sudden Death (20.8) or by controlling all hexes of Rome; otherwise it’s a Draw. If the German player can claim the win, but the Allied player can trace a path of hexes from the south to the north mapboard edges free of EZOCs, enemy units, lakes, Apennine hexes or hexsides, then the game is then declared a Draw.
[4.0] ScenariosEach of the Scenarios includes set-up instructions and an ending Game Turn. When the indicated ending Game Turn is completed, that scenario’s listed specific Victory Conditions are checked and the winner is determined.
IMPORTANT! A scenario cannot end in a tie. If the player with the Initiative does not win, the other player does.
Shorter Campaign Games: Alternately, the Diadem scenario can be used as the starting point for a Campaign Game played to the end of Game Turn 22 using the stan-dard Victory Conditions.
A. Operation Husky Mini-GameThis small scenario is a perfect way of learning the game’s rules and concepts.
Set-Up Procedure 1. Maps: Place the Sicilia mapboard between the two players; only this map is used in this scenario.2. Track Markers: Place the round Game Turn marker in the “1” box of the Game Turn Track (Allied-side up), and the Week marker in the “0” box in the Major Offen-sive Track (Allied-side up). On the Victory Point Track, place the Event Points marker in the “0” box, and both the Map Points and VP Total markers in the “6” box (each German-side up).
3. Italian War Status Track: Put the Italian War Status Track marker German-side up, in the “Viva il Duce!” box of the Italian War Status Track.4. Strategic Map Display Cards: Each player takes his Strategic Display card and sets up his units/markers as instructed in the display, and the instructions below:5. Allied Set-Up: All units on the display start in the Al-lied Reserves Box (most are considered to be in North Africa, including the four Allied Reserve markers, two-strength side face-up).
6. German/Italian Set-Up: • Italian units are set up as shown on the Sicilia set-up
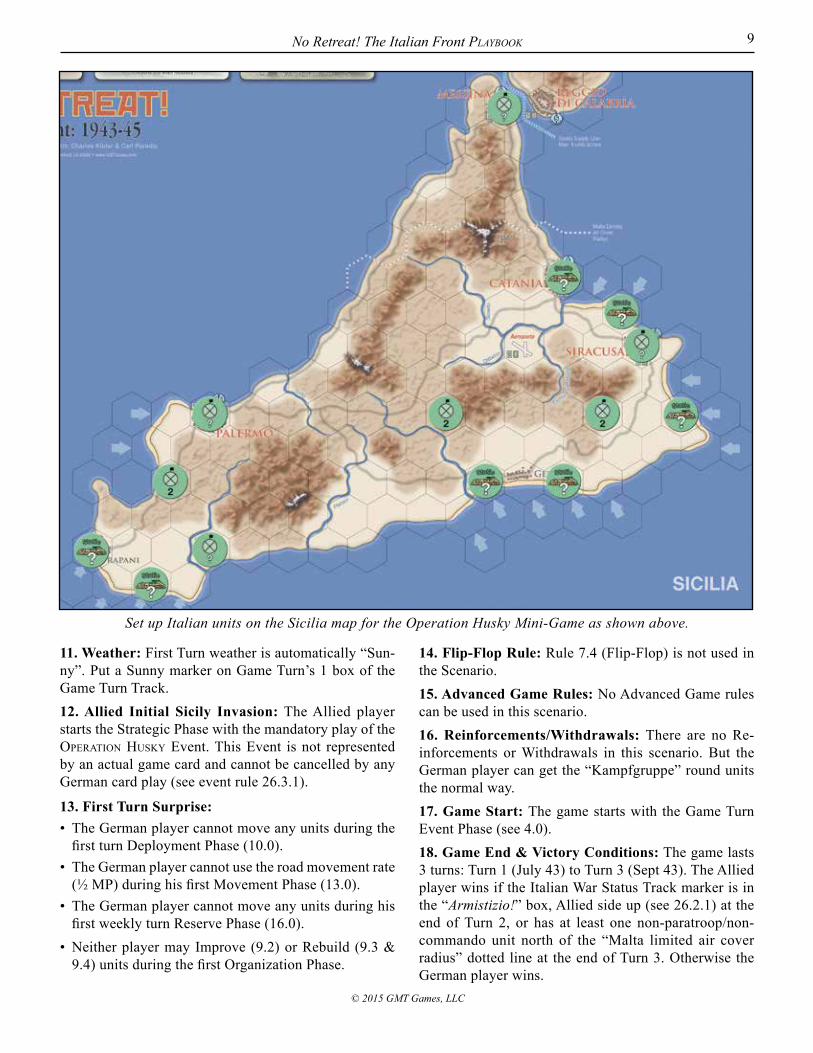
Display. Follow the set-up shown on the Operation Husky set-up diagram, page 9.
• The HG Panzer and 15th Panzer Grenadier may only
be set up in a road hex or a hex adjacent to a road—provided such a hex is not a Beach, City or Town hex.
• The 29th PzGren and 1st FJ (face-down) units are set
up in the German Reserves Box, plus one two-strength German Reserve marker.
7. Starting Allied Hand: The Allied player temporarily removes card #26 (rOugH WeatHer/diadem) from play, shuffles the deck of cards, and places the deck face-down next to the map forming the Draw Pile. He then draws two cards from the Draw Pile. 8. Starting German Hand: The German player draws one card from the top of the Draw Pile into his hand. He then reshuffles all the cards into one Draw Pile, includ-ing card #26.9. Operation Husky: The Allied player starts the Stra-tegic Phase with the play of OperatiOn Husky Event (see rule 26.3.1).
10. Leader Cards:• The Allied player starts with the alexander in COmmand
Main Leader card #52 active.• The German player starts with the kesselring in
COmmand Main Leader card #48 active.
No Retreat! The Italian Front Playbook 9
© 2015 GMT Games, LLC
11. Weather: First Turn weather is automatically “Sun-ny”. Put a Sunny marker on Game Turn’s 1 box of the Game Turn Track.12. Allied Initial Sicily Invasion: The Allied player starts the Strategic Phase with the mandatory play of the OperatiOn Husky Event. This Event is not represented by an actual game card and cannot be cancelled by any German card play (see event rule 26.3.1).
13. First Turn Surprise: • The German player cannot move any units during the
first turn Deployment Phase (10.0).• The German player cannot use the road movement rate
(½ MP) during his first Movement Phase (13.0).• The German player cannot move any units during his
first weekly turn Reserve Phase (16.0).• Neither player may Improve (9.2) or Rebuild (9.3 &
9.4) units during the first Organization Phase.
14. Flip-Flop Rule: Rule 7.4 (Flip-Flop) is not used in the Scenario.15. Advanced Game Rules: No Advanced Game rules can be used in this scenario.16. Reinforcements/Withdrawals: There are no Re-inforcements or Withdrawals in this scenario. But the German player can get the “Kampfgruppe” round units the normal way.17. Game Start: The game starts with the Game Turn Event Phase (see 4.0).18. Game End & Victory Conditions: The game lasts 3 turns: Turn 1 (July 43) to Turn 3 (Sept 43). The Allied player wins if the Italian War Status Track marker is in the “Armistizio!” box, Allied side up (see 26.2.1) at the end of Turn 2, or has at least one non-paratroop/non-commando unit north of the “Malta limited air cover radius” dotted line at the end of Turn 3. Otherwise the German player wins.
Set up Italian units on the Sicilia map for the Operation Husky Mini-Game as shown above.

No Retreat! The Italian Front Playbook10
© 2015 GMT Games, LLC
B. Operation DiademThis 6-turn scenario takes place during the Allied breakout from the Anzio beachhead, final assault of the formidable Cassino position and capture of Rome, and ends near Northern Italy’s last major German defensive line.
Set-Up Procedure 1. Maps: Place the Central Italy and Southern Italy map-boards between the two players. Put an Allied Control marker in the Corsica/Sardinia Holding Box.2. Track Markers: Place the round Game Turn marker in the “11” box of the Game Turn Track (Allied-side up), and the Week marker in the “0” box of the Major Offensive Track (Allied-side up). On the Victory Point Track, place the Event Points marker in the “2” box, the Map Points marker in the “13” box, and the VP Total marker in the “15” box—each German-side up. 3. Italian War Status Track: Place the Italian War Status Track marker in the “Armistizio!” box of the Italian War Status Track (Allied-side up).4. Strategic Map Display Cards: Place Allied Control markers on the six Map Objectives (2.11) on the two maps.5. Allied Set-Up: Follow the set-up shown on the Diadem set-up diagram, page 11. 6. German Set-Up: Follow the set-up shown on the Diadem set-up diagram, page 11.Ten Fort markers are placed. The German player picks five Fort markers and places them face-down in any of the Fort locations shown on the scenario set-up map (“known” side up). He then picks five more Fort markers, and places them face up, after looking at their strength, in the remaining Fort locations (“untried” side up).The German 3rd PzGren and 98 Inf should be placed in the Destroyed Units Box.7. Starting Allied Hand: The Allied player temporarily removes card #26 (rOugH WeatHer/diadem) from play, shuffles the deck of cards, and places the deck face-down next to the map forming the Draw Pile.He then draws one card from the Draw Pile, plus card #26 (rOugH WeatHer/diadem).8. Starting German Hand: The German player draws one card from the top of the Draw Pile into his hand. He then reshuffles all the cards into one Draw Pile.9. Operation Diadem: The Allied player must start the Strategic Phase by playing the OperatiOn diadem card. This Event cannot be cancelled by any German card play (see rule 8.1).
10. Leader Cards:• The Allied player starts with the alexander in COmmand
Main Leader card #52 active.• The German player starts with the kesselring in
COmmand Main Leader card #48 active.11. Weather: The First Turn’s weather is automatically Sunny. Put the Sunny marker in the Game Turn “1” box of the Game Turn Track.12. Allied Invasions: The Allied player may not do any Invasions (13.6) during this scenario.13. First Turn Surprise/Preparation: • The first turn Organization Phase (9.0) consists only of
step A (Get Combat Markers); skip steps B to F.• Skip the first turn Deployment Phase (10.0) for both
players.• For the first weekly turn of this scenario, Allied Shock!
markers are worth two CRT shifts to the right (instead of one shift).
• Neither player may Improve (9.2) nor Rebuild (9.4) units during the first Organization Phase.
14. Flip-Flop Game Rule: Rule 7.4 (Flip-Flop) is not used in this scenario.15. Advanced Game Rules: “A. Allied Major Offensive Bonus” (page 2 of this Playbook) is used. 16. Reinforcements/ Withdrawals: Both players get their Standard Campaign Game reinforcements and withdrawals.17. Allied Supply:• Three Port markers are set up in any Port hexes on the
Southern Italy map. • Only one Port marker (Anzio) and two Landings
markers are set up on the Central Italy map. The remaining Port and Landings markers are not used in the game.
18. Game Start: The game starts with the Game Turn Event Phase (see 4.0). During the Strategic Phase (8.0) both players continue drawing cards until they actually have four more than they started that Phase with in their card hand.19. Game End & Victory Conditions: The game lasts 6 turns: Turn 11 (May 44) to Turn 16 (Oct 44). The Allied player wins if the VP Total marker is in the “20” box (or higher) at game end or if he controls at least four Cities/Towns that are entirely located on the Northern Italy map (i.e., not Ravenna). Otherwise the German player wins, unless the Allied player can trace a path of hexes from the South to the North mapboard edges free of EZOCs, enemy units, lakes, Apennine hexes or hexsides, in which case the game is then declared a Draw.

No Retreat! The Italian Front Playbook 11
© 2015 GMT Games, LLC
Set up units for the Operation Diadem Mini-Game as shown above.

No Retreat! The Italian Front Playbook12
© 2015 GMT Games, LLC
C. The Gothic LineThis 3-turn scenario takes place during the last months of the war and the final surrender of the German forces in Italy.
Set-Up Procedure 1. Map: Lay out the Northern Italy and Central Italy mapboards between the two players.2. Track Markers: Place the round Game Turn marker in the “20” box of the Game Turn Track (Allied-side up), and the Week marker in the “0” box in the Major Offensive Track (Allied-side up). On the Victory Point Track, place the Event Points marker in the “1” box, the Map Points in the “18” box (Allied-side up), the VP Total marker in the “19” box (Allied-side up). The “High Tide” marker goes in the “24” box (German-side up).3. Italian War Status Track: Place the Italian War Status Track marker (German-side up) in the “Viva il Duce!” box of the Italian War Status Track.4. Allied Control Markers: Put Allied Control markers on the seven Map Objectives (2.11) that are controlled on the two maps.5. Allied Set-Up: Follow the set-up shown on The Gothic Line set-up diagram, page 13.6. German Set-Up: Follow the set-up shown on The Gothic Line set-up diagram, page 13. The German player picks four Fort markers and places them face up, after looking at their strength, in any of the Fort locations shown on the scenario set-up map (so “untried” side up). 7. Starting Allied Hand: The Allied player temporarily removes card #12 (veteran nCOs/OperatiOn enCOre) and card #34 (FOrCed labOr/OperatiOn grapesHOt) from play, shuffles the deck of cards, and places the deck face-down next to the map forming the Draw Pile.He draws no cards, and takes card #12 (veteran nCO’s/ OperatiOn enCOre) and card #34 (FOrCed labOr/Opera-tiOn grapesHOt).8. Starting German Hand: The German player draws no cards. Note: Do not forget rule 26.3.6, affecting card draws for both sides in 1945.9. Operation Encore: The Allied player starts the Stra-tegic Phase with the mandatory play of the OperatiOn enCOre Event card. This cannot be cancelled by any German card play (see rule 8.1).10. Leader Cards:• The Allied player automatically starts with the Clark
in COmmand Replacement Leader card #53 active.
• The German player automatically starts with the vietingHOFF in COmmand Replacement Leader card #49 active.
11. Weather: No special First Turn weather in effect. Put a Sunny marker on Turns Turn 20 (Feb 45) and Turn 22 (April 45).12. Allied Invasions: The Allied player cannot do any Invasions (13.6) during this scenario.13. First Turn Surprise/Preparation: • The first turn Organization Phase (9.0) will consist only
of Step A (Get Combat Markers); skip steps B to F.• Skip the first turn Deployment Phase (10.0) for both
players.• For the first weekly turn of this scenario, Allied Shock!
markers are worth two CRT shifts to the right (instead of one shift).
• Neither player may Improve (9.2) nor Rebuild (9.4) units during the first Organization Phase.
14. Flip-Flop Rule: Rule 7.4 (Flip-Flop) is not used in the scenario.15. Advanced Game Rules: “A. Allied Major Offensive Bonus” (page 2 of this Playbook) and Advanced rule (27.7) End-Run Weekly Turn, are used.16. Reinforcements/ Withdrawals: Both players get their Standard Campaign Game Reinforcements and Withdrawals.17. Allied Supply:• The south edge of the map board is a supply source for
Allied units. • There are no Port or Landings markers in play during
this scenario.18. Game Start: The game starts with the Game Turn Event Phase (see 4.0). During the Strategic Phase (8.0) both players will continue drawing cards until they actu-ally have three more than they started that Phase in their card hand.19. Game End & Victory Conditions: The game lasts 3 turns: Turn 20 (Feb 45) to Turn 22 (April 45). The Allied player wins if the VP Total marker is in the “25” box (or higher) at game end or if he controls at least six of the eight Objectives on the Northern Italy map. Otherwise the German player wins, unless the Allied player can trace a path of hexes from the South to the North mapboard edges free of EZOCs, enemy units, lakes, Apennine hexes or hexsides, in which case the game is then declared a Draw. This is a relatively large scenario but also a quick “no holds barred” contest. The Allied player might finally see some mobile action in the North Italian Plains for a change…

No Retreat! The Italian Front Playbook 13
© 2015 GMT Games, LLC
Set up units for the Gothic Line Mini-Game as shown above.

No Retreat! The Italian Front Playbook14
© 2015 GMT Games, LLC
[5.0] Three-Player GameAll the Campaigns and Scenarios can be played by three players—one controlling the Axis forces, a second con-trolling the (Allied) U.S., and a third player controlling the (Allied) British/Commonwealth forces—using the following instructions.
Procedure1. Allied Unit Set-Up:• The U.S. player controls the green units.• The British player controls the tan units.2. Leader Card Ownership:• If the Leader is Eisenhower or Clark the U.S. player
controls the Leader card.• If the Leader is Alexander or Montgomery the British
player controls the Leader card.3. Allied Card Hand & Markers Distribution:• Each Allied player initially receives half the total
starting number of Allied cards and markers.• If there are an odd number of cards/markers, the Allied
player currently controlling the Leader card decides who gets the remainder.
• Each Allied player receives half of the total Allied card draws at the start of the Game Turn (thus two cards per player). During Major Offensive weeks the player controlling the Leader card decides who gets the card.
• At the start of the Allied players’ turn, the maximum hand for each Allied player is three cards; randomly discard the extras.
4. Allied Card and Shock!/Target! Markers Manage-ment:• During the Card Draw Phase the two Allied players
can freely exchange most cards and markers amongst themselves. Exception: Some markers cannot be shared; see instructions 5 & 6 below.
• An Allied player cannot use his cards or markers to help/influence the other Allied player’s units during the other player’s Game Turn phases.Example: During the Combat Phase of the U.S. player, the British player cannot play an Event card to cancel a German card play.
• If there is a conflict about which Allied player plays what card and when, the Allied player currently controlling the Leader card has priority.Example: In the Strategic Phase, the Allied player controlling the Leader card can play an Event card for the Allied side before the other Allied player can, thus preventing the latter from using his card.
5. Allied Reserve Markers: Each Allied player has his own Reserve markers (green = U.S.; tan = British) which can only be used by the owning player and cannot be exchanged with the other Allied player.6. Allied Landings/Port Markers: Each Allied player gets half of the Landings/Port markers, which can only be used by the owning player and cannot be exchanged with the other Allied player.7. Allied Turn Management: Each Allied player per-forms each of the game’s phases in sequence, one after the other; the player controlling the Leader deciding at the start of the turn which Allied player goes first during all phases (same player for all).Example: The U.S player does his Movement Phase, then the British. Next the U.S. player does his Combat Phase, then the British, etc…
8. Allied Coordination in Combat:• At the start of the first Allied player’s Movement Phase,
the other Allied player can freely give the initially-moving Allied player control of up to three of his units during that Game Turn. Any such “loaned” units suffer the penalties of rule 14.6.10 (Allied Attack Coordination Problems). This is the only way U.S and British units can voluntarily attack together.
• If responding to Counterblows, both Allied players units can respond together. If there is a disagreement, the units of the Allied player that moved first in the current turn must respond.

No Retreat! The Italian Front Playbook 15
© 2015 GMT Games, LLC
9. Leadership Appeals to SHAEF: At the start of a Sudden Death turn, the Allied player not controlling the Allied Leader card can ask the Allied High Command for the current Allied Leader to be replaced—but only if he (i.e., the Allied player not controlling the current Allied Leader) currently has less VPs than the player controlling the Allied Leader card.
Roll one die:1. If the die roll is higher than the current Leader
Replacement status number (see 5.5), that Leader is replaced at no VP cost, following the list below.
Alexander 4 Clark Montgomery 4 Clark Eisenhower 4 Alexander Clark 4 No Leader card (5.6.C)2. If the die roll is equal to the current Leader Re-
placement Status number (see 5.5), that Leader is considered “Away From the Front” (see 5.7).
3. If the die roll is lower than the current Leader Re-placement Status number (see 5.5), the rolling player loses one VP (this does not affect the game’s total VPs).
4. If there is no Allied Leader card in play, the oldest Allied player is considered to be controlling the Leader card for rules purposes.
This means that (compared to the normal Leader Re-placement rule) there is an exception if Eisenhower is in command—he is replaced by Alexander, not Clark.
10. Allied Player Victory Points Set-Up:• Each Allied played keeps track of his own VPs on the
Victory Point Track using one of his Control markers (British Roundel or American Star).
• These two markers are completely independent from the VP markers used in the regular game (these are still used).
• Even when the Allies do not have the Initiative the number of total VPs each Allied player earns (captured Objectives, card Events, eliminated units) is individually computed independently from the game’s Total VPs.
11. Allied Player Victory Points Scoring: If a VP is gained or lost without the direct intervention of an Allied player, the Allied player currently controlling the Allied Leader card loses/gains the VP.Example 1: The German player plays an Event card causing the Allies to lose one Event VP; it will also lower by one the Allied VP Control marker of the player controlling the Allied Leader card.Example 2: One U.S. unit is sent to the Surrendered Box. The German player thus gains one Event VP, and the U.S. player lowers his Allied VP Control marker by one.Example 3: The German player has the Strategic Ad-vantage when the British player captures an Objective. The Map German VP marker is lowered by one, and the British Allied VP Control marker is increased by one.
So you are keeping three different VP totals indepen-dent of each other: the normal game VPs, plus the two Allied players’ VPs, the sum of which could very well be different from the game’s total VP score.
12. Allied Player Victory:• If the German side wins, both Allied players lose
(obviously), with the player currently controlling the Allied Leader (if any) getting a special mention for the disaster.
• If the Allied side wins, the Allied player with the most Allied VPs (indicated by the two Allied Control markers on the VP track) wins the game.
• In case of a tie the Allied player controlling the current Leader card wins.
13. Flip-Flop side switch rule:• If the Flip-Flop rule is used (7.4), the German
player changes sides with the Allied player currently controlling the Allied Leader card.
• There are no Flip-Flop Map VPs adjustments (26.2.4-4).14. Game Secrecy: The Allied players must conduct all discussions openly in front of the German player.
Obviously, the German player will probably have a good time watching both his Allied opponents arguing about the conduct of operations. Time to open a nice bottle of Chianti and enjoy the show…

No Retreat! The Italian Front Playbook16
© 2015 GMT Games, LLC
[6.0] DESIGNER’S NOTESWhy This Game?This is fourth game in my “No Retreat!” series, which premiered with the Russian Front, my favorite WWII topic. This was followed by the North African Front (1940-43) game. The third was about the French Front (1940), published by Victory Point Games, and currently on the GMT’s P500 per-order system, with the Polish campaign added in. My initial goal was to make just the first NR game, but things got out of hand and I was some-how goaded into adding more and more titles to the list. My goal right now is to make five games total, the final one covering the West Front (1943-45). This series is a tribute to the old Avalon Hill “Classics”, NR1 = Russian Campaign, NR2 = Afrika Korps, NR3 = France 40, NR4 = Anzio, NR5 = D-Day. We now are at number four: The Italian Campaign.Ever since playing Anzio as a young teen in the late 70’s, I was fascinated by this grueling campaign, where an irresistible force (the Allies’ war machine) met an im-movable object (the German defensive expertise) in a long, frustrating battle for both sides. I embarked into this project with much trepidation, and this title will be the most complex of the NR line. I found out that there were precious few wargames that fully portrayed the whole front from 1943 to 1945, and probably for good reason. There were few exciting breakthroughs; the battle lines were short, linear, with long lull periods punctuated by a few weeks of intense activity. Yep, it has all the ingre-dients for the making of a predictable, lengthy, boring game, and it’s maybe why very few designers got really interested in the topic. This is exactly the type of simula-tion the No Retreat! game system can cover adequately.
Hopefully you’ll find that I have succeeded in making this game fun, relatively fast, full of interesting options and surprises!
Inner WorkingsThe existing simulations of scale/topic have an inordinate number of Game Turns, seemingly taking forever to play; or too little, not simulating the frontline dyanmics too well. I tackled this by using relatively few turns for a game of this scope, with each turn lasting a month. This is a large chunk of time compared to the ground (ten miles per hex) and unit (divisions) scale, but players can declare a Major Offensive during some turns, segmenting a one-month long turn into smaller one-week “mini-turns” that will see a lot more action; while others will be played in a few minutes if using the new Attrition rules, neatly taking care of the inevitable battle interludes of the cam-paign. The counter count—being very low— a trademark of the NR series, also speeds up play, and makes each decision critical. The combat system is similar to that of my very first game, The Russian Front, but with notable differences in many of the combat results. I have spiced things up, adding more options into the Combat Tables, making months’ long slugging matches in the mud, trying to breach the impregnable German mountain defenses, a lively wargame challenge. Like the other titles, there will be no sure thing in this game, and the successful player will be the one able to manage the chaos of the battlefield!Some of you may have noticed that the ground and unit scale is the same as the second game of the series, The North African Front. If you own that title, try laying the maps side-by-side with those of the Italian Front for a very interesting comparison of both theaters of war.The Event card play is improved with a new set of special icons, making it easy to see at a glance the capabilities and timing options of each card. The Event texts were also streamlined. Sea Invasions make an entry into the NR rule set, simulating in a simple but effective way the many complex amphibious operations that made this campaign so fascinating. I have added in a 3-player option that in fact speeds up play and is really fun, especially when combined with the flip-flop side-switching rule. All in all, if you have ever played any of the other NR games, you should feel right at home.
Pick a CardThe Event card engine is the very heart of the game. Players simply never know what sneaky card effects their opponent might play on them. Consequently, perfect plan-ning of moves or attacks is never entirely possible. For

No Retreat! The Italian Front Playbook 17
© 2015 GMT Games, LLC
example, can you afford to temporarily weaken your line, or will your adversary be able to play a Major Offensive card allowing him to fully exploit the weakness during the now multiple-weeks turn, creating an unexpected breakthrough?Those cards are an excellent indicator of the tactical and strategic resources a player has at his disposal; if you start your turn with a large card hand, lots of Reserve markers, and your opponent has none, then things are potentially very good for you! The cards you have in reserve represent energy you can spend, not only when using the main card Events, but also the all-important alternate uses: paying for replacements, counterblows, Strategic Moves, etc. With a low card count, your options are limited; sure, a player can still get by while holding only a card or two and no Reserve markers, but the game’s battle initiative is probably being held by the opponent who is holding more!
Follow the LeaderWhen the NR4 game system was laid out I intended to use the same type of “plan” cards that made an appearance in NR3 The French Front: each player draws a special card at the start of the game, giving him specific High Command goals to achieve at set times in the campaign, earning extra VPs. Alas, I rapidly came to the realization that both sides did very little, if any, long-term planning besides getting the Italians rapidly out of the war (Allies) and defending the industrial north of the peninsula at all costs (Germans). In fact both succeeded in their own en-deavor, the rest of the campaign was more an “and what do we do now, sir?” improvisation in planning. So that concept was scrapped. Instead I put more emphasis on the senior military commanders, their abilities, and influence on the overall situation, also making for some fun “what if” variations in the Orders of Battle (e.g., what if Rom-mel was in charge of the whole front, or Montgomery had remained in Italy?).
Combat!The Combat Results Tables are a bit unusual. As an at-tacker, even at lower odds, you do not suffer many losses (save for the occasional EX result), but you could get a CA or CR result, and that opens some interesting pos-sibilities. It gives your opponent the option/obligation of counterattacking and possibly upsetting your posi-tion—thus making it easier for them to charge at you during your opponent’s upcoming Player Turn, or on a CA your opponent might simply “pass” on the opportunity to counterattack and opt to simply play it safe and stay on the defensive. The tables are also more tailored for the Counterblow rule with a new CB sub-table added for
more variation of that combat result. Upon study of the two odds-based different CRTs, you will notice subtle dif-ferences between them that have a substantial impact on how to play each side. Yet the great German CRT results superiority of the other games in the series is as good as gone now, the Allies have learned their trade! The tables were also tweaked to better simulate the harrowing set-piece battle engagements of the Italian Campaign, the increased importance of firepower support and of the smaller sub-units’ tactical abilities.
Counter-PunchingWhat does the Counterblow rule represent? We wanted players to have some say and influence during their op-ponent’s turn and to reward the careful management of the precious Event cards: players need to plan their Counterblows use for local spoiling counterattacks/moves launched in reaction to the enemy offensives. We did not go so far as to allow an actual attack by the defender (this is what players should do on their own turns), but it’s close. And because your troops are leaving their positions to engage the enemy, they lose their defensive terrain benefits—thus, some risk is involved in launching a counterblow. It is a good idea to use this rule to quickly wipe out pockets of surrounded enemy units, and to allow your units a chance to advance during your opponent’s turn (if a CA result is rolled, and followed up with a suc-cessful counterattack of your own). You can also use it to put pressure on your enemy’s hard-to-take terrain and/or fortifications—lowering their defensive advantages—or even as an end-run advance. This result can also happen by a CRT result, to be resolved next turn, representing a drawn-out engagement. There are myriad possibilities for a well-timed counterblow, but alas all of this fancy footwork often has a cost in Event cards, and you never have enough of those!
All is Quiet on the Italian FrontI strongly recommend using the Advanced Rules’ “Attri-tion” table. This was added for the frequent “lull” turns; it not only speeds up play, but is a pretty good historical representation of the long stretches of inactivity seen by both sides, especially during bad weather. The normal combat tables portray the same thing, but will demand more of that precious play time. Attrition will make the Germans sweat some more, and use some of his reserves in keeping the integrity of his front line, stopping the Allies getting good jump off points for their next Major Offensive. Use it!

No Retreat! The Italian Front Playbook18
© 2015 GMT Games, LLC
Roads to VictoryYou really have to carefully read and make sure that you understand Game Rule 20.0, “How to Win”. While the scenarios have their own, separate victory conditions, that rule explains how to win the Campaign Game. There are many roads to victory, and they are all important. The Automatic Victory is straightforward and works as most traditional wargamers might expect: capture a lot of key cities and kill lots of enemy units fast and you might dramatically win the game right away. The Sudden Death Victory is subtler and keeps players paying closer attention to the current VP score. Here is how it works: every fourth Game Turn this victory con-dition is checked against a sum of VPs that the player currently with the Strategic Advantage has (the Germans during the first half of the game; the Allies during the latter half; and both sides on Game Turn 12). If that player has sufficient VPs at that moment, and the opponent’s Main Leader was sacked, the game is over and that player wins outright—if he controls Rome; if not the game continues. So you’ll have one more chance to get the victory’s pen-dulum swinging your side if you did not lose your Main Leader, or if you hold the all-important Italian capital. A sufficient sum of VPs for Sudden Death to occur is not that easy to get, but not impossibly hard to obtain either. This fact will stop your opponent from becoming complacent; i.e., from knowing in advance what the historical outcome of the war was (“Bah, I can just withdraw and lose the ground south of Rome without a fight! The Allies will be withdrawing lots of units soon for the invasion of southern France. I’ll just trade space for time in the meantime”). Finally, there is the Operational Victory. If things go that far without an Automatic or Sudden Death winner, then the more territory the German player has retained by Game Turn 12 (i.e., when they place their High Tide marker on the Victory Point Track), the better his chances of salvaging a victory out of a bad situation. If the German player was timid and didn’t keep as much Italian land as possible, chances are he will not win via this condition. Or perhaps he could win if the Allied player has been equally timid and did not push north far and fast enough! One thing is certain: the German player has to keep as many of his units “alive” as possible for a cautious defense approach to work. The tricky part is that the entire Axis front can crumble surprisingly fast in the middle of 1944, when the Allies are at their strongest! If you want a very short game, try to get a lot of your units killed while being Out of Supply, never do the same to your opponent, and never play for the Event cards giving you VPs: that is a sure road to ruin!
Orders of Battle For a relatively small wargame, a large amount of his-torical research was involved. I studied the actual per-formance and locations of all the divisional units of this campaign, and this in one-month steps (one game turn) from 1943 to 1945. Within the rigid 88-square counter limits of the NR series, a simulation engine of the relative strengths and weaknesses of the two sides in presence was created. Having a good, complete OOB was doubly diffi-cult because of the many reinforcements and withdrawals that liven up this campaign. Most of the time I was able to portray the great majority of the formations that fought in Italy, with some simplifications when needed; like the generic Italian round counters, the tank brigades included in some larger units, as the paratroop regiments integrated in the commando counters, etc. You should be able to represent most historical situations of the campaign with a reasonable degree of accuracy using the game pieces included, despite the minor fudging that had to be done. You may have noticed that for many units the strength on a counter’s reverse side is not much lower than its full-strength side. Why? While most of the fighting strength of the divisions was spread over many arms (infantry, artil-lery, engineers, armor), the “poor bloody infantry”, which comprised only around 15% of the strength, suffered 90% of the casualties! It means that a division could suffer lots of losses and still conserve a good portion of its fighting strength. But at one point the losses in foot soldiers will make the unit unable to fight effectively, so the unit is eliminated in the game, while in reality the majority of the troops are alive and well. The German formations (having in general more up-front strength in infantry and short-range weapons like mortars) could hold their own longer than, say, most 8th Army units (British and Com-monwealth) that were suffering from an infantry shortage at this late stage in the war. I have put white strengths on the reverse sides of these units to show that they can still give a good account of themselves in defense, but do not have enough “grunts” left to undertake offensive opera-tions. For example, a British division of around 12,000

No Retreat! The Italian Front Playbook 19
© 2015 GMT Games, LLC
men had about 5,000 men in the combat arms, including less than 1,600 infantrymen. If it took 800 casualties in a week of offensive operations this meant that 50% of its frontline strength was gone—it could not remain ef-ficient in the attack anymore! On the opposite side of the spectrum, the Americans had a far bigger replacement pool and could keep units on the attack longer, thus their strength numbers are black on both sides. The late-war weak German divisions still represent a lot of troops on the ground, and even if their basic strength is not much (“2” in most cases), they are able to keep the same even after taking substantial losses.Note that the new Leader cards will allow you to explore some plausible alternative history OOBs, allowing some units to stay in Italy longer than they did historically, or even make an unplanned appearance (such as the “Rom-mel” or “Model” units).Below is a graphic representing the maximum Force Levels for both sides over the game’s 22 monthly turns. As you can see the Allies do not have a huge advantage in numbers or unit strength. They make up for that in special cards, Shock! markers, and other resources. Still, the Germans have all those fortified lines, narrow front, mountains, rivers, mud weather, etc. Both parties are in for a real “uphill” battle!
Some HistoryHere is not the place for me to explain in full detail this riveting campaign—there are excellent books out there that do it better justice—but here are some historical facts that I think stand out and show that the Italian front was not a mere side show: • The conflict on the Italian front spanned over 22
months, and the Allied armies suffered over 310,000 casualties; by comparison, the battles in northwest Europe caused about 770,000 Allied casualties.
• The number of troops landed in Sicily during Op-eration Husky rivals the amount landed on D-Day in Normandy; in fact a case could be made that it was slightly larger.
• The German losses were somewhat higher than the Allies’, even when mostly defending in strong moun-tain positions. The Allies’ overwhelming advantage in firepower, artillery and air power accounts in part for this (German Russian front veterans often said it was far worse to be under a British artillery bombardment than anything they endured from the Soviet Army), but the German tactic of defense by aggressive counter-attacks also caused the extra casualties.
• Given the disproportionate difference between both sides’ military resources, one can wonder how the Ger-man defenders—mostly marching on foot, with few guns, low supplies, and virtually no air support—could hold their own against two Allied armies equipped with thousands of guns, tanks, airplanes, and supplied by the industrial might of America. Yet they did!
• The “Forces of Democracy” prevailed at the end, but with more planning and decisiveness, perhaps the Ital-ian campaign could have been concluded in favor of the Allies far earlier than historically happened, putting even more preassure on Hitler’s crumbling empire. Or perhaps, with more resources, the Germans could have shut down for good the gates of Rome, denying the Al-lies access to the peninsula up to the bitter end.
This game will help you find out how and why things hap-pened the way they did in Italy in 1943-45, and explore what might have happened if the generals in charge had acted differently. To paraphrase a famous Avalon Hill game’s box blurb: “Now you command in this realistic Italian campaign game”. Even if your armies are crum-bling, supplies missing, troops deserting, hang on com-mander, as there is No Retreat!
ConclusionI hope you have fun playing this deluxe version of No Retreat! The Italian Front, and that this intense little game gives you some insight on what transpired during this grueling and tragic campaign. Following these notes are some more basic tips for both players. I am looking forward to your comments, suggestions and replays on the game’s discussion folder at www.consimworld.com and www.boardgamegeek.com.

No Retreat! The Italian Front Playbook20
© 2015 GMT Games, LLC
[7.0] PLAYER’S NOTESHere are a few rough guidelines on strategy and tactics. The game is a bit harder to learn than the first of the se-ries, but is not otherwise very complicated for seasoned wargamers.
German OKW Directives(Holding “Sunny” Italy)• Use your forts, build
as many as possible! These markers are invaluable in lower-ing the losses that your units will most certainly take, as each can absorb one step loss on an EX result, and give a one CRT shift left. Their good use is pivotal for your success; if you can spare a few from the frontlines they can cover beach hexes effectively even if garrisoned by weak units, or make for a second line of defense.
• Counterblows are your friend: even just a few can do wonders in foiling Allied concentrated attacks against your frontline, especially if used on “Robust” units that the enemy will have to attack back, diverting some of their strength from their main objectives.
• Keep a close eye on your casualties! Your elite units cost double to flip back to their high-strength side; careless usage will put you on the losing side of the attrition war! If you attack with them, do it decisively, quickly, using high odds if at all possible and try to limit your losses.
• The Allies usually will not have a huge advantage in apparent strength, except during a few critical mo-ments. This can be misleading as they have some very strong Event cards, and better replacement capabili-ties, so never become complacent, especially if you suspect that a naval invasion is coming!
• If you are looking at the enemy behind rows upon rows of rivers, mountains and forts, then all is well: let the “Amis” come at you. But if part of your front is in clear ground without any forts for protection, in
clear weather, during a Major Offensive, then you’ll most probably bleed.
• Always keep some troops in the Reserves Box to quickly reinforce threatened areas, plug unforeseen holes in your frontline, or send fresh units where you are making progress.
• Have a goal, even if it’s only to defend a critical piece of ground. Pay attention at what the Allies are doing, as you’ll probably have to react to their attacks sooner rather than later. Build a reaction force; you can’t be strong everywhere, and choose your fights carefully!
• Your army will inevitably dwindle in quality in the lat-ter stages of the game, your elite units being replaced by low-strength infantry divisions, making the use of good defensive terrain and forts more important than ever. You’ll have enough cannon fodder to put up a tough defense, but your ability to fix broken parts of your line will be far more limited, so try to attrit the enemy as much as you can to impede their offensive capabilities. The British 8th Army is a prime target for this ploy as they have a lot of counters that have white strength factors on their flip-side.
The German War Years in Review (The Interminable Withdrawal)1943: Your early situ-ation is a paradox; you don’t have a lot of German units on the map, yet they are all of excellent quality and very mobile, while the majority of the rest are indifferent, weak-strength Ital-ian units. Don’t you dare to belittle Mus-
solini’s legions! They represent a sizeable part of your initial strength, and can temporarily hold parts of the line while you are busy elsewhere. The 2-strength Italian two-steppers can be surprisingly effective if stacked with their comrades in good defensive terrain. Eventually il Duce will be ousted and the new government will ask for an Ar-mistice, the timing of which depends on where the Allies invade first. An attack on Sicily, with many easy objec-tives, will see the quick departure of Italy from the war. But if they attack the mainland right off the bat, perhaps

No Retreat! The Italian Front Playbook 21
© 2015 GMT Games, LLC
even risking an invasion near Rome, you could witness the Italian army staying far longer on the field of battle.After the Italians quit the war, you’ll have a rough time for a few months before you can stabilize your line with new reinforcements coming from the north and fortified positions: trade ground for time or use your elite units to hold the line without retreating, but this can be costly in expensive “Robust” unit step losses. If at all possible try to save as many Reserve Points as you can, or the end of the year might have you looking at a huge Allied Reserve Point stockpile, while your own supply stores are empty before winter allows you to re-plenish your strength. Remember: mud and rain are your best friends and allies. In bad weather it might be better to lose a bit of ground, not using your precious cards for their Events; be frugal! Ah yes, watch out for a possible surprise “end run” Allied naval invasion that could outflank your painstakingly built fortified positions …and try not to lose Rome!1944: Yes, things will get worse. Springtime will prob-ably see you facing a very strong Allied army, reinforced by lots of armor, infantry and that troublesome French Mountain Corps. Don’t kid yourself; you’ll have a very rough time of it for a good 3-4 months—until enemy units start to leave Italy to prepare for the invasion of southern France in July. Sadly, that time will see some of your best mobile units disappear too (other disasters in Europe beckon them). Your main concern should be to save as many troops and resources as possible, while retreating as slowly as you can. Try to have a line of forts ready for the survivors to occupy on the south edge of the Northern Italy map right before muddy weather appears. Lots of warm (but poorly-trained) bodies will also come to help shore up the line in Autumn 44. If you have kept the enemy out of the northern map altogether, you are do-ing a good job! On the contrary, if you are barely holding the last mountain range in front of the north Italian plain, things are bad! Try using the winter’s respite to play as many VP-giving Event cards as you can to compensate a bit for your failures on the ground.1945: The writing is on the wall for Hitler’s Thousand-Year Reich. If the game is still going at this point then a lot more good men are going to die before this is over—make sure they are not your own. Now is the time to re-ally defend at all costs what is left of German-occupied Italy. Check the VP count and get a good estimate of what amount of ground you can afford to lose and still win the game—then hold most of it! If the Allies are low on resources (you certainly will be!) and/or the front line is way south you might have a good chance of delaying the
inevitable long enough. Just be aware that at this point in the war your armies may suddenly crumble, so keep a good watch on the warning signs: lots of flipped units, low card stock, lost mountain tops, a cocky smile on your opponent’s face, etc. You might have to attempt some last-ditch Italian-style “Custer’s Last Stands” around what is left of your Map Objectives, but do not—I repeat, do not— let your units go to the Surrendered Units Box in the closing turns, especially if the Event VP marker is scor-ing in your favor, or you’ll certainly lose in a spectacular Götterdämmerung game finale.To conclude, in victory or in defeat, try to follow the footsteps of Generalfeldmarshall Albert Kesselring, and keep on smiling!To give you an idea of the evolution of the campaign, below is a map of the historical frontlines and invasions:

No Retreat! The Italian Front Playbook22
© 2015 GMT Games, LLC
Allied Expeditionary Forces Directives(Taking the Soft Underbelly of Europe)
• Most of the time you’ll be able to rebuild your army, even after a long and grueling Major Of-fensive. But don’t over-extend yourself or you might lose precious months licking your wounds, giving the Ger-mans an undeserved break!• The majority of the terrain in Italy is bad for mobile operations, bad for tanks, bad for air support, difficult even for seasoned infantry
units to take, and “sunny” Italy is not. The Germans will love it and excel at these head-on defensive battles. Sometimes you’ll get a Breakthrough, but usually you’ll be thankful just to get an EX combat result, making the foe bleed as much as you! Keep up the pressure and try not to attack too many Fortified positions at once unless this pushes Kesselring’s troops past their breaking point.
• The use of Counterblows—forcing the enemy units to counterattack during their owner’s player turn—can be very effective against a complacent or incomplete defense line, especially if you have a lot of Shock! markers to use during the Counterattacks, or if you made some headway during your own turn. You saved enough Reserve Points and have the extra cards to pay for these, right? You have the Free World’s industrial might backing you, so no excuses!
• Always keep some units in the Reserves Box for rein-forcing an unexpected breakthrough and for threaten-ing to execute a sea invasion.
• If there is a weak point in the German lines, pound it mercilessly! The force ratios are not much in your favor, so take any opportunity to cause your foe as many losses as you can.
• If you do a second (or even a third) mainland inva-sion to outflank the fortified mountain lines, do it decisively—and have a sound fallback plan if things go awry. And make sure you have checked how many reinforcements the Germans can bring smashing against your beachhead during the landing turn. You
may be surprised how fast they can get at you! A large diversionary attack on the main front might be needed to keep them busy.
• Again, be careful with your invasions! They can be rousing successes, but also unmitigated disasters. Never underestimate the enemy’s elite units’ attack potential if they decide to go “all in”. Plus those fancy naval affairs will cost you precious Event VPs.
• You will have more Event cards than your opponent can get, far more Support markers too. Use that supe-riority to offset his defensive advantages. The possible “killer” card combinations will help you make local attacks, attrition fights, or well-prepared Major Of-fensives. Study those cards well, as they are the keys to the gates of Rome, and victory!
The Allied War Years in Review (The Endless Advance)1943: If using the Standard Campaign Game, you’ve got one pretty serious command decision to make right from the start, i.e., what location do you invade first? There are quite a few interesting possibilities, some safer and pre-dictable, some more tempting, exciting, and dangerous! Following is a map of the actual and planned-but-not-executed Allied invasion plans for you to ponder about.
So what are your options?The safe, historical route is to invade Sicily first. There is a large Italian garrison, but it’s hard for the Germans to reinforce, plus lots of objectives and good ports are within easy reach. This will help bring about the quick

No Retreat! The Italian Front Playbook 23
© 2015 GMT Games, LLC
downfall of Mussolini, and you have good air support from Malta and North Africa. You can’t go wrong here. However, if you want to get into the thick of things faster, you could bypass Sicily and aim for South-ern Italy; the landings are risky as you are outside air cover and what is left of the Ital-ian navy could cause some trouble. There are few easily reach-able objectives so the Armistice could come much later than expected, but at least you’ll be on mainland Italy right from the start. Then there is the drastic solution: invade near Rome on the central map! There are two ways of doing this, either you take the less risky ploy of first going for Corsica/Sardinia, giving you much needed air cover from the captured airfields and some ports. This will take one full game turn to accomplish, netting you zero Objectives, and makes your intentions pretty clear to the German player who will be able to redeploy his garrisons accordingly for your next turn invasion. Or you could go straight for Rome: unless you are lucky in your landing rolls and can capture the capital in a quick coup de main, expect a very hard fight, with the Germans getting extra mobile units from their Northern Italy garrisons, and the help of the numerous Fascist divisions on the central map. Either you’ll succeed, bypassing the Italian boot’s defensive bottleneck around Cassino, or you’ll end up with a mega-Anzio “stranded whale” beachhead impossible to break out of, and few well-protected ports. Whatever you choose to do, if you end the year with a solid frontline partly on the Central Italy map and Mussolini’s legions out of the war, you have done well.1944: OK, you are ashore in Italy, probably with two maps completely in your control. The weather is bad for the first few months of the year and you’ll probably not have the opportunity for big territorial gains before summer when more reinforcements arrive. But this does not mean you have to stop putting pressure on the Ger-mans—au contraire! Now is an excellent time to build up your Reserve Points while perhaps making an invasion to outflank the fortified line you are sure to find in your way. Who knows? You might even succeed where Allied com-
manders historically failed and unhinge the whole Nazi defensive system much sooner than happened historically! When good weather comes, put the American-British war resources superiority to use and your Major Offensive into high gear! You must capture Rome when Turn 12 comes around and the initiative changes; if not the German High Tide marker might be on an unreachably high VP number, making an end-game victory extremely hard. And don’t forget that a lot of your best units will soon depart for other European fronts, leaving you with far fewer troops to continue your offensive. Destroy as many enemy forts as you can before the withdrawals and kill as many German elite units as you can during any mobile battles after you crack open the front. This is a critical time in the game; keep your foe off-balance and attack, attack, attack! Aim to have a serious foothold on the Northern Italy map by October. Even better: surround and kill by surrender a handful of Boche divisions. This could put a big dent in your opponent’s game resources, and he’ll need as many as he can spare in the upcoming fight for the last good mountain defensive positions up north. 1945: By this time, you have already pushed Hitler’s army out of Italy (congratulations for a great victory!), or you are still facing yet another fortified, mountainous, river-covered defense line. Your opposition probably consists mainly of low-quality units; the German war machine is scratching the bottom of the proverbial bar-rel. Don’t be complacent! Your enemy can still absorb a good amount of losses (especially if they were able to build many forts), plus your window of opportunity is not great: the weather is muddy but for the last turn of the game. Hasten the inevitable disintegration of the enemy’s armies by applying unrelenting pressure during all the months despite the bad climate. Don’t be afraid to take losses and use most of your reserves: they will not be of any use once the game is over! If you can get your tanks past the last mountain range and rolling into the Italian plains, you should be in an excellent position to demand the unconditional surrender of all German forces in Italy. But if you are facing a competent opponent, you’ll have to work at it until the very last die roll! The Swiss frontier beckons, one last push and all the blood, sweat and tears shed over the last years of the campaign will finally earn you the laurels of victory! Yet, in the end, the history books will not care much, as The Big Show is happening elsewhere, in Northern Europe …SNAFU!

No Retreat! The Italian Front Playbook24
© 2015 GMT Games, LLC
[8.0] HISTORICAL NOTESVae Victis!I will not delve into the historical minutiae of the cam-paign; instead I’ll focus attention on the main actors of this “Italian Drama”: the leaders and the military units. But first, here’s a turn-by-turn overview of the Italian front battles.Allied Goals: The Allies primarily wanted to topple Mussolini and knock Italy out of the war so they could at-tack Germany directly and relieve the Soviet Union from Nazi military pres-sure. The secondary purpose was to tie up enemy forces that might be used to resist the upcoming D-Day inva-sion. The captured airfields in Italy were also of great importance in the strategic bombing of Germany and German-held territories, such as the oil fields in Rumania. Many Allied commanders didn’t think the German Wehrmacht would defend Italy and assumed the campaign would be completed by the middle of 1944. There were even plans to move the troops around the Alps and into Vienna!You can follow the frontline evolution using the map on page 21 while reading the major events described below.Sicily Invasion, Turns 1-2: The 8th British and 5th US Armies landed on Sicily in July 1943. General Patton was selected to lead the attack on the left flank, General Mont-gomery the right. On July 25th King Victor Emmanuel III overthrew Mussolini. The Italian monarchy then made an armistice with the Allies. The Germans rescued Mussolini from prison and set him up as the leader of a new puppet republic in Northern Italy.Mainland Italy Invasion, Turns 3-6: On September 3rd, Montgomery landed at the toe of Italy after an ex-tensive artillery bombardment. The 5th US Army landed at Salerno a few days later. The Italian government sur-rendered and ordered Italians not to resist. Soon, both armies had captured the lower part of Italy, including the Foggia airfield and the valuable port of Naples. By Turn 6 the Germans had retreated to the natural fortresses along the Liri Valley just south of Rome. The Allies were about to attempt something that had only been done once in Rome’s history—capture “The Eternal City” from the south!
Battles for the Gustav Line, Turns 7-10: The British had a hard time along the east coast because of the many rivers and ridges crossing their route. Near Cassino, the US had a setback at the crossing of the Rapido River (near the bottom of the Central Italy map). One Allied corps was landed farther north behind German lines at Anzio on Turn 7 but did not succeed in breaking the deadlock. After three successive offensives were made against the fortified lines it all ended in a stalemate. An estimated 180,000 men of both sides were killed or wounded dur-ing this period. Capture of Rome, Turns 11-15: After receiving more units, the Allied armies renewed their offensive on May 11, 1944. The Gustav Line was broken and by June 4th the two Allied armies had linked up and advanced into Rome, the Germans giving it up without causing further damage. On Turn 15 Kesselring’s troops fought a delay-ing action as they retreated into their major defensive line in the last mountain range before the Italian plain north of Firenze.Stalemate on the Gothic Line, Turns 16-19: Germans were solidly installed on the “Gothic Line” along the backbone of the northern Apennine Mountains. Again, the British attacked along the east coast. The main crossing of the Apennines was located at Futa Pass (the road between Firenze and Bologna on the Northern Italy map). It was heavily defended so the main attack was directed to the east of that position. Fighting devolved into a gruelling infantry battle, as several large peaks had to be assaulted. Both Allied armies were drained of men, as units had been pulled out for the invasion of Normandy and southern France months before. Without sufficient reserves, the fighting drew to a stalemate due to bad weather as the second winter in Italy set in. Final Advance into the Po Valley, Turns 20-22: Some new Allied units finally arrived, most notably the US 10th Mountain Division, which was used effectively during late winter operations. On the last turn of the game, the British initiated a major offensive towards Bologna; this was followed by an American attack on a parallel axis. After the fall of that city, the Allies completely pushed the Germans out of the mountains and raced across the Po River valley. Amid much confusion, they rapidly chased the two retreating German armies into the Alps, where they finally surrendered on April 29th, 1945.
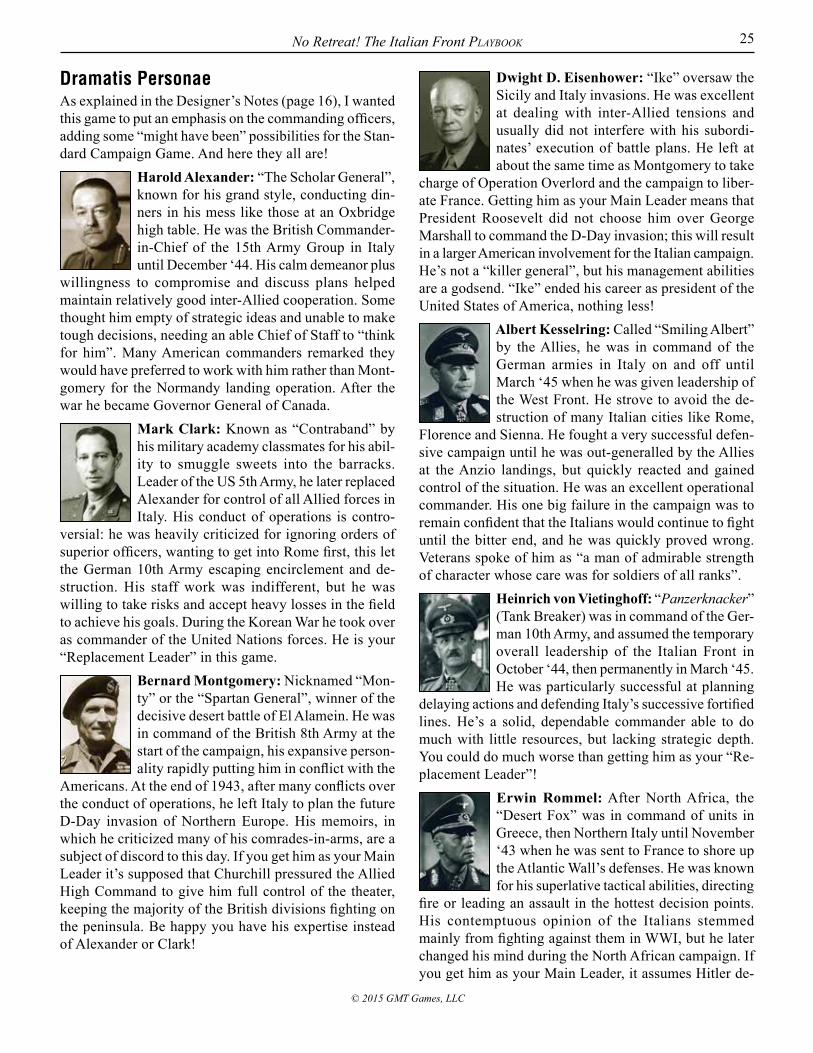
No Retreat! The Italian Front Playbook 25
© 2015 GMT Games, LLC
Dramatis PersonaeAs explained in the Designer’s Notes (page 16), I wanted this game to put an emphasis on the commanding officers, adding some “might have been” possibilities for the Stan-dard Campaign Game. And here they all are!
Harold Alexander: “The Scholar General”, known for his grand style, conducting din-ners in his mess like those at an Oxbridge high table. He was the British Commander-in-Chief of the 15th Army Group in Italy until December ‘44. His calm demeanor plus
willingness to compromise and discuss plans helped maintain relatively good inter-Allied cooperation. Some thought him empty of strategic ideas and unable to make tough decisions, needing an able Chief of Staff to “think for him”. Many American commanders remarked they would have preferred to work with him rather than Mont-gomery for the Normandy landing operation. After the war he became Governor General of Canada.
Mark Clark: Known as “Contraband” by his military academy classmates for his abil-ity to smuggle sweets into the barracks. Leader of the US 5th Army, he later replaced Alexander for control of all Allied forces in Italy. His conduct of operations is contro-
versial: he was heavily criticized for ignoring orders of superior officers, wanting to get into Rome first, this let the German 10th Army escaping encirclement and de-struction. His staff work was indifferent, but he was willing to take risks and accept heavy losses in the field to achieve his goals. During the Korean War he took over as commander of the United Nations forces. He is your “Replacement Leader” in this game.
Bernard Montgomery: Nicknamed “Mon-ty” or the “Spartan General”, winner of the decisive desert battle of El Alamein. He was in command of the British 8th Army at the start of the campaign, his expansive person-ality rapidly putting him in conflict with the
Americans. At the end of 1943, after many conflicts over the conduct of operations, he left Italy to plan the future D-Day invasion of Northern Europe. His memoirs, in which he criticized many of his comrades-in-arms, are a subject of discord to this day. If you get him as your Main Leader it’s supposed that Churchill pressured the Allied High Command to give him full control of the theater, keeping the majority of the British divisions fighting on the peninsula. Be happy you have his expertise instead of Alexander or Clark!
Dwight D. Eisenhower: “Ike” oversaw the Sicily and Italy invasions. He was excellent at dealing with inter-Allied tensions and usually did not interfere with his subordi-nates’ execution of battle plans. He left at about the same time as Montgomery to take
charge of Operation Overlord and the campaign to liber-ate France. Getting him as your Main Leader means that President Roosevelt did not choose him over George Marshall to command the D-Day invasion; this will result in a larger American involvement for the Italian campaign. He’s not a “killer general”, but his management abilities are a godsend. “Ike” ended his career as president of the United States of America, nothing less!
Albert Kesselring: Called “Smiling Albert” by the Allies, he was in command of the German armies in Italy on and off until March ‘45 when he was given leadership of the West Front. He strove to avoid the de-struction of many Italian cities like Rome,
Florence and Sienna. He fought a very successful defen-sive campaign until he was out-generalled by the Allies at the Anzio landings, but quickly reacted and gained control of the situation. He was an excellent operational commander. His one big failure in the campaign was to remain confident that the Italians would continue to fight until the bitter end, and he was quickly proved wrong. Veterans spoke of him as “a man of admirable strength of character whose care was for soldiers of all ranks”.
Heinrich von Vietinghoff: “Panzerknacker” (Tank Breaker) was in command of the Ger-man 10th Army, and assumed the temporary overall leadership of the Italian Front in October ‘44, then permanently in March ‘45. He was particularly successful at planning
delaying actions and defending Italy’s successive fortified lines. He’s a solid, dependable commander able to do much with little resources, but lacking strategic depth. You could do much worse than getting him as your “Re-placement Leader”!
Erwin Rommel: After North Africa, the “Desert Fox” was in command of units in Greece, then Northern Italy until November ‘43 when he was sent to France to shore up the Atlantic Wall’s defenses. He was known for his superlative tactical abilities, directing
fire or leading an assault in the hottest decision points. His contemptuous opinion of the Italians stemmed mainly from fighting against them in WWI, but he later changed his mind during the North African campaign. If you get him as your Main Leader, it assumes Hitler de-

No Retreat! The Italian Front Playbook26
© 2015 GMT Games, LLC
cided that a more aggressive stance was needed in this theater: you get extra mobile units that were in garrison in Northern Italy and historically left early. Try to win fast, as in the long haul Rommel will not do as well de-fensively as the other commanders. If he leaves the game, his role in the plot against Hitler caused his demise and suicide…
Walter Model: An aggressive Panzer com-mander, his expertise in rebuilding broken fronts in Russia earned him the nickname of “Führer’s Fireman”. He then fought in the West, from Normandy to the final defeat in the Ruhr. If you get this leader it’s consid-
ered that the German OKW used his tenacious style of fighting to make a more “active” defensive stance in Ita-ly, earning the extended stay of many good quality infan-try units. He is a good all-around commander who will allow you to attack more effectively and then use a lot of Counterblows in the enemy turn, in a series of one-two punches that could be devastating to your opponent—or may cause you heavy losses if things go awry. He com-mitted suicide in April ‘45 rather than be captured by the Allies.
Oblitus Legiones (Forgotten Legions)The relatively low number of divisions present in this game on both sides gives me the opportunity to look in some detail at military units of both sides that fought on the Italian “Forgotten Front”. Their diversity was stu-pendous, but most of the fighting was left to the “Poor Bloody Infantry”.German Units: The Wehrmacht fielded a bewildering assortment of troops in Italy. At the start of the campaign most were mobile units of excellent quality but their num-bers dwindled as more and more of those elites were called to shore up other fronts, being replaced by second- or even third-line infantry formations. Yet, most of the “krauts” stayed and soldiered on until the bitter end.Fallschirmjägers: Three paratrooper divisions make an appearance in the campaign. The 1st Fallschirmjäger Di-vision is probably the best unit in the game, and defended the Cassino position against all odds for months. A good number of the 4th Fallschirmjäger Division combatants were volunteers from two disbanded Italian airborne divi-sions. They are solid units you can always depend on to hold their positions against all comers.
British Commander Harold Alexander said of them dur-ing the Cassino battle: “No other troops in the world but German paratroops could have stood up to such an ordeal and then gone on fighting with such ferocity.”
Panzergrenadiers: The German OKW sent a large number of these to Italy as they were found to be more effective than tank units due to the difficult terrain and mainly defensive stance of the frontline. They are the most mul-tipurpose units in the German arsenal. Most notable was the 15th Panzergrenadier (formed from the 15th Panzer of Afrika Korps fame), and the 29th Panzergrenadier, both of which fought from Sicily until the final capitulation.Not surprisingly, the 16th SS Panzergrenadier was implicated in many large-scale massacres of Italian civilians while on anti-partisan duties…
Panzers: Not many of these formations fought for long in theater; all but one, the 26th Panzer, leaving for other fronts. Remaining tank support consisted of smaller units represented by the two Tiger and Panther tank counters: their use was not extremely successful, due in large part to Allied air superiority, bad terrain, and lack of fuel late in the campaign. Still, a substantial number could have been engaged, especially in 1943.
The “Hermann Göring” Parachute Panzer Division is notable from the equipment lavished on it by its Luftwaffe namesake, and includes many attached sub-units, like a whole Nebelwerfer rocket artillery brigade.
1st & 2nd Line Infantry: These are the 3- and 4-strength infantry counters. Quite a few of these “no frills” de-pendable troops will be available to anchor the German defensive line while the glamorous elite troops will get all the propaganda reporters’ attention. They are repre-sentative of the “low profile” horse-drawn divisions that comprised the majority of the Wehrmacht during WW2. An exception is the 715th Mot Inf, fully motorized using “war booty” trucks of French origin. Strongest of the lot, the 44th HuD (Hoch und Deutsch-meister) was an “old army” Austrian unit that had its roots in a regiment formed in 1696 and performed admirably.
3rd Line Infantry: These are the 2-strength counters. They represent the late-war German Army’s “bottom of the barrel” troops that are low on equipment, qual-ity and initiative. Nevertheless, they were able to hold their own in circumstances that would have seen many other troops quit. During the Italian campaign, many such units replaced departing elite formations. By this time there was not much they could do but hang on in their fortified positions as best as they could. They have white “cannot attack” strength values. The 19th and 20th Luftwaffe divisions are especially bad, consisting mostly

No Retreat! The Italian Front Playbook 27
© 2015 GMT Games, LLC
of German Air Force ground personnel largely untrained in infantry combat. One notable exception is the 278th Infantry Division; it successfully fought a ferocious defensive battle near Ancona in July 44, against none other than the whole Polish II Corps!
Mountain & Light Infantry: Many Gebirgsjäger and Jäger (lightly-equipped) divisions were sent to fight in Italy. They were perfectly adapted to the mountainous terrain and bad weather conditions, able to move across obstacles considered impassible to other troops. The High Apennines are their operational area of choice. The 5th Gebirgsjäger is the best of the lot, and includes many smaller sub-units. It took part in the invasion of Crete in 1941, being deployed by emergency air transport to the island when things got bad for the attacking airborne troops, saving the day.
Fascist Italian Army: In July 1943 the “writing was on the wall” for Mussolini’s battered legions. Most of the best troops were already lost in the sandy expanses of North Africa, or in snowy Russia. Many others were busy garrisoning the Balkans, leaving precious few to defend Italy proper. A lot of the rest were very low qual-ity Coastal Defense units, represented in the game by the Static round counters. Only a few were somewhat mobile, with decent equipment and soldiers willing to fight; these are the 2-step counters. After a sharp fight in Sicily all but a few die-hard Fascist elements surrendered to the Allies in September 1943; the Germans then disarmed and sent over 600,000 Italians to labor camps. German-controlled Italian divisions appearing late in the game are from Mussolini’s puppet “Republic of Salò” government; they fought mainly their own countrymen’s partisan bands in northern Italy, most “volunteers” joining to avoid going to the camps. Given the low counter mix in the game I had to make these units generic; most will not last long in a stand-up fight with the Allies.
Fortified Lines: The Germans made extensive use of fortifications, the most famous of which were the Gustav Line (or Winter Line) hinged on the Cassino position, and the Gothic Line, where they made their last stand in 1945. Tens—if not hundreds—of thousands of Italian civilians were conscripted by Organization Todt (German Labor Service) to work on building successive fortified positions consisting of hundreds of bunkers, massive minefields, boobytraps, pre-registered artillery points, anti-tank guns etc. Given the already difficult terrain present in Italy, these lines presented a formidable challenge to the ad-
vancing Allied armies. Many, like the Gustav Line, were able to stop them for months on end.Numerous Panzerstellung (a camouflaged tank tur-ret atop a concrete emplacement) were used in Italy. Even more unique was a movable all-steel shelter that could accommodate two men and a machine gun firing through an armoured cupola—only a direct shell hit could disable it.
Allied Units: The Allied armies in Italy fielded troops from a rainbow of nationalities ranging from fair to excellent. Their war resources were multiple times big-ger than those of their opponents, but units engaged on this “forgotten front” experienced a shortage of ground fighting personnel that firepower alone could not make up for. The many American, French and British veteran divisions left for the invasion of France during summer ‘44, to be replaced by an amazing diversity of hodgepodge formations.British Troops: The British had the most units present in this theater at one time or another. Many of the divisions were full of veterans who had fought Rommel in North Africa. They used lots of armor during offensives, some-thing not always possible due to the difficult Apennine terrain. The infantry is generally of good quality, besides a few tired divisions (the 50th and 51st) that mutinied for a few days when earmarked to go fight in Italy again instead of being sent back to England as promised. The main problem plaguing the 8th Army’s commander was the difficulty of replacing losses in infantry, making him very careful using troops offensively, thus most non-tank counters have a white (non-attacking) backside. You may have noticed that two Armored counters have “Churchill” tank profiles; a lot of these vehicles were used, because—even if slow moving—their heavy protection and ability to climb steep hills made them ideal in Italy.
The British 78th Infantry Division was the only one of the Allied divisions that fought in Italy/Sicily from beginning to end. Even if understrength it always performed creditably. The commando unit includes the 2SS (Special Service) and the 2nd Airborne brigades. It was often assigned tasks in the high Apennine terrain for lack of specialized mountain troops.
American Troops: The US Army in Italy went through a major transformation during the campaign. At first, in Sicily, it was made of seasoned and effective units under Patton’s generalship (the 5-strength counters), gradually these were withdrawn and replaced by less experienced divisions (the 4’s), then green “draftee” formations (the 3’s). Not many Armored divisions saw action in this cam-

No Retreat! The Italian Front Playbook28
© 2015 GMT Games, LLC
paign, but the infantry always had more than enough tank and tank-destroyer battalions giving them close support. Contrary to their British allies, fighting Hitler since 1939, replacements were never a big problem. The campaign saw some interesting units being put in line, such as the 442nd Regimental Combat Team, made up of Japanese-Americans, the 92nd “Buffalo” (all-black) Division; Task Force 45 (formed from troops from anti-aircraft, anti-tank or rear area services who were more needed as infantry-men), the 1st Special Service Force (an elite American-Canadian unit that fought in Alaska’s Aleutians before going to Italy), and the 1st Brazilian Division attached to the 5th Army (Brazil was neutral for a good part of the war until U-boats started sinking Brazilian ships, killing over 1,000 civilians). The US 34th Infantry Division was one of the first American divisions sent to Europe, and saw more combat service than any other, 500 days… The 10th Mountain arrived late in the campaign; it was one of the few “specialist” Mountain divisions fielded by the Allies (composed of many college men from Colorado and Vermont) and performed admirably.
French Troops: The French government-in-exile in North Africa raised five divisions of colonial troops who were sent to fight in Italy under the command of General Alphonse Juin. Most men originated from Morocco, Tu-nisia, and Algeria. These units played an important role in the attack on Monte Cassino. After the fall of Rome, French troops were pulled out to go fight in France; their presence was sorely missed when the Allies encountered the fortified Gothic Line. The counters are “US Army” green as they had American equipment and fought side-by-side with their American allies during the campaign. The mountain abilities of these units proved critical in breaking open the German frontlines.
The elite Moroccan Goums regiments, adept at mountain fighting, are included in the other French counters’ strength. Some of the troops in the 1st Free French Division fought the Germans in North Africa, notably the 13th Demi-Brigade of the Foreign Legion at Bir Hakeim.
Commonwealth Troops: Commonwealth countries sent their best men to help the British Empire, and most were volunteers. The Indians had the same personnel problems as their English counterparts, as lots of soldiers were ear-marked to go fight the Japanese in the Pacific, but they otherwise gave stellar service, especially the 4th Indian who fought at Cassino. The New Zealand, South African and Canadian divisions were rightly feared by the Ger-
man landsers. These Allied units also had fewer problems replenishing their losses, and thus have a black strength value on their counters’ reverse sides. At the last minute Churchill recommended that Cana-dian troops be used for the invasion of Sicily (the 1st Canadian replacing the 3rd British Division) as there was pressure in Canada for the troops to see major action again. Over two dozen of their regiments saw service in Italy.
Italian & Minor Troops: After September 1943 the Ital-ians who could surrender to the Allies did so and many were re-equipped as rear-area support troops, providing indirect aid to the Allies on an unofficial basis as trans-lators, guides and logistical supply unit personnel. The better elements at first formed a 22,000-man force and engaged the Germans along the Gustav Line. As Italy was liberated, the unit grew large enough to be formed into an “Italian Royal Army” of a half-dozen combat groups. These units will probably be very useful at the end of the campaign when the Allies will be stretched thin on the ground. Also making an appearance in the game is a counter representing two independent brigades made up of Greek and Jewish soldiers.
Polish Troops: Last, but not least, the Polish soldiers… These warriors traveled a long, hard road to get to Italy and demonstrated they were willing to fight the hated Germans in any location to get their country back. Poland was the first country attacked by Hitler and his dubious ally, Stalin. After the 1939 defeat, Soviet-captured Pol-ish prisoners were placed in Russian camps. Later in the war the British convinced them to release the Poles so they could help fight their new-found common enemy. They proved their mettle at Cassino, capturing it from German paratroopers, and many times again during the campaign. These high-quality troops keep their black strength combat factors on their reverse counter sides, but are a bit weaker than you might expect due to difficulty in getting enough replacements. In the latter portion of the campaign the Polish command was able to convince the Allies to recruit from soldiers who had been forced to serve in the German Army. After getting the ex-German Army Polish soldiers as replacements, the Polish 2nd Corps swelled to an impressive 110,000-man force.

No Retreat! The Italian Front Playbook 29
© 2015 GMT Games, LLC
[9.0] Examples of PlayOperation Husky Mini-GameIt’s the start of the first game turn of the Operation Husky scenario. All the Allies start in the Reserves Box. The Italian units are set-up as per the fixed setup shown on page 9 of this booklet. The HG Panzer is set up in the “Aeroporto” hex, and the 15 PzGren next to Palermo, farther to the west. Note that Invading units must start in their Reserves Box, not in Port hexes (see 10.0.A).
Starting Cards: The Allied player starts with two card draws: #39 italian auxiliaries (unplayable for its Event until Turn 12 as it sports a roundel icon; see 5.2.3), and #04 invasiOn sCare (not useful either). So no playable Events, but those cards are still worth two discards each for other uses (see 5.4). The German player starts with one card, and draws #7 sOldatenlieder (Soldiers’ Songs) which must be played immediately as per by the card’s red text. He then reshuffles it back into the deck.Reserve Markers: The Allied player has a whopping eight Reserve Points, the German player has two. Each point can be used for one free card draw.
Event Phase: The Operation Husky Event occurs automatically. The Allied player gets a free (i.e., does not need to play a card) three-week Major Offensive this turn (26.3.1). Since the sky is Sunny the offensive lasts four weeks (see 24.3).
Checks Phase: No checks happening this turn.Strategic Phase: The Allied player draws, one by one, four more cards (thus giving him six). The four drawn cards are: #14 naval OutFlank, #38 naval supremaCy, #35 OperatiOn Olive, #42 alpHOnse Juin. The last two are not playable for their Events (roundel icons); the other two might be very useful. He cannot use any of his Reserve Points for extra cards since he reached his six-card hand limit, and can’t draw Reserve markers instead of card draws as he’s at maximum there too (4 x 2 RPs markers).Note that the Allied Leader card, #52 Alexander in Command, has the “DA” ability, which allows the Allied player to discard the first drawn Allied non-red Event card in the Strategic Phase (see 25.0). However, the Allied player preferred keeping the #14 Naval Outflank card he drew first.
The German player also draws four cards: #34 FOrCed labOr, #40 Heavy mOrtar attaCks, #12 veteran nCO’s, #09 OCCupied territOry. Being a red event, card #09 must be played immediately. Following its instructions, the card is first given to the Allied player. Next, the Ger-man player draws a replacement card, #18 republiC OF salO. As per card #09’s instructions, he rolls a die; the result is a “5”. Accordingly, the German player is in-structed to move one OB Süd unit into his Reserves Box from the his Garrison Box, but alas these units are not used in the scenario, so the Event has no effect. Most of his other cards are not much help (except for #12), as two have “roundel” icons, and one can’t be used as there are no Fort builds allowed until Turn 4 (see 8.2.2). At least the “dummy” cards can be used for discards later to rebuild units. Having only four cards in hand, he could have used his Reserve markers to draw more (5.1).
The Strategic Phase Event card play now starts.The Allied player activates the Operation Husky Event (no card play necessary), thus starting a Major Offensive. The German player passes (he could play card #34 for the Event VP effect, but in this scenario VPs are not used to determine victory).The Allied player has seven cards in his hand, which is one card over the six-card maximum. He must play a card or randomly discard the excess later (12.4). Shouting “Vive

No Retreat! The Italian Front Playbook30
© 2015 GMT Games, LLC
la France!” he plays #42 alpHOnse Juin, which has no effect as there are no French units in the game yet—but it does allow him to draw a new card, #17 COmmandO raids, which is a good Event for the coming invasion!The German player passes.The Allied player could play #04 invasiOn sCare, but it would actually help his opponent, so he passes, and he still has seven cards…Since both players consecutively passed, the phase is over. There is only one Strategic Phase, which occurs at the start of the Game Turn. Only cards with the “Play Anytime” ( ) or “Play during the Strategic Phase” ( ) icons can be played in that phase. This means that some “Play in the Strategic Phase” Event cards cannot be used for their Events later in the Weekly Turns, such as the Weather Event cards.
Organization Phase: As per the Turn Track, the Allied player gets three Shock!, and the German player two Blitz!. An extra Shock! should be awarded to the Allied player be-
cause of Sunny Skies (24.3), but he also loses one Shock! as no map is under Allied Air Cover (2.13.6). Nothing else happens in this phase, as no units can be improved per scenario instruction 13, “First Turn Surprise.”Deployment Phase: The German player cannot move units into or out of his Reserves Box (again, as per the “First Turn Surprise” scenario instruction). The Allied player cannot move any units either as he controls no hexes on the map yet. In the Landing Phase he places six Landings markers in two Landing Zones (the maximum allowed; 13.6.3), but keeps one marker in reserve for possible later use with card #14 naval OutFlank.The Landings markers act as “stepping stones,” al-lowing units to move on their hex from their Reserves Box to LZ hexes, at a cost of 3MPs (13.2.2).
1st Allied Supply Phase: All units on the map are in sup-ply for now. Supply is not needed for units in the various holding boxes.At the end of the phase, the Allied player must discard one card, since he’s one over the limit (12.4). He randomly discards #38 naval supremaCy, cursing his bad luck and the probable intervention of German/Italian planes and ships that might historically explain the loss of this powerful Event.Don’t forget that Allied units are in supply on LZ hexes or on the turn they Paradrop (see 12.2.1).
1st Allied Movement Phase: The invading Allied units are moved from their Reserves Box to the LZ hexes. Some are in EZOCs (which stops them; 13.4.2), otherwise they continue onto beach hexes. Each Landings marker can “carry” one unit; the Commandos do not need any Land-ings marker to land, and can even move directly onto the coastline if near an Invasion Zone (13.6.5).
Illustration 1: Turn 1 Allied LandingsThe 82nd Abn is dropped in front of the American beaches in an EZOC and must draw one Event card for casualties as it’s doing an Opposed Paradrop (13.6.8). Card #27, extreme temperature, is drawn. Since there are no cross or roundel icons on the Allied portion of the card the drop succeeds but the 82nd must take a step loss. The text on the card is ignored and it’s put in the Discard Pile.Note that the Allied player cheated here: the 5th Brit-ish Division is not allowed to more directly from one EZOC to another EZOC!”.
1st Allied Combat Phase: The Allied player declares four Attacks, using his regular Target markers (he has a special Shock!-Target, but declines its use since it would probably cause needless losses to his troops; see 14.7.2).
The German player puts his free Shock!-Counterblow marker (the “SC” ability of his Leader) on the Italian unit adjacent to the 82nd Abn, forcing it to attack. Playing this
however causes the defender to lose the defensive bonus of the mountain hex (see Counterblows, 14.1.2). The Allied player decides to do that battle first, adding one of his Shock! markers. Initial ratio is 2:2 (1:1 odds). The Shock-Counterblow shifts the column one to the left and the Shock! one to the right, so it’s unchanged. Neither player uses an Event card. A die roll of “2” on the Allied CRT yields a “CA” (Counterattack) result. The Italian unit may launch an immediate counterattack, which it does. Initial ratio is 1:1. As it’s a new battle the previous Allied Shock! is removed (as would be any Event

No Retreat! The Italian Front Playbook 31
© 2015 GMT Games, LLC
cards). A Blitz! marker raises the odds to 3:2. The die roll is “5,” a “D” (Defender Falls Back). With only one step of strength left, the Allied player wisely decides to retreat the paratroopers east one hex, into the only available hex free of EZOCs. The Italians advance.Next, the attack on Siracusa is resolved. Initial ratio is 6:1, but the odds are 5:1, as the hex is a Port, giving a CRT shift left. The roll is “3,” resulting in “DR” (Defend-er Retreats). Given the Objec- tive city’s important nature, the German player uses a card (#40 Heavy mOrtar at-taCks) to lower the odds one column to 4:1, changing the outcome into a “D” result. Ac-cordingly, the city’s defenders do not retreat; they instead take a step loss (only units with a non-white strength value can do this). The city is now empty of troops, but the Allies cannot advance, as on a “D” result (con-trary to a “DR”) they can advance only if the defender retreated, which did not happen in this combat.
The attack on the Italian unit south of Sir-acusa is now made. The ratio is 10:2, so 5:1 odds. Taking no chances after the previous failure, the Allied player uses one of his
Shock! markers to raise the attack to 6:1+, the maximum on the CRT. No cards are played. The roll is “4,” a “DR” result. The defending unit is surrounded by EZOCs and has no adjacent friendly unit to cover its withdrawal, so it is eliminated.Note that even if “Static” Italian units have a move rate of “0” they can still retreat in combat.
Both attacking units can advance two hexes (Beach hexes are non-stopping terrain, see the TEC): first the defender’s hex, then one hex beyond.The 9th US Division now assaults the “0” Static unit at 6:1 odds. Normally the beach would give a CRT column shift bonus to the defender, but since it has 0 SP it’s always attacked on the maximum 6:1 Combat Table (14.6.9). The roll is “3,” “DS” (Defender Shattered). The Static unit retreats two hexes, and should go to the Shattered Units Box, but since it’s an Italian unit it is eliminated instead and is returned to the draw cup (21.8). The victors advance two hexes.
Illustration 2: Allied First Combat PhaseThe last attack is now done, 6:1 odds again. The roll is “6,” resulting in a red “DD” (Defender Destroyed). The defending Italian unit is eliminated. Since the combat result is red, one of two things can happen: the 1st US is a mechanized unit, and could advance three hexes, or a Tank/Panzer or Allied Mechanized attacker may put a Second Combat marker if not advancing more than two hexes, and into non-advance stopping terrain. The Allied player elects to do the latter action with the 1st US; the 3rd US moves next to it as flank protection.
1st Allied Second Combat Phase: The Sec-ond Combat against the Italian 2-strength unit is now resolved. No Combat Support or Event cards are allowed in Second Combats (15.2).
The ratio is 6:2, thus 3:1 odds. The Mountain terrain low-ers this by two-column shifts to the left, to 3:2 odds. The die roll is “6” again, a “D” outcome. Not wanting to give up the position the German player decides to lose one step, flipping the counter to its white 1-strength side. This ends the Combat Phase.
Illustration 3: Allied Second Combat Phase

No Retreat! The Italian Front Playbook32
© 2015 GMT Games, LLC
The German player could have used his #12 Veteran NCO’s to reroll the combat result, but decides to keep it for more important battles.
1st Allied Reserve Phase: First, the Phasing player may deploy units from the his Reserves Box to the map. These have to be in supply, and right now the only hexes suitably supplied are the LZ hexes.
The US 2nd Armored is placed on a LZ hex occupied by a Landings marker in the first Invasion Zone; the 45th US is kept in the Allied Reserves Box because of supply constraints, as you will see later. The 78th
British and 23rd Tank units are placed on Landings mark-ers in the second Invasion Zone, the British 50th North and 51st Highland divisions stay in Reserve. Next, the Landings markers can be moved to their respec-tive beaches, indicated by the pointing arrow in their LZ hex, and flipped over to their Beachhead side. The Allied Player Turn is over. It’s now the German’s turn to act.Besides the failed Siracusa attack, the initial Invasion was successful, with only one step of units lost. The opposi-tion is losing a lot of poor quality Italian “Static” units but that’s to be expected. A few more steps were also voluntarily sacrificed to contain the initial Allied assault.
Illustration 4: Allied Reserve Phase1st German Supply Phase: All units are still in supply. The six Allied units draw supply from the Beachhead markers (two of these counting for two units), so 8 out of a possible 12 slots of Beachhead supplies are used.
Note that there are enough Beachhead markers in place to supply 12 Allied units in the next Supply Phase. Three of these units have an “Oil Drum” icon, which means they cost double to supply. The Com-mandos are always supplied on coastal hexes, as are units on the LZ hexes. The Paratroopers are automati-cally supplied during the whole weekly turn they drop (12.2.1). Having Active Ports on the map would solve the supply situation, but these markers come in only during the Deployment Phase (10.0.E).
1st German Movement Phase: Units cannot use Road Movement, due to this scenario’s “First Turn Surprise” rule. Eliminating enemy units will not be that productive as the Italian War Status Track is already “maxed out” —but the 82nd Abn is too tempting a target, so the Ger-man player decides to send some nearby Panzers against them. The port of Siracusa is a lost cause as there are far too many 8th Army units nearby, and it doesn’t offer any defensive benefits, so it’ll stay unoccupied. The Italian 2-strength unit moves on adjacent high terrain instead, but this causes problems later.The 15th PzGren moves in from the West. It would be nice to attack the Rangers with help of the remaining Blitz! marker, but at 4:1 odds there is still a 33% chance of not advancing after combat, leaving a gaping hole in the German lines. The 15th PzGren prudently takes a strong defensive position on a nearby mountain range.
1st German Combat Phase: A Target mark-er is put on the 82nd Abn. The Allied player discards card #39 italian auxiliaries to gain two Counterblow markers, placing them on
units adjacent to the Italians near the port city of Sir-acusa, which will force them to attack back.The discarded card #39 is worth two discards and thus awards two Counterblow markers (5.4).
The German player wants to see what happens to the city first, so the Counterblow battle is resolved. The ratio is 2:16, thus 1:7 odds with no terrain modifiers in that type of combat (see 14.1.2). No Combat cards are played. Since the odds are less than 1:3, the result is an automatic “CA1” (Counterattack, one shift right). The Allies counterattack at an overwhelming 6:1 odds (still no terrain modifiers as it’s a counterattack; see 14.7.3). The roll is “1,” an “EX/CR” result. The Italians put on a lively fight. The “EX” result is resolved first (both sides must take one step of losses), then the “CR” is resolved (the defenders must immediately counterattack

No Retreat! The Italian Front Playbook 33
© 2015 GMT Games, LLC
or suffer a “D” result). Since the Italian unit’s strength is now white after taking the “EX” loss, it can’t remain and take a second loss, so it Retreats two hexes. The two intact Allied units advance into the Mountain hex and must stop.
Even if the Mountain hex did not give a defensive CRT bonus in the battle, the terrain is still active for other game purposes and stops the advance. The British unit that took the “EX” loss cannot advance as its strength value is now white (see 14.8).
Illustration 5: German Combat PhaseThe HG Panzer now attacks the 82nd Abn, adding in a Blitz! marker. The basic ratio is 7:2, resulting in 3:1 odds. Hills give one shift left, the Blitz! one shift right, thus cancelling each other. However, the tanks give a one shift right, so the final odds are 4:1. The roll is 4, “DS” (De-fender Shattered). The defending unit retreats two hexes and is put in the Shattered Units Box. No advance is made. Note that a unit going to the Shattered Units Box is not considered Eliminated (14.7). The Italian unit could not retreat into the HG Panzer unit’s hex, since they may not stack with German units (13.3.2).
Illustration 6: Combat Results
1st German Reserve Phase: No units may move, as per the scenario’s “First Turn Surprise” rule. 1st Major Offensive Continuation: The Weekly Turn marker is moved down one box, to the “3” space. The Player Turns will be repeated three more times. Unused Shock!, Blitz! and Target/Counterblow markers are con-sidered spent. Play continues with the Weekly Preparation Phase.
1st Weekly Event Draw Segment: Both players draw one card. The Allied player draws #29 medal OF HOnOr Wearers. He cannot spend Reserve Points to get more cards as he already has six in his hand. The German draws #26 rOugH WeatHer, whose red instructions must be fol-lowed right after drawing. “Immediately discard this card. Play if in the Strategic Phase”. The card is discarded, but since we are not in the Strategic Phase the black text has no effect. He spends one Reserve Point to draw an extra card, #19 panzerstellung. However, this card is not use-ful as there are no Forts in play until Turn 4.
Note that the “DA” ability of the Allied Leader (al-lowing him to discard the first drawn Allied non-red Event card in the Strategic Phase; see 25.0) may not be used during the Weekly Draw Segment.
1st Weekly Organization Segment: Don’t forget that the Allied player always goes first in all game procedures unless otherwise noted. First, both players collect the same number of Target, Shock! and Blitz! markers they received at the start of the Game Turn.Second, Unit Improvement is done for counters on the map or in the Reserves Box. The Allies discard #35 Op-eratiOn Olive, worth two card discards as it has a Double Discard ( ) icon. This flips the 46th British Division to full strength. Since no other units can be flipped, the extra discard is lost.The 1st Airborne in the Allied Reserves Box needs to be improved, but Paratroopers cost two discards, and the Allied player doesn’t want to spend more right now.
The German plays #34 FOrCed labOur for two discards: the two Italian units that took losses are flipped back to full strength.

No Retreat! The Italian Front Playbook34
© 2015 GMT Games, LLC
Third, the shattered US 82nd Abn is moved to the Reserves Box, and is marked with a No Combat marker, which it must remain under until the end of the Game Turn. There are no
units to rebuild in the Destroyed Units Box (the destroyed Italians went back to their draw cup). All this action sees the Allied player with five cards left in his hand, the Ger-man player with three cards. Now play goes back to Se-quence III: The Allied Player Turn.The Allied player could have done a card discard to remove the No Combat marker for the 82nd Abn, but decides against it, since it is too weak to be useful for now.
2nd Allied Supply Phase: All units are in supply, but the situation will start getting tight for the Allies, as the units on the LZ hexes will land soon.Note that the Italian units always draw their supply directly from friendly cities only (12.2.2).
2nd Allied Movement Phase: The 5th US and 8th UK Armies attempt two pincer manoeuvres to pocket German units. They enter Siracusa, moving the Italian War Status marker to the “Finito Benito!” space (see 26.2.1-B).
Because of the capture of the Objec-tive, both sides are awarded some Reserve Points as per the two RP boxes in the City’s hex: one for the British 8th Army (but the Allied player is already at his maximum of
eight RPs so gets nothing), and one for the German player (he’s at two RPs).The effects of the War Status change will only be implemented in the Checks Phase, next Game Turn (see 26.2.1-B).
With new troops landing in Sicily, the Beachheads’ supply capacity is now fully used at 12 units, with three divisions counting double (because of their Oil Barrel icon). There are no good targets yet for the British 1st Airborne, with the airfield not yet captured an air drop is risky. Since the 1st Airborne does not have complete Air Cover (2.13), it stays in the Allied Reserves Box.
The Allied player discards #17 COmmandO raids to allow the 1SFF/Rng to move directly from one EZOC to another, surround-ing the 15th PzGren.Note on the 1SSF/Rng move pictured in illus-tration #7 that even in an EZOC, the Road’s ½ MP cost and its negating of the River’s MP cost is valid.
The Allied player also uses card #14 naval Out-Flank. While his opponent watches in fascinated horror, he puts his last Landings marker on a LZ near Catania, and moves the 51st Highland there. It costs 3 MP for the LZ hex, plus 1 MP for the EZOC, for a total of 4 MP. The German player wishes he had withdrawn his frontline a bit farther north… Note that the Beachheads add a +1MP to a hex’s move cost, and that there can be three British units stacked to-gether since the 2SS/Para CDO unit has a Free Stacking asterisk (13.3.3).
Illustration 7: Second Allied Movement Phase; the numbers in the circles show the MP cost for each move2nd Allied Combat Phase: The Allied player goes “all in” and declares five attacks, using all his Target markers.The German player puts his Shock-Counterblow marker on the HG Panzer in the hopes of somehow getting it out of this mess.The first attack resolved is against the surrounded 15th PzGren. The ratio is 13:6, so 2:1 odds. Two shifts right for the Shock! and Shock-Target markers, two shifts left for the Mountain terrain; having nothing to lose the German player uses his unit’s red-SP Tenacious Defense (21.11)

No Retreat! The Italian Front Playbook 35
© 2015 GMT Games, LLC
bonus to get one extra shift left (at the risk of extra ca-sualties; 14.6.4), the odds are now 3:2. No initial Event cards are played. The die roll is “5,” an “EX/CR” result. The German player im-mediately plays his #12 veteran nCO’s card to re-roll the dice, for a 6, a red “D” result. Using the Tenacious Defense bonus forbids any retreats, but the unit had no retreat path any-way because of the EZOCs, so the 15th PzGren takes a step loss. Having used the Shock/Target marker, the Allies must take at least one step loss in the battle (14.6.7 & 14.7.2), so the 3rd US takes the loss.The Allied player could use his #29 Medal of Honor Wearers card to reroll the dice yet again, but decides to keep it for worse outcomes.
The 1st US now attacks the “2” Italian division. Ratio of 3:1, one shift right for the Shock!, two shifts left for the Mountains, resulting in final odds of 2:1. No cards are played. Roll is a “3,” an “EX” result. Again the Italians hold and both sides must take a loss.The Canadians and two other divisions now assault the second Italian unit. The odds are at 6:1, die roll is “6,” a red “DD” (Defender Destroyed) result. The Italian retreats west two hexes and takes a step loss. The advancing units take the airfield (no RP awarded, the Allies are maxed out) and must stop (Rivers stop advance after crossed). A Sec-ond Combat marker can’t be placed on the 1st Canadian, as it crossed Advance-stopping terrain.During Rainy Skies you cannot even advance across Rivers (24.4).
The 51st Highland Division attacks Catania. Odds are 3:1, the Shock! and Port CRT shifts cancel each other. The die roll is “3,” a result of “EX/CR.” This time the Allied player plays his #29 medal OF HOnOr Wearers card for a reroll —it’s a “1,” a “CB” result. Since the attacker played a card, he must now roll again on the blue “CB” column of the CRT. He rolls a “2”, resulting in “FB” (Final Counterblow). A Counterblow marker is placed on the British units, which will be resolved next Player Turn. The Italians are again doing wonders…The 6:1 attack against the 0-strength Static unit is a roll of “3,” a “DS” (Defender Shattered). The Italian unit is put back in its draw cup, and the victors advance north while the 2SS/Para CDO unit stays in the Port.
Note that Roads have no effect in advances after combat.
Illustration 8: Second Allied Combat PhaseFor the last battle, the 9th US must attack the HG Panzer. The ratio is 5:7, thus initial odds of 1:2. The Mountain terrain is not counted, but the Shock/Counterblow marker gives a one shift left for 1:3 odds. Roll is “2,” a “CA” (Counterattack) result. The German player decides to risk it, as he’s getting surrounded. Odds are 1:1 (on the German CRT), the attacker is a Tank unit in good terrain against Infantry so it gets a shift right, one Blitz! marker is used to shift it one column right, to 2:1. Since it’s a counterattack, the defender’s Hill terrain is not taken into account for CRT shifts. The die roll is a “4”, resulting in an “EX/CR”. Both sides take a step loss. The American unit can now either retreat one hex or counterattack. The Allied player decides to attack back. Ratio 3:4, so odds are 1:2, no terrain shifts. The die roll is “1” —another “CA” result. The Germans counterattack once more. They are using their one remaining Blitz! marker, and they still have their tank bonus for two shifts left at again 2:1 odds. The die roll is “6,” a red “DR” (Defender Retreats). Since the 9th US has only one step left, it would be needless bloodshed to take a loss and not retreat as the Germans would be able to advance into the now-empty hex, so the Allied unit retreats two hexes toward the town of Gela.

No Retreat! The Italian Front Playbook36
© 2015 GMT Games, LLC
Illustration 9: Post-combat advances and retreatsNow the German player has some interesting choices. He could advance the HG Panzer two hexes adjacent to Gela, put a Second Combat marker on it and attack the 9th US again (but the 9th US is now stacked with a Beachhead marker, which gives it an extra +2 red strength). Alterna-tively, the HG Panzer could advance three hexes straight to the beaches, eliminating a Beachhead marker—but would probably be destroyed later, as this move would put it Out of Supply deep in enemy territory, surrounded by EZOCs. Instead, after occupying the defender’s vacated hex, the HG Panzer falls back to its own lines near the Dittaino River.
German units are very precious in this scenario because of the Victory Conditions. Playing as the German player, you must strive to lose as few units as possible.
2nd Allied Reserve Phase: Units can be deployed from the Reserves Box to the map, but Supply capacity is at maximum, so the four remaining Allied divisions shown below remain in the Allied Reserves Box.
2nd German Supply Phase: The 15th PzGren is sur-rounded by EZOCs, with no friendly units to help it trace a supply line. Therefore, a No Supply marker is put on it which causes several penalties (12.3). The US 1 SFF/Rng unit is similarly marked, as an Italian unit’s EZOC south of it is blocking its supply. Their raid last turn has unforeseen consequences!
Note that both sides are now down to two Event cards. Losses can be quite heavy during Major Offensives: Reserve Points will be put to good use to draw more cards in the next Weekly Phase…
2nd German Movement Phase: The German player tries to extricate his two mobile units from the Allied stranglehold: the HG Panzer can move from an EZOC to another and stop, thanks to the Italian unit adjacent to the 9th US (see 13.4.3 Exception). The 1st FJ and 15th PzGren in the German Reserves Box will be released in the upcoming Reserve Phase to shore up the line. Some more Italian units come up from the west to try to free their surrounded German compatriots.
2nd German Combat Phase: Only one Target marker is used, against the 1 SSF/Rng. The Allied player uses his next-to-last card #04 invasiOn sCare, worth two discards, to put two Counterblow markers on the adjacent US units. This forces the 15th PzGren in the pocket to attack them back. The Allied player decides not to use his Leader’s free Counterblow on the 8th Army units, as he would prefer Catania to stay in Italian instead of German hands for now. Both sides have already used all their Shock! and Blitz! markers.
Illustration 10: German Combat PhaseFirst, the attack on the 1 SSF/Rng is resolved. The two untried Italian units are flipped; one has a white strength value so can’t attack (14.1.1). Ratio is 3:2, one shift left for the terrain, two right for the No Supply marker, resulting in 2:1 odds. The die roll is a “4,” an “EX/CR”. Each side loses one step, which eliminates the US CDO unit. Since the defender was eliminated, the “CR” result is applied as a “D” (an eliminated unit can’t counterattack), and the attackers can’t advance on this result as no unit retreated. Also, since an Allied unit was eliminated (placed into the

No Retreat! The Italian Front Playbook 37
© 2015 GMT Games, LLC
Destroyed Units Box), the Italian War Status marker goes back to the “Viva il Duce!” box.Second, the Counterblow battle is resolved. The ratio is 4:9, so 1:3 odds, with no terrain modifiers. The die roll is a “2,” resulting in a “CA” (Counterattack). The Allies attack back at 9:4, 2:1 odds, two CRT shifts right for the No Supply marker, resulting in final odds 4:1. The Ger-man player does not use his Tenacious Defense bonus as it would preclude his units from retreating and this is exactly what he would prefer they do. The die roll is a “4,” a “DR” result (Defender Retreats), and the 15th PzGren retreats away to fight another day.Third, the battle near the Port of Catania is resolved. The ratio is 2:3, so 1:1 odds, no terrain CRT shifts as it’s an involuntary Counterblow battle (this is actually helping the defenders since LZ hex is a shift to the right). The roll is a “6,” a “D” result. The British unit retreats to Siracusa; the victors cannot advance as their Combat Strength is white, and LZ hexes are impassable to them anyway (only the Allies can enter). The Landings marker remains in place.Note that you do not have a combat penalty CRT shift when a non-phasing unit with a non-Supply marker is involuntarily attacking (see 12.3.2).
2nd German Reserve Phase: The German player brings two new units in from his Reserves Box. Their positions on the map are not optimal, but they can’t set up adjacent to an enemy, unless a Fort marker is in the hex (16.1).
Illustration 11: Combat Results & Reserve Phase2st Major Offensive Continuation: The weekly Turn marker is moved down one box, to the “2” space. The Player Turns will be repeated again with two weeks re-maining. Unused Shock!, Blitz! and Target/Counterblow
markers are considered spent. Play continues with the Weekly Preparation Phase.
This example ends here. During the Weekly Prepara-tion we would probably see both players spend quite a few of their Reserve Points for extra card draws, with a lot of those cards used as discards to rebuild the units on their one-step side (five steps for the Germans and the same for the Allies, if you count the ones in the Reserves and Destroyed Units Boxes). As you can see resources will be depleted fast during a Major Offensives, having a lot of RPs is a must.
Assault on a Fortified LineThis is an example of an attack on a German fortified line. The date is February 1944—or Turn 8 of the game. This commences at the start of the Allies’ Combat Phase. Alexander and Kesselring are in command. The weather is Mud.Starting Cards: The Allied player has one Shock! and three cards he can use in the Combat phase: #13 vOlks-grenadiers, #21 arty “time On target”, #46 Carpet bOmbing. The German player has two cards: #11 assault badge Wearers and #25 90-day WOnders.
Unfortunately, the Allied player cannot play either card #46 (as the weather is Mud), or card #13 (as is has a British Roundel and is only playable starting on Turn 12; see 5.2.3).

No Retreat! The Italian Front Playbook38
© 2015 GMT Games, LLC
Allied Combat Phase: Having only one Shock! marker, the Allied player decides to use his Shock-Target marker to give a bit more power to one attack, at the risk of more losses. He concentrates his assaults on the two weaker hexes of the fortified line. The German player uses his precious Shock-Counterblow to make a diversionary at-tack using his elite Paratroopers.First the Polish Corps, supported by Commandos, attacks the 5th Gebs and the +2 Fort. The original plan was for the 2nd NZ and 8th Indian to also participate in this at-tack, but the Allied player decides instead to engage them against the tough Cassino position instead.You cannot split units in the same hex to make two different attacks (see 14.3.5). Note also that if the lat-ter two units took part in the attack, and if there was no Commando in the battle, then the defensive shifts would be one left for the Apennine/River hexsides (there is no distinction here even if the two hexsides are different terrain types), plus two left for the Mountain, one for the Fort, for a total of four shifts left!
The ratio is 10:5, or 2:1 odds. The Allied 2SS/Para CDO unit lowers the Mountain’s bonus to one shift left instead of two, and negates the Apennines’ defensive bonus (21.3 and 21.4), thus cancelling the river by default, since not all the units are attacking across odds-affecting terrain (see 14.6.1); the Fort gives one shift left. The final odds are 1:1. No cards are played by either side. The die roll is “6,” a “D” (Defender Falls Back). The Poles want blood! The German player has two options: either his unit stays put and takes a loss, or it must retreat. If the 5th Gebs retreats the Fort marker will be forfeit as it cannot move and is eliminated when an enemy moves in. The Fort cannot take the loss as it’s Brittle (21.13), so the German mountain unit is flipped to its 2-4 side.Since the Allied units attacked a hex with a Fort marker, they must take at least one loss in this Combat (14.7.2). Also, since the terrain-cancelling ability of the Commando unit was used, it must take the loss (see 21.3) and is placed in the Destroyed Units Box.
The German player could have used his #11 AssAult BAdge WeArers at the start of the battle to get one shift left, or to roll two dice instead of one, but given the low odds of the original battle he decided to save it for more critical combats.
Illustration 1: Allied Combat PhaseNext, the Allied player decides to attack the 94th Inf on the coast. The ratio is 16:5, resulting in 3:1 odds. The river doesn’t give a defensive shift since not all the attackers are assaulting across affecting hexsides (i.e., River or Apennine); the mountain only gives one shift left because of the French mountain units; the Fort gives one shift left, for a total of two left. The Shock-Target gives one shift right. The net column shift is one left, so the odds are now 2:1. The Allied player elects to not play any Combat card, but the German plays card #25 90-day WOnders, for an extra two column shifts left, thus making the final odds 1:1. The die roll is “4,” a “CB” (Counterblow) result. There was no Allied card played, the final CRT was not to the right. The Allied player should flip the Shock-Target marker to show its Counterblow side and place it on one of his attacking stacks, but in this case nothing happens, as there is no Counterblow side on the Shock-Target marker, so none is placed (see 14.7.4, third bullet). One Allied unit must take at least one step loss, as there was a Fort in the defender’s hex and/or the Shock-Target marker was used. The loss must be taken by a mountain unit, so the 3rd Algerian is flipped.

No Retreat! The Italian Front Playbook 39
© 2015 GMT Games, LLC
The maximum you can lose this way is one step, even if there was more than one loss condition—in this case the Fort and the Shock-Target (14.7.2).
The Cassino Counterblow battle is now resolved. The German Fort is not included in the battle as it has a white strength factor (see 14.1.2, second bullet). The ratio is 17:9, so 3:2 odds. There are no terrain shifts in a Coun-terblow battle. The Allied Shock! and the German Shock-Counterblow markers’ shifts cancel each other. Since both 5th Army (green) and 8th Army (tan) units are attacking together, the defender gets a shift left (see 14.6.10). Wanting to apply real pressure, the German player now announces he will use his “Tenacious Defense” bonus (21.11) for an extra shift left. Given the low odds, the risk of an extra loss due to this bonus is very low. Final odds are 1:3; neither player uses a combat card. The die roll is a “4,” resulting in a “CA” (Counterattack). The Allies do not lose a step for the Fort in the hex, as it was not part of the battle.
The German player decides to attack back. The Shock! and Shock-Counterblow markers are removed, as is the German-played combat card.The ratio is 9:17, thus odds of 1:2. No terrain shifts ap-ply. This does not look very good, so he plays card #11 assault badge Wearers, for the ability to roll two dice in the battle and decide which die to use. Alas, the Allied player cannot use his #21 Arty “time on tArget” card, as there are no “US” units in that combat (French units are of green color, but not con-sidered “US”).
Illustration 2: Results of the CombatThe dice rolls are “1” and “6.” The German player choses the latter result, a “D” (Defender Falls Back). Not wanting to retreat from two hexes, the Allied player has the 8th Indian take a step loss.The Combat Phase is over.
I will stop this example here. I didn’t play the Allies especially well. This shows how difficult it can be to crack a German-held fortified position. The muddy weather meant that many good air support cards couldn’t be played, and that only one Shock! marker was available. Obviously, the rare Allied mountain troops are very important to help the assaults—but they will take the brunt of the losses, too. In this situ-ation, the best bet might have been to use Attrition Combat (27.2), and wait for better fighting weather and Event cards.

No Retreat! The Italian Front Playbook40
GMT Games, LLCP.O. Box 1308, Hanford, CA 93232-1308www.GMTGames.com