Embed Size (px)
Citation preview
Plate Tectonics
Activity
????
• What is plate tectonics?
Video
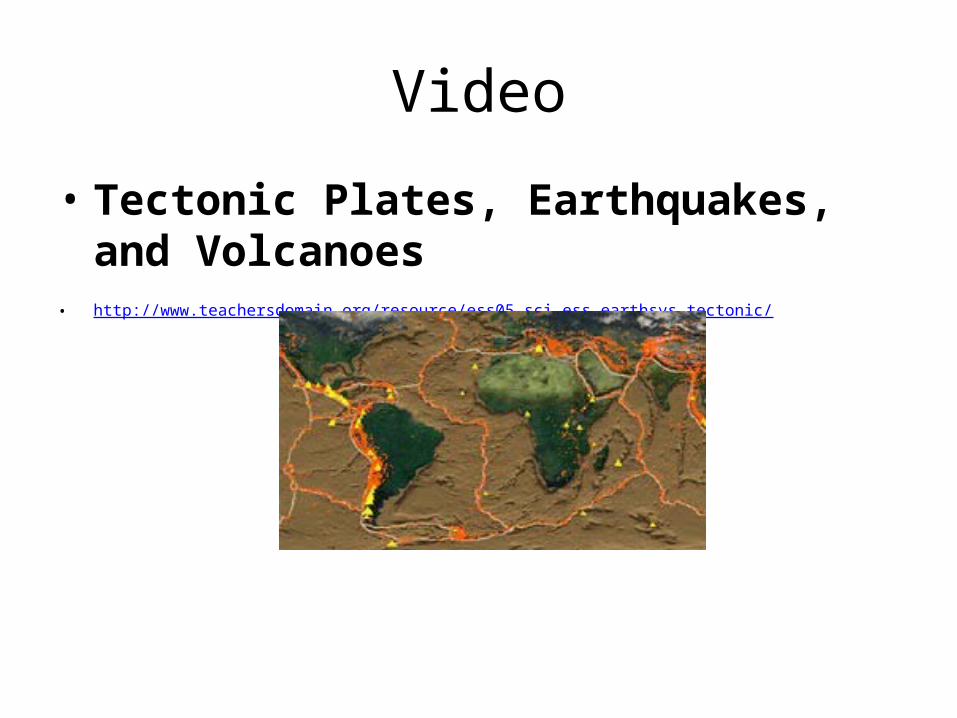
• Tectonic Plates, Earthquakes, and Volcanoes • http://www.teachersdomain.org/resource/ess05.sci.ess.earthsys.tectonic/
Video
• Plate Tectonics: An Introduction
• Tectonic Plates, Earthquakes, and Volcanoes
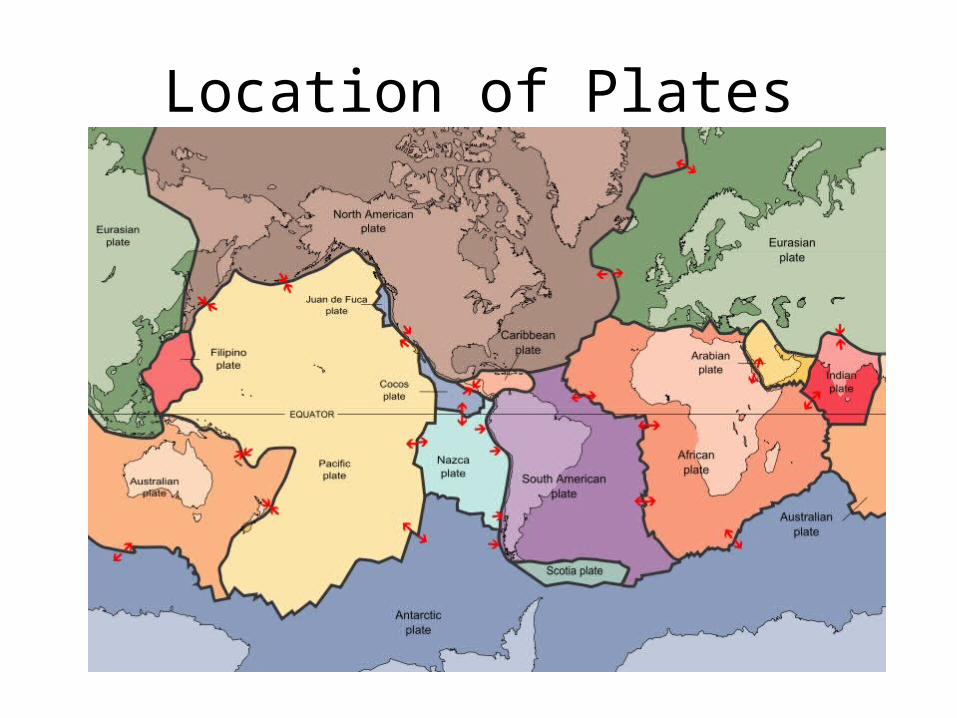
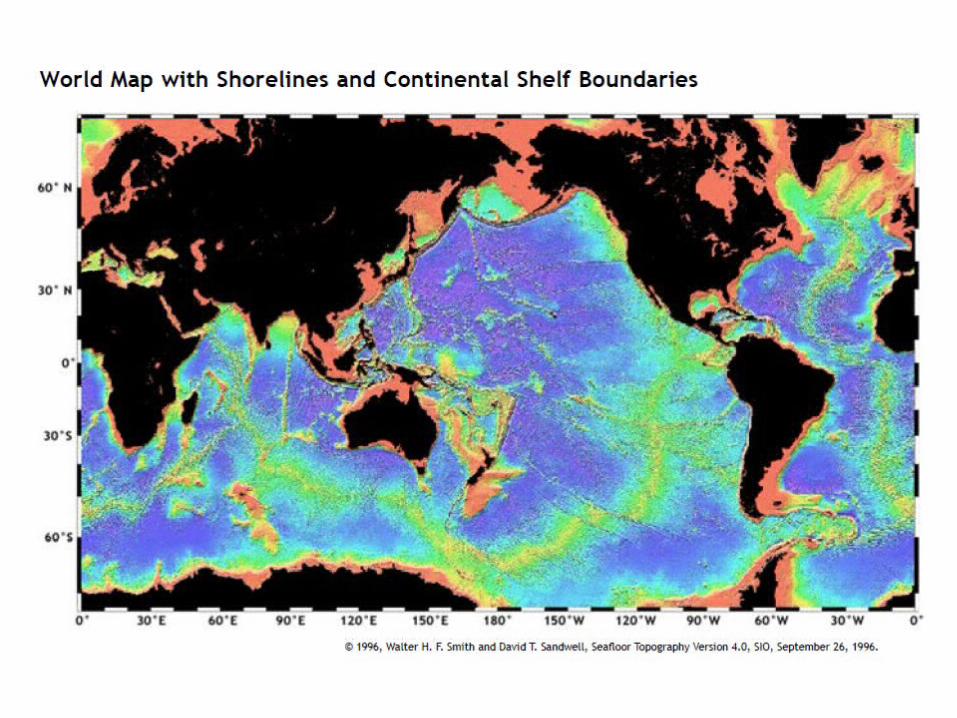
Location of Plates
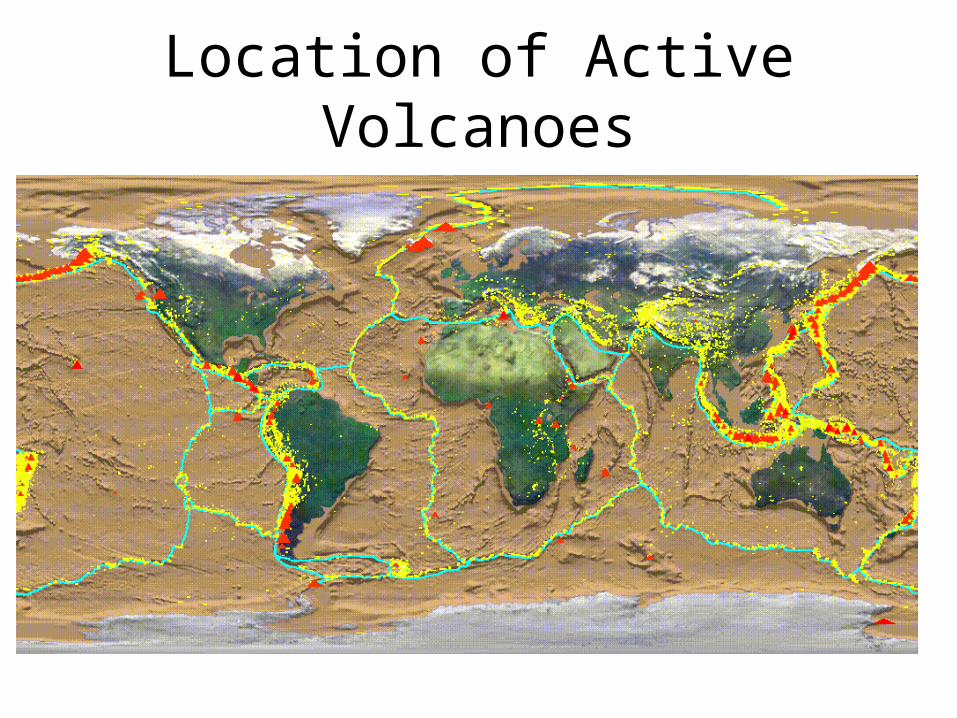
Location of Active Volcanoes
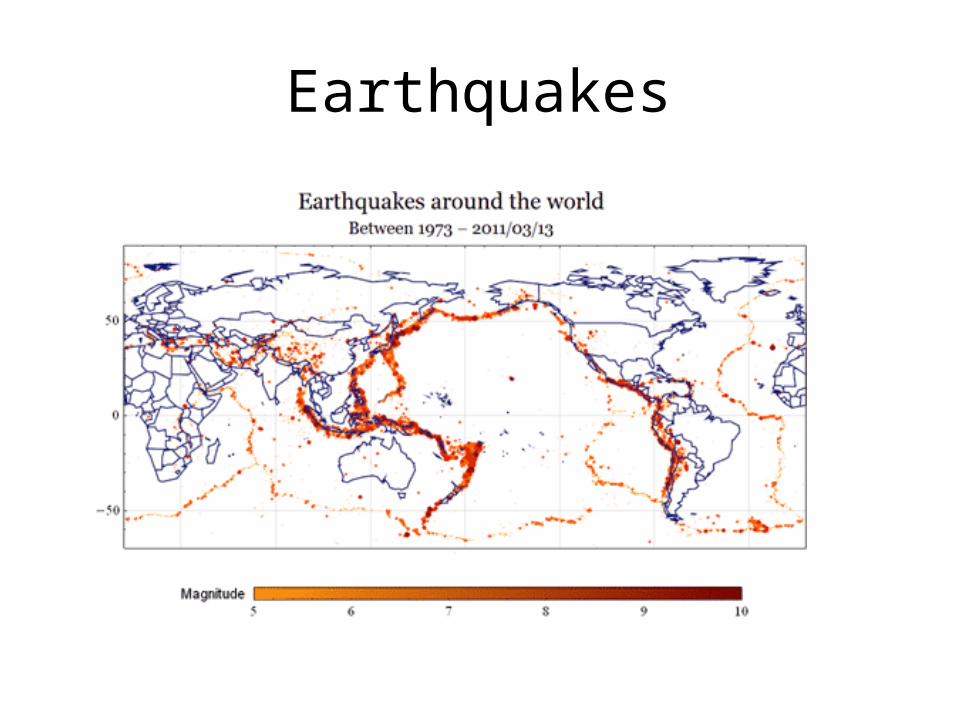
Earthquakes
????
• What is the relationship between the location of plates and the location of earthquakes and volcanoes?
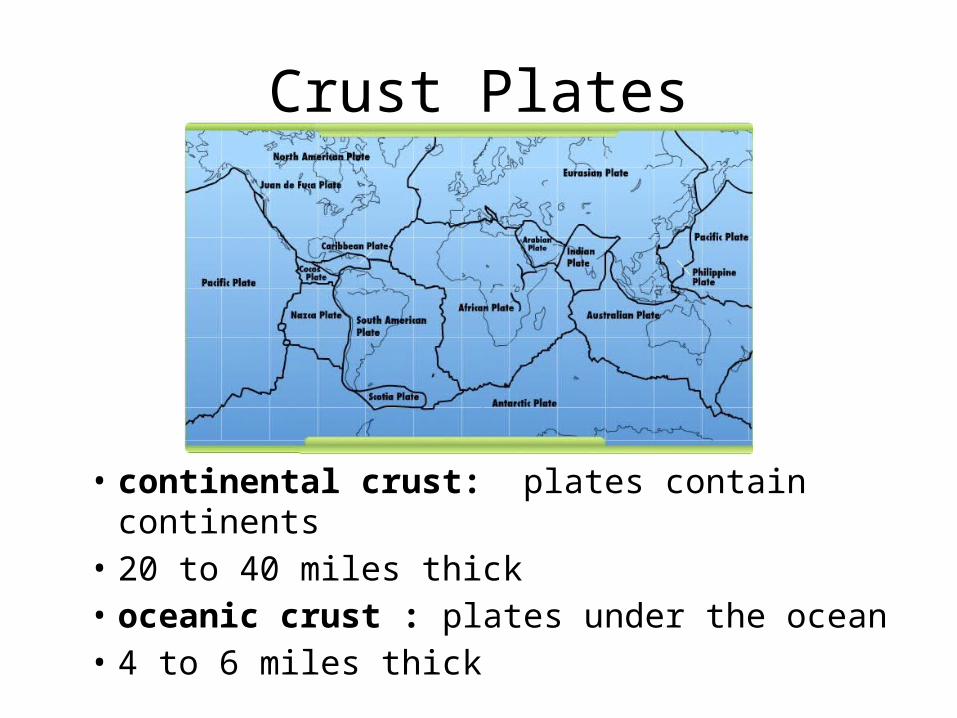
Crust Plates
• continental crust: plates contain continents• 20 to 40 miles thick• oceanic crust : plates under the ocean• 4 to 6 miles thick
Plate Boundary
• The border between two tectonic plates • All the tectonic plates are moving very SLOWLY
around the planet• They move in many different directions• Some are moving toward each other, some are
moving apart, and some are sliding past each other.
• Because of these differences, tectonic plate boundaries are grouped into three main types.
Matching
• There are three types of plate boundary interactions
• Convergent• Divergent• Transform • Read the terms and definitions• Cut out the pictures and match them with the
matching term and definition
Video
• Plate Tectonics: The Scientist Behind the Theory
• Why was Wegener's original idea about continental drift referred to as intuition and not science?
• What did Wegener find that he believed was evidence to support his theory?
• Why didn't others think that his findings constituted evidence?
Videos
• Plate Tectonics: Further Evidence
• Plate Tectonics: Lake Mead, Nevada
Sea-Floor Spreading1. Cut the vertical lines so there will be three slits (figure 1)2. Use red and blue markers to outline the alternating bands of arrows. Red represents (+)
up and blue represents (-) down3. Choose one color to represent normal polarity and a second to represent reversed
polarity. 4. Cut the paper in half parallel to the long edge to get two strips of paper as shown in
Figure 2. 5. Insert one end of each strip of paper through the spreading center line on your first
piece of paper (see Figure 3). 6. Pull each strip of paper towards the slits nearest the margins of the paper (the
subduction zones). 7. Tape each strip to make a loop as shown in Figure 3. 8. Circulate the ribbons of paper (which represent oceanic crust) to simulate the
movement of ocean floor from the mid-ocean spreading center to the subduction zone. 9. Start the movement of the ribbons with bands representing normal polarity.
Video
• Tectonic Plates and Plate Boundaries
Video
• Plate Tectonics: The Hawaiian Archipelago