Embed Size (px)
Citation preview
Pilot View Plugin User Guide
Written by Sandy Barbour – 04th March, 2006 Updated by Sandy Barbour -Monday, 15 April 2013
Introduction The PilotView plugin, PV plugin for short allows you position the pilot’s head when in 3D cockpit mode. The PV plugin is not designed to work in a 2D cockpit. It allows for 8 positions to be stored, these are called presets. This is done through the PV Control panel, which is described in a later section. The PV plugin also has effects that can be enable or disabled. These consist of G forces that are applied to the X, Y and Z axes. This not the same as the G force blackout that you get in Xplane. There is also the effect of engine vibration which can be enabled or disabled. These are described in a later section. As of V1.70 External Data can be used with the plugin. This is described in a later section. If you are using the windows version of the plugin and have a TrackIR device, you can use it to move the pilots head around. This is described in a later section.
Pilot View Plugin User Guide
Written by Sandy Barbour – 04th March, 2006 Updated by Sandy Barbour -Monday, 15 April 2013
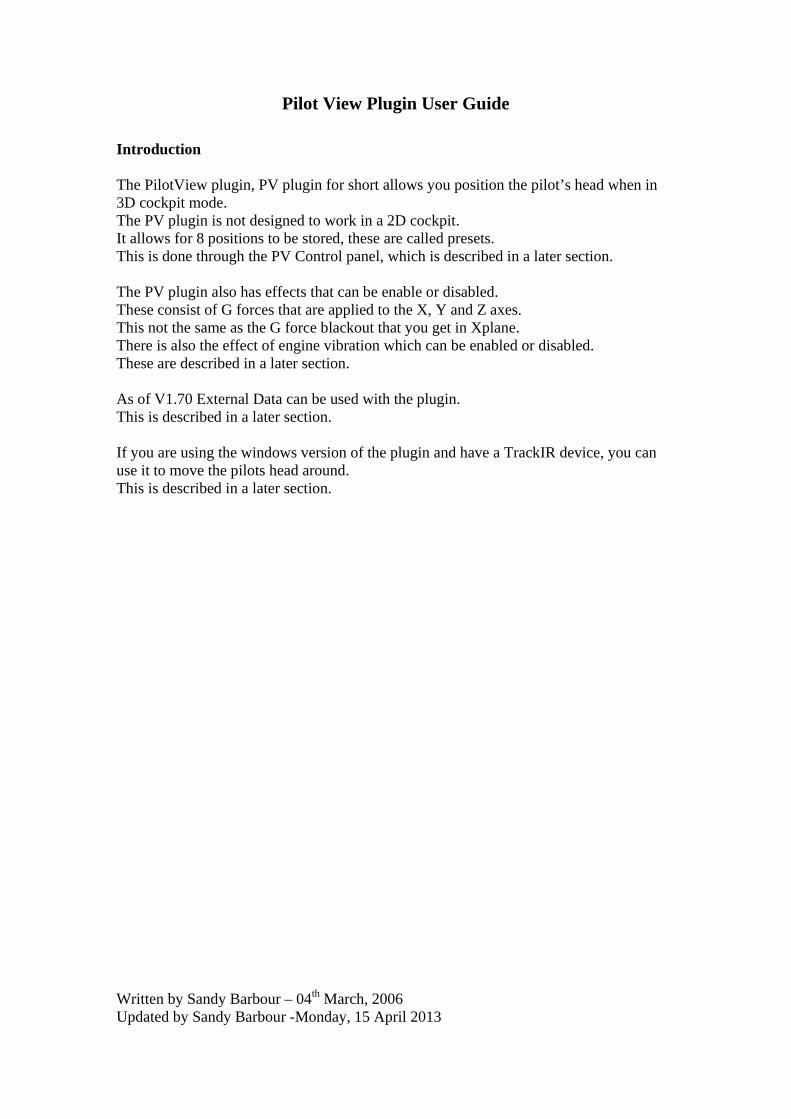
Installation The zip file below contains a FAT plugin that has the 32 and 64 bit plugins for Windows, OS X, and Linux http://www.xpluginsdk.org/downloads/PilotView.zip Unzip the archive so that there is a PilotView folder under the plugins folder. e.g. /X-Plane/Resources/plugins/PilotView The files and folders that should be there are listed below. This layout will work in X-Plane V9, V10 32 bit and V10 64 bit. PilotView
PilotView.ini lin.xpl mac.xpl win.xpl 32
lin.xpl mac.xpl win.xpl
64 lin.xpl mac.xpl win.xpl
Pilot View Plugin User Guide
Written by Sandy Barbour – 04th March, 2006 Updated by Sandy Barbour -Monday, 15 April 2013
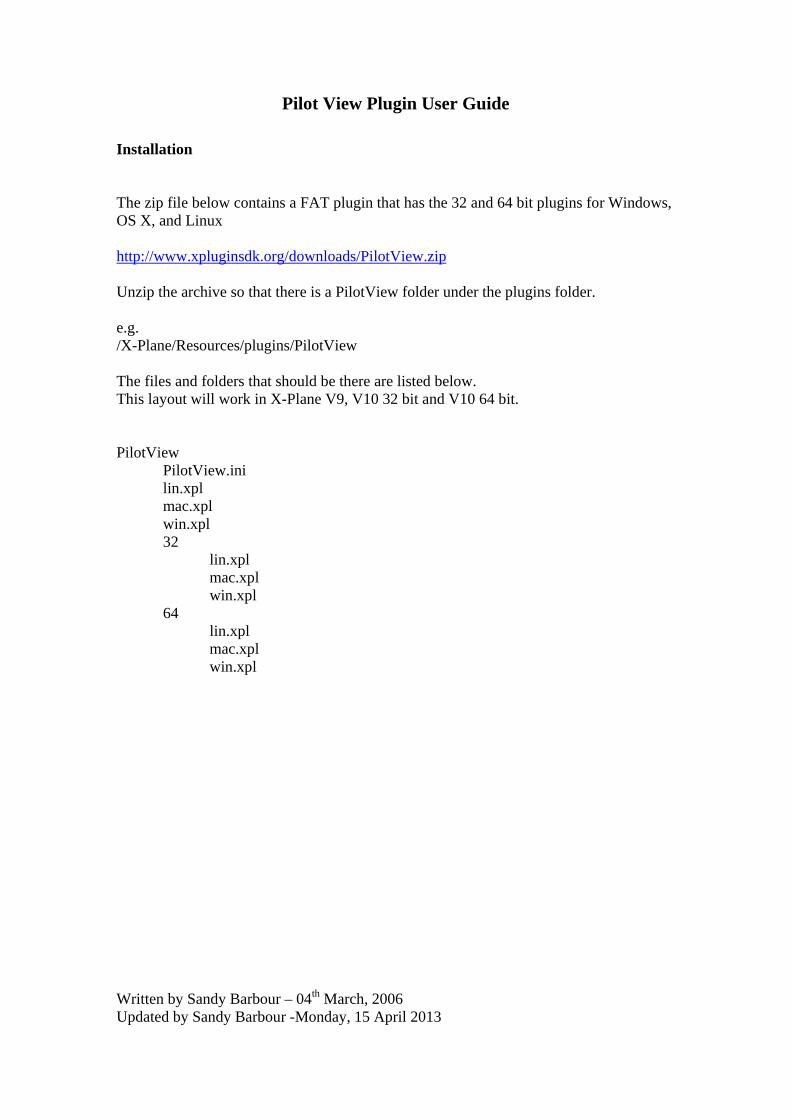
PV Menu The menu has the following sub menu options.
Enable This will enable the PV plugin. Disable This will disable the PV plugin. Control Panel This will display the PV Control Panel, which is described in a later section. Data Display This will display the PV Data Display, which is described in a later section. Forces Effects Panel This will display the PV Forces Effects Panel, which is described in a later section. TrackIR Enable This will enable the TrackIR device. TrackIR Disable Thse will disable the TrackIR device.
Pilot View Plugin User Guide
Written by Sandy Barbour – 04th March, 2006 Updated by Sandy Barbour -Monday, 15 April 2013
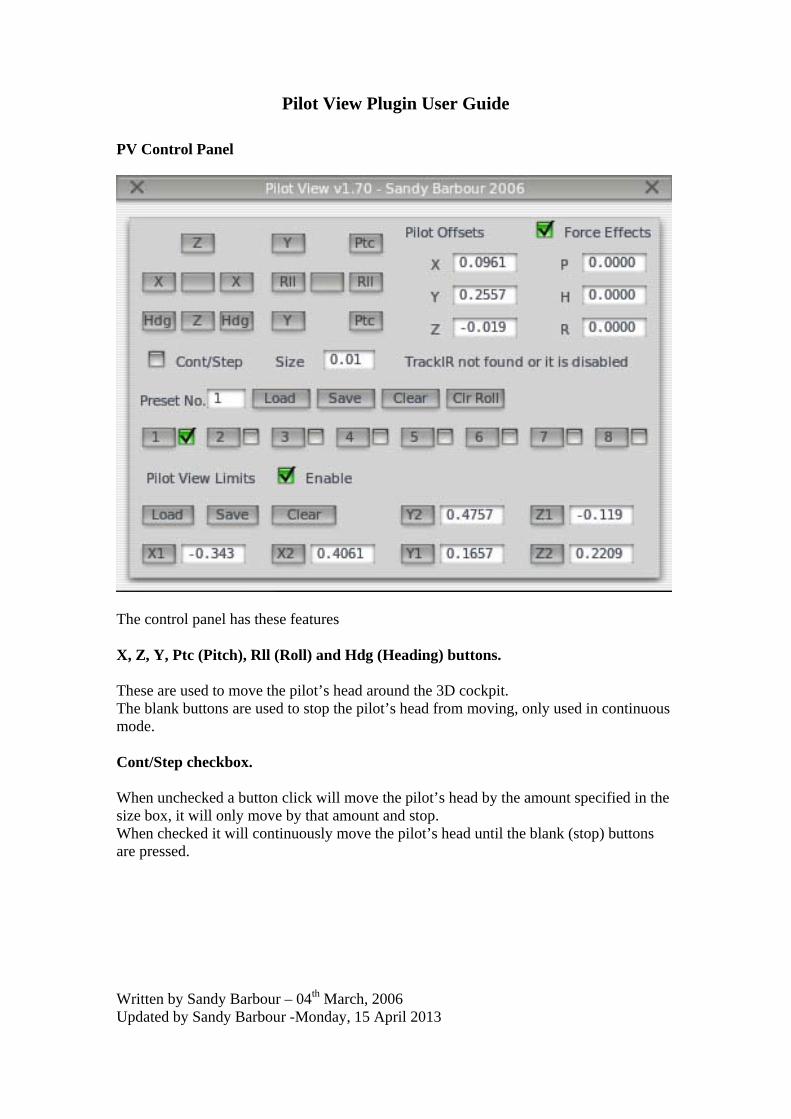
PV Control Panel
The control panel has these features X, Z, Y, Ptc (Pitch), Rll (Roll) and Hdg (Heading) buttons. These are used to move the pilot’s head around the 3D cockpit. The blank buttons are used to stop the pilot’s head from moving, only used in continuous mode. Cont/Step checkbox. When unchecked a button click will move the pilot’s head by the amount specified in the size box, it will only move by that amount and stop. When checked it will continuously move the pilot’s head until the blank (stop) buttons are pressed.
Pilot View Plugin User Guide
Written by Sandy Barbour – 04th March, 2006 Updated by Sandy Barbour -Monday, 15 April 2013
Clr (Clear) Roll Button This clears any roll offset, this is required because the data for roll is not the same as the data for the other axes for the pilot’s head. See the description, in a later section, for the ResetRollOffsetOnStartup INI file setting for an explanation why this is required. Presets These are described below. Preset No. Textbox This shows you the preset that is currently active. Load Button Load the position data from the PilotView.dat file, this file is stored per aircraft so that you can have different position presets for each aircraft. Save Button Save the position data to the PilotView.dat file in the current user aircraft folder. If the file does not exist a new file will be created. Clear Button This will clear all presets and automatically store the current position into Preset 1. Buttons 1 to 8 These buttons when clicked will move the pilot’s head to that preset position. Only a preset that has the checkbox checked will move the pilot’s head. If the checkbox for a button is unchecked, clicking on the button will store the current pilot’s head position into that preset. Once a preset has been stored, clicking on the movement buttons will always update the pilot’s head position. So if you click on another stored preset button and back to the previous button, the pilot’s head will go back to last position of that button. Once you are happy with the presets, click on the Save Button so that your presets will be written to the PilotView.dat file. The Clr Roll button will be explained later on.
Pilot View Plugin User Guide
Written by Sandy Barbour – 04th March, 2006 Updated by Sandy Barbour -Monday, 15 April 2013
Limits These are used to stop the pilot’s head from moving past a certain limit in any of the axes that it can move in. You can, for example, use this to restrict the pilot’s head from moving out of the 3D cockpit. These consist of the following. Enable Checkbox This turns the limits on or off, checkbox on means enable, off means disabled. Load Button Load the limits data from the PilotViewLimits.dat file, this file is stored per aircraft so that you can have different limits for each aircraft. Save Button Save the limits data to the PilotViewLimits.dat file in the current user aircraft folder. If the file does not exist a new file will be created. Clear Button This will clear all limit data. X1, X2, Y1, Y2, Z1 and Z2 Buttons These are used to set the limit in that axis to a certain value. They are arranged to indicate the following X1 is left limit and X2 is right limit. Y1 is bottom limit and Y2 is top limit. Z1 is forward limit and Z2 is backward limit. They are use as follows. Move the pilot’s head to the limit that you want to set for that axis. Press the relevant button to set that as the limit. For example, move the pilot’s head to the left limit and then click on the X1 button. Once you have set all your limits then click on the limits Save button.
Pilot View Plugin User Guide
Written by Sandy Barbour – 04th March, 2006 Updated by Sandy Barbour -Monday, 15 April 2013
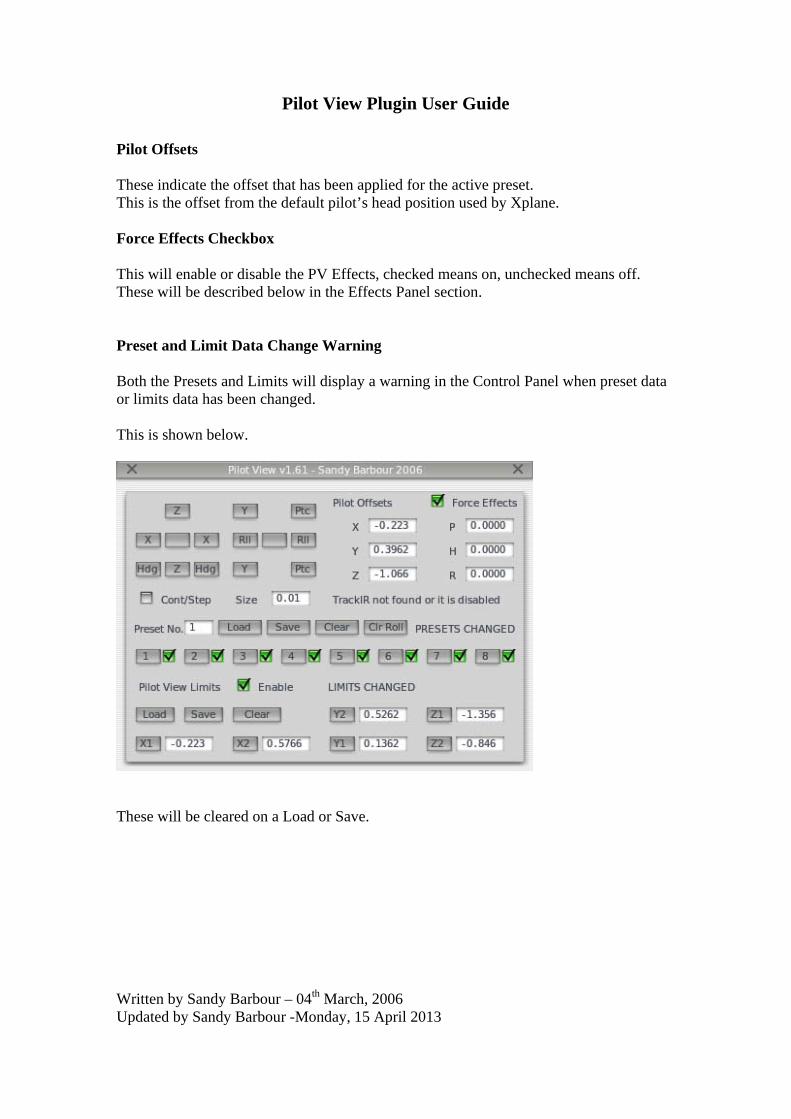
Pilot Offsets These indicate the offset that has been applied for the active preset. This is the offset from the default pilot’s head position used by Xplane. Force Effects Checkbox This will enable or disable the PV Effects, checked means on, unchecked means off. These will be described below in the Effects Panel section. Preset and Limit Data Change Warning Both the Presets and Limits will display a warning in the Control Panel when preset data or limits data has been changed. This is shown below.
These will be cleared on a Load or Save.

Pilot View Plugin User Guide
Written by Sandy Barbour – 04th March, 2006 Updated by Sandy Barbour -Monday, 15 April 2013
PV Effects Panel
The panel above has the following features. Apply Button Allow the user to try the setting before saving it. Load Button Load the effects data from the PilotViewEffects.dat file, this file is stored per aircraft so that you can have different effects for each aircraft. Save Button Save the effects data to the PilotViewEffects.dat file in the current user aircraft folder. If the file does not exist a new file will be created. Effects On Checkbox This will enable or disable the PV Effects, checked means on, unchecked means off. This has the same function as the Force Effects Checkbox described earlier.
Pilot View Plugin User Guide
Written by Sandy Barbour – 04th March, 2006 Updated by Sandy Barbour -Monday, 15 April 2013
Scaler X This is applied to the X axis to move the pilot’s head based on the G value. Scaler Y This is applied to the Y axis to move the pilot’s head based on the G value. Scaler Z This is applied to the Y axis to move the pilot’s head based on the G value. For all the above a larger value decreases the effect of G. Gnd Sc X (Ground Scaler X) Gnd Sc Y (Ground Scaler Y) Gnd Sc Z (Ground Scaler Z) These are used to modify the G effect depending on whether the aircraft is on the ground. If it is not on the ground it also effects the G below a certain altitude.
Pilot View Plugin User Guide
Written by Sandy Barbour – 04th March, 2006 Updated by Sandy Barbour -Monday, 15 April 2013
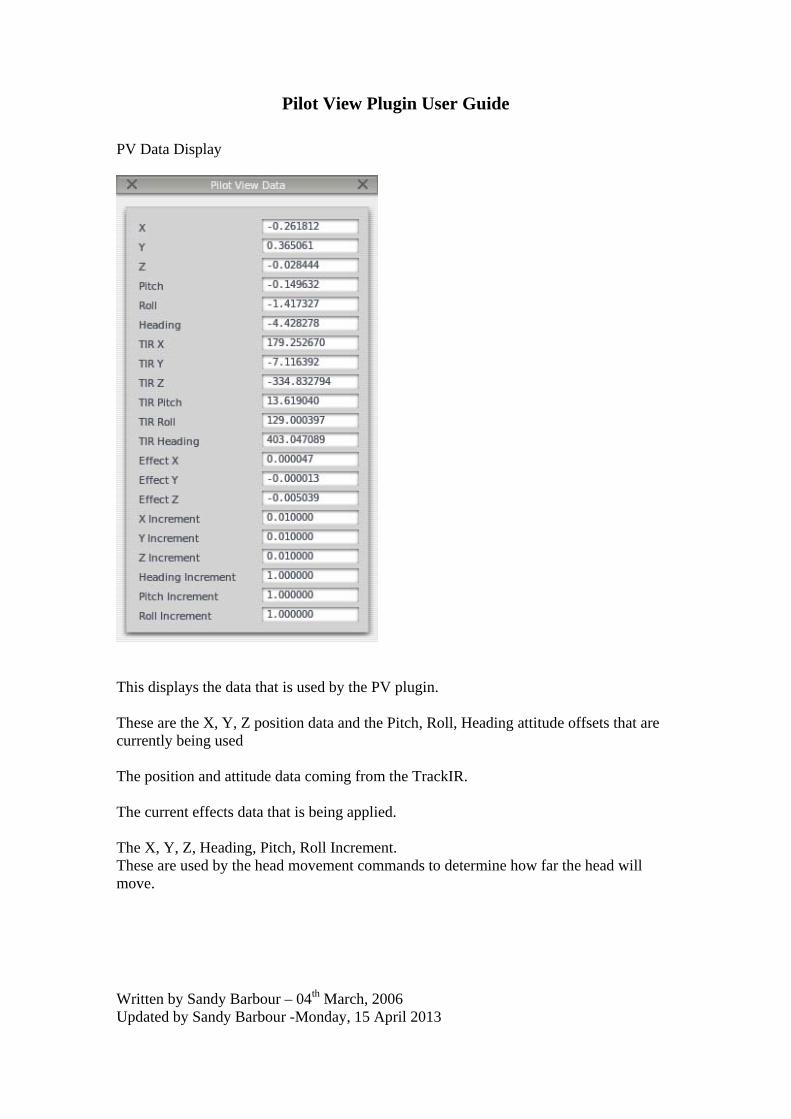
PV Data Display
This displays the data that is used by the PV plugin. These are the X, Y, Z position data and the Pitch, Roll, Heading attitude offsets that are currently being used The position and attitude data coming from the TrackIR. The current effects data that is being applied. The X, Y, Z, Heading, Pitch, Roll Increment. These are used by the head movement commands to determine how far the head will move.
Pilot View Plugin User Guide
Written by Sandy Barbour – 04th March, 2006 Updated by Sandy Barbour -Monday, 15 April 2013
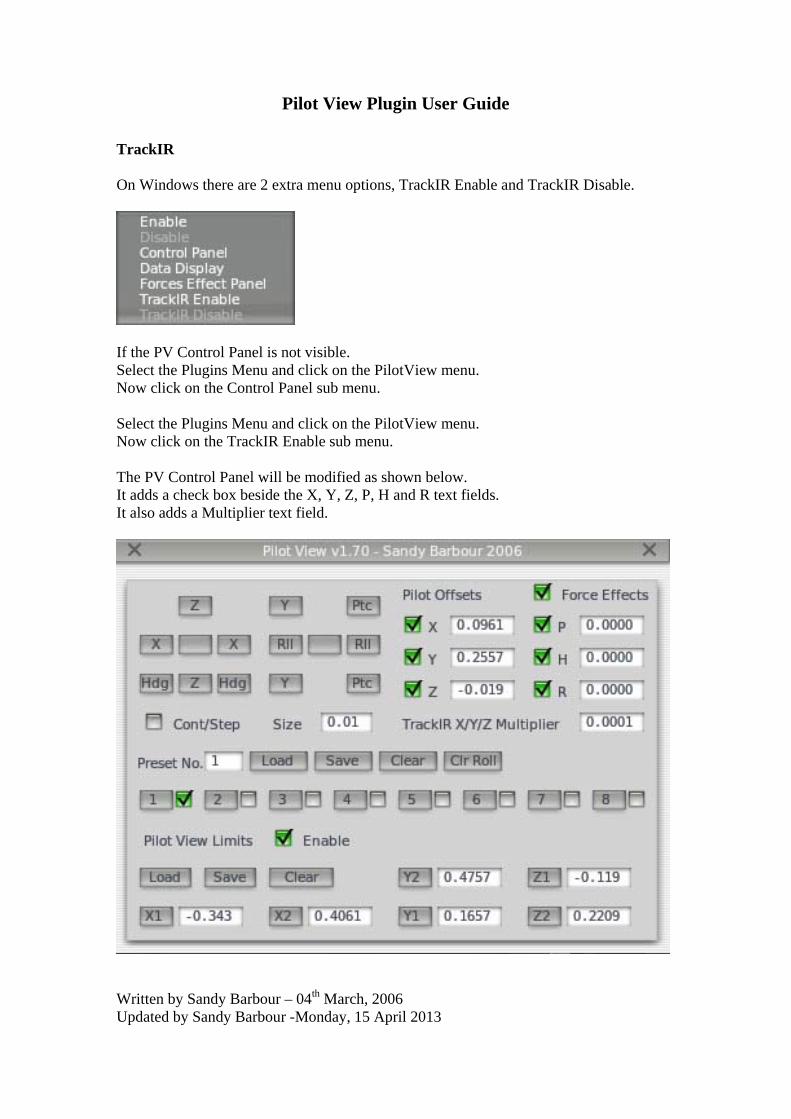
TrackIR On Windows there are 2 extra menu options, TrackIR Enable and TrackIR Disable.
If the PV Control Panel is not visible. Select the Plugins Menu and click on the PilotView menu. Now click on the Control Panel sub menu. Select the Plugins Menu and click on the PilotView menu. Now click on the TrackIR Enable sub menu. The PV Control Panel will be modified as shown below. It adds a check box beside the X, Y, Z, P, H and R text fields. It also adds a Multiplier text field.
Pilot View Plugin User Guide
Written by Sandy Barbour – 04th March, 2006 Updated by Sandy Barbour -Monday, 15 April 2013
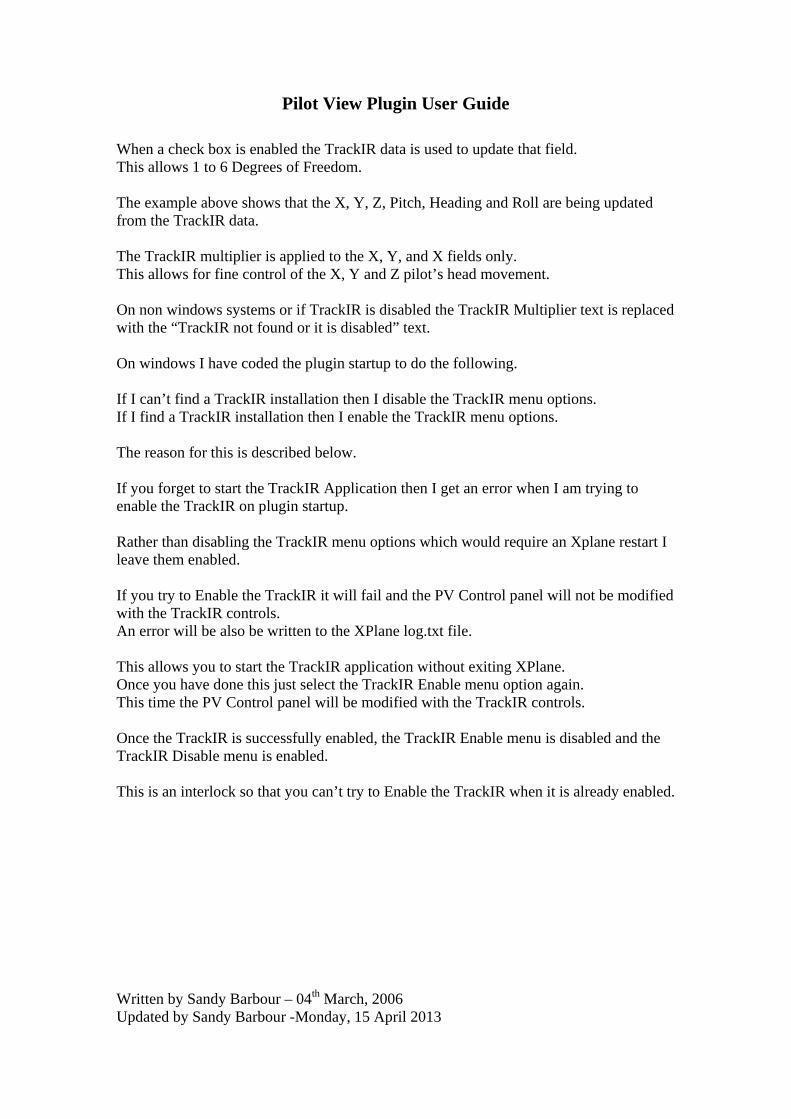
When a check box is enabled the TrackIR data is used to update that field. This allows 1 to 6 Degrees of Freedom. The example above shows that the X, Y, Z, Pitch, Heading and Roll are being updated from the TrackIR data. The TrackIR multiplier is applied to the X, Y, and X fields only. This allows for fine control of the X, Y and Z pilot’s head movement. On non windows systems or if TrackIR is disabled the TrackIR Multiplier text is replaced with the “TrackIR not found or it is disabled” text. On windows I have coded the plugin startup to do the following. If I can’t find a TrackIR installation then I disable the TrackIR menu options. If I find a TrackIR installation then I enable the TrackIR menu options. The reason for this is described below. If you forget to start the TrackIR Application then I get an error when I am trying to enable the TrackIR on plugin startup. Rather than disabling the TrackIR menu options which would require an Xplane restart I leave them enabled. If you try to Enable the TrackIR it will fail and the PV Control panel will not be modified with the TrackIR controls. An error will be also be written to the XPlane log.txt file. This allows you to start the TrackIR application without exiting XPlane. Once you have done this just select the TrackIR Enable menu option again. This time the PV Control panel will be modified with the TrackIR controls. Once the TrackIR is successfully enabled, the TrackIR Enable menu is disabled and the TrackIR Disable menu is enabled. This is an interlock so that you can’t try to Enable the TrackIR when it is already enabled.
Pilot View Plugin User Guide
Written by Sandy Barbour – 04th March, 2006 Updated by Sandy Barbour -Monday, 15 April 2013
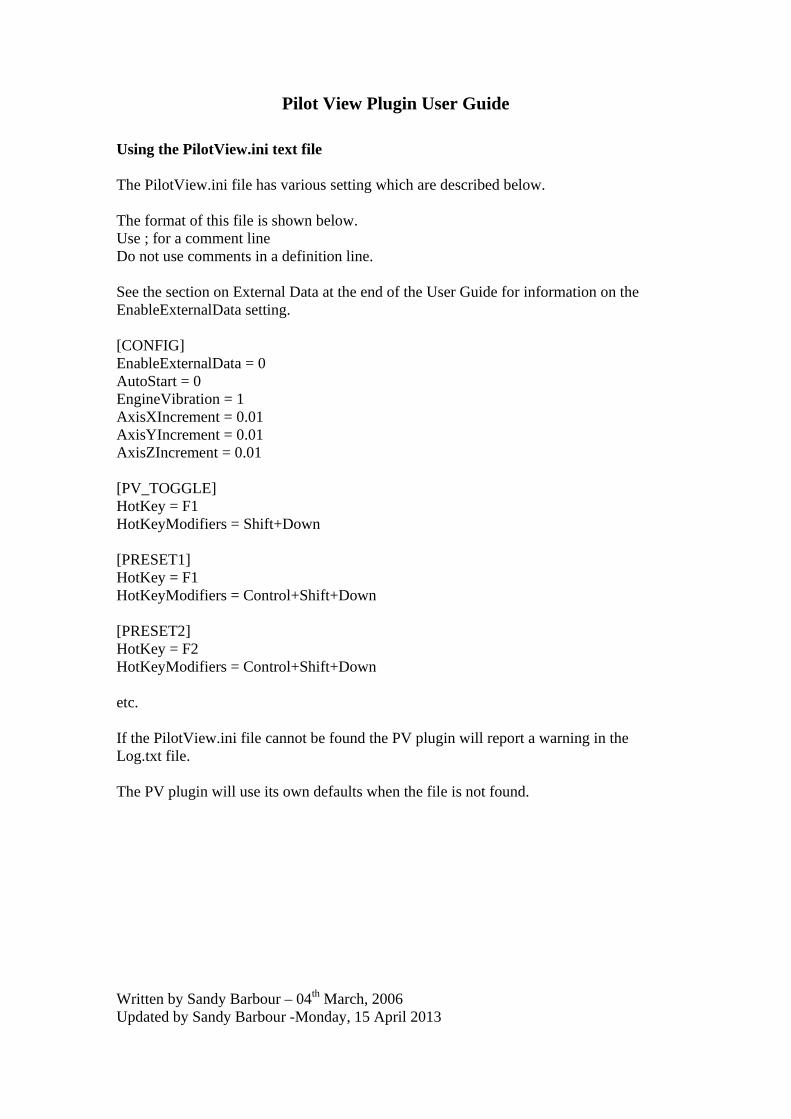
Using the PilotView.ini text file The PilotView.ini file has various setting which are described below. The format of this file is shown below. Use ; for a comment line Do not use comments in a definition line. See the section on External Data at the end of the User Guide for information on the EnableExternalData setting. [CONFIG] EnableExternalData = 0 AutoStart = 0 EngineVibration = 1 AxisXIncrement = 0.01 AxisYIncrement = 0.01 AxisZIncrement = 0.01 [PV_TOGGLE] HotKey = F1 HotKeyModifiers = Shift+Down [PRESET1] HotKey = F1 HotKeyModifiers = Control+Shift+Down [PRESET2] HotKey = F2 HotKeyModifiers = Control+Shift+Down etc. If the PilotView.ini file cannot be found the PV plugin will report a warning in the Log.txt file. The PV plugin will use its own defaults when the file is not found.
Pilot View Plugin User Guide
Written by Sandy Barbour – 04th March, 2006 Updated by Sandy Barbour -Monday, 15 April 2013
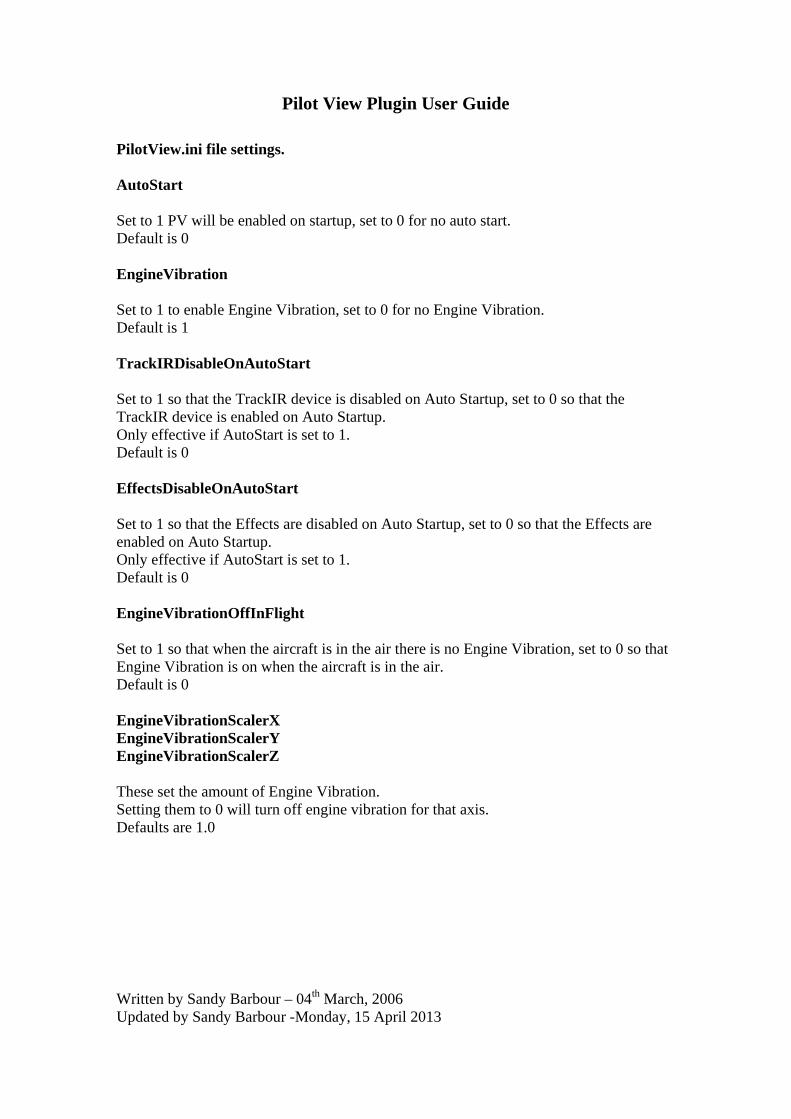
PilotView.ini file settings. AutoStart Set to 1 PV will be enabled on startup, set to 0 for no auto start. Default is 0 EngineVibration Set to 1 to enable Engine Vibration, set to 0 for no Engine Vibration. Default is 1 TrackIRDisableOnAutoStart Set to 1 so that the TrackIR device is disabled on Auto Startup, set to 0 so that the TrackIR device is enabled on Auto Startup. Only effective if AutoStart is set to 1. Default is 0 EffectsDisableOnAutoStart Set to 1 so that the Effects are disabled on Auto Startup, set to 0 so that the Effects are enabled on Auto Startup. Only effective if AutoStart is set to 1. Default is 0 EngineVibrationOffInFlight Set to 1 so that when the aircraft is in the air there is no Engine Vibration, set to 0 so that Engine Vibration is on when the aircraft is in the air. Default is 0 EngineVibrationScalerX EngineVibrationScalerY EngineVibrationScalerZ These set the amount of Engine Vibration. Setting them to 0 will turn off engine vibration for that axis. Defaults are 1.0
Pilot View Plugin User Guide
Written by Sandy Barbour – 04th March, 2006 Updated by Sandy Barbour -Monday, 15 April 2013
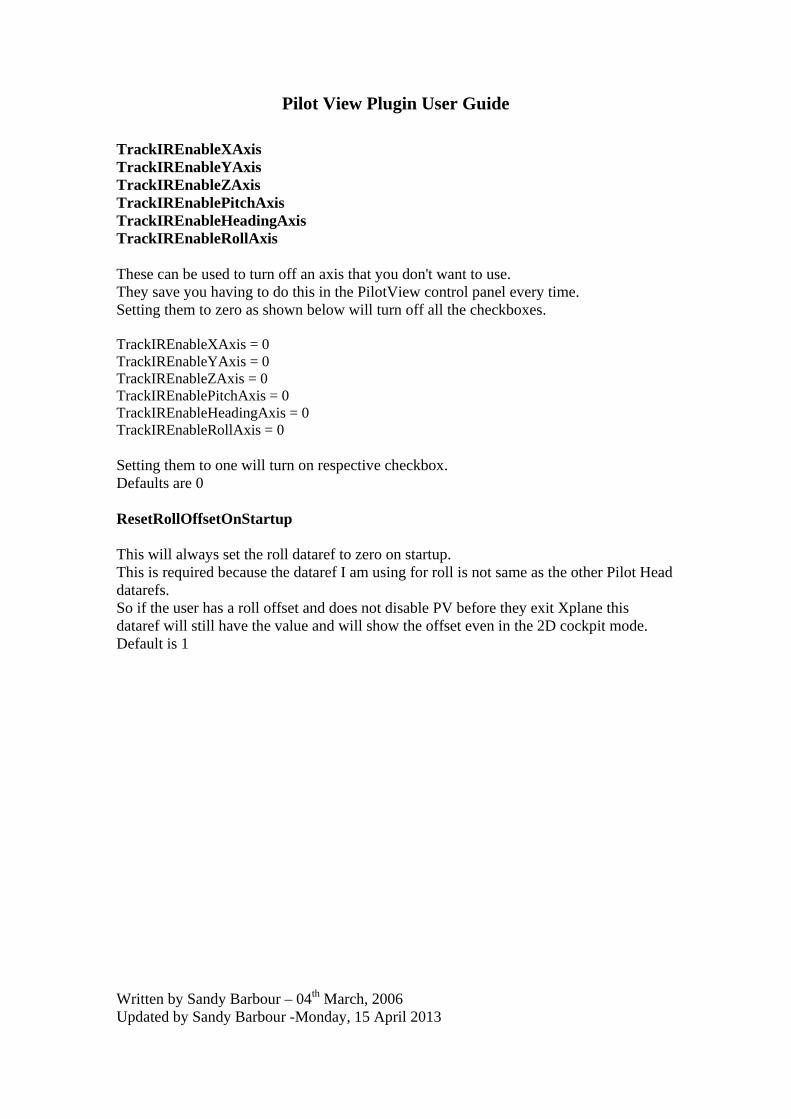
TrackIREnableXAxis TrackIREnableYAxis TrackIREnableZAxis TrackIREnablePitchAxis TrackIREnableHeadingAxis TrackIREnableRollAxis These can be used to turn off an axis that you don't want to use. They save you having to do this in the PilotView control panel every time. Setting them to zero as shown below will turn off all the checkboxes. TrackIREnableXAxis = 0 TrackIREnableYAxis = 0 TrackIREnableZAxis = 0 TrackIREnablePitchAxis = 0 TrackIREnableHeadingAxis = 0 TrackIREnableRollAxis = 0 Setting them to one will turn on respective checkbox. Defaults are 0 ResetRollOffsetOnStartup This will always set the roll dataref to zero on startup. This is required because the dataref I am using for roll is not same as the other Pilot Head datarefs. So if the user has a roll offset and does not disable PV before they exit Xplane this dataref will still have the value and will show the offset even in the 2D cockpit mode. Default is 1
Pilot View Plugin User Guide
Written by Sandy Barbour – 04th March, 2006 Updated by Sandy Barbour -Monday, 15 April 2013
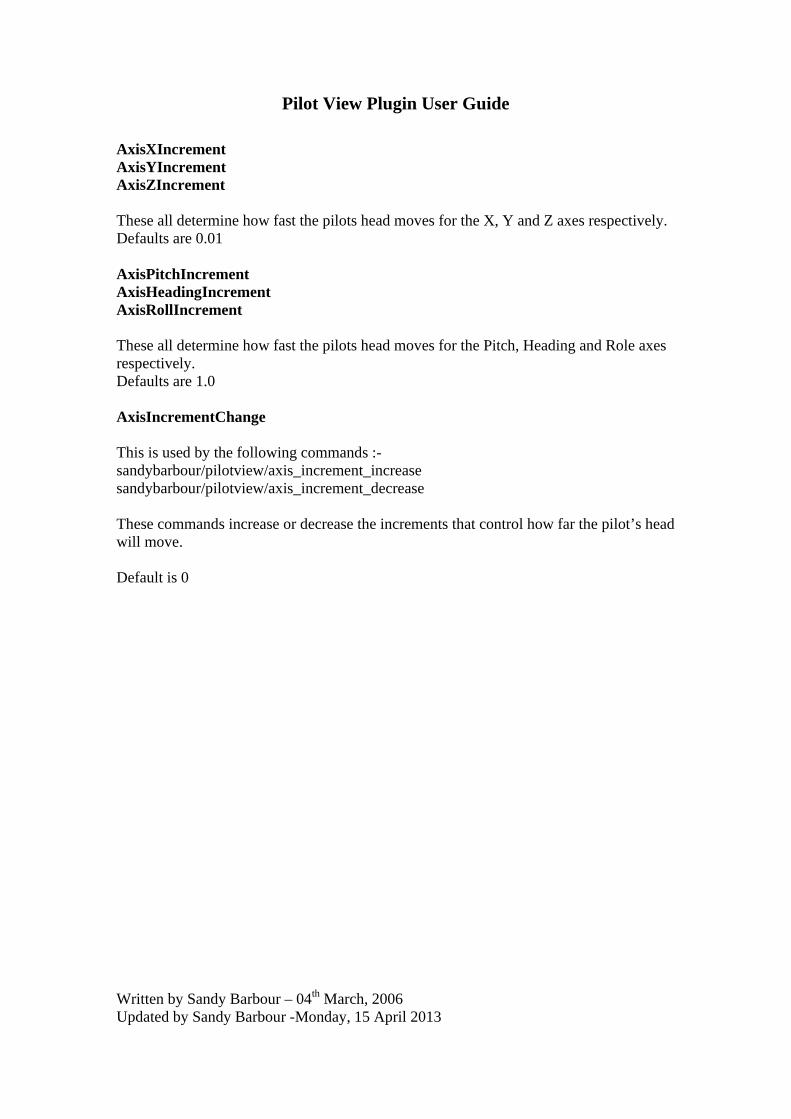
AxisXIncrement AxisYIncrement AxisZIncrement These all determine how fast the pilots head moves for the X, Y and Z axes respectively. Defaults are 0.01 AxisPitchIncrement AxisHeadingIncrement AxisRollIncrement These all determine how fast the pilots head moves for the Pitch, Heading and Role axes respectively. Defaults are 1.0 AxisIncrementChange This is used by the following commands :- sandybarbour/pilotview/axis_increment_increase sandybarbour/pilotview/axis_increment_decrease These commands increase or decrease the increments that control how far the pilot’s head will move. Default is 0
Pilot View Plugin User Guide
Written by Sandy Barbour – 04th March, 2006 Updated by Sandy Barbour -Monday, 15 April 2013
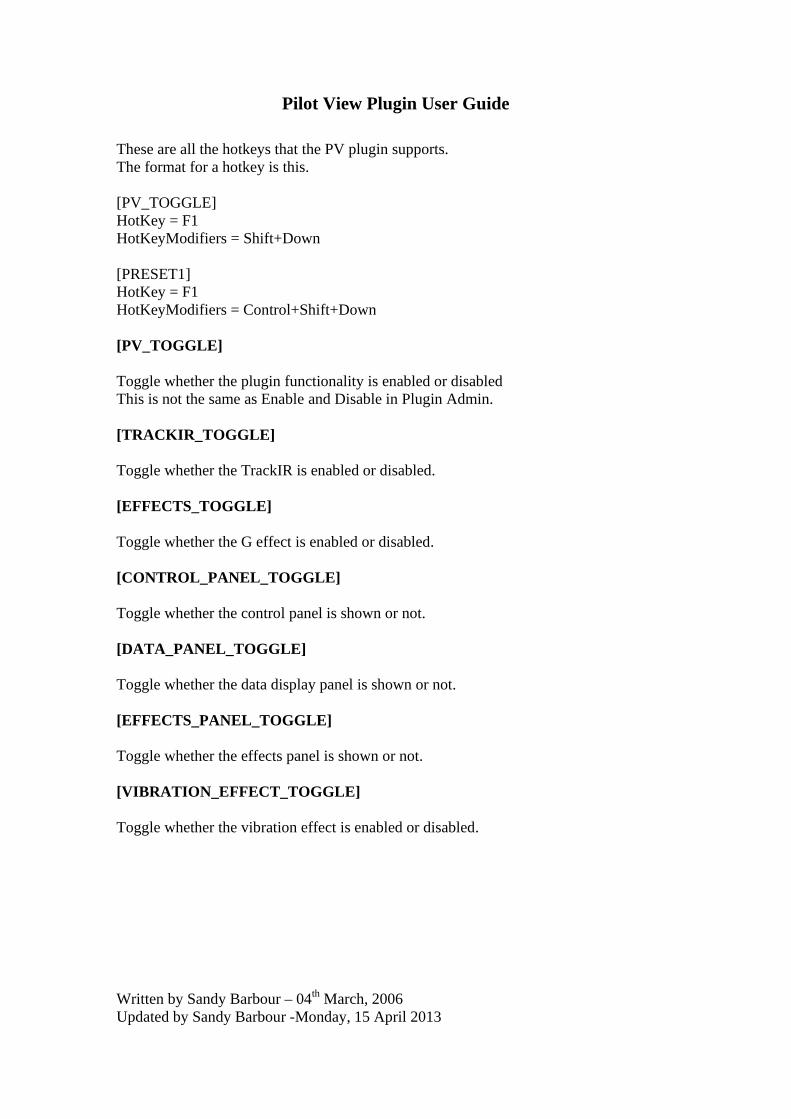
These are all the hotkeys that the PV plugin supports. The format for a hotkey is this. [PV_TOGGLE] HotKey = F1 HotKeyModifiers = Shift+Down [PRESET1] HotKey = F1 HotKeyModifiers = Control+Shift+Down [PV_TOGGLE] Toggle whether the plugin functionality is enabled or disabled This is not the same as Enable and Disable in Plugin Admin. [TRACKIR_TOGGLE] Toggle whether the TrackIR is enabled or disabled. [EFFECTS_TOGGLE] Toggle whether the G effect is enabled or disabled. [CONTROL_PANEL_TOGGLE] Toggle whether the control panel is shown or not. [DATA_PANEL_TOGGLE] Toggle whether the data display panel is shown or not. [EFFECTS_PANEL_TOGGLE] Toggle whether the effects panel is shown or not. [VIBRATION_EFFECT_TOGGLE] Toggle whether the vibration effect is enabled or disabled.
Pilot View Plugin User Guide
Written by Sandy Barbour – 04th March, 2006 Updated by Sandy Barbour -Monday, 15 April 2013
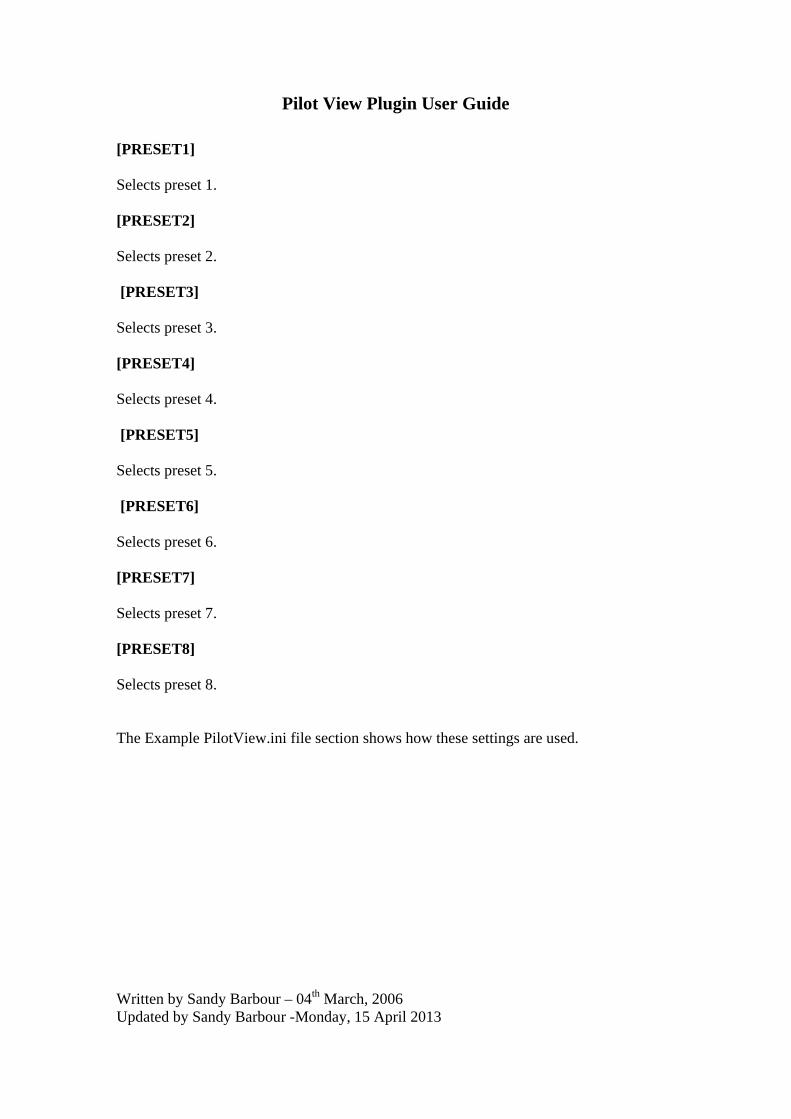
[PRESET1] Selects preset 1. [PRESET2] Selects preset 2. [PRESET3] Selects preset 3. [PRESET4] Selects preset 4. [PRESET5] Selects preset 5. [PRESET6] Selects preset 6. [PRESET7] Selects preset 7. [PRESET8] Selects preset 8. The Example PilotView.ini file section shows how these settings are used.
Pilot View Plugin User Guide
Written by Sandy Barbour – 04th March, 2006 Updated by Sandy Barbour -Monday, 15 April 2013
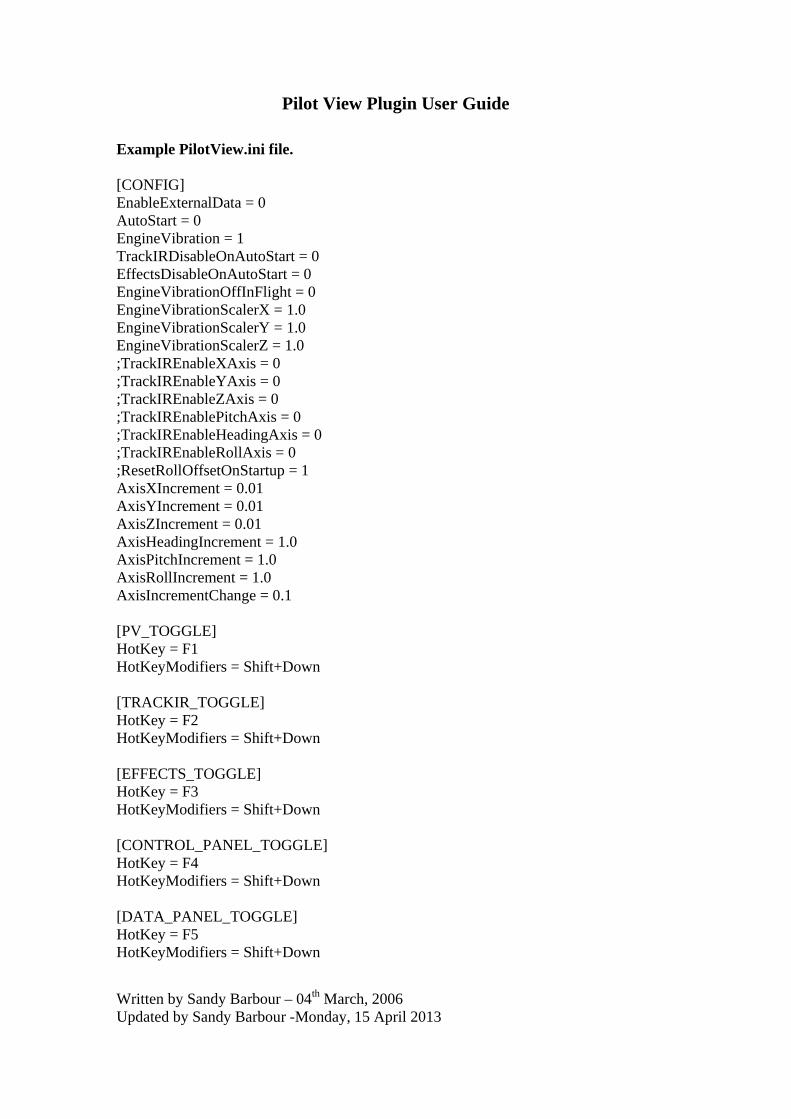
Example PilotView.ini file. [CONFIG] EnableExternalData = 0 AutoStart = 0 EngineVibration = 1 TrackIRDisableOnAutoStart = 0 EffectsDisableOnAutoStart = 0 EngineVibrationOffInFlight = 0 EngineVibrationScalerX = 1.0 EngineVibrationScalerY = 1.0 EngineVibrationScalerZ = 1.0 ;TrackIREnableXAxis = 0 ;TrackIREnableYAxis = 0 ;TrackIREnableZAxis = 0 ;TrackIREnablePitchAxis = 0 ;TrackIREnableHeadingAxis = 0 ;TrackIREnableRollAxis = 0 ;ResetRollOffsetOnStartup = 1 AxisXIncrement = 0.01 AxisYIncrement = 0.01 AxisZIncrement = 0.01 AxisHeadingIncrement = 1.0 AxisPitchIncrement = 1.0 AxisRollIncrement = 1.0 AxisIncrementChange = 0.1 [PV_TOGGLE] HotKey = F1 HotKeyModifiers = Shift+Down [TRACKIR_TOGGLE] HotKey = F2 HotKeyModifiers = Shift+Down [EFFECTS_TOGGLE] HotKey = F3 HotKeyModifiers = Shift+Down [CONTROL_PANEL_TOGGLE] HotKey = F4 HotKeyModifiers = Shift+Down [DATA_PANEL_TOGGLE] HotKey = F5 HotKeyModifiers = Shift+Down
Pilot View Plugin User Guide
Written by Sandy Barbour – 04th March, 2006 Updated by Sandy Barbour -Monday, 15 April 2013
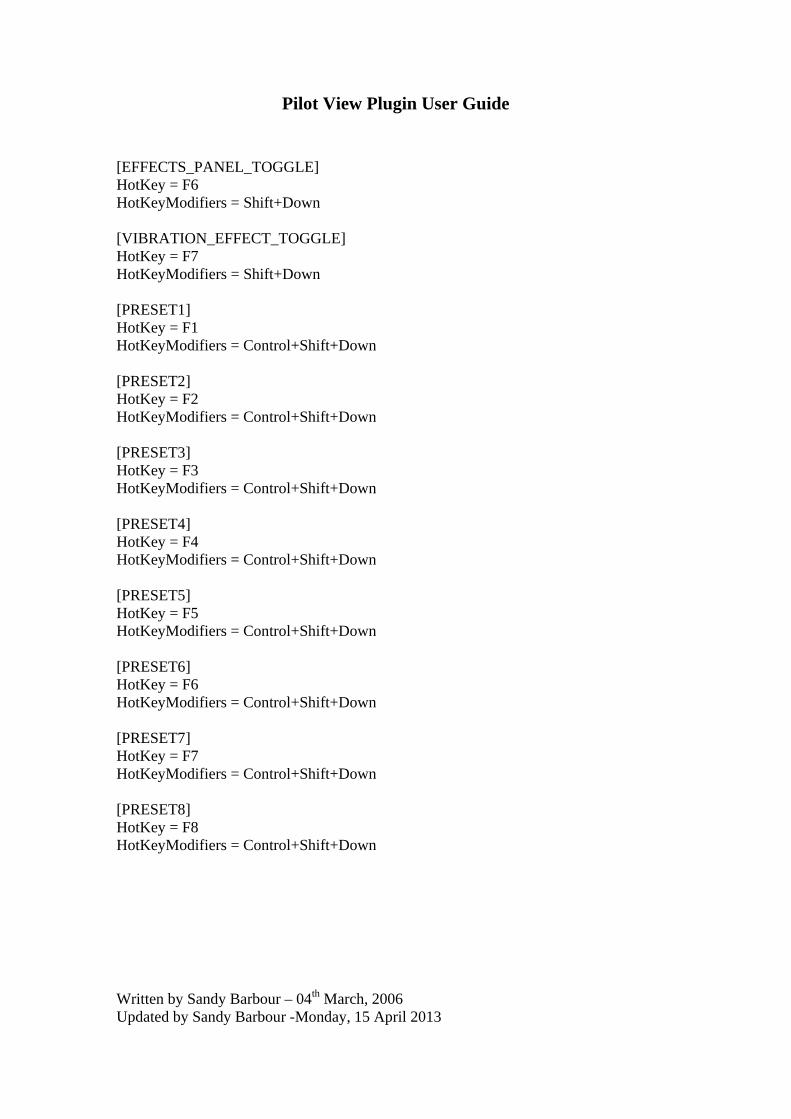
[EFFECTS_PANEL_TOGGLE] HotKey = F6 HotKeyModifiers = Shift+Down [VIBRATION_EFFECT_TOGGLE] HotKey = F7 HotKeyModifiers = Shift+Down [PRESET1] HotKey = F1 HotKeyModifiers = Control+Shift+Down [PRESET2] HotKey = F2 HotKeyModifiers = Control+Shift+Down [PRESET3] HotKey = F3 HotKeyModifiers = Control+Shift+Down [PRESET4] HotKey = F4 HotKeyModifiers = Control+Shift+Down [PRESET5] HotKey = F5 HotKeyModifiers = Control+Shift+Down [PRESET6] HotKey = F6 HotKeyModifiers = Control+Shift+Down [PRESET7] HotKey = F7 HotKeyModifiers = Control+Shift+Down [PRESET8] HotKey = F8 HotKeyModifiers = Control+Shift+Down
Pilot View Plugin User Guide
Written by Sandy Barbour – 04th March, 2006 Updated by Sandy Barbour -Monday, 15 April 2013
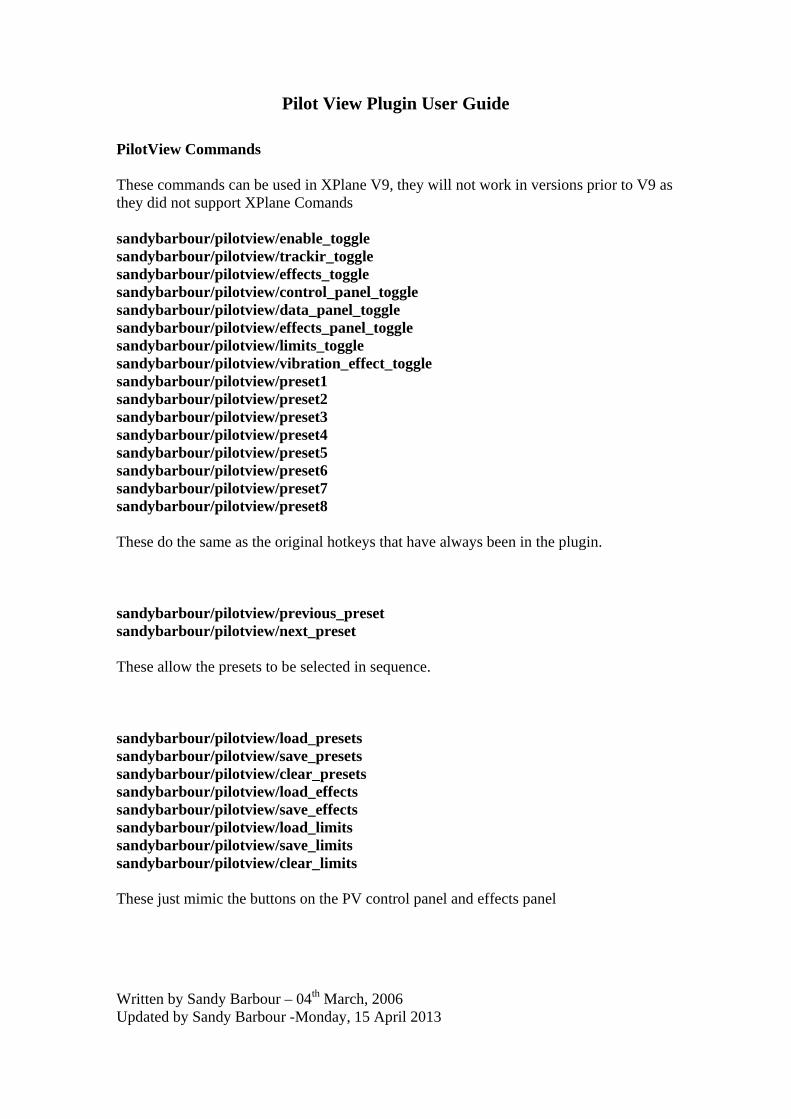
PilotView Commands These commands can be used in XPlane V9, they will not work in versions prior to V9 as they did not support XPlane Comands sandybarbour/pilotview/enable_toggle sandybarbour/pilotview/trackir_toggle sandybarbour/pilotview/effects_toggle sandybarbour/pilotview/control_panel_toggle sandybarbour/pilotview/data_panel_toggle sandybarbour/pilotview/effects_panel_toggle sandybarbour/pilotview/limits_toggle sandybarbour/pilotview/vibration_effect_toggle sandybarbour/pilotview/preset1 sandybarbour/pilotview/preset2 sandybarbour/pilotview/preset3 sandybarbour/pilotview/preset4 sandybarbour/pilotview/preset5 sandybarbour/pilotview/preset6 sandybarbour/pilotview/preset7 sandybarbour/pilotview/preset8 These do the same as the original hotkeys that have always been in the plugin. sandybarbour/pilotview/previous_preset sandybarbour/pilotview/next_preset These allow the presets to be selected in sequence. sandybarbour/pilotview/load_presets sandybarbour/pilotview/save_presets sandybarbour/pilotview/clear_presets sandybarbour/pilotview/load_effects sandybarbour/pilotview/save_effects sandybarbour/pilotview/load_limits sandybarbour/pilotview/save_limits sandybarbour/pilotview/clear_limits These just mimic the buttons on the PV control panel and effects panel
Pilot View Plugin User Guide
Written by Sandy Barbour – 04th March, 2006 Updated by Sandy Barbour -Monday, 15 April 2013
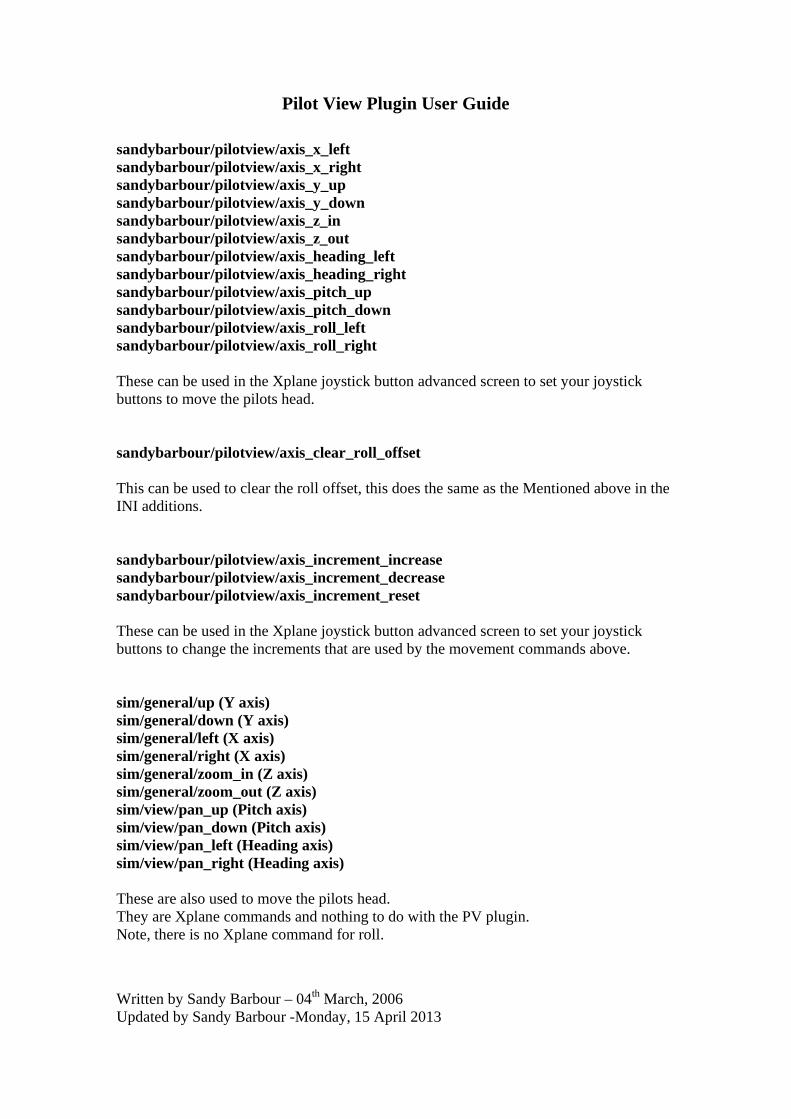
sandybarbour/pilotview/axis_x_left sandybarbour/pilotview/axis_x_right sandybarbour/pilotview/axis_y_up sandybarbour/pilotview/axis_y_down sandybarbour/pilotview/axis_z_in sandybarbour/pilotview/axis_z_out sandybarbour/pilotview/axis_heading_left sandybarbour/pilotview/axis_heading_right sandybarbour/pilotview/axis_pitch_up sandybarbour/pilotview/axis_pitch_down sandybarbour/pilotview/axis_roll_left sandybarbour/pilotview/axis_roll_right These can be used in the Xplane joystick button advanced screen to set your joystick buttons to move the pilots head. sandybarbour/pilotview/axis_clear_roll_offset This can be used to clear the roll offset, this does the same as the Mentioned above in the INI additions. sandybarbour/pilotview/axis_increment_increase sandybarbour/pilotview/axis_increment_decrease sandybarbour/pilotview/axis_increment_reset These can be used in the Xplane joystick button advanced screen to set your joystick buttons to change the increments that are used by the movement commands above. sim/general/up (Y axis) sim/general/down (Y axis) sim/general/left (X axis) sim/general/right (X axis) sim/general/zoom_in (Z axis) sim/general/zoom_out (Z axis) sim/view/pan_up (Pitch axis) sim/view/pan_down (Pitch axis) sim/view/pan_left (Heading axis) sim/view/pan_right (Heading axis) These are also used to move the pilots head. They are Xplane commands and nothing to do with the PV plugin. Note, there is no Xplane command for roll.
Pilot View Plugin User Guide
Written by Sandy Barbour – 04th March, 2006 Updated by Sandy Barbour -Monday, 15 April 2013
IMPORTANT NOTES ON USING EXTERNAL DATA. 1. It is up to the provider of the external data to handle any calibration with respect to their data. The PilotView plugin does not and will not handle calibration of the external data. 2. If a user is using external data from a provider, then any problems should be sent to the provider of the external data first and foremost as I will not be supporting the usage of external data. That is because the data that is sent is out with my control. The provider can get in touch with me directly to discuss the data they are sending. If a user does email me about it then I will refer them to the provider of the external data. I don't think I am being unreasonable here as I do not want to get bogged down with problems that may not be related to the PilotView plugin. 3. When using External Data, the effects will work as normal. If the provider provides their own effects, then the PilotView effects can be turned off in the PilotView Effects Control panel and then saved. This will save that on a per aircraft basis NOTE. Turning off the effects is something that has always been in the PilotView plugin and is not something that has been added for the External Data.
Pilot View Plugin User Guide
Written by Sandy Barbour – 04th March, 2006 Updated by Sandy Barbour -Monday, 15 April 2013
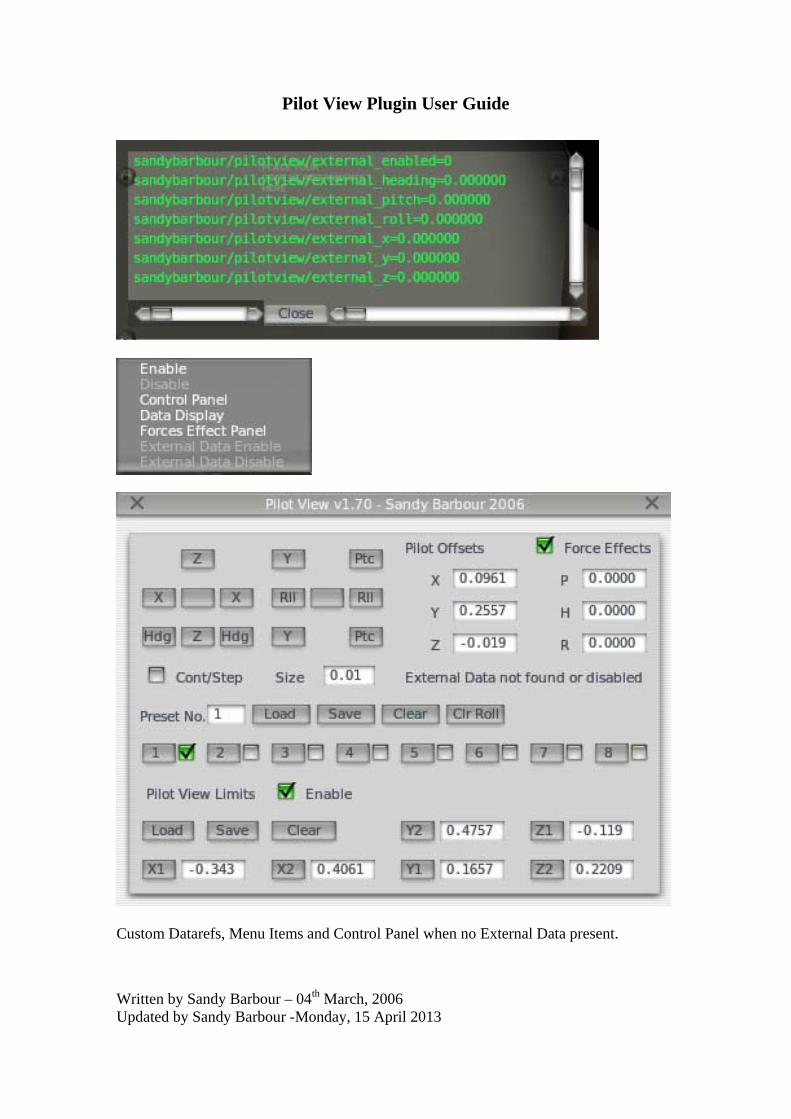
Using External Data with the PilotView Plugin. To use external data with the plugin you need to add the line below to the PilotView.ini file. EnableExternalData = 1 When the above line is in the PilotView.ini file TrackIR is not used. The PilotView plugin will then use the custom datarefs below for its tracker data. These datarefs will show in DataRefEditor which is a handy plugin for testing that the custom datarefs are being updated properly. EnableExternalData = 0 When the above setting is in the PilotView.ini file the plugin works with the TrackIR (if present) and the behaviour is the same as the original PilotView plugin. If the above option is missing from the PilotView.ini file the plugin works with the TrackIR (if present) and the behaviour is the same as the original PilotView plugin. Custom Datarefs sandybarbour/pilotview/external_enabled If this is set to 1 then the plugin will move the pilots head using the custom datarefs below. If it is set to 0 (zero) then the pilots head will not be moved. sandybarbour/pilotview/external_x sandybarbour/pilotview/external_y sandybarbour/pilotview/external_z These are used to position the pilots head in the x, y, and z axes. The units for these are the same as the plugin SDK pilots head dataref s which are cockpit metres. If the PilotView Effects are on then this data will changed accordingly. sandybarbour/pilotview/external_pitch sandybarbour/pilotview/external_heading sandybarbour/pilotview/external_roll These are used to change the pilots head in the pitch, heading and roll axes. The units for these are the same as the plugin SDK pilots head datarefs which are are degrees..
Pilot View Plugin User Guide
Written by Sandy Barbour – 04th March, 2006 Updated by Sandy Barbour -Monday, 15 April 2013
Custom Datarefs, Menu Items and Control Panel when no External Data present.
Pilot View Plugin User Guide
Written by Sandy Barbour – 04th March, 2006 Updated by Sandy Barbour -Monday, 15 April 2013
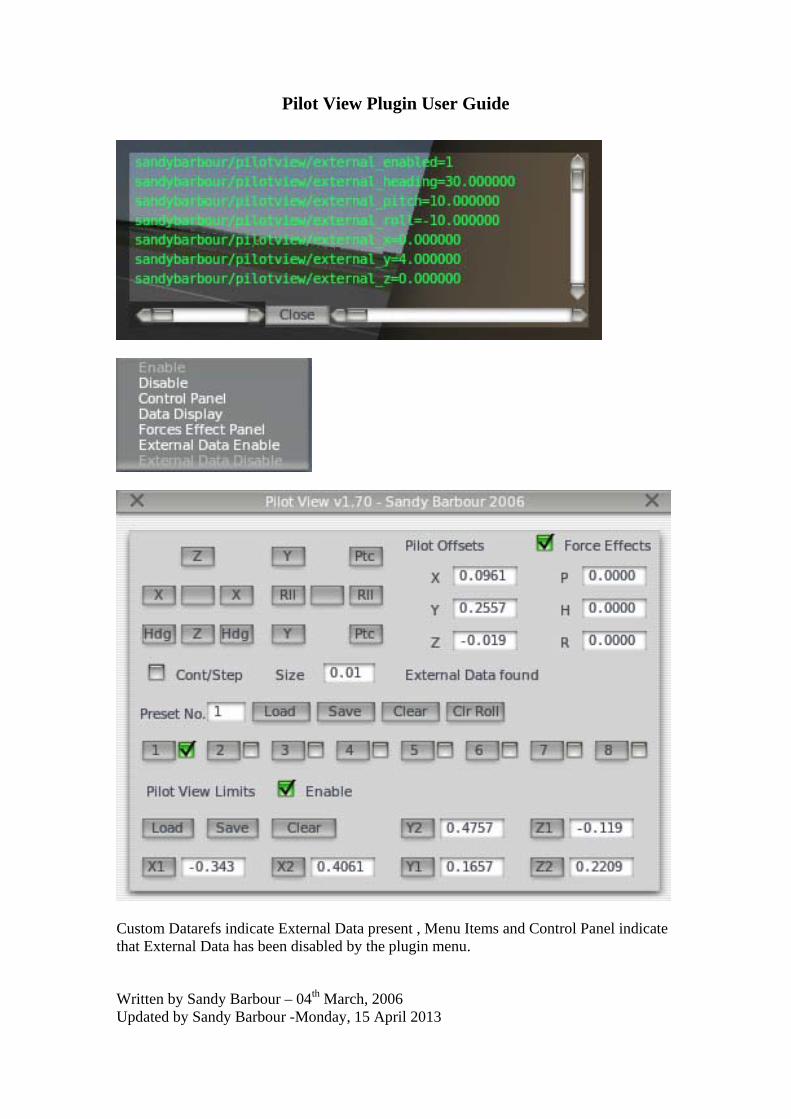
Custom Datarefs indicate External Data present , Menu Items and Control Panel indicate that External Data has been disabled by the plugin menu.
Pilot View Plugin User Guide
Written by Sandy Barbour – 04th March, 2006 Updated by Sandy Barbour -Monday, 15 April 2013
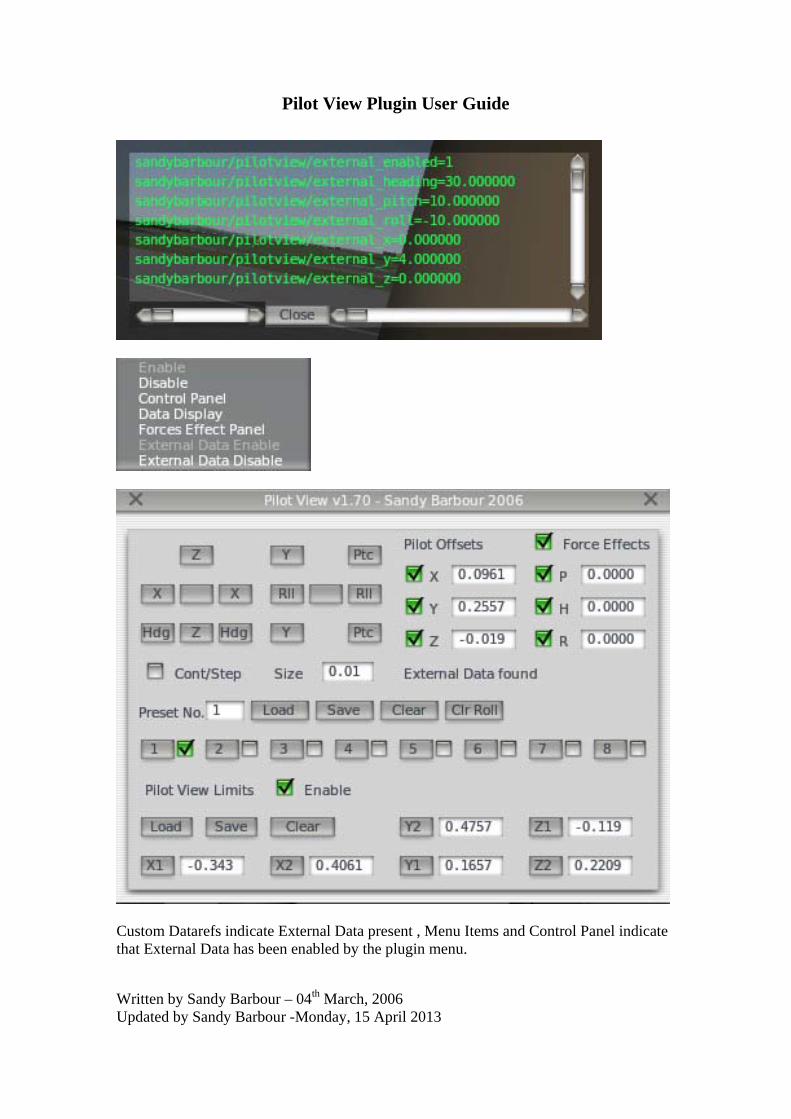
Custom Datarefs indicate External Data present , Menu Items and Control Panel indicate that External Data has been enabled by the plugin menu.