Embed Size (px)
DESCRIPTION
paintthemoon.net/blog Annie with Paint the Moon Photoshop™ Actions presents a comprehensive overview of the tools and features you'll find within the Facebook Timeline. From understanding how to customize the look and feel of your page, creating custom tabs, to understanding Insights, this quick overview filled with tips and tricks will help you get the most out of Timeline, as well as help you further develop your brand and branding on Facebook. facebook.com/paintthemoonphotography/app_241467572609895
Citation preview
© p a i n t t h e m o o n p h o t o s h o p a c t i o n sa l l r i g h t s r e s e r v e d • p a i n t t h e m o o n . n e t
Paint the Moonp hotoshop™ act ions and textures
Guide to Making the Most Out ofFacebook™ Timeline for Business Pages
f r o m y o u r c o v e r p h o t o t o e n g a g i n g f a n s ,w e ’ v e g o t y o u c o v e r e d .
© p a i n t t h e m o o n p h o t o s h o p a c t i o n sa l l r i g h t s r e s e r v e d • p a i n t t h e m o o n . n e t
Facebook recently unveiled the Timeline format for brand pages and with it a new experience for both page owners and their fans. As with all changes there will be an adjustment time, and thankfully Facebook is giving page owners the capability of previewing and setting up their Timeline before it goes live. This allows you to go in and set everything up, get used to how it functions, test all the features and make sure the settings are the way you’d want them. Once it all looks good and you’re comfortable with it you can hit Publish and have it be seen by the world. Just be aware that Facebook will be pushing all Fan Pages to the Timeline set up by the end of March. So it’s a great idea to start to check out all the new awesome features it offers and get yours slick looking before that happens. At the end of this guide you’ll also find a handy checklist to take a look at for tips on preparing your Timeline be-fore going live as well as a few pointers to help make the most out of your new Timeline experience.
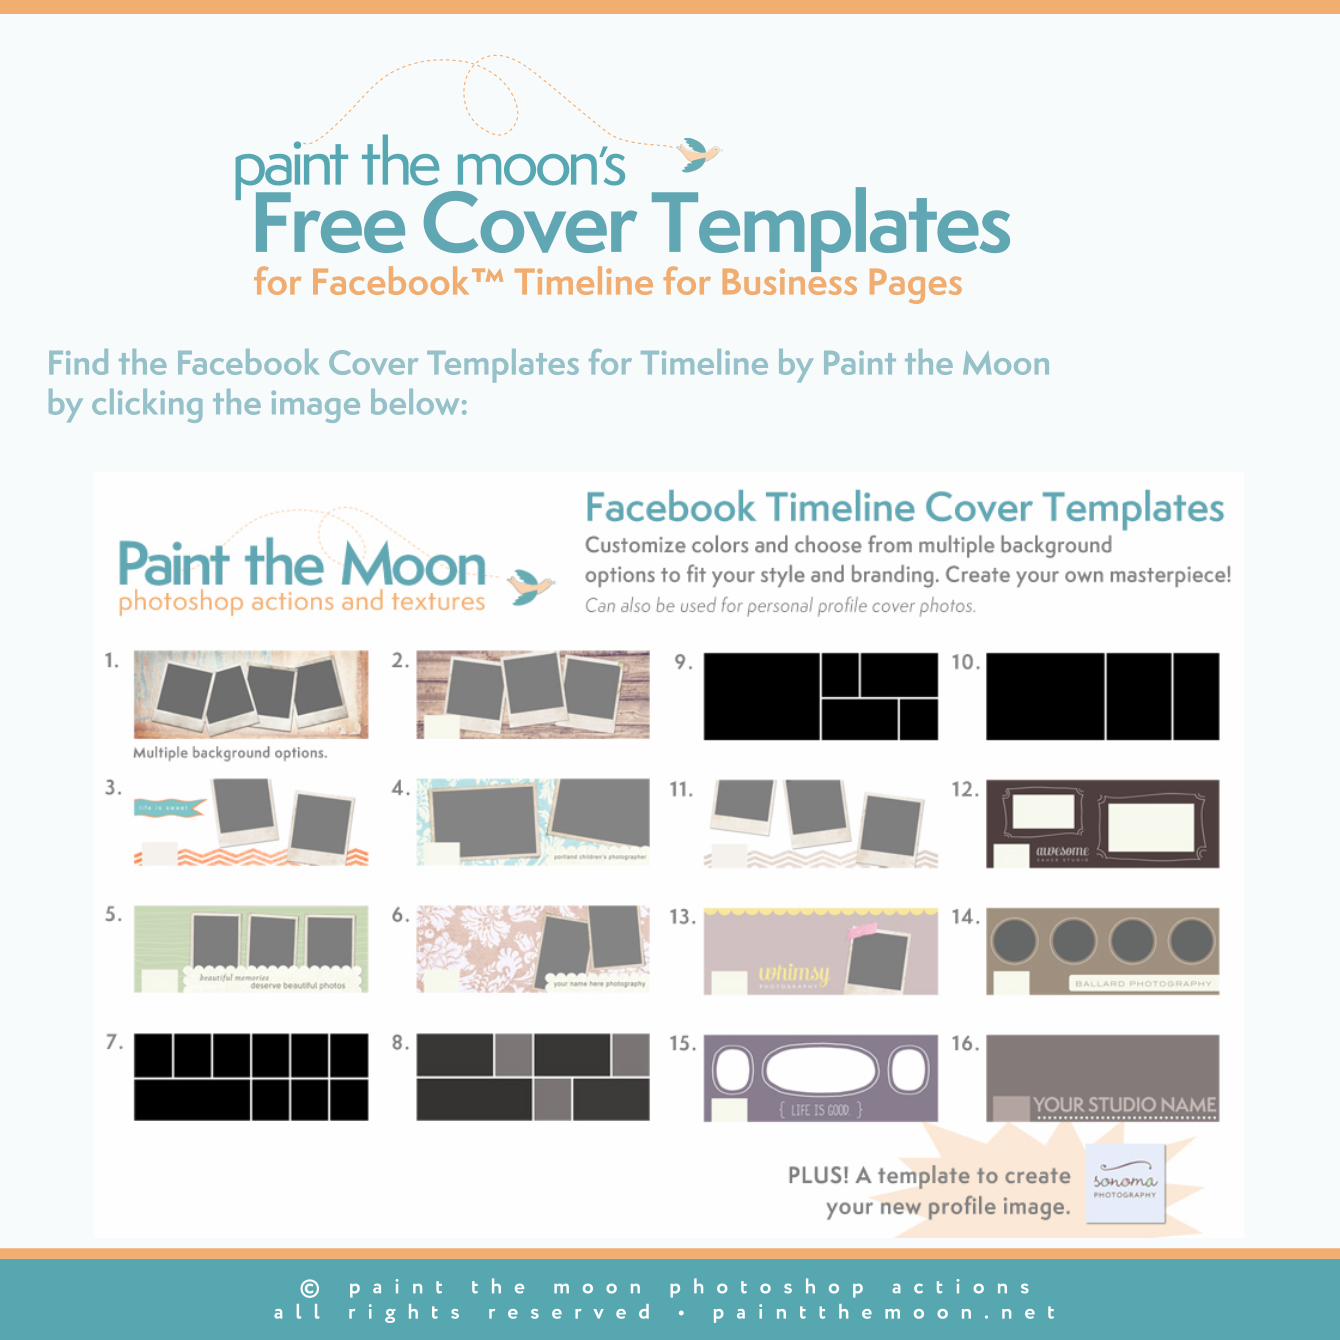
Similar to the Facebook profile templates I released several years ago, I’ve got you covered with fabulous templates for your Timeline Cover Photo for your business page on Facebook. I am offering this extensive collection of Facebook Timeline Cover Templates which are easily customized with the option to change the colors to match your branding and change backgrounds to fit your style. To assist with this, I’ve included with the templates three videos show-ing the templates in use and one video that walks you through some of the new changes.
Note: Free template products are created for your personal and business use. My goal is to help businesses make the most of the new Facebook Timeline and you are welcome to use them for your own business on Facebook or even for blogging. I do ask that the free templates are not used to resell to clients - if you would like a product licensed for this use, you’ll want the larger, more comprehensive template bundle that will be available in the store in a few weeks.
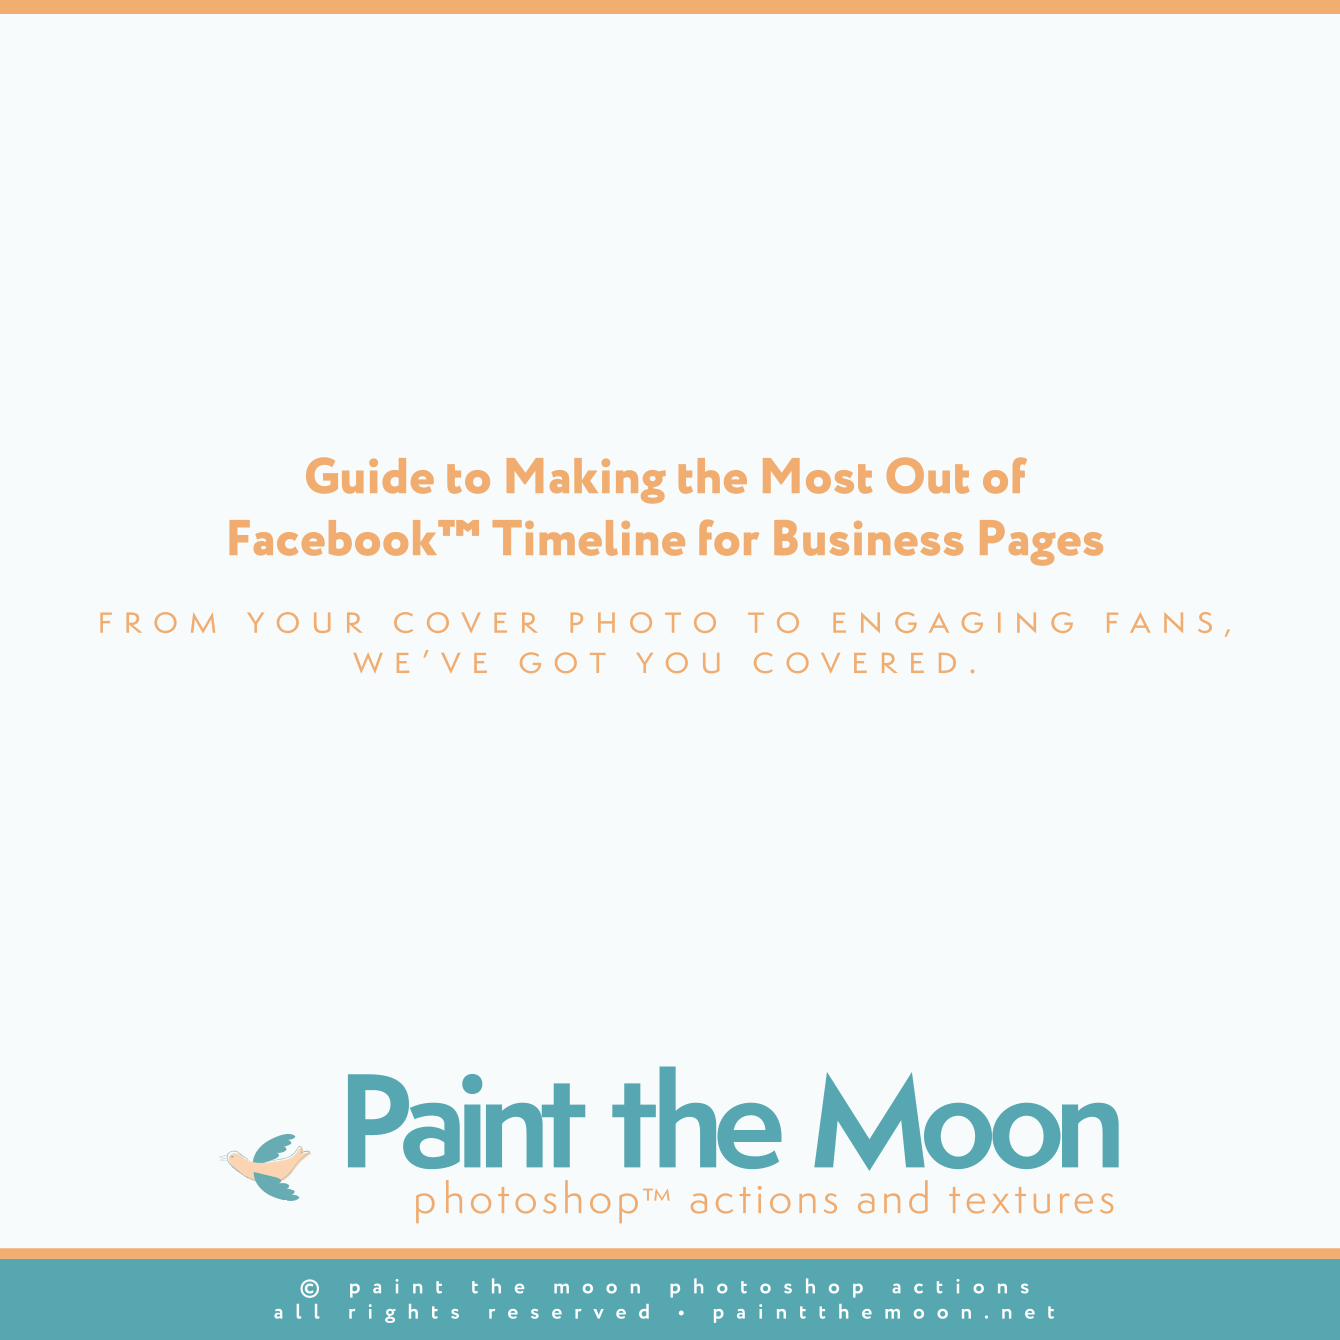
Cover Photos
The large space they occupy are an awesome opportunity to showcase your work and create a solid branding experience, making your page visually appealing and engaging your fans.
photographer’s guidepaint the moon’s
to Facebook™ Timeline for Business Pages
© p a i n t t h e m o o n p h o t o s h o p a c t i o n sa l l r i g h t s r e s e r v e d • p a i n t t h e m o o n . n e t
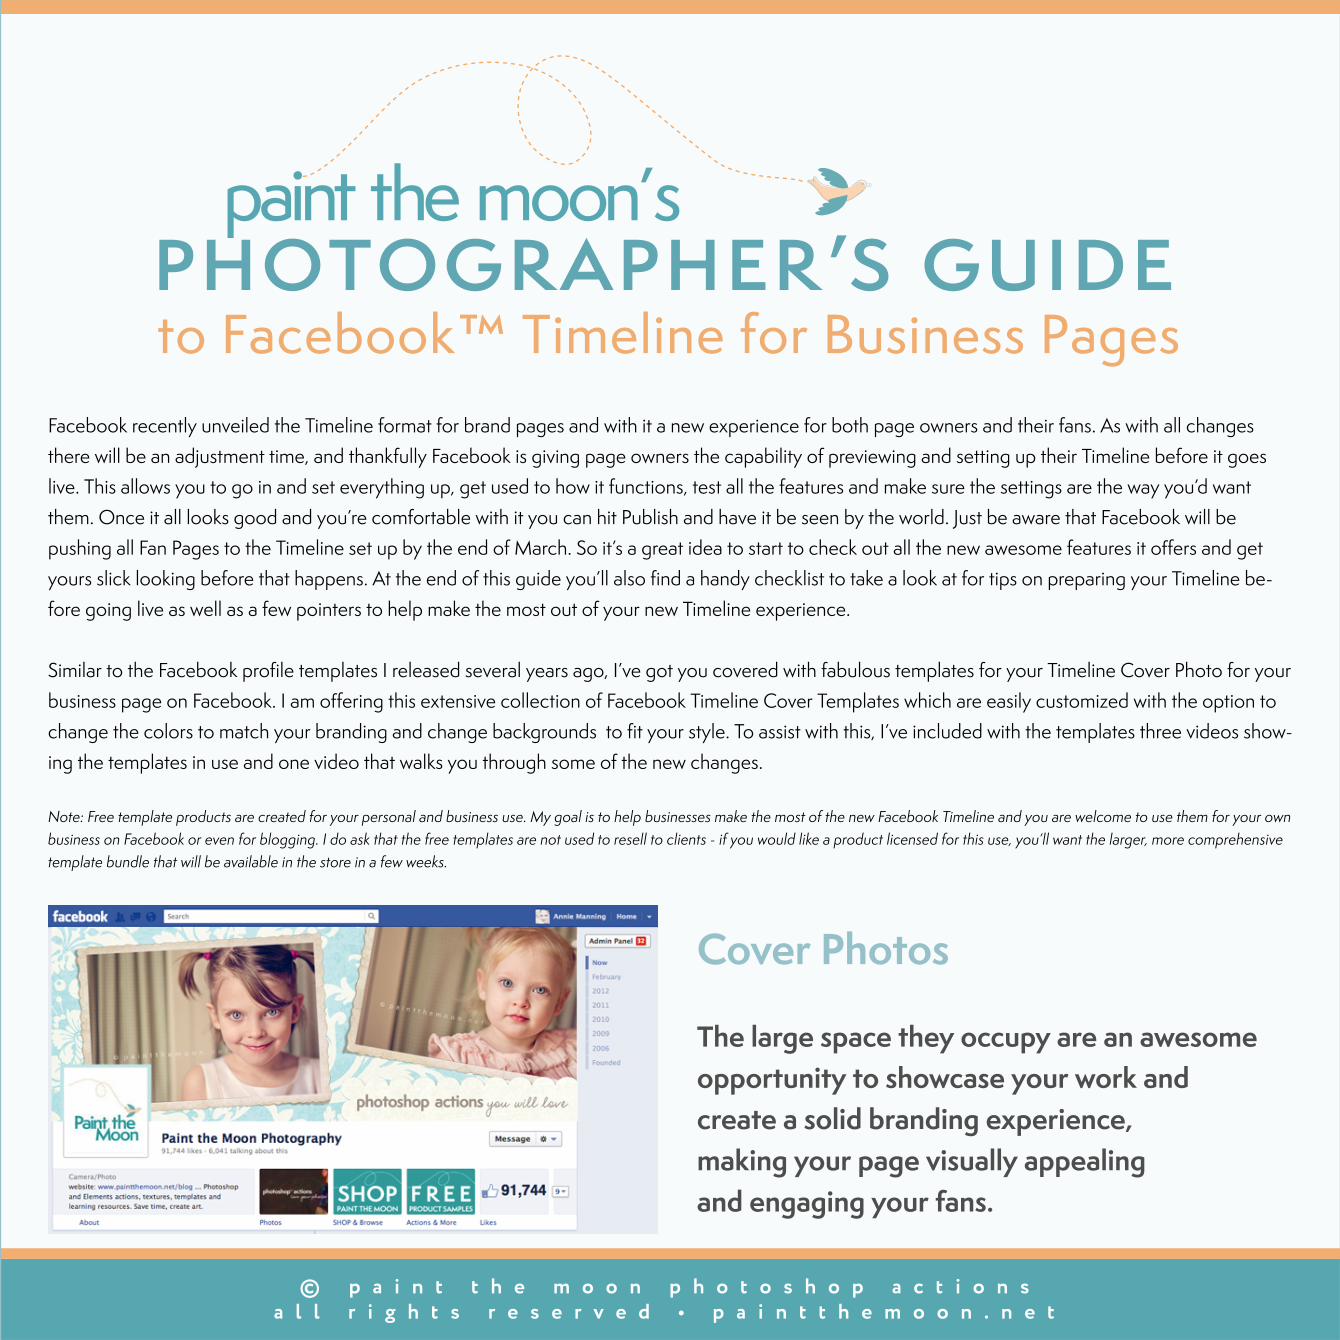
Cover Photo
The first and most obvious change you’ll notice is the Cover Photo. As we’ve seen on personal profiles starting last fall, the new Timeline design displays a cover photo across the top of your page. These remain static until you decide to change it out yourself. It’s a brilliant way to cement your brand, show off your favorite photos and make a fabulous first impression. The dimensions are 851 pixels wide by 315 pixels tall. Be sure to check out the Paint the Moon Cover Templates for many creative options that you can customize for your brand, including one to simply build your own cover or create a large photo cover as I have done in my example above. Here you’ll find the videos on creating a cover photo using the templates to make it super easy and fun.
Be sure to view the guidelines for the new covers as it is important to know they are not allowed to contain excessive text, promotional messaging such as calls-to-action (Get It Now! or Visit Our Website). You also may not reference Facebook features like arrows directing users to”Like Us” or “See Our Special Offers Below.” Also, no contact information may be included such as URLs, phone numbers, etc. You can find the complete guidelines for cover photo here. While some have said they feel this seems too restrictive, I think it’s a good thing overall because it will create a community feel. People will want to come visit and be a part of your page, rather than running into pages that look like giant advetisements trying to sell to them all over Facebook.
© p a i n t t h e m o o n p h o t o s h o p a c t i o n sa l l r i g h t s r e s e r v e d • p a i n t t h e m o o n . n e t
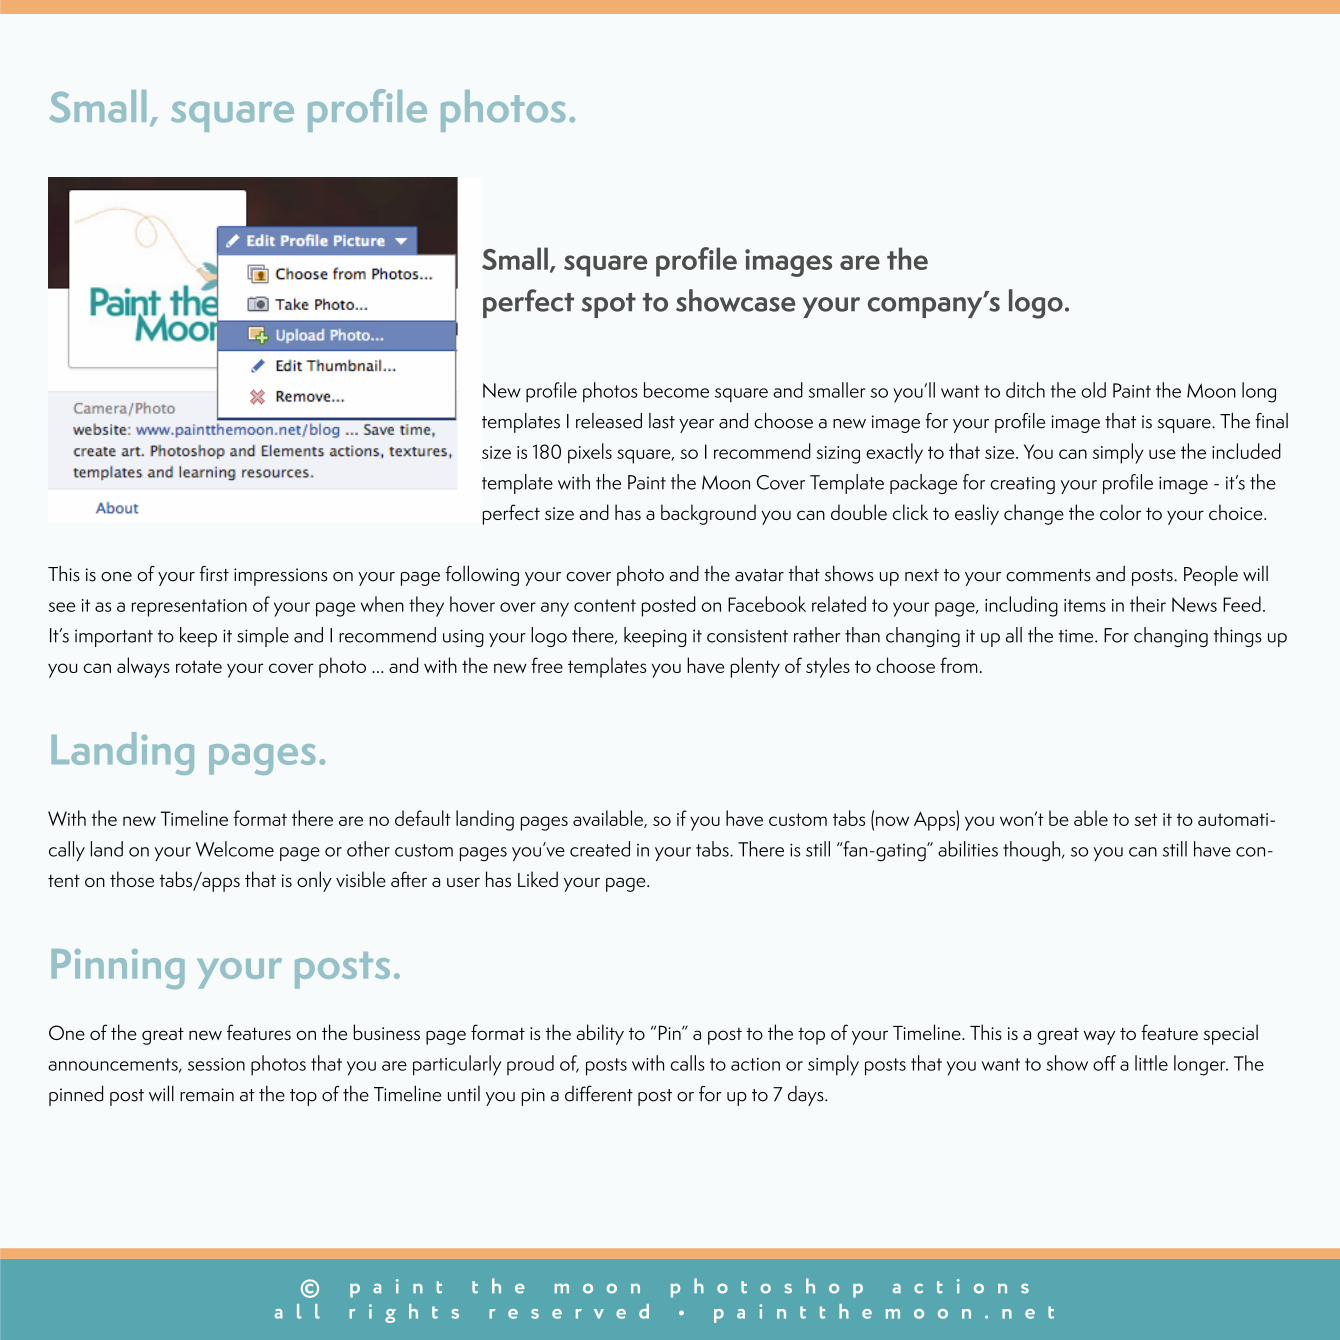
Small, square profile photos.
New profile photos become square and smaller so you’ll want to ditch the old Paint the Moon long templates I released last year and choose a new image for your profile image that is square. The final size is 180 pixels square, so I recommend sizing exactly to that size. You can simply use the included template with the Paint the Moon Cover Template package for creating your profile image - it’s the perfect size and has a background you can double click to easliy change the color to your choice.
This is one of your first impressions on your page following your cover photo and the avatar that shows up next to your comments and posts. People will see it as a representation of your page when they hover over any content posted on Facebook related to your page, including items in their News Feed. It’s important to keep it simple and I recommend using your logo there, keeping it consistent rather than changing it up all the time. For changing things up you can always rotate your cover photo ... and with the new free templates you have plenty of styles to choose from.
Landing pages.With the new Timeline format there are no default landing pages available, so if you have custom tabs (now Apps) you won’t be able to set it to automati-cally land on your Welcome page or other custom pages you’ve created in your tabs. There is still “fan-gating” abilities though, so you can still have con-tent on those tabs/apps that is only visible after a user has Liked your page.
Pinning your posts.One of the great new features on the business page format is the ability to “Pin” a post to the top of your Timeline. This is a great way to feature special announcements, session photos that you are particularly proud of, posts with calls to action or simply posts that you want to show off a little longer. The pinned post will remain at the top of the Timeline until you pin a different post or for up to 7 days.
Small, square profile images are theperfect spot to showcase your company’s logo.
© p a i n t t h e m o o n p h o t o s h o p a c t i o n sa l l r i g h t s r e s e r v e d • p a i n t t h e m o o n . n e t
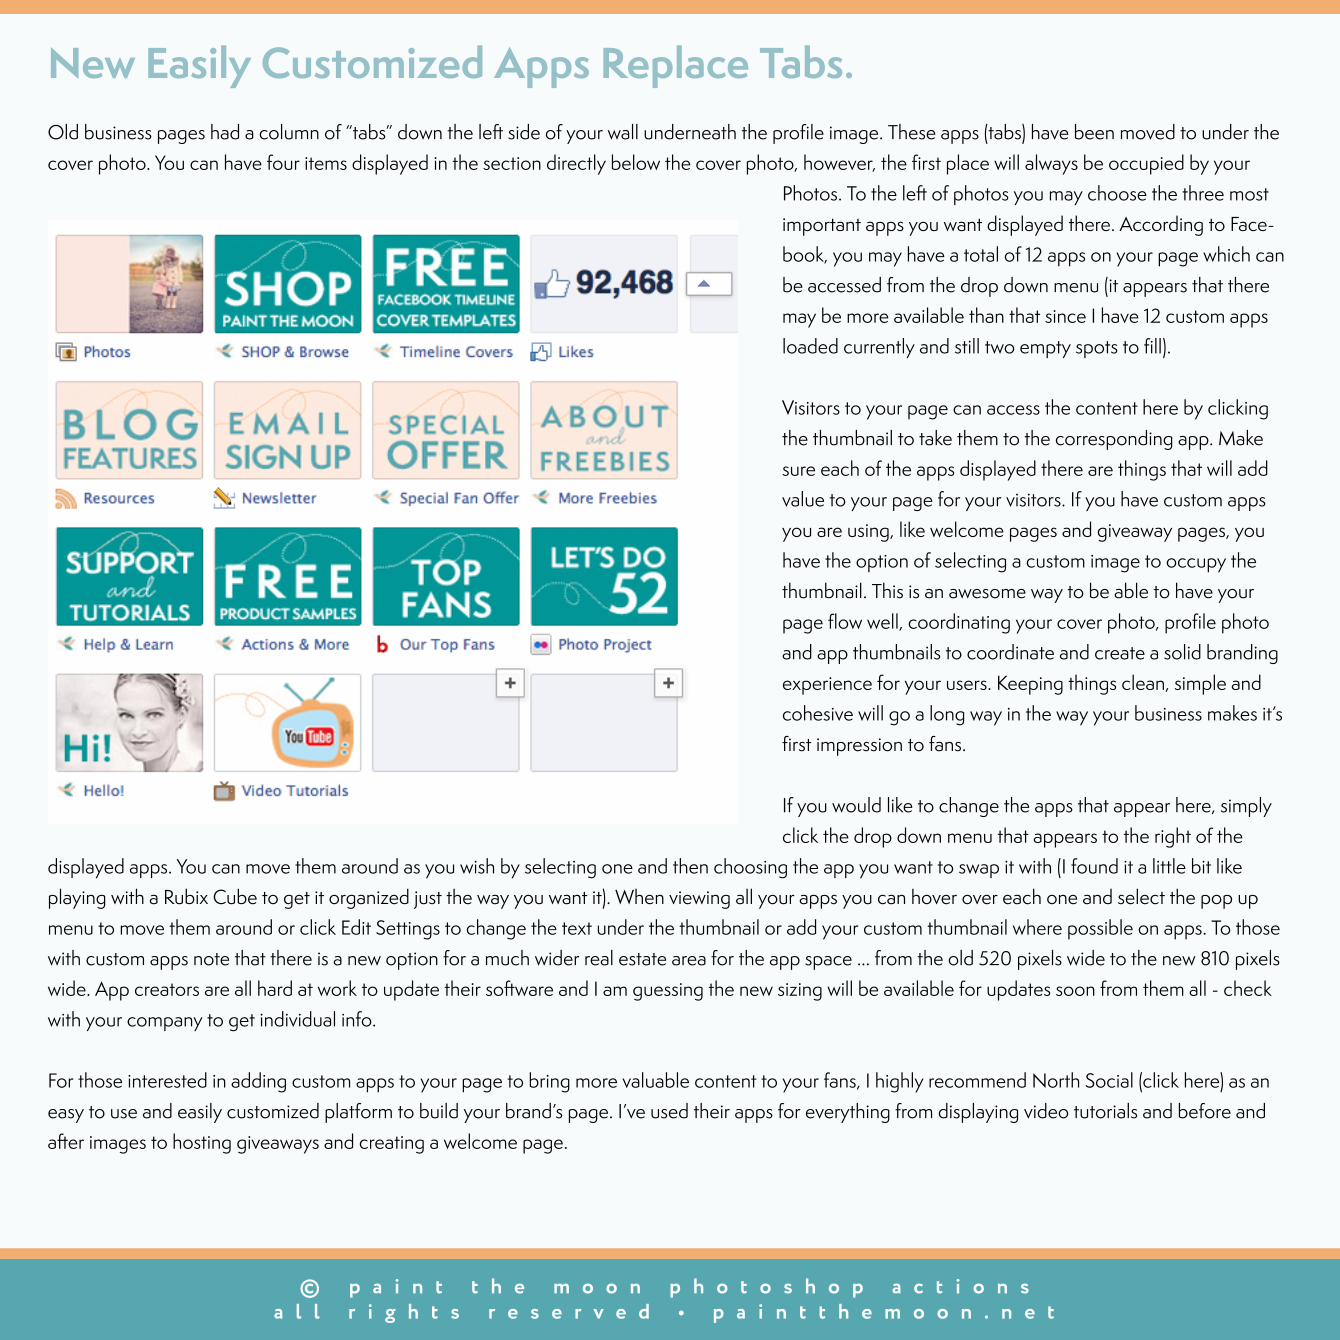
New Easily Customized Apps Replace Tabs.Old business pages had a column of “tabs” down the left side of your wall underneath the profile image. These apps (tabs) have been moved to under the cover photo. You can have four items displayed in the section directly below the cover photo, however, the first place will always be occupied by your
Photos. To the left of photos you may choose the three most important apps you want displayed there. According to Face-book, you may have a total of 12 apps on your page which can be accessed from the drop down menu (it appears that there may be more available than that since I have 12 custom apps loaded currently and still two empty spots to fill).
Visitors to your page can access the content here by clicking the thumbnail to take them to the corresponding app. Make sure each of the apps displayed there are things that will add value to your page for your visitors. If you have custom apps you are using, like welcome pages and giveaway pages, you have the option of selecting a custom image to occupy the thumbnail. This is an awesome way to be able to have your page flow well, coordinating your cover photo, profile photo and app thumbnails to coordinate and create a solid branding experience for your users. Keeping things clean, simple and cohesive will go a long way in the way your business makes it’s first impression to fans.
If you would like to change the apps that appear here, simply click the drop down menu that appears to the right of the
displayed apps. You can move them around as you wish by selecting one and then choosing the app you want to swap it with (I found it a little bit like playing with a Rubix Cube to get it organized just the way you want it). When viewing all your apps you can hover over each one and select the pop up menu to move them around or click Edit Settings to change the text under the thumbnail or add your custom thumbnail where possible on apps. To those with custom apps note that there is a new option for a much wider real estate area for the app space ... from the old 520 pixels wide to the new 810 pixels wide. App creators are all hard at work to update their software and I am guessing the new sizing will be available for updates soon from them all - check with your company to get individual info.
For those interested in adding custom apps to your page to bring more valuable content to your fans, I highly recommend North Social (click here) as an easy to use and easily customized platform to build your brand’s page. I’ve used their apps for everything from displaying video tutorials and before and after images to hosting giveaways and creating a welcome page.
© p a i n t t h e m o o n p h o t o s h o p a c t i o n sa l l r i g h t s r e s e r v e d • p a i n t t h e m o o n . n e t
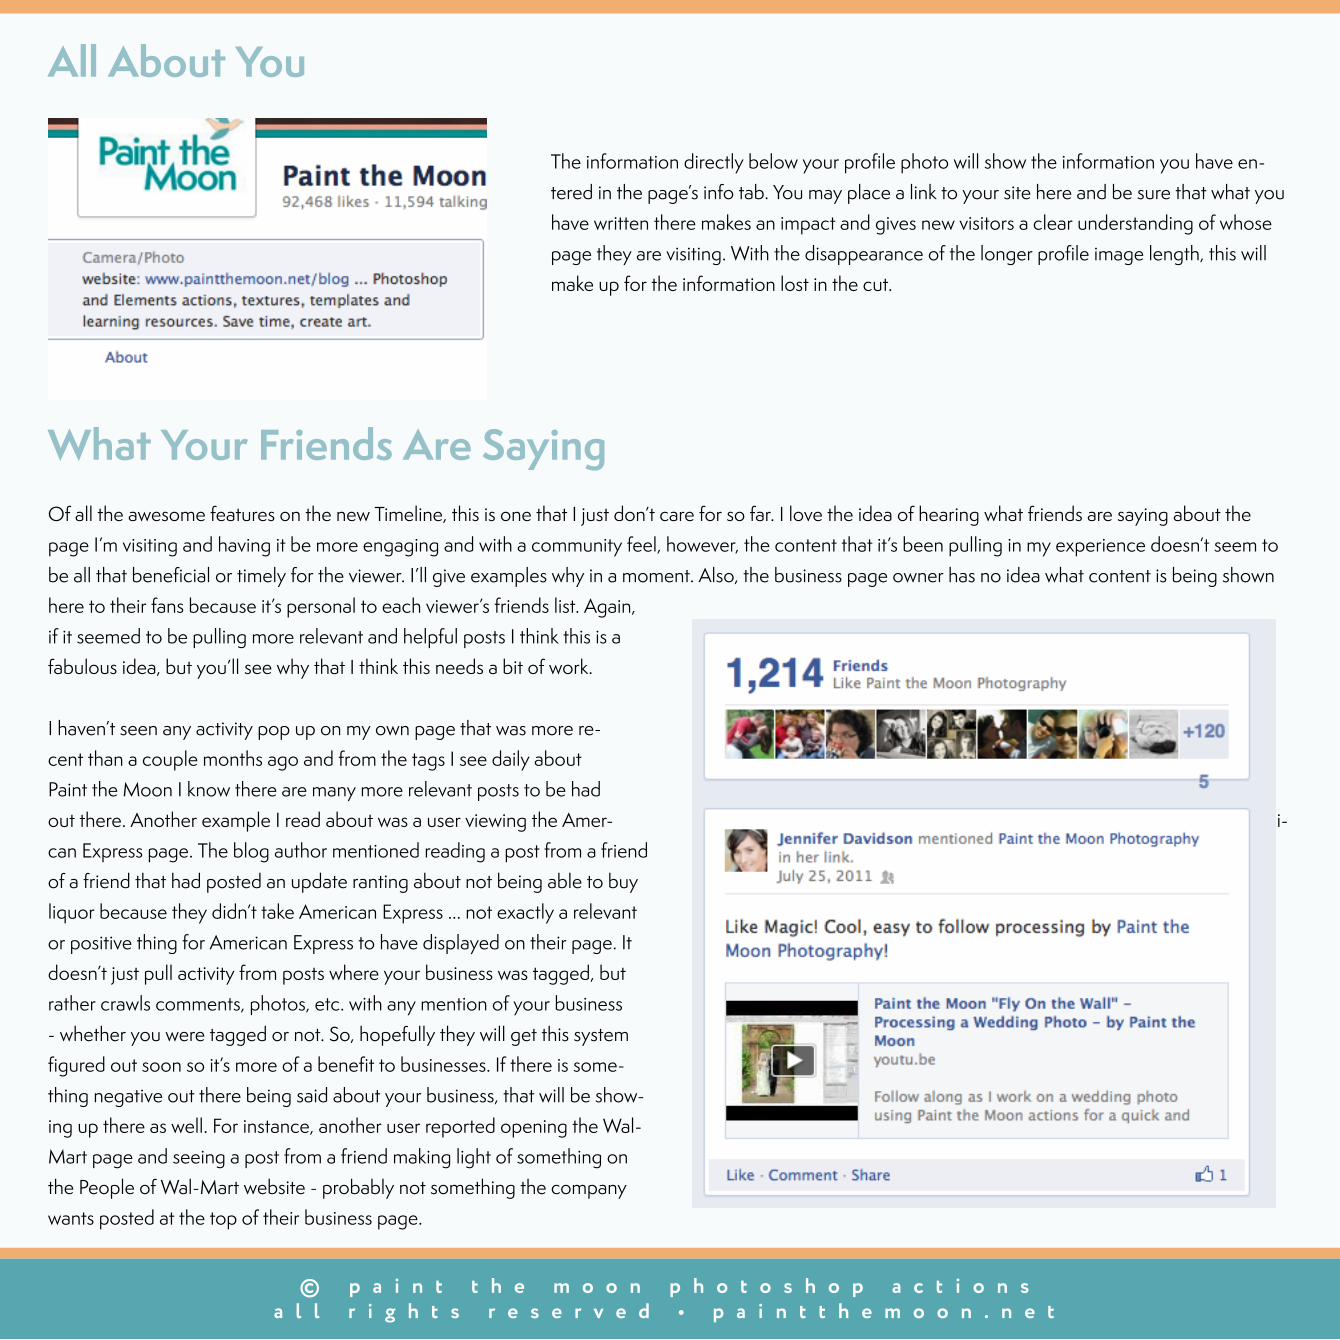
All About You
The information directly below your profile photo will show the information you have en-tered in the page’s info tab. You may place a link to your site here and be sure that what you have written there makes an impact and gives new visitors a clear understanding of whose page they are visiting. With the disappearance of the longer profile image length, this will make up for the information lost in the cut.
What Your Friends Are SayingOf all the awesome features on the new Timeline, this is one that I just don’t care for so far. I love the idea of hearing what friends are saying about the page I’m visiting and having it be more engaging and with a community feel, however, the content that it’s been pulling in my experience doesn’t seem to be all that beneficial or timely for the viewer. I’ll give examples why in a moment. Also, the business page owner has no idea what content is being shown here to their fans because it’s personal to each viewer’s friends list. Again, if it seemed to be pulling more relevant and helpful posts I think this is a fabulous idea, but you’ll see why that I think this needs a bit of work.
I haven’t seen any activity pop up on my own page that was more re-cent than a couple months ago and from the tags I see daily about Paint the Moon I know there are many more relevant posts to be had out there. Another example I read about was a user viewing the Amer- i-can Express page. The blog author mentioned reading a post from a friend of a friend that had posted an update ranting about not being able to buy liquor because they didn’t take American Express ... not exactly a relevant or positive thing for American Express to have displayed on their page. It doesn’t just pull activity from posts where your business was tagged, but rather crawls comments, photos, etc. with any mention of your business - whether you were tagged or not. So, hopefully they will get this system figured out soon so it’s more of a benefit to businesses. If there is some-thing negative out there being said about your business, that will be show-ing up there as well. For instance, another user reported opening the Wal-Mart page and seeing a post from a friend making light of something on the People of Wal-Mart website - probably not something the company wants posted at the top of their business page.
© p a i n t t h e m o o n p h o t o s h o p a c t i o n sa l l r i g h t s r e s e r v e d • p a i n t t h e m o o n . n e t
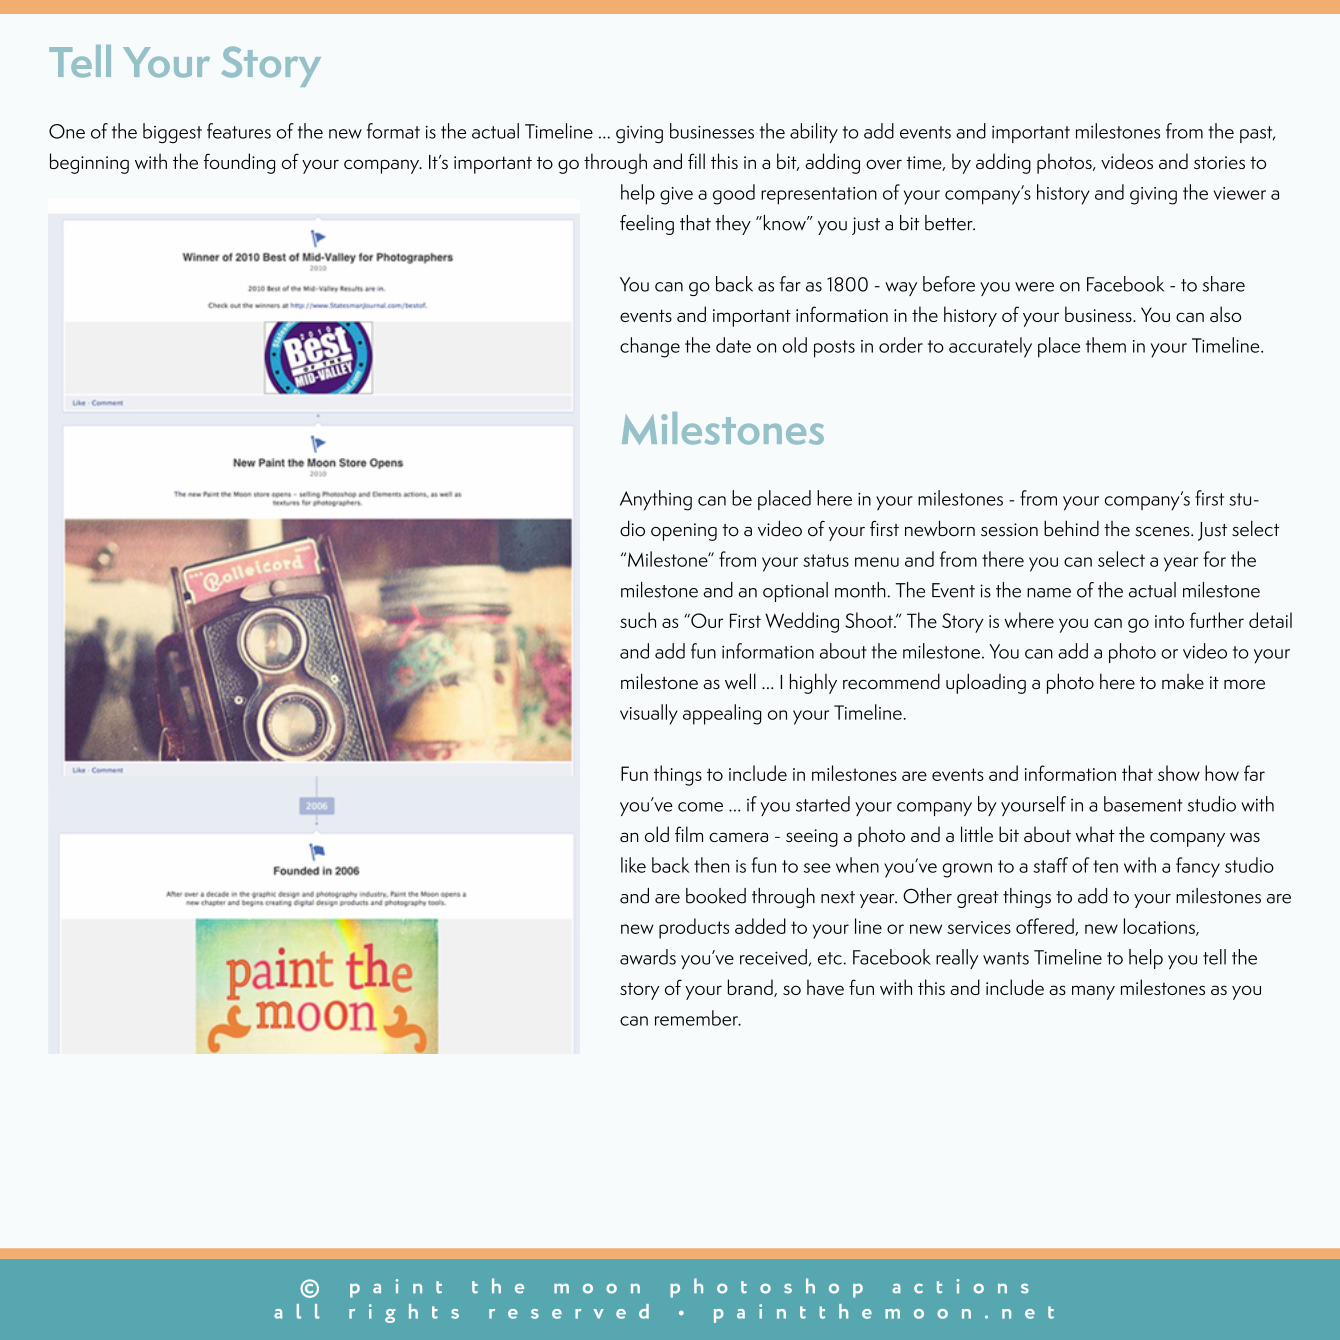
Tell Your StoryOne of the biggest features of the new format is the actual Timeline ... giving businesses the ability to add events and important milestones from the past, beginning with the founding of your company. It’s important to go through and fill this in a bit, adding over time, by adding photos, videos and stories to
help give a good representation of your company’s history and giving the viewer a feeling that they “know” you just a bit better.
You can go back as far as 1800 - way before you were on Facebook - to share events and important information in the history of your business. You can also change the date on old posts in order to accurately place them in your Timeline.
MilestonesAnything can be placed here in your milestones - from your company’s first stu-dio opening to a video of your first newborn session behind the scenes. Just select “Milestone” from your status menu and from there you can select a year for the milestone and an optional month. The Event is the name of the actual milestone such as “Our First Wedding Shoot.” The Story is where you can go into further detail and add fun information about the milestone. You can add a photo or video to your milestone as well ... I highly recommend uploading a photo here to make it more visually appealing on your Timeline.
Fun things to include in milestones are events and information that show how far you’ve come ... if you started your company by yourself in a basement studio with an old film camera - seeing a photo and a little bit about what the company was like back then is fun to see when you’ve grown to a staff of ten with a fancy studio and are booked through next year. Other great things to add to your milestones are new products added to your line or new services offered, new locations, awards you’ve received, etc. Facebook really wants Timeline to help you tell the story of your brand, so have fun with this and include as many milestones as you can remember.
© p a i n t t h e m o o n p h o t o s h o p a c t i o n sa l l r i g h t s r e s e r v e d • p a i n t t h e m o o n . n e t
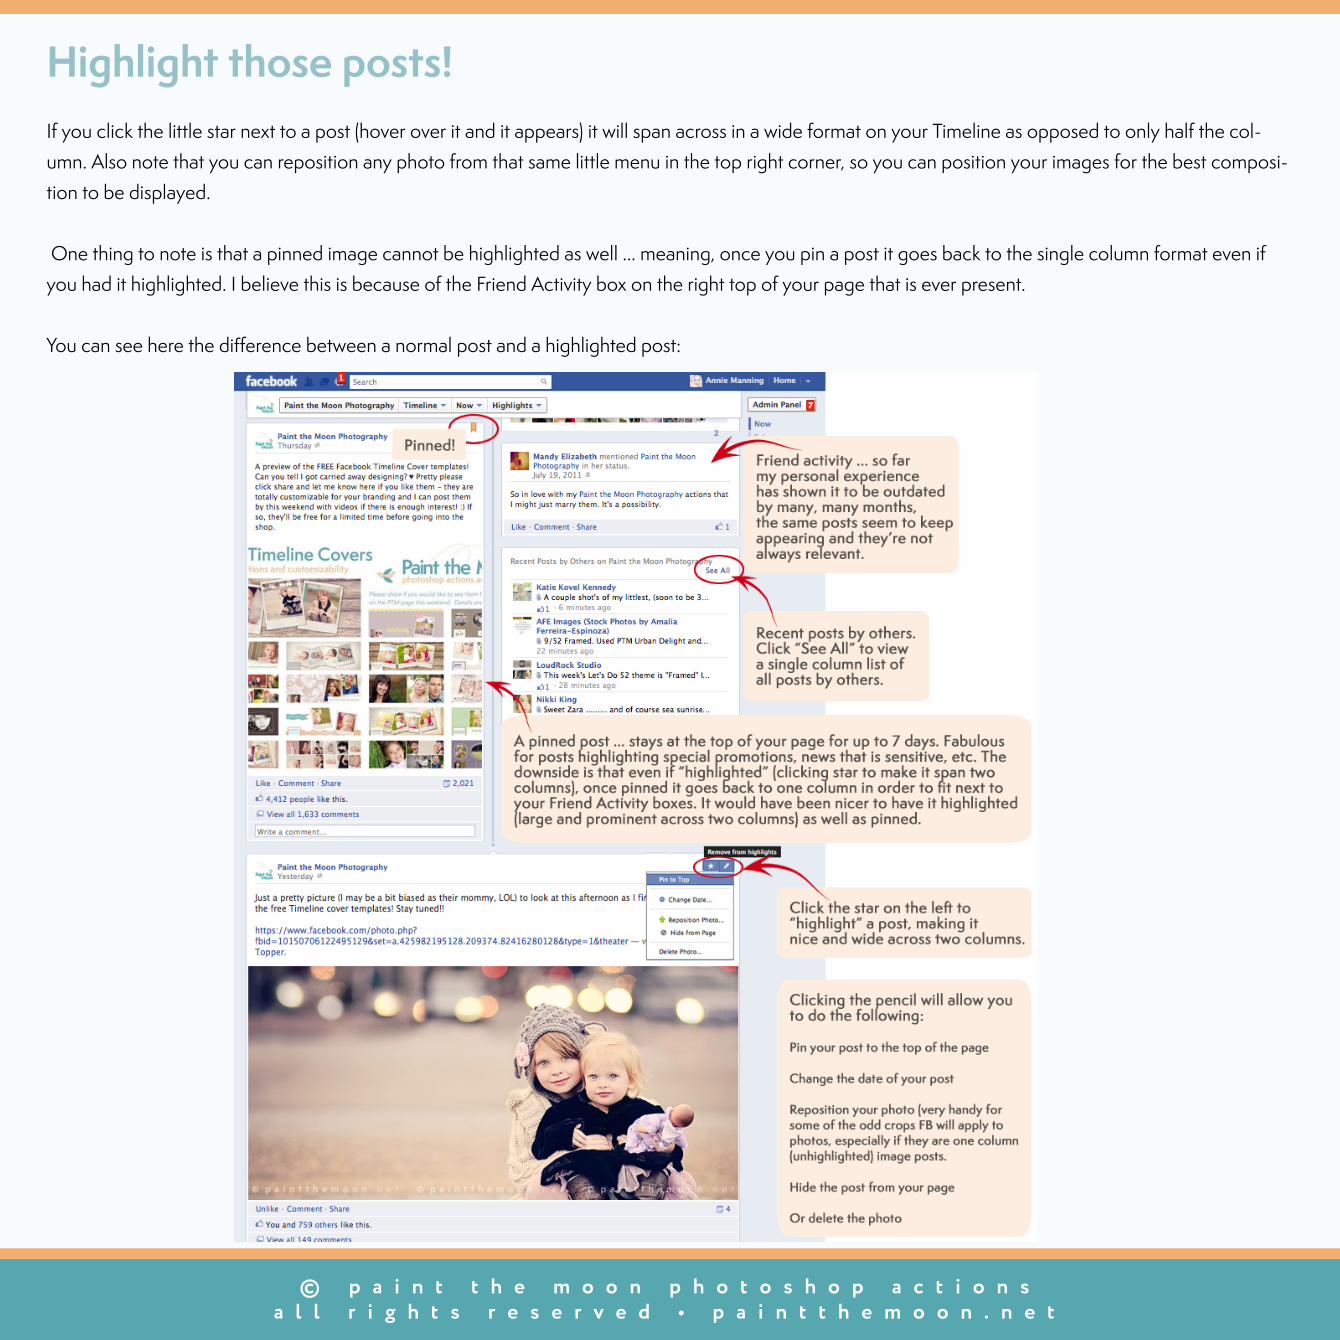
Highlight those posts!If you click the little star next to a post (hover over it and it appears) it will span across in a wide format on your Timeline as opposed to only half the col-umn. Also note that you can reposition any photo from that same little menu in the top right corner, so you can position your images for the best composi-tion to be displayed.
One thing to note is that a pinned image cannot be highlighted as well ... meaning, once you pin a post it goes back to the single column format even if you had it highlighted. I believe this is because of the Friend Activity box on the right top of your page that is ever present.
You can see here the difference between a normal post and a highlighted post:
© p a i n t t h e m o o n p h o t o s h o p a c t i o n sa l l r i g h t s r e s e r v e d • p a i n t t h e m o o n . n e t
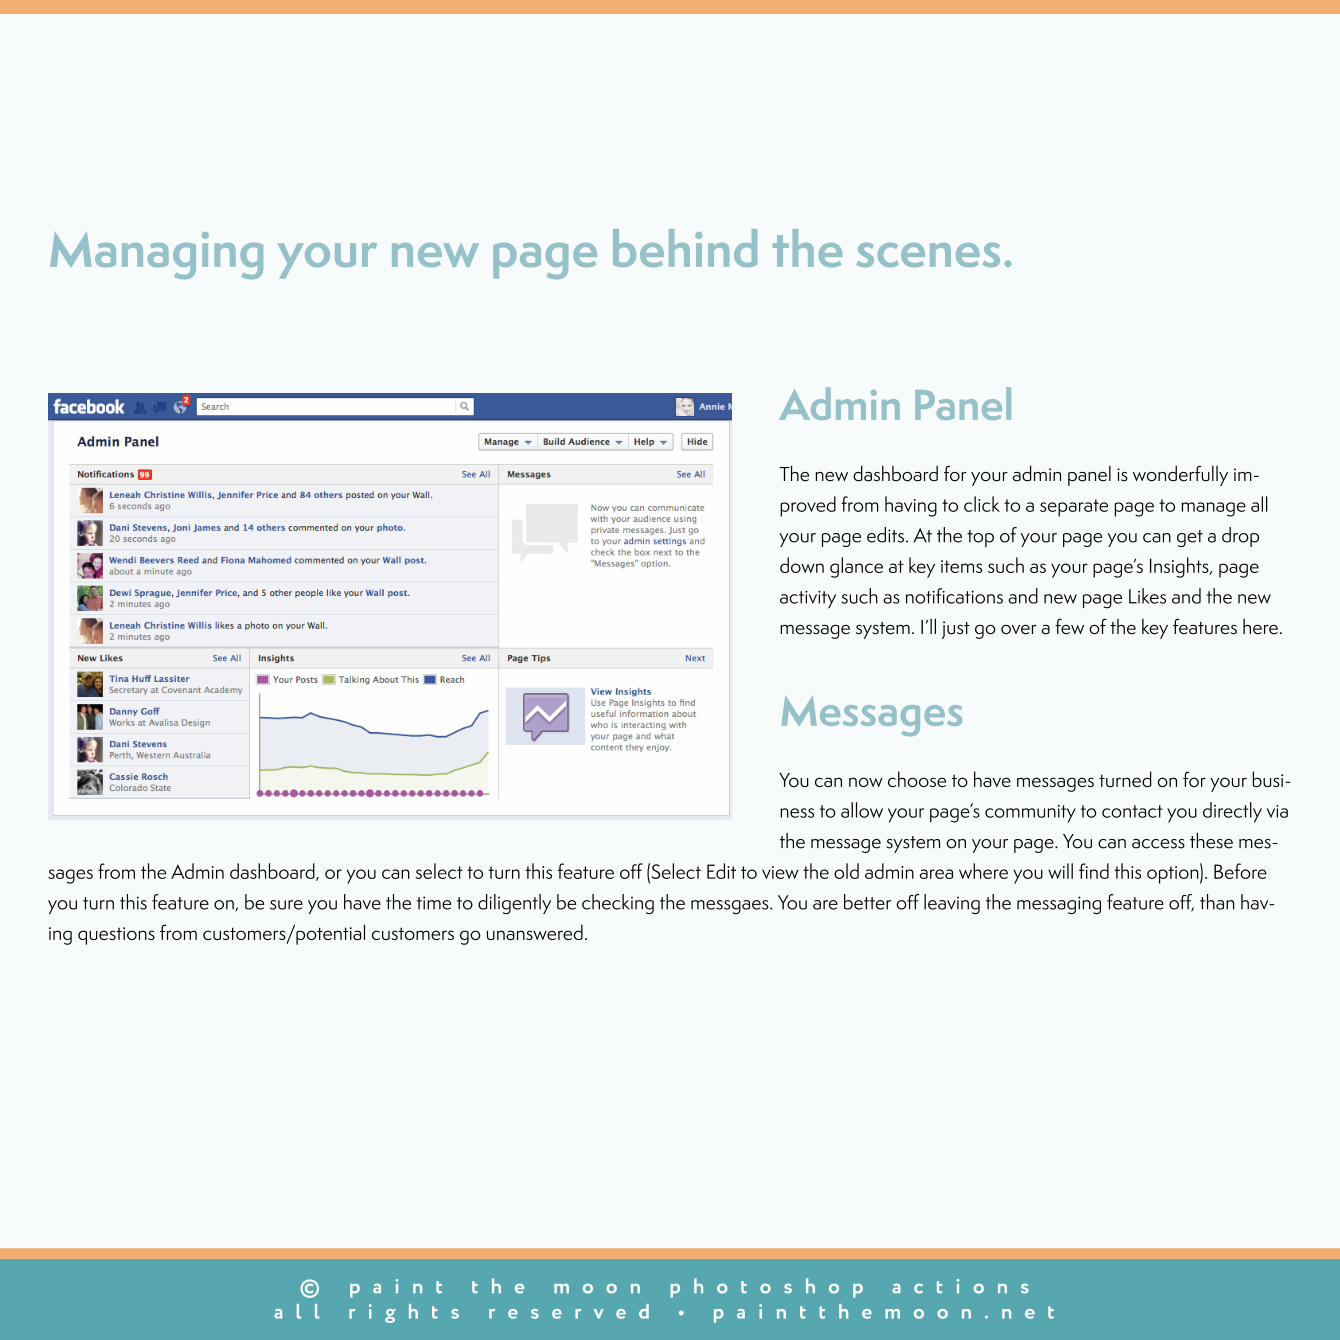
Managing your new page behind the scenes.
Admin PanelThe new dashboard for your admin panel is wonderfully im-proved from having to click to a separate page to manage all your page edits. At the top of your page you can get a drop down glance at key items such as your page’s Insights, page activity such as notifications and new page Likes and the new message system. I’ll just go over a few of the key features here.
MessagesYou can now choose to have messages turned on for your busi-ness to allow your page’s community to contact you directly via the message system on your page. You can access these mes-
sages from the Admin dashboard, or you can select to turn this feature off (Select Edit to view the old admin area where you will find this option). Before you turn this feature on, be sure you have the time to diligently be checking the messgaes. You are better off leaving the messaging feature off, than hav-ing questions from customers/potential customers go unanswered.
© p a i n t t h e m o o n p h o t o s h o p a c t i o n sa l l r i g h t s r e s e r v e d • p a i n t t h e m o o n . n e t
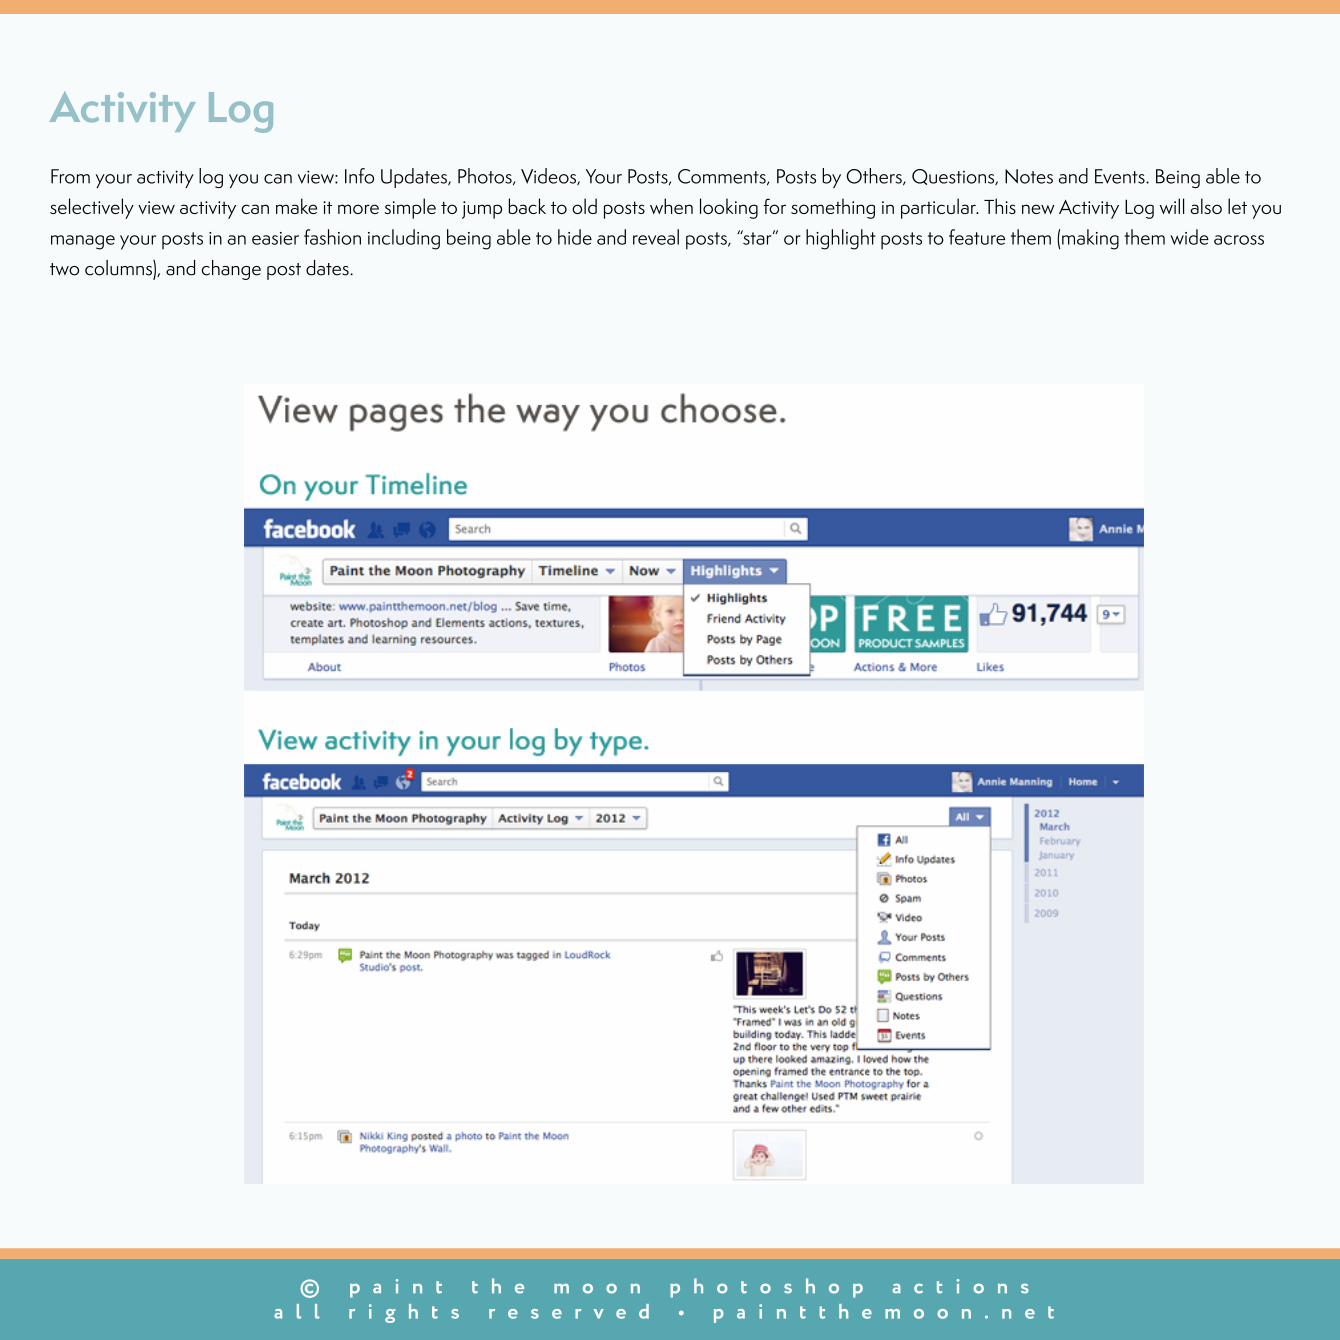
Activity LogFrom your activity log you can view: Info Updates, Photos, Videos, Your Posts, Comments, Posts by Others, Questions, Notes and Events. Being able to selectively view activity can make it more simple to jump back to old posts when looking for something in particular. This new Activity Log will also let you manage your posts in an easier fashion including being able to hide and reveal posts, “star” or highlight posts to feature them (making them wide across two columns), and change post dates.
© p a i n t t h e m o o n p h o t o s h o p a c t i o n sa l l r i g h t s r e s e r v e d • p a i n t t h e m o o n . n e t
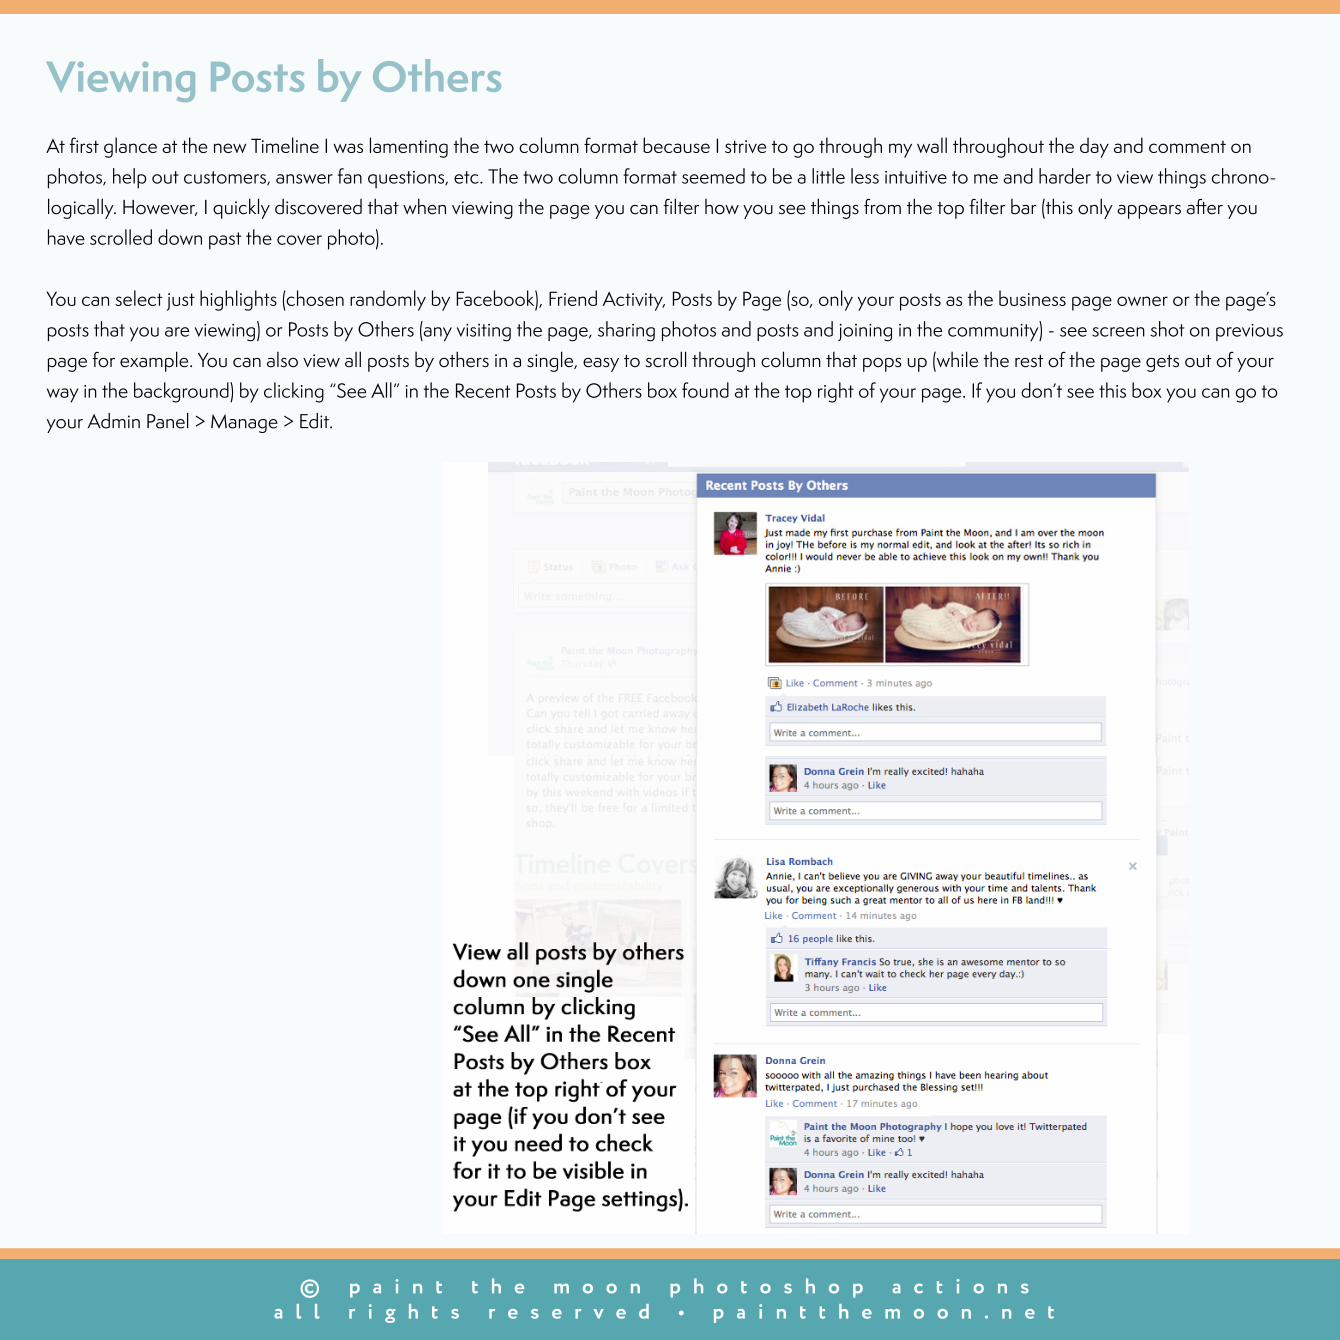
Viewing Posts by OthersAt first glance at the new Timeline I was lamenting the two column format because I strive to go through my wall throughout the day and comment on photos, help out customers, answer fan questions, etc. The two column format seemed to be a little less intuitive to me and harder to view things chrono-logically. However, I quickly discovered that when viewing the page you can filter how you see things from the top filter bar (this only appears after you have scrolled down past the cover photo).
You can select just highlights (chosen randomly by Facebook), Friend Activity, Posts by Page (so, only your posts as the business page owner or the page’s posts that you are viewing) or Posts by Others (any visiting the page, sharing photos and posts and joining in the community) - see screen shot on previous page for example. You can also view all posts by others in a single, easy to scroll through column that pops up (while the rest of the page gets out of your way in the background) by clicking “See All” in the Recent Posts by Others box found at the top right of your page. If you don’t see this box you can go to your Admin Panel > Manage > Edit.
© p a i n t t h e m o o n p h o t o s h o p a c t i o n sa l l r i g h t s r e s e r v e d • p a i n t t h e m o o n . n e t
Insights - and my own insights ;)The insights are Facebook’s internal analytic system, tracking how well your page posts, fan count, reach, etc are doing. It tells you how many people are talking about your company through the “People Talking About This” numbers and highlights how many people are potentially seeing those “conversations” through the “Reach.” The insights have been available for a long time now, but it is now integrated into the Admin Panel making it more accessible and the word from the Facebook is that the numbers on new posts will soon be almost instant. This means that instead of having to wait 2-3 days to see how a post performed with feedback, reach, etc., the data is displayed within 10-15 minutes in your insights. It must be a feature they are still working on because I saw this happening for a couple posts of mine one day and since then it’s gone back to the old way - waiting a couple days before you see how well a particular post was received.
Having instant feedback on posts can help business page owners take immediate action to help their business ... if a post is doing well they can decide to pin it to the top of the page, create an ad from that post, plan more posts similar to it or further the conversation surrounding that post. And if the post receives little feedback or interest a page owner can see that it’s not doing well immediately and delete it.
This is all well and good ... but for me personally, I tend to post content that I think my customers and fans will enjoy and truly find value from rather than try and hunt for “comment/like” getters. I feel it’s just a bit disingenuous to post the fluff status updates that are obviously posted for the sole purpose of getting more activity on a page. I know sometimes my posts aren’t as “easy” to answer as the “Canon or Nikon” type posts where people find it easy to leave a quick one word comments, giving the page a lot of instant activity. However, I enjoy sharing posts which either get people thinking, spark conversation or to share valuable and helpful content that will hopefully aid other photographers. Really, anything that is genuine and real (and, yes, I’ve had a fluff update or two ... but only if I feel it’s something I think others will enjoy as well). This may not be everyone’s cup of tea, but I really base my business on being personable and truly love helping other photographers out.
Not only does it just come natural to me to take this approach (I am just *not* a good sales person, LOL), but marketers agree that focusing your efforts on lis-tening and responding to your audience is one of the smartest things you can do for your business. I adore the community feel that my page has and feel bless-ed to be part of such an amazing group of people.
I really believe that if business owners are authentic, helpful and kind that your clients will respond to that by being more engaged and feel a sense of loyalty and trust. Having a lot of “Likes” on your page doesn’t matter one bit if you aren’t engaging your fans ... being there to answer questions and posting valuable content (and, yes, posting all your pretty pictures is valuable content to those who appreciate your work and love seeing your latest sessions). I’ve found that constantly “selling” to people or shouting about the latest promotion is a turn off to people ... telling stories and being authentic while sharing valuable content is what engages people. And that’s a lucky thing for me because I would much rather simply demonstrate how great my products are and let my customers discover for themselves how much they love them. This allows me to focus on the things I love most about this business: helping customers and fans, aiding them with teach-ing materials and products to help them better their own businesses and photography endeavors, and dedicating more time to creating new amazing products for everyone. I think this is an important thing to consider for businesses big and small.
© p a i n t t h e m o o n p h o t o s h o p a c t i o n sa l l r i g h t s r e s e r v e d • p a i n t t h e m o o n . n e t
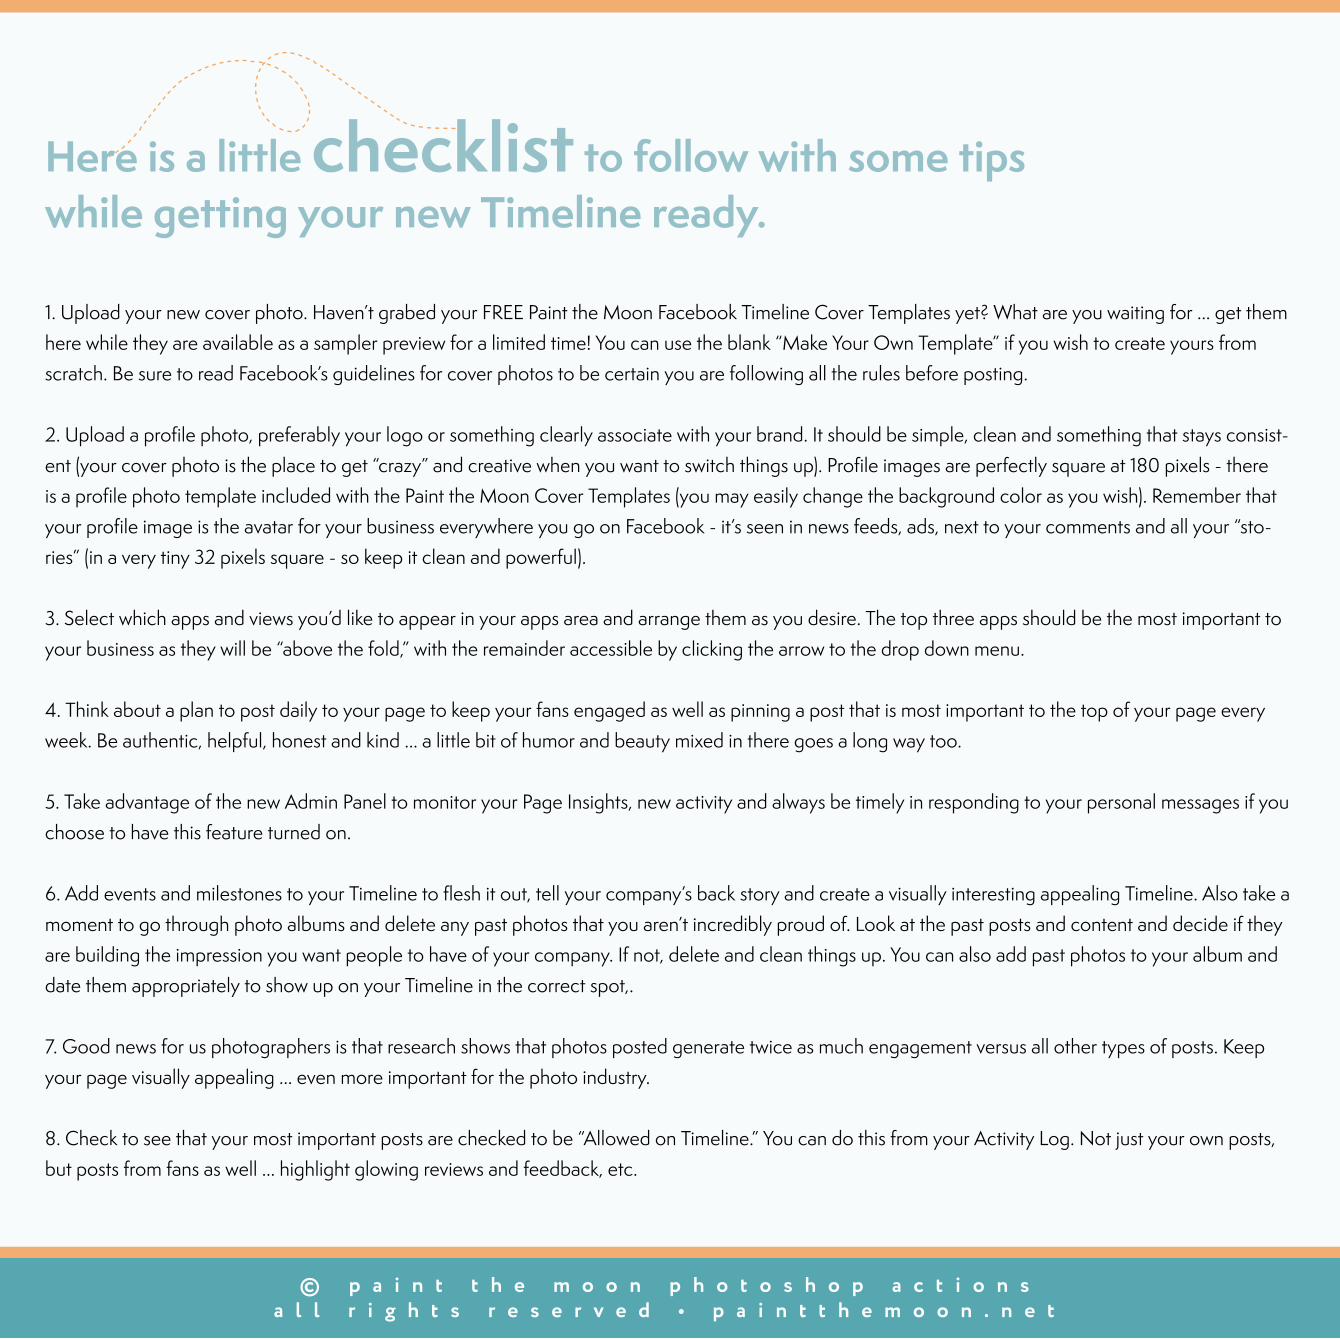
Here is a little checklist to follow with some tips while getting your new Timeline ready.
1. Upload your new cover photo. Haven’t grabed your FREE Paint the Moon Facebook Timeline Cover Templates yet? What are you waiting for ... get them here while they are available as a sampler preview for a limited time! You can use the blank “Make Your Own Template” if you wish to create yours from scratch. Be sure to read Facebook’s guidelines for cover photos to be certain you are following all the rules before posting.
2. Upload a profile photo, preferably your logo or something clearly associate with your brand. It should be simple, clean and something that stays consist-ent (your cover photo is the place to get “crazy” and creative when you want to switch things up). Profile images are perfectly square at 180 pixels - there is a profile photo template included with the Paint the Moon Cover Templates (you may easily change the background color as you wish). Remember that your profile image is the avatar for your business everywhere you go on Facebook - it’s seen in news feeds, ads, next to your comments and all your “sto-ries” (in a very tiny 32 pixels square - so keep it clean and powerful).
3. Select which apps and views you’d like to appear in your apps area and arrange them as you desire. The top three apps should be the most important to your business as they will be “above the fold,” with the remainder accessible by clicking the arrow to the drop down menu.
4. Think about a plan to post daily to your page to keep your fans engaged as well as pinning a post that is most important to the top of your page every week. Be authentic, helpful, honest and kind ... a little bit of humor and beauty mixed in there goes a long way too.
5. Take advantage of the new Admin Panel to monitor your Page Insights, new activity and always be timely in responding to your personal messages if you choose to have this feature turned on.
6. Add events and milestones to your Timeline to flesh it out, tell your company’s back story and create a visually interesting appealing Timeline. Also take a moment to go through photo albums and delete any past photos that you aren’t incredibly proud of. Look at the past posts and content and decide if they are building the impression you want people to have of your company. If not, delete and clean things up. You can also add past photos to your album and date them appropriately to show up on your Timeline in the correct spot,.
7. Good news for us photographers is that research shows that photos posted generate twice as much engagement versus all other types of posts. Keep your page visually appealing ... even more important for the photo industry.
8. Check to see that your most important posts are checked to be “Allowed on Timeline.” You can do this from your Activity Log. Not just your own posts, but posts from fans as well ... highlight glowing reviews and feedback, etc.
© p a i n t t h e m o o n p h o t o s h o p a c t i o n sa l l r i g h t s r e s e r v e d • p a i n t t h e m o o n . n e t
Find the Facebook Cover Templates for Timeline by Paint the Moon by clicking the image below:
Free Cover Templatespaint the moon’s
for Facebook™ Timeline for Business Pages
© p a i n t t h e m o o n p h o t o s h o p a c t i o n sa l l r i g h t s r e s e r v e d • p a i n t t h e m o o n . n e t
Be sure to see all these new features in action with a walk through video and tutorial on the Timeline for Business Pages on Facebook by clicking below.
And, lastly, the three tutorials for the Timeline Cover Templates by Paint the Moon can be found by in the link above as well as two additional videos with more tips by clicking here.
paint the moon’s
to Facebook™ Timeline for Business Pages