Embed Size (px)
Citation preview
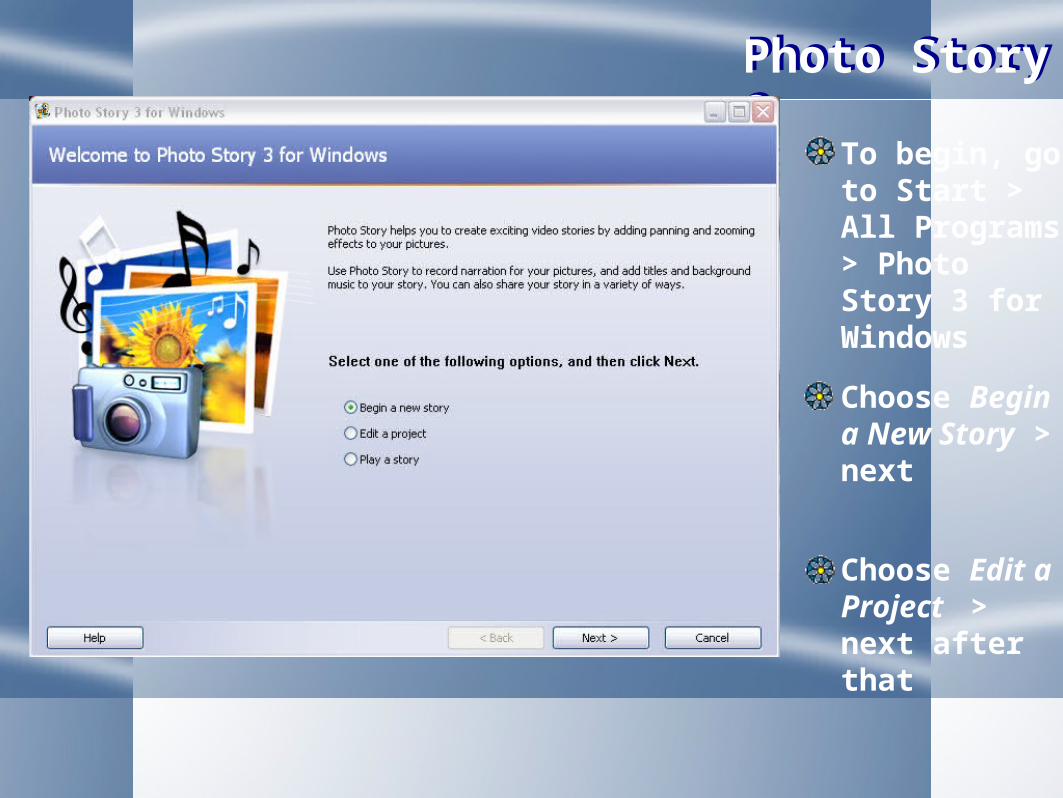
Photo Story 3Photo Story 3
To begin, go to Start > All Programs > Photo Story 3 for WindowsChoose Begin a New Story > next
Choose Edit a Project > next after that
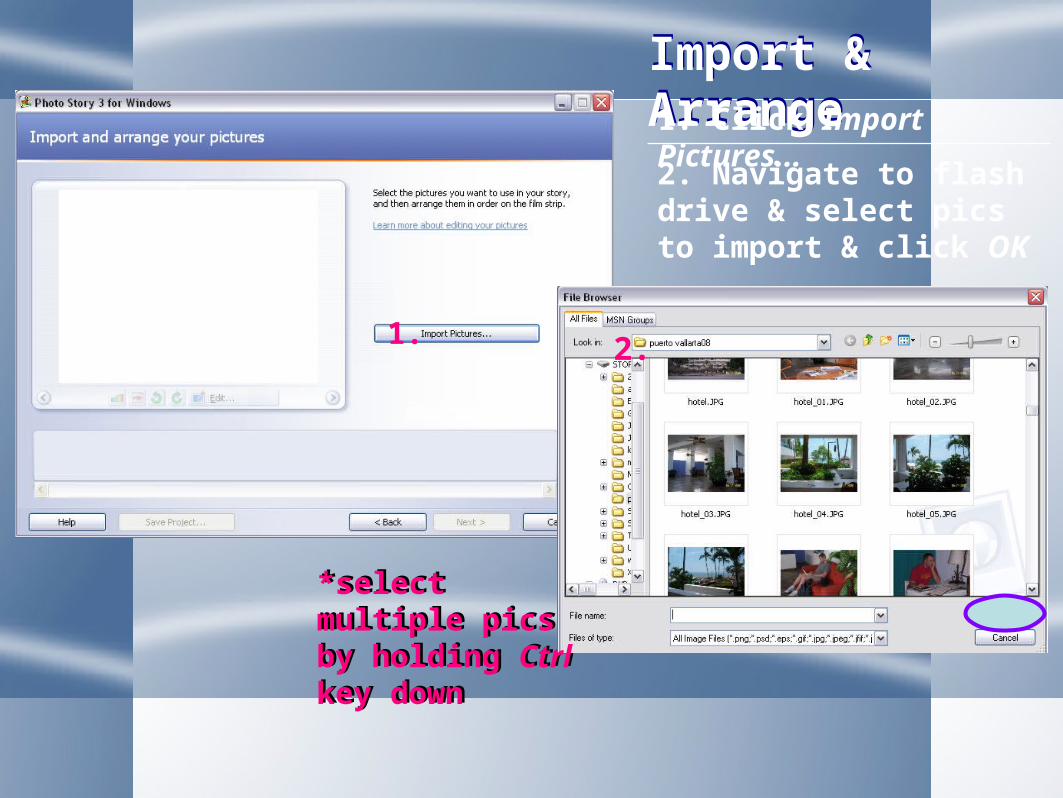
*select multiple pics by holding Ctrl key down
Import & ArrangeImport & Arrange1. Click Import Pictures...
1. 2.
2. Navigate to flash drive & select pics to import & click OK
*select multiple pics by holding Ctrl key down
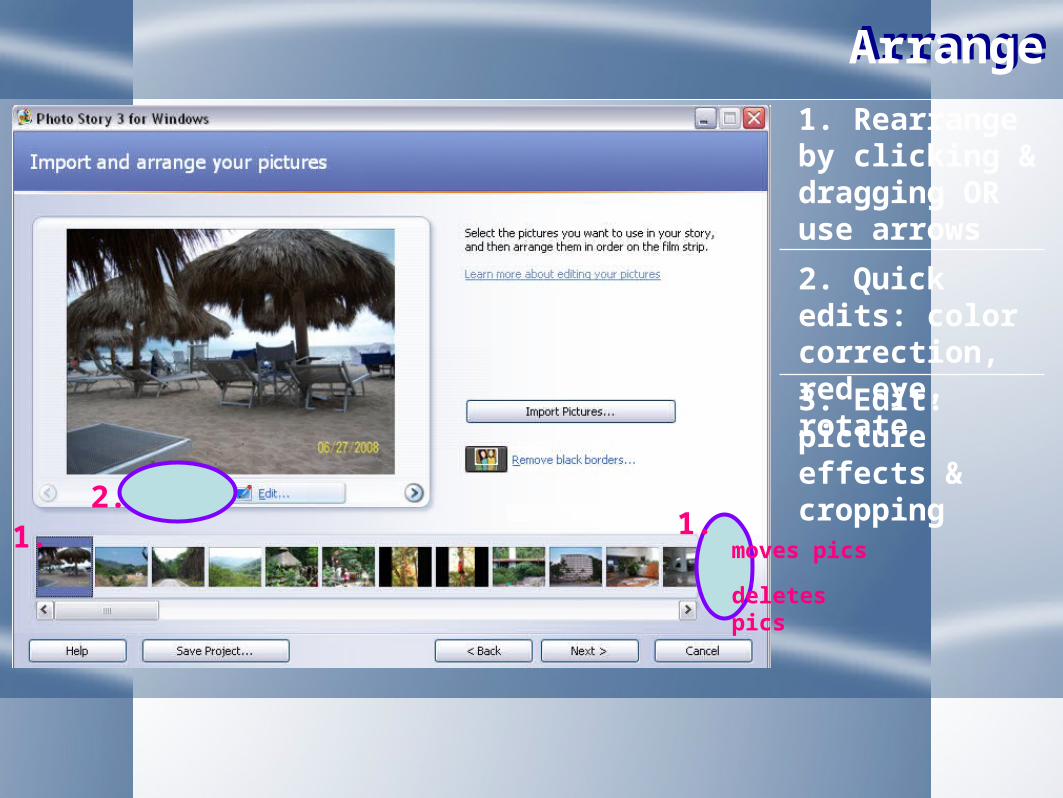
ArrangeArrange1. Rearrange by clicking & dragging OR use arrows
1.
deletes pics
moves pics1.
2. Quick edits: color correction, red eye, rotate
2.
3. Edit: picture effects & cropping

Editing PicturesEditing Pictures
1. rotate & crop
2. fix colors or red eye
3. add effect to picture
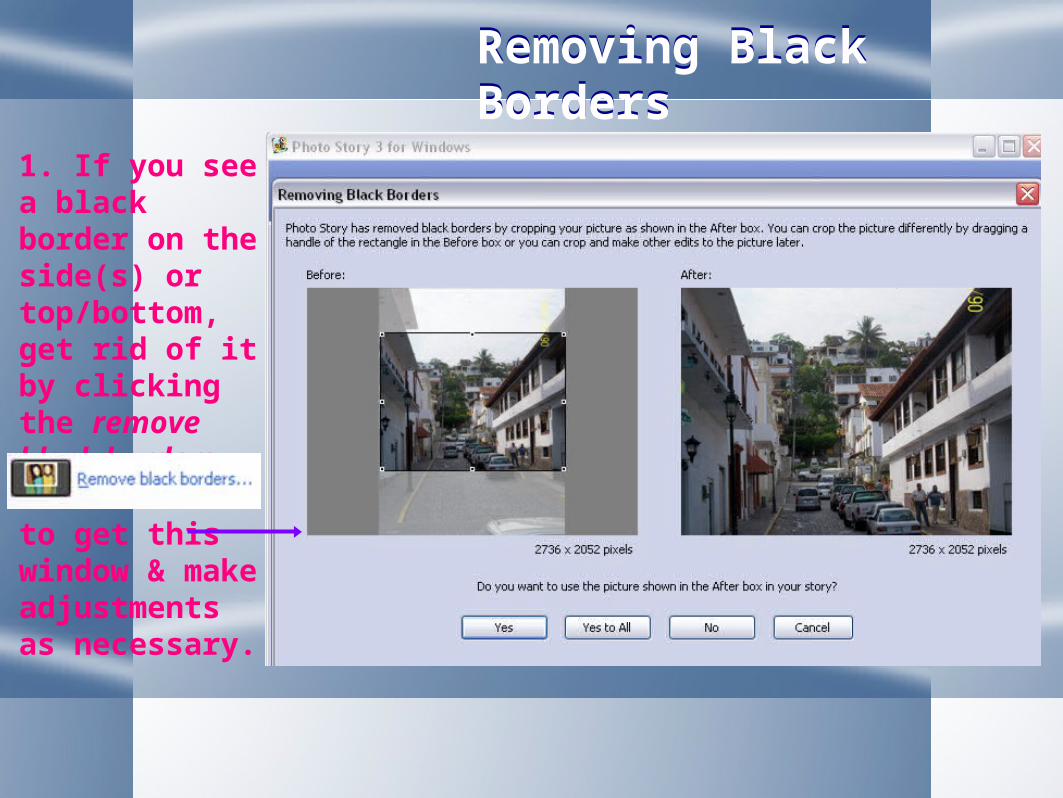
Removing Black BordersRemoving Black Borders
1. If you see a black border on the side(s) or top/bottom, get rid of it by clicking the remove black borders buttonto get this window & make adjustments as necessary.
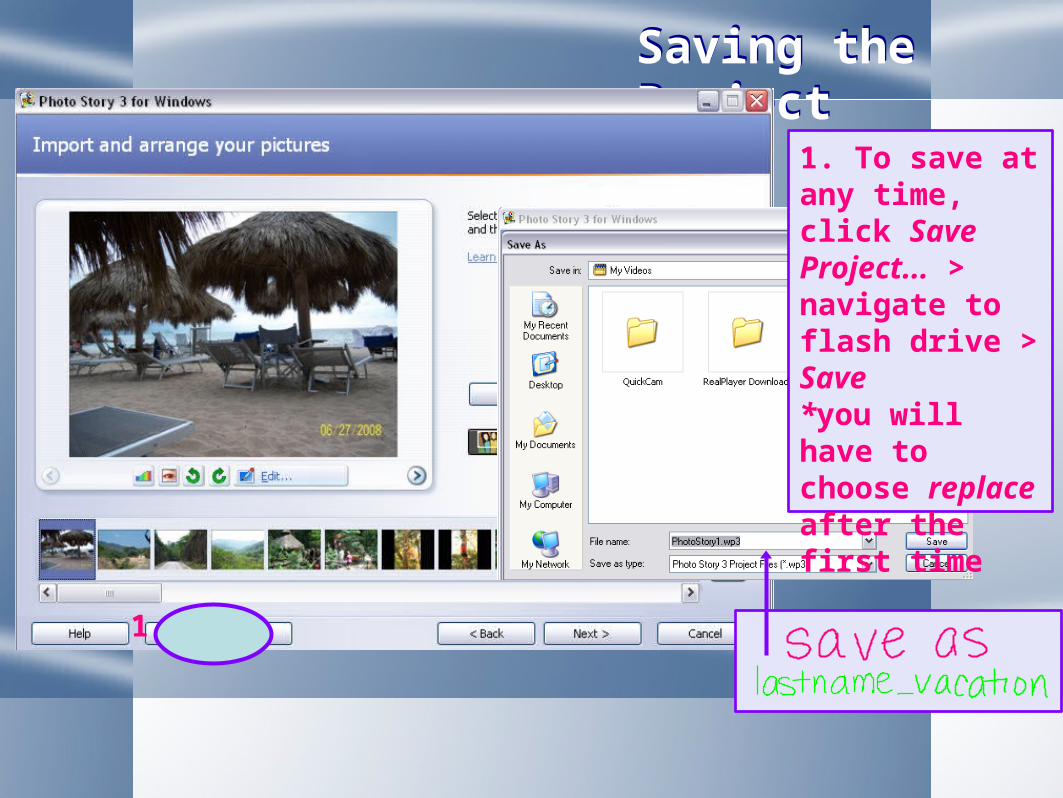
Saving the ProjectSaving the Project
1.
1. To save at any time, click Save Project... > navigate to flash drive > Save*you will have to choose replace after the first time

Add a Title to your PicturesAdd a Title to your Pictures
1. Change font, style, color, size, alignment options2. Click arrow to get to next picture to add more titles if necessary
1.
2.
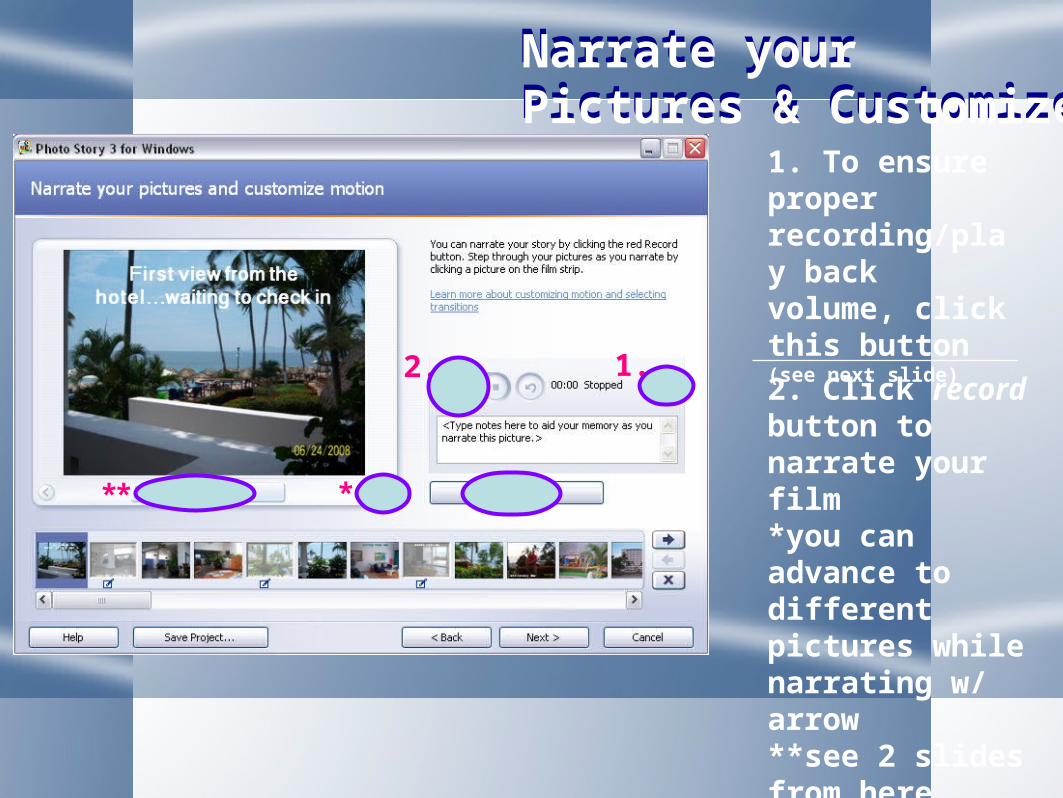
Narrate your Pictures & Customize Motion
Narrate your Pictures & Customize Motion
1.2.
1. To ensure proper recording/play back volume, click this button (see next slide)2. Click record button to narrate your film*you can advance to different pictures while narrating w/ arrow**see 2 slides from here
***
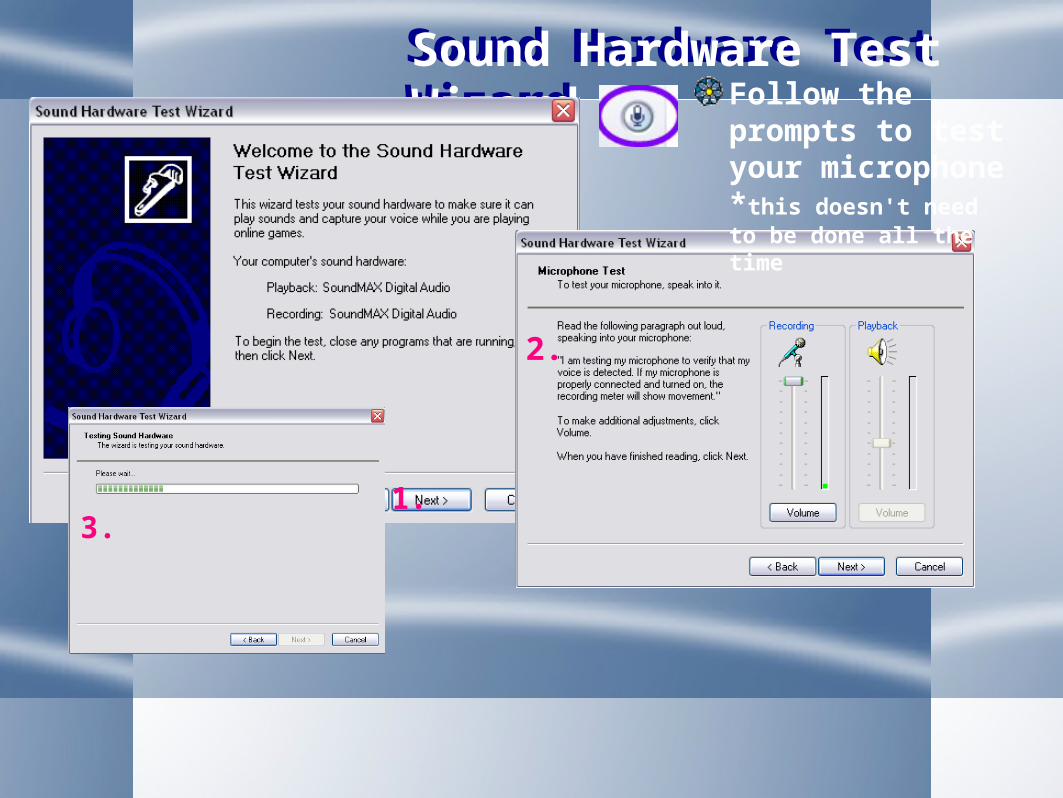
Sound Hardware Test WizardSound Hardware Test Wizard Follow the
prompts to test your microphone *this doesn't need to be done all the time
1.
2.
3.
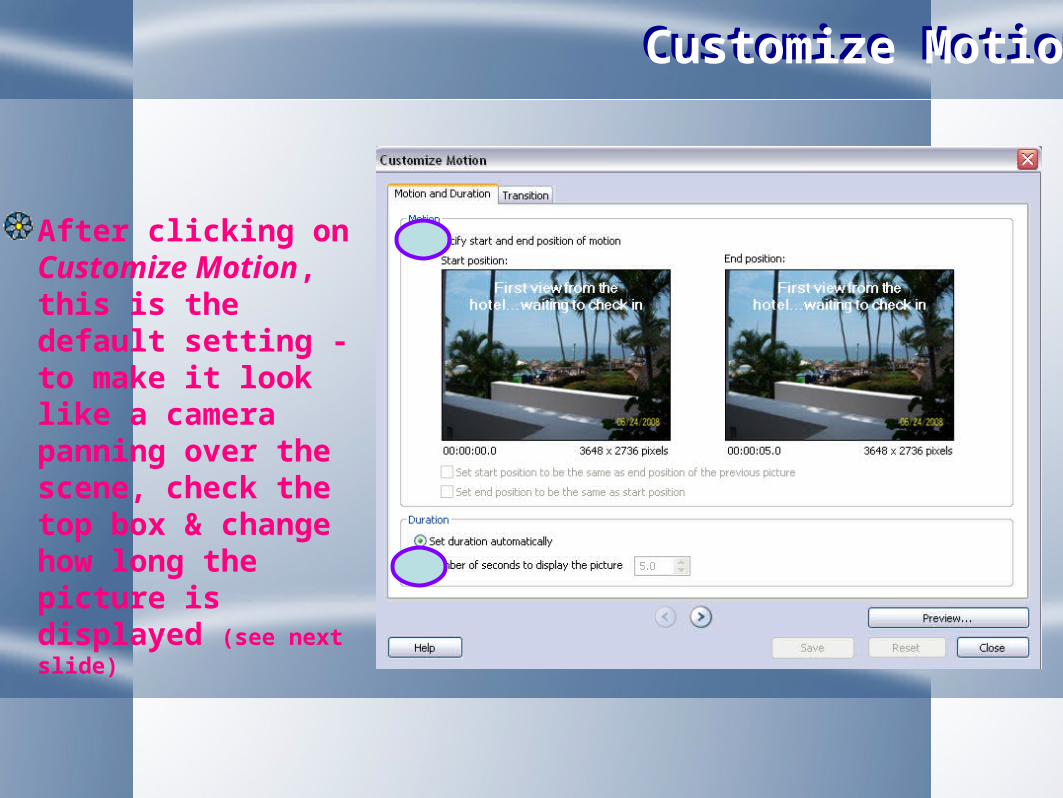
Customize MotionCustomize Motion
After clicking on Customize Motion, this is the default setting - to make it look like a camera panning over the scene, check the top box & change how long the picture is displayed (see next slide)
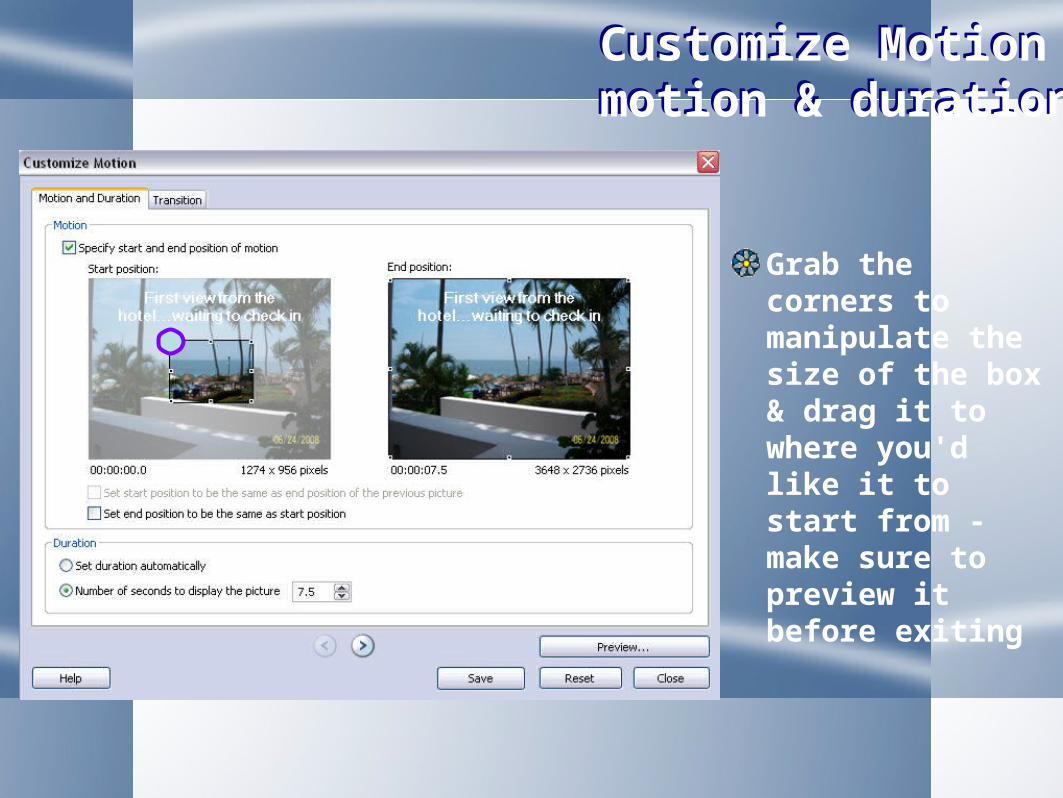
Customize Motion | motion & durationCustomize Motion | motion & duration
Grab the corners to manipulate the size of the box & drag it to where you'd like it to start from - make sure to preview it before exiting
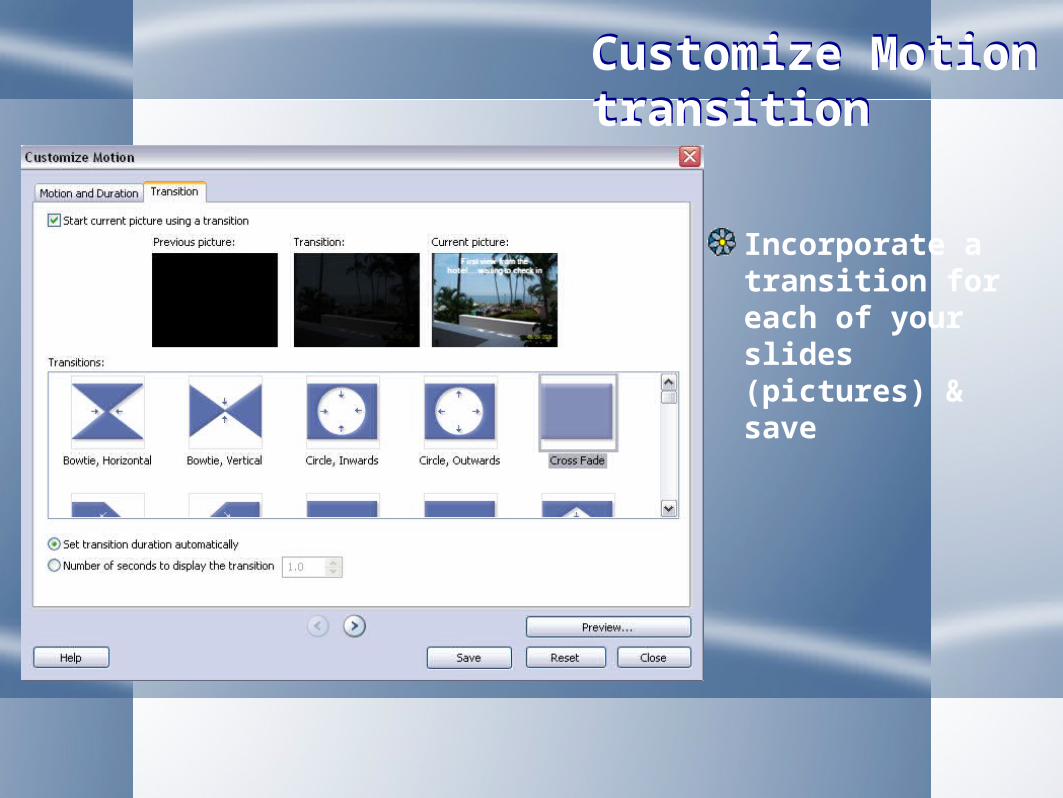
Customize Motion | transitionCustomize Motion | transition
Incorporate a transition for each of your slides (pictures) & save
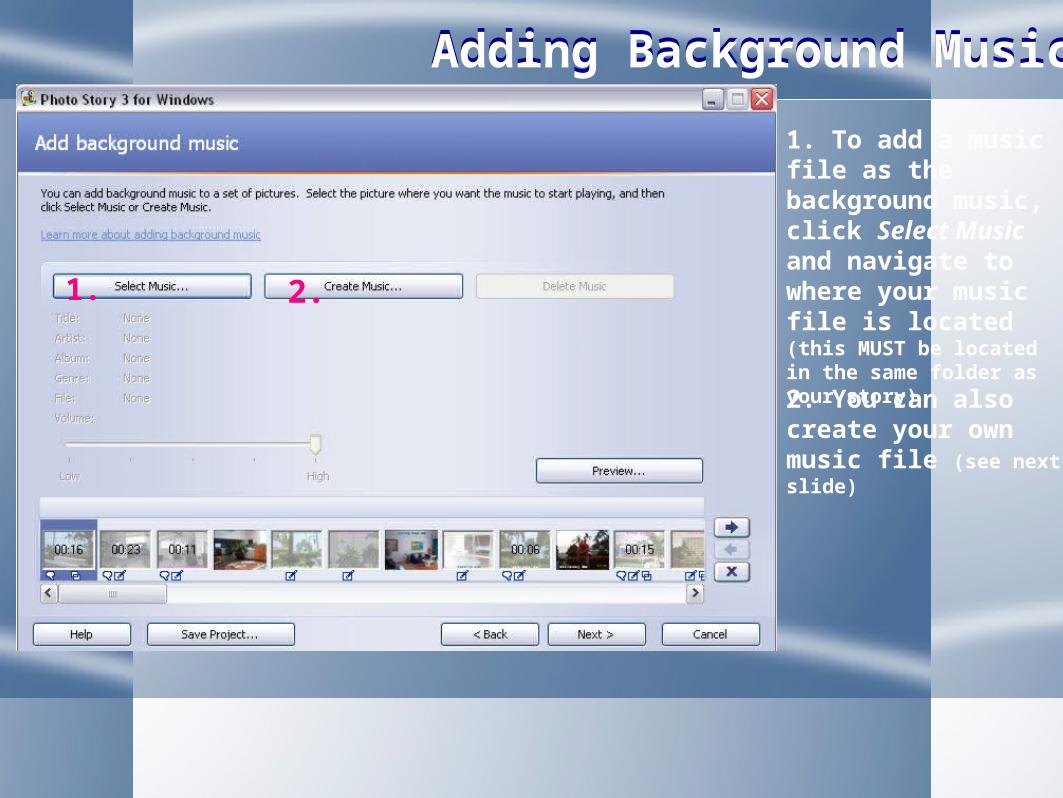
Adding Background MusicAdding Background Music
1. To add a music file as the background music, click Select Music and navigate to where your music file is located (this MUST be located in the same folder as your story)
1. 2.
2. You can also create your own music file (see next slide)
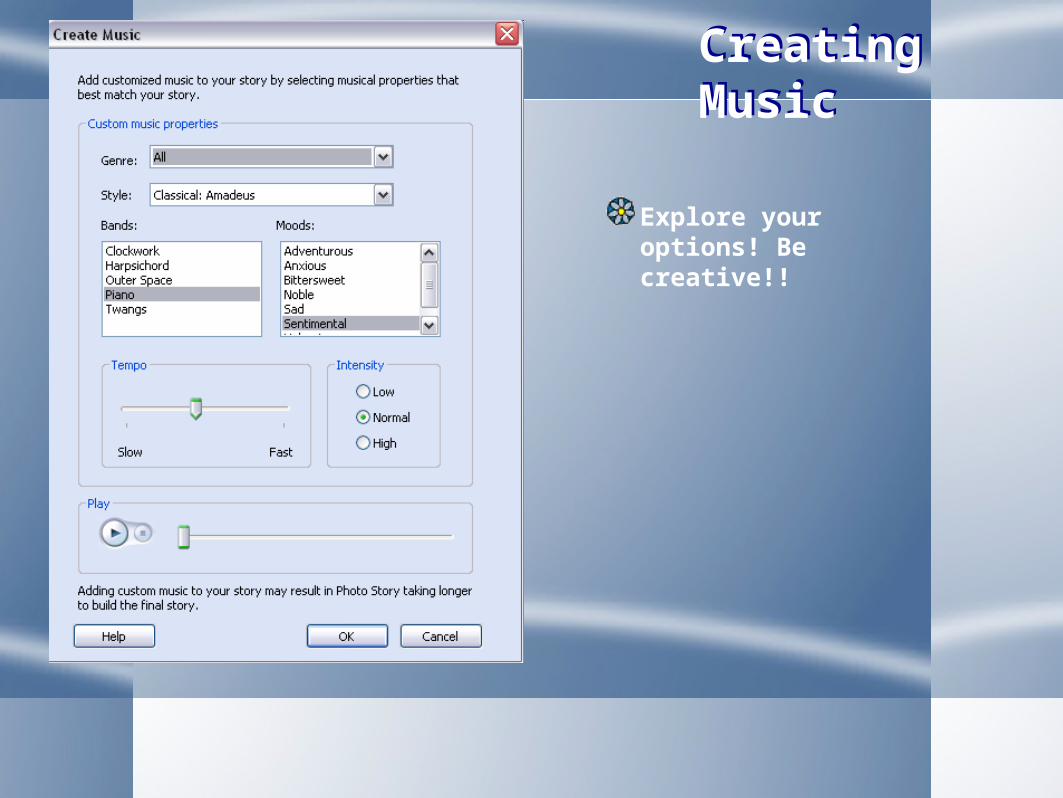
Creating MusicCreating Music
Explore your options! Be creative!!
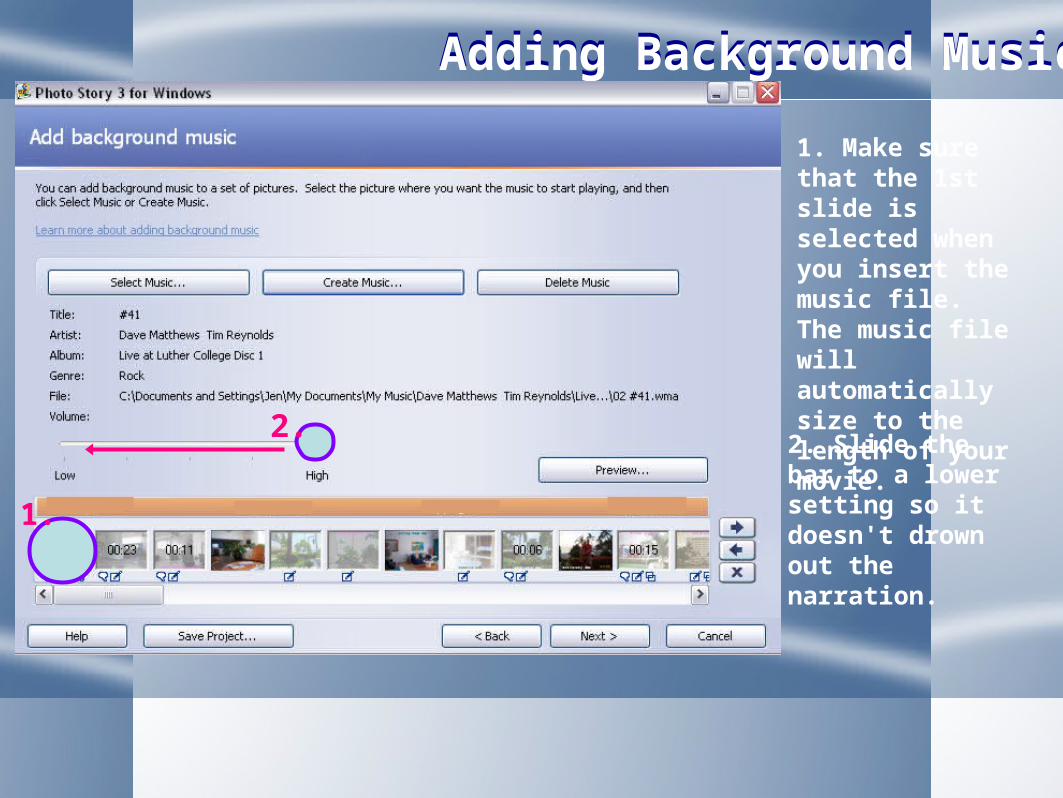
Adding Background MusicAdding Background Music
1. Make sure that the 1st slide is selected when you insert the music file. The music file will automatically size to the length of your movie.2. Slide the bar
to a lower setting so it doesn't drown out the narration.
1.
2.
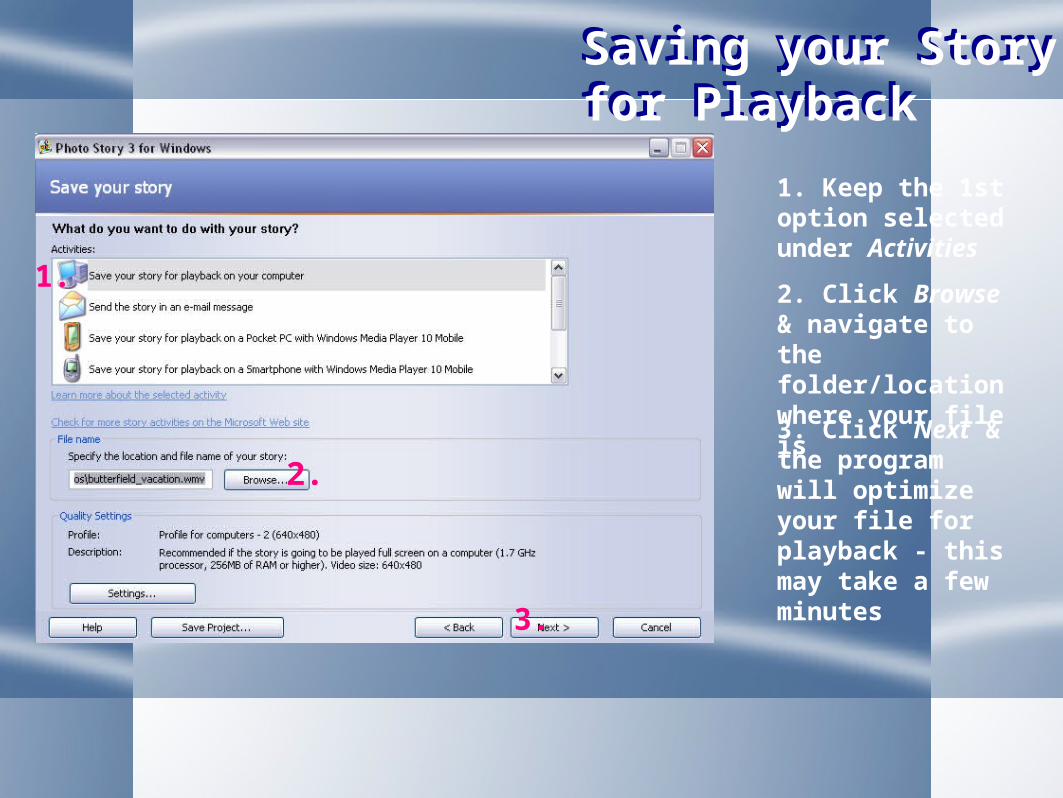
Saving your Story for PlaybackSaving your Story for Playback
1.
2.
1. Keep the 1st option selected under Activities
2. Click Browse & navigate to the folder/location where your file is3. Click Next & the program will optimize your file for playback - this may take a few minutes3.
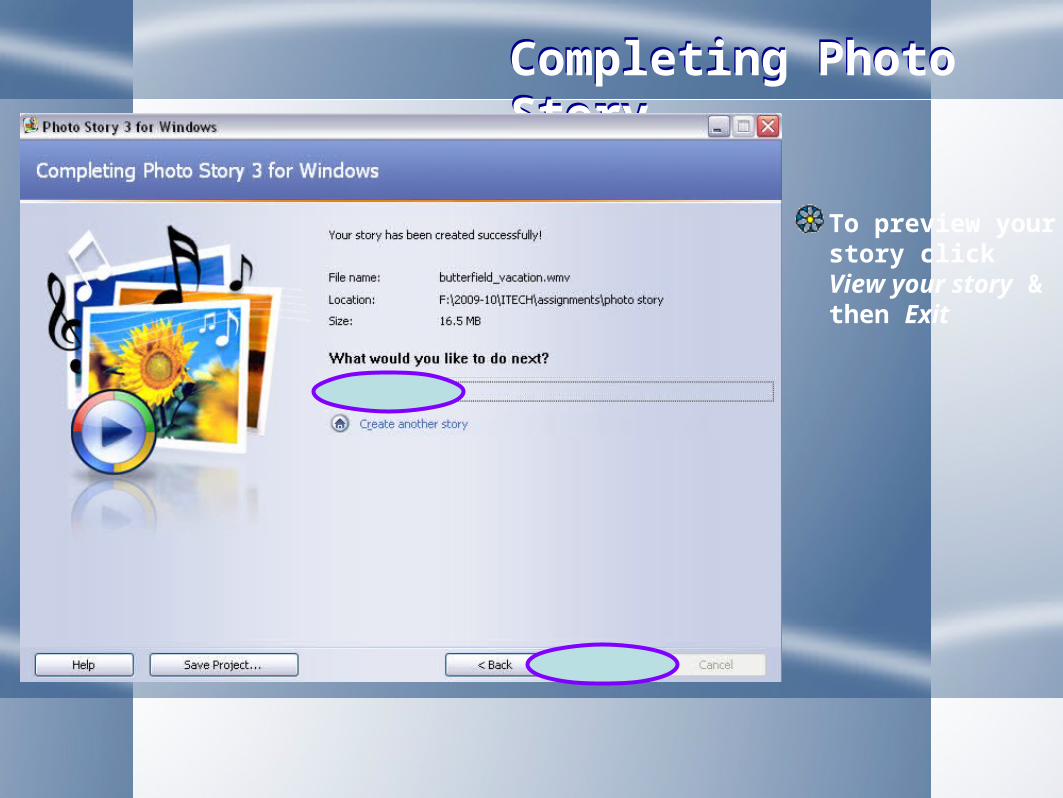
Completing Photo StoryCompleting Photo Story
To preview your story click View your story & then Exit
Submit through SESubmit through SE
When you submit through SE, make sure you select the CORRECT file!