Embed Size (px)
Citation preview

Photo Restoration in PaintShop Pro
Welcome to this tutorial using PaintShop Pro. In this example you will learn some tools which dramatically improve the quality of old, faded or worn photographs.
What you will Learn
How to use Fade Correction to dramatically improve the quality of older photos How to use the Smart Photo Fix features to enhance image color and brightness How to use the Burn Brush to touch up areas of a picture which have faded

The image being used in this example is of a professional ballerina, who was with Les Grands Ballets Canadiens in Montreal Quebec. Since the photo was taken in the mid 1960’s, it has faded signicantly over the years.
To breath new life into this photo you will rst need to have the le open in PaintShop Pro and the Edit screen active.
Click on Adjust from the main menu followed by Color and then Fade Correction.
With Preview on Image checked you will be able to see the adjustments taking place on the image as you make them.
In this example the image is extremely faded and so a high level of correction will be needed.
Fade Correction

Smart Photo Fix
The fade correction makes the photo look much better but there are still some options available to restore color, saturation and brightness. In the Learning Center menu, select Quick Adjustments followed by Smart Photo Fix.
The Smart Photo Fix dialog box allows you to preview your adjustments as well as showing a Before and After images.
In this example the color is being adjusted to 27% and the brightness to 7%
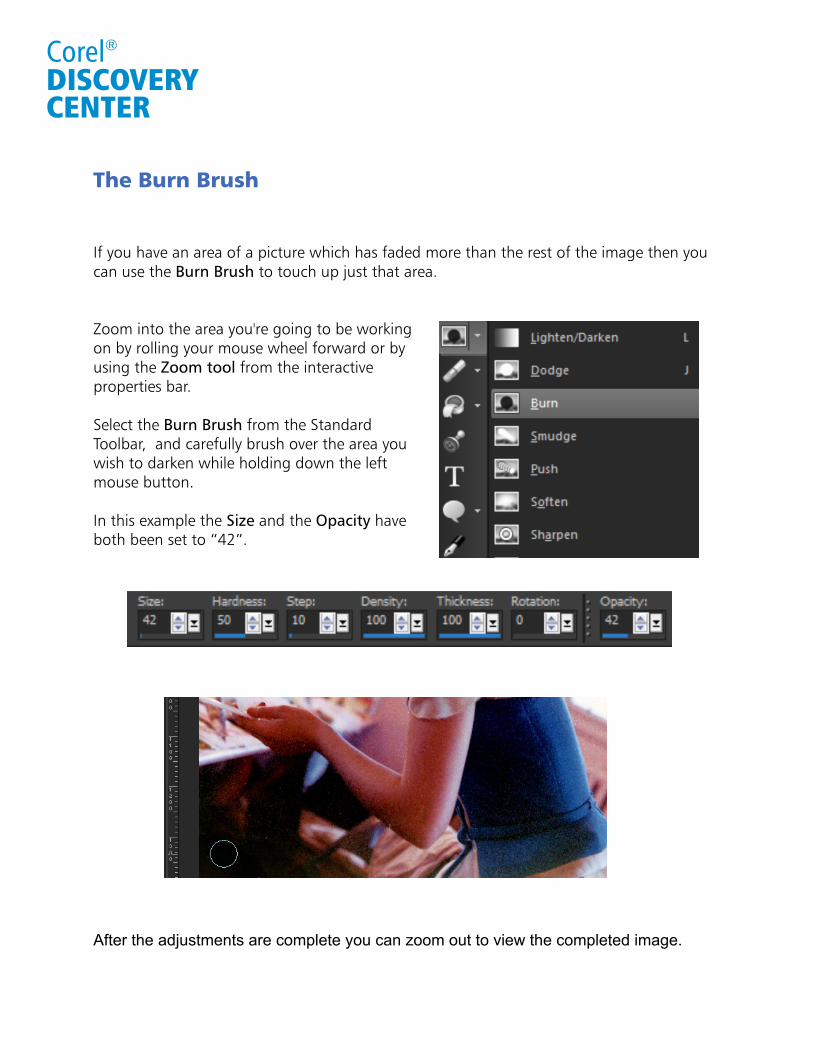
The Burn Brush
If you have an area of a picture which has faded more than the rest of the image then you can use the Burn Brush to touch up just that area.
Zoom into the area you're going to be working on by rolling your mouse wheel forward or by using the Zoom tool from the interactive properties bar.
Select the Burn Brush from the Standard Toolbar, and carefully brush over the area you wish to darken while holding down the left mouse button.
In this example the Size and the Opacity have both been set to “42”.
After the adjustments are complete you can zoom out to view the completed image.

When it comes to Cherished memories, a restored photo can make a very special gift.
If you have enjoyed this tutorial, be sure to check out the other tutorials that are available in the Discovery Center. If you have any ideas for tutorials or projects that you would like to see in the future, e-mail [email protected].


![Corel PaintShop Pro X6 Reviewer's Guide€™s Guide [ 1 ] Introducing Corel® PaintShop® Pro X6 Corel® PaintShop® Pro X6 is powerful, easy-to-use image-editing software that helps](https://img.pdfslide.us/doc/110x75/5acda69f7f8b9a6a678dc0ef/corel-paintshop-pro-x6-reviewers-s-guide-1-introducing-corel-paintshop-pro.jpg)