Embed Size (px)
Citation preview

PG – KIT
INSTALLATION GUIDE
Tools needed

Image 2
Measure and leave 7 inches (18 cm) of the existing power cable and cut the rest
Image 3
This is how it should look

Image 4
Gently make an incision with the cutter all around the cable at a point located at 1.5
inches (3.5 cm) from the end of the cable itself.
Image 5
Remove the outer rubber shield thereby revealing the 3 inner cables

Image 6
Prepare the tips of the 3 cables by removing ¼ inch (0.9 cm) of their rubber shield.
Do it for all three cables
Image 7
This is how the 3 cables are supposed to look

Image 8
VERY IMPORTANT: INSERT THE 3 CABLES LIKE IT IS SHOWN IN THE
IMAGE
THE YELLOW/GREEN CABLE (THE GROUND CABLE)
MUST BE INSERTED IN THE SLOT CLOSEST TO THE
LABEL “PE”

Image 9
As you insert the individual cables use the screwdriver to tighten them in place
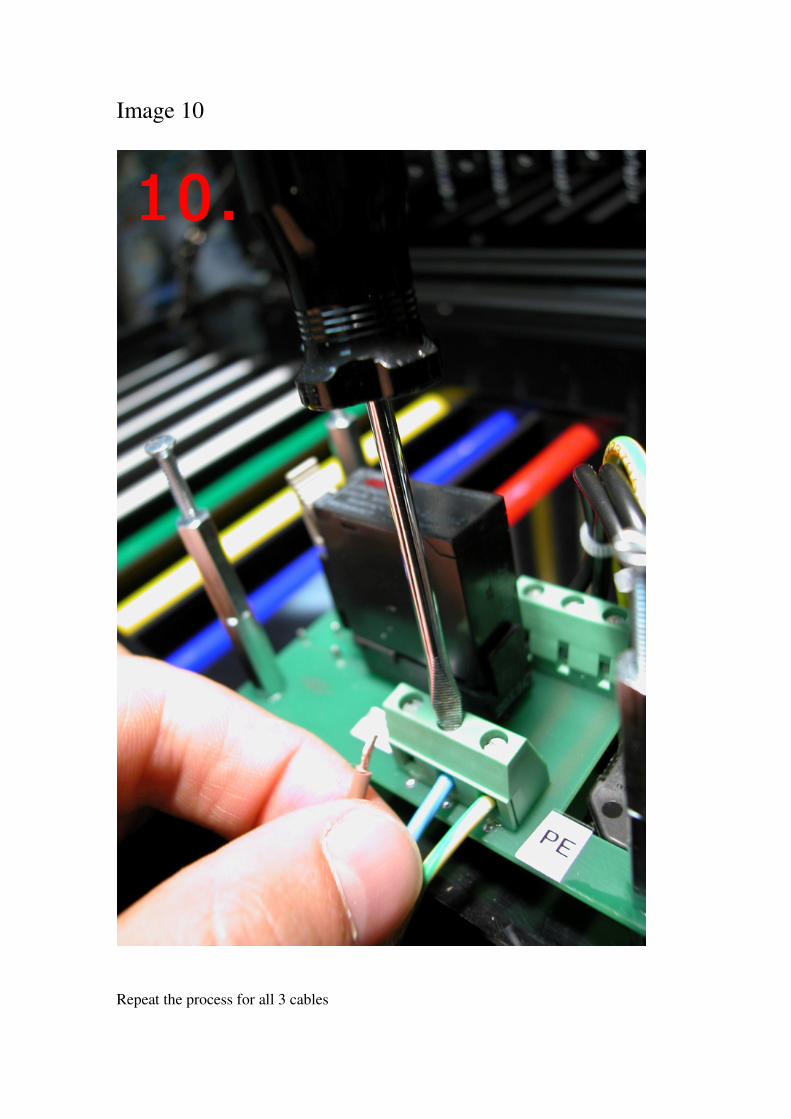
Image 10
Repeat the process for all 3 cables
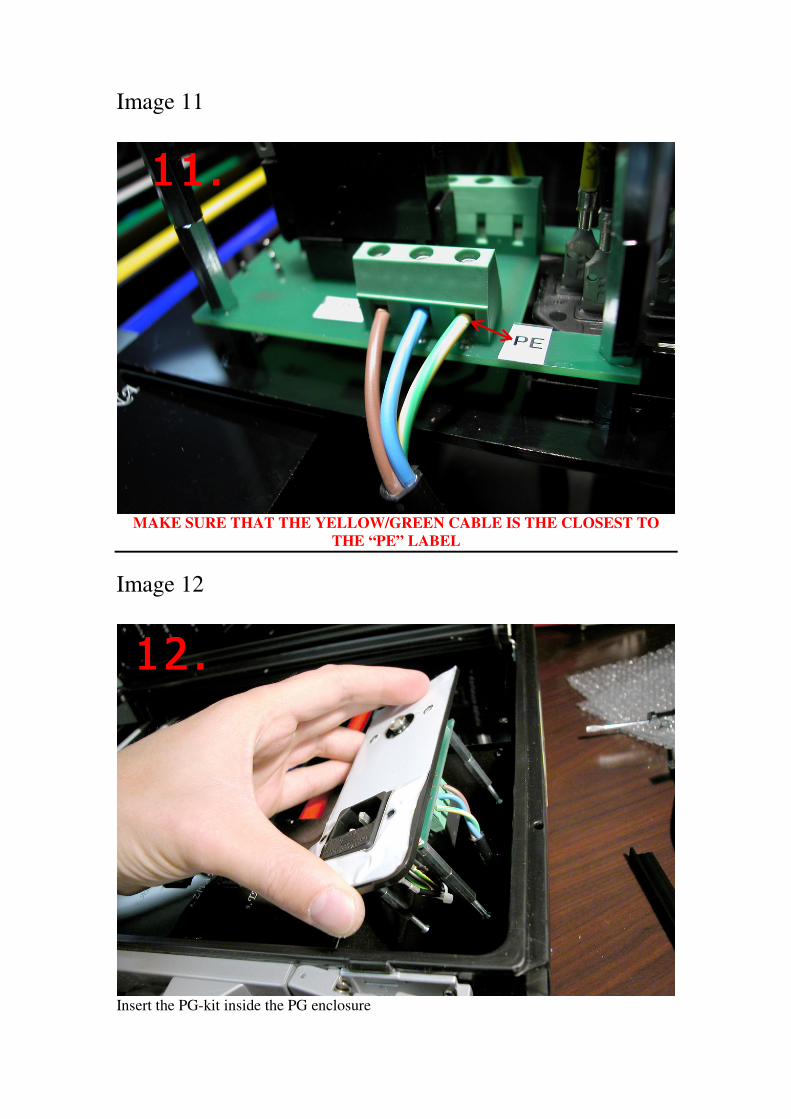
Image 11
MAKE SURE THAT THE YELLOW/GREEN CABLE IS THE CLOSEST TO
THE “PE” LABEL
Image 12
Insert the PG-kit inside the PG enclosure

Image 13
Try to center the PG-kit
Image 14
This is how you will place the brackets that will hold the PG-kit in place

Image 15
Place the brackets at this distance from the power socket
Image 16
The PG-kit should touch this side of the enclosure

Image 17
Open the tube of glue and pierce it so that the glue can come out
Image 18
Gently lift the white film and begin removing it

Image 19
Completely remove the white film
Image 20
If this screw is sticking out gently tighten it so that it does not.

Image 21
Spread some glue along this side
Image 22
And spread it along the other side as well

Image 23
Do not overdo it
Image 24
Place both brackets

Image 25
Use the square polyester piece to keep the brackets in place
Image 26
Here is how it should look

Image 27
Load some weight on the unit and leave it overnight
Image 28
When unplugging the power cord please remember to place fingers on one side of the
power socket.