Embed Size (px)
Citation preview
Personalized Instructor’s Guide– ADVANCED GLAMOUR
by Shanna Nowling-Brannon
Assembly Directions: (this pages does not go in the Instructor’s Guide– it is an instruction page ONLY!)
1. Print out all the pages. You will have to cut info boxes to apply into Instructor’s Guide.
2. The page number on the pages you will print off is the page that you will apply them to the Instructor’s
Guide. Example: the First page you print will not have a #, it says front cover and back cover, you will
apply it to the front cover of the Instructor’s Guide and the very back cover of the Instructor’s Guide. The
next page says inside front cover, it will go on the BACK of the front page of guide. The next page says
(3) and it will be applied to the page coordinating with number (3) and so on.
I recommend you print on full sheet adhesive labels or print on reg. paper and paste to Instructor’s Guide.
These words will take up the entire page of Instructor’s Guide. (The NEW Instructor’s Guides come Bound
and will be a better option for long term use.)
If you can Read, Flip and Squirt, you will have My Advanced Glamour Appointment MASTERED!!! Using
the Instructor’s Guide has MANY Advantages like staying on track, not forgetting things and it also will help
YOU sell your position because others will think, “I can read, so there is no reason why I couldn’t do this!”
The More PARTIES you hold, the better you will become at it!! Be sure to read over and familiarize yourself
with these words before using it live and also don’t hesitate to make these words your own!
HAPPY SELLING!!!

(Front Cover) (Back Cover)
See diagram above to help you understand the purpose and placement of
the three shades. Be sure to blend the three shades really well into skin
because it is the blending that makes the effect work.
Use foundation Base Color all over your face, then apply the lightest
color to the highlighted areas which are actually those areas of the face
that you want to “bring out” or bring focus to. Lastly, apply your darkest
shade to the areas of your face you want to contour, minimize or appear
to recede— such as cheeks that seem too full, temples of wide forehead
or sides of broad nose.
**Remember to finish w/a light dusting of powder to set your founda-
tion. For a more Dramatic Look you could follow same application with
3 different shades of Powder.
Sculpting the Face
Benefits: Make a full face
look slimmer
Give any face shape
a more oval appear-
ance.
3 Foundation Colors:
1st:Base Tone; exact
match skin’s depth
color.
2nd: Highlighter
Color; shade lighter
than skin tone
3rd: Contour Color;
shade darker that
skin tone.
Highlight
Contour
Highlight Highlight
Highlight
Contour Contour
Contour
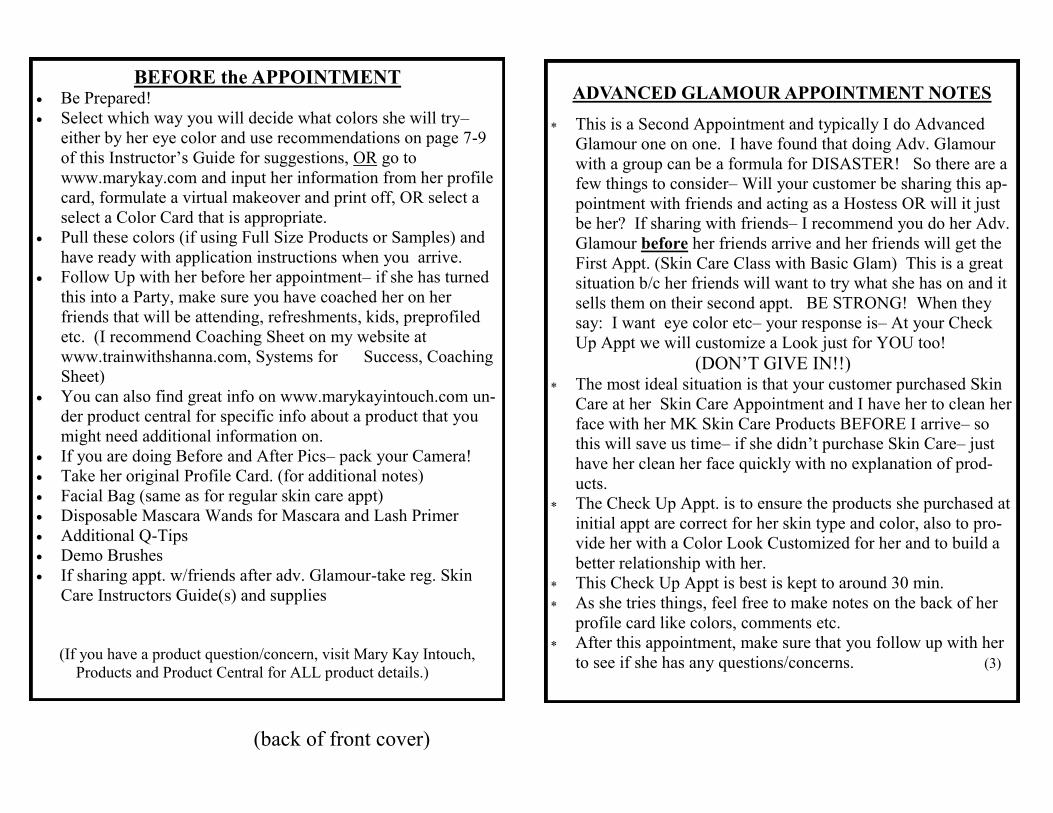
BEFORE the APPOINTMENT Be Prepared!
Select which way you will decide what colors she will try–
either by her eye color and use recommendations on page 7-9
of this Instructor’s Guide for suggestions, OR go to
www.marykay.com and input her information from her profile
card, formulate a virtual makeover and print off, OR select a
select a Color Card that is appropriate.
Pull these colors (if using Full Size Products or Samples) and
have ready with application instructions when you arrive.
Follow Up with her before her appointment– if she has turned
this into a Party, make sure you have coached her on her
friends that will be attending, refreshments, kids, preprofiled
etc. (I recommend Coaching Sheet on my website at
www.trainwithshanna.com, Systems for Success, Coaching
Sheet)
You can also find great info on www.marykayintouch.com un-
der product central for specific info about a product that you
might need additional information on.
If you are doing Before and After Pics– pack your Camera!
Take her original Profile Card. (for additional notes)
Facial Bag (same as for regular skin care appt)
Disposable Mascara Wands for Mascara and Lash Primer
Additional Q-Tips
Demo Brushes
If sharing appt. w/friends after adv. Glamour-take reg. Skin
Care Instructors Guide(s) and supplies
(If you have a product question/concern, visit Mary Kay Intouch,
Products and Product Central for ALL product details.)
ADVANCED GLAMOUR APPOINTMENT NOTES
This is a Second Appointment and typically I do Advanced
Glamour one on one. I have found that doing Adv. Glamour
with a group can be a formula for DISASTER! So there are a
few things to consider– Will your customer be sharing this ap-
pointment with friends and acting as a Hostess OR will it just
be her? If sharing with friends– I recommend you do her Adv.
Glamour before her friends arrive and her friends will get the
First Appt. (Skin Care Class with Basic Glam) This is a great
situation b/c her friends will want to try what she has on and it
sells them on their second appt. BE STRONG! When they
say: I want eye color etc– your response is– At your Check
Up Appt we will customize a Look just for YOU too!
(DON’T GIVE IN!!)
The most ideal situation is that your customer purchased Skin
Care at her Skin Care Appointment and I have her to clean her
face with her MK Skin Care Products BEFORE I arrive– so
this will save us time– if she didn’t purchase Skin Care– just
have her clean her face quickly with no explanation of prod-
ucts.
The Check Up Appt. is to ensure the products she purchased at
initial appt are correct for her skin type and color, also to pro-
vide her with a Color Look Customized for her and to build a
better relationship with her.
This Check Up Appt is best is kept to around 30 min.
As she tries things, feel free to make notes on the back of her
profile card like colors, comments etc.
After this appointment, make sure that you follow up with her
to see if she has any questions/concerns. (3)
(back of front cover)
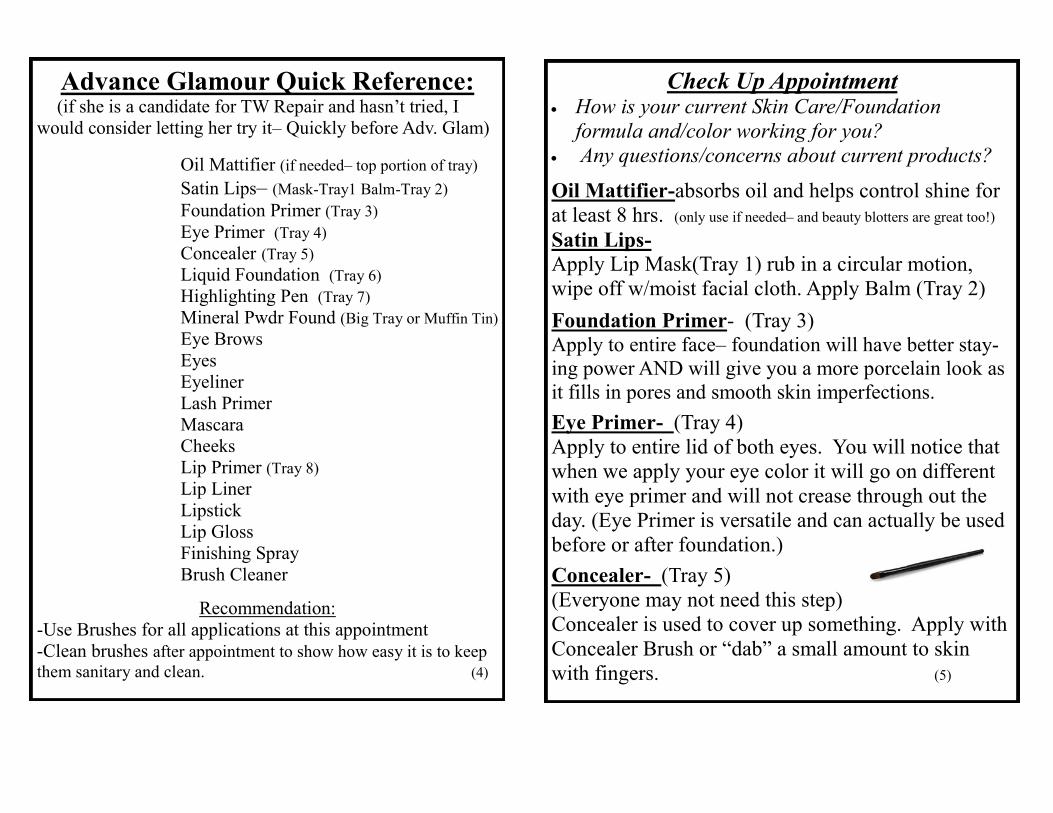
Advance Glamour Quick Reference: (if she is a candidate for TW Repair and hasn’t tried, I
would consider letting her try it– Quickly before Adv. Glam)
Oil Mattifier (if needed– top portion of tray)
Satin Lips– (Mask-Tray1 Balm-Tray 2) Foundation Primer (Tray 3) Eye Primer (Tray 4)
Concealer (Tray 5) Liquid Foundation (Tray 6) Highlighting Pen (Tray 7) Mineral Pwdr Found (Big Tray or Muffin Tin) Eye Brows
Eyes
Eyeliner
Lash Primer
Mascara
Cheeks
Lip Primer (Tray 8) Lip Liner
Lipstick
Lip Gloss
Finishing Spray
Brush Cleaner
Recommendation:
-Use Brushes for all applications at this appointment
-Clean brushes after appointment to show how easy it is to keep
them sanitary and clean. (4)
Check Up Appointment How is your current Skin Care/Foundation
formula and/color working for you?
Any questions/concerns about current products?
Oil Mattifier-absorbs oil and helps control shine for
at least 8 hrs. (only use if needed– and beauty blotters are great too!)
Satin Lips-
Apply Lip Mask(Tray 1) rub in a circular motion,
wipe off w/moist facial cloth. Apply Balm (Tray 2)
Foundation Primer- (Tray 3) Apply to entire face– foundation will have better stay-
ing power AND will give you a more porcelain look as
it fills in pores and smooth skin imperfections.
Eye Primer- (Tray 4)
Apply to entire lid of both eyes. You will notice that
when we apply your eye color it will go on different
with eye primer and will not crease through out the
day. (Eye Primer is versatile and can actually be used
before or after foundation.)
Concealer- (Tray 5)
(Everyone may not need this step)
Concealer is used to cover up something. Apply with
Concealer Brush or “dab” a small amount to skin
with fingers. (5)
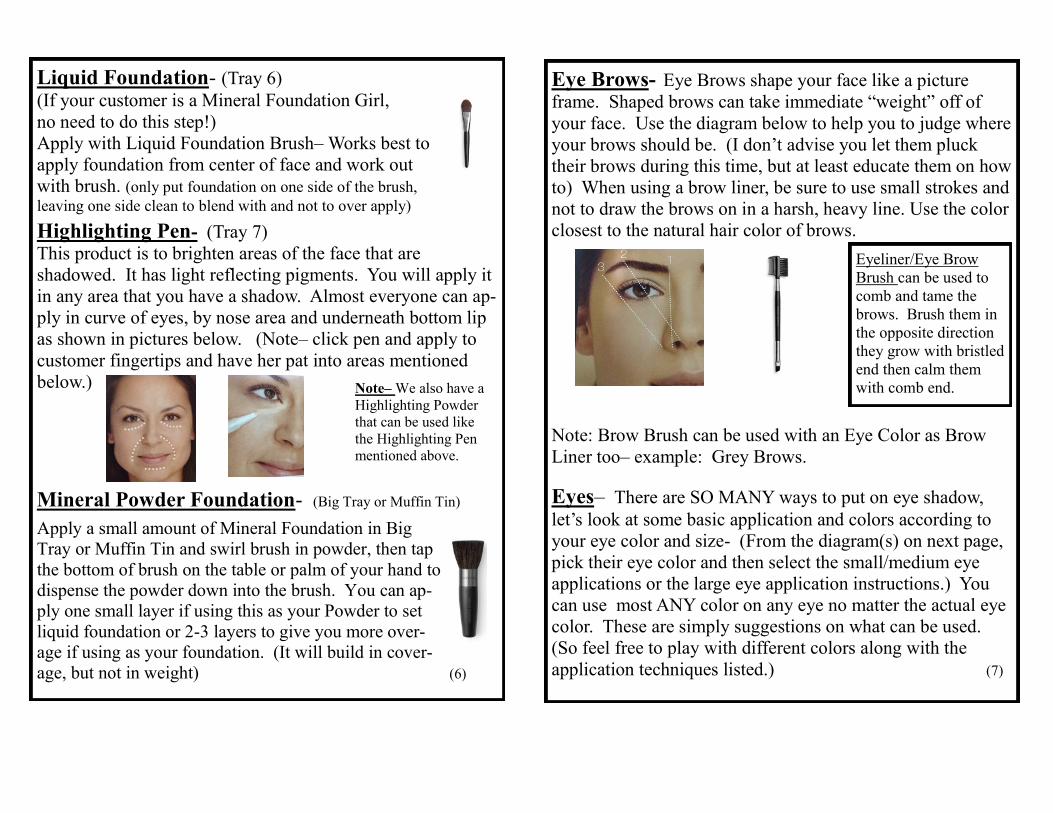
Liquid Foundation- (Tray 6)
(If your customer is a Mineral Foundation Girl,
no need to do this step!)
Apply with Liquid Foundation Brush– Works best to
apply foundation from center of face and work out
with brush. (only put foundation on one side of the brush,
leaving one side clean to blend with and not to over apply)
Highlighting Pen- (Tray 7)
This product is to brighten areas of the face that are
shadowed. It has light reflecting pigments. You will apply it
in any area that you have a shadow. Almost everyone can ap-
ply in curve of eyes, by nose area and underneath bottom lip
as shown in pictures below. (Note– click pen and apply to
customer fingertips and have her pat into areas mentioned
below.)
Mineral Powder Foundation- (Big Tray or Muffin Tin)
Apply a small amount of Mineral Foundation in Big
Tray or Muffin Tin and swirl brush in powder, then tap
the bottom of brush on the table or palm of your hand to
dispense the powder down into the brush. You can ap-
ply one small layer if using this as your Powder to set
liquid foundation or 2-3 layers to give you more over-
age if using as your foundation. (It will build in cover-
age, but not in weight) (6)
Eye Brows- Eye Brows shape your face like a picture
frame. Shaped brows can take immediate “weight” off of
your face. Use the diagram below to help you to judge where
your brows should be. (I don’t advise you let them pluck
their brows during this time, but at least educate them on how
to) When using a brow liner, be sure to use small strokes and
not to draw the brows on in a harsh, heavy line. Use the color
closest to the natural hair color of brows.
Note: Brow Brush can be used with an Eye Color as Brow
Liner too– example: Grey Brows.
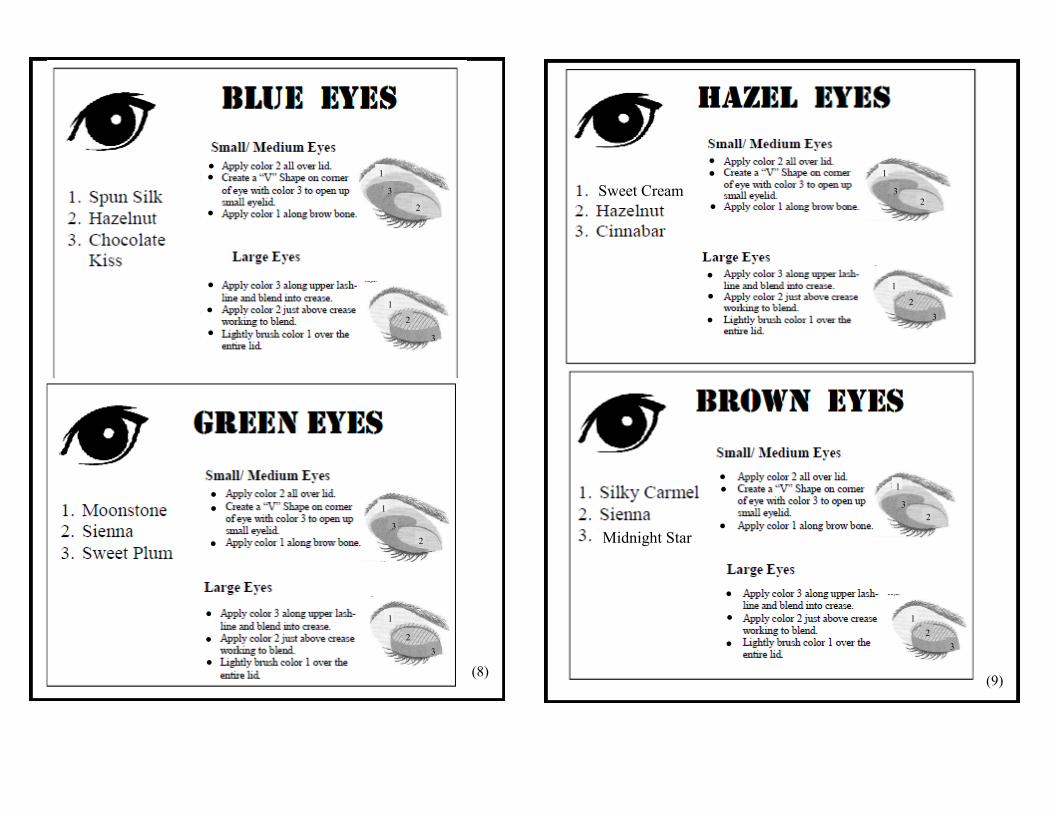
Eyes– There are SO MANY ways to put on eye shadow,
let’s look at some basic application and colors according to
your eye color and size- (From the diagram(s) on next page,
pick their eye color and then select the small/medium eye
applications or the large eye application instructions.) You
can use most ANY color on any eye no matter the actual eye
color. These are simply suggestions on what can be used.
(So feel free to play with different colors along with the
application techniques listed.) (7)
Eyeliner/Eye Brow
Brush can be used to
comb and tame the
brows. Brush them in
the opposite direction
they grow with bristled
end then calm them
with comb end. Note– We also have a
Highlighting Powder
that can be used like
the Highlighting Pen
mentioned above.
(8)
(9)
Sweet Cream
Midnight Star
3
2
3
3
3
1
2 2
2
2
1
1
1
1
1 1
1
3
3
3
3
2
2 2

Eyeliner- Eyeliner color is really a personal preference.
Most everyone can wear Black, however some people like
something lighter and others like a little color.
Below is a list of what colors coordinate best with specific
eye colors, if you are wanting colored liner.
Blue Eyes– Green Eyeliner (Rich Jade)
Green Eyes- Purple Eyeliner (Violet Ink)
Hazel Eyes– Purple Eyeliner (Violet Ink)
Brown Eyes– Blue Eyeliner (Dark Denim)
Tips on WHERE and HOW to apply:
-Glide onto upper lash line and/or along lower lash line.
Everyone should line top– this will help to give the illusion
that the eye is more lifted.
-Lining the Bottom is a personal preference– (do not
line inner rim of eyes, liner should go underneath lashes)
-When you apply, try to “color” like in a coloring book
and make short soft strokes so it doesn’t look like a
harsh line.
Using a smudge brush is great for creating this look.
-Mary Kay Eye/Lip Pencils colors come with a Built
in Shaper. (see page 19 for details)
- You can also use Eye Shadow as Eyeliner– using the
angel brush on the end of the Eyeliner/Eye Brow
Brush. (to get more vibrant color, dampen the brush
before you apply eye shadow as eyeliner.) (10)
LASHES:
Curling Lashes- (optional) should be done before any
products are put on the Eye Lashes– (good info to give if you
are not comfortable with doing this at this appointment)
Lash Primer- Get more from your mascara– stronger,
more voluminous, longer-looking lashes by applying Lash
Primer. Apply Mascara to lashes while Lash Primer is still
wet.
Mascara- We have several types of mascara, Lash Love
and Ultimate are our most popular choices…
Ultimate– Thickens (Black or Black Brown)
Lash Love– Fans the Lashes (Black or Brown)
Lash Love Waterproof– Fans the Lashes AND Waterproof
(Black or Brown)
Mascara should be replaced every 3 months.
To make most of application, apply mascara to top side of
lashes first, then hold brush vertically and brush lashes side
to side. Lastly apply mascara to bottom side of top lashes by
brushing them upward. Mascara should be applied on upper
and lower lashes.
“Minking” with Mascara… (optional– good info to give for
them to try at home) Minking is when you put Brown
Mascara on the lashes and tip the ends with Black– because
of the different colors on the lashes it will make them appear
thicker and fuller.
(Give info on Lash/Brow Serum if time permits – see page 17 for details)
(11)

Cheeks-
Sweep cheek brush across cheek color, tapping off excess.
Begin applying color at the apple of the cheek bone. Feather
the color slightly upward and along the check bone, stopping
at the top of the check bone, just below the temple. Color
should not begin before the pupil or extend below the nose.
LIPS- (Prime, Outline, Fill in and Finish)
Lip Primer– Reduces lines and wrinkles on the lips and
around the lip area. Helps prevent feathering and bleeding
of lipstick and/or lip gloss and also allows products glide
on lips.
Lip Liner- For a fool proof application, choose a lip liner shade close to
the color of your lips or our clear lip liner.
To achieve intense polished look, use a shade just slightly
darker than the color of your lip.
To extend the wear of your lip color, begin with outlining your
lips before filling in the entire lip with your lip liner. Then ap-
ply your lipstick or lip gloss.
Use a slightly darker shade below the center of the fullest part
of your lip.
To visually enlarge OR reduce your lips– see diagram on next
page
*Mary Kay Eye/Lip Pencils colors come
with a Built in Shaper. (see page 19 for details) (12)
Take Thin Lips to the MAX- 1. Apply Lip Primer on the lips and outside the lip line.
Allow to dry.
2. Erase the existing lip line by applying concealer or
foundation over it.
3. Use Lip Liner to draw a line slightly above the natural top
and around the bottom lip lines. Fill in lips completely
with the lip liner to create a matte base.
4. Place a dab of light Concealer in the center of the top and
bottom lips.
5. Apply Lipstick
6. Finish with Gloss applied to the center of the lips over lip-
stick to help make lips appear fuller.
(13)
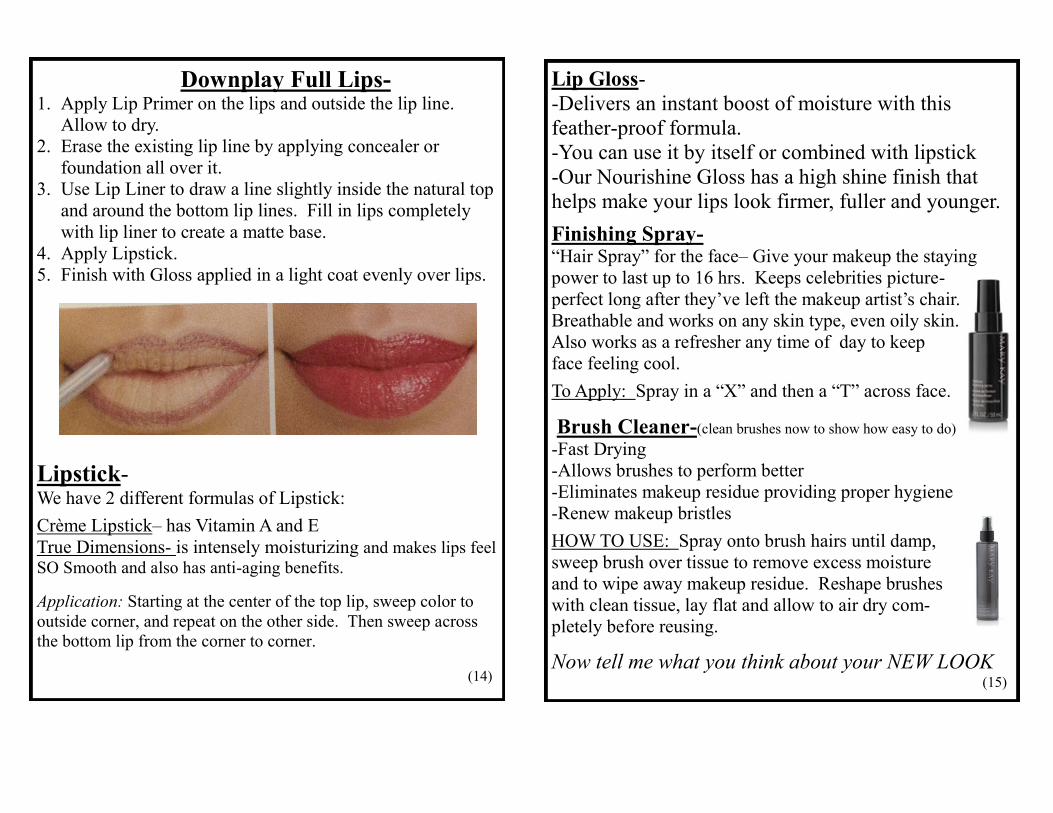
Downplay Full Lips- 1. Apply Lip Primer on the lips and outside the lip line.
Allow to dry.
2. Erase the existing lip line by applying concealer or
foundation all over it.
3. Use Lip Liner to draw a line slightly inside the natural top
and around the bottom lip lines. Fill in lips completely
with lip liner to create a matte base.
4. Apply Lipstick.
5. Finish with Gloss applied in a light coat evenly over lips.
Lipstick-
We have 2 different formulas of Lipstick:
Crème Lipstick– has Vitamin A and E
True Dimensions- is intensely moisturizing and makes lips feel
SO Smooth and also has anti-aging benefits.
Application: Starting at the center of the top lip, sweep color to
outside corner, and repeat on the other side. Then sweep across
the bottom lip from the corner to corner.
(14)
Lip Gloss-
-Delivers an instant boost of moisture with this
feather-proof formula.
-You can use it by itself or combined with lipstick
-Our Nourishine Gloss has a high shine finish that
helps make your lips look firmer, fuller and younger.
Finishing Spray- “Hair Spray” for the face– Give your makeup the staying
power to last up to 16 hrs. Keeps celebrities picture-
perfect long after they’ve left the makeup artist’s chair.
Breathable and works on any skin type, even oily skin.
Also works as a refresher any time of day to keep
face feeling cool.
To Apply: Spray in a “X” and then a “T” across face.
Brush Cleaner-(clean brushes now to show how easy to do) -Fast Drying
-Allows brushes to perform better
-Eliminates makeup residue providing proper hygiene
-Renew makeup bristles
HOW TO USE: Spray onto brush hairs until damp,
sweep brush over tissue to remove excess moisture
and to wipe away makeup residue. Reshape brushes
with clean tissue, lay flat and allow to air dry com-
pletely before reusing.
Now tell me what you think about your NEW LOOK (15)
(Sets)
I offer a special at your Advanced Glamour Appointment: (show products as you talk about them)
Bronze Collection Filled Compact:
3 Eye Colors, Cheek Color, Lipstick & Applicators
Mascara
Lip Gloss
Oil Free Eye Remover
Value of $111.50 TODAY $99
Silver Collection Bronze Collection PLUS:
Eyeliner
Brow Pencil
Lip Liner
Eye Primer
Value of $159.50 TODAY $139
Gold Collection
Silver Collection PLUS
Brush Collection
Smudge Brush
Lash Primer
Facial Highlighting Pen
Brush Cleaner
Finishing Spray
Value $283.50 TODAY $229
(16)
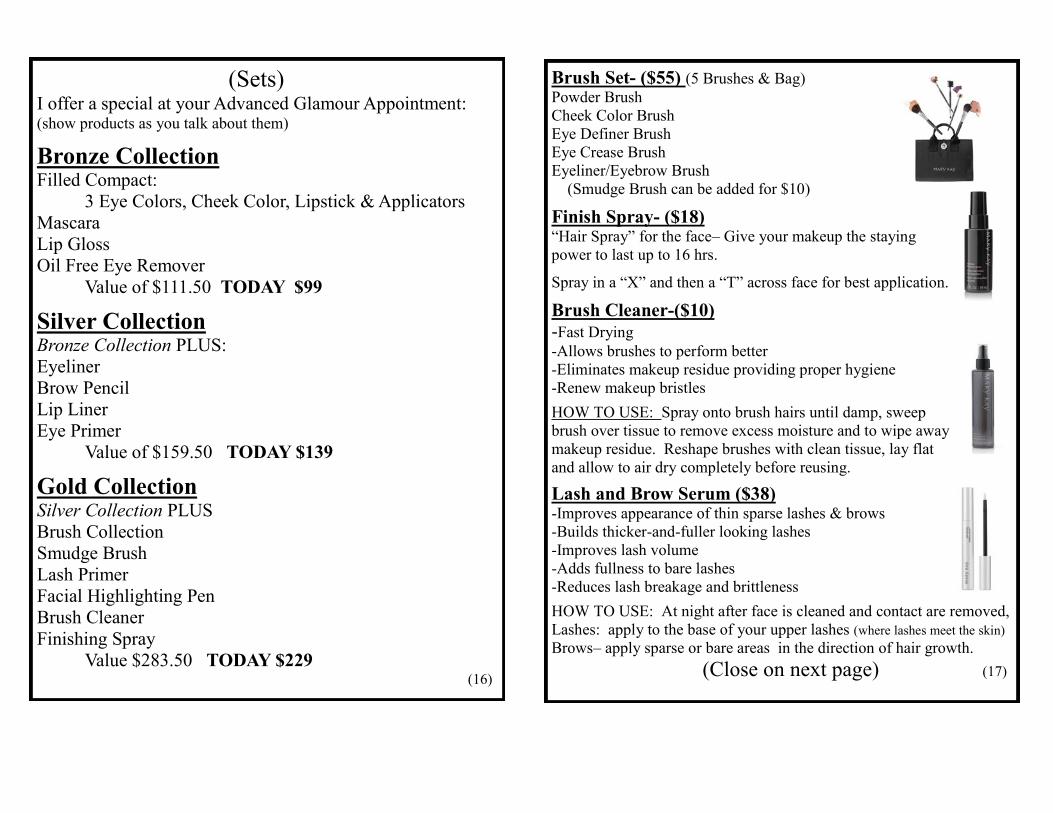
Brush Set- ($55) (5 Brushes & Bag) Powder Brush
Cheek Color Brush
Eye Definer Brush
Eye Crease Brush
Eyeliner/Eyebrow Brush
(Smudge Brush can be added for $10)
Finish Spray- ($18) “Hair Spray” for the face– Give your makeup the staying
power to last up to 16 hrs.
Spray in a “X” and then a “T” across face for best application.
Brush Cleaner-($10) -Fast Drying
-Allows brushes to perform better
-Eliminates makeup residue providing proper hygiene
-Renew makeup bristles
HOW TO USE: Spray onto brush hairs until damp, sweep
brush over tissue to remove excess moisture and to wipe away
makeup residue. Reshape brushes with clean tissue, lay flat
and allow to air dry completely before reusing.
Lash and Brow Serum ($38) -Improves appearance of thin sparse lashes & brows
-Builds thicker-and-fuller looking lashes
-Improves lash volume
-Adds fullness to bare lashes
-Reduces lash breakage and brittleness
HOW TO USE: At night after face is cleaned and contact are removed,
Lashes: apply to the base of your upper lashes (where lashes meet the skin)
Brows– apply sparse or bare areas in the direction of hair growth.
(Close on next page) (17)

(CLOSE)
Ask: *Did you have fun/learn something
*What would you like to take home with you tonight?
LISTEN AND WRITE!!! (don’t interrupt)
(at this point hopefully she is already using the skin care, if
not after she tells you all that she would like today, say: To
achieve the way your face feels today, I would recommend
you consider some of the Skin Care Products that you have
sampled too)
Make Wish List of other items she would like to have—on
back of profile card
Finish Sales Ticket and Take her payment.
(If she has several things on her “wish list” I would offer her
to earn some of these products at a discount or possibly free)
You could share me with some of your friends OR if this
ADV. Glamour appointment is taking place before a party
that she is hosting, remind her of how she can earn the
MOST products so she can help you make her party a success
AND she can also be thinking about what items she will be
picking out for FREE/DISCOUNT after the party.
Revisit the idea of her starting her own MK Business and if
hosting a party ask- “who will be attending tonight that you
think would be great at what I do OR could use some extra
income?”
If necessary give her another piece of recruiting info and
schedule a time to follow up!
(18)
~More Tips/Ideas~ Eye and Lip Pencil, Built in Shaper– How to use:
1. Remove the shaper cap from the end of the pencil cap.
2. Holding the shaper cap in your dominant hand, grasp the
pencil near the end of the tip and insert into the shaper.
3. Carefully twist the shaper cap in a gentle back and forth mo-
tion to shape the top of the pencil.
Quick Reference/Targeted Areas- Minor Scars- dab moisturizer only on the scar and apply a thin
layer of powder that matches skin tone, apply concealer directly to
the scar, use your ring finger to pat the edges to blend and lightly
dust with powder to set. (may also use concealer brush to apply)
Age Spots- (brown or patches) match concealer color and apply to
only the discolored area(s) (may also use concealer brush to apply)
Blemishes– match color of concealer to skin and apply lightly to
the blemish and use your ring finger to lightly pat around the edges
to blend. Add a second light layer and blend if needed.
Dark Circles Under Eye- apply concealer at the edge of the
dark area and extend up, never go below the dark area, be sure to in-
clude the inside corner of the eyes and lids if necessary. Use ring
finger to lightly pat the edges to blend. For more serious dark circle,
a concealer one or two shades lighter than skin tone may be needed.
For long term benefits, TW Eye Revitalizer or TW Repair Eye
Renewal Cream are great options.
Undereye Puffiness- see page 6 on how to use Facial Highlight-
ing Pen to minimize the look of undereye puffiness.
Shadows- brighten shadowy areas of face with Facial Highlighting
pen—NOT Concealer– see page 6 for more details.
Redness- to cover redness on Ivory/Beige skin tones, try yellow
concealer, always dab foundation over concealed areas to keep from
smudging and set with powder. (19)