Embed Size (px)
Citation preview

Copyright © 2010 pergolaplans4free.co.uk. All rights reserved.
This publication is protected under the UK Copyright, Designs and Patents Act
1988.
You may print part, or all, of this document for your own personal use. Any
unauthorised copying or distribution, whether commercial or non-commercial,
unless permission is sought from the author, will constitute an infringement of
copyright law.
Although the author and publisher have made every reasonable attempt to achieve
complete accuracy of the content of this guide, they assume no responsibility for
errors or omissions. Also, you should use this information as you see fit, and at your
own risk.
All dealings with third party organisations, i.e. sellers of products, shall be between
yourself and the organisation and, in the unlikely event of a problem, shall be dealt
with between yourself and the third party.
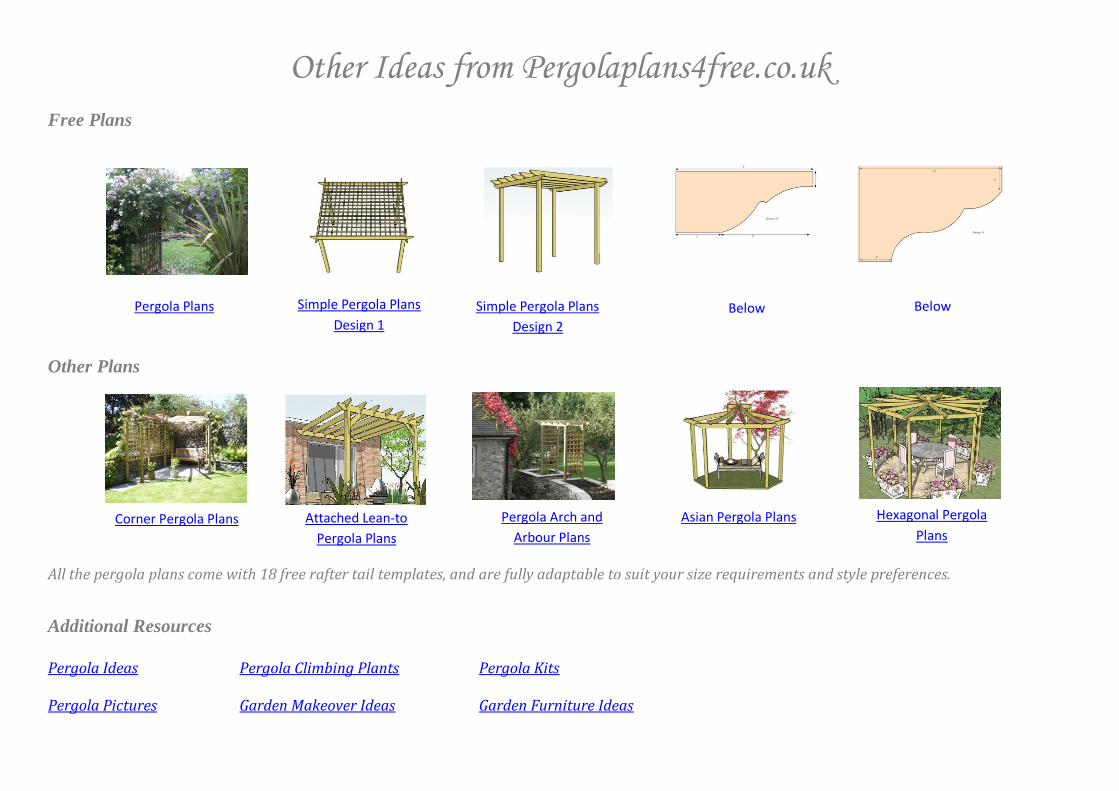
Other Ideas from Pergolaplans4free.co.uk
Free Plans
Other Plans
All the pergola plans come with 18 free rafter tail templates, and are fully adaptable to suit your size requirements and style preferences.
Additional Resources
Pergola Ideas Pergola Climbing Plants Pergola Kits Pergola Pictures Garden Makeover Ideas Garden Furniture Ideas
Pergola Plans
Simple Pergola Plans
Design 1
Simple Pergola Plans
Design 2
Below Below
Attached Lean-to
Pergola Plans
Pergola Arch and
Arbour Plans
Hexagonal Pergola
Plans
Corner Pergola Plans Asian Pergola Plans
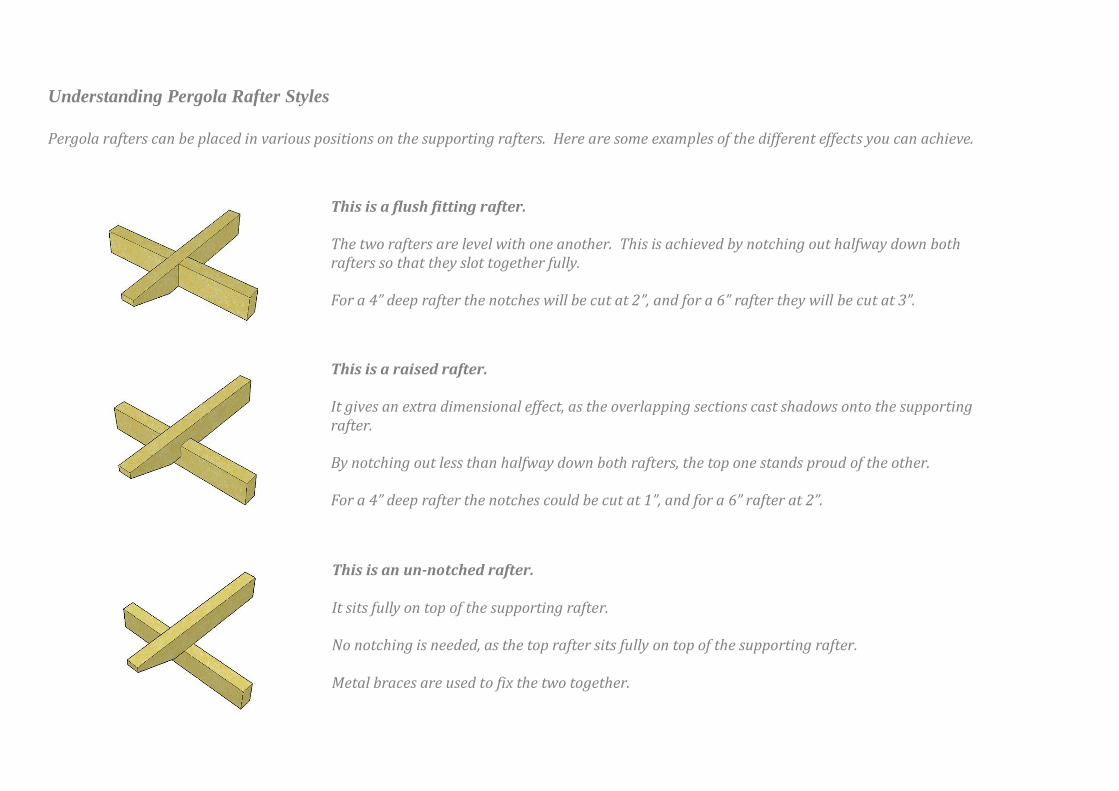
Understanding Pergola Rafter Styles
Pergola rafters can be placed in various positions on the supporting rafters. Here are some examples of the different effects you can achieve.
This is a flush fitting rafter. The two rafters are level with one another. This is achieved by notching out halfway down both rafters so that they slot together fully. For a 4” deep rafter the notches will be cut at 2”, and for a 6” rafter they will be cut at 3”.
This is a raised rafter. It gives an extra dimensional effect, as the overlapping sections cast shadows onto the supporting rafter. By notching out less than halfway down both rafters, the top one stands proud of the other. For a 4” deep rafter the notches could be cut at 1”, and for a 6” rafter at 2”.
This is an un-notched rafter. It sits fully on top of the supporting rafter. No notching is needed, as the top rafter sits fully on top of the supporting rafter. Metal braces are used to fix the two together.
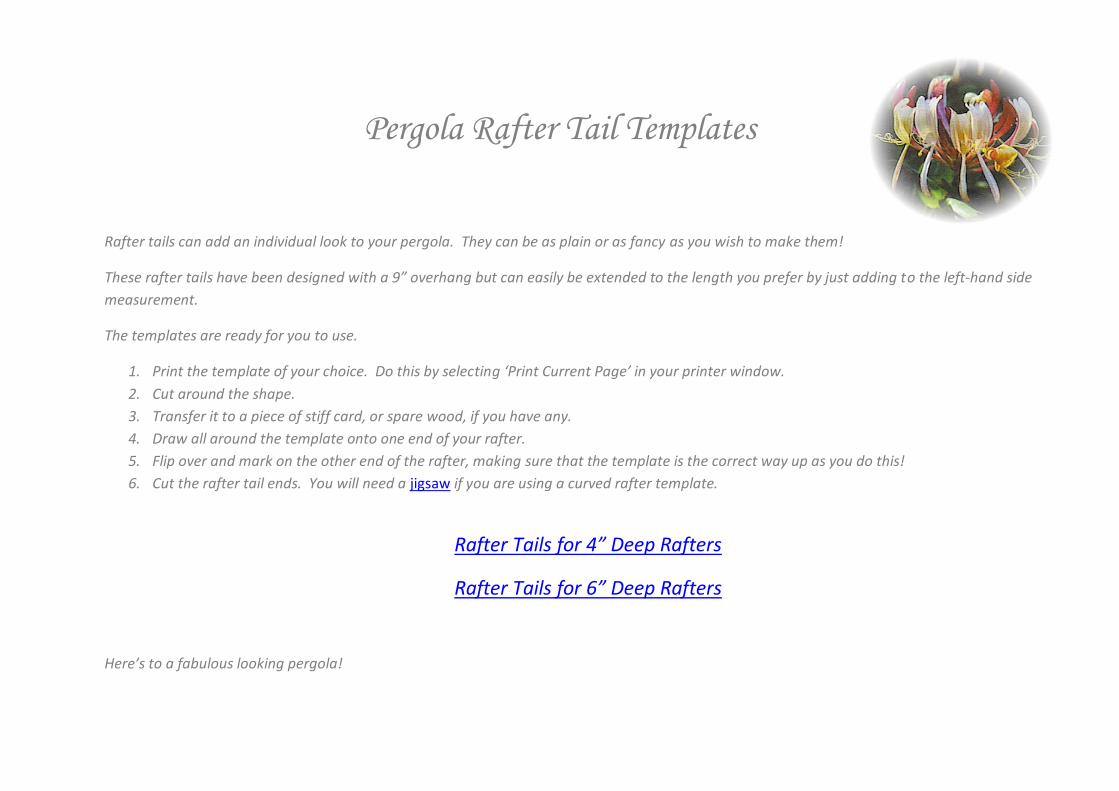
Pergola Rafter Tail Templates
Rafter tails can add an individual look to your pergola. They can be as plain or as fancy as you wish to make them!
These rafter tails have been designed with a 9” overhang but can easily be extended to the length you prefer by just adding to the left-hand side
measurement.
The templates are ready for you to use.
1. Print the template of your choice. Do this by selecting ‘Print Current Page’ in your printer window.
2. Cut around the shape.
3. Transfer it to a piece of stiff card, or spare wood, if you have any.
4. Draw all around the template onto one end of your rafter.
5. Flip over and mark on the other end of the rafter, making sure that the template is the correct way up as you do this!
6. Cut the rafter tail ends. You will need a jigsaw if you are using a curved rafter template.
Rafter Tails for 4” Deep Rafters
Rafter Tails for 6” Deep Rafters
Here’s to a fabulous looking pergola!
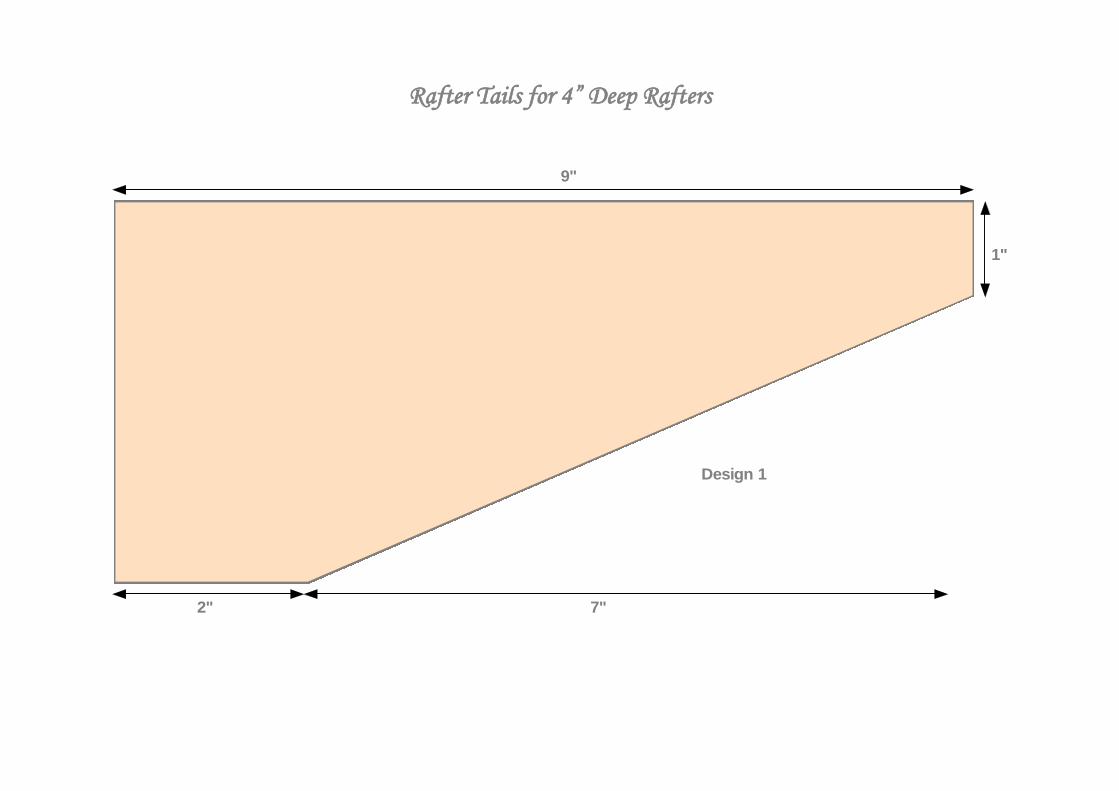
Rafter Tails for 4” Deep Rafters
Design 1
7"2"
9"
1"
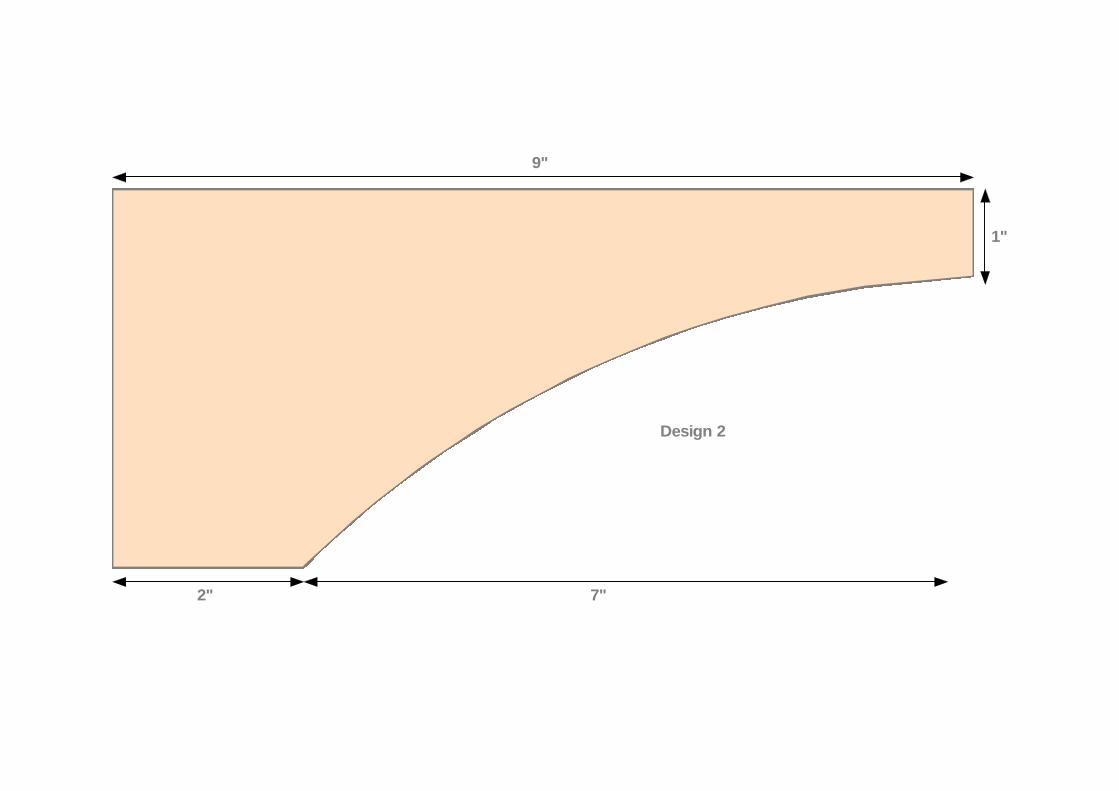
Design 2
7"
9"
1"
2"
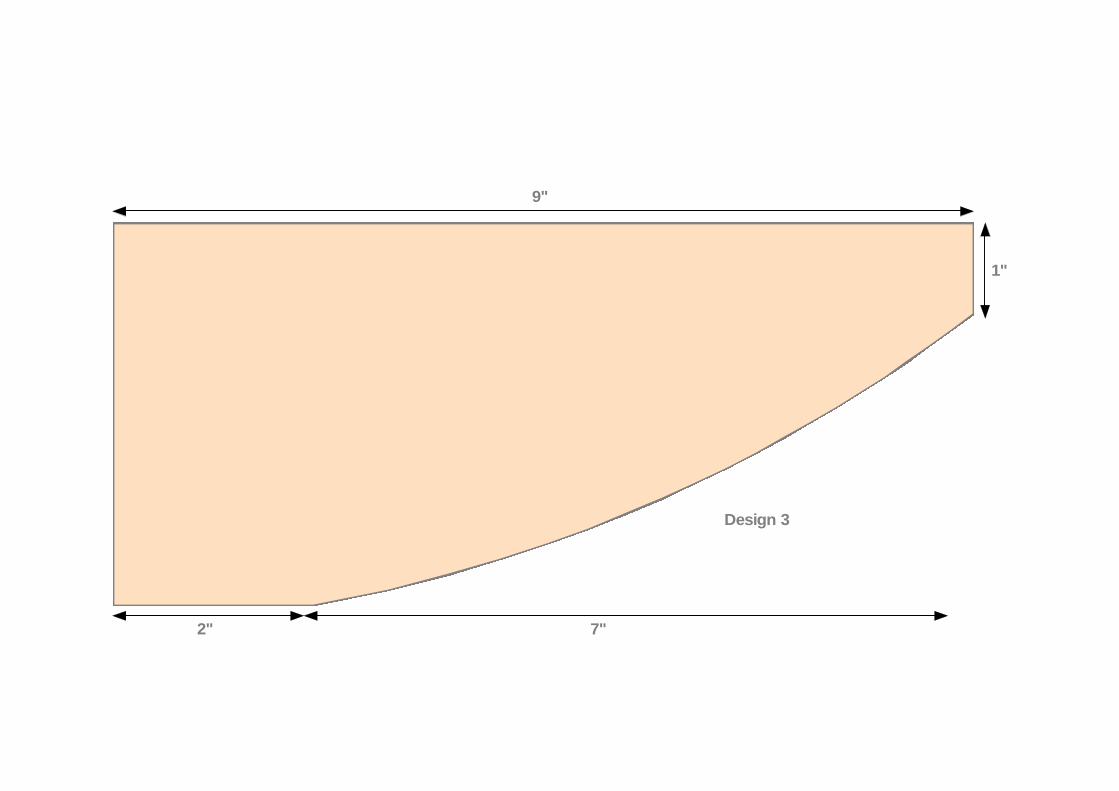
Design 3
7"
9"
1"
2"
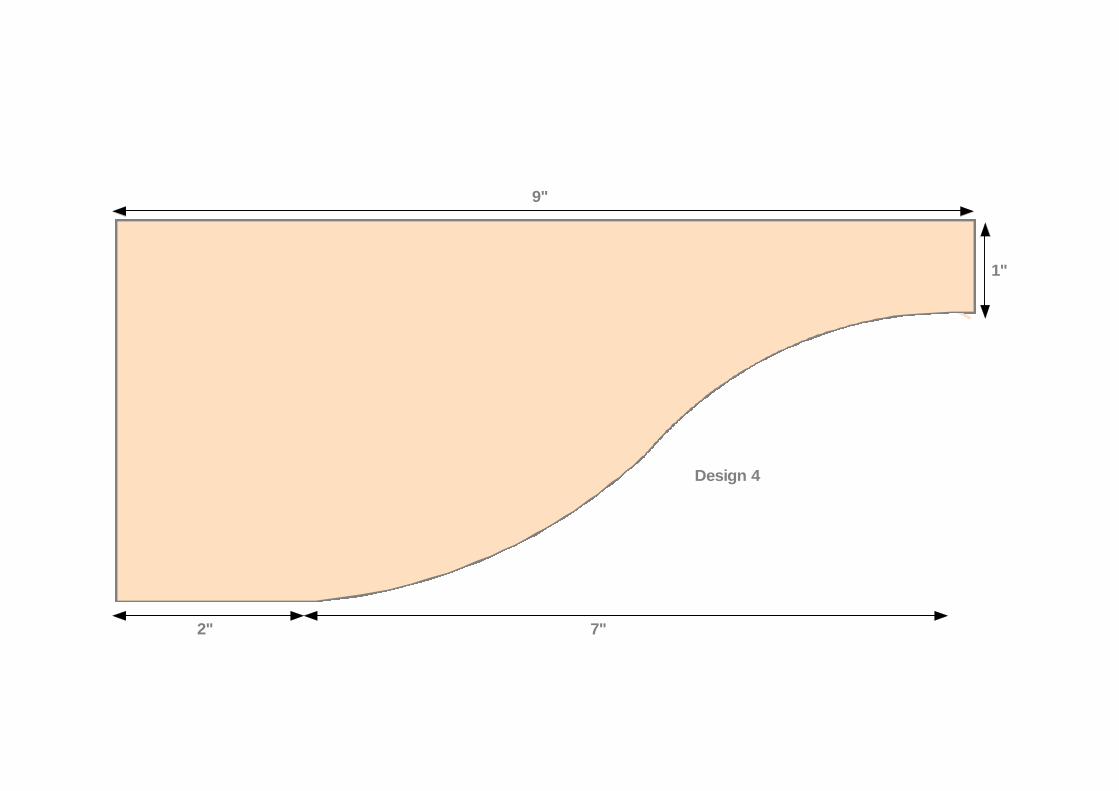
Design 4
7"
9"
1"
2"
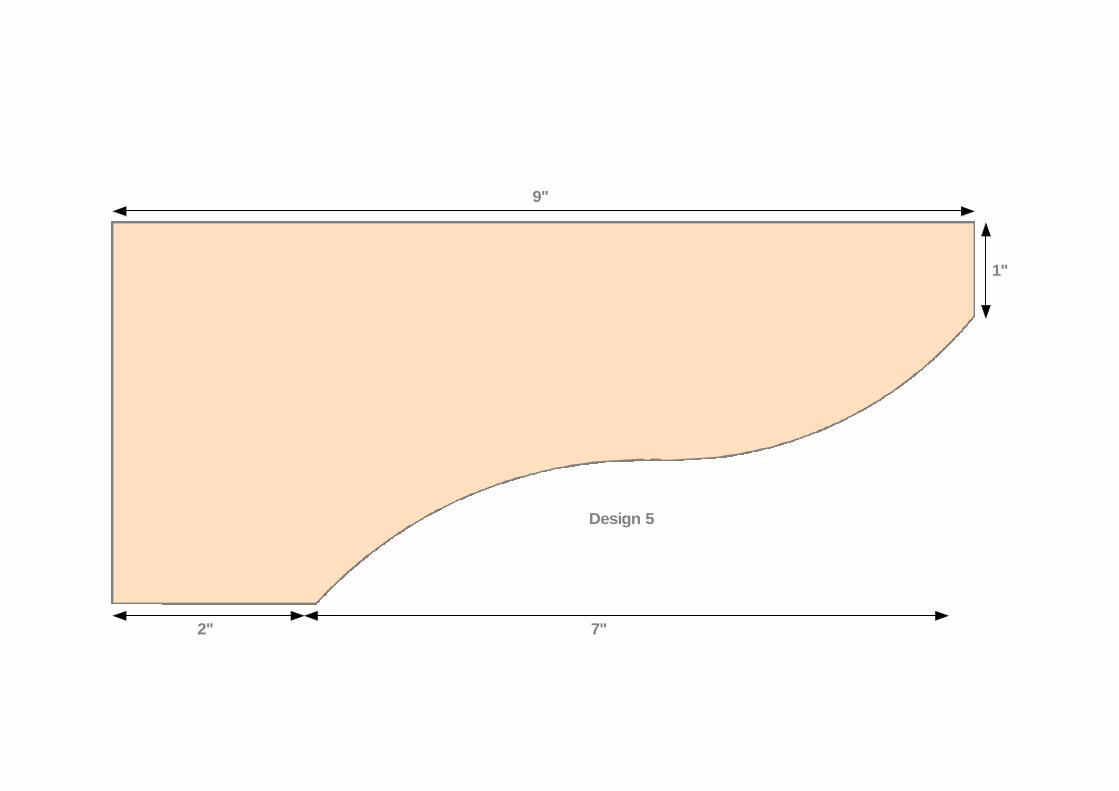
Design 5
7"
9"
1"
2"

Design 6
6"
9"
1"
3"

Design 7
6"
9"
1"
3"
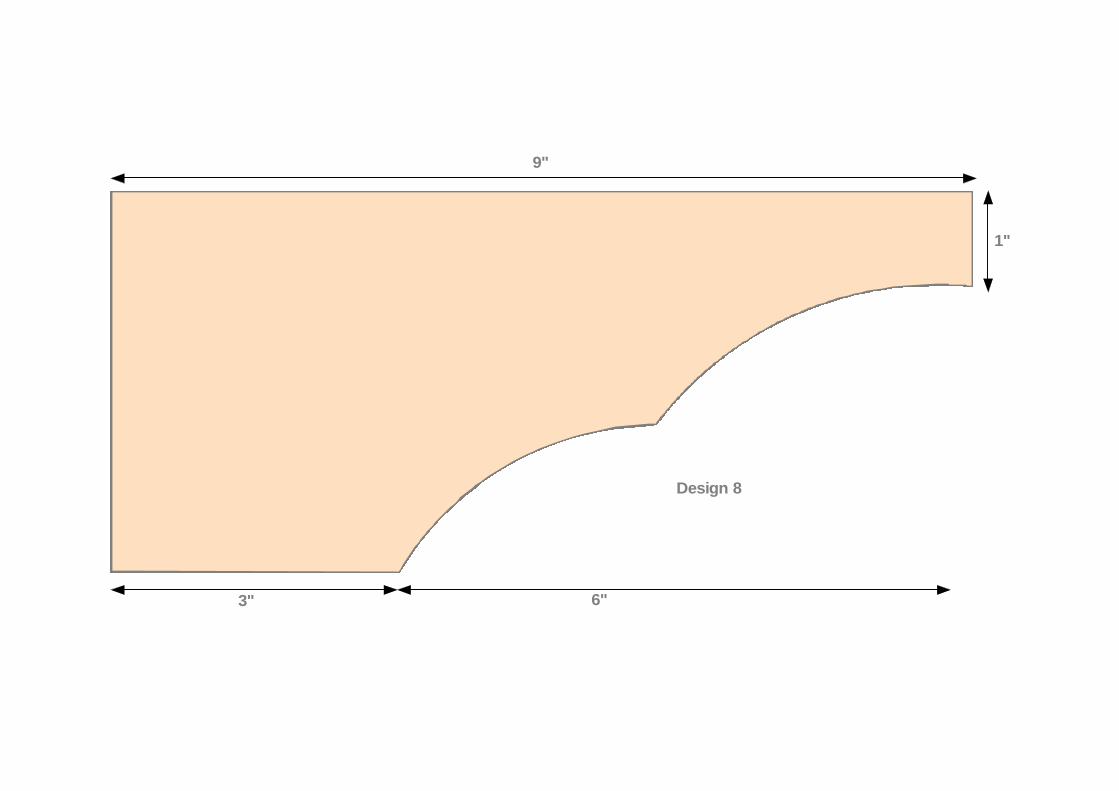
Design 8
6"
9"
1"
3"
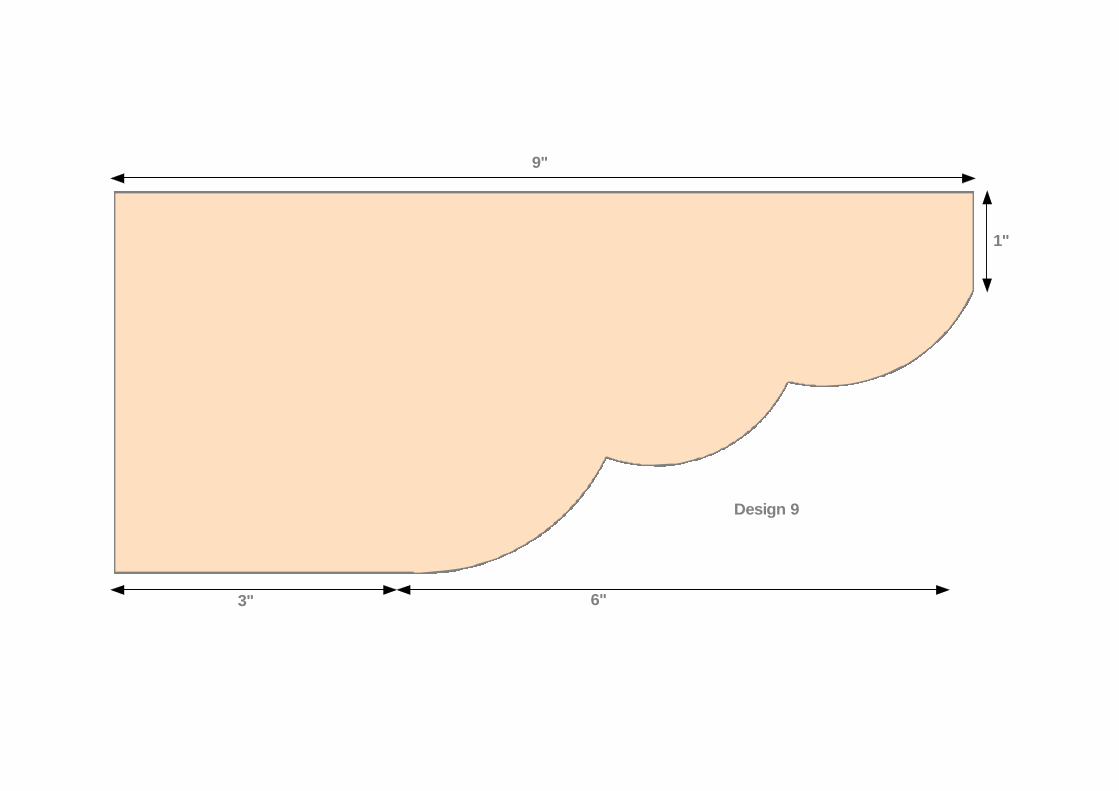
Design 9
6"
9"
1"
3"

Design 10
6"
9"
1"
3"

Design 11
6"
9"
1"
3"
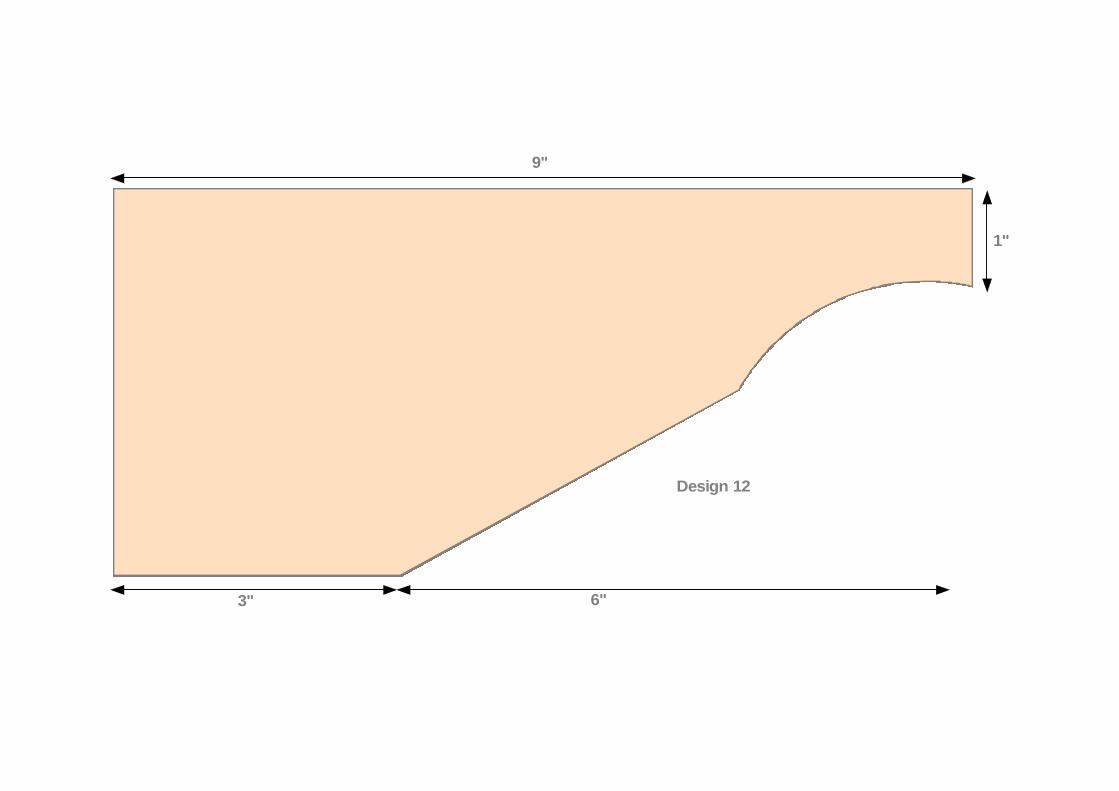
Design 12
6"
9"
1"
3"
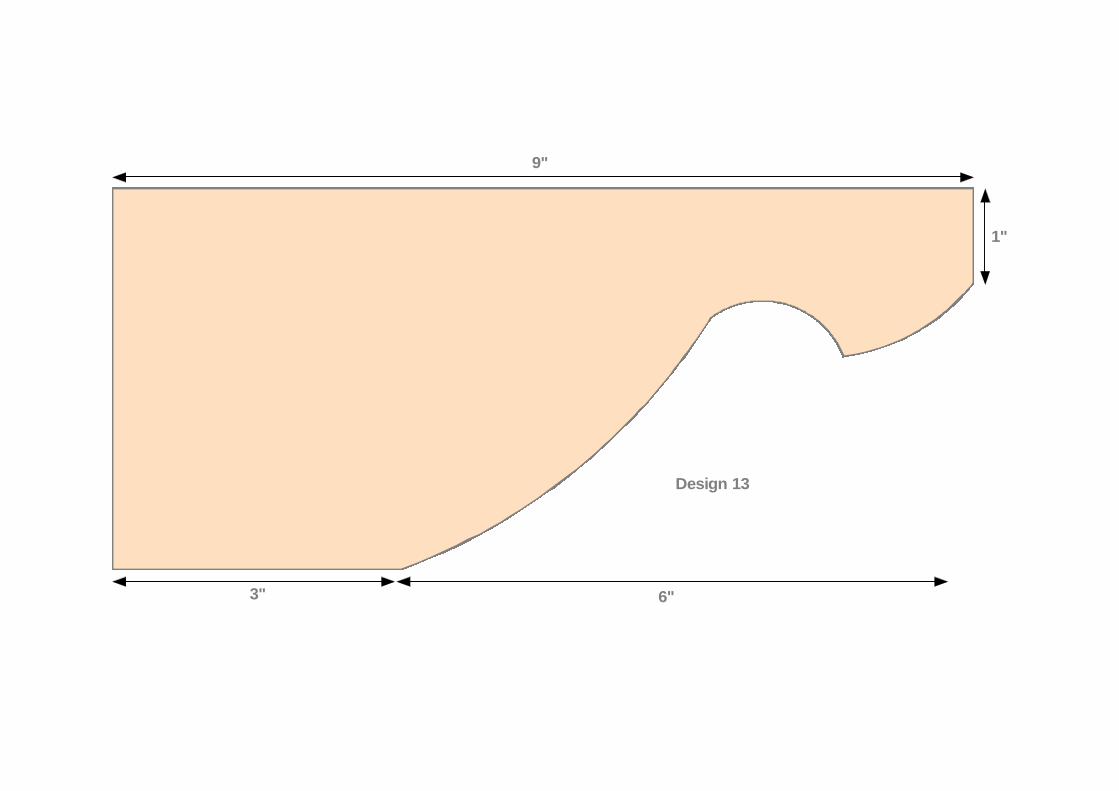
Design 13
6"
9"
1"
3"
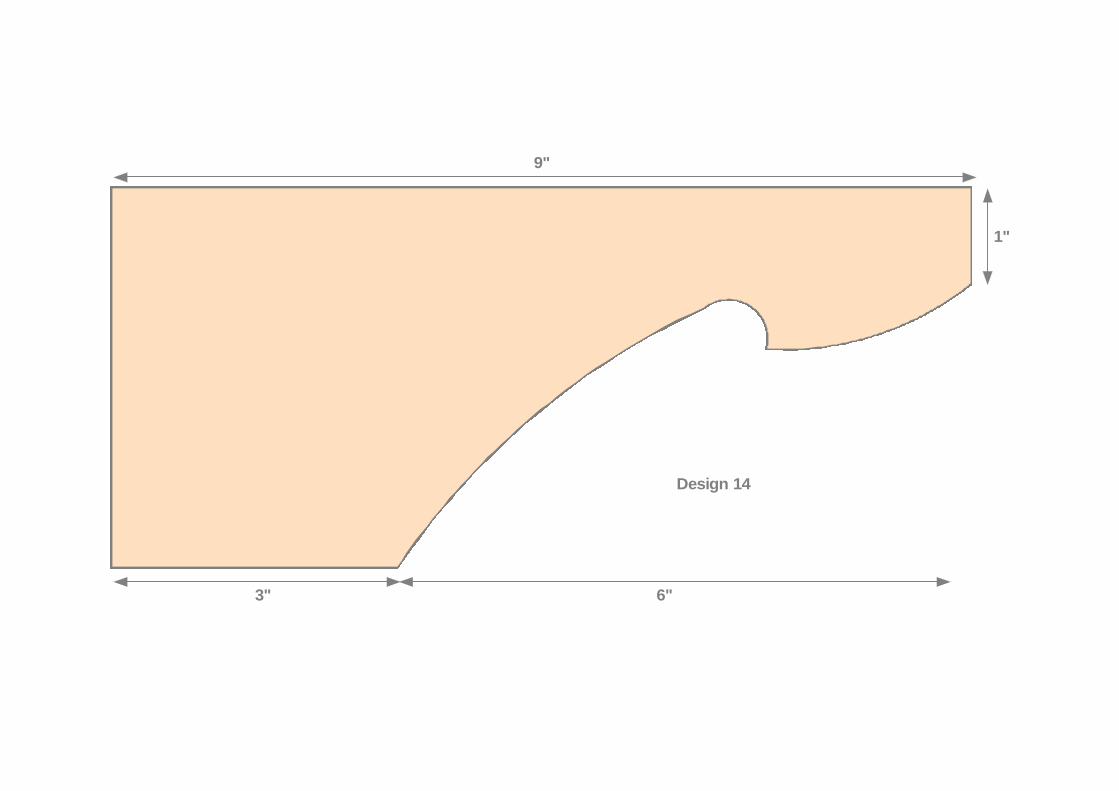
Design 14
6"
9"
1"
3"
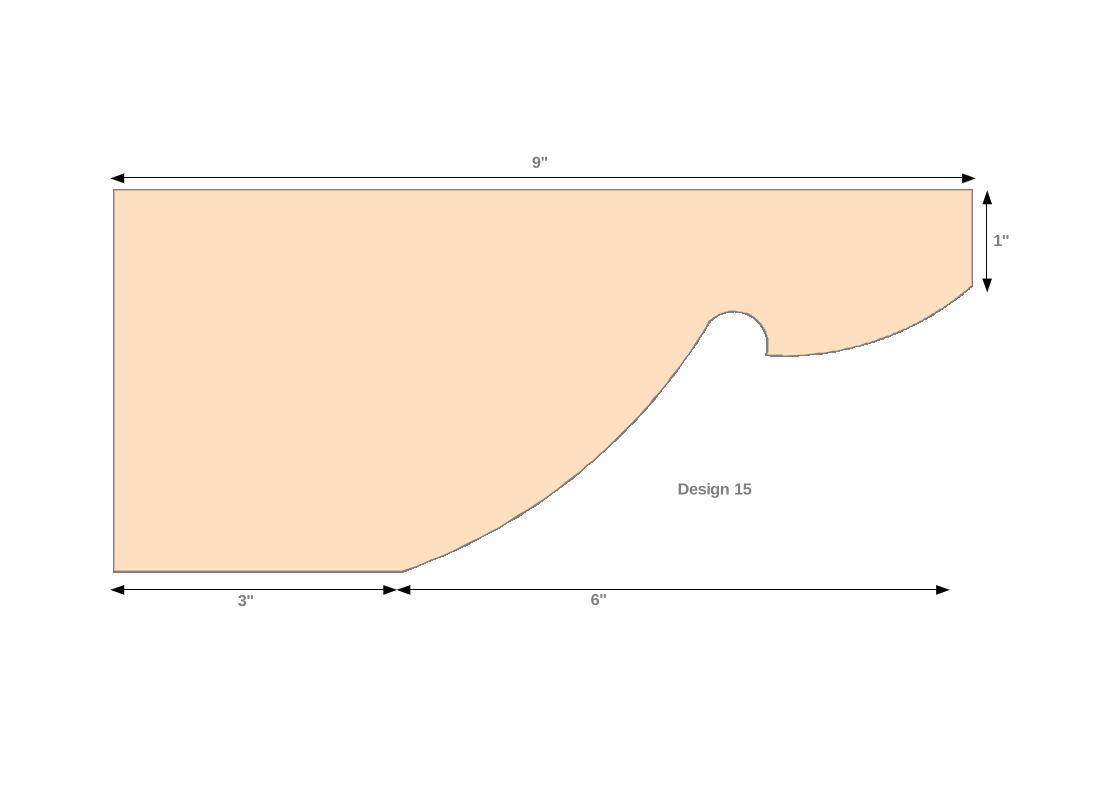
Design 15
6"
9"
1"
3"
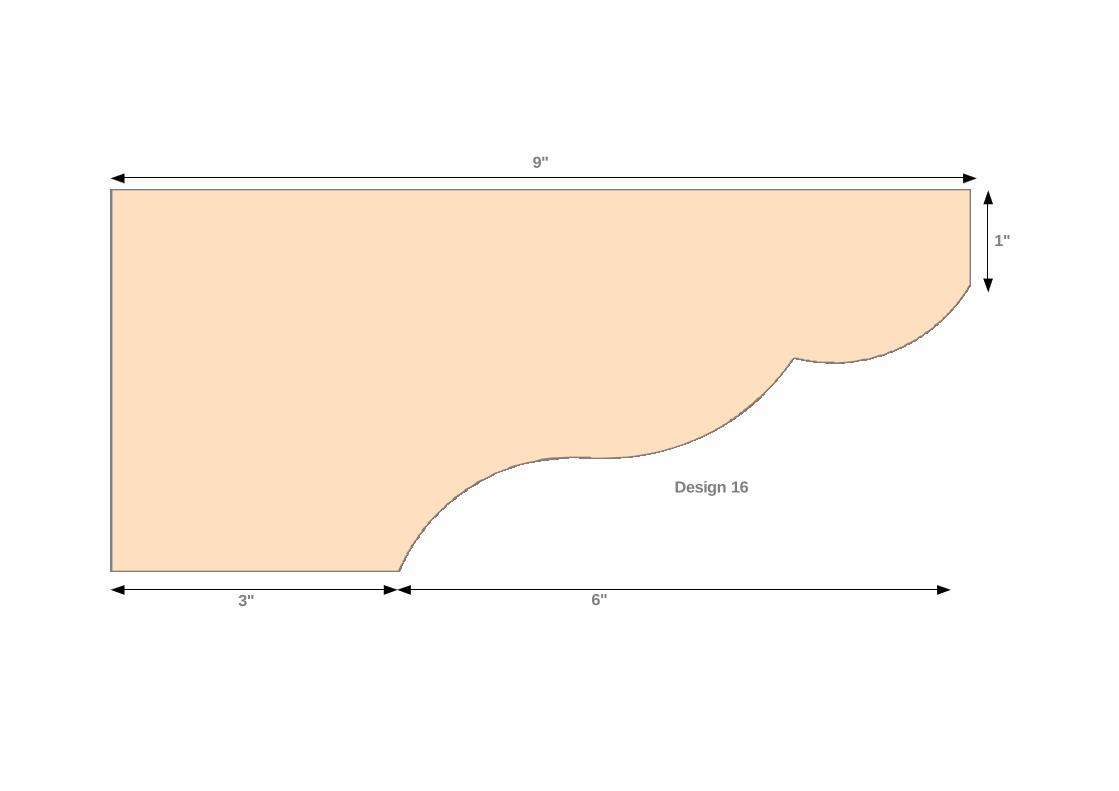
Design 16
6"
9"
1"
3"
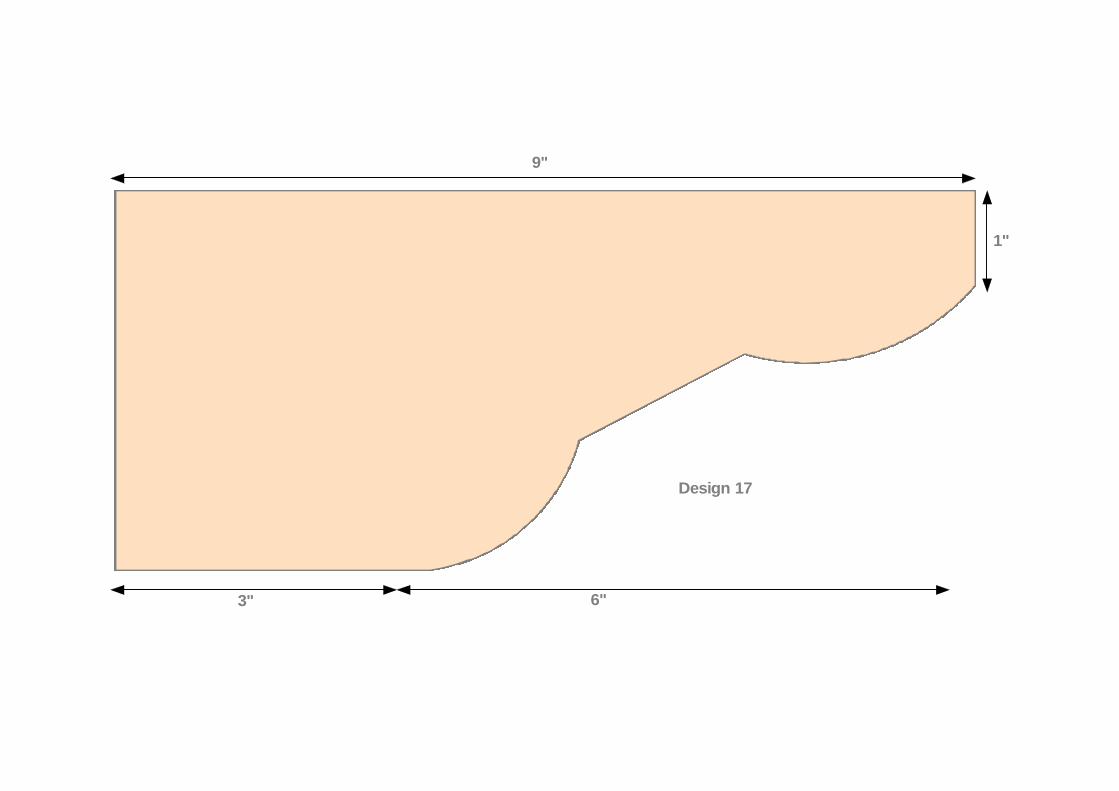
Design 17
6"
9"
1"
3"
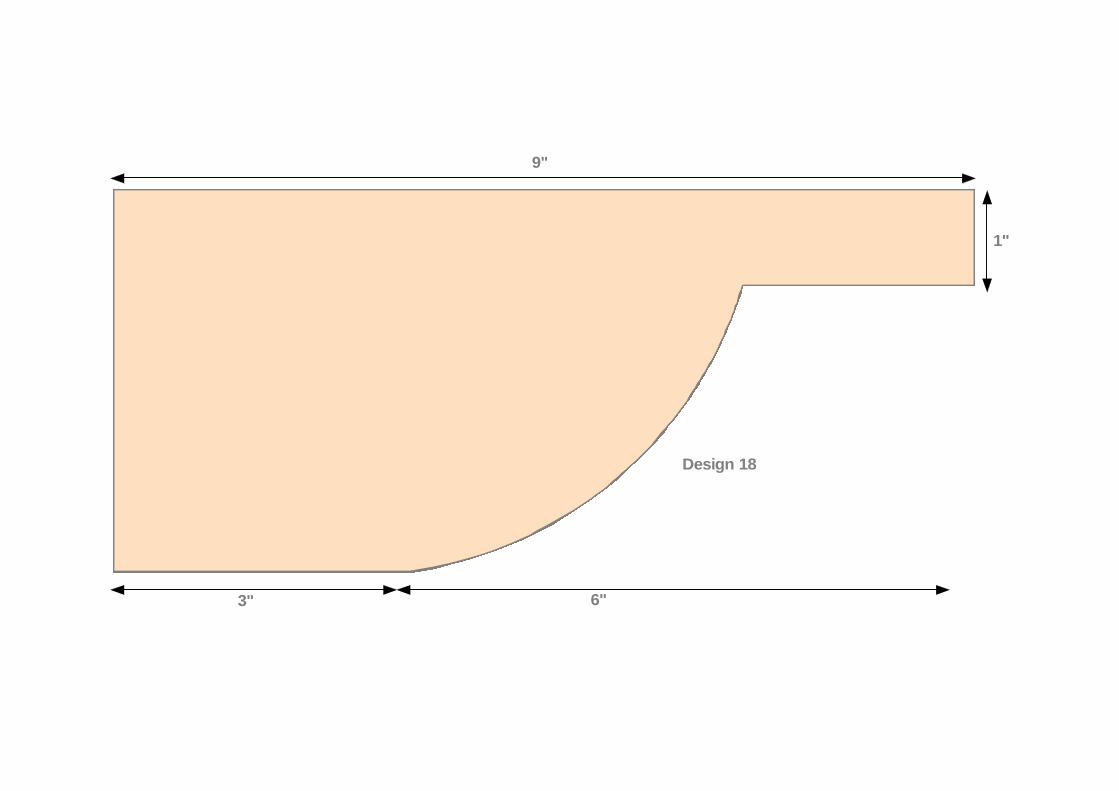
Design 18
6"
9"
1"
3"
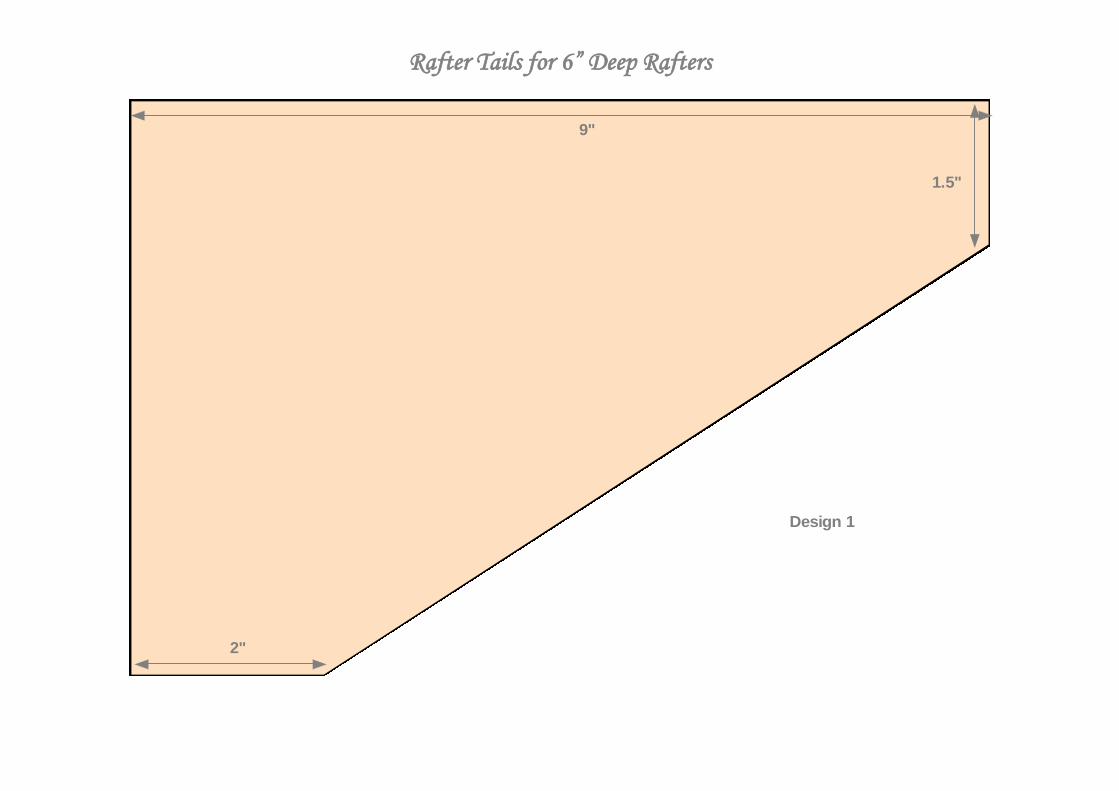
Rafter Tails for 6” Deep Rafters
Design 1
2"
1.5"
9"
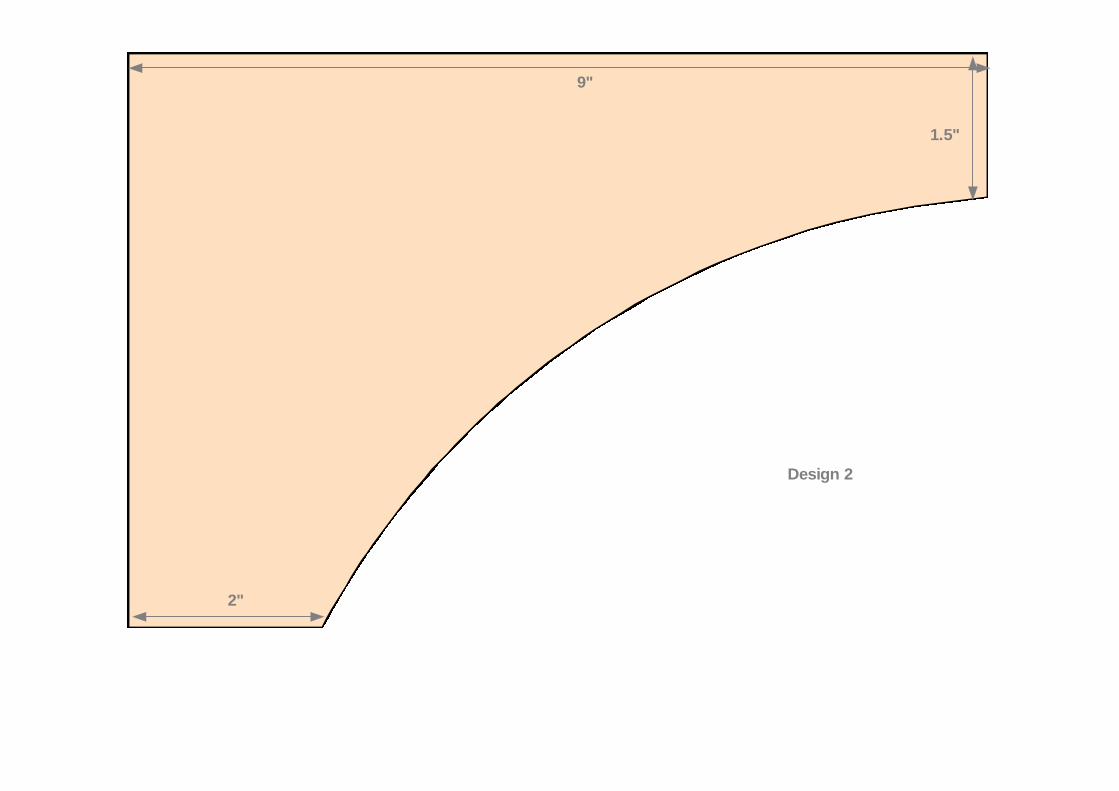
Design 2
2"
1.5"
9"
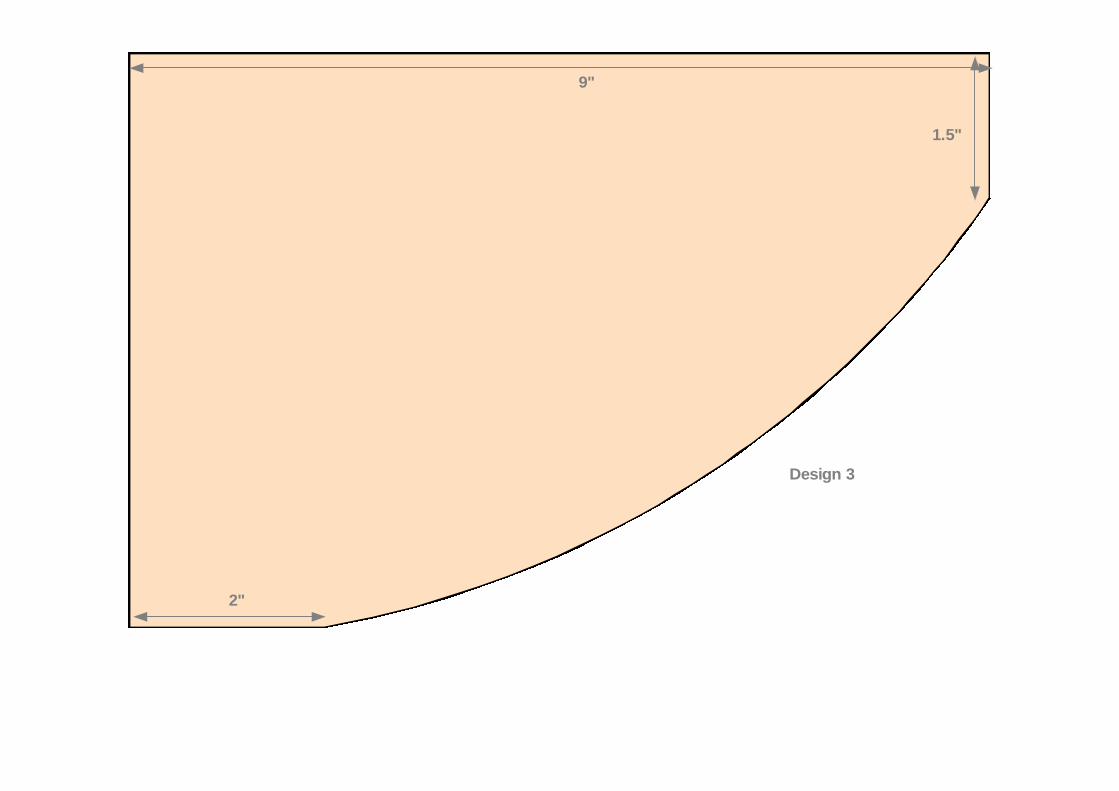
Design 3
2"
1.5"
9"
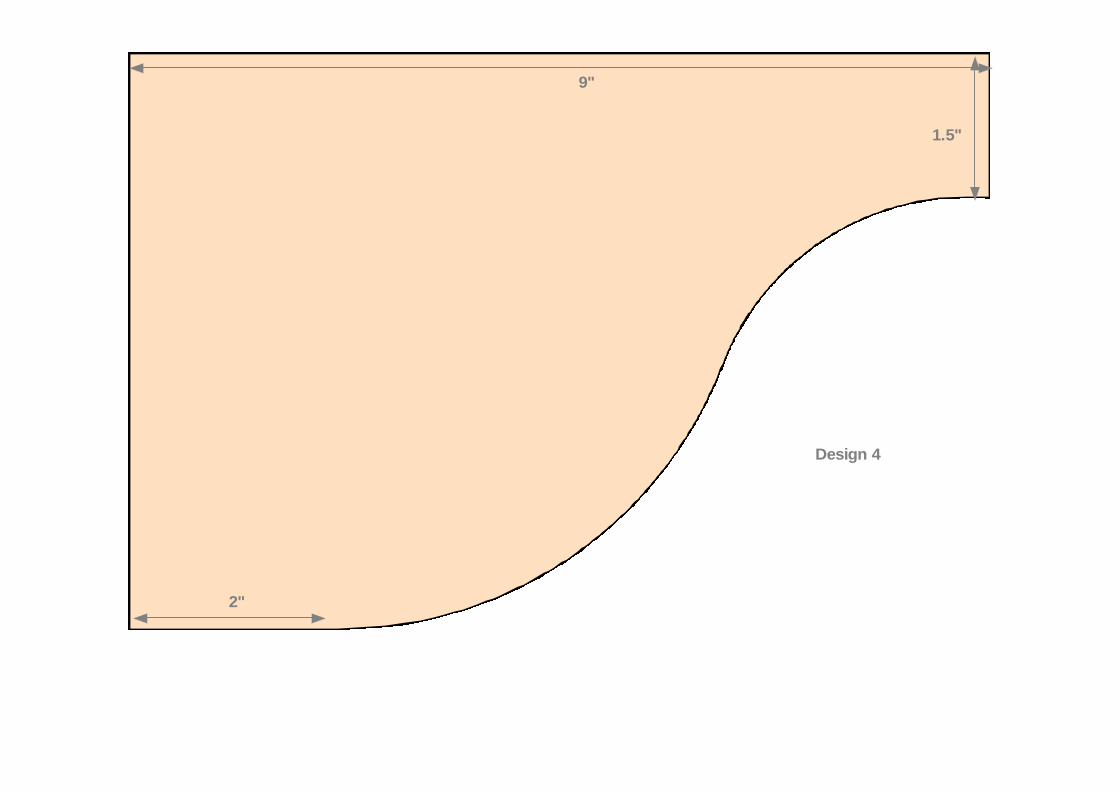
Design 4
2"
1.5"
9"
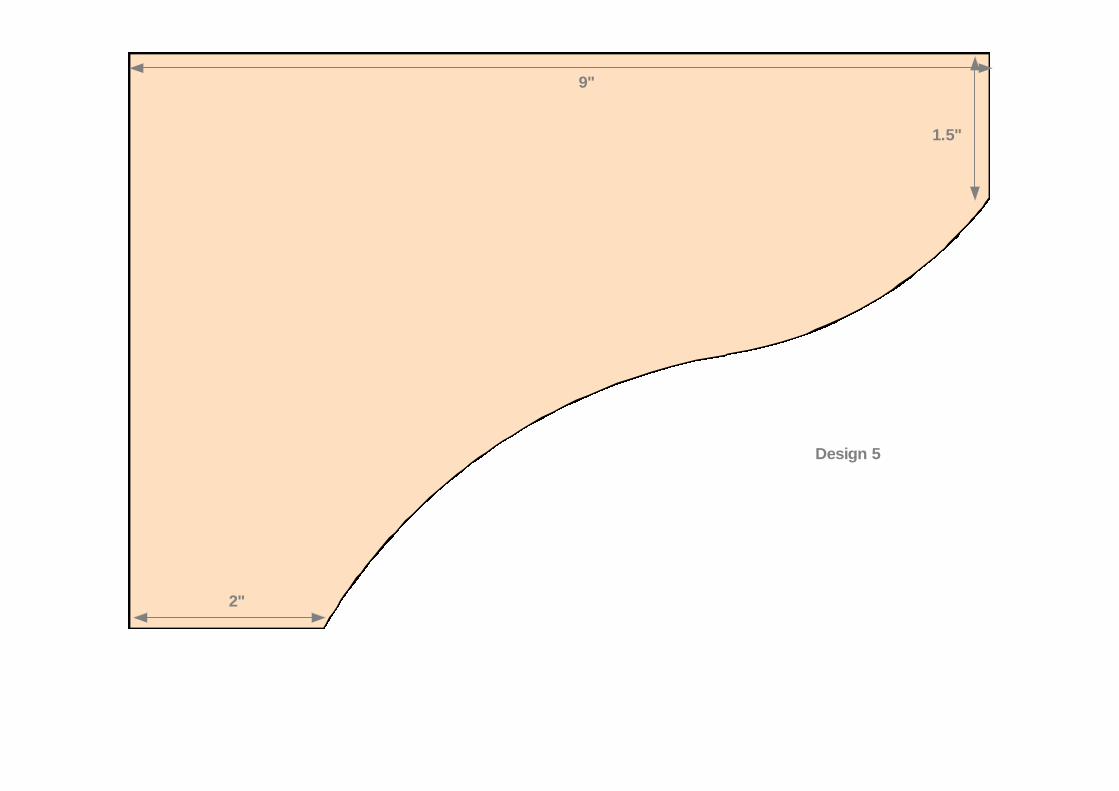
Design 5
2"
1.5"
9"
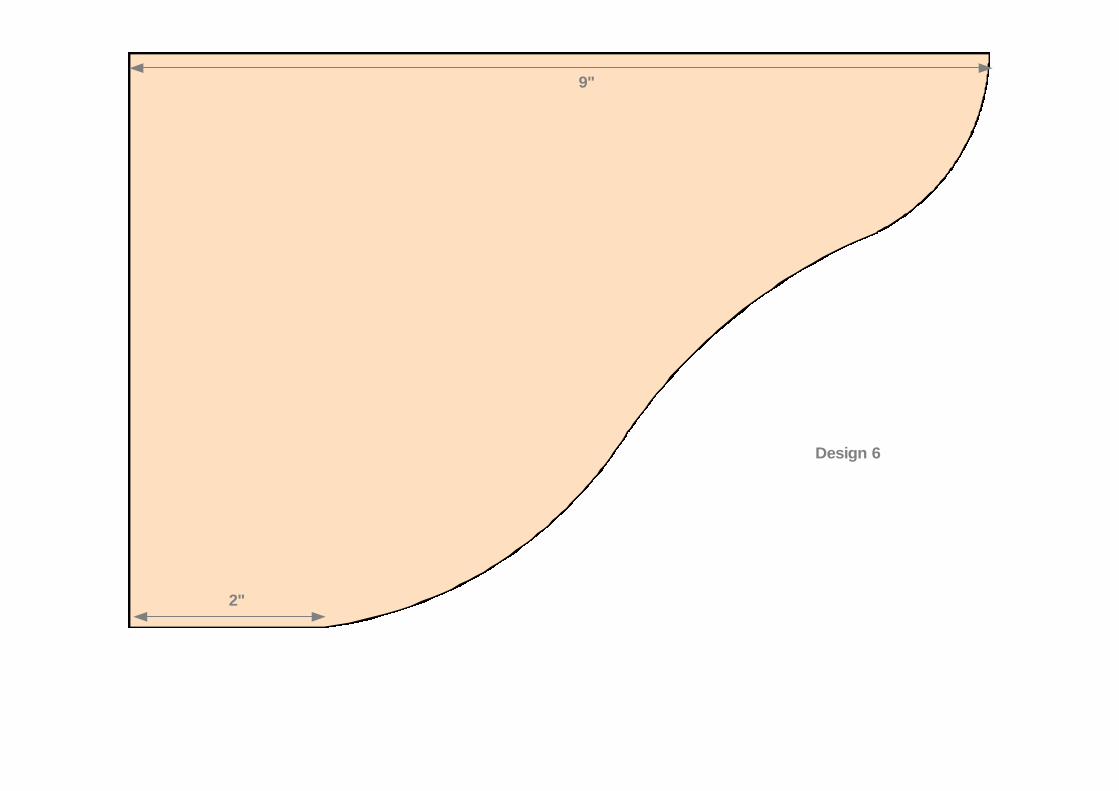
Design 6
2"
9"
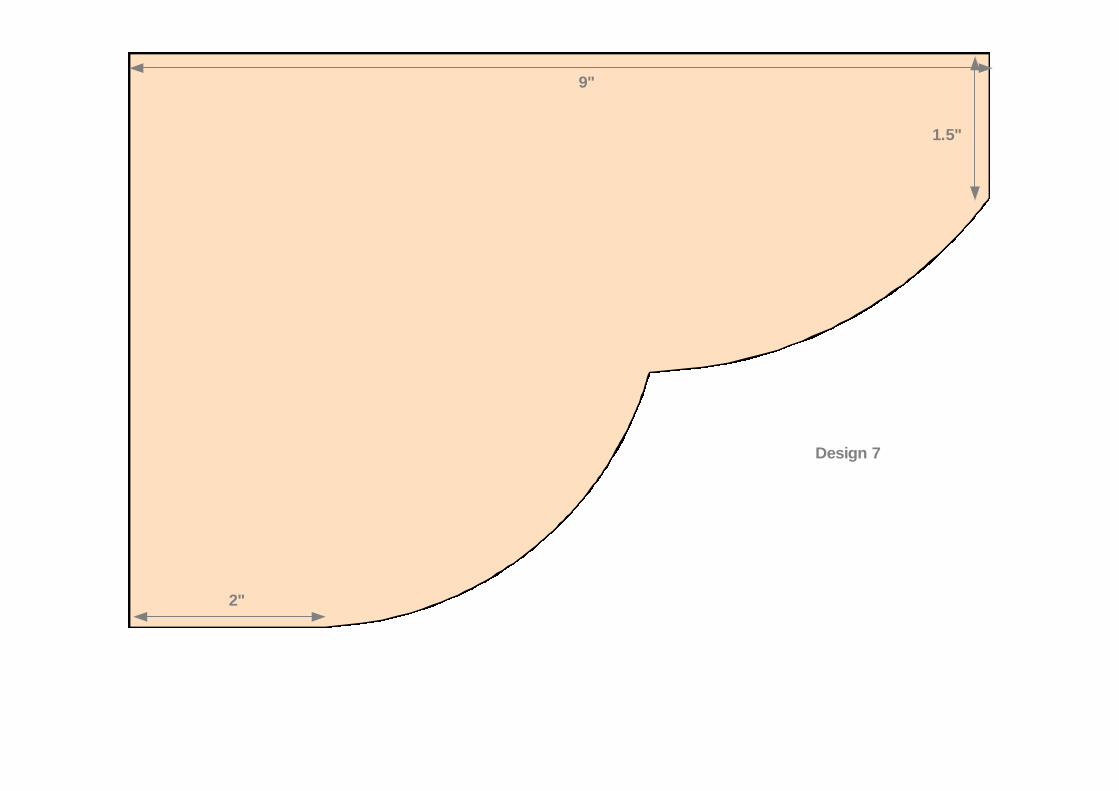
Design 7
2"
1.5"
9"
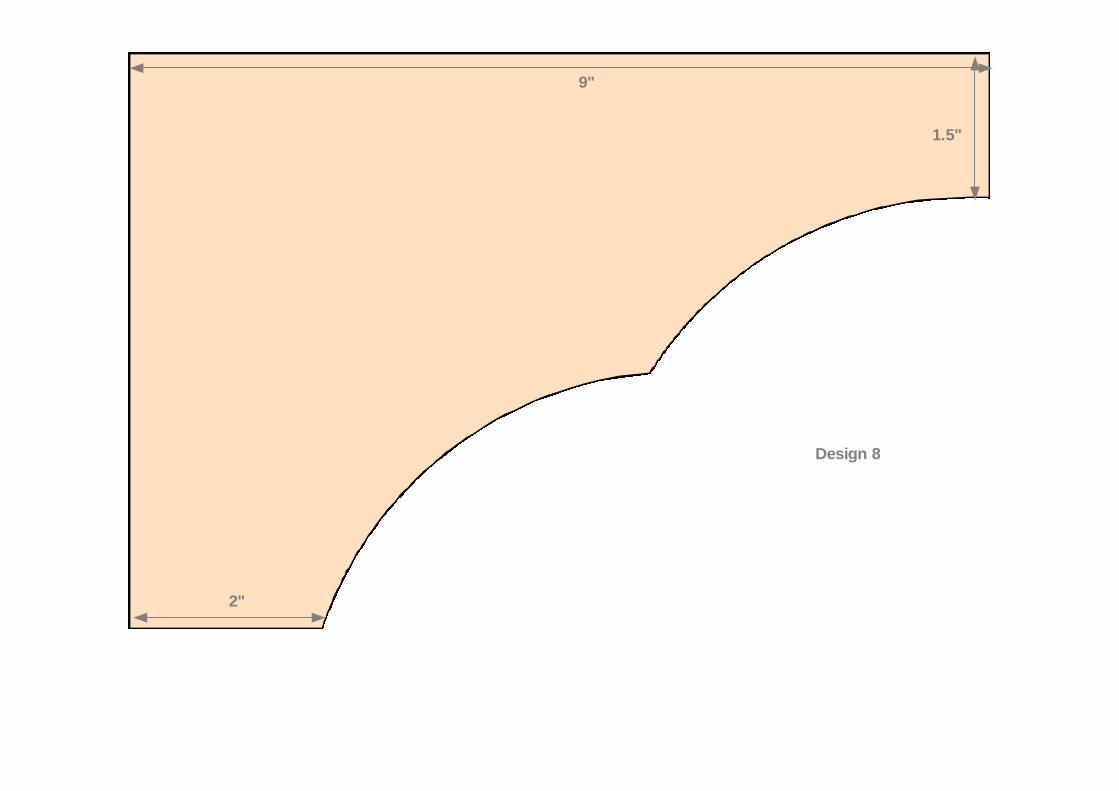
Design 8
2"
1.5"
9"
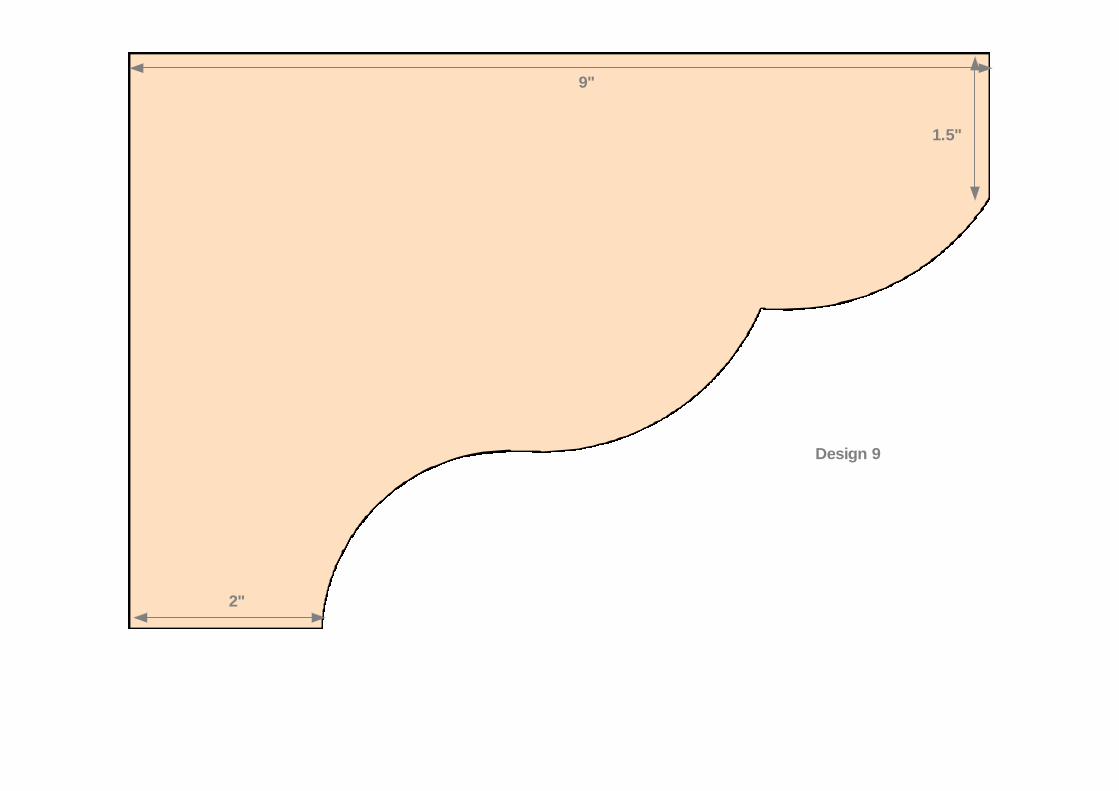
Design 9
2"
1.5"
9"
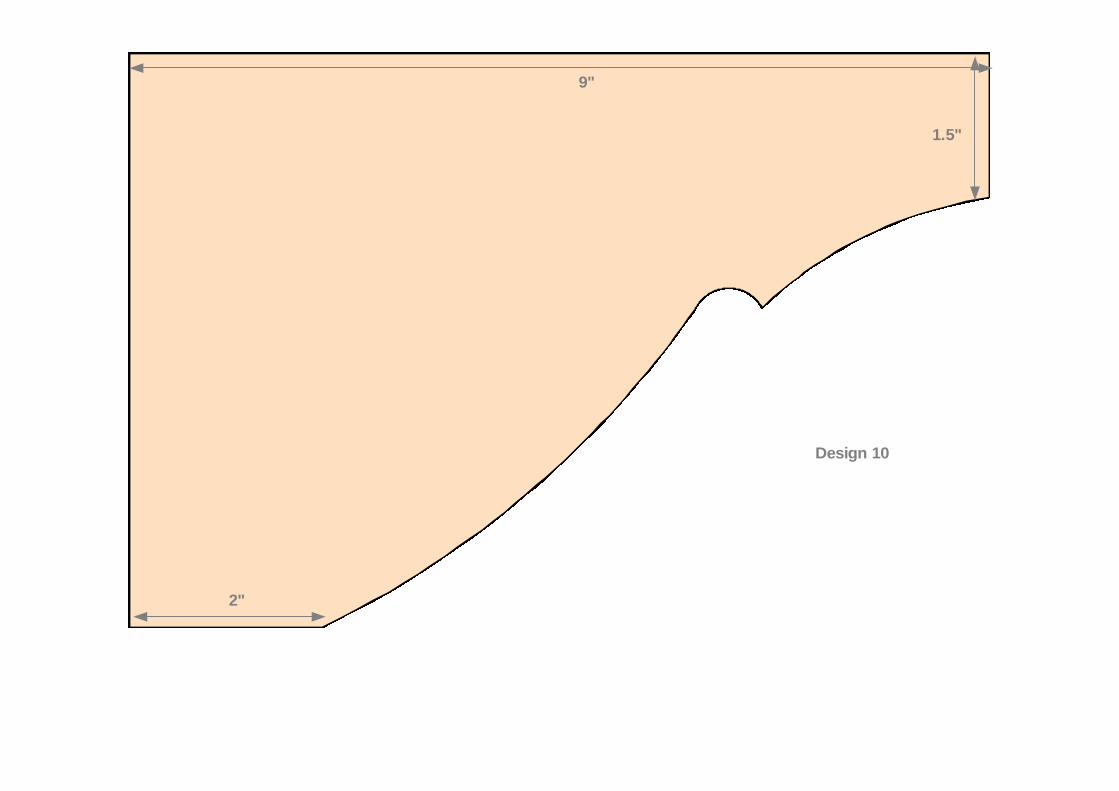
Design 10
2"
1.5"
9"
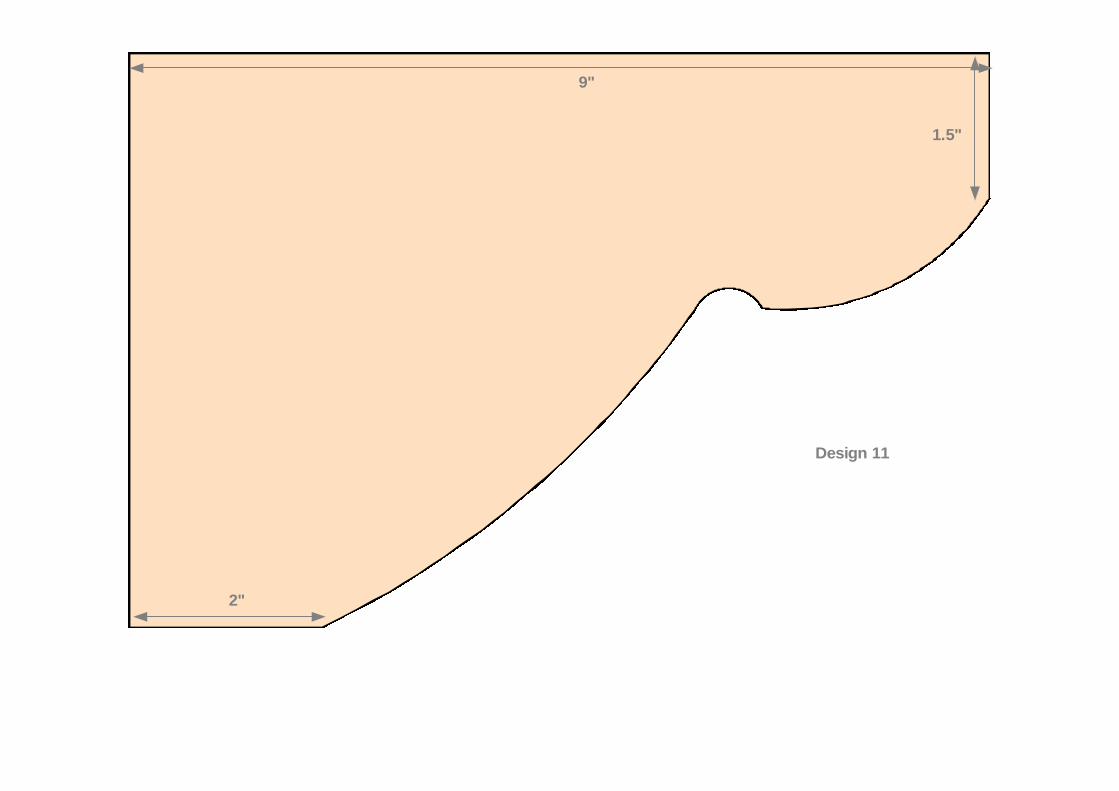
Design 11
2"
1.5"
9"
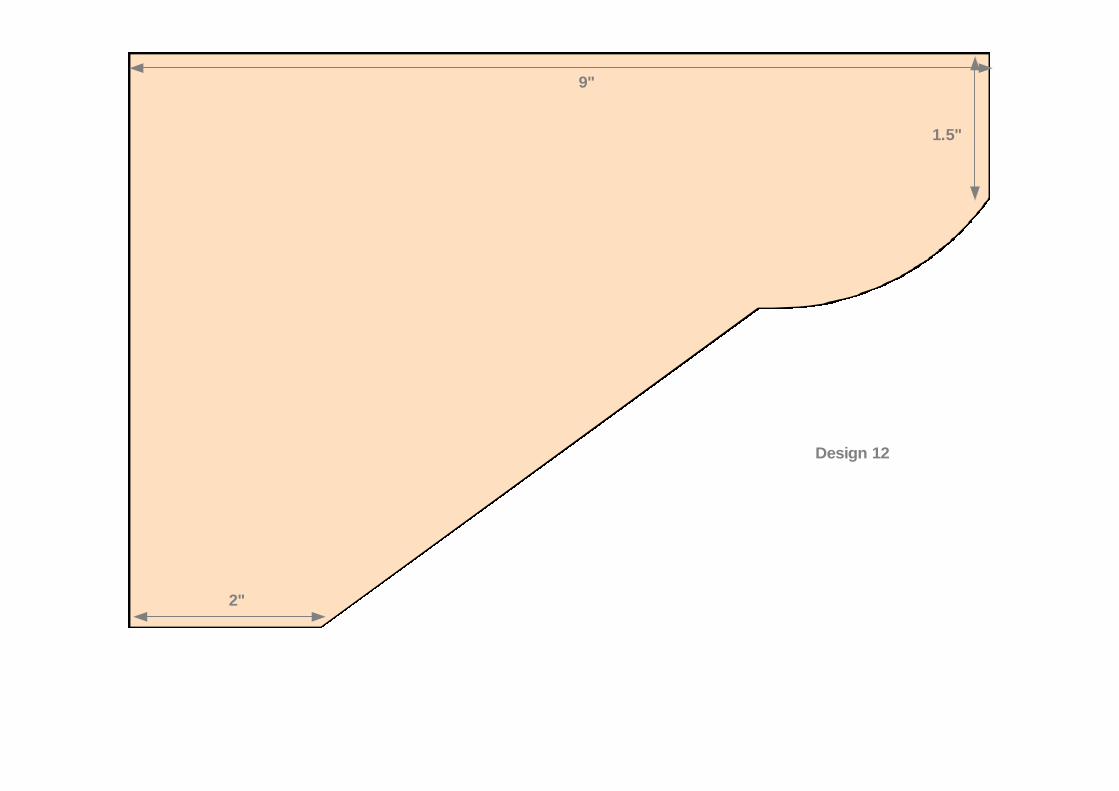
Design 12
2"
1.5"
9"
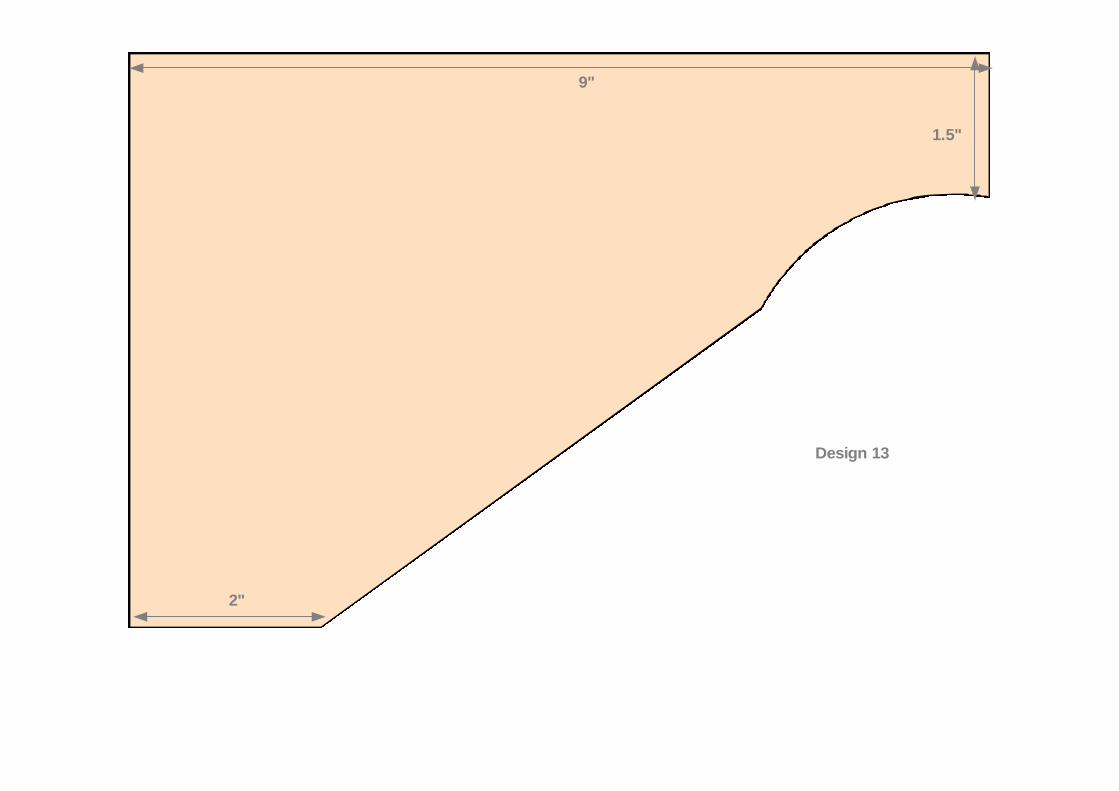
Design 13
2"
1.5"
9"
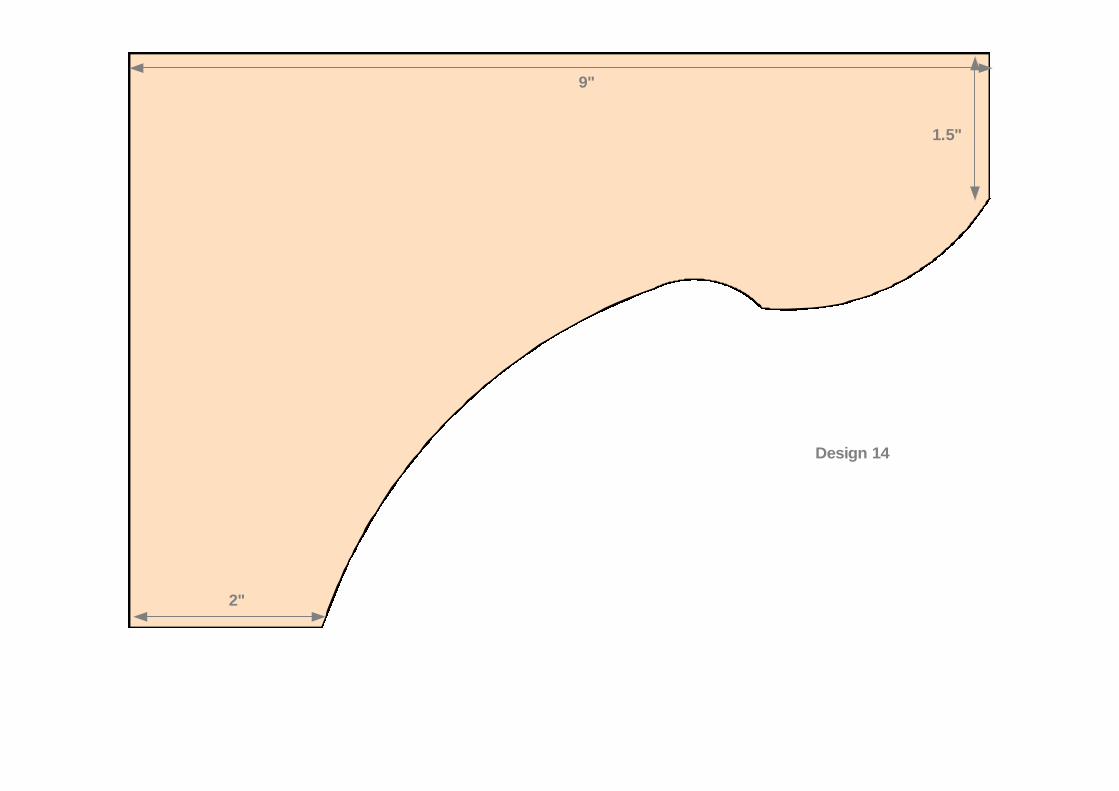
Design 14
2"
1.5"
9"
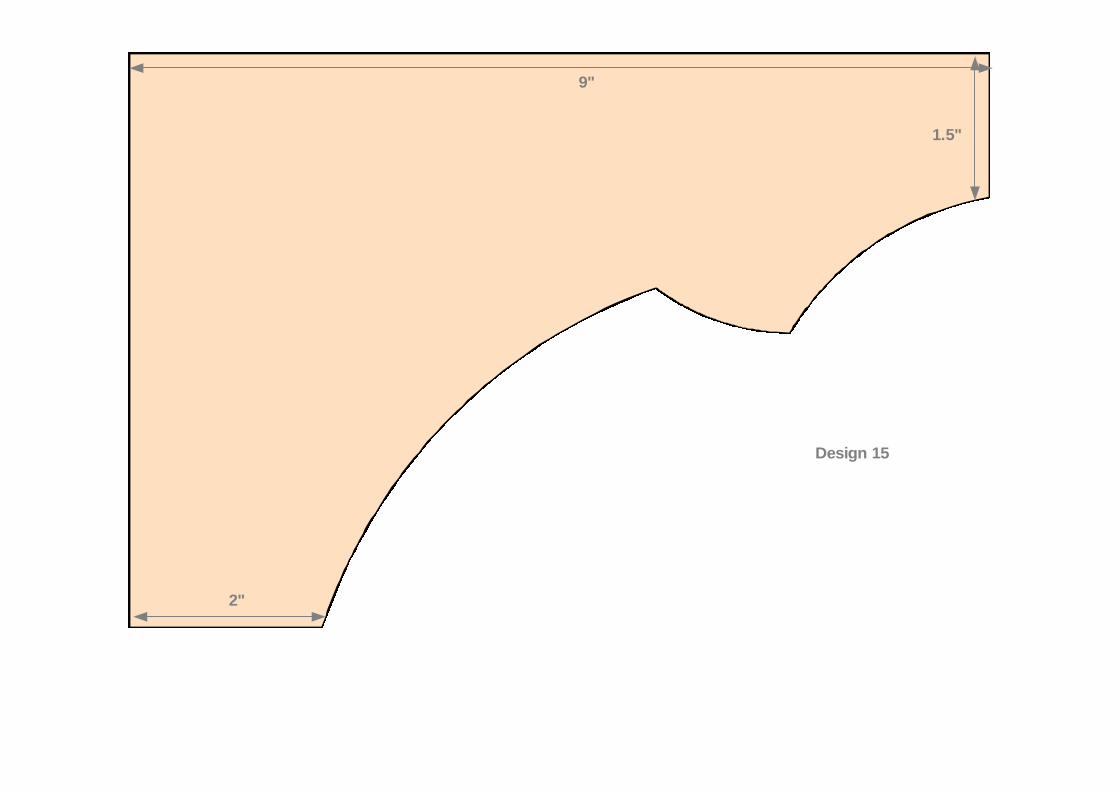
Design 15
2"
1.5"
9"
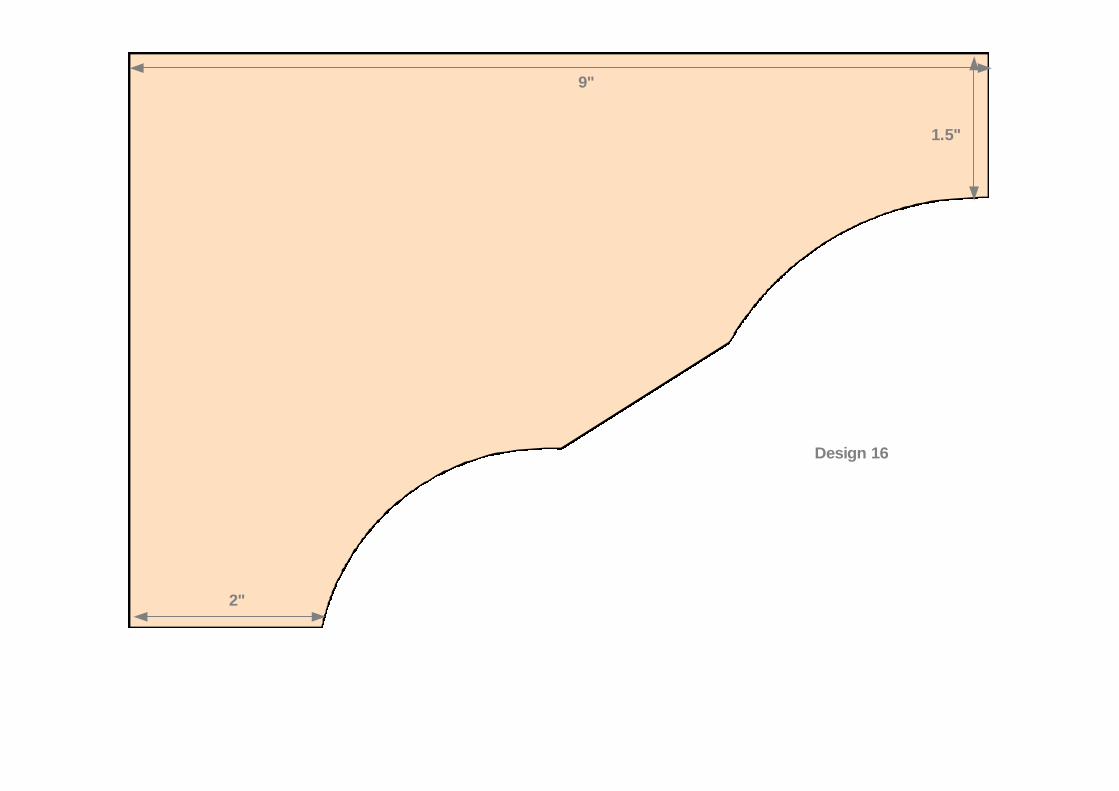
Design 16
2"
1.5"
9"
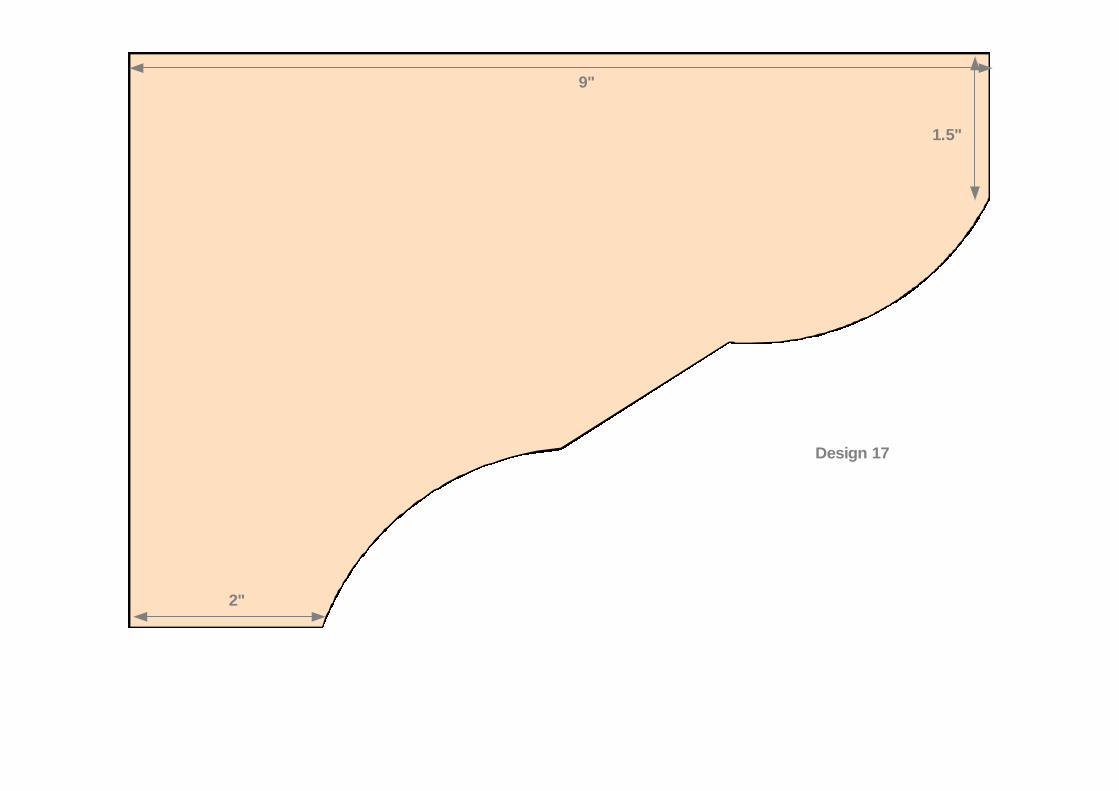
Design 17
2"
1.5"
9"
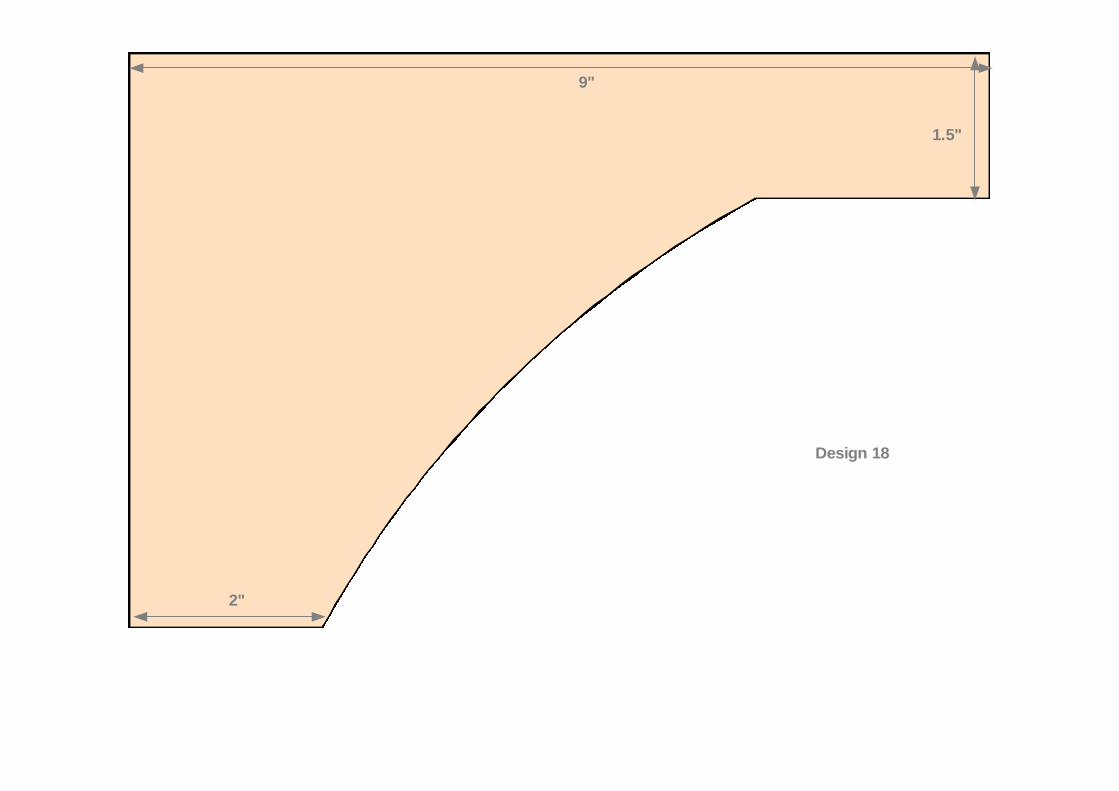
Design 18
2"
1.5"
9"