Embed Size (px)
Citation preview
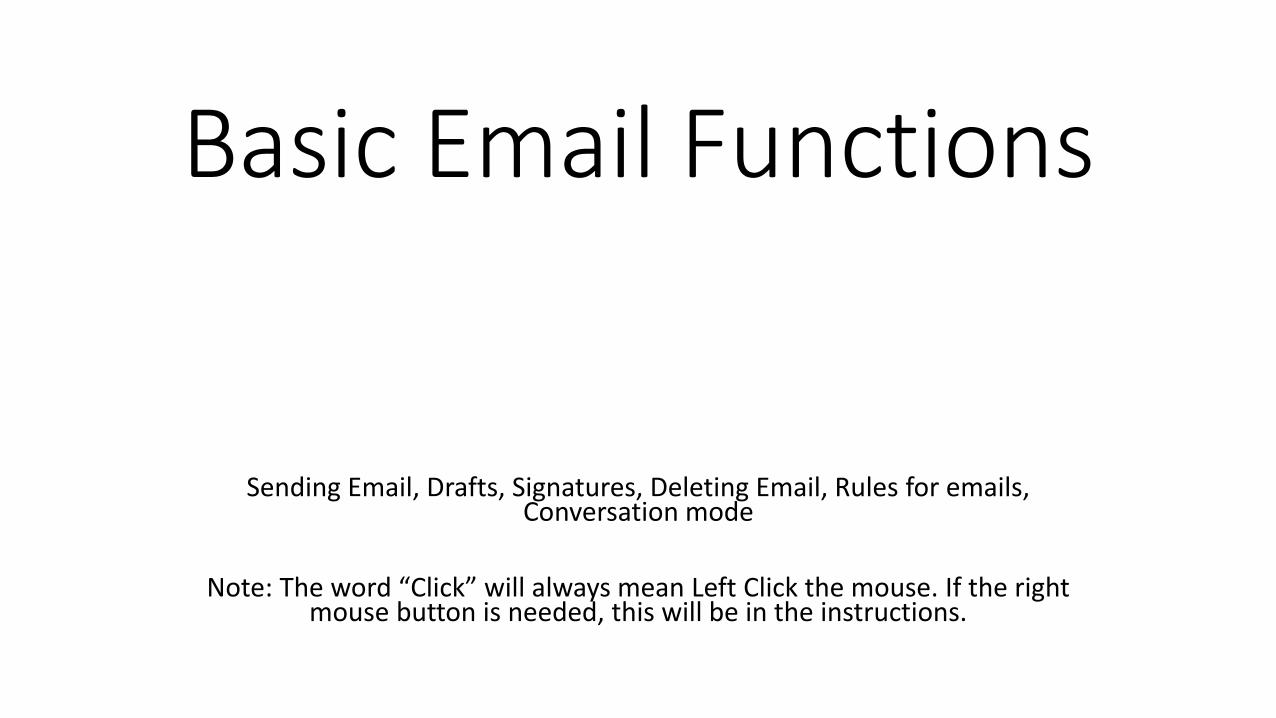
Basic Email Functions
Sending Email, Drafts, Signatures, Deleting Email, Rules for emails, Conversation mode
Note: The word “Click” will always mean Left Click the mouse. If the right mouse button is needed, this will be in the instructions.
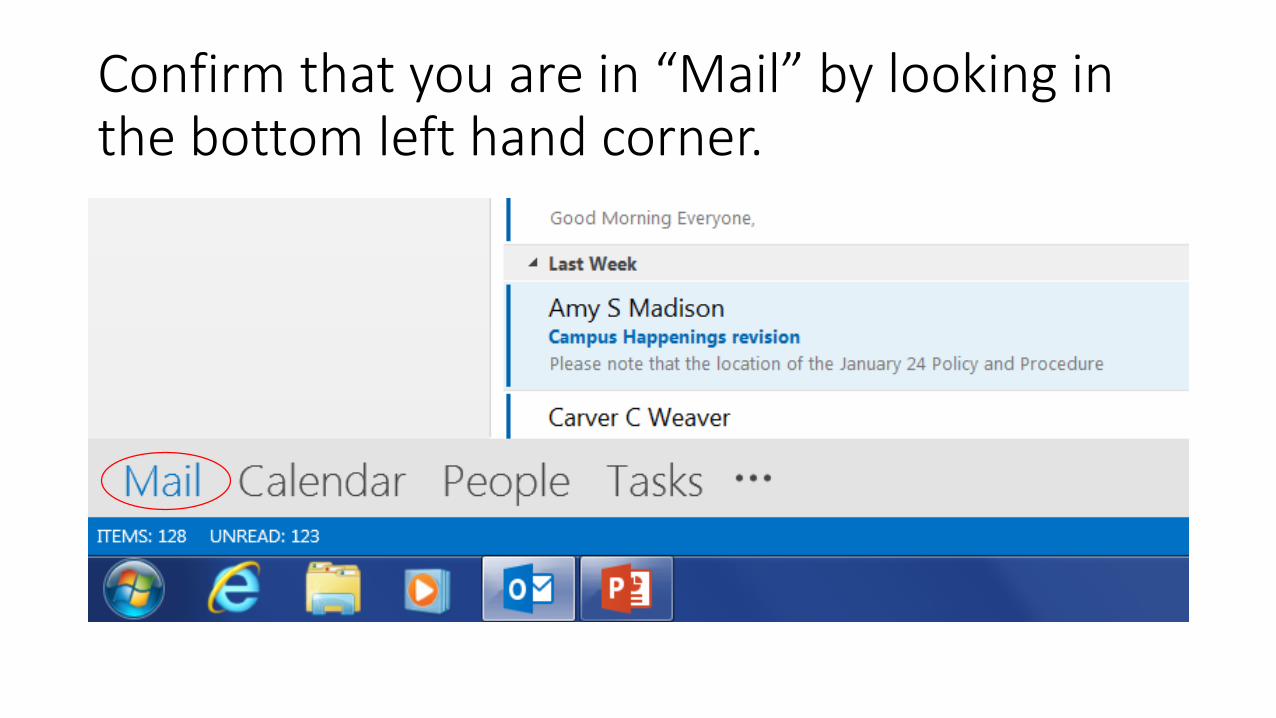
Confirm that you are in “Mail” by looking in the bottom left hand corner.
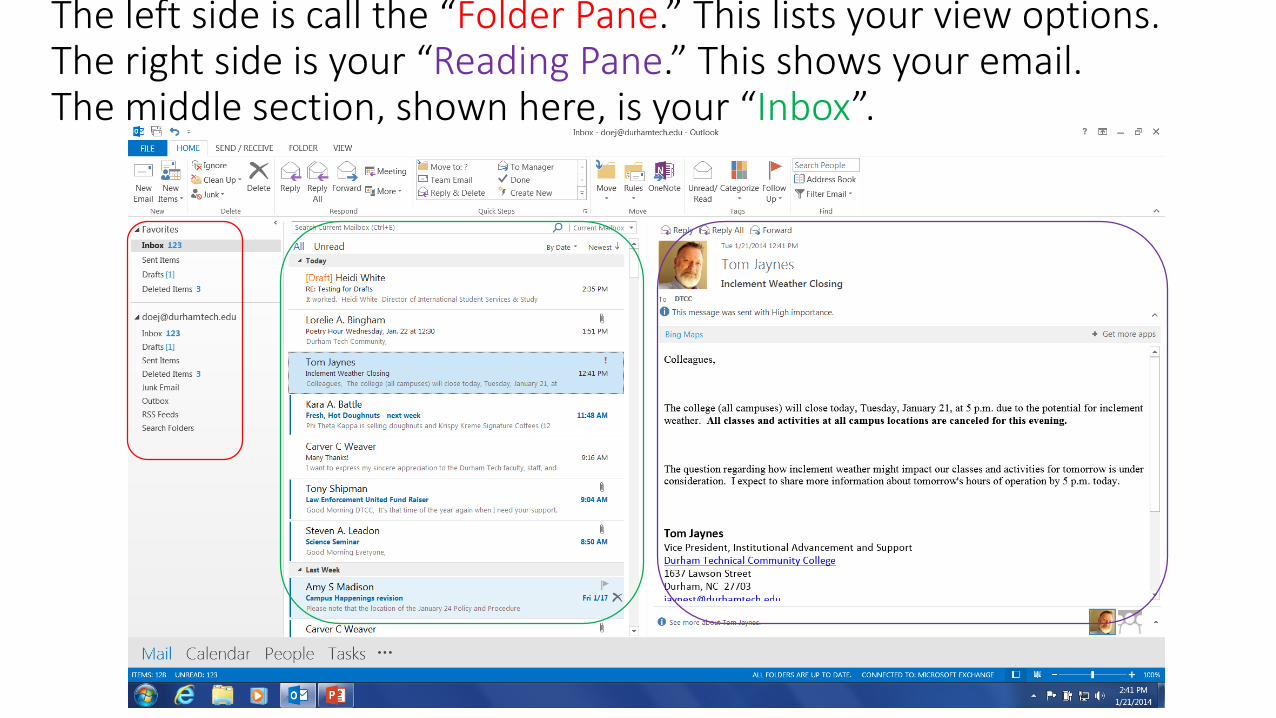
The left side is call the “Folder Pane.” This lists your view options.The right side is your “Reading Pane.” This shows your email. The middle section, shown here, is your “Inbox”.
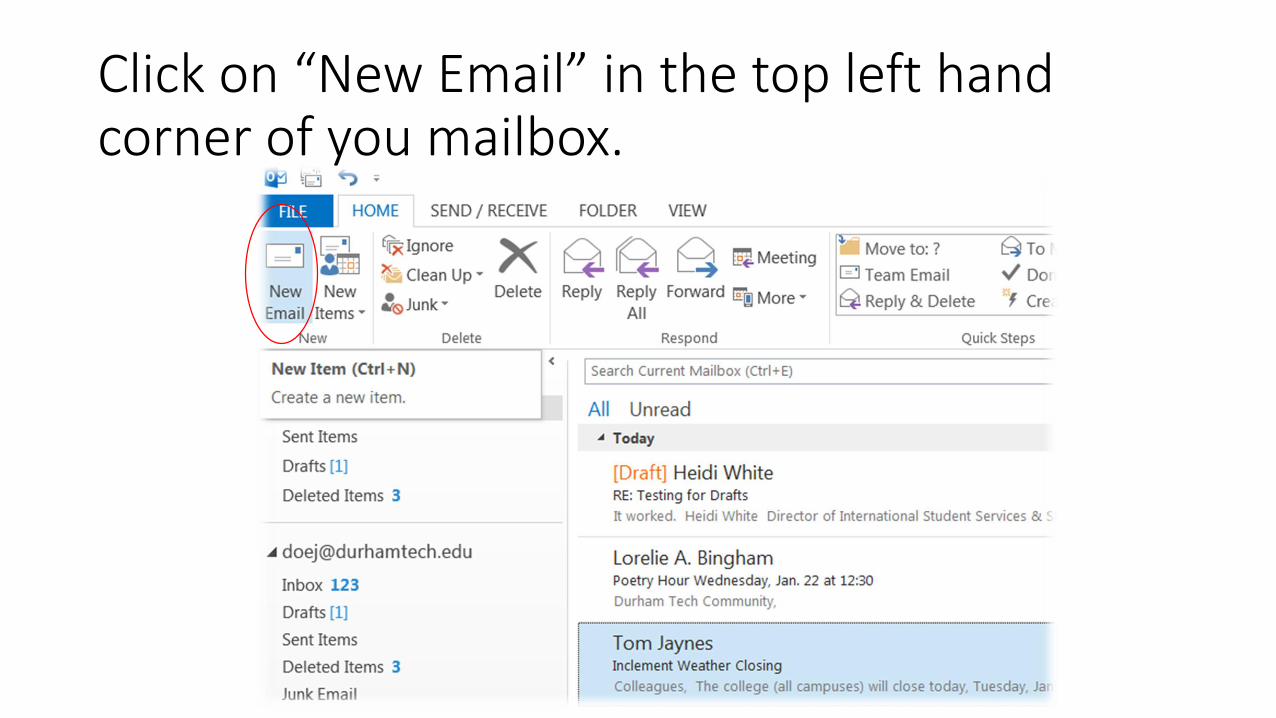
Click on “New Email” in the top left hand corner of you mailbox.
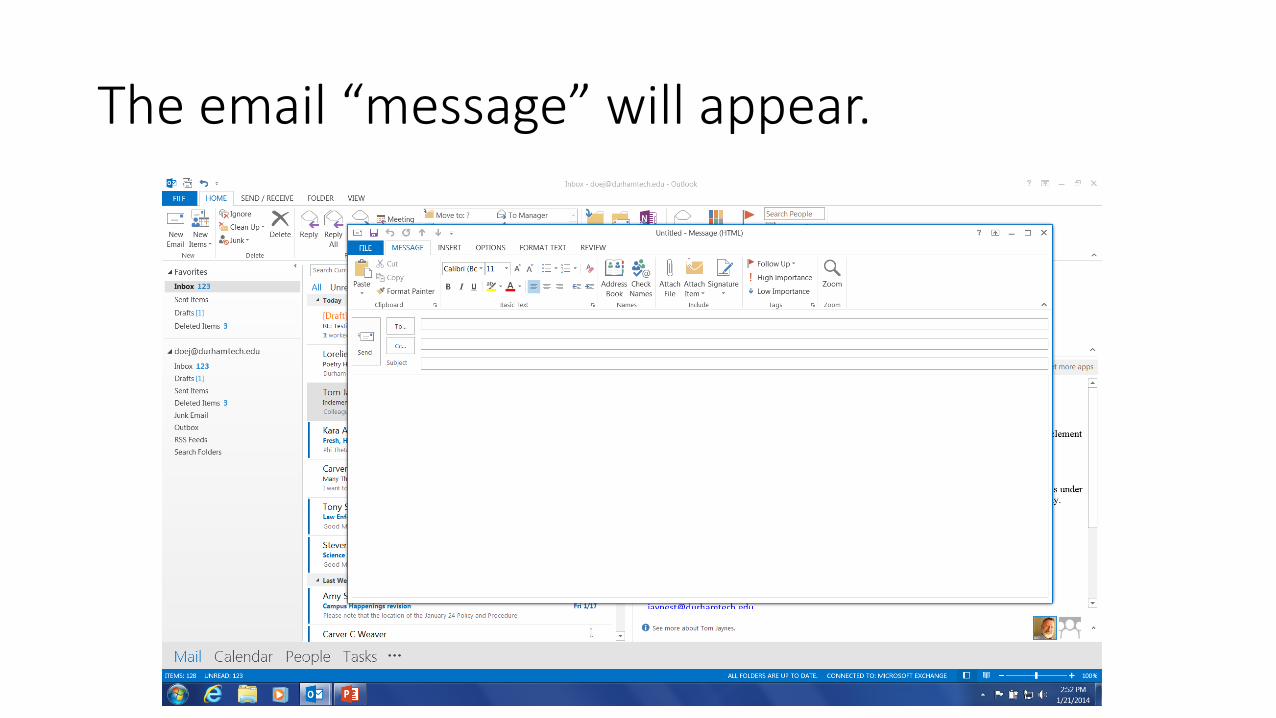
The email “message” will appear.
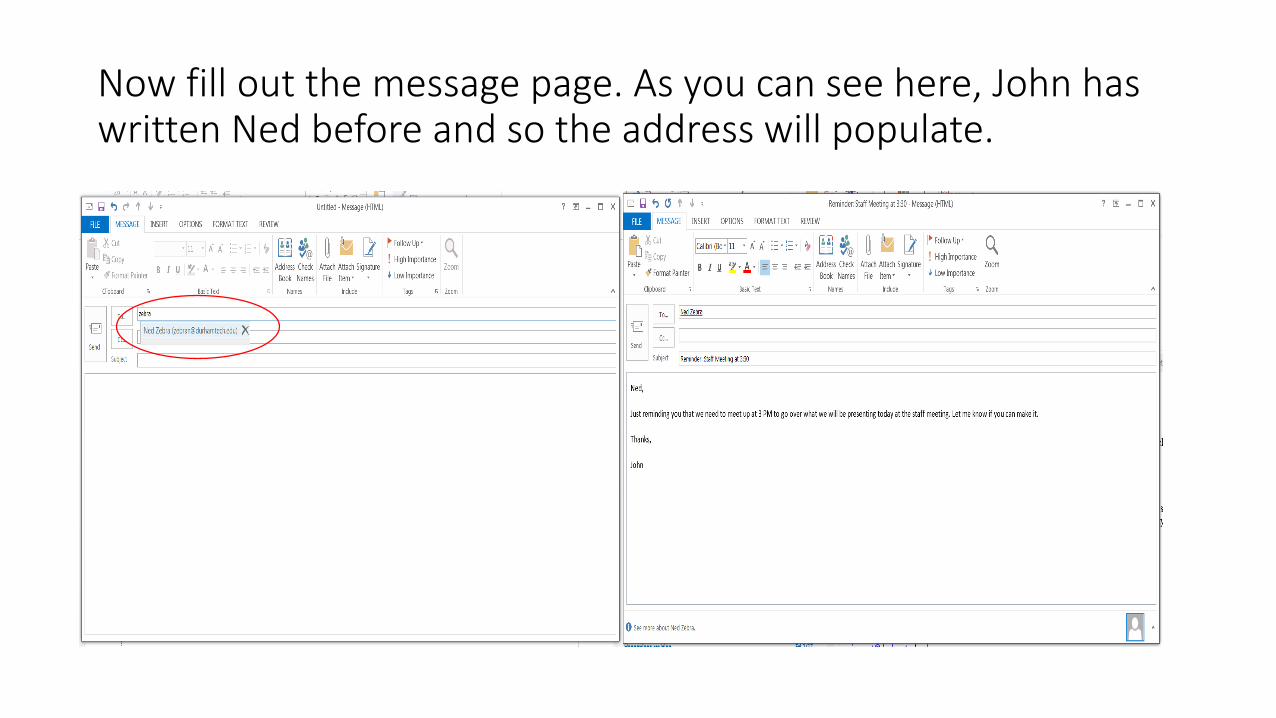
Now fill out the message page. As you can see here, John has written Ned before and so the address will populate.
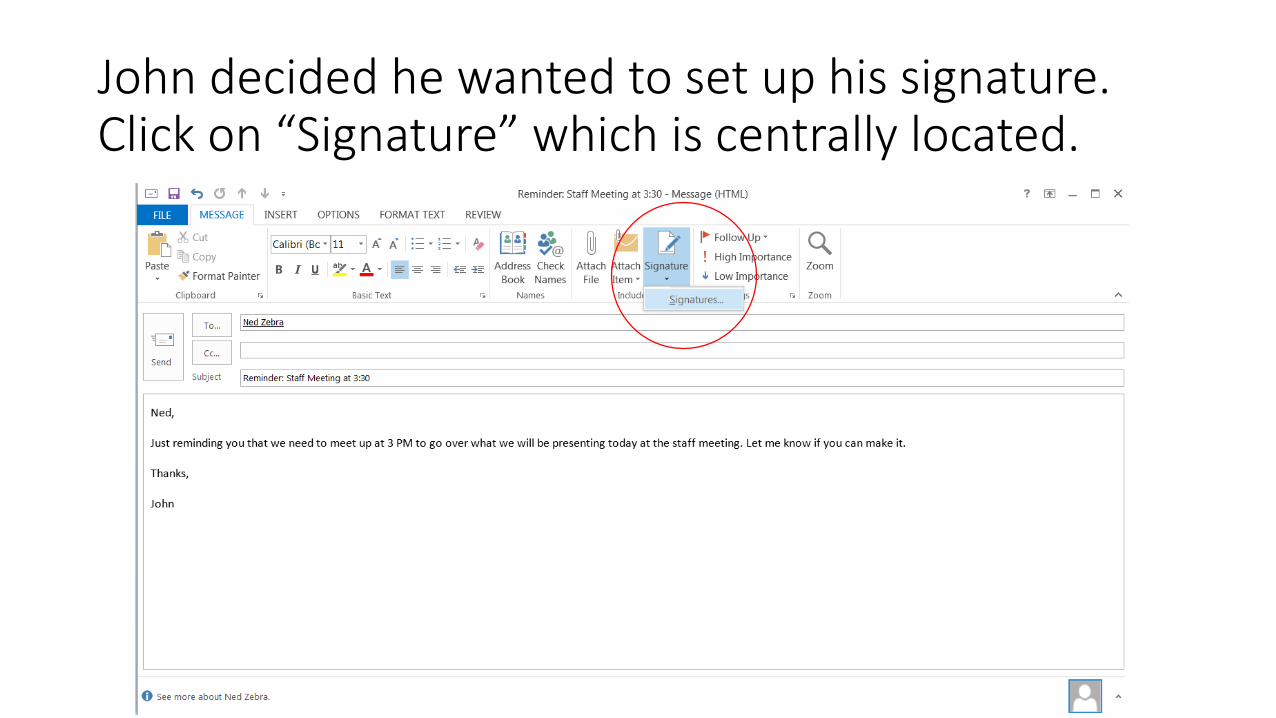
John decided he wanted to set up his signature. Click on “Signature” which is centrally located.
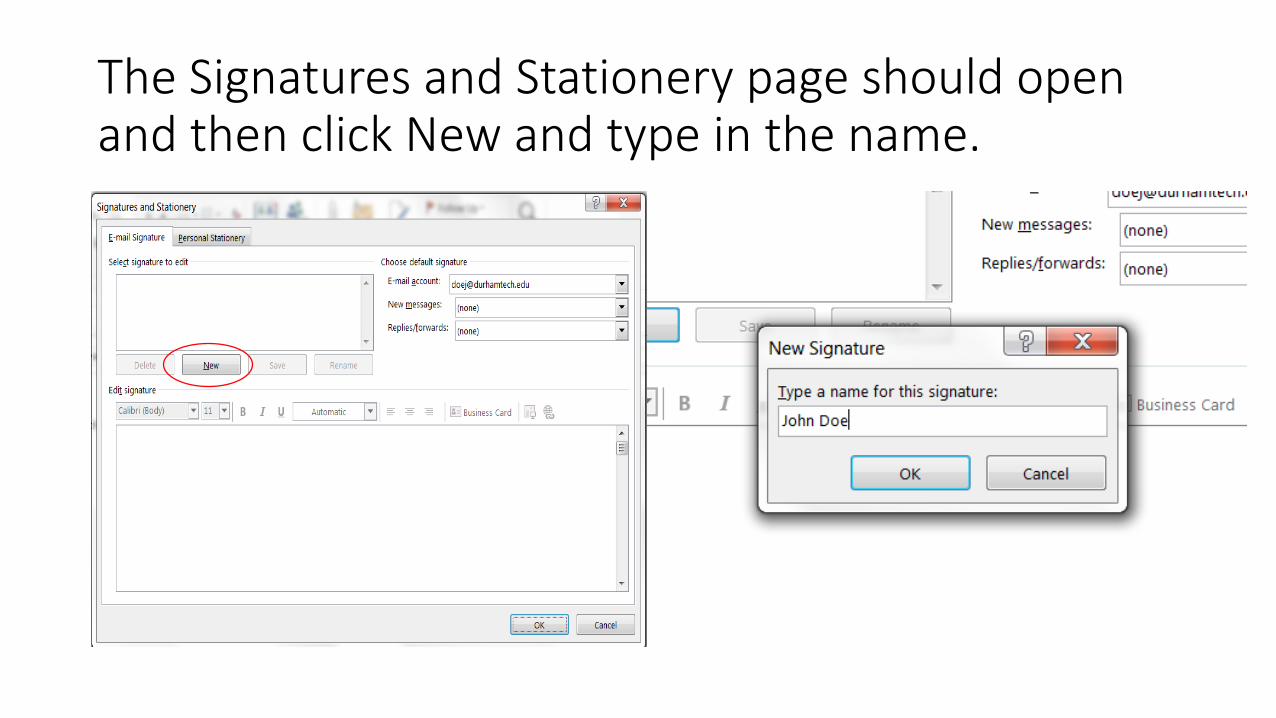
The Signatures and Stationery page should open and then click New and type in the name.
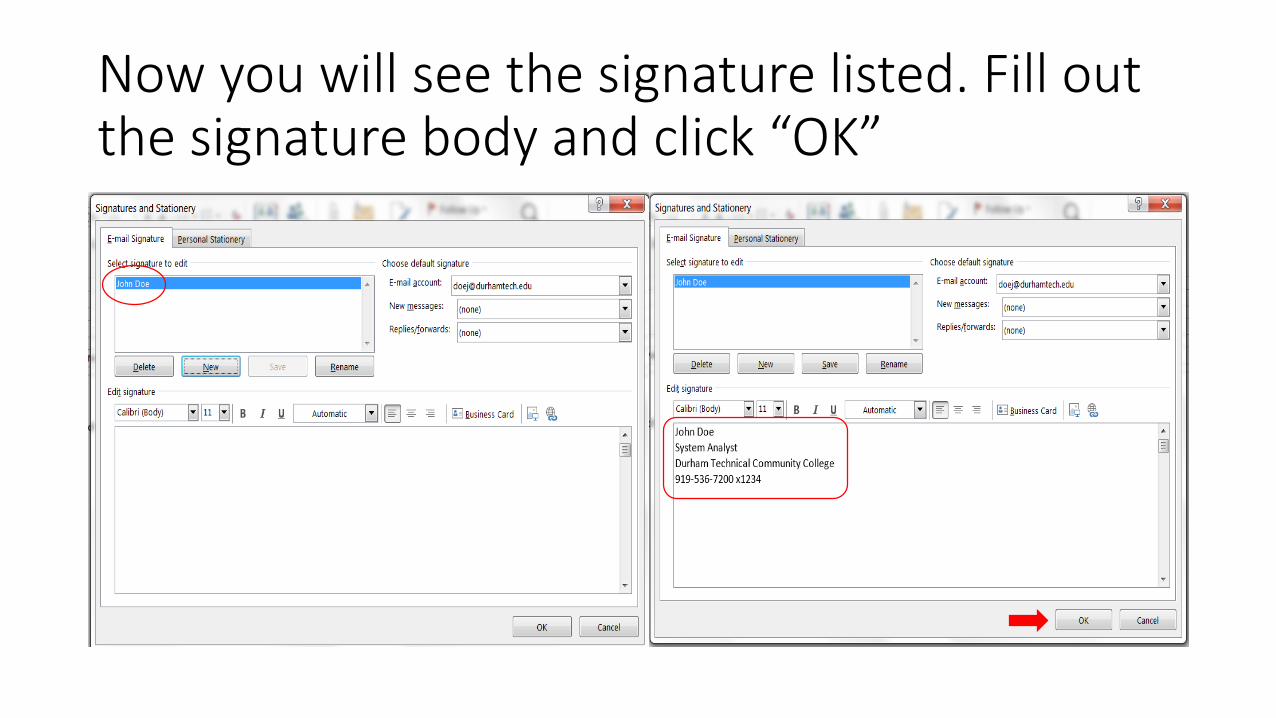
Now you will see the signature listed. Fill out the signature body and click “OK”
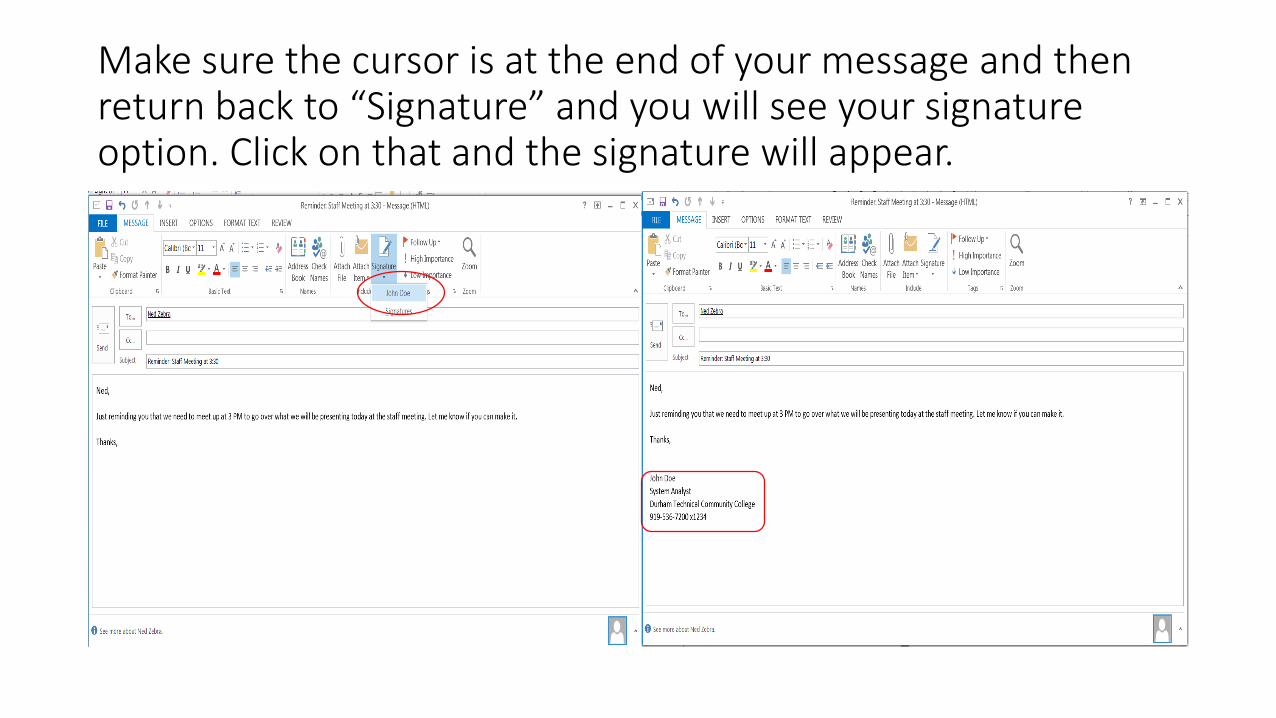
Make sure the cursor is at the end of your message and then return back to “Signature” and you will see your signature option. Click on that and the signature will appear.
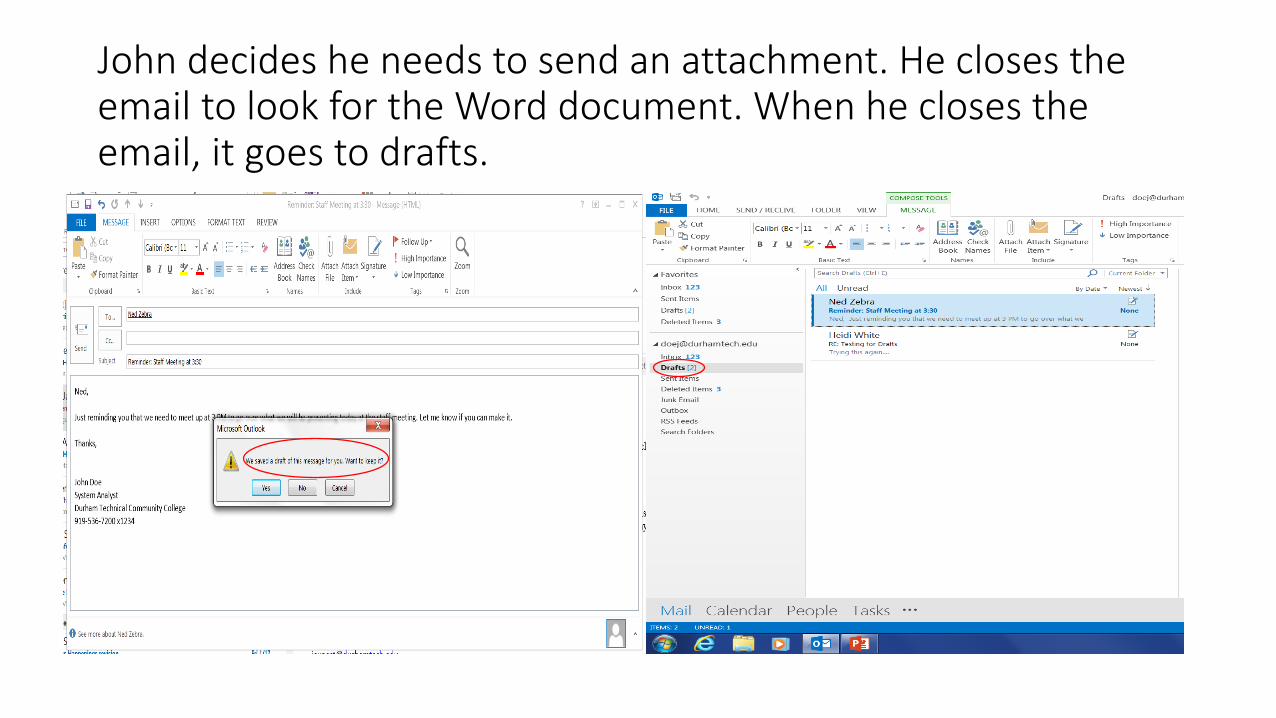
John decides he needs to send an attachment. He closes the email to look for the Word document. When he closes the email, it goes to drafts.

After finding the documents location, John goes back into his email and double clicks the draft to open the email back up.
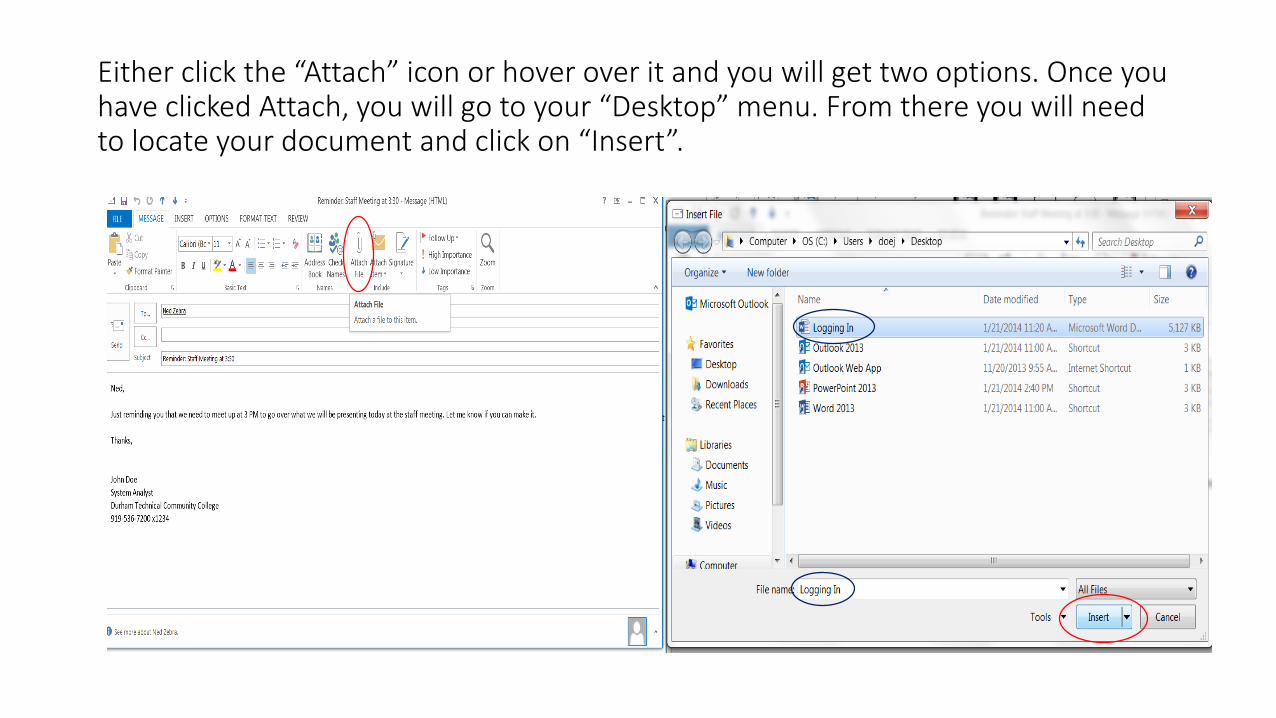
Either click the “Attach” icon or hover over it and you will get two options. Once you have clicked Attach, you will go to your “Desktop” menu. From there you will need to locate your document and click on “Insert”.
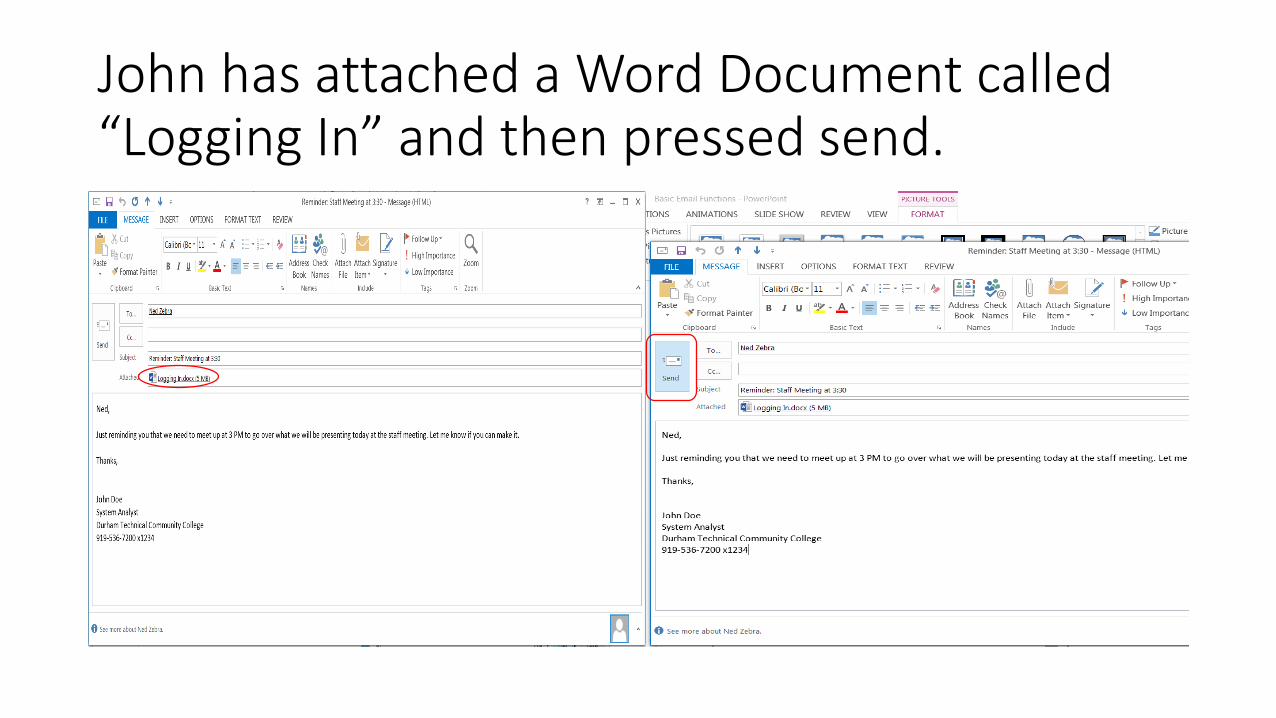
John has attached a Word Document called “Logging In” and then pressed send.
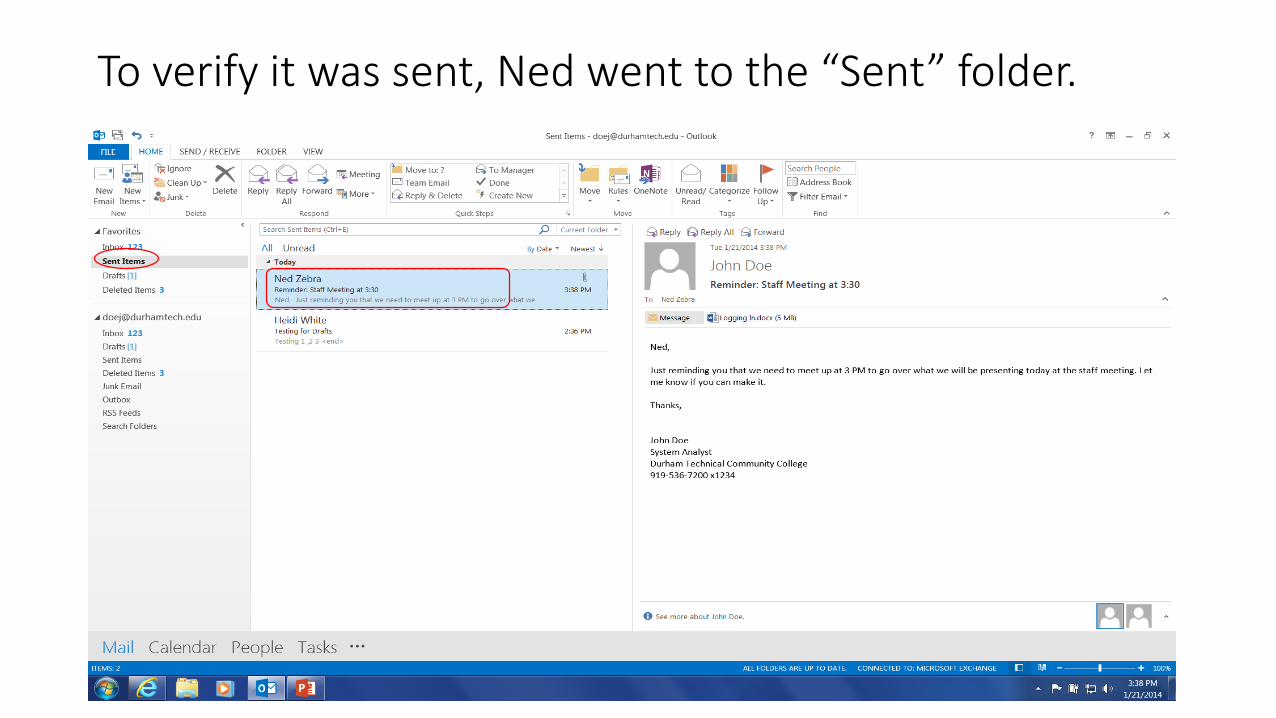
To verify it was sent, Ned went to the “Sent” folder.
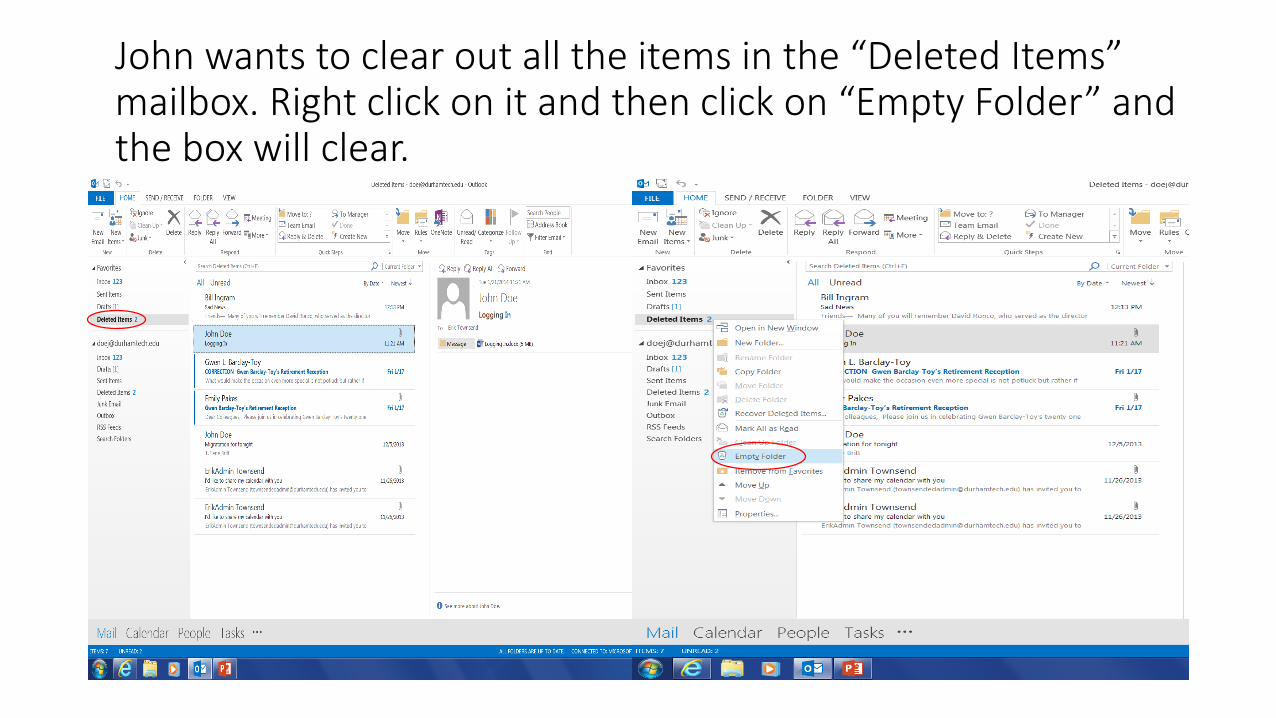
John wants to clear out all the items in the “Deleted Items” mailbox. Right click on it and then click on “Empty Folder” and the box will clear.
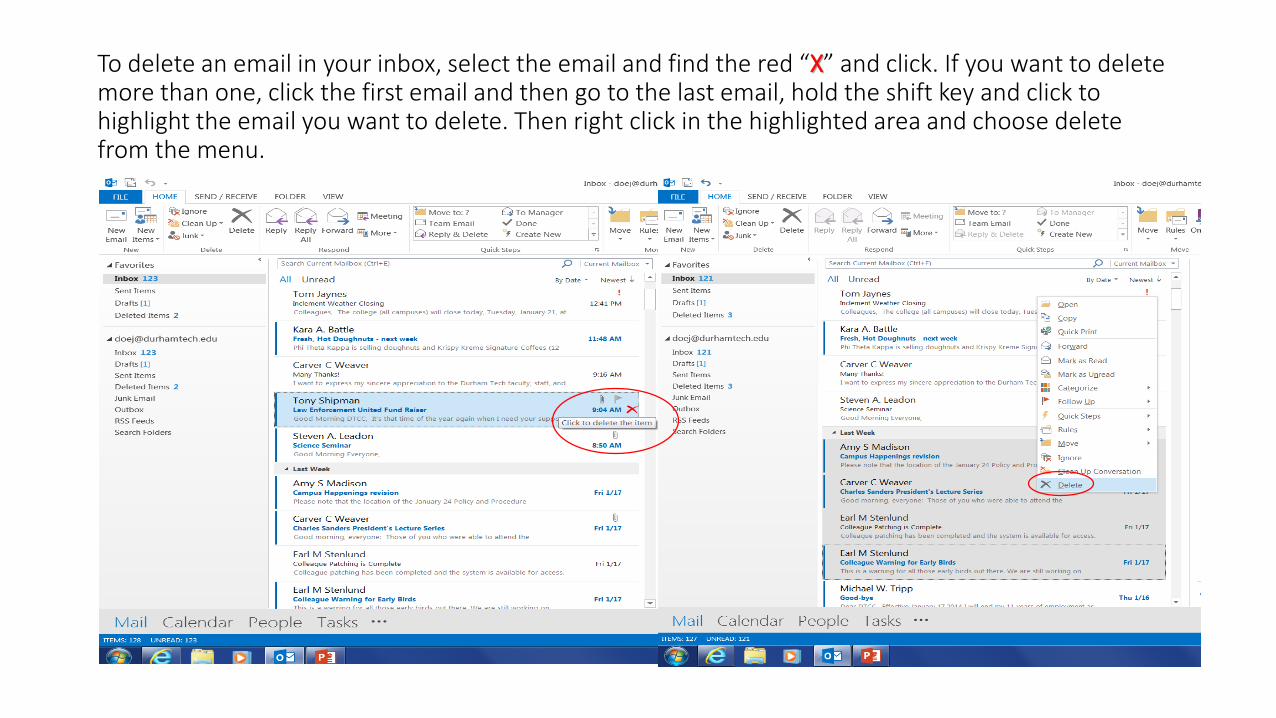
To delete an email in your inbox, select the email and find the red “X” and click. If you want to delete more than one, click the first email and then go to the last email, hold the shift key and click to highlight the email you want to delete. Then right click in the highlighted area and choose delete from the menu.
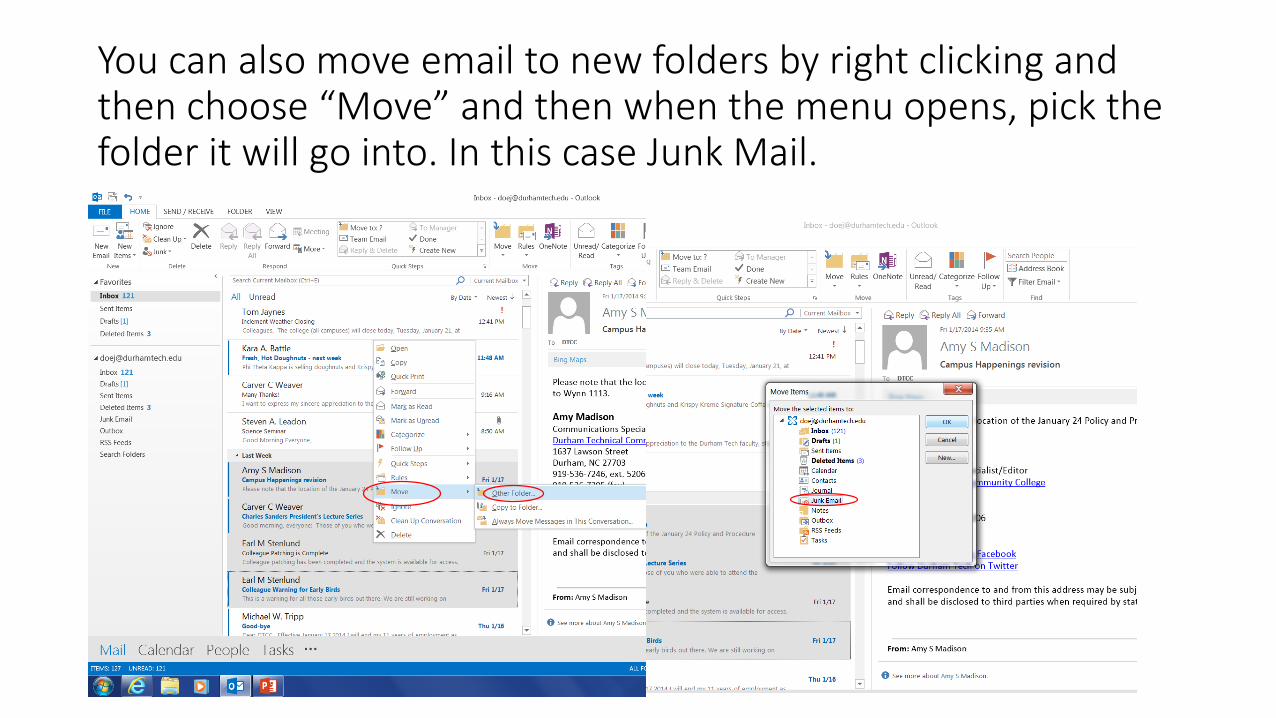
You can also move email to new folders by right clicking and then choose “Move” and then when the menu opens, pick the folder it will go into. In this case Junk Mail.

Rule: To automatically have an email go to a folder you have to make a rule. First right click on the email. Then chose “Rules” and “Create Rules” from the menu. Then choose From Café (or from whomever it was from) and choose “Move the item to folder:” and click the “Select Folder” option. A new menu will open, “Rules and Alerts”, and in this case we are putting this in the Junk Email folder. Then click “OK” and “OK” to Create the Rule.
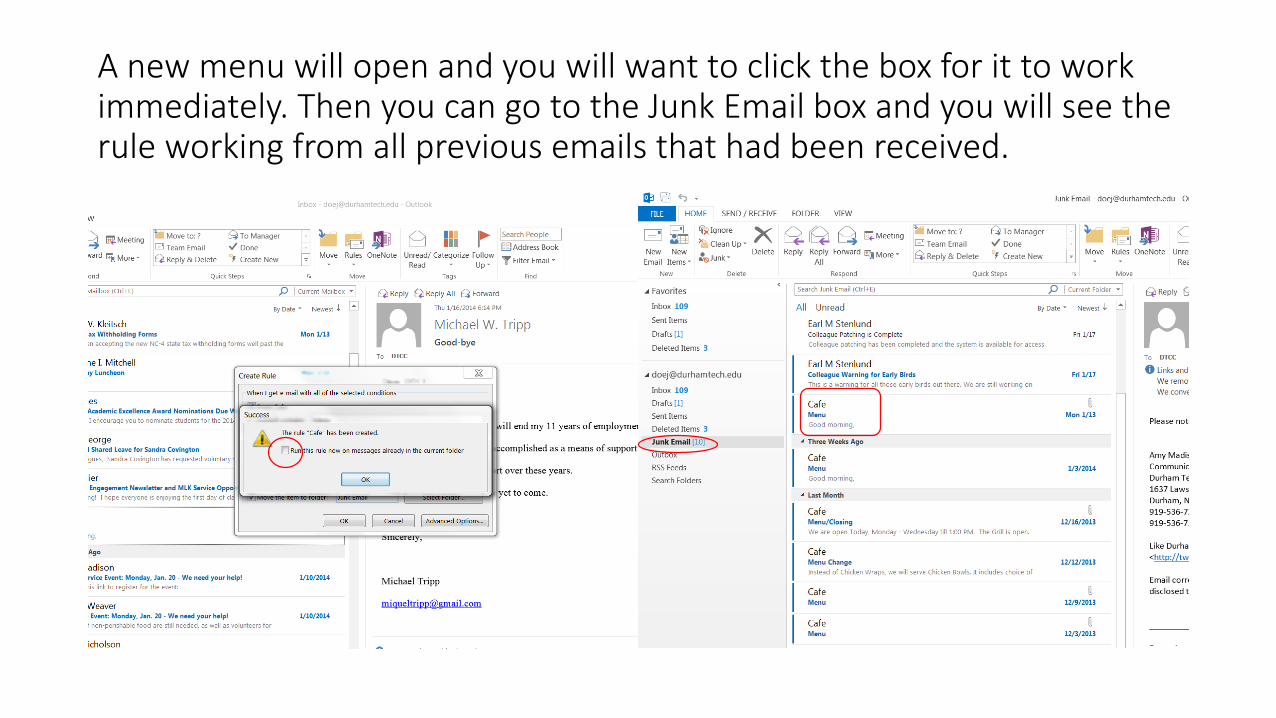
A new menu will open and you will want to click the box for it to work immediately. Then you can go to the Junk Email box and you will see the rule working from all previous emails that had been received.
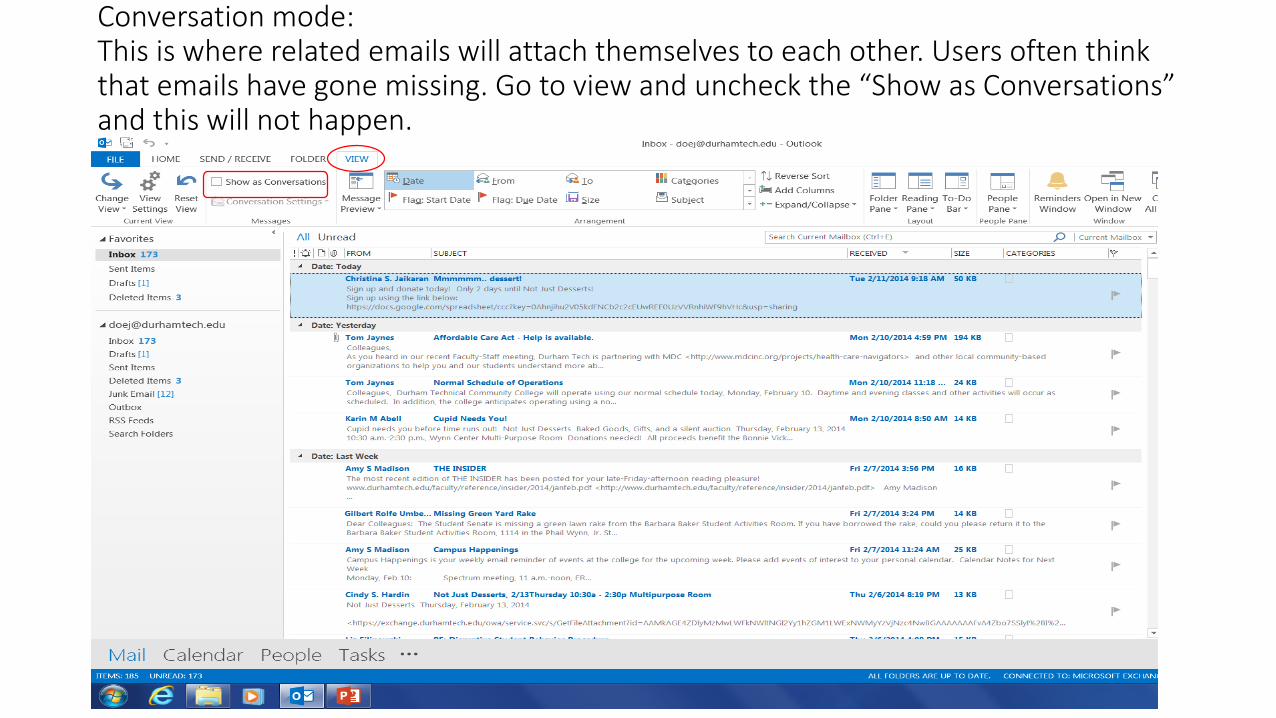
Conversation mode: This is where related emails will attach themselves to each other. Users often think that emails have gone missing. Go to view and uncheck the “Show as Conversations” and this will not happen.

THE END
This will be listed on our “Exchange/Outlook Information” page.


![Multifractal analysis of arithmetic functions 10mm @[email protected]](https://img.pdfslide.us/doc/110x75/620ef54a841171490c0a9163/multifractal-analysis-of-arithmetic-functions-10mm-emailprotected.jpg)