Embed Size (px)
Citation preview

Product Information WinCC/TM V2.01 04.05.2001
© Siemens AG 2001 1 of 21
PCS7 / TM (WinCC / TM)V2.01
Product Information
This product information is more binding than current statements in Manuals an in the on-line help.

Product Information WinCC/TM V2.01 04.05.2001
© Siemens AG 2001 2 of 21
Chapter Page
1 General Information ........................................................................................................................................ 31.1 Operating System Windows NT, 4.0; Upgrading to SP5 ........................................................................ 3
2 General Information About the Installation..................................................................................................... 32.1 Installation of the TELEPERM M-Channel DLL and Tools................................................................... 4
2.1.1 Installing the N_AT Driver.............................................................................................................. 52.1.2 Enhancements / Modifications vs. Version V1.05........................................................................... 52.1.3 Modifications vs. Version V2.00/ SP1 ............................................................................................ 52.1.4 Restrictions ...................................................................................................................................... 6
2.2 Installing the WinCC/TM-OCX (NORA) ............................................................................................... 72.2.1 Procedure......................................................................................................................................... 72.2.2 Revision Levels ............................................................................................................................... 72.2.3 Enhancement in TM_x.ocx vs. Version V1.05................................................................................ 72.2.4 Modifications vs. Version V2.00/ SP1 ............................................................................................ 8
2.3 Installing the WinCC/TM-OCX (PCS7).................................................................................................. 82.3.1 Procedure......................................................................................................................................... 92.3.1................................................................................................................................................................. 92.3.2 Revision Levels ............................................................................................................................... 92.3.3 Enhancement in TM7_x.ocx vs. Version V1.05.............................................................................. 92.3.4 Modifications vs. Version V2.00/ SP1 .......................................................................................... 102.3.5 Simultaneous Utilization of WinCC/TM-OCX( NORA) and WinCC/TM-OCX (PCS7) ............. 10
3 Necessary Licenses (Authorization) .............................................................................................................. 113.1 Authorization of WinCC/TM (now: PCS7/TM) Upgrade V2.0 ............................................................ 11
4 Documentation .............................................................................................................................................. 125 Version Interdependencies ............................................................................................................................ 136 Conversion of a WinCC/TM Project from WinCC 4.0x to 5.x ..................................................................... 13
6.1 Transition from WinCC, V5.0, to V5.0/SP2 (PCS7, V5.1) ................................................................... 147 Creating a New WinCC/TM Project.............................................................................................................. 15
7.1 Creating a Project for Multi-Client Operation on a Server .................................................................... 157.2 Creating a Multi-Client Project in a Milti-Client................................................................................... 16
8 Bus Parameters for PROFIBUS TM System Bus on ASx88/TM and WinCC.............................................. 179 Important Notes ............................................................................................................................................. 18
9.1 Permissible Installations ........................................................................................................................ 189.2 Time in the Bus System......................................................................................................................... 189.3 Logical Connections .............................................................................................................................. 189.4 ZKS Blocks ........................................................................................................................................... 189.5 C Scripts ................................................................................................................................................ 189.6 Quantity Framework.............................................................................................................................. 189.7 PROGRAF AS+ .................................................................................................................................... 189.8 Manipulations in the AS ........................................................................................................................ 199.9 S Strings in TML Blocks ....................................................................................................................... 199.10 Structures of Field Blocks (GA, GB, etc.) ............................................................................................. 199.11 Fonts ...................................................................................................................................................... 199.12 Number of Variables Under a Connection............................................................................................. 199.13 Troubleshooting Tips............................................................................................................................. 199.14 TELEPERM M in Intranet or Internet ................................................................................................... 19
10 Appendix ................................................................................................................................................... 2010.1 Files and Search Paths ........................................................................................................................... 20

Product Information WinCC/TM V2.01 04.05.2001
© Siemens AG 2001 3 of 21
1 General Information
Scope of delivery
This CD contains the following components:• TELEPERM M channel DLL• TELEPERM M tools such as wizards for "establish connection", ORPA import and block import;
message generator, message router.• Image blocks in TELEPERM M NORA representation• Image blocks in a representation similar to PCS7• Documentation and product information in pdf format
The scope of delivery does not contain:• System software WinCC, V5.0/ SP2, or PCS7-OS, V5.1• Operating system Windows NT, 4.0, including Service Packs
Requirements
The software products WinCC/TM, WinCC/TM-OCX (NORA) and WinCC/TM-OCX (PCS7) that arecontained on this CD execute under WinCC, Version 5.0/SP2, or PCS7, Version 5.1, plus Hot-fix2_K5.2.58.5 or Windows NT, 4.0 + SP5. The hardware requirements are listed in the associateddocuments.
Please observe the Chapter "Version Interdependencies" in this document.
�To install the WinCC or PCS7 hot fix, branch to the CD directory WinCC_V5_0_SP2_HF2\ and startthe setup.exe file under cd\disk1.
1.1 Operating System Windows NT, 4.0; Upgrading to SP5
Note: The WinCC/TM CD does not contain the operating system Windows NT, 4.0 or any ServicePacks. SP language variants of the SP must be used according to the selection in the base installation.
To install the NT SP5, load the corresponding setup.exe. Overwrite older files when the system asksfor file versions during the installation process. Please observe the notes etc. of the SP5.
2 General Information About the Installation
The software components for WinCC / TM and the documents are supplied on CD-ROM.CD directory structure (excerpt):
- Dok Contains the product information and all the descriptions in pdfformat
- Siemens Contains the channel components in an uncompressed form
- SW Contains the installation programs for channel and image blocks (and additional products)
- Winnt.400 Contains the driver software for the N_AT module
- TM_Rangierer Contains a free program that facilitates the computation of theEventState variables from the status words.

Product Information WinCC/TM V2.01 04.05.2001
© Siemens AG 2001 4 of 21
This CD is equipped with an "Autorun" facility that automatically starts the installation mask when theCD is inserted (provided that the computer has been set up for this feature). If this selection has notbeen made in your computer, the installation mask can also be initiated by double-clicking on thesetup.exe file in the CD's main directory. Likewise, all installation steps can manually be started via thesetup.exe file in the corresponding subdirectories. The majority of the installation steps described inthe following Chapters are performed via this installation mask.
New: In the installation mask that is used now, the components that are to be installed are merely tobe provided with a check. When WinCC/TM is selected, the check is automatically set for the NAT-NPCI driver software. The check can be removed if this driver software shall not be installed. The lan-guage selection in the installation mask solely concerns the comments; the language of the installationproper must be specified separately.Any old installation of the components that are to be installed will be removed at the beginning.
2.1 Installation of the TELEPERM M-Channel DLL and Tools
The TELEPERM M channel DLL and tools package must be installed in the following WinCC comput-ers:
- Single-user system- Client/ server system: In all servers; in the clients merely the TELEPERM M.chn channel and
all files of the Telpm*.lng type.- Multi-client system: In all servers; in the multi-clients merely the TELEPERM M.chn channel
and all files of the Telpm*.lng type.
The TELEPERM M channel DLL and the WinCC/TM tools are on the CD.
The authorization is supplied on a separate floppy disk.
Manual installation: To install the TELEPERM M channel DLL and tools, please branch to the SW\ Kanal directory andinvoke setup.exe there. From now on, the installation procedure will be prompted. The default settingof <LW> is the installation drive of WinCC. This setting must not be changed.Any existing installation will be removed during this process. � If it does not yet exist, the authorization must be transferred to the WinCC installation drive. To
do this, please insert the authorization floppy disk into the drive and double-click on theAuthors.exe or Authorsw.exe program (same procedure as for other WinCC components).
� The installation is thus performed. Further information can be found in the <LW>:\Siemens\TM_Werkzeuge\Liesmich.txt file or in the documentation.
� The files Ydata220.dat and Ydata230.dat that are included in the delivery contain the data thatis relevant for the W startup, and must not be modified.
� Depending on the installed authorization, this software version permits communication with thefollowing automation systems: - AS 230/ AS 235/ AS 235H/ AS 388/ AS 488 AS 215 AG 150U / AG 155U - AS 220S/ AS 220H(See also Chapter "Necessary Licenses")
� Startup features:The AS systems are marked as failed during the entire duration of the startup phase. TheYdata23x.dat phase is no longer read; it is merely used for verification purposes and shouldalways be identical to the Ydata230.dat file.Furthermore, all AS systems must be operational on the bus at the startup time.

Product Information WinCC/TM V2.01 04.05.2001
© Siemens AG 2001 5 of 21
2.1.1 Installing the N_AT Driver
If the N_AT driver is required, it can be installed via a separate installation procedure (NAT-NPCI).
2.1.2 Enhancements / Modifications vs. Version V1.05 • New authorizations (licenses) are required for versions from V2.0 onwards. The distinction be-
tween CS 275 and L2 no longer exists. • The message generator was modified in several points.
Messages derived from the block status word:"S16 String \ block instance" (previously: Block instance). is written to the "Origin" mes-sage block.
In order to ensure area-specific reporting, the name of an area of the topmost level of thePicture Tree Manager must be written to the "Area" message block. This can be donemanually or using the TM_RangMeld tool supplied (is copied into the<LW>:\Siemens\WinCC\BSTMapper directory when the channel is copied).
"External fault" has been changed from the previous signaling type "Fault" to the signalingtype "System".
Operator communication messages from the AS systems:"S16 String \ block instance" (previously: Block instance) is written to the "Origin" messageblock. The operator input text from the AS is written to the "Operator input" message block(previously: S16 string).
Channel messages:The message text is written to the "Event" message block (previously in the "Area" mes-sage block).
• Status routing in common displays
Routing of "External fault" etc. has been changed from signaling type "Field" (bit 8) to signalingtype "System" (bit 9).
2.1.3 Modifications vs. Version V2.00/ SP1
The following problems have been eliminated:
• Image above test point (function of WinCC-LTO)This WinCC function can be used again. The necessary entries in the tag editor list can be madeusing the WinCC programs TTEdit.exe.
The following new functions have been implemented:
• Logging on/off AS links via link-specific internal variables.During runtime, the AS links can only be logged on or off via so-called "link-specific internal vari-ables".Please refer to the Technical Description, Chapter 2.2.3. for details. The Technical Description canbe found as WinCC_TM.pdf in the CD directory dok.
These variables can be added to WinCC projects that were created using earlier versions. This is

Product Information WinCC/TM V2.01 04.05.2001
© Siemens AG 2001 6 of 21
done for each previously created link by processing the "Setting up TELEPERM M links" wizard,that is described in the above-mentioned Chapter.
An OCX (TM_Coniunctio.ocx) is provided that permits a convenient log on/off to be performed.See AS_Verbindung description on this CD.
• Filter for I&C alarms (CS 275 bus messages)From this version onwards, unwanted CS 275 bus messages can be filtered out of the messagesystem. This is done using a file in csv format that is to be configured.Please refer to the Technical Description, Chapter 4.4. for details. The Technical Description canbe found as WinCC_TM.pdf in the CD directory dok.
• User-block-specific messagesFor all TML blocks (user blocks), five messages are created for five fixed bits of the status word.This is done using the message generator. From this version onwards, any message can be cre-ated of any bit of the status word. A&D SE11S can perform the necessary adjustment of the TMwizards message generator in a project- and system-specific way. The expenditure will be in-voiced for.
• Logging time synchronization on/off.This option is available again. However, it will only become effective after runtime has been termi-nated and restarted.
2.1.4 Restrictions
• Curve over test point (function of WinCC-LTO)This function will no longer be available from V5.0 onwards.
• Creating the WinCC variable managementThe WinCC variable management (variable under connections) may only be created via the"TELEPERM M Import blocks" wizard provided.

Product Information WinCC/TM V2.01 04.05.2001
© Siemens AG 2001 7 of 21
2.2 Installing the WinCC/TM-OCX (NORA) The image blocks in TELEPERM M-NORA representation WinCC/TM-OCX (NORA), and the authori-zation DLLs that are required for proper operation are in the directory sw\OCX_TM on the CD.
The authorization is supplied on a separate floppy disk.
The WinCC/TM-OCX (NORA) package must be installed in all computers that shall be used for op-erator communication and visualization.
- Single-user system- Multi-clients or Clients- Server, if it is operator station at the same time.
2.2.1 Procedure
Manual installation: � There is an older version of WinCC /TM-OCXs (NORA) in your computer and the objects
WinCC/TM-OCX (NORA) and VB5_DLL are contained in the "Settings/System con-trol/Software" tab:
Uninstall these two objects.
� To install WinCC/TM-OCX (NORA), branch to the SW\ OCX_TM directory and invokeSetup.exe there. The rest of the installation procedure will be prompted. Also install theVB5_DLL (in the same setup). Any existing installation will be removed during this process. The "Prototype images" option can be used for copying these images into the correspondingWinCC folder from where they will be copied into the project when the Split Screen Wizardexecutes.
� The authorization must be transferred to the WinCC installation drive. To do this, please insertthe authorization floppy disk into the drive and double-click on the Authors.exe orAuthorsw.exe program (same procedure as for other WinCC components).Of course, this step is only necessary if an authorization has not yet been installed.
The WinCC/TM-OCXs (NORA) are now ready for the configuration in the WinCC-Graphics Designer. 2.2.2 Revision Levels � Elemente.ocx V1.04.01 � TM_x.ocx V2.00.01 or 2.00.02 (x stands for the different block types) � TM_MKS.ocx V1.00 � TM_Sym V2.00.01 � TM_AS215 V2.00 � TelepermMOCX.dll V1.0.0.3 Image blocks (OCX) for the five standard function blocks TRAS, TRB, TRES, TRM and TRR are pro-vided for the operation with AS 215. Their utilization is subject to change. 2.2.3 Enhancement in TM_x.ocx vs. Version V1.05 The operator input privilege is now interpreted in an area-specific way (provided that the image hasbeen hooked in the Picture Tree Manager).
Product Information WinCC/TM V2.01 04.05.2001
© Siemens AG 2001 8 of 21
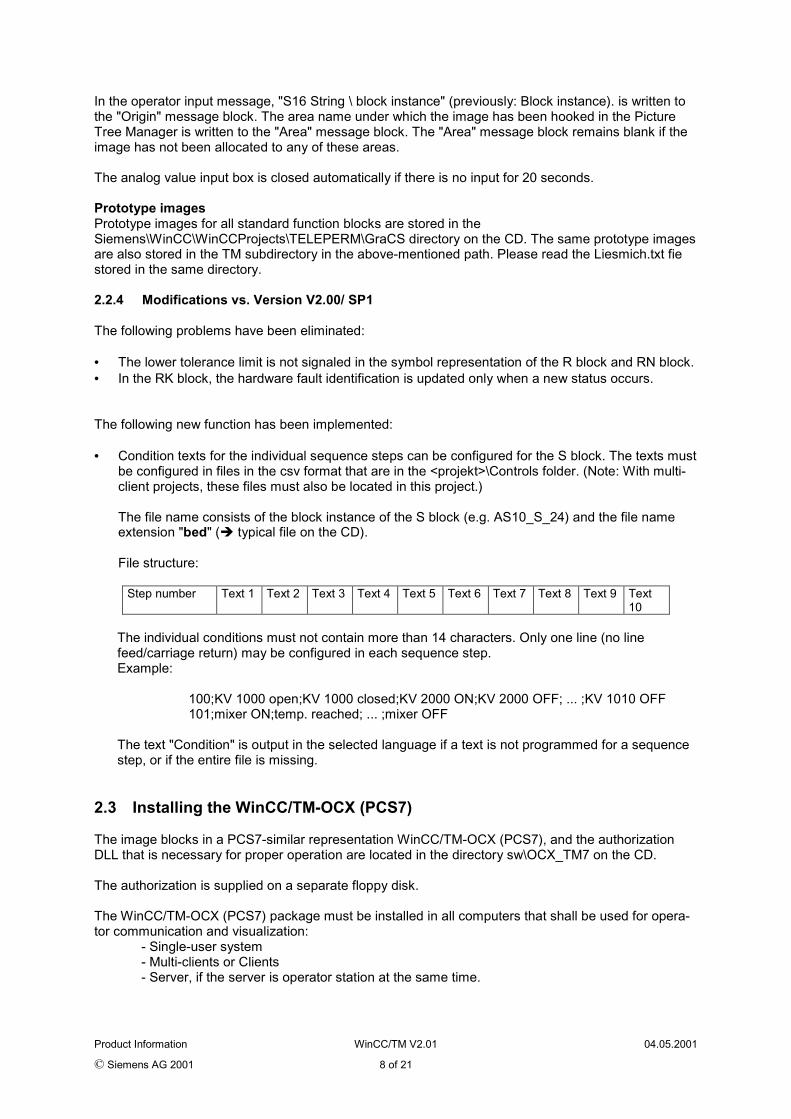
In the operator input message, "S16 String \ block instance" (previously: Block instance). is written tothe "Origin" message block. The area name under which the image has been hooked in the PictureTree Manager is written to the "Area" message block. The "Area" message block remains blank if theimage has not been allocated to any of these areas.
The analog value input box is closed automatically if there is no input for 20 seconds.
Prototype images Prototype images for all standard function blocks are stored in theSiemens\WinCC\WinCCProjects\TELEPERM\GraCS directory on the CD. The same prototype imagesare also stored in the TM subdirectory in the above-mentioned path. Please read the Liesmich.txt fiestored in the same directory. 2.2.4 Modifications vs. Version V2.00/ SP1
The following problems have been eliminated:
• The lower tolerance limit is not signaled in the symbol representation of the R block and RN block.• In the RK block, the hardware fault identification is updated only when a new status occurs.
The following new function has been implemented:
• Condition texts for the individual sequence steps can be configured for the S block. The texts mustbe configured in files in the csv format that are in the <projekt>\Controls folder. (Note: With multi-client projects, these files must also be located in this project.)
The file name consists of the block instance of the S block (e.g. AS10_S_24) and the file nameextension "bed" (� typical file on the CD).
File structure:
Step number Text 1 Text 2 Text 3 Text 4 Text 5 Text 6 Text 7 Text 8 Text 9 Text10
The individual conditions must not contain more than 14 characters. Only one line (no linefeed/carriage return) may be configured in each sequence step.Example:
100;KV 1000 open;KV 1000 closed;KV 2000 ON;KV 2000 OFF; ... ;KV 1010 OFF101;mixer ON;temp. reached; ... ;mixer OFF
The text "Condition" is output in the selected language if a text is not programmed for a sequencestep, or if the entire file is missing.
2.3 Installing the WinCC/TM-OCX (PCS7)
The image blocks in a PCS7-similar representation WinCC/TM-OCX (PCS7), and the authorizationDLL that is necessary for proper operation are located in the directory sw\OCX_TM7 on the CD.
The authorization is supplied on a separate floppy disk. The WinCC/TM-OCX (PCS7) package must be installed in all computers that shall be used for opera-tor communication and visualization:
- Single-user system- Multi-clients or Clients- Server, if the server is operator station at the same time.

Product Information WinCC/TM V2.01 04.05.2001
© Siemens AG 2001 9 of 21
2.3.1 Procedure
Manual installation: � There is an older version of WinCC /TM-OCXen (PCS7) in your computer and the objects
WinCC/TM-OCX (PCS7) and VB5_DLL are contained in the "Settings/System con-trol/Software" tab:
Uninstall these two objects.
� To install WinCC/TM-OCX (PCS7), branch to the SW\ OCX_TM7 directory and invokeSetup.exe there. The further install procedure will be prompted. Also install the VB5_DLL (inthe same setup). Any existing installation will be removed during this process. The "Prototype images" option can be used for copying these images into the correspondingWinCC folder from where they will be copied into the project when the Split Screen Wizardexecutes.
� The authorization must be transferred to the WinCC installation drive. To do this, please insertthe authorization floppy disk into the drive and double-click on the Authors.exe orAuthorsw.exe program (same procedure as for other WinCC components).Of course, this step is only necessary if an authorization has not yet been installed.
The WinCC/TM-OCXs (PCS7) are now ready for the configuration in the WinCC-Graphics Designer. Note: Some image blocks in PCS7-similar representation need more parameters in the ORPA filterthan the ones in TELEPERM M representation. Instead of the ORPAFilter.txt file that was copied intothe <LW>:\Siemens\WinCC\BSTMapper directory during the installation of the TELEPERM M channel,ORPAFilter from the TM7 directory of the CD shall therefore be used. This directory also contains theprototype images. 2.3.2 Revision Levels � ElementsTM7.ocx V1.00.03� Input.ocx V1.01� TM7_x V2.00 2.3.3 Enhancement in TM7_x.ocx vs. Version V1.05 Image blocks for A block (motor representation), A block (valve representation), C, F, FN and R blockare provided. The operator input privilege is now interpreted in an area-specific way (provided that the image hasbeen hooked in the Picture Tree Manager). In the operator input message, "S16 String \ block instance" (previously: Block instance). is written tothe "Origin" message block. The area name under which the image has been hooked in the PictureTree Manager is written to the "Area" message block. The "Area" message block remains blank if theimage has not been allocated to any of these areas. A two-stage mode selection is now possible too. Please refer to the description for details. The analog value input box is closed automatically if there is no input for 20 seconds.
Within the scope of multi-client operation upgrading, the logged-on user who is logged in the operatorinput message is identified within the OCX and no longer via the "User" property. The property, thatremains for compatibility reasons, is no longer interpreted.

Product Information WinCC/TM V2.01 04.05.2001
© Siemens AG 2001 10 of 21
The message window of the "Messages" view, that had to be implemented as a WinCC image, hasnow been integrated into the OCX. Prototype imagesPrototype images for these standard function blocks are stored in theSiemens\WinCC\WinCCProjects\TELEPERM\GraCS\TM7 directory on the CD. Please read the Lies-mich.txt file that is stored in the same directory.
2.3.4 Modifications vs. Version V2.00/ SP1
The following problems have been eliminated:
• The "Trend" view is missing in the group display representation of the F block.
The following new functions have been implemented:
• The language selection now works for English.
2.3.5 Simultaneous Utilization of WinCC/TM-OCX( NORA) and WinCC/TM-OCX (PCS7)
Both image block types can be used simultaneously in a computer. However, the package of the im-age blocks in TELEPERM M NORA representation must first be installed.
If one of the simultaneously installed packages shall be removed, we strongly recommend to removeboth packages and to reinstall the one that shall remain.
Simultaneous utilization of the prototype images of both image types is not possible.

Product Information WinCC/TM V2.01 04.05.2001
© Siemens AG 2001 11 of 21
3 Necessary Licenses (Authorization)
Authorizations are installed in the <LW>:AX NF ZZ directory.
Depending on the employed channel, the following authorization must be stored there:
CS 275/ L2
� AS 23x, AS 488, AS 215 only A7TMCS50� AS 220 only A7T2CS50� AS 220 and AS 23x, AS488, AS 215 A7TACS50
These are not to be installed in clients or multi-clients.
If the installed channel and the authorization are not compatible with each other, a box appears duringruntime that states this incompatibility. The License.log file in the <LW>:\Siemens\WinCC\Diagnosedirectory tells you which license is required for the installed channel.
The authorization A7TMFP50 is uniformly required for all image blocks.It must be installed wherever operator input and visualization is required
3.1 Authorization of WinCC/TM (now: PCS7/TM) Upgrade V2.0Important note:Upon the migration from version V1.0x ... V1.05 to version V2.0 you will irrevocably lose the authoriza-tion for the previous version.
We recommend to perform the migration of the authorization prior to the installation of PCS7/TM. Themigration requires the following preconditions to be fulfilled:• You possess a single license or a copy license for WinCC/TM; V1.0x on an authorization floppy
disk or in your computer.• You have purchased an upgrade license to PCS7/TM V2.0 (referred to as "authorization upgrade"
in the text below).To upgrade the software from version V1.0x, use the following procedure:1. The "old authorization" must be on the associated "old authorization floppy disk�. If necessary, you
must first transfer this authorization from your computer onto the "old authorization floppy disk".2. Insert the "authorization floppy disk - upgrade� and invoke the "AuthorsW" program via the start bar
under Simatic > AuthorsW. If "AuthorsW" has not been installed in your computer, you must carryout the installation from the CD ("Setup.exe" in the Authors / Disk 1 directory). The "Extras" menucontains a menu item "Upgrading guideline�. This guideline can support you during upgrading.
3. Select the "Authorization management" tab. Select the menu item "Upgrading..." from the "Authori-zation� menu.
4. Select the upgrade program from the dialog that is opened subsequently. You will then beprompted to insert the authorization floppy disk of the old authorization (V1.0x). Please follow theinstructions on the screen and insert the "Authorization floppy disk - upgrade" when you areprompted to do so.
5. Upgrading will be terminated when the new authorization V2.0 is activated on the "Authorizationfloppy disk - upgrade".
6. The new authorization can now be transferred to your computer during the setup or using"AuthorsW�.

Product Information WinCC/TM V2.01 04.05.2001
© Siemens AG 2001 12 of 21
4 Documentation Revised descriptions in pdf format are supplied in the dok\ directory on the delivery CD. Their contentsreplace the printed descriptions. • WinCC/TM
Description of the TELEPERM M channel and the tools
• WinCC/TM-OCX (NORA)Description of the image blocks in TELEPERM M NORA representation
• WinCC/TM-OCX (PCS7)Description of the image blocks in PCS7-similar representation
• WinCC/TM-OCX_SymboleDescription of the image blocks in symbol representation
• WinCC/TM-OCX_AS215Description of the image blocks for AS 215
• MKSDescription of the single bit acknowledgement of the MKS block
• TM_RangMeldDescription of the EXCEL list for message text routing
The Acrobat Reader1 is provided (ar40deu.exe) for reading the pdf files.(1"Acrobat→ Reader Copyright ♥ 1987-1999 Adobe Systems Incorporated. All Rights Reserved.Adobe, the Adobe logo, Acrobat and the Acrobat logo are trademarks of Adobe Systems Incorpo-rated")

Product Information WinCC/TM V2.01 04.05.2001
© Siemens AG 2001 13 of 21
5 Version Interdependencies
WinNT 4.0+SP5 4.0+SP5 4.0+SP5 Com-ments
WinCC or PCS7 SW 5.0/ SP1 + HF 4.8 WinCC 5.0 +SP1 + HF5
orPCS7 V5.0 +SP2 + HF2 +WinCC HF5
WinCC 5.0 +SP2 + HF2
orPCS7 V5.1 +WinCC HF2
WinCC/TM SW2.0 x2.0 + SP1 x2.01 x
X = can be usedSP = Service Pack
6 Conversion of a WinCC/TM Project from WinCC 4.0x to 5.x This explanation is valid for the language selection "German". A WinCC/TM project that was created under WinCC 4.02 or an earlier version must first be convertedfor WinCC 5.x. The procedure that is described in the WinCC product information ("ReleaseNotes")must basically be used. Observe this procedure.
To show this clearly, we point out the following mandatory steps:
• Open the project with WinCC, V5.x • Edit the Split Screen Wizard
With single-user systems or multi-client systems, the area overview on the server now contains 16areas instead of 12 previously.With multi-client systems, one out of two area overviews can be selected on the multi-client:• Across all servers with a total of 16 areas.• Server-specific overview with 12 areas and an additional 6 server buttons,
Recommendation for the selection of the area overview in clients of multi-client systems:The first variant should be selected in a system of no more than a total of 16 areas. The secondvariant should be preferred in systems of more than 16 areas.
• Edit the Alarm Logging Wizard • Convert the graphic images • Convert the global library
• Convert the project library
• Open tag logging and save to terminate.

Product Information WinCC/TM V2.01 04.05.2001
© Siemens AG 2001 14 of 21
• Open the Picture Tree Manager and save to terminate it.It can happen upon the migration of projects from WinCC version V4.0x to WinCC version 5 thatan OCX in a graphic image is either not recognized ("unknown object") or that the properties areno longer visible in the Graphics Designer. The corresponding OCX must newly be placed in ei-ther case. Failure to do so will produce an error message when the Picture Tree Manager issaved.
• Terminate WinCC and restart it afterwards.
• Start DynWizEdit. Read all four TELEPERM M wizards ("TELEPERM M Verbindung einrich-ten.wnf", �TELEPERM M Import ORPA.wnf�, �TELEPERM M Import Bausteine.wnf� and�TELEPERM M Meldungen.wnf�) from the Siemens\WinCC\BSTMapper directory, and create aCWD file.
• Implementing the changes in the group display routing requires the variable management and theORPA definitions (structures) to be deleted and newly to be created. All TELEPERM M messagesmust first be cleared.
• To implement the changes of the message generator, you must first start it and clear all existingTELEPERM M messages. Next, you must start the message generator again and create defaultmessage texts.
• Area-specific reportingUsing this function requires messages from function blocks (via status word) to be allocated to anarea in the sense of the Picture Tree Manager.Manual allocation:Each message concerned must be provided with an area name in the "Area" message block.
Allocation via EXCEL list and TM_RangMeld:To make this allocation more convenient and easier to reproduce, it can be performed using theTM_RangMeld program that is provided on the WinCC/TM CD and an EXCEL list that must becreated beforehand. See the corresponding description on the CD.
Allocation via exporting/importing the Alarm Logging Editor:Another possibility is the export of the relevant messages (set the selection accordingly) in AlarmLogging into a file, editing the messages such that an area name is entered in the "Block:2" (=area) column, and removing the associated TextID ("TextID 2") in the same line. Next, reimport thefile in Alarm Logging.
• The converted project must be a "multi-user system" if it shall be used as a server in multi-clientoperation. With an empty test point list (that was filled by the tag editor up to V4.02), there may bean error message when the package is created that is required for multi-client operation. This errormessage can be ignored in most cases. However, you should ensure that the package has beencreated in the "Package" subdirectory of the directory that bears the name of the computer.
• 6.1 Transition from WinCC, V5.0, to V5.0/SP2 (PCS7, V5.1)
Special measures are not required for this transition.

Product Information WinCC/TM V2.01 04.05.2001
© Siemens AG 2001 15 of 21
7 Creating a New WinCC/TM Project This explanation is valid for the language selection "German". Please observe the WinCC productinformation ("ReleaseNotes"). 7.1 Creating a Project for Multi-Client Operation on a Server • Create the project as a multi-user project with WinCC, V5.0.
It must be noted here that the server name and the project name in the multi-client are both dis-played according to the selection of the area overviews: The names of the two components shouldtherefore not be excessively long.
• Edit the Split Screen Wizard • Edit the Alarm Logging Wizard
• Insert new drivers for the TELEPERM M channel in the variable management.
• Start DynWizEdit. Read all four TELEPERM M wizards ("TELEPERM M Verbindung einrich-ten.wnf", �TELEPERM M Import ORPA.wnf�, �TELEPERM M Import Bausteine.wnf� and�TELEPERM M Meldungen.wnf�) from the Siemens\WinCC\BSTMapper directory, and create aCWD file.
• Start the "Setup link" wizard and create the required link.
• Execute �Import TELEPERM M ORPAs� once or twice (user blocks, TML blocks).�Ensure that only one element is created for each field block (GA, GB, etc.). Additional elementsmust manually be created before the block is imported.
• Execute �Import TELEPERM M blocks�.
• Execute �TELEPERM M messages� and create default message texts.
• Area-specific reportingUsing this function requires messages from function blocks (via status word) to be allocated to anarea in the sense of the Picture Tree Manager.Manual allocation:Each message concerned must be provided with an area name in the "Area" message block.
Allocation via EXCEL list and TM_RangMeld:To make this allocation more convenient and easier to reproduce, it can be performed using theTM_RangMeld program that is provided on the WinCC/TM CD and an EXCEL list that must becreated beforehand. See the corresponding description on the CD.
Prior to this step, you should expediently create the topmost area level in the Picture Tree Man-ager.
• If necessary, the TELEPERM M message class must be included in the selection of the individualmessage windows.
• Next, all further configuration steps are performed.
• Once the configuration has been completed, a package for the operation from a multi-client mustbe created under Serverdata. In the project, the package is created in the "Package" subdirectoryof the directory that bears the name of the computer.

Product Information WinCC/TM V2.01 04.05.2001
© Siemens AG 2001 16 of 21
7.2 Creating a Multi-Client Project in a Multi-Client
• Create the project as a multi-client system with WinCC, V5.0
• Edit the Split Screen WizardSelection between two area overviews is possible in the multi-client:• Across all servers with a total of 16 areas.• Server-specific overview with 12 areas and an additional 6 server buttons,
Recommendation for the selection of the area overview in clients of multi-client systems:The first variant should be selected in a system of no more than a total of 16 areas. The secondvariant should be preferred in systems of more than 16 areas.
• Edit the Alarm Logging Wizard
• Import the server packages
• Create the operator input privileges in the User Administrator
• Define the standard server for alarm loggingThis definition must be made to store the operator communication messages of a multi-client in aserver (the selected default server).
• The connection to the servers is established under Serverdata by loading the packages.

Product Information WinCC/TM V2.01 04.05.2001
© Siemens AG 2001 17 of 21
8 Bus Parameters for PROFIBUS TM System Bus on ASx88/TMand WinCC
Parameterdescription
DOS_CONF.DAT in AS488 andBridge
L2AMPRO.INIin ASx88
Configura-tion dialog inWindows NTfor WinCC
Value
Highest station address l2_hsa l2_hsa Highest Sta-tion Address
1 .... 126
Local device address l2_ts l2_ts Local StationAddress
1 .... 99
Baud rates (index) l2_baud_rate l2_baud_rate TransmissionRate
1,5 Mbits/s
Slot time l2_tsl l2_tsl Tslot 3000
Quiet time l2_tqui l2_tqui Tqui 0
Setup time l2_tset l2_tset Tset 240
Minimum station delaytime
l2_max_tsdr l2_max_tsdr Max Tsdr 980
Maximum station delaytime
l2_min_tsdr l2_min_tsdr Min Tsdr 150
Token rotation time l2_ttr l2_ttr Ttr min.90000 *)
GAP factor l2_g l2_g Gap factor 30 **)
Call repetitions l2_retry_ctr - Retry Limit 1
Ready time - - Trdy 150
Idle time 1 - - Tid1 515
Idle time 2 - - Tid2 980 • The PROFIBUS bus parameters for WinCC are specified in the user-defined profile. But for the Ttr parame-
ter, the values of the general-purpose profile will be transferred to the user-defined profile if the general-purpose profile is selected beforehand. In this case, these values are almost identical to the above-mentioned ones.
• *) Use the following formula to calculate the Ttr parameter, and enter it:Ttr (l2_ttr) = 9000 * [number of active PROFIBUS-TM devices].
Note: The factor 9000 in the formula is only valid for a baud rate of 1.5 Mbits/s. • **) For the baud rate of 1.5 Mbits/s, the default value of the gap factor is 30 � 50. Entering a smaller value
may be necessary in exceptional cases. • All specified bus parameters are tuned to the baud rate of 1.5 Mbits/s. Any change/optimization requires a
deep knowledge of the PROFIBUS standard. • The bus parameters for all TELEPERM components (e.g. OS525 and PROGRAF AS) on the PROFIBUS TM
system bus must be selected accordingly.

Product Information WinCC/TM V2.01 04.05.2001
© Siemens AG 2001 18 of 21
9 Important Notes
9.1 Permissible Installations
Software products that are not mandatory for the operation of WinCC or PCS7 must not be installed inservers, clients or multi-clients. This includes MS Office, for example. This shall prevent that the in-stallation of other software components (such as DLLs) has a detrimental influence on the systembehavior.
9.2 Time in the Bus System
Time synchronization is mandatory in the bus system. Consistent message processing is not possibleotherwise.
9.3 Logical Connections
Creating logical connections with the same CS275 address is not permitted. The name of a logicalconnection must not contain any special character (including "_"). This means that AS_103 is not per-mitted.
9.4 ZKS Blocks
The access to ZKS blocks has not been implemented.
9.5 C Scripts
General: We expressively want to point out again here that the general conventions of the program-ming language C must be observed when scripts are employed. Failure to do so may cause unpre-dictable reactions that can strongly affect proper operator communication and visualization.
9.6 Quantity Framework
When project images are configured in WinCC/TM, the capacity utilization of the bus system and ofthe subordinate automation systems must be taken into consideration in addition to the specificationsof the permissible mixed quantity framework / see TELEPERM M aktuell 1998/011/.
9.7 PROGRAF AS+
Utilization of PROGRAF AS+ data for the functions ORPA import or block import as a function of theemployed automation system:
AS 23x/ AS x 88 AS 220 AS 215 AG 155UORPA import X X - 2) - 2)Block import x - 1) - 2) - 2)
1) Can be ordered from A&D SE S11S at a fixed price.2) Can be ordered from A&D SE S11S and will be charged as incurred.

Product Information WinCC/TM V2.01 04.05.2001
© Siemens AG 2001 19 of 21
9.8 Manipulations in the AS
With manipulations in the AS it must be ensured that - depending on the measure - messages etc.may be lost via status message frames and/or MKS message frames. Setting the AS in a defined statefirst is therefore expedient.
9.9 S Strings in TML Blocks
Only the first character of a parameter of the "S" type in a TML block can be read.
9.10 Structures of Field Blocks (GA, GB, etc.)
Only one structure definition is possible for each field type. All configured fields in the AS must show atleast this length.The export of PROGRAF AS merely creates the first element. Any other element must be addedmanually. The 0th element must also be created manually if it shall be read.A length between 1 and 255 is possible.
9.11 Fonts
"Large fonts" must not be selected in the screen properties.
9.12 Number of Variables Under a Connection
A maximum of 64k variables may be created under an AS connection.
9.13 Troubleshooting Tips
���� Frequently, the TELEPERM M hotline is notified of license problems that are signaled during run-time after the TELEPERM M channel has been installed. In all cases this is due to the fact that anauthorization was purchased for the operation with AS 23*, while version "AS 23* and AS 220" wasspecifically selected during the installation process. The problem is eliminated when the installation isrepeated correctly.
Version and AS type of the TELEPERM M channel are stored in the registry codeHKEY_LOCAL_MACHINE\Software\Siemens AG\WinCC_TM under "Version" or "AS type".This information can also be retrieved via the TM_Info program (in the TM_Werkzeuge directory).
� Likewise, customers frequently report that texts are not displayed in the image blocks during run-time after the WinCC/TM-OCX (NORA) has been installed. This is due to the fact that - contrary to therequirement fixed in the description - these image blocks were not configured via the properties box.Once the image blocks have been edited via this properties box, the texts are transferred and aredisplayed by the image blocks during runtime.
� For various function blocks, the TELEPERM M message generator creates messages of theTELEPERM M class. Since this class is obviously not contained in the prefabricated WinCC messageimages, they must be incorporated by the configuring engineer if this is required.
9.14 TELEPERM M in Intranet or Internet
Please refer to the following sites for current information about TELEPERM M:
Homepage (external): http://www.siemens.de/teleperm/index_00.shtmlHomepage (internal): http://intra1.nbgm.siemens.de/extern/spiegeln/teleperm/index_00.shtml

Product Information WinCC/TM V2.01 04.05.2001
© Siemens AG 2001 20 of 21
10 Appendix
10.1 Files and Search Paths
The following files are copied when the TELEPERM M channel is installed:<LW>:\Siemens\TM_Werkzeuge\Liesmich.txt<LW>:\Siemens\TM_Werkzeuge\Regini.exe<LW>:\Siemens\TM_Werkzeuge\Wincc.ldb
<LW>:\Siemens\TM_Werkzeuge\TM_Info.exe <LW>:\Siemens\WinCC\bin\NrmTelpm.nll
<LW>:\Siemens\WinCC\bin\TELEPERM M WNF Support.dll<LW>:\Siemens\WinCC\bin\TELEPERM M.chn<LW>:\Siemens\WinCC\bin\Telpmdeu.Ing<LW>:\Siemens\WinCC\bin\Telpmenu.Ing<LW>:\Siemens\WinCC\bin\Telpmfra.Ing<LW>:\Siemens\WinCC\bin\Ydata220.Dat<LW>:\Siemens\WinCC\bin\Ydata230.Dat<LW>:\Siemens\WinCC\bin\TM_RangMeld.exe<LW>:\Siemens\WinCC\BSTMapper\BSTFilter.txt<LW>:\Siemens\WinCC\BSTMapper\Logotm.bmp<LW>:\Siemens\WinCC\BSTMapper\ORPAFilter.txt<LW>:\Siemens\WinCC\BSTMapper\TELEPERM M Import Bausteine.wnf<LW>:\Siemens\WinCC\BSTMapper\TELEPERM M Import ORPA.wnf<LW>:\Siemens\WinCC\BSTMapper\TELEPERM M Meldungen.wnf<LW>:\Siemens\WinCC\BSTMapper\TELEPERM M PseudoAS.wnf<LW>:\Siemens\WinCC\BSTMapper\TELEPERM M Verbindung einrichten.wnf<LW>:\Siemens\WinCC\BSTMapper\TELEPERM M WNF Support.h
<LW>:\Siemens\WinCC\BSTMapper\TM_RangMeld.exe<LW>:\Siemens\WinCC\BSTMapper\BSTMapper.deu\BSTFilter.txt<LW>:\Siemens\WinCC\BSTMapper\BSTMapper.deu\Logotm.bmp<LW>:\Siemens\WinCC\BSTMapper\BSTMapper.deu\ORPAFilter.txt<LW>:\Siemens\WinCC\BSTMapper\BSTMapper.deu\TELEPERM M Import Bausteine.wnf<LW>:\Siemens\WinCC\BSTMapper\BSTMapper.deu\TELEPERM M Import ORPA.wnf<LW>:\Siemens\WinCC\BSTMapper\BSTMapper.deu\TELEPERM M Meldungen.wnf<LW>:\Siemens\WinCC\BSTMapper\BSTMapper.deu\TELEPERM M PseudoAS.wnf<LW>:\Siemens\WinCC\BSTMapper\BSTMapper.deu\TELEPERM M Verbindung einrichten
.wnf<LW>:\Siemens\WinCC\BSTMapper\BSTMapper.deu\TELEPERM M WNF Support.h<LW>:\Siemens\WinCC\BSTMapper\BSTMapper.deu\BSTFilter.txt<LW>:\Siemens\WinCC\BSTMapper\BSTMapper.enu\Logotm.bmp<LW>:\Siemens\WinCC\BSTMapper\BSTMapper.enu\ORPAFilter.txt<LW>:\Siemens\WinCC\BSTMapper\BSTMapper.enu\TELEPERM M Import Bausteine.wnf<LW>:\Siemens\WinCC\BSTMapper\BSTMapper.enu\TELEPERM M Import ORPA.wnf<LW>:\Siemens\WinCC\BSTMapper\BSTMapper.enu\TELEPERM M Meldungen.wnf<LW>:\Siemens\WinCC\BSTMapper\BSTMapper.enu\TELEPERM M PseudoAS.wnf<LW>:\Siemens\WinCC\BSTMapper\BSTMapper.enu\TELEPERM M Verbindung einrichten
.wnf<LW>:\Siemens\WinCC\BSTMapper\BSTMapper.enu\TELEPERM M WNF Support.h<LW>:\Siemens\WinCC\BSTMapper\BSTMapper.fra\BSTFilter.txt<LW>:\Siemens\WinCC\BSTMapper\BSTMapper.fra\Logotm.bmp<LW>:\Siemens\WinCC\BSTMapper\BSTMapper.fra\ORPAFilter.txt<LW>:\Siemens\WinCC\BSTMapper\BSTMapper.fra\TELEPERM M Import Bausteine.wnf<LW>:\Siemens\WinCC\BSTMapper\BSTMapper.fra\TELEPERM M Import ORPA.wnf<LW>:\Siemens\WinCC\BSTMapper\BSTMapper.fra\TELEPERM M Meldungen.wnf<LW>:\Siemens\WinCC\BSTMapper\BSTMapper.fra\TELEPERM M PseudoAS.wnf<LW>:\Siemens\WinCC\BSTMapper\BSTMapper.fra\TELEPERM M Verbindung einrichten
.wnf<LW>:\Siemens\WinCC\BSTMapper\BSTMapper.fra\TELEPERM M WNF Support.h
The following files are copied when the WinCC/TM-OCX (NORA) package is installed:

Product Information WinCC/TM V2.01 04.05.2001
© Siemens AG 2001 21 of 21
<LW>:\Siemens\WinCC\bin\ccGraphics\WinCCDataServer.dll<LW>:\Siemens\WinCC\bin\ccGraphics\ccUserAdmin.dll<LW>:\Siemens\WinCC\bin\ccGraphics\CCOperationMessage.dll<LW>:\Siemens\TM_ocx\TelepermMOCX.dll<LW>:\Siemens\TM_ocx\Elemente.ocx<LW>:\Siemens\TM_ocx\IXSimpleBar.ocx<LW>:\Siemens\TM_ocx\TM_A.ocx<LW>:\Siemens\TM_ocx\TM_B.ocx<LW>:\Siemens\TM_ocx\Tm_C.ocx<LW>:\Siemens\TM_ocx\TM_DZ.ocx<LW>:\Siemens\TM_ocx\TM_EG.ocx<LW>:\Siemens\TM_ocx\TM_EK.ocx<LW>:\Siemens\TM_ocx\TM_EU.ocx<LW>:\Siemens\TM_ocx\TM_F.ocx<LW>:\Siemens\TM_ocx\TM_FN.ocx<LW>:\Siemens\TM_ocx\TM_M.ocx<LW>:\Siemens\TM_ocx\TM_MSB.ocx<LW>:\Siemens\TM_ocx\TM_R.ocx<LW>:\Siemens\TM_ocx\TM_RE.ocx<LW>:\Siemens\TM_ocx\TM_RI.ocx<LW>:\Siemens\TM_ocx\TM_RK.ocx<LW>:\Siemens\TM_ocx\TM_RN.ocx<LW>:\Siemens\TM_ocx\TM_S.ocx<LW>:\Siemens\TM_ocx\TM_TVB.ocx<LW>:\Siemens\TM_ocx\TM_V.ocx<LW>:\Siemens\TM_ocx\TM_MKS.ocx<LW>:\Siemens\TM_ocx\TM_Sym.ocx<LW>:\Siemens\TM_ocx\Zusanz.ocx<LW>:\Siemens\TM_ocx\TM_GLobal.dll<LW>:\Siemens\TM_ocx\Language.dll<LW>:\Siemens\TM_ocx\OCX_Texte407.dll<LW>:\Siemens\TM_ocx\OCX_Texte409.dll<LW>:\Siemens\TM_ocx\OCX_Texte40A.dll<LW>:\Siemens\TM_ocx\OCX_Texte40C.dll<LW>:\Siemens\TM_ocx\OCX_Texte40E.dll<LW>:\Siemens\TM_ocx\OCX_Texte413.dll<LW>:\Siemens\TM_ocx\OCX_Texte41D.dll<LW>:\Siemens\TM_ocx\TMOCX.dll<LW>:\Siemens\TM_ocx\TMCOND.dll
The following files are copied when the WinCC/TM-OCX (PCS7) package is installed:<LW>:\Siemens\TM_ocx\TM_GLobal.dll<LW>:\Siemens\TM_ocx\TelepermMOCX.dll<LW>:\Siemens\TM_ocx\TMOCX.dll<LW>:\Siemens\TM7_ocx\ElementeTM7.ocx<LW>:\Siemens\TM7_ocx\Input.ocx<LW>:\Siemens\TM7_ocx\TM7_A.ocx<LW>:\Siemens\TM7_ocx\TM7_A_MotVen.ocx<LW>:\Siemens\TM7_ocx\TM7_B.ocx<LW>:\Siemens\TM7_ocx\TM7_C.ocx<LW>:\Siemens\TM7_ocx\TM7_F.ocx<LW>:\Siemens\TM7_ocx\TM7_FN.ocx<LW>:\Siemens\TM7_ocx\TM7_M.ocx<LW>:\Siemens\TM7_ocx\TM7_R.ocx<LW>:\Siemens\TM7_ocx\TM7_RN.ocx<LW>:\Siemens\TM7_ocx\TM7_V.ocx<LW>:\Siemens\TM7_ocx\PCX_Texte407.dll<LW>:\Siemens\TM7_ocx\PCX_Texte409.dll<LW>:\Siemens\TM7_ocx\PLanguage.dll