Embed Size (px)
Citation preview
AT&T Connect® Participant Application for Mac User Guide v9.5
February 2013
Participant Application for Mac User Guide
Product Version: v9.5 Published: 2/12/2013 2
Disclaimer
© 2012-2013 AT&T Intellectual Property. All rights reserved. AT&T, the AT&T logo and all other AT&T marks contained herein are trademarks of AT&T Intellectual Property and/or AT&T affiliated companies. All other marks contained herein are the property of their respective owners. AT&T Proprietary.
Published by: AT&T Intellectual Property
Product: AT&T Connect®
Title: Participant Application for Mac User Guide
Product version: v9.5
Publication date: 2/12/2013
Reference number: CONMACUG
Revision number 01
Participant Application for Mac User Guide
Product Version: v9.5 Published: 2/12/2013 3
About This Guide This User Guide introduces you to the AT&T Connect Participant Application for Mac and describes its virtual conference room.
Those who are hosting an AT&T Connect Participant Application for Mac conference should read the entire guide.
Those who are just participating in an AT&T Connect Participant Application for Mac conference (participants) need to read only Chapters 1, 2 and 4 in this guide.
Participant Application for Mac User Guide
Product Version: v9.5 Published: 2/12/2013 4
Contents
1. Getting Started ............................................................................................................................... 9
Features ...................................................................................................................................... 9
What You Need ......................................................................................................................... 10
2. Joining a Conference .................................................................................................................... 11
Joining a Conference for the First Time .................................................................................... 11
Joining a Conference from the Source List (Quick Join) ............................................................ 11
Joining a Conference from Your Favorite Conference Rooms .................................................. 12
Joining a Conference by Email .................................................................................................. 13
Joining a Conference from your Calendar................................................................................. 14
Chose Your Media Device ......................................................................................................... 14
Using the Call Me Feature ..................................................................................................... 16
Using Voice over Computer .................................................................................................. 17
Dialing in to the Conference ................................................................................................. 17
Choosing Your Default Audio Connection ............................................................................. 18
Reconnecting Audio and Video ............................................................................................. 18
3. Participating in a Conference ....................................................................................................... 19
What Do You See in the Virtual Conference Room? ................................................................. 19
Toolbar .................................................................................................................................. 20
Video Panel ........................................................................................................................... 21
Participants Panel.................................................................................................................. 21
My Meeting Minutes Panel ................................................................................................... 22
Whiteboard ........................................................................................................................... 23
Menu Bar ............................................................................................................................... 23
What Can You Do in the Conference Room? ............................................................................ 23
Use Video .............................................................................................................................. 24
Mute and Unmute Your Microphone ................................................................................... 25
Use Emoticons to Express Your Mood, Opinion and More ................................................... 26
View Content on the Whiteboard ......................................................................................... 26
Write Meeting Minutes ......................................................................................................... 29
Participant Application for Mac User Guide
Product Version: v9.5 Published: 2/12/2013 5
Send a Note ........................................................................................................................... 31
Participate in a Poll ............................................................................................................... 34
Play back a Recording ........................................................................................................... 35
Submit a Telephony Ticket .................................................................................................... 36
Leave the Conference ........................................................................................................... 37
Accessing Past Conferences (Source List) ................................................................................. 37
What Do You See? ................................................................................................................. 38
What Can You Do? ................................................................................................................ 39
4. Starting a Conference (Hosts) ...................................................................................................... 40
Activating your AT&T Connect Account .................................................................................... 40
Activating from the Registration Email ................................................................................. 40
Activating from Previous Email Invitations ........................................................................... 41
Starting a Conference................................................................................................................ 41
Setting a Security Code (Optional) ........................................................................................ 42
Inviting Participants .................................................................................................................. 42
Inviting Participants by Email ................................................................................................ 43
Inviting Participants by Copying the Conference Address .................................................... 43
Inviting Participants by Copying the Conference Invitation ................................................. 43
Setting the Conference Type ..................................................................................................... 43
Setting the Type .................................................................................................................... 44
Changing the Type................................................................................................................. 44
5. Scheduling a Conference (Hosts) ................................................................................................. 45
6. Managing a Conference (Hosts) ................................................................................................... 47
Sharing your Applications/Desktop .......................................................................................... 47
Using the Dashboard ............................................................................................................. 48
Creating Polls ............................................................................................................................ 50
Viewing the Results ............................................................................................................... 51
Hiding the Popover ............................................................................................................... 52
Detaching the Popover ......................................................................................................... 52
Saving the Poll ....................................................................................................................... 53
Publishing the Poll ................................................................................................................. 54
Stopping the Poll ................................................................................................................... 54
Participant Application for Mac User Guide
Product Version: v9.5 Published: 2/12/2013 6
Conducting a Web Tour ............................................................................................................ 54
Add, Rename or Delete Bookmarks ...................................................................................... 55
Inviting Others during the Conference ..................................................................................... 56
Inviting Participants by Email ................................................................................................ 56
Inviting Participants by Phone .............................................................................................. 56
Using Broadcast Mode .............................................................................................................. 57
Locking/Unlocking the Conference ........................................................................................... 57
Recording on the Server ............................................................................................................ 57
Dialing Out................................................................................................................................. 58
Changing the Conference Name ............................................................................................... 58
Clearing All Emoticons .............................................................................................................. 58
Ending or Leaving the Conference ............................................................................................ 59
7. Managing Participants (Hosts) ..................................................................................................... 60
Giving/Taking Presenting Rights ............................................................................................... 60
Expelling a Participant ............................................................................................................... 60
Muting/Un-muting Participants ................................................................................................ 60
Mute/Un-mute a Participant ................................................................................................ 60
Muting and Locking a Participant ......................................................................................... 61
Muting/Un-muting All ........................................................................................................... 61
Changing a Participant’s Role .................................................................................................... 61
8. Setting Preferences ...................................................................................................................... 63
Setting General Preferences (for all Participants)..................................................................... 63
Viewing Account Details (for Hosts) .......................................................................................... 64
Change Conference Settings ..................................................................................................... 64
Setting Sharing Preferences (for Hosts) .................................................................................... 65
Figures Figure 1-Security Code Action Sheet ................................................................................................. 11 Figure 2-Defining a Favorite Conference Room ................................................................................ 12 Figure 3- Favorite Banner .................................................................................................................. 13 Figure 4-My Favorite Conference Rooms Menu ............................................................................... 13
Participant Application for Mac User Guide
Product Version: v9.5 Published: 2/12/2013 7
Figure 5–AT&T Connect Icon ............................................................................................................. 14 Figure 6–Connection Setup Action Sheet ......................................................................................... 15 Figure 7–Connection Setup Action Sheet for Audio and Video ........................................................ 15 Figure 8–Settings Button ................................................................................................................... 16 Figure 9–Audio Settings Tab ............................................................................................................. 16 Figure 10–Dial In Instructions Window ............................................................................................. 17 Figure 11–Virtual Conference Room ................................................................................................. 19 Figure 12–Toolbar ............................................................................................................................. 20 Figure 13–Participants Panel ............................................................................................................ 21 Figure 14–Search Participants Box .................................................................................................... 22 Figure 15–My Meeting Minutes Panel .............................................................................................. 23 Figure 16–Menu Bar .......................................................................................................................... 23 Figure 17–Video Panel on the Whiteboard ....................................................................................... 24 Figure 18–Swap Button ..................................................................................................................... 24 Figure 19–Emoticons ......................................................................................................................... 26 Figure 20–Whiteboard Display .......................................................................................................... 27 Figure 21–Annotations Button with Tools ........................................................................................ 28 Figure 22–Annotations Button and Annotations Palette.................................................................. 29 Figure 23–Text Box ............................................................................................................................ 29 Figure 24–Camera Button ................................................................................................................. 29 Figure 25–Memo Tab ........................................................................................................................ 30 Figure 26–Forward Button ................................................................................................................ 30 Figure 27–History Options Menu ...................................................................................................... 30 Figure 28–Note Popover ................................................................................................................... 31 Figure 29–Announcement Button .................................................................................................... 32 Figure 30–Announcement Popover .................................................................................................. 32 Figure 31–Received Announcement ................................................................................................. 32 Figure 32–Note to Presenters ........................................................................................................... 33 Figure 33–General Tab ...................................................................................................................... 33 Figure 34–Possible Poll Responses ................................................................................................... 34 Figure 35–Poll Results ....................................................................................................................... 35 Figure 36–Mac Finder with VCR Recordings ..................................................................................... 35 Figure 37–Playback Panel.................................................................................................................. 36 Figure 38–Submit a Ticket Window .................................................................................................. 37 Figure 39–Source List Button ............................................................................................................ 38 Figure 40–Source List Window .......................................................................................................... 38 Figure 41–Preview Button................................................................................................................. 39 Figure 42–Send Button...................................................................................................................... 39 Figure 43–File Button ........................................................................................................................ 39 Figure 44–First-time Activation ......................................................................................................... 41 Figure 45–Joining the Conference .................................................................................................... 42 Figure 46–Conference Security Code Action Sheet .......................................................................... 42
Participant Application for Mac User Guide
Product Version: v9.5 Published: 2/12/2013 8
Figure 47–Conference Settings in Accounts Tab ............................................................................... 44 Figure 48–iCal Window ..................................................................................................................... 45 Figure 49–Share Action Sheet ........................................................................................................... 47 Figure 50–Selected Applications ....................................................................................................... 48 Figure 51–Sharing Dashboard ........................................................................................................... 48 Figure 52–Dashboard ........................................................................................................................ 48 Figure 53–Monitoring Mode ............................................................................................................. 49 Figure 54–Updating Mode ................................................................................................................ 50 Figure 55–Default Poll Button ........................................................................................................... 50 Figure 56–Start a Poll Popover .......................................................................................................... 50 Figure 57–Respond to Poll Action Sheets ......................................................................................... 51 Figure 58–Poll Results Popover ......................................................................................................... 51 Figure 59–Expanded Poll Results Popover ........................................................................................ 52 Figure 60–Active Poll Button ............................................................................................................. 52 Figure 61–“Hidden Poll” Button ........................................................................................................ 52 Figure 62–Save Button ...................................................................................................................... 53 Figure 63–“Save As” Action Sheet .................................................................................................... 53 Figure 64–“Save As” Browser ............................................................................................................ 53 Figure 65–Poll in Conference Materials Panel .................................................................................. 54 Figure 66–Publish Button .................................................................................................................. 54 Figure 67–Web Tour Browser ........................................................................................................... 55 Figure 68–Add Bookmark Popover ................................................................................................... 56 Figure 69–Invite by Phone ................................................................................................................ 57 Figure 70–Server-side Recording ...................................................................................................... 58 Figure 71–Preferences Window: General Tab .................................................................................. 63 Figure 72–AT&T Connect Preferences Window: Accounts Tab ....................................................... 64 Figure 73–Conference Settings Window ........................................................................................... 65 Figure 74–AT&T Connect Preferences Window: Sharing Tab ........................................................... 65
Product Version: v9.5 Published: 2/12/2013 9
1. GETTING STARTED
Welcome to the AT&T Connect Participant Application for Mac. AT&T Connect provides tools for visual presentation, remote collaboration and voice conferencing. This best-of-breed virtual meeting space lets you easily share voice, data and video while using existing Internet and telephone resources.
The AT&T Connect Participant Application for Mac is designed according to Apple guidelines, for a sleek and intuitive user experience.
Features Features for participants include:
• Video conferencing
• Viewing the whiteboard and Participants list
• Seeing who is currently speaking
• Connecting audio using voice-over-computer (VOC)
• Chatting (privately and publicly)with other participants using notes
• Taking meeting minutes during a conference and reading them later on
• Taking snapshots of the whiteboard
• Viewing notes, snapshots, polls and meeting minutes (using Mail and Outlook 2011)
• Recording a current conference
• Playing back a recorded conference
Features for hosts:
• Scheduling conferences with iCal® and Outlook® 2011
• Sending email invitations with a link to the conference

Participant Application for Mac User Guide
Product Version: v9.5 Published: 2/12/2013 10
• Managing the participants
• Sharing desktops, applications and windows
• Modifying conference settings before and during a conference using the Profile page
• Forwarding conference materials and sending emails to conference participants.
What You Need The following system requirements must be met in order to use the AT&T Connect Participant Application for Mac:
• Supported Devices: All Apple-released devices, including iMac, MacBook Pro with/without Retina display, MacBook Air, and Mac mini
• Supported Operating Systems: 10.7 and 10.8
• Supported Mail Clients: Mail, Microsoft Outlook
• Browsers: Safari 5, FF 4 and Chrome 9 (and up)
• JavaScript and cookies must be enabled
• RAM: At least 512 MB
• Intel processor
Product Version: v9.5 Published: 2/12/2013 11
2. JOINING A CONFERENCE
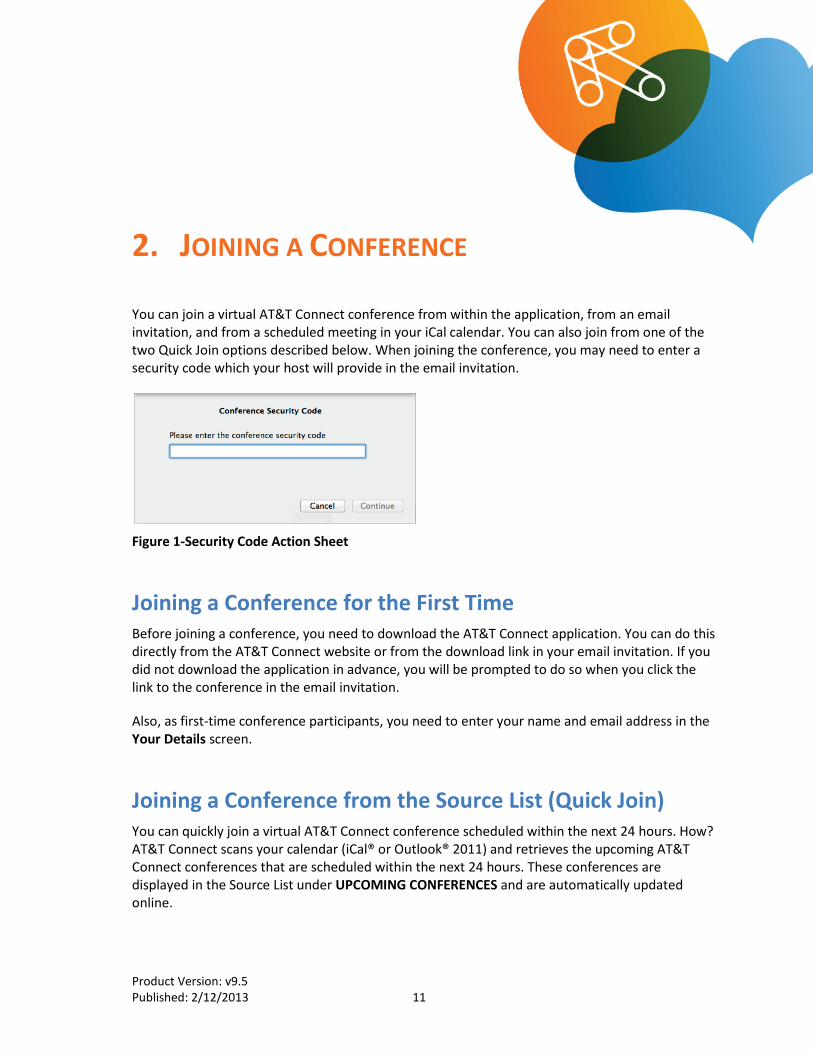
You can join a virtual AT&T Connect conference from within the application, from an email invitation, and from a scheduled meeting in your iCal calendar. You can also join from one of the two Quick Join options described below. When joining the conference, you may need to enter a security code which your host will provide in the email invitation.
Figure 1-Security Code Action Sheet
Joining a Conference for the First Time Before joining a conference, you need to download the AT&T Connect application. You can do this directly from the AT&T Connect website or from the download link in your email invitation. If you did not download the application in advance, you will be prompted to do so when you click the link to the conference in the email invitation.
Also, as first-time conference participants, you need to enter your name and email address in the Your Details screen.
Joining a Conference from the Source List (Quick Join) You can quickly join a virtual AT&T Connect conference scheduled within the next 24 hours. How? AT&T Connect scans your calendar (iCal® or Outlook® 2011) and retrieves the upcoming AT&T Connect conferences that are scheduled within the next 24 hours. These conferences are displayed in the Source List under UPCOMING CONFERENCES and are automatically updated online.
Participant Application for Mac User Guide
Product Version: v9.5 Published: 2/12/2013 12
To join the conference:
1. In the Source List window, select the conference you wish to join under UPCOMING CONFERENCES.
Information from the conference invitation is extracted and displayed to the right of panel, including the conference name, start time, invitees’ names, conference URL, indication if the conference is recurring or not, and text of the invitation.
2. Click Enter Meeting.
3. Connect your audio and video by following the instructions in the Connection Setup action sheet (see Chose Your Media Device).
Joining a Conference from Your Favorite Conference Rooms Another way to quickly join a conference (which has already started) is from your Favorites list. But first you need to know how to add a conference to your Favorites List.
To add a conference room to the Favorites list when participating in a conference:
1. Click Add to Favorites from the Conference menu. The conference room remains in the participant’s Favorites list until it is removed.
2. To remove the conference room, click Remove From Favorites.
To add a conference room to the Favorites list when not currently in a conference:
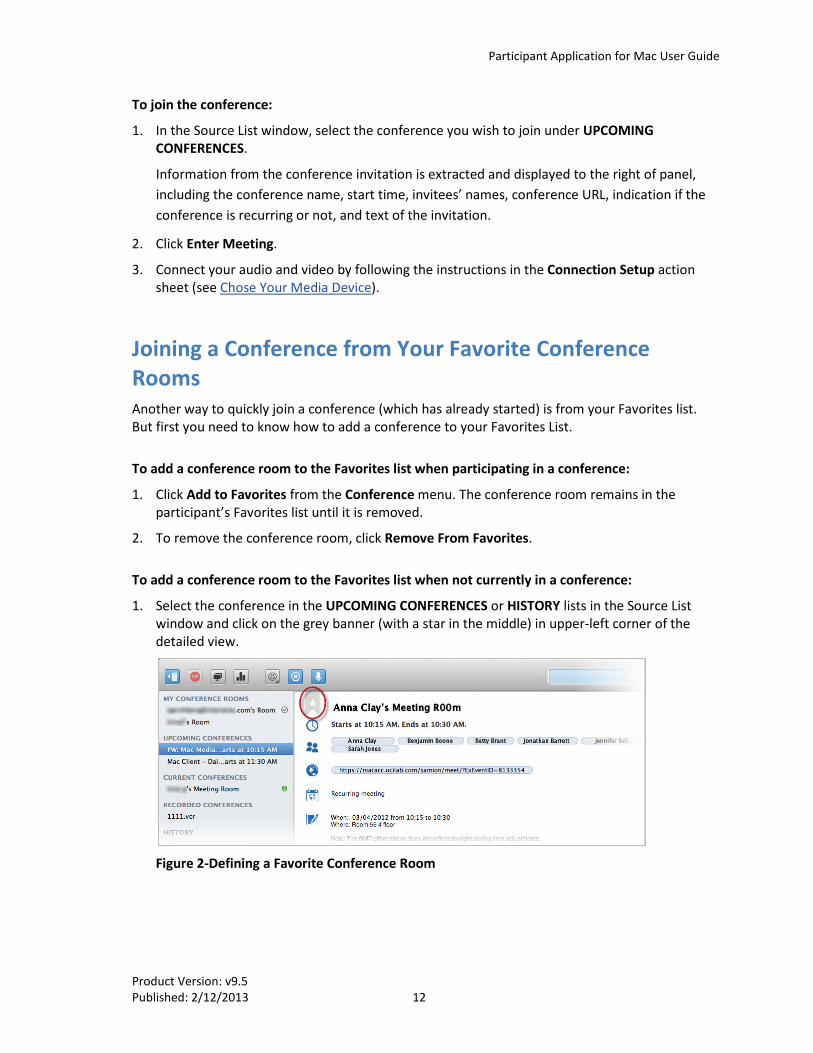
1. Select the conference in the UPCOMING CONFERENCES or HISTORY lists in the Source List window and click on the grey banner (with a star in the middle) in upper-left corner of the detailed view.
Figure 2-Defining a Favorite Conference Room
Participant Application for Mac User Guide
Product Version: v9.5 Published: 2/12/2013 13
The banner changes to orange when this conference room is tagged as a favorite.
Figure 3- Favorite Banner
To join a conference from your Favorites list:
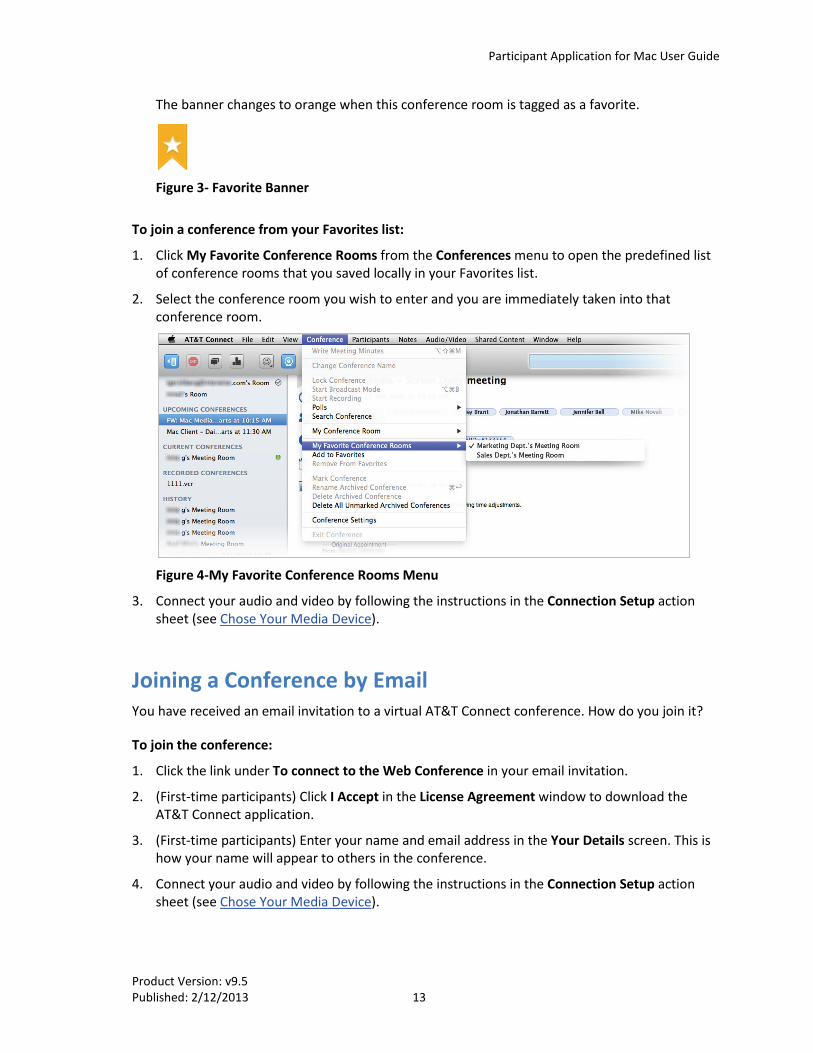
1. Click My Favorite Conference Rooms from the Conferences menu to open the predefined list of conference rooms that you saved locally in your Favorites list.
2. Select the conference room you wish to enter and you are immediately taken into that conference room.
Figure 4-My Favorite Conference Rooms Menu
3. Connect your audio and video by following the instructions in the Connection Setup action sheet (see Chose Your Media Device).
Joining a Conference by Email You have received an email invitation to a virtual AT&T Connect conference. How do you join it?
To join the conference:
1. Click the link under To connect to the Web Conference in your email invitation.
2. (First-time participants) Click I Accept in the License Agreement window to download the AT&T Connect application.
3. (First-time participants) Enter your name and email address in the Your Details screen. This is how your name will appear to others in the conference.
4. Connect your audio and video by following the instructions in the Connection Setup action sheet (see Chose Your Media Device).
Participant Application for Mac User Guide
Product Version: v9.5 Published: 2/12/2013 14
Note: Clicking the link automatically downloads the latest version of the application. The AT&T Connect icon appears in your Mac User Applications folder and usually on your dock. On Lion and Mountain Lion you will see the icon on your launch pad.
Figure 5–AT&T Connect Icon
Joining a Conference from your Calendar 1. For a conference scheduled for a future date, accept the invitation and the conference will
appear in your iCal® or Outlook® calendar.
2. On the day of the conference, open your iCal® or Outlook® calendar, double-click the relevant conference, copy the conference URL and paste it into your browser, then press Enter on the keyboard.
3. (First-time participants) Click I Accept in the License Agreement window to download the AT&T Connect application.
4. (First-time participants) Enter your name and email address in the Your Details screen. This is how your name will appear to others in the conference.
5. Connect your audio and video by following the instructions in the Connection Setup action sheet (see Chose Your Media Device).
Chose Your Media Device When you first enter the conference room, you are asked to set your audio/video presence in the conference. Your options may vary according to company policy.
To connect your audio, you can request to be called, use voice-over-computer, or dial in to the conference. If your company allows video, you can view up to four video streams in the conference, including your own. For more information on video, see Use Video.
Participant Application for Mac User Guide
Product Version: v9.5 Published: 2/12/2013 15
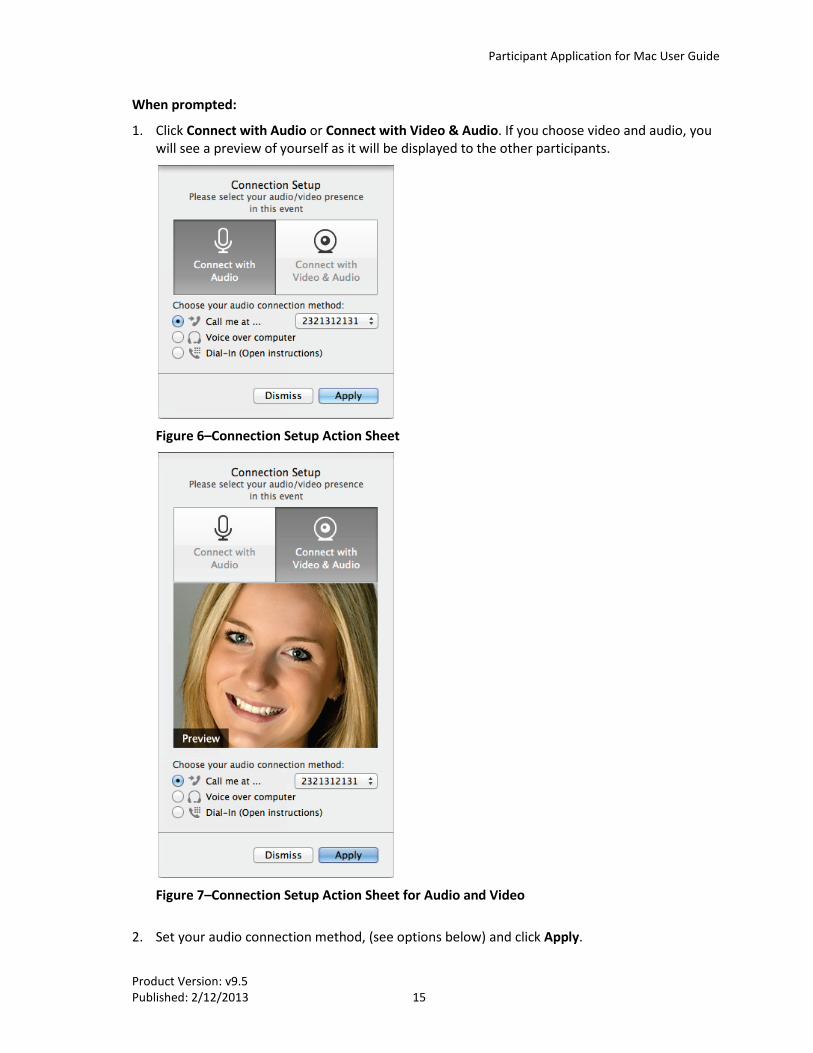
When prompted:
1. Click Connect with Audio or Connect with Video & Audio. If you choose video and audio, you will see a preview of yourself as it will be displayed to the other participants.
Figure 6–Connection Setup Action Sheet
Figure 7–Connection Setup Action Sheet for Audio and Video
2. Set your audio connection method, (see options below) and click Apply.
Participant Application for Mac User Guide
Product Version: v9.5 Published: 2/12/2013 16
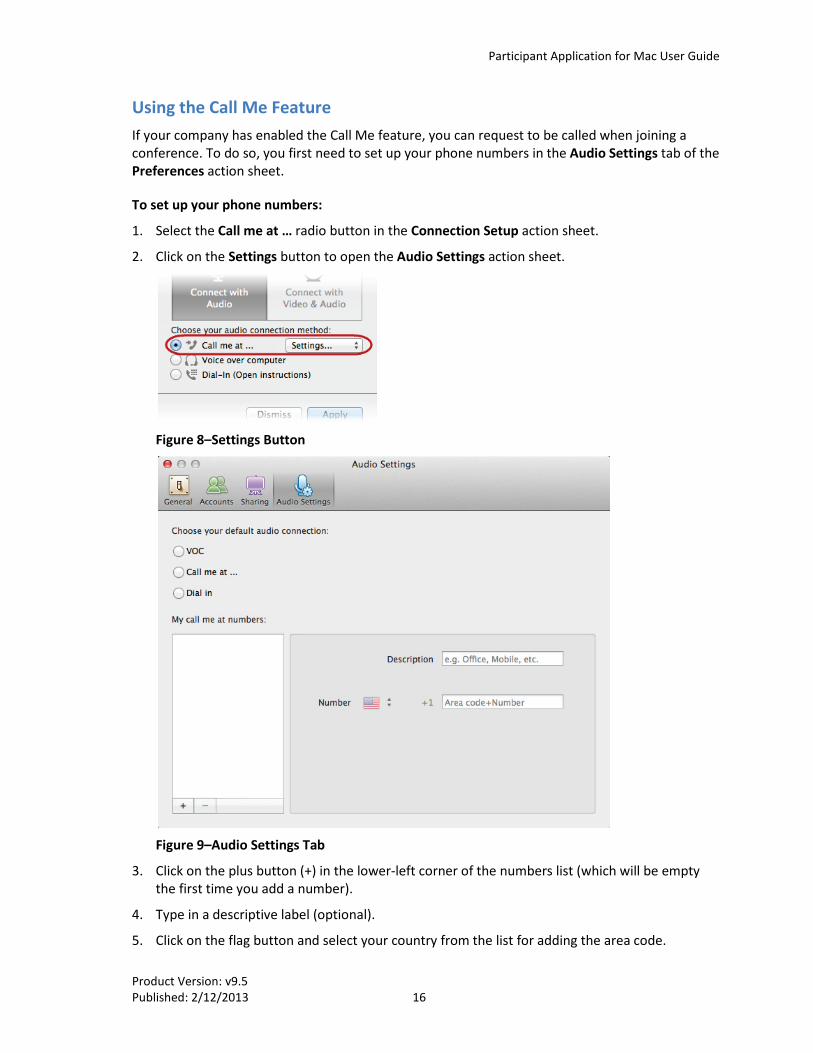
Using the Call Me Feature If your company has enabled the Call Me feature, you can request to be called when joining a conference. To do so, you first need to set up your phone numbers in the Audio Settings tab of the Preferences action sheet.
To set up your phone numbers:
1. Select the Call me at … radio button in the Connection Setup action sheet.
2. Click on the Settings button to open the Audio Settings action sheet.
Figure 8–Settings Button
Figure 9–Audio Settings Tab
3. Click on the plus button (+) in the lower-left corner of the numbers list (which will be empty the first time you add a number).
4. Type in a descriptive label (optional).
5. Click on the flag button and select your country from the list for adding the area code.
Participant Application for Mac User Guide
Product Version: v9.5 Published: 2/12/2013 17
6. Type in the phone number (must be at least eight digits).
7. Repeat steps 3-6 for as many numbers as you wish.
8. Close the Audio Settings action sheet. The first number you set replaces Settings … in the Connection Settings action sheet.
To use the Call Me feature:
1. Select the Call me at… option and chose the phone number from the drop-down list. (Your phone numbers were set in AT&T Connect/Preferences/Audio Settings.)
2. Click Apply.
3. When called, continue according to the operator’s instructions.
Note: The Call Me feature automatically remembers the last 10 numbers dialed.
Using Voice over Computer 1. Select the Voice over computer option to use a microphone and speakers, or a headset.
2. Click Apply.
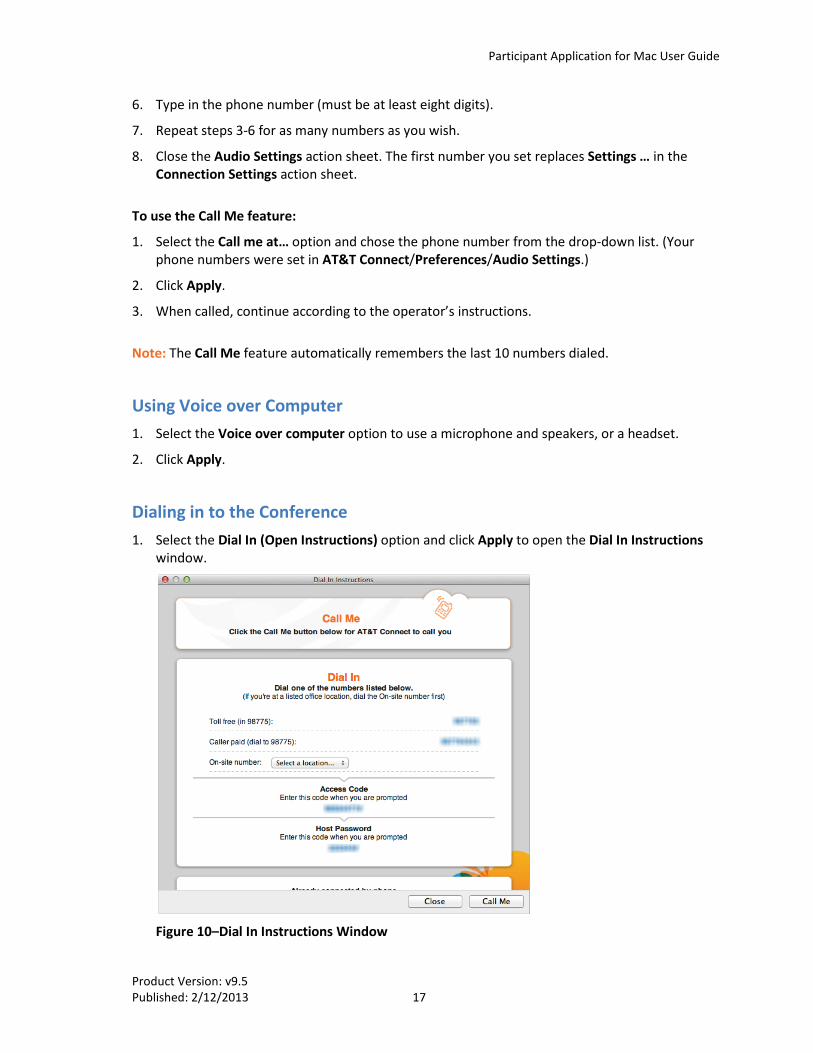
Dialing in to the Conference 1. Select the Dial In (Open Instructions) option and click Apply to open the Dial In Instructions
window.
Figure 10–Dial In Instructions Window
Participant Application for Mac User Guide
Product Version: v9.5 Published: 2/12/2013 18
2. Follow the instructions in the window to dial into the conference.
Choosing Your Default Audio Connection You can choose your default audio connection in the top area of the Audio Settings action sheet. This setting affects the current conference and the next time you enter the room.
1. Click AT&T Connect on the main menu, and then click Preferences/Audio Settings.
2. Select the VOC, Call me at…, or Dial in radio button.
Note: Once selected, you cannot deselect your choice for the current conference.
Reconnecting Audio and Video You can connect your audio and video if you joined a conference without them, or reconnect them during the conference. To open the Connection Setup action sheet, click Choose Media Device from the Audio/Video menu on the top menu bar.
Product Version: v9.5 Published: 2/12/2013 19
3. PARTICIPATING IN A CONFERENCE
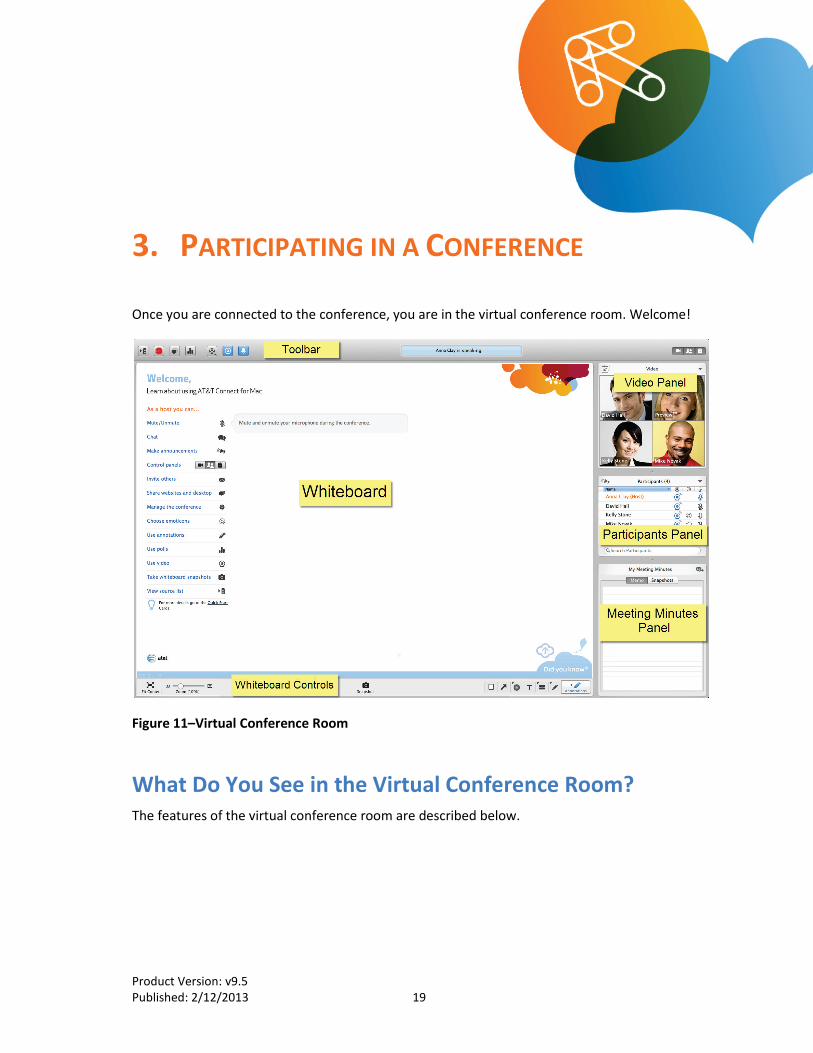
Once you are connected to the conference, you are in the virtual conference room. Welcome!
Figure 11–Virtual Conference Room
What Do You See in the Virtual Conference Room? The features of the virtual conference room are described below.
Participant Application for Mac User Guide
Product Version: v9.5 Published: 2/12/2013 20
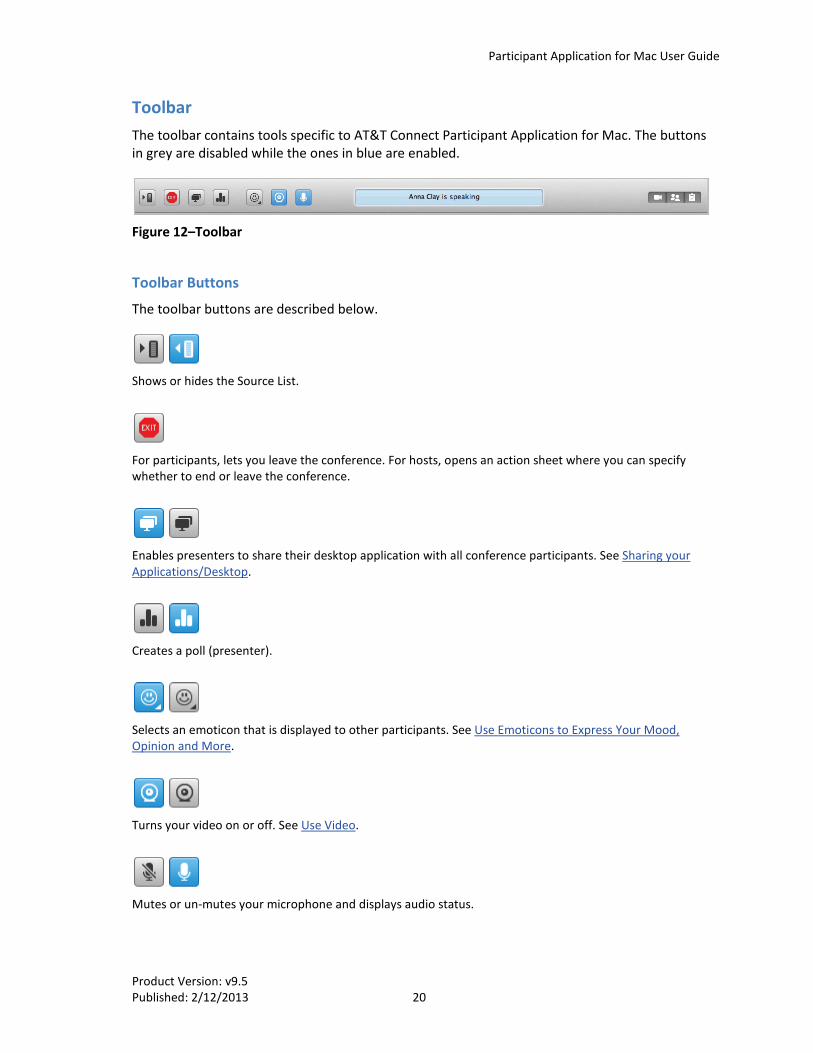
Toolbar The toolbar contains tools specific to AT&T Connect Participant Application for Mac. The buttons in grey are disabled while the ones in blue are enabled.
Figure 12–Toolbar
Toolbar Buttons
The toolbar buttons are described below.
Shows or hides the Source List.
For participants, lets you leave the conference. For hosts, opens an action sheet where you can specify whether to end or leave the conference.
Enables presenters to share their desktop application with all conference participants. See Sharing your Applications/Desktop.
Creates a poll (presenter).
Selects an emoticon that is displayed to other participants. See Use Emoticons to Express Your Mood, Opinion and More.
Turns your video on or off. See Use Video.
Mutes or un-mutes your microphone and displays audio status.
Participant Application for Mac User Guide
Product Version: v9.5 Published: 2/12/2013 21
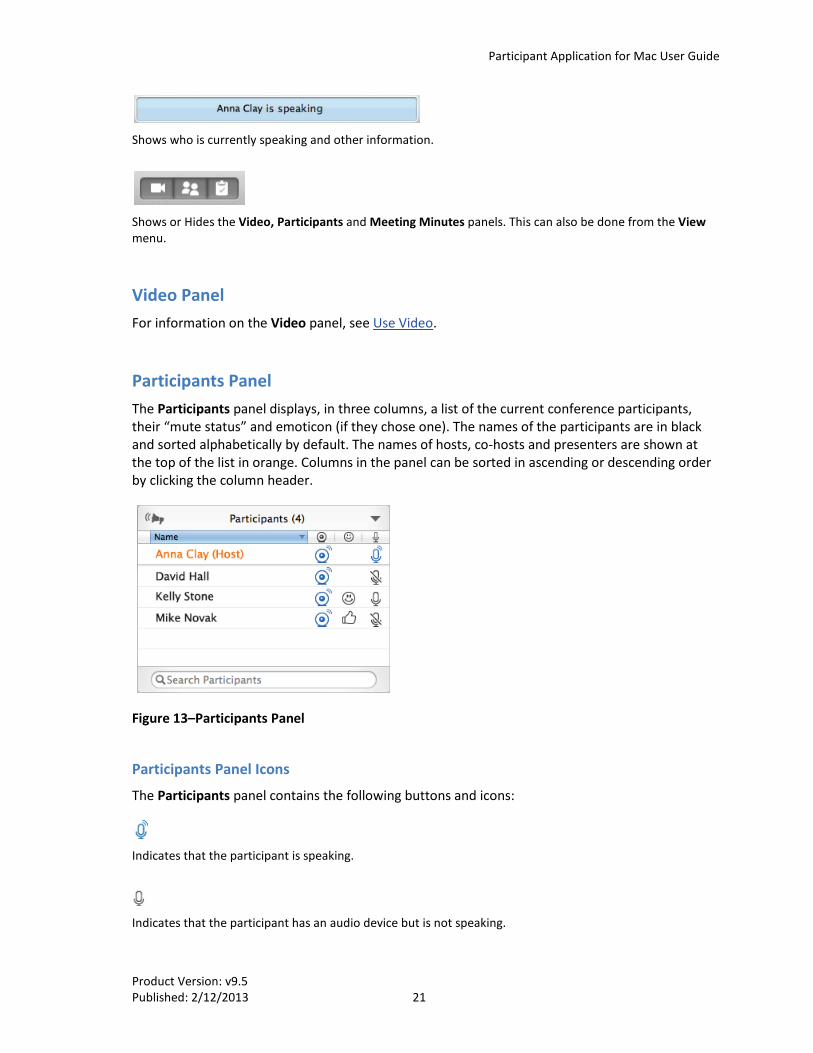
Shows who is currently speaking and other information.
Shows or Hides the Video, Participants and Meeting Minutes panels. This can also be done from the View menu.
Video Panel For information on the Video panel, see Use Video.
Participants Panel The Participants panel displays, in three columns, a list of the current conference participants, their “mute status” and emoticon (if they chose one). The names of the participants are in black and sorted alphabetically by default. The names of hosts, co-hosts and presenters are shown at the top of the list in orange. Columns in the panel can be sorted in ascending or descending order by clicking the column header.
Figure 13–Participants Panel
Participants Panel Icons
The Participants panel contains the following buttons and icons:
Indicates that the participant is speaking.
Indicates that the participant has an audio device but is not speaking.
Participant Application for Mac User Guide
Product Version: v9.5 Published: 2/12/2013 22
Indicates that the participant is muted.
Indicates that the participant is muted and locked.
Indicates that the participant’s audio is not available.
Indicates that the participant is connected by phone only.
Indicates that the participant’s video is on.
Indicates that the participant’s video is off.
Example of emoticon.
Search for Participants
The Search Participants box at the bottom of the Participants panel lets you search for a participant in the Participants list. The system searches for participants whose first or last names start with whatever text you enter in the box.
Figure 14–Search Participants Box
Click the “X” on the right to clear the filter, which redisplays the entire Participants list again.
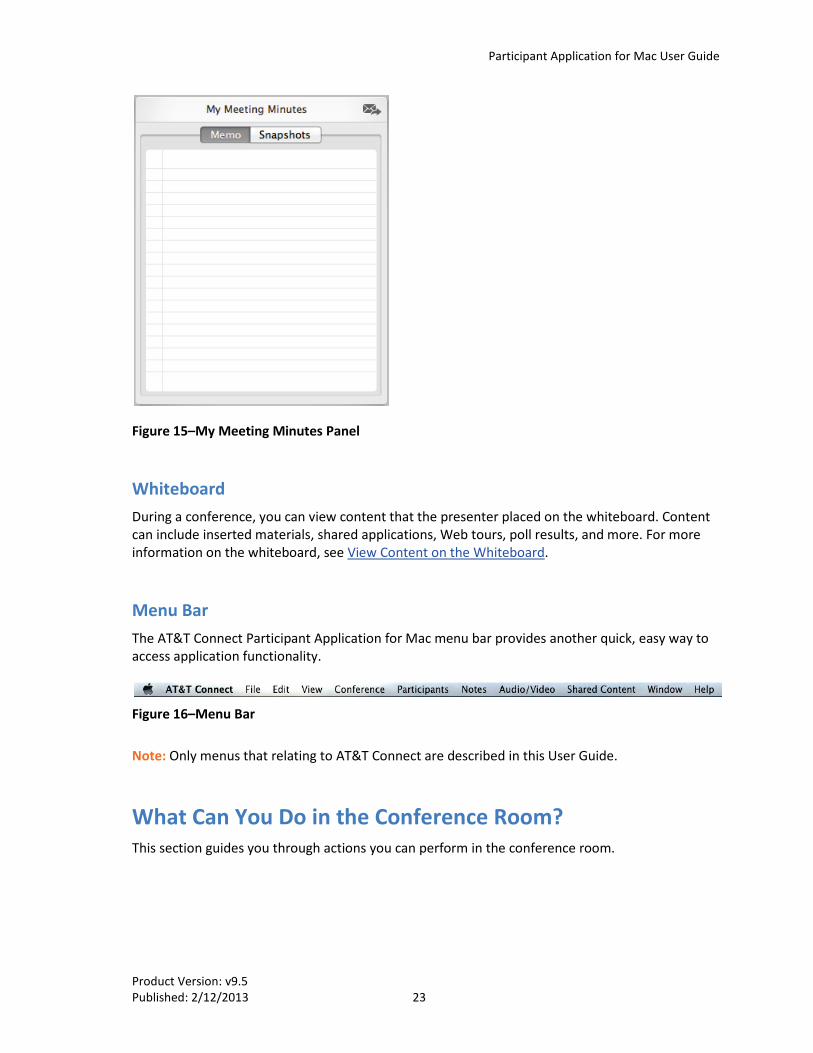
My Meeting Minutes Panel The My Meeting Minutes panel is for writing meeting minutes or personal memos during a conference. In this panel you can also view the snapshots which were taken in the conference. For more information, see Write Meeting Minutes and Save Whiteboard Content.
Participant Application for Mac User Guide
Product Version: v9.5 Published: 2/12/2013 23
Figure 15–My Meeting Minutes Panel
Whiteboard During a conference, you can view content that the presenter placed on the whiteboard. Content can include inserted materials, shared applications, Web tours, poll results, and more. For more information on the whiteboard, see View Content on the Whiteboard.
Menu Bar The AT&T Connect Participant Application for Mac menu bar provides another quick, easy way to access application functionality.
Figure 16–Menu Bar
Note: Only menus that relating to AT&T Connect are described in this User Guide.
What Can You Do in the Conference Room? This section guides you through actions you can perform in the conference room.
Participant Application for Mac User Guide
Product Version: v9.5 Published: 2/12/2013 24
Use Video In conferences where video is allowed, participants can view up to four video streams simultaneously.
To enable video:
1. When joining the conference, click Connect with Video & Audio in the Choose Media Device action sheet. This opens a preview of how the participant’s video will be broadcast.
2. Click Apply to open the video panel in the upper-right corner of the window, with up to three additional video screens of other conference participants. These screens are labeled with the participants’ names.
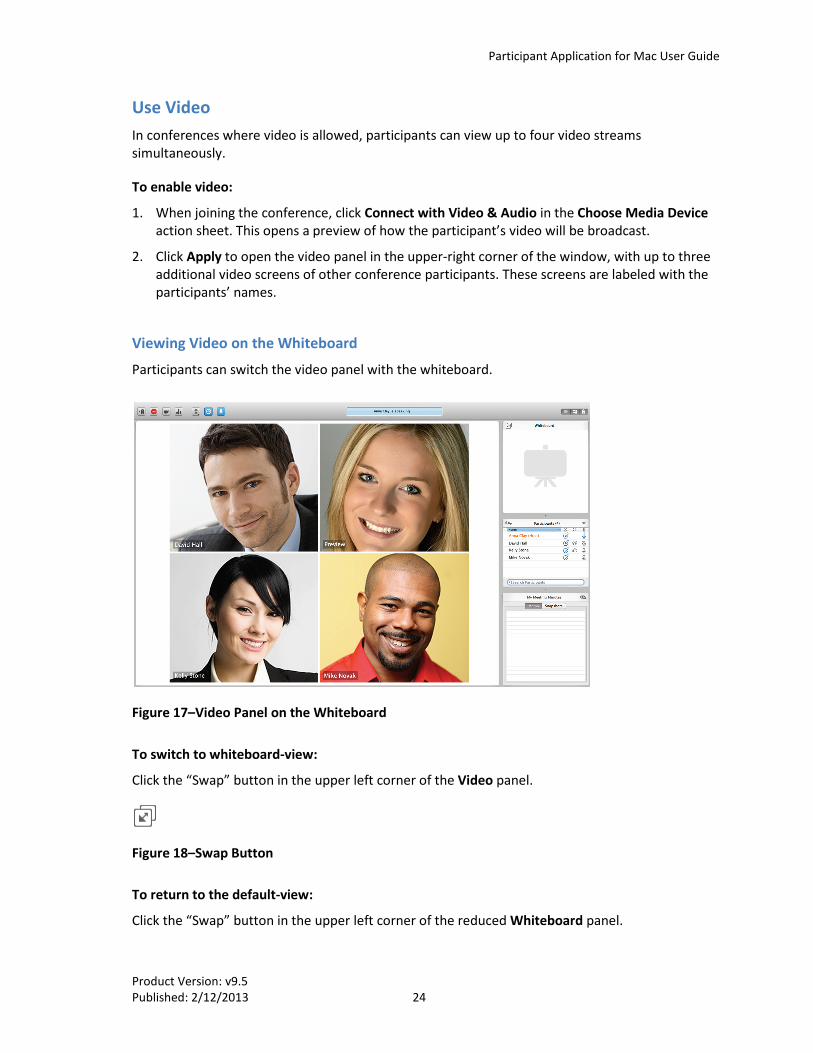
Viewing Video on the Whiteboard
Participants can switch the video panel with the whiteboard.
Figure 17–Video Panel on the Whiteboard
To switch to whiteboard-view:
Click the “Swap” button in the upper left corner of the Video panel.
Figure 18–Swap Button
To return to the default-view:
Click the “Swap” button in the upper left corner of the reduced Whiteboard panel.
Participant Application for Mac User Guide
Product Version: v9.5 Published: 2/12/2013 25
Extracting and Docking the Video Panel
The video panel can be extracted to an external, floating panel for placement anywhere on the desktop. It can also be returned to its original location.
To extract the video panel:
Select Extract Video Panel from the View menu and drag the detached window to the desired location. (Extract Video Panel toggles to Dock Video Panel.)
To dock the video panel:
Select Dock Video Panel from the View menu, or click the red button in the floating window toolbar.
Maximizing and Minimizing the Video Panel (Detached Mode)
To maximize to full view:
Click the double-ended arrow in the Video toolbar, or click the green button in the floating window toolbar.
To minimize:
Re-click the double-ended arrow in the Video toolbar, or click the yellow button in the Video toolbar.
Pausing and Stopping Video Transmission
To pause:
1. Click the arrow in the upper-right of the Video panel to open the menu.
2. Click Pause my Video. (Pause my Video toggles to Resume my Video).
3. To resume video transmission, click Resume my Video.
To terminate transmission:
1. Click the arrow in the upper-right of the Video panel to open the menu.
2. Click Stop Sending my Video. (Stop Sending my Video toggles to Start Video.)
3. To re-start video transmission, click Start Video.
Mute and Unmute Your Microphone Click the Mute button on the toolbar (see Toolbar Buttons), or select Mute in the Audio menu, or use the Command + Shift + M shortcut.
Participant Application for Mac User Guide
Product Version: v9.5 Published: 2/12/2013 26
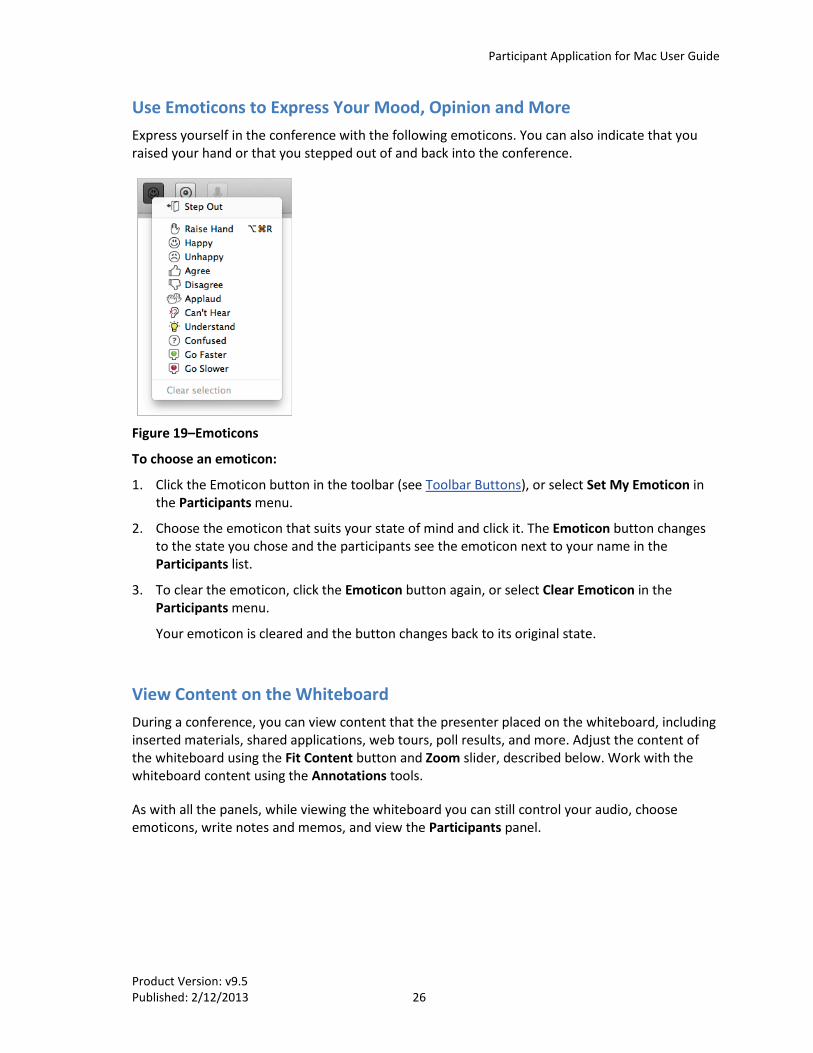
Use Emoticons to Express Your Mood, Opinion and More Express yourself in the conference with the following emoticons. You can also indicate that you raised your hand or that you stepped out of and back into the conference.
Figure 19–Emoticons
To choose an emoticon:
1. Click the Emoticon button in the toolbar (see Toolbar Buttons), or select Set My Emoticon in the Participants menu.
2. Choose the emoticon that suits your state of mind and click it. The Emoticon button changes to the state you chose and the participants see the emoticon next to your name in the Participants list.
3. To clear the emoticon, click the Emoticon button again, or select Clear Emoticon in the Participants menu.
Your emoticon is cleared and the button changes back to its original state.
View Content on the Whiteboard During a conference, you can view content that the presenter placed on the whiteboard, including inserted materials, shared applications, web tours, poll results, and more. Adjust the content of the whiteboard using the Fit Content button and Zoom slider, described below. Work with the whiteboard content using the Annotations tools.
As with all the panels, while viewing the whiteboard you can still control your audio, choose emoticons, write notes and memos, and view the Participants panel.
Participant Application for Mac User Guide
Product Version: v9.5 Published: 2/12/2013 27
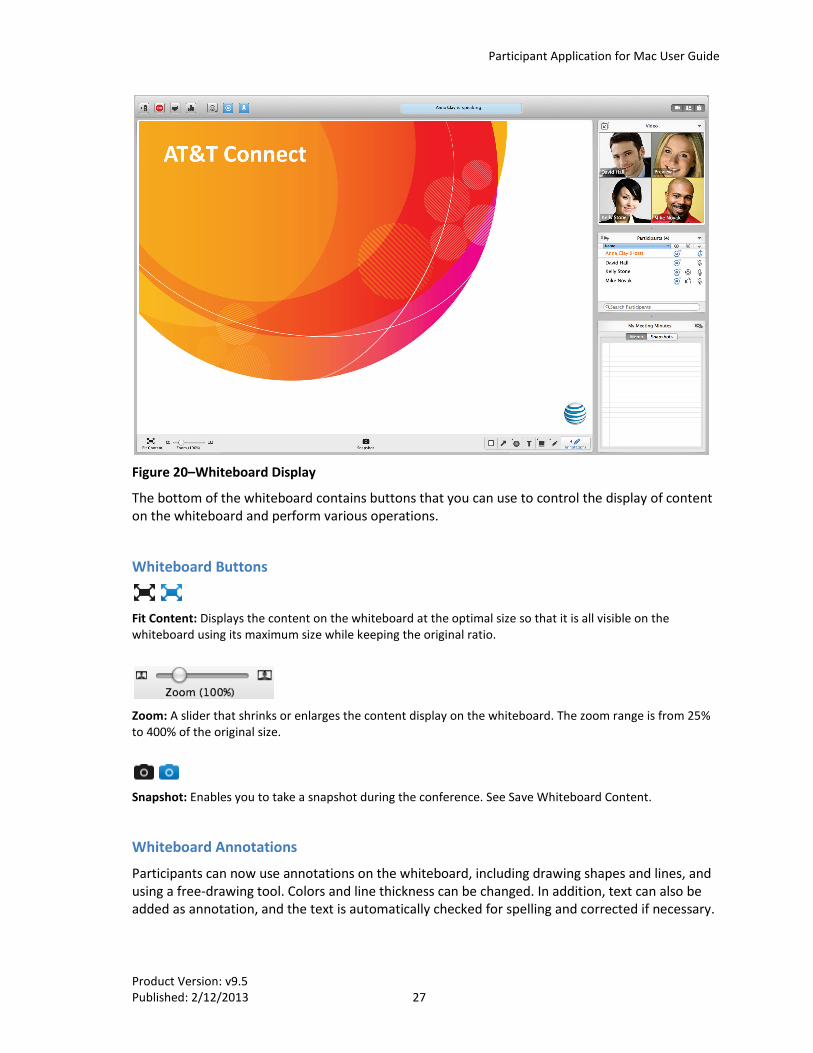
Figure 20–Whiteboard Display
The bottom of the whiteboard contains buttons that you can use to control the display of content on the whiteboard and perform various operations.
Whiteboard Buttons
Fit Content: Displays the content on the whiteboard at the optimal size so that it is all visible on the whiteboard using its maximum size while keeping the original ratio.
Zoom: A slider that shrinks or enlarges the content display on the whiteboard. The zoom range is from 25% to 400% of the original size.
Snapshot: Enables you to take a snapshot during the conference. See Save Whiteboard Content.
Whiteboard Annotations
Participants can now use annotations on the whiteboard, including drawing shapes and lines, and using a free-drawing tool. Colors and line thickness can be changed. In addition, text can also be added as annotation, and the text is automatically checked for spelling and corrected if necessary.
Participant Application for Mac User Guide
Product Version: v9.5 Published: 2/12/2013 28
Use the whiteboard annotation tools to add your personal touch to whiteboard content. You can:
• Use a drawing tool, including tools for drawing lines, squares, circles, and free-drawing. There is also a tool for erasing your drawings.
• Set the line thickness.
• Write text (with auto correction). See Using the Text Tool below.
• Use the Mac color palette.
• Use the whiteboard pointer, which displays your name with the pointer to the other participants. (Double-click on the pointer to fix the arrow on the whiteboard.)
• Clear the whiteboard (enabled only for presenters).
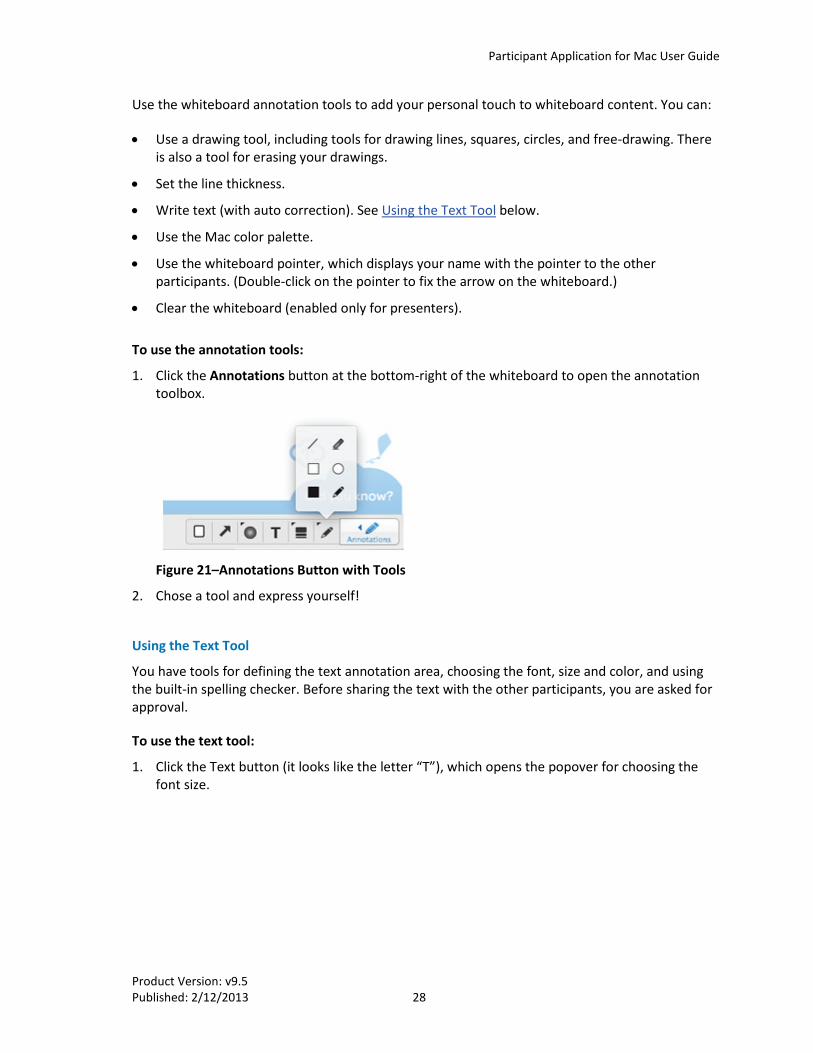
To use the annotation tools:
1. Click the Annotations button at the bottom-right of the whiteboard to open the annotation toolbox.
Figure 21–Annotations Button with Tools
2. Chose a tool and express yourself!
Using the Text Tool
You have tools for defining the text annotation area, choosing the font, size and color, and using the built-in spelling checker. Before sharing the text with the other participants, you are asked for approval.
To use the text tool:
1. Click the Text button (it looks like the letter “T”), which opens the popover for choosing the font size.
Participant Application for Mac User Guide
Product Version: v9.5 Published: 2/12/2013 29
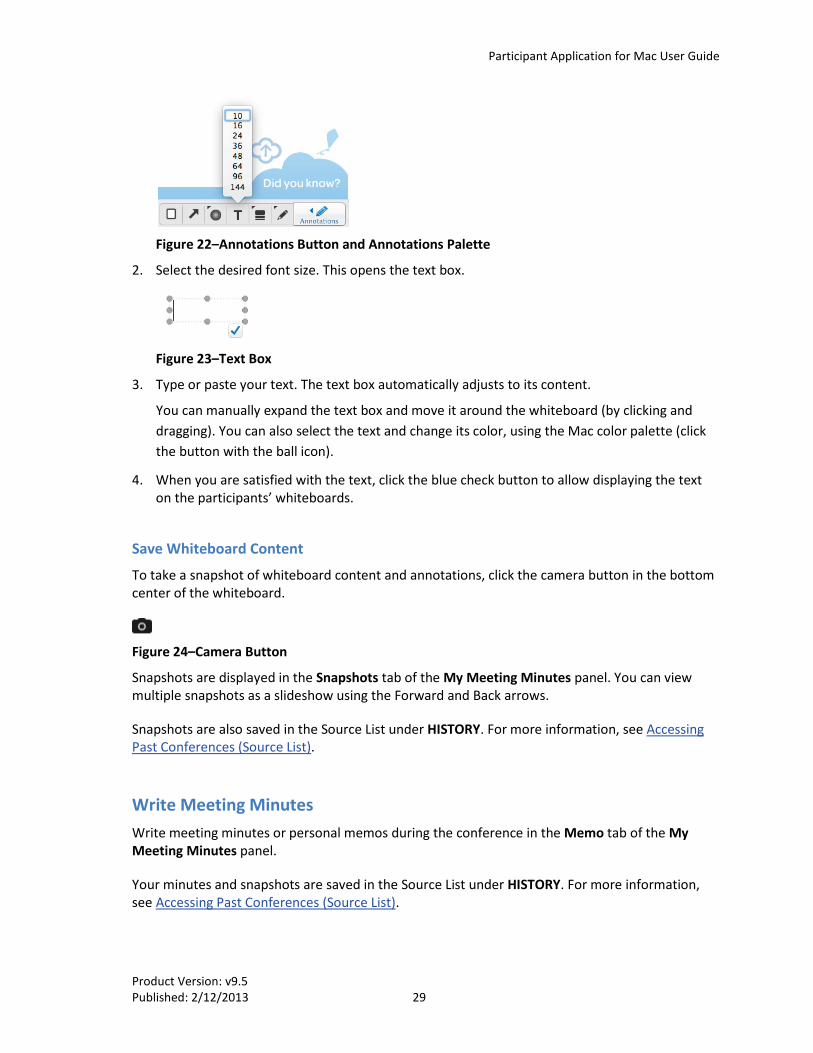
Figure 22–Annotations Button and Annotations Palette
2. Select the desired font size. This opens the text box.
Figure 23–Text Box
3. Type or paste your text. The text box automatically adjusts to its content.
You can manually expand the text box and move it around the whiteboard (by clicking and dragging). You can also select the text and change its color, using the Mac color palette (click the button with the ball icon).
4. When you are satisfied with the text, click the blue check button to allow displaying the text on the participants’ whiteboards.
Save Whiteboard Content
To take a snapshot of whiteboard content and annotations, click the camera button in the bottom center of the whiteboard.
Figure 24–Camera Button
Snapshots are displayed in the Snapshots tab of the My Meeting Minutes panel. You can view multiple snapshots as a slideshow using the Forward and Back arrows.
Snapshots are also saved in the Source List under HISTORY. For more information, see Accessing Past Conferences (Source List).
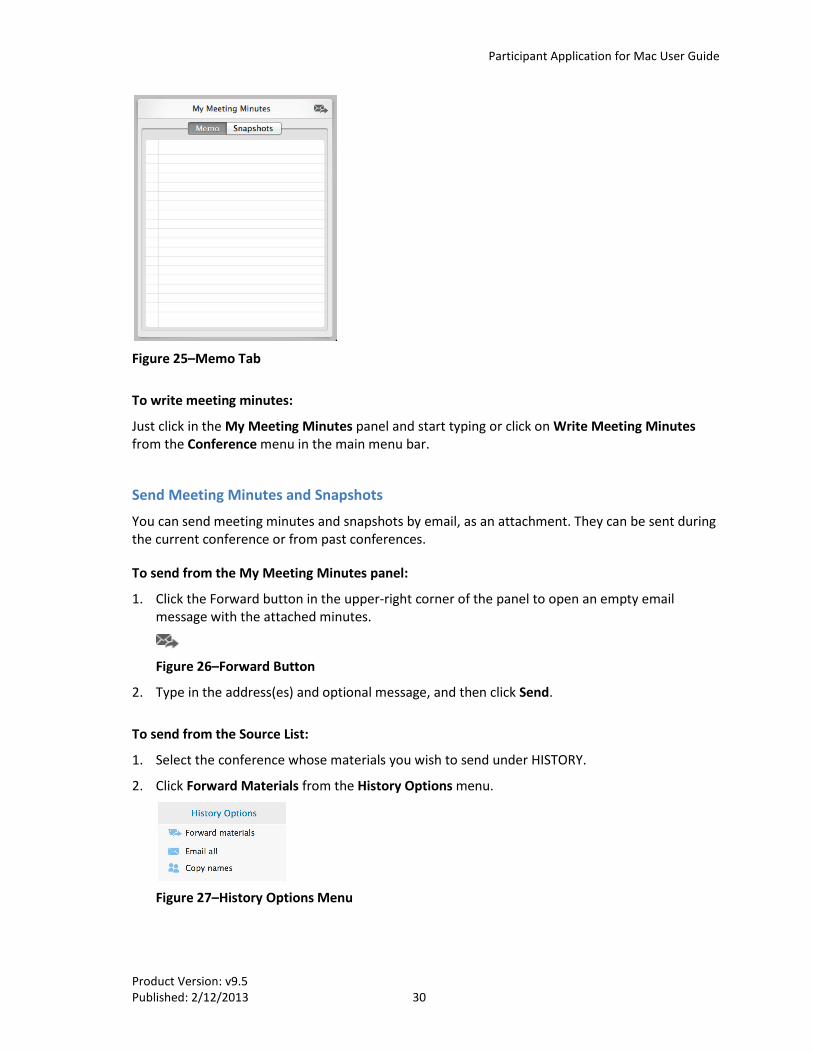
Write Meeting Minutes Write meeting minutes or personal memos during the conference in the Memo tab of the My Meeting Minutes panel.
Your minutes and snapshots are saved in the Source List under HISTORY. For more information, see Accessing Past Conferences (Source List).
Participant Application for Mac User Guide
Product Version: v9.5 Published: 2/12/2013 30
Figure 25–Memo Tab
To write meeting minutes:
Just click in the My Meeting Minutes panel and start typing or click on Write Meeting Minutes from the Conference menu in the main menu bar.
Send Meeting Minutes and Snapshots
You can send meeting minutes and snapshots by email, as an attachment. They can be sent during the current conference or from past conferences.
To send from the My Meeting Minutes panel:
1. Click the Forward button in the upper-right corner of the panel to open an empty email message with the attached minutes.
Figure 26–Forward Button
2. Type in the address(es) and optional message, and then click Send.
To send from the Source List:
1. Select the conference whose materials you wish to send under HISTORY.
2. Click Forward Materials from the History Options menu.
Figure 27–History Options Menu
Participant Application for Mac User Guide
Product Version: v9.5 Published: 2/12/2013 31
Send a Note You can send three types of chat-like notes during a conference: private notes, public notes (announcements), and notes to the presenters’ group.
Note: Sending notes is dependent on company policy.
Send/Receive a Private Note
Communicate during the conference with chat-like notes (if your host or presenter allows).
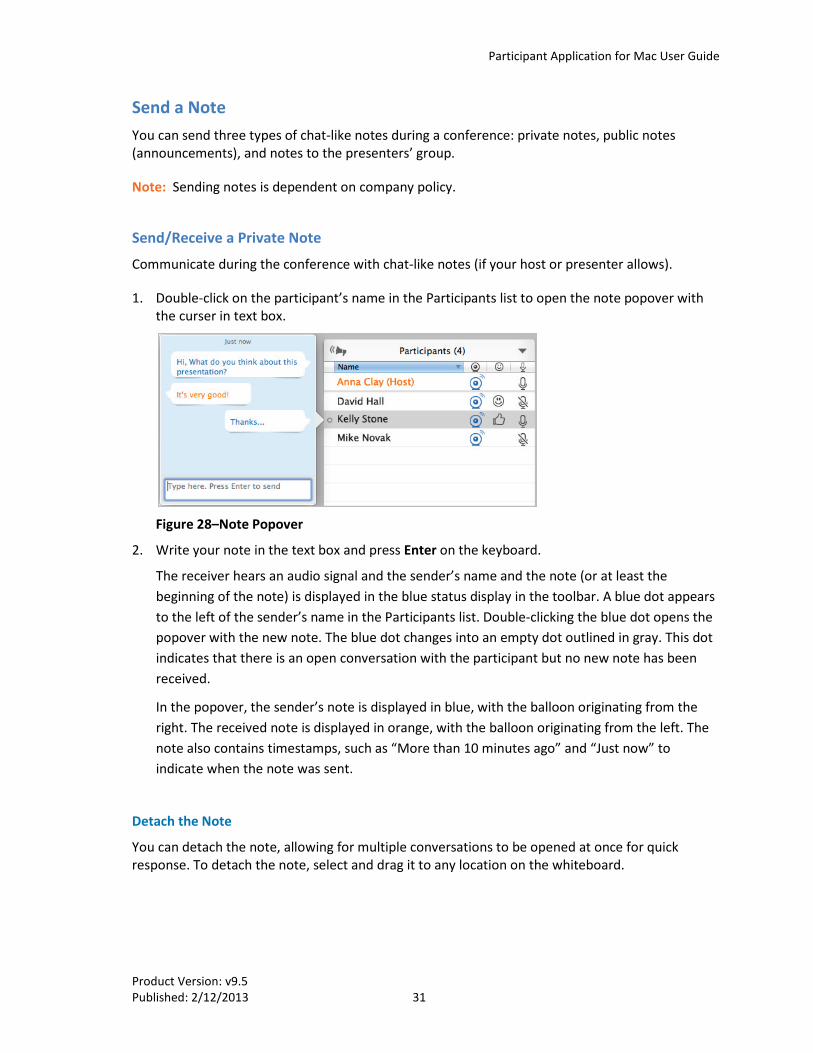
1. Double-click on the participant’s name in the Participants list to open the note popover with the curser in text box.
Figure 28–Note Popover
2. Write your note in the text box and press Enter on the keyboard.
The receiver hears an audio signal and the sender’s name and the note (or at least the beginning of the note) is displayed in the blue status display in the toolbar. A blue dot appears to the left of the sender’s name in the Participants list. Double-clicking the blue dot opens the popover with the new note. The blue dot changes into an empty dot outlined in gray. This dot indicates that there is an open conversation with the participant but no new note has been received.
In the popover, the sender’s note is displayed in blue, with the balloon originating from the right. The received note is displayed in orange, with the balloon originating from the left. The note also contains timestamps, such as “More than 10 minutes ago” and “Just now” to indicate when the note was sent.
Detach the Note
You can detach the note, allowing for multiple conversations to be opened at once for quick response. To detach the note, select and drag it to any location on the whiteboard.
Participant Application for Mac User Guide
Product Version: v9.5 Published: 2/12/2013 32
Send/Receive a Public Note (Announcement)
You can send notes to all the participants at once (again, if allowed in the conference).
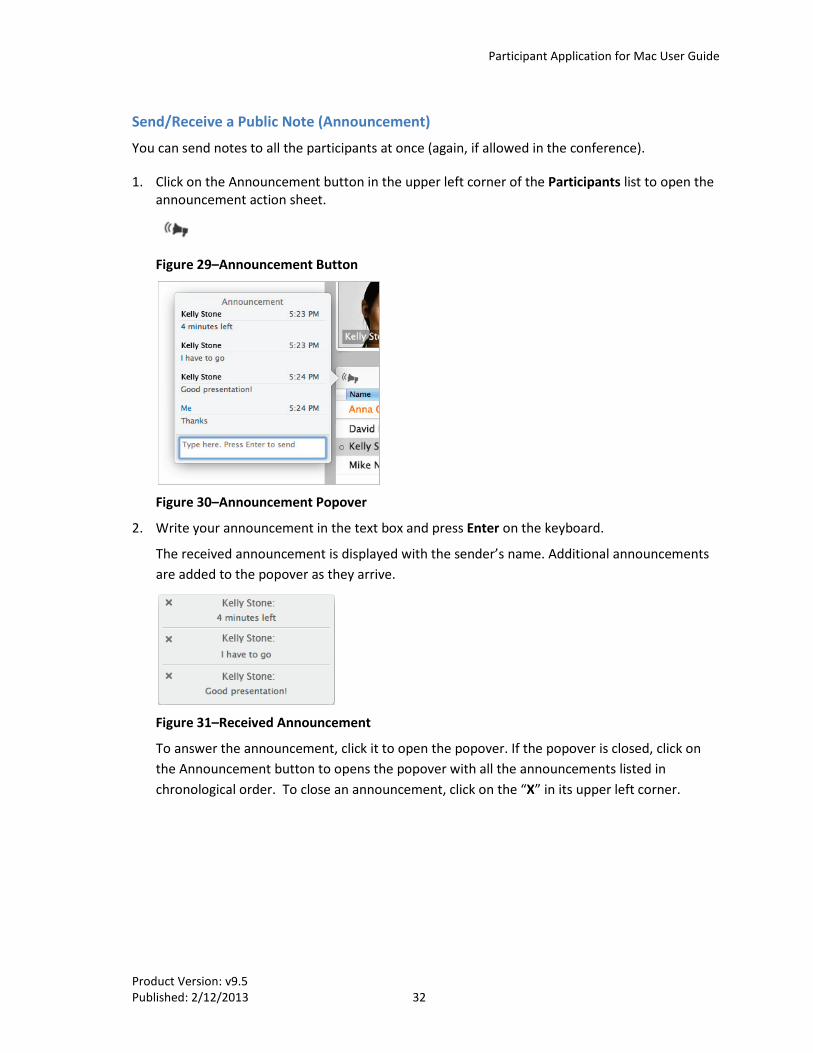
1. Click on the Announcement button in the upper left corner of the Participants list to open the announcement action sheet.
Figure 29–Announcement Button
Figure 30–Announcement Popover
2. Write your announcement in the text box and press Enter on the keyboard.
The received announcement is displayed with the sender’s name. Additional announcements are added to the popover as they arrive.
Figure 31–Received Announcement
To answer the announcement, click it to open the popover. If the popover is closed, click on the Announcement button to opens the popover with all the announcements listed in chronological order. To close an announcement, click on the “X” in its upper left corner.
Participant Application for Mac User Guide
Product Version: v9.5 Published: 2/12/2013 33
Send/Receive Note to the Presenters’ Group
You may wish to send a note to the members of the presenter’s group. This group includes the presenter, the host and the co-hosts. Each member of the group can send you a private reply.
To send a group note:
1. Right-click anywhere in the Participants list and select Send Note to Presenter. Or, click on the arrow in the Participants list to open the action menu and select Send Note to Presenter. Or, select Send Note to Presenter from the Notes menu in the main menu.
2. Type in your note and press Enter.
Figure 32–Note to Presenters
3. Click View All… to see all of your notes with the Presenters’ group.
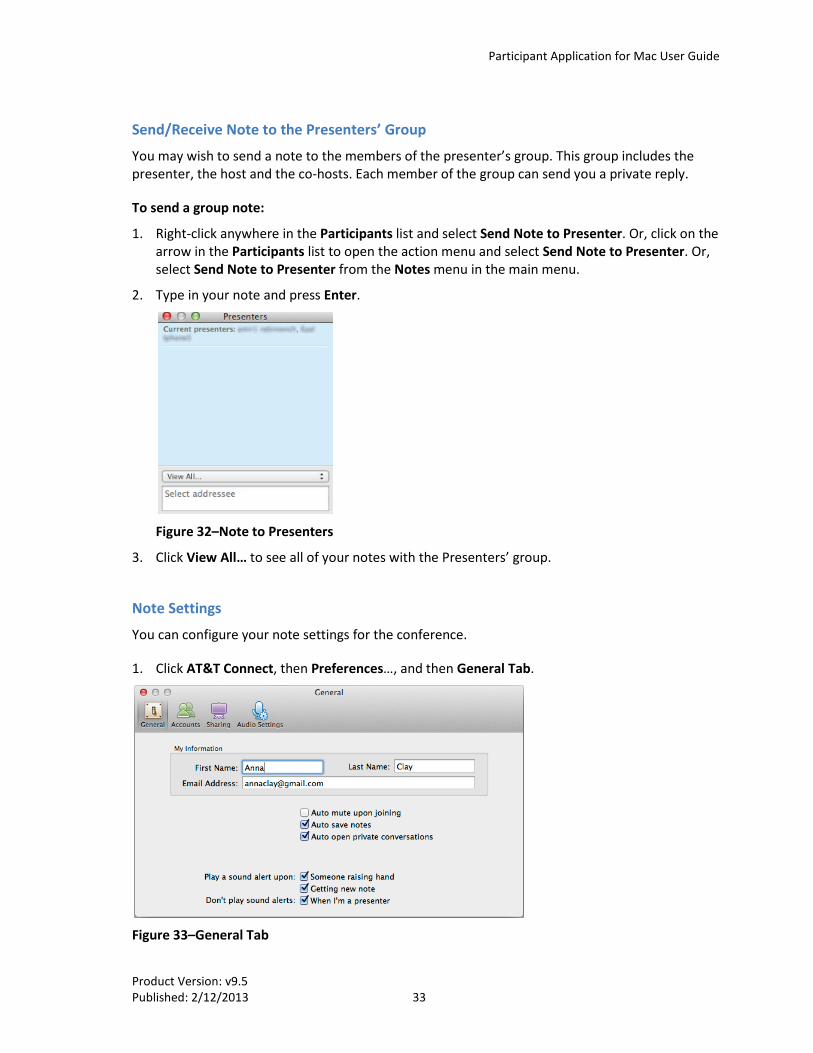
Note Settings
You can configure your note settings for the conference.
1. Click AT&T Connect, then Preferences…, and then General Tab.
Figure 33–General Tab
Participant Application for Mac User Guide
Product Version: v9.5 Published: 2/12/2013 34
2. Check or uncheck the following options:
• Auto save notes for saving all the notes that are sent/received during a conference • Auto open private conversation for automatically opening the note in a floating panel • Play sound alert upon getting new note for playing a musical tone when a new note
arrives
Participate in a Poll Your presenter may want you and all the other participants to voice your opinion about an issue in a poll. There are two types of polls: those with a Yes or No response and those with an OK response. For information on how presenters create a poll, see Creating Polls.
To participate in a poll:
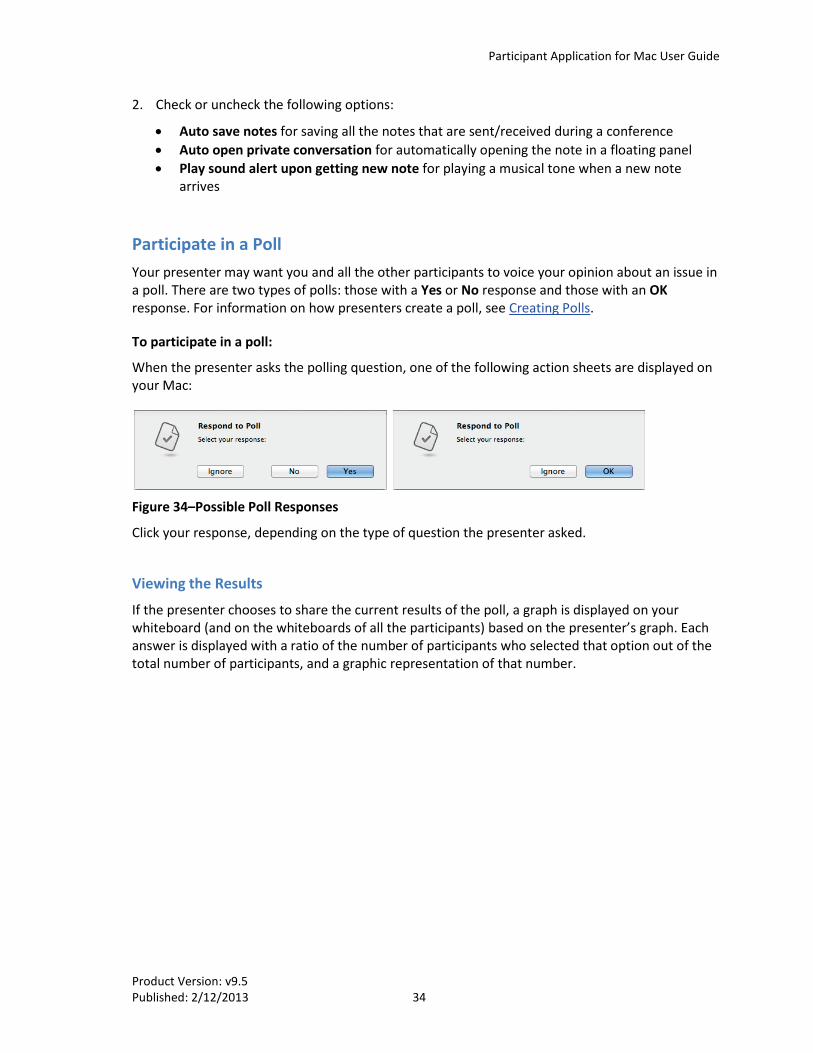
When the presenter asks the polling question, one of the following action sheets are displayed on your Mac:
Figure 34–Possible Poll Responses
Click your response, depending on the type of question the presenter asked.
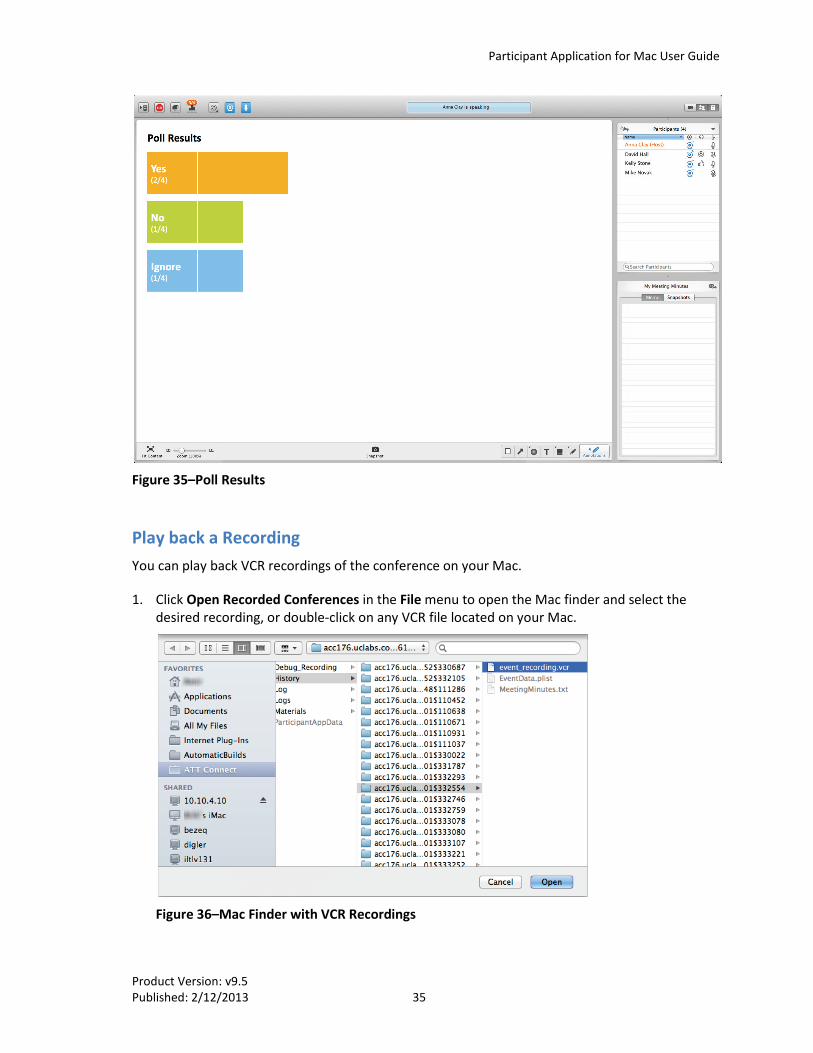
Viewing the Results
If the presenter chooses to share the current results of the poll, a graph is displayed on your whiteboard (and on the whiteboards of all the participants) based on the presenter’s graph. Each answer is displayed with a ratio of the number of participants who selected that option out of the total number of participants, and a graphic representation of that number.
Participant Application for Mac User Guide
Product Version: v9.5 Published: 2/12/2013 35
Figure 35–Poll Results
Play back a Recording You can play back VCR recordings of the conference on your Mac.
1. Click Open Recorded Conferences in the File menu to open the Mac finder and select the desired recording, or double-click on any VCR file located on your Mac.
Figure 36–Mac Finder with VCR Recordings
Participant Application for Mac User Guide
Product Version: v9.5 Published: 2/12/2013 36
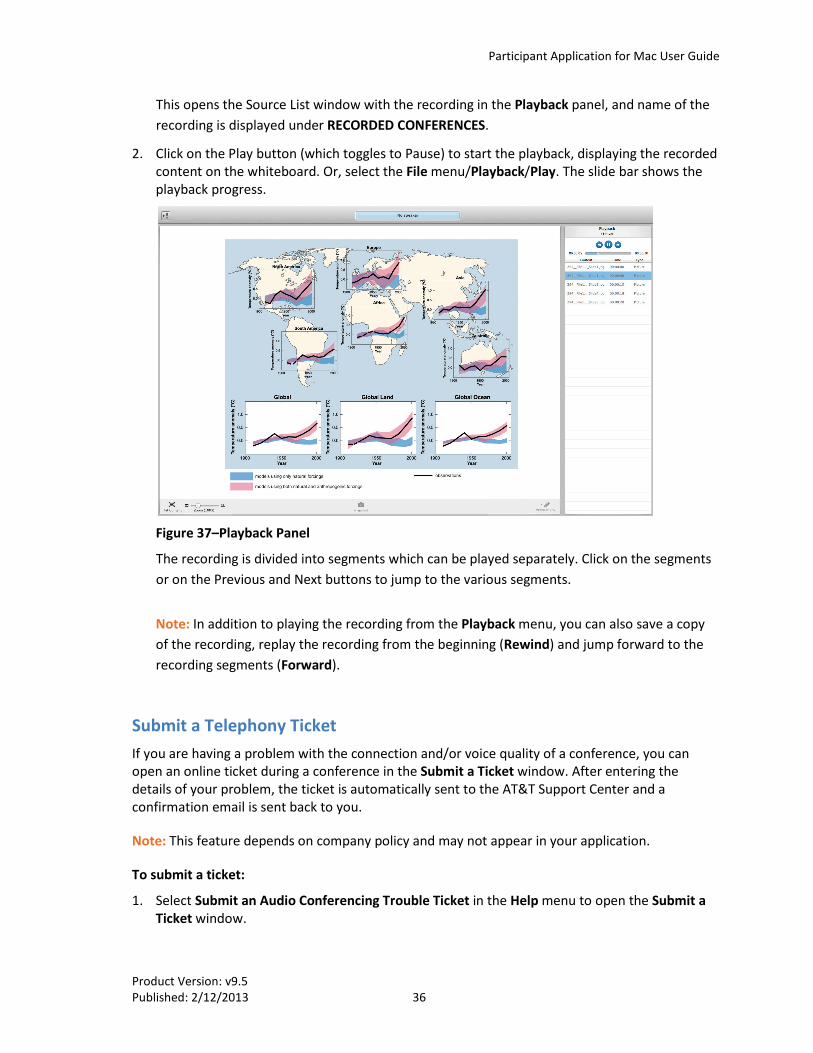
This opens the Source List window with the recording in the Playback panel, and name of the recording is displayed under RECORDED CONFERENCES.
2. Click on the Play button (which toggles to Pause) to start the playback, displaying the recorded content on the whiteboard. Or, select the File menu/Playback/Play. The slide bar shows the playback progress.
Figure 37–Playback Panel
The recording is divided into segments which can be played separately. Click on the segments or on the Previous and Next buttons to jump to the various segments.
Note: In addition to playing the recording from the Playback menu, you can also save a copy of the recording, replay the recording from the beginning (Rewind) and jump forward to the recording segments (Forward).
Submit a Telephony Ticket If you are having a problem with the connection and/or voice quality of a conference, you can open an online ticket during a conference in the Submit a Ticket window. After entering the details of your problem, the ticket is automatically sent to the AT&T Support Center and a confirmation email is sent back to you.
Note: This feature depends on company policy and may not appear in your application.
To submit a ticket:
1. Select Submit an Audio Conferencing Trouble Ticket in the Help menu to open the Submit a Ticket window.
Participant Application for Mac User Guide
Product Version: v9.5 Published: 2/12/2013 37
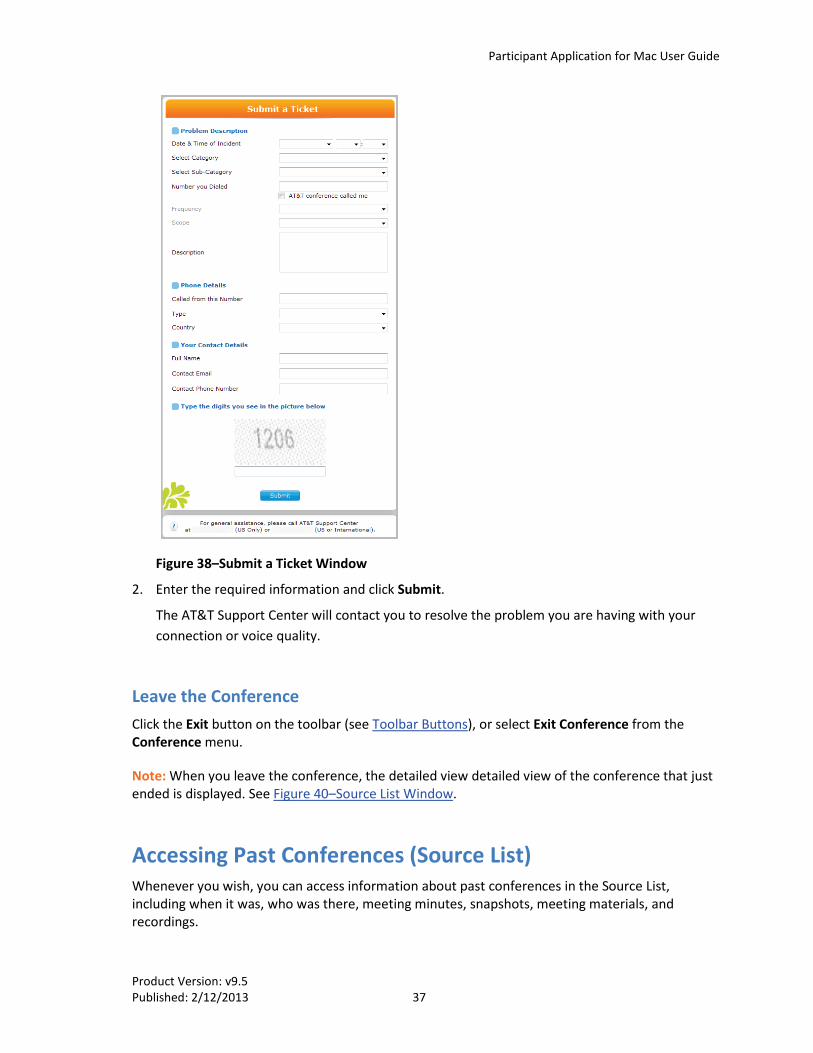
Figure 38–Submit a Ticket Window
2. Enter the required information and click Submit.
The AT&T Support Center will contact you to resolve the problem you are having with your connection or voice quality.
Leave the Conference Click the Exit button on the toolbar (see Toolbar Buttons), or select Exit Conference from the Conference menu.
Note: When you leave the conference, the detailed view detailed view of the conference that just ended is displayed. See Figure 40–Source List Window.
Accessing Past Conferences (Source List) Whenever you wish, you can access information about past conferences in the Source List, including when it was, who was there, meeting minutes, snapshots, meeting materials, and recordings.
Participant Application for Mac User Guide
Product Version: v9.5 Published: 2/12/2013 38
1. If the Source List is hidden, click the Source List button to open the Source List window.
Figure 39–Source List Button
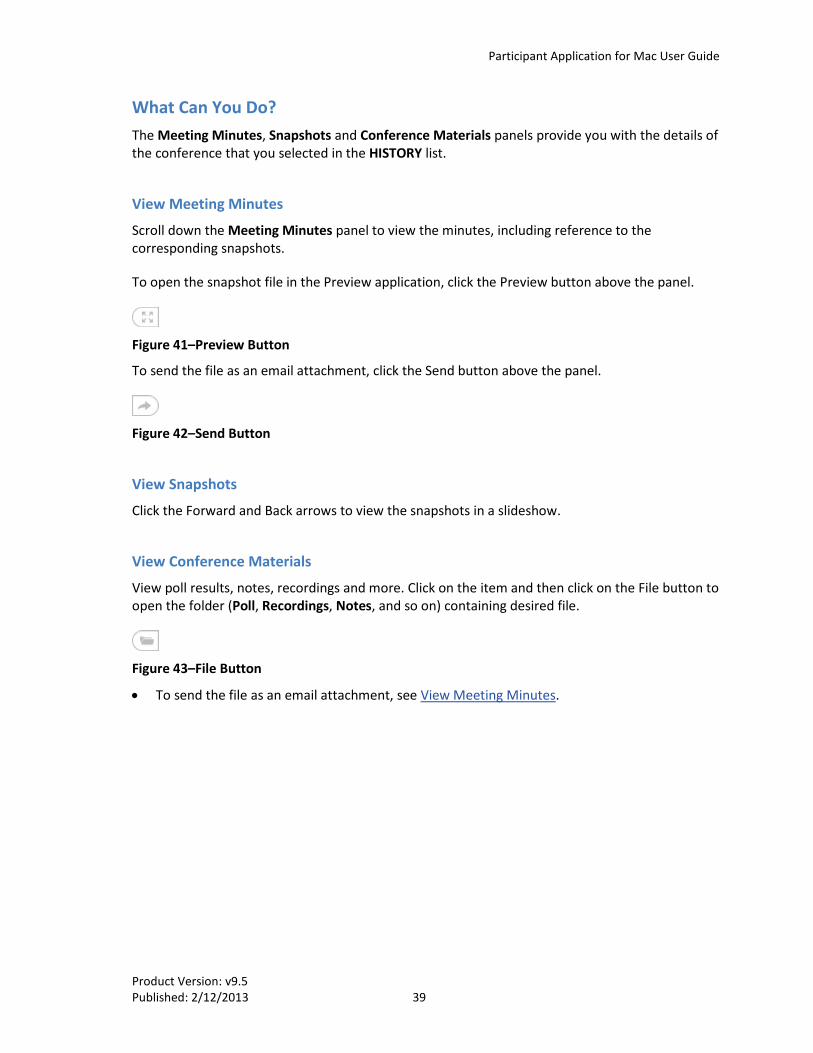
2. Select a past conference from the left panel under HISTORY to view the information.
Figure 40–Source List Window
What Do You See? The top of the Source List displays the conference’s date and start/end times. The names of the participants are also displayed. In the top-right corner is the History Options menu with the following options:
• Forward materials for sending all the conference materials as email attachments.
• Email all (available only to hosts) for sending an email message to all the participants in the conference.
• Copy names for copying all the participants’ names for pasting into any document for follow-up purposes.
The lower part of the window contains the Meeting Minutes, Snapshots and Conference Materials panels.
Participant Application for Mac User Guide
Product Version: v9.5 Published: 2/12/2013 39
What Can You Do? The Meeting Minutes, Snapshots and Conference Materials panels provide you with the details of the conference that you selected in the HISTORY list.
View Meeting Minutes
Scroll down the Meeting Minutes panel to view the minutes, including reference to the corresponding snapshots.
To open the snapshot file in the Preview application, click the Preview button above the panel.
Figure 41–Preview Button
To send the file as an email attachment, click the Send button above the panel.
Figure 42–Send Button
View Snapshots
Click the Forward and Back arrows to view the snapshots in a slideshow.
View Conference Materials
View poll results, notes, recordings and more. Click on the item and then click on the File button to open the folder (Poll, Recordings, Notes, and so on) containing desired file.
Figure 43–File Button
• To send the file as an email attachment, see View Meeting Minutes.
Product Version: v9.5 Published: 2/12/2013 40
4. STARTING A CONFERENCE (HOSTS)
In addition to using all the options available to participants, as a host you also need to start, schedule, and manage a conference. The following sections explain how you can do all this and much more. This section specifically explains how to start an unscheduled conference.
Activating your AT&T Connect Account To start a conference, you first will need to activate your AT&T Connect account.
Activating from the Registration Email When you registered with AT&T Connect, you received a registration email with an activation link.
To activate your account:
Click the activation link in the registration email.
AT&T Connect automatically downloads and launches the application with the preferences you set for this account. For more information on setting preferences, see Setting Preferences.
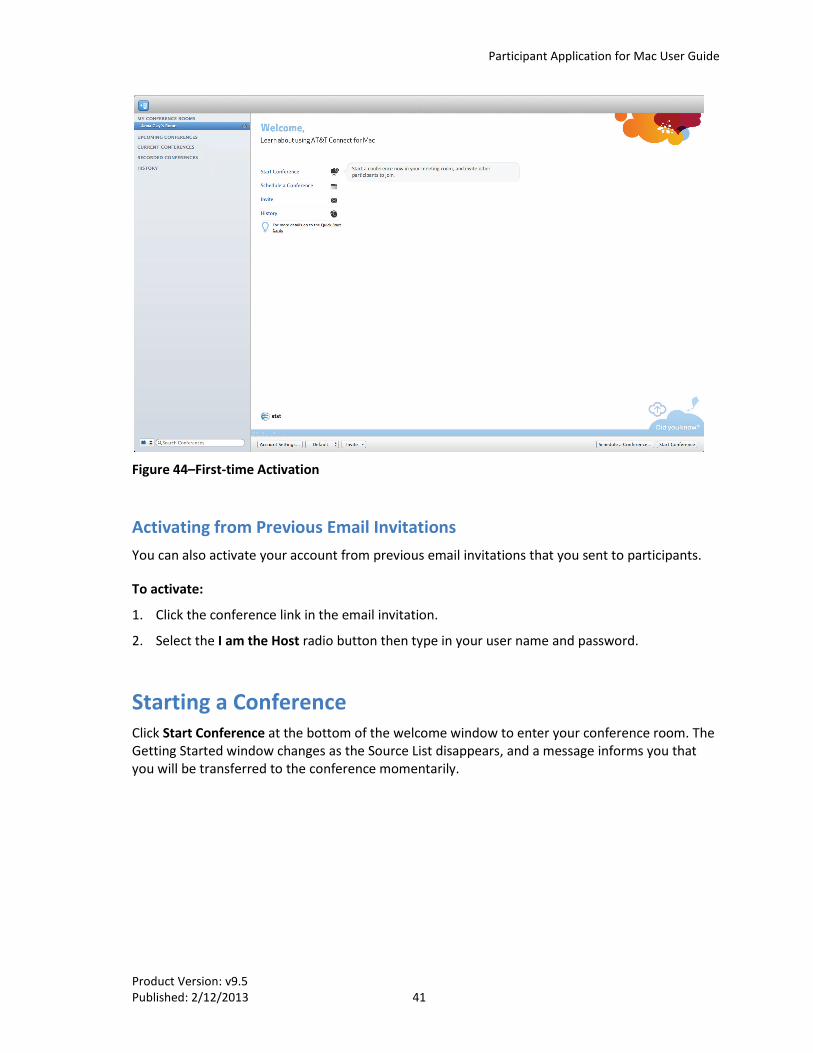
Activating your account displays the virtual conference window. The Source List is empty the first time you launch the application. After hosting conferences, the Source List displays your previous conferences.
Participant Application for Mac User Guide
Product Version: v9.5 Published: 2/12/2013 41
Figure 44–First-time Activation
Activating from Previous Email Invitations You can also activate your account from previous email invitations that you sent to participants.
To activate:
1. Click the conference link in the email invitation.
2. Select the I am the Host radio button then type in your user name and password.
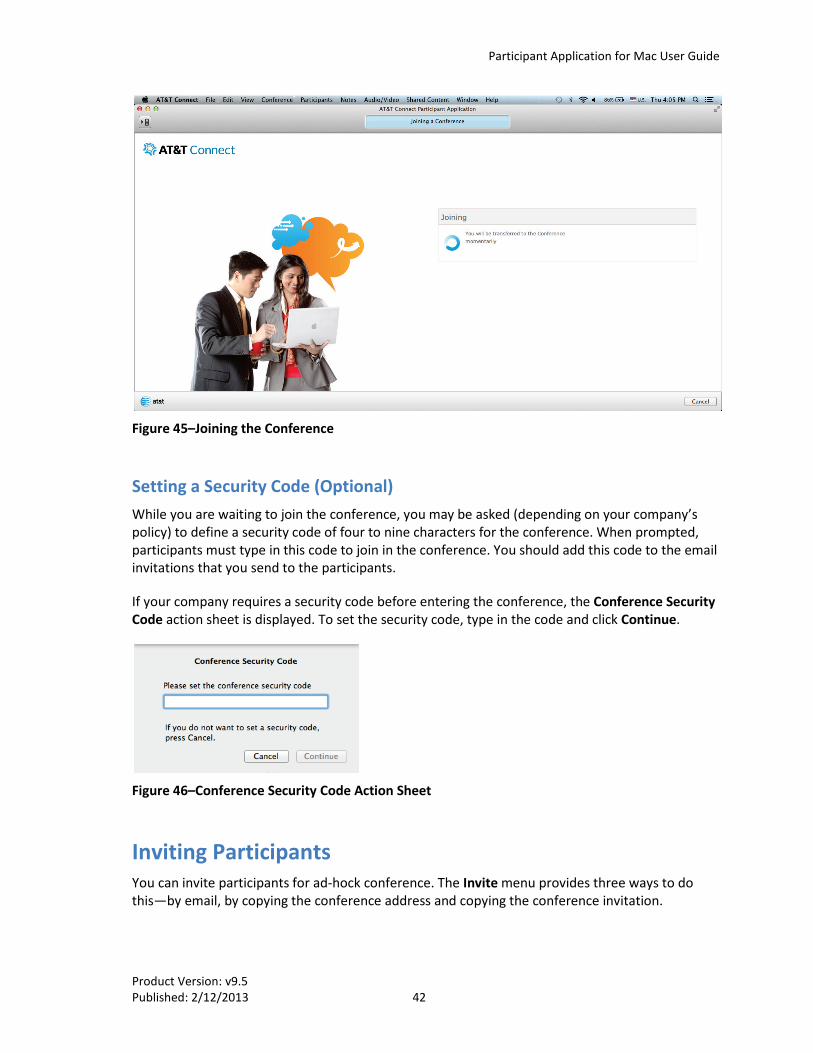
Starting a Conference Click Start Conference at the bottom of the welcome window to enter your conference room. The Getting Started window changes as the Source List disappears, and a message informs you that you will be transferred to the conference momentarily.
Participant Application for Mac User Guide
Product Version: v9.5 Published: 2/12/2013 42
Figure 45–Joining the Conference
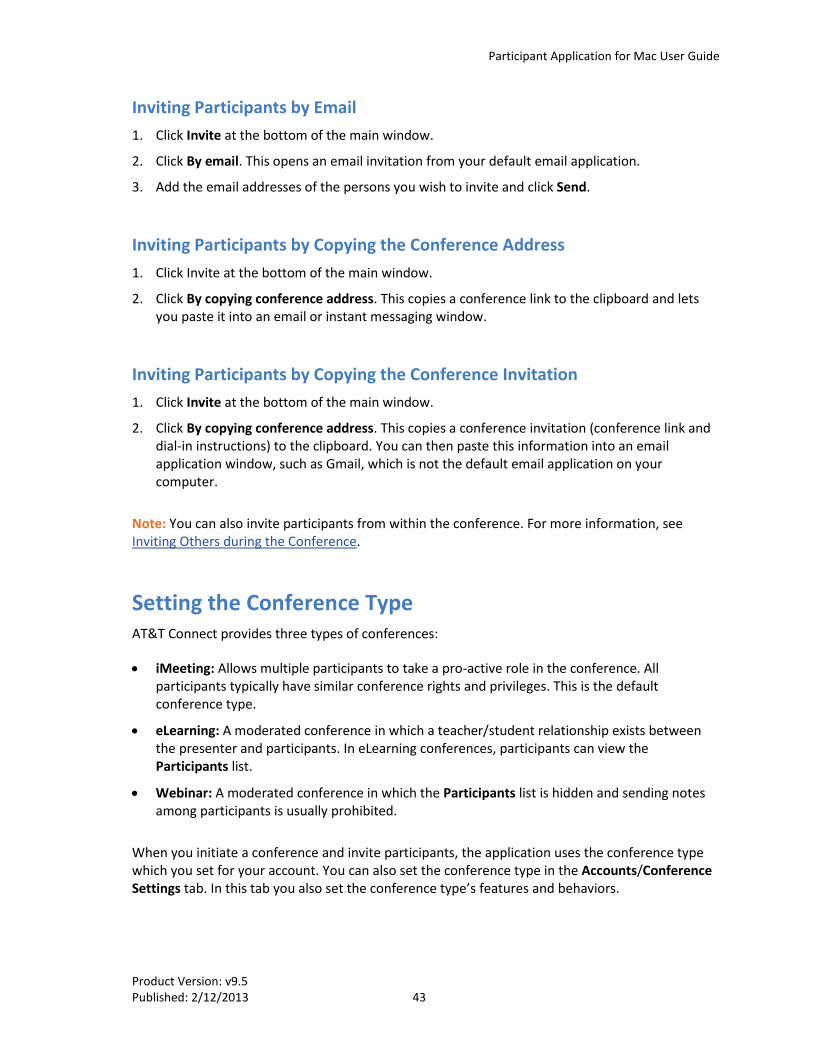
Setting a Security Code (Optional) While you are waiting to join the conference, you may be asked (depending on your company’s policy) to define a security code of four to nine characters for the conference. When prompted, participants must type in this code to join in the conference. You should add this code to the email invitations that you send to the participants.
If your company requires a security code before entering the conference, the Conference Security Code action sheet is displayed. To set the security code, type in the code and click Continue.
Figure 46–Conference Security Code Action Sheet
Inviting Participants You can invite participants for ad-hock conference. The Invite menu provides three ways to do this—by email, by copying the conference address and copying the conference invitation.
Participant Application for Mac User Guide
Product Version: v9.5 Published: 2/12/2013 43
Inviting Participants by Email 1. Click Invite at the bottom of the main window.
2. Click By email. This opens an email invitation from your default email application.
3. Add the email addresses of the persons you wish to invite and click Send.
Inviting Participants by Copying the Conference Address 1. Click Invite at the bottom of the main window.
2. Click By copying conference address. This copies a conference link to the clipboard and lets you paste it into an email or instant messaging window.
Inviting Participants by Copying the Conference Invitation 1. Click Invite at the bottom of the main window.
2. Click By copying conference address. This copies a conference invitation (conference link and dial-in instructions) to the clipboard. You can then paste this information into an email application window, such as Gmail, which is not the default email application on your computer.
Note: You can also invite participants from within the conference. For more information, see Inviting Others during the Conference.
Setting the Conference Type AT&T Connect provides three types of conferences:
• iMeeting: Allows multiple participants to take a pro-active role in the conference. All participants typically have similar conference rights and privileges. This is the default conference type.
• eLearning: A moderated conference in which a teacher/student relationship exists between the presenter and participants. In eLearning conferences, participants can view the Participants list.
• Webinar: A moderated conference in which the Participants list is hidden and sending notes among participants is usually prohibited.
When you initiate a conference and invite participants, the application uses the conference type which you set for your account. You can also set the conference type in the Accounts/Conference Settings tab. In this tab you also set the conference type’s features and behaviors.
Participant Application for Mac User Guide
Product Version: v9.5 Published: 2/12/2013 44
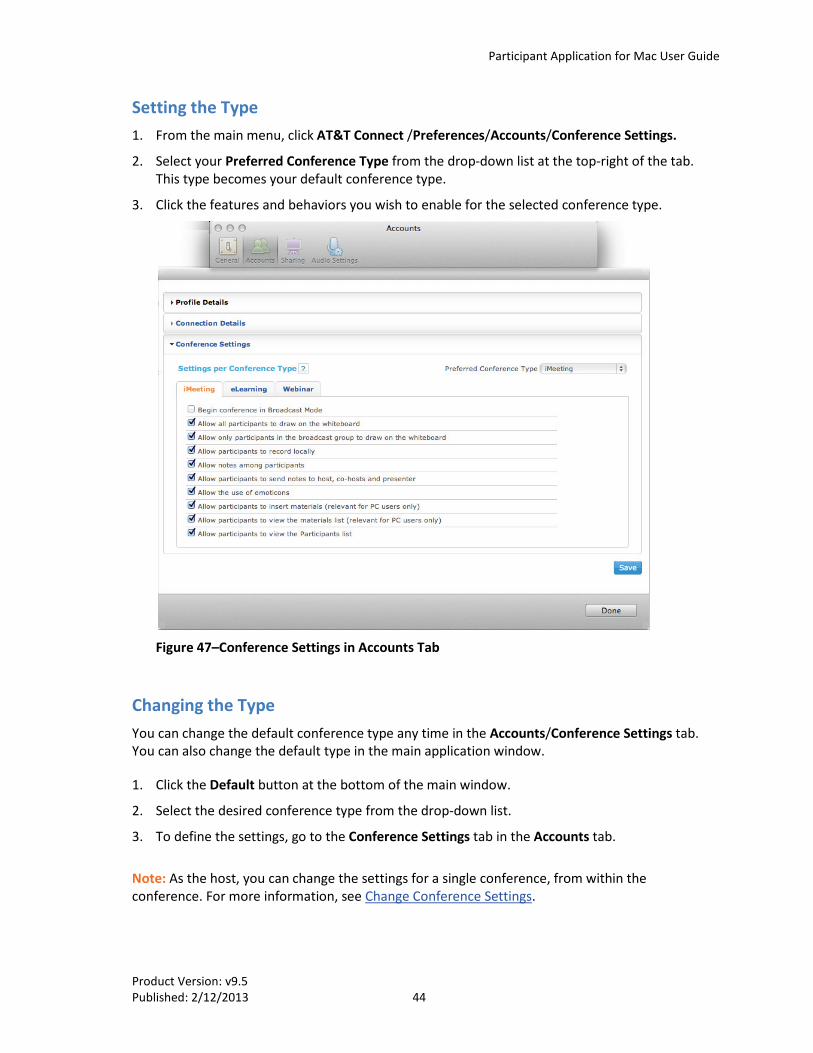
Setting the Type 1. From the main menu, click AT&T Connect /Preferences/Accounts/Conference Settings.
2. Select your Preferred Conference Type from the drop-down list at the top-right of the tab. This type becomes your default conference type.
3. Click the features and behaviors you wish to enable for the selected conference type.
Figure 47–Conference Settings in Accounts Tab
Changing the Type You can change the default conference type any time in the Accounts/Conference Settings tab. You can also change the default type in the main application window.
1. Click the Default button at the bottom of the main window.
2. Select the desired conference type from the drop-down list.
3. To define the settings, go to the Conference Settings tab in the Accounts tab.
Note: As the host, you can change the settings for a single conference, from within the conference. For more information, see Change Conference Settings.
Product Version: v9.5 Published: 2/12/2013 45
5. SCHEDULING A CONFERENCE (HOSTS)
As the host, you can schedule a future conference using the Microsoft Outlook 2011 or iCal applications.
To schedule a conference (in iCal):
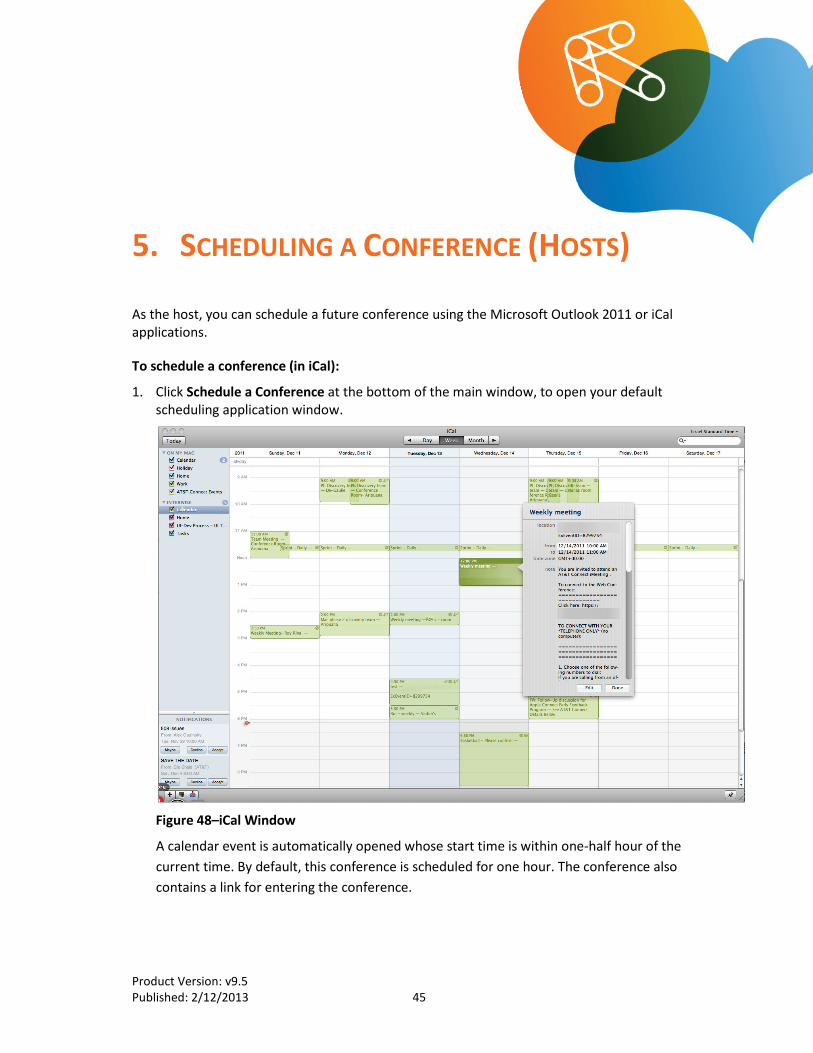
1. Click Schedule a Conference at the bottom of the main window, to open your default scheduling application window.
Figure 48–iCal Window
A calendar event is automatically opened whose start time is within one-half hour of the current time. By default, this conference is scheduled for one hour. The conference also contains a link for entering the conference.

Participant Application for Mac User Guide
Product Version: v9.5 Published: 2/12/2013 46
2. Click the Add Invitees… link to invite participants for the conference by typing in the names of those you wish to invite, or add them from your local address book.
Tip: After you begin typing in a name, the auto-complete feature automatically completes the name, based on matching names in your local address book.
3. Add all relevant attachments to the invitation [Optional].
4. Click Send to send the conference invitation.
Product Version: v9.5 Published: 2/12/2013 47
6. MANAGING A CONFERENCE (HOSTS)
As the host and/or presenter, you can manage your conference in the Participants panel and elsewhere on the interface. Some of these actions depend on company policy and may not appear on your application. (Participants do not see these host features in their Participants panel.)
Sharing your Applications/Desktop As the presenter, you can share your applications and desktop with the other participants in the conference.
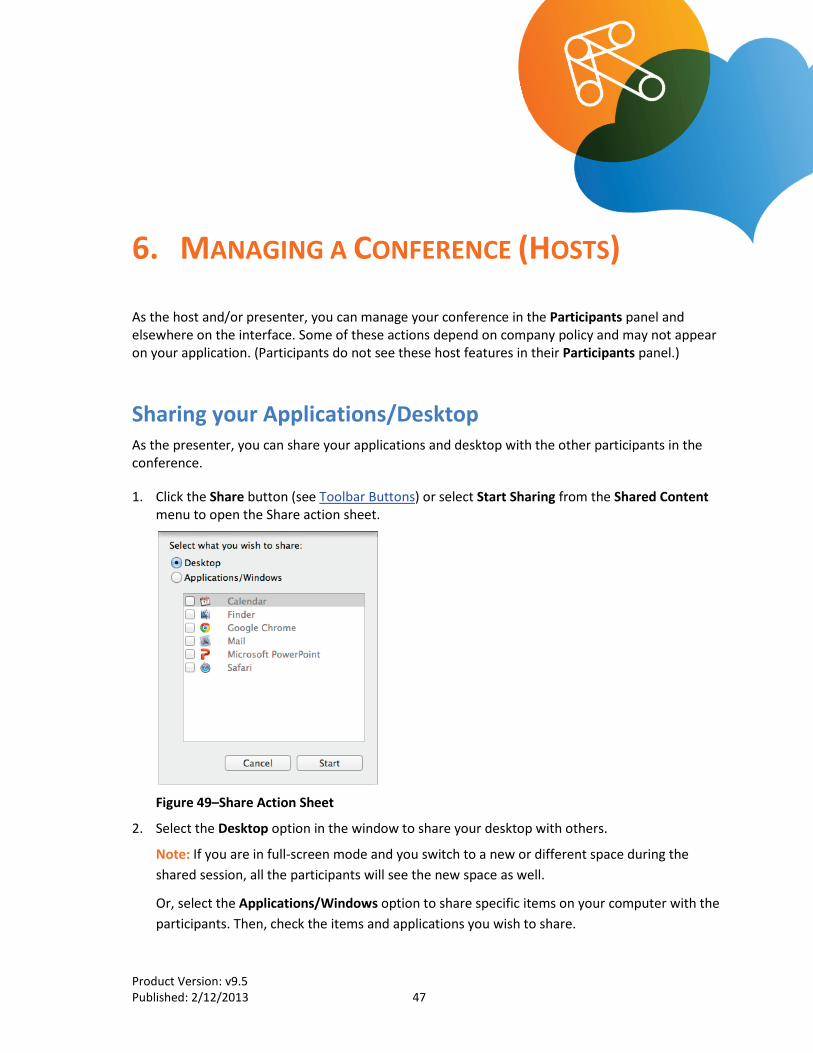
1. Click the Share button (see Toolbar Buttons) or select Start Sharing from the Shared Content menu to open the Share action sheet.
Figure 49–Share Action Sheet
2. Select the Desktop option in the window to share your desktop with others.
Note: If you are in full-screen mode and you switch to a new or different space during the shared session, all the participants will see the new space as well.
Or, select the Applications/Windows option to share specific items on your computer with the participants. Then, check the items and applications you wish to share.
Participant Application for Mac User Guide
Product Version: v9.5 Published: 2/12/2013 48
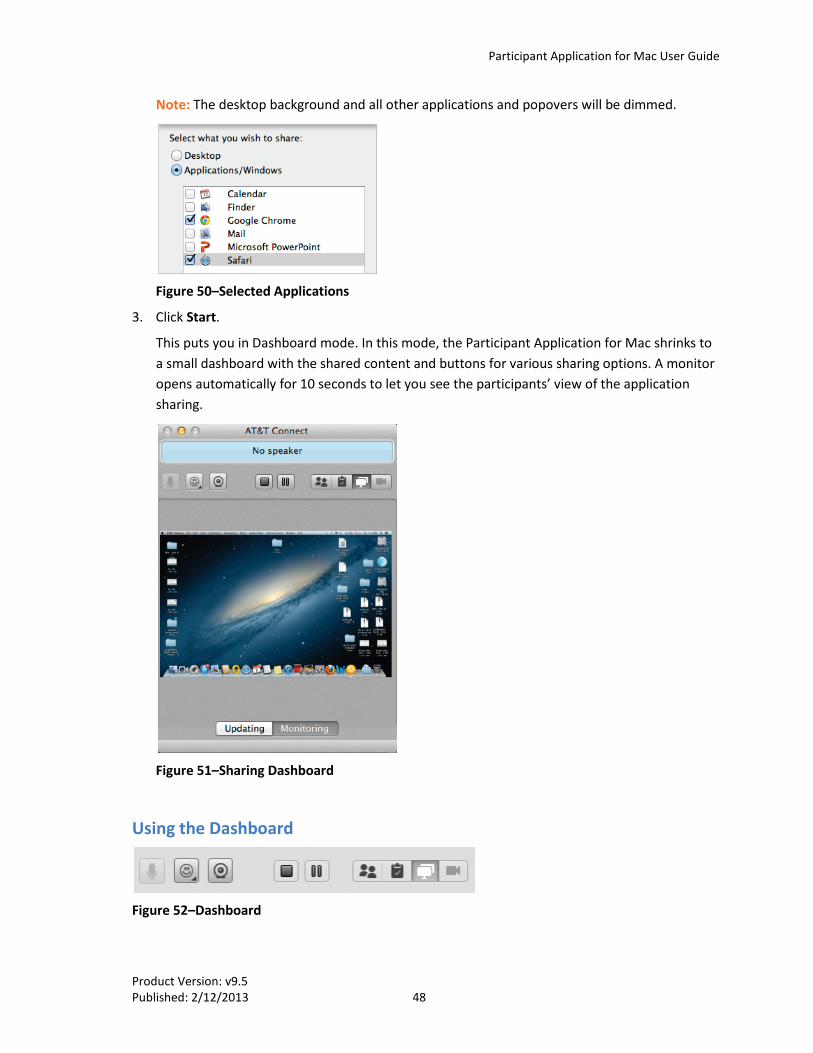
Note: The desktop background and all other applications and popovers will be dimmed.
Figure 50–Selected Applications
3. Click Start.
This puts you in Dashboard mode. In this mode, the Participant Application for Mac shrinks to a small dashboard with the shared content and buttons for various sharing options. A monitor opens automatically for 10 seconds to let you see the participants’ view of the application sharing.
Figure 51–Sharing Dashboard
Using the Dashboard
Figure 52–Dashboard
Participant Application for Mac User Guide
Product Version: v9.5 Published: 2/12/2013 49
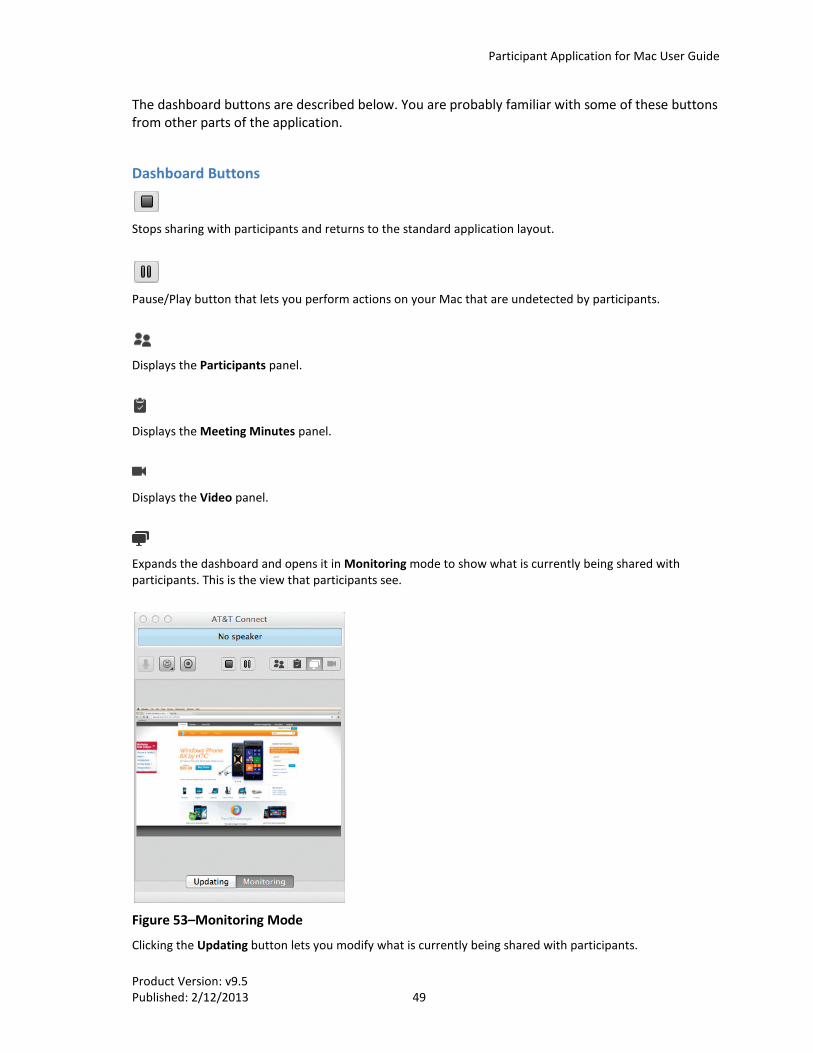
The dashboard buttons are described below. You are probably familiar with some of these buttons from other parts of the application.
Dashboard Buttons
Stops sharing with participants and returns to the standard application layout.
Pause/Play button that lets you perform actions on your Mac that are undetected by participants.
Displays the Participants panel.
Displays the Meeting Minutes panel.
Displays the Video panel.
Expands the dashboard and opens it in Monitoring mode to show what is currently being shared with participants. This is the view that participants see.
Figure 53–Monitoring Mode
Clicking the Updating button lets you modify what is currently being shared with participants.
Participant Application for Mac User Guide
Product Version: v9.5 Published: 2/12/2013 50
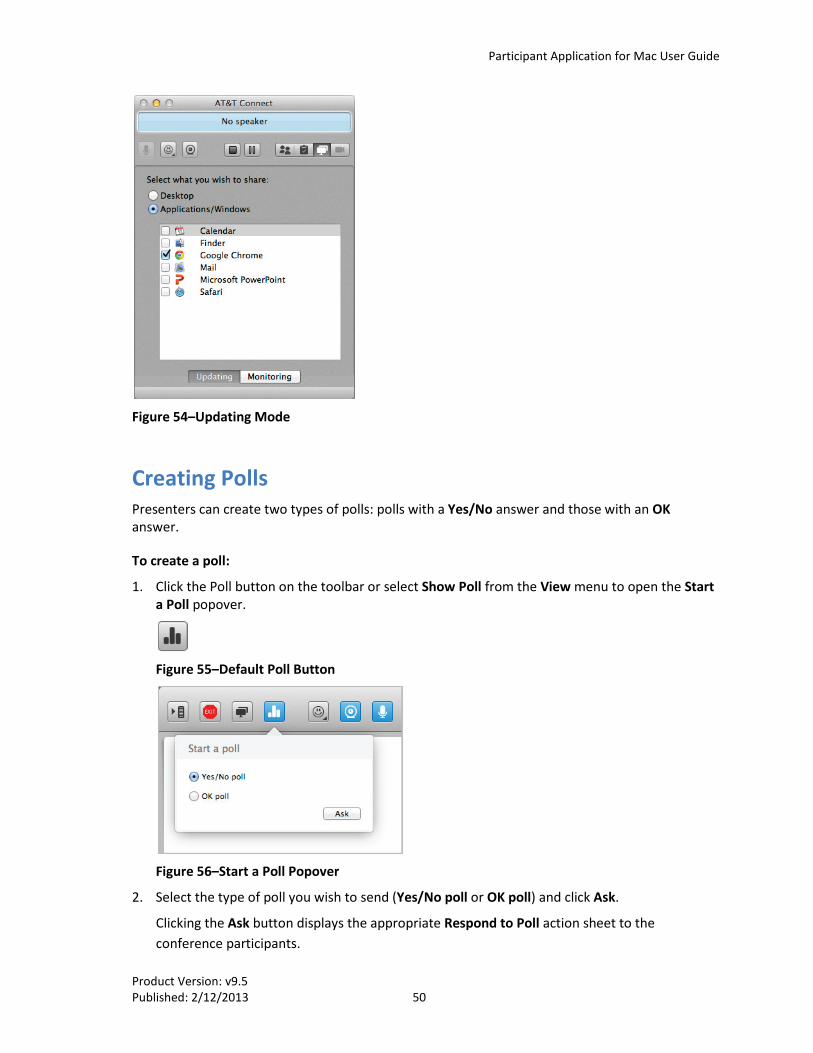
Figure 54–Updating Mode
Creating Polls Presenters can create two types of polls: polls with a Yes/No answer and those with an OK answer.
To create a poll:
1. Click the Poll button on the toolbar or select Show Poll from the View menu to open the Start a Poll popover.
Figure 55–Default Poll Button
Figure 56–Start a Poll Popover
2. Select the type of poll you wish to send (Yes/No poll or OK poll) and click Ask.
Clicking the Ask button displays the appropriate Respond to Poll action sheet to the conference participants.
Participant Application for Mac User Guide
Product Version: v9.5 Published: 2/12/2013 51
Figure 57–Respond to Poll Action Sheets
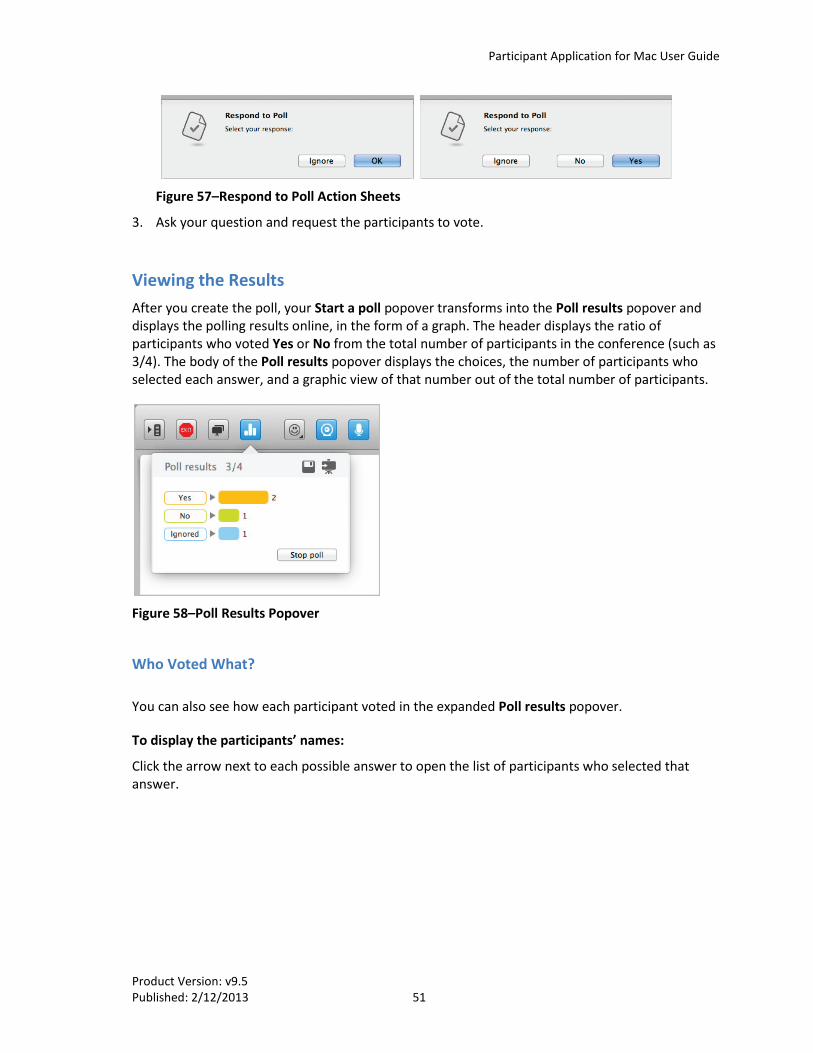
3. Ask your question and request the participants to vote.
Viewing the Results After you create the poll, your Start a poll popover transforms into the Poll results popover and displays the polling results online, in the form of a graph. The header displays the ratio of participants who voted Yes or No from the total number of participants in the conference (such as 3/4). The body of the Poll results popover displays the choices, the number of participants who selected each answer, and a graphic view of that number out of the total number of participants.
Figure 58–Poll Results Popover
Who Voted What?
You can also see how each participant voted in the expanded Poll results popover.
To display the participants’ names:
Click the arrow next to each possible answer to open the list of participants who selected that answer.
Participant Application for Mac User Guide
Product Version: v9.5 Published: 2/12/2013 52
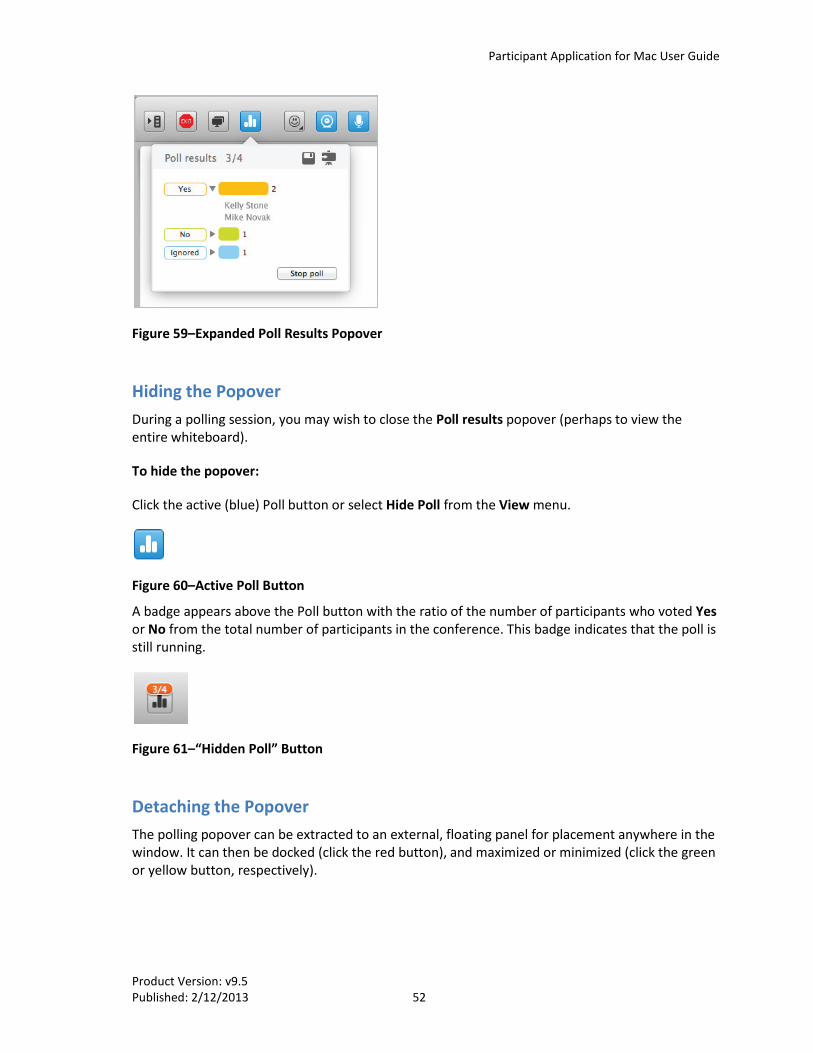
Figure 59–Expanded Poll Results Popover
Hiding the Popover During a polling session, you may wish to close the Poll results popover (perhaps to view the entire whiteboard).
To hide the popover:
Click the active (blue) Poll button or select Hide Poll from the View menu.
Figure 60–Active Poll Button
A badge appears above the Poll button with the ratio of the number of participants who voted Yes or No from the total number of participants in the conference. This badge indicates that the poll is still running.
Figure 61–“Hidden Poll” Button
Detaching the Popover The polling popover can be extracted to an external, floating panel for placement anywhere in the window. It can then be docked (click the red button), and maximized or minimized (click the green or yellow button, respectively).
Participant Application for Mac User Guide
Product Version: v9.5 Published: 2/12/2013 53
Saving the Poll You can save the results of the poll locally as an RTF file.
To save the poll:
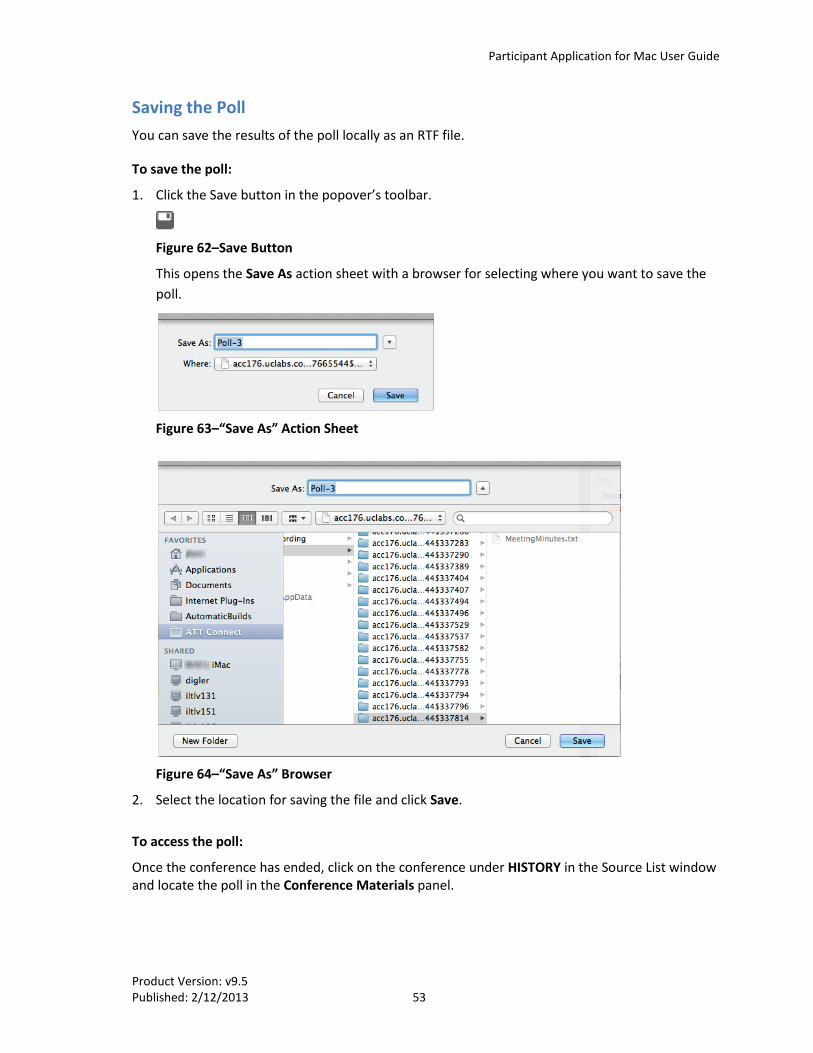
1. Click the Save button in the popover’s toolbar.
Figure 62–Save Button
This opens the Save As action sheet with a browser for selecting where you want to save the poll.
Figure 63–“Save As” Action Sheet
Figure 64–“Save As” Browser
2. Select the location for saving the file and click Save.
To access the poll:
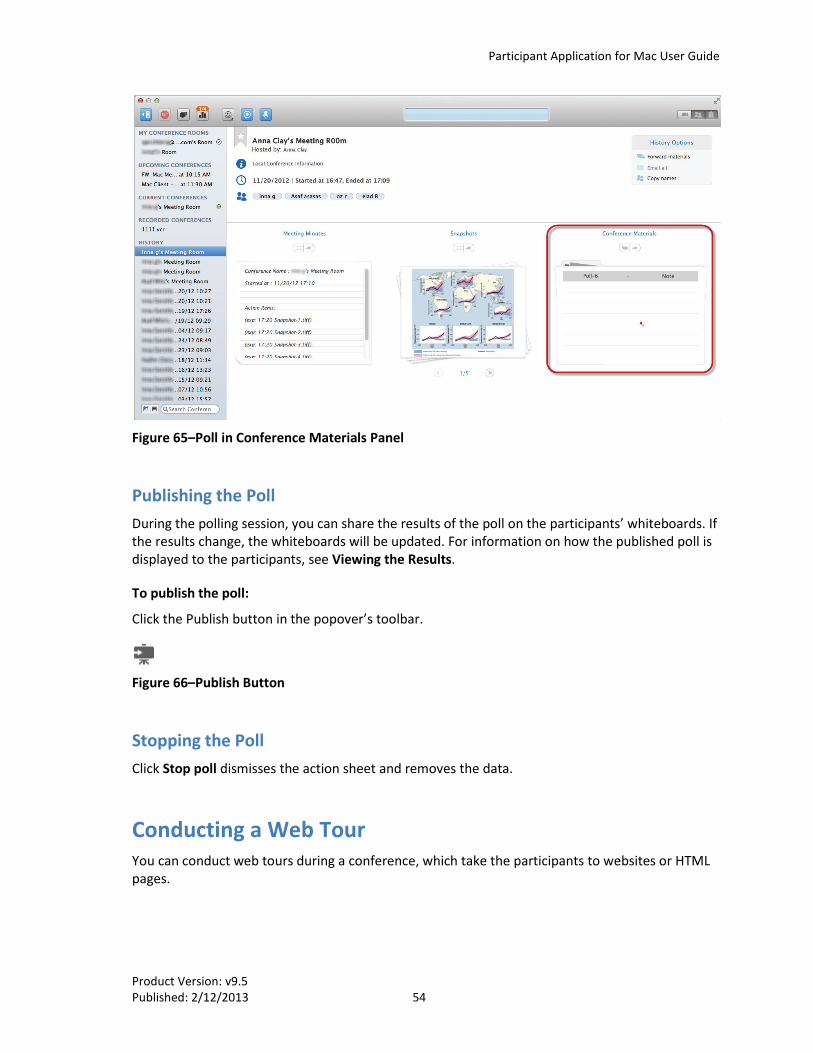
Once the conference has ended, click on the conference under HISTORY in the Source List window and locate the poll in the Conference Materials panel.
Participant Application for Mac User Guide
Product Version: v9.5 Published: 2/12/2013 54
Figure 65–Poll in Conference Materials Panel
Publishing the Poll During the polling session, you can share the results of the poll on the participants’ whiteboards. If the results change, the whiteboards will be updated. For information on how the published poll is displayed to the participants, see Viewing the Results.
To publish the poll:
Click the Publish button in the popover’s toolbar.
Figure 66–Publish Button
Stopping the Poll Click Stop poll dismisses the action sheet and removes the data.
Conducting a Web Tour You can conduct web tours during a conference, which take the participants to websites or HTML pages.

Participant Application for Mac User Guide
Product Version: v9.5 Published: 2/12/2013 55
To conduct a web tour:
1. Click on Web Tour then Start Web Tour on the Shared Content menu to display the browser at the top of the whiteboard.
Note: The web browser is displayed only to presenters. Participants see content only.
Figure 67–Web Tour Browser
2. Enter the URL address and click Enter.
3. To navigate in the browser, click on the Back and Forward arrow buttons.
4. To refresh the browser, click the Refresh button.
5. To use choose a favorite site, click the Bookmark button to open the list of bookmarks and select it (see Add, Rename or Delete Bookmarks).
6. To terminate the web tour, clicking the Stop Web Tour button on the toolbar or the Close Web Tour button in the browser.
Add, Rename or Delete Bookmarks You can add and rename bookmarks for easy access to your favorite websites.
To add a bookmark:
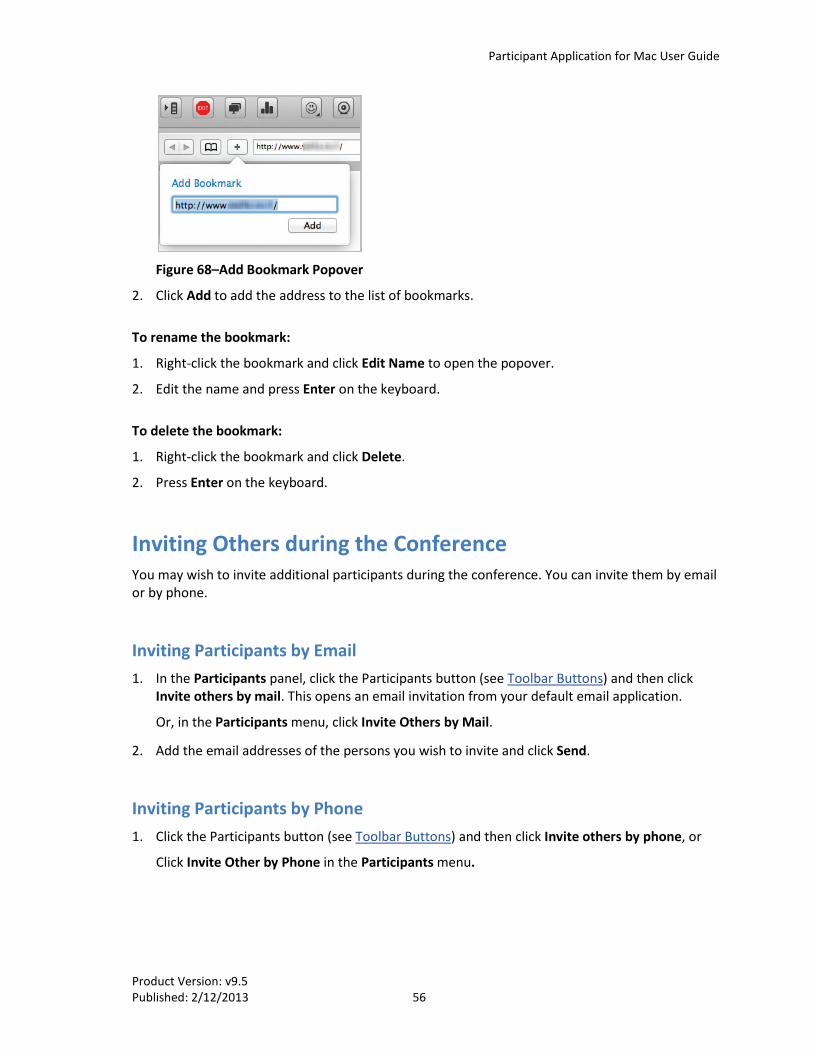
1. At the web site you wish to bookmark, click the Add button (to the right of the Bookmark button) to open the Add Bookmark popover with the URL address.
Participant Application for Mac User Guide
Product Version: v9.5 Published: 2/12/2013 56
Figure 68–Add Bookmark Popover
2. Click Add to add the address to the list of bookmarks.
To rename the bookmark:
1. Right-click the bookmark and click Edit Name to open the popover.
2. Edit the name and press Enter on the keyboard.
To delete the bookmark:
1. Right-click the bookmark and click Delete.
2. Press Enter on the keyboard.
Inviting Others during the Conference You may wish to invite additional participants during the conference. You can invite them by email or by phone.
Inviting Participants by Email 1. In the Participants panel, click the Participants button (see Toolbar Buttons) and then click
Invite others by mail. This opens an email invitation from your default email application.
Or, in the Participants menu, click Invite Others by Mail.
2. Add the email addresses of the persons you wish to invite and click Send.
Inviting Participants by Phone 1. Click the Participants button (see Toolbar Buttons) and then click Invite others by phone, or
Click Invite Other by Phone in the Participants menu.
Participant Application for Mac User Guide
Product Version: v9.5 Published: 2/12/2013 57
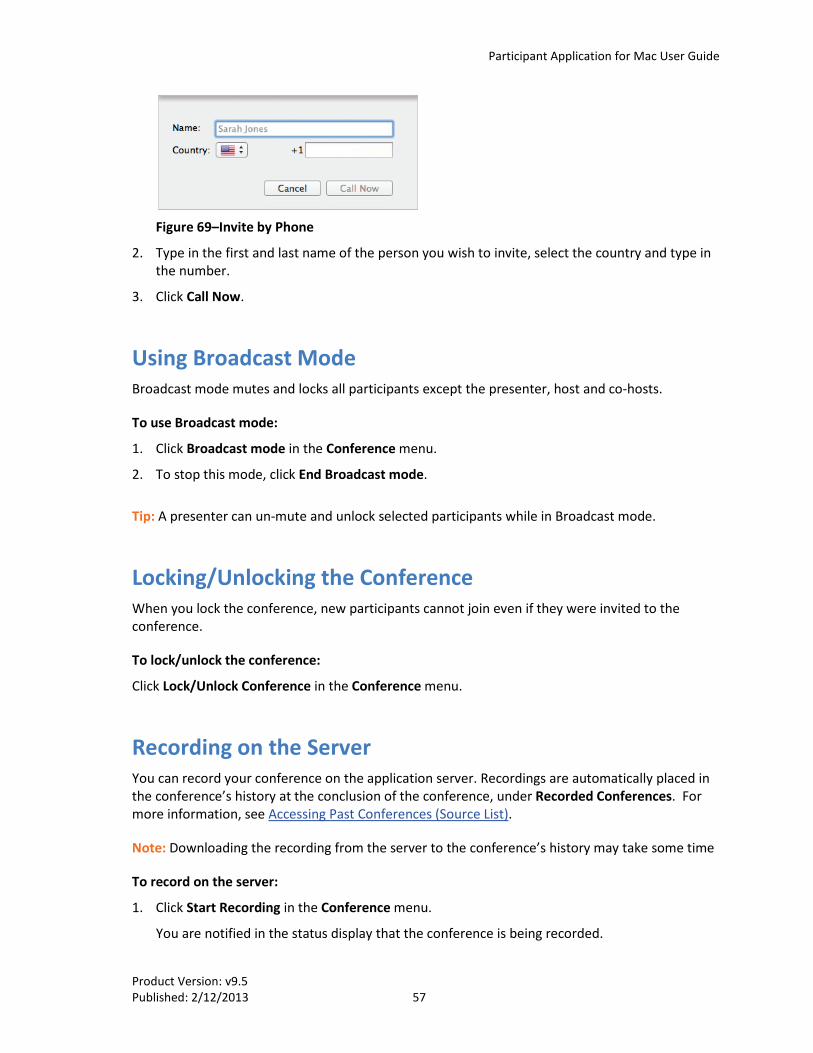
Figure 69–Invite by Phone
2. Type in the first and last name of the person you wish to invite, select the country and type in the number.
3. Click Call Now.
Using Broadcast Mode Broadcast mode mutes and locks all participants except the presenter, host and co-hosts.
To use Broadcast mode:
1. Click Broadcast mode in the Conference menu.
2. To stop this mode, click End Broadcast mode.
Tip: A presenter can un-mute and unlock selected participants while in Broadcast mode.
Locking/Unlocking the Conference When you lock the conference, new participants cannot join even if they were invited to the conference.
To lock/unlock the conference:
Click Lock/Unlock Conference in the Conference menu.
Recording on the Server You can record your conference on the application server. Recordings are automatically placed in the conference’s history at the conclusion of the conference, under Recorded Conferences. For more information, see Accessing Past Conferences (Source List).
Note: Downloading the recording from the server to the conference’s history may take some time
To record on the server:
1. Click Start Recording in the Conference menu.
You are notified in the status display that the conference is being recorded.
Participant Application for Mac User Guide
Product Version: v9.5 Published: 2/12/2013 58
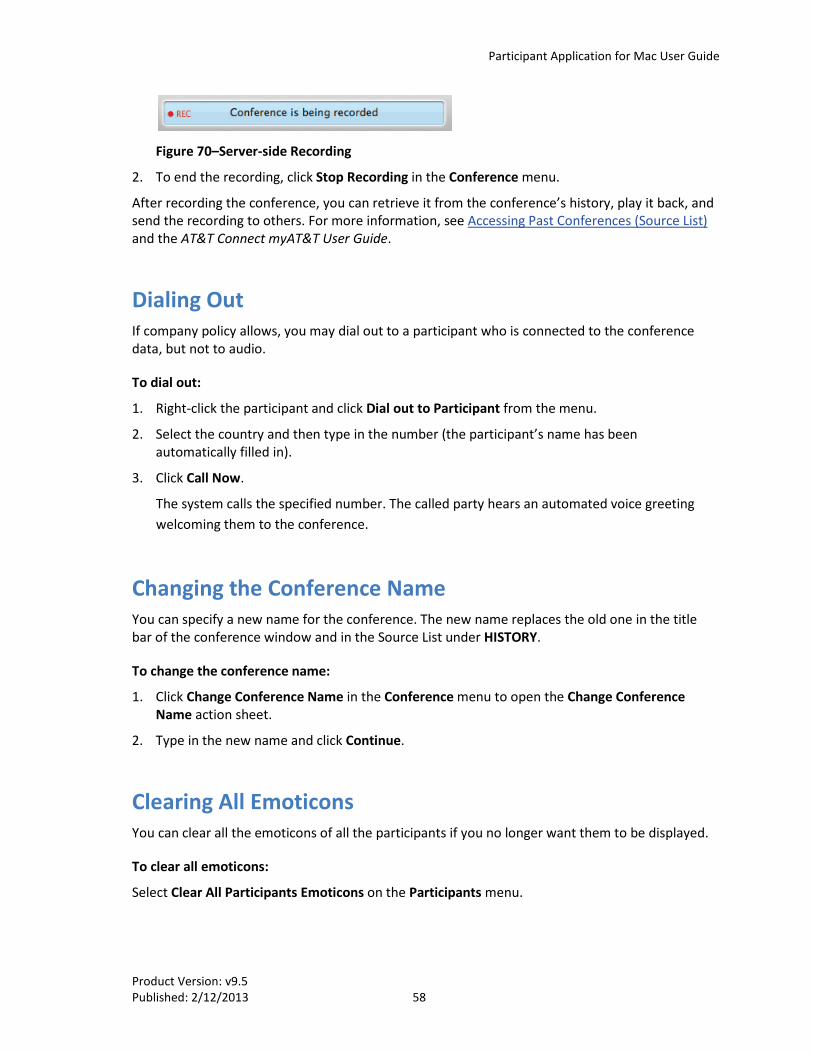
Figure 70–Server-side Recording
2. To end the recording, click Stop Recording in the Conference menu.
After recording the conference, you can retrieve it from the conference’s history, play it back, and send the recording to others. For more information, see Accessing Past Conferences (Source List) and the AT&T Connect myAT&T User Guide.
Dialing Out If company policy allows, you may dial out to a participant who is connected to the conference data, but not to audio.
To dial out:
1. Right-click the participant and click Dial out to Participant from the menu.
2. Select the country and then type in the number (the participant’s name has been automatically filled in).
3. Click Call Now.
The system calls the specified number. The called party hears an automated voice greeting welcoming them to the conference.
Changing the Conference Name You can specify a new name for the conference. The new name replaces the old one in the title bar of the conference window and in the Source List under HISTORY.
To change the conference name:
1. Click Change Conference Name in the Conference menu to open the Change Conference Name action sheet.
2. Type in the new name and click Continue.
Clearing All Emoticons You can clear all the emoticons of all the participants if you no longer want them to be displayed.
To clear all emoticons:
Select Clear All Participants Emoticons on the Participants menu.
Participant Application for Mac User Guide
Product Version: v9.5 Published: 2/12/2013 59
Ending or Leaving the Conference As a host, you can either leave the conference while keeping it alive for the participants (perhaps you have assigned the role of co-host or presenter to a participant). Or, you can end the conference and disconnect all conference participants.
1. Click the Exit button (see Toolbar Buttons) on the toolbar, or select Exit Conference in the Conference menu. A message is displayed asking you if you wish to leave or end the conference.
2. Click End Conference or Leave Conference according to your decision. A confirmation window is displayed, reflecting the option you selected.
If you chose to end the conference, the participants receive a notification that the conference has ended.
Product Version: v9.5 Published: 2/12/2013 60
7. MANAGING PARTICIPANTS (HOSTS)
As well as managing the conference, hosts, co-hosts and presenters have many options for managing the participants, as described below.
Giving/Taking Presenting Rights As the host, you can give presenting rights to any other participant in the conference, and you can also take them back.
To give/take presenting rights:
In the Participants list, right-click the participant and click Give Presenting Rights/Take Presenting Rights, or from the Participants menu, click Give Presenting Rights/Take Presenting Rights.
Expelling a Participant Hosts and presenters can expel a participant from a conference. An expelled participant cannot re-enter the conference and will see a message as such if attempting to re-enter.
In the Participants list, right-click on the participant and then click Expel. Or, click on the participant in the Participants list, and click Expel from the Participants menu. Or, click Expel from Participants main menu.
Muting/Un-muting Participants As the host, you can mute the microphone of a participant, mute and lock the microphone of a participant, and mute the microphone of all participants.
Mute/Un-mute a Participant When a host mutes a participant’s microphone, a mute icon (see Participants Panel Icons) is displayed next to the participant’s name in the Participants list.
Participant Application for Mac User Guide
Product Version: v9.5 Published: 2/12/2013 61
To mute/unmute a participant:
In the Participants list, right-click the participant whose microphone you wish to mute and click Mute/Un-mute.
Or, select the participant in the Participants list, and in the Participants menu click Mute Participant/Un-mute Participant.
Note: Participants can un-mute their microphones after the host muted them.
Muting and Locking a Participant When a host mutes and locks a participant’s microphone, the participant cannot un-mute. A mute and lock icon (see Participants Panel Icons) is displayed next to the participant’s name in the Participants list.
To mute/unmute a participant:
Select the participant in the Participants list, and in the Participants menu click Mute and Lock/Un-mute and Unlock.
Muting/Un-muting All When using the Mute All option, the host is not muted—only the participants are muted.
Note: Participants can un-mute their microphones after the host muted them.
To mute/unmute all participants:
Click Mute All/Un-mute All in the Participants menu in the Participants list, or click Mute All/Un-mute All in the Participants menu.
Changing a Participant’s Role As a host, you can assign co-host status to a participant. Co-hosts have the same privileges as the host and can perform many of the same actions. For example, co-hosts can:
• Determine which options to give to participants.
• Send notes to all participants at once (when this option is not available in the conference for regular participants).
• Reply to notes that were sent to presenters.
• Activate Broadcast mode.
• View the Participants list when this option is not available in the conference for regular participants.
• Give and take presenting rights if the host leaves the conference.
Participant Application for Mac User Guide
Product Version: v9.5 Published: 2/12/2013 62
To change the role of a participant:
1. Select the participant in the Participants list, and in the Participants menu click Change Role to/Co-Host. Or, right-click the participant in the Participants list and click Co-Host on the menu.
2. To remove the Co-Host role, click Change Role to/Participant, or right-click the participant and click Participant on the menu.
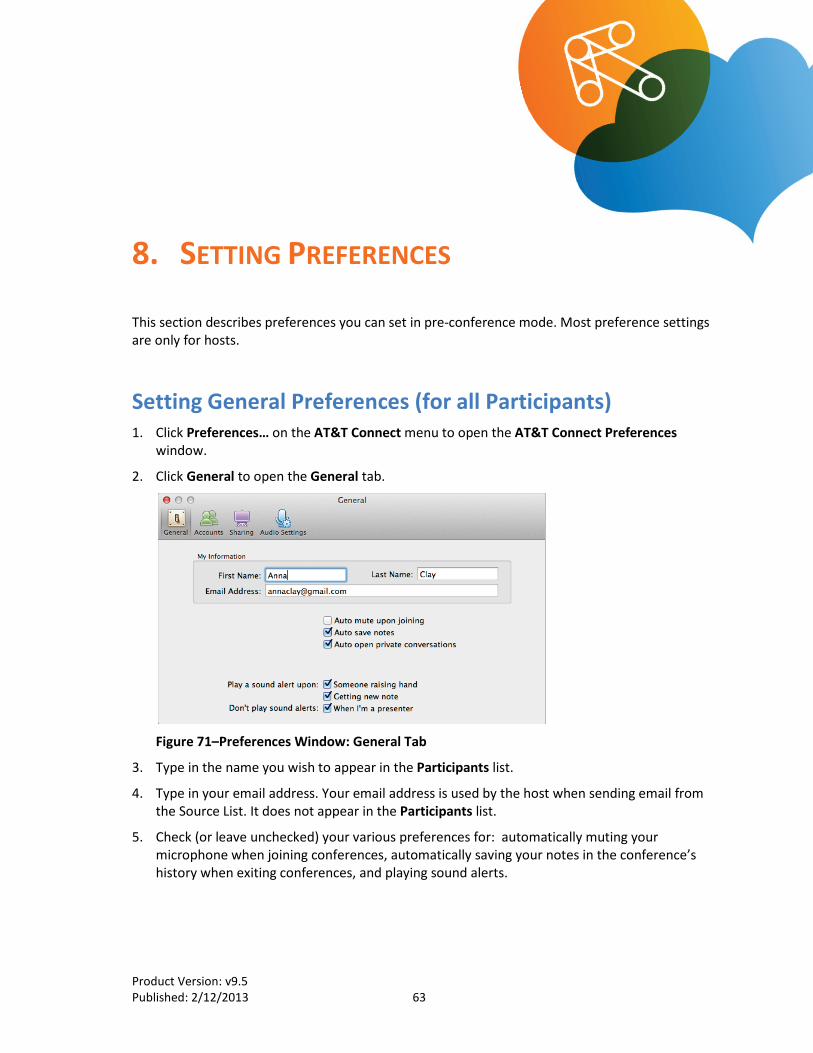
Product Version: v9.5 Published: 2/12/2013 63
8. SETTING PREFERENCES
This section describes preferences you can set in pre-conference mode. Most preference settings are only for hosts.
Setting General Preferences (for all Participants) 1. Click Preferences… on the AT&T Connect menu to open the AT&T Connect Preferences
window.
2. Click General to open the General tab.
Figure 71–Preferences Window: General Tab
3. Type in the name you wish to appear in the Participants list.
4. Type in your email address. Your email address is used by the host when sending email from the Source List. It does not appear in the Participants list.
5. Check (or leave unchecked) your various preferences for: automatically muting your microphone when joining conferences, automatically saving your notes in the conference’s history when exiting conferences, and playing sound alerts.
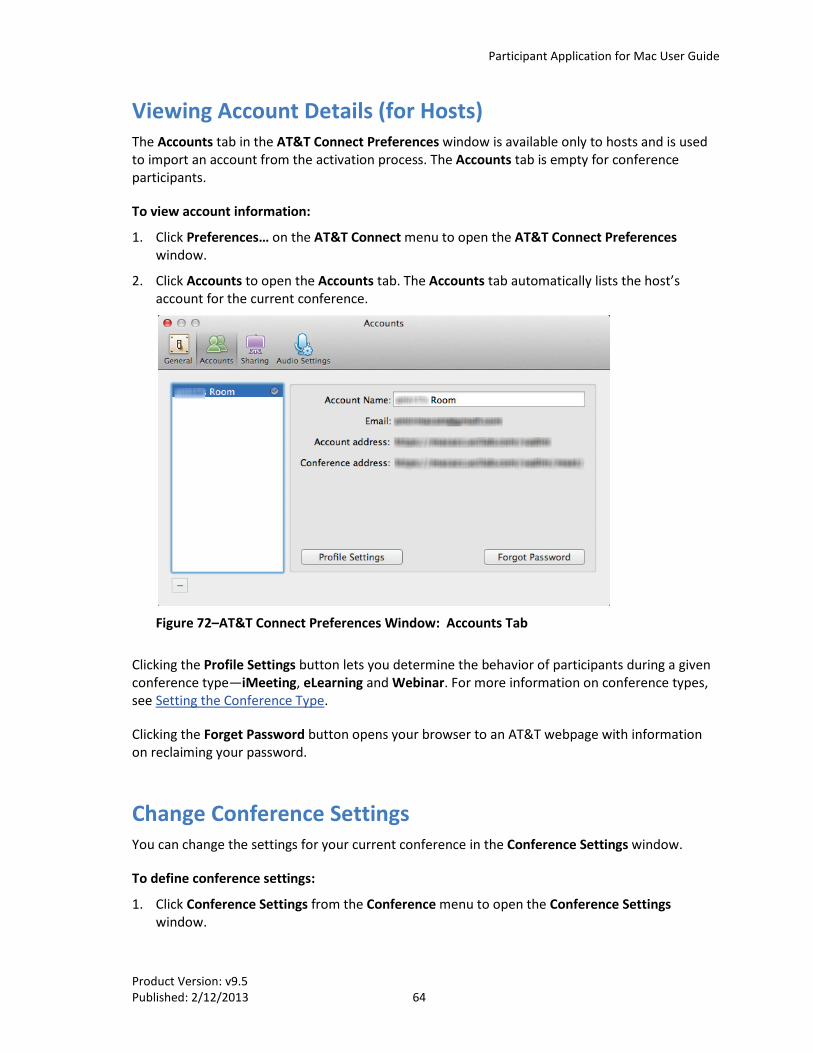
Participant Application for Mac User Guide
Product Version: v9.5 Published: 2/12/2013 64
Viewing Account Details (for Hosts) The Accounts tab in the AT&T Connect Preferences window is available only to hosts and is used to import an account from the activation process. The Accounts tab is empty for conference participants.
To view account information:
1. Click Preferences… on the AT&T Connect menu to open the AT&T Connect Preferences window.
2. Click Accounts to open the Accounts tab. The Accounts tab automatically lists the host’s account for the current conference.
Figure 72–AT&T Connect Preferences Window: Accounts Tab
Clicking the Profile Settings button lets you determine the behavior of participants during a given conference type—iMeeting, eLearning and Webinar. For more information on conference types, see Setting the Conference Type.
Clicking the Forget Password button opens your browser to an AT&T webpage with information on reclaiming your password.
Change Conference Settings You can change the settings for your current conference in the Conference Settings window.
To define conference settings:
1. Click Conference Settings from the Conference menu to open the Conference Settings window.
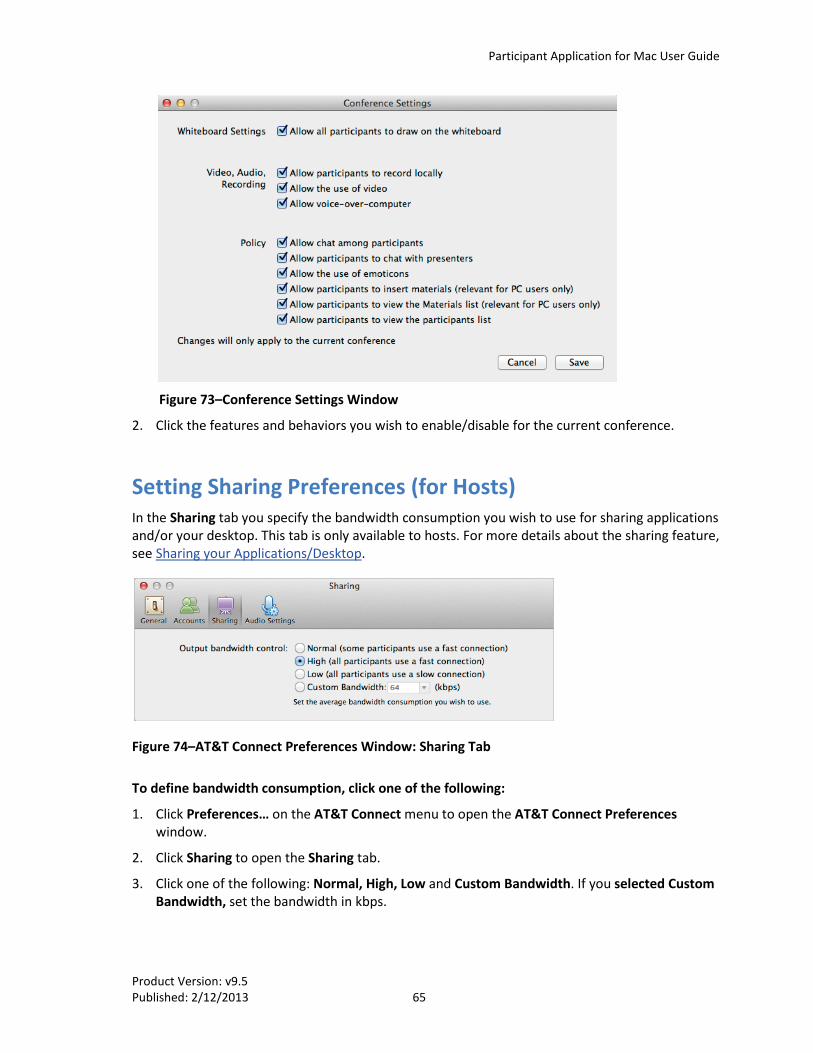
Participant Application for Mac User Guide
Product Version: v9.5 Published: 2/12/2013 65
Figure 73–Conference Settings Window
2. Click the features and behaviors you wish to enable/disable for the current conference.
Setting Sharing Preferences (for Hosts) In the Sharing tab you specify the bandwidth consumption you wish to use for sharing applications and/or your desktop. This tab is only available to hosts. For more details about the sharing feature, see Sharing your Applications/Desktop.
Figure 74–AT&T Connect Preferences Window: Sharing Tab
To define bandwidth consumption, click one of the following:
1. Click Preferences… on the AT&T Connect menu to open the AT&T Connect Preferences window.
2. Click Sharing to open the Sharing tab.
3. Click one of the following: Normal, High, Low and Custom Bandwidth. If you selected Custom Bandwidth, set the bandwidth in kbps.