Embed Size (px)
Citation preview
FLOAT FISHING
http://www.fishingmagic.com/news/article/mps/UAN/1909/V/3/SP/208178506667646725342
Part One - What You Need
If I was going to teach someone to fish I would start them on float fishing and take them to a stillwater. So that's where this series will start, by showing you the basic grass roots of stillwater float fishing.
Before you can go float fishing you need to assemble the correct tackle. This is what you need:
• Float rod, minimum 12ft in length • Small fixed spool reel • 3lb breaking strain line • Small selection of waggler floats • Box of lead free split shot • Hooks ready tied to nylon • A plummet • Small bait catapult • Rod rest • Bait containers • Bait • Landing net • Disgorger
All of the above are available from local tackle dealers. Make good use of your tackle dealer and tell him exactly what it is you want and what your budget is. Don't be afraid to ask him questions, if he's worth your money he should be willing to make sure you get kitted out correctly.
Let's look at these items in more detail, what they are for, why a particular type and why you need them.
The rod - There are literally hundreds of rods of many different types, made by many different manufacturers and all very confusing to the newcomer I'm sure. So what do you buy? Well, for float fishing you need a rod that is purposely designed for casting a float, pure and simple.
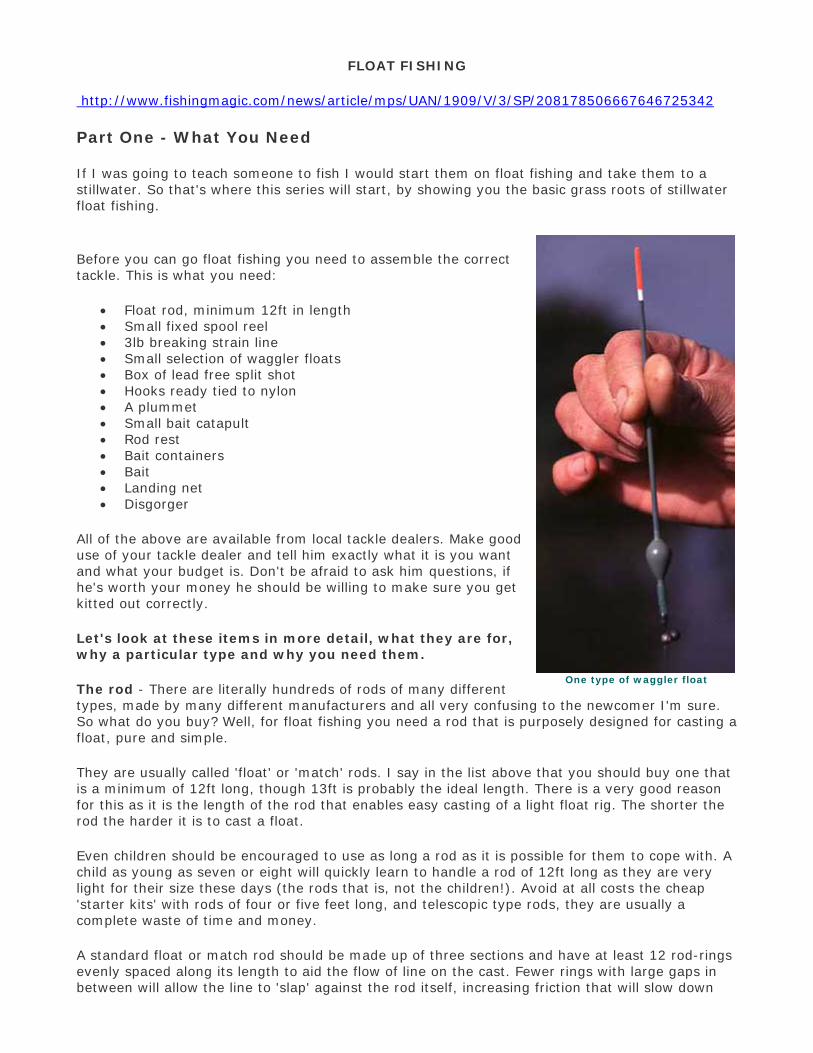
One type of waggler float
They are usually called 'float' or 'match' rods. I say in the list above that you should buy one that is a minimum of 12ft long, though 13ft is probably the ideal length. There is a very good reason for this as it is the length of the rod that enables easy casting of a light float rig. The shorter the rod the harder it is to cast a float.
Even children should be encouraged to use as long a rod as it is possible for them to cope with. A child as young as seven or eight will quickly learn to handle a rod of 12ft long as they are very light for their size these days (the rods that is, not the children!). Avoid at all costs the cheap 'starter kits' with rods of four or five feet long, and telescopic type rods, they are usually a complete waste of time and money.
A standard float or match rod should be made up of three sections and have at least 12 rod-rings evenly spaced along its length to aid the flow of line on the cast. Fewer rings with large gaps in between will allow the line to 'slap' against the rod itself, increasing friction that will slow down
Float Fishing 2 the flow of line and hence reduce the distance that a float can be cast. The rod should have a 'tip action' which means it should bend easily in the tip section and progressively less easily in the middle and lower sections. To test this put the rod together and ask someone to pull down on the rod tip. Look at the shape of the rod as it bends. The reason a float rod has a soft top is to help stop small fish being 'bumped' off the hook.
Generally, the more money you are able to spend on a rod of any type the better the product will be. The more expensive the rod, the better will be the quality of the carbon fibre it is made from, the slimmer and lighter the rod blank will be and the line guides will be lined with harder and smoother materials. Always buy the best your budget will allow. Having said that, some of the cheaper rods from the top name manufacturers are still very good indeed.
The reel - The reel should be a small fixed spool reel capable of holding at least 100 metres of 3lb breaking strain (bs) line. It should have an interchangeable handle so that it can be used by left or right handed people. A right handed person will normally hold a rod in their right hand and wind the reel handle with their left hand. It should have a bale-arm that opens easily and returns solidly back into the closed position on turning the reel handle. The bale-arm should also have a line guide. Ideally buy one with a line roller that actually turns as this will prevent excessive line wear and line twist. The reel should have an anti-reverse switch that when set will prevent the reel being wound backwards and it should have a variable 'clutch' or 'drag' switch that allows the spool to rotate under excess tension from a fighting fish, enabling line to be pulled from the reel before it reaches its breaking point.
The line - I recommend starting off using 3lb breaking strain line. This is light and thin enough to cast well and give good presentation, yet strong enough under normal circumstances to cope with all but the biggest of coarse fish.
Floats - I will cover the floats in more detail in part 2 of 'Float Fishing', but suffice to say here that you don't need to get too complicated too soon. A small selection of waggler (attached bottom end only) floats in the 2AAA to 3AAA size is all you need to start with. Like most anglers, in a few years you will probably collect a fair number of wagglers in all shapes, sizes and colours imaginable, but to start with one or two that I will go into more detail on later is all you need. The 2AAA and 3AAA size refers to the number and size of split shot required to 'cock' the float correctly in the water.
Split shot - Split shot are the weights used to 'cock' a float i.e. make it sit upright in the water with just the tip showing. They are often just referred to as 'shot' or sometimes as 'lead shot', though this is misleading as split shot have not been made out of lead in the UK for many years due to its toxicity. Split shot is now made from a tungsten alloy that is not harmful to wildlife if accidentally swallowed.
Float Fishing 3
Hooks to nylon - Hooks can be purchased ready-tied to a short hooklength and are usually referred to as 'hooks to nylon'. This hooklength is joined to the reel line using two loops. I will explain how in more detail in part 2. The hook sizes you need to start with are sizes 16 and 18 in a general fine wire, preferably barbless, pattern. These hooklengths also come in specified breaking strains. The hooklength you use should always be a slightly lighter breaking strain than the reel line. This is because if your rig becomes caught on something, maybe on a bush or a snag in the water, and has to be pulled out, the line might well break and you want the line to break as close to the hook as possible to keep the loss of line and tackle to a minimum. Therefore buy hooklengths with a breaking strain of approximately 2lb to 2.5lb.
Plummet - It is imperative that you know the depth of water that you are fishing so you can set your bait to be fishing just on the bottom. The way to find out the depth your swim is by using a plummet. Essentially a plummet is
a lead weight that you attach to your hook. By casting out with the plummet attached will tell you whether your float is set too shallow or too deep depending on whether it is pulled under by the weight of the plummet or lays flat on the water. By adjusting the depth of your float until just the tip of your float is showing above the water is how you find the exact depth.
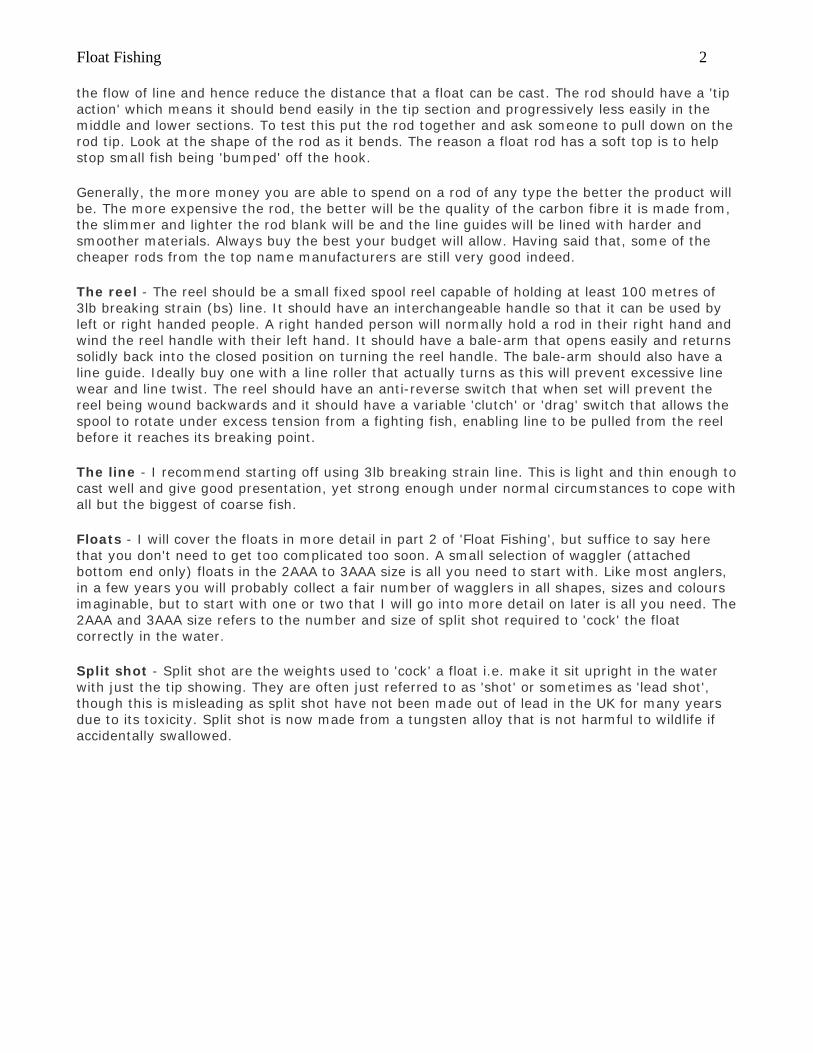
Using a bait catapult
Bait catapult - Perhaps not entirely essential as you can throw free bait offerings in by hand, but correct and accurate feeding of a swim is imperative to successful fishing and baiting by catapult is, with practise, far more efficient and accurate than that which can be achieved by hand. A small match-type catapult with a soft pouch designed to fire maggots and small particles is what you need.
Rod rest - A rod rest is essential for holding the rod safely while baiting hooks and unhooking fish. It is also a great help in ensuring that your rod stays still and doesn't pull your float about and not least because holding a 12 or 13ft rod for several hours at a time is very tiring on the arm even with today's lightweight versions.
Bait containers - It is best to buy purpose-made bait boxes, although you can make do with any reasonable sized plastic box with a secure lid. The purpose-made ones are designed primarily to keep live baits such as maggots and worms in as they have perforated lids to allow air through.
Float Fishing 4
Bait - The number one bait for the beginner is the maggot and for now I wouldn't look at too much else, except for perhaps sweetcorn and bread if maggots are not available for any reason. Maggots are simple to use and are eaten by almost every fish that swims.
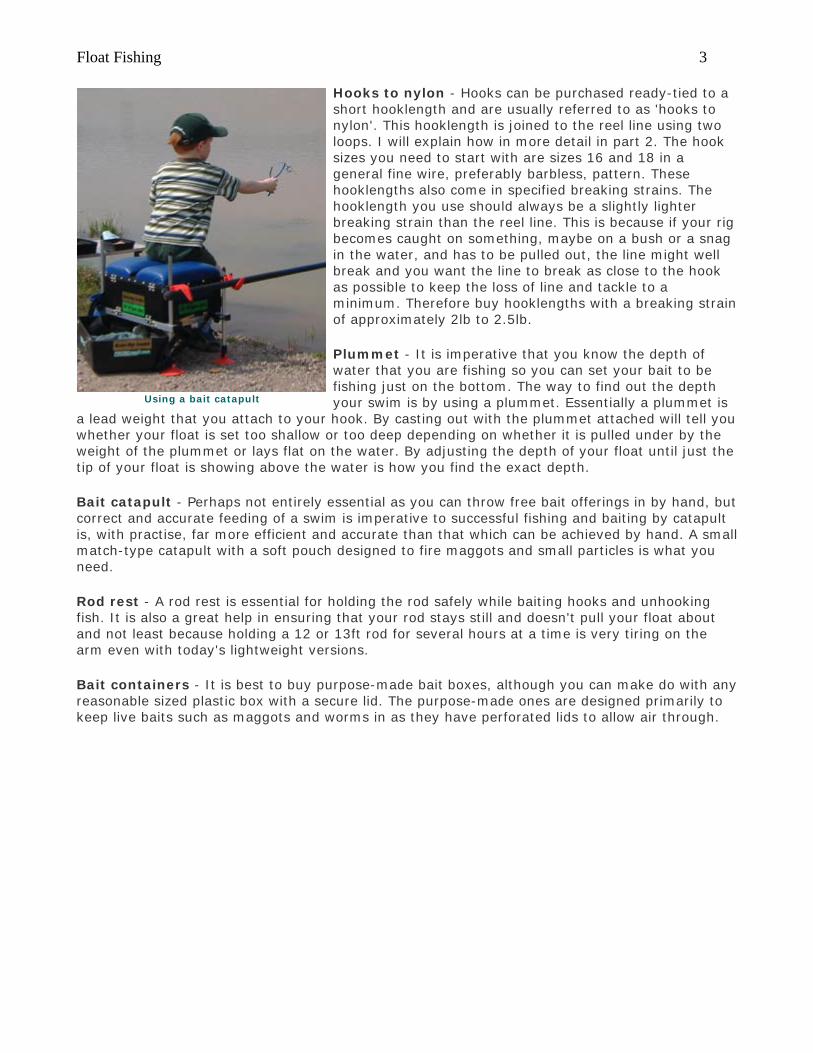
Using a disgorger
Landing net - A landing net is an essential piece of kit and you shouldn't go fishing without one. You may be able to land fish of a few ounces by swinging them in, but anything from half a pound up will require a landing net if you don't want to be in danger of snapping your line or pulling the hook from the fishes mouth. Neither is desirable, not least for the fish. The net itself should have a diameter of around 18 inches minimum with a handle of at least 6ft long.
Disgorger - A device for removing the hook from a fish's mouth. Always carry a disgorger, preferably at least two in case you lose one. Small hooks often go a long way into a fishes mouth and it is not always possible to retrieve them with your fingers. A disgorger makes removing deep-set hooks a doddle without risk of harming the fish.
Part Two - Basic Stillwater Waggler Fishing
I'm making some general assumptions here about where and when you are going to fish. Firstly I'm assuming that it is a 'mixed' fishery containing your everyday British coarse fish such as roach, rudd, perch, bream, tench, etc, rather than a commercial carp fishery. I'll deal with carp fisheries as a separate topic in another article because the method for these, though much the same in principle, needs a few amendments to the basic rig.
Secondly I'm assuming for the moment that you are fishing in the warmer months of the year when the fish are most active, rather than the middle of winter when the most experienced of coarse anglers are likely to be struggling for a bite.
In part 1 I covered the basic kit required to go waggler fishing on a stillwater. Now in part 2 I will cover how to set up a waggler rig for general stillwater use and start fishing with it.
Selecting Your Swim First thing to do on arriving at a fishery is to choose your swim, which is the term used to describe the area in the water where you will be casting your tackle and bait. Ideally you will be seeking water between three and six feet in depth. Fish will be in water both shallower and deeper than this but any shallower than 3 feet means you are likely to spook fish with constant casting and retrieving of the float, any deeper and the float rig itself becomes difficult for the inexperienced angler to handle with any efficiency.
If at all possible choose a swim without any obstructions, like bushes or trees, behind or above where you will be casting from. These will hinder your casting. You are going to be using an overhead cast so make sure you have enough room. Save the tight swims until you are reasonably proficient.
What Is a Waggler Float? OK, I've mentioned the style of float we are going to be using several times now, so I had better tell you what a 'waggler' float actually is. Very simply, it's a float that you attach to your line by the bottom end only. The float just 'waggles' about on your line, hence the name.
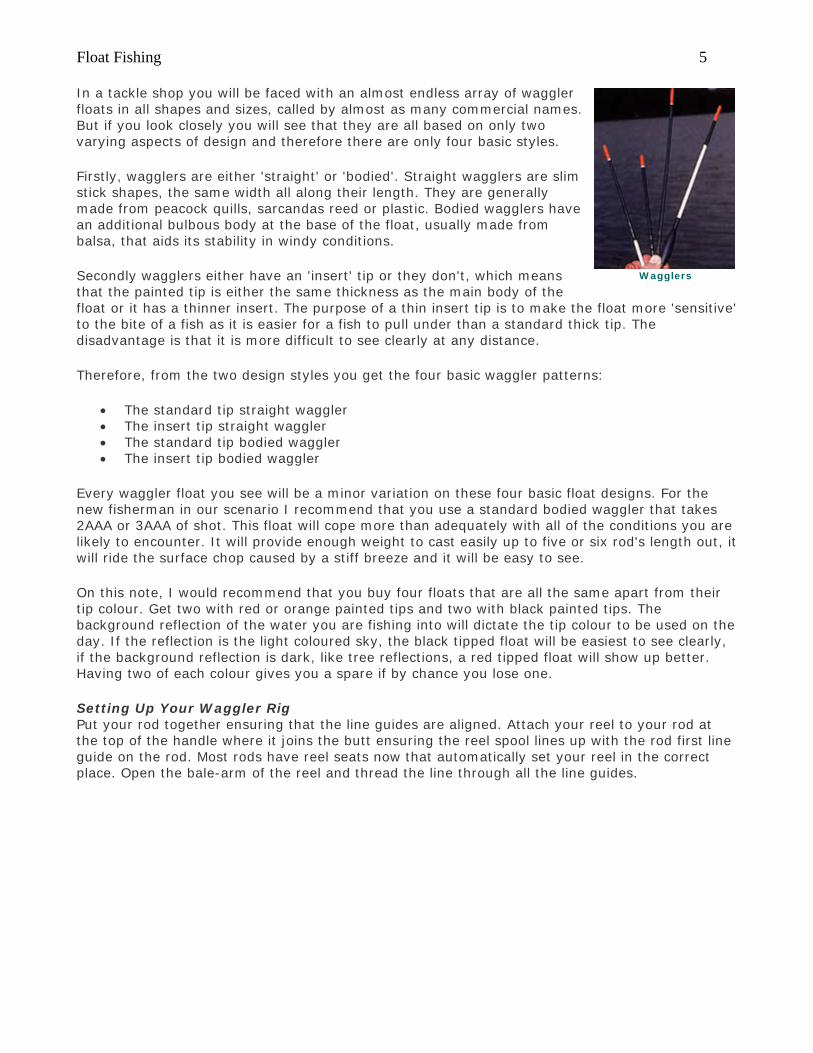
Float Fishing 5 In a tackle shop you will be faced with an almost endless array of waggler floats in all shapes and sizes, called by almost as many commercial names. But if you look closely you will see that they are all based on only two varying aspects of design and therefore there are only four basic styles.
Firstly, wagglers are either 'straight' or 'bodied'. Straight wagglers are slim stick shapes, the same width all along their length. They are generally made from peacock quills, sarcandas reed or plastic. Bodied wagglers have an additional bulbous body at the base of the float, usually made from balsa, that aids its stability in windy conditions.
Secondly wagglers either have an 'insert' tip or they don't, which means that the painted tip is either the same thickness as the main body of the float or it has a thinner insert. The purpose of a thin insert tip is to make the float more 'sensitive' to the bite of a fish as it is easier for a fish to pull under than a standard thick tip. The disadvantage is that it is more difficult to see clearly at any distance.
Wagglers
Therefore, from the two design styles you get the four basic waggler patterns:
• The standard tip straight waggler • The insert tip straight waggler • The standard tip bodied waggler • The insert tip bodied waggler
Every waggler float you see will be a minor variation on these four basic float designs. For the new fisherman in our scenario I recommend that you use a standard bodied waggler that takes 2AAA or 3AAA of shot. This float will cope more than adequately with all of the conditions you are likely to encounter. It will provide enough weight to cast easily up to five or six rod's length out, it will ride the surface chop caused by a stiff breeze and it will be easy to see.
On this note, I would recommend that you buy four floats that are all the same apart from their tip colour. Get two with red or orange painted tips and two with black painted tips. The background reflection of the water you are fishing into will dictate the tip colour to be used on the day. If the reflection is the light coloured sky, the black tipped float will be easiest to see clearly, if the background reflection is dark, like tree reflections, a red tipped float will show up better. Having two of each colour gives you a spare if by chance you lose one.
Setting Up Your Waggler Rig Put your rod together ensuring that the line guides are aligned. Attach your reel to your rod at the top of the handle where it joins the butt ensuring the reel spool lines up with the rod first line guide on the rod. Most rods have reel seats now that automatically set your reel in the correct place. Open the bale-arm of the reel and thread the line through all the line guides.

Float Fishing 6 The waggler, we now know, is attached by the bottom end only. At the base of the float there is usually a small eye that you can thread the line through. Alternatively, you can buy silicon float adapters. These are small pieces of tubular silicon rubber that you attach to the line first and then push the float into. The benefit of these is that that you can change floats quickly without breaking down the rest of your rig. Either method is fine, so thread the float onto the line.
Now, we have to add the shot to cock the float. You will need shot in the following sizes and these can usually be purchased in a single multi-size dispenser, although you may have to buy the No.8's separately.
AAA BB No. 1 No. 4 No. 6 No. 8
This is an important rule when waggler fishing. The bulk of the split shot, approximately 90 to 95%, is placed right at the base of the float, with the rest in the smaller shot sizes further down the line. This is how to shot and set up a typical 3AAA waggler rig correctly.
Waggler
with silicon float
adapter and
locking shot in position
• Lock the float on the line by adding two AAA shot, one either side of the float eye. Leave a small gap, approx. ¼ to ½ inch, for the float eye to move in.
• Immediately below the lower of the two AAA shot, add a BB, a No1 and a No4 size shot. This should leave the float requiring a small amount of shot, equivalent to about a No.4, to 'dot it down'. These will be attached towards the hook. Before these final shot can be added you need to do two more things first.
• Take a size 18 ready tied hook to nylon from the packet. You will see that it has a loop tied in it. Using an overhand knot, tie a similar loop in the mainline. Pass the mainline loop through the hooklink loop then pass the hook through the mainline loop. Pull the hooklink right through and pull tight and the two loops should come together in a figure of eight configuration.
•
• Next you need to plumb the depth of the swim. Attach your plummet to the hook and let it hang below the float. Allow the float to hang about three feet below the tip of the rod. Trap the line just above the reel with the index finger of your hand holding the rod and release the bale arm with your free hand. Swing the plummet into the anticipated fishing area using a gentle underarm cast, closing the bale arm when the plummet hits the water. The float will either sink or lay flat depending on whether it is set too shallow or too deep. Wind the rig back in and adjust the depth of the float by carefully sliding the locking shot up or down as necessary. Repeat the process several times until the exact depth is found. You then need to add approximately two to three inches to the depth to ensure your bait will be on the bottom.
Split shot
• Now your tackle is set at the correct depth you can add the final couple of shot. Attach a No.6 shot just a fraction below the half distance between the float and the hook and then a No.8 shot a fraction below the half distance between the No.6 shot and the hook.
That should set your float to fish just about right, though you may have to play around with the sizes of the smaller shot to get it perfect as the exact shot required often varies from float to float. You want to end up with about ½ inch of the painted float tip above the water.
Float Fishing 7 Getting set and casting out So that's it. The float rig is set up and you are ready to fish with it. Now set up the rest of your tackle so that it is close at hand. You need to fish from the sitting position so get yourself comfortable on your chair or box and Insert your rod rest in front of you so that when you place the rod in it with the rod butt resting on your knee the rod tip is just touching the surface of the water. Make sure your landing net is set up (most important, don't wait until a decent fish is on to discover that your landing net is not assembled) and your bait and catapult are easily accessible.
Next, set the drag on your reel. Make sure the anti-reverse switch on your reel is engaged. Hold the line just above the hook and put a good bend in the rod. Loosen the drag until the reel just begins to give line on the slipping spool. This will ensure that any decent fish hooked does not snap your line. Bait your hook with a single maggot and you are ready to cast.
To get your float out it is usual to use a gentle overhead cast. You will need to have mentally noted the area that you plumbed the depth of earlier. There's not much point plumbing one place and fishing another! Your aim now is to cast the float about four or five feet past the point at which you want to fish.
Release the bale-arm and trap the line with the index finger of your hand that is holding the rod. Have the float hanging about three feet below the rod tip. Take the rod tip behind your head so you are looking along the rod butt towards the area you are casting to with your free hand on the end of the rod butt. The rod behind you should be pointing at an angle of about 45 degrees. Smoothly but firmly bring the rod forward and release the line from the reel as the rod comes in front of you. The rod should end up pointing slightly upwards from the horizontal and towards where you are aiming your float.
If you have timed it all right the float will sail out over the water. Just before the float hits the water, slow the line down by gently placing your index finger on the rim of the spool. This will force the hook to overtake the float in the air and land in a straight line on the water with the minimum of disturbance. Close the reel's bale-arm with a turn of the reel handle This will initially take a little practice to perfect but after a while become second nature.
The float is now in the water and about four feet beyond where you plumbed up the depth. Now we need to bring the rig back to the plumbed area and at the same time sink the line between the float and the rod tip. Sinking the line prevents the wind drifting the line and pulling your float out of position. Dip your rod tip under the surface of the water and rapidly give the reel handle three or four turns. This pulls the line under the surface and the float back the four feet or so to where you want to fish. Place the rod in the rest so it remains still and there you are, fishing the waggler. Your hook and bait are just laying on the bottom and waiting for a fish to pick it up.
What you need to do now is attract the fish to the area around your hookbait and get them actively looking for food.
Part Three - Stillwater Waggler Fishing continued - how to feed, play fish and general tips
In part two I covered how to set up a waggler rig for general stillwater use and start fishing with it. Now I will show you how to feed correctly to attract and hold fish in your swim, how to identify bites, how to strike, how to play fish and some additional tips on how to overcome some of the more common problems encountered when stillwater waggler fishing.
You need to feed
Float Fishing 8 No matter how good your rig is, no matter how good or expensive your tackle, it counts for very little if you are not feeding your swim correctly. If you haven't got sufficient numbers of fish being drawn to and holding in your swim, then you are only going to catch the occasional fish and are obviously going to struggle to put a decent bag together. The one major thing that sets a good angler apart from a poor one is the ability to feed the swim properly.
In our scenario built up in the first two parts of Float Fishing our target fish are probably small to medium sized silver fish such as roach, rudd, and bream, plus maybe perch, tench and crucian carp. They may be different species but they all have one thing in common. They swim in shoals.
These shoals of fish patrol around the lake looking for food items. What you need to do when they reach your swim is convince them to stop and feed for an extended period of time without getting the urge to wander off again. The secret to keeping them feeding is to give them enough free bait to keep them occupied, but not enough to fill them too fast and get them competing with one another for what's available. To be fair this is a skill that develops with experience and the most experienced don't get it right all the time, but there are rules of thumb that can be followed.
What to feed
I am going to build on our scenario using the assumption that we will be loose feeding free samples of the bait we are using on the hook, namely maggots. There are scenarios where you may want to use groundbait to attract the fish, but I will cover groundbait in more detail in a future edition of First Class Fishing. All you need to know for now is that groundbait is essentially a crumb-based feed that can be introduced in dampened balls to attract the fish and encourage them to feed in one area. There are many different proprietary groundbait mixes on the market containing various additives and flavours, each with their individual use and as such warrant an edition of their own.
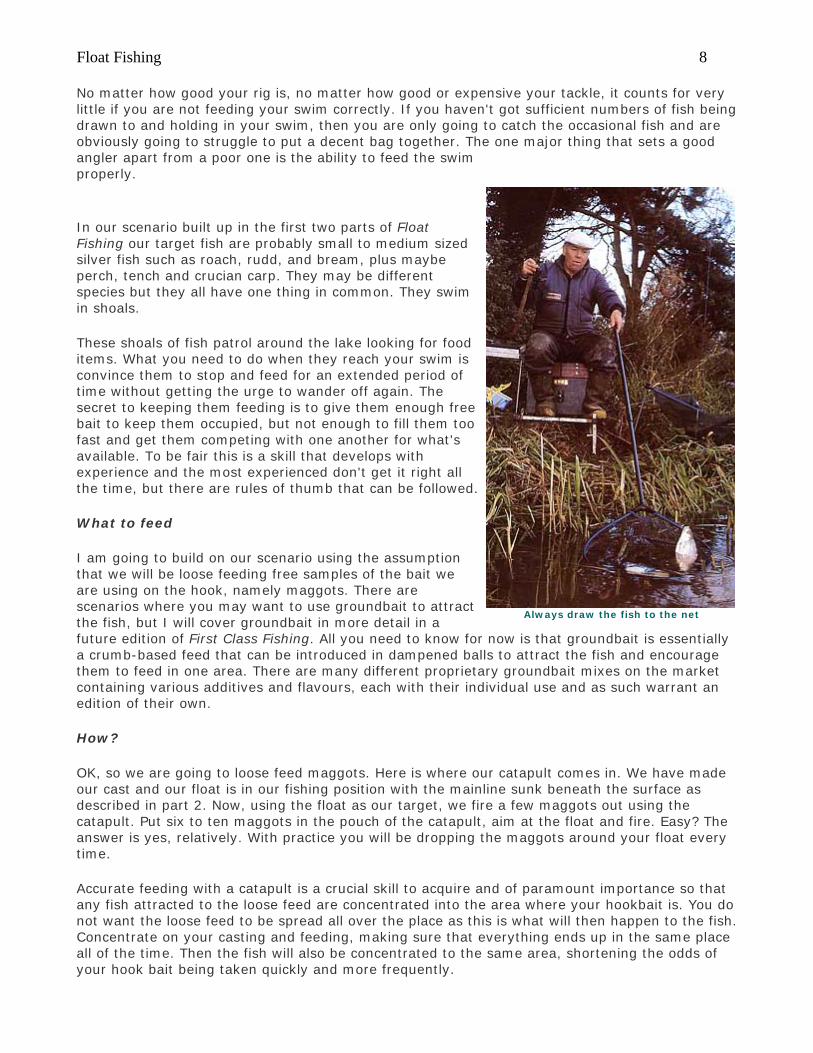
Always draw the fish to the net
How?
OK, so we are going to loose feed maggots. Here is where our catapult comes in. We have made our cast and our float is in our fishing position with the mainline sunk beneath the surface as described in part 2. Now, using the float as our target, we fire a few maggots out using the catapult. Put six to ten maggots in the pouch of the catapult, aim at the float and fire. Easy? The answer is yes, relatively. With practice you will be dropping the maggots around your float every time.
Accurate feeding with a catapult is a crucial skill to acquire and of paramount importance so that any fish attracted to the loose feed are concentrated into the area where your hookbait is. You do not want the loose feed to be spread all over the place as this is what will then happen to the fish. Concentrate on your casting and feeding, making sure that everything ends up in the same place all of the time. Then the fish will also be concentrated to the same area, shortening the odds of your hook bait being taken quickly and more frequently.
Float Fishing 9 How much, how often?
When you begin your session I would recommend that you start off by feeding 6 to 10 maggots at a time. Keep feeding 6 to 10 maggots every couple of minutes, even if you are not getting any bites. The single biggest mistake the inexperienced angler makes is to fire out a couple of pouches of feed and then stop feeding on the assumption that there is enough bait around for the fish to find. This is a frequent and fatal error for a number of reasons. Firstly, maggots do not lie still just because they are in water. They will crawl off and disappear under the dead leaves and other natural litter on the lakebed or burrow into the soft silt or mud. After a couple of minutes, even if there are no fish currently present, your loose fed maggots will almost certainly have totally disappeared. Secondly, passing fish will respond to bait falling through the water. By keeping up a regular pattern of maggots falling through the water it is more likely that fish will spot the bait and come to investigate. Once you have one or two fish hunting about in your swim you will probably get more. There is nothing like feeding fish to attract more feeding fish.
So, the key to successful loose feeding is to keep the bait trickling in. This next phrase has been written thousands of times in angling articles and books but it is so relevant and important I have to write it again here. Feed Little And Often! It is so important. If nothing else please remember this small phrase that has such a large impact when float fishing.
So, don't stop feeding, whatever you do. Don't worry if bites are slow to appear. Sometimes it can take a couple of hours before fish start to feed in earnest, but then all of a sudden they 'switch on' and bites come fast and furious.
Hopefully, after a short while of feeding, you will begin to get bites. When you do it is even more imperative that you keep feeding regularly as you don't want to lose the attention of the fish now you have gained it. If you are hooking and landing fish try to remember to keep up the regular feeding routine. It is so easy to get caught up in the excitement of catching one fish that you stop feeding for several minutes and this is sometimes all that is needed to lose the interest of the feeding shoal and they move off. Keep that feed going in. If you watch top match fishermen at work you may well see them continue to feed while they are still playing a hooked fish. I don't mean that you need to go this far, but it is an indicator as to how important the matchmen consider regular feeding to be to put a maximum possible weight together.
Once you have fish feeding you now have to judge how many fish you have in front of you. If you are getting bites very quickly after recasting, indicating that you may well have a large number of fish in your swim, then you may want to step up the amount of maggots being fed or feed more often so that there are enough free offerings to keep all the fish interested and competing. If bites are 'finicky', that is fast, erratic and hard to hit, or the number of bites you are getting slows down, you may well try reducing the number of maggots being fed, but keep up the rate of feed. As I said earlier, this is something that comes with experience and even the best will get it wrong as it is by no means a science. It is what makes fishing the challenge it is.
Identifying bites
The float will give differing indications that a bite has occurred depending on how a fish has taken your bait. You need to be able to read these float movements and react to them accordingly. Here are some of the most common bite indications you will see.
• Float goes under - the most common bite from a fish is the float going under the water, pulled down by a fish that has taken the bait and moved off at a reasonable pace.
• Float slides sideways without going under - this type of bite is caused by a fish picking up the bait but only moving slowly away so the float doesn't get pulled below the surface or it can also be caused by fish coming up in the water while moving away.
Float Fishing 10
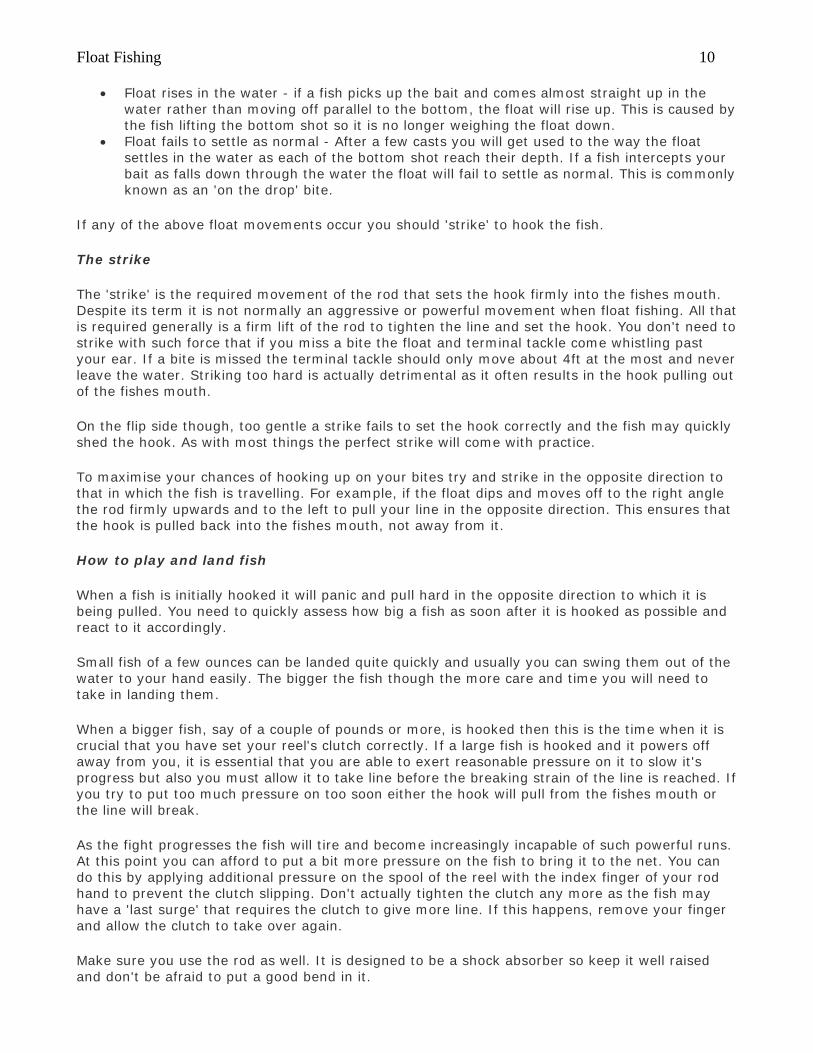
• Float rises in the water - if a fish picks up the bait and comes almost straight up in the water rather than moving off parallel to the bottom, the float will rise up. This is caused by the fish lifting the bottom shot so it is no longer weighing the float down.
• Float fails to settle as normal - After a few casts you will get used to the way the float settles in the water as each of the bottom shot reach their depth. If a fish intercepts your bait as falls down through the water the float will fail to settle as normal. This is commonly known as an 'on the drop' bite.
If any of the above float movements occur you should 'strike' to hook the fish.
The strike
The 'strike' is the required movement of the rod that sets the hook firmly into the fishes mouth. Despite its term it is not normally an aggressive or powerful movement when float fishing. All that is required generally is a firm lift of the rod to tighten the line and set the hook. You don't need to strike with such force that if you miss a bite the float and terminal tackle come whistling past your ear. If a bite is missed the terminal tackle should only move about 4ft at the most and never leave the water. Striking too hard is actually detrimental as it often results in the hook pulling out of the fishes mouth.
On the flip side though, too gentle a strike fails to set the hook correctly and the fish may quickly shed the hook. As with most things the perfect strike will come with practice.
To maximise your chances of hooking up on your bites try and strike in the opposite direction to that in which the fish is travelling. For example, if the float dips and moves off to the right angle the rod firmly upwards and to the left to pull your line in the opposite direction. This ensures that the hook is pulled back into the fishes mouth, not away from it.
How to play and land fish
When a fish is initially hooked it will panic and pull hard in the opposite direction to which it is being pulled. You need to quickly assess how big a fish as soon after it is hooked as possible and react to it accordingly.
Small fish of a few ounces can be landed quite quickly and usually you can swing them out of the water to your hand easily. The bigger the fish though the more care and time you will need to take in landing them.
When a bigger fish, say of a couple of pounds or more, is hooked then this is the time when it is crucial that you have set your reel's clutch correctly. If a large fish is hooked and it powers off away from you, it is essential that you are able to exert reasonable pressure on it to slow it's progress but also you must allow it to take line before the breaking strain of the line is reached. If you try to put too much pressure on too soon either the hook will pull from the fishes mouth or the line will break.
As the fight progresses the fish will tire and become increasingly incapable of such powerful runs. At this point you can afford to put a bit more pressure on the fish to bring it to the net. You can do this by applying additional pressure on the spool of the reel with the index finger of your rod hand to prevent the clutch slipping. Don't actually tighten the clutch any more as the fish may have a 'last surge' that requires the clutch to give more line. If this happens, remove your finger and allow the clutch to take over again.
Make sure you use the rod as well. It is designed to be a shock absorber so keep it well raised and don't be afraid to put a good bend in it.
Float Fishing 11 When the fish is sufficiently tired you can net it. Do this by sinking your extended net under your rod and drawing the fish over the stationary net. Don't try to take the net to the fish, always take the fish to the net. When the fish comes over the rim of the net, lift the net straight up to capture it.
Solving common problems
You will quickly realise as you spend more time on the bank that rarely are any two fishing sessions the same. Conditions at the water will vary, particularly the weather, and you will encounter various problems each time you go fishing. To finish off the basics of stillwater waggler fishing, here are a few tips on how to beat the more common problems.
• My line won't sink! Sometimes, no matter how hard you try, you just won't be able to get the line to sink beneath the surface. This is caused by the line becoming greasy as it runs through your hands and through general use. Being greasy it becomes buoyant and refuses to cut through the surface film of the water. Line that doesn't sink will get blown into a bow by the wind and will continually pull your float out of position. An easy way to overcome this is to soak your reel spools in a weak solution of washing up liquid and water. This degreases your line and, hey presto, it sinks easily again. Of course you need to do this before you leave home, but as an emergency alternative for use at the waters edge, try carrying a piece of sponge that has a washing up solution soaked into it. Keep it in a sealed plastic bag so it stays moist. If your line starts to float run your line through the sponge as you wind in. This will again degrease it and allow the line to sink.
• The breeze is still moving my float even though the line is sunk! If you can't get your float to stay still just by sinking the line, try increasing the depth of the float a few inches so about six inches of line is on the bottom. Then add another no.8 shot onto the line that is lying on the bottom and this should stop the float from drifting. You can add a few more inches and more shot that lie on the bottom if the problem continues, but this increasingly makes the rig less sensitive. At some point you will have to decide that the conditions do not favour float fishing and switch to a ledger set up.
• I'm getting fast bites but can't hit them! Sometimes you just cannot hook up bites. They are fast bites and the fish seem to be letting go before you can strike. This is often caused by the fish 'feeling' the bottom dropper shot and spitting the bait out. If this happens try sliding the bottom no.8 shot away from the hook a few inches. This gives the fish longer to hold the bait before the weight is felt and gives a much more positive bite.
• My maggot is being bitten and sucked but my float didn't register a bite! This is the opposite to the problem above. The fish are taking the bait confidently and not moving very far, but your bottom shot, often called a 'tell tale' shot, is too far away from the hook to register the bite on the float. The fish then has a chance then to suck your maggot and spit it out again before you know it's there. In this case move the bottom shot a few inches closer to the hook and then you should see more bites.
Part Four - Stillwater Waggler Fishing continued - Building on the basics
In part three we looked at how to loose feed to attract and hold fish in your swim, how to identify bites, how to strike, how to play fish and some additional tips on how to overcome some of the more common problems encountered when stillwater waggler fishing.
This time I will expand on the basics, showing you how and when to use different designs and sizes of waggler floats, some different shotting patterns for various situations including, 'on the drop', 'beat the small fish', 'off the bottom drift beater', 'the lift method', and 'the slider'.
When to use which waggler
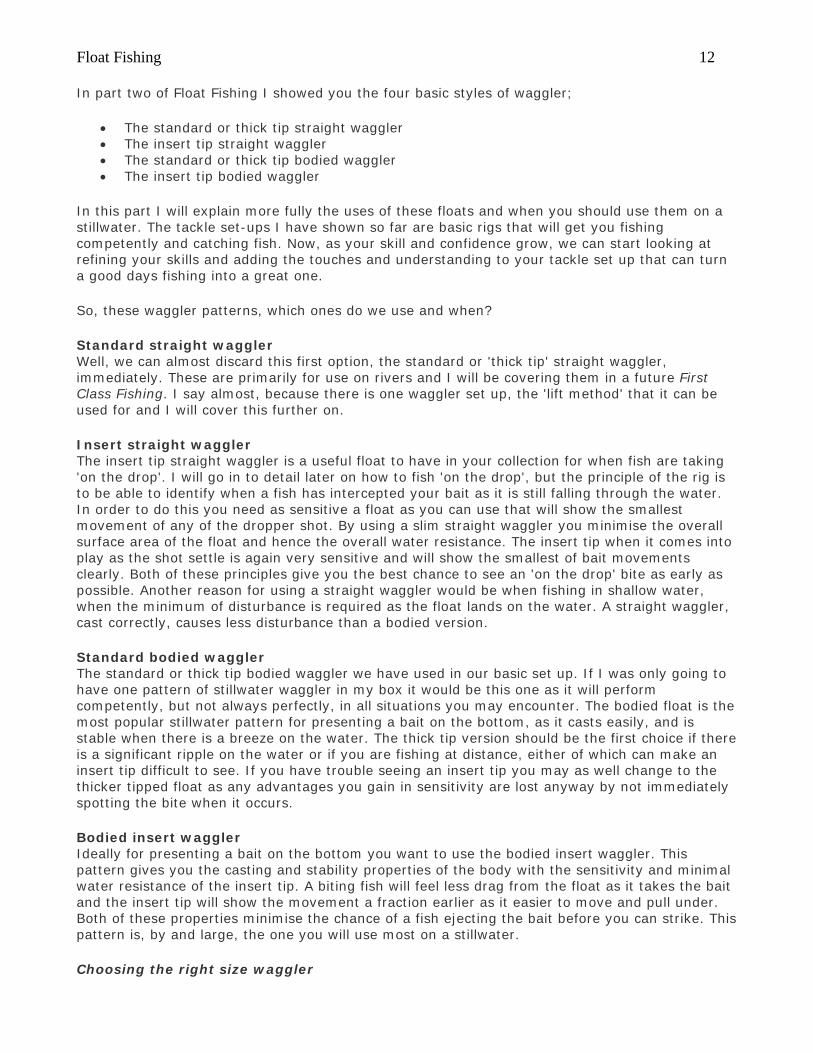
Float Fishing 12 In part two of Float Fishing I showed you the four basic styles of waggler;
• The standard or thick tip straight waggler • The insert tip straight waggler • The standard or thick tip bodied waggler • The insert tip bodied waggler
In this part I will explain more fully the uses of these floats and when you should use them on a stillwater. The tackle set-ups I have shown so far are basic rigs that will get you fishing competently and catching fish. Now, as your skill and confidence grow, we can start looking at refining your skills and adding the touches and understanding to your tackle set up that can turn a good days fishing into a great one.
So, these waggler patterns, which ones do we use and when?
Standard straight waggler Well, we can almost discard this first option, the standard or 'thick tip' straight waggler, immediately. These are primarily for use on rivers and I will be covering them in a future First Class Fishing. I say almost, because there is one waggler set up, the 'lift method' that it can be used for and I will cover this further on.
Insert straight waggler The insert tip straight waggler is a useful float to have in your collection for when fish are taking 'on the drop'. I will go in to detail later on how to fish 'on the drop', but the principle of the rig is to be able to identify when a fish has intercepted your bait as it is still falling through the water. In order to do this you need as sensitive a float as you can use that will show the smallest movement of any of the dropper shot. By using a slim straight waggler you minimise the overall surface area of the float and hence the overall water resistance. The insert tip when it comes into play as the shot settle is again very sensitive and will show the smallest of bait movements clearly. Both of these principles give you the best chance to see an 'on the drop' bite as early as possible. Another reason for using a straight waggler would be when fishing in shallow water, when the minimum of disturbance is required as the float lands on the water. A straight waggler, cast correctly, causes less disturbance than a bodied version.
Standard bodied waggler The standard or thick tip bodied waggler we have used in our basic set up. If I was only going to have one pattern of stillwater waggler in my box it would be this one as it will perform competently, but not always perfectly, in all situations you may encounter. The bodied float is the most popular stillwater pattern for presenting a bait on the bottom, as it casts easily, and is stable when there is a breeze on the water. The thick tip version should be the first choice if there is a significant ripple on the water or if you are fishing at distance, either of which can make an insert tip difficult to see. If you have trouble seeing an insert tip you may as well change to the thicker tipped float as any advantages you gain in sensitivity are lost anyway by not immediately spotting the bite when it occurs.
Bodied insert waggler Ideally for presenting a bait on the bottom you want to use the bodied insert waggler. This pattern gives you the casting and stability properties of the body with the sensitivity and minimal water resistance of the insert tip. A biting fish will feel less drag from the float as it takes the bait and the insert tip will show the movement a fraction earlier as it easier to move and pull under. Both of these properties minimise the chance of a fish ejecting the bait before you can strike. This pattern is, by and large, the one you will use most on a stillwater.
Choosing the right size waggler
Float Fishing 13 We have learned that a waggler comes in only four basic patterns, but why is there a myriad of sizes available? Which size is used when? Well, the answer is generally governed by answering another simple question, “how far do I need to cast?”
Usually the size of the float to be used is simply governed by how far you need to cast it. From a casting point of view, the closer in you are fishing, the smaller the float you can get away with, the further out you need to fish, the heavier the float will need to be in order to reach the required distance. You also need to consider the strength and direction of the breeze that is blowing, as casting into a headwind will reduce by several yards the distance that you can cast the same float with the wind coming from behind you. My overall guidance would be use a float that errs slightly on the heavy side, perhaps by a BB shot or so. Remember that in most instances you want to be able to cast a few feet beyond your fishing area so you can draw it back and sink the line. You need to be able to accomplish this with ease with a smooth cast, rather than trying to lash the float out with a lot of effort. An underweight float usually leads to loss of accuracy, wasted effort, reduced actual fishing time, unnecessary disturbance and ultimately will reduce your enjoyment.
Over time you can build up a collection of floats that vary from those that carry a couple of BB shot that you can use under your rod tip, up to floats carrying multiple SSG's that you can punch out a fair distance. Try a few practice sessions with floats of varying weights to see how far you can cast each one. Armed with this knowledge you will be able to judge which float to choose for a particular session.
More advanced methods and rigs
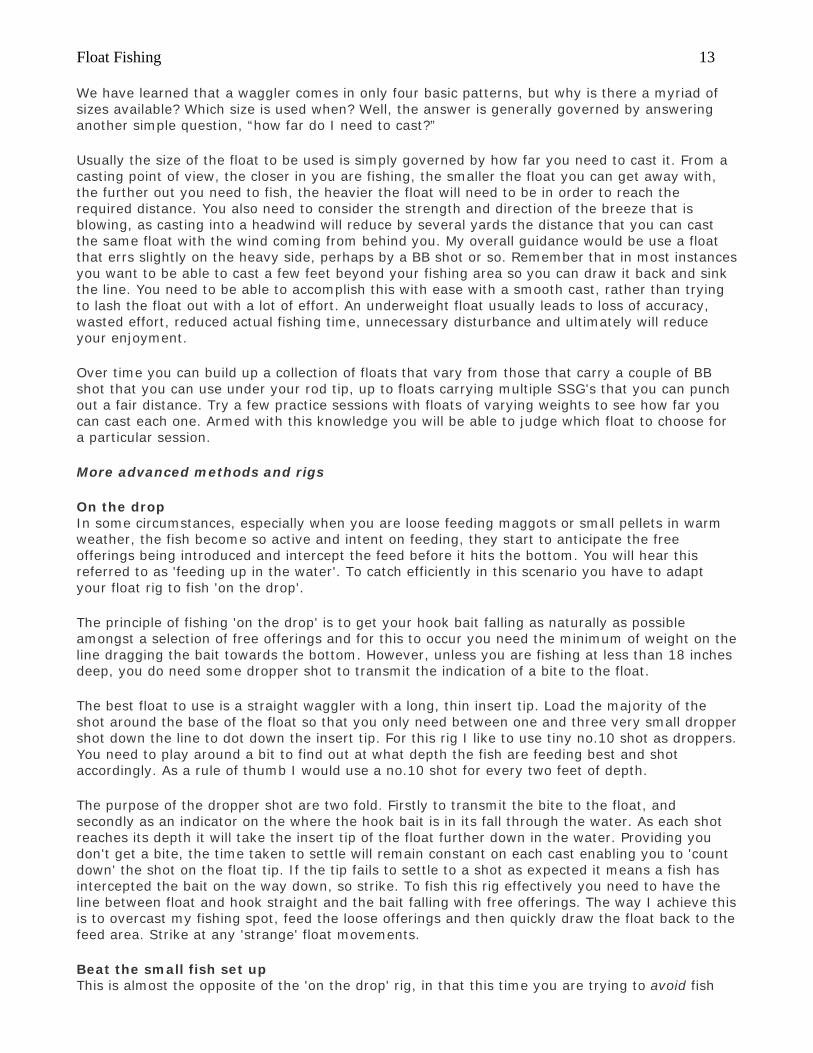
On the drop In some circumstances, especially when you are loose feeding maggots or small pellets in warm weather, the fish become so active and intent on feeding, they start to anticipate the free offerings being introduced and intercept the feed before it hits the bottom. You will hear this referred to as 'feeding up in the water'. To catch efficiently in this scenario you have to adapt your float rig to fish 'on the drop'.
The principle of fishing 'on the drop' is to get your hook bait falling as naturally as possible amongst a selection of free offerings and for this to occur you need the minimum of weight on the line dragging the bait towards the bottom. However, unless you are fishing at less than 18 inches deep, you do need some dropper shot to transmit the indication of a bite to the float.
The best float to use is a straight waggler with a long, thin insert tip. Load the majority of the shot around the base of the float so that you only need between one and three very small dropper shot down the line to dot down the insert tip. For this rig I like to use tiny no.10 shot as droppers. You need to play around a bit to find out at what depth the fish are feeding best and shot accordingly. As a rule of thumb I would use a no.10 shot for every two feet of depth.
The purpose of the dropper shot are two fold. Firstly to transmit the bite to the float, and secondly as an indicator on the where the hook bait is in its fall through the water. As each shot reaches its depth it will take the insert tip of the float further down in the water. Providing you don't get a bite, the time taken to settle will remain constant on each cast enabling you to 'count down' the shot on the float tip. If the tip fails to settle to a shot as expected it means a fish has intercepted the bait on the way down, so strike. To fish this rig effectively you need to have the line between float and hook straight and the bait falling with free offerings. The way I achieve this is to overcast my fishing spot, feed the loose offerings and then quickly draw the float back to the feed area. Strike at any 'strange' float movements.
Beat the small fish set up This is almost the opposite of the 'on the drop' rig, in that this time you are trying to avoid fish
Float Fishing 14 taking your bait on the drop. Sometimes while targeting bottom feeding fish like tench or bream, you may get plagued by small roach or rudd intercepting your bait on the way down to the bottom which prevents your target species from having any chance of picking up your bait. To combat this you need to get the bait down to the bottom much more quickly to give the better fish feeding there a chance to find your bait.
To do this, reduce the bulk shot immediately below the float by about a no.6 or No. 4 and add this shot at about two feet from the hook. Arrange the dropper shot below this. The additional weight down the line will take the hook bait close to the bottom quickly, hopefully avoiding the attentions of the 'nuisance' small fish. Take care when casting though, making sure you 'feather' the cast, as this shotting pattern is more prone to tangles.
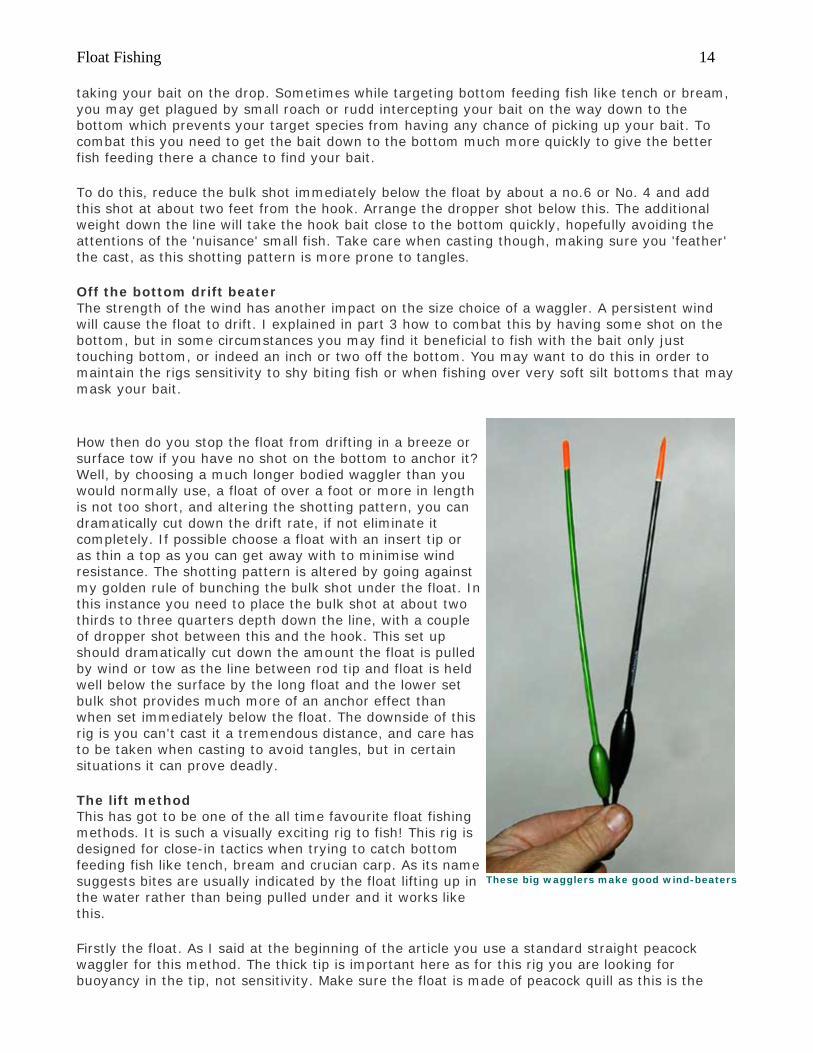
Off the bottom drift beater The strength of the wind has another impact on the size choice of a waggler. A persistent wind will cause the float to drift. I explained in part 3 how to combat this by having some shot on the bottom, but in some circumstances you may find it beneficial to fish with the bait only just touching bottom, or indeed an inch or two off the bottom. You may want to do this in order to maintain the rigs sensitivity to shy biting fish or when fishing over very soft silt bottoms that may mask your bait.
These big wagglers make good wind-beaters
How then do you stop the float from drifting in a breeze or surface tow if you have no shot on the bottom to anchor it? Well, by choosing a much longer bodied waggler than you would normally use, a float of over a foot or more in length is not too short, and altering the shotting pattern, you can dramatically cut down the drift rate, if not eliminate it completely. If possible choose a float with an insert tip or as thin a top as you can get away with to minimise wind resistance. The shotting pattern is altered by going against my golden rule of bunching the bulk shot under the float. In this instance you need to place the bulk shot at about two thirds to three quarters depth down the line, with a couple of dropper shot between this and the hook. This set up should dramatically cut down the amount the float is pulled by wind or tow as the line between rod tip and float is held well below the surface by the long float and the lower set bulk shot provides much more of an anchor effect than when set immediately below the float. The downside of this rig is you can't cast it a tremendous distance, and care has to be taken when casting to avoid tangles, but in certain situations it can prove deadly.
The lift method This has got to be one of the all time favourite float fishing methods. It is such a visually exciting rig to fish! This rig is designed for close-in tactics when trying to catch bottom feeding fish like tench, bream and crucian carp. As its name suggests bites are usually indicated by the float lifting up in the water rather than being pulled under and it works like this.
Firstly the float. As I said at the beginning of the article you use a standard straight peacock waggler for this method. The thick tip is important here as for this rig you are looking for buoyancy in the tip, not sensitivity. Make sure the float is made of peacock quill as this is the
Float Fishing 15 most buoyant float material. The float should be small, around four to six inches long, and attached to the line by a half inch long piece of silicon tubing rather than locking it on with shot.
The shot should be a single large weight, like an SSG, pinched on about four inches above the hook. The buoyancy of the float should ideally just support the weight of the shot.
The rig is then set over-depth by about a 12 inches and cast out. The float will obviously lie flat on the surface initially as it's set over-depth and the large shot is on the bottom, so set your rod in a rod rest with the rod tip just touching the water and then gently wind in until the line tightens and the float cocks. Carefully wind in until the float is set with just its tip breaking the surface.
Depending on how a fish takes your bait, the float will do one of two things. It will either slide straight under as a fish picks up your bait and moves away with it quite quickly, usually resulting in your rod tip being pulled round too, or you will get the classic lift bite. The lift bite occurs when the taking fish lifts the shot off the bottom, causing the float to rise up in the water. If it lifts it far enough the float will actually lie flat on the surface. It will then slide away across the waters surface as the fish moves slowly off. At this point strike and hang on.
This method is a classic early season tench method and is very visual and exciting to fish. However, it is limited for casting distance and doesn't work too well in windy conditions or where there is significant surface drift. But on a calm summer morning when feeding tench are fizzing up clouds of bubbles, it is superb.
The slider How do you float fish in water that is deeper than the length of your rod? For example, you want to float fish with the bait on or near the bottom, but the water is 20 feet deep and your rod is only 13 feet long. You can't fish a fixed waggler because you won't be able to cast or land fish. What you need in this situation is the slider.
The slider is a big, bodied, loaded waggler, with a long stem and usually with an insert tip, that takes a lot of weight to cock it. What do I mean by loaded? This is when the float has weight built in to its base so you don't have to attach as much shot to the line, making it partly 'self cocking'. The loading on the float should submerge the body part of the float and part of the stem, leaving the remaining stem part requiring an additional 2 to 4 AAA shot to set it correctly in the water. The slider float will have either a small eye fixed on the base, or sometimes a small swivel.
The principle of the slider is to let the float run free on the line with the shot bulked towards the hook. When you cast out, the bulk shot pull the line through the eye of the float, enabling the float to slide until it reaches the correct depth. How is the correct depth set? This is achieved by tying a short piece of line to the mainline using a 'stop knot'. The stop knot will run freely on and off the reel and through the rod rings, but it will not pass through the small eye of the float, stopping the float from sliding any further. By adjusting the position of the stop knot on the mainline you can stop the float at the depth you want to fish at.
The slider seems an intimidating and complicated rig to fish, but if you get the mechanics of the rig right it is actually relatively simple and very effective. The first rule is to make sure that the loading weight on the float is greater than the weight of the bulk shot down the line. This ensures that the float provides the dominant casting weight and stops the float from sliding up the line in mid air, which in turn will reduce the casting distance and greatly increase the chance of a tangle occurring. The second rule is to get the shotting pattern below the float right. Let's do this with an example.
Firstly, you don't want your slider float sitting right on top of your bulk shot. You need to add a 'stopper' shot for the float to rest on prior to casting. This should be a no.4 shot and set at approximately 8ft above the hook. This places the float at a comfortable position for casting.
Float Fishing 16 Next, add the bulk shot. This should be a bulk of 2 or 3AAA and maybe a BB, depending on the required float loading, and is positioned just below the half distance point between the rest shot and the hook, say about 3 feet above the hook. Lastly put a BB dropper shot just below the half distance between the bulk shot and the hook, say around 14 inches above the hook. A BB sounds large for a dropper shot, but is correct for this set up.
To cast the slider rig you need to hold the line with your free hand just above the hook and with the rod pointing straight out in front of you. Bring the rod round to the side until it is pointing parallel with the bank, than smoothly bring the rod back round to the front, releasing the line from your free hand as you do so. If your timing is correct the rig will fly out accurately to your intended fishing area without tangling. Don't close the bale-arm straight away, allow the line to continue peeling off the reel until the float has come to rest against the stop knot. Then close the bail arm, tighten up to the float and you are fishing.
Watch the float closely as bites often occur as lift bites with this rig. Taking fish lift the bottom dropper shot causing the float to ride up. Otherwise the float will sail away. Despite the size and shotting appearing rather bulky and crude, this rig is actually quite sensitive and works really well, even for smaller fish like roach, often out-fishing an alternative leger set up.
Part Five - Waggler Fishing on Rivers - The Set Up
In parts 1 to 4 we looked at how to fish the waggler on stillwaters. Now in part 5 I shall move on to fishing the waggler on rivers, looking at the tackle required, the floats and when to use them, plus general shotting patterns.
Additional factor
Waggler fishing is slightly more complicated on rivers than on stillwaters because, in addition to wind direction, depth and distance, an additional factor has to be taken into account which is that the water itself is moving. You have to contend with a current.
Float Fishing 17 Where we were largely concentrating on how to keep a bait static with stillwater fishing, on rivers we will be attempting to make our hook bait mimic a food item being carried down on the current and this requires a different set up and technique. But more of set ups later. Let's first look at any additional tackle requirements that we need over and above those we used for stillwater fishing.
Tackle
Well, the good news here is that you don't necessarily have to change anything major. You can still use the same float rod of around 13 feet coupled to the small fixed spool reel, although a longer rod can be beneficial, making float control that much easier. The only change that you might like to consider is in investing in a 'closed face' reel. A closed face reel is much less prone to tangling when 'trotting' a float, which effectively is allowing the line to peel freely off the reel as the float moves downstream. A fixed spool has the line coming off in much looser coils which, especially in windy conditions, can tangle around the bale-arm if you are not careful. Fixed spools are also a little more difficult to strike into a bite with as the bale-arm is awkward to close in a hurry, whereas a closed face reel re-engages at the touch of the handle. After saying all that, the closed face reel is not so popular these days despite its efficiency and the fixed spool, being more than good enough, is used by the majority of anglers.
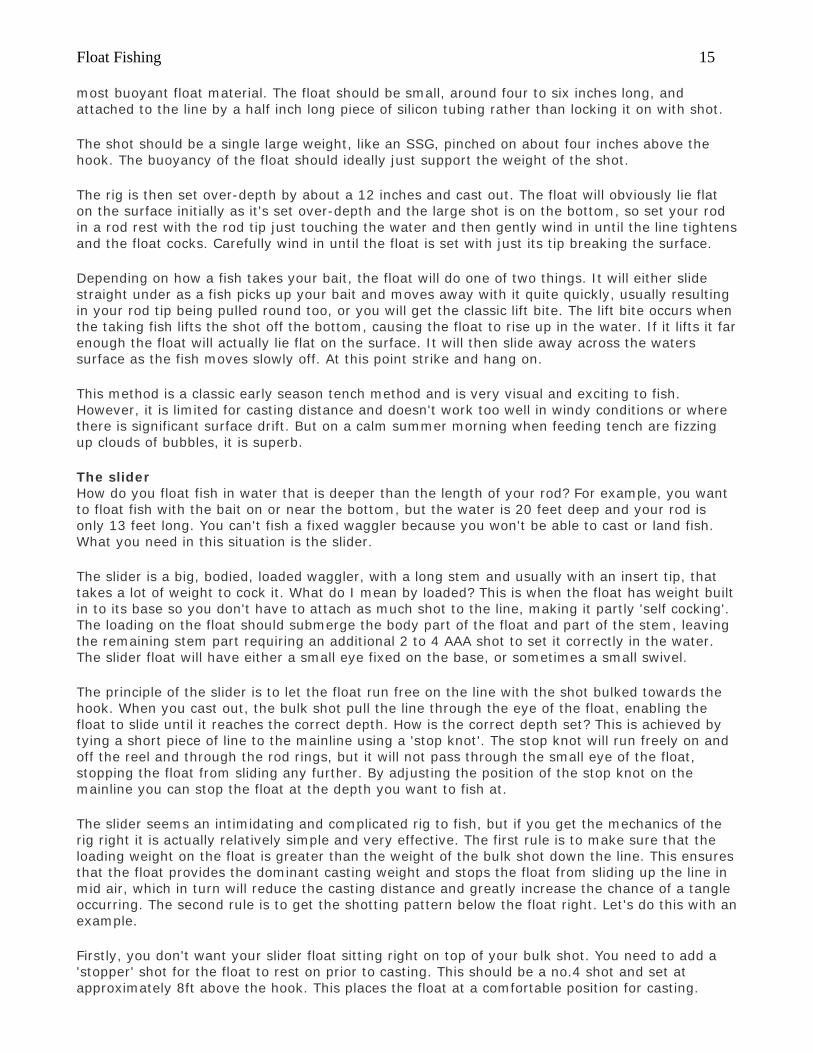
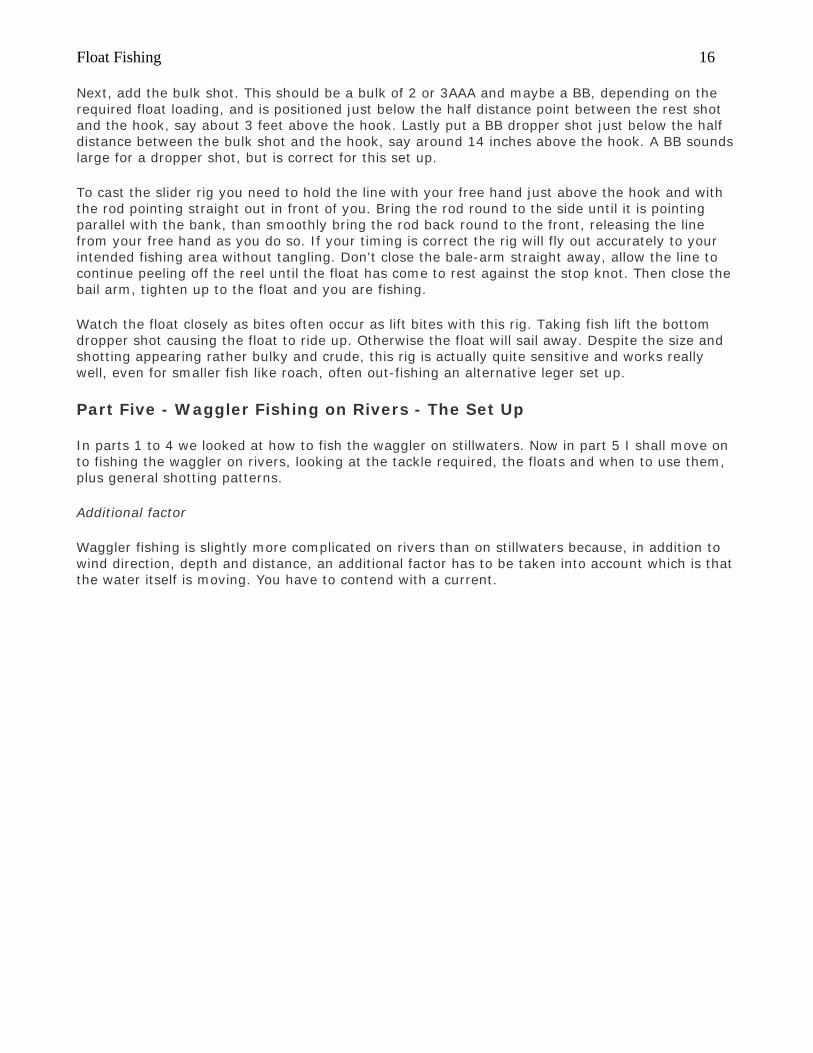
River waggler fishing is often done from a standing position rather than a seated one, so to keep your bait to hand you should invest in a bait waiter or a bait apron. A bait waiter is a bait box holder that screws onto a bank stick. It holds three or four standard bait boxes at waist height so you don't have to keep bending to the ground to get your loose feed. A bait apron is specially designed for float fishing from a standing position as it has a large pouch that you keep your maggots and catapult in for easy access to your maggots for feeding, plus a couple of additional pockets in which to keep spare hook links, shot and disgorgers. Both are available cheaply from your local tackle shop and either will make your river waggler session so much easier and enjoyable.
Three insert wagglers and a plain
waggler
The last item you will require is a large plummet that will help you gauge the depth.
When
During the warmer months of the year, especially, the river waggler comes into its own. Many anglers these days turn up at the river and almost automatically reach for a feeder rod. Why? Well usually because it's easier than float fishing. But generally river fish such as roach, chub, dace, perch, etc, are far easier to catch on a properly fished float rig than on a feeder rig as they tend to respond better to a moving bait than a static one. I tend to fish the feeder only for very specific reasons or when it's physically impossible to fish a float.
River Wagglers
The float that we predominantly looked at in the stillwater sections was the bodied waggler, with the straight waggler being used only in specific situations. For river fishing this principle is reversed. The straight waggler is king on the river with very few exceptions.
Float Fishing 18 Your waggler collection for rivers will, like your stillwater varieties, grow over time until you have floats for all occasions, taking weights up to 4 SSG's if you end up tackling the big rivers like the Severn, Wye and Trent. But for average river waggler fishing you need only a selection in the 2AAA to 4AAA range, both with and without insert tips. The floats should be made of peacock quill which is very buoyant and rides flowing water particularly well.
Choice
Three things determine which type and size of waggler should be used:
• Strength of the flow • Strength of the wind • Distance required to cast
The strength of the flow pretty much determines which type of tip to use. Where the river is flowing with a slow to moderate pace you should use an insert tip as it will still be able to show clearly when a fish has intercepted the bait 'on the drop' (as the bait sinks through the water). But as you encounter stronger and stronger flows the less beneficial an insert tip becomes and additional buoyancy is the main requirement, so a thick tipped waggler should be selected. Also with a faster current you are going to need more dropper shot down the line. The shotting pattern for a river waggler still requires the bulk of the shot, a minimum of 75%, to be set immediately below the float, so to maintain the bulk to dropper ratio where additional shot is required down the line you have to use a larger float. This will become clearer as I explain shotting patterns below.
Wind strength influences the size choice due to the drag effect. The stronger the wind, the longer and heavier a float you will need to combat its ability to pull the float across the current, particularly if the wind is blowing downstream. If your float is too light and drags across the current the bait will behave unnaturally and will probably be ignored by the fish.
Distance is much the same as with stillwater fishing. The float must be heavy enough to be cast the required distance easily and you should err slightly on the heavy side rather than end up fishing too light.
So, when choosing your waggler ask yourself these four questions. Is the current slow enough to use an insert tip? How much shot will I need down the line? How far do I need to cast? Is the wind going to be a factor? By reasoning through these questions you will be able to pick the right float for the day. If you find that you have chosen on the light side and are struggling to cope with any of the variables described, don't hesitate to change to a heavier float. The fish won't mind and you will find your fishing is easier and far more fun.
Shotting patterns
Let me show you some shotting patterns to cover a reasonable spectrum of river situations that will give you the basic idea of how to shot a river waggler. From these you can work out slightly different options to cope with your particular river.
It seems useful here to give you the exact weights in grams of each particular shot size so you can work out the dropper patterns given the overall shotting requirement of the float. See the table below.
Float Fishing 19
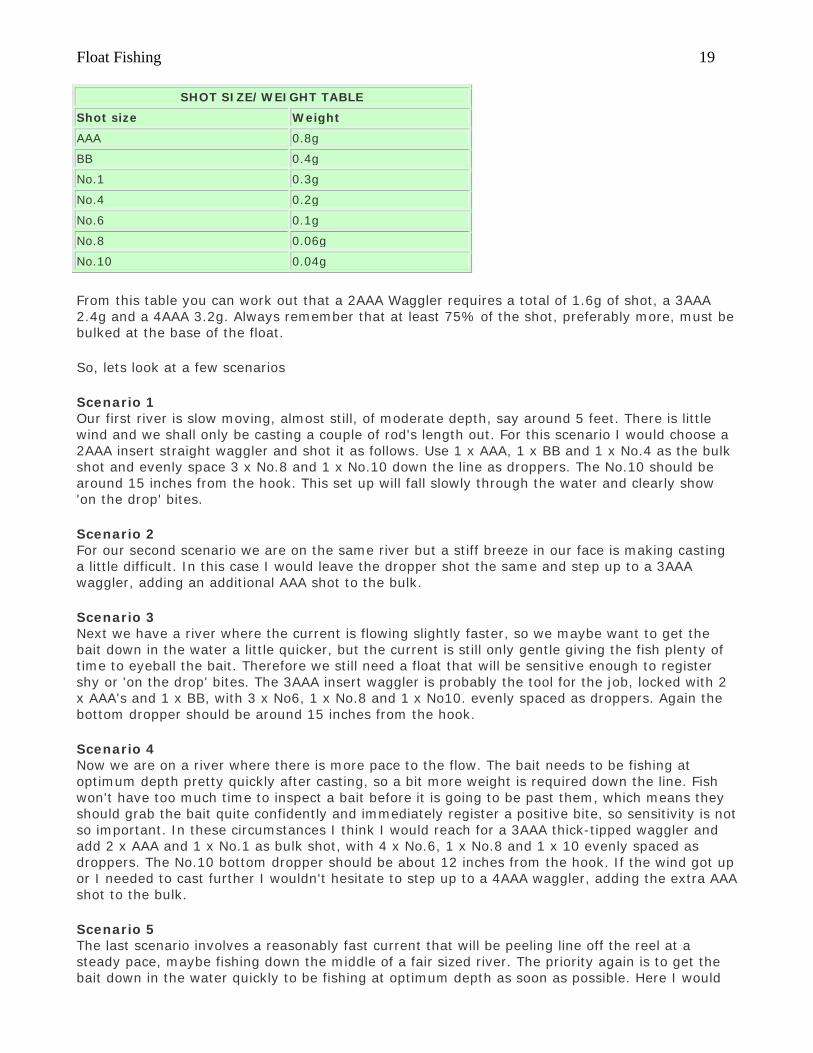
SHOT SIZE/WEIGHT TABLE
Shot size Weight
AAA 0.8g
BB 0.4g
No.1 0.3g
No.4 0.2g
No.6 0.1g
No.8 0.06g
No.10 0.04g
From this table you can work out that a 2AAA Waggler requires a total of 1.6g of shot, a 3AAA 2.4g and a 4AAA 3.2g. Always remember that at least 75% of the shot, preferably more, must be bulked at the base of the float.
So, lets look at a few scenarios
Scenario 1 Our first river is slow moving, almost still, of moderate depth, say around 5 feet. There is little wind and we shall only be casting a couple of rod's length out. For this scenario I would choose a 2AAA insert straight waggler and shot it as follows. Use 1 x AAA, 1 x BB and 1 x No.4 as the bulk shot and evenly space 3 x No.8 and 1 x No.10 down the line as droppers. The No.10 should be around 15 inches from the hook. This set up will fall slowly through the water and clearly show 'on the drop' bites.
Scenario 2 For our second scenario we are on the same river but a stiff breeze in our face is making casting a little difficult. In this case I would leave the dropper shot the same and step up to a 3AAA waggler, adding an additional AAA shot to the bulk.
Scenario 3 Next we have a river where the current is flowing slightly faster, so we maybe want to get the bait down in the water a little quicker, but the current is still only gentle giving the fish plenty of time to eyeball the bait. Therefore we still need a float that will be sensitive enough to register shy or 'on the drop' bites. The 3AAA insert waggler is probably the tool for the job, locked with 2 x AAA's and 1 x BB, with 3 x No6, 1 x No.8 and 1 x No10. evenly spaced as droppers. Again the bottom dropper should be around 15 inches from the hook.
Scenario 4 Now we are on a river where there is more pace to the flow. The bait needs to be fishing at optimum depth pretty quickly after casting, so a bit more weight is required down the line. Fish won't have too much time to inspect a bait before it is going to be past them, which means they should grab the bait quite confidently and immediately register a positive bite, so sensitivity is not so important. In these circumstances I think I would reach for a 3AAA thick-tipped waggler and add 2 x AAA and 1 x No.1 as bulk shot, with 4 x No.6, 1 x No.8 and 1 x 10 evenly spaced as droppers. The No.10 bottom dropper should be about 12 inches from the hook. If the wind got up or I needed to cast further I wouldn't hesitate to step up to a 4AAA waggler, adding the extra AAA shot to the bulk.
Scenario 5 The last scenario involves a reasonably fast current that will be peeling line off the reel at a steady pace, maybe fishing down the middle of a fair sized river. The priority again is to get the bait down in the water quickly to be fishing at optimum depth as soon as possible. Here I would

Float Fishing 20 be reaching for a 4AAA thick tipped waggler and locking it with a 3 x AAA bulk. Then down the line I would be evenly spacing 3 x No4, 1 x No.6 and 1 x No.8 droppers.
Maintain the 3:1 ratio
Oh no - Maths! This is supposed to be fun! Don't worry if this next bit sounds a bit complicated, it's not really when you get your head round it. But just to demonstrate what I mean about maintaining the 3:1 bulk to dropper ratio, let's do some calculations on the dropper pattern of scenario 5 above, but with the 2AAA and 3AAA wagglers. The total weight of the droppers is 0.76 grams (add up the weights of the dropper shot). If you were to shot a 2AAA waggler, which takes 1.6 grams of shot in total, with these droppers you would only have 0.84 grams left for the bulk, which is only 57% of the total capacity of the float, or not much more than a 1:1 bulk to dropper ratio. With the 3AAA waggler you have 1.64 grams left for the bulk, or around 68% of the total shot required, which is only a 2:1 bulk to dropper ratio. Bearing in mind our minimum bulk requirement is 75%, or 3:1 ratio, these floats are obviously too small for the dropper pattern. The 4AAA float is the correct choice, as it will have 2.44 grams or 76% of the shot as bulk. If you were to use the smaller floats you would find them difficult to cast and prone to tangling more than the correctly balanced set up.
That sounds really technical and complicated, but basically all you need to do is learn (or write down) the gram equivalents of the floats and divide by 4. As long as only the answer or less is down the line as droppers you're OK. You may find it useful to write the total shot requirements of the wagglers, plus the shot weights in the table above, on to a sticky label and stick it to the inside lid of your seat box. The information is then always to hand when you need it.
Hopefully these scenarios demonstrate the logic required to deal with the varying factors when tackling rivers with a waggler set up. Obviously these scenarios are only rule of thumb and you have to deal with conditions as you find them. They can be almost infinitely variable so to a degree you can only learn from experience, but hopefully you now have a sound basis to help you get the set up right.
Part Six – Waggler Fishing on Rivers – Casting, Controlling & Feeding
In part five of Float Fishing I introduced you to waggler float choice and set up for the most encountered river scenarios. In this part I will be showing you how cast and control the river waggler and how to feed successfully.
Getting ready
As with stillwater waggler fishing getting yourself organised to fish is very important. It is often beneficial to fish the river waggler from a standing position so make sure you have everything you want close to hand so you are not fumbling or bending unnecessarily.
Set up two rod rests to hold your rod in while feeding and baiting up. They should be set at waist height beside you on your rod arm side so you can easily place the rod in them between casts. If you are using a bait waiter set it up on the opposite side of you to your rod rests with your bait, catapult and disgorger on it. If you are using a bait apron fill the pouch with maggots and keep your catapult in there too. Bait aprons normally have additional pockets to keep ‘bits’ in. Have a disgorger in one of them plus some additional hook lengths. Finally make sure your landing net is set up and is within easy reach.
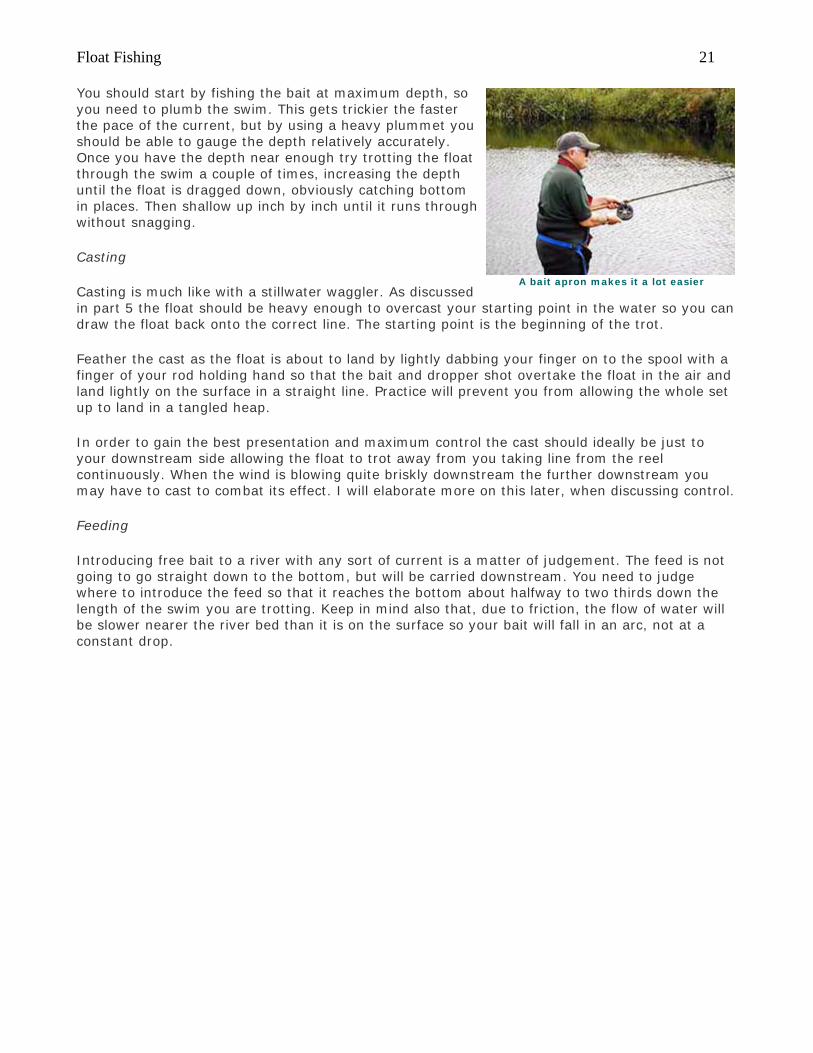
Float Fishing 21 You should start by fishing the bait at maximum depth, so you need to plumb the swim. This gets trickier the faster the pace of the current, but by using a heavy plummet you should be able to gauge the depth relatively accurately. Once you have the depth near enough try trotting the float through the swim a couple of times, increasing the depth until the float is dragged down, obviously catching bottom in places. Then shallow up inch by inch until it runs through without snagging.
Casting
Casting is much like with a stillwater waggler. As discussed in part 5 the float should be heavy enough to overcast your starting point in the water so you can draw the float back onto the correct line. The starting point is the beginning of the trot.
A bait apron makes it a lot easier
Feather the cast as the float is about to land by lightly dabbing your finger on to the spool with a finger of your rod holding hand so that the bait and dropper shot overtake the float in the air and land lightly on the surface in a straight line. Practice will prevent you from allowing the whole set up to land in a tangled heap.
In order to gain the best presentation and maximum control the cast should ideally be just to your downstream side allowing the float to trot away from you taking line from the reel continuously. When the wind is blowing quite briskly downstream the further downstream you may have to cast to combat its effect. I will elaborate more on this later, when discussing control.
Feeding
Introducing free bait to a river with any sort of current is a matter of judgement. The feed is not going to go straight down to the bottom, but will be carried downstream. You need to judge where to introduce the feed so that it reaches the bottom about halfway to two thirds down the length of the swim you are trotting. Keep in mind also that, due to friction, the flow of water will be slower nearer the river bed than it is on the surface so your bait will fall in an arc, not at a constant drop.
Float Fishing 22 You should introduce loose feed just prior to casting. The little and often theory still applies so feed before every cast. To adjust the feed levels to suit the activity of the fish adjust how many maggots you introduce each time, not the frequency. The object of the exercise is to get your hookbait travelling down amongst the free offerings, so keep a continuous stream of bait going in. It’s very important to keep that bait trickling in and don’t worry if the fish don’t react immediately. Often it takes an hour or more to get a shoal in the swim and feeding confidently.
Make sure your hook is baited and place your rod on the rod rests next to you. Introduce a pouch of maggots into the swim, then quickly, but not hurriedly, make your cast. Your hook bait should then be travelling down in the vicinity of a few loose offerings ready to tempt any fish searching for a meal.
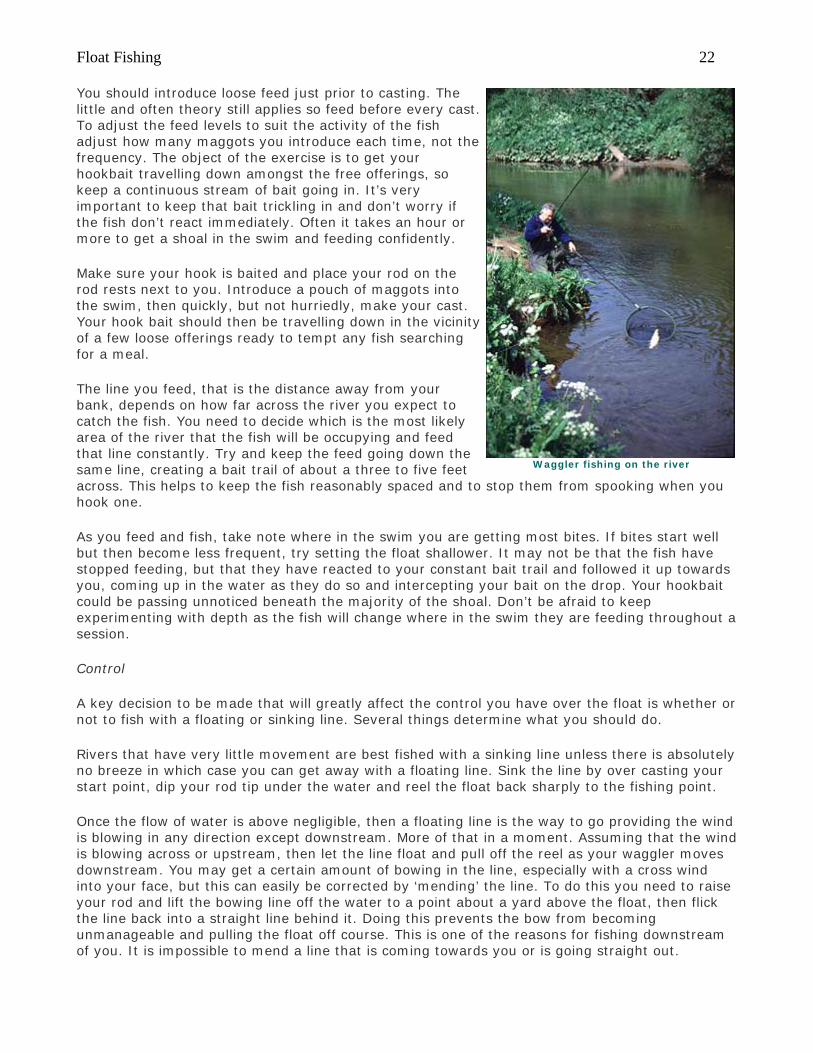
The line you feed, that is the distance away from your bank, depends on how far across the river you expect to catch the fish. You need to decide which is the most likely area of the river that the fish will be occupying and feed that line constantly. Try and keep the feed going down the same line, creating a bait trail of about a three to five feet across. This helps to keep the fish reasonably spaced and to stop them from spooking when you hook one.
Waggler fishing on the river
As you feed and fish, take note where in the swim you are getting most bites. If bites start well but then become less frequent, try setting the float shallower. It may not be that the fish have stopped feeding, but that they have reacted to your constant bait trail and followed it up towards you, coming up in the water as they do so and intercepting your bait on the drop. Your hookbait could be passing unnoticed beneath the majority of the shoal. Don’t be afraid to keep experimenting with depth as the fish will change where in the swim they are feeding throughout a session.
Control
A key decision to be made that will greatly affect the control you have over the float is whether or not to fish with a floating or sinking line. Several things determine what you should do.
Rivers that have very little movement are best fished with a sinking line unless there is absolutely no breeze in which case you can get away with a floating line. Sink the line by over casting your start point, dip your rod tip under the water and reel the float back sharply to the fishing point.
Once the flow of water is above negligible, then a floating line is the way to go providing the wind is blowing in any direction except downstream. More of that in a moment. Assuming that the wind is blowing across or upstream, then let the line float and pull off the reel as your waggler moves downstream. You may get a certain amount of bowing in the line, especially with a cross wind into your face, but this can easily be corrected by ‘mending’ the line. To do this you need to raise your rod and lift the bowing line off the water to a point about a yard above the float, then flick the line back into a straight line behind it. Doing this prevents the bow from becoming unmanageable and pulling the float off course. This is one of the reasons for fishing downstream of you. It is impossible to mend a line that is coming towards you or is going straight out.
Float Fishing 23 Now, how to combat a downstream wind. A downstream wind is the worst to cope with because it makes the line travel quicker than the current, pushing the line ahead of the float. This causes a floating line to bow to the downstream side of the float and hence will pull your float sideways giving a poor presentation. With a floating line you spend more time trying to mend the line than in watching the float. To combat a ‘downstreamer’ use a sinking line combined with a heavier than normal float that will not get dragged out of position so much. The line may still bow with the current but you should be able to cure this with only the occasional mend. You will find that the harder the wind is blowing the further downstream you may need to cast. This makes controlling the waggler easier, because you are creating a much straighter line between the rod tip and the float, reducing the scope in which the line can bow.
That’s about it on the river waggler. Hopefully I have demonstrated what a versatile tool the waggler is and for me it’s one of the most enjoyable and active methods of fishing. Give it a try, I’m sure you will enjoy it too.
Part Seven - Stickfloat Fishing
In parts one to six of Float Fishing I introduced you to the various types of waggler floats and showed you how to start fishing with them on both still and running water. In this part I will be introducing you to the classic river float, the stickfloat.
The tackle
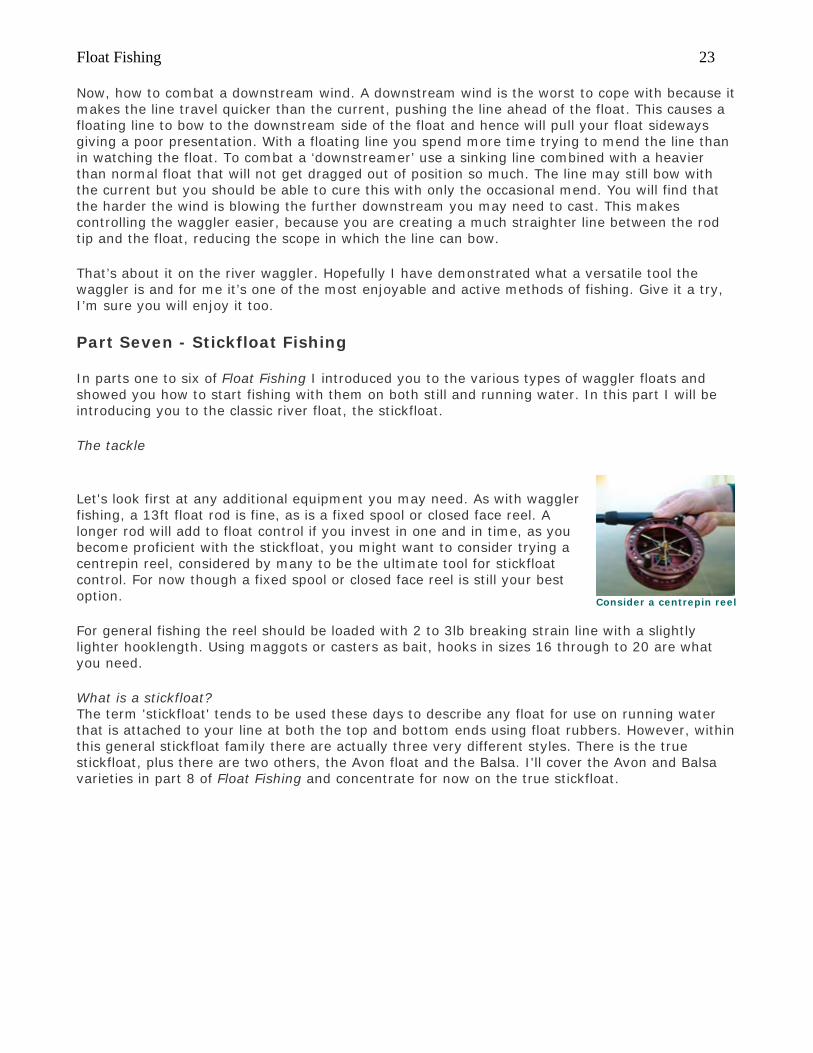
Consider a centrepin reel
Let's look first at any additional equipment you may need. As with waggler fishing, a 13ft float rod is fine, as is a fixed spool or closed face reel. A longer rod will add to float control if you invest in one and in time, as you become proficient with the stickfloat, you might want to consider trying a centrepin reel, considered by many to be the ultimate tool for stickfloat control. For now though a fixed spool or closed face reel is still your best option.
For general fishing the reel should be loaded with 2 to 3lb breaking strain line with a slightly lighter hooklength. Using maggots or casters as bait, hooks in sizes 16 through to 20 are what you need.
What is a stickfloat? The term 'stickfloat' tends to be used these days to describe any float for use on running water that is attached to your line at both the top and bottom ends using float rubbers. However, within this general stickfloat family there are actually three very different styles. There is the true stickfloat, plus there are two others, the Avon float and the Balsa. I'll cover the Avon and Balsa varieties in part 8 of Float Fishing and concentrate for now on the true stickfloat.
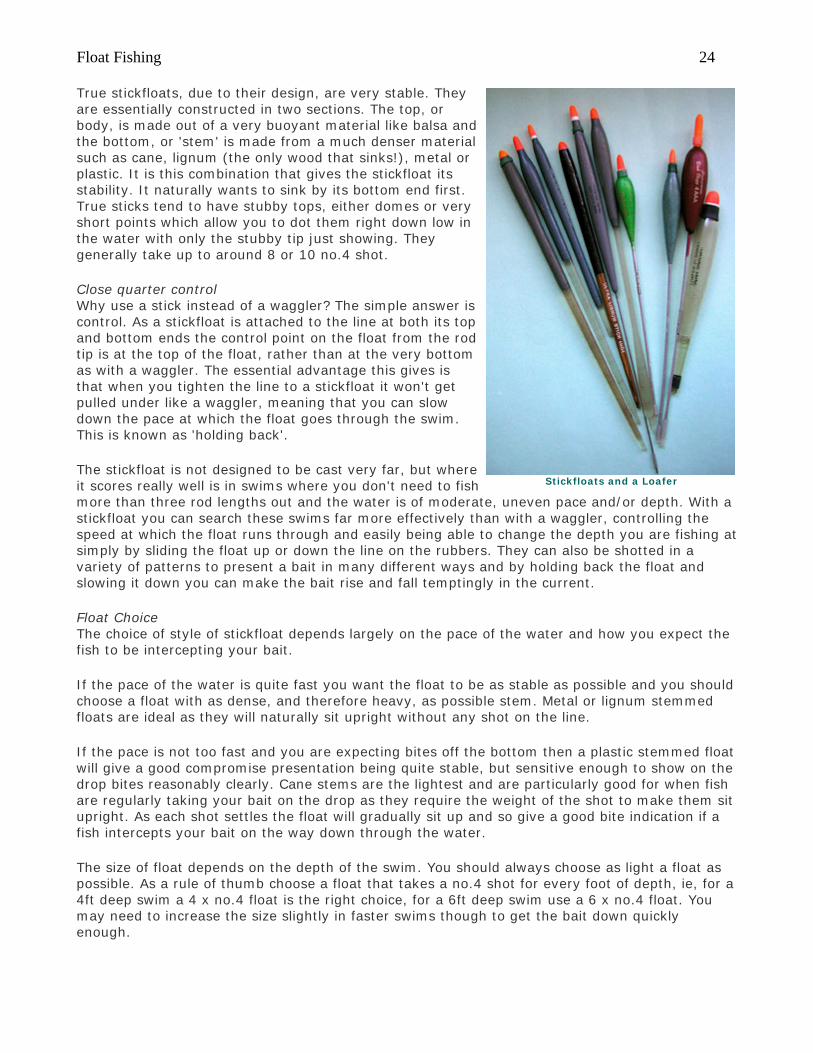
Float Fishing 24 True stickfloats, due to their design, are very stable. They are essentially constructed in two sections. The top, or body, is made out of a very buoyant material like balsa and the bottom, or 'stem' is made from a much denser material such as cane, lignum (the only wood that sinks!), metal or plastic. It is this combination that gives the stickfloat its stability. It naturally wants to sink by its bottom end first. True sticks tend to have stubby tops, either domes or very short points which allow you to dot them right down low in the water with only the stubby tip just showing. They generally take up to around 8 or 10 no.4 shot.
Close quarter control Why use a stick instead of a waggler? The simple answer is control. As a stickfloat is attached to the line at both its top and bottom ends the control point on the float from the rod tip is at the top of the float, rather than at the very bottom as with a waggler. The essential advantage this gives is that when you tighten the line to a stickfloat it won't get pulled under like a waggler, meaning that you can slow down the pace at which the float goes through the swim. This is known as 'holding back'.
The stickfloat is not designed to be cast very far, but where it scores really well is in swims where you don't need to fish more than three rod lengths out and the water is of moderate, uneven pace and/or depth. With a stickfloat you can search these swims far more effectively than with a waggler, controlling the speed at which the float runs through and easily being able to change the depth you are fishing at simply by sliding the float up or down the line on the rubbers. They can also be shotted in a variety of patterns to present a bait in many different ways and by holding back the float and slowing it down you can make the bait rise and fall temptingly in the current.
Stickfloats and a Loafer
Float Choice The choice of style of stickfloat depends largely on the pace of the water and how you expect the fish to be intercepting your bait.
If the pace of the water is quite fast you want the float to be as stable as possible and you should choose a float with as dense, and therefore heavy, as possible stem. Metal or lignum stemmed floats are ideal as they will naturally sit upright without any shot on the line.
If the pace is not too fast and you are expecting bites off the bottom then a plastic stemmed float will give a good compromise presentation being quite stable, but sensitive enough to show on the drop bites reasonably clearly. Cane stems are the lightest and are particularly good for when fish are regularly taking your bait on the drop as they require the weight of the shot to make them sit upright. As each shot settles the float will gradually sit up and so give a good bite indication if a fish intercepts your bait on the way down through the water.
The size of float depends on the depth of the swim. You should always choose as light a float as possible. As a rule of thumb choose a float that takes a no.4 shot for every foot of depth, ie, for a 4ft deep swim a 4 x no.4 float is the right choice, for a 6ft deep swim use a 6 x no.4 float. You may need to increase the size slightly in faster swims though to get the bait down quickly enough.
Float Fishing 25 Attaching your stickfloat The stickfloat is attached to the line using silicon rubber bands. There are a couple of tips to give you here that are very handy to know.
Firstly, although you only need two bands to attach the float, one at the top and one at the bottom, it is a good idea to actually use three. By placing one in the middle as well gives you the assurance that you don't have to break down your rig should one of the other two bands snap. You simply slide the third band into the position of the broken one.
Another good idea is to use a long bottom rubber rather than a narrow band. By cutting a length of silicon tubing about ¾'s of an inch long and allowing this to overlap the bottom of the float greatly reduces the chances of the rig tangling.
Stick technique As with fishing the waggler, casts should be made downstream. You cannot control a float that is coming downstream towards you. To cast a stickfloat, hold the line just above the hook in your free hand with the line taught between your hand and the rod tip. Point the rod parallel with bank on your free hand side, then bring it smoothly round and up in front of you, releasing the line from your free hand as you do so. The rig will shoot out smoothly in front of you hook first, landing in a straight line.
After casting, always maintain a straight line between your rod tip and your float, don't let the mainline overtake the float on the trot. This will make the float pull across the current and cause your bait to behave unnaturally. If you have trouble with the wind bowing your line you can combat this by removing a small shot from below the float, either a no.8 or no.6, and adding it about a foot above the float. This sinks the last 2ft of line above the float and reduces the drag effect.
There are four main ways to fish a stickfloat:
1. Running through at the pace of the current 2. Creating a natural drop of the bait 3. Holding back periodically 4. Holding back hard constantly
To run the bait through at the pace of the current you need to shot your float 'shirt button' style, that is, evenly space your shot down the line between the float and the hook. Although the float is labelled as say a 4 x no.4, I wouldn't actually shot the float with no.4's. I would use twice as many no.6 shot spaced at approximately six inch intervals, with perhaps one or two no.8's as the bottom droppers. This gives a much more sensitive rig and more scope to move the shot around. While making sure you don't have too much line on the water, but without interfering with it's progress, allow the float to run through your swim at the pace of the current.
When you are loose feeding, especially in summer, the fish will often intercept your bait 'on the drop'. Use a cane stemmed float and shot it with as few light shot down the line as possible to enable the bait to sink naturally down through the water with some free offerings. Cast so that the hook lands directly downstream from the float in a straight line. As the bait falls through the water the cane stemmed float will begin to cock. Any interruption to this settling pattern caused by a fish taking your bait will register on the float.
Sometimes you can entice fish to take your bait by holding the float back periodically as it trots down the swim. Holding back the float for a moment causes the bait to slow and rise up enticingly in the water as if caught by a swirl of the current. The fish also have a bit of extra time to inspect the bait and sometimes that is all that is required to entice them to grab it. You can control the amount the bait rises by varying your shotting pattern. Still weight the float using no.6 shot, but
Float Fishing 26 by varying the shotting pattern and playing around with smaller dropper shot enables you to control the rise and fall of the bait from a few inches to several feet depending on the pace of the current. Moving some of the shot down the line creates a bulk which will form the upper point that your bait can rise to.
During the cold winter months fish become quite lethargic and minimise the amount of energy that they expend. Hence they won't go chasing after a bait like they might in warmer times of the year. Sometimes you can entice these lethargic fish, especially roach, to take your bait by holding back hard on the float and edging it through the swim far slower than the actual pace of the current. You are effectively trying to steer the bait directly into their mouths. During the winter it is likely that the fish will be very near the bottom, so accurately plumb the depth and then set the float over depth by between 6 and 18 inches. Place a bulk of shot on the line so that they are just off bottom to keep the hook bait well down in the water and then keep a tight line to the float and just edge it slowly down the current. Some skilled stickfloat anglers actually overshot the float so that it is only their tight line keeping the float above the waters surface.
Feeding If you have read the previous parts of this Float Fishing series you will recall that I advised feeding little and often when waggler fishing. This principle is common to most forms of float fishing where you are loose feeding and stickfloat fishing is no exception.
Introduce bait downstream of your fishing position. You are aiming to get the bait down to the bottom within the confines of your swim, so judge where that point will be and introduce the bait accordingly. Choose a line to feed that you know you can easily reach and maintain control of your float. As you become more proficient you can try moving further out. Keep the feed trickling down your chosen line, feeding first and then casting.
Every now and again, try running your float down outside of the line that you are feeding. Better fish often hang around the edge of the feed trail, drifting in occasionally to intercept some bait and then moving out again. Don't be tempted to feed further out though or you will push the better fish out of reach.
If bites don't come straight away don't worry. Keep feeding as the fish will most often come to you if the bait is trickling in steadily over a period of time. If bites start coming frequently but then dry up, one of two things has probably occurred. The fish are fewer in number than you originally thought, so you need to cut back on the amount of feed going in, or the fish have moved up in the water. Check for the latter first by shallowing up and altering your shotting pattern accordingly. If this doesn't work, cut back on the feed, but not the frequency, and continue to experiment with the depth and shotting patterns.
Experiment Don't be afraid to experiment when stickfloat fishing. If bites are not forthcoming play around with shotting patterns and depths and mix and match the four control principles above. Things change even during a session, so that what has been working for an hour or so might stop working and a different approach may be needed. The trick I find is to keep visualising what your bait and feed is doing and make adjustments accordingly to see what the fish prefer on the day.