Embed Size (px)
Citation preview
Carol Reed, R.D.A., C.D.A., Enspire Dental
This is the fifth topic in a series of articles about lab related duties an assistant may perform.
LAB SERIES — PART 5:
VACUUM FORMED RETAINERSThe next in the series is fabricating a vacuum formed retainer. The most popular type made in the office is an Essix-style retainer, which looks just like an Invisalign tray. There are multiple reasons for wearing a retainer, such as preventing the movement of teeth after braces. Other indications may include:
• To hold a temporary tooth in place after an extraction• For retention to keep teeth from hyper erupting when the opposing arch has an implant awaiting a
restoration• Some cases of bruxism • To move a tooth slightly by making a dimple in the retainer
These are all fabricated the same way, but the thickness of the material may vary depending on the reason for the retainer. You should check with the doctor to see what type of material and which thickness is preferred. It’s a good idea to keep a couple of choices on hand.
Armamentarium for retainer fabrication
• Trimmed Model• Lubricator - Trim-Rite® Release Agent
(DENTSPLY Raintree Essix) or Isolac Clear (Erkodent)
• Essix Tray Material (DENTSPLY Raintree Essix) or brand of choice
• Sharp lab knife• Lab Utility Scissors• Contouring Scissors• Electric Heat Knife (DENTSPLY Raintree
Essix)• Acrylic HP Lab Bur• Hatho® Scotch Brite™ Brushes - Miniature
HP - black medium (Keystone Industries)
Electric Heat KnifeScotch Brite™ Brush
Carol Reed, R.D.A., C.D.A., Enspire Dental
LAB SERIES — PART 5 (continued):
VACUUM FORMED RETAINERS{ }
Remove any bubbles from the margins of the teeth and occlusal surfaces. Check to make sure there are not any chips or voids on the model, especially the incisal edges (this will affect the fit of the retainer). If there is, repour immediately. If that’s not possible, the impression will have to be retaken.
3Apply lubricant to the model for easier removal. You can use a spray or liquid. The reason I like the Isolac Clear (Erkodent) liquid for lubricating is that it leaves a film on the model and if a tooth breaks upon removal, it holds it in place. This is convenient if you need to remake the retainer; that piece can be glued perfectly back into place.
4
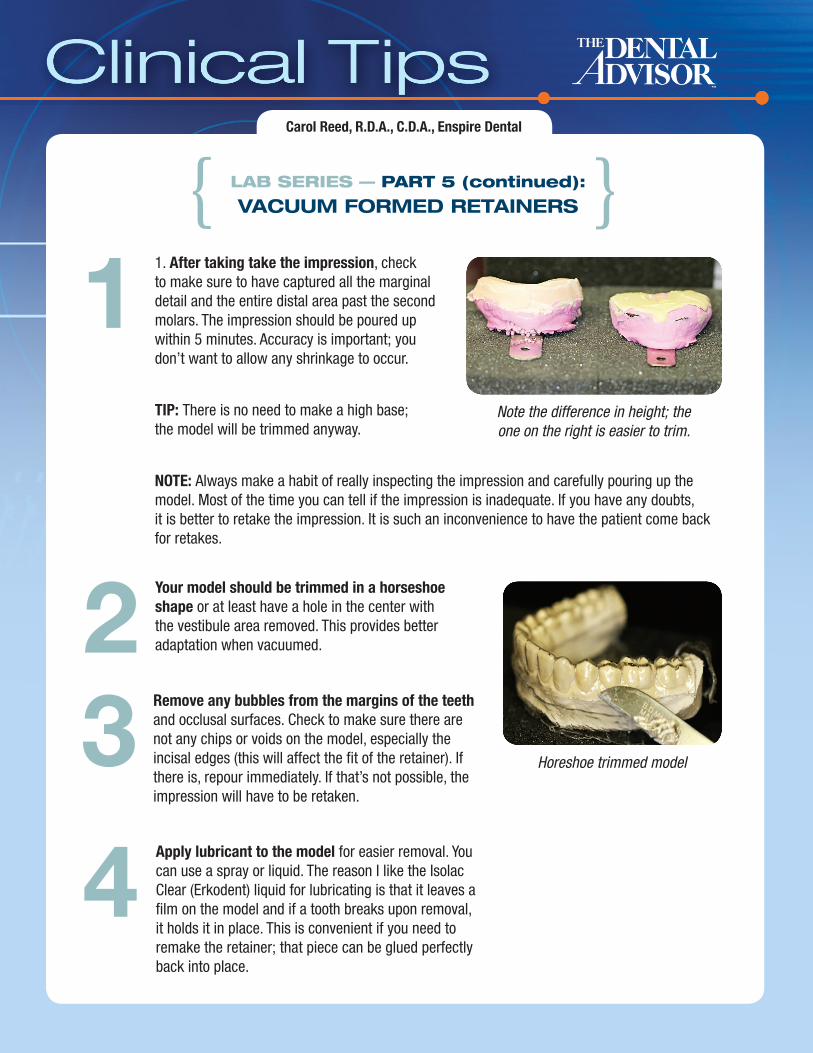
Your model should be trimmed in a horseshoe shape or at least have a hole in the center with the vestibule area removed. This provides better adaptation when vacuumed.2
Horeshoe trimmed model
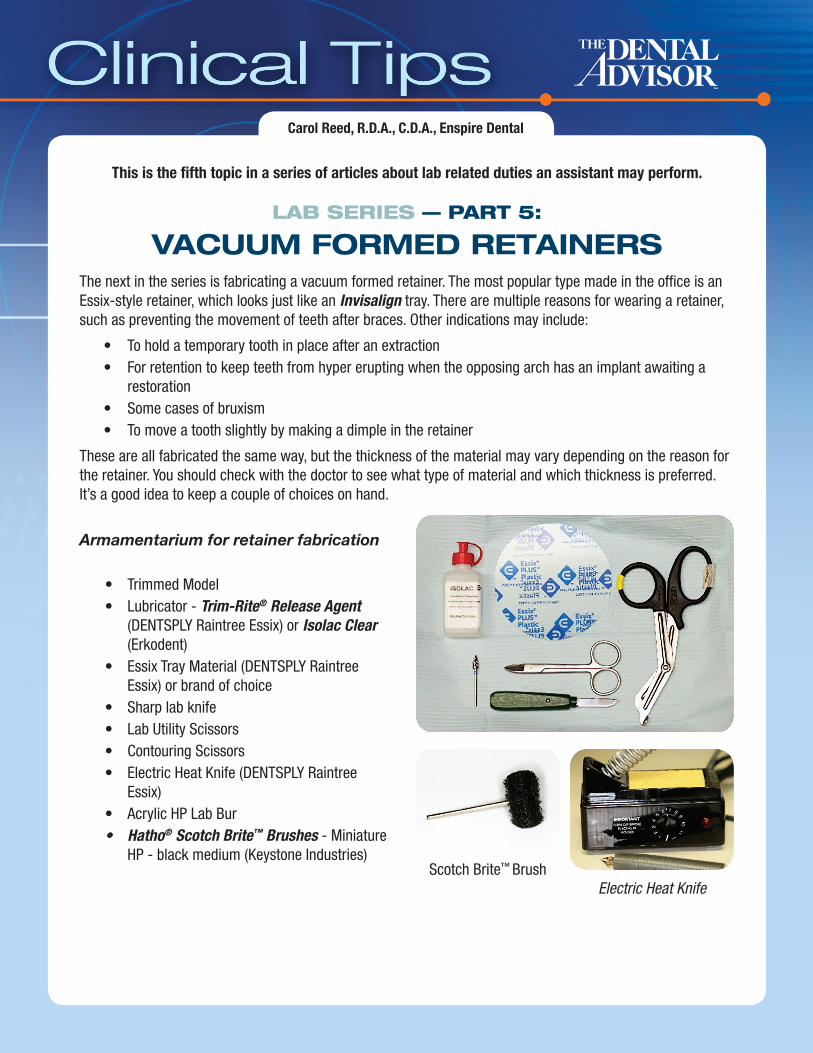
1. After taking take the impression, check to make sure to have captured all the marginal detail and the entire distal area past the second molars. The impression should be poured up within 5 minutes. Accuracy is important; you don’t want to allow any shrinkage to occur.
TIP: There is no need to make a high base; the model will be trimmed anyway.
NOTE: Always make a habit of really inspecting the impression and carefully pouring up the model. Most of the time you can tell if the impression is inadequate. If you have any doubts, it is better to retake the impression. It is such an inconvenience to have the patient come back for retakes.
1Note the difference in height; the one on the right is easier to trim.
Carol Reed, R.D.A., C.D.A., Enspire Dental
Next Month: Sports Guard
Use a lab knife to remove trimmed pieces, tease the retainer off the model starting at one end and then the other, going back and forth lifting it a little higher each time, being careful not to break a tooth. Use the contouring scissors to trim off more after removing if necessary.
7Use an acrylic bur to trim the retainer, removing any sharp edges. Once the retainer is the shape you like, use the medium Hatho® Miniature HP ScotchBrite™ brush to smooth edges. Rinse and scrub with a clean brush to remove any dust or debris.
8
Use the utility scissor to trim off excess material. Start to trim just below the crown level. To cut off the retainer, you can use a metal disc or a tapered acrylic bur. If possible, use an electric lab knife to cut off the retainer. It is just so much easier, faster and cleaner.
6
LAB SERIES — PART 5 (continued):
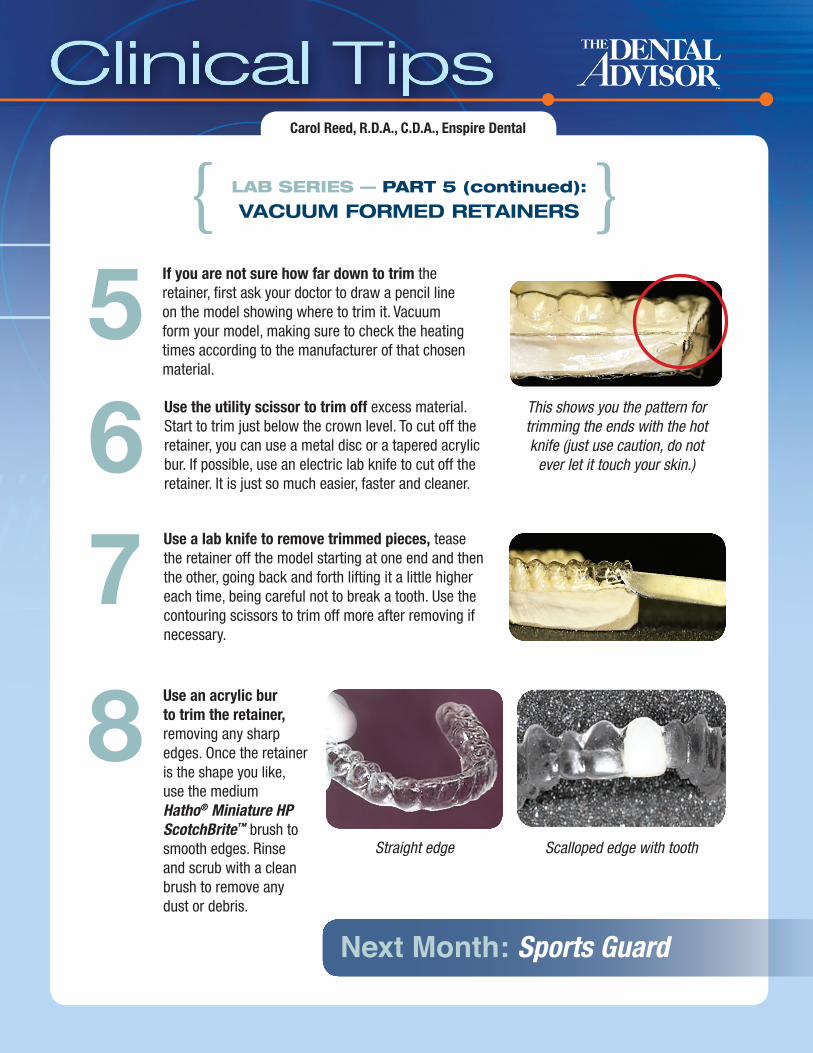
VACUUM FORMED RETAINERS{ }If you are not sure how far down to trim the retainer, first ask your doctor to draw a pencil line on the model showing where to trim it. Vacuum form your model, making sure to check the heating times according to the manufacturer of that chosen material.
5This shows you the pattern for trimming the ends with the hot knife (just use caution, do not
ever let it touch your skin.)
Straight edge Scalloped edge with tooth