Embed Size (px)
Citation preview

www.intellimedia.ca
Parent User Guide

SchoolEngage v1.0 – Parent User Guide (August 30 2016) 2
Table of Contents
INTRODUCTION 3
PARENT USER INSTRUCTIONS 4
PARENT ACCESS TO SCHOOLENGAGE 5 NEW PARENT SIGN UP 5 EXISTING PARENT SIGN IN – PARENT PORTAL 7 EXISTING PARENT SIGN IN – WEB ADDRESS 8 HOME PAGE 10 NAVIGATION BAR 10 ADD STUDENT 11 COMPLETE FORM 13 SAVE FORM 14 DELETE FORM 15 SUBMIT FORM 16 SCHEDULE APPOINTMENT 17 FILE UPLOAD 18 EDIT SUBMITTED FORM 20 VIEW STUDENT PROFILE 21 EVENTS AND APPOINTMENTS 21 NOTIFICATIONS 24 VIEW AND MANAGE PARENT PROFILE 25
SchoolEngage v1.0 – Parent User Guide (August 30 2016) 3
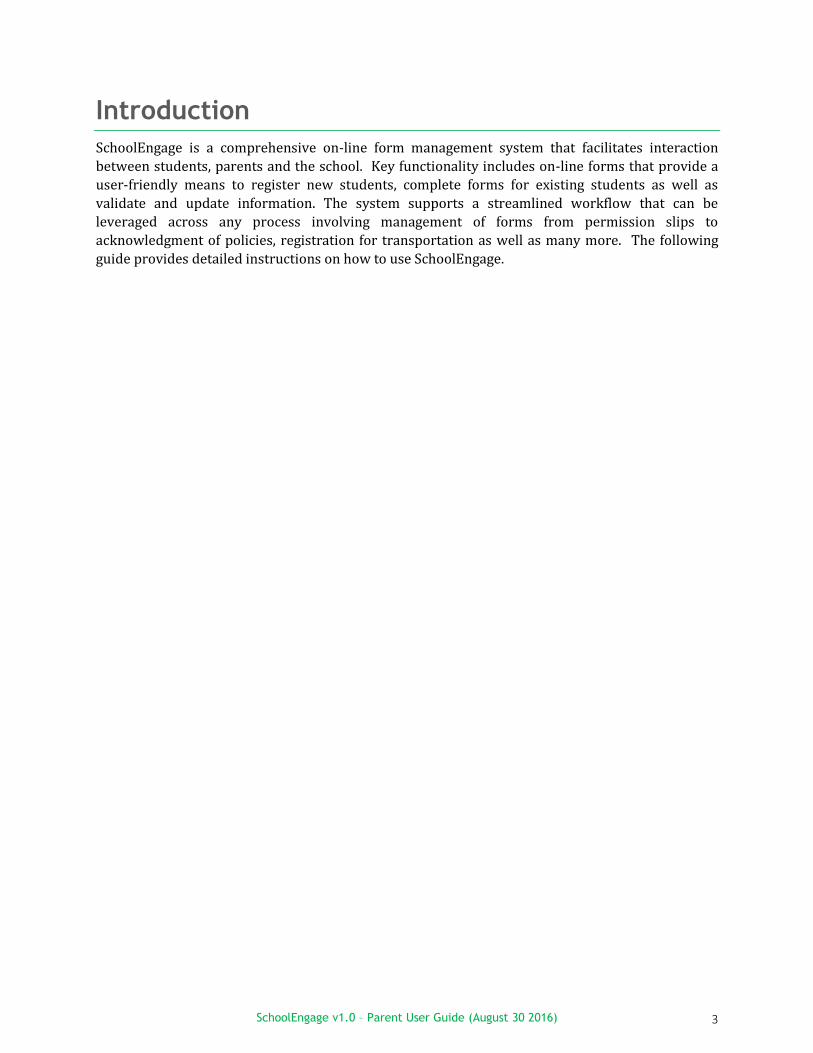
Introduction
SchoolEngage is a comprehensive on-line form management system that facilitates interaction
between students, parents and the school. Key functionality includes on-line forms that provide a
user-friendly means to register new students, complete forms for existing students as well as
validate and update information. The system supports a streamlined workflow that can be
leveraged across any process involving management of forms from permission slips to
acknowledgment of policies, registration for transportation as well as many more. The following
guide provides detailed instructions on how to use SchoolEngage.
SchoolEngage v1.0 – Parent User Guide (August 30 2016) 4
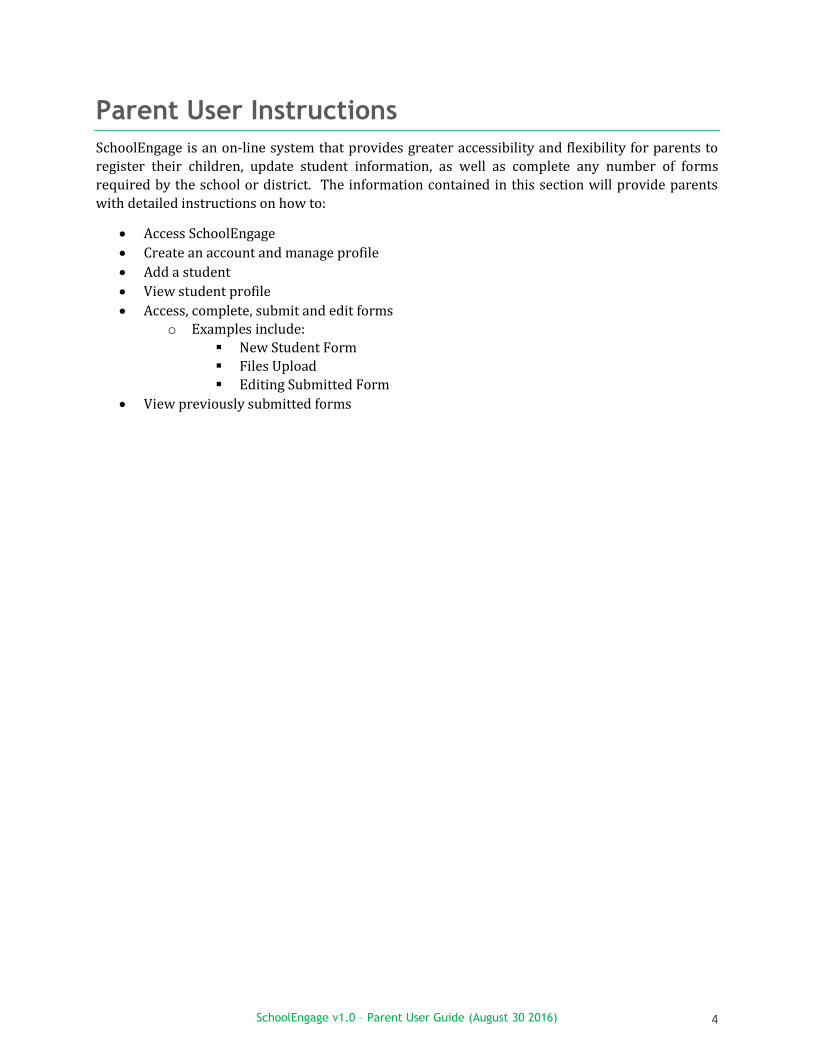
Parent User Instructions
SchoolEngage is an on-line system that provides greater accessibility and flexibility for parents to
register their children, update student information, as well as complete any number of forms
required by the school or district. The information contained in this section will provide parents
with detailed instructions on how to:
Access SchoolEngage
Create an account and manage profile
Add a student
View student profile
Access, complete, submit and edit forms o Examples include:
New Student Form
Files Upload
Editing Submitted Form
View previously submitted forms
SchoolEngage v1.0 – Parent User Guide (August 30 2016) 5
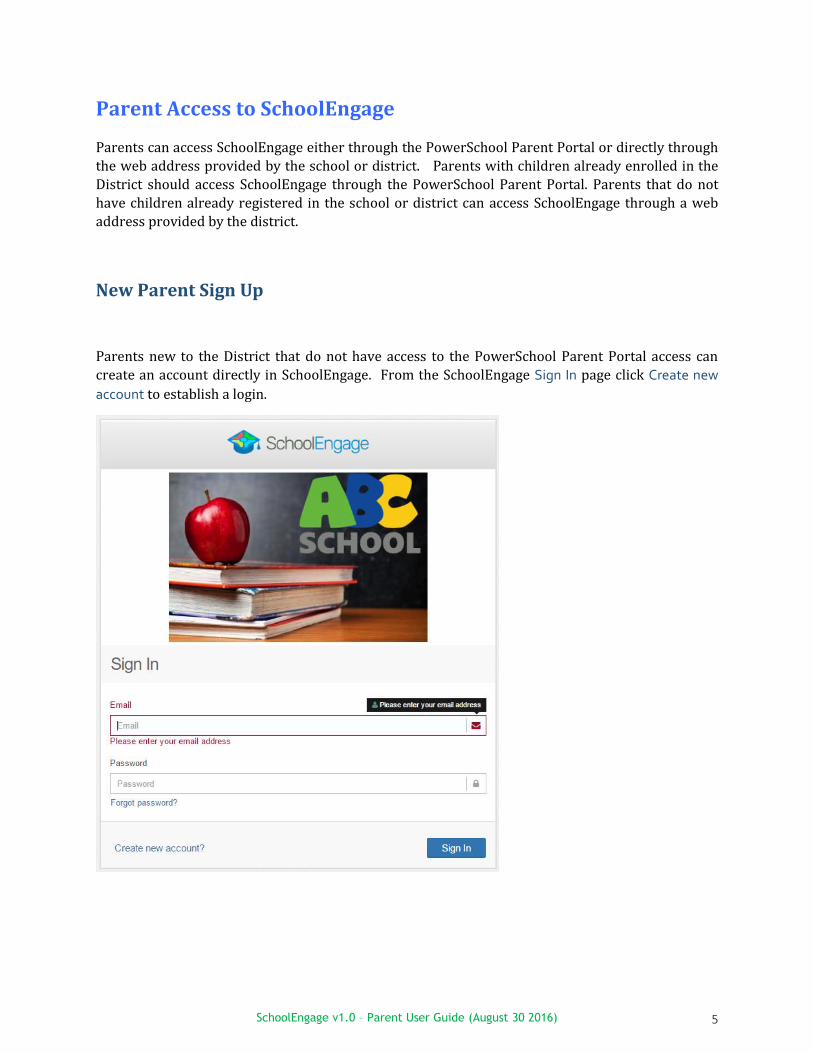
Parent Access to SchoolEngage
Parents can access SchoolEngage either through the PowerSchool Parent Portal or directly through
the web address provided by the school or district. Parents with children already enrolled in the
District should access SchoolEngage through the PowerSchool Parent Portal. Parents that do not
have children already registered in the school or district can access SchoolEngage through a web
address provided by the district.
New Parent Sign Up
Parents new to the District that do not have access to the PowerSchool Parent Portal access can
create an account directly in SchoolEngage. From the SchoolEngage Sign In page click Create new
account to establish a login.

SchoolEngage v1.0 – Parent User Guide (August 30 2016) 6
From the Registration screen complete the required fields to establish an account.
Fields circled are required fields and must be completed
Password is a minimum of 8 characters
Once the required fields are entered click Register to confirm. Successful registrations are
confirmed with the message display below. User is then redirected back to start screen to proceed
with log in.

SchoolEngage v1.0 – Parent User Guide (August 30 2016) 7
Existing Parent Sign In – Parent Portal
Parents with students already registered in PowerSchool should access SchoolEngage through the
PowerSchool Parent Portal. Once logged into the Parent Portal to access SchoolEngage click on the
SchoolEngage icon on the bottom left hand side of the navigation menu. Because user is already
successfully logged into PowerSchool there is no need to re-enter credentials to access
SchoolEngage.

SchoolEngage v1.0 – Parent User Guide (August 30 2016) 8
Existing Parent Sign In – Web Address
Parents who already exist as users within PowerSchool can also access SchoolEngage through the
web address provided by the school, although access through the PowerSchool Parent Portal is
the preferred means of access. When logging in, existing user accessing SchoolEngage for the
first time through the web enter their email address and click on Forgot Password. The system will
generate a new password and send it to the email address on file.
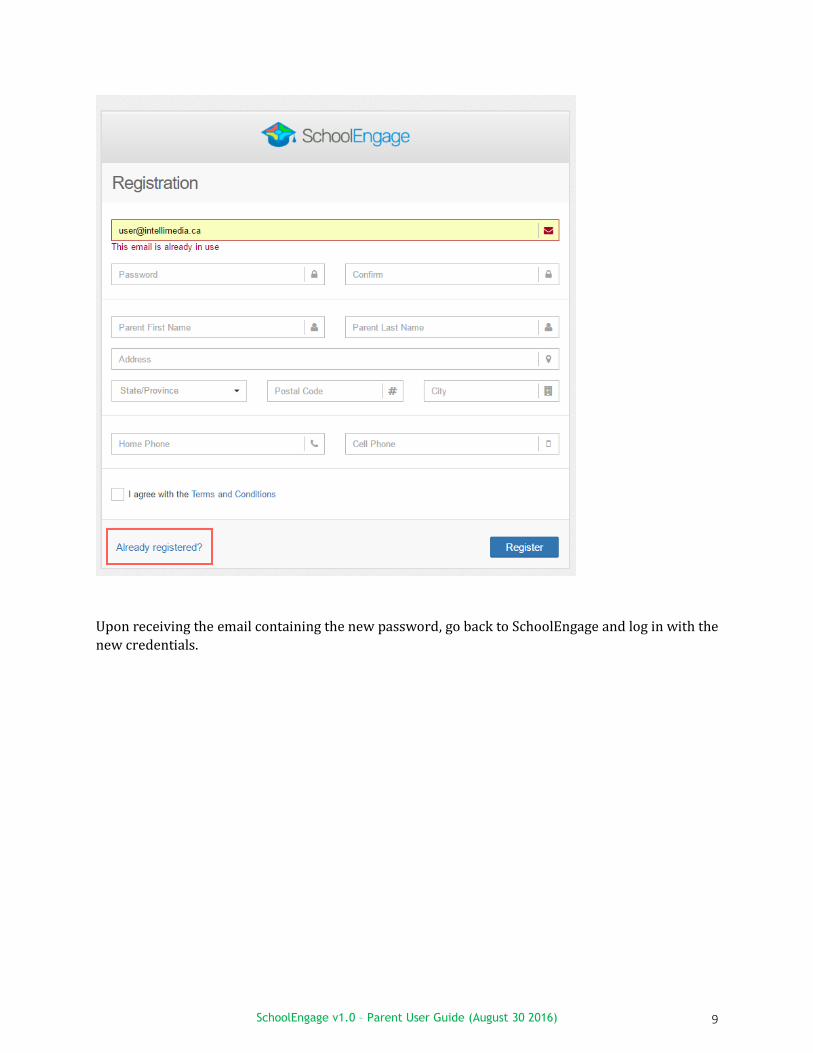
Existing parents who attempt to create an account in SchoolEngage will be advised that the email
address is already in use. In this case click on the Already registered to go on the main log in screen,
where you can restore the password by clicking Forgot password. A new password is generated
and emailed to the address on file.
SchoolEngage v1.0 – Parent User Guide (August 30 2016) 9
Upon receiving the email containing the new password, go back to SchoolEngage and log in with the
new credentials.

SchoolEngage v1.0 – Parent User Guide (August 30 2016) 10
Home Page
Once logged into SchoolEngage the system will default to the Home Page where the district logo is
displayed along with any message created by the System Administrator. From the Home page you
can also fill in new forms as well as view any previously created or submitted forms.
Navigation Bar
The Navigation Bar is available in every screen and provides links to the following functions:
1. User Profile
2. Return to the Home Page
3. Calendar of events
4. Menu of Existing Students
5. Add New Students
6. Event Manager

SchoolEngage v1.0 – Parent User Guide (August 30 2016) 11
Add Student
To add a new student click Add Student from the navigation bar.
Upon selecting Add Student the following screen will display requiring input of:
Student Legal First, Middle and Last Name
Date of Birth
Gender
Alberta Student Number (ASN) if known
SchoolEngage v1.0 – Parent User Guide (August 30 2016) 12
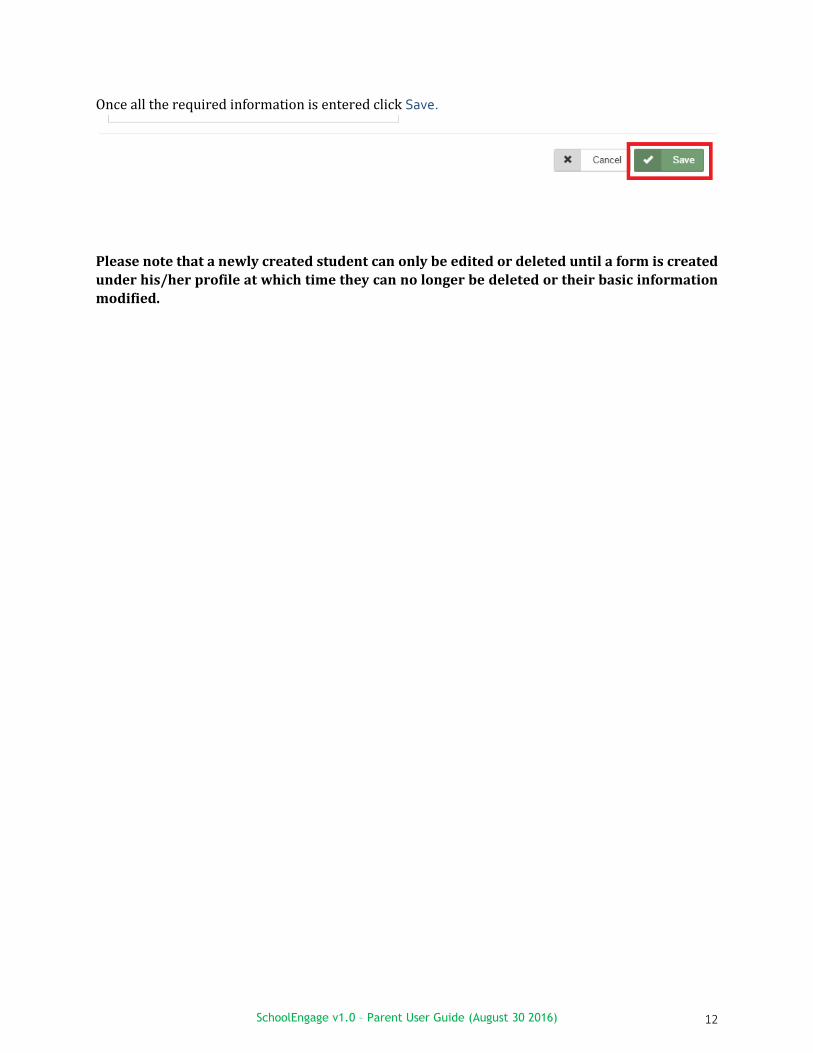
Once all the required information is entered click Save.
Please note that a newly created student can only be edited or deleted until a form is created
under his/her profile at which time they can no longer be deleted or their basic information
modified.
SchoolEngage v1.0 – Parent User Guide (August 30 2016) 13
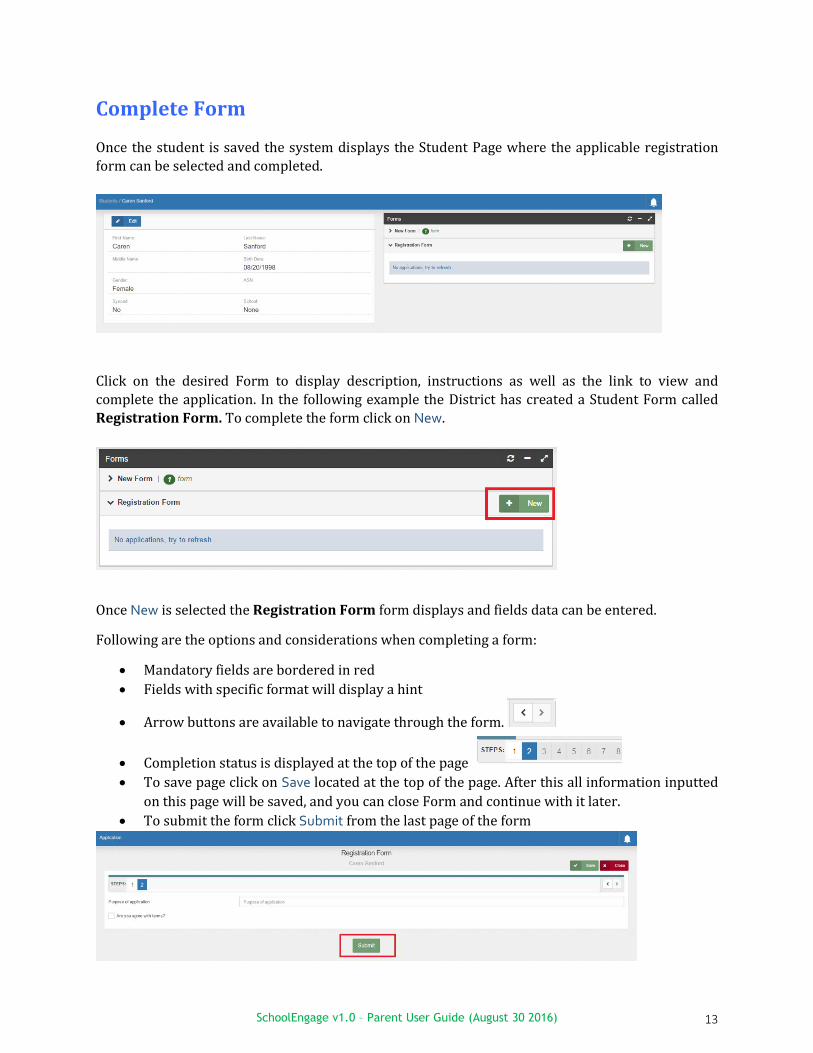
Complete Form
Once the student is saved the system displays the Student Page where the applicable registration
form can be selected and completed.
Click on the desired Form to display description, instructions as well as the link to view and
complete the application. In the following example the District has created a Student Form called
Registration Form. To complete the form click on New.
Once New is selected the Registration Form form displays and fields data can be entered.
Following are the options and considerations when completing a form:
Mandatory fields are bordered in red
Fields with specific format will display a hint
Arrow buttons are available to navigate through the form.
Completion status is displayed at the top of the page
To save page click on Save located at the top of the page. After this all information inputted
on this page will be saved, and you can close Form and continue with it later.
To submit the form click Submit from the last page of the form

SchoolEngage v1.0 – Parent User Guide (August 30 2016) 14
Save Form
Clicking on the forward and backward navigation tabs will trigger the system to automatically save
the information entered. If the system quits unexpectedly all the information entered up to the last
click of forward or backward tab will be saved. To quit the form and continue completing it later
click on Save. Select the student from the Students tab in the navigation bar to display the forms for
that student. Forms that are in progress will display as New. Click on the Open button to resume
completion.
Forms that are saved but not yet submitted will generate a notification to the parent advising that a
student has form still not submitted. The school will not be able to view the form until it has been
submitted.

SchoolEngage v1.0 – Parent User Guide (August 30 2016) 15
Delete Form
A form can only be deleted if it has not been submitted. Once a form is submitted the parent can no
longer delete it. To delete a form that has not been submitted click on the form from the Student
Page. Once it is displayed click on the trashcan on the far right hand side of the page.
Click Yes to confirm deletion of form.

SchoolEngage v1.0 – Parent User Guide (August 30 2016) 16
Submit Form
Once Form is complete on the last page of the form click Submit for form submission.
SchoolEngage v1.0 – Parent User Guide (August 30 2016) 17
Schedule Appointment
Certain forms may require an appointment to be scheduled as part of the registration process. For
example, in the Pre-Kindergarten Registration an appointment for student assessment is
required. An appointment can only be scheduled once the applicable form is completed and
submitted. You will be presented with the screen where you can select appropriate day and time.
Please see page 15 for instructions on scheduling an appointment.

SchoolEngage v1.0 – Parent User Guide (August 30 2016) 18
File Upload
A District may require that files be included with the submission of specific forms. A common
example is a copy of a child’s birth certificate. This type of file would require the document to be
scanned and saved within the computer files to be uploaded into SchoolEngage.
If a document is required the system will display the page Document Uploading and includes a
listing of the documents to be provided. Select the type of document from the Category drop down
menu then select Browse to locate the file to be uploaded.
To add an additional file, repeat the same steps.
If the file is not loaded during the initial completion of the application it can still be added after the
form is submitted. From the Student page the submitted form is displayed and by clicking on the
upload button on the far right hand side of the screen a document can be still be attached.

SchoolEngage v1.0 – Parent User Guide (August 30 2016) 19
Chose category and add new file.

SchoolEngage v1.0 – Parent User Guide (August 30 2016) 20
Edit Submitted Form
The option to edit a form after it has been submitted will depend upon the settings established by
the District. Depending on how the form is designed the options would include:
No edits permitted
Can be edited by Student
Can be edited by Guardian
Can be edited by Staff
Select the student from the Students tab in the navigation bar to display the forms for that student.
If the form can be edited after submission it can be selected and modified. If the field cannot be
edited a user will not be able to click on it. Click Save to update the form. A previously submitted
form that has been edited does NOT need to be re-submitted as changes will be visible to the
District immediately upon saving. Once a form has been approved or denied it can no longer be
edited.

SchoolEngage v1.0 – Parent User Guide (August 30 2016) 21
View Student Profile
Select the student from the Students tab in the navigation bar. Page will display basic profile
information. This information can only be edited before a form has been submitted for the student.
After a form is submitted information in the profile screen is only can only be modified by the
School.
Events and Appointments
In certain instance the School or District may create events and invite Parents to select a time from
pre-determined timeslots. Events can be accessed from the Student Page separately for each
student. If an event or appointment is associated with a particular form you will be directed to
event page to book an appointment once the form is submitted. To select and register for a specific
appointment click Schedule under the appropriate event.
To schedule an appointment, click on the date field to display days on which appointments are
available. Only the days where appointments are available can be selected.

SchoolEngage v1.0 – Parent User Guide (August 30 2016) 22
Available time slots are displayed in green to indicate they are available.
To select appointment click on the desired time slot to display additional details for the
appointment as well as add any comments if required. Comments are visible to the school
secretary.
Click Schedule to book the appointment then click Yes to validate selection.

SchoolEngage v1.0 – Parent User Guide (August 30 2016) 23
Once the appointment is scheduled it will be displayed in the Calendar. Click on the event in the
date box of the calendar to display details of the appointment. Opening the appointment from the
calendar also provides the option to add the appointment to a calendar. Select the appropriate
option from the Add to Calendar drop down menu to be redirected to the calendar application.
Click Cancel Event to cancel the appointment.

SchoolEngage v1.0 – Parent User Guide (August 30 2016) 24
Notifications
The District or School can trigger notifications to Parents to communicate announcements and/or
requests for completion of specific forms. A common instance for notification from the District is
the request for Parents to verify and update student related data. When a notification is triggered a
number will display beside the Notification Icon in the navigation bar, indicating how many
notifications are waiting to be read. To access the notification the user can click on the Notification
icon.

SchoolEngage v1.0 – Parent User Guide (August 30 2016) 25
View and Manage Parent Profile
Click on the Profile icon from the main navigation bar to view or manage the parent profile.
Click Edit to modify permitted fields.

SchoolEngage v1.0 – Parent User Guide (August 30 2016) 26
Click Save to confirm changes.
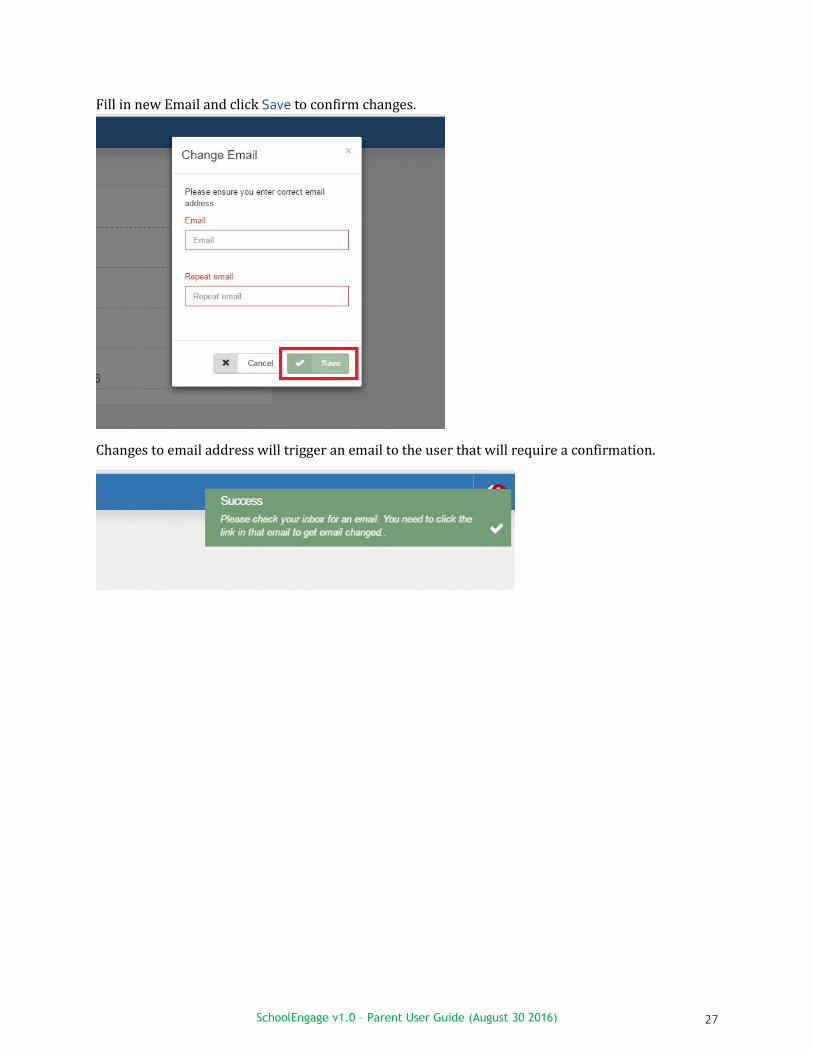
Click Change Email to modify Email information.
SchoolEngage v1.0 – Parent User Guide (August 30 2016) 27
Fill in new Email and click Save to confirm changes.
Changes to email address will trigger an email to the user that will require a confirmation.