Embed Size (px)
Citation preview
Trade of Sheet Metalwork Module 3: Thermal Processes
Unit 4: Oxy-acetylene Welding Square Butt Joint - Flat Position
Phase 2

Trade of Sheet Metalwork – Phase 2 Module 3 Unit 4
Unit 4 3
Table of Contents
List of Figures .................................................................................................................... 4
List of Tables ..................................................................................................................... 5
Document Release History ............................................................................................... 6
Module 3 – Thermal Processes ........................................................................................ 7
Unit 4 – Oxy-acetylene Welding Square Butt Joint - Flat Position ................................ 7 Learning Outcome: ..................................................................................................... 7 Key Learning Points: .................................................................................................. 7 Training Resources: .................................................................................................... 7 Key Learning Points Code: ......................................................................................... 7
Common Weld Faults ....................................................................................................... 9
Workshop Testing of Welds ........................................................................................... 10
Inspection of Etched Sections and Bend Specimens .................................................... 11 Method of Preparing Etched Specimens ....................................................................... 11
Common Weld Faults ..................................................................................................... 12
Self Assessment................................................................................................................ 13
Answers to Questions 1-4. Module 3.Unit 4 .................................................................. 15
Index ................................................................................................................................. 16
Trade of Sheet Metalwork – Phase 2 Module 3 Unit 4
Unit 4 4
List of Figures
Figure 1 - Oxy-Acetylene Welding - Square Butt Joint ..................................................... 8
Figure 2 - Workshop Testing of Welds ............................................................................. 10
Figure 3 - Bend-Testing of Welds .................................................................................... 10

Trade of Sheet Metalwork – Phase 2 Module 3 Unit 4
Unit 4 5
List of Tables
Table 1 - Common Weld Faults .......................................................................................... 9
Trade of Sheet Metalwork – Phase 2 Module 3 Unit 4
Unit 4 6
Document Release History
Date Version Comments
14/09/06 First draft
08/04/14 2.0 SOLAS transfer
Trade of Sheet Metalwork – Phase 2 Module 3 Unit 4
Unit 4 7
Module 3 – Thermal Processes
Unit 4 – Oxy-acetylene Welding Square Butt Joint - Flat Position
Duration – 14 Hours
Learning Outcome:
By the end of this unit each apprentice will be able to:
Read and interpret drawing and weld symbols
Select suitable nozzle, set gas pressures, light torch and adjust to the neutral condition
Arrange and tack weld plates to form butt joint
Complete the welded joints with the use of filler rod in mild steel sheet
Complete the welded joints with the use of filler rod in mild steel sheet ranging in thickness from 1.0 mm to 1.5 mm
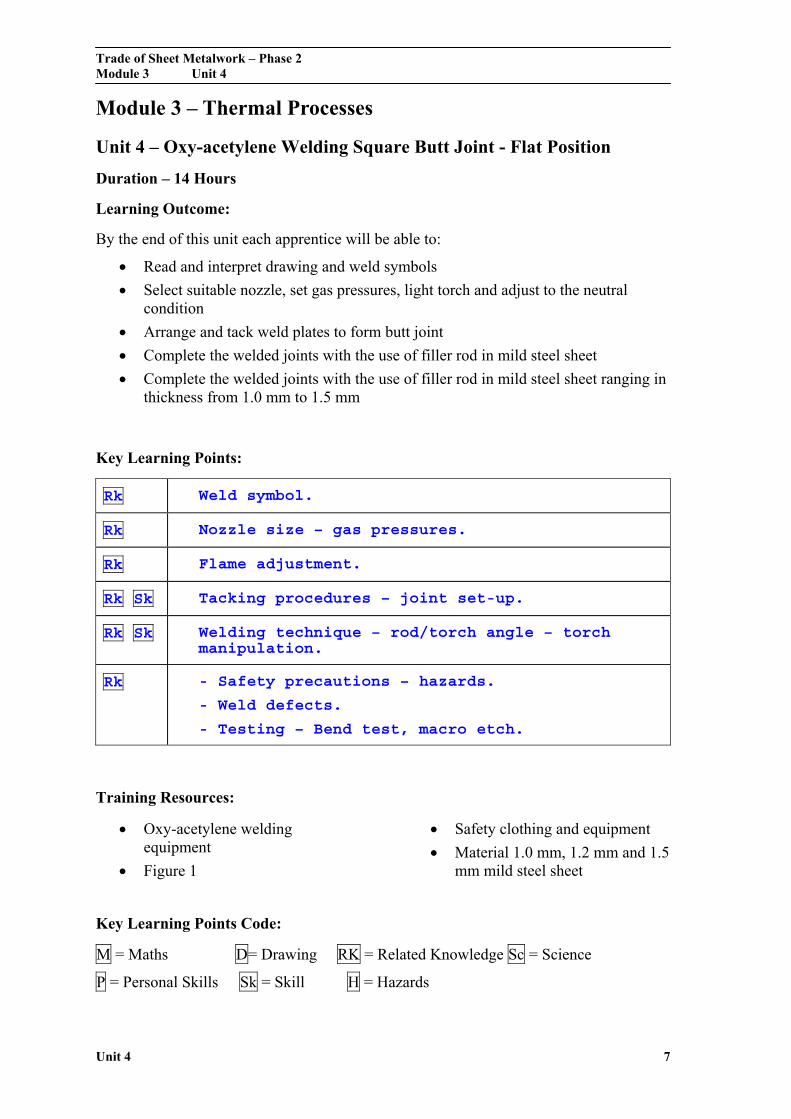
Key Learning Points:
Rk Weld symbol.
Rk Nozzle size – gas pressures.
Rk Flame adjustment.
Rk Sk Tacking procedures – joint set-up.
Rk Sk Welding technique – rod/torch angle – torch manipulation.
Rk - Safety precautions – hazards.
- Weld defects.
- Testing – Bend test, macro etch.
Training Resources:
Oxy-acetylene welding equipment
Figure 1
Safety clothing and equipment
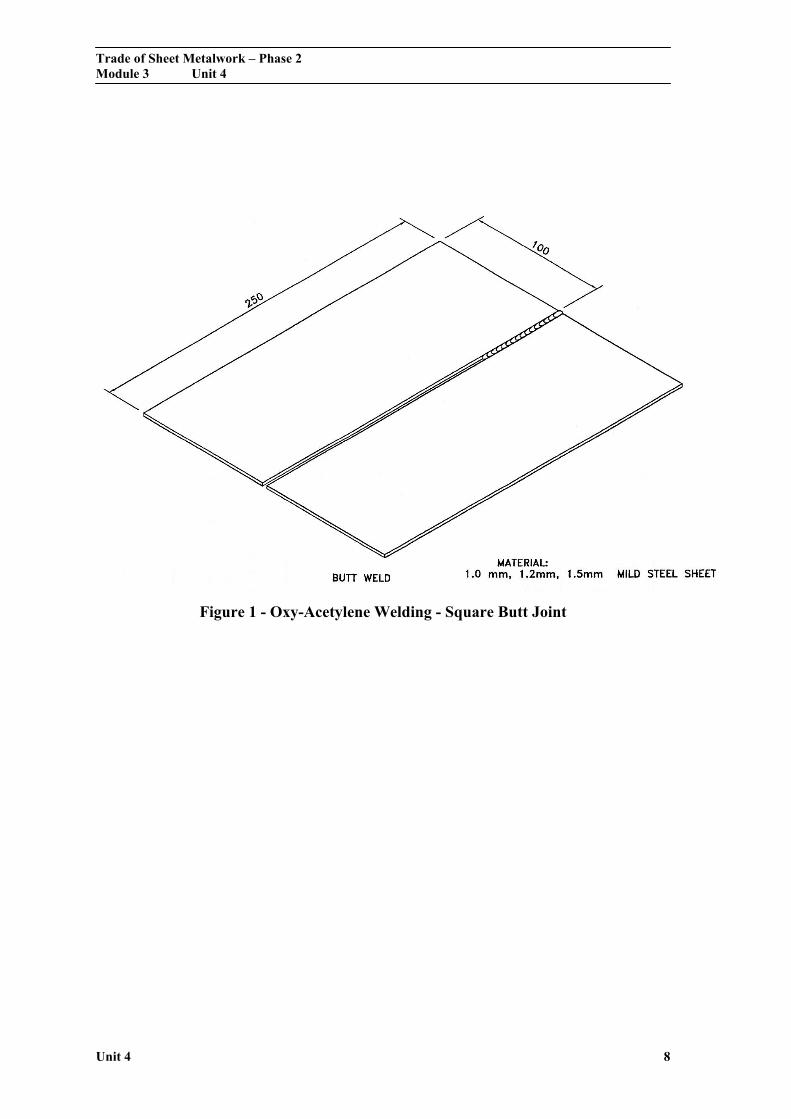
Material 1.0 mm, 1.2 mm and 1.5 mm mild steel sheet
Key Learning Points Code:
M = Maths D= Drawing RK = Related Knowledge Sc = Science
P = Personal Skills Sk = Skill H = Hazards
Trade of Sheet Metalwork – Phase 2 Module 3 Unit 4
Unit 4 8
Figure 1 - Oxy-Acetylene Welding - Square Butt Joint
Trade of Sheet Metalwork – Phase 2 Module 3 Unit 4
Unit 4 9
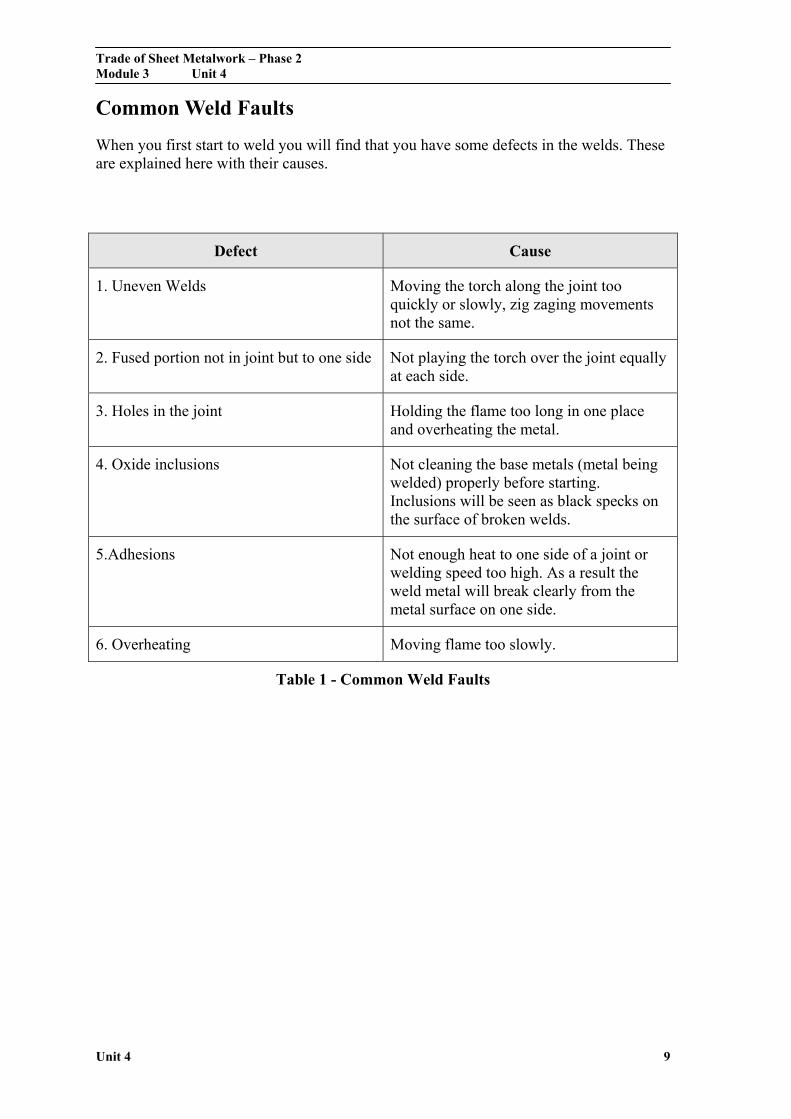
Common Weld Faults
When you first start to weld you will find that you have some defects in the welds. These are explained here with their causes.
Defect Cause
1. Uneven Welds Moving the torch along the joint too quickly or slowly, zig zaging movements not the same.
2. Fused portion not in joint but to one side Not playing the torch over the joint equally at each side.
3. Holes in the joint Holding the flame too long in one place and overheating the metal.
4. Oxide inclusions Not cleaning the base metals (metal being welded) properly before starting. Inclusions will be seen as black specks on the surface of broken welds.
5.Adhesions Not enough heat to one side of a joint or welding speed too high. As a result the weld metal will break clearly from the metal surface on one side.
6. Overheating Moving flame too slowly.
Table 1 - Common Weld Faults
Trade of Sheet Metalwork – Phase 2 Module 3 Unit 4
Unit 4 10
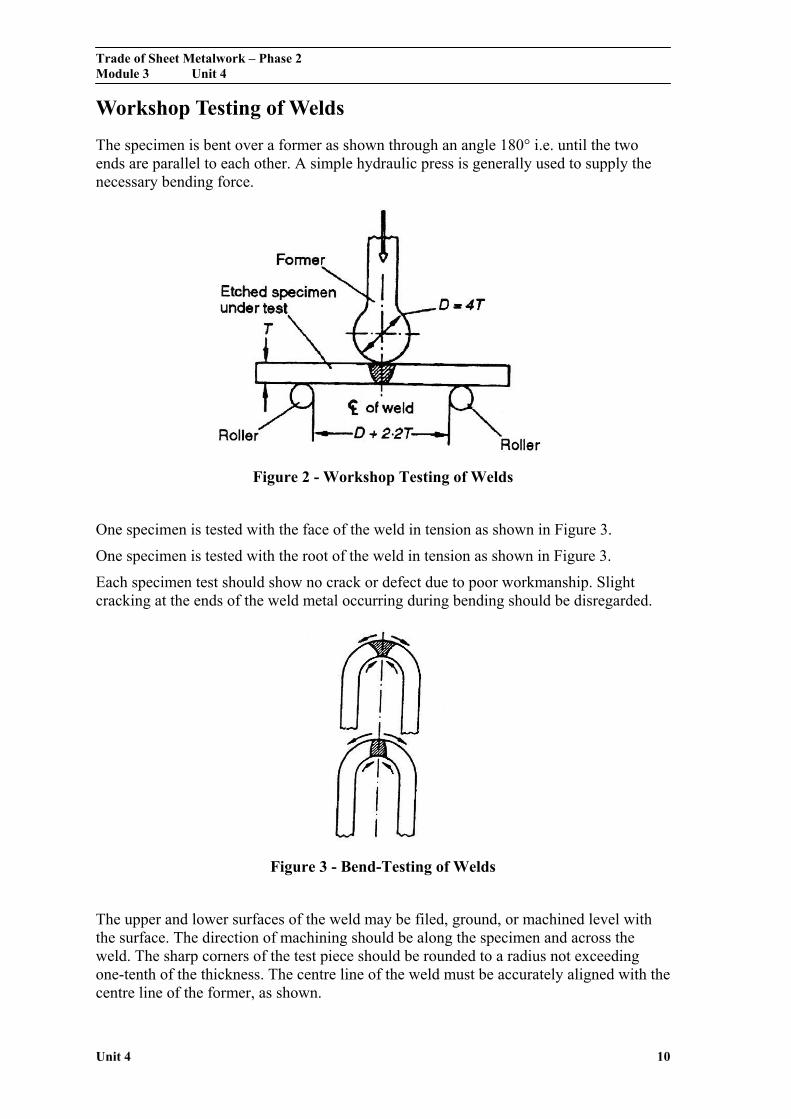
Workshop Testing of Welds
The specimen is bent over a former as shown through an angle 180° i.e. until the two ends are parallel to each other. A simple hydraulic press is generally used to supply the necessary bending force.
Figure 2 - Workshop Testing of Welds
One specimen is tested with the face of the weld in tension as shown in Figure 3.
One specimen is tested with the root of the weld in tension as shown in Figure 3.
Each specimen test should show no crack or defect due to poor workmanship. Slight cracking at the ends of the weld metal occurring during bending should be disregarded.
Figure 3 - Bend-Testing of Welds
The upper and lower surfaces of the weld may be filed, ground, or machined level with the surface. The direction of machining should be along the specimen and across the weld. The sharp corners of the test piece should be rounded to a radius not exceeding one-tenth of the thickness. The centre line of the weld must be accurately aligned with the centre line of the former, as shown.
Trade of Sheet Metalwork – Phase 2 Module 3 Unit 4
Unit 4 11
Inspection of Etched Sections and Bend Specimens
Etched sections and weld fractures will give information of the following defects if present:
1. Incorrect profile.
2. Undercutting.
3. Slag inclusions.
4. Porosity and cracks.
5. Poor root penetration and lack of fusion.
It is recommended that the examination of etched specimens should be made with the aid of, at least, a hand magnifying glass.
Method of Preparing Etched Specimens
1. Preparation of surface for etching: The surface should first be filed using a coarse file until all the deep marks are removed. A smooth file is then used to file the surface at right angles to the initial coarse file marks. This smooth filed surface should then be polished with successively finer grades of emery paper, the direction of polishing being at right angles to the marks made by the previous grade in each case. It is important to polish with each grade of emery paper until the scratches made by the previous paper have been removed before proceeding to the next finer grade. This will ensure a first-class finish to the surface to be etched.
2. Etching for macro-examination: A suitable etching solution is as follows: 10-15 ml. Nitric Acid (specific gravity 1-42) 90 ml. Alcohol (Industrial spirit) The specimen may be immersed in the etching solution until a well-defined macro-structure is obtained, or the surface of the specimen may be swabbed with cotton wool saturated with the solution. In either case, the specimen should be thoroughly washed in hot water, followed by rinsing with acetone or industrial spirit and drying in a current of air. It is possible to preserve etched specimens by a coating of clear lacquer.
Trade of Sheet Metalwork – Phase 2 Module 3 Unit 4
Unit 4 12
Common Weld Faults
Write the answers to the following questions in your notebook.
You may refer back in the notes if necessary.
1. What is the cause of an uneven weld?
2. What is the cause of holes in the joint?
3. What is the cause of overheating?
4. What is the cause of fused portion not in joint but to one side?
Trade of Sheet Metalwork – Phase 2 Module 3 Unit 4
Unit 4 13
Self Assessment
Questions on Background Notes – Module 3.Unit 4
1. What is the cause of an uneven weld?
2. What is the cause of holes in the joint?
3. What is the cause of overheating?
Trade of Sheet Metalwork – Phase 2 Module 3 Unit 4
Unit 4 14
4. What is the cause of fused portion not in joint but to one side?
Trade of Sheet Metalwork – Phase 2 Module 3 Unit 4
Unit 4 15
Answers to Questions 1-4. Module 3.Unit 4
1.
Moving the torch along the joint too quickly or slowly, zig
zag movements that are not the same.
2.
3.
Moving the flame too slowly.
4.
Not playing the torch over the joint equally at each side.
Holding the flame too long in one place and overheating the flame.

Trade of Sheet Metalwork – Phase 2 Module 3 Unit 4
Unit 4 16
Index
C Common Weld Faults, 9, 13
W Workshop Testing of Welds, 10
Inspection of Etched Sections and Bend Specimens, 12 Method of Preparing Etched Specimens, 12


![[PPT]Oxy-Acetylene Cutting Safety - Home | Occupational … · Web viewOxy-Acetylene Cutting Safety in Agriculture OSHA Standard 1910.253 Produced by Idaho State University Office](https://img.pdfslide.us/doc/110x75/5abfe75a7f8b9ac6688b7fa4/pptoxy-acetylene-cutting-safety-home-occupational-viewoxy-acetylene-cutting.jpg)