Embed Size (px)
Citation preview
Oxxo (IP65 tube ready)Batten 78566, 78567, 78569, 78570
Instruction leaflet
Care and Safety• We recommend cleaning with a soft dry cloth. Do not use solvents or abrasive cleaners as these could damage
the finish.
• Always disconnect the product from mains at least 10 minutes allowing to cool down before any maintenance oradjustment.
Iss .3 25/03/2019
www.saxbylighting.com Saxby Lighting. BH23 3PE
• You have correctily identified the wires.
• The connections are tight.
• No loose strands have been left out of the terminals.
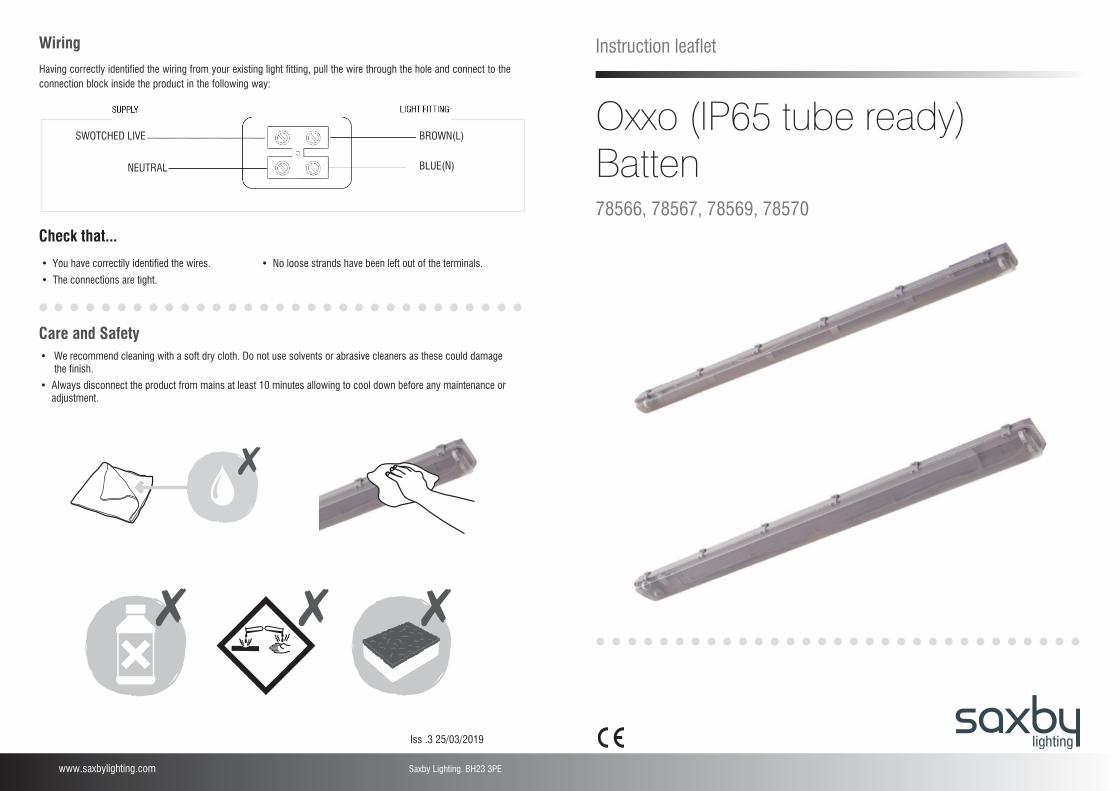
Wiring
Check that...
Having correctly identified the wiring from your existing light fitting, pull the wire through the hole and connect to the connection block inside the product in the following way:
BLUE(N)
BROWN(L)SWOTCHED LIVE
NEUTRAL
Thank you for purchasing this light fitting. Please read the instructions carefully before use to ensure safe and satisfactory operation of this product. Please retain these instructions for future reference.
Warning
Technical data
Please read these instructions carefully before commencing any work.
If replacing an existing fitting, make a careful note
Cables must be protected using suitable conduit or plastic trunking.
of the connections.
Always use the correct type and wattage bulb. Using the incorrect wattage bulb will damage the bulb
These products should not be fitted to PIR circuits or short duration timed switches. Should you wish to connect this unit to a timed system please consult the manufacturer before installation.
The mains supply cable must have a minimum cross sectional area of 1.0mm².
This unit must be fitted by a competent and qualified electrician.
Check the pack and make sure you have all of the
This light fitting should be connected to a circuit with a 30mA RCD fitted.
parts listed.
To prevent electrocution switch off at mains supplybefore installing or maintaining this fitting.Ensure other persons cannot restore the electricalsupply without your knowledge.
Install in accordance with IEE Wiring regulations and current Building Regulations.
Supply
Bulb Type:
Voltage: 240V~, 50 Hz
1 x T8 18W LED 4FT - 785661 x T8 23W LED 5FT - 78567
2 x T8 18W LED 4FT - 785692 x T8 23W LED 5FT - 78570
Conformity with all relevant EC Directive requirements.
All light sources are not available. Need to buy separately.This series of lamps must use LED tubes with single ended power supply.
Waste electrical products should not be disposed of with household waste.
The power supply is Double Insulated and does not require connection to an Earth circuit.
Please recycle where facilities exist.Check with your Local Authority orlocal store for recycling advice.
This product is not suitable for dimming.
Jet-Proof
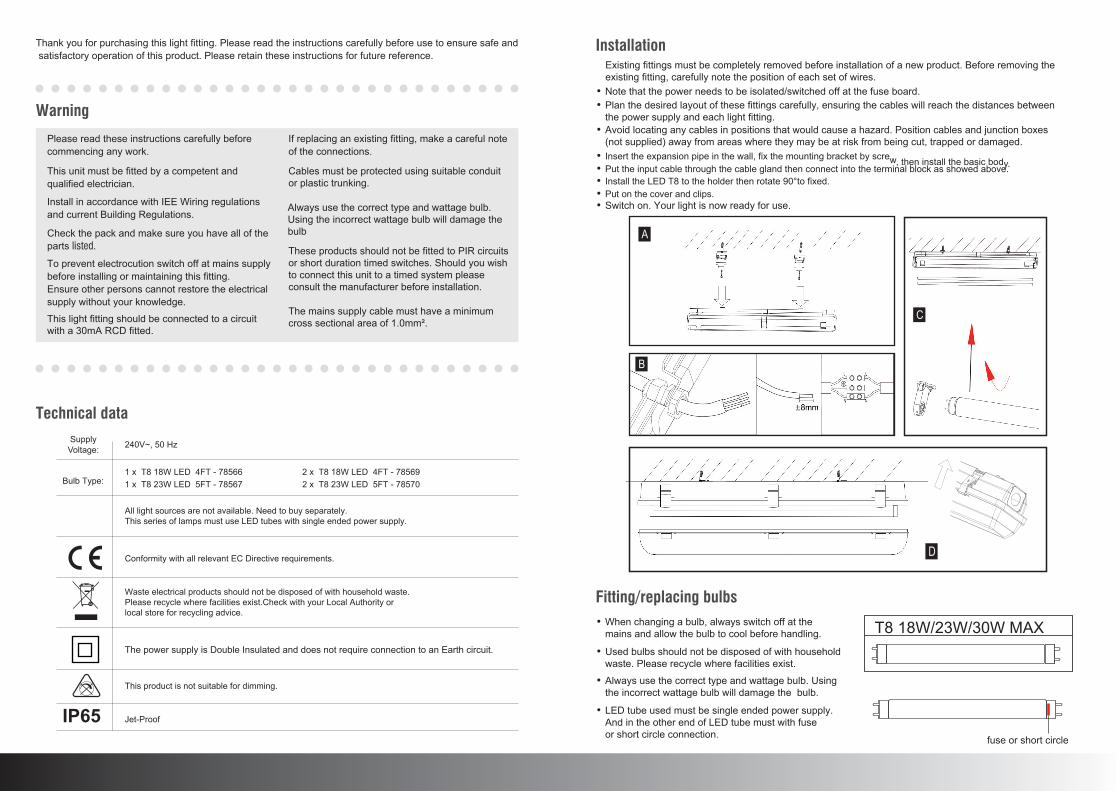
InstallationExisting fittings must be completely removed before installation of a new product. Before removing the existing fitting, carefully note the position of each set of wires.
IP65
• Note that the power needs to be isolated/switched off at the fuse board.
• Switch on. Your light is now ready for use.
• Insert the expansion pipe in the wall, fix the mounting bracket by screw, then install the basic body.• Put the input cable through the cable gland then connect into the terminal block as showed above. • Install the LED T8 to the holder then rotate 90°to fixed.• Put on the cover and clips.
• Plan the desired layout of these fittings carefully, ensuring the cables will reach the distances betweenthe power supply and each light fitting.
• Avoid locating any cables in positions that would cause a hazard. Position cables and junction boxes (not supplied) away from areas where they may be at risk from being cut, trapped or damaged.
A
C
D
B
Fitting/replacing bulbs• When changing a bulb, always switch off at the
mains and allow the bulb to cool before handling.
• Used bulbs should not be disposed of with household waste. Please recycle where facilities exist.
• Always use the correct type and wattage bulb. Using the incorrect wattage bulb will damage the bulb.
• LED tube used must be single ended power supply.And in the other end of LED tube must with fuse or short circle connection.
T8 18W/23W/30W MAX
fuse or short circle