Embed Size (px)
Citation preview

MAD MAX ATV
OWNERS MANUAL
Please read this owner’s manual carefully before using this product ! This is most important ! Please read this owner’s manual carefully! It’s good for driver’s safety and vehicle’s maintenance! If the rider is without safety awareness or driving experiences, please do drive under the adult’s supervision! This is most important! It’s very important for your safety. This product is recommended for riders of 14 years old or over. Do not lend the vehicle to others who don’t know how to operate. Please observe the local law and regulations. Instructions from dealers:
Please read instructions Carefully before operating your New Motor Bike:
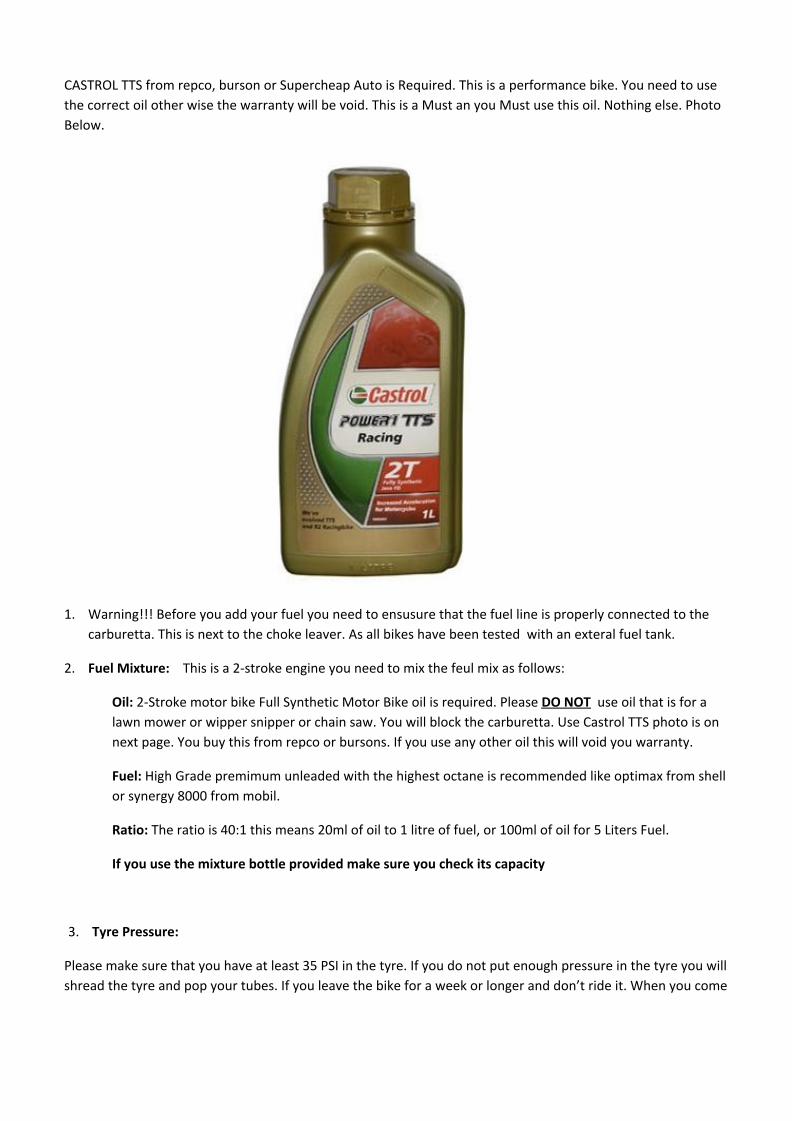
CASTROL TTS from repco, burson or Supercheap Auto is Required. This is a performance bike. You need to use
the correct oil other wise the warranty will be void. This is a Must an you Must use this oil. Nothing else. Photo
Below.
1. Warning!!! Before you add your fuel you need to ensusure that the fuel line is properly connected to the
carburetta. This is next to the choke leaver. As all bikes have been tested with an exteral fuel tank.
2. Fuel Mixture: This is a 2-stroke engine you need to mix the feul mix as follows:
Oil: 2-Stroke motor bike Full Synthetic Motor Bike oil is required. Please DO NOT use oil that is for a
lawn mower or wipper snipper or chain saw. You will block the carburetta. Use Castrol TTS photo is on
next page. You buy this from repco or bursons. If you use any other oil this will void you warranty.
Fuel: High Grade premimum unleaded with the highest octane is recommended like optimax from shell
or synergy 8000 from mobil.
Ratio: The ratio is 40:1 this means 20ml of oil to 1 litre of fuel, or 100ml of oil for 5 Liters Fuel.
If you use the mixture bottle provided make sure you check its capacity
3. Tyre Pressure:
Please make sure that you have at least 35 PSI in the tyre. If you do not put enough pressure in the tyre you will
shread the tyre and pop your tubes. If you leave the bike for a week or longer and don’t ride it. When you come
back to the bike you need to recheck the tyre pressure again. Simply feeling the pressure with your hand is not
enough, it needs to be measured with a pressure guadge.
4. Starting Procedure:
Step 1: Turn the white fuel tap on by factory default this will already be set to on. However you can check
this by looking for the white plastic T–piece valve on the carburetta ensure this is in the vertical position.
Step 2: Make sure the Key is in and turned to the right position
Step 3: Set the Choke to the Up Position. In some cases you may need to set this to ¼ down from the top or
1/2 way depending on the air temerature and the temperature of the bike. Usually the warmer the day and
warmer the bike the choke will not be required as much. So move the choke down to half way if it is a
resonably warm day.
Step 4: Hold the throttle to the full position while pulling the cord.
Step 5: WARNING !!! When pull starting the bike from the very first time make 10 small slow light pulls in
order to pump the fuel to the engine. If you do not follow these instructions you will break the starter. You
have to do this to prime the engine as there will be no fuel in the carburetta for the first time.
When pulling the starter ensure that you begin each pull with the cord out about 5cm. This will ensure that
the pull starting mechanism has properly engaged onto the engine. Pull lightly 10 times. Just to get the fuel
down the fuel lines and into the carburetta lubricating the engine. You will notice it gets easier to pull the
cord as time goes on.
Step 6: Pull harder short, sharp, jabbs. There is not need to pull the cord out all the way but rather short
sharp jabbs. Will start the engine. The pull starter will come out exactly 4 combustions of the engine. Please
do not go past the 3rd combusition as you will pull the cord out if you pull to hard. You can pull from 1-3
combustions then stop at the 4th.
Once the bike has started you can let go of the throttle and you have to move the choke to the down
position. You have to do this right away after the bike has started to keep the engine running. You are
taking the choke OFF now that the bike has started.
5. Oil coming out of Exhaust
If there is some oil coming out of the exhaust don’t panic its perfectly normal and healthy for a small amount of
oil to come out of the exhaust. What you can do is ease up a little on the oil mix next time round or add a bit of
feul to the mix. But not too much as the oil helps lubricate the engine.
Instructions from manufacturer:
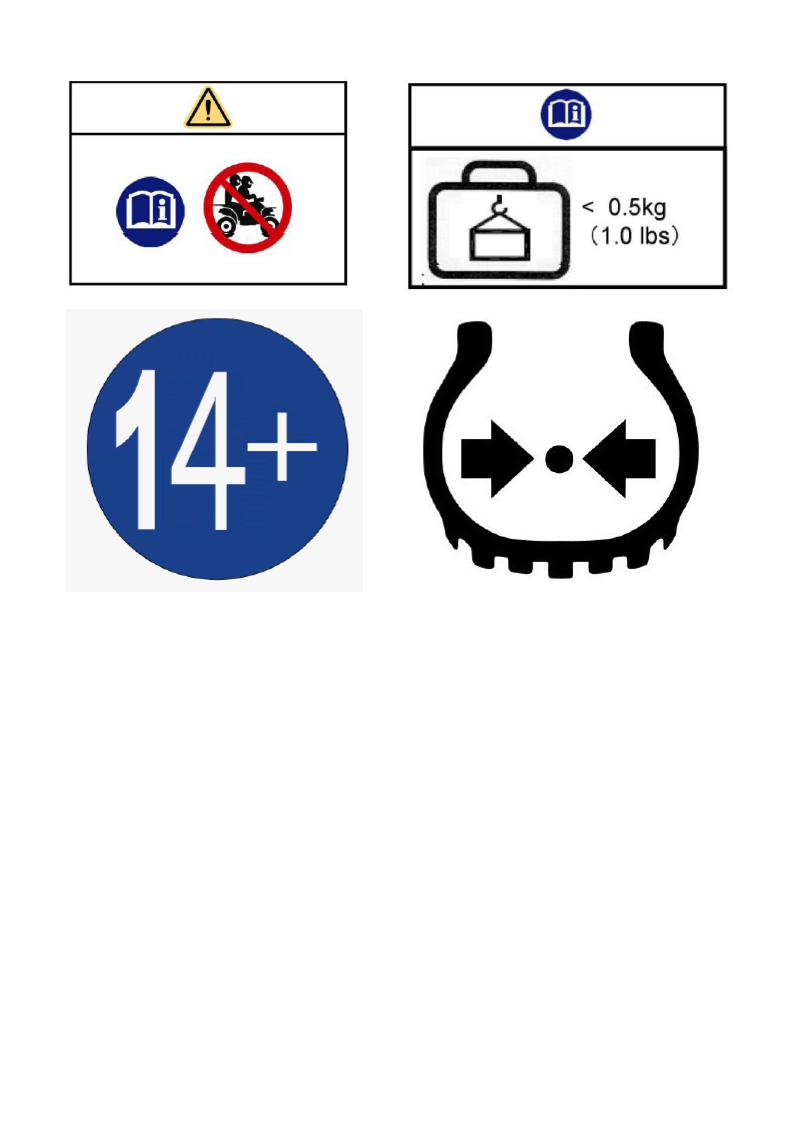
Safety warning 1. This vehicle is not a toy. 2. Rider under16 years old must use this product under adult’s supervision 3. Children must be trained before driving. This is very important. 4. Be sure of children's ability to forbid the risk. This is very important. 5. Children must understand the manual and the importance of warnings on the manual. 6. User must read the owner manual carefully and understand the content of the manual.
7. Incorrect operation of this ATV will result serious injury or even death. 8. Age limit warning.(See aluminum warning plate on the ATV) 9. This product is not intended for OFF-ROAD use. Please get off the vehicle and walk with it when crossing the roads. 10. Never ride with more than one person. 11. Never attempt to operate this vehicle while under the influence of alcohol or drugs, avoid injury or death. 12. Please control the speed, do not drive at excessive speed. 13. The vehicle is not allowed to use in the adjustment or maintenance period. 14. Be sure the vehicle is in a good condition before using it. 15. Do not modify the vehicles or change the spare parts. This is unsafe and illegal. 16. The accelerating installation of the vehicle has been set. Users should not adjust it, which may result in serious injuries and death. 17. Before riding ,please wear the safety helmet、gloves、protection dress and footwear ,to ensure the safety . 18. It is necessary to receive training from importer or retailer, and learn the operation skills. 19. Learn local laws and regulations of ATV driving from the retailers. 20. It's easy to be burned by break after using the vehicle for a long time. 21. Although the vehicle is with safety designed measures, harms still can not be avoided. Please read the warning labels on the vehicle carefully, and understand them fully. 1. Warning caution label includes important safety information . 2. User must understand the content of labels completely, and carry out. 3. Make sure all the labels are put on the vehicles already. 4. When finding the labels are not clear or fall off, please ask dealers for them to stick on the vehicles to ensure the integrity of all the labels. Compliance with the laws and directives:
2006/42/EC MACHINERY DIRECTIVE 2004/108/EC EMC DIRECTIVE 97/68/EC ENGINE POLLUTANT DIRECTIVE
Assembling guide: 1. Place packing box on the flat ground, then open it.(with the scissors or cutter) 2. Use 10# open-end wrench and 6# allen wrench to apart the packing metal. 1st step: Please install steering linkages, tighten nut with 25N.m force, and adjust the balance of the left and the right. 2nd step: Please install rear shock absorbers, and tighten nuts on both sides with 25N.m force. 3rd step: Please install the front tires (make the tread pattern and cycle valve outside),and tighten nuts with force between 35N.m ~ 45N.m. 4th step: Please install the rear tires (make the tread pattern and cycle valve outside),and tighten nuts with force between 50N.m ~ 60N.m. 5th step: Please install handlebar (adjust to proper angles), and tighten nuts with force between 15N.m ~ 25N.m. 6th step: Please install bumper and accessories, and tighten nuts with force between 15N.m ~ 25N.m.Connect battery cables. When you connect battery cables, electric lock is in the sate of "OFF”. Positive first, then negative. Disassembly is opposite. If you fail to understand the instruction, please contact with the local retailers and get professional confirmation after installation. Loading Adjustment (This step should be checked regularly to ensure safety and convenience):
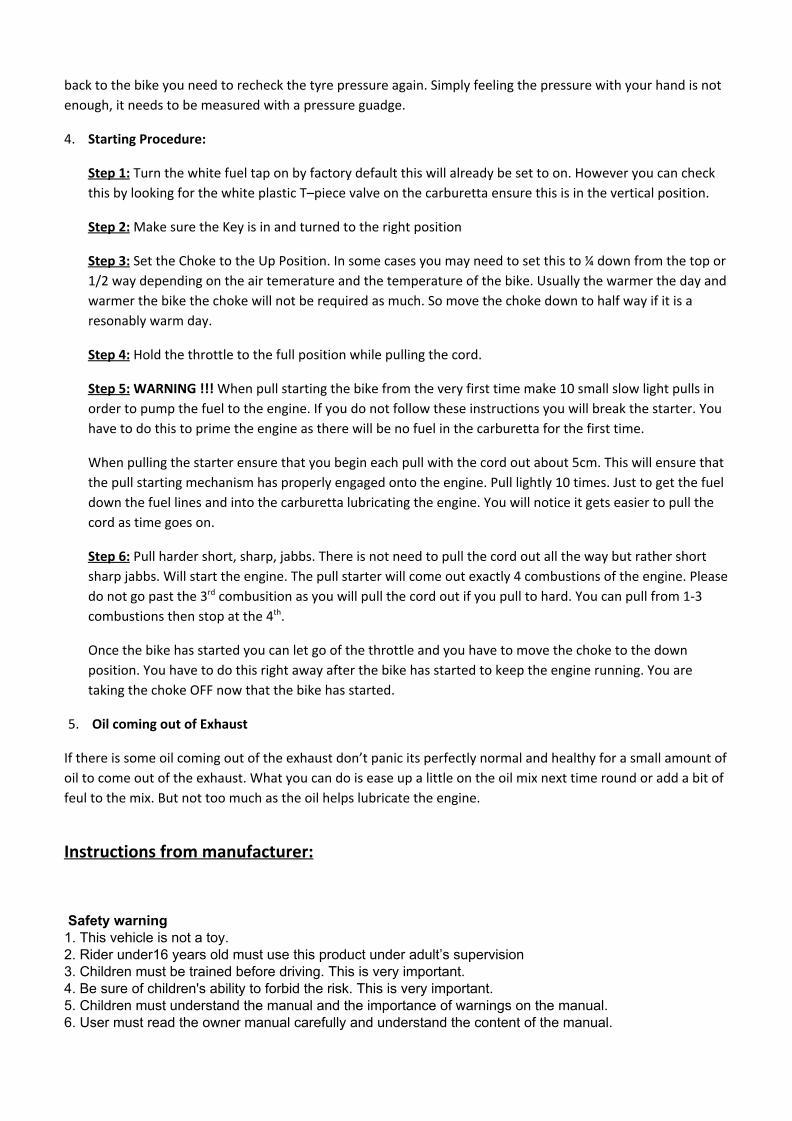
Check the toe-in of front tire, make sure the front center distance is 5-10mm shorter than the rear center distance.
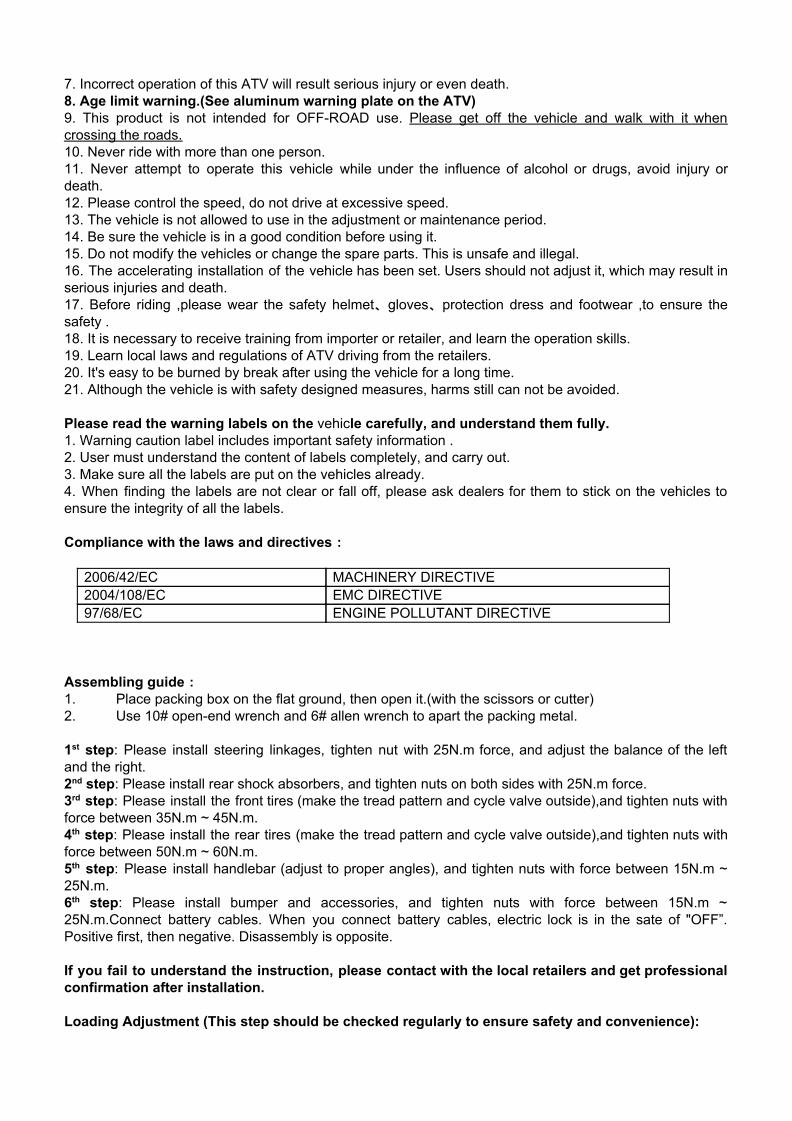
Make sure the connection is ON, and no part is OFF. So vehicle can be started at anytime. Adjust the Chain: Use the index finger, to press lightly the middle position between power output sprocket and rear sprocket. The best condition should be pressed 15mm to 20mm. If it is not in this range, please adjust the chain adjuster. (Please note: The chain adjuster should be adjusted at the same time to ensure the balance of both side).To loosen the fasten nuts of chain adjuster first, and then unscrew or screw nuts to be best condition. Finally, make the nuts of chain adjuster screwed .
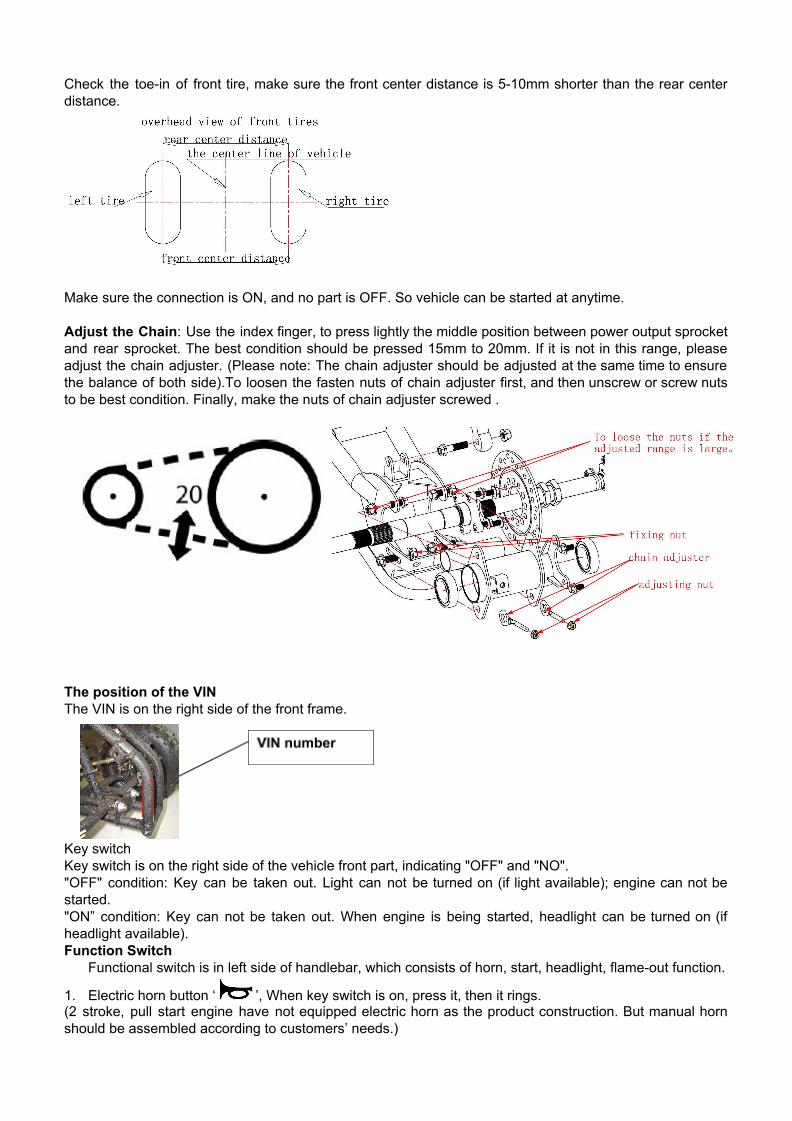
The position of the VIN The VIN is on the right side of the front frame.
Key switch Key switch is on the right side of the vehicle front part, indicating "OFF" and "NO". "OFF" condition: Key can be taken out. Light can not be turned on (if light available); engine can not be started. "ON” condition: Key can not be taken out. When engine is being started, headlight can be turned on (if headlight available). Function Switch
Functional switch is in left side of handlebar, which consists of horn, start, headlight, flame-out function.
1. Electric horn button ‘ ’, When key switch is on, press it, then it rings. (2 stroke, pull start engine have not equipped electric horn as the product construction. But manual horn should be assembled according to customers’ needs.)
2. Start horn button: Red, ‘ ’Press it to start the vehicle (when brake hand is ready ).
3. Headlight button:‘ ’near light;‘ ’distance light .
4. Turn-off switch:‘ ’ turn off;‘ ’turn on. Charger (optional) 1. The input voltage is 220V or 110V (the same as voltage in local place), and output voltage is12V. 2. When the vehicle is charging, the indicator light turns to be red. When the vehicle is fully charged, the
indicator light turns to be green. Burglar alarm (optional) 1. The input voltage is 12V. Anti-theft function: Press the “lock” key, vehicle is in alerting condition. 2. Keyless function: Don’t need to turn on the key switch. Press the “start” button twice continuously, and
then operate the vehicle. 3. Telecontrol stop function: With the keyless function used first, press the button of “unlock” within the
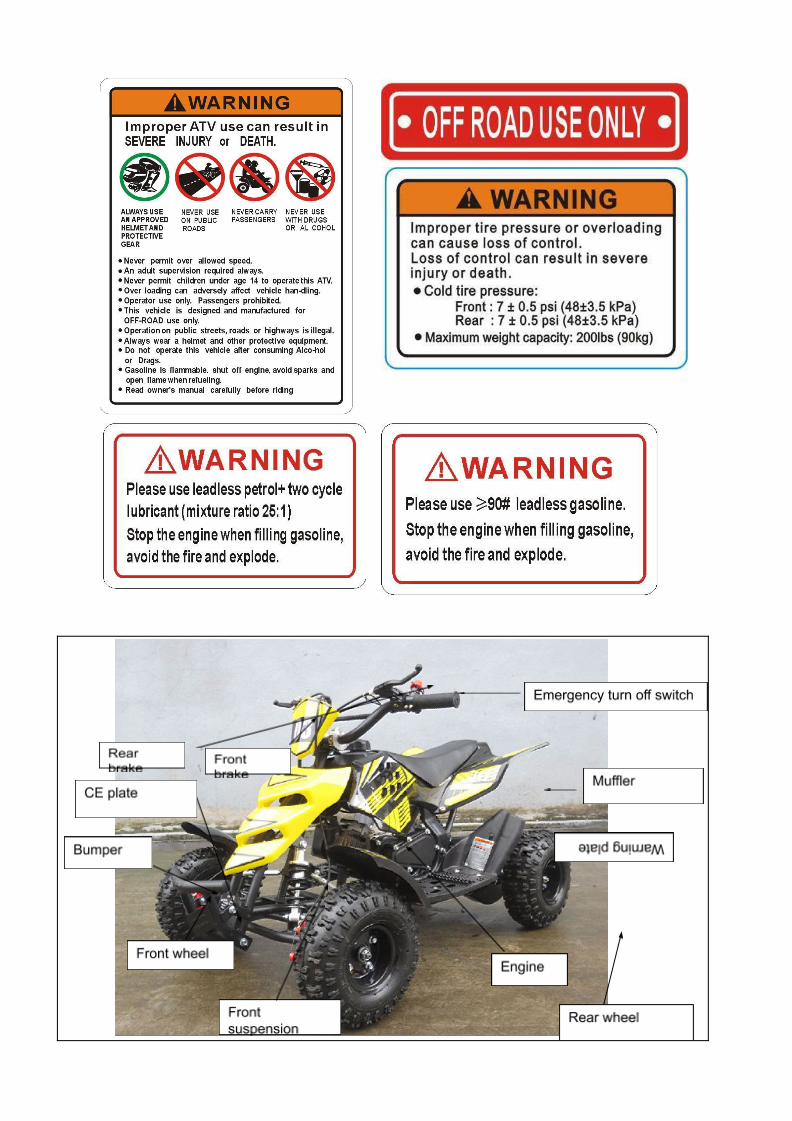
certain distance of remote control, the power of vehicle will be turn off) (Please note: This function is ineffective if vehicle is to be turned by key switch). Emergency turn off stop switch It’s put in the left side of the rear frame, or on the left handlebar. Pull or press down the switch, the engine will be stopped. The emergency rope can be fastened on the driver when there is emergency, the vehicle will be stopped automatically by the driver getting off the seats and pulling down the rope. Tire and Tire gauge Tire: The proper tire pressure can provide the maximum stability and comfortableness. Do check and adjust the tire pressure regularly, to make sure the pressure to be on the standard grade.
To find the tire size and standard pressure, please check parameter list and warning label on the vehicle. To find the “Load-bearing” and “speed grade”, please check the tire surface.
1. Check tire pressure and condition before driving. Please make the replacement if there is any following condition happened: broken, stabbing, or rim is out of shape. (Please seek assistance from qualified technician or local retailer for replacement.)
2. Improper tire pressure will result in hazards. Over the standard pressure can cause a flat tire. Lower than the standard pressure can cause tire relaxation or even dropping, and resulting in losing control of the vehicle.
3. When the tire-tread wearing is over 2mm,please replace new tire in time.(Please seek assistance from qualified technician or local retailer for replacement.) Tire gauge (optional): Manufacturer will provide to customers to measure tie pressure. Tire gauge is put on the key ring of the key switch for users' convenience. Measure method:Unscrew valve cap,then press it toward the valve cap with tire gauge. The measured value is tie pressure. Put back the valve cap and screw it after measuring. . Operating Inspection before riding
Idling inspection 1. Stabilize the vehicle, shake it up and down to inspect the swing arm and fork condition, to make
sure it move normally and without interference. 2. Check whether the front and rear the shock absorber is deformed or leakage or not. 3. Check whether the front suspension and the rear flat fork is fastened in place. 4. Hold the vehicle when checking. 5. Repair and replace parts in time when finding that negative phenomena. 6. Contact with the dealer when the situation is out of control. Front brake inspection Check whether the front brake installation is firm, the braking effect is valid. 1. Front brake handle is mounted on the right side.
2. The brake is working well if backward movement of the brake handle is in the top 20-30mm. 3. Check if the tire rotation is good after releasing the brake lever 4. Contact the dealer for the need of brake maintenance. 5. The front brake lever is with parking feature as well. Use it when parking. Rear brake inspection Check whether the rear brake installation is firm, the braking effect is valid. 1. The rear brake is mounted on the left hand, or on the right foot. 2. The brake is working well if backward movement of the brake handle is in the top 20-30mm or
downward movement of the top of the foot brake lever 20-30mm. 3. Put the brake lever or foot brake lever back into place quickly and check if the tire rotation is good
when the force is removed. 4. Contact the dealer for the need of brake maintenance. 5. Inspect the brake shoe regularly, and replace if timely when it is worn out as the brake shoe is a
worn pieces of block. 6. Do not open the brake casually as the brake fluid will damage people’s skin. Clean the skin with
water of go to the doctor when it happens. 7. The rear brake lever is with parking feature as well. Use it when parking. Battery check (if available) The battery of this vehicle is maintenance free. 1. Check whether battery joint is tight. If there is some part broken ,please change it. 2. Do not throw off the battery which resulting in environment pollution. 3. Do not charge the battery until it is out of power. 4. When the vehicle placed for extended period of inactivity, check the electric quantity every 3 weeks.
Charge it when below 12V. 5. When charging, using or placing the battery, do not put it upside down. Tool bag inspection Check whether tool bag is taken every time before riding. The tool bag is equipped with some professional tools. You can use time when in need. Self-protection inspection Self-protection inspection is the guarantee of pleased driving and life safety. Please wear the
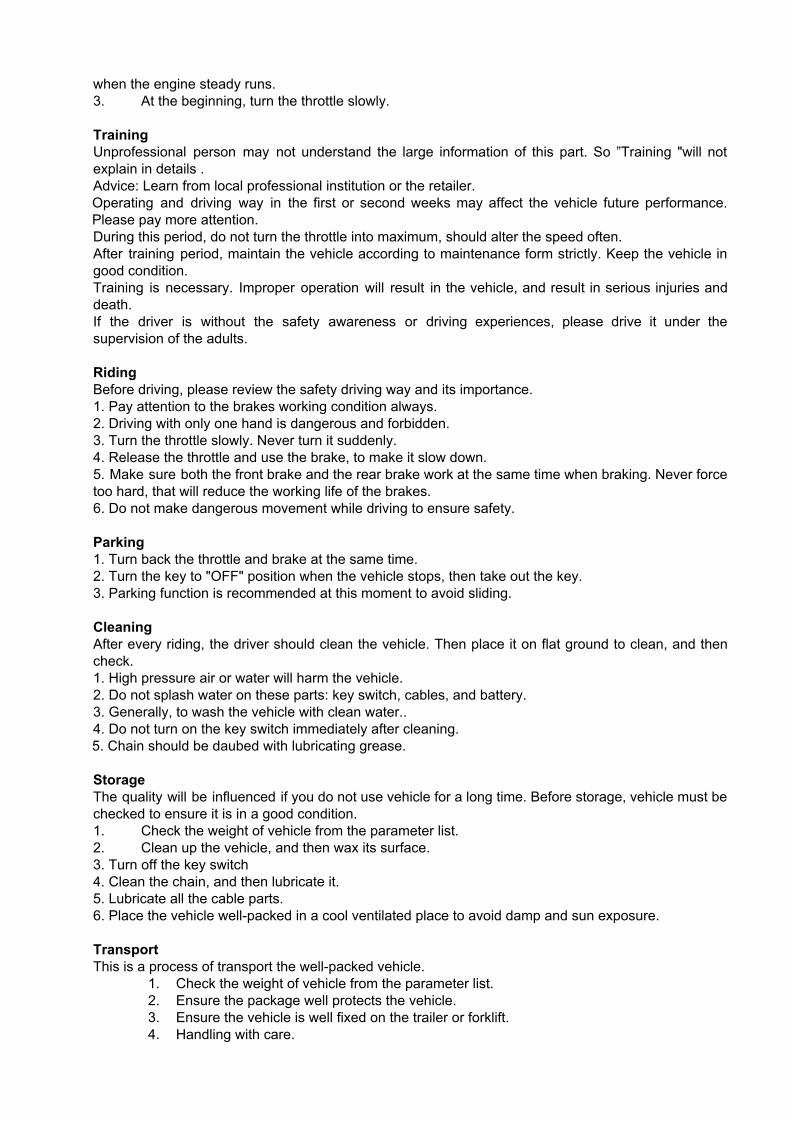
protective clothing correctly to ensure your safety. Protective clothing consists of these parts below:
! Every check and inspection step above is necessary, there is danger existing when driving. Please conform the above process before driving, and operate in accordance with the standard strictly when driving will protect your and life safety. The warning sticker put on the surface of vehicle includes important safety information. User must comprehend fully and act strictly. It will cause the extreme injure and even death, if not carefully checking or executing. Starting Following the steps below to start the engine: 1. Park the vehicle on the flat ground. 2. Turn on the key switch to "NO" position. Make sure it’s well connected. 3. If the engine doesn’t start, please open the choke valve first. Try again. Close the choke valve,
when the engine steady runs. 3. At the beginning, turn the throttle slowly.
Training Unprofessional person may not understand the large information of this part. So ”Training "will not explain in details . Advice: Learn from local professional institution or the retailer. Operating and driving way in the first or second weeks may affect the vehicle future performance. Please pay more attention. During this period, do not turn the throttle into maximum, should alter the speed often. After training period, maintain the vehicle according to maintenance form strictly. Keep the vehicle in good condition. Training is necessary. Improper operation will result in the vehicle, and result in serious injuries and death. If the driver is without the safety awareness or driving experiences, please drive it under the supervision of the adults.
Riding Before driving, please review the safety driving way and its importance. 1. Pay attention to the brakes working condition always. 2. Driving with only one hand is dangerous and forbidden. 3. Turn the throttle slowly. Never turn it suddenly. 4. Release the throttle and use the brake, to make it slow down. 5. Make sure both the front brake and the rear brake work at the same time when braking. Never force too hard, that will reduce the working life of the brakes. 6. Do not make dangerous movement while driving to ensure safety. Parking 1. Turn back the throttle and brake at the same time. 2. Turn the key to "OFF" position when the vehicle stops, then take out the key. 3. Parking function is recommended at this moment to avoid sliding. Cleaning After every riding, the driver should clean the vehicle. Then place it on flat ground to clean, and then check. 1. High pressure air or water will harm the vehicle. 2. Do not splash water on these parts: key switch, cables, and battery. 3. Generally, to wash the vehicle with clean water.. 4. Do not turn on the key switch immediately after cleaning. 5. Chain should be daubed with lubricating grease.
Storage The quality will be influenced if you do not use vehicle for a long time. Before storage, vehicle must be checked to ensure it is in a good condition. 1. Check the weight of vehicle from the parameter list. 2. Clean up the vehicle, and then wax its surface. 3. Turn off the key switch 4. Clean the chain, and then lubricate it. 5. Lubricate all the cable parts. 6. Place the vehicle well-packed in a cool ventilated place to avoid damp and sun exposure. Transport This is a process of transport the well-packed vehicle.
1. Check the weight of vehicle from the parameter list. 2. Ensure the package well protects the vehicle. 3. Ensure the vehicle is well fixed on the trailer or forklift. 4. Handling with care.
Delivery This is the process of delivery the well-packed vehicle. 1. Check the weight of vehicle from the parameter list. 2. Ensure the vehicle is placed normally. Do not turn it upside down or side lay it. 3. Ensure the vehicle is well fixed on the trailer or forklift. 4. Handling with care.
Maintenance Unprofessional person may not understand the large information of this part. So" Training "will not explain in details .For more details ,please contact local retailer. Necessary maintenance is the important guarantee to keep the vehicle in good condition. Please maintain the vehicle according to time list. Engine maintenance: After every driving, please close the switch of carburetor and oil-way. Release the rest oil. This is very important. If not do it accordingly, the vehicle will not be easily started after it has been placed for a long time, or carburetor will leak. Maintenance time list (Please do operate strictly according to maintenance list) I: Inspection, Maintenance or lubricant replacement C: Cleaning L: Add lubricant First week 30days after driving Each year Fuel System I Throttle I Air filter C spark plug I carburetor I I&C chain I&L I&L Brake pads brake system I I I Nuts and bolts I I Tire I I I Steering system I suspension system I I Battery (if available) I
The position of spare parts, parameter, Electrical diagram, age warning and other warning labels and plates.
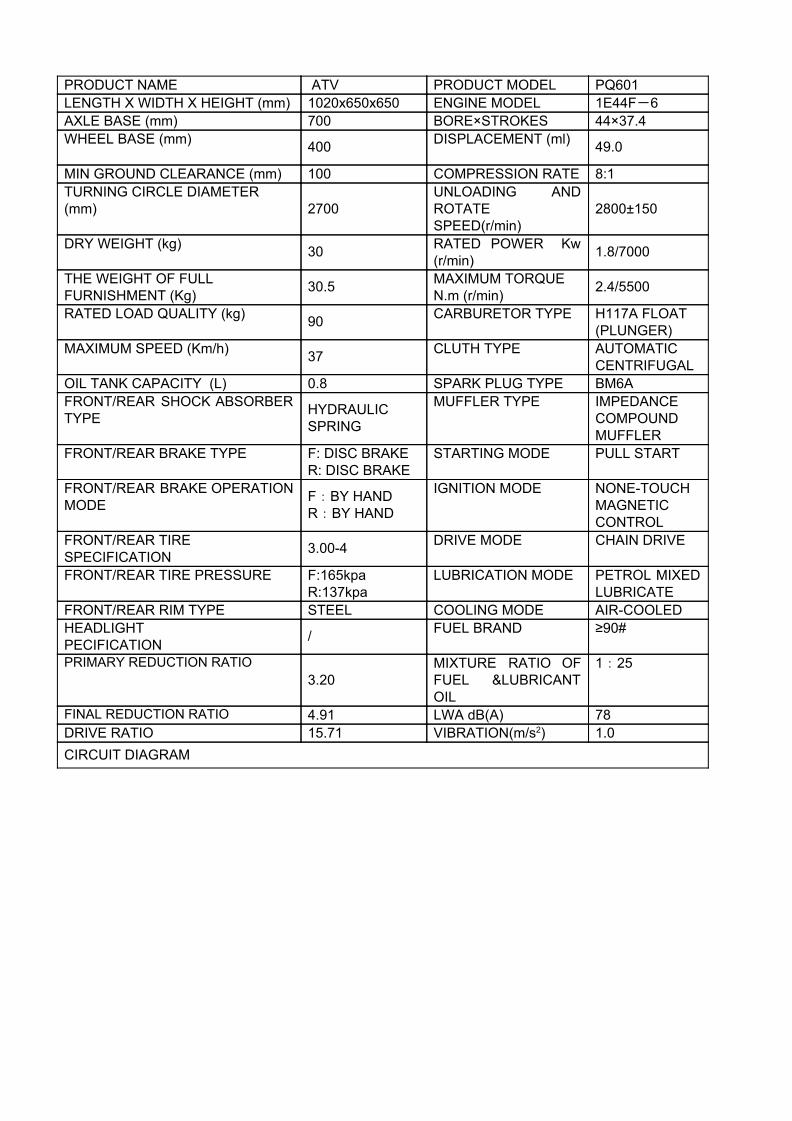
PRODUCT NAME ATV PRODUCT MODEL PQ601 LENGTH X WIDTH X HEIGHT (mm) 1020x650x650 ENGINE MODEL 1E44F-6 AXLE BASE (mm) 700 BORE×STROKES 44×37.4 WHEEL BASE (mm) 400 DISPLACEMENT (ml) 49.0
MIN GROUND CLEARANCE (mm) 100 COMPRESSION RATE 8:1 TURNING CIRCLE DIAMETER (mm) 2700
UNLOADING AND ROTATE SPEED(r/min)
2800±150
DRY WEIGHT (kg) 30 RATED POWER Kw (r/min) 1.8/7000
THE WEIGHT OF FULL FURNISHMENT (Kg) 30.5 MAXIMUM TORQUE
N.m (r/min) 2.4/5500
RATED LOAD QUALITY (kg) 90 CARBURETOR TYPE H117A FLOAT (PLUNGER)
MAXIMUM SPEED (Km/h) 37 CLUTH TYPE AUTOMATIC CENTRIFUGAL
OIL TANK CAPACITY (L) 0.8 SPARK PLUG TYPE BM6A FRONT/REAR SHOCK ABSORBER TYPE HYDRAULIC
SPRING
MUFFLER TYPE IMPEDANCE COMPOUND MUFFLER
FRONT/REAR BRAKE TYPE F: DISC BRAKE R: DISC BRAKE
STARTING MODE PULL START
FRONT/REAR BRAKE OPERATION MODE F:BY HAND
R:BY HAND
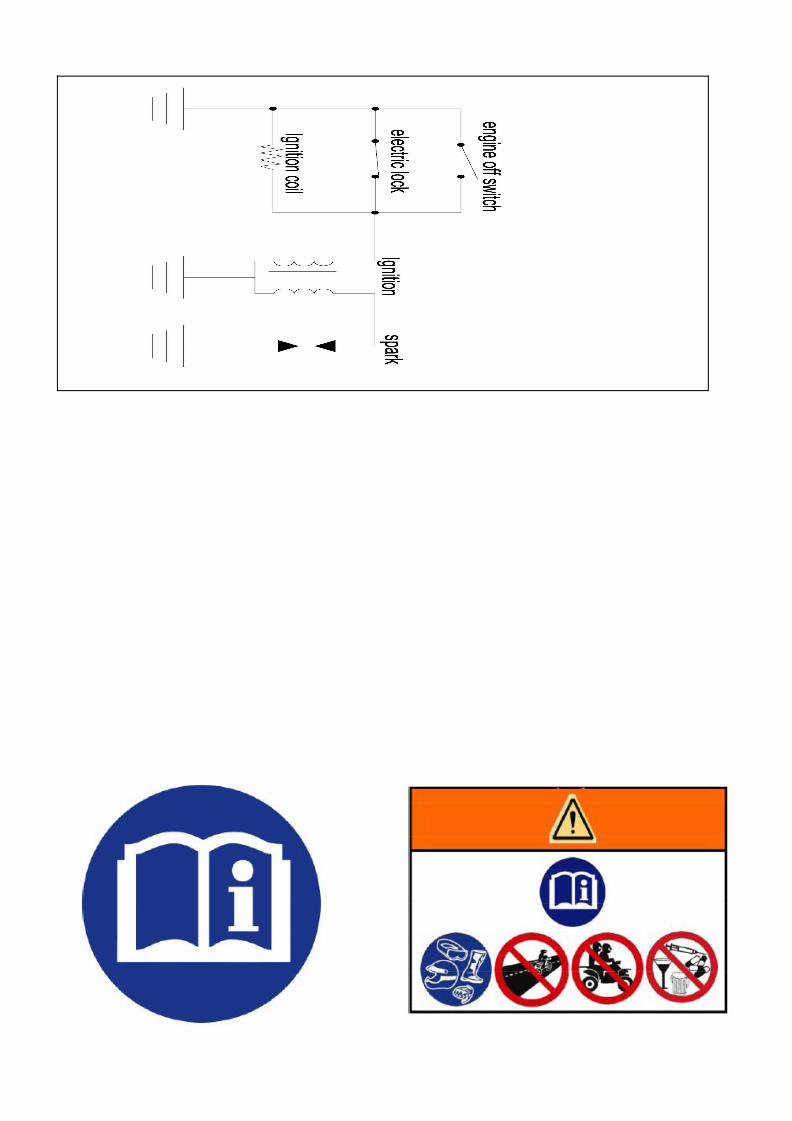
IGNITION MODE NONE-TOUCH MAGNETIC CONTROL
FRONT/REAR TIRE SPECIFICATION 3.00-4 DRIVE MODE CHAIN DRIVE
FRONT/REAR TIRE PRESSURE F:165kpa R:137kpa
LUBRICATION MODE PETROL MIXED LUBRICATE
FRONT/REAR RIM TYPE STEEL COOLING MODE AIR-COOLED HEADLIGHT PECIFICATION / FUEL BRAND ≥90#
PRIMARY REDUCTION RATIO 3.20
MIXTURE RATIO OF FUEL &LUBRICANT OIL
1:25
FINAL REDUCTION RATIO 4.91 LWA dB(A) 78 DRIVE RATIO 15.71 VIBRATION(m/s2) 1.0 CIRCUIT DIAGRAM