Embed Size (px)
Citation preview

PLATINUMClass
Experience the Ultimate
Owners Guide
Built by May Manufacturing Inc.Victorville, California
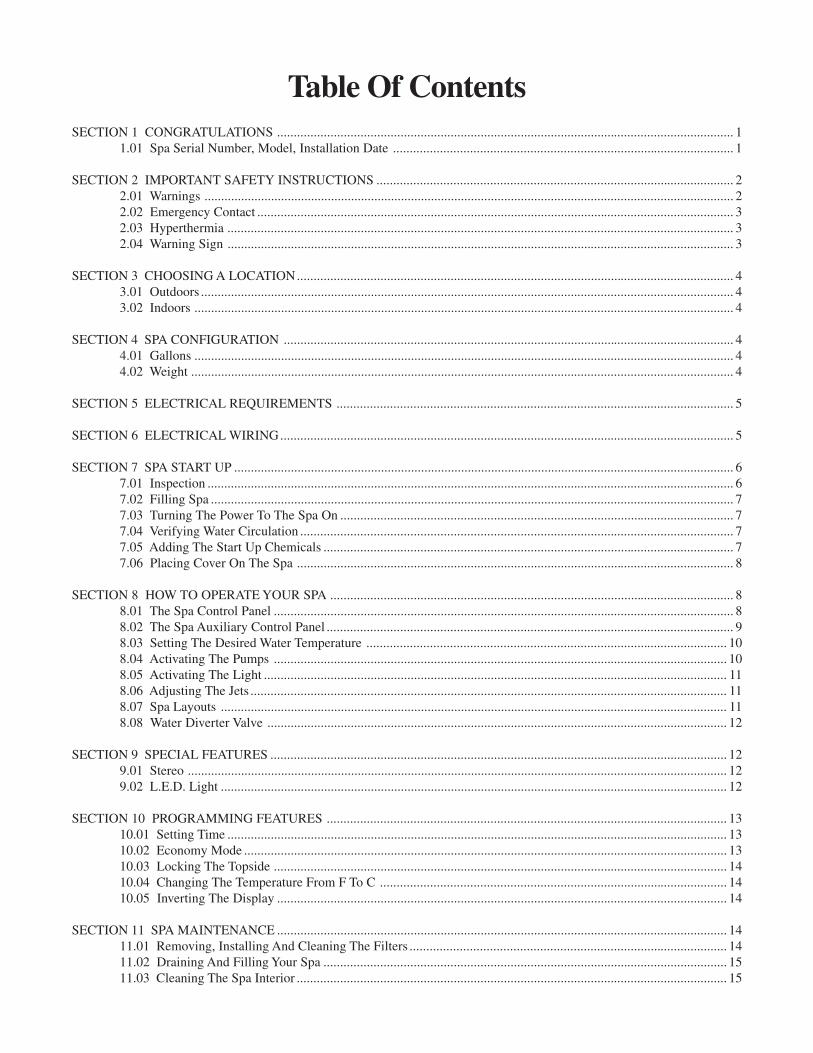
Table Of ContentsSECTION 1 CONGRATULATIONS ......................................................................................................................................... 1
1.01 Spa Serial Number, Model, Installation Date ...................................................................................................... 1
SECTION 2 IMPORTANT SAFETY INSTRUCTIONS ........................................................................................................... 22.01 Warnings ............................................................................................................................................................... 22.02 Emergency Contact ............................................................................................................................................... 32.03 Hyperthermia ........................................................................................................................................................ 32.04 Warning Sign ........................................................................................................................................................ 3
SECTION 3 CHOOSING A LOCATION................................................................................................................................... 43.01 Outdoors ................................................................................................................................................................ 43.02 Indoors .................................................................................................................................................................. 4
SECTION 4 SPA CONFIGURATION ....................................................................................................................................... 44.01 Gallons .................................................................................................................................................................. 44.02 Weight ................................................................................................................................................................... 4
SECTION 5 ELECTRICAL REQUIREMENTS ....................................................................................................................... 5
SECTION 6 ELECTRICAL WIRING........................................................................................................................................ 5
SECTION 7 SPA START UP ...................................................................................................................................................... 67.01 Inspection .............................................................................................................................................................. 67.02 Filling Spa ............................................................................................................................................................. 77.03 Turning The Power To The Spa On ...................................................................................................................... 77.04 Verifying Water Circulation .................................................................................................................................. 77.05 Adding The Start Up Chemicals ........................................................................................................................... 77.06 Placing Cover On The Spa ................................................................................................................................... 8
SECTION 8 HOW TO OPERATE YOUR SPA ......................................................................................................................... 88.01 The Spa Control Panel .......................................................................................................................................... 88.02 The Spa Auxiliary Control Panel .......................................................................................................................... 98.03 Setting The Desired Water Temperature ............................................................................................................ 108.04 Activating The Pumps ........................................................................................................................................ 108.05 Activating The Light ........................................................................................................................................... 118.06 Adjusting The Jets ............................................................................................................................................... 118.07 Spa Layouts ........................................................................................................................................................ 118.08 Water Diverter Valve .......................................................................................................................................... 12
SECTION 9 SPECIAL FEATURES ......................................................................................................................................... 129.01 Stereo .................................................................................................................................................................. 129.02 L.E.D. Light ........................................................................................................................................................ 12
SECTION 10 PROGRAMMING FEATURES ........................................................................................................................ 1310.01 Setting Time ...................................................................................................................................................... 1310.02 Economy Mode ................................................................................................................................................. 1310.03 Locking The Topside ........................................................................................................................................ 1410.04 Changing The Temperature From F To C ........................................................................................................ 1410.05 Inverting The Display ....................................................................................................................................... 14
SECTION 11 SPA MAINTENANCE ....................................................................................................................................... 1411.01 Removing, Installing And Cleaning The Filters ............................................................................................... 1411.02 Draining And Filling Your Spa ......................................................................................................................... 1511.03 Cleaning The Spa Interior ................................................................................................................................. 15
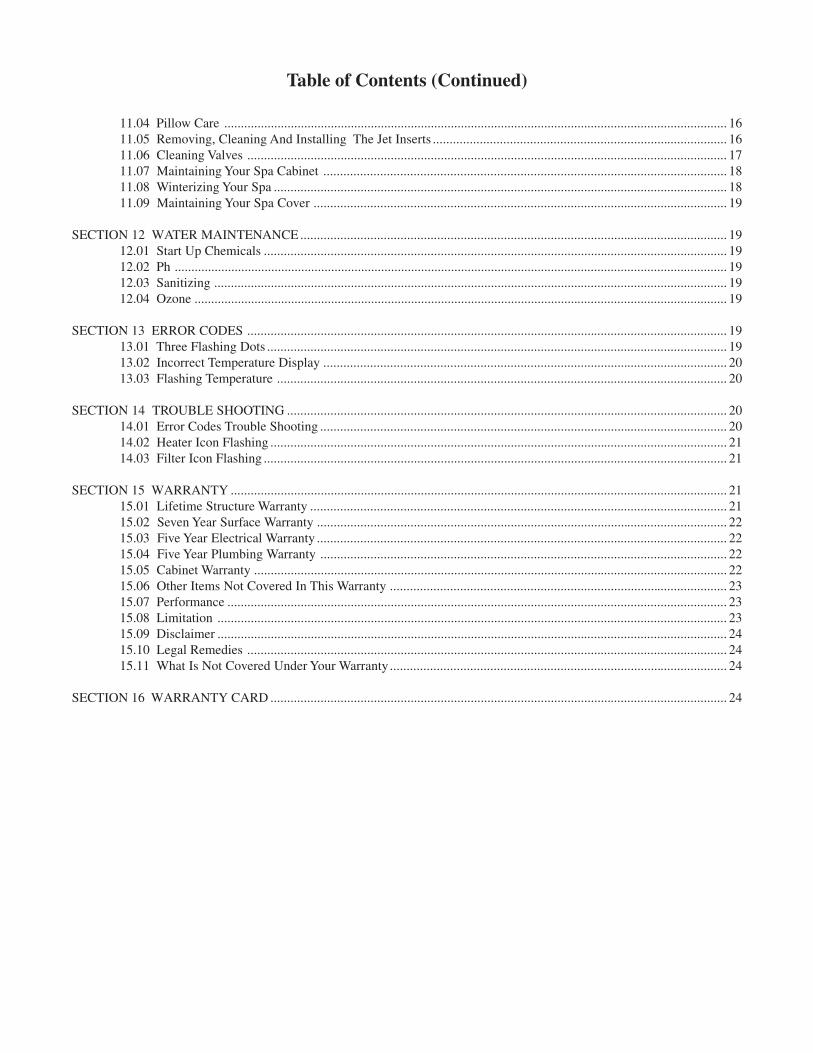
11.04 Pillow Care ....................................................................................................................................................... 1611.05 Removing, Cleaning And Installing The Jet Inserts ........................................................................................ 1611.06 Cleaning Valves ................................................................................................................................................ 1711.07 Maintaining Your Spa Cabinet ......................................................................................................................... 1811.08 Winterizing Your Spa ........................................................................................................................................ 1811.09 Maintaining Your Spa Cover ............................................................................................................................ 19
SECTION 12 WATER MAINTENANCE ................................................................................................................................ 1912.01 Start Up Chemicals ........................................................................................................................................... 1912.02 Ph ...................................................................................................................................................................... 1912.03 Sanitizing .......................................................................................................................................................... 1912.04 Ozone ................................................................................................................................................................ 19
SECTION 13 ERROR CODES ................................................................................................................................................ 1913.01 Three Flashing Dots .......................................................................................................................................... 1913.02 Incorrect Temperature Display ......................................................................................................................... 2013.03 Flashing Temperature ....................................................................................................................................... 20
SECTION 14 TROUBLE SHOOTING .................................................................................................................................... 2014.01 Error Codes Trouble Shooting .......................................................................................................................... 2014.02 Heater Icon Flashing ......................................................................................................................................... 2114.03 Filter Icon Flashing ........................................................................................................................................... 21
SECTION 15 WARRANTY ..................................................................................................................................................... 2115.01 Lifetime Structure Warranty ............................................................................................................................. 2115.02 Seven Year Surface Warranty ........................................................................................................................... 2215.03 Five Year Electrical Warranty ........................................................................................................................... 2215.04 Five Year Plumbing Warranty .......................................................................................................................... 2215.05 Cabinet Warranty .............................................................................................................................................. 2215.06 Other Items Not Covered In This Warranty ..................................................................................................... 2315.07 Performance ...................................................................................................................................................... 2315.08 Limitation ......................................................................................................................................................... 2315.09 Disclaimer ......................................................................................................................................................... 2415.10 Legal Remedies ................................................................................................................................................ 2415.11 What Is Not Covered Under Your Warranty ..................................................................................................... 24
SECTION 16 WARRANTY CARD ......................................................................................................................................... 24
Table of Contents (Continued)

SECTION 1.0 CONGRATULATIONS
Congratulations on the purchase of your new Artesian Platinum Class Spa.
With proper care, your spa will provide years of enjoyment and therapy for your family and friends. Please read and understandall of the instructions provided before you install your Artesian Spa. This owner’s manual is meant as a supplement to thetraining you should have received from your dealer when you purchased your spa.
Please remember, your spa is a powerful piece of equipment. It is extremely important that you have it properly installed toensure safe use.
This manual explains safety precautions, installation instructions, operating instructions, and maintenance procedures. If youhave any questions regarding this manual, please call your Artesian Spa dealer who will be happy to assist you.
For your future reference and convenience, please record the Serial Number and Model, along with the Installation Date, in thespace provided below. Also, you should store this manual where you can easily find it when you need it. The Serial Number andModel are mounted on the base of the equipment enclosure area, as shown below.
1.01 Spa Serial Number, Model, Installation Date
SPA SERIAL NUMBER:
SPA MODEL:
INSTALLATION DATE:
1
SECTION 2.0 IMPORTANT SAFETY INSTRUCTIONS
2.01 Warnings
When installing and using this electrical equipment, basic safety precautions should always be followed,including:
IMPORTANT SAFETY INSTRUCTIONSREAD AND FOLLOW ALL INSTRUCTIONS!!!!
1. DANGER - To reduce the risk of injury, DO NOT permit children to use this product unless they are closely supervised atall times.
2. WARNING - RISK OF DROWNING. Extreme caution must be exercised to prevent unauthorized access by children.To avoid accidents, ensure that children cannot use a spa or hot tub unless they are supervised at all times.
3. WARNING - To reduce the risk of electrical shock, replace damaged cord immediately.4. DANGER - To reduce the risk of injury to persons, DO NOT REMOVE SUCTION FITTINGS.5. A pressure wire connector is provided in the control box inside the unit to permit connection of a minimum No. 8 AWG
(8.4mm) solid copper bonding conductor between this point and any metal equipment, metal enclosures of electrical equip-ment, metal water pipe, and/or conduit within 5 feet (1.5m) of the unit as needed to comply with local requirements.
6. DANGER - RISK OF ELECTRIC SHOCK. Install the spa at least 5 feet (1.5m) from all metal surfaces.7. DANGER - RISK OF ELECTRIC SHOCK. Do not permit any electric appliance, such as a light, telephone, radio, or
television, within 5 feet (1.5m) of a spa or hot tub.8. To reduce the risk of injury:
A. The water in a spa or hot tub should never exceed 104˚F (40˚C).Water temperatures between 100˚F (38˚C) and 104˚F (40˚C) are considered safe for a healthy adult. Lower watertemperatures are recommended for extended use (exceeding 10-15 minutes) and for young children.
B. Since excessive water temperatures have high potential for causing fetal damage during the early months of pregnancy,pregnant or possibly pregnant women should limit spa or hot tub water temperatures to 100˚F (38˚ C).
C. Before entering a spa or hot tub, the user should measure the water temperature with an accurate thermometer since thetolerance of water temperature-regulating devices may vary as much as plus or minus 5˚F (3˚C).
D. The use of alcohol, drugs, or medication before or during spa or hot tub use may lead to unconsciousness with thepossibility of drowning.
E. Persons suffering from obesity or with a medical history of heart disease, low or high blood pressure, circulatorysystem problems, or diabetes should consult a physician before using a spa or hot tub.
F. Persons using medication should consult a physician before using a spa or hot tub, since some medications may inducedrowsiness while others may affect heart rate, blood pressure, and circulation.
9. The electrical supply for this product must include a correctly rated switch or circuit breaker to open all ungrounded supplyconductors, to comply with Section 422-20 of the most recent addition of the National Electrical Code, ANSI/NFPA 70.The disconnecting means must be readily accessible to the hot tub occupant but installed at least 5 feet (1.5m) from the tubwater.
10. People with infectious diseases should not use a spa or hot tub.11. To avoid injury, exercise care when entering or exiting the spa or hot tub.12. Do not remove the front panel of the spa or hot tub (unless instructed by your dealer). There is a danger of electrocution.
2
2.02 Emergency Contact Numbers
1. PHYSICIAN:
2. HOSPITAL:
3. AMBULANCE:
4. POLICE:
2.03 Hyperthermia
Hypothermia occurs when the internal temperature of the body reaches a level several degrees above the normal body tempera-ture of 98.6˚F. The symptoms of hypothermia include dizziness, fainting, drowsiness, lethargy, and increase in the internaltemperature of the body. The effects of hyperthermia include (1) unawareness of impending hazard, (2) failure to perceive heat,(3) failure to recognize the need to exit spa, (4) physical inability to exit spa, (5) fetal damage to pregnant women, and (6)unconsciousness resulting in a danger of drowning. WARNING - The use of alcohol, drugs or medication can greatly increasethe risk of fatal hyperthermia in hot tubs and spas.
SAVE THESE INSTRUCTIONS
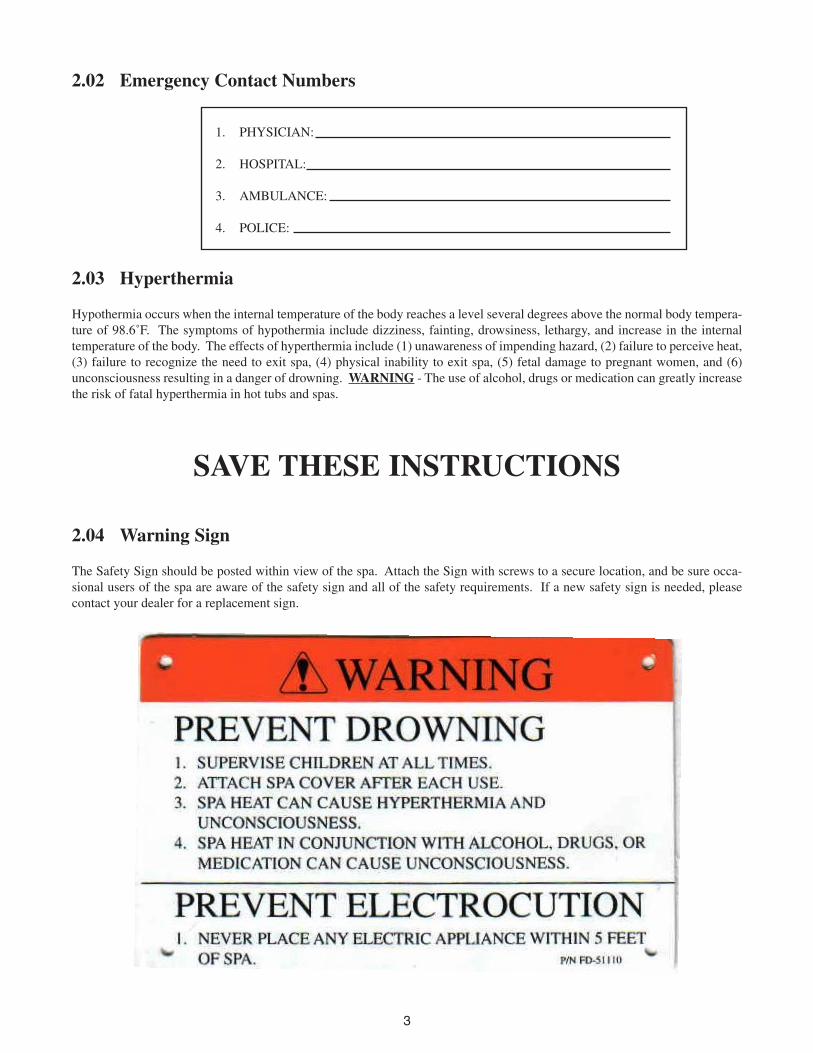
2.04 Warning Sign
The Safety Sign should be posted within view of the spa. Attach the Sign with screws to a secure location, and be sure occa-sional users of the spa are aware of the safety sign and all of the safety requirements. If a new safety sign is needed, pleasecontact your dealer for a replacement sign.
3

SECTION 3 CHOOSING A LOCATION
IMPORTANT: It is highly important that your spa be adequately supported. Because of the weight of the spa,it must have a solid foundation. We recommend at least a 4-in. slab of cement that has cured for a minimum of72 hours. The slab should be large enough to support the entire spa. If spa is being placed on a wooden deck,check with your contractor to verify that the deck can support the weight of the spa (see section 4.02 on page 4)when filled with water and people. If your spa is not on a level surface, damage to the spa can occur. A spa that
is damaged in this way WILL NOT be covered under warranty.
Artesian Spas are considered to be portable spas. All equipment is mounted within the spa. Therefore it is not recommendedthat the spa be recessed into the ground. If you choose to recess the spa in the ground, you must have adequate drainage and youshould also allow easy access to the equipment area. If the spa needs service, extra charges for the repair may be incurred, andthese charges are not covered under the warranty program. Damage to the spa equipment do to poor ventilation on a recessedtub is not covered under warranty.
3.01 Outdoors
When choosing an outdoor location, please consider the following:1. Will the sprinkler system hit the spa? You do not want sprinklers to hit the skirt of the spa. This will cause higher
maintenance of the skirt, and could also cause water to buildup underneath your spa, making it seem as if your spa isleaking.
2. Are there tree branches over the spa? Tree branches hanging over the spa can cause higher maintenance and more chemicaluse. Debris from trees (i.e., leaves, twigs, and sap) can collect in the water and clog your filters and make maintenance andchemicals use more frequent and expensive.
3. Have a clear walkway to your spa. To minimize the dirt, grass clippings and other foreign debris tracked into your spa, it isrecommended that you have a walkway to the spa for a more enjoyable spa experience.
3.02 Indoors
If you are installing your spa indoors, you must make sure there is plenty of ventilation in the location. When spas are usedindoors, a great deal of moisture escapes and can cause damage to walls and ceilings.
SECTION 4 PLATINUM CLASS SPA CONFIGURATION
4.01 Gallons
MODEL GALLONS LITERS
PIPER GLEN 505 1909
DOVE CANYON 475 1795
QUAIL RIDGE 345 1304
FALCON COVE 360 1361
4.02 Weight
MODEL DRY FILLED
PIPER GLEN 968 lbs. 5008 lbs.
DOVE CANYON 901 lbs. 4701 lbs.
QUAIL RIDGE 645 lbs. 3339 lbs.
FALCON COVE 645 lbs. 3525 lbs.
4
SECTION 5 ELECTRICAL REQUIREMENTS
WARNING - The following information is provided for hooking up electrical supply to your spa. A quali-fied, licensed electrician must perform this work. Failure to follow these instruction will terminate all war-ranty coverage and can cause serious injury and/or death.
Your Artesian spa is preset at the factory to run on 230V with a high current draw. This feature gives you the most performanceout of your spa. This will require a 230V, 50 amp GFCI. If a 50 Amp service is not available, your spa can be made to run in lowcurrent mode. Please see your dealer to have the power pack set up for lower current draws.
SECTION 6 ELECTRICAL WIRING
WARNING - Your spa must be wired according to these instructions. Failure to do so will void all warrantiesand all listings from the independent listing facility.
1. The Platinum Class Spa requires a 230V, 50 amp dedicated system. The spa must be hardwired to the power supply, withno plug-in connections, extension cords, or sharing of service.
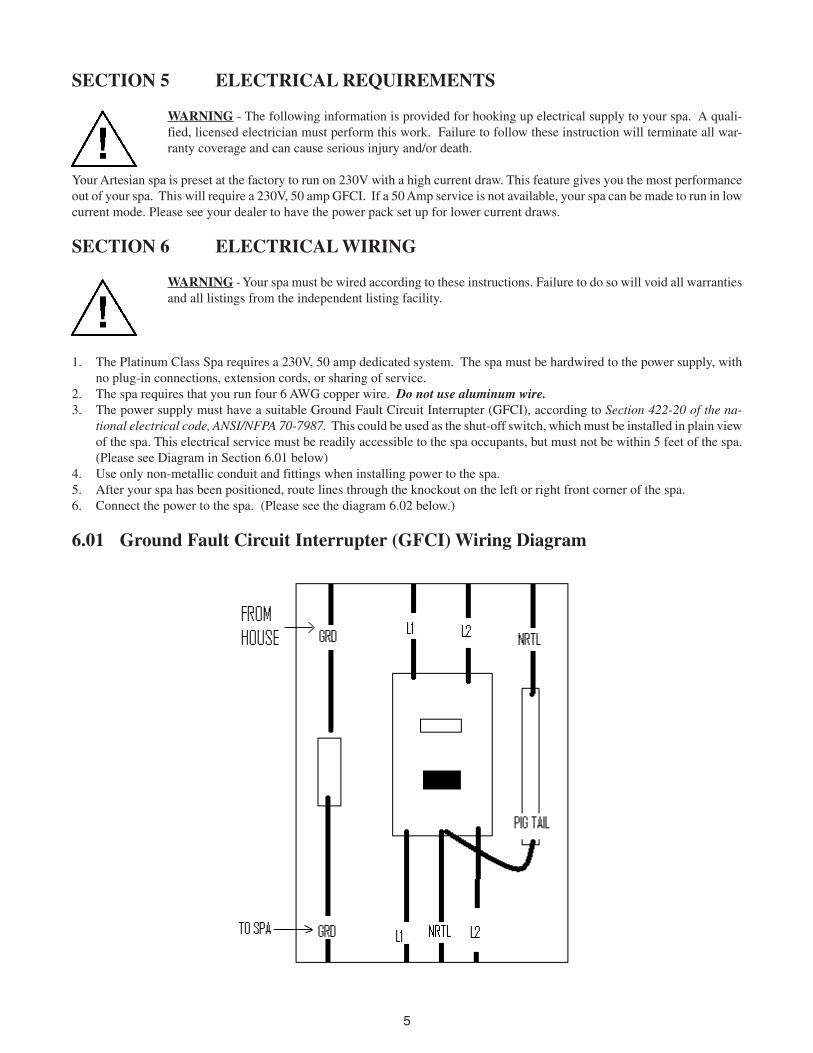
2. The spa requires that you run four 6 AWG copper wire. Do not use aluminum wire.3. The power supply must have a suitable Ground Fault Circuit Interrupter (GFCI), according to Section 422-20 of the na-
tional electrical code, ANSI/NFPA 70-7987. This could be used as the shut-off switch, which must be installed in plain viewof the spa. This electrical service must be readily accessible to the spa occupants, but must not be within 5 feet of the spa.(Please see Diagram in Section 6.01 below)
4. Use only non-metallic conduit and fittings when installing power to the spa.5. After your spa has been positioned, route lines through the knockout on the left or right front corner of the spa.6. Connect the power to the spa. (Please see the diagram 6.02 below.)
6.01 Ground Fault Circuit Interrupter (GFCI) Wiring Diagram
5

6.02 Equipment Pack Wiring Diagram
SECTION 7 SPA START UP
Please read each step of the Start up section prior to doing the step.
7.01 Inspection
You will want to inspect your spa, prior to filling it up with water. Look for and remove any debris in the spa tub and in the filter.Verify that pump plugs are installed on the pumps and the pump unions are tight. (See diagram 7.01a)
7.01a Pump Plug Diagram
6
7.02 Filing The Spa
CAUTION - DO NOT fill your spa with hot water straight out of your water heater or tap. This water may beas hot as 180˚F and will cause damage to the surface and the plumbing of the spa, WHICH WILL VOIDYOUR WARRANTY.
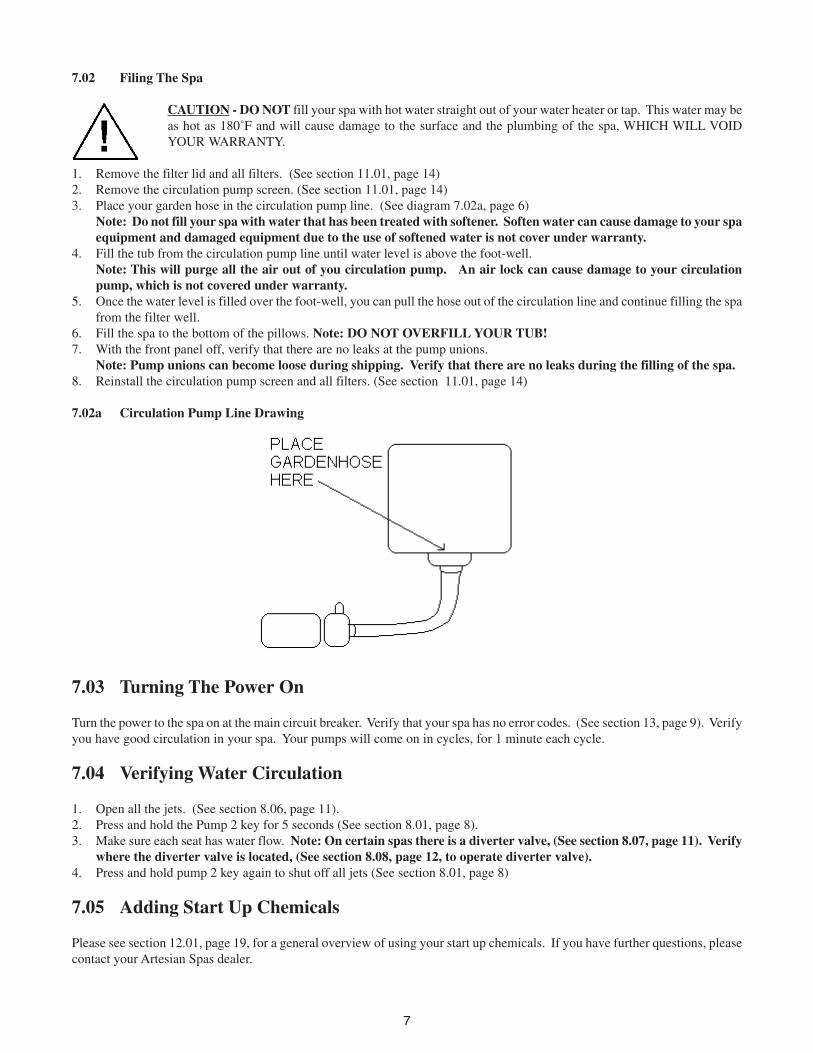
1. Remove the filter lid and all filters. (See section 11.01, page 14)2. Remove the circulation pump screen. (See section 11.01, page 14)3. Place your garden hose in the circulation pump line. (See diagram 7.02a, page 6)
Note: Do not fill your spa with water that has been treated with softener. Soften water can cause damage to your spaequipment and damaged equipment due to the use of softened water is not cover under warranty.
4. Fill the tub from the circulation pump line until water level is above the foot-well.Note: This will purge all the air out of you circulation pump. An air lock can cause damage to your circulationpump, which is not covered under warranty.
5. Once the water level is filled over the foot-well, you can pull the hose out of the circulation line and continue filling the spafrom the filter well.
6. Fill the spa to the bottom of the pillows. Note: DO NOT OVERFILL YOUR TUB!7. With the front panel off, verify that there are no leaks at the pump unions.
Note: Pump unions can become loose during shipping. Verify that there are no leaks during the filling of the spa.8. Reinstall the circulation pump screen and all filters. (See section 11.01, page 14)
7.02a Circulation Pump Line Drawing
7.03 Turning The Power On
Turn the power to the spa on at the main circuit breaker. Verify that your spa has no error codes. (See section 13, page 9). Verifyyou have good circulation in your spa. Your pumps will come on in cycles, for 1 minute each cycle.
7.04 Verifying Water Circulation
1. Open all the jets. (See section 8.06, page 11).2. Press and hold the Pump 2 key for 5 seconds (See section 8.01, page 8).3. Make sure each seat has water flow. Note: On certain spas there is a diverter valve, (See section 8.07, page 11). Verify
where the diverter valve is located, (See section 8.08, page 12, to operate diverter valve).4. Press and hold pump 2 key again to shut off all jets (See section 8.01, page 8)
7.05 Adding Start Up Chemicals
Please see section 12.01, page 19, for a general overview of using your start up chemicals. If you have further questions, pleasecontact your Artesian Spas dealer.
7

7.06 Placing Cover On Spa
After putting the start up chemicals in your spa water, leave the cover off for 15 min. After 15 min. place the cover on the spa.Then always keep your cover on the spa when not in use. The cover will help maintain the heat and protect the spa surface.
WARNING - Spa surfaces can be damaged by prolonged exposure to direct sunlight. Damage caused bydirect sunlight is not covered under your spa warranty. Always keep your spa cover on when not in use, evenif the spa is not filled with water.
SECTION 8 HOW TO OPERATE YOUR SPA
Diagram 8.01a
Diagram 8.01b
8.01 The Spa Control Panel (see diagrams, 8.01a and 8.01b)
A. The LCD display. This will display the time and temperature intermittently. It also displays icons to show what is runningon the spa.
B. Pump 1 KeyTurns pump 1 on and off. (See section 8.04, page 10)
8

C. Pump 2 KeyTurns pump 2 on and off. (See section 8.04, page 10)
D. Pump 3 KeyTurns pump 3 on and off. (See section 8.04, page 10)
E. Pump 4 KeyTurns pump 4 on and off. (See section 8.04, page 10)
F. Pump 5 Key (if applicable)Turns pump 5 on and off. (See section 8.04, page 10)
G. Light KeyTurns the light on high, then medium, then low, then off.
H. Mode KeyPrograms the Economy mode. (See section 10.02, page 13)
I. Program KeyPrograms the Time of Day, Filter Cycle Time, and Filter Duration. (see Section 10.01, page 13)
J. Temperature Up and Down KeyUsed to set temperature. (See section 8.03, page 10)
NOTE: Some keys are also used for programming. These keys will be discussed in section 10, page 13.
8.02 The Spa Auxiliary Panels
The Platinum Class Direct Flow System gives you the ability to control the pump from the seat in which you are sitting.
A. Speed control: Adjusting this dial will increase and decrease the rate of water at the jets.B. Air control: Adjusting this dial will inject air into the jets for a more vigorous massage.C. Pump Key: Pushing this key will turn the pump on and then off for that seat.
9

8.03 Setting The Desired Water Temperature
The Up and Down arrow keys are used to adjust the temperature set point. First push of either key will display the current setpoint for 5 seconds. When the current set point is displayed on the LCD screen, the set point icon will show on the screen.
To raise the temperature, press and hold the Up arrow key. This will increase the set point temperature by 1˚F. The maxtemperature is 104˚F.
To lower the temperature set point press and hold the Down arrow key. This will decrease the set point temperature by 1˚F.Minimum temperature setting is 59˚F.
When your spa is calling for heat, you will see a solid heating icon on the LCD display.
NOTE: If you heating icon is flashing, it means the spa is calling for heat, but the heater is not on. To correct thisproblem please see section 14.01d, pages 20.
The spa programming will maintain the heat at the desired set point when in noEC (Please see section 10.02, Economy mode).The heater will come on when the water temperature reaches 1˚ F below the set point and will turn off when the water tempera-ture reaches 1˚ F above set point.
8.04 Activating The Pumps
With the patent pending Direct Flow system, you have two ways of activating the pumps: either by using the main topsidecontrol or the auxiliary control panels. (Please see section 8.02, page 9)
On the main topside control panel you will have 4 or 5 pump keys. The first push of these keys will turn on the desired pump,the second push will turn off the desired pump.
1. To activate Pump 1 press the Pump 1 key. When Pump 1 is running you will see the Pump 1 icon on the LCD dis-play panel. The second push of the pump 1 key will turn Pump 1 off.
2. To activate Pump 2 press the Pump 2 key. When Pump 2 is running you will see the Pump 2 icon on the LCD displaypanel. The second push of the Pump 2 key will turn Pump 2 off. If Pump 2 key is held for 5 seconds, it automatically
start each pump one second apart. Holding Pump 2 key again for 5 seconds will shut off all the pumps.
3. To activate Pump 3 press the Pump 3 key. When Pump 3 is running you will see the Pump 3 icon on the LCD display
panel. The second push of the Pump 3 key will turn pump 3 off.
4. To activate Pump 4 press the Pump 4 key. The second push of the Pump 4 key will turn Pump 4 off.
5. To activate Pump 5 press the Pump 5 key. The second push of the Pump 5 key will turn pump 5 off.NOTE: Pumps 4 and 5 do not have an Icon on the LCD display.
10

8.05 Activating The Light
This section will cover the 12V Spa light. Your spa maybe equipped with the optional L.E.D. lighting, if so see section 9.02,pages 12.
To activate the light, press the light key. The 12V light will come on in high intensity. A solid light icon on the LCDdisplay will identify this. The second push of the light key will drop the light to medium intensity. A flashing light iconwill identify this. A third push of the light key will bring the light down to low intensity. The flashing light icon also will identifythis. The fourth push of the light key will turn the light off.
8.06 Adjusting The Jets
With the patent pending Direct Flow System, you should not adjust the jets. Adjusting the jets will cause the direct flow tooperate erratically. For example turning certain jets off will cause back pressure to the pump, which will disable the variablespeed of the pump. It is suggested that you use the variable speed control to adjust the water flow of the jets. (See section 8.02a,page 9).
8.06a Adjusting Neck Jets
The neck jets can be adjusted at the face of the jet, or all the jets can be adjusted by using the control valve. Please see section8.07, page 11 to see the location of the Control Valve.
8.07 Spa Layouts By Models
Piper Glen
Dove Canyon
11

Quail Ridge
Falcon Cove
8.08 Water Diverter Valve
The water diverter valve will divert water from one location to another. By moving the handle clockwise or counter clockwisethe user can switch the water from one set of jets to another. Please see section 8.07 for locating your diverter valve and the jetsit affects.
SECTION 9 SPECIAL FEATURES
Your spa may have the optional Stereo System with remote and/or the optional LED lighting system. This section will give youa brief description of operations of these options. For more in-depth instruction, please see the specific feature manuals thatcame with your spa.
9.01 Stereo
Please see stereo manual that came with your spa. If you did not receive a manual please contact your dealer.
WARNING - Putting a wet CD in the stereo or using wet hands to put a CD in the stereo, will damage the stereo unit. Thisdamage is not covered under your warranty.
9.02 L.E.D. Lighting
Please see L.E.D. manual that came with your spa. If you did not receive a manual please contact your dealer.
12
SECTION 10 PROGRAMMING FEATURES
10.01 Setting Time And Filtration
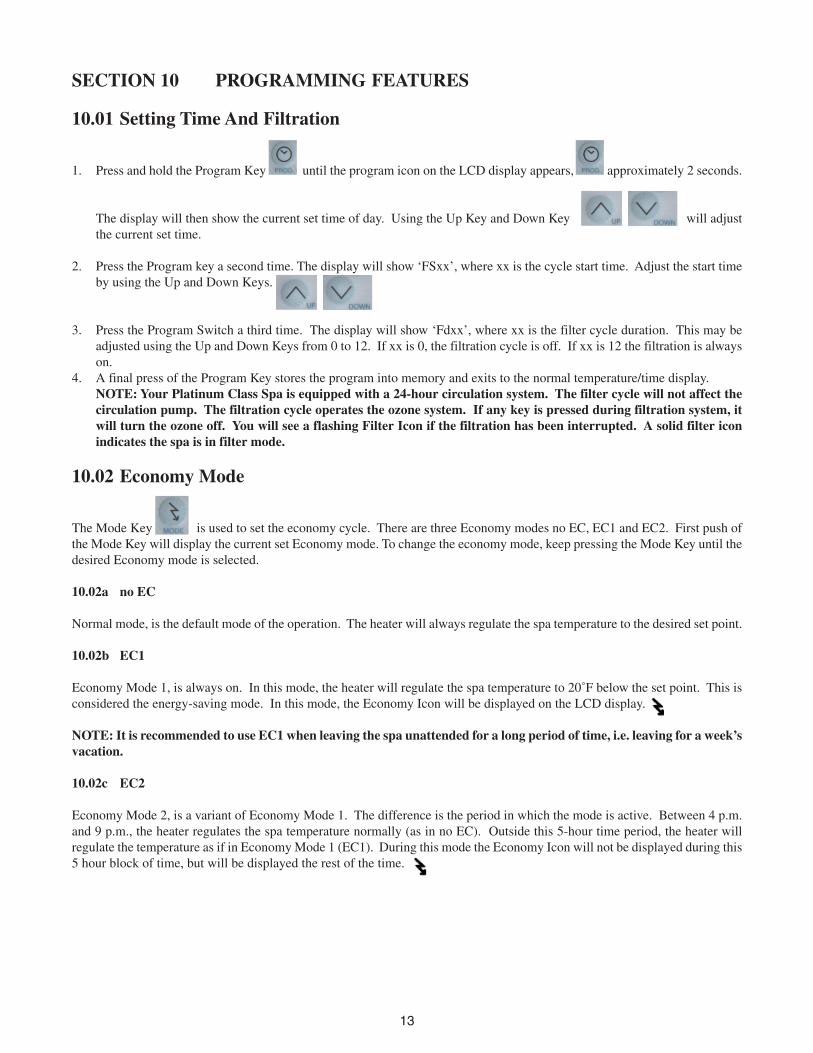
1. Press and hold the Program Key until the program icon on the LCD display appears, approximately 2 seconds.
The display will then show the current set time of day. Using the Up Key and Down Key will adjustthe current set time.
2. Press the Program key a second time. The display will show ‘FSxx’, where xx is the cycle start time. Adjust the start timeby using the Up and Down Keys.
3. Press the Program Switch a third time. The display will show ‘Fdxx’, where xx is the filter cycle duration. This may beadjusted using the Up and Down Keys from 0 to 12. If xx is 0, the filtration cycle is off. If xx is 12 the filtration is alwayson.
4. A final press of the Program Key stores the program into memory and exits to the normal temperature/time display.NOTE: Your Platinum Class Spa is equipped with a 24-hour circulation system. The filter cycle will not affect thecirculation pump. The filtration cycle operates the ozone system. If any key is pressed during filtration system, itwill turn the ozone off. You will see a flashing Filter Icon if the filtration has been interrupted. A solid filter iconindicates the spa is in filter mode.
10.02 Economy Mode
The Mode Key is used to set the economy cycle. There are three Economy modes no EC, EC1 and EC2. First push ofthe Mode Key will display the current set Economy mode. To change the economy mode, keep pressing the Mode Key until thedesired Economy mode is selected.
10.02a no EC
Normal mode, is the default mode of the operation. The heater will always regulate the spa temperature to the desired set point.
10.02b EC1
Economy Mode 1, is always on. In this mode, the heater will regulate the spa temperature to 20˚F below the set point. This isconsidered the energy-saving mode. In this mode, the Economy Icon will be displayed on the LCD display.
NOTE: It is recommended to use EC1 when leaving the spa unattended for a long period of time, i.e. leaving for a week’svacation.
10.02c EC2
Economy Mode 2, is a variant of Economy Mode 1. The difference is the period in which the mode is active. Between 4 p.m.and 9 p.m., the heater regulates the spa temperature normally (as in no EC). Outside this 5-hour time period, the heater willregulate the temperature as if in Economy Mode 1 (EC1). During this mode the Economy Icon will not be displayed during this5 hour block of time, but will be displayed the rest of the time.
13
10.03 Locking The Topside Control
There are two topside control lock modes. The partial lock mode (LocP), and the full lock mode (LocF). When the topside islocked, you will see the lock icon on the LCD.
• Partial Lock (LocP). To do a Partial Lock press and hold the Light Key for 5 seconds. At this point LocP will bedisplayed. When Partial Lock is on, all programming will be locked. The light, temperature and pumps will still operate.
• Full Lock (LocF). To do a Full Lock, press and hold the Light Key for 10 seconds. You will see LocP, continue holding theLight Key until LocF appears. When in Full Lock mode, all functions are locked.
• To remove the either Lock Function, press and hold the Light Key for 5 seconds.NOTE: When the topside control is locked and a locked function key is pressed, the topside will display which lockmode it is in.
10.04 Changing Temperature Reading From ˚F To ˚C
To change from Fahrenheit to Celsius press and hold the Pump 1 Key for 5 seconds. You will see either F or C to determinewhich temperature readings are displayed.
10.05 Inverting The Display
To invert the Temperature/Time display, press and hold the Mode Key for 5 seconds.
SECTION 11 SPA MAINTENANCE
Proper and regular maintenance of your spa will enhance its beauty and performance of your spa.
11.01 Removing, Installing And Cleaning Filters
You should remove and clean your spa filters monthly, or if you have a heavy bather load, bimonthly. Following are the stepsyou should take to clean your filters.
WARNING - Power to the spa must be turned off prior to removing your filters. The suction at the filter isextremely strong and can cause injury if there is no filter. NEVER! Run your spa without the filters. Injury toperson and damage to the equipment can occur. Any damage to equipment due to this circumstance will not becovered under warranty.
• Shut the power to the spa off.• Remove the filter lid by grabbing the front of the lid and lifting it towards you.• Remove the filter by turning the filter counter-clockwise.• Rinse the filter with a garden hose, going from the top to the bottom. DO NOT scrub the filter with a scrub brush. This will
deteriorate the filter pleats and cause premature failure of the filter.• Your circulation pump filter (See diagram Section 8.07, page 11) has a stand-up screen. To remove the screen, follow the
procedure above to remove your filter. Remove the screen by turning it counter-clockwise. Rinse the screen using a gardenhose. Place the garden hose in the screen opening and rinse thoroughly.
• To replace the screen, line up the threads with the threaded wall and turn clockwise. DO NOT over- tighten the screen. Youcan strip the threads and the screen will not lock into position.
• Replace the filter by aligning the threads on the filter to the wall in the filter well. Turn the filter clockwise until snug. DONOT over-tighten. Over-tightening the filter will strip the threads, and the filter will not stay in place. (See Diagram 11.01a)
14

11.01a Filter Diagram
11.02 Draining And Refilling Your Spa
You will want to drain your spa about every 6 months. It may need to be drained more frequently if the bather load is higher. Ifthe water is sudsing and/or cloudy and the balance is correct it is time to change the water.
• Turn the power to the spa off.
WARNING - Shut the power to the spa off prior to draining the spa. Never drain the spa with the power on.This will cause damage to the spa equipment and void your warranty. Do not turn the power to the spa backon until the spa is refilled.
WARNING - Precautions need to be taken when draining your spa. If the weather is extremely cold, freezingin the pipes may occur. If the spa equipment is damaged due to freeze conditions, it will void your warranty.Never leave your spa uncovered even if it is drained. An uncovered spa in direct sunlight can discolor andcrack. Damage to the spa from direct sunlight is not covered under warranty.
• Pull out the drain hose.• Remove drain hose cap.
WARNING - Verify the drainage location. The hot water and chemicals in your spa will kill vegetation. If itis necessary to drain your spa where vegetation is located, it is recommended that you turn the power to yourspa off and leave the cover off overnight to cool the water down before draining.
• Connect drain bib to a garden hose.• Open drain valve.• Some seats will retain water; use a wet vacuum to remove the water, or push the water into the foot-well.• Close the drain valve.• Remove the garden hose.• Replace the drain cap. Do not over-tighten the drain cap; only tight enough to be done by hand.• Refill the spa. See section 6, page 5, and follow Start up Procedures.
15

11.03 Cleaning The Spa Interior
While your spa is drained, you should clean it to help preserve the sheen of your spa’s surface. However, it is important that youdo not use any abrasive cleaners or strong chemicals. Your Artesian Spa authorized dealer will be able to supply you with theproper cleaning solution for your spa. After cleaning, make sure all residues are removed prior to filling the spa. This will helpprevent sudsing and improper chemical balance.
11.04 Pillow Care
Remove and clean your pillows as needed. Use a mild detergent and a soft cloth. Do not use harsh detergents or chemicals,which will damage the pillow surface.
11.05 Removing, Cleaning, And Installing Your Jets
It is recommended to clean your jets when you drain your spa. The jets may need to be cleaned in between the times you drainyour spa/ the jet internals can be removed without draining your spa.• Remove the jet inserts. (See diagram 11.05a)• Turn the jet to the off position until it stops.• Turn the jet pass the stop point.• Pull jet insert away from the spa.
11.05a Jet Removable Diagram
• In a solution of 1/3 vinegar and 2/3 warm water, soak the jet for a few hours.• Periodically rotate the spinner nozzle, to break up residue in the jets.• Rinse the jets thoroughly with clean water.• Reinstall the jets. (See diagram 11.05b)
• Insert Jet insert into jet body.• Turn jet face clockwise until fully seated.• Tug gentle on jet to verify it is seated properly.• Turn jet clockwise until it stops
Section 11.05b Jet Install Diagram
NOTE - A jet with a stainless steel escutcheon can be slippery. You can use a soft cloth or a jar-opening pad to assist inremoving and installing the jet.
16

11.06 Cleaning Valves
You should clean and lube your valves every 6 months to ensure smooth operation. It is recommended that you clean and lubethe valves while the spa is drained. If the valve becomes hard to turn between drain times, make sure you shut the power to thespa off prior to removing any valves.
11.06a Removing, Cleaning And Lubing Diverter Valve.
• To remove the diverter cap, turn it counter-clockwise.• Pull the diverter valve cap, handle and internals out of the diverter body.• Wipe down the diverter insert body with a clean cloth.• Using a lubricant for spas, lubricate the areas shown in diagram 11.06a1.• Reinstall the diverter valve insert. Reinsert the internal into the diverter valve body. Turn the diverter cap clockwise until
hand tight.
11.06a1 Removing, Cleaning And Lubing Diverter Valves
11.06b Removing, Cleaning And Lubing Air Valves
• To remove air valve cap, turn the cap counter clockwise.• Pull the air valve cap, handle and internals out of the air valve body.• Wipe down the air valve internal with a clean cloth• Using a lubricant for spas, lubricate the areas shown in diagram 10.06b1• Reinstall the air valve internal. Reinsert the internal into the air valve body. Turn the air valve cap clockwise until hand
tight.
11.06a1 Removing, Cleaning And Lubing Air Valves
17
11.07 Maintaining Your Spa Cabinet
Your spa cabinet may require maintenance. Depending on which cabinet you ordered with your spa, more or less maintenanceis required.
REDWOOD CABINETSIf your spa came with a redwood cabinet, you will need to stain and seal the cabinet. Areas of the cabinet that are exposed todirect sunlight will require more maintenance. It is suggested that you stain and seal the cabinet at least twice a year. Do not letyour sprinkler system directly hit directly your cabinet.
PERMAWOOD CABINETSIf your spa came with a PermaWood cabinet, less maintenance is required. To clean this cabinet, use a soft cloth and water towipe it down.
11.08 Winterizing Your Spa
Your Platinum Class Spa is designed with a freeze protection mode to protect your plumbing from freezing in cold environments(See section 11.08a Smart Winter Mode). If you are not going to use your spa for a long period of time during freezing condi-tions, please contact your authorized Artesian Spas dealer to assist in winterizing your spa.NOTE: Damage to your spa caused by failure to winterize is not covered under warranty.
WARNING: Freeze damage is not covered under your spas warranty.
During extremely cold temperatures, you should check your spa frequently to verify that it is operating properly. If there areprolong periods of power outages during freezing conditions, it is recommended that you have your Authorized Artesian SpasDealer winterize your spa. If an emergency arises and the spa needs to be drained during freezing conditions, please followthese steps.
1. Follow the directions in section 10.02.2. When the water is drained from the spa, remove the drain plugs from the pumps (See section 7.01a, page 6).3. Water will flow out of the pumps, remove as much of the excess water as possible.4. Replace the drain plugs.5. Contact your authorized Artesian Spas dealer to do an inspection and finish winterizing.
11.08a Smart Winter Mode
This system prevents the water from freezing in the pump plumbing. An onboard sensor continuously checks the ambient airtemperature in the power pack. If at any time the temperature goes below 68˚F, the system activates the winter mode for the next24 hours, even if the temperature returns to 68˚F or above. In this mode, if a pump hasn’t been turned on for some time and,depending on the temperature, the system will start all pumps to circulate warmer water in the plumbing. When the pumps arerunning because of this protective feature, the filter cycle ICON on the display will blink.
When the Smart Winter Mode is starts, the pumps do not start all at the same time, the sequence follows:On the first minute: Pump 1 and 2 are started.On the second minute: Pump 3 and 4 are started.On the third minute: Pump 5 is started.
NOTE: If a key is pressed during a 1-minute cycle, the cycle will be cancelled.
18
11.09 Maintaining Your Spa Cover
Your spa cover should be cleaned periodically with mild soap and water. It is recommended that you clean the cover during yourregular scheduled maintenance. To prolong the life of your cover, never drag the cover across any surface.NOTE: Remember to always keep your cover on your spa when your spa is not in use.
SECTION 12 WATER MAINTENANCE
Maintaining your water chemistry within the specified limits will enhance your enjoyment and prolong the life of your spaequipment. Water maintenance requires regular testing and adding of chemicals. See your Authorized Artesian Spas dealer forchemical recommendation and consolation.
12.01 Start Up Chemicals
Your Authorized Artesian Spa dealer will have available to you a chemical Start-Up Kit. This kit usually includes a video and/or booklet to teach you the basics of spa chemicals. If you have questions regarding your chemicals, please contact yourAuthorized Artesian Spa Dealer.
12.02 pH
pH is a measure of relative acidity and alkalinity. An ideal reading for pH is 7.2 to 7.6. Too low a pH level will cause corrosionof your spa equipment, and too high a pH will give a build up on the interior of your spa. If your pH moves beyond the idealrange, it will become harder to maintain the sanitation of the spa water.
12.03 Sanitizing
The most common sanitizers in the market are chlorine and bromine, but there are others available. Please see your AuthorizedArtesian Spa Dealer for their recommendation of chemical use. Water chemistry is different from location to location, so yourlocal dealer will be most knowledgeable regarding the best chemicals to use for your water
12.04 Ozone
Your Platinum class spa is equipped with an ozone system. Use of ozone is a natural way of destroying bacteria and viruses.This does not mean you no longer need chemicals. Ozone will work with your chemicals to give you a cleaner spa.
SECTION 13 ERROR CODES
The following is a description of the various error codes your spa is equipped with. Use the troubleshooting section (See section14), to help diagnose spa problems.NOTE: The more information you can give your dealer regarding a problem your spa maybe having, the easier yourdealer will be able to service and repair your spa.
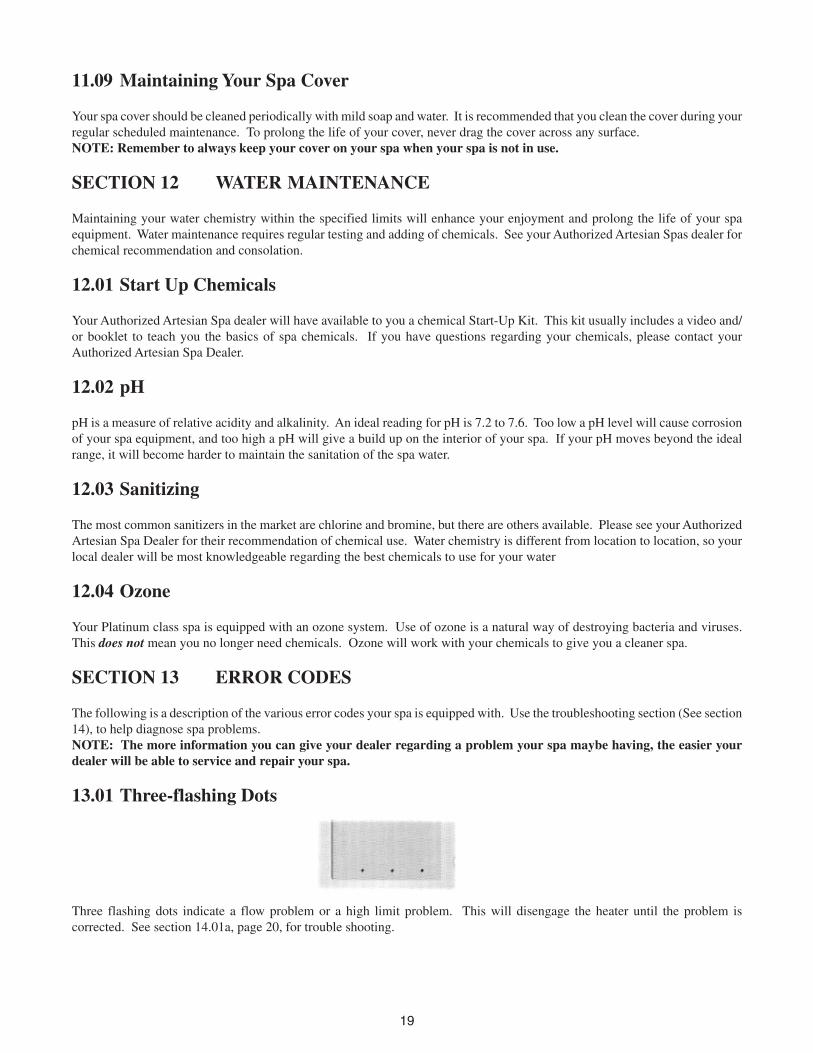
13.01 Three-flashing Dots
Three flashing dots indicate a flow problem or a high limit problem. This will disengage the heater until the problem iscorrected. See section 14.01a, page 20, for trouble shooting.
19
13.02 Incorrect Temperature Display
An incorrect temperature display indicates an out-of-calibration temperature sensor. See section 14.01b, page 20.
13.03 Flashing Temperature Display.
A flashing temperature display indicates high water temperature. See section 14.01c, page 20.
WARNING - Always check your water temperature prior to entering the spa. NEVER enter the spa if thetemperature display is flashing.
SECTION 14 TROUBLESHOOTING
This section will give you basic troubleshooting tips to help you diagnose a problem and to correct minor problems.
WARNING - Never open the equipment pack unless it is requested by your dealer, you will be exposed toohigh voltage and the risk of electrical shock, which can cause injuries and/or death.
14.01 Error Codes Troubleshooting
14.01a Three-flashing Dots Error Code
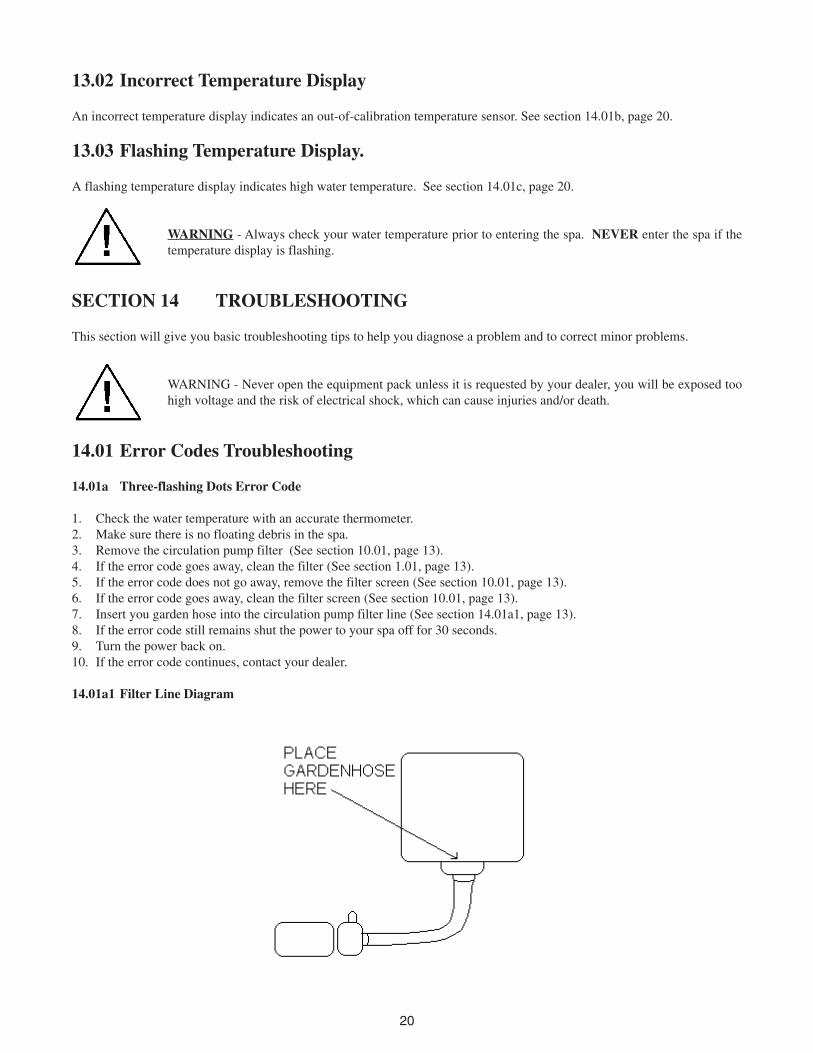
1. Check the water temperature with an accurate thermometer.2. Make sure there is no floating debris in the spa.3. Remove the circulation pump filter (See section 10.01, page 13).4. If the error code goes away, clean the filter (See section 1.01, page 13).5. If the error code does not go away, remove the filter screen (See section 10.01, page 13).6. If the error code goes away, clean the filter screen (See section 10.01, page 13).7. Insert you garden hose into the circulation pump filter line (See section 14.01a1, page 13).8. If the error code still remains shut the power to your spa off for 30 seconds.9. Turn the power back on.10. If the error code continues, contact your dealer.
14.01a1 Filter Line Diagram
20
14.01b Incorrect Temperature Display
1. Check to see if the LCD is in Fahrenheit or Celsius (See section 10.04, page 14).2. Test the water temperature with an accurate thermometer.3. If water temperature is more than +/- 1˚F call your dealer.
14.01c Temperature Is Flashing
The temperature will continue to flash.1. DO NOT enter the spa.2. Test the spa water with an accurate thermometer.3. Hit Pump 1 Key (see section 7.04, page 7).4. If pump does not come on, leave the cover open to cool the spa water.5. Once the temperature has dropped to normal range all functions will return.6. If spa temperature flashes again contact your dealer.
NOTE: In extremely hot climates, your spa may indicate the temperature flashing display. See your dealer forrecommendations on how to keep the ambient temperature from affecting your spa.
14.02 Heater Icon Is Flashing
Your heater icon will flash if the spa is calling for heat, but the heater cannot come on.1. If all 5 pumps are running, the system will shut down the heater. This is due to high amperage draw.2. If all 5 pumps are not running, and your heater icon is flashing your spa is most likely set up in low current made. This mode
is designed for an electrical system with a 30-amp breaker.3. If you are using a 50-amp breaker, contact your dealer to set your spa in high current mode.
14.03 Filter Icon Flashes
This indicates interruption of the filter cycle. If you hit any key on the topside, it will interrupt the filter cycle. This isnormal operation and the filter cycle will restart on its own.
SECTION 15 WARRANTY
This section is a description of your warranty. Here you will find descriptions of what is covered under your PLATINUM ClassSpa warranty and what can void your warranty.
15.01 Lifetime Structure Warranty
Platinum Class Spas carry a lifetime structure warranty. The structure is defined as the shell below the exposed material finish.The manufacturer warrants the spa against loss of water due to a defect in the spa structure, for the lifetime of the spa structure.In the event of a defect in the material and/or workmanship, the spa structure will be repaired or replace at the discretion of themanufacturer. THIS WARRANTY IS GIVEN ONLY TO THE ORIGINAL OWNER, AND TERMINATES UPON TRANS-FER OF OWNERSHIP. COMMERCIAL APPLICATIONS ARE EXCLUDED FROM THIS AND ALL WARRANTIES.
If the spa structure is defective and must be replaced, it will be returned to the factory. The original, installed equipment (thisincludes the frame, skirt and all equipment) will be reinstalled. If new equipment is desired, there will be additional charges tothe customer.
If the frame and/or skirt of the spa is badly damaged there will be a cost to the spa owner to repair or replace the frame and/or theskirt. When a spa needs to be returned to the factory for repair, the cost of freight to the company will be at the customer’sexpense. The MANUFACTURER will not pay for removal, installation, cranes, construction, de-construction, or any costassociated with access, egress or ingress of the spa to the customers home. The MANUFACTURER reserves the right to an on-sight inspection by its authorized representative. In the unlikely event a shell or spa must be repaired or replaced, all warranties(shell, surface, electrical and plumbing) date back to the original date of installation.
21

15.02 Seven-year Surface Warranty
The spa surface is described as the exposed material finish. The MANUFACTURER warrants the spa surface to be free fromdefects in material and workmanship, such as blistering, cracking or delaminating, under normal use and maintenance for aperiod of seven years from the original date of delivery. THIS WARRANTY IS GIVEN TO THE ORIGINAL CONSUMERAND TERMINATES UPON TRANSFER OF OWNERSHIP. COMMERCIAL APPLICATION ARE EXCLUDEDFROM THIS AND ALL WARRANTIES. The spa must be set on a level cement slab and/or a level deck surface that issufficient to support the entire length and width of the spa. Standard building practices must be followed. Damage caused byfailure to have a properly leveled and supported foundation under the spa is not covered under warranty. The MANUFAC-TURER does not warrant problems associated with prolonged exposure to the sun and/or use of any sanitation or ozone systemnot approved by the MANUFACTURER. Damage to the spa surface caused by leaving the spa uncovered and empty of waterwith direct sunlight exposure will terminate this warranty. Any alteration to any system, either electrical, plumbing or mechani-cal, or over use of chemicals, or any other problems caused by external source are not covered under warranty. Other exclusionsmay apply. Please read the warranty thoroughly.
Normally, problems associated with material and workmanship can and will be repaired. If the spa surface is repaired, the repairis limited to the affected area only, and there is no guarantee against discoloration or fading. The decision to repair will be madeby the MANUFACTURER and its field representative after a review of the facts, pictures, or any other data presented by thedealer or customer. In all cases, pictures of the affected area and foundation of the spa must be provided before any decisions torepair or replace can be made. In the unlikely event of a spa replacement, all warranties, (structure, surface, equipment andplumbing) date back to the original date of installation. If it is determined that the surface is to be replaced, the same conditionsand terms as outlined in the surface warranty (section 15.01, page 21) will apply.
15.03 Five-year Electrical Warranty
The Electrical is defined as the electrical items (i.e., pumps, equipment packs, heaters, topside, etc.) The MANUFACTURERwarrants all electrical equipment to be free from defect in material and workmanship for five-years. THIS WARRANTY ISGIVEN TO THE ORIGINAL CONSUMER AND TERMINATES UPON TRANSFER OF OWNERSHIP. COMMERCIALAPPLICATIONS ARE EXCLUDED FROM THIS AND ALL WARRANTIES. The stereo, speakers, L.E.D. lighting, andOzone are not included in this warranty but are covered under a separate warranty. Damage caused by weather, poor waterchemistry, and/or improper maintenance will not be covered under this warranty. Alterations or replacements of componentsinstalled in the spa that are not purchased and/or approved by the MANUFACTURER, including incorrect wiring, will termi-nate the complete spa warranty.
15.04 Five-year Plumbing Warranty
The Plumbing is described as all piping, jet bodies, and valve bodies. The MANUFACTURER warrants all plumbing for aperiod of five years from date of installation. THIS WARRANTY IS GIVEN TO THE ORIGINAL CONSUMER AND TER-MINATES UPON TRANSFER OF OWNERSHIP. COMMERCIAL APPLICATIONS ARE EXCLUDED FROM THISAND ALL WARRANTIES. Jet internals, valve handles, and such items, are regular maintenance items and they are not coveredunder this warranty. Damages caused by weather, poor water chemistry, and/or improper maintenance is not covered underwarranty.
15.05 Cabinet Warranty
The spa cabinet is described as the outer material encasing the spa. The MANUFACTURER warrants it to be free from defectin material and/or workmanship from the date of original installation. THIS WARRANTY IS GIVEN TO THE ORIGINALCONSUMER AND TERMINATES UPON TRANSFER OF OWNERSHIP. COMMERCIAL APPLICATIONS ARE EX-CLUDED FROM THIS AND ALL WARRANTIES. This warranty does not cover normal darkening, staining, or aging. Thespa cabinet requires care and maintenance by the consumer. Damaged caused by weather, poor water chemistry, and/or im-proper maintenance is not be covered under this warranty.
TWO-YEAR WARRANTY ON PERMAWOOD CABINETSPermaWood cabinets are covered under this warranty for a two-year period.
22

ONE-YEAR WARRANTY ON REDWOOD CABINETSWood cabinets are covered for a one-year period. A coat of stain should be applied regularly to the cabinet to keep the wood inproper condition.
15.06 Other Items Not Covered In This Warranty
Some items are not covered in this warranty. These items either have a different warranty, or are warranted through the manu-facturer of that item.
15.06a Stereo And Stereo Components
The stereo and stereo components, including speakers, sub woofer, wire harness and remote control, are covered for 30 days.This warranty does not cover damage to a stereo or stereo component from abuse, poor reception, or damage caused by puttinga wet CD into the stereo. If a stereo is replaced under this warranty, the MANUFACTURER reserves the right to replace the unitwith another like unit, but not necessarily the same stereo manufacturer. No spa will be replaced for a failed stereo. The stereodoes not affect the performance of the spa.
15.06b Ozonator
The ozonator is covered for one year from the date of delivery.
15.06c Spa Cover
The spa cover manufacturer covers the spa cover for one year. Do not send the cover to the spa MANUFACTURER. This willdelay the replacement or repair of the cover, and the spa MANUFACTURER is not responsible for lost covers.
15.06d L.E.D. Lighting
The L.E.D. lighting is guaranteed to work upon delivery. There is no warranty covering the L.E.D. lighting.
15.06e Fiberoptic Lighting
The fiberoptic lighting box is covered for 90 days from the date of installation. This warranty covers the fiberoptic box only.Fiberoptic lights and light bulb are not covered but are guaranteed to work upon delivery.
15.07 Performance
In the event of any defect covered by this LIMITED warranty, a May Manufacturing LLC, authorized agent will correct suchdefect within the terms and conditions contained herein. There will be no charge for parts or labor within the above terms.However, travel charges that occur will not be covered under warranty. If it is determined by May Manufacturing LLC that therepair of the product is not feasible, a replacement spa equal to the value of the original purchased price will be provided. Costfor removal of the defective spa and delivery and installation of the replacement spa is the responsibility of the spa owner andwill not under any circumstances be covered by May Manufacturing LLC.
15.08 Limitations
This warranty is void if this Artesian Spa has been subjected to alteration, misuse or abuse, or if any repairs have been done byanyone other than an authorized agent of May Manufacturing LLC. Misuse or abuse is defined as: use of the spa in a non-residential application, water temperature outside of the range of 32˚F to 110˚F, damage caused by clogged or dirty filtercartridges, damage to the spa from absence of a hard cover, damage to components from improper pH, use of any type of acid,or from chemical imbalance. ACTS of NATURE are not covered under this warranty.
23
15.09 Disclaimer
May Manufacturing LLC, or its agent shall not be liable for any injury, cost or other damage, whether incidental or consequen-tial, arising out of any defect covered by the LIMITED WARRANTY. The liability of May Manufacturing LLC under thisLIMITED WARRANTY shall not exceed the original amount paid for the spa.
15.10 Legal Remedies
This LIMITED WARRANTY gives specific rights, and other rights that may apply will vary from state to state.
15.11 What Is Not Covered Under Your Warranty
The following is a general overview of non-warranty items and work. This is not an all-inclusive list.
Diagnoses of spa problems Jet insertsFuses Valve handlesLight bulbs of all kinds Pump sealsRemoving a spa from a structure Draining and filling a tubPillows Acts of natureFilters Travel chargesChemical misuse Cabinet screwsFilter lids Incorrect wiringAny part not purchased from Artesian Spas
Any alteration of the spa that has not been pre-authorized by the MANUFACTURER will void all warranties. If the MANU-FACTURER approves an alteration, verify that this alteration is covered under warranty. Damage caused by moving a spa thatis blocked in or that has been recessed is not covered under warranty.
SECTION 16 WARRANTY CARD
This warranty card must be returned to May Manufacturing LLC, within 45 days of installation. Failure to return the warrantycard, with required areas filled in completely, can void the warranty.
The benefit of sending in your warranty:• Guarantees your warranty is in place.• Registers you with the manufacturer.• Registers the date of delivery with the manufacturer.
LIFETIME STRUCTURE WARRANTYSEVEN-YEAR SURFACE WARRANTY
FIVE-YEAR ELECTRICAL WARRANTYFIVE-YEAR PLUMBING WARRANTY
TWO-YEAR WARRANTY ON PERMAWOOD CABINETSONE-YEAR WARRANTY ON REDWOOD CABINETS
24

PLACESTAMPHERE
Please do not send products orother correspondence to theaddress below.
ARTESIAN SPASATTN: CUSTOMER CARE DEPARTMENT
13198 MUSTANG STREETVICTORVILLE, CA 92394
❑ Mr. ❑ Mrs. ❑ Miss.
Name
Address
City State Zip Code
Phone Number
Date of Installation Spa Serial Number
Spa Model
Your Dealers Name and Location
What Other spa brands did you consider buying?
(Optional Questions)How many people are in your household?
What is your age bracket? 25-30 31-40 41-50 51-60 61-70 71+
What is your reason for purchasing a spa? ❑ Health Benefits ❑ Stress ❑ Relief ❑ Relaxation
Other: