Embed Size (px)
Citation preview
Training 1 September 9, 2011
Outlining in MS Word 2010 Microsoft Word 2010 provides users with an Outline View and Outlining toolbar, which allows us to create outlines. Outlines in Word are based on Styles. For instance, if a line of text is formatted using the Heading 1 style then it is a Major heading. If a line of text is formatted using the Heading 2 style then it is a Minor heading and so on. There are two ways to create outlines in Word.
The first way allows you to use headings and then format your text with Outlining styles just as you would create a numbered list.
The second method involves using the Outline View and Outlining toolbar. This handout will focus on the first method as an easy way to get a nicely formatted outline. Then the focus will switch to the second method and the increased functionality that we are given when using the Outline Tool.
Objective 1: Create an Outline in the Print Layout or Normal Views. To Create an Outline~ Method 1
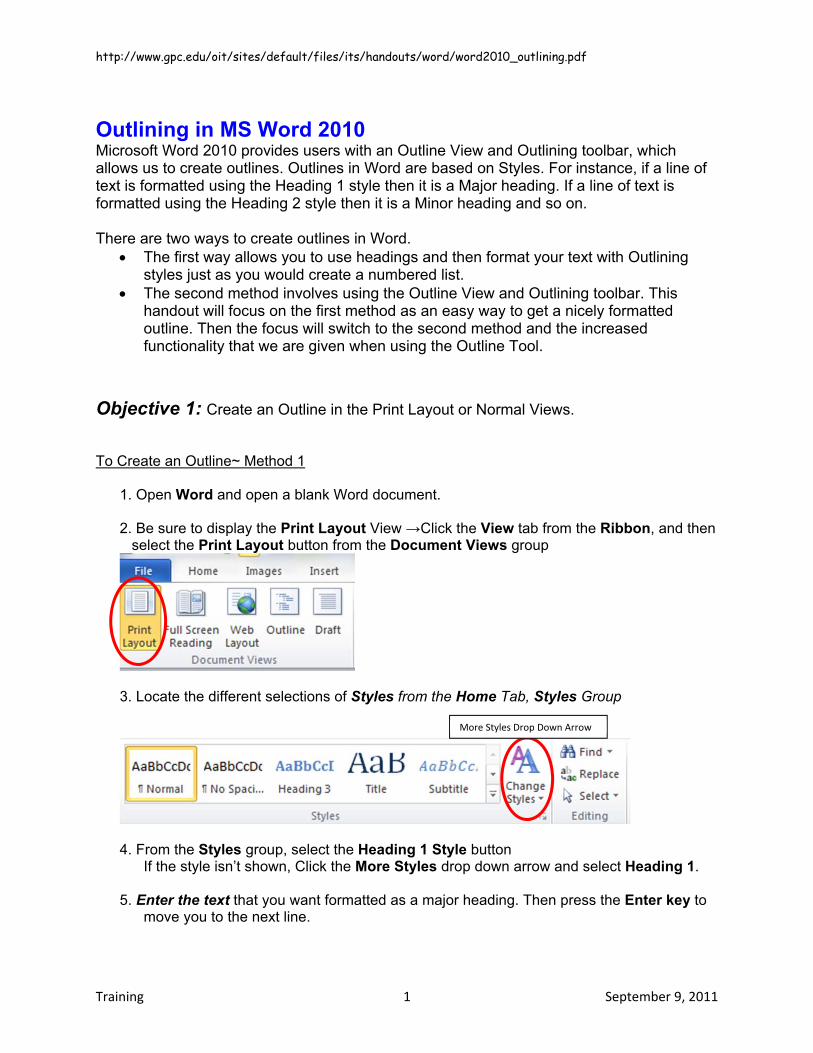
1. Open Word and open a blank Word document. 2. Be sure to display the Print Layout View Click the View tab from the Ribbon, and then
select the Print Layout button from the Document Views group
3. Locate the different selections of Styles from the Home Tab, Styles Group
4. From the Styles group, select the Heading 1 Style button
If the style isn�’t shown, Click the More Styles drop down arrow and select Heading 1. 5. Enter the text that you want formatted as a major heading. Then press the Enter key to
move you to the next line.
More Styles Drop Down Arrow
http://www.gpc.edu/oit/sites/default/files/its/handouts/word/word2010_outlining.pdf

Training 2 September 9, 2011
6. If necessary, click the More Styles drop down arrow to locate and select Heading 2. 7. Enter the text that you want formatted as a minor heading. Then press the Enter key to
move you to the next line. 8. If necessary, click the More Styles drop down list to locate and select Heading 3. 9. Enter the text that you want formatted as a minor heading. Then press the Enter key to
move you to the next line. 10. Repeat steps 4-9 as appropriate for each line of text in your outline.
11. Highlight the entire outline. You can use Ctrl +A or click the Select arrow from the
Editing group on the Home tab, and click Select All.
12. Click the Number button from the Home tab, Paragraph group to add numbering style to outline.
13. Click the Multilevel list button and Click the Outlined style that you prefer from the List Library
Training 3 September 9, 2011
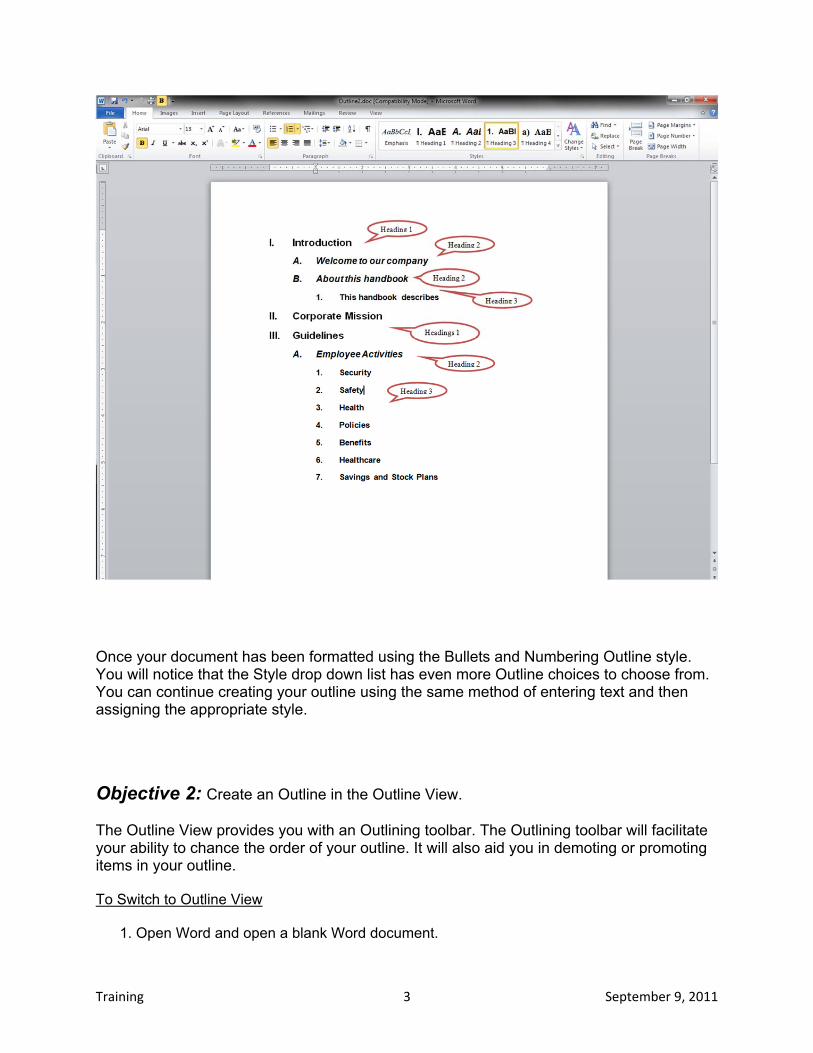
Once your document has been formatted using the Bullets and Numbering Outline style. You will notice that the Style drop down list has even more Outline choices to choose from. You can continue creating your outline using the same method of entering text and then assigning the appropriate style. Objective 2: Create an Outline in the Outline View. The Outline View provides you with an Outlining toolbar. The Outlining toolbar will facilitate your ability to chance the order of your outline. It will also aid you in demoting or promoting items in your outline. To Switch to Outline View
1. Open Word and open a blank Word document.
Training 4 September 9, 2011
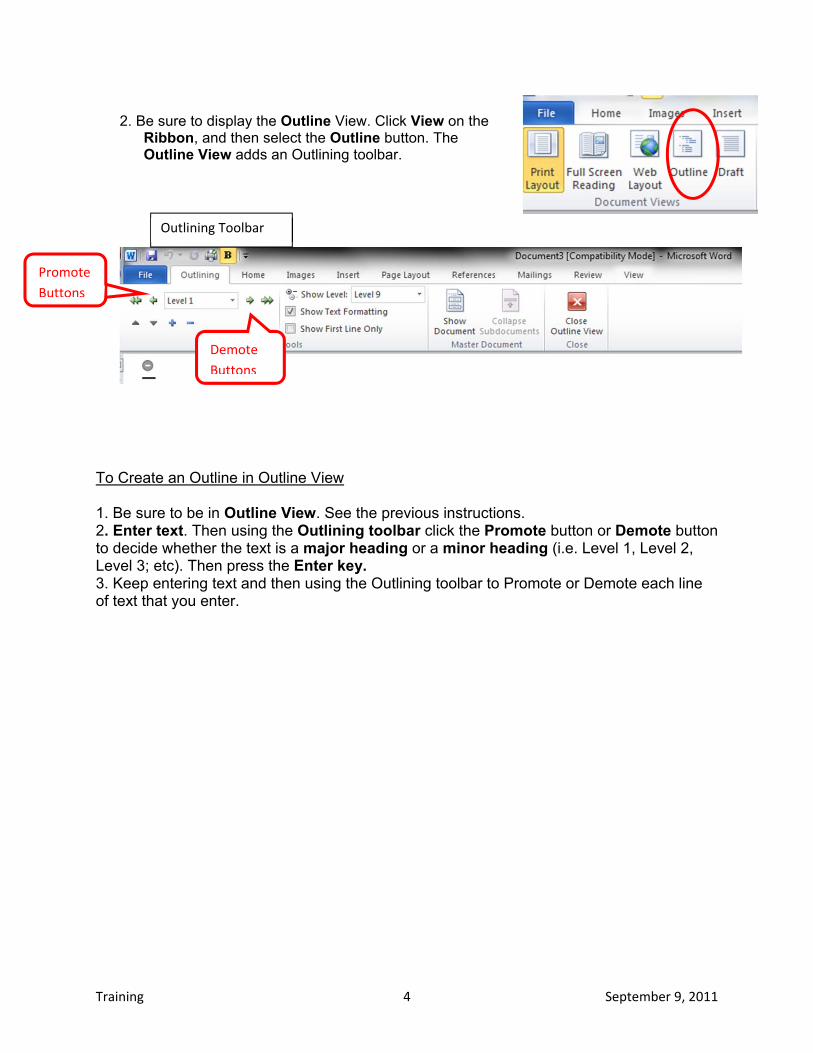
2. Be sure to display the Outline View. Click View on the
Ribbon, and then select the Outline button. The Outline View adds an Outlining toolbar.
To Create an Outline in Outline View 1. Be sure to be in Outline View. See the previous instructions. 2. Enter text. Then using the Outlining toolbar click the Promote button or Demote button to decide whether the text is a major heading or a minor heading (i.e. Level 1, Level 2, Level 3; etc). Then press the Enter key. 3. Keep entering text and then using the Outlining toolbar to Promote or Demote each line of text that you enter.
PromoteButtons
DemoteButtons
Outlining Toolbar
Training 5 September 9, 2011
To Expand or Collapse an Outline
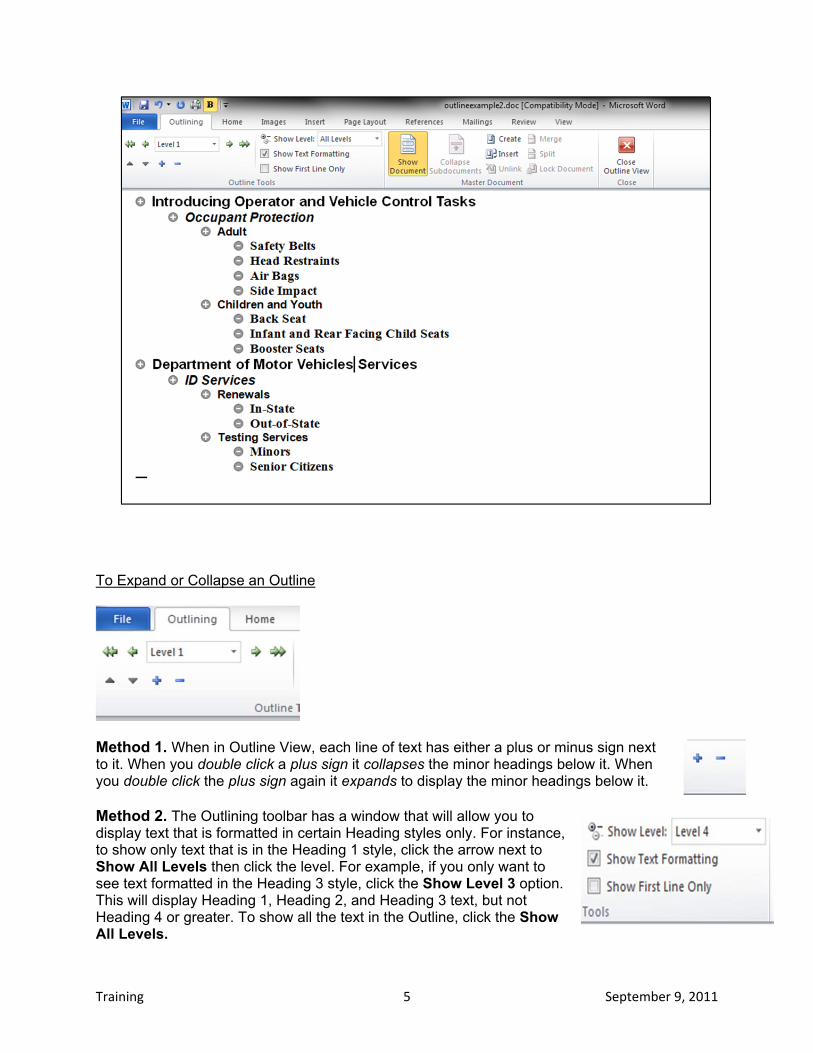
Method 1. When in Outline View, each line of text has either a plus or minus sign next to it. When you double click a plus sign it collapses the minor headings below it. When you double click the plus sign again it expands to display the minor headings below it. Method 2. The Outlining toolbar has a window that will allow you to display text that is formatted in certain Heading styles only. For instance, to show only text that is in the Heading 1 style, click the arrow next to Show All Levels then click the level. For example, if you only want to see text formatted in the Heading 3 style, click the Show Level 3 option. This will display Heading 1, Heading 2, and Heading 3 text, but not Heading 4 or greater. To show all the text in the Outline, click the Show All Levels.
Training 6 September 9, 2011
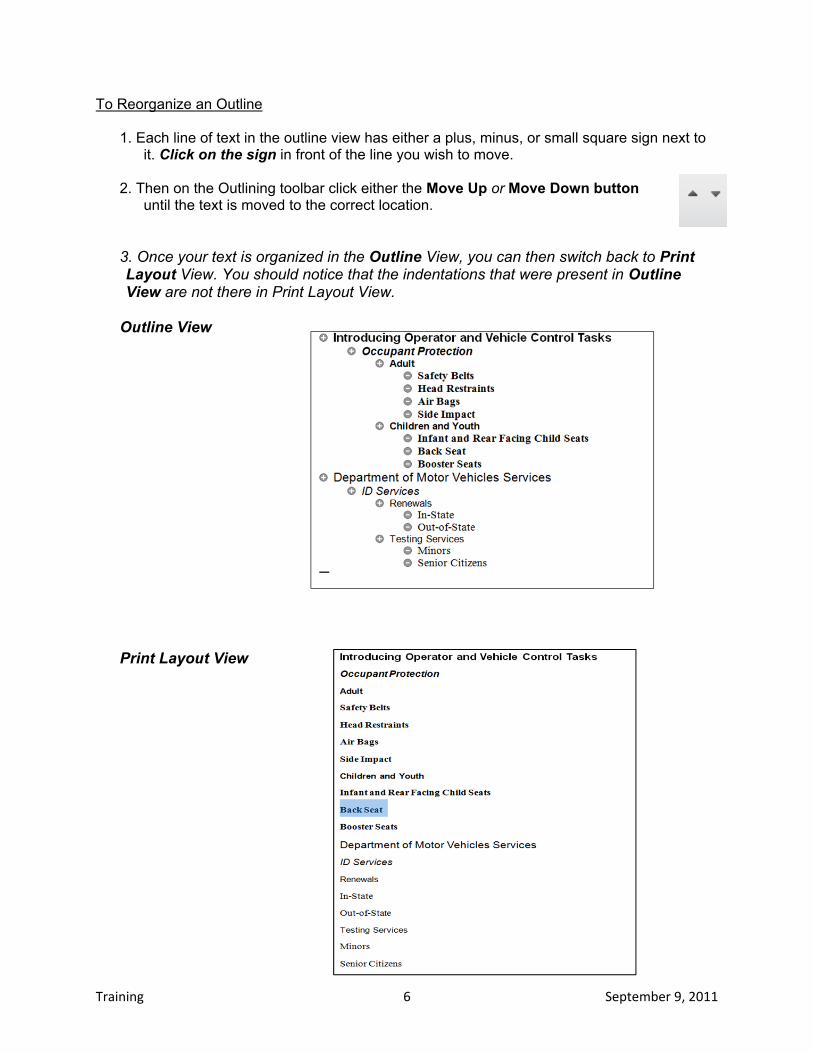
To Reorganize an Outline
1. Each line of text in the outline view has either a plus, minus, or small square sign next to it. Click on the sign in front of the line you wish to move.
2. Then on the Outlining toolbar click either the Move Up or Move Down button
until the text is moved to the correct location.
3. Once your text is organized in the Outline View, you can then switch back to Print Layout View. You should notice that the indentations that were present in Outline View are not there in Print Layout View.
Outline View Print Layout View