Embed Size (px)
Citation preview
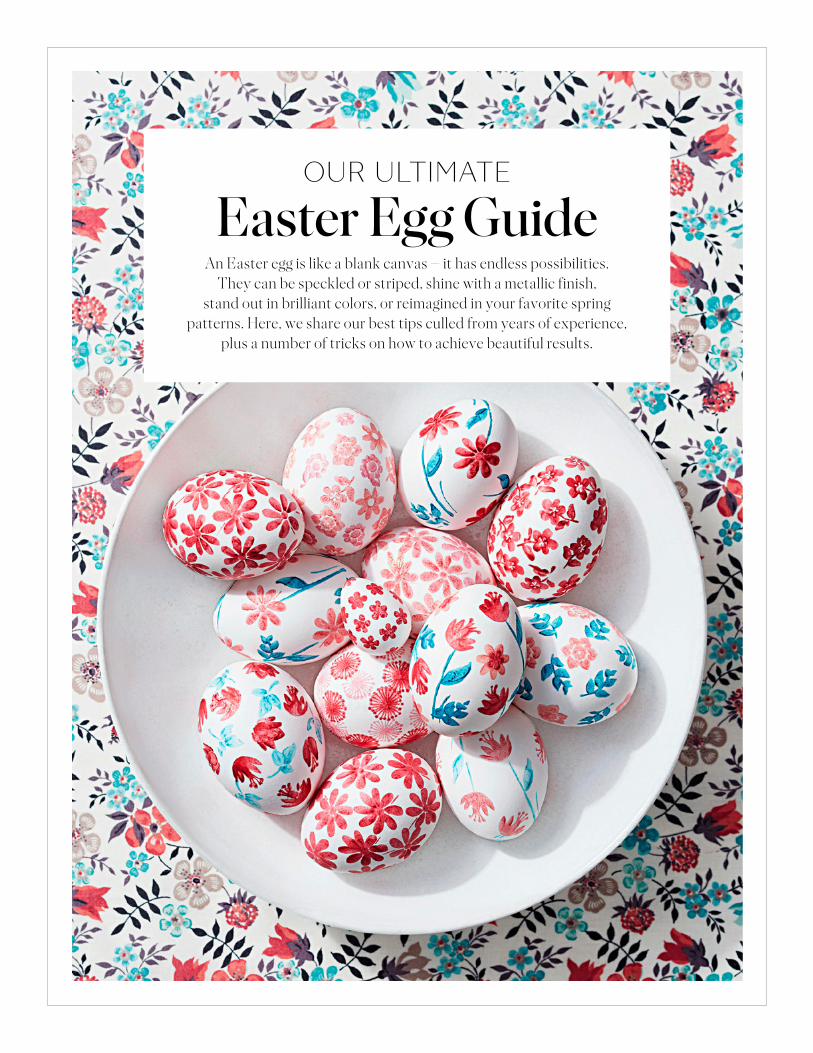
Easter Egg GuideAn Easter egg is like a blank canvas — it has endless possibilities.
They can be speckled or striped, shine with a metallic finish, stand out in brilliant colors, or reimagined in your favorite spring
patterns. Here, we share our best tips culled from years of experience, plus a number of tricks on how to achieve beautiful results.
OUR ULTIMATE
MARTHA STEWART LIVING EASTER EGG GUIDE 2
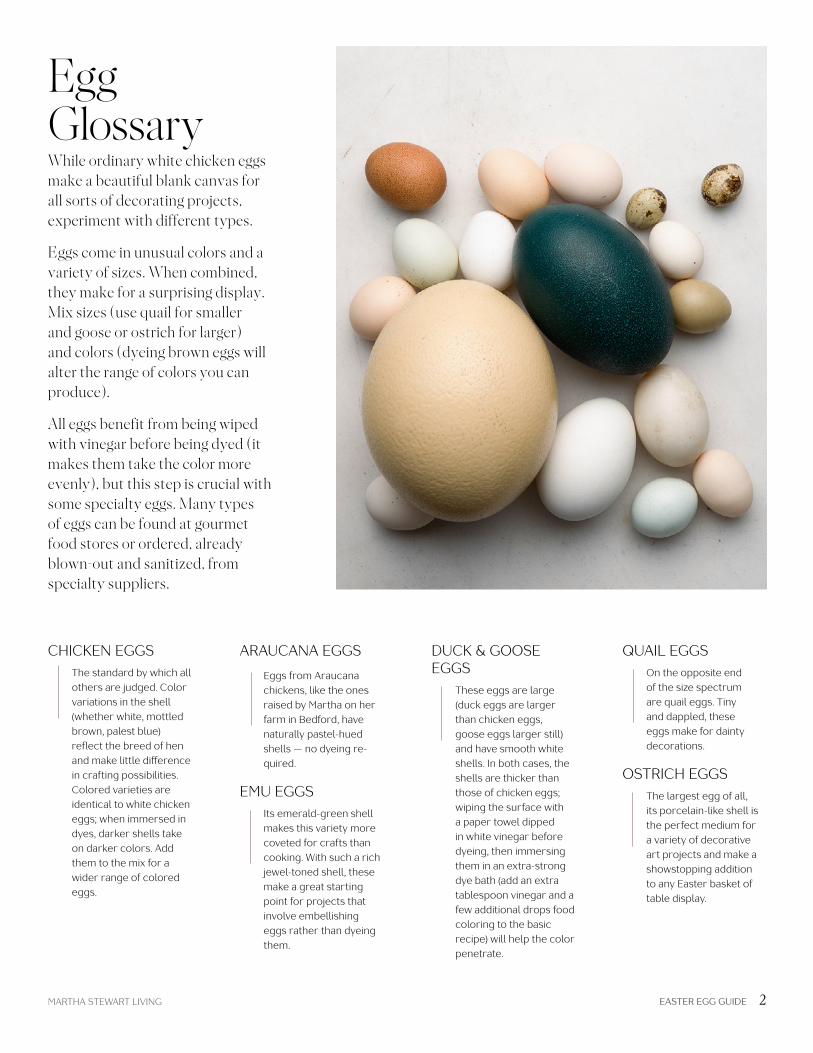
Egg GlossaryWhile ordinary white chicken eggs make a beautiful blank canvas for all sorts of decorating projects, experiment with different types.
Eggs come in unusual colors and a variety of sizes. When combined, they make for a surprising display. Mix sizes (use quail for smaller and goose or ostrich for larger) and colors (dyeing brown eggs will alter the range of colors you can produce).
All eggs benefit from being wiped with vinegar before being dyed (it makes them take the color more evenly), but this step is crucial with some specialty eggs. Many types of eggs can be found at gourmet food stores or ordered, already blown-out and sanitized, from specialty suppliers.
CHICKEN EGGS The standard by which all
others are judged. Color variations in the shell (whether white, mottled brown, palest blue) reflect the breed of hen and make little difference in crafting possibilities. Colored varieties are identical to white chicken eggs; when immersed in dyes, darker shells take on darker colors. Add them to the mix for a wider range of colored eggs.
ARAUCANA EGGS Eggs from Araucana
chickens, like the ones raised by Martha on her farm in Bedford, have naturally pastel-hued shells — no dyeing re-quired.
EMU EGGS Its emerald-green shell
makes this variety more coveted for crafts than cooking. With such a rich jewel-toned shell, these make a great starting point for projects that involve embellishing eggs rather than dyeing them.
DUCK & GOOSE EGGS These eggs are large
(duck eggs are larger than chicken eggs, goose eggs larger still) and have smooth white shells. In both cases, the shells are thicker than those of chicken eggs; wiping the surface with a paper towel dipped in white vinegar before dyeing, then immersing them in an extra-strong dye bath (add an extra tablespoon vinegar and a few additional drops food coloring to the basic recipe) will help the color penetrate.
QUAIL EGGS On the opposite end
of the size spectrum are quail eggs. Tiny and dappled, these eggs make for dainty decorations.
OSTRICH EGGS The largest egg of all,
its porcelain-like shell is the perfect medium for a variety of decorative art projects and make a showstopping addition to any Easter basket of table display.
MARTHA STEWART LIVING EASTER EGG GUIDE 3
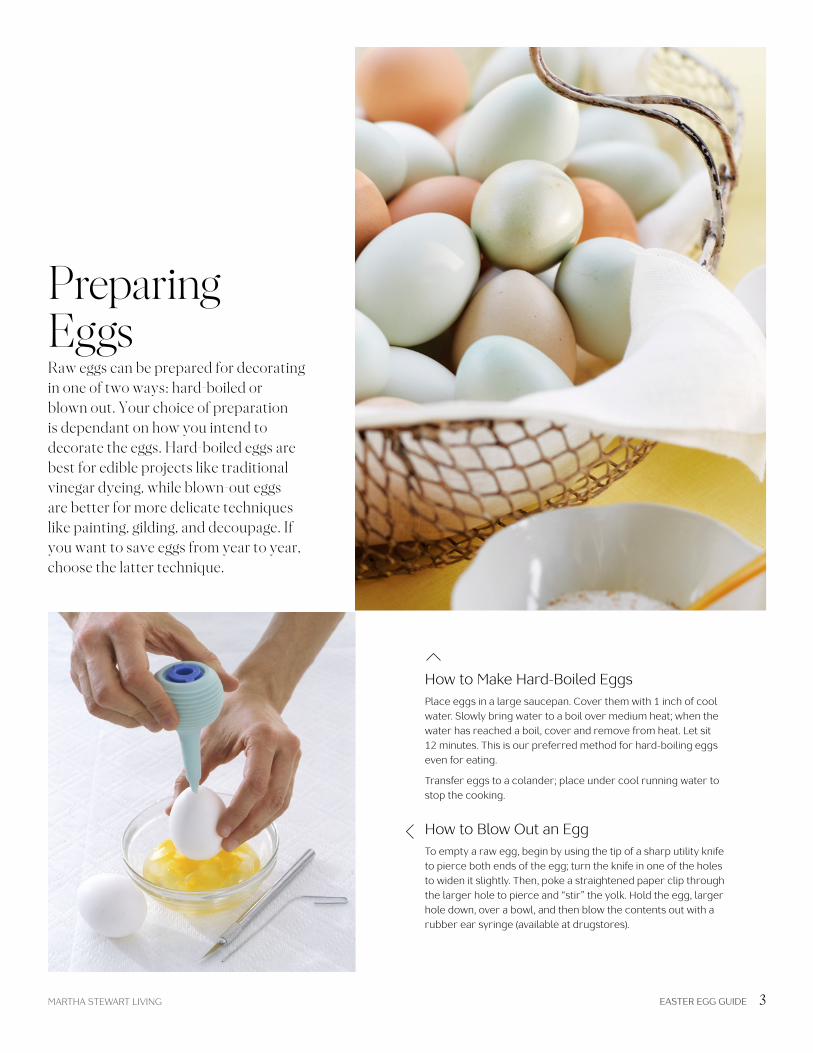
Preparing Eggs Raw eggs can be prepared for decorating in one of two ways: hard-boiled or blown out. Your choice of preparation is dependant on how you intend to decorate the eggs. Hard-boiled eggs are best for edible projects like traditional vinegar dyeing, while blown-out eggs are better for more delicate techniques like painting, gilding, and decoupage. If you want to save eggs from year to year, choose the latter technique.
How to Make Hard-Boiled EggsPlace eggs in a large saucepan. Cover them with 1 inch of cool water. Slowly bring water to a boil over medium heat; when the water has reached a boil, cover and remove from heat. Let sit 12 minutes. This is our preferred method for hard-boiling eggs even for eating.
Transfer eggs to a colander; place under cool running water to stop the cooking.
How to Blow Out an EggTo empty a raw egg, begin by using the tip of a sharp utility knife to pierce both ends of the egg; turn the knife in one of the holes to widen it slightly. Then, poke a straightened paper clip through the larger hole to pierce and “stir” the yolk. Hold the egg, larger hole down, over a bowl, and then blow the contents out with a rubber ear syringe (available at drugstores).
MARTHA STEWART LIVING EASTER EGG GUIDE 4
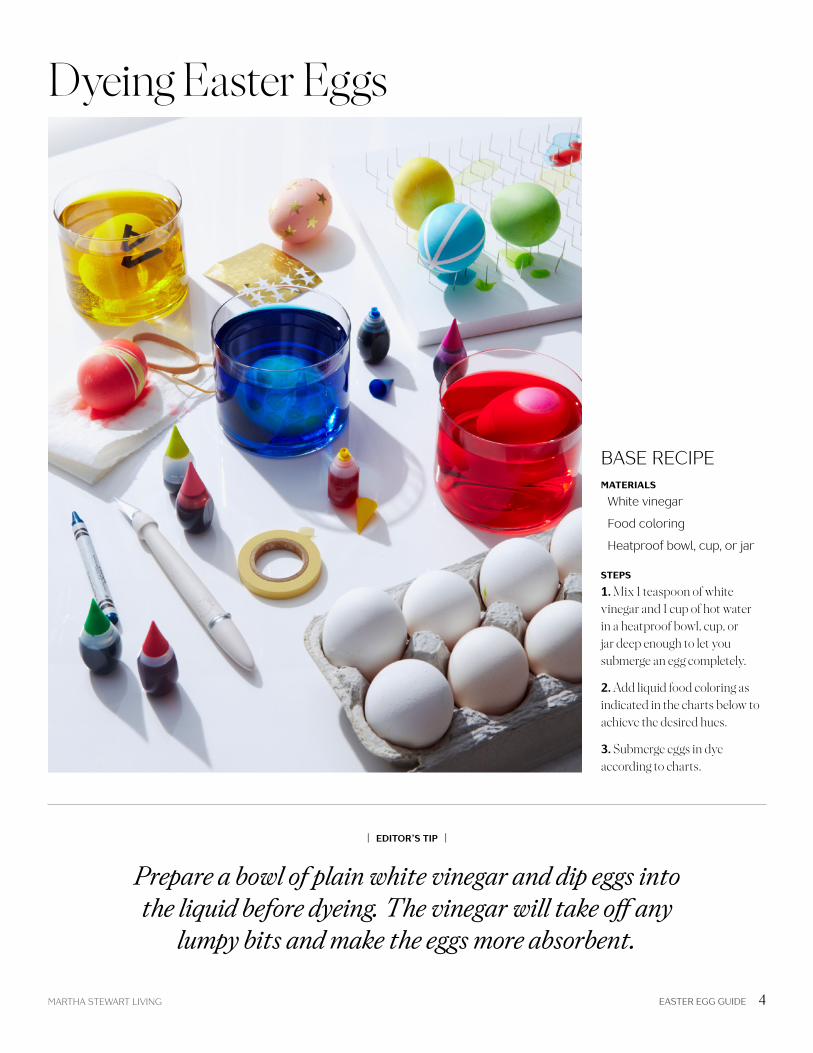
Dyeing Easter Eggs
BASE RECIPEMATERIALS
White vinegar
Food coloring
Heatproof bowl, cup, or jar
STEPS
1. Mix 1 teaspoon of white vinegar and 1 cup of hot water in a heatproof bowl, cup, or jar deep enough to let you submerge an egg completely.
2. Add liquid food coloring as indicated in the charts below to achieve the desired hues.
3. Submerge eggs in dye according to charts.
| EDITOR’S TIP |
Prepare a bowl of plain white vinegar and dip eggs into the liquid before dyeing. The vinegar will take off any
lumpy bits and make the eggs more absorbent.
MARTHA STEWART LIVING EASTER EGG GUIDE 5
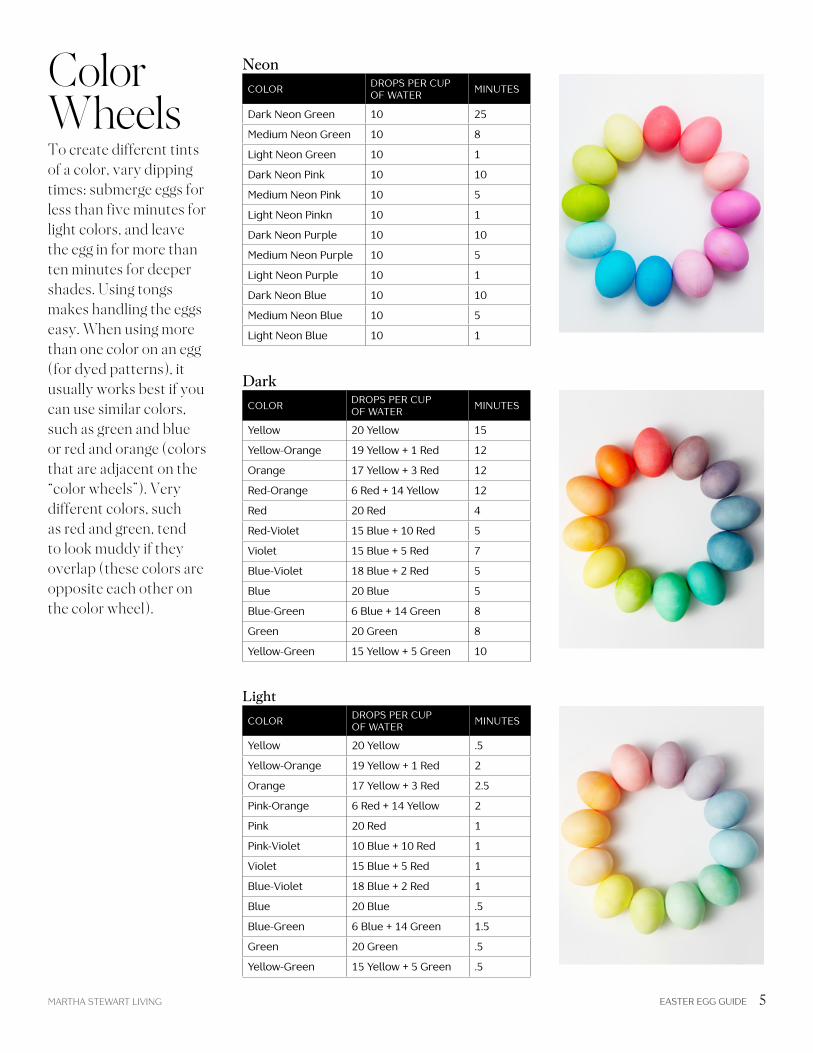
Color WheelsTo create different tints of a color, vary dipping times: submerge eggs for less than five minutes for light colors, and leave the egg in for more than ten minutes for deeper shades. Using tongs makes handling the eggs easy. When using more than one color on an egg (for dyed patterns), it usually works best if you can use similar colors, such as green and blue or red and orange (colors that are adjacent on the “color wheels”). Very different colors, such as red and green, tend to look muddy if they overlap (these colors are opposite each other on the color wheel).
COLOR DROPS PER CUP OF WATER MINUTES
Dark Neon Green 10 25
Medium Neon Green 10 8
Light Neon Green 10 1
Dark Neon Pink 10 10
Medium Neon Pink 10 5
Light Neon Pinkn 10 1
Dark Neon Purple 10 10
Medium Neon Purple 10 5
Light Neon Purple 10 1
Dark Neon Blue 10 10
Medium Neon Blue 10 5
Light Neon Blue 10 1
Neon
COLOR DROPS PER CUP OF WATER MINUTES
Yellow 20 Yellow 15
Yellow-Orange 19 Yellow + 1 Red 12
Orange 17 Yellow + 3 Red 12
Red-Orange 6 Red + 14 Yellow 12
Red 20 Red 4
Red-Violet 15 Blue + 10 Red 5
Violet 15 Blue + 5 Red 7
Blue-Violet 18 Blue + 2 Red 5
Blue 20 Blue 5
Blue-Green 6 Blue + 14 Green 8
Green 20 Green 8
Yellow-Green 15 Yellow + 5 Green 10
Dark
COLOR DROPS PER CUP OF WATER MINUTES
Yellow 20 Yellow .5
Yellow-Orange 19 Yellow + 1 Red 2
Orange 17 Yellow + 3 Red 2.5
Pink-Orange 6 Red + 14 Yellow 2
Pink 20 Red 1
Pink-Violet 10 Blue + 10 Red 1
Violet 15 Blue + 5 Red 1
Blue-Violet 18 Blue + 2 Red 1
Blue 20 Blue .5
Blue-Green 6 Blue + 14 Green 1.5
Green 20 Green .5
Yellow-Green 15 Yellow + 5 Green .5
Light
MARTHA STEWART LIVING EASTER EGG GUIDE 6
Try one of our editors’ best kept secrets: Set your dyed eggs to dry on a pin-board. This will prevent the color from pooling and drying in an uneven fashion. The board is simple to make and can be saved and reused year after year.
MATERIALS
Foam core
Ruler
Pencil
Sewing pins
STEPS
1. Use 1/2 inch of foam core cut into a 10-inch square (you can make it as big or as small as you want).
2. Using a pencil and ruler, draw a grid.
3. Insert pins where the lines cross.
4. Place eggs on pins to dry.
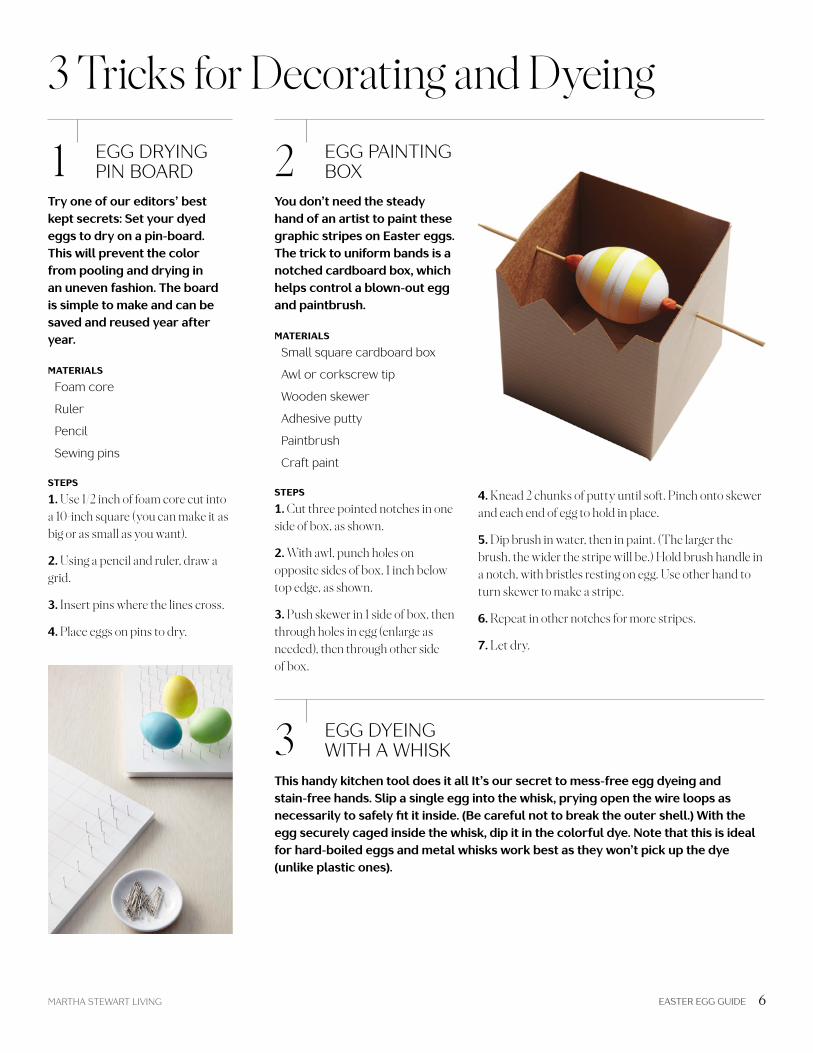
You don’t need the steady hand of an artist to paint these graphic stripes on Easter eggs. The trick to uniform bands is a notched cardboard box, which helps control a blown-out egg and paintbrush.
MATERIALS
Small square cardboard box
Awl or corkscrew tip
Wooden skewer
Adhesive putty
Paintbrush
Craft paint
STEPS
1. Cut three pointed notches in one side of box, as shown.
2. With awl, punch holes on opposite sides of box, 1 inch below top edge, as shown.
3. Push skewer in 1 side of box, then through holes in egg (enlarge as needed), then through other side of box.
This handy kitchen tool does it all It’s our secret to mess-free egg dyeing and stain-free hands. Slip a single egg into the whisk, prying open the wire loops as necessarily to safely fit it inside. (Be careful not to break the outer shell.) With the egg securely caged inside the whisk, dip it in the colorful dye. Note that this is ideal for hard-boiled eggs and metal whisks work best as they won’t pick up the dye (unlike plastic ones).
3 Tricks for Decorating and Dyeing
1 2EGG DRYING PIN BOARD
EGG PAINTING BOX
4. Knead 2 chunks of putty until soft. Pinch onto skewer and each end of egg to hold in place.
5. Dip brush in water, then in paint. (The larger the brush, the wider the stripe will be.) Hold brush handle in a notch, with bristles resting on egg. Use other hand to turn skewer to make a stripe.
6. Repeat in other notches for more stripes.
7. Let dry.
3 EGG DYEING WITH A WHISK
MARTHA STEWART LIVING EASTER EGG GUIDE 7
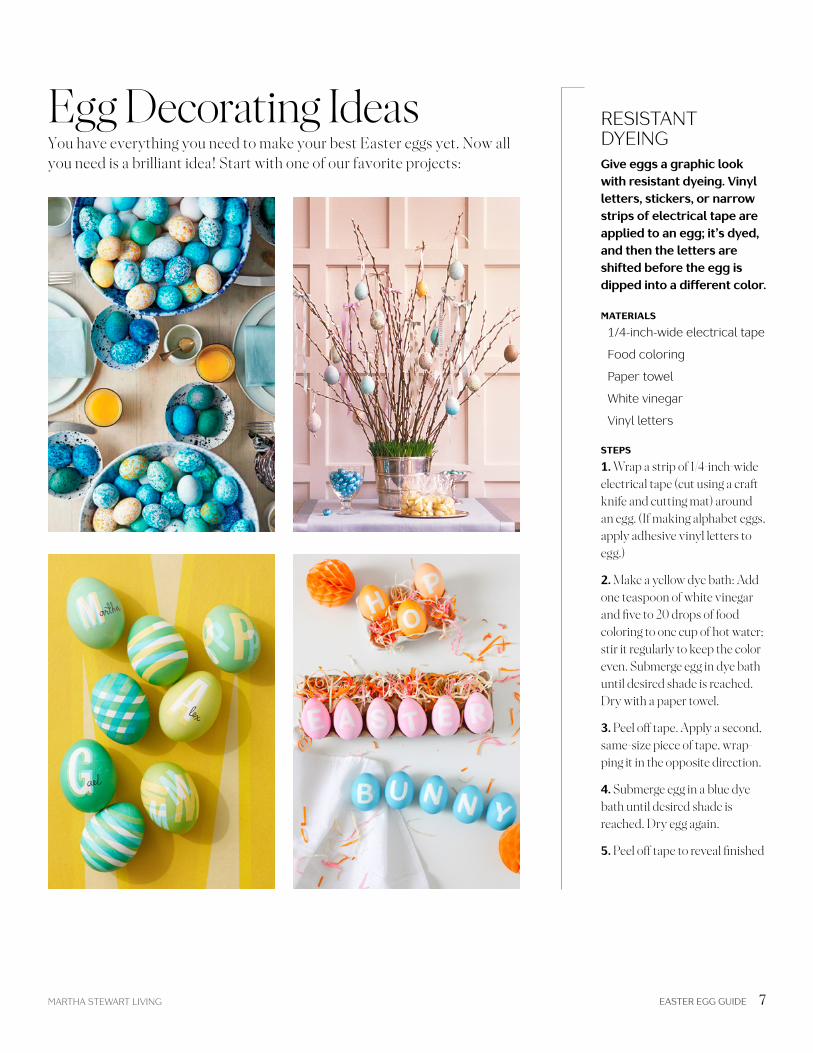
Egg Decorating IdeasYou have everything you need to make your best Easter eggs yet. Now all you need is a brilliant idea! Start with one of our favorite projects:
RESISTANT DYEINGGive eggs a graphic look with resistant dyeing. Vinyl letters, stickers, or narrow strips of electrical tape are applied to an egg; it’s dyed, and then the letters are shifted before the egg is dipped into a different color.
MATERIALS
1/4-inch-wide electrical tape
Food coloring
Paper towel
White vinegar
Vinyl letters
STEPS
1. Wrap a strip of 1/4-inch-wide electrical tape (cut using a craft knife and cutting mat) around an egg. (If making alphabet eggs, apply adhesive vinyl letters to egg.)
2. Make a yellow dye bath: Add one teaspoon of white vinegar and five to 20 drops of food coloring to one cup of hot water; stir it regularly to keep the color even. Submerge egg in dye bath until desired shade is reached. Dry with a paper towel.
3. Peel off tape. Apply a second, same-size piece of tape, wrap-ping it in the opposite direction.
4. Submerge egg in a blue dye bath until desired shade is reached. Dry egg again.
5. Peel off tape to reveal finished
MARTHA STEWART LIVING EASTER EGG GUIDE 8
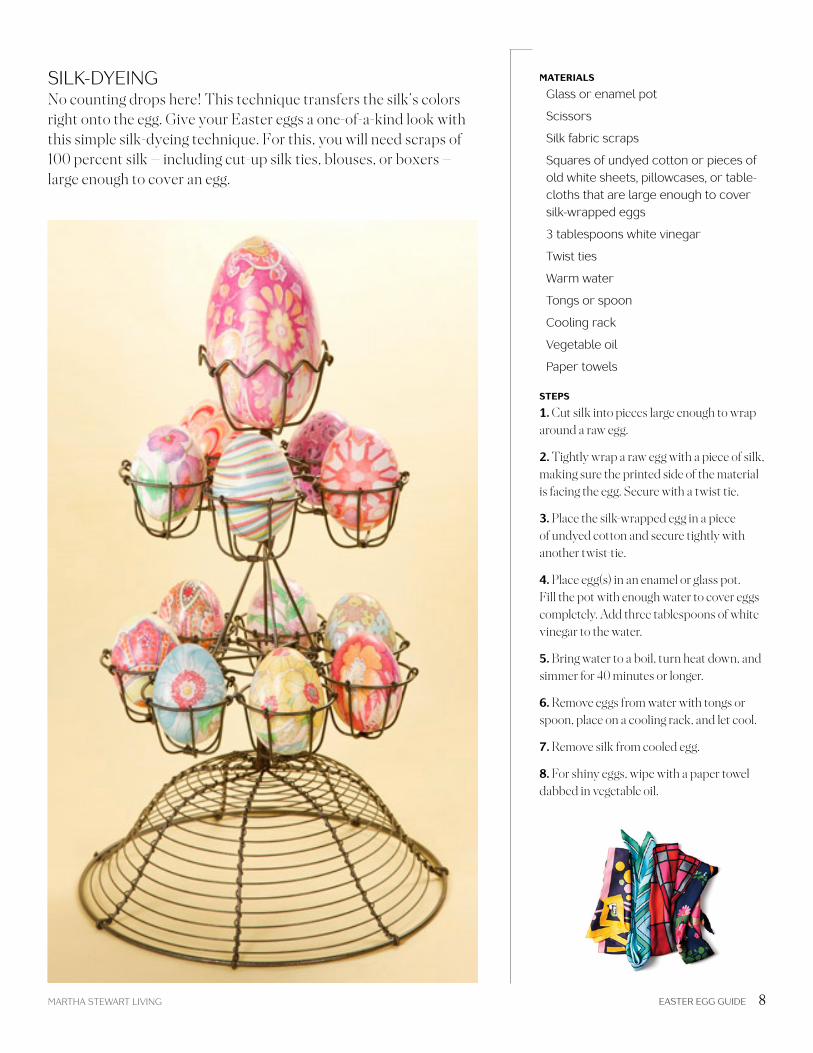
SILK-DYEINGNo counting drops here! This technique transfers the silk’s colors right onto the egg. Give your Easter eggs a one-of-a-kind look with this simple silk-dyeing technique. For this, you will need scraps of 100 percent silk — including cut-up silk ties, blouses, or boxers — large enough to cover an egg.
MATERIALS
Glass or enamel pot
Scissors
Silk fabric scraps
Squares of undyed cotton or pieces of old white sheets, pillowcases, or table-cloths that are large enough to cover silk-wrapped eggs
3 tablespoons white vinegar
Twist ties
Warm water
Tongs or spoon
Cooling rack
Vegetable oil
Paper towels
STEPS
1. Cut silk into pieces large enough to wrap around a raw egg.
2. Tightly wrap a raw egg with a piece of silk, making sure the printed side of the material is facing the egg. Secure with a twist tie.
3. Place the silk-wrapped egg in a piece of undyed cotton and secure tightly with another twist-tie.
4. Place egg(s) in an enamel or glass pot. Fill the pot with enough water to cover eggs completely. Add three tablespoons of white vinegar to the water.
5. Bring water to a boil, turn heat down, and simmer for 40 minutes or longer.
6. Remove eggs from water with tongs or spoon, place on a cooling rack, and let cool.
7. Remove silk from cooled egg.
8. For shiny eggs, wipe with a paper towel dabbed in vegetable oil.
MARTHA STEWART LIVING EASTER EGG GUIDE 9
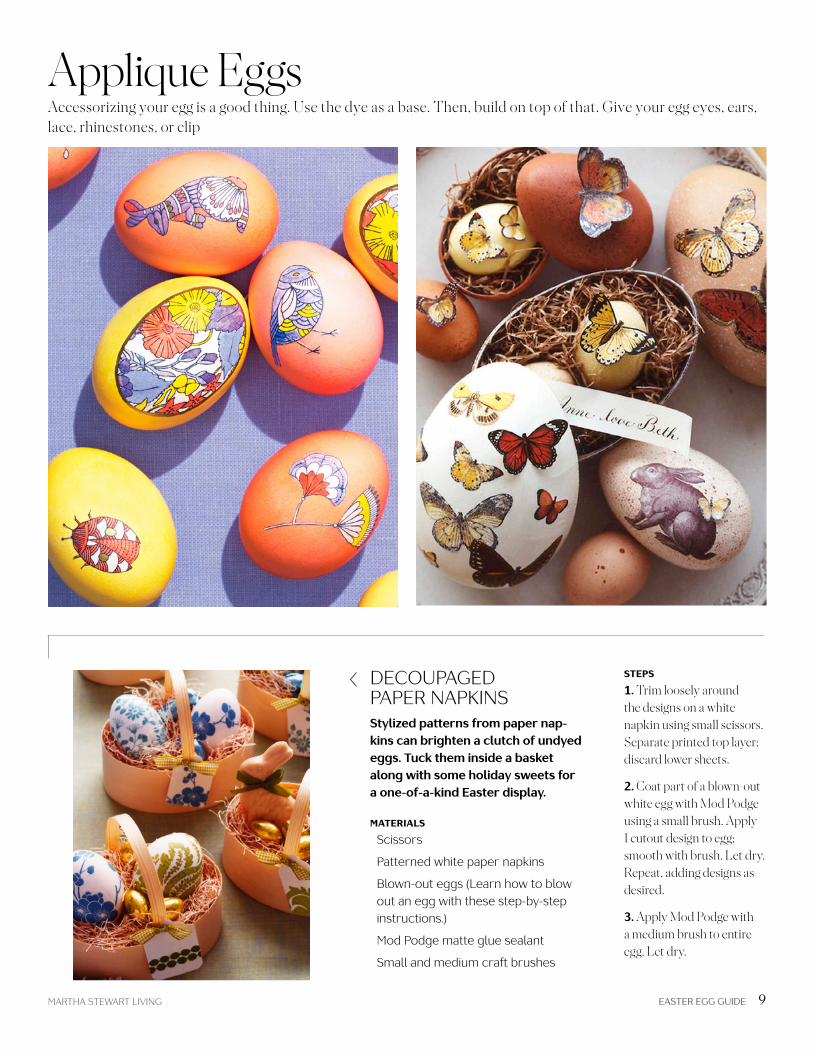
Applique EggsAccessorizing your egg is a good thing. Use the dye as a base. Then, build on top of that. Give your egg eyes, ears, lace, rhinestones, or clip
DECOUPAGED PAPER NAPKINSStylized patterns from paper nap-kins can brighten a clutch of undyed eggs. Tuck them inside a basket along with some holiday sweets for a one-of-a-kind Easter display.
MATERIALS
Scissors
Patterned white paper napkins
Blown-out eggs (Learn how to blow out an egg with these step-by-step instructions.)
Mod Podge matte glue sealant
Small and medium craft brushes
STEPS
1. Trim loosely around the designs on a white napkin using small scissors. Separate printed top layer; discard lower sheets.
2. Coat part of a blown-out white egg with Mod Podge using a small brush. Apply 1 cutout design to egg; smooth with brush. Let dry. Repeat, adding designs as desired.
3. Apply Mod Podge with a medium brush to entire egg. Let dry.
MARTHA STEWART LIVING EASTER EGG GUIDE 10
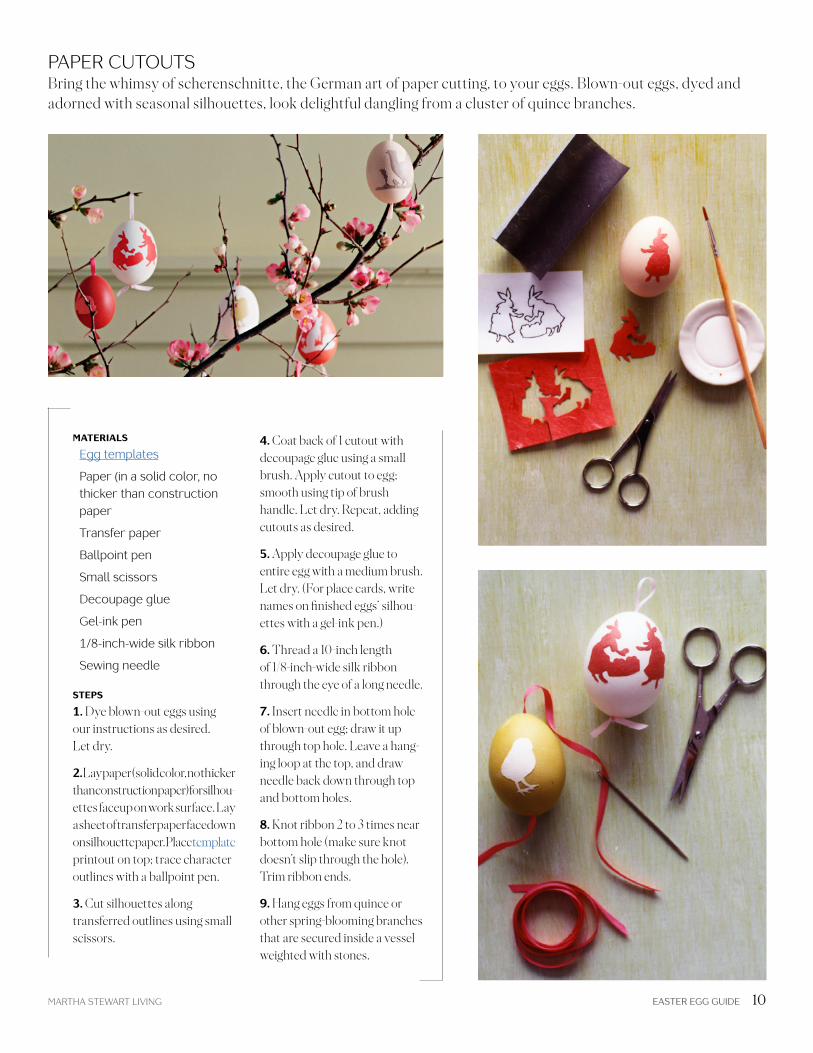
PAPER CUTOUTSBring the whimsy of scherenschnitte, the German art of paper cutting, to your eggs. Blown-out eggs, dyed and adorned with seasonal silhouettes, look delightful dangling from a cluster of quince branches.
MATERIALS
Egg templates
Paper (in a solid color, no thicker than construction paper
Transfer paper
Ballpoint pen
Small scissors
Decoupage glue
Gel-ink pen
1/8-inch-wide silk ribbon
Sewing needle
STEPS
1. Dye blown-out eggs using our instructions as desired. Let dry.
2. Lay paper (solid color, no thicker than construction paper) for silhou-ettes faceup on work surface. Lay a sheet of transfer paper facedown on silhouette paper. Place template printout on top; trace character outlines with a ballpoint pen.
3. Cut silhouettes along transferred outlines using small scissors.
4. Coat back of 1 cutout with decoupage glue using a small brush. Apply cutout to egg; smooth using tip of brush handle. Let dry. Repeat, adding cutouts as desired.
5. Apply decoupage glue to entire egg with a medium brush. Let dry. (For place cards, write names on finished eggs’ silhou-ettes with a gel-ink pen.)
6. Thread a 10-inch length of 1/8-inch-wide silk ribbon through the eye of a long needle.
7. Insert needle in bottom hole of blown-out egg; draw it up through top hole. Leave a hang-ing loop at the top, and draw needle back down through top and bottom holes.
8. Knot ribbon 2 to 3 times near bottom hole (make sure knot doesn’t slip through the hole). Trim ribbon ends.
9. Hang eggs from quince or other spring-blooming branches that are secured inside a vessel weighted with stones.
MARTHA STEWART LIVING EASTER EGG GUIDE 11
PAPER DOILIESCraft these delicate eyelet-in-spired beauties from inexpensive paper doilies (available in bulk online).
MATERIALS
Eggs
Paper doilies
Glue dot adhesives
Mod Podge découpage glue
STEPS
1. The large duck egg gets its ruffles from overlapping cut-up scalloped strips, secured along the bottom edges with Glue Dots.
2. To create the melted-on look of the little eggs, adhere smaller doily pieces to the shell using découpage glue.
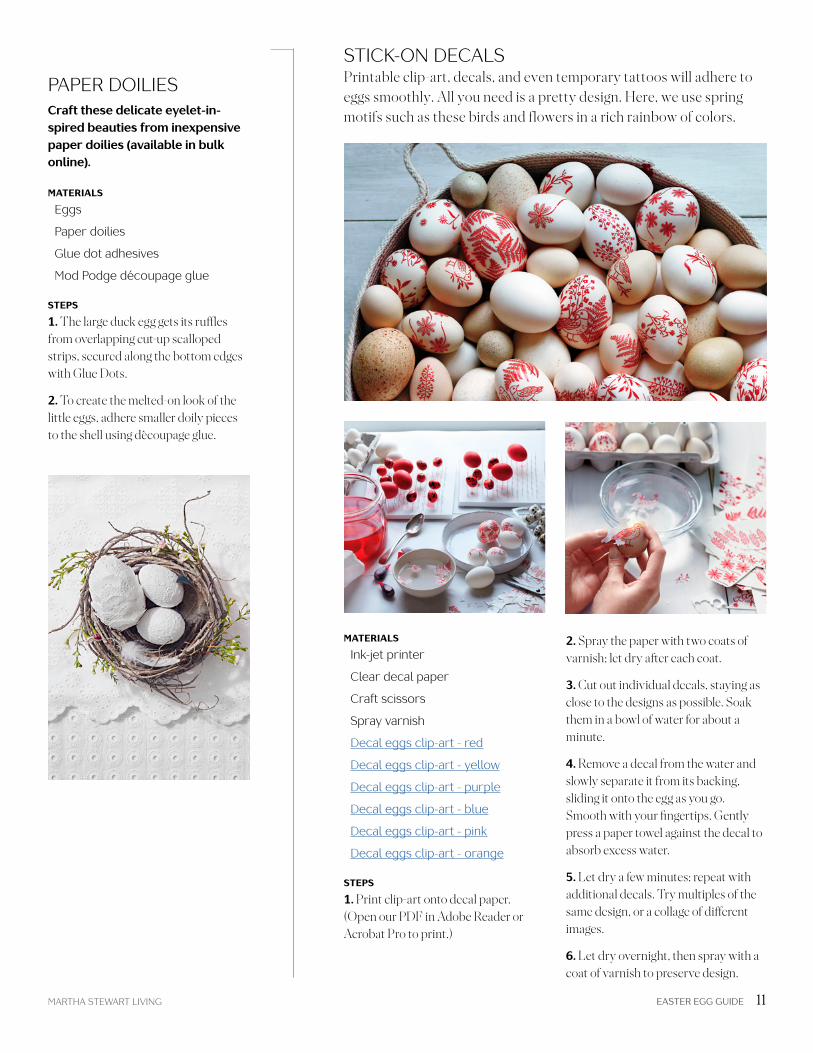
STICK-ON DECALSPrintable clip-art, decals, and even temporary tattoos will adhere to eggs smoothly. All you need is a pretty design. Here, we use spring motifs such as these birds and flowers in a rich rainbow of colors.
MATERIALS
Ink-jet printer
Clear decal paper
Craft scissors
Spray varnish
Decal eggs clip-art - red
Decal eggs clip-art - yellow
Decal eggs clip-art - purple
Decal eggs clip-art - blue
Decal eggs clip-art - pink
Decal eggs clip-art - orange
STEPS
1. Print clip-art onto decal paper. (Open our PDF in Adobe Reader or Acrobat Pro to print.)
2. Spray the paper with two coats of varnish; let dry after each coat.
3. Cut out individual decals, staying as close to the designs as possible. Soak them in a bowl of water for about a minute.
4. Remove a decal from the water and slowly separate it from its backing, sliding it onto the egg as you go. Smooth with your fingertips. Gently press a paper towel against the decal to absorb excess water.
5. Let dry a few minutes; repeat with additional decals. Try multiples of the same design, or a collage of different images.
6. Let dry overnight, then spray with a coat of varnish to preserve design.
MARTHA STEWART LIVING EASTER EGG GUIDE 12
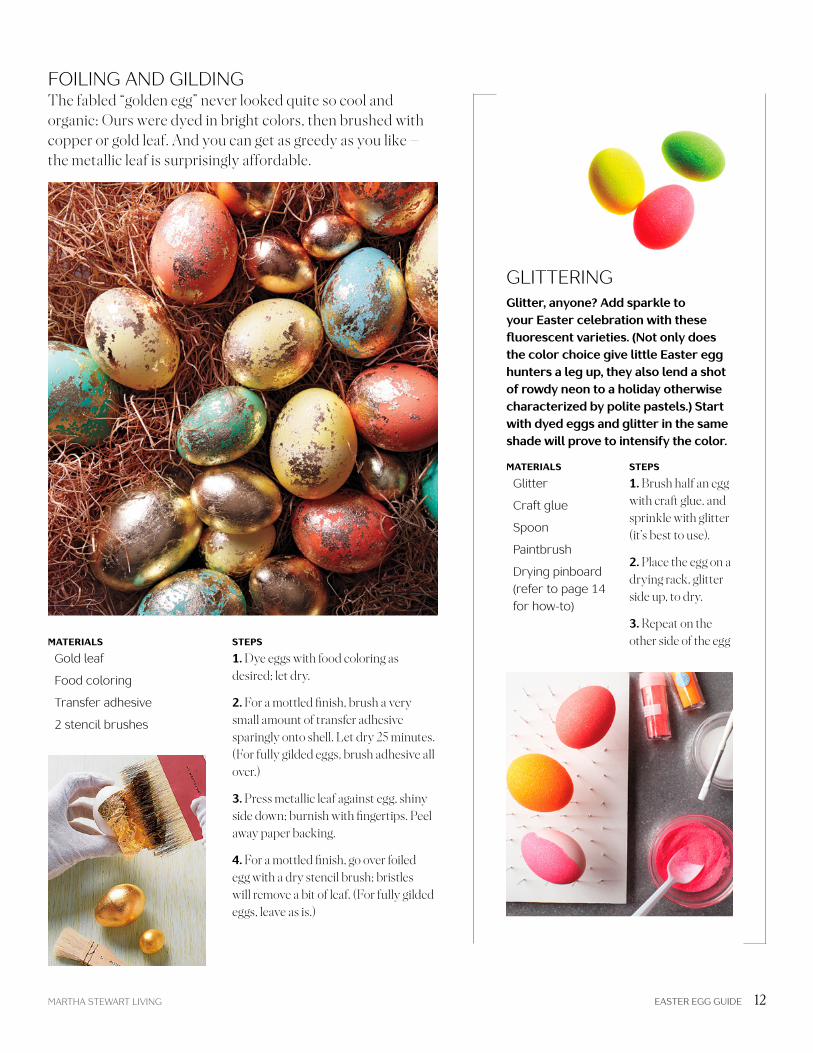
FOILING AND GILDINGThe fabled “golden egg” never looked quite so cool and organic: Ours were dyed in bright colors, then brushed with copper or gold leaf. And you can get as greedy as you like — the metallic leaf is surprisingly affordable.
MATERIALS
Gold leaf
Food coloring
Transfer adhesive
2 stencil brushes
STEPS
1. Dye eggs with food coloring as desired; let dry.
2. For a mottled finish, brush a very small amount of transfer adhesive sparingly onto shell. Let dry 25 minutes. (For fully gilded eggs, brush adhesive all over.)
3. Press metallic leaf against egg, shiny side down; burnish with fingertips. Peel away paper backing.
4. For a mottled finish, go over foiled egg with a dry stencil brush; bristles will remove a bit of leaf. (For fully gilded eggs, leave as is.)
GLITTERINGGlitter, anyone? Add sparkle to your Easter celebration with these fluorescent varieties. (Not only does the color choice give little Easter egg hunters a leg up, they also lend a shot of rowdy neon to a holiday otherwise characterized by polite pastels.) Start with dyed eggs and glitter in the same shade will prove to intensify the color.
STEPS
1. Brush half an egg with craft glue, and sprinkle with glitter (it’s best to use).
2. Place the egg on a drying rack, glitter side up, to dry.
3. Repeat on the other side of the egg
MATERIALS
Glitter
Craft glue
Spoon
Paintbrush
Drying pinboard (refer to page 14 for how-to)
MARTHA STEWART LIVING EASTER EGG GUIDE 13
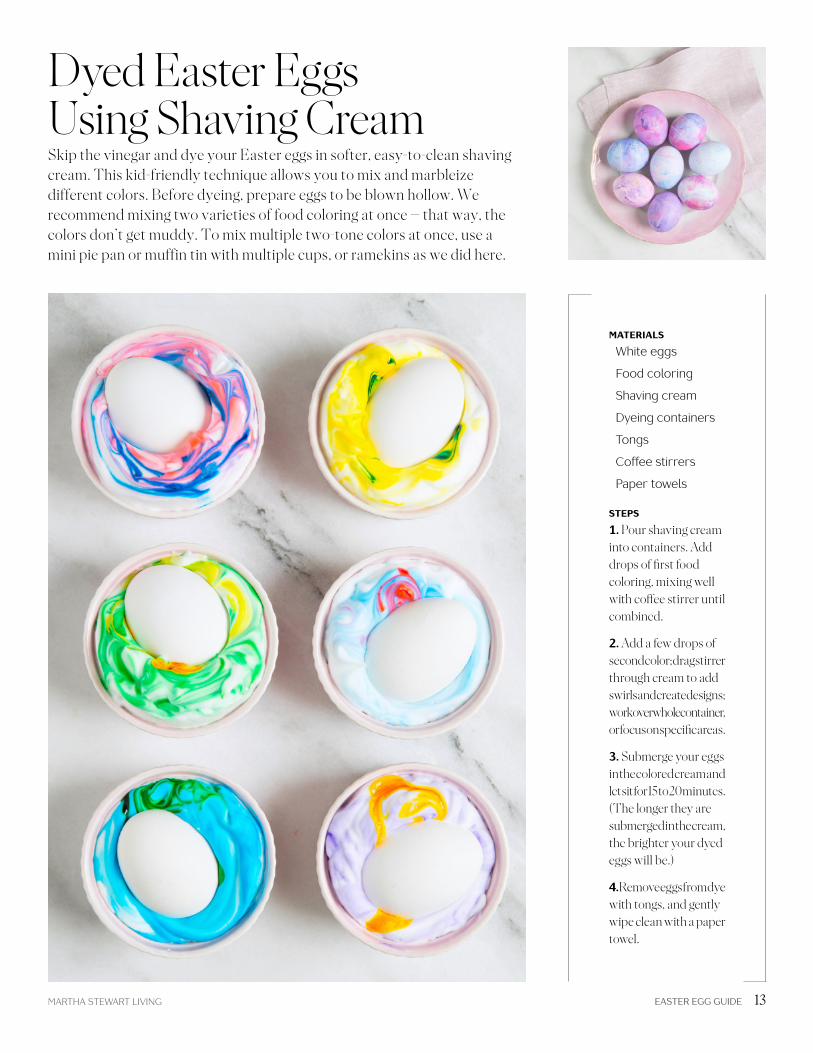
Dyed Easter Eggs Using Shaving CreamSkip the vinegar and dye your Easter eggs in softer, easy-to-clean shaving cream. This kid-friendly technique allows you to mix and marbleize different colors. Before dyeing, prepare eggs to be blown hollow. We recommend mixing two varieties of food coloring at once — that way, the colors don’t get muddy. To mix multiple two-tone colors at once, use a mini pie pan or muffin tin with multiple cups, or ramekins as we did here.
MATERIALS
White eggs
Food coloring
Shaving cream
Dyeing containers
Tongs
Coffee stirrers
Paper towels
STEPS
1. Pour shaving cream into containers. Add drops of first food coloring, mixing well with coffee stirrer until combined.
2. Add a few drops of second color; drag stirrer through cream to add swirls and create designs; work over whole container, or focus on specific areas.
3. Submerge your eggs in the colored cream and let sit for 15 to 20 minutes. (The longer they are submerged in the cream, the brighter your dyed eggs will be.)
4. Remove eggs from dye with tongs, and gently wipe clean with a paper towel.
MARTHA STEWART LIVING EASTER EGG GUIDE 14
COLOR STEPS TIME
DEEP GOLD Boil eggs in Turmeric solution 30 Minutes
SIENNA Boil eggs in Onion-Skin solution 30 Minutes
DARK, RICH BROWN Boil eggs in Black Coffee 30 Minutes
PALE YELLOW Soak eggs in room-temperature Turmeric solution 30 Minutes
ORANGE Soak eggs in room-temperature Onion-Skin solution 30 Minutes
LIGHT BROWN Soak eggs in room-temperature Black Coffee 30 Minutes
LIGHT PINK Soak eggs in room-temperature Beet solution 30 Minutes
LIGHT BLUE Soak eggs in room-temperature Cabbage solution 30 Minutes
ROYAL BLUE Soak eggs in room-temperature Cabbage solution Overnight
LAVENDER Soak eggs in room-temperature Beet solution 30 Minutes
Follow with room-temperature Cabbage solution 30 Seconds
CHARTREUSE Soak eggs in room-temperature Turmeric solution 30 Minutes
Follow with room-temperature Cabbage solution 5 Seconds
SALMON Soak eggs in room-temperature Turmeric solution 30 Minutes
Follow with room-temperature Onion-Skin solution 30 Minutes
COLOR GLOSSARYNatural dyes can sometimes produce unexpected results, so don’t be surprised if, for example, your red-cabbage dye yields blue eggs. Use the following guide to help you achieve the colors you desire.
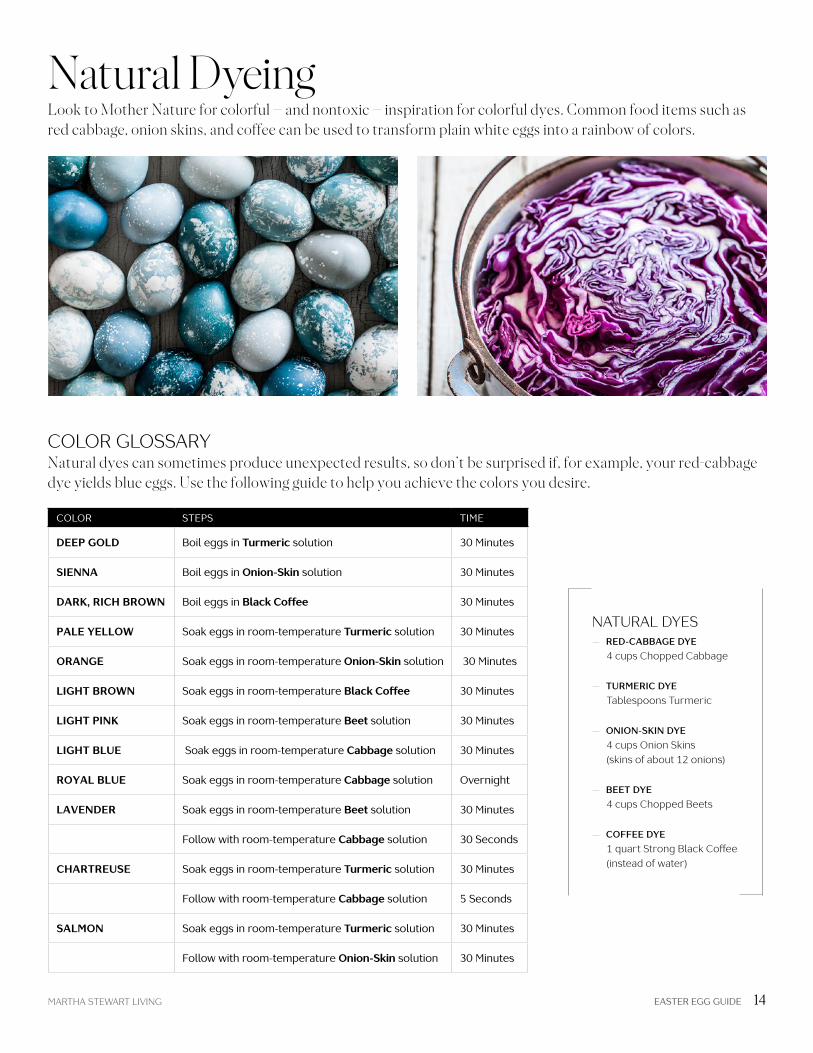
Natural DyeingLook to Mother Nature for colorful — and nontoxic — inspiration for colorful dyes. Common food items such as red cabbage, onion skins, and coffee can be used to transform plain white eggs into a rainbow of colors.
NATURAL DYES— RED-CABBAGE DYE 4 cups Chopped Cabbage
— TURMERIC DYE Tablespoons Turmeric
— ONION-SKIN DYE 4 cups Onion Skins
(skins of about 12 onions)
— BEET DYE 4 cups Chopped Beets
— COFFEE DYE 1 quart Strong Black Coffee
(instead of water)
MARTHA STEWART LIVING EASTER EGG GUIDE 15
NATURAL DYES RECIPEMATERIALS
Natural dyeing agents (red cabbage, turmeric, onion skins, beets, and coffee)
3-quart pot (or larger)
White vinegar
Strainer
Small bowls
Large metal spoon
Paper towels
Drying rack
NOTE: With this method, the eggs and the ingredients for the dye are boiled separately.
STEPS
1. Select a dyeing agent, and place it in the pot using the amount (From page 13) Add 1 quart water and 2 tablespoons white vinegar to pot; if more water is necessary to cover ingredients, proportionally increase the amount of vinegar. Bring to a boil, then lower heat. Allow the ingredients to simmer for 30 minutes. Strain dye into a bowl.
2. Prepare eggs for dye by patting them dry with paper towels, and let dry on a wire rack. The cold-dipping method produces subtle, translucent shades, but can result in uneven coloring unless the eggs are rotated vigilantly while in the dye. For hollow eggs that will last indefinitely, cold-dip raw
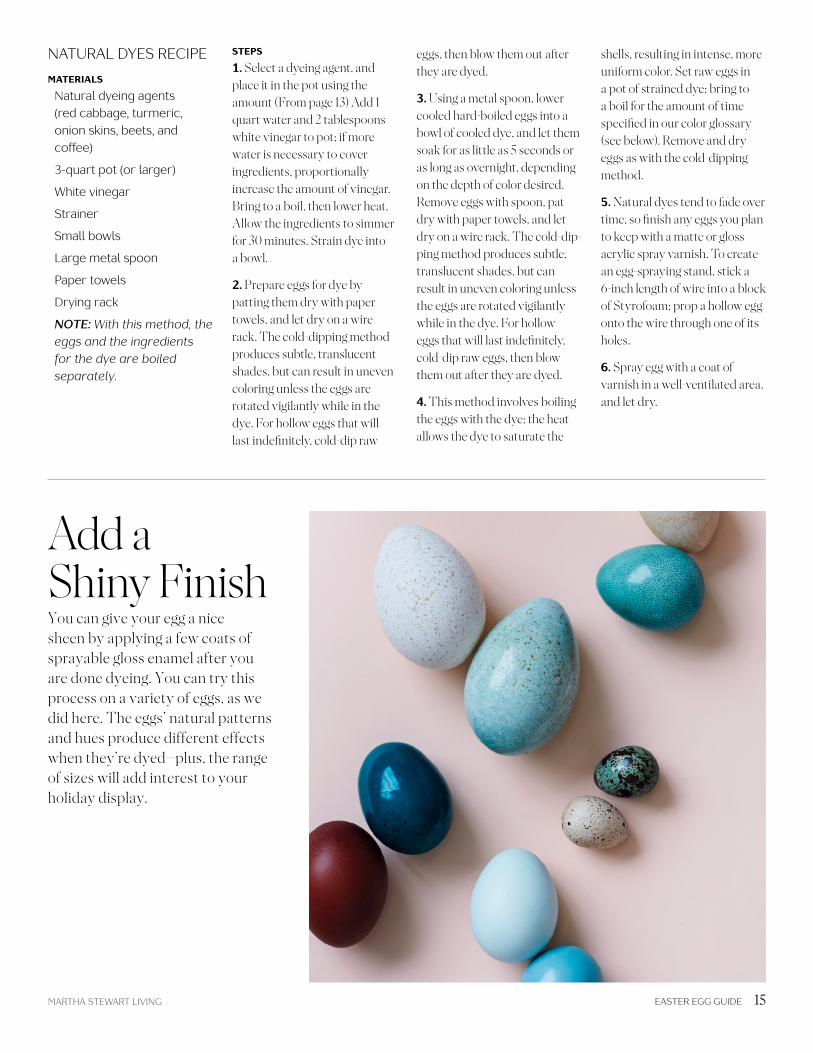
Add a Shiny FinishYou can give your egg a nice sheen by applying a few coats of sprayable gloss enamel after you are done dyeing. You can try this process on a variety of eggs, as we did here. The eggs’ natural patterns and hues produce different effects when they’re dyed—plus, the range of sizes will add interest to your holiday display.
eggs, then blow them out after they are dyed.
3. Using a metal spoon, lower cooled hard-boiled eggs into a bowl of cooled dye, and let them soak for as little as 5 seconds or as long as overnight, depending on the depth of color desired. Remove eggs with spoon, pat dry with paper towels, and let dry on a wire rack. The cold-dip-ping method produces subtle, translucent shades, but can result in uneven coloring unless the eggs are rotated vigilantly while in the dye. For hollow eggs that will last indefinitely, cold-dip raw eggs, then blow them out after they are dyed.
4. This method involves boiling the eggs with the dye; the heat allows the dye to saturate the
shells, resulting in intense, more uniform color. Set raw eggs in a pot of strained dye; bring to a boil for the amount of time specified in our color glossary (see below). Remove and dry eggs as with the cold- dipping method.
5. Natural dyes tend to fade over time, so finish any eggs you plan to keep with a matte or gloss acrylic spray varnish. To create an egg-spraying stand, stick a 6-inch length of wire into a block of Styrofoam; prop a hollow egg onto the wire through one of its holes.
6. Spray egg with a coat of varnish in a well-ventilated area, and let dry.