Embed Size (px)
Citation preview


OTHER EXCITING SCIENCE FICTION GAMES
FROM TASK FORCECERBERUS
C E R B E R U S was the first planet of another star to be reached by Man. But it was already colonized by TauCeti, and the Cetians wanted no visitors.
STAR FLEET BATTLES
Can you command a Starship? S T A R F L E E T B A T T L E S depicts the excitem ent of individual ship actions in deep space for tw o or more players.
S T A R F IR E captures the suspense and terror of battles between Fleets o f space warships ranging from massive Superdreadnoughts to low ly C o rvettes.
Published by TASK FORCE GAMES, 405 South Crockett, Amarillo, Texas 79106 (Telephone (806) 376-6229). Dealer Inquiries are welcome. Hobby and game stores, please ask for a list of qualified wholesalers. TASK FORCE GAMES are available to individuals in hobby stores and from several direct mail sales companies. Games are not directly available to stores and individuals from TASK FORCE GAMES. Please do not order from us. If your hobby store does not carry TASK FORCE games, send us his name and address and we will have our wholesalers contact him.We will cheerfully answer questions on the rules of our games. Please phrase your question in such a way that it can be answered yes or no, or perhaps with a few words, and include a stamped self-addressed envelope. TASK FORCE GAMES is actively seeking free-lance game designers for future games. Please inquire before sending a playtest copy.Printing by Standard Printing Company of Amarillo, Texas.
STARFIRE
ASTEROID ZERO-FOUR is Copyright© 1979 by TASK FORCE GAMES.Second Edition: Certain minor errors have been corrected since the first edition.

ASTEROID ZERO-FOUR RULES OF PLAY
11.0) INTRODUCTIONASTEROID ZERO-FOUR is a game representing combat between two Asteroid Bases in the Asteroid Belt of the Solar System. It takes place approximately 50 years from the present era. The two players represent the commanders of the two Bases. One commands the asteroid garrisoned by the Russians, maneuvers the Russian units, and is referred to as the Russian player. The other player uses the American units, and commands the American Base. He is known as the American player.(1.1) HISTORICAL BACKGROUNDAs Man expanded through the Solar System, the need for high-grade metal ores became acute. Fortunately, the Asteroid Belts proved to be rich in metal, and the two major governments on Earth (the USA and USSR) built large and complex mining Bases in the Asteroid Belt. The American Base, known as "MacArthur Station," was built on an asteroid which had been designated as Asteroid Zero-Four in the Asteroid Belt Survey of 2027. The Russian Base, known as "Leningrad Station," was built on Asteroid Zero-Two. While both stations were, ostensibly, under the control of non-military government-owned mining corporations, both were heavily staffed by military personnel from the start.
In 2034, the situation radically changed. Scientists on Earth determined that approximately two years later, massive solar flares would effectively shut down all manned space travel inside the orbit of Mars. Just how long a period this would be, none could be sure, but at least for several months. During this period, both Asteroid Bases would be cut off from Earth, and the military crews of both stations began to be concerned about what would happen during that period. While the ore that was mined could still be sent to Earth in unmanned containers, no manned ships could come out from Earth.
This created a situation in which a complete nuclear war could be fought in space without any interference from Earth. The winner of such a war would dominate the mining of the Asteroid Beit for years to come, and could gain a considerable industrial advantage on the Earth. Naturally, both sides claimed that they were arming their asteroid for "defense" and as a "deterent," and may have been honest in saying so, but the net result was the same: both sides were armed to the teeth and had little choice but to attack virtually the instant that the flares started.
The Americans built some Missiles into their asteroid, but preferred to depend on manned ships. Their primary vehicle was the FS-30 CONDOR Space Fighter-Bomber, a large ship with long range, heavy payload capability, and high maneuverability. The Russians stocked more Missiles, and fewer Spacecraft. Those that were available included the COMET Space Bomber, with longer range than the CONDOR, higher payload, but far less maneuverability. The METEOR Space Fighter, another Russian design, was highly maneuverable but very short- ranged, and could not carry very many bombs. The Russians also had a few PLANETOID class Space Tankers, which they intended to use on long-range missions.
As the time for the storms approached, tension built to incredible heights as both Asteroid Commanders tried to out-smart their opposite number. Would massive strikes be launched immediately, or would both sides reinforce their defensive patrols and wait for the other to make the first move? What targets would be taken out first? Whose spacecraft would prove superior? How the "w ar" began, and what happened during its first hours, was endlessly researched and debated by the historians. But there was never any doubt as to how it ended.
(2.0) GENERAL COURSE OF PLAYASTEROID ZERO-FOUR is a two-player game. Each player represents the commander of a Base constructed on an asteroid measuring perhaps four by six miles. While the purpose of the base is to operate mining ships and to process metal ore mined from other asteroids to be sent to Earth, each asteroid is armed with Missiles and manned Spacecraft. During the course of the game, the players will engage in combat operations in an attempt to destroy the other player's ability to conduct both mining operations and military operations.
Players will notice that at certain points in the rules there are references to other rule sections. This cross-referencing is intended to aid players in both learning the rules and checking rules during the course of the game.
The Mapsheet includes maps of each of the two asteroids (referred to as "Asteroid Maps"), a "Turn Record Track" (to record the turn in progress), and a "Scatter Diagram" (to determine the direction of scatter of weapons). On a separate sheet is found the "Strategic Display."
The Asteroid Maps are used to show the systems which are built into and onto the asteroid. These are also used to calculate and record damage caused by weapons landing on

the asteroid. Additionally, Spacecraft will be maneuvered on the Asteroid Maps as they attempt to attack the asteroid and deliver bombs. Finally, the Asteroid Maps are used to "hold" Missiles which are preparing for launch, and Spacecraft which are refueling, rearming and being repaired.
The Strategic Display represents, in a stylized fashion, the space around and between the two asteroids. The boxes are used to hold groups of Spacecraft which have been assigned to various areas.
The COMBAT SPACE PATROL box is used to hold those Spacecraft which are assigned to protect the home asteroid. These will usually be Fighters (or Fighter-Bombers) but Bombers may be placed in this box if the situation requires. They will be less effective than Fighters but better than nothing. Spacecraft may be added to, and removed from, the COMBAT SPACE PATROL box, but generally there will always be at least a few Spacecraft in this box as long as the enemy player has something with which to attack.
The STRIKE box is used to hold those Spacecraft and Missiles which are to be used on the current turn to attack the enemy asteroid. At the end of each turn, all Spacecraft in the box (that have not been destroyed in attacking the enemy asteroid) are placed into the NEED REFUELING box, while Missiles are, by definition, on a one-way trip. The STRIKE ESCORT box holds those Spacecraft which are being used to escort the "Strike Forces." The "Strike Escort" will engage the enemy "Combat Space Patrol" (5.0). A t the end of the turn, there will be no Spacecraft in this box; those that have survived the turn will have been placed into the NEED REFUELING box.
The NEED REFUELING box is used to hold those Spacecraft which need refueling. At the beginning of most turns, there will be some Spacecraft in this box which are returning from prior Strike Missions. These will be landed during that turn. As the turn progresses, Spacecraft from the Strike and STRIKE ESCORT boxes will be added to the NEED REFUELING box.
The STRIKE HOLDING box is used to hold Spacecraft which may be used on the NEXT turn to attack the enemy asteroid. Basically, these are a "threat" which MAY attack or return to Base on the next turn.
The REAR AREA box is used to hold Spacecraft which have been sent "away" from the combat zone, or which have not yet arrived from Earth. Spacecraft sent to the REAR AREA box are assumed to have landed at small Bases at a considerable distance from the combat area. Because of distance and dispersion, they cannot be attacked, and because of the small Bases, they need no fuel and can remain there indefinitely. Players might send Spacecraft to the REAR AREA box when they are expecting a major raid but are not certain of when it will arrive (and do not want to get caught with Spacecraft on the asteroid), or when there are more damaged Spacecraft than can be repaired conveniently, and it is desirable to send the excess out of harms way. Also, in the ADVANCED SCENARIO (see 15.2) considerable quantities of Spacecraft may be held in the REAR AREA. In this scenario, damaged Spacecraft may be exchanged for undamaged Spacecraft in the REAR AREA box. Note, however, that the REAR AREA box has NO repair capability of its own.
The DEPLOYMENT boxes are used in the secret and simultaneous deployment of the Spacecraft and Missiles. This is explained in the Explanation of the Sequence of Play (4.0),(2.1) GAME EQUIPMENTEach ASTEROID ZERO-FOUR game should include:
— one sheet of die-cut unit counters printed in red, blue and black, These represent the American (blue) and Russian (red) Spacecraft, Missiles and Engineer units of the Bases.
— one sheet of die-cut damage markers used to indicate damage inflicted on the asteroids.
— one game Mapsheet showing the two Asteroid Maps and various other information.— one Strategic Display sheet.— one rulebook.Also necessary for play but not included are one or two six-sided dice and scratch
paper.(2.11) The unit counters represent the various manned Spacecraft, Missiles and Engineer units used in the game. All counters include an identifying number to distinguish them from other counters of the same type. In addition, Spacecraft counters carry a type identification code to show' which type of Spacecraft they are. These types are: F — Fighter, В — Bomber, FB — Fighter-Bomber and T — Tanker. Missiles are designated as one of five types in the secret records maintained by the players. The Russian units are printed in red and the US units are printed in blue,(2.12) The game Mapsheet consists of the two Asteroid Maps, the Turn Record Track and the Scatter Diagram. The Strategic Display is found on a separate sheet. The Mapsheet contains two Asteroid Maps, one controlled by the American player and the other controlled by the
Russian player. Each Asteroid Map has been superimposed with a hexagonal (hex) grid to regularize movement and position of the units. Each Asteroid Map portrays the asteroid itself with all of its systems (6.0) and the space immediately above and around the asteroid.
The Strategic Display consists of various boxes which may, at a given time, contain some of the Missiles and/or Spacecraft of each player. The entire Strategic Display represents all the space between the two asteroids (not immediately surrounding each asteroid) in which Missiles and/or Spacecraft of each player may be located.
The various holding boxes of the Strategic Display represent the location and/or the mission of the given Missile or Spacecraft.
The Scatter Diagram is used to determine which direction targeted weapons scatter П0.8) and the Turn Record Track is used to record the turn in progress.
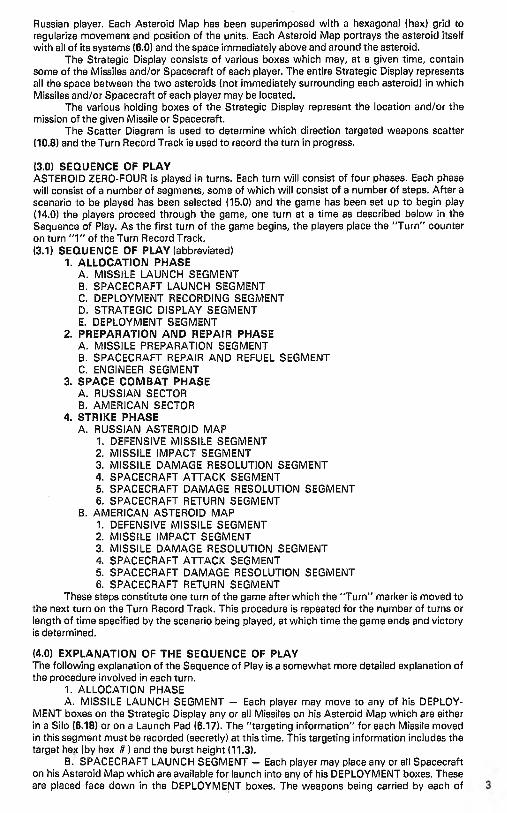
13.0) SEQUENCE OF PLAYASTEROID ZERO-FOUR is played in turns. Each turn will consist of four phases. Each phase will consist of a number of segments, some of which will consist of a number of steps. After a scenario to be played has been selected (15.0) and the game has been set up to begin play(14.0) the players proceed through the game, one turn at a time as described below in the Sequence of Play. As the first turn of the game begins, the players place the "Turn" counter on turn "1 " of the Turn Record Track.(3.1) SEQUENCE OF PLAY (abbreviated)
1. ALLOCATION PHASEA. MISSILE LAUNCH SEGMENTB. SPACECRAFT LAUNCH SEGMENTC. DEPLOYMENT RECORDING SEGMENTD. STRATEGIC DISPLAY SEGMENTE. DEPLOYMENT SEGMENT
2. PREPARATION AND REPAIR PHASEA. MISSILE PREPARATION SEGMENTB. SPACECRAFT REPAIR AND REFUEL SEGMENTC. ENGINEER SEGMENT
3. SPACE COMBAT PHASEA. RUSSIAN SECTORB. AMERICAN SECTOR
4. STRIKE PHASEA. RUSSIAN ASTEROID MAP
1. DEFENSIVE MISSILE SEGMENT2. MISSILE IMPACT SEGMENT3. MISSILE DAMAGE RESOLUTION SEGMENT4. SPACECRAFT ATTACK SEGMENT5. SPACECRAFT DAMAGE RESOLUTION SEGMENT6. SPACECRAFT RETURN SEGMENT
B. AMERICAN ASTEROID MAP1. DEFENSIVE MISSILE SEGMENT2. MISSILE IMPACT SEGMENT3. MISSILE DAMAGE RESOLUTION SEGMENT4. SPACECRAFT ATTACK SEGMENT5. SPACECRAFT DAMAGE RESOLUTION SEGMENT6. SPACECRAFT RETURN SEGMENT
These steps constitute one turn of the game after which the "Turn" marker is moved to the next turn on the Turn Record Track. This procedure is repeated for the number of turns or length of time specified by the scenario being played, at which time the game ends and victory is determined.
(4.0) EXPLANATION OF THE SEQUENCE OF PLAYThe following explanation of the Sequence of Play is a somewhat more detailed explanation of the procedure involved in each turn.
1. ALLOCATION PHASEA. MISSILE LAUNCH SEGMENT — Each player may move to any of his DEPLOY
MENT boxes on the Strategic Display any or all Missiles on his Asteroid Map which are either in a Silo (6.18) or on a Launch Pad (6.17). The "targeting information" for each Missile moved in this segment must be recorded (secretly) at this time. This targeting information includes the target hex (by hex t t ) and the burst height (11.3).
B. SPACECRAFT LAUNCH SEGMENT — Each player may place any or all Spacecraft on his Asteroid Map which are available for launch into any of his DEPLOYMENT boxes. These are placed face down in the DEPLOYMENT boxes. The weapons being carried by each of

these Spacecraft (9.121 is secretly recorded at this time.C. DEPLOYMENT RECORDING SEGMENT — Each player secretly records on scratch
paper the destination of the units in each DEPLOYMENT box. (Example: A - STRIKE, В - REAR AREA, С - STRIKE HOLDING, D - STRIKE ESCORT, E - COMBAT SPACE PATROL, F - Return to Asteroid.)
Note that Missiles may only be deployed into the STRIKE or STRIKE HOLDING boxes. Also, more than one group may be recorded to go to the same box. Note that at this time these Missiles and Spacecraft temporarily remain in the DEPLOYMENT boxes until Segment E of this phase.
If any Russian Fighters are deployed into the STRIKE HOLDING box, the group (regardless of size) must be accompanied by one Russian Tanker or two Russian Bombers carrying fuel instead of weapons (acting as Tankers). In this case, a "group" is defined as the group in the final box, and not necessarily each group in each DEPLOYMENT box.
D. STRATEGIC DISPLAY SEGMENT — Units in boxes other than the DEPLOYMENT boxes of the Strategic Display are now checked and possibly moved. Units in these boxes are those remaining from the prior turn or the initial Combat Space Patrol (16.0). All other Spacecraft in the STRIKE HOLDING box must either be landed on the asteroid or moved into the STRIKE or STRIKE ESCORT boxes. Spacecraft in the REAR AREA box or in the COMBAT SPACE PATROL box may land on the asteroid. Spacecraft in the NEED REFUELING box MUST be landed on the asteroid.
E. DEPLOYMENT SEGMENT — The players now reveal their written deployment orders and the Missiles and/or Spacecraft placed in the DEPLOYMENT boxes in Segments A and В of this phase are moved to the indicated boxes.
2. PREPARATION AND REPAIR PHASEA. MISSILE PREPARATION SEGMENT — Each player may move up to two Missiles
from each of his OPERABLE Missile Command Bunkers to adjacent OPERABLE Missile Launch Pads or Silos.
B. SPACECRAFT REPAIR AND REFUEL SEGMENT - Spacecraft located on any type of Landing Field are automatically considered to be refueled. Spacecraft may now be repaired in accordance with the rules on Repair (9.18 and 9.19).
C. ENGINEER SEGMENT — Engineer units may now move on each asteroid Map making repairs in accordance with the rules on Engineers (7.0).
3. SPACE COMBAT PHASEA. RUSSIAN SECTOR — Space combat in the Russian sector of the Strategic Display
is resolved in accordance with the rules on Space Combat (5.01.B. AMERICAN SECTOR — Space combat in the American sector of the Strategic
Display is resolved in accordance with the rules on Space Combat (5.0).A t the end of the Space Combat Phase, all Spacecraft in the STRIKE ESCORT boxes
are returned to the NEED REFUELING boxes. A t this time each player may, at his option, return any Spacecraft in his STRIKE box to the NEED REFUELING box. This, presumably, would include any damaged Spacecraft which the owning player decides not to risk against the defenses of the enemy asteroid. Either player may also abort ALL his attacking Spacecraft and cancel the entire Strike, Missiles, of course, cannot cancel their attacks and must proceed on to the target regardless of losses or damage (assuming that they are not destroyed first).
4. STRIKE PHASEA. RUSSIAN ASTEROID MAP
1. DEFENSIVE MISSILE SEGMENT - Space Defense Missiles (SDM's) fire at the incoming attacking American Spacecraft and Missiles.
2. MISSILE IMPACT SEGMENT — Missiles in the American STRIKE box are placed in the hex of the Russian Asteroid Map for which each was targeted. The MISSILE SCATTER TABLE (10.81) is used for each such Missile to determine if it has scattered, and if so, each is moved the direction and number of hexes indicated.
3. MISSILE DAMAGE RESOLUTION SEGMENT - Damage to the Russian Asteroid caused by impacting Missiles is calculated using the WEAPONS EFFECTS TABLES(11.411). Each Missile counter impacting in this segment is at this time laid aside and not used again in the game.
4. SPACECRAFT ATTACK SEGMENT — Attacking American Spacecraft conduct attacks on the Russian Asteroid in accordance with the rules on Spacecraft Attack (9.2). This segment is divided into several tactical turns. The American player may, however, if he wishes, abort the attack of any or all of his Spacecraft at this time by placing them in the NEED REFUELING box.
5. SPACECRAFT DAMAGE RESOLUTION SEGMENT - Damage to the Russian Asteroid caused by weapons dropped by American Spacecraft is calculated using the WEAPONS EFFECTS TABLES (11.411).
6. SPACECRAFT RETURN SEGMENT — All surviving American Spacecraft from

the attack are placed in the NEED REFUELING box.B. AMERICAN ASTEROID MAPThe six segments of the Strike Phase as listed above are now conducted for any
Russian Strike on the American Asteroid, with the Russian Spacecraft attacking and the American Asteroid defending.
(5.0) SPACE COMBATDuring the Space Combat Phase of each turn, space combat occurs between opposing Spacecraft and Missiles on the Strategic Display. Spacecraft in the Russian COMBAT SPACE PATROL (CSP) box have combat with American Spacecraft in the American STRIKE ESCORT box, and some Russian Spacecraft in the Russian CSP box may instead attack American Spacecraft or Missiles in the American STRIKE box.
Conversely, American Spacecraft in the American CSP box will have combat with Russian Spacecraft in the Russian STRIKE ESCORT box, and some of them may attack Russian Spacecraft or Missiles in the Russian STRIKE box.15.1) Missiles and Spacecraft in the REAR AREA, NEED REFUELING and STRIKE HOLDING boxes may never be involved in space combat.(5.2) Space combat is resolved first with the Russian CSP and then with the American CSP in the procedure as follows. The American player takes all the Spacecraft from his STRIKE ESCORT box, and places them in any convenient area off the map, spread out side by side. Then the Russian player takes all the Spacecraft from his CSP box, and places these with the American Spacecraft, with each Russian Spacecraft adjacent to, and facing, a specific American Spacecraft. If the Russian player does not have enough Spacecraft to place one of his adjacent to each American Spacecraft, then the American player may take any "unpaired" escorting Spacecraft and "double-up" on the Russian CSP Spacecraft (this must be divided as evenly as possible). Three American Spacecraft may not be assigned to attack a given Russian Spacecraft unless all Russian Spacecraft are attacked by at least two American Spacecraft. Similarly, four Americans could not attack a given Russian unless every other Russian was already being attacked by three Americans, and so on.
If the Russian player has more Spacecraft in his CSP than the American has in his STRIKE ESCORT box, then the excess Russian Spacecraft may be used either to "double-up" on the American escorting Spacecraft, or to attack the Missiles and Spacecraft in the STRIKE box (some of the excess Russian Spacecraft could be assigned to each of the two possible missions, or all could be used for either). If used to attack units in the STRIKE box, the American player spreads out his Missiles and Spacecraft, and the Russian player assigns his Spacecraft to attack any of the American units. The Russian player is not restricted in his deployment and may assign all his Spacecraft to attack a single American Missile, if he so desires.
Combat is then resolved, using the procedures of (5.3). The Russian Spacecraft all attack the American Spacecraft to which they are assigned, but ONLY the American Spacecraft in the STRIKE ESCORT box attack the Russian Spacecraft assigned to attack them. American Spacecraft in the STRIKE box do not attack in Space Combat, they must "s it and take it."
After combat is resolved, the American player places his STRIKE ESCORT Spacecraft, and any of his STRIKE Spacecraft that he wishes, into the NEED REFUELING box.
This procedure is then repeated, with the American CSP units engaging Russian units in the Russian STRIKE ESCORT and STRIKE boxes.(5.3) Individual space combat is conducted as follows. Each set of "paired-up" units becomes an individual combat. For each combat, the unit or units of one player would attack the enemy unit or units and then the procedure would be reversed. However, in the case of combat between one player's CSP units and the other's STRIKE units, only the CSP player would have attacking units (see 5.2). Combat is considered to be simultaneous, and any damage inflicted on a unit would not be applied to that unit until AFTER it had it's turn to attack. Each Spacecraft may attack only once during a given Space Combat Phase, however, a given unit may be attacked more than once during a given Space Combat Phase. Each Spacecraft attacks individually and may attack only one enemy unit in a given Space Combat Phase.
For each unit involved in a given combat, the attack and defense factors are determined from the MANNED SPACECRAFT TABLE (5.4). Take the attack factor of the attacking Spacecraft and subtract from it the defense factor of the defending Spacecraft. This will result in an "attacker superiority" number. Roll a single die. Cross-index the die roll with the attacker superiority number on the MANNED SPACECRAFT COMBAT RESULTS TABLE (5.5) and the resulting number is the number of damage points inflicted on the unit being attacked.(5.31) Reduce the attack and defense factors by one point for each point of damage taken by a given unit. For example, an American Fighter-Bomber has an attack factor of 9 and a defense factor of 4 when used in COMBAT SPACE PATROL. If this particular Spacecraft takes two

points of damage, its attack factor would be reduced to 7 and its defense factor would be reduced to 2. This reduction would not occur, however, until AFTER the American Fighter- Bomber had an opportunity to attack in the Space Combat Phase in which it received the damage. Attack and defense factors may NEVER be reduced below zero.(5.41 MANNED SPACECRAFT TABLE (seepage21).(5.51 MANNED SPACECRAFT COMBAT RESULTS TABLE (see page 211.
(6.0I THE ASTEROIDSThe Asteroid Maps (see Mapsheet) represent the asteroids and the installations built on them. The symbols printed on the Asteroid Maps indicate permanent construction and are collectively called "systems." The die-cut unit counters represent moveable items and are collectively called "units." Each system on each Asteroid Map is presumed to be the dominant item in the hex and is assigned a "defense factor" which is printed in red in the hex. Each defense factor indicates the structures' relative resistance to damage. Note that all identical systems do not have the same defense factor. Generally, those with lower defense factors represent systems built earlier, with the better protected systems built later. Also in each hex is a fourdigit number printed in gray. This is known as the "hex number" and is primarily used for the targeting of weapons.(6.1) Each system on each asteroid has a particular function which it will perform until it becomes damaged to an extent which will prevent it from performing this function. The following is a listing of the various systems found on each asteroid. Refer to the TERRAIN CHART (6.36) for explanation of terrain types.(6.11) COMMAND BUNKER — a Command Bunker houses the controlling officers, computers and power generators of the asteroid. There are three types of Command Bunkers. Missile Command Bunkers are adjacent to Missile Silos or Pads and only Missile Command Bunkers may contain Missiles. Fighter Command Bunkers are adjacent to Fighter Landing Fields and only Fighter Command Bunkers may provide the most extensive type of service to Spacecraft (see 9.19). Any type of Command Bunker may provide power to Laser Towers (6.4 and 8.2).(6.12) LIVING QUARTERS — while not essentially critical to the game, the construction of living quarters is sufficiently different to require differentiation.(6.13) ORE PROCESSING PLANT — Information on ore processing plants is found in the rules on Mining (13.0).(6.141 LASER TOWER — these provide defense against incoming enemy Spacecraft (9.0). They provide no defense, however, against enemy Missiles (10.0).(6.15) SPACE DEFENSE MISSILES — Space Defense Missiles (SDM's) defend against enemy Missiles and Spacecraft (8.1).(6.16) TUNNELS — these are used as a means of supplying power to systems (6.4) and also provide Engineers (7.0) with underground movement.(6.17) MISSILE LAUNCH PADS — used to launch offensive Missiles (not SDM's). Note that in the case of these systems the actual Missiles are kept in adjacent Missile Command Bunkers until almost ready to fire, at which time they are moved to the Pads. Missile Launch Pads (as compared to Missile Silos) do not provide any protection against damage from the "FRAG TABLE" (12.5) to Missiles on the Pads.(6.18) MISSILE SILOS — these serve the same purpose as Missile Launch Pads, however, the Missile may either begin in, or be moved into, the Silos where they remain until launched. The primary purpose of Missile Silos is to protect the Missiles from being damaged by shrapnel(12.0) and attacking Spacecraft.(6.19) STOCKPILES — these represent piles of processed ore lying in shallow trenches. They are virtually indestructable, and damage is neither calculated nor recorded on them.(6.20) MOUNTAINS — these represent high rock formations. The defense factors of systems built under them (as shown on the maps) have been thereby increased. They also affect Spacecraft moving across the asteroid surface (9.25), they affect the blast radius of Nuclear(11.0) and Fragmentary Weapons (12.0) and they affect the firing arcs of Laser Towers (8.2).(6.21) LANDING PAD — these are used to land both mining ships (13.0) and the various military Spacecraft (9.0). The proximity of such Pads to Fighter Command Bunkers has a considerable effect on their use (9.19).(6.22) CARGO SHIP LANDING PAD — these are large open areas of the asteroid. While they can be used to service military Spacecraft, the primary purpose is in the mining system (13.01. Unlike any other systems on the asteroids, Landing Pads and Cargo Ship Landing Pads cannot

be totally destroyed. If more than eight damage steps (11.4) are scored on a Landing Pad or a Cargo Ship Landing Pad, the excess is ignored.(6.24) RETRACTABLE LANDING PAD — each asteroid includes five Landing Fields which can be retracted below the surface of the asteroid. These function just as other Landing Fields, but Spacecraft on them are considered to be below the surface. Unlike other Landing Pads, retractable Landing Pads can be irreparably destroyed.I6.3) TERRAINThe only terrain found on the asteroids which has any effect on the play of the game is mountains.(6.31) Laser Beams on Spacecraft may be fired into or out of mountain hexes, but never completely through a mountain hex.I6.32) Laser Beams on Laser Towers which are firing at Spacecraft which are at high altitude ignore mountains.(6.33) Laser Towers which are firing at Spacecraft at low altitude may fire into mountain hexes but not completely through them.(6.34) The effect of Nuclear or Fragmentation Bomb blasts reach into but not through mountain hexes. If a straight line from the center of the blast hex to the hex in question passes through any part of (or along the edge of) a mountain hex, the hex in question is NOT affected by the blast. In the illustration below,the hexes marked with an "X " are NOT affected by the blast because they are shielded by the mountains. All other hexes shown (and possibly others) would be affected.
(6.35) Any weapon which explodes in a mountain hex, regardless of the burst height designated by the owning player at launch, is considered to be a "low " burst in that hex and a "h igh" burst in all other hexes.(6.36) TERRAIN CHART
MOUNTAINS
LANDING PAD
_ f T ) CARGO SHIP / LANDING PAD
RETRACTABLE LANDING PAD
*Note that Fighter Command Bunkers are labeled FC and Missile Command Bunkers are labeled MC.

(6.4) ELECTRICAL POWER.Laser Towers are presumed to require electrical power in order to fire. Electrical power is generated in Command Bunkers, and must be transmitted to the Laser Towers through passable installation and tunnel hexes.(6.41) In order to fire, a given Laser Tower MUST be connected by an unbroken chain of passable (NOT necessarily operable) tunnel hexes, or installation hexes connected by tunnel symbols to an operable Command Bunker.(6.42) A given Command Bunker may supply power to any number of Laser Towers.(6.43) Any type of Command Bunker (Missile, Fighter, or normal) may supply power.
(7.0) ENGINEERSThe Engineer units in the game represent teams of technicians and skilled workers who can repair damage done to the various systems of the asteroids. They are capable of working both inside the tunnel complexes and on the asteroid's surface.(7.1) All activities performed by Engineer units occur during the Engineer Segment of the Preparation and Repair Phase. During this Engineer Segment, each Engineer unit has a given number of "activity points," assigned by the scenario (15.0), which may be used to move the Engineer unit and/or to repair damage to the asteroid.(7.2) Each Engineer activity point may be "exchanged" to provide the Engineer unit with four "movement points," which are used to move the Engineer unit on that turn only. Each hex on an asteroid has a "cost" in movement points which must be expended by the Engineer unit in order to enter that hex.(7.211 When moving on the surface, the cost to enter any non-mountain hex is two movement points, and the cost to enter a mountain hex is four movement points.(7.221 When using sub-surface movement, the cost to enter any hex which has taken four or less damage steps is one movement point. The cost to enter any hex which has taken from five to eight damage steps is two movement points. Any hex which has taken more than eight damage steps may not be entered by sub-surface movement.(7.3) An Engineer unit is considered to be below the surface if it is in any hex which contains any part of a tunnel symbol, and the hex has taken eight or fewer damage steps. Engineer units in hexes which do not meet this criterion are considered to be on the surface of the asteroid (exception — see 7.33).(7.311 An Engineer unit may enter an adjacent hex by sub-surface movement if both the hex moved into and the hex moved from are hexes in which the Engineer unit could exist below the surface, and if the two hexes are joined by a tunnel symbol.(7.32) Whether an Engineer unit is above or below the surface of the asteroid is critically important at the end of the Engineer Segment. Engineers left exposed on the surface are more vulnerable to enemy attack.(7.33) Missile Silos (for example, hex 1106 on the Russian Asteroid) and Retractable Fighter Landing Pads (for example, hex 1809 on the American Asteroid) are considered to be subsurface hexes, even though they do not contain tunnel symbols. However, even though an Engineer unit could exist in a Missile Silo Hex below the surface, it could not move to that Missile Silo by sub-surface movement, since there is no connecting tunnel. Surface movement is not in itself harmful, but it is generally slower, and remaining on the surface at the end of a turn is virtual suicide if enemy units are about to strike.(7.4) Damage to a hex does not affect the entry cost of that hex when using surface movement. An Engineer unit may not enter a given hex if it lacks the necessary movement points to do so during a given Engineer Segment.(7.5) Engineer units moving below the surface must be moved through appropriate system hexes and tunnel hexes which are connected by tunnel symbols. There are no special rules for the change during a turn from surface to sub-surface movement or vice versa. When an Engineer unit moves into a hex which may be entered by either surface or sub-surface movement, the owning player designates whether the unit is moving by surface or by sub-surface movement. The unit must expend the appropriate number of movement points required by the situation to enter the hex.(7.6) Each Engineer unit has a fixed number of activity points for each turn. These points may be expended in any order desired. In a given Engineer Segment, a given Engineer unit could exchange an activity point for movement points, use some of them to move to a hex, perform repairs to that hex, then use its remaining movement points (perhaps exchanging another activity point to gain more movement points) to move to another hex and perform more repairs, finally using its last movement points to move to a hex where it hopes to be safe from Nuclear

Weapons during the remainder of the turn.17.61} Movement points provided by a given activity point need not all be used before another activity point is used. For example, on a given turn an Engineer unit expends an activity point to gain four movement points. It uses two of these to move to a hex needing repairs, and then uses two activity points to repair that hex to an operable level. Then it uses its two remaining movement points to move to another hex which needs repairs, and uses any remaining activity points to repair this hex.(7.62) A given activity point may be used by an Engineer unit to move, or to perform repairs, but not both.(7.63) The activity points are assigned by the scenario, and are renewed each turn. Activity points, and movement points gained by exchanging activity points, may not be transferred from unit to unit or accumulated from turn to turn.(7.7) Each Engineer activity point nriay be used to repair one step of damage (see 11.4) to any one hex of the asteroid. An Engineer unit may expend more than one activity point repairing a given hex, and would repair a number of steps equal to the number of points expended.(7.71) Several Engineer units could combine to perform repairs to a critically damaged hex. However, it is not wise to leave too many Engineer units in too small an area when an enemy strike is expected. Loss of Engineer units early in the game can prove decisive.(7.8) Engineer units on or below the surface of the asteroid may be damaged if they are in a hex affected by an attack on the asteroid, in exactly the same manner as Spacecraft and Missiles which are on the asteroid can be damaged. See (11.0) Nuclear Weapons and 112.0) Fragmentation Bombs for details on this.
An Engineer unit which begins an Engineer Segment in an operable Command Bunker, and does not move or expend any activity points during that Engineer Segment, may repair one point of damage to itself. This point is considered to be repaired at the end of the same Engineer Segment. These "repairs" are presumed to be the result of reorganizing, treating wounded, recruiting additional personnel, and picking up space equipment.(7.9) Players must keep track on scratch paper of any damage inflicted on each Engineer unit. A given Engineer unit is permanently destroyed (removed from the game) at the instant it has accumulated its fourth damage point. (Engineer units are also destroyed if in a hex completely destroyed by a Nuclear Weapon, see 11.6).
Each point of damage inflicted on an Engineer unit reduces the number of activity points available to that unit by one. Damage points scored on Engineer units may NOT be transferred from one Engineer unit to another.EXAMPLE OF ENGINEER MOVEMENT
American Engineer unit #3 begins the Engineer Segment in the Living Quarters at hex 1209, where it ended its movement during the last turn. The American player now desires to have this unit move to the Missile Silo at hex 1012, where it will perform sufficient repairs for this Silo to be used. Noting that hex 1110 is blocked by bomb damage, he has the unit leave the tunnels and move by surface movement to hex 1210 (a mountain hex that costs 4 movement points), then to hex 1211. Even though hex 1211 is a hex in which the Engineer can be underground, it is not connected to hex 1210 by a tunnel, and the movement from hex 1210 to 1211 must be by surface movement, costing 2 more movement points. From this point, the Engineer unit moves to hex 1212 by sub-surface movement, expending only 1 movement point. Note that if hex 1212 had previously taken 5 damage steps, this movement would have cost 2 points, which is the same cost for overground movement. While it would make little difference in this case if the Engineer unit was moving by sub-surface or surface movement into hex 1212, if the unit ENDED its movement in this hex, it could be listed as either sub-surface or surface.
From hex 1212, the Engineer unit moves to hex 1113, again expending only one movement point. Now, to enter the Silo, the Engineer unit must go above the surface since there is no tunnel connected to the Silo. Doing so costs 2 movement points. The Engineer unit is now in the Silo (presumably below the surface, but it does not have to be) and has expended (4 + 2 + 1 + 1 + 2 = ) 10 movement points, which would have required exchanging at least 3 activity points.
(8.0) ASTEROID DEFENSIVE WEAPONSEach asteroid Base has various Defensive Weapons Systems to protect it from attacks by Missiles and manned Spacecraft. These include Space Defense Missiles (SDM's) and Laser Towers. SDM's are long-range weapons, while Laser Towers are used against Spacecraft which attack the asteroid directly.(8.1) SPACE DEFENSE MISSILES (SDM's)During the Defensive Missile Segments of each Strike Phase, the defending player may fire

each of his operable SDM Launchers.(8.11) SDM Launchers are fired at Spacecraft and Missiles in the enemy STRIKE box on the Strategic Display. Each SDM Launcher may make one attack during each turn.(8.12) SPACE DEFENSE MISSILE CHART (see page 20).(8.13) SDM attacks may be made against any Spacecraft or Missile in the enemy STRIKE box. Each SDM Launcher may attack one (and only one) enemy Spacecraft or Missile per turn.(8.14) PROCEDURE. For each SDM Launcher, the defending player designates a target and rolls a single die. He then cross-indexes the result of that die roll with the appropriate column on the SDM CHART (8.12! to determine the result of the attack, which may be destruction of the target, damage to it, or no effect. The result of the attack is applied immediately. The defending player determines the result of each of his SDM attacks before designating the remaining attacks.(8.2I LASER TOWERSDuring each Spacecraft Attack Segment of each Strike Phase, the Laser Towers (located on the Asteroid Maps) may be fired at enemy Spacecraft which are moving across the surface of the asteroid.(8.21) Each Laser Tower may fire once during each Tactical Turn (9.21). Laser Towers fire only at Spacecraft, never at Missiles. All Laser Towers have a 360-degree firing arc (note the effects of mountains on this at low altitude, see 6.3) and a maximum range of 6 hexes.(8.22) PROCEDURE. For each Laser Tower, a target is designated (if any are within range). The targets of all Laser Towers are determined before any firing is resolved. The fire of each Tower is resolved independently of all other attacks.
For each attack, determine the range from the Laser Tower to the target, in hexes. For this determination, include the hex that the Spacecraft is in, but NOT the hex that the Laser Tower is in. Also determine the altitude of the target Spacecraft. The defending player then rolls a single die and cross-indexes this information (range, altitude, and die roll) on the LASER TOWER CHART (8.23). The chart will yield a result in damage points, which are immediately applied to the target Spacecraft.(8.23) LASER TOWER CHART (see page 20).(8.24) If, due to the firing of other Towers, a given Tower finds that its designated target has been destroyed, then the Tower in question (and all others designated to fire at the same target) does not fire.
(9.0) SPACECRAFTPerhaps the most critical units available to the players are their Spacecraft. These may be used offensively (to carry Nuclear Weapons to the enemy asteroid) or defensively (to intercept incoming enemy Missiles and Spacecraft).(9.1) Spacecraft operate on the Strategic Display and on the Asteroid Maps. Wherever they operate, they must operate within the rules on Spacecraft.(9.11) Each player is assigned a number of Spacecraft by the scenario (15.0), All American Spacecraft are of the same type (Fighter-Bombers) which may act as either Fighters or Bombers. There are three types of Russian Spacecraft: Fighters, Bombers, and Tankers. This designation, however, is more a description of class than ability. Fighters may, in a limited way, perform as Bombers, and Bombers may, within limits, operate as Fighters or, in some cases. Tankers. Tankers may only operate as Tankers. What a particular Spacecraft is to be used for is decided by the owning player, usually at the time of launch. Spacecraft in the COMBAT SPACE PATROL (CSP) or STRIKE ESCORT (SE) boxes are being used as "Fighters" regardless of their nominal designation. Spacecraft in the STRIKE box are being used as "Bombers," again regardless of their nominal designation. Tankers may only be placed in the STRIKE HOLDING or REAR AREA box, or on the Asteroid Map. Tankers may not be placed in COMBAT SPACE PATROL, STRIKE, STRIKE ESCORT, or NEED REFUELING.(9.12) As each Spacecraft is launched from the asteroid, a record is made of the weapons (see11.0,12.0 and 9.3) that it is carrying. Spacecraft being used as "Fighters" never carry Bombs or Rockets. Spacecraft being sent to the STRIKE box always carry weapons. Spacecraft being sent to the STRIKE HOLDING box are usually all assigned weapons. However, on the next turn, when these Spacecraft are moved to the STRIKE box, the owning player has the option of moving some of these to the STRIKE ESCORT box, in which case they are presumed to have "ditched" their Bombs and Rockets in order to operate as "Fighters."(9.13) Each type of Spacecraft has only a limited number of ordnance options (Bomb Loads) to choose from. Basically, when loading your Spacecraft during the Spacecraft Launch

Segment of the Allocation Phase, you can choose from the ORDNANCE OPTIONS CHART (see 9.14),19.14) ORDNANCE OPTIONS CHART (see page 20).(9.15) All Spacecraft (except Tankers) have built-in Lasers, which may be used to attack enemy Spacecraft (see Space Combat 5.0) or the systems on the enemy asteroid (see 9.31).(9.16) Spacecraft which are on the friendly asteroid may be on any type of Landing Field. Note that some Landing Fields are retractable and if a Spacecraft is on one of these it is assumed to be below the surface and would be attacked differently than an exposed Spacecraft when a Nuclear or Fragmentation Weapon exploded nearby.(9.17) Each player must keep a record of the damage points which are inflicted on each of his Spacecraft.19.18) Spacecraft may be repaired, rearmed, and/or refueled on their own asteroid Base. Spacecraft may be landed on any Landing Field (one Spacecraft per field maximum) during the Spacecraft Repair and Refuel Segment of the Preparation and Repair Phase, and be serviced. The services performed on each Spacecraft depends on the location of the field, as explained in (9.19).
(9.19) Any Landing Field which is ADJACENT to an operable Fighter Command Bunker may refuel a Spacecraft, repair up to three points of damage on the Spacecraft, and may load any type of weapon onto the Spacecraft.
Any Landing Field which is NOT ADJACENT to an operable Fighter Command Bunker may refuel a Spacecraft but may only repair one point of damage, and may NOT load N-3 Nuclear Bombs (any other type of weapon is available).
A given Landing Field may perform each function listed above on a given turn, but only on one Spacecraft per turn, and that Spacecraft must be ON that Landing Field.(9.2) ATTACKS ON ASTEROIDS BY MANNED SPACECRAFT
(9.21) PROCEDURE: During the Spacecraft Attack Segment of the Strike Phase of each turn, any Spacecraft in the STRIKE boxes may be used to attack the enemy asteroid. When conducting such attacks, the player controlling the asteroid under attack is known as the "defending" player, and the player controlling the attacking Spacecraft is known as the "attacking" player, (During many turns, both players will have the opportunity to be both the "attacking" and "defending" player). In such attacks, the following procedure is used. The Spacecraft A ttack Segment is divided into a number of "Tactical Turns." There may be several Tactical Turns or only one. The number is dependent on the tactics and luck of the attacking player. (Generally, the tactical procedure will continue for as long as the attacking player has operational Spacecraft carrying Bombs over the asteroid.) In staging his attacks, the attacking player will use Spacecraft from his STRIKE box. As they exit the map (assuming that they are not destroyed in the attack) they are placed into the NEED REFUELING box.
Each Tactical Turn is divided into steps as follows:Step 1: Manned Spacecraft on the Asteroid Map are moved within the limits of the
rules on Spacecraft Movement (9.25). Naturally, on the first Tactical Turn, there will be no Spacecraft on the map and this step will be skipped.
Step 2: At the option of the attacking player, some or all the Spacecraft (if any) in the attacking player's STRIKE box are placed on the map (9.22).
Step 3: Laser Towers on the asteroid fire at the attacking player's Spacecraft (8.2).Step 4: Attacking Spacecraft on the Asteroid Map may fire Lasers and/or Rockets at
systems or units on the asteroid. The effects of Rocket and Laser Fire is resolved and applied immediately.
Step 5: Attacking Spacecraft on the Asteroid Map may drop any Bombs they are carrying onto the asteroid. Such Bombs are assumed to detonate during the Spacecraft Damage Assessment Segment in the hex that the Spacecraft was in at the instant the Bombs were dropped. Burst height is announced by the attacking player at time of drop (see 11.3). Note that several Spacecraft may drop Bombs into a hex during different Tactical Turns, and all will be resolved during the Spacecraft Damage Resolution Segment. While this is a slight distortion of reality, it does avoid the necessity for determining the effect of the blast on Spacecraft in the vicinity. It can be assumed that due to the low gravity, a given Bomb can be made, by various types of retro-rockets, to fall more or less at any speed desired.
The tactical procedure is repeated for as long as the attacking player either has Spacecraft on the map, or Spacecraft not yet committed to the map which he wishes to commit.
(9.22) INTRODUCTION OF ATTACKING SPACECRAFT TO THE ASTEROID MAP. On theTactical Turn during which a given Spacecraft is first placed on the Asteroid Map, it may be placed on any hex but is considered to be at "h igh" altitude (see the LASER TOWER CHART

8.231. On the NEXT Tactical Turn, during Step 1, the Spacecraft is moved EXACTLY ONE hex, and is assumed to be at "low " altitude. It remains at "low " altitude until using the exit procedure. (Exception — see9.231.)(9.23) EXIT PROCEDURE. This may be done either of two ways. A Spacecraft anywhere on the map may move EXACTLY ONE hex (during any Step 1) and be declared (by the owning player) to be at "h igh" altitude. On the next Tactical Turn it is removed from the Asteroid Map and returned to the NEED REFUELING box on the Strategic Display. Alternatively, it may move by normal movement to the outermost ring of hexes. Even if it has sufficient movement to continue moving, it may not leave the map on that turn. If it remains in the outer ring, it may be declared to be at "h igh" altitude, and may exit the map on the next Tactical Turn, at which time it would be placed in the NEED REFUELING box.(9.231) A Spacecraft which was placed on the map on one Tactical Turn may, on the next Tactical Turn, exit the map and return to the Strategic Display, if the owning player so desires (because of damage to the Spacecraft or a changing situation in the attack).(9.232) No Spacecraft may, having once exited the Asteroid Map on a given Tactical Turn, return to the asteroid on that Tactical Turn. When leaving the Asteroid Map, the Spacecraft MUST go to the NEED REFUELING box, and on the next turn, return to the home asteroid to be refueled.(9.24) Spacecraft at high altitude may NOT fire Lasers or Rockets, nor may they drop Bombs.(9.26) Spacecraft on the Asteroid Map may move a maximum of 3 hexes per Tactical Turn. They must move at least one hex. Spacecraft on the Asteroid Map must maintain a specific facing, each must always be pointed directly at one of the six surrounding hexes, and this facing can only be changed within certain specific rules. After entering each hex during their movement Spacecraft may change their facing by up to 60 degrees. Spacecraft do not pay any movement penalties for this change in direction. Note that facing is very important when Spacecraft are firing Lasers or Rockets (see 9.3). The decision on turning must be made immediately upon entering the new hex, before Rockets or Lasers are fired. Note that all Spacecraft MUST, in effect, move directly ahead one hex at the start of Step 1 of each Tactical Turn.(9.26) As a Spacecraft drops a Nuclear or Fragmentation Bomb, this is marked off the record sheet for that Spacecraft (obviously, each Bomb can only be dropped once). The effect of all Nuclear and Fragmentation Weapons dropped during the Spacecraft Attack Segment are resolved, and take effect, during the Spacecraft Damage Resolution Segment. Whenever weapons are dropped, players should note the hex number, weapons type, and burst height. Players may wish to use blank counters (not provided) to create special markers for this purpose.(9.27) Spacecraft belonging to the defending player may not enter the Asteroid Map during this segment. This is prohibited by tactical doctrine. The Laser Towers are fully automatic, and any kind of "friend or foe" device would slow the computers down and be highly vulnerable to jamming or deception. Additionally, combat maneuvers close to the surface of the asteroid are rather dangerous (high-speed maneuvers could run the combatants into the side of a mountain). Additionally, Spacecraft of the attacking player may NOT land on the defending asteroid. There is NO provision in this game for landing "troops" onto the other asteroid.(9.28) Bombs are dropped ONLY into the hex occupied by the Spacecraft during Step 5 of the Tactical Turn.(9.3) LASERS AND ROCKETSSpacecraft may attack the enemy asteroid directly with their built-in Lasers, and with Rockets carried as part of their Bomb Loads.(9.31) All Spacecraft except Tankers have Lasers. Lasers may be used to attack any exposed unit (Engineer, Missile, or Spacecraft) or a Laser Tower. The Spacecraft must be at "low " altitude. The Laser may be used each Tactical Turn during Step 4. The target must be directly ahead of the Spacecraft and at a range of 3 hexes or less. In the illustration below, the shaded hexes may be fired into by Lasers.

(9.311) When attacking Laser Towers, use the SPACECRAFT VS. LASER TOWER CHART(9.312).(9.312) SPACECRAFT VS. LASER TOWER CHART (see page 20).(9.313) When attacking exposed units, the attack is resolved on the FRAG TABLE (11.5).(9.32) Manned Spacecraft may carry Rockets as a part of their ordnance load. Each Rocket has an "explosion factor" of 5. During Step 4 of each Tactical Turn, any Spacecraft on the enemy Asteroid Map may fire any or all of the Rockets which it is carrying. These have a maximum range of 5 and a minimum range of 2 (they cannot be fired at a one hex range). To determine if a Rocket has hit its target (each must be resolved individually) roll one die. If the result of the die roll is equal to or less than 4, the Rocket has hit its target. After all Rockets have been fired (by all Spacecraft on a given Step 4) their explosion factors (5 each) are totaled and damage is computed as if a Nuclear Weapon of that force had exploded in the hex. Damage from Rockets does not spread into surrounding hexes. Rockets which "miss" are presumed to have landed in an open area, and the small warhead will not cause damage except by a direct hit. Rockets cannot be fired at units directly, but can be fired into the same hex, ostensibly at the system in that hex. However, exposed units are damaged by blast as a "side effect" and this can be quite dangerous for exposed Spacecraft. The most common targets for Rockets are Laser Towers and Spacecraft sitting on Landing Fields.
Rockets may be fired at any hex which is within the 120-degree arc ahead of the Spacecraft. In the illustration below, the shaded hexes may be fired into by the Rockets of the Spacecraft shown.
/ \/ V —
(10.0) MISSILESMissiles are an important part of the offensive armament of each of the asteroid Bases. Each asteroid Base is equipped with several launchers for Missiles. These launchers include Silos and surface Launch Pads. Both asteroids have a number of Missiles, including a variety of Warheads.(10.1) Each player is assigned a number of each of the five types of Missiles by the scenario(15.0). Before play begins, each player obtains from the counter-mix a number of Missile counters equal to the number of Missiles assigned to him by the scenario. Each player then designates each of his Missile counters to be a specific type of Missile, as specified in the scenario. This is done to preserve secrecy, since at various times in the game the enemy player may have the opportunity to fire at several of your Missiles, and if he could tell which type of Warhead was in each, he would naturally direct his attacks against the most powerful Missiles. A player might, for example, designate Missiles №2, 5, 6, and 10 as Type "A ,” and Missiles № 1, 7, 8, and 12 as Type "B ,” and so on.(10.11) MISSILE TYPE CHART (seepage ).(10.12) During game set up, Missiles may be placed in Silo hexes (one per hex) or in Missile Command Bunkers (no limit). Within these limits, the player may place his Missiles as he sees

fit. The usual procedure is to load all the Silos and then distribute the remainder among the Missile Command Bunkers, but the players may feel free to pursue whatever strategies they can create.(10.2) During the Missile Preparation Segment of the Preparation and Repair Phase (Segment 2-A) of each turn, each player may take up to two Missiles from each of his operable Missile Command Bunkers and place them on any adjacent, operable. Launch Pad (or Silo) hexes. No more than one Missile may be on each Launch Pad (or in each Silo) at any time.(10.3) Missiles may be damaged before they are launched by attacks on the asteroids. Missiles cannoj: be repaired, and if damaged before launch are simply easier to destroy by enemy Spacecraft and Space Defense Missiles.(10.41 Missiles are launched in the Missile Launch Segment of the Allocation Phase (Segment1-A) of each turn. During this phase, each player may, at his option, launch any Missiles which he has on operable Launch Pads or in operable Silos. A player is never required to launch Missiles. Missiles may NOT be launched directly out of Missile Command Bunkers, and Missiles may never be in any hexes on the owning player's Asteroid Map except Missile Command Bunkers, Silos, and Launch Pads.(10.5) Once a Missile is placed on a Launch Pad or into a Silo it may NEVER be taken back to the Command Bunker.(10.6) When launched, the owning player must record, for each Missile, the target hex (or target hexes in the case of MIRV (multiple Warheads) and the burst height (either high or low). MIRV warheads may be designated into any hexes (they are not required to be any particular distance or pattern from each other), and may even be targeted into the same hex. Once launched, the recorded information may not be changed. The records are kept on a sheet of scratch paper, and this information is NOT shown to the enemy player until each particular Missile has reached its target.(10.71 While on the Strategic Display, Missiles may be attacked by manned Spacecraft. In such a case, the owning player (of the Missile) informs the attacking player of the defense factor of any Missiles under attack, and combat is then resolved according to the rules on Space Combat (5.0). The owning player (of the Missiles) is not required to announce the defense factors of any Missiles which are not under attack, or to announce these factors before the attacking player has designated which Missiles his Spacecraft will attack.
Damage scored against Missiles is recorded in damage points. The fourth damage point scored against a given Missile destroys it.(10.8) Upon reaching the target asteroid, the Missile may undergo attack by the Space Defense Missile Systems. If the Missile survives this attack, it is assumed to have hit the target asteroid. However, it may not have landed exactly where it was targeted, and may have gone considerably off course. To determine if the Missile has scattered, role a single die. All Missiles have a basic accuracy rating (this is 4 for American Missiles and 3 for Russian Missiles). If the die roll is equal to or less than the accuracy rating, the Missile has hit its target. Place the Missile counter in the target hex, and resolve the scatter on your other Missiles. If the Missile is found to scatter (the die roll exceeded the accuracy rating) then roll a second die to determine which direction the Missile scattered. There is a Scatter Diagram on the Mapsheet, which will convert the die roll into a direction. Then roll a third die, and determine the distance scattered from the MISSILE SCATTER TABLE (10.81).
If a given Missile is found to scatter off the Mapsheet, or into the outer row of hexes (example, hex 0110 on the American Asteroid Map) then it is assumed to have completely missed the enemy asteroid and exploded harmlessly in space. MIRV Missiles are presumed to separate into their component Warheads immediately after SDM fire. All MIRV Warheads are treated as separate Missiles for targeting and scatter resolution. If the players wish, all the Warheads of a given MIRV Missile may be targeted on the same hex, or on different hexes, and at various altitudes (see 11.8).(10.81) MISSILE SCATTER TABLE (see page21).(10.9) Missiles are a limited asset and a one-way delivery system. The scenario (15.0) designates how many of each type of Missile is available. Once a given Missile has reached its target, or has been destroyed, the counter representing that Missile is removed from the game and is assumed to be destroyed. Missiles cannot be used more than once.
(11.01 NUCLEAR WEAPONSNuclear Weapons are delivered to the enemy Asteroid Map by Missiles or Spacecraft. Nuclear Weapons carried by Missiles (referred to as "Warheads") impact during the Missile Impact Segment, and the damage caused is resolved in the Missile Damage Resolution Segment.

Nuclear Weapons which are carried by Spacecraft (referred to as "Bombs") are dropped in the Spacecraft Attack Segment, and their damage is resolved in the Spacecraft Damage Resolution Segment.(11.1) Nuclear Weapons are primarily intended to damage systems on the asteroids, however, they may, incidentally, damage units (Spacecraft, Missiles, or Engineers).(11.2) There are three types of Nuclear Weapons (designated N-1, N-2, and N-3, with N-3 being the most powerful). The number and type of Nuclear Weapons which are carried by a given Missile is shown on the MISSILE TYPE CHART (10.11). The number and type of Nuclear Weapons which may be carried by a given Spacecraft is shown on the ORDNANCE OPTIONS CHART (9.14).(11.3) Each Nuclear Weapon must be designated to be set off as either a "low altitude" or a "high altitude" burst. In the case of Nuclear Weapons carried by Missiles, this must be secretly recorded when the Missile is launched. In the case of Nuclear Weapons carried by Spacecraft, the burst altitude must be designated at the time that the Bomb is dropped (during the Spacecraft Attack Segment).
(11.31) Note that in the case of Nuclear Weapons dropped by Spacecraft, the altitude of the Spacecraft dropping the Bomb has NO EFFECT on the "altitude" of the burst. Altitude is a relative term, and while a Spacecraft at "low ” altitude is lower than one at "h igh" altitude, it is still higher than the burst height of a Bomb set to go off as a "high burst." A Spacecraft at "h igh" altitude may not drop Bombs (since the aiming systems are not sufficiently accurate to insure an effective hit), and a Spacecraft at "low ” altitude may drop Bombs designated for a "h igh” or "low " burst.(11.32) All decisions of burst height are made by the owning player based on his judgment of the target type (exception — see 6.35). Generally, ''h igh" bursts will give less destructive effect over a wider area.111.4) During the appropriate Damage Resolution Segment, the effects of the Nuclear and Fragmentation Weapons are determined and recorded. Note that Laser and Rocket damage takes effect immediately during the Spacecraft Attack Segment.
(11.41) The WEAPONS EFFECTS TABLES (11.411) are used to calculate the amount of explosive force that is exerted into each hex. From this force and the defense factor of the hex (printed on the Mapsheet in red) the damage to that hex can be calculated. For each weapon that explodes on the Asteroid Map, find the weapon type and the height of burst on the WEAPONS EFFECTS TABLES (11.411). To determine the amount of damage caused in any given hex by that weapon, determine the distance in hexes from the hex in question to the blast hex. In such calculations, do not include the blast hex, but do include the hex in question. (For example, the actual blast hex is "0 " hexes from the impact, those hexes adjacent are "1 " hex distant, and so on.)
By cross-indexing this information (weapons type, burst height, distance from burst) on the chart, you will find a number, which is the number of "explosion factors" that are applied to that hex. For example, an N-2 Bomb exploding in a "low " burst would exert 50 explosion factors into the hex it landed in, 25 into the six immediately surrounding hexes, and 5 into the 12 hexes that are two hexes from the blast.
Note that in high altitude bursts, the outermost hexes in the "blast radius" are not marked with numbers, but with an *. This indicates that shrapnel (fragments) only have spread into these hexes. Any explosed UNITS (Engineers, Spacecraft or Missiles) in such hexes would be attacked once on the FRAG TABLE (12.5) due to this blast.(11.411) WEAPONS EFFECTS TABLES (see page 21).(11.42) To determine the damage done to a hex, divide the number of explosion factors applied to that hex by the defense factor (as printed in red in the hex) of that hex, dropping all fractions. The resulting number is the number of "damage steps" applied to that system. This is recorded by placing a damage marker of the appropriate number in that hex. Damage markers marked as "X " are used to designate system hexes which are irreparably damaged.
(11.43) The effects of these damage steps on the operation of damage systems is shown on the DAMAGE EFFECTS TABLE (11.44).(11.44) DAMAGE EFFECTS TABLE (see page20).(11.45) Damage steps may be repaired by Engineer units, see (7.0).(11.46) Damage steps are cumulative. Damage caused in the same or prior turns to the same hex (unless repaired) is reflected by adding the additional steps.
EXAMPLE: A given Laser Tower has suffered two steps of damage in a prior turn. It has a "2 " marker on it. During the Spacecraft Attack Segment, a Spacecraft fired two Rockets

at this Laser Tower. One hit, causing a damage step. The "2 " marker was changed to a "3 " marker. During that same Spacecraft Attack Segment, two Nuclear Bombs landed near the Laser Tower. As a result of one of these, one more damage step was applied to the Tower, changing the marker to a "4 ." The other Bomb was an N-2 which landed in an adjacent hex. This resulted in five damage steps, bringing the total to 9, and an "X ” marker was placed on the Tower. It can never be repaired.(11.471 The normal procedure for resolving damage is to start at one end of the asteroid and work to the other, resolving each explosion in turn. When resolving a given Nuclear (or non- Nuclear) Explosion, start with the impact hex, and then resolve each "ring" of hexes in an expanding circle until the blast is entirely resolved. (Players wishing to speed up the game could ignore "5 " results on the WEAPONS EFFECTS TABLES. While this will result in a certain amount of inaccuracy, the game will play considerably faster.)(11.481 Whenever two Nuclear Weapons land in the same hex, their effects are combined. Example: An N-3 which exploded in a "low " burst, and an N-2 which exploded in a "h igh" burst, would be combined into: 130-65-20-5.
This can result, in the game, in particularly critical targets having five or six Bombs dropped on them by marauding Spacecraft.(11.5) The following rules apply to UNITS in a hex which has explosion factors applied to it. Each unit which is "exposed" (on the surface) will suffer on attack on the FRAG TABLE (12.5) for each FIVE explosion factors applied to that hex. Each unit which is inside a system (below the surface) will suffer one attack on the FRAG TABLE for each damage step applied to the system.(11.6) Any unit that is inside a system when the system is completely destroyed (takes its 9th damage step) is considered to be destroyed.(11.7) All types of Landing Fields are really little more than large open areas. These areas are never irreparably destroyed. No more than eight damage steps may be scored on them. In the event that more than eight are scored on one, the excess is ignored.
(11.8) EXAMPLE OF NUCLEAR WEAPONS RESOLUTIONThe target is the American Asteroid. A t the time of the attack, there is a Missile in the Silo at 1114, a Spacecraft on the exposed Pad at 0712, an Engineer in the Command Bunker at 1010, and a Missile on the exposed Pad at 1314. The Missile is a type A, with an N-3 Warhead, and is targeted for a low burst on hex 1013. The die roll for accuracy is a "5 ," indicating that the Missile has scattered. A second die roll (for direction) is a "2 ," and the third die roll (for distance) is a "1 ." Thus the Missile scatters one hex in direction 2, and lands in hex 1012. Consulting the WEAPONS EFFECTS TABLES, we note that for an N-3 on a low burst, the explosion factor in the impact hex is 100. As the defense factor of the Silo in the impact hex is 20, five damage steps (100/20 = 5) are applied to the Silo. If there had been a Missile in this Silo, it would have been attacked five times on the FRAG TABLE. In the first "ring" of hexes around the impact hex (the six hexes adjacent to it) the explosion factor is 60. As it happens, hexes 1011 and 1112 are empty. However, had there been an Engineer unit exposed on the surface in one of these hexes, it would have been attacked 12 times (60/5 = 12) on the FRAG TABLE, and would probably have been eliminated. Hex 1113 contains a tunnel (defense strength 15) which receives 4 damage steps. The Command Bunker at hex 1013 takes 2 damage steps (60/30 = 2) while the Silo in hex 0913 (with a defense strength of only 20) takes three. The Landing Field at 0912 takes 12 damage steps. The excess over 8 would be ignored.
In the next ring of hexes (the twelve hexes that are two hexes from impact) only 20 explosion factors will be applied. In hex 1010 this results in one damage step (and one attack on the FRAG TABLE for the Engineer unit). Hex 1111 takes one step, hexes 1211 and 1212 take two each, and 1213 takes 4. Hex 1114 takes one damage step (and the Missile in it takes one roll on the FRAG TABLE), as do hexes 1014 and 0914. Hexes 0813 and 0812 take 4 steps of damage. The Command Bunker at 0811 will take one step (20/15 = 1.33333, drop fractions). The Laser Tower at 0911 will take 2 steps of damage. Hexes 0910 and 1312 are not affected because the defense factors are greater than the 5 explosion points.
In the last ring of hexes to suffer from the blast (only 5 explosion points per hex) one step of damage is caused to hexes 1110, 1314 (where a die roll is made for the Missile on the FRAG TABLE), 1214,1115,1015,0915, 0814,0713,0712 (where a die roll is made on the FRAG TABLE for the Spacecraft), 0711 and 0810.
(11.9) EXAMPLE OF TERRAIN EFFECT ON NUCLEAR BLASTIf an N-3 Nuclear Weapon were to detonate in a low burst in hex 1512 (of the American Asteroid) hexes 1312, 1211, 1410, 1409, 1310, and 1710, although nominally within the blast radius of the Bomb, would not be effected since the blast is blocked by the mountains (see 6.3 illustration).

(12.0) FRAGMENTATION BOMBSFragmentation Bombs are non-Nuclear Weapons which produce large amounts of shrapnel. These Bombs are primarily used to damage exposed units (Missiles, Spacecraft, and Engineer units on the surface). Their primary advantage over Nuclear Weapons is their larger blast area compared to their size. Naturally, the existence of these Weapons largely serves to encourage the enemy player not to expose units, which limits their use.(12.1) Fragmentation Bombs come only in one size.(12.2) Fragmentation Bombs may be carried by Spacecraft (they take the same space as an N-1 Bomb) or by Type E Missiles (which carry four MIRV Warheads).(12.3) Fragmentation Bombs are normally set for "h igh" bursts, so their blast radius will cover the maximum area. However, they may be used for "lo w " bursts, in which case they have a very limited explosion factor.(12.4) All exposed units within 4 hexes of the detonation hex of the Fragmentation Bomb (when it is set off at high altitude) are attacked once on the FRAG TABLE (12.5).(12.5) FRAG TABLE (see page 20).
(13.0) MINING SYSTEMSThe purpose of the Asteroid Bases is to mine the Asteroid Belt. In this regard, the Bases serve as home ports for the mining ships, and then process the ore and ship it back to Earth. For game purposes, however, this entire system is abstracted into a simple count of the number of operable "mining tracks" that each player has. There are no counters for "mining ships" or "cargo ships."(13.1) Each mining track consists of: a Cargo Ship Landing Field, adjacent to which MUST be a stockpile hex, adjacent to which must be a Processing Plant (P), adjacent to which there MUST be a Landing Field. An example of a mining track would be, on the Russian Asteroid, hexes 0607, 0608, 0609, 0710. A given Cargo Ship Landing Field, Landing Field, or Stockpile hex may be in several (any number) of mining tracks, but each Processing Plant may only be in a single mining track.(13.2) All four elements of the mining track must be contiguous (and in order), though not necessarily in a straight line.(13.3) To be counted as an operable mining track, all four elements MUST be operable (1 damage step or less).(13.4) Both players begin with twenty mining tracks.
(14.0) SET UP AND PREPARE FOR PLAYPlayers should lay the Mapsheet out flat. One player takes the Russian units and sits by the side of the map with the Russian Asteroid. The other player takes the American units and sits by the side of the map with the American Asteroid. The Strategic Display is placed in a convenient place to one side of the map. Players decide which scenario they will play (which is largely a matter of how much time is available), and select their initial units from the counter mix. The damage markers should be placed in a convenient place accessible to both players.
Both players prepare a control sheet for their Missiles and Spacecraft. For Missiles, players should note the Warhead type. The target hex, burst height, and any damage scored on the Missile will be recorded as the game progresses. For Spacecraft, the players should provide space on their control sheet to note what weapons are being carried and what damage has been taken. After set-up is complete, and all control sheets have been prepared, play begins with turn 1.
(15.0) SCENARIOSThere are two scenarios in ASTEROID ZERO-FOUR. While both represent the same battles, the Introductory Scenario has fewer units, and consequently takes less time to set up and play. Players, regardless of their experience with other games, should play the Introductory Scenario first, since it will give them a chance to master the skills needed to play the game well. Players who are content with the Introductory Scenario should not feel obligated to play the Advanced Scenario.(15.1) THE INTRODUCTORY SCENARIO(15.11) INITIAL SET UP: Both asteroids are at full operational levels and have no prior damage. All units are undamaged.(15.12) Each player receives six Engineer units, which may be set up in any Command Bunkers

on the owning player's Asteroid Map. Engineer units in this scenario have four (4) activity points per turn.(15.131 RUSSIAN INITIAL FORCES:SPACECRAFT: Eight Fighters, four Bombers, and one Tanker. Three of the Fighters may be set up in the Russian COMBAT SPACE PATROL box. All other Spacecraft must be set up (one Spacecraft per hex) on Landing Fields on the Russian Asteroid Map.
MISSILES: 3 x Type "A ,"3 x "В ," 4x "C ," 4x "D ," 1 x "E " (15 total). Set up in Missile Silos and Missile Command Bunkers as per the Missile Rules (10.2).(15.14) AMERICAN INITIAL FORCES:SPACECRAFT: Twelve Fighter-Bombers. Three may be set up in the American COMBAT SPACE PATROL box. All others must be set up on Landing Fields on the American Asteroid Map (one Spacecraft per hex).
MISSILES: 1 xType "A ," 2x "B ,"3 x "C ,"2 x "D ,"2 x "E " (10 total). Setup in Missile Silos and Missile Command Bunkers as per the Missile Rules (10.2).(15.15) REINFORCEMENTS:These units represent Spacecraft which left Earth just before the solar flares began, and which arrived during the course of the battle. Reinforcements arrive during the Preparation Phase, and are placed in the appropriate REAR AREA box on the Strategic Display. Thereafter, they may be moved to the asteroids during the Allocation Phase, as per the Sequence of Play (3.0).(15.151) RUSSIAN REINFORCEMENTS:Group 1 — One Tanker, one Fighter, three Bombers, arrives on turn 2.Group 2 — One Tanker, one Fighter, three Bombers, arrives on turn 3.(15.152) AMERICAN REINFORCEMENTS:Group 1 — Five Fighter-Bombers, arrives on turn 4.Group 2 — Five Fighter-Bombers, arrives on turn 5.Group 3 — Five Fighter-Bombers, arrives on turn 6.(15.16) SCENARIO LENGTH: 10 turns.(15.171 VICTORY CONDITIONS: After the end of the scenario, players play an additional five turns, during which only Engineer units may move and function. A t the end of that time, the player with the most complete and operable mining production tracks wins the game. Winning by 1,2, or 3 tracks is a Marginal Victory. Winning by 4 to 7 tracks in a Tactical Victory, and winning by eight or more tracks is a Decisive Victory. Destroying all enemy mining production tracks and all enemy Spacecraft is a TOTAL VICTORY.(15.21 THE ADVANCED SCENARIOThis scenario covers the same battle as the Introductory Scenario, but uses more units to do so. It takes approximately twice as long to play. Players may, if they wish, adapt parts of this scenario to the Introductory Scenario. All elements of this scenario are given as changes to the Basic Scenario.(15.21) Same as (15.11).(15.22) Same as (15.121, except that Engineer units now have six activity points.(15.231 RUSSIAN INITIAL FORCES:SPACECRAFT: Increase to ten Fighters, eight Bombers, one Tanker. May put up to five Fighters in CSP box.MISSILES: Increase to 5 x "A ," 5 x "B ," 7 x "C ", 7 x "D, 1 x "E " (25 total).(15.24) AMERICAN INITIAL FORCES:SPACECRAFT: Eighteen Fighter-Bombers. Up to five may be in CSP.MISSILES: Increase to 2 x "A ," 4 x "B ," 6 x "C ," 5 x "D ," 3 x "E " (20 total).(15.25) REINFORCEMENTS:RUSSIANS: Increase each group to include one Tanker, three Fighters, five Bombers. AMERICAN: Increase each group to include eight Fighter-Bombers,
NOTE: In this scenario, there will not be sufficient counters to bring the reinforcements onto the board. Simply keep a record on scratch paper of how many reinforcements are in the REAR AREA box, and bring these forward ONLY when casualties make counters available. The counter-mix serves to limit the number of Spacecraft in operation to the amount that could reasonably be controlled by the Control Stations on the asteroids. Players may, if they wish, send damaged Spacecraft to the REAR AREA to be exchanged with undamaged Spacecraft. In effect, this transfer would be done on paper only, since the undamaged Spacecraft would use the counter of the damaged one. The owning player would simply note that one of the Spacecraft in the REAR AREA had "X " number of damage points on it.(15.26) The scenario continues until neither player has any Spacecraft or Missiles remaining.
Missiles or Spacecraft that are in or on systems that cannot launch them are not considered in this determination. Alternatively, if a period of five turns passes without any damage steps being applied to any system on either asteroid (no effective attacks are launched) then the scenario is over.(15.27) VICTORY CONDITIONS: On turn 5, and on each 5th turn thereafter (10, 15, etc.), each player counts the number of operable mining tracks that he has, and records one victory point for each such track. A t the end of the scenario, ten turns of Engineer operations are performed, and then each player scores 10 points for each operable track. The player with the most points wins the game. Winning by 1-20 points is a Marginal Victory, by 21-50 points is a Tactical Victory, and by 51 points or more is a Decisive Victory. Destruction of all enemy mining tracks and all enemy Spacecraft is a TOTAL VICTORY.
(16.0) PLAYER'S NOTESASTEROID ZERO-FOUR probably provides more distinct strategic options to its players than 95% of the games in print. This multiplicity of options made it imperative that the designer make sure that none of them was THE OPTION (the one sure-fire way to win the game).
The first strike can, if properly conducted (and with a little luck), decide the game. Often, it decides that neither player is going to have much left by turn 3 or 4. Players will quickly note that if, on the first turn, a strike is launched on the enemy asteroid, it will include only the five Silo-based Missiles. A strike sent into the STRIKE HOLDING box will allow four (or six, in the case of the Russians) additional Missiles to be readied, but if the enemy player launches a first turn strike most of these will be destroyed before they can be launched. Of course, if the enemy launches a turn 1 strike, and you send yours into STRIKE HOLDING, you will catch most of his Spacecraft on their Landing Fields on turn 2.
Another possible early strategy is to forget about a first turn (or even second turn) strike and put all your Spacecraft into COMBAT SPACE PATROL, hoping to win space superiority quickly. Unfortunately, this allows your enemy, once he sees what you are doing, to ready Missiles and Spacecraft on his asteroid without fear of attack, since you must land and arm your Spacecraft before you can strike (giving him a turns' warning).
Something that can be debated endlessly is target priority in the early part of the game. Remember that the purpose is to get the mining tracks, but the means to the end is to establish superiority. Space Defense Missiles, if knocked out, will open up the asteroid to nuisance attacks with small number of Spacecraft. Careful analysis of the asteroids will reveal certain hexes that, while of no value in themselves, can "unplug" whole batteries of Laser Towers. Missile Launch Facilities are good targets for a first turn strike, but after that, seldom contain enough Missiles to be worth shooting at (in the advanced Scenario, with more Missiles, this period stretches to about turn 4). Fighter Command Bunkers, if destroyed, or at least kept damaged, prevent him from repairing his Spacecraft at the faster rates and can lead to eventual space superiority, if you are around to enjoy it. At least a few of your Spacecraft should be detailed to drop large Bombs onto Engineer units, since damage control and repair is half the game. Players might consider targeting the small MIRV Warheads along the edges of the asteroids to take out the Laser Towers (the small Bombs are really useful only against softer targets such as Lasers and SDM's). If you can ever achieve the optimum condition of having more Spacecraft than your opponent and have knocked out most of his Lasers, you can selectively destroy his asteroid hex-by-hex. Careful analysis of the maps will show occasional weak links in production tracks (mostly isolated Landing Fields) which can reduce the enemy's ore processing capability. The Retractable Landing Fields are, of course, prime targets and should be taken out at the first opportunity.
The game is a race, but not so much between the players as between their resources. Can you keep your asteroid operating until he runs out of something to attack you with? That is the ultimate challenge of this game.
(17.0) DESIGNER’S NOTESWhen I began to conceptualize the game, it was relatively easy to design the asteroids (I consulted fellow engineers in the metalurgy field for the required size of the ore plants) based on the space required for each type of system. The game maps were taken from engineering drawings I made of the "actual" asteroids. The weapons would have to be nuclear to do much damage to the kind of concrete and steel structures I envisioned (I calculated the effects from an Army manual on nuclear munitions) and they could obviously be delivered by either Missiles or Spacecraft.
One point that I feel I should comment on is that we did not resort to the "polite" surrogate enemies (such as Eastern Socialist Alliance or European Marxist Empire) but called a Russian a Russian and let it be done at that. I doubt seriously if their sensibilities will suffer and have always found it just a bit silly to pretend that the Russians are somebody else.

(18.0) CREDITSGame D esign..........................Stephen V. ColeGame Development............... Leslie H. DixonRules Editing and Graphics . . . Allen D. Eldridge Cover Painting........................A. J. BelflowerPlaytesting.............................. Mark Moody, David W. Crump, Barry Jacobs and
Paul Knox.
(8.23) LASER TOWER CHARTALTITUDE LOW HIGHRange (hexes) 0 1 2-4 5-6 0-3 4-(Die Roll1 ................................. 0 1 2 1 1 12 ................................. 0 1 1 1 1 03-4.............................. 0 0 1 0 0 05-6.............................. 0 0 0 0 0 0The number shown is the number of damage points scored on the target Spacecraft.
(9.3121 SPACECRAFT VS. LASER TOWER CHART Die Roll # of Damage steps on Tower
1 ................. 22 -3 ............. 14 - 6 ............. 0
(11.44) DAMAGE EFFECTS TABLE# of Damage Steps Effect on the System (hex)
0 - 1 .............................. No Effect2 - 4 .............................. System cannot function. Electrical power can be trans
mitted through such hexes, and Engineer units can move through them (by subsurface movement).
5 - 8 .............................. System cannot function. Electrical power cannot be transmitted through such hexes, and Engineer units cannot move through them (by subsurface movement).
9 or m ore...................... Same effects as 5-8, but system (hex) is now totally destroyed and can never be repaired.
(12.5) FRAG TABLEDie Roll Damage Points 1 4 2 3 3 2 4 1 5 0 6 0
(8.12) SPACE DEFENSE MISSILE CHART n i0 Rnii TARGET TYPE
Missile Spacecraft 1 X X 2 X X 3 X 2 4 2 1 5 1 1 6 1 0X = Target is destroyed# = Number of damage points scored
(9.14) ORDNANCE OPTIONS CHARTSPACECRAFT TYPE ORDNANCE OPTIONS AVAILABLE Bomber (USSR)............. A. 1x N-3 Bomb
B. 2 x N-2 BombsC. 1 x N-2 + 2xN-1 BombsD. 4xN-1BombsE. Fuel (when used as Tanker)
Fighter (USSR)............... A. 4 x RocketsB. 2 x Rockets + 1 x N-1 Bomb

Fighter-Bomber (US) . . . A. 1 x N-2 + 1 x N-1 Bombs + 2 RocketsB. 3 x N-1 Bombs + 2 RocketsC. 2 x N-1 Bombs + 4 Rockets
(Fragmentation Bombs may be substituted for N-1 Bombs on a one for one basis).
(10.11) MISSILE TYPE CHARTTYPE WARHEAD DEFENSE RATINGA ......................................... N-3 2В ......................................... N-2 2С ......................................... N-1 3D ......................................... 3 x N-1 2E ......................................... 4XFB 3Type D and E are "MIRV” Missiles, each Warhead must be targeted separately. FB is Fragmentation Bomb.
110.81) MISSILE SCATTER TABLEDIE ROLL HEXES FROM INTENDED TARGET1 .............................. 12 .............................. 1 3 2 4 2 5 3 6 4
(11.411) WEAPONS EFFECTS TABLESWEAPON HIGH BURST LOW BURST(Hexes from impact hex) 0 1 2 3 4 5 0 1 2 3 4 5N-1 ...................................................... 10 * * - - - 20 5 - - - -N-2 ...................................................... 30 5 * * - - 50 25 5 - - -N-3 ...................................................... 60 20 10 * * 100 60 20 5 - -Fragmentation Bomb.......................... * * * * * - 5 * . . . -EXPLANATIONtt = The number of explosion factors applied to all hexes that distance from the
impact hex.* = Shrapnel (only) extends into hexes that distance from the impact hex. All
exposed units in such hexes are attacked once on the FRAG TABLE (12.5).= No blast or shrapnel extends into hexes this distance from the impact hex.
(5.4) MANNED SPACECRAFT TABLEt v p p DAMAGE ATTACK DEFENSE
r c POINTS FACTOR FACTORFighter (USSR)................. 3 10 4/3Bomber (U SSR )............... 5 5 3/2Tanker (USSR)................. 5 0 0/3Fighter-Bomber (US)......... 4 9 4/3Missile................................. 4 0 0/*
‘ The defense factor of a Missile varies with Missile type, see MISSILE TYPE CHART (10.11).Damage points is the number of such points required to destroy the Spacecraft or
Missile. For each such point of damage, there are detrimental effects on the combat factors. Attack factor is the factor used in combat when Spacecraft is in the STRIKE ESCORT or COMBAT SPACE PATROL box.
Defense Factor: The first number shows the defense factor of the particular Spacecraft when it is in the STRIKE ESCORT or COMBAT SPACE PATROL box, the second number when it is in the STRIKE box.I5.5) MANNED SPACECRAFT COMBAT RESULTS TABLE
ATTACKER SUPERIORITY Die Roll 2 3 4 5 6 7 8 9 10 1 1 1 1 2 2 2 3 3 4 2 0 1 1 1 1 2 2 3 4 3 0 0 1 1 1 1 1 2 2 4 .. . . 0 0 0 0 1 1 1 2 2 5 0 0 0 0 0 0 1 1 2 6 0 0 0 0 0 0 0 1 1# is the number of damage points scored on the target. An attacker superiority of more than 10 is considered to be 10. An attacker superiority of less than 2 is no effect.

TH€ UNDCCLRRCD ШЙП IN SPRCC!
"Large numbers of missiles and spacecraft approaching from the Russian Asteroid. W e M U S T launch our interceptors N O W , S ir !"
" N o sense trying to look peaceful any longer. G o ahead and launch them, and you may as well get our strike forces off this rock before we get plastered!"
Each player com m ands one of the tw o Asteroid Bases. A t his disposal are Missiles to bombard the enem y Base, and Laser To w e rs and Space Defense Missiles to defend his ow n Base. Manned Spacecraft can be used as defensive interceptors or to deliver nuclear weapons. Each warhead that impacts is calculated for yield, burst height and blast radius; resulting in damage to the various installations on the Asteroids. Engineer units on the Base can repair damaged systems, but are themselves vulnerable to nuclear and con ventional explosions. Th e game presents players w ith a unique challenge — to keep the civilian mining system s operating in the midst of a nuclear war.
ASTEROID ZERO-FOUR is an action packed game for two players. Both must allocate their resources to produce the most devastating attack possible. Skill, cunning and a little bit of luck will bring you to ultimate victory.
ASTEROID ZERO-FOUR
— Introductory and Advanced scenarios — playing time: 1 to 4 hours.— Complexity level — Moderate.
1002

J ] Q Э f l V
saxoa iN3WAOid3a NVQiaaiMV
mm
Ш Э $ а
mm
0НШ10Нmm
v a u v
u v a u
apis smi uo paAoidap aje suun ueauauiy
ю н ш
a a v d s
lVflwoa
m m m
азам
COMBATSPACEPATROL
NEEDREFUELING
Russian units are deplayed an this side
REARAREA
STRIKEHOLDING
STRIKEESCORT
STRIKE
RUSSIAN DEPLOYMENT BOXES
A В С D E F
ASTEROID ZERO-FOUR STRATEGIC DISPLAY © 1979 TASK FORCE GAMES

A M E R I C A N U N I T S ASTEROID ZERO-FOUR
■ д , :
■ 4 4 н\ Ж
4
ж ж !
' ¥jj
¥F B А 1 2
\ i ¥ Т ¥ :I 1
¥ т
' Г т'-------------------------
"4г Т т тi .......................j
FB^ * 6
т |1 1 2 1 3 1 4 I 3 1 6 1 1 8 1 9д 1 1 1 11 1 I I 1 1 1
1 1 I • I ” | “ ! I ” l ” 1 1 \ |
i i I I i I i I 'l j у p fjb&i.А А A A \ A A------------------------- !_________ I--------------I_________ !________ i - !
R U S S I A N U N I T S
I ----Ш------------------ r ------------- -------------------------- --------------------------------------- ■ _F 1 1 ' F | 2 F I 3 ' F I 4 T F 1 5 ' F J 6 F | 7 ' F I 8
--------------------------------------------------------------------------------------------------------------------T '
i 1 в l 2 В i 3 J 5 В 1 6 В 1 7 В ( 8 В 1
ш ш
* 10 в , 10 А 1 | 2 А з | 4 I 5 Д 6 А
* * 1 1 1 1 1 1 1А 8 А 9 А ю А и А 12 А 13 А и А 15 А ш
И И И Н И
1 1 1 201
221-----_—-----. -24 25
h * А А "ч# Г* А
© 1 9 7 9 T A S K F O RC E G A M E S

DAMAGE MARKERS
1 1 1 1 1 1 1 1 i 1 1
1 1 1 1 1 1 1 1 1 1 1
1 1 1 1 1 1 1 1 1 1 1
3 3 3 3 3 3 3 3 3 3 3
3 3 3 3 3 3 3 3 3 3 3
3.
3_
3 3 3 3 3 3 3 3 3'
5 5 5 5 5 5 5 5 5 5 5
5 5 5 5 5 5 5 5 5 5 5
5 5 5 5 5 5 5 5 5 5 5
7 7 7 7 7 7 7 7
i ...
......
......
......
j
N !
7 7 7 7 7 7 "7 7I
7 | 7 |_7
8 8 8 8 8 8 a 8 8 8 8
8 8 8 8 8 8 8 8 8 8 8
8 8 8 8 8 8 8 8 8 8 8

2 2 2 2 2 2 2 2 2 2 2
2 2 2 2 2 2 2 2 2 2 2
2 2 2 2 2 2 2 2 2 2 2
4 4 4 4 4 4 4 4 4 4 4
4 4 4 4 4 4 4 4 4 4 4
4 4 4 4 4 4 4 4 4 4 4
6 6 6 6 6 6 6 6 6 6 6
6 6 6 6 6 6 6 6 6 6 6
6 6 6 6 6 6 6 6 6 6 6
x x x x x x x x x x xX X X X X X X X X X Xx x x x x x x x x x x
X X X X X X X X X X Xx x x x x x x x x x x*
x x x x x x x x x x x

15021302
16021402
1 9 0 31 503 1 70 31303
2 0 0 33603
2 1 0 4
2 0 0 41204
2 3 0 5
1 80 5 2 4 0 51405
2 5 0 61506J 3 0 6
1606 2 40 62 20 6Л 2 06
1907 2 1 0 7
1807
2 3 0 8 2 50 82 1 0 817081308
1608 2 2 0 81408
2 5 0 91 909 2 3 0 917091509
1 609 2 0 0 9
1910 21101710
201010
22101410
1911 211 1171 1шшш181 1 2011 2211
19121712 2 51 2
& & з.:17131 31 3
1 813 2 4 1 3
1914
Щ Ш .2.Q14:
17161316
1 816 RUSSIAN ASTEROID

06010401
090205 02 07 0203 02
08020 6 020202 0402
0 9 0 3щ а з . $ 7 0 3030.3.:
Q8Q3,06 030 4 030203:
0 9 0 407 040 3 04
08 04
09 05
0 6 05
05 06 09 0603 06
020$ 06 06
09070307
0607
09 08
0208
0509 0709
ШШШ ГГ" 09 09S . ю
0309
06090209
ш ш
ш и ,

2002
19031 503 2 1 0 31703
18031603 20 03
1904:1504
20 04
17051505
18055 ( О Щ
ш .f i f > I ' !s A 20
1906 2 1 0 61706
1806 24 06
1707
24072007
.2408
$.5.0 91709
24 09
1810 2010J O *
1711
*t«:r261 1161 1
2 1 1 2
1812
i i l 21 1317131513
2 4 1 3
191417141514
1814 20 14
17151515
ш ш
Ш ё 20 16
1917 21171517 1717
18171617
AMERICAN ASTEROID

1202
1 103 1303..
1003 1203
0 9 0 40 5 0 4 0 7 0 4 1304
08 040 6 0 4 1004.0 4 0 4 1204
09 050 50 5 0 7 0 5 11050 305 1305
•0605 1 00504Q.5;0 2 0 5
0 5 0 6 0 9 0 607 06 1 106 13060 10 6
0 6 0 6 0 8060206 0 40 6
: с -0 507 1 1070 70 70 10 7
10070 6070 407
Ж 11080 5 0 80 1 0 8
10080 4 0 8
1109 13090 7 0 90 10 9
1 0090 80 90 40 9
1 1100 7 1 00110
1 0 1 00 8 100210 0 4 10
071 1 0911 1111
101 10611 081 10211
0 912 1 1 12 1312
10120812
Ш Ш - 0 9 1 3 1113 13130 31 3
10130 8 1 30 4 1 3
0 5 1 4 0 91 4 11 14 1314
10140 61 4
1115т т
0 7 1 6
Ш Ш
1117 13170 917
1017 1217