Embed Size (px)
Citation preview

__________________________________________________________________________
John’s Art – Unity Games & Assets Developer
http://www.johnsartdev.com
1
Horror Development Kit
Official Documentation - Unity Asset Developed By John’s Art
Ver. 1.5 Beta

__________________________________________________________________________
John’s Art – Unity Games & Assets Developer
http://www.johnsartdev.com
2
INTRODUCTION
HORROR DEVELOPMENT KIT IS AN ALL-IN-ONE SOLUTION TO CREATE A PERFECT AND REALISTIC FPS HORROR GAME WITH UNITY3D GAME ENGINE. INCLUDES TONS OF READY-TO-USE-PREFABS, PLUS HUNDREDS OF HIGH QUALITY SOUNDS, MODELS, ANIMATIONS AND MUCH MORE! IT’S EASY TO USE AND EASY TO CUSTOMIZE AND YOU CAN EASILY INTEGRATE YOUR OWN ASSETS, SUCH AS MODELS, ANIMATIONS, SOUNDS, GUI ETC. A BASIC UNITY KNOWLEDGE IS REQUIRED TO ACHIEVE COMPLEX THINGS BY USING THIS ASSET. IF YOU ARE ACTUALLY THINKING ABOUT CREATING AN HORROR GAME BUT YOU DON’T KNOW WHERE START FROM, NO PROBLEM, THIS ASSET KIT IT’S PERFECT TO SPEED UP YOUR GAME DEVELOPMENT PROCESS, PROVIDING READY SOURCES FOR YOUR GAME.
__________________________________________________________________________
John’s Art – Unity Games & Assets Developer
http://www.johnsartdev.com
3
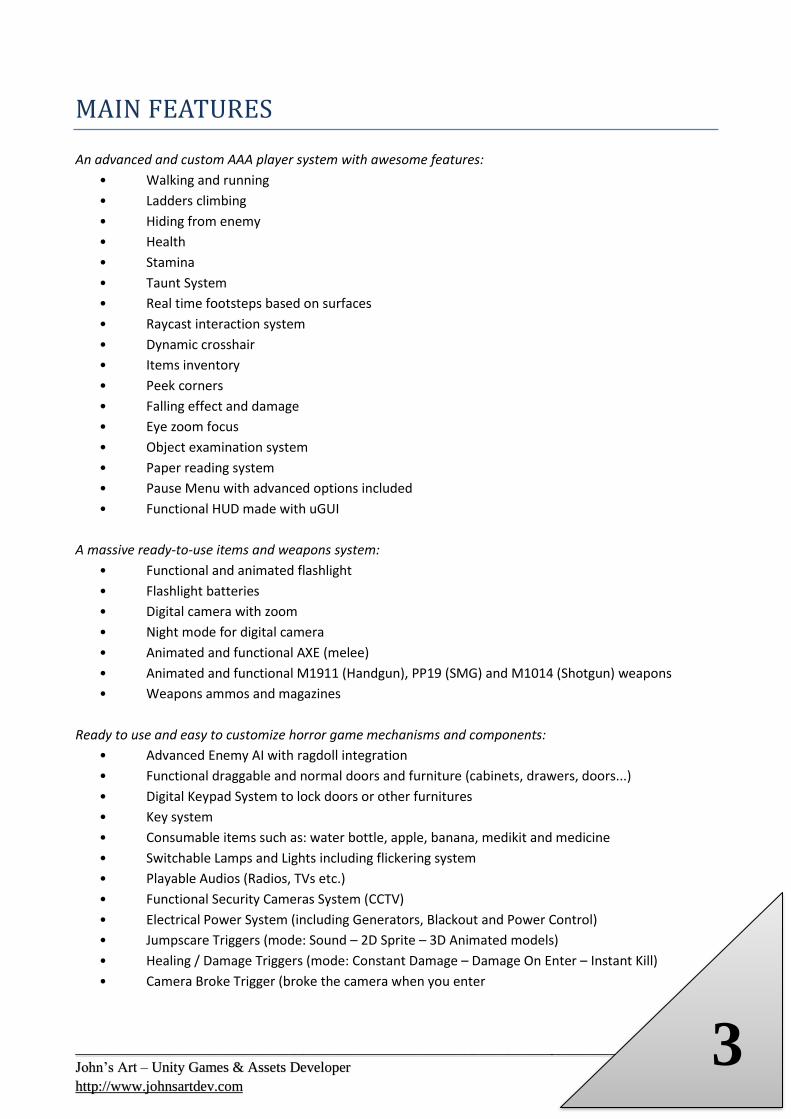
MAIN FEATURES
An advanced and custom AAA player system with awesome features:
• Walking and running
• Ladders climbing
• Hiding from enemy
• Health
• Stamina
• Taunt System
• Real time footsteps based on surfaces
• Raycast interaction system
• Dynamic crosshair
• Items inventory
• Peek corners
• Falling effect and damage
• Eye zoom focus
• Object examination system
• Paper reading system
• Pause Menu with advanced options included
• Functional HUD made with uGUI
A massive ready-to-use items and weapons system:
• Functional and animated flashlight
• Flashlight batteries
• Digital camera with zoom
• Night mode for digital camera
• Animated and functional AXE (melee)
• Animated and functional M1911 (Handgun), PP19 (SMG) and M1014 (Shotgun) weapons
• Weapons ammos and magazines
Ready to use and easy to customize horror game mechanisms and components:
• Advanced Enemy AI with ragdoll integration
• Functional draggable and normal doors and furniture (cabinets, drawers, doors...)
• Digital Keypad System to lock doors or other furnitures
• Key system
• Consumable items such as: water bottle, apple, banana, medikit and medicine
• Switchable Lamps and Lights including flickering system
• Playable Audios (Radios, TVs etc.)
• Functional Security Cameras System (CCTV)
• Electrical Power System (including Generators, Blackout and Power Control)
• Jumpscare Triggers (mode: Sound – 2D Sprite – 3D Animated models)
• Healing / Damage Triggers (mode: Constant Damage – Damage On Enter – Instant Kill)
• Camera Broke Trigger (broke the camera when you enter

__________________________________________________________________________
John’s Art – Unity Games & Assets Developer
http://www.johnsartdev.com
4
And much more:
• Main Menu
• Loading Screen between scenes
• Full C# Source Code
• PDF Documentation
• Video Tutorials
• Integrations with other assets: Achievement Creator, Lever Puzzle System, Offroad Pickup +
Animated Hands
__________________________________________________________________________
John’s Art – Unity Games & Assets Developer
http://www.johnsartdev.com
5
INFO ABOUT DOCUMENTATION AND TUTORIALS
AS YOU CAN SEE THE DOCUMENTATION IS STILL WORK IN PROGRESS, AND AS I WROTE IN THE RELEASE
ANNOUNCEMENT IT WILL BE UPDATED DAY PER DAY AND WILL BE PUBLISHED ALSO SOME VIDEO
TUTORIALS, THIS IS THE LIST OF VIDEOS THAT WILL COME:
• Setup the asset
• Setup a new scene
• Setup a new readable paper/document
• Setup a new consumable item
• Setup new interactable audio player
• Setup new examinable-only object
• Setup new functional light
• Setup an electrical power system with generators
• Setup a simple electrical power system (with no generators)
• Setup a new weapon
• Setup a new door with keypad
• Setup a new jammed door
• Setup a new locked door
• Setup a new security camera with monitor
• Setup a new timed bomb
• Setup a new clock bomb
• Setup a new AI waypoint network
• Setup a new AI model
• Setup a new surface and footsteps sounds
• How to use ready prefabs of items
THE ORDER OF PUBLICATION OF THESE VIDEOS MAY CHANGE. IF YOU HAVE A SPECIAL REQUEST OR IDEA
JUST CONTACT ME.

__________________________________________________________________________
John’s Art – Unity Games & Assets Developer
http://www.johnsartdev.com
6
INFORMATION ABOUT DEFINITIVE VERSION 1.5
I’M WORKING HARD TO FINISH THE SAVE/LOAD SYSTEM FOR THE DEFINITIVE VERSION 1.5.
THERE WILL BE ALSO BUG FIXES, GENERAL OPTIMIZATION, BETTER SCRIPTS INSPECTOR (EDITOR VIEW FOR
SCRIPTS), BETTER ENEMY AI SYSTEM WITH BUGS AND GLITCHES FIXES.
IF YOU HAVE A SPECIAL REQUEST OR IDEA JUST CONTACT ME.
__________________________________________________________________________
John’s Art – Unity Games & Assets Developer
http://www.johnsartdev.com
7
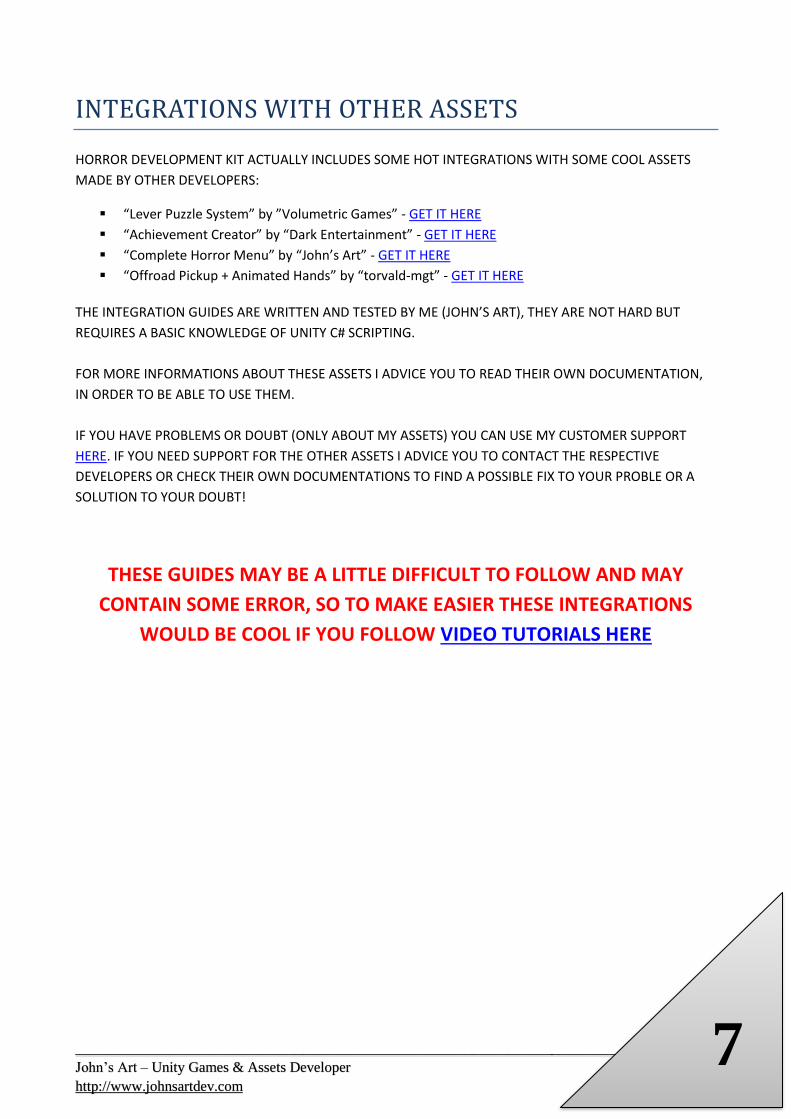
INTEGRATIONS WITH OTHER ASSETS
HORROR DEVELOPMENT KIT ACTUALLY INCLUDES SOME HOT INTEGRATIONS WITH SOME COOL ASSETS
MADE BY OTHER DEVELOPERS:
▪ “Lever Puzzle System” by ”Volumetric Games” - GET IT HERE
▪ “Achievement Creator” by “Dark Entertainment” - GET IT HERE
▪ “Complete Horror Menu” by “John’s Art” - GET IT HERE
▪ “Offroad Pickup + Animated Hands” by “torvald-mgt” - GET IT HERE
THE INTEGRATION GUIDES ARE WRITTEN AND TESTED BY ME (JOHN’S ART), THEY ARE NOT HARD BUT
REQUIRES A BASIC KNOWLEDGE OF UNITY C# SCRIPTING.
FOR MORE INFORMATIONS ABOUT THESE ASSETS I ADVICE YOU TO READ THEIR OWN DOCUMENTATION,
IN ORDER TO BE ABLE TO USE THEM.
IF YOU HAVE PROBLEMS OR DOUBT (ONLY ABOUT MY ASSETS) YOU CAN USE MY CUSTOMER SUPPORT
HERE. IF YOU NEED SUPPORT FOR THE OTHER ASSETS I ADVICE YOU TO CONTACT THE RESPECTIVE
DEVELOPERS OR CHECK THEIR OWN DOCUMENTATIONS TO FIND A POSSIBLE FIX TO YOUR PROBLE OR A
SOLUTION TO YOUR DOUBT!
THESE GUIDES MAY BE A LITTLE DIFFICULT TO FOLLOW AND MAY
CONTAIN SOME ERROR, SO TO MAKE EASIER THESE INTEGRATIONS
WOULD BE COOL IF YOU FOLLOW VIDEO TUTORIALS HERE
__________________________________________________________________________
John’s Art – Unity Games & Assets Developer
http://www.johnsartdev.com
8
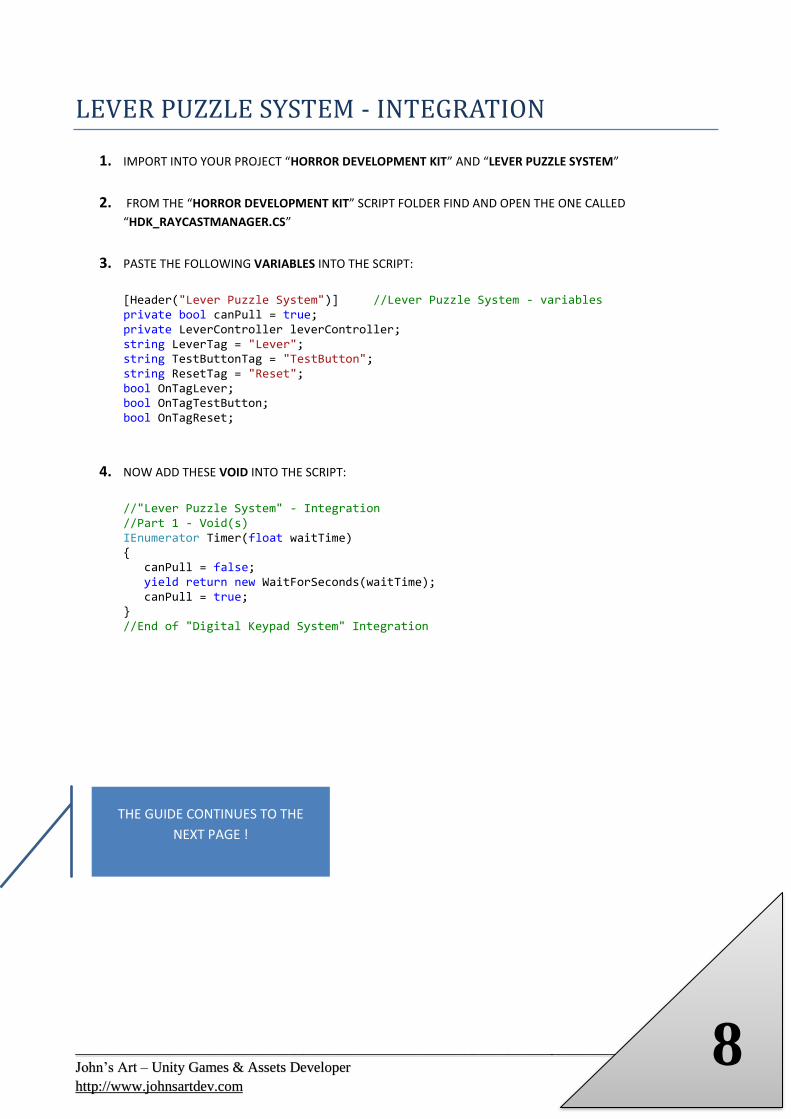
LEVER PUZZLE SYSTEM - INTEGRATION
1. IMPORT INTO YOUR PROJECT “HORROR DEVELOPMENT KIT” AND “LEVER PUZZLE SYSTEM”
2. FROM THE “HORROR DEVELOPMENT KIT” SCRIPT FOLDER FIND AND OPEN THE ONE CALLED
“HDK_RAYCASTMANAGER.CS”
3. PASTE THE FOLLOWING VARIABLES INTO THE SCRIPT:
[Header("Lever Puzzle System")] //Lever Puzzle System - variables private bool canPull = true; private LeverController leverController; string LeverTag = "Lever"; string TestButtonTag = "TestButton"; string ResetTag = "Reset"; bool OnTagLever; bool OnTagTestButton; bool OnTagReset;
4. NOW ADD THESE VOID INTO THE SCRIPT:
//"Lever Puzzle System" - Integration //Part 1 - Void(s) IEnumerator Timer(float waitTime) { canPull = false; yield return new WaitForSeconds(waitTime); canPull = true; } //End of "Digital Keypad System" Integration
THE GUIDE CONTINUES TO THE
NEXT PAGE !
__________________________________________________________________________
John’s Art – Unity Games & Assets Developer
http://www.johnsartdev.com
9
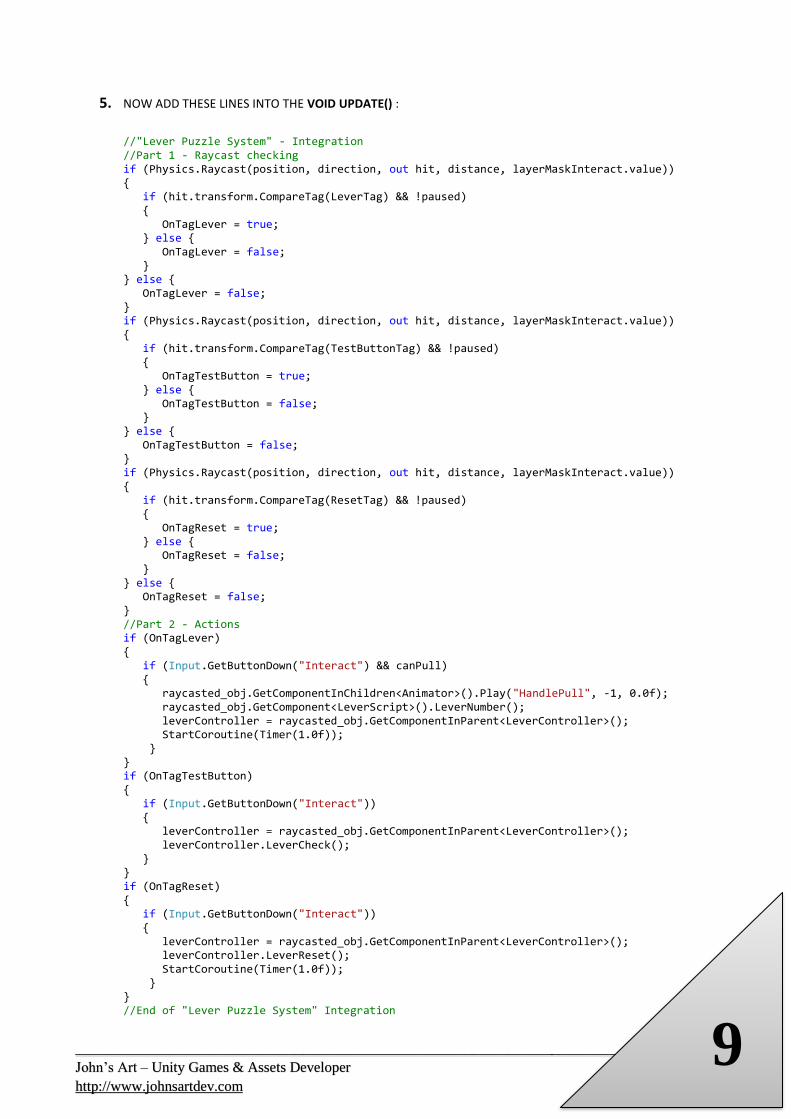
5. NOW ADD THESE LINES INTO THE VOID UPDATE() :
//"Lever Puzzle System" - Integration //Part 1 - Raycast checking if (Physics.Raycast(position, direction, out hit, distance, layerMaskInteract.value)) { if (hit.transform.CompareTag(LeverTag) && !paused) { OnTagLever = true; } else { OnTagLever = false; } } else { OnTagLever = false; } if (Physics.Raycast(position, direction, out hit, distance, layerMaskInteract.value)) { if (hit.transform.CompareTag(TestButtonTag) && !paused) { OnTagTestButton = true; } else { OnTagTestButton = false; } } else { OnTagTestButton = false; } if (Physics.Raycast(position, direction, out hit, distance, layerMaskInteract.value)) { if (hit.transform.CompareTag(ResetTag) && !paused) { OnTagReset = true; } else { OnTagReset = false; } } else { OnTagReset = false; } //Part 2 - Actions if (OnTagLever) { if (Input.GetButtonDown("Interact") && canPull) { raycasted_obj.GetComponentInChildren<Animator>().Play("HandlePull", -1, 0.0f); raycasted_obj.GetComponent<LeverScript>().LeverNumber(); leverController = raycasted_obj.GetComponentInParent<LeverController>(); StartCoroutine(Timer(1.0f)); } } if (OnTagTestButton) { if (Input.GetButtonDown("Interact")) { leverController = raycasted_obj.GetComponentInParent<LeverController>(); leverController.LeverCheck(); } } if (OnTagReset) { if (Input.GetButtonDown("Interact")) { leverController = raycasted_obj.GetComponentInParent<LeverController>(); leverController.LeverReset(); StartCoroutine(Timer(1.0f)); } } //End of "Lever Puzzle System" Integration
__________________________________________________________________________
John’s Art – Unity Games & Assets Developer
http://www.johnsartdev.com
10
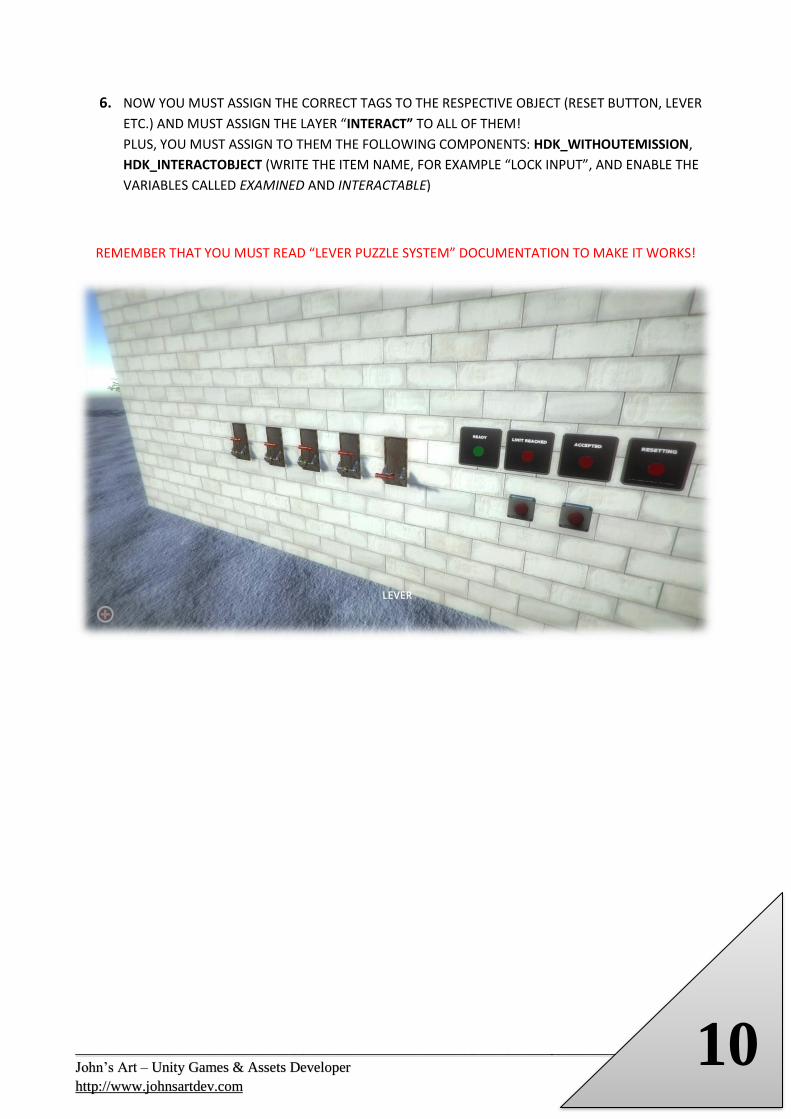
6. NOW YOU MUST ASSIGN THE CORRECT TAGS TO THE RESPECTIVE OBJECT (RESET BUTTON, LEVER
ETC.) AND MUST ASSIGN THE LAYER “INTERACT” TO ALL OF THEM!
PLUS, YOU MUST ASSIGN TO THEM THE FOLLOWING COMPONENTS: HDK_WITHOUTEMISSION,
HDK_INTERACTOBJECT (WRITE THE ITEM NAME, FOR EXAMPLE “LOCK INPUT”, AND ENABLE THE
VARIABLES CALLED EXAMINED AND INTERACTABLE)
REMEMBER THAT YOU MUST READ “LEVER PUZZLE SYSTEM” DOCUMENTATION TO MAKE IT WORKS!
__________________________________________________________________________
John’s Art – Unity Games & Assets Developer
http://www.johnsartdev.com
11
COMPLETE HORROR MENU – INTEGRATION
1. IMPORT INTO YOUR PROJECT “HORROR DEVELOPMENT KIT” AND “COMPLETE HORROR MENU”.
THESE ASSETS ARE STRICTLY COMPATIBLE, INFACT YOU MUSTN’T CODE FOR THIS INTEGRATION.
2. OPEN THE DEMO SCENE OF THE HORROR MENU CALLED “HORROR MENU”, SELECT THE GAME OBJECT
CALLED “_GAMEMANAGER_”, FIND THE COMPONENT CALLED “MENUMANAGER” AND MODIFY THE STRING
FIELD CALLED “GAME SCENE” WITH THE NAME OF YOUR SCENE.
IF YOU WANT TO ADD THE HORROR DEVELOPMENT KIT’S DEMO SCENE JUST WRITE IT’S NAME “HDK_DEMO”
3. DON’T FORGET TO ADD THE MENU SCENE AND GAME SCENE INTO UNITY’S BUILD SETTINGS
4. NOW YOU ARE READY TO USE BOTH ASSETS WITHOUT PROBLEM!
__________________________________________________________________________
John’s Art – Unity Games & Assets Developer
http://www.johnsartdev.com
12
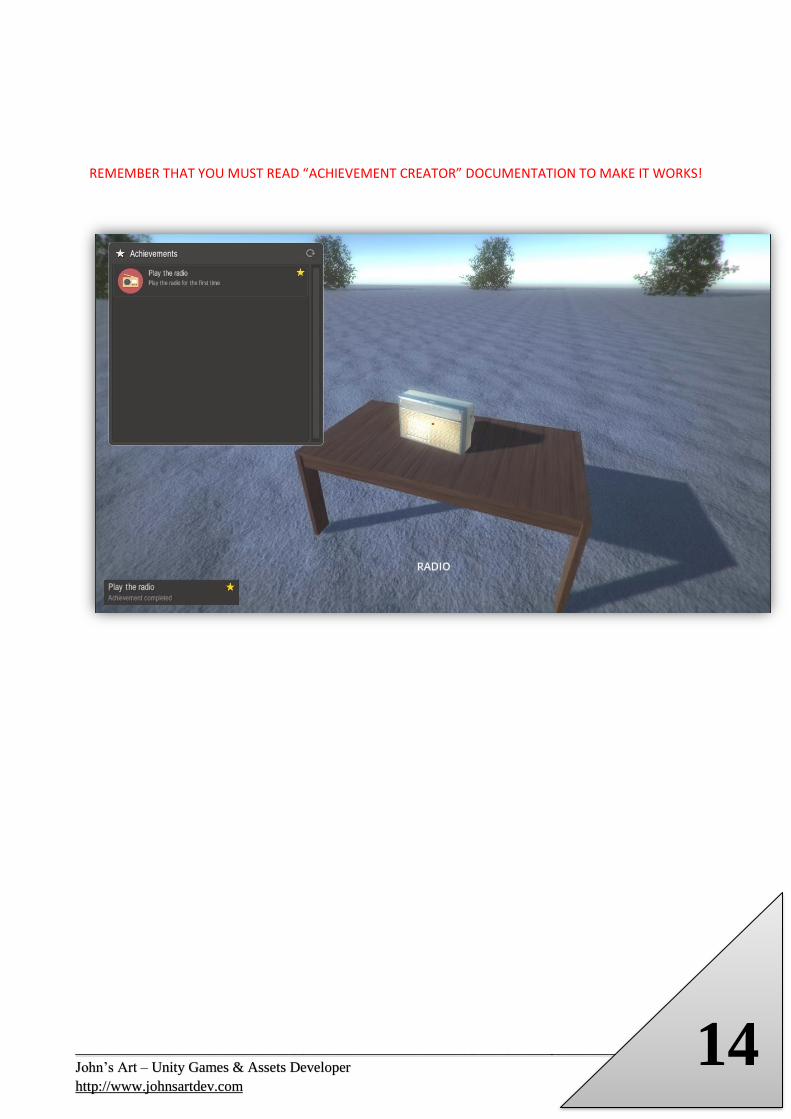
ACHIEVEMENT CREATOR – INTEGRATION
1. IMPORT INTO YOUR PROJECT “HORROR DEVELOPMENT KIT” AND “ACHIEVEMENT CREATOR”
2. GO INTO THE ACHIEVEMENT FOLDER CALLED “PREFABS” AND SELCET THE GAME OBJECT “ACHIEVEMENT
CONTROLLER” AND DRAG AND DROP IT INTO YOUR SCENE (FOR EXAMPLE THE DEMO SCENE OF HORROR
DEVELOPMENT KIT)
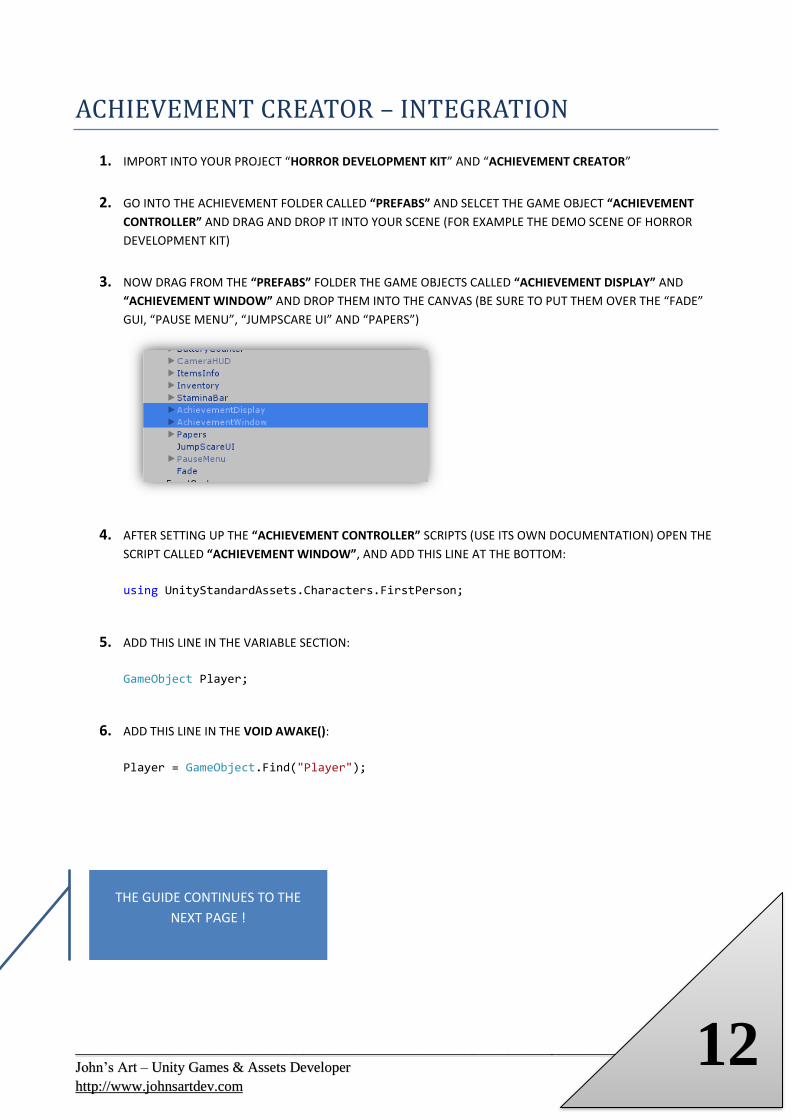
3. NOW DRAG FROM THE “PREFABS” FOLDER THE GAME OBJECTS CALLED “ACHIEVEMENT DISPLAY” AND
“ACHIEVEMENT WINDOW” AND DROP THEM INTO THE CANVAS (BE SURE TO PUT THEM OVER THE “FADE”
GUI, “PAUSE MENU”, “JUMPSCARE UI” AND “PAPERS”)
4. AFTER SETTING UP THE “ACHIEVEMENT CONTROLLER” SCRIPTS (USE ITS OWN DOCUMENTATION) OPEN THE
SCRIPT CALLED “ACHIEVEMENT WINDOW”, AND ADD THIS LINE AT THE BOTTOM:
using UnityStandardAssets.Characters.FirstPerson;
5. ADD THIS LINE IN THE VARIABLE SECTION:
GameObject Player;
6. ADD THIS LINE IN THE VOID AWAKE():
Player = GameObject.Find("Player");
THE GUIDE CONTINUES TO THE
NEXT PAGE !
__________________________________________________________________________
John’s Art – Unity Games & Assets Developer
http://www.johnsartdev.com
13
7. NOW REPLACE THE VOID UPDATE() WITH THIS ONE BELOW:
//Running update every frame. void Update() { bool examining = HDK_RaycastManager.ExaminingObject; bool reading = HDK_RaycastManager.ReadingPaper; bool security = HDK_RaycastManager.UsingSecurityCam; if (!examining && !reading && !security) { //Opening and closing the window via a key. if (Input.GetKeyDown(openKey)) { isShowing = !isShowing; //Shows the window and instantiates the achievement clones. if (isShowing) { windowUI.alpha = 1; RefreshAchievementDisplay(); GetComponent<AudioSource>().PlayOneShot(openSound); Player.GetComponent<FirstPersonController>().enabled = false; Player.GetComponent<HDK_Stamina>().Busy(true); Player.GetComponent<HDK_CameraStates>().Busy(true); Cursor.visible = true; Cursor.lockState = CursorLockMode.None; } //Hides the window and destroys all the achievement clones. else if (!isShowing) { windowUI.alpha = 0; RemoveAchievementClones(); GetComponent<AudioSource>().PlayOneShot(closeSound); Player.GetComponent<FirstPersonController>().enabled = true; Player.GetComponent<HDK_Stamina>().Busy(false); Player.GetComponent<HDK_CameraStates>().Busy(false); } } } }
8. THE SCRIPTING INTEGRATION IS DONE.
TO USE ACHIEVEMENT CREATOR NOW BE SURE TO USE ITS OWN DOCUMENTATION FOR SUPPORT.
THE GUIDE CONTINUES TO THE
NEXT PAGE !
__________________________________________________________________________
John’s Art – Unity Games & Assets Developer
http://www.johnsartdev.com
14
REMEMBER THAT YOU MUST READ “ACHIEVEMENT CREATOR” DOCUMENTATION TO MAKE IT WORKS!
__________________________________________________________________________
John’s Art – Unity Games & Assets Developer
http://www.johnsartdev.com
15
OFFROAD PICKUP + ANIMATED HANDS – INTEGRATION
YOU CAN FIND A SCENE WITH THE TWO ASSETS ALREADY INTEGRATED IN PACKAGE CONTENT > OTHER >
INTEGRATIONS > OFFROAD PICKUP + ANIMATED HANDS – HDK INTEGRATED
BE SURE TO HAVE IMPORTED BOTH TWO ASSETS BEFORE OPENING THE SCENE!
1. IMPORT INTO YOUR PROJECT “HORROR DEVELOPMENT KIT” AND “OFFROAD PICKUP + ANIMATED HANDS”.
2. OPEN THE DEMO SCENE FROM OFFROAD PICKUP ASSET, CALLED “DEMO”.
NOW ADD THE PLAYER AND THE CANVAS FROM “HORROR DEVELOPMENT KIT” (FOLLOW THE GUIDE AT THE
PAGE 9 TO SETUP CANVAS AND PLAYER).
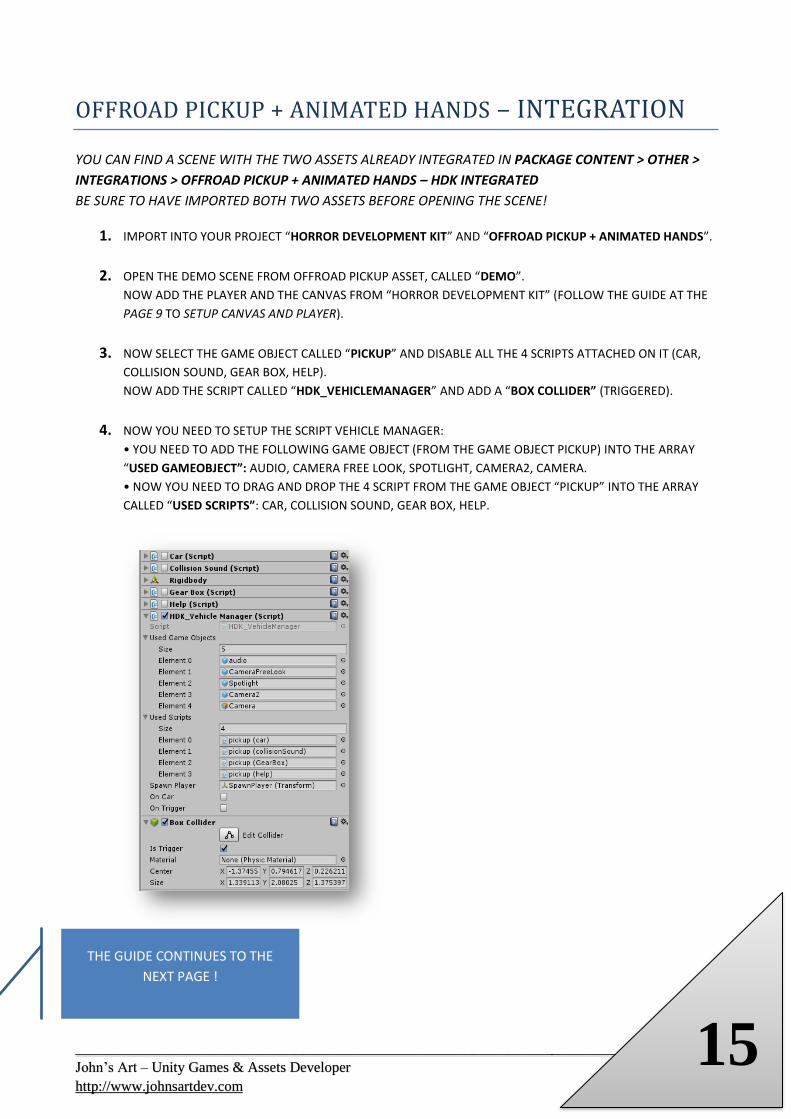
3. NOW SELECT THE GAME OBJECT CALLED “PICKUP” AND DISABLE ALL THE 4 SCRIPTS ATTACHED ON IT (CAR,
COLLISION SOUND, GEAR BOX, HELP).
NOW ADD THE SCRIPT CALLED “HDK_VEHICLEMANAGER” AND ADD A “BOX COLLIDER” (TRIGGERED).
4. NOW YOU NEED TO SETUP THE SCRIPT VEHICLE MANAGER:
• YOU NEED TO ADD THE FOLLOWING GAME OBJECT (FROM THE GAME OBJECT PICKUP) INTO THE ARRAY
“USED GAMEOBJECT”: AUDIO, CAMERA FREE LOOK, SPOTLIGHT, CAMERA2, CAMERA.
• NOW YOU NEED TO DRAG AND DROP THE 4 SCRIPT FROM THE GAME OBJECT “PICKUP” INTO THE ARRAY
CALLED “USED SCRIPTS”: CAR, COLLISION SOUND, GEAR BOX, HELP.
THE GUIDE CONTINUES TO THE
NEXT PAGE !
__________________________________________________________________________
John’s Art – Unity Games & Assets Developer
http://www.johnsartdev.com
16
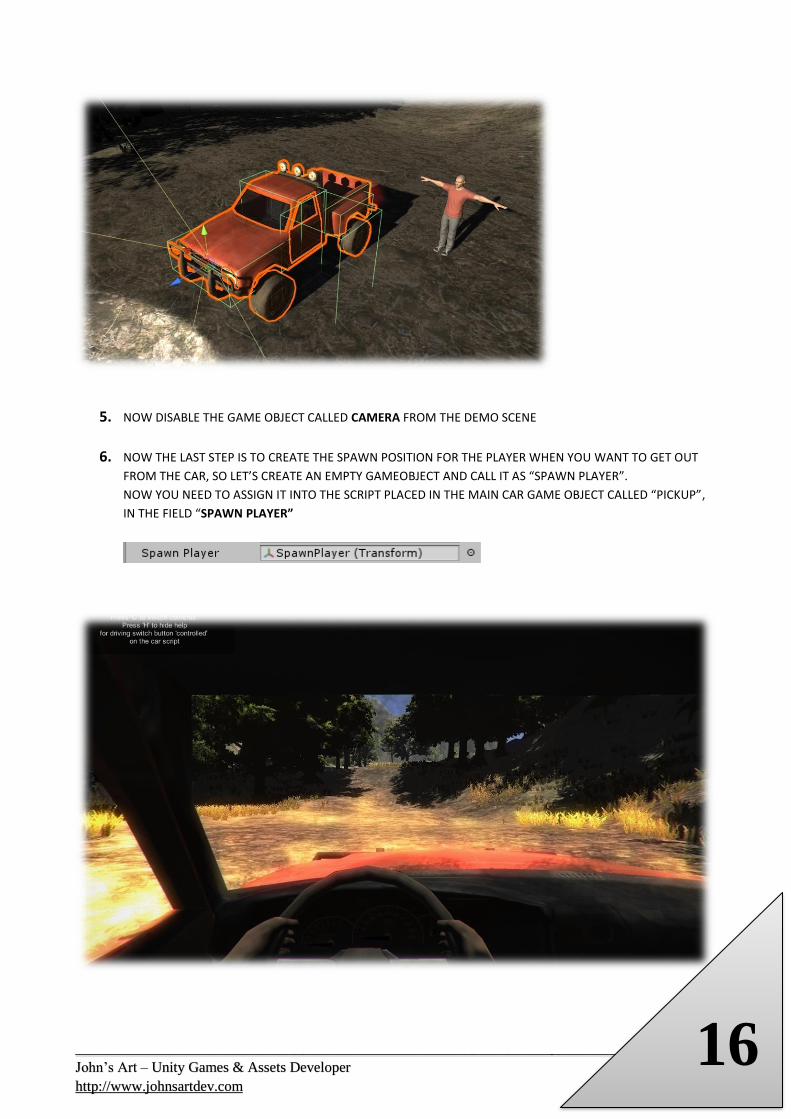
5. NOW DISABLE THE GAME OBJECT CALLED CAMERA FROM THE DEMO SCENE
6. NOW THE LAST STEP IS TO CREATE THE SPAWN POSITION FOR THE PLAYER WHEN YOU WANT TO GET OUT
FROM THE CAR, SO LET’S CREATE AN EMPTY GAMEOBJECT AND CALL IT AS “SPAWN PLAYER”.
NOW YOU NEED TO ASSIGN IT INTO THE SCRIPT PLACED IN THE MAIN CAR GAME OBJECT CALLED “PICKUP”,
IN THE FIELD “SPAWN PLAYER”

__________________________________________________________________________
John’s Art – Unity Games & Assets Developer
http://www.johnsartdev.com
17
CREDITS, SUPPORT AND POLICY
• This asset has been developed by John’s Art using the Unity game engine.
• You are allowed to:
✓ Use this asset for your game (commercial and non-commercial)
✓ Use this asset for learning
✓ Modify this asset for your game
• You are NOT allowed to:
➢ Resell or share this asset for free or for money
➢ Use this asset without a valid license
➢ Modify this asset and share it as your own creation for free or for money
• Support is offered to all official customers of this asset.
To be an official customer you must have a valid license of this asset, this means that you should have
bought this asset from the Unity Asset Store or from John’s Art Official Shop, any other place where you got
this asset is not legal and you are not allowed to use it.
To send a support request use this page from my website, be sure to write your Invoice NR, to let me to check your purchase, if you bought this asset from the Unity Asset Store, while if you got from my Website Shop you need to write your PayPal email in the email field (just follow the instructions in the support page).
If you don’t know how to see your Invoice NR, you just need to go in this page and search this asset, then the Invoice NR is the number written over the asset name.