Embed Size (px)
Citation preview

Take some trendy papercraft and add a dash of Christmas, and what do you get? Origami fillable
baubles just perfect for a colourful Christmas tree! These are a great project for kids to spend a
rainy afternoon inside getting crafty.
You Will Need
Origami paper » Invisible Thread » Fillable Baubles »
Craft Essentials
Scissors »
How to Make
1. Take a 6” square sheet of your chosen origami paper and cut it into four square quarters. You will need one quarter for each crane.

2. With the coloured side facing down, fold the unit in half horizontally, unfold, then fold in half vertically and unfold.
3. With the coloured side facing up, fold the sheet in half diagonally, unfold, then fold diagonally in the other direction.
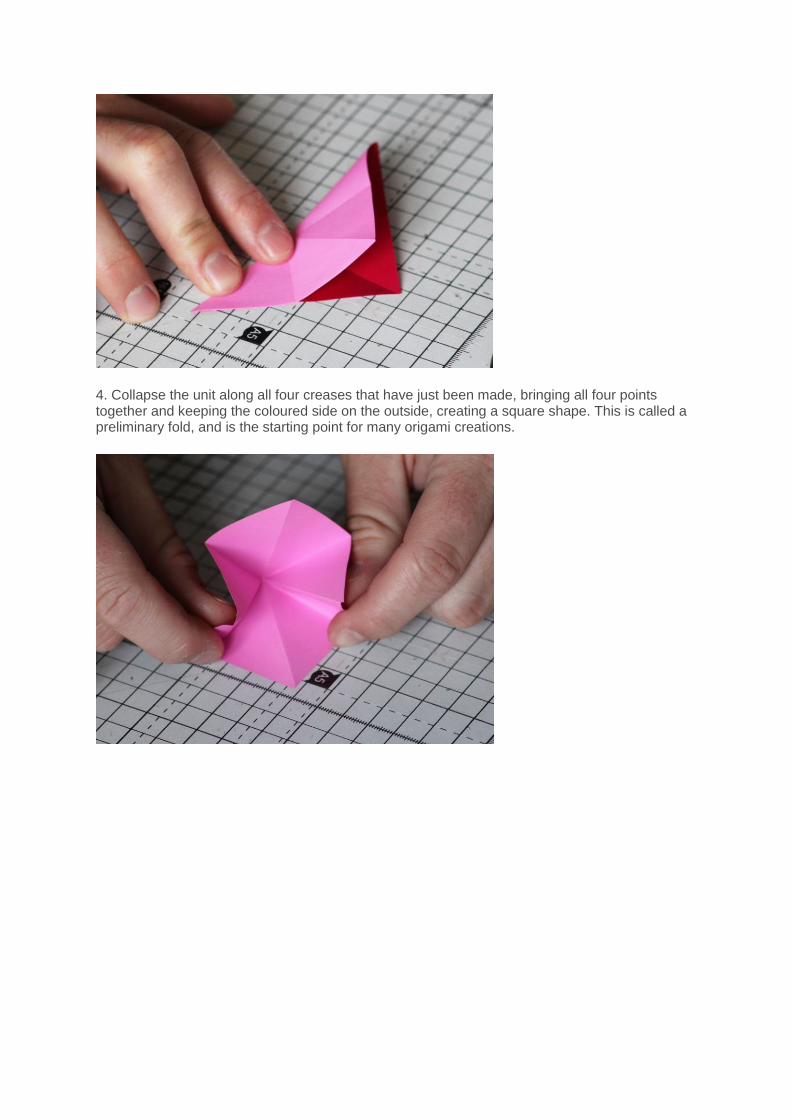
4. Collapse the unit along all four creases that have just been made, bringing all four points together and keeping the coloured side on the outside, creating a square shape. This is called a preliminary fold, and is the starting point for many origami creations.
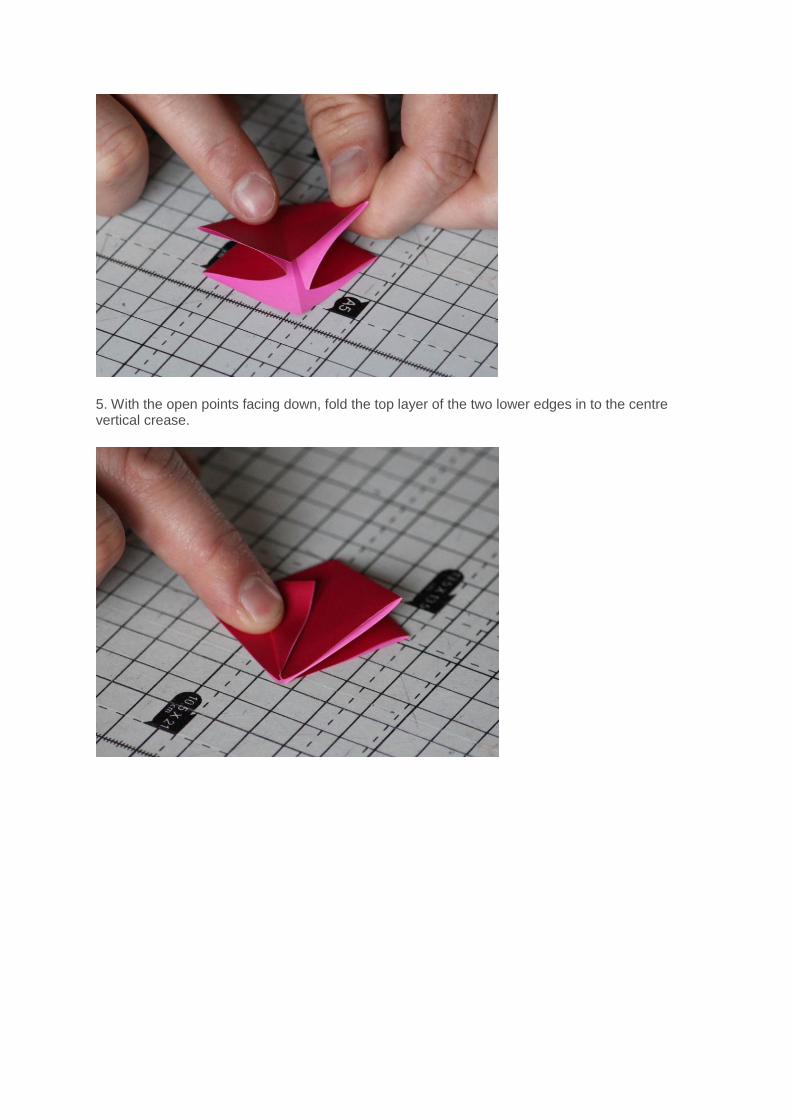
5. With the open points facing down, fold the top layer of the two lower edges in to the centre vertical crease.

6. Fold the top point down along the top of the edges you have just created, then unfold all three folds.
7. Pull the uppermost point up and, creasing along the folds you just made, squash it to create a large diamond shape.

8. Turn the unit over and repeat these steps on the other side.
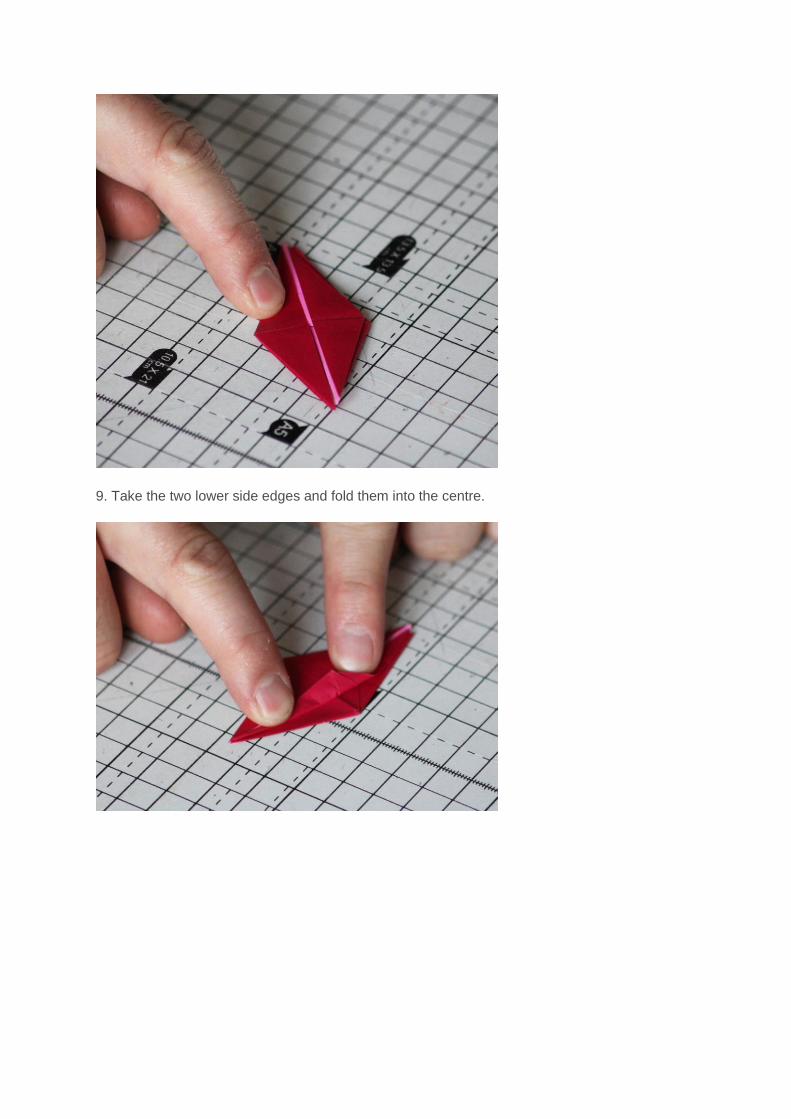
9. Take the two lower side edges and fold them into the centre.
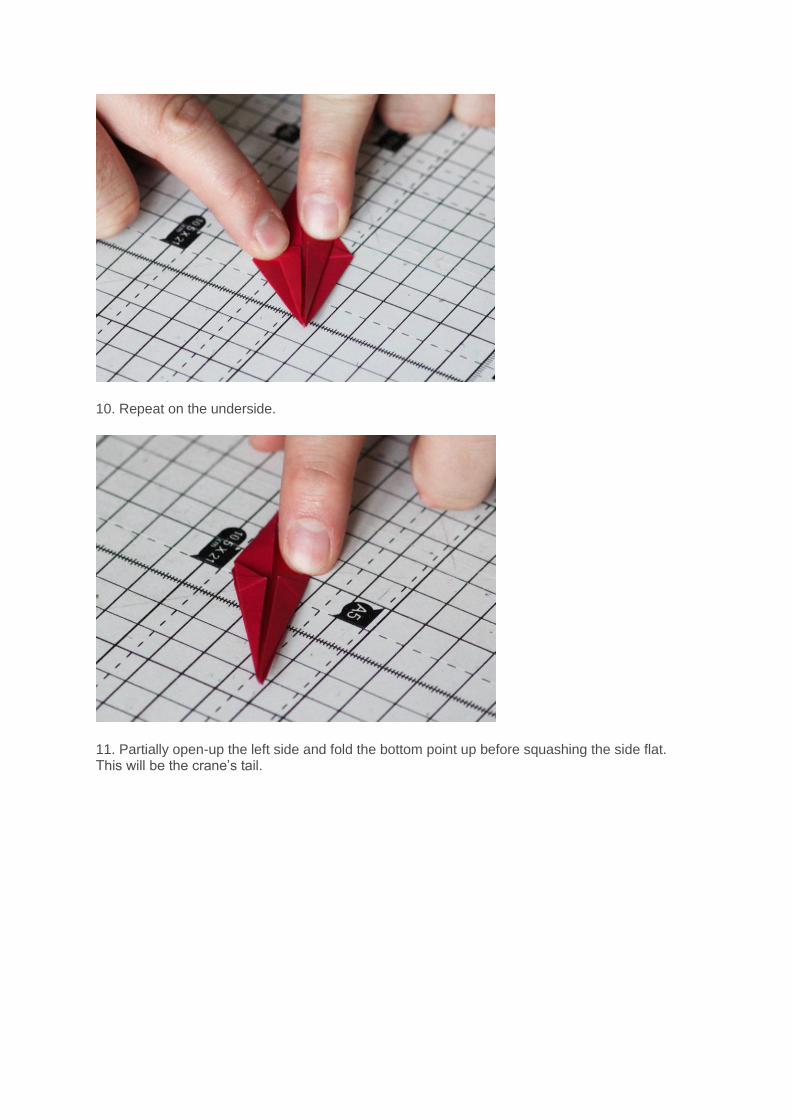
10. Repeat on the underside.
11. Partially open-up the left side and fold the bottom point up before squashing the side flat. This will be the crane’s tail.
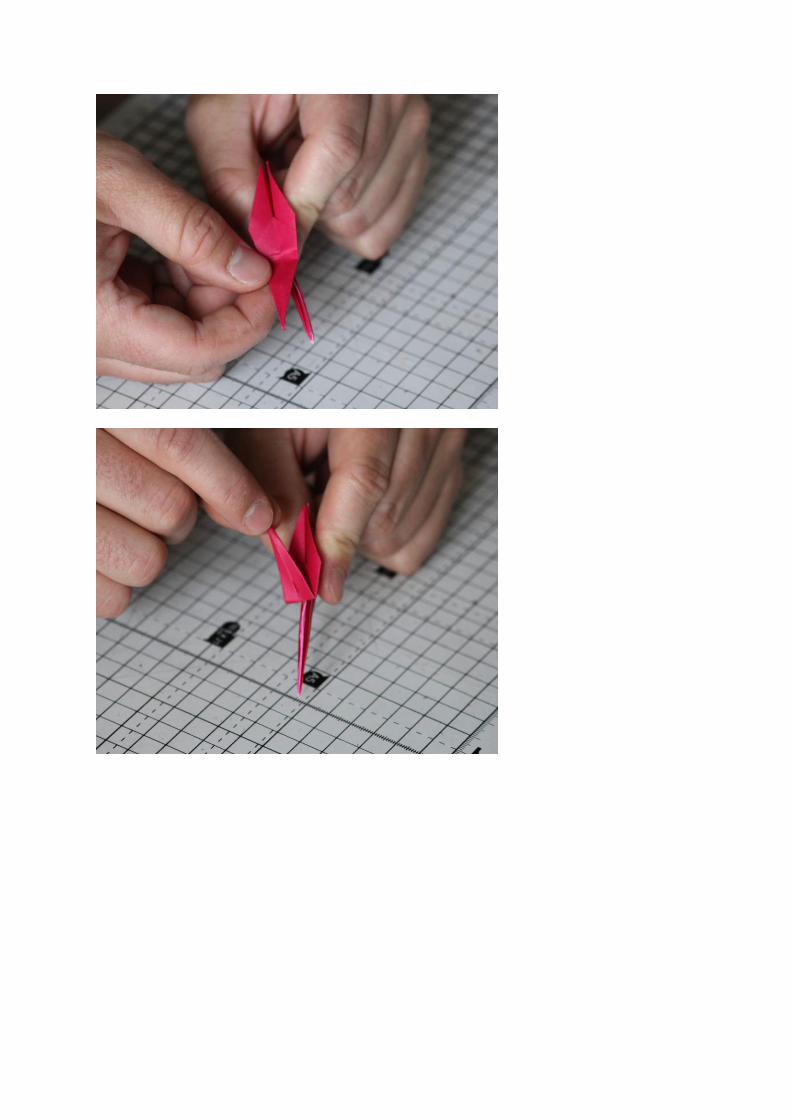

12. Repeat this step on the right side, but before squashing flat fold the point down a short distance, to create the head.
13. Fold the top point down to the create a wing. Repeat on the other side to create the second wing. Gently pull the wings apart to inflate the body.
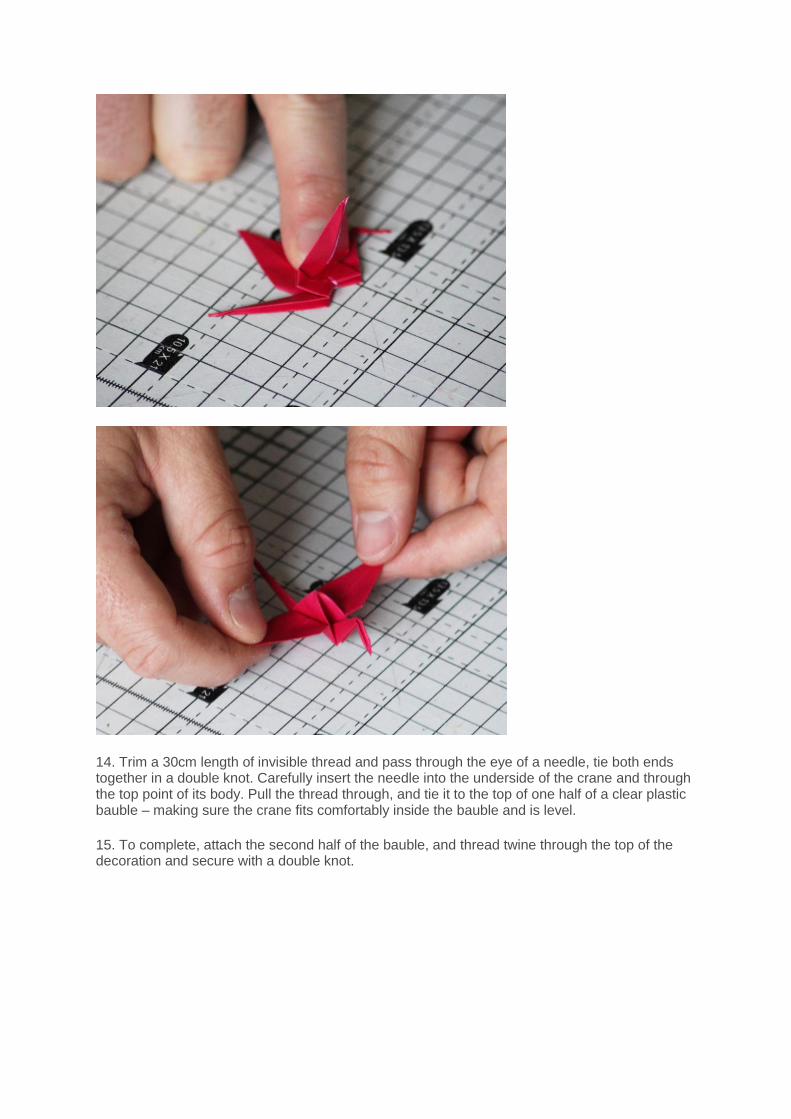
14. Trim a 30cm length of invisible thread and pass through the eye of a needle, tie both ends together in a double knot. Carefully insert the needle into the underside of the crane and through the top point of its body. Pull the thread through, and tie it to the top of one half of a clear plastic bauble – making sure the crane fits comfortably inside the bauble and is level.
15. To complete, attach the second half of the bauble, and thread twine through the top of the decoration and secure with a double knot.