Embed Size (px)
Citation preview

Orienteering PostersFormatted for
Legal size paper
(3 sheets per topic)
Glued to 22” x 26”
poster board

Overview of posters - NTOA Style
OrienteeringBasics
After you’re done
Beforeyou run
What to doat a Control
PaperworkContour
LinesMap
Reading
How to Orient your map
Front of Poster #1
Poster #4 or Back of Poster #1
Front of Poster #2
Poster # 3 or Back of Poster #2

ORIENTEERING BASICS
• Map & Compass skills
• Race against time
“The Thinking Sport”
Follow a point-to-point course (connect the dots!)

STRATEGY• Look for the easiest course
( Hint: it’s usually not a straight line )
• Follow the “Handrails”– Roads, paths, powerlines, fences, streams
• Focus on course-following, rather than speed
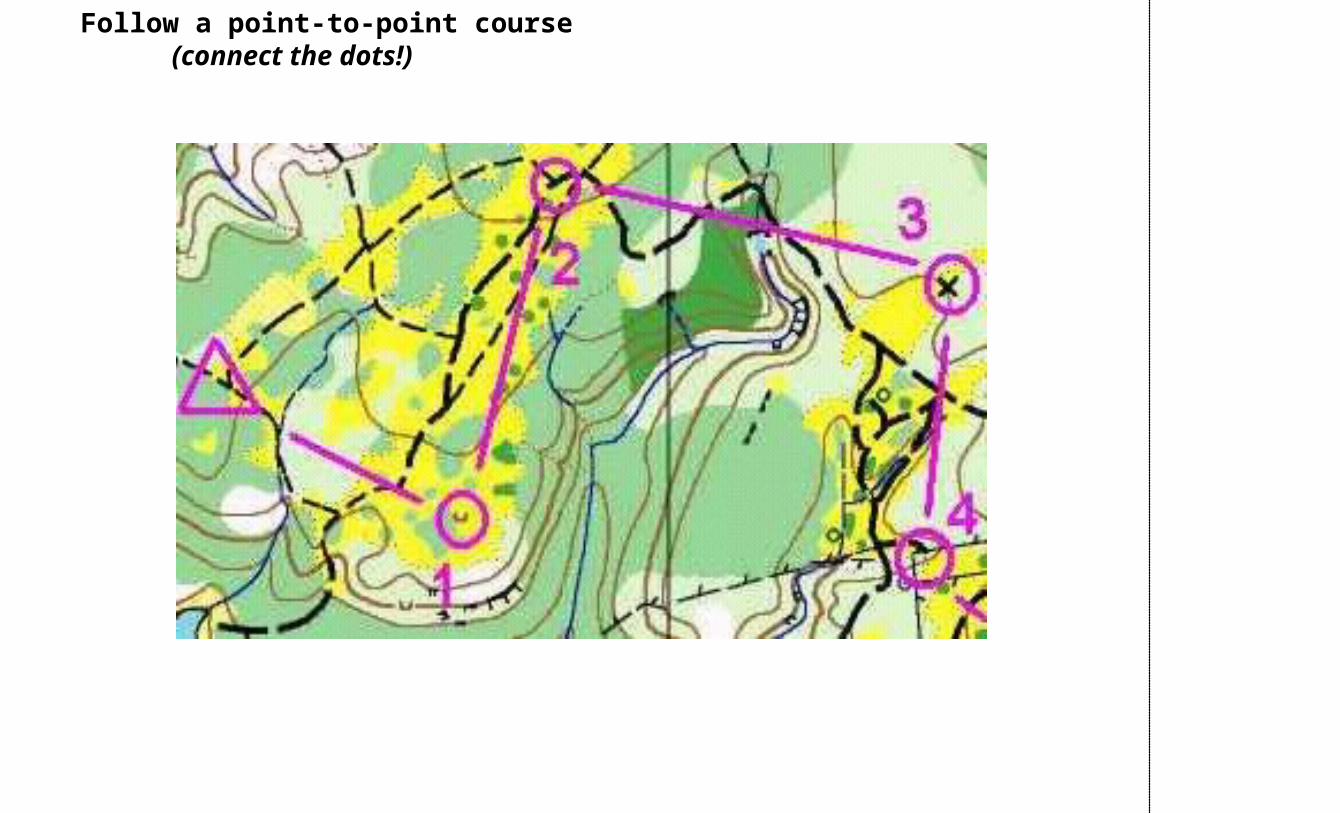
What to do at a ControlControls are identified with an orange and white
marker
1. Verify the control number
Match with your clue sheet

2. Punch in the proper space on your punch card

3. Move away from the control
4. Check your map to figure your direction to the next control

Before you run...• Registration Decisions
– Sign up for WhiteWhite or YellowYellow Courses Only• These courses do not require knowledge of international
orienteering symbols
– Competition vs. Map Hike --- Which one???
Map Hike
• Un-timed. Take your time and smell the poison ivy
• Good for families and groups
Competition
• Race against time
• Eligible for awards, based on age & gender

• Map Table– Depending on the event,
your course will be either:
1) Pre-drawn on your map» Receive it at the start
2) You will draw it on the map

– Competitors start at 1 or 2 minute intervals– Start number = Minutes after event begins
Example: If your start number is 7710:00 AM Official starting time for the event
+ 77 minutes (your start number) = 11:17 AM Your start time
• Start line
Pick up a map & clue sheet
(make sure you have the
ones for your “color”)
“Start” is identified by a triangle on your map

After you’re done...• Finish Line
– Turn in your punch card• Even if you don’t finish!!! (We
need to know you’re back safely)
• 3 hour time limit(May be less at some events)
Scoring– Officials will check
for correct punches
Finish line identified with ribbon

Results
• Find your results about 1/2 hour after finishing
Awards• Given to the
top 3 in each age / gender class

PAPERWORK
PUNCH CARD• Receive at Registration• Punch the card at each
control– Punch first control in box 1,second in box 2,etc.
• Turn it in at the finish line
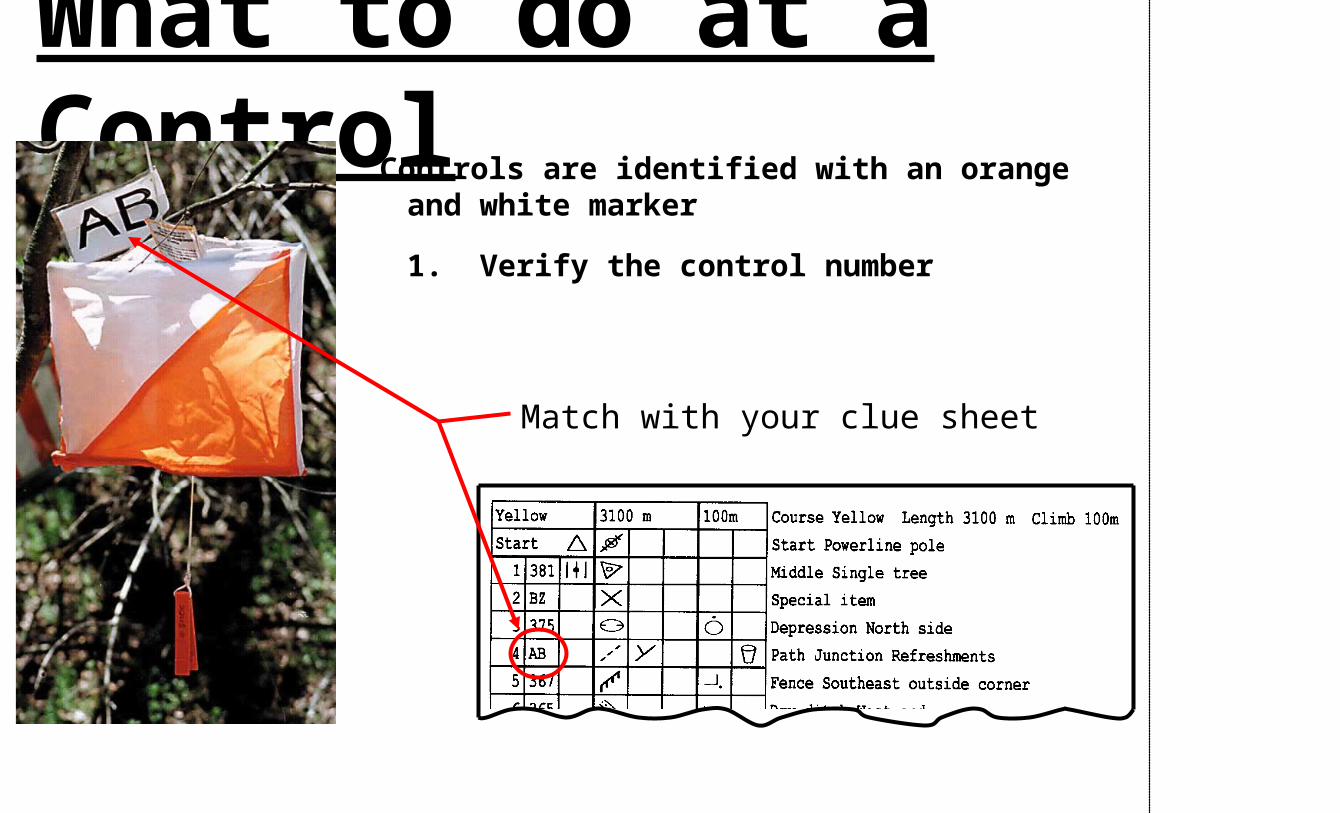
MAP
• Receive it at the start (or map table, depending on the event)

CLUE SHEET
• Detailed description of the control locations
• Receive it at the start (or map table)
Clues in EnglishClues in International Orienteering symbols
Control # (may be numeric or alpha)

MAP READING
North is at the top of map

BLACK = Man made Good Handrails! Building PowerlineRoad PipelinePath Fence
YELLOW = Open areasYELLOW = Open areas Easy Running! Fields, grassFields, grass
WHITE = Open forest Running/ Walking!

GREEN = Vegetation Slow Walking!Darker green is denser brush
BLUE = Water Go Around! Streams Lake/Pond
Well Marsh
BROWN = Land shapeEarth bank Contour lines
CONTOUR LINES• Lines of EQUAL ELEVATION
• They describe the slope of the land
• Colored brown on orienteering maps


Lines far apart Lines close together
• Which way is up or down? – Water flows downhill
• Start at a lake or stream, and work up
– Compare the map to your surroundings
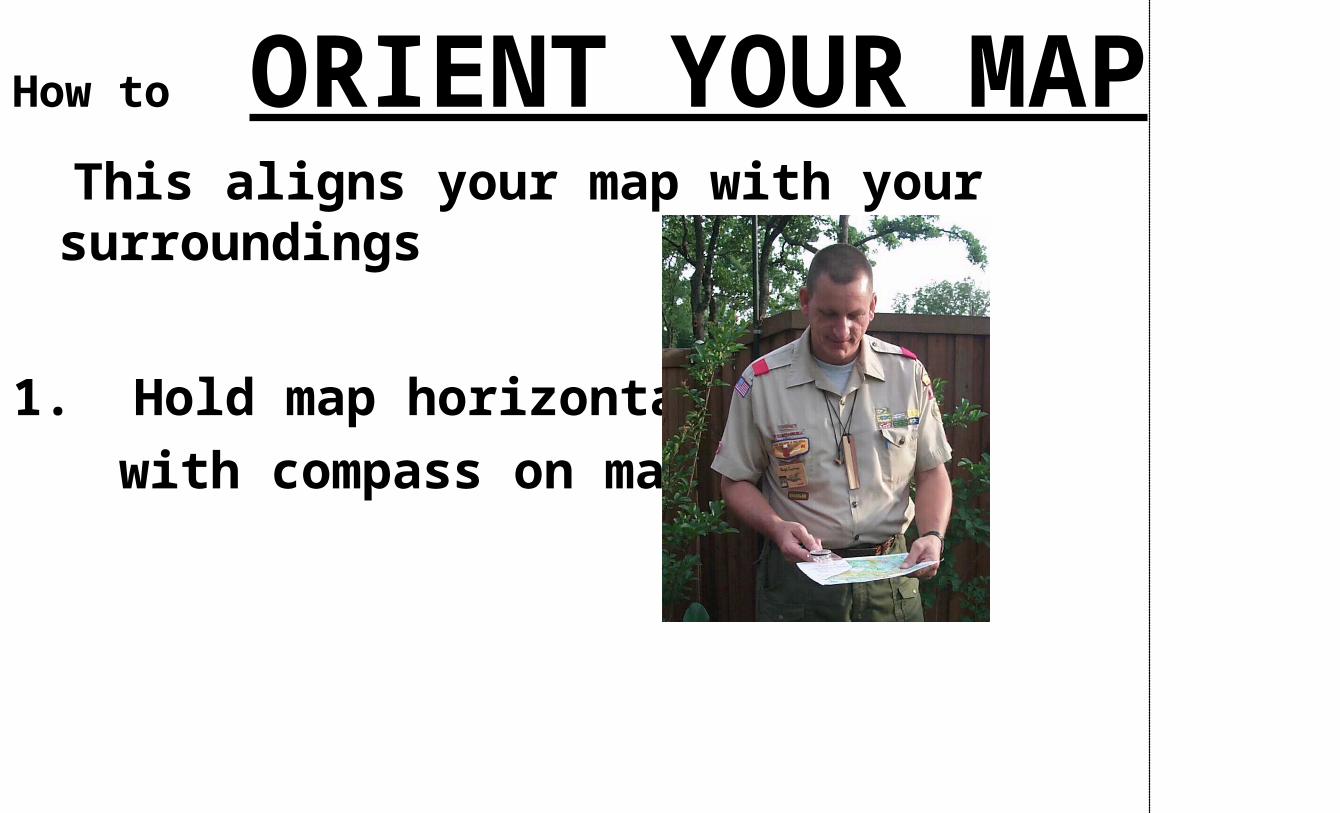
How to ORIENT YOUR MAP This aligns your map with your surroundings
1. Hold map horizontal,
with compass on map

2. Compare:
3. Rotate your map until they line up
Compass
needle
North on
the map

• Reality check:• Look at your surroundings
– Which way is uphill / downhill?
– Which way is the forest / lake?
– Where is the sun?