Embed Size (px)
Citation preview

1 Orientation & Manual registration - Revision 01 – 16 Nov 2015
Orientation and Manual registration
USER’S GUIDE
2 Orientation & Manual registration - Revision 01 – 16 Nov 2015
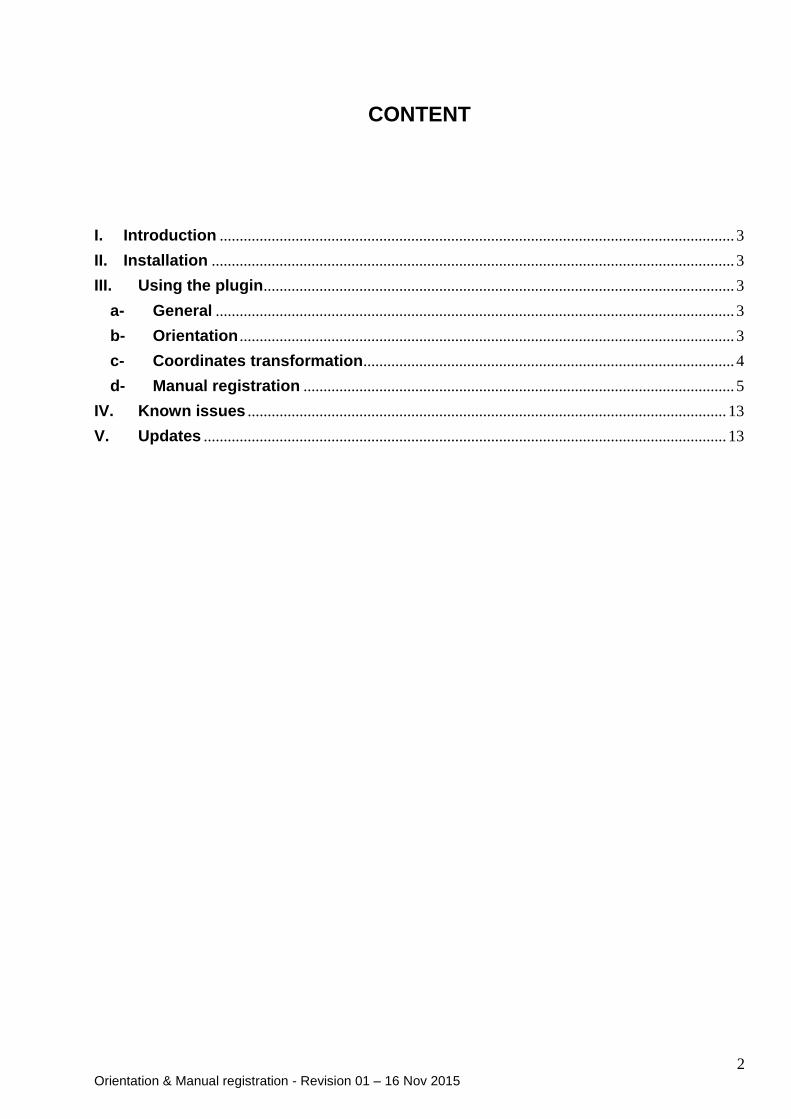
CONTENT
I. Introduction ................................................................................................................................. 3
II. Installation ................................................................................................................................... 3
III. Using the plugin ...................................................................................................................... 3
a- General .................................................................................................................................. 3
b- Orientation ............................................................................................................................ 3
c- Coordinates transformation ............................................................................................. 4
d- Manual registration ............................................................................................................ 5
IV. Known issues ........................................................................................................................ 13
V. Updates ................................................................................................................................... 13
3 Orientation & Manual registration - Revision 01 – 16 Nov 2015
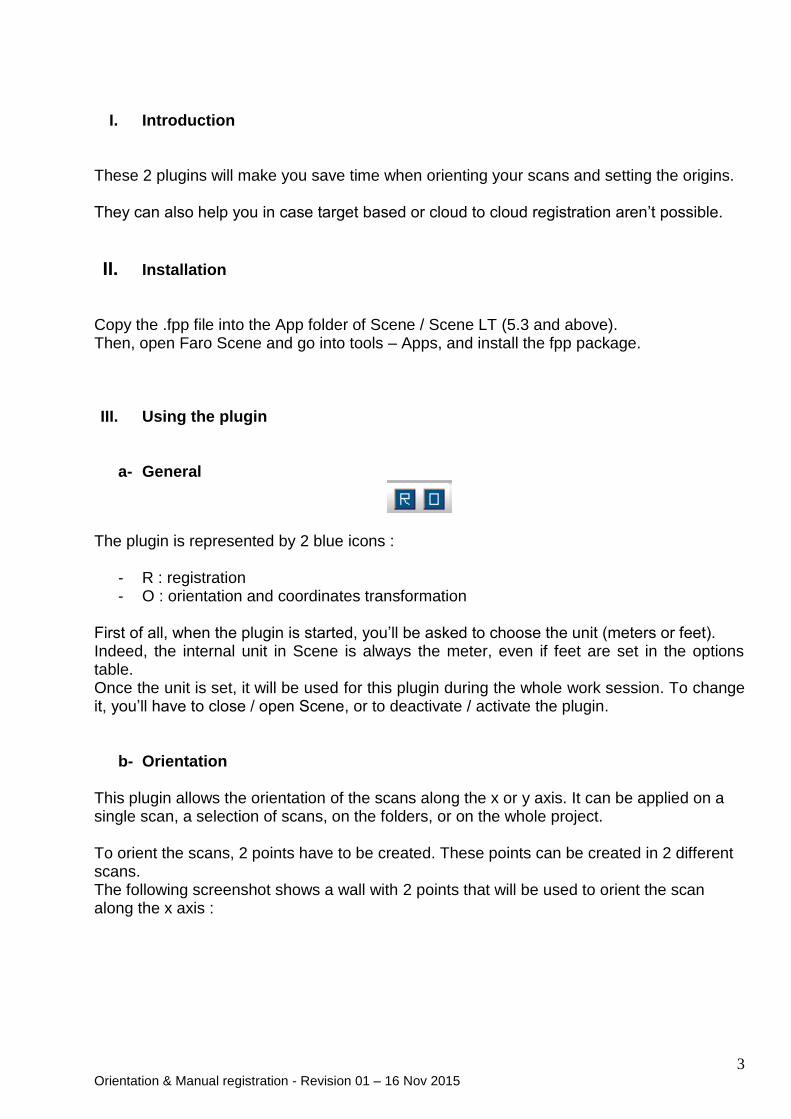
I. Introduction These 2 plugins will make you save time when orienting your scans and setting the origins. They can also help you in case target based or cloud to cloud registration aren’t possible.
II. Installation Copy the .fpp file into the App folder of Scene / Scene LT (5.3 and above). Then, open Faro Scene and go into tools – Apps, and install the fpp package. III. Using the plugin
a- General
The plugin is represented by 2 blue icons :
- R : registration - O : orientation and coordinates transformation
First of all, when the plugin is started, you’ll be asked to choose the unit (meters or feet). Indeed, the internal unit in Scene is always the meter, even if feet are set in the options table. Once the unit is set, it will be used for this plugin during the whole work session. To change it, you’ll have to close / open Scene, or to deactivate / activate the plugin.
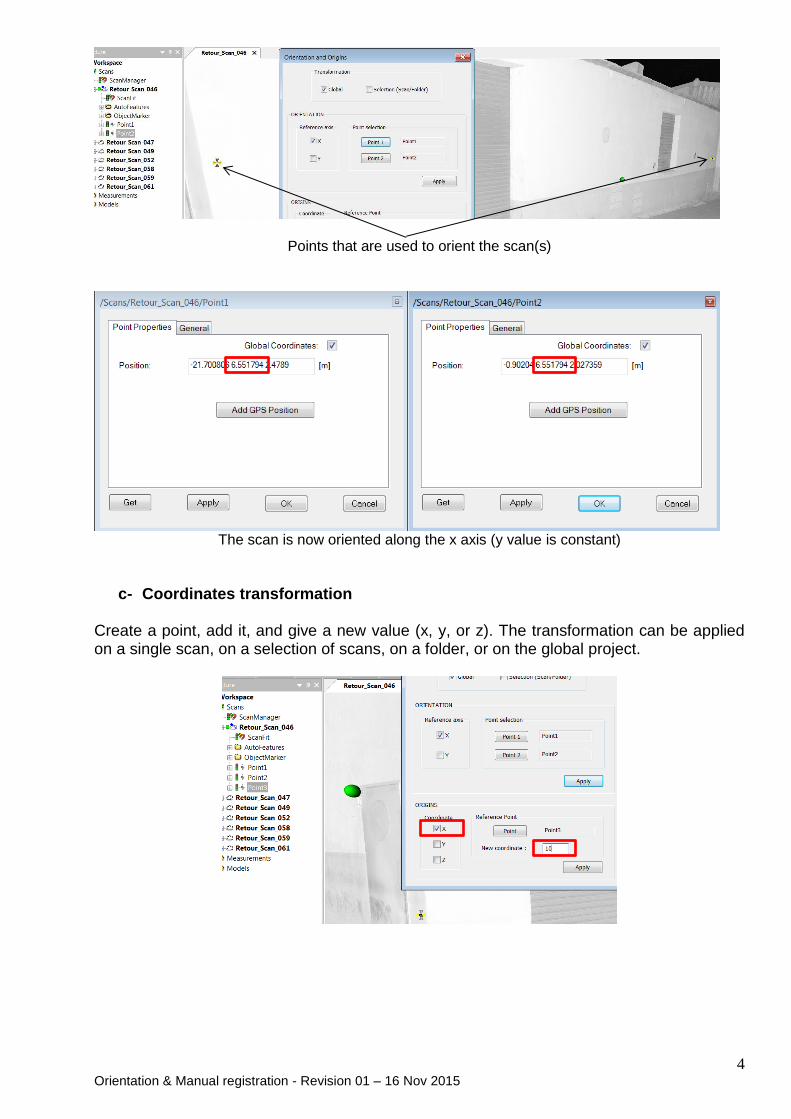
b- Orientation This plugin allows the orientation of the scans along the x or y axis. It can be applied on a single scan, a selection of scans, on the folders, or on the whole project. To orient the scans, 2 points have to be created. These points can be created in 2 different scans. The following screenshot shows a wall with 2 points that will be used to orient the scan along the x axis :
4 Orientation & Manual registration - Revision 01 – 16 Nov 2015
Points that are used to orient the scan(s)
The scan is now oriented along the x axis (y value is constant)
c- Coordinates transformation Create a point, add it, and give a new value (x, y, or z). The transformation can be applied on a single scan, on a selection of scans, on a folder, or on the global project.

5 Orientation & Manual registration - Revision 01 – 16 Nov 2015
Now the x coordinate of the selected point gets the new value
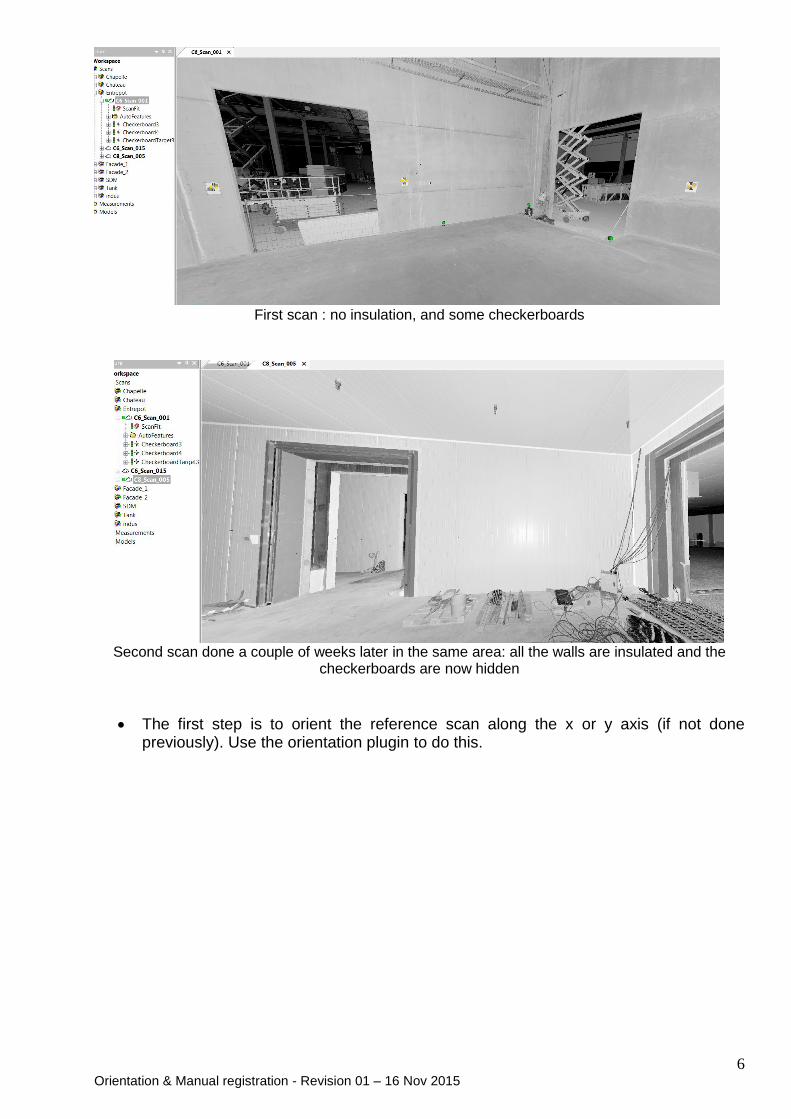
d- Manual registration Sometimes, either target based or cloud to cloud registration aren’t possible. This can happen if you need to go back on a site that changed very much. And sometimes you don’t have nice walls to create planes. This feature allows to register 2 scans by giving one direction and 3 coordinates. Important : please scan with the inclinometer switched on. For good results, the reference scan has to be correctly oriented along the x,y axis first (walls or geometry parallel to the xy axis). Start the plugin with the icon « R ». Choose a reference scan and a scan to register. In each scan, create 2 points that will be used for the direction. Please use the same point ordering to avoid to get 2 different orientations. Create 3 points for the coordinates. Then, add these points in the plugin interface and click on apply : the scan to place will be rotated and moved to match the reference scan. As it is a purely manual registration, you won’t get any report or traffic light here. Example : Let’s take a warehouse under construction. The first scan was done very early during the construction. Some checkerboards were left on the walls, in order to prepare the next scanning. But some weeks later, most of the walls were insulated : no more targets, the cloud to cloud was impossible, and there was no nice planar surfaces. But the insulation sheet still has the same direction as the wall, and there are still some concrete parts on the openings sides. The concrete slab is the same. So, we have a direction and some reliable areas.
6 Orientation & Manual registration - Revision 01 – 16 Nov 2015
First scan : no insulation, and some checkerboards
Second scan done a couple of weeks later in the same area: all the walls are insulated and the
checkerboards are now hidden
The first step is to orient the reference scan along the x or y axis (if not done previously). Use the orientation plugin to do this.
7 Orientation & Manual registration - Revision 01 – 16 Nov 2015
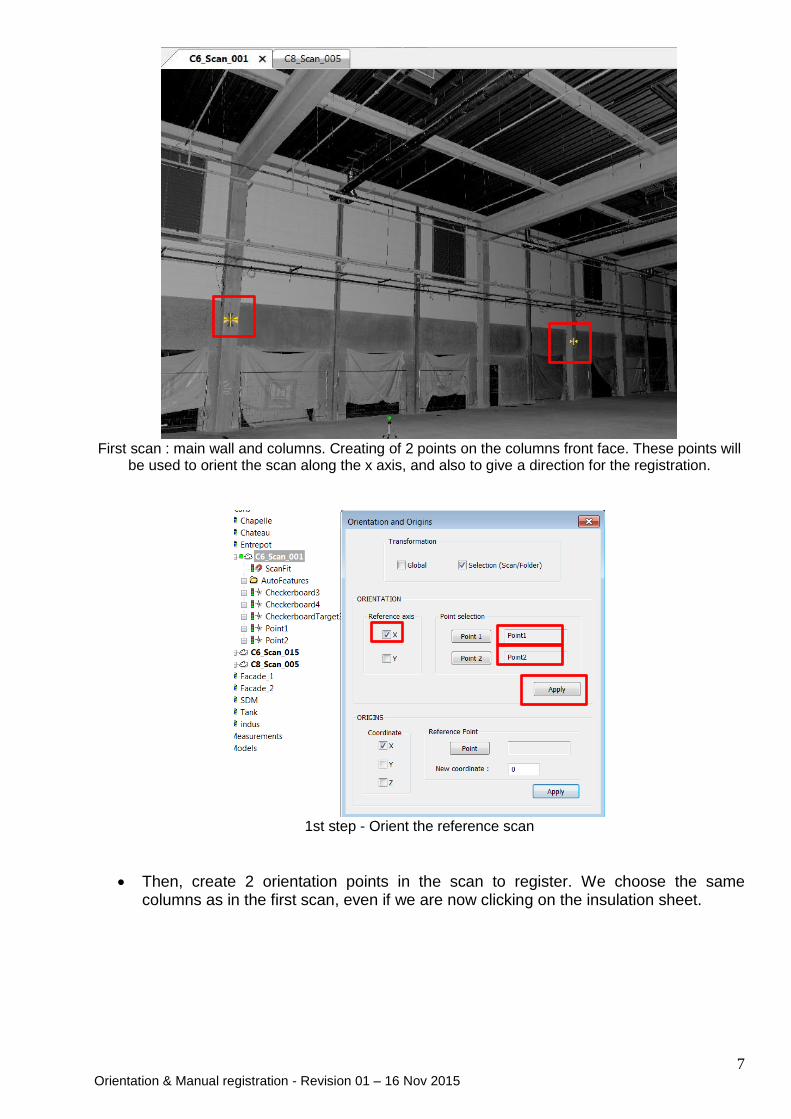
First scan : main wall and columns. Creating of 2 points on the columns front face. These points will
be used to orient the scan along the x axis, and also to give a direction for the registration.
1st step - Orient the reference scan
Then, create 2 orientation points in the scan to register. We choose the same columns as in the first scan, even if we are now clicking on the insulation sheet.
8 Orientation & Manual registration - Revision 01 – 16 Nov 2015
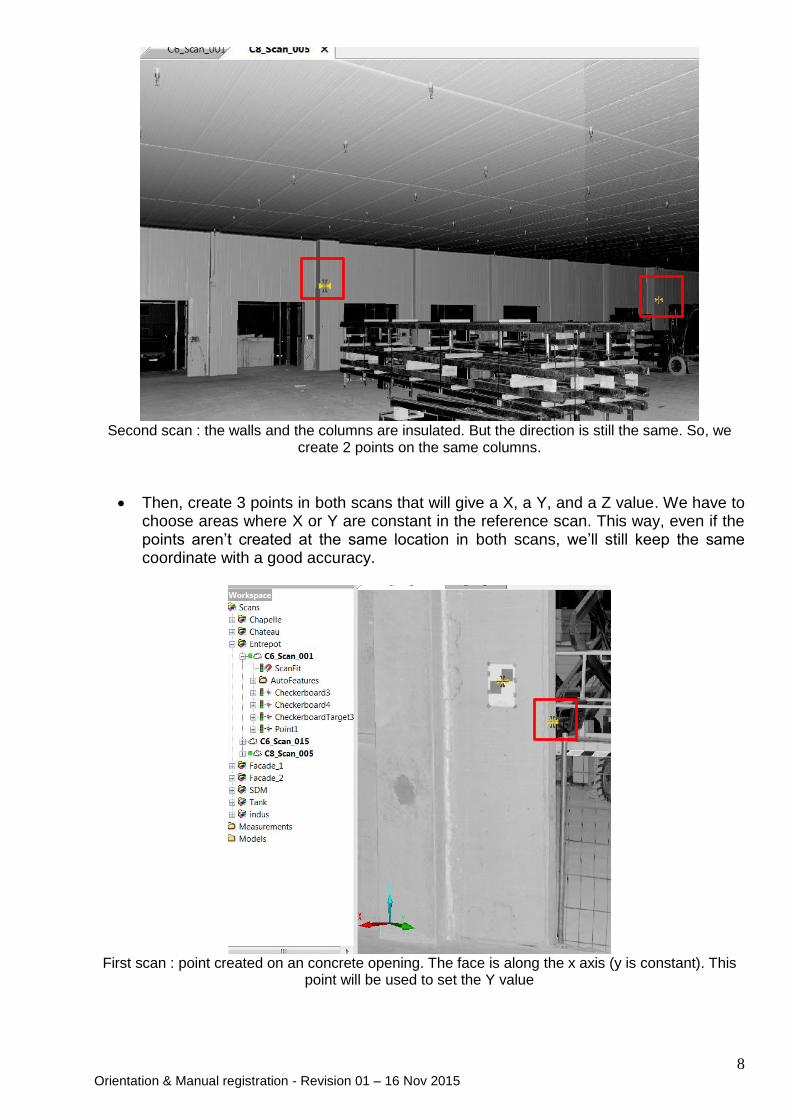
Second scan : the walls and the columns are insulated. But the direction is still the same. So, we
create 2 points on the same columns.
Then, create 3 points in both scans that will give a X, a Y, and a Z value. We have to choose areas where X or Y are constant in the reference scan. This way, even if the points aren’t created at the same location in both scans, we’ll still keep the same coordinate with a good accuracy.
First scan : point created on an concrete opening. The face is along the x axis (y is constant). This
point will be used to set the Y value

9 Orientation & Manual registration - Revision 01 – 16 Nov 2015
Second scan : create a point in the same area as in the first scan. As this area is along the x axis,
the y value doesn’t change very much (we should stay within 1-2mm)
Do the same along the y axis, to set a X value :
Same for the y axis in the first scan

10 Orientation & Manual registration - Revision 01 – 16 Nov 2015
Same for the y axis in the second scan
Finally, we create a point to set a Z value :
First scan : creation of a point on the ground to set the Z value

11 Orientation & Manual registration - Revision 01 – 16 Nov 2015
Same in the second scan
So, now we have defined a direction, and also 3 coordinates created in similar areas in both scans.
Start the plugin and add the points. Make sure that the point ordering is the same for the orientation. When all the points are added, click on « apply » :
Important : At the end of the calculation, you have to go in the transformation table (properties\transformation) of the registered scan. Just enter the transformation screen and click on « ok ». Indeed Scene has a small refreshing issue when applying the calculation, and displaying this table solves it.

12 Orientation & Manual registration - Revision 01 – 16 Nov 2015
Because of a small screen refreshing issue, please enter the transformation table of the registered
scan and click on « ok ».
The registered scan (yellow) and the reference scan (grey)

13 Orientation & Manual registration - Revision 01 – 16 Nov 2015
IV. Known issues
It’s important to enter the transformation properties table of the registered scan at the end of the calculation. Otherwise, the 3D view will still show a scan that is not registered. e-mail : [email protected]
V. Updates Revision 1 – 16 Nov. 2015