Embed Size (px)
Citation preview
Oracle® Identity ManagerPassword Synchronization Module for Microsoft Active Directory Installation and Configuration Guide
Release 9.0.4
E10450-11
April 2010

Oracle Identity Manager Password Synchronization Module for Microsoft Active Directory Installation and Configuration Guide, Release 9.0.4
E10450-11
Copyright © 2010, Oracle and/or its affiliates. All rights reserved.
Primary Author: Lyju Vadassery
Contributing Authors: Debapriya Datta, Devanshi Mohan, Alankrita Prakash
This software and related documentation are provided under a license agreement containing restrictions on use and disclosure and are protected by intellectual property laws. Except as expressly permitted in your license agreement or allowed by law, you may not use, copy, reproduce, translate, broadcast, modify, license, transmit, distribute, exhibit, perform, publish, or display any part, in any form, or by any means. Reverse engineering, disassembly, or decompilation of this software, unless required by law for interoperability, is prohibited.
The information contained herein is subject to change without notice and is not warranted to be error-free. If you find any errors, please report them to us in writing.
If this software or related documentation is delivered to the U.S. Government or anyone licensing it on behalf of the U.S. Government, the following notice is applicable:
U.S. GOVERNMENT RIGHTS Programs, software, databases, and related documentation and technical data delivered to U.S. Government customers are "commercial computer software" or "commercial technical data" pursuant to the applicable Federal Acquisition Regulation and agency-specific supplemental regulations. As such, the use, duplication, disclosure, modification, and adaptation shall be subject to the restrictions and license terms set forth in the applicable Government contract, and, to the extent applicable by the terms of the Government contract, the additional rights set forth in FAR 52.227-19, Commercial Computer Software License (December 2007). Oracle USA, Inc., 500 Oracle Parkway, Redwood City, CA 94065.
This software is developed for general use in a variety of information management applications. It is not developed or intended for use in any inherently dangerous applications, including applications which may create a risk of personal injury. If you use this software in dangerous applications, then you shall be responsible to take all appropriate fail-safe, backup, redundancy, and other measures to ensure the safe use of this software. Oracle Corporation and its affiliates disclaim any liability for any damages caused by use of this software in dangerous applications.
Oracle is a registered trademark of Oracle Corporation and/or its affiliates. Other names may be trademarks of their respective owners.
This software and documentation may provide access to or information on content, products, and services from third parties. Oracle Corporation and its affiliates are not responsible for and expressly disclaim all warranties of any kind with respect to third-party content, products, and services. Oracle Corporation and its affiliates will not be responsible for any loss, costs, or damages incurred due to your access to or use of third-party content, products, or services.

iii
Contents
Preface ................................................................................................................................................................. v
Audience....................................................................................................................................................... vDocumentation Accessibility ..................................................................................................................... vRelated Documents ..................................................................................................................................... viDocumentation Updates ............................................................................................................................ viConventions ................................................................................................................................................. vi
What's New in Oracle Identity Manager Password Synchronization Module for Microsoft Active Directory? ................................................................................................................... vii
Software Updates ....................................................................................................................................... viiDocumentation-Specific Updates.............................................................................................................. x
1 Overview of the Password Synchronization Module
1.1 Components for Connecting Oracle Identity Manager to Microsoft Active Directory .... 1-11.2 How Password Synchronization Works.................................................................................. 1-21.3 Files and Directories That Comprise the Password Synchronization Module .................. 1-31.4 Determining the Release Number of the Password Synchronization Module.................. 1-3
2 Deploying the Password Synchronization Module
2.1 Preparing to Install the Password Synchronization Module................................................ 2-12.1.1 Determining the Release Number of the Connector ...................................................... 2-12.1.2 Verifying Deployment Requirements............................................................................... 2-22.2 Installing the Password Synchronization Module ................................................................. 2-22.2.1 Files Copied During Password Synchronization Module Installation ........................ 2-52.3 Performing Postinstallation Steps for the Password Synchronization Module ................ 2-52.4 Configuring the Password Synchronization Module............................................................ 2-72.5 Step 6: Configuring the Password Synchronization Module for SSL Communication.... 2-82.5.1 Configuring the Password Synchronization Module for SSL Communication on JBoss
Application Server 2-92.5.2 Configuring the Password Synchronization Module for SSL Communication on Oracle
WebLogic Server 2-102.6 Enabling the Strong Password Authentication (Password Complexity) Feature of Microsoft
Active Directory 2-132.7 Disabling and Enabling Password Synchronization .......................................................... 2-13
iv
3 Upgrading the Password Synchronization Module
4 Removing the Password Synchronization Module
5 Known Issues
A Special Characters Supported for Passwords
Index
v
Preface
This guide describes the connector that is used to integrate Oracle Identity Manager with Microsoft Active Directory.
AudienceThis guide is intended for resource administrators and target system integration teams.
Documentation AccessibilityOur goal is to make Oracle products, services, and supporting documentation accessible to all users, including users that are disabled. To that end, our documentation includes features that make information available to users of assistive technology. This documentation is available in HTML format, and contains markup to facilitate access by the disabled community. Accessibility standards will continue to evolve over time, and Oracle is actively engaged with other market-leading technology vendors to address technical obstacles so that our documentation can be accessible to all of our customers. For more information, visit the Oracle Accessibility Program Web site at http://www.oracle.com/accessibility/.
Accessibility of Code Examples in DocumentationScreen readers may not always correctly read the code examples in this document. The conventions for writing code require that closing braces should appear on an otherwise empty line; however, some screen readers may not always read a line of text that consists solely of a bracket or brace.
Accessibility of Links to External Web Sites in DocumentationThis documentation may contain links to Web sites of other companies or organizations that Oracle does not own or control. Oracle neither evaluates nor makes any representations regarding the accessibility of these Web sites.
Access to Oracle SupportOracle customers have access to electronic support through My Oracle Support. For information, visit http://www.oracle.com/support/contact.html or visit http://www.oracle.com/accessibility/support.html if you are hearing impaired.
vi
Related DocumentsFor information about installing and using Oracle Identity Manager, see the Oracle Identity Manager documentation library.
For generic information about connectors, see Oracle Identity Manager Connector Concepts.
The following Oracle Technology Network page provides links to Oracle Identity Manager documentation:
http://www.oracle.com/technology/documentation/oim.html
Documentation UpdatesOracle is committed to delivering the best and most recent information available. For information about updates to the Oracle Identity Manager Connectors documentation, visit Oracle Technology Network at
http://www.oracle.com/technology/documentation/index.html
ConventionsThe following text conventions are used in this document:
Convention Meaning
boldface Boldface type indicates graphical user interface elements associated with an action, or terms defined in text or the glossary.
italic Italic type indicates book titles, emphasis, or placeholder variables for which you supply particular values.
monospace Monospace type indicates commands within a paragraph, URLs, code in examples, text that appears on the screen, or text that you enter.
vii
What's New in Oracle Identity ManagerPassword Synchronization Module for
Microsoft Active Directory?
This chapter provides an overview of the updates made to the software and documentation for the Microsoft Active Directory connector in release 9.0.4.17.
The updates discussed in this chapter are divided into the following categories:
■ Software Updates
This section describes updates made to the connector software.
■ Documentation-Specific Updates
This section describes major changes made to this guide. These changes are not related to software updates.
Software UpdatesThe following sections discuss software updates:
■ Software Updates in Release 9.0.4.5
■ Software Updates in Release 9.0.4.6
■ Software Updates in Release 9.0.4.7
■ Software Updates in Release 9.0.4.8
■ Software Updates in Release 9.0.4.9
■ Software Updates in Release 9.0.4.10
■ Software Updates in Release 9.0.4.10.1
■ Software Updates in Release 9.0.4.11
■ Software Updates in Release 9.0.4.12
■ Software Updates in Release 9.0.4.13
■ Software Updates in Release 9.0.4.14
■ Software Updates in Release 9.0.4.15
See Also: The earlier release of this guide for information about updates that were new in that release
viii
■ Software Updates in Release 9.0.4.16
■ Software Updates in Release 9.0.4.17
Software Updates in Release 9.0.4.5The following are issues resolved in release 9.0.4.5:
Software Updates in Release 9.0.4.6There are no software updates in release 9.0.4.6.
Software Updates in Release 9.0.4.7There are no software updates in release 9.0.4.7.
Software Updates in Release 9.0.4.8There are no software updates in release 9.0.4.8.
Software Updates in Release 9.0.4.9The following are issues resolved in release 9.0.4.9:
Software Updates in Release 9.0.4.10There are no software updates in release 9.0.4.10.
Software Updates in Release 9.0.4.10.1The following are issues resolved in release 9.0.4.10.1:
Bug Number Issue Resolution
6989471 The following issue was seen if the password synchronization module was installed on Oracle Identity Manager 9.1.0:
If a user's password were changed on the target system, then the password synchronization module would make the same change to the user's password on Oracle Identity Manager. However, the flag that indicated that the change was made from the target system would not be set. Next, if the account password were changed on Oracle Identity Manager, then the tcStaleDataException exception was thrown.
This issue has been fixed. The flag that indicates a password change made on the target system is correctly set each time the password is changed on the target system.
Bug Number Issue Resolution
7021306 While changing the password in Microsoft Active Directory, an error was thrown if a special character was included in the password.
This issue has been resolved. While specifying a password, you can now include any of the supported special characters. See Appendix A, "Special Characters Supported for Passwords" for more information.
ix
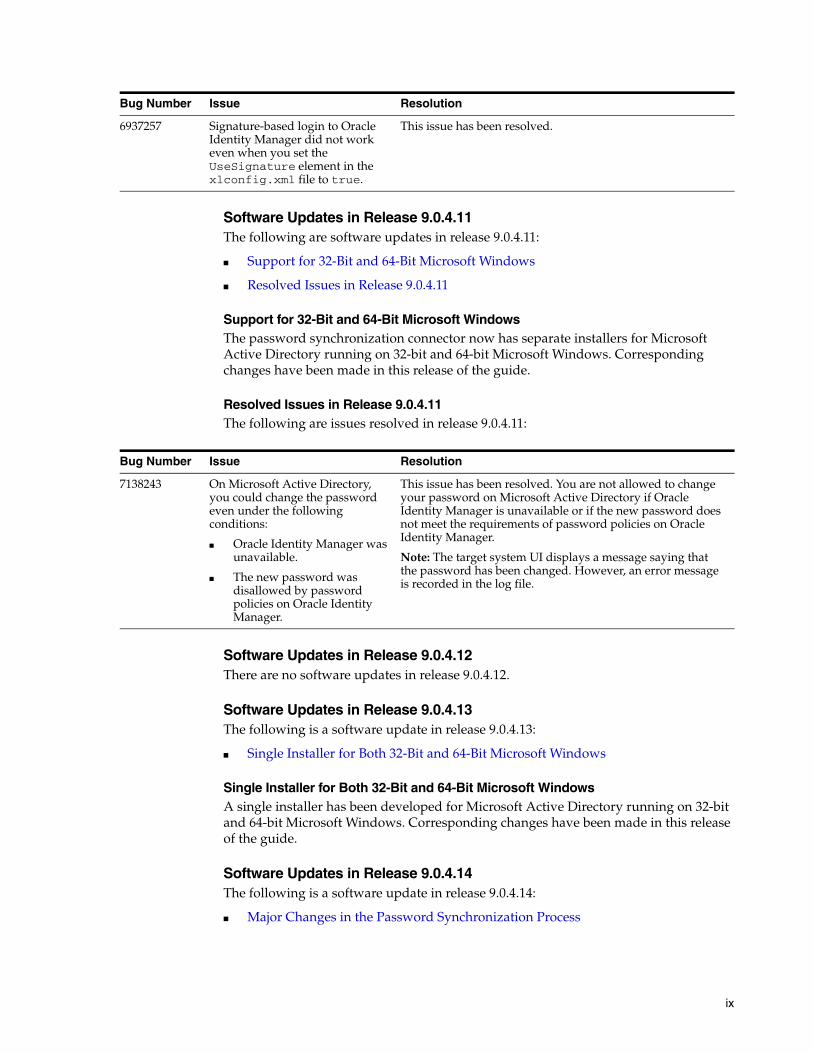
Software Updates in Release 9.0.4.11The following are software updates in release 9.0.4.11:
■ Support for 32-Bit and 64-Bit Microsoft Windows
■ Resolved Issues in Release 9.0.4.11
Support for 32-Bit and 64-Bit Microsoft WindowsThe password synchronization connector now has separate installers for Microsoft Active Directory running on 32-bit and 64-bit Microsoft Windows. Corresponding changes have been made in this release of the guide.
Resolved Issues in Release 9.0.4.11The following are issues resolved in release 9.0.4.11:
Software Updates in Release 9.0.4.12There are no software updates in release 9.0.4.12.
Software Updates in Release 9.0.4.13The following is a software update in release 9.0.4.13:
■ Single Installer for Both 32-Bit and 64-Bit Microsoft Windows
Single Installer for Both 32-Bit and 64-Bit Microsoft WindowsA single installer has been developed for Microsoft Active Directory running on 32-bit and 64-bit Microsoft Windows. Corresponding changes have been made in this release of the guide.
Software Updates in Release 9.0.4.14The following is a software update in release 9.0.4.14:
■ Major Changes in the Password Synchronization Process
Bug Number Issue Resolution
6937257 Signature-based login to Oracle Identity Manager did not work even when you set the UseSignature element in the xlconfig.xml file to true.
This issue has been resolved.
Bug Number Issue Resolution
7138243 On Microsoft Active Directory, you could change the password even under the following conditions:
■ Oracle Identity Manager was unavailable.
■ The new password was disallowed by password policies on Oracle Identity Manager.
This issue has been resolved. You are not allowed to change your password on Microsoft Active Directory if Oracle Identity Manager is unavailable or if the new password does not meet the requirements of password policies on Oracle Identity Manager.
Note: The target system UI displays a message saying that the password has been changed. However, an error message is recorded in the log file.
x
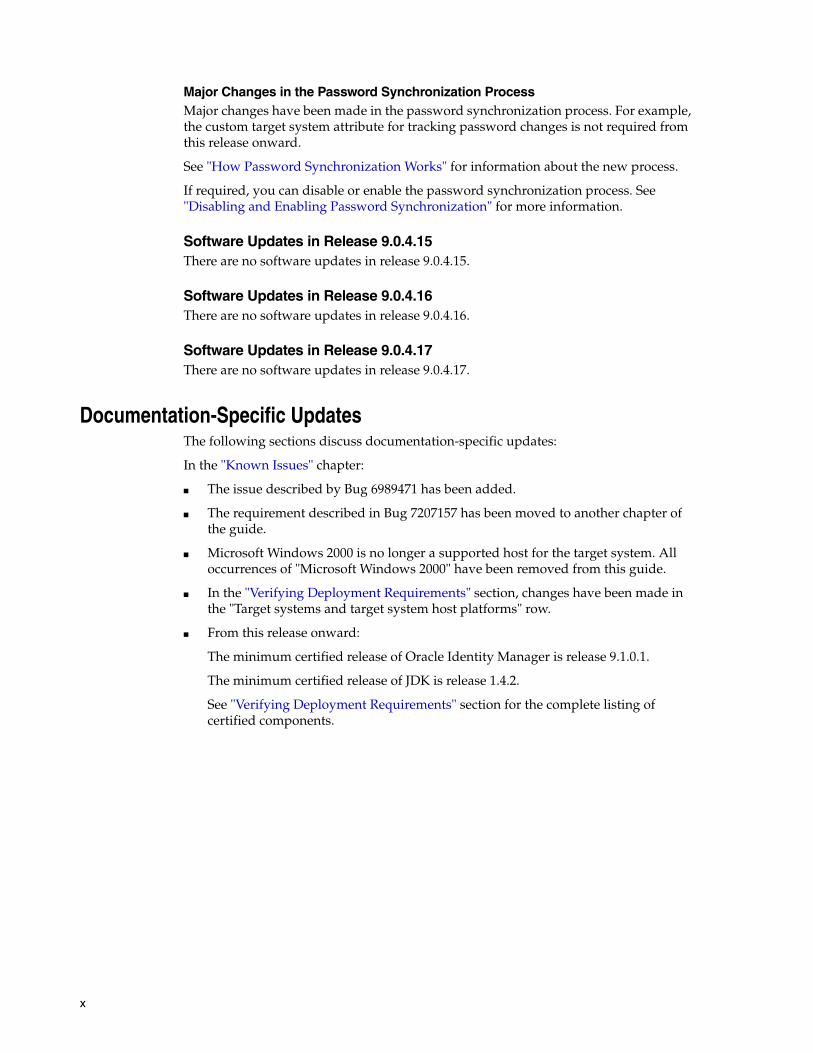
Major Changes in the Password Synchronization ProcessMajor changes have been made in the password synchronization process. For example, the custom target system attribute for tracking password changes is not required from this release onward.
See "How Password Synchronization Works" for information about the new process.
If required, you can disable or enable the password synchronization process. See "Disabling and Enabling Password Synchronization" for more information.
Software Updates in Release 9.0.4.15There are no software updates in release 9.0.4.15.
Software Updates in Release 9.0.4.16There are no software updates in release 9.0.4.16.
Software Updates in Release 9.0.4.17There are no software updates in release 9.0.4.17.
Documentation-Specific UpdatesThe following sections discuss documentation-specific updates:
In the "Known Issues" chapter:
■ The issue described by Bug 6989471 has been added.
■ The requirement described in Bug 7207157 has been moved to another chapter of the guide.
■ Microsoft Windows 2000 is no longer a supported host for the target system. All occurrences of "Microsoft Windows 2000" have been removed from this guide.
■ In the "Verifying Deployment Requirements" section, changes have been made in the "Target systems and target system host platforms" row.
■ From this release onward:
The minimum certified release of Oracle Identity Manager is release 9.1.0.1.
The minimum certified release of JDK is release 1.4.2.
See "Verifying Deployment Requirements" section for the complete listing of certified components.
1
Overview of the Password Synchronization Module 1-1
1Overview of the Password SynchronizationModule
Oracle Identity Manager is an advanced user account provisioning system for automatically granting and revoking access to enterprise applications and managed systems. The modular architecture of Oracle Identity Manager can handle most IT requirements, without requiring changes to existing infrastructure, policies, or procedures.
This chapter contains the following sections:
■ Components for Connecting Oracle Identity Manager to Microsoft Active Directory
■ How Password Synchronization Works
■ Files and Directories That Comprise the Password Synchronization Module
■ Determining the Release Number of the Password Synchronization Module
1.1 Components for Connecting Oracle Identity Manager to Microsoft Active Directory
Oracle Identity Manager provides the following components to link with Microsoft Active Directory:
■ Connector for Microsoft Active Directory
■ Password synchronization module for Microsoft Active Directory
Depending on your specific needs, you can deploy one or both of these components to connect Oracle Identity Manager and Microsoft Active Directory. Deployed together (along with LDAP over SSL), the connector and the password synchronization module provide full, bidirectional synchronization of all user attributes, including passwords.
The connector for Microsoft Active Directory can update user account attributes bidirectionally. However, password changes are updated only when the password is changed through Oracle Identity Manager, and not when it is changed through Microsoft Active Directory.
In contrast, the password synchronization module for Microsoft Active Directory updates Oracle Identity Manager with passwords changed in Microsoft Active Directory.
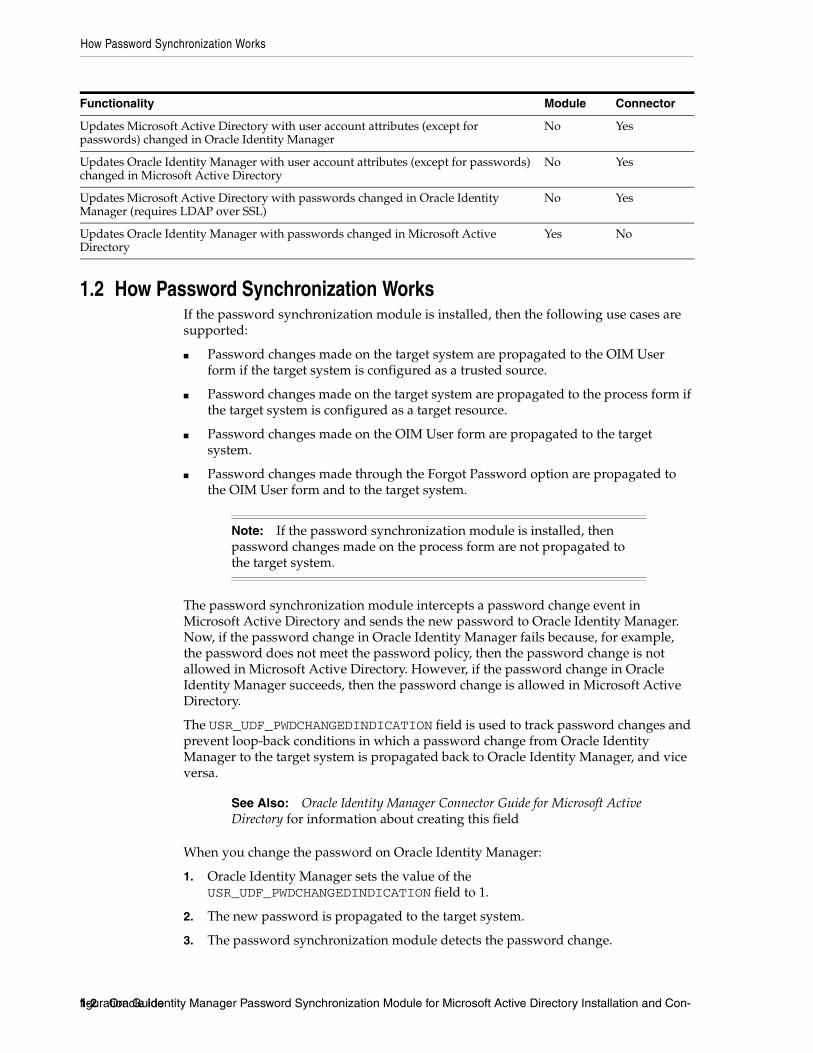
The following table compares the functionality offered by both tools.
How Password Synchronization Works
1-2 Oracle Identity Manager Password Synchronization Module for Microsoft Active Directory Installation and Con-figuration Guide
1.2 How Password Synchronization WorksIf the password synchronization module is installed, then the following use cases are supported:
■ Password changes made on the target system are propagated to the OIM User form if the target system is configured as a trusted source.
■ Password changes made on the target system are propagated to the process form if the target system is configured as a target resource.
■ Password changes made on the OIM User form are propagated to the target system.
■ Password changes made through the Forgot Password option are propagated to the OIM User form and to the target system.
The password synchronization module intercepts a password change event in Microsoft Active Directory and sends the new password to Oracle Identity Manager. Now, if the password change in Oracle Identity Manager fails because, for example, the password does not meet the password policy, then the password change is not allowed in Microsoft Active Directory. However, if the password change in Oracle Identity Manager succeeds, then the password change is allowed in Microsoft Active Directory.
The USR_UDF_PWDCHANGEDINDICATION field is used to track password changes and prevent loop-back conditions in which a password change from Oracle Identity Manager to the target system is propagated back to Oracle Identity Manager, and vice versa.
When you change the password on Oracle Identity Manager:
1. Oracle Identity Manager sets the value of the USR_UDF_PWDCHANGEDINDICATION field to 1.
2. The new password is propagated to the target system.
3. The password synchronization module detects the password change.
Functionality Module Connector
Updates Microsoft Active Directory with user account attributes (except for passwords) changed in Oracle Identity Manager
No Yes
Updates Oracle Identity Manager with user account attributes (except for passwords) changed in Microsoft Active Directory
No Yes
Updates Microsoft Active Directory with passwords changed in Oracle Identity Manager (requires LDAP over SSL)
No Yes
Updates Oracle Identity Manager with passwords changed in Microsoft Active Directory
Yes No
Note: If the password synchronization module is installed, then password changes made on the process form are not propagated to the target system.
See Also: Oracle Identity Manager Connector Guide for Microsoft Active Directory for information about creating this field

Determining the Release Number of the Password Synchronization Module
Overview of the Password Synchronization Module 1-3
4. The password synchronization module checks the value of the USR_UDF_PWDCHANGEDINDICATION field, sets the field to 0, and then performs no further action.
When you change the password on the target system:
1. The password synchronization module sets the value of the USR_UDF_PWDCHANGEDINDICATION field to 1.
2. The new password is set in the USR table.
3. Oracle Identity Manager detects the password change.
4. Oracle Identity Manager checks the value of the USR_UDF_PWDCHANGEDINDICATION field, sets the field to 0, and then performs no further action.
1.3 Files and Directories That Comprise the Password Synchronization Module
The installation files for the module are in the following directory on the installation media:
Directory Servers/Microsoft Active Directory/Microsoft Active Directory Password Sync
These files and directories are listed in the following table.
1.4 Determining the Release Number of the Password Synchronization Module
To determine the release number of an existing password synchronization module:
1. Extract the contents of the xliADSync.jar file. This file is copied into the ADSYNC_HOME/lib directory after you perform the installation process described in Chapter 2.
Note: When you perform a Create User provisioning operation, the value of the field is NULL. The password synchronization mod treats the NULL value the same as it would treat a value of 1.
File in the Installation Media Directory Description
setup_ad.exe This file is used to install the password synchronization module.
set_ad.jar This JAR file is used during the installation process.
Files in the com/oracle/xl/installer directory
Each of these resource bundle files contains language-specific information that is used by the connector.
Note: A resource bundle is a file containing localized versions of the text strings that are displayed on the Administrative and User Console. These text strings include GUI element labels and messages.
Files in the jpclient/lib directory These are password synchronization library files.
Files in the xlhome/ext directory These are third-party JAR files.
Files in the xlhome/install directory These JAR files are required by the password synchronization module installer.

Determining the Release Number of the Password Synchronization Module
1-4 Oracle Identity Manager Password Synchronization Module for Microsoft Active Directory Installation and Con-figuration Guide
2. Open the manifest.mf file in a text editor. The manifest.mf file is one of the files bundled inside the xliADSync.jar file.
In the manifest.mf file, the release number of the connector is displayed as the value of the Version property.
2
Deploying the Password Synchronization Module 2-1
2Deploying the Password SynchronizationModule
This guide covers two scenarios:
■ Upgrading an existing instance of the password synchronization module to the current version
To implement this option, follow the instructions provided in Chapter 3.
■ Deploying the password synchronization module
To implement this option, follow the instructions provided in this chapter.
Deploying the password synchronization module involves performing the following steps:
■ Preparing to Install the Password Synchronization Module
■ Installing the Password Synchronization Module
■ Performing Postinstallation Steps for the Password Synchronization Module
■ Configuring the Password Synchronization Module
If you want to use the Strong Password Authentication (Password Complexity) feature of Microsoft Active Directory, then perform the procedure described in the following section:
■ Enabling the Strong Password Authentication (Password Complexity) Feature of Microsoft Active Directory
If you want to disable or enable password synchronization, then:
■ Disabling and Enabling Password Synchronization
2.1 Preparing to Install the Password Synchronization ModuleThis section contains the following topics:
■ Determining the Release Number of the Connector
■ Verifying Deployment Requirements
2.1.1 Determining the Release Number of the ConnectorYou might have a deployment of an earlier release of the connector. While deploying the current release, you might want to know the release number of the earlier release. To determine the release number of the connector that has already been deployed:
Installing the Password Synchronization Module
2-2 Oracle Identity Manager Password Synchronization Module for Microsoft Active Directory Installation and Con-figuration Guide
1. In a temporary directory, extract the contents of the following JAR file:
ADSYNC_HOME\lib\xliADSync.jar
Here, ADSYNC_HOME is the directory on the Microsoft Active Directory host computer in which you had installed the connector.
2. Open the manifest.mf file in a text editor. The manifest.mf file is one of the files bundled inside the xliADSync.jar file.
In the manifest.mf file, the release number of the connector is displayed as the value of the Version property.
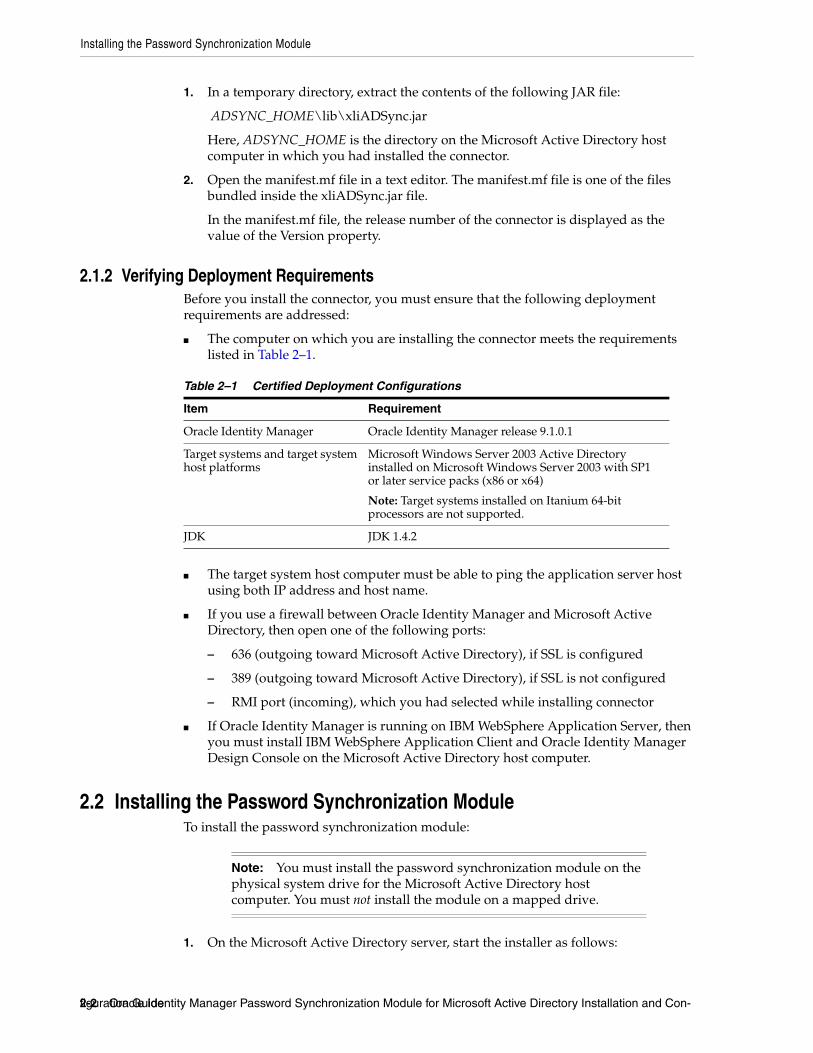
2.1.2 Verifying Deployment RequirementsBefore you install the connector, you must ensure that the following deployment requirements are addressed:
■ The computer on which you are installing the connector meets the requirements listed in Table 2–1.
■ The target system host computer must be able to ping the application server host using both IP address and host name.
■ If you use a firewall between Oracle Identity Manager and Microsoft Active Directory, then open one of the following ports:
– 636 (outgoing toward Microsoft Active Directory), if SSL is configured
– 389 (outgoing toward Microsoft Active Directory), if SSL is not configured
– RMI port (incoming), which you had selected while installing connector
■ If Oracle Identity Manager is running on IBM WebSphere Application Server, then you must install IBM WebSphere Application Client and Oracle Identity Manager Design Console on the Microsoft Active Directory host computer.
2.2 Installing the Password Synchronization ModuleTo install the password synchronization module:
1. On the Microsoft Active Directory server, start the installer as follows:
Table 2–1 Certified Deployment Configurations
Item Requirement
Oracle Identity Manager Oracle Identity Manager release 9.1.0.1
Target systems and target system host platforms
Microsoft Windows Server 2003 Active Directory installed on Microsoft Windows Server 2003 with SP1 or later service packs (x86 or x64)
Note: Target systems installed on Itanium 64-bit processors are not supported.
JDK JDK 1.4.2
Note: You must install the password synchronization module on the physical system drive for the Microsoft Active Directory host computer. You must not install the module on a mapped drive.
Installing the Password Synchronization Module
Deploying the Password Synchronization Module 2-3
a. The installation files for the password synchronization module are in the following directory on the installation media:
Directory Servers/Microsoft Active Directory/Microsoft Active Directory Password Sync
Copy the contents of this directory to a temporary directory.
b. In the temporary directory, run the setup_ad.exe file to start the installer.
2. Specify a language.
3. Click Next.
4. On the Target Directory page, you can either accept the default installation directory or specify the path to the directory in which you want install the module. For example, you can specify a path similar to the following:
C:\OracleProvisioningAD
Alternatively, you can use the Browse button to navigate to the installation directory.
5. Click Next.
The installer creates a directory named adsynch inside the installation directory that you specify. Then, it copies the password synchronization module components into the adsynch directory and creates certain directories inside the adsynch directory.
6. On the Application Server page, specify the application server that hosts the Oracle Identity Manager server to which the Active Directory domain controller will connect. Then, click Next.
7. On the WebSphere Directory page, specify the path to the directory where the IBM WebSphere Application Client is installed, on the computer where you are installing the module. Then, click Next.
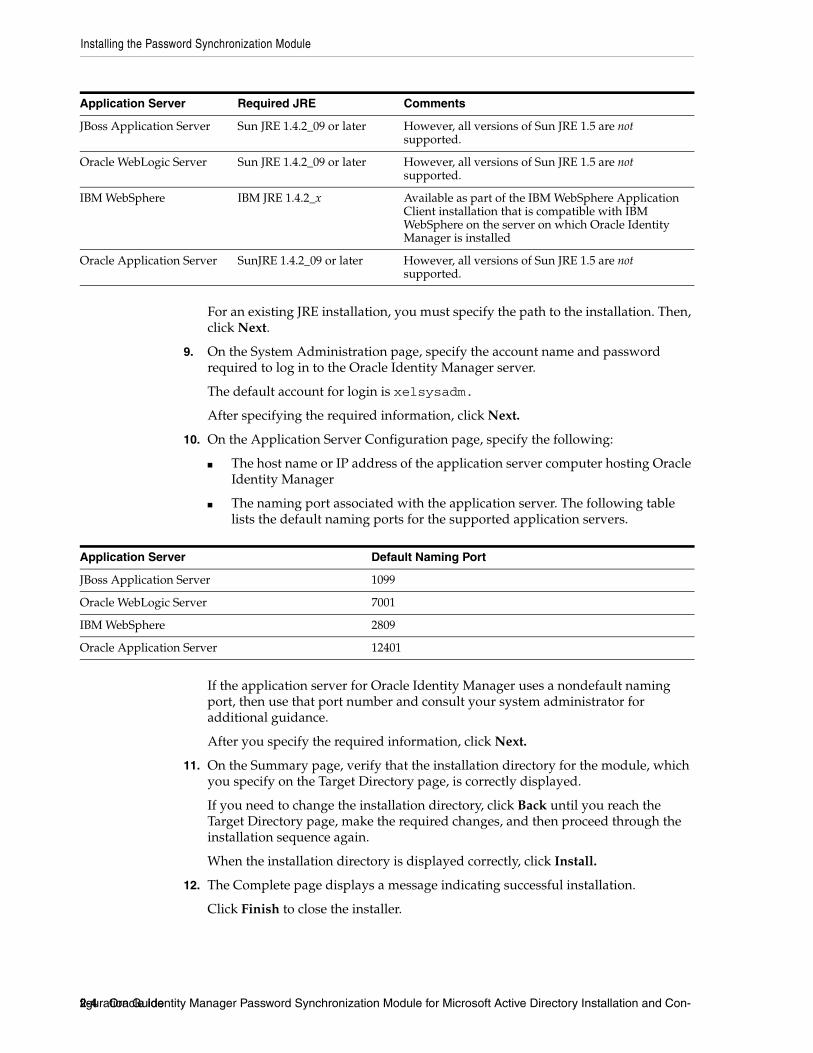
8. On the JRE page, specify the JRE option that you want to use with the module. The following choices are available:
■ JRE bundled with Oracle Identity Manager
■ An existing JRE 1.4.2 installation on the computer where you are installing the password synchronization module. The following table lists the appropriate JRE version for the supported application servers.
See Also: The "Files and Directories That Comprise the Password Synchronization Module" section on page 1-3 for more information about the installation files
Note: From this point onward, this guide refers to the directory user_specified_install_directory/adsynch as ADSYNC_HOME.
Note: If you specify IBM WebSphere as the application server, then perform the next step. Otherwise, directly proceed to Step 7.
Installing the Password Synchronization Module
2-4 Oracle Identity Manager Password Synchronization Module for Microsoft Active Directory Installation and Con-figuration Guide
For an existing JRE installation, you must specify the path to the installation. Then, click Next.
9. On the System Administration page, specify the account name and password required to log in to the Oracle Identity Manager server.
The default account for login is xelsysadm.
After specifying the required information, click Next.
10. On the Application Server Configuration page, specify the following:
■ The host name or IP address of the application server computer hosting Oracle Identity Manager
■ The naming port associated with the application server. The following table lists the default naming ports for the supported application servers.
If the application server for Oracle Identity Manager uses a nondefault naming port, then use that port number and consult your system administrator for additional guidance.
After you specify the required information, click Next.
11. On the Summary page, verify that the installation directory for the module, which you specify on the Target Directory page, is correctly displayed.
If you need to change the installation directory, click Back until you reach the Target Directory page, make the required changes, and then proceed through the installation sequence again.
When the installation directory is displayed correctly, click Install.
12. The Complete page displays a message indicating successful installation.
Click Finish to close the installer.
Application Server Required JRE Comments
JBoss Application Server Sun JRE 1.4.2_09 or later However, all versions of Sun JRE 1.5 are not supported.
Oracle WebLogic Server Sun JRE 1.4.2_09 or later However, all versions of Sun JRE 1.5 are not supported.
IBM WebSphere IBM JRE 1.4.2_x Available as part of the IBM WebSphere Application Client installation that is compatible with IBM WebSphere on the server on which Oracle Identity Manager is installed
Oracle Application Server SunJRE 1.4.2_09 or later However, all versions of Sun JRE 1.5 are not supported.
Application Server Default Naming Port
JBoss Application Server 1099
Oracle WebLogic Server 7001
IBM WebSphere 2809
Oracle Application Server 12401
Performing Postinstallation Steps for the Password Synchronization Module
Deploying the Password Synchronization Module 2-5
13. If you are installing the connector on a 64-bit Microsoft Windows operating system, then copy the Adsync.dll file from the Windows\SysWOW64 directory to the WINDOWS\system32 directory.
14. Restart the computer.
2.2.1 Files Copied During Password Synchronization Module InstallationThe following table lists the installation locations for the key components of the password synchronization module.
2.3 Performing Postinstallation Steps for the Password Synchronization Module
After you install the password synchronization module, perform the following steps:
1. Copy the following files from the OIM_HOME/ext directory to the ADSYNC_HOME\ext directory on the computer where you installed the password synchronization module:
■ javagroups-all.jar or jgroups-all.jar
■ oscache-2.0.2-22Jan04.jar or oscache.jar
2. Copy all the JAR files from the OIM_Design_Console_installation_dir/lib directory on the computer
Caution: Do not change the Oracle Identity Manager administrator password after you install the password synchronization module. If you change the password after installation, then the password synchronization module would stop working.
If you change the password, then you must reinstall the password synchronization module.
File Description
ADSYNC_HOME\config\xlconfig.xml This file contains all the user-configurable settings for the password synchronization module. Users can edit this file after installing the module. For details, refer to the "Configuring the Password Synchronization Module" section on page 2-7.
ADSYNC_HOME\lib\xliADSync.jar This JAR file contains the class files required by the Change Password script.
ADSYNC_HOME\ChangePassword.cmd This script, which is called by adsync.dll in response to a password change, uses the required classpath and command-line parameters to call the ChangePassword class, which is in the xliADSync.jar file.
ADSYNC_HOME\wsChangePassword.cmd This is the version of the Change Password script that is used by IBM WebSphere.
ADSYNC_HOME\lib\xliADSync.ear This file contains the class files required by the version of the Change Password script used by IBM WebSphere.
Windows\system32\Adsync.dll If you install the connector on a 32-bit Microsoft Windows operating system, then the Adsync.dll file is registered as a listener for password changes.
Windows\SysWOW64\Adsync.dll If you install the connector on a 64-bit Microsoft Windows operating system, then the Adsync.dll file is registered as a listener for password changes.
Performing Postinstallation Steps for the Password Synchronization Module
2-6 Oracle Identity Manager Password Synchronization Module for Microsoft Active Directory Installation and Con-figuration Guide
hosting the Oracle Identity Manager Design Console to the ADSYNC_HOME\lib directory on the computer where you install the password synchronization module.
3. Depending on the application server used, perform one of the following steps:
■ For JBoss Application Server, copy the JBOSS_HOME/client/jbossall-client.jar to the ADSYNC_HOME/ext directory.
■ For Oracle WebLogic Server, copy the BEA_HOME/weblogic81/server/lib/weblogic.jar into the ADSYNC_HOME/ext directory.
■ For IBM WebSphere, extract and copy the xlDataObjectBeans.jar file into the ADSYNC_HOME/lib directory as follows:
a. Use the following URL to connect to the IBM WebSphere administrative console:
http://localhost:9090/admin
b. Use the Oracle Identity Manager administrator account credentials to log in.
c. Click Applications, and then click Enterprise Applications.
d. Select Xellerate.
e. Click Export.
f. Save the Xellerate.ear file to a temporary directory.
g. Extract the xlDataObjectBeans.jar file from the Xellerate.ear file.
h. Copy the xlDataObjectBeans.jar file into the ADSYNC_HOME/lib directory.
■ For Oracle Application Server, copy the following files into the ADSYNC_HOME/ext directory:
ORACLE_HOME/j2ee/home/oc4jclient.jarORACLE_HOME/j2ee/home/lib/ejb.jar
4. If you plan to run Oracle Identity Manager on a clustered application server, then:
a. Establish a trust relationship between the virtual server that represents the Oracle Identity Manager cluster and the computer hosting the Active Directory domain controller on which you install the password synchronization module.
b. Add the host name of the virtual server to the hosts file of the computer hosting the Active Directory domain controller on which you install the password synchronization module.
c. Edit the xlconfig.xml file associated with the password synchronization module you install. This file is located in the ADSYNC_HOME/config directory.
Note: Ensure that you extract and copy the xlDataObjectBeans.jar file, not the xlDataObjects.jar file.
Configuring the Password Synchronization Module
Deploying the Password Synchronization Module 2-7
In the xlconfig.xml file, change the value of the <java.naming.provider.url> tag to the fully qualified host name of the virtual server.
After you update the value of the <java.naming.provider.url> tag in the xlconfig.xml file associated with the password synchronization module, save and close the file.
5. In the IT resource for Microsoft Active Directory, set the value of the AD Sync installed (yes/no) parameter to yes.
See Oracle Identity Manager Design Console Guide for detailed information about modifying values of IT resource parameters.
2.4 Configuring the Password Synchronization ModuleAfter you complete installation of the password synchronization module, you can configure it by editing the xlconfig.xml file, which is located in the ADSYNC_HOME\config directory.
To configure the parameters in the xlconfig.xml file, first open the file by using any text editor. The following table lists the elements you can configure within the <ADsync> tag in the xlconfig.xml file.
Note: Each instance of the xlconfig.xml file is in the config directory. This directory is in the root installation directory for the component with which the configuration file is associated. For example, the path of the xlconfig.xml file associated with the password synchronization module is as follows:
ADSYNC_HOME\config
Note: If you set the value of this parameter to no, then you must also disable password synchronization. See "Disabling and Enabling Password Synchronization" for more information.
Tag Within the <ADSync> Tag Description
<UserMatch> The MatchingMethod parameter specifies how Oracle Identity Manager matches an Oracle Identity Manager user to the Active Directory ID passed to the adsync.dll file. The first of the following three options is the default. Use it when all the login IDs in Oracle Identity Manager match all the Active Directory user IDs. When the login IDs in Oracle Identity Manager and the Active Directory IDs do not match, then use one of the remaining options.
■ UserID: The Active Directory user ID matches the Oracle Identity Manager user login.
■ UDF: The Active Directory user ID matches the UDF specified in the <FieldName> attribute.
■ ResourceField: The Active Directory user ID matches the <FieldName> attribute in the process form of the Oracle Identity Manager user to whom a resource object specified by the <ResourceObject> attribute is provisioned.
Step 6: Configuring the Password Synchronization Module for SSL Communication
2-8 Oracle Identity Manager Password Synchronization Module for Microsoft Active Directory Installation and Con-figuration Guide
After you make the required changes to the user-configurable tags in the xlconfig.xml file, save and close the file.
2.5 Step 6: Configuring the Password Synchronization Module for SSL Communication
<Result> This optional configuration element specifies where the result of the password change operation must be logged (apart from the adsync.log file). Values for the following parameters are provided as tags within the <Result> tag:
■ UpdateUDF: Set to True or False to update a status field in the Users form.
■ FieldName: Specify a field name when the UpdateUDF tag is set to True. For example, FieldName can be USR_UDF_STATUS.
■ FailureValue: This string goes into the status field if the password reset operation fails.
■ SuccessValue: This string goes into the status field if the password reset operation succeeds.
■ AppendTimeStamp: Set this to True or False to append a timestamp to the string in the status field.
<Installed> Use the <Installed> tag to specify whether the Microsoft Active Directory connector has been installed. If you have installed that connector, then specify true as the value of the <Installed> tag. Otherwise, specify false.
For example:
<ADConnectorConfig> <Installed>true</Installed> <OIMUserUDF></OIMUserUDF></ADConnectorConfig>
<OIMUserUDF> Use the <OIMUserUDF> tag to specify the name of the USR table column that holds is used as flag to track password changes from Oracle Identity Manager to the target system and vice versa. See "How Password Synchronization Works" for more information about this flag. The USR_UDF_PWDCHANGEDINDICATION field is used as the default. If you have created a different UDF, then specify the name of that UDF as the value of this field.
For example:
<ADConnectorConfig> <Installed>true</Installed> <OIMUserUDF> USR_UDF_PWDCHANGEDINDICATION </OIMUserUDF></ADConnectorConfig>
<Disabled> See "Disabling and Enabling Password Synchronization" for information about this tag.
Note: This is an optional step of the procedure.
However, the configuration of secure client operation (using SSL at the server) affects all clients. This means that if you use SSL to secure Oracle Identity Manager communication with the password synchronization module, then the Oracle Identity Manager Design Console and any other custom clients must also communicate with Oracle Identity Manager using SSL.
Tag Within the <ADSync> Tag Description
Step 6: Configuring the Password Synchronization Module for SSL Communication
Deploying the Password Synchronization Module 2-9
You can configure SSL to secure the transfer of password information from Microsoft Active Directory to Oracle Identity Manager. The procedure that you must follow depends on the application server on which Oracle Identity Manager is installed:
■ Configuring the Password Synchronization Module for SSL Communication on JBoss Application Server
■ Configuring the Password Synchronization Module for SSL Communication on Oracle WebLogic Server
After you configure the password synchronization module and the Design Console for SSL communication, you must check if SSL has been enabled for these clients by performing the following procedure:
■ Validating SSL Communication for the Password Synchronization Module and the Design Console
2.5.1 Configuring the Password Synchronization Module for SSL Communication on JBoss Application Server
To configure password synchronization module for SSL communication on JBoss Application Server:
1. To export the Oracle Identity Manager Server certificate, in a terminal window, change to the OIM_home/config directory and then enter the following command:
JAVA_HOME/bin/keytool -export -file xlserver.cer -keystore .xlkeystore -storepass xellerate -alias xell
A file named xlserver.cer is created in the config directory. This is the Oracle Identity Manager certificate file.
2. Copy the xlserver.cer file from the OIM_home/config directory to the ADSYNC_HOME\java\lib\security directory on the Microsoft Active Directory server.
3. On the Microsoft Active Directory server, change to the directory into which you copy the xlserver.cer file, and then enter the following command to import the certificate:
keytool -import -alias alias -file xlserver.cer -keystore my_cacerts -storepass password -trustcacerts
In this command:
■ alias is the alias for the certificate (for example, the server name)
See Also: The "Step 8: Configuring SSL" section on page 2-14 of Oracle Identity Manager Connector Guide for Microsoft Active Directory for information about configuring SSL to secure data transfer from Oracle Identity Manager to Microsoft Active Directory.
Note: You create the xlserver.cer file by performing Step 2 of the procedure described in the "Configuring the Design Console for SSL Communication on JBoss Application Server" section. If you have already created the xlserver.cer file, then you can skip Step 1.
Step 6: Configuring the Password Synchronization Module for SSL Communication
2-10 Oracle Identity Manager Password Synchronization Module for Microsoft Active Directory Installation and Con-figuration Guide
■ my_cacerts is the full path and name of the certificate store (the default is cacerts)
The actual certificate store location is JBOSS_HOME/jre/lib/security/cacerts.
■ password is the keystore password
Note: changeit is the default password for the cacerts file stored in the Sun JVM. This may change depending on the JVM that you are using.
4. In the command window, when you are prompted to specify whether or not you want to trust this certificate, enter YES.
After you configure the password synchronization module for SSL communication, you must ensure that all other clients of Oracle Identity Manager, such as the Design Console, are configured for SSL communication.
2.5.2 Configuring the Password Synchronization Module for SSL Communication on Oracle WebLogic Server
To configure the password synchronization module for SSL communication on Oracle WebLogic Server:
1. Open the Oracle WebLogic Server console.
2. Generate a signed certificate as follows:
a. In a terminal window, navigate to the following directory:
JDK_used_by_WebLogic/jre/lib/security
b. Enter the following command to generate the certificate:
keytool –genkey -alias private_key_alias -keyalg RSA -keysize 1024 -dname "DN_value" -keypass private_key_password -keystore identity_store_file -storepass identity_store_file_password
In this command:
– private_key_alias is the alias that you want to use for the private key
– private_key_password is the password that you want to use for the private key
– DN_value is the distinguished name (DN) for your organization
The CN value in the DN must be the host name or IP address of the Ora-cle Identity Manager server. You can get the CN value from the ADSYNC_HOME\config\xlconfig.xml file. For example, suppose the value of the <java.naming.provider.url> tag is as follows:
t3://oimserver:7001
Then, the DN that you enter in the command must contain CN=oimserver.
– identity_store_file is the identity store that you want to use
– identity_store_file_password is the password of the identity store that you want to use
See Also: Oracle Identity Manager Design Console Guide for information about configuring the Design Console for SSL communication
Step 6: Configuring the Password Synchronization Module for SSL Communication
Deploying the Password Synchronization Module 2-11
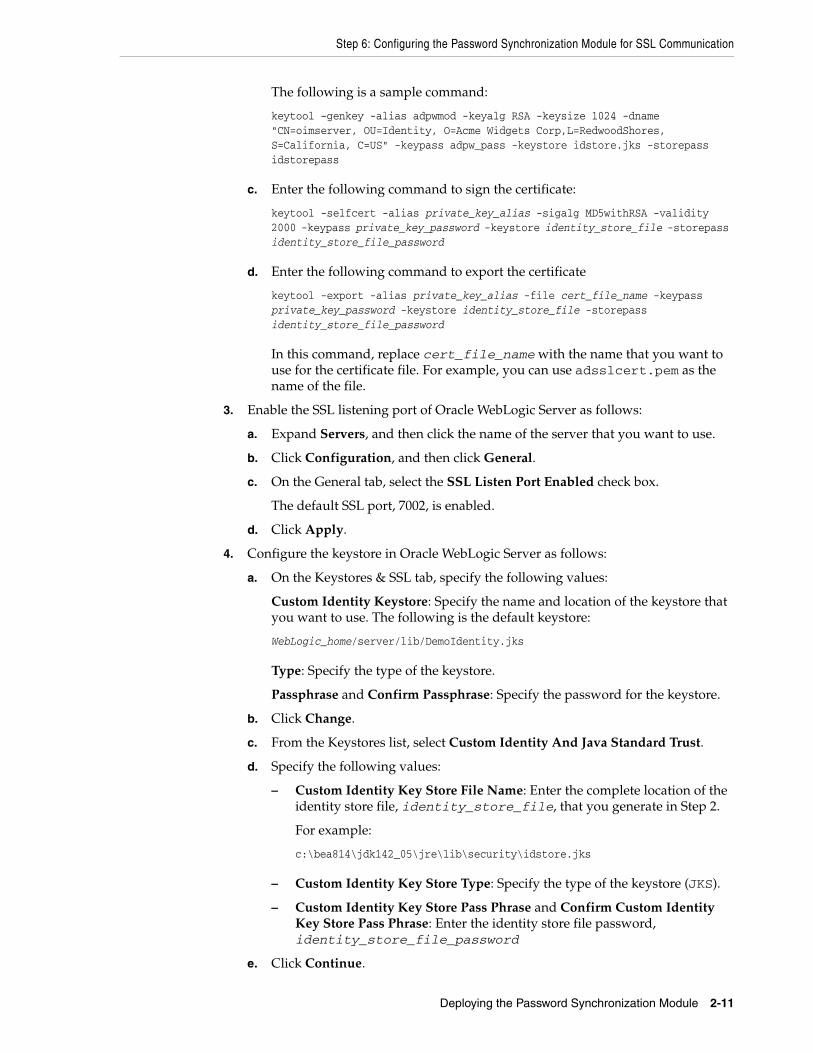
The following is a sample command:
keytool –genkey -alias adpwmod -keyalg RSA -keysize 1024 -dname "CN=oimserver, OU=Identity, O=Acme Widgets Corp,L=RedwoodShores, S=California, C=US" -keypass adpw_pass -keystore idstore.jks -storepass idstorepass
c. Enter the following command to sign the certificate:
keytool -selfcert -alias private_key_alias -sigalg MD5withRSA -validity 2000 -keypass private_key_password -keystore identity_store_file -storepass identity_store_file_password
d. Enter the following command to export the certificate
keytool -export -alias private_key_alias -file cert_file_name -keypass private_key_password -keystore identity_store_file -storepass identity_store_file_password
In this command, replace cert_file_name with the name that you want to use for the certificate file. For example, you can use adsslcert.pem as the name of the file.
3. Enable the SSL listening port of Oracle WebLogic Server as follows:
a. Expand Servers, and then click the name of the server that you want to use.
b. Click Configuration, and then click General.
c. On the General tab, select the SSL Listen Port Enabled check box.
The default SSL port, 7002, is enabled.
d. Click Apply.
4. Configure the keystore in Oracle WebLogic Server as follows:
a. On the Keystores & SSL tab, specify the following values:
Custom Identity Keystore: Specify the name and location of the keystore that you want to use. The following is the default keystore:
WebLogic_home/server/lib/DemoIdentity.jks
Type: Specify the type of the keystore.
Passphrase and Confirm Passphrase: Specify the password for the keystore.
b. Click Change.
c. From the Keystores list, select Custom Identity And Java Standard Trust.
d. Specify the following values:
– Custom Identity Key Store File Name: Enter the complete location of the identity store file, identity_store_file, that you generate in Step 2.
For example:
c:\bea814\jdk142_05\jre\lib\security\idstore.jks
– Custom Identity Key Store Type: Specify the type of the keystore (JKS).
– Custom Identity Key Store Pass Phrase and Confirm Custom Identity Key Store Pass Phrase: Enter the identity store file password, identity_store_file_password
e. Click Continue.
Step 6: Configuring the Password Synchronization Module for SSL Communication
2-12 Oracle Identity Manager Password Synchronization Module for Microsoft Active Directory Installation and Con-figuration Guide
f. Specify the following values:
Private Key Alias: Enter the alias that you have created for the identity keystore, private_key_alias.
Passphrase and Confirm Passphrase: Enter the private key password, private_key_password.
g. Click Continue, and then click Finish.
5. Restart Oracle WebLogic Server for the changes to take effect.
After you configure Oracle WebLogic Server for SSL, configure the password synchronization module for SSL communication as follows:
1. Copy the certificate file from the JDK_used_by_WebLogic/jre/lib/security directory to the JRE configured with the password synchronization module. This certificate file is created when you perform Step 2.d of the earlier procedure.
For example, if you are using the JRE bundled with the module, then copy the certificate file into the <ADSYNC_HOME>/java/lib/security directory.
2. Change to the directory into which you copy the certificate file, and then enter the following command to import the certificate:
keytool -import -alias private_key_alias -file cert_file_name -keystore my_cacerts -storepass password -trustcacerts
In this command:
■ alias is the alias for the certificate (for example, the server name)
■ my_cacerts is the full path and name of the certificate store (the default is cacerts)
The actual certificate store location is as follows:
JBOSS_HOME/java/jre/lib/security/cacerts
■ password is the keystore password
Note: changeit is the default password for the cacerts file stored in the Sun JVM. This may change depending on the JVM that you are using.
3. In the command window, when you are prompted to specify whether or not you want to trust this certificate, enter YES.
4. Copy the WebLogic_home/license.bea file into the ADSYNC_HOME directory.
5. Add the ADSYNC_HOME directory path to the CLASSPATH environment variable.
To do this, you first enter a semicolon (;) at the end of the existing value of the CLASSPATH and then enter the ADSYNC_HOME directory path.
6. In the ADSYNC_HOME\config\xlconfig.xml file, search for the <java.naming.provider.url> tag and change the protocol value to t3s and the port value to the SSL port number.
For Example:
<java.naming.provider.url>t3s://solqe4:7002</java.naming.provider.url>
7. Copy the BEA_HOME/weblogic81/server/lib/wlcipher.jar file to the <ADSYNC_HOME>\ext directory.
Disabling and Enabling Password Synchronization
Deploying the Password Synchronization Module 2-13
8. Open the ADSYNC_HOME\classpath.bat file and add the following at the end of the file:
;.\ext\wlcipher.jar
2.6 Enabling the Strong Password Authentication (Password Complexity) Feature of Microsoft Active Directory
Microsoft Active Directory provides the Strong Password Authentication feature through the implementation of a password filter. If you want to use this password filter along with the password synchronization module, then follow the instructions on the Microsoft Web site for enabling the "Passwords must meet complexity requirements" policy setting. After you enable this policy setting, password changes in Microsoft Active Directory are checked against the Strong Password Authentication requirements before they are passed on to the password synchronization module.
2.7 Disabling and Enabling Password SynchronizationIf you want to temporarily disable password synchronization, then:
1. Search for the following lines in the XML file:
<ADSyncConfig> <Disabled>no</Disabled></ADSyncConfig>
2. Change the value of the Disabled element to yes. For example:
<ADSyncConfig> <Disabled>yes</Disabled></ADSyncConfig>
3. In the IT resource for Microsoft Active Directory, set the value of the AD Sync installed (yes/no) parameter to no.
To reenable password synchronization:
1. Change the value of the Disabled element to no. For example:
<ADSyncConfig> <Disabled>no</Disabled></ADSyncConfig>
2. In the IT resource for Microsoft Active Directory, set the value of the AD Sync installed (yes/no) parameter to yes.
Note: Perform the procedure described in this section only if you want to use the Strong Password Authentication (Password Complexity) feature of Microsoft Active Directory.

Disabling and Enabling Password Synchronization
2-14 Oracle Identity Manager Password Synchronization Module for Microsoft Active Directory Installation and Con-figuration Guide
3
Upgrading the Password Synchronization Module 3-1
3Upgrading the Password SynchronizationModule
You can upgrade an existing password synchronization module to the current revision. To do this, perform the following procedures:
1. Refer to Chapter 4 for instructions on removing an earlier instance of the password synchronization module.
2. Verify that your environment is ready for the latest release of the password synchronization module by completing the procedure described in the "Preparing to Install the Password Synchronization Module" section on page 2-1.
3. Complete the procedure described in the "Enabling the Strong Password Authentication (Password Complexity) Feature of Microsoft Active Directory" section on page 2-13.
4. Complete the procedure described in the "Installing the Password Synchronization Module" section on page 2-2 to install the password synchronization module on the computer hosting the Active Directory domain controller for which you want to implement password synchronization.
5. Complete the procedure described in the "Performing Postinstallation Steps for the Password Synchronization Module" section on page 2-5 to copy the required files from the computer hosting Oracle Identity Manager to the computer on which you install the password synchronization module.

3-2 Oracle Identity Manager Password Synchronization Module for Microsoft Active Directory Installation and Con-figuration Guide
4
Removing the Password Synchronization Module 4-1
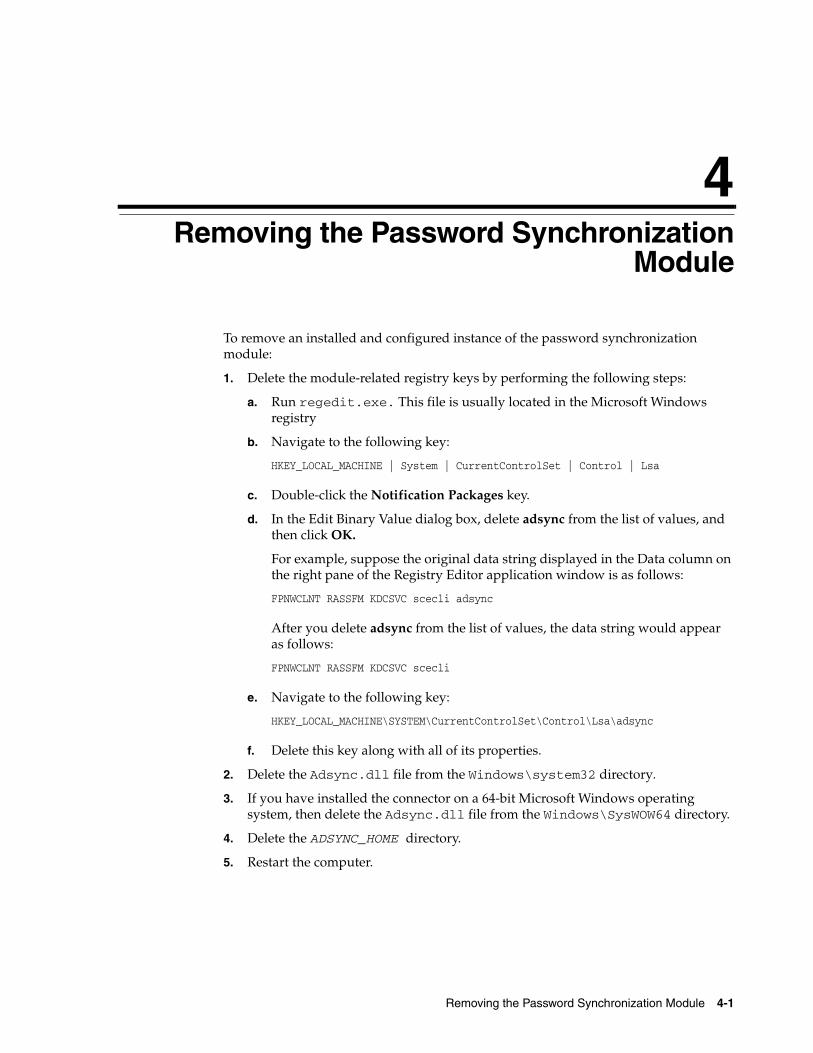
4Removing the Password SynchronizationModule
To remove an installed and configured instance of the password synchronization module:
1. Delete the module-related registry keys by performing the following steps:
a. Run regedit.exe. This file is usually located in the Microsoft Windows registry
b. Navigate to the following key:
HKEY_LOCAL_MACHINE | System | CurrentControlSet | Control | Lsa
c. Double-click the Notification Packages key.
d. In the Edit Binary Value dialog box, delete adsync from the list of values, and then click OK.
For example, suppose the original data string displayed in the Data column on the right pane of the Registry Editor application window is as follows:
FPNWCLNT RASSFM KDCSVC scecli adsync
After you delete adsync from the list of values, the data string would appear as follows:
FPNWCLNT RASSFM KDCSVC scecli
e. Navigate to the following key:
HKEY_LOCAL_MACHINE\SYSTEM\CurrentControlSet\Control\Lsa\adsync
f. Delete this key along with all of its properties.
2. Delete the Adsync.dll file from the Windows\system32 directory.
3. If you have installed the connector on a 64-bit Microsoft Windows operating system, then delete the Adsync.dll file from the Windows\SysWOW64 directory.
4. Delete the ADSYNC_HOME directory.
5. Restart the computer.

4-2 Oracle Identity Manager Password Synchronization Module for Microsoft Active Directory Installation and Con-figuration Guide
5
Known Issues 5-1
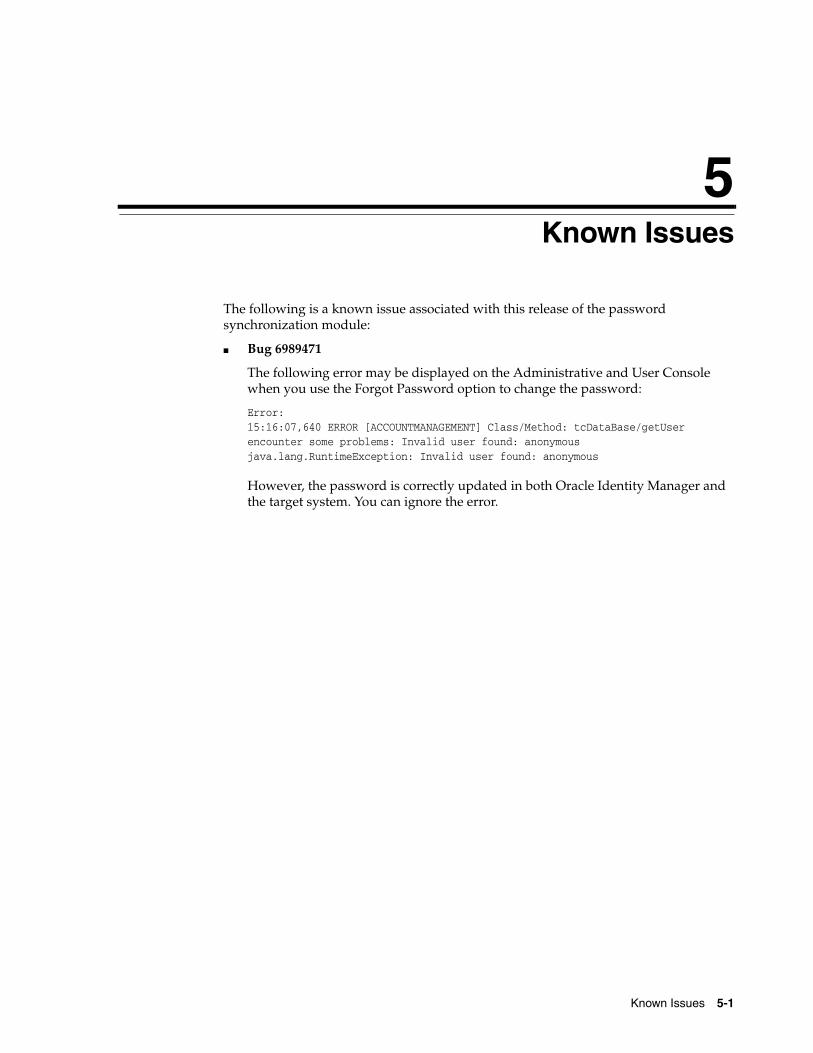
5 Known Issues
The following is a known issue associated with this release of the password synchronization module:
■ Bug 6989471
The following error may be displayed on the Administrative and User Console when you use the Forgot Password option to change the password:
Error:15:16:07,640 ERROR [ACCOUNTMANAGEMENT] Class/Method: tcDataBase/getUser encounter some problems: Invalid user found: anonymousjava.lang.RuntimeException: Invalid user found: anonymous
However, the password is correctly updated in both Oracle Identity Manager and the target system. You can ignore the error.

5-2 Oracle Identity Manager Password Synchronization Module for Microsoft Active Directory Installation and Con-figuration Guide
A
Special Characters Supported for Passwords A-1
A Special Characters Supported forPasswords
There are some restrictions on the special characters that you can use in the Password field on both Oracle Identity Manager and Microsoft Active Directory. For information about the supported special characters, refer to the "Special Characters Supported for Passwords" appendix in Oracle Identity Manager Connector Guide for Microsoft Active Directory.

A-2 Oracle Identity Manager Password Synchronization Module for Microsoft Active Directory Installation and Con-figuration Guide
Index-1
Index
Ccertified deployment configuration, 2-2complex passwords, 2-13components, 1-1, 1-3, 2-5configurations, certified, 2-2configuring, 2-7connector files and directories
installation directory, 1-3connector release number, determining, 2-1connector version number, determining, 1-3
Ddeinstalling, 4-1deploying, 2-1deployment configuration, certified, 2-2deployment requirements, 2-2determining release number of connector, 2-1determining version number of connector, 1-3
Ffiles and directories, 1-3functionality, 1-1
IIBM WebSphere, 2-4IBM WebSphere Application Server, 2-2installation
files, 2-5media, 2-3ZIP file, 2-3
issues, 5-1
JJBoss Application Server, 2-4
LLDAP, 1-1
OOracle Application Server, 2-4
Oracle WebLogic, 2-4Oracle WebLogic Server, 2-4
PPassword Complexity feature, 2-13password policies, 2-13postdeployment, 2-5, 2-7postinstallation, 2-5predeployment steps, 2-1preinstallation steps, 2-1prerequisites for connector deployment, 2-2problems, 5-1
Rrelease number of connector, determining, 1-3, 2-1removing, 4-1requirements for connector deployment, 2-2
SSSL, 1-1Strong Password Authentication feature, 2-13supported
target system host platforms, 2-2target systems, 2-2
Ttarget systems
host platforms supported, 2-2supported, 2-2
Uupgrading, 3-1
Vversion number of connector, determining, 1-3, 2-1
ZZIP file on installation media, 2-3

Index-2