Embed Size (px)
Citation preview

Oracle® Fusion MiddlewareBusiness Process Composer User's Guide for Oracle Business Process Management
11g Release 1 (11.1.1.5.0 Feature Pack)
E15177-05
September 2011

Oracle Fusion Middleware Business Process Composer User's Guide for Oracle Business Process Management, 11g Release 1 (11.1.1.5.0 Feature Pack)
E15177-05
Copyright © 2011 Oracle and/or its affiliates. All rights reserved.
Primary Author: Steven Leslie
This software and related documentation are provided under a license agreement containing restrictions on use and disclosure and are protected by intellectual property laws. Except as expressly permitted in your license agreement or allowed by law, you may not use, copy, reproduce, translate, broadcast, modify, license, transmit, distribute, exhibit, perform, publish, or display any part, in any form, or by any means. Reverse engineering, disassembly, or decompilation of this software, unless required by law for interoperability, is prohibited.
The information contained herein is subject to change without notice and is not warranted to be error-free. If you find any errors, please report them to us in writing.
If this software or related documentation is delivered to the U.S. Government or anyone licensing it on behalf of the U.S. Government, the following notice is applicable:
U.S. GOVERNMENT RIGHTS Programs, software, databases, and related documentation and technical data delivered to U.S. Government customers are "commercial computer software" or "commercial technical data" pursuant to the applicable Federal Acquisition Regulation and agency-specific supplemental regulations. As such, the use, duplication, disclosure, modification, and adaptation shall be subject to the restrictions and license terms set forth in the applicable Government contract, and, to the extent applicable by the terms of the Government contract, the additional rights set forth in FAR 52.227-19, Commercial Computer Software License (December 2007). Oracle USA, Inc., 500 Oracle Parkway, Redwood City, CA 94065.
This software is developed for general use in a variety of information management applications. It is not developed or intended for use in any inherently dangerous applications, including applications which may create a risk of personal injury. If you use this software in dangerous applications, then you shall be responsible to take all appropriate fail-safe, backup, redundancy, and other measures to ensure the safe use of this software. Oracle Corporation and its affiliates disclaim any liability for any damages caused by use of this software in dangerous applications.
Oracle is a registered trademark of Oracle Corporation and/or its affiliates. Other names may be trademarks of their respective owners.
This software and documentation may provide access to or information on content, products, and services from third parties. Oracle Corporation and its affiliates are not responsible for and expressly disclaim all warranties of any kind with respect to third-party content, products, and services. Oracle Corporation and its affiliates will not be responsible for any loss, costs, or damages incurred due to your access to or use of third-party content, products, or services.
iii
Contents
Preface ............................................................................................................................................................... xv
Intended Audience.................................................................................................................................... xvDocumentation Accessibility ................................................................................................................... xvWhat’s New In This Release .................................................................................................................... xviStructure ..................................................................................................................................................... xviRelated Documents .................................................................................................................................. xviiConventions ............................................................................................................................................. xviii
Part I Introduction to Oracle Business Process Composer
1 Oracle Business Process Management Suite Overview
1.1 Introduction to the Oracle Business Process Management Suite......................................... 1-11.2 Oracle BPM User Personas ........................................................................................................ 1-21.3 Oracle BPM Suite Components................................................................................................. 1-31.3.1 Process Modeling and Implementation............................................................................ 1-41.3.1.1 Oracle BPM Studio ....................................................................................................... 1-41.3.1.2 Oracle Business Process Composer............................................................................ 1-41.3.1.3 Oracle Metadata Service (MDS) Repository ............................................................. 1-51.3.1.4 Oracle BPM Projects ..................................................................................................... 1-51.3.2 Oracle BPM Run Time Components................................................................................. 1-51.3.2.1 Oracle BPM Engine ...................................................................................................... 1-51.3.2.2 Oracle Human Workflow............................................................................................ 1-61.3.2.3 Oracle Business Rules .................................................................................................. 1-61.3.2.4 Oracle WebLogic Application Server ........................................................................ 1-61.3.2.5 Oracle Enterprise Manager ......................................................................................... 1-61.3.3 Oracle BPM Suite Process Participant Applications....................................................... 1-61.3.3.1 Oracle Business Process Management Workspace (Process Workspace) ............ 1-71.3.3.2 Oracle Business Process Management Process Spaces (Process Spaces).............. 1-71.3.4 Other Oracle BPM Suite Components .............................................................................. 1-71.3.4.1 Process Analytics .......................................................................................................... 1-71.3.4.2 Guided Business Processes ......................................................................................... 1-71.4 Oracle Business Process Analysis (BPA) Suite ....................................................................... 1-71.5 Introduction to the Application Development Life Cycle .................................................... 1-81.5.1 Process Modeling................................................................................................................. 1-91.5.2 Implementation................................................................................................................. 1-10

iv
1.5.3 Deployment ....................................................................................................................... 1-101.5.4 Oracle BPM Run Time...................................................................................................... 1-111.6 Oracle BPM Use Cases ............................................................................................................ 1-111.6.1 Use Case: Using BPM Studio to Create Project Templates......................................... 1-111.6.2 Use Case: Using BPM Studio to Model Processes and Deploy an Application ...... 1-121.6.3 Use Case: Using Business Process Composer to Create Projects............................... 1-121.6.4 Use Case: Using Business Process Composer to Revise Oracle Business Rules...... 1-131.6.5 Use Case: Using The Oracle Business Process Analysis Suite to Model Your Business
Processes 1-13
2 Overview of Business Process Design
2.1 Introduction to Business Process Management Notation (BPMN) ..................................... 2-12.1.1 What is Business Process Management Notation (BPMN) ........................................... 2-12.1.2 Business Processes ............................................................................................................... 2-12.1.2.1 Process Instances .......................................................................................................... 2-22.1.2.2 Process Tokens .............................................................................................................. 2-22.1.3 Flow Objects ......................................................................................................................... 2-22.1.3.1 Tasks ............................................................................................................................... 2-22.1.3.2 Events ............................................................................................................................. 2-22.1.3.3 Gateways........................................................................................................................ 2-22.1.3.4 Sequence Flows............................................................................................................. 2-22.1.4 Data Objects .......................................................................................................................... 2-22.2 Introduction to the Sales Quote Example................................................................................ 2-32.2.1 Breakdown of the Sales Quote Example .......................................................................... 2-32.2.1.1 Initiate Sales Quote....................................................................................................... 2-32.2.1.2 Determine Business Practice Review......................................................................... 2-42.2.1.3 Approve Quote ............................................................................................................. 2-52.2.1.4 Approvals Outcome ..................................................................................................... 2-6
3 Introduction to Oracle Business Process Composer
3.1 Oracle Business Process Composer Overview ....................................................................... 3-13.1.1 Oracle Business Process Composer Use Cases................................................................ 3-13.2 Overview of the Application Development Life Cycle ........................................................ 3-23.2.1 Workflow: Create Projects Based on Project Templates ................................................ 3-23.2.2 Workflow: Creating New Projects..................................................................................... 3-43.2.3 Workflow: Editing Business Rules at Run Time ............................................................. 3-53.3 Signing On to Oracle Business Process Composer ................................................................ 3-63.3.1 How to Sign On to Oracle Business Process Composer................................................. 3-63.4 Introduction to the Business Process Composer Application Interface.............................. 3-63.4.1 Introduction to the Business Process Composer Toolbar .............................................. 3-73.4.2 Introduction to the Business Process Composer Welcome Page.................................. 3-83.4.2.1 Project Views ................................................................................................................. 3-83.4.2.2 Project Browser ............................................................................................................. 3-93.4.2.3 Control Panel................................................................................................................. 3-93.4.2.4 Search ............................................................................................................................. 3-93.4.3 Introduction to the Business Process Composer Main Menu ....................................... 3-9
v
Part II Using Oracle Business Process Composer
4 Working with Projects and Project Templates
4.1 Introduction to Oracle BPM Projects........................................................................................ 4-14.1.1 Introduction to Project Components and Resources ...................................................... 4-14.1.1.1 Editable Project Resources .......................................................................................... 4-24.1.1.2 The Business Catalog ................................................................................................... 4-24.2 Introduction to the Oracle BPM Repository............................................................................ 4-44.3 Introduction to the Project Welcome Page.............................................................................. 4-44.3.1 Introduction to the Project Information Pane.................................................................. 4-54.3.2 Introduction to the Project Component Pane .................................................................. 4-54.3.3 Introduction to the Quickstart Menu................................................................................ 4-64.3.4 Introduction to the Recent Activity Browser................................................................... 4-64.3.5 Introduction to the Snapshot Browser.............................................................................. 4-64.3.6 Introduction to the Organization Browser....................................................................... 4-64.3.7 Introduction to the Oracle Business Process Composer Editors................................... 4-64.3.7.1 Process Editor................................................................................................................ 4-64.3.7.2 Activity Guide Editor................................................................................................... 4-74.3.7.3 Human Task Editor ...................................................................................................... 4-74.3.7.4 Business Rules Editor................................................................................................... 4-74.3.7.5 Data Associations Editor ............................................................................................. 4-74.3.7.6 Expression Editor ......................................................................................................... 4-74.3.8 Introduction to the Supporting Browsers and Editors................................................... 4-74.3.8.1 Project and Process Validation Browser.................................................................... 4-74.3.8.2 Documentation Editor ................................................................................................. 4-74.3.8.3 Approval Workflow Browser ..................................................................................... 4-84.4 Sharing Projects with Other Users............................................................................................ 4-84.4.1 Private and Public Projects ................................................................................................. 4-84.4.2 Edit Mode.............................................................................................................................. 4-84.4.3 Project Roles.......................................................................................................................... 4-84.5 Creating and Working with Projects........................................................................................ 4-94.5.1 How to Access the Project Welcome Page ....................................................................... 4-94.5.2 How to Create a New Project............................................................................................. 4-94.5.3 How to Open a Project Using the Application Welcome Page.................................. 4-104.5.4 How to Open a Project Using the Main Menu ............................................................. 4-104.5.5 How to Share a Project with Other Users ..................................................................... 4-104.5.6 How to Edit a Shared Project .......................................................................................... 4-114.5.7 How to Save Changes to a Project.................................................................................. 4-114.5.8 How to Validate a Project ................................................................................................ 4-114.5.9 How to Discard Changes to a Shared Project ............................................................... 4-124.5.10 How to Close a Project ..................................................................................................... 4-124.5.11 How to View the History of Changes Made to a Project ............................................ 4-124.5.12 How to View and Edit Project Properties ..................................................................... 4-134.5.13 How to Mark a Project as a Favorite.............................................................................. 4-134.6 Using Guided Business Processes to Create Project Milestones ....................................... 4-13

vi
4.6.1 Introduction to Guided Business Processes.................................................................. 4-134.6.1.1 Introduction to Activity Guides and Milestones .................................................. 4-144.6.2 How to Configure the Activity Guide and Create Project Milestones...................... 4-144.7 Defining the Roles Used in a Project ..................................................................................... 4-154.7.1 Introduction to Project Roles........................................................................................... 4-154.7.2 Working with Project Roles............................................................................................. 4-15
5 Working with Processes and the Process Editor
5.1 Introduction to Business Processes .......................................................................................... 5-15.2 Introduction to the Process Editor............................................................................................ 5-25.2.1 Introduction to the Process Editor Toolbar...................................................................... 5-35.2.2 Introduction to the Process Editor Canvas ...................................................................... 5-35.2.3 Introduction to the BPMN Component Palette............................................................... 5-35.2.4 Introduction to the Business Catalog................................................................................ 5-55.3 Working with Business Processes ............................................................................................ 5-55.3.1 How to Create a New Business Process ........................................................................... 5-55.3.2 How to Open a Business Process....................................................................................... 5-65.3.3 How to Delete a Business Process ..................................................................................... 5-65.3.3.1 What You Need to Know About Deleting a Business Process .............................. 5-65.4 Working with Flow Elements ................................................................................................... 5-65.4.1 How to Add a Flow Object from the Component Palette.............................................. 5-75.4.2 How to Cut, Copy or Delete a Flow Object ..................................................................... 5-75.4.3 How to Paste a Flow Object in a Process.......................................................................... 5-75.4.4 How to Add a Sequence Flow to a Process...................................................................... 5-85.4.5 How to Delete a Sequence Flow ........................................................................................ 5-85.4.5.1 What You Need to Know About Deleting a Sequence Flow ................................. 5-85.4.6 How to Edit the Properties of a Flow Object ................................................................... 5-85.4.7 How to Assign a Custom Icon to a Flow Object ............................................................. 5-85.5 Working with Business Catalog Components........................................................................ 5-95.5.1 How to Assign a Business Catalog Component to a Flow Object ................................ 5-95.5.2 How to Create New Human Tasks in the Business Catalog ......................................... 5-95.6 Working with Draft Processes .................................................................................................. 5-95.6.1 Introduction to Draft Processes ...................................................................................... 5-105.6.2 How to Mark a Flow Object as Draft ............................................................................. 5-105.7 Documenting Your Process .................................................................................................... 5-105.7.1 Introduction to the Documentation Editor ................................................................... 5-105.7.1.1 Inserting Links in Your Documentation ................................................................ 5-115.7.2 How to Add Documentation to Your Process.............................................................. 5-115.7.3 How to Add Notes to a Process...................................................................................... 5-12
6 Modeling Business Processes with Oracle BPM
6.1 Using Swimlanes to Organize Your Process........................................................................... 6-16.1.1 Introduction to Roles........................................................................................................... 6-16.1.1.1 Roles in Context ............................................................................................................ 6-26.1.2 Introduction to Swimlanes ................................................................................................. 6-2
vii
6.1.2.1 Swimlanes in Context .................................................................................................. 6-36.1.3 How to Add Roles and Swimlanes to Your Process....................................................... 6-36.1.4 How to Edit Swimlane Properties..................................................................................... 6-46.1.5 Sharing Roles Between Business Process Composer and BPM Studio........................ 6-46.2 Defining the Start and End Point of a Process ........................................................................ 6-46.2.1 Introduction to Start and End Events ............................................................................... 6-46.2.1.1 Specifying the Start Events for Different Types of Processes ................................ 6-56.2.1.2 Using Multiple Start Events in a Process .................................................................. 6-56.2.1.3 Using Multiple End Events in a Process ................................................................... 6-66.2.2 Defining How a Process Instance is Triggered................................................................ 6-66.2.3 Introduction to the None Start Event................................................................................ 6-76.2.3.1 The None Start Event in Context................................................................................ 6-76.2.3.2 Data Associations ......................................................................................................... 6-86.2.4 Introduction to the Message Start Event .......................................................................... 6-86.2.4.1 The Message Start Event in Context .......................................................................... 6-86.2.4.2 Using Process Input and Output Arguments........................................................... 6-96.2.5 Introduction to the Signal Start Event .............................................................................. 6-96.2.5.1 The Signal Start Event in Context .............................................................................. 6-96.2.6 Introduction to the Timer Start Event............................................................................... 6-96.2.7 Introduction to the Error Start Event ............................................................................. 6-106.2.8 Introduction to the None End Event.............................................................................. 6-106.2.8.1 The None End Event in Context.............................................................................. 6-116.2.9 Introduction to the Error End Event .............................................................................. 6-116.2.10 Introduction to the Message End Event ........................................................................ 6-126.2.11 Introduction to the Terminate End Event ..................................................................... 6-126.3 Adding User Interaction to Your Process............................................................................. 6-126.3.1 Introduction to Human Workflow................................................................................. 6-126.3.1.1 Introduction to Human Tasks.................................................................................. 6-136.3.2 Introduction to the User Task ......................................................................................... 6-136.3.2.1 The User Task in Context ......................................................................................... 6-146.3.2.2 Using Interactive Activities...................................................................................... 6-146.3.2.3 Using the User Task in Project Templates ............................................................. 6-156.3.3 Introduction to the Manual Task.................................................................................... 6-156.3.3.1 The Manual Task in Context.................................................................................... 6-166.3.4 Introduction to the Update Task .................................................................................... 6-166.4 Communicating With Other Processes and Services.......................................................... 6-166.4.1 Introduction to the Service Task..................................................................................... 6-176.4.1.1 The Service Task in Context..................................................................................... 6-176.4.1.2 Implementing Reusable Services in Project Templates........................................ 6-186.4.2 Introduction to the Notification Task ............................................................................ 6-186.4.3 Introduction to the Call Activity .................................................................................... 6-196.4.3.1 Reusable Processes .................................................................................................... 6-196.4.4 Introduction to the Send Task......................................................................................... 6-196.4.4.1 The Send Task in Context......................................................................................... 6-206.4.5 Introduction to the Receive Task.................................................................................... 6-206.4.5.1 The Receive Task in Context .................................................................................... 6-216.4.5.2 Starting a Process with the Receive Task ............................................................... 6-21

viii
6.4.6 Using the Send and Receive Tasks to Communicate Between Processes ................ 6-216.4.7 Introduction to the Message Throw Event.................................................................... 6-226.4.8 Introduction to the Message Catch Event ..................................................................... 6-236.4.9 Using Message Throw and Catch Events to Communicate Between Processes ..... 6-236.5 Adding Business Logic Using Oracle Business Rules ........................................................ 6-246.5.1 Introduction to Oracle Business Rules........................................................................... 6-246.5.2 Introduction to the Business Rules Task ....................................................................... 6-246.5.2.1 The Business Rule Task in Context ......................................................................... 6-256.6 Controlling Process Flow Using Sequence Flows ............................................................... 6-256.6.1 Introduction to Sequence Flows ..................................................................................... 6-266.6.2 Introduction to Unconditional Sequence Flows........................................................... 6-266.6.3 Introduction to Conditional Sequence Flows ............................................................... 6-266.6.4 Introduction to Default Sequence Flows ....................................................................... 6-276.7 Controlling Process Flow Using Gateways.......................................................................... 6-276.7.1 Introduction to Gateways................................................................................................ 6-276.7.1.1 Split-Merge Pairs ....................................................................................................... 6-276.7.2 Introduction to the Exclusive Gateway ......................................................................... 6-286.7.2.1 The Exclusive Gateway in Context ......................................................................... 6-286.7.2.2 Splitting and Merging Exclusive Gateways .......................................................... 6-296.7.3 Introduction to the Inclusive Gateway .......................................................................... 6-296.7.3.1 Splitting and Merging Inclusive Gateways ........................................................... 6-306.7.4 Introduction to the Parallel Gateway............................................................................. 6-306.7.4.1 The Parallel Gateway in Context............................................................................. 6-316.7.4.2 Splitting and Merging Parallel Gateways .............................................................. 6-316.7.5 Introduction to the Complex Gateway.......................................................................... 6-316.7.6 Introduction to the Event-Based Gateway.................................................................... 6-326.7.6.1 Starting a Process with an Event-Based Gateway ................................................ 6-336.8 Controlling Process Flow Using Intermediate Events........................................................ 6-336.8.1 Introduction to Intermediate Events.............................................................................. 6-336.8.2 Introduction to the Timer Catch Event.......................................................................... 6-346.8.3 Introduction to the Error Catch Event ........................................................................... 6-346.9 Using Subprocesses and Inline Handlers to Organize Your Process ............................... 6-356.9.1 Introduction to Subprocesses.......................................................................................... 6-356.9.1.1 Subprocesses and Sequence Flows ......................................................................... 6-366.9.1.2 Subprocesses in Context ........................................................................................... 6-376.9.1.3 Looping Subprocesses............................................................................................... 6-376.9.2 Introduction to Inline Handlers...................................................................................... 6-376.10 Changing the Value of Data Objects in Your Process......................................................... 6-386.10.1 Introduction to the Script Task ....................................................................................... 6-386.10.1.1 The Script Task in Context ....................................................................................... 6-386.11 Measuring Process Performance Using Measurement Marks .......................................... 6-396.11.1 How to Add a Measurement Mark to a Process .......................................................... 6-40
7 Working with the Project Life Cycle
7.1 Importing and Exporting Projects ............................................................................................ 7-17.1.1 How to Import a Project from Your Local File System .................................................. 7-17.1.2 How to Export a Project to Your Local File System........................................................ 7-2

ix
7.2 Using BPM Project Templates................................................................................................... 7-27.2.1 Introduction to Project Templates ..................................................................................... 7-27.2.1.1 Introduction to Edit Policies ....................................................................................... 7-37.2.1.2 Introduction to Using Data Objects and Variables in Project Templates ............. 7-47.2.2 Creating a Project Based on a Project Templates ............................................................ 7-47.3 Using Project Snapshots............................................................................................................. 7-57.3.1 Introduction to Project Snapshots ..................................................................................... 7-57.3.2 Working with Project Snapshots ....................................................................................... 7-57.3.2.1 How to Create a New Project Snapshot .................................................................... 7-57.3.2.2 How to View the Contents of a Project Snapshot .................................................... 7-57.3.2.3 How to Return to the Active Version of a Project.................................................... 7-67.3.2.4 How to Delete a Project Snapshot .............................................................................. 7-67.3.2.5 How to Export a Project Snapshot ............................................................................. 7-67.3.2.6 How to Deploy a Project Snapshot ............................................................................ 7-67.4 Configuring Approval Workflow for a Project ...................................................................... 7-67.4.1 Introduction to Approval Workflow ................................................................................ 7-67.4.2 Working with Approval Workflow .................................................................................. 7-77.4.2.1 How to Configure Approval Workflow for a Project ............................................. 7-77.5 Deploying a Project..................................................................................................................... 7-77.5.1 Introduction to the Deployer Security Role ..................................................................... 7-77.5.2 How to Deploy a Project to Run Time.............................................................................. 7-87.5.3 How to Deploy a Project Using an Approval Workflow............................................... 7-97.5.4 How to Edit a Deployed Project ..................................................................................... 7-107.5.5 How to Generate a Project SAR File .............................................................................. 7-107.5.6 How to Generate a Deployment Plan ............................................................................ 7-10
8 Using Oracle Business Rules
8.1 Introduction to Oracle Business Rules..................................................................................... 8-18.1.1 Introduction to Rule Conditions........................................................................................ 8-28.1.2 Introduction to Rule Actions.............................................................................................. 8-28.1.3 Introduction to Decision Tables......................................................................................... 8-28.1.4 Introduction to Facts and Bucketsets ................................................................................ 8-38.1.5 Introduction to Rulesets...................................................................................................... 8-38.1.6 Introduction to Decision Functions................................................................................... 8-38.1.7 Introduction to Decision Points ......................................................................................... 8-38.1.8 Introduction to Dictionaries ............................................................................................... 8-38.2 Introduction to the Business Process Composer Rules Editor ............................................. 8-38.3 Viewing and Editing Business Rules in Business Process Composer ................................. 8-58.3.1 How to Open a Business Rule............................................................................................ 8-58.3.2 How to Add a Bucketset ..................................................................................................... 8-58.3.3 How to Edit an Existing Bucketset.................................................................................... 8-68.3.4 How to View Globals in the Oracle Rules Dictionary.................................................... 8-68.3.5 How to Add a Rule to a Ruleset ........................................................................................ 8-68.4 Editing Oracle Business Rules at Run Time............................................................................ 8-78.5 Assigning a Rule to a Business Rules Task ............................................................................. 8-7

x
Part III Advanced Business Process Composer Functionality
9 Advanced Business Process Composer Functionality
9.1 Working with Services ............................................................................................................... 9-19.1.1 How to Create New Services in the Business Catalog ................................................... 9-19.2 Defining Conversations ............................................................................................................. 9-29.2.1 Introduction to Conversations ........................................................................................... 9-29.2.2 Working with Conversations ............................................................................................. 9-29.2.2.1 How to define a conversation..................................................................................... 9-29.2.2.2 How to set the default conversation .......................................................................... 9-39.2.2.3 How to define a conversation for a BPMN flow object........................................... 9-39.2.2.4 How to view a collaboration diagram....................................................................... 9-3
10 Working with Data Objects and Expressions
10.1 Introduction to Data Objects .................................................................................................. 10-110.1.1 Introduction to Process and Project Data Objects ........................................................ 10-310.1.2 Using Data Objects in New BPM Projects..................................................................... 10-410.1.3 Using Data Objects in Projects Based on Project Templates....................................... 10-410.1.4 Introduction to Data Associations.................................................................................. 10-410.1.5 Introduction to the Data Association Editor................................................................. 10-510.2 Working with Data Objects and Data Associations............................................................ 10-610.2.1 How to Create a Data Object........................................................................................... 10-610.2.2 How to Delete a Data Object ........................................................................................... 10-710.2.2.1 What You Need to Know About Deleting Data Objects...................................... 10-710.2.3 How to Configure Data Associations for a Flow Object ............................................. 10-710.3 Working with Business Indicators and Counter Marks..................................................... 10-710.3.1 Introduction to Business Indicators and Counters ...................................................... 10-810.3.2 Introduction to Counter Marks....................................................................................... 10-810.3.3 How to Add a New Counter Mark to a Process .......................................................... 10-810.3.4 How to Delete a Counter Mark ...................................................................................... 10-910.4 Introduction to Expressions ................................................................................................... 10-910.4.1 Types of Expressions........................................................................................................ 10-910.4.2 Simple Expressions......................................................................................................... 10-1010.4.2.1 Operator Types ........................................................................................................ 10-1010.4.2.2 Operator Precedence ............................................................................................... 10-1110.5 Defining Process Input and Output .................................................................................... 10-1110.5.1 How to Define the Input Arguments for a Process ................................................... 10-1110.5.2 How to Define Data Associations for a Message Start Event................................... 10-1210.5.3 How to Define the Output Arguments for a Process ................................................ 10-1210.5.4 How to Define Data Association for a Message End Event ..................................... 10-1210.6 Introduction to the Expression Editor ................................................................................ 10-1310.7 Working with Expressions ................................................................................................... 10-1310.7.1 How to Define a Simple Expression for a Conditional Sequence Flow.................. 10-14

xi
10.7.2 How to Define a Simple Expression in Data Associations ....................................... 10-14
11 Working with Human Tasks
11.1 Understanding Human Tasks ................................................................................................ 11-111.1.1 Introduction to Routing and Participants ..................................................................... 11-111.1.1.1 Participant Types....................................................................................................... 11-211.1.1.2 Routing Types ............................................................................................................ 11-211.1.1.3 Outcome...................................................................................................................... 11-411.1.2 Introduction to Participant Assignment........................................................................ 11-411.1.3 Introduction to Duration ................................................................................................. 11-511.2 Introduction to the Human Task Editor ............................................................................... 11-511.3 Working with Human Tasks .................................................................................................. 11-611.3.1 How to Create New Human Task.................................................................................. 11-611.3.2 How to Open a Human Task .......................................................................................... 11-611.3.3 How to Add Participants to a Human Task ................................................................. 11-611.3.4 How to Configure the Outcome for Parallel Routing ................................................. 11-711.3.5 How to Assign Users, Groups, or Roles to a Participant ............................................ 11-811.3.6 How to Define the Duration for a Participant .............................................................. 11-911.3.7 How to Define the Duration for a Human Task .......................................................... 11-911.3.8 How to Create Task Data for a Human Task.............................................................. 11-1011.3.9 How to Specify the Presentation of a Human Task................................................... 11-10
12 Performing Administrative Tasks
12.1 Introduction to Business Process Composer Administration ........................................... 12-112.2 How to Assign Global Roles................................................................................................... 12-112.3 How to Delete a Project or Project Template ....................................................................... 12-212.4 How to Configure on a Project............................................................................................... 12-212.5 How to Release the Lock on a Shared Project...................................................................... 12-312.6 How to Import a Project Template ........................................................................................ 12-3
BPMN Flow Object Property Reference 1A.1 Common Properties................................................................................................................... A-1A.1.1 Basic Tab............................................................................................................................... A-1A.2 Activity Properties ..................................................................................................................... A-2A.2.1 User Task.............................................................................................................................. A-2A.2.1.1 Basic Tab ....................................................................................................................... A-2A.2.1.2 Counter Tab.................................................................................................................. A-3A.2.1.3 Implementation Tab.................................................................................................... A-3A.2.2 Manual Task ........................................................................................................................ A-3A.2.2.1 Basic Tab ....................................................................................................................... A-3A.2.3 Service Task ......................................................................................................................... A-3A.2.3.1 Basic Tab ....................................................................................................................... A-3A.2.3.2 Implementation Tab.................................................................................................... A-3A.2.4 Send Task ............................................................................................................................. A-4A.2.4.1 Basic Tab ....................................................................................................................... A-4

xii
A.2.4.2 Implementation Tab .................................................................................................... A-4A.2.5 Receive Task ........................................................................................................................ A-5A.2.5.1 Basic Tab ....................................................................................................................... A-5A.2.5.2 Implementation Tab .................................................................................................... A-5A.2.6 Business Rule Task ............................................................................................................. A-6A.2.6.1 Basic Tab ....................................................................................................................... A-6A.2.6.2 Implementation Tab .................................................................................................... A-6A.2.7 Script Task............................................................................................................................ A-6A.2.7.1 Basic Tab ....................................................................................................................... A-7A.2.8 Call Activity......................................................................................................................... A-7A.2.8.1 Basic Tab ....................................................................................................................... A-7A.2.8.2 Implementation Tab .................................................................................................... A-7A.2.9 Subprocesses........................................................................................................................ A-7A.2.9.1 Basic Tab ....................................................................................................................... A-7A.2.9.2 Loop Characteristics Tab ............................................................................................ A-7A.2.9.3 Argument Definitions Tab ......................................................................................... A-7A.2.10 Inline Handlers.................................................................................................................... A-8A.2.10.1 Basic Tab ....................................................................................................................... A-8A.3 Gateway Properties ................................................................................................................... A-8A.3.1 Exclusive Gateway.............................................................................................................. A-8A.3.1.1 Basic Tab ....................................................................................................................... A-8A.3.1.2 Outflows Order Tab .................................................................................................... A-8A.3.2 Inclusive Gateway .............................................................................................................. A-8A.3.2.1 Basic Tab ....................................................................................................................... A-8A.3.3 Parallel Gateway ................................................................................................................. A-8A.3.3.1 Basic Tab ....................................................................................................................... A-9A.3.4 Complex Gateway .............................................................................................................. A-9A.3.4.1 Basic Tab ....................................................................................................................... A-9A.3.4.2 Implementation Tab .................................................................................................... A-9A.3.5 Event-Based Gateway ........................................................................................................ A-9A.3.5.1 Basic Tab ....................................................................................................................... A-9A.3.5.2 Outflows Order............................................................................................................ A-9A.4 Event Properties ......................................................................................................................... A-9A.4.1 The None Start Event ....................................................................................................... A-10A.4.1.1 Basic Tab ..................................................................................................................... A-10A.4.2 The Message Start Event.................................................................................................. A-10A.4.2.1 Basic Tab ..................................................................................................................... A-10A.4.2.2 Implementation Tab .................................................................................................. A-10A.4.3 The Timer Start Event ...................................................................................................... A-11A.4.3.1 Basic Tab ..................................................................................................................... A-11A.4.3.2 Implementation Tab .................................................................................................. A-11A.4.4 The Signal Start Event ...................................................................................................... A-12A.4.4.1 Basic Tab ..................................................................................................................... A-12A.4.4.2 Implementation Tab .................................................................................................. A-12A.4.5 The Error Start Event........................................................................................................ A-12A.4.5.1 Basic Tab ..................................................................................................................... A-12A.4.5.2 Implementation Tab .................................................................................................. A-13

xiii
A.4.6 None Catch Event ............................................................................................................. A-13A.4.6.1 Basic Tab ..................................................................................................................... A-13A.4.7 Message Catch Event........................................................................................................ A-13A.4.7.1 Basic Tab ..................................................................................................................... A-13A.4.7.2 Implementation Tab.................................................................................................. A-13A.4.8 Timer Catch Event ............................................................................................................ A-14A.4.8.1 Basic Tab ..................................................................................................................... A-15A.4.8.2 Implementation Tab.................................................................................................. A-15A.4.9 Error Catch Event ............................................................................................................. A-15A.4.9.1 Basic Tab ..................................................................................................................... A-15A.4.9.2 Implementation Tab.................................................................................................. A-15A.4.10 Message Throw Event...................................................................................................... A-15A.4.10.1 Basic Tab ..................................................................................................................... A-15A.4.10.2 Implementation Tab.................................................................................................. A-16A.4.11 Signal Throw Event .......................................................................................................... A-17A.4.11.1 Basic Tab ..................................................................................................................... A-17A.4.11.2 Implementation Tab.................................................................................................. A-17A.4.12 None End Event ................................................................................................................ A-17A.4.12.1 Basic Tab ..................................................................................................................... A-17A.4.13 Message End Event........................................................................................................... A-17A.4.13.1 Basic Tab ..................................................................................................................... A-17A.4.13.2 Implementation Tab.................................................................................................. A-18A.4.14 Signal End Event............................................................................................................... A-18A.4.14.1 Basic Tab ..................................................................................................................... A-18A.4.14.2 Implementation Tab.................................................................................................. A-18A.4.15 Error End Event ................................................................................................................ A-19A.4.15.1 Basic Tab ..................................................................................................................... A-19A.4.15.2 Implementation Tab.................................................................................................. A-19A.4.16 Terminate End Event........................................................................................................ A-19A.4.16.1 Basic Tab ..................................................................................................................... A-19A.5 Measurement Mark Properties .............................................................................................. A-20A.6 Sequence Flow Properties....................................................................................................... A-20A.6.1 Default Sequence Flow..................................................................................................... A-20A.6.2 Normal Sequence Flow.................................................................................................... A-20A.6.3 Conditional Sequence Flow............................................................................................. A-21

xiv
Preface
This guide describes the Oracle Business Process Composer application.
Intended AudienceThis guide is intended for process analysts who use the Business Process Composer application to create and edit the business processes and Oracle BPM projects used to created process-based applications using the Oracle Business Process Management Suite.
This guide is also intended for process developers who must use Business Process Composer. See Section 1.2, "Oracle BPM User Personas" for more information on these user personas.
This manual assumes that you have basic knowledge of business process design and are familiar with Business Process Management Notation (BPMN) 2.0.
Documentation AccessibilityOur goal is to make Oracle products, services, and supporting documentation accessible to all users, including users that are disabled. To that end, our documentation includes features that make information available to users of assistive technology. This documentation is available in HTML format, and contains markup to facilitate access by the disabled community. Accessibility standards will continue to evolve over time, and Oracle is actively engaged with other market-leading technology vendors to address technical obstacles so that our documentation can be accessible to all of our customers. For more information, visit the Oracle Accessibility Program Web site at http://www.oracle.com/accessibility/.
Accessibility of Code Examples in DocumentationScreen readers may not always correctly read the code examples in this document. The conventions for writing code require that closing braces should appear on an otherwise empty line; however, some screen readers may not always read a line of text that consists solely of a bracket or brace.
Accessibility of Links to External Web Sites in DocumentationThis documentation may contain links to Web sites of other companies or organizations that Oracle does not own or control. Oracle neither evaluates nor makes any representations regarding the accessibility of these Web sites.
Deaf/Hard of Hearing Access to Oracle Support ServicesTo reach Oracle Support Services, use a telecommunications relay service (TRS) to call Oracle Support at 1.800.223.1711. An Oracle Support Services engineer will handle technical issues and provide customer support according to the Oracle service request process. Information about TRS is available at http://www.fcc.gov/cgb/consumerfacts/trs.html, and a list of phone numbers is available at http://www.fcc.gov/cgb/dro/trsphonebk.html.
What’s New In This ReleaseThis is a new manual describing the initial release of the Oracle Business Process Composer.
StructureThe following sections describe the structure of this guide:.
Part I, "Introduction to Oracle Business Process Composer"This part contains general information about the Oracle Business Process Management Suite, process design, Business Process Management Notation (BPMN), and the Oracle Business Process Composer application.
Chapter 1, "Oracle Business Process Management Suite Overview"This chapter provides a general overview of the Oracle Business Process Management Suite. It describes how Oracle BPM interacts with the overall Oracle SOA Suite architecture. It also describes each component of Oracle BPM.
Chapter 2, "Overview of Business Process Design"This chapter contains a brief introduction to Business Process Management Notation (BPMN). It also contains a description of the Sales Quote example project.
Chapter 3, "Introduction to Oracle Business Process Composer"This chapter provides an introduction to the Oracle Business Process Composer application.
Part II, "Using Oracle Business Process Composer"This part contains information on using Business Process Composer application to create and edit business processes and Oracle BPM projects.
Chapter 4, "Working with Projects and Project Templates"This chapter provides an introduction to Oracle BPM projects and project templates. It also contains information on publishing projects to the Oracle BPM Metadata Service (MDS) repository and deploying projects to Oracle BPM run time.
Chapter 5, "Working with Processes and the Process Editor"This chapter provides information on creating and editing business processes using Oracle Business Process Composer. It also contains a detailed description of the Process Editor user interface.
Chapter 6, "Modeling Business Processes with Oracle BPM"This chapter describes how to model business processes using Oracle BPM and Business Process Management Notation (BPMN) 2.0. It provides detailed information on Oracle’s implementation of the BPMN 2.0 specification.
Chapter 7, "Working with the Project Life Cycle"This chapter describes some of the advanced features related to BPM projects and how to work with them within the development life-cycle
Chapter 8, "Using Oracle Business Rules"This chapter describes how to edit Oracle Business Rules using Business Process Composer. It also provides procedures for editing Oracle Business Rules at run time.
Part III, "Advanced Business Process Composer Functionality"This part describes advanced functionality of Business Process Composer that is targeted towards process developers who need to make changes to the implementation details of a BPM project.
Chapter 9, "Advanced Business Process Composer Functionality"This chapter describes functionality of Business Process Composer related to technical implementation of a BPMN process. The functionality described in this chapter is generally performed by a process developer.
Chapter 10, "Working with Data Objects and Expressions"This chapter describes how to handle information within your project and processes. It also provides detailed information on using data associations and the expression editor.
Chapter 11, "Working with Human Tasks"This chapter describes how to create and edit human tasks using Oracle Business Process Composer.
Chapter 12, "Performing Administrative Tasks"The chapter provides information on using the Business Process Composer administration tools. It provides procedures for managing users and Oracle BPM projects.
Appendix A, "BPMN Flow Object Property Reference"This appendix provides reference information for each BPMN flow object property.
Related DocumentsFor more information, see the following Oracle resources:
Oracle Business Process ManagementSee the following for more information about the Oracle BPM Suite:

■ Oracle Fusion Middleware Modeling and Implementation Guide for Oracle Business Process Management
■ Oracle Fusion Middleware Business Process Management User's Guide
Oracle SOA and BPM Suite Installation and Administration■ Oracle Fusion Middleware Installation Guide for Oracle SOA Suite
■ Oracle Fusion Middleware Administrator's Guide for Oracle SOA Suite and Oracle BPM Suite
■ Oracle Fusion Middleware High Availability Guide
ConventionsThe following conventions are also used in this manual:
Convention Meaning
. . .
Vertical ellipsis points in an example mean that information not directly related to the example has been omitted.
. . . Horizontal ellipsis points in statements or commands mean that parts of the statement or command not directly related to the example have been omitted
boldface text Boldface type in text indicates a term defined in the text, the glossary, or in both locations.
< > Angle brackets enclose user-supplied names.
[ ] Brackets enclose optional clauses from which you can choose one or none.
Part IIntroduction to Oracle Business Process
Composer
This part provides a general introduction to the Oracle Business Process Composer application. It also provides an overview of the Oracle BPM Suite and shows how Business Process Composer is used within the overall process development life cycle.
This part contains the following chapters:
■ Chapter 1, "Oracle Business Process Management Suite Overview"
■ Chapter 2, "Overview of Business Process Design"
■ Chapter 3, "Introduction to Oracle Business Process Composer"


Oracle Business Process Management Suite Overview 1-1
1Oracle Business Process Management Suite
Overview
This chapter provides a general overview of the Oracle Business Process Management (BPM) Suite.
This chapter includes the following sections:
■ Section 1.1, "Introduction to the Oracle Business Process Management Suite"
■ Section 1.2, "Oracle BPM User Personas"
■ Section 1.3, "Oracle BPM Suite Components"
■ Section 1.4, "Oracle Business Process Analysis (BPA) Suite"
■ Section 1.5, "Introduction to the Application Development Life Cycle"
■ Section 1.6, "Oracle BPM Use Cases"
1.1 Introduction to the Oracle Business Process Management SuiteThe Oracle BPM Suite provides an integrated environment for developing, administering, and using business applications centered around business processes.
The Oracle BPM Suite provides the following:
■ Enables you to create process models based on standards with user-friendly applications. It enables collaboration between process developers and process analysts. Oracle BPM supports BPMN 2.0 and BPEL from modeling and implementation to run time and monitoring.
■ Enables process analysts and process owners to customize business processes and Oracle Business Rules.
■ Provides a web-based application for creating business processes, editing Oracle Business Rules, and task customization using predefined components.
■ Expands business process management to include flexible, unstructured processes. It adds dynamic tasks and supports approval routing using declarative patterns and rules-driven flow determination.
■ Enables collaboration by providing integration with Oracle Process Spaces which drives productivity and innovation.
■ Unifies different stages of the application development life cycle by addressing end-to-end requirements for developing process-based applications. Oracle BPM unifies the design, implementation, run time, and monitoring stages. Oracle BPM
Oracle BPM User Personas
1-2 Business Process Composer User's Guide for Oracle Business Process Management
enables different personas to participate through all stages of the application life-cycle.
See Section 1.2, "Oracle BPM User Personas" for more information on the user personas defined for the Oracle BPM Suite.
The Oracle BPM Suite provides a seamless integration of all stages of the application development life cycle from design-time and implementation to run-time and application management.
The Oracle BPM Suite is layered on the Oracle SOA Suite and shares many of the same product components, including:
■ Business Rules
■ Human Workflow
■ Oracle Adapter Framework for Integration
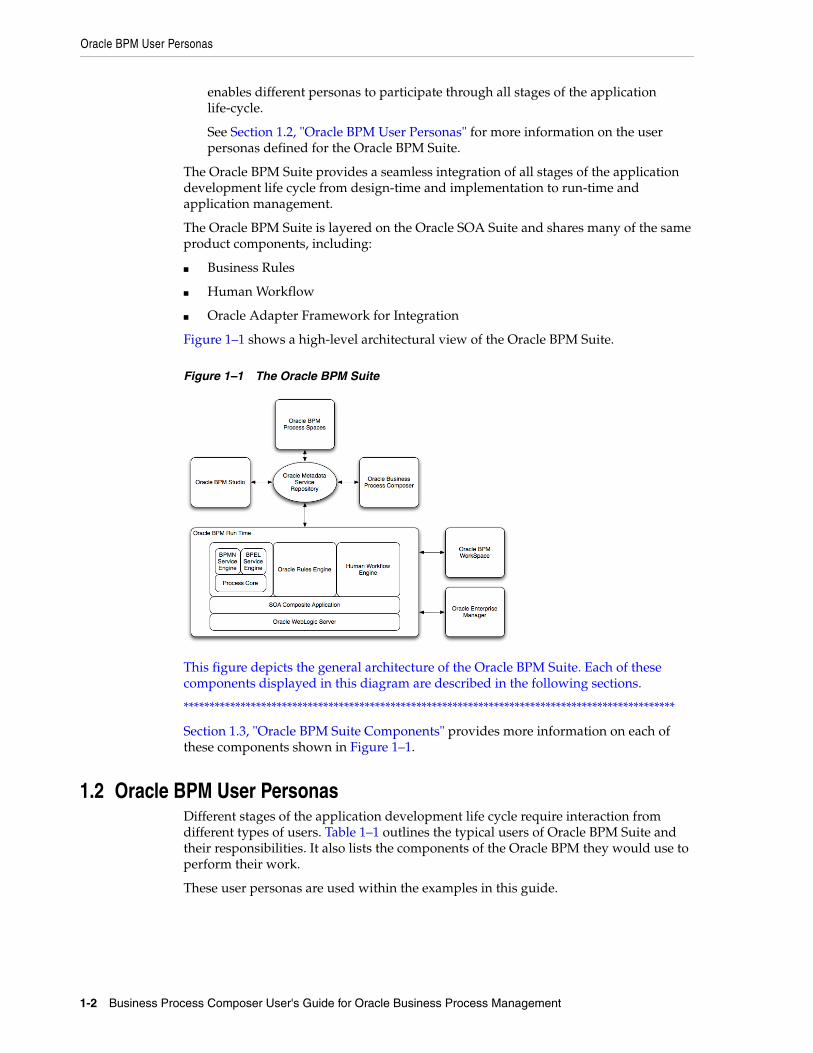
Figure 1–1 shows a high-level architectural view of the Oracle BPM Suite.
Figure 1–1 The Oracle BPM Suite
This figure depicts the general architecture of the Oracle BPM Suite. Each of these components displayed in this diagram are described in the following sections.
***********************************************************************************************
Section 1.3, "Oracle BPM Suite Components" provides more information on each of these components shown in Figure 1–1.
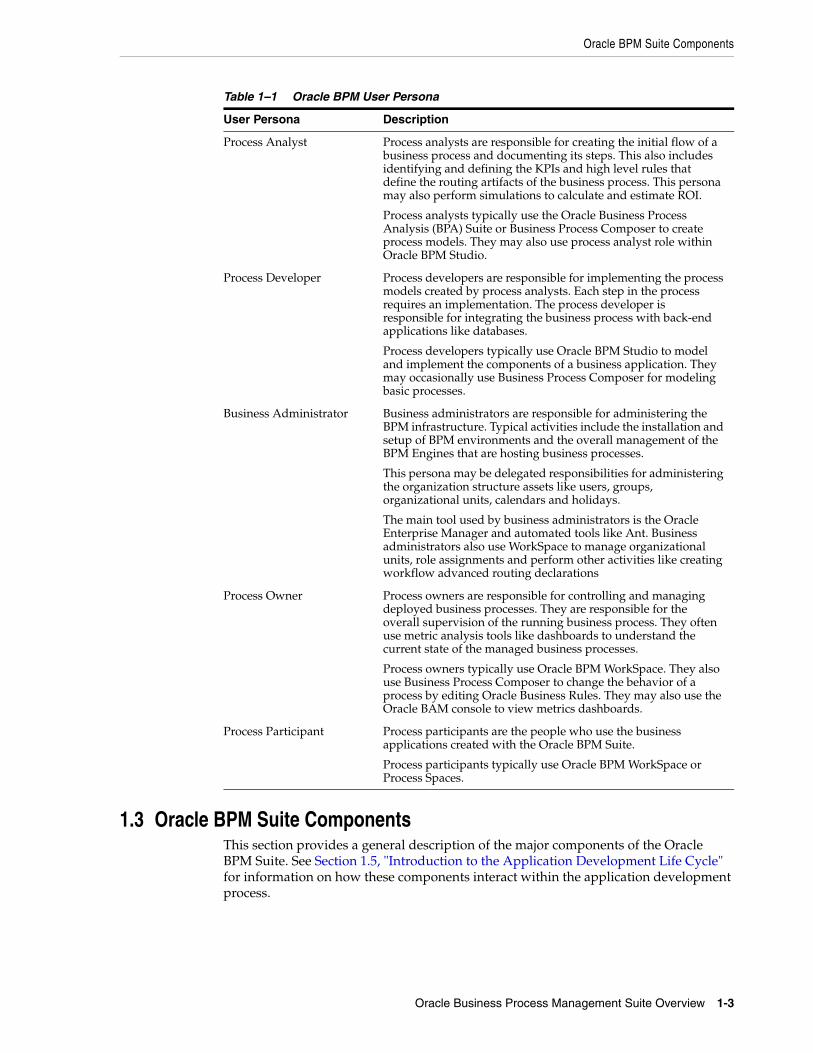
1.2 Oracle BPM User PersonasDifferent stages of the application development life cycle require interaction from different types of users. Table 1–1 outlines the typical users of Oracle BPM Suite and their responsibilities. It also lists the components of the Oracle BPM they would use to perform their work.
These user personas are used within the examples in this guide.
Oracle BPM Suite Components
Oracle Business Process Management Suite Overview 1-3
1.3 Oracle BPM Suite ComponentsThis section provides a general description of the major components of the Oracle BPM Suite. See Section 1.5, "Introduction to the Application Development Life Cycle" for information on how these components interact within the application development process.
Table 1–1 Oracle BPM User Persona
User Persona Description
Process Analyst Process analysts are responsible for creating the initial flow of a business process and documenting its steps. This also includes identifying and defining the KPIs and high level rules that define the routing artifacts of the business process. This persona may also perform simulations to calculate and estimate ROI.
Process analysts typically use the Oracle Business Process Analysis (BPA) Suite or Business Process Composer to create process models. They may also use process analyst role within Oracle BPM Studio.
Process Developer Process developers are responsible for implementing the process models created by process analysts. Each step in the process requires an implementation. The process developer is responsible for integrating the business process with back-end applications like databases.
Process developers typically use Oracle BPM Studio to model and implement the components of a business application. They may occasionally use Business Process Composer for modeling basic processes.
Business Administrator Business administrators are responsible for administering the BPM infrastructure. Typical activities include the installation and setup of BPM environments and the overall management of the BPM Engines that are hosting business processes.
This persona may be delegated responsibilities for administering the organization structure assets like users, groups, organizational units, calendars and holidays.
The main tool used by business administrators is the Oracle Enterprise Manager and automated tools like Ant. Business administrators also use WorkSpace to manage organizational units, role assignments and perform other activities like creating workflow advanced routing declarations
Process Owner Process owners are responsible for controlling and managing deployed business processes. They are responsible for the overall supervision of the running business process. They often use metric analysis tools like dashboards to understand the current state of the managed business processes.
Process owners typically use Oracle BPM WorkSpace. They also use Business Process Composer to change the behavior of a process by editing Oracle Business Rules. They may also use the Oracle BAM console to view metrics dashboards.
Process Participant Process participants are the people who use the business applications created with the Oracle BPM Suite.
Process participants typically use Oracle BPM WorkSpace or Process Spaces.

Oracle BPM Suite Components
1-4 Business Process Composer User's Guide for Oracle Business Process Management
1.3.1 Process Modeling and ImplementationThis section describes the applications and components used to model and implement business processes and process-based business applications.
The Oracle BPM Suite provides two primary applications for modeling and implementing business processes.
1.3.1.1 Oracle BPM StudioOracle BPM Studio is a component of the Oracle BPM Suite that provides a user-friendly environment where process analysts can create business process models and run process simulations. Oracle BPM Studio supports Business Process Management Notation (BPMN) 2.0.
Oracle BPM Studio also enables process developers to create working process-based applications. These applications are Oracle BPM projects that are integrated as SOA composite applications.
You can use Oracle BPM Studio to implement business processes with other Oracle components such as adapters, human workflow and business rules. You can then deploy these processes to Oracle BPM run time.
Oracle BPM Studio is a part of the Oracle JDeveloper IDE. Oracle BPM Studio enables IT users to use a single integrated tool to model and edit business processes, implement the required IT elements, and deploy applications to the run-time environment.
Oracle BPM Studio also provides a BPM role that enables business users to use a simplified version of Oracle JDeveloper that only displays functionality relevant to process design.
See the Oracle Fusion Middleware Modeling and Implementation Guide for Oracle Business Process Management for more information.
1.3.1.2 Oracle Business Process ComposerOracle Business Process Composer is a web-based application that enables business users to collaborate with process developers and designers. It provides a user friendly environment for editing processes and process templates created in Oracle BPM Studio.
Process developers can create a catalog of preconfigured components such as services, tasks, and rules in Oracle BPM Studio. This catalog can be included in project templates that process analysts can use to create new projects using Oracle Business Process Composer.
After creating a project based on a project template, process analysts can incorporate business catalog elements and perform other required edits defined by the project template. Process analysts can then deploy these projects to the Oracle BPM run time.
Business Process Composer also enables process analysts to create new projects. These are initial versions of a project that can be used by process developers who use Oracle BPM Studio to add further implementation details and refinement.
Note: Oracle BPM can also integrate business processes created using the Oracle Business Process Analysis (BPA) Suite. See Section 1.4, "Oracle Business Process Analysis (BPA) Suite" for more information.
Oracle BPM Suite Components
Oracle Business Process Management Suite Overview 1-5
Business Process Composer also enables you to edit Oracle Business Rules at run time. This is important because policies tend to evolve faster that business processes.
See Chapter 3, "Introduction to Oracle Business Process Composer" for more information.
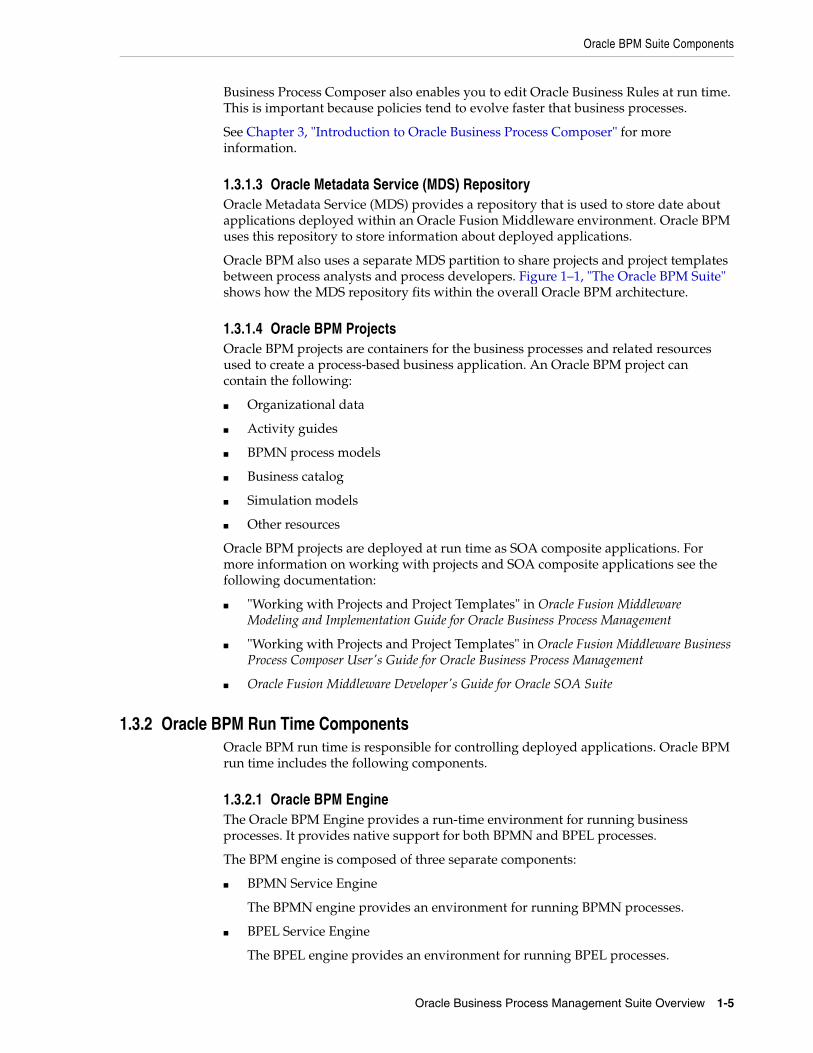
1.3.1.3 Oracle Metadata Service (MDS) RepositoryOracle Metadata Service (MDS) provides a repository that is used to store date about applications deployed within an Oracle Fusion Middleware environment. Oracle BPM uses this repository to store information about deployed applications.
Oracle BPM also uses a separate MDS partition to share projects and project templates between process analysts and process developers. Figure 1–1, "The Oracle BPM Suite" shows how the MDS repository fits within the overall Oracle BPM architecture.
1.3.1.4 Oracle BPM ProjectsOracle BPM projects are containers for the business processes and related resources used to create a process-based business application. An Oracle BPM project can contain the following:
■ Organizational data
■ Activity guides
■ BPMN process models
■ Business catalog
■ Simulation models
■ Other resources
Oracle BPM projects are deployed at run time as SOA composite applications. For more information on working with projects and SOA composite applications see the following documentation:
■ "Working with Projects and Project Templates" in Oracle Fusion Middleware Modeling and Implementation Guide for Oracle Business Process Management
■ "Working with Projects and Project Templates" in Oracle Fusion Middleware Business Process Composer User's Guide for Oracle Business Process Management
■ Oracle Fusion Middleware Developer's Guide for Oracle SOA Suite
1.3.2 Oracle BPM Run Time ComponentsOracle BPM run time is responsible for controlling deployed applications. Oracle BPM run time includes the following components.
1.3.2.1 Oracle BPM EngineThe Oracle BPM Engine provides a run-time environment for running business processes. It provides native support for both BPMN and BPEL processes.
The BPM engine is composed of three separate components:
■ BPMN Service Engine
The BPMN engine provides an environment for running BPMN processes.
■ BPEL Service Engine
The BPEL engine provides an environment for running BPEL processes.
Oracle BPM Suite Components
1-6 Business Process Composer User's Guide for Oracle Business Process Management
■ Process Core
Provides engine functionality that is shared by the BPMN and BPEL engines. Some of the key functionality performed by the process core includes:
– Manage security
– Generate audit trails
– Invoke services
– Manage persistence
1.3.2.2 Oracle Human WorkflowMany end-to-end business processes require human interactions with the process. For example, humans may be needed for approvals, exception management, or performing activities required to advance the business process. The human workflow service provides features such as:
■ Task routing to users, groups or application roles.
■ Deadlines, escalations, notifications, and other features required for ensuring the timely performance of a task.
■ Task forms for presentation of tasks to end users through a variety of mechanisms, including a workspace and portals.
■ Organization, filtering, prioritization, dispatching rules and other features required for end users to productively perform their tasks.
1.3.2.3 Oracle Business RulesOracle Business Rules are a component of the Oracle SOA Suite that enable dynamic decisions at run time allowing, among other features, applications to rapidly adapt to regulatory and competitive pressures. This increased agility is possible because process analysts using Oracle Business Rules can create and change business rules that are separated from the application code. By using Oracle Business Rules, process analysts can change business rules without stopping business processes. Also, externalizing business rules enables process analysts to manage business rules directly, without involving process developers.
1.3.2.4 Oracle WebLogic Application ServerOracle WebLogic Server is an application server that provides a platform for creating and running J2EE-compliant applications.
1.3.2.5 Oracle Enterprise ManagerThe Oracle Enterprise Manager is a web-based application that enables system administrators to control and manage applications running on the Oracle SOA Suite. Enterprise Manager enables business administrators to configure and manage business applications and process instances.
1.3.3 Oracle BPM Suite Process Participant ApplicationsThe following sections describe the components of the Oracle BPM Suite that are used by process participants to perform their day-to-day work. These applications enable process participants to interact with running business applications managed by Oracle BPM run time.

Oracle Business Process Analysis (BPA) Suite
Oracle Business Process Management Suite Overview 1-7
1.3.3.1 Oracle Business Process Management Workspace (Process Workspace)Process Workspace enable process participants to interact with the applications you create using Oracle BPM. The Process Workspace user interface provides tabs for each of the following:
■ Tasks: This page enables process participants to view and work with their assigned tasks.
■ Process Tracking: This page enables process participants to view running process instances.
■ Standard Dashboards: This page provides out-of-the-box dashboards for monitoring process performance, task performance, and workload.
■ Custom Dashboards: This page enables process participants to define and use custom dashboards based on the measurement data generated by process instances.
Process Workspace also enables business administrators to configure and maintain organizations and roles. See the Oracle Fusion Middleware Business Process Management User's Guide for more information.
1.3.3.2 Oracle Business Process Management Process Spaces (Process Spaces)Process Spaces is a collaborative workspace built on top of Oracle WebCenterSpaces and enables more productive BPM by increasing collaboration.
See the Oracle Fusion Middleware Business Process Management User's Guide for more information.
1.3.4 Other Oracle BPM Suite ComponentsThe following sections describe other components of the Oracle BPM Suite.
1.3.4.1 Process AnalyticsBusiness Process Analytics enables process participants to monitor the performance of a running process-based applications. It measures the key performance indicators defined in a BPM project and stores them in a database. Process participants and analysts can view the metrics stored in the process analytics databases using WorkSpace dashboards or Oracle BAM.
1.3.4.2 Guided Business ProcessesGuided Business Processes enable process analysts and developers to group the interactive activities in a business process into a set of milestones that are meaningful to the process participants. They outline the steps the process participants have to complete, hiding the complexity of the business process.
See "Introduction to Guided Business Processes" in Oracle Fusion Middleware Modeling and Implementation Guide for Oracle Business Process Management
1.4 Oracle Business Process Analysis (BPA) SuiteThe Oracle BPA Suite is a separate Oracle product suite based on the Aris platform from IDS Scheer. The Oracle Business Process Analysis (BPA) Suite provides comprehensive modeling, analysis and simulation capabilities for enterprise wide business processes. Oracle BPA supports capturing business architecture artifacts such

Introduction to the Application Development Life Cycle
1-8 Business Process Composer User's Guide for Oracle Business Process Management
as strategic objectives, goals, higher level KPIs, risks and controls, and conceptual models such as value chain diagrams.
Additionally, the Oracle BPA Suite supports the following:
■ Alignment of business processes with business strategy.
■ Service discovery & linking to business processes. Drives service requirements for the Oracle SOA Suite.
■ Loading and creating simulation scenarios which allow you to determine optimal resource allocation. Simulations allow you to perform throughput analysis, activity based costing and resource utilization. Additionally, you can create simulation analysis reports for easy analysis of simulation results.
■ Comprehensive version management including check-in, check-out, and change management capabilities.
The business architecture defined by the Oracle BPA Suite is the formal link between strategic objectives and the actual business applications created using Oracle BPM. The Oracle BPA Suite supports modeling of Business Architecture artifacts such as strategy maps, goals, objectives, risk and controls and linking them to business processes.
This provides the ability to prioritize efforts, justify decisions, and trace activities of the business process improvement initiatives to strategic goals of the business, hence improving business/IT alignment. It provides tremendous value as it offers a clear understanding of which BPM projects to undertake, which processes are currently most strategic to the company, and which services are most aligned with business strategy.
The Oracle BPA Suite complements the functionality of the Oracle BPM Suite by adding orthogonal dimensions to the modeling phases including organization goals. See the Oracle BPA Quick Start Guide for more information
Processes created in the Oracle BPA Suite can be imported into the Oracle BPM Suite. Using Oracle BPM Studio, you can integrate your business process with other Oracle technologies including adapters, business rules, and human tasks.
See the Oracle Fusion Middleware Modeling and Implementation Guide for Oracle Business Process Management for more information on using business processes created in Oracle BPA within Oracle BPM Studio.
1.5 Introduction to the Application Development Life CycleThis section outlines the stages of the development life cycle of an Oracle BPM application. It describes how different components of Oracle BPM are used within each stage.
Figure 1–2 lists the four stages of the application development life cycle, the user personas applicable to each stage, and the Oracle BPM tools and applications that are used.

Introduction to the Application Development Life Cycle
Oracle Business Process Management Suite Overview 1-9
Figure 1–2 Stages of the Oracle BPM Application Development Life Cycle
This figure shows each of the components of the Oracle BPM Suite within the four stages of the application development life cycle.
***********************************************************************************************
1.5.1 Process ModelingThe first stage of the application development life cycle is process modeling. During this stage a process analyst creates process models based on real-word business processes and problems.
Oracle BPM provides three distinct tools for modeling business processes. Each tool has a different role within the Oracle BPM Suite. The tool you use depends on your business requirements, the stage of the application development cycle, and your user persona.
■ Oracle BPM Studio
Oracle BPM Studio runs on the Oracle JDeveloper IDE platform. Oracle BPM Studio provides a process analyst role that displays a simplified set of JDeveloper functionality that focuses on designing process models.
Oracle BPM Studio enables process analysts and process developers to design and implement detailed process flows that are deployed to Oracle BPM run time and run as working applications. Additionally, detailed process flows from Oracle BPA Suite or Business Process Composer can be opened in Oracle BPM Studio for further implementation, then deployed to the Oracle BPM run time.
■ Oracle Business Process Composer
Business Process Composer is a collaboration tool that enables process analysts to collaborate with process developers.
■ Oracle Business Process Analysis (BPA) Suite
The Oracle BPA Suite enables you to create robust models of your business processes from high-level models of your entire organization down to lower-level business processes that you can implement as running processes.
See Section 1.6, "Oracle BPM Use Cases" for more information on how each of these tools fit within the typical Oracle BPM uses cases. See Section 3.2, "Overview of the Application Development Life Cycle" for more information on how Oracle Business
Introduction to the Application Development Life Cycle
1-10 Business Process Composer User's Guide for Oracle Business Process Management
Process Composer and Oracle BPM Studio interact within the application development life cycle.
1.5.2 ImplementationAfter process analysts model business processes, process developers are responsible for creating business applications based on these models. Using Oracle BPM Studio, process developers implement reusable services and integrate other business systems.
Implementation may include the following types of tasks generally performed by process developers:
■ Data mapping and transformation
■ System fault handling
■ Designing and implementing user interfaces using Oracle Human Workflow.
■ Designing Oracle Business Rules
■ Creating dashboards
After a process developer finishes the implementation of the application, it is compiled and deployed like other SOA composite applications. It can be compiled and deployed using Oracle BPM Studio.
1.5.3 DeploymentDeployment is the process of transferring an Oracle BPM project from the development environment to the run-time environment. This can be either a testing or production run-time environment.
After finishing the integration of business processes with back-end systems and reusable services, process developers create and compile a working process-based application. The application is then deployed to Oracle BPM run time.
Oracle BPM Suite contains the following typical scenarios for deploying to Oracle BPM run time:
■ Deployment directly from Oracle BPM Studio
Applications created with Oracle BPM can be deployed directly to the run-time environment like any other SOA composite application. This is typically performed by a process developer using BPM Studio within a test or development environment.
See the Oracle Fusion Middleware Developer's Guide for Oracle SOA Suite for more information on deploying SOA composite applications.
■ Deployment directly from Business Process Composer
Oracle BPM enables you to deploy projects created from project templates directly to the same run-time environment where Business Process Composer is installed. When creating a project, you can specify an approval workflow that must be completed before the project is deployed.
You can deploy from Business Process Composer when it is installed in the same server infrastructure as Oracle BPM run time. Deploying from Business Process Composer enables process analysts to easily deploy and test process-based business applications. The is generally done in a testing environment.
■ Deployment using an exported SAR file

Oracle BPM Use Cases
Oracle Business Process Management Suite Overview 1-11
Oracle BPM Studio and Business Process Composer enable you to export applications using a SAR file. The SAR file can be deployed to run time by business administrators using Oracle Enterprise Manager.
In a production environment, this is generally how applications are deployed.
■ Deployment Using the WebLogic Scripting Tool (WLST)
Oracle BPM provides customized WLST commands for managing and deploying Oracle BPM projects.
1.5.4 Oracle BPM Run TimeAfter an application is deployed, the run-time environment makes the Oracle BPM application available to process participants based on the roles assigned in the organization where the business processes were deployed. This stage is divided into two distinct functions:
■ User interaction
Process participants and process owners are responsible for interacting with the running application using Oracle BPM WorkSpace.
Process analysts and owners can also monitor the process and revise Oracle Business Rules at run time using Business Process Composer.
■ Process management and monitoring
Process owners are responsible for monitoring and maintaining running processes using Oracle BPM WorkSpace. Process analysts and owners use Oracle Process Analytics to monitor the real-time performance of business processes.
■ Process creation
Process participants who have the necessary permissions can create new processes using Oracle BPM Workspace or Oracle Process Spaces
■ System administration
Business administrators are responsible for maintaining running business applications and the overall run-time infrastructure using Oracle Enterprise Manager and the Oracle Weblogic Server administration console.
1.6 Oracle BPM Use CasesThis section describes typical uses cases of the Oracle BPM Suite from process modeling to run time.
1.6.1 Use Case: Using BPM Studio to Create Project TemplatesThis use case involves using Oracle BPM Studio to create project templates. These templates are used by process analysts to create new projects using Business Process Composer.
Typical Workflow for Using Oracle BPM Studio to Create Project Templates1. Determine the business requirements. (process analyst)
2. Model the required business processes using Oracle BPM Studio (process analyst / process developer).
Process analyst can use the Process Analyst role in Oracle JDeveloper.
Oracle BPM Use Cases
1-12 Business Process Composer User's Guide for Oracle Business Process Management
3. Implement the processes by integrating each element of the process with back-end systems and reusable services. (process developer).
4. Create a project template using Oracle BPM Studio (process developer).
5. Publish the project template to the Oracle BPM MDS repository (process developer).
6. Create a new Oracle BPM project based on a project template (process analyst).
7. Implement the required reusable services defined by the project template (process analyst).
8. Deploy the project to Oracle BPM run time (process analyst).
1.6.2 Use Case: Using BPM Studio to Model Processes and Deploy an ApplicationThis use case involves using Oracle BPM Studio to create process models. These models are used to create working business applications that are deployed to the Oracle BPM run time.
Typical Workflow for Using Oracle BPM Studio to Model Processes1. Determine the business requirements (process analyst).
2. Model the required business processes using Oracle BPM Studio (process analyst / process developer).
Process analyst can use the Process Analyst role in Oracle JDeveloper.
3. Run a simulation to test and improve process performance. (process analyst / process developer).
4. Implement the processes by integrating each element of the process with back-end systems and reusable services. (process developer).
5. Compile the Oracle BPM project as a composite application (process developer).
6. Deploy the application to the run time environment (process developer, business administrator).
7. Interact with the deployed processes as part of a running business application (process participants, process owner).
8. Maintain and monitor the running process-based applications (business administrator, process owner).
1.6.3 Use Case: Using Business Process Composer to Create ProjectsThis use case involves creating new projects using Business Process Composer. These projects are then shared with process developers who import them into Oracle BPM Studio, where they perform further refinement and implementation.
Typical Workflow for Using Business Process Composer to Create New Projects1. Create a new project using Business Process Composer (process analyst).
2. Provide implementation details for the project and prepare the process-based business application for deployment (process developer).
3. Create project templates and publish them to the Oracle BPM Metadata Store repository using Oracle BPM Studio (process developer).
4. Create a project based on a the project template (process analyst).

Oracle BPM Use Cases
Oracle Business Process Management Suite Overview 1-13
5. Edit the project as defined by the edit policies of the project template (process analyst).
6. Deploy the project to Oracle BPM run time (process analyst, process administrator).
1.6.4 Use Case: Using Business Process Composer to Revise Oracle Business RulesThe use case involves using Business Process Composer to edit Oracle Business Rules at run time. After an application is deployed, process analysts and owners can open the deployed project and edit Oracle Business Rules.
Typical Workflow for Using Business Process Composer to Revise Oracle Business Rules1. Model a set of business processes (process analyst).
2. Implement and deploy an application (process developer).
3. Edit the Oracle Business Rules at run time using Business Process Composer (process owner).
1.6.5 Use Case: Using The Oracle Business Process Analysis Suite to Model Your Business Processes
This use case involves using the Oracle BPA Suite to model your business processes. These processes can be imported into Oracle BPM Studio.
Typical Workflow for Using the Oracle Business Process Analysis Suite and Oracle BPM Suite to Model Processes1. Determine the business requirements (process analyst).
2. Design your business architecture by capturing strategic objectives, process maps, and value chain diagrams using Oracle BPA. (process analyst).
3. Perform strategic analysis to determine potential process candidates for Oracle BPM projects (process analysts).
4. Design detailed process flows for the process candidates identified above (process analyst).
5. Import your process models into Oracle BPM Studio (process analyst, process developer).
6. Implement the processes by integrating each process component with back-end systems and reusable services (process developer).
7. Deploy the business processes as a BPM project to the run time environment (process developer, business administrator).
8. Interact with the deployed processes as part of a business application (process participant, process owner).
9. Maintain the processes (business administrator, process owner).

Oracle BPM Use Cases
1-14 Business Process Composer User's Guide for Oracle Business Process Management
Overview of Business Process Design 2-1
2Overview of Business Process Design
This chapter provides an overview of business process design. It provides a basic introduction to Business Process Management Notation (BPMN). This introduction is primarily designed to introduce the BPMN-specific terminology used within this guide.
See Chapter 6, "Modeling Business Processes with Oracle BPM" for more detailed information about Oracle’s implementation of BPMN 2.0.
This chapter also describes the Sales Quote example. This project is used throughout the examples within the Oracle BPM documentation set.
This chapter includes the following sections:
■ Section 2.1, "Introduction to Business Process Management Notation (BPMN)"
■ Section 2.2, "Introduction to the Sales Quote Example"
2.1 Introduction to Business Process Management Notation (BPMN)This section provides a brief introduction to Business Process Management Notation (BPMN). It is primarily designed to introduce the BPMN terminology used throughout this guide.
2.1.1 What is Business Process Management Notation (BPMN)Business Process Management Notation (BPMN) is an industry standard notation for defining business processes. Oracle BPM supports BPMN 2.0.
For general information on BPMN see: http://www.bpmn.org. For information on the BPMN functional specification supported by Oracle BPM, see http://www.omg.org/spec/BPMN/2.0/.
2.1.2 Business ProcessesA business process can be generally defined as a sequence of tasks that, after performed, result in a well-defined outcome. As the term business process implies, a business process usually represents work that is performed within the context of a company or organization.
The Sales Quote example project shows an example of a business process. It contains a sequence of tasks that result either in the approval or rejection of a sales quote.
Within the context of Oracle BPM, a business process is also something that can be managed by software. Oracle BPM enables you to model real-world business processes like the Sales Quote example and integrate them within an IT environment.

Introduction to Business Process Management Notation (BPMN)
2-2 Business Process Composer User's Guide for Oracle Business Process Management
2.1.2.1 Process InstancesA process instance refers to the specific instance of a business process. While a business process generally defines how an organization performs its work, a process instance refers to the work of a specific person within that organization. In Oracle BPM, this person is referred to as a process participant.
For example, the Sales Quote example shows the overall definition, or model, of a business process, including the roles of the process participants who are responsible for performing the work. It defines how a sales quote is created and approved and defines the types of people responsible for performing that work.
In contrast, a process instance refers to a specific sales quote and the specific people responsible for approving it.
This distinction between process and process instance is important because Oracle BPM enables you to model business processes, convert them into running business applications, and manage the process instances created within those applications.
2.1.2.2 Process TokensProcess tokens are an abstract concept in BPMN. They refer to the current point of execution within a process. A business process can have multiple tokens that indicate that the process is running in multiple paths.
For example, gateways are often used to split the path of a process. Splitting a process path creates multiple process tokens.
2.1.3 Flow ObjectsFlow objects are the BPMN components that represent the work performed within a process. The following sections describe the types of flow objects available in BPMN.
2.1.3.1 TasksIn Oracle BPM, tasks are used to represent the work performed by a process.
2.1.3.2 EventsEvents define something that happens during a process.
2.1.3.3 GatewaysGateways are used to determine the flow of your process.
2.1.3.4 Sequence FlowsSequence flows are used to connect flow objects.
2.1.4 Data ObjectsWhile flow objects are used to define the behavior of a business process, data objects are used to define and store the information used by a business process. Data objects are variables that are defined during the modeling and implementation of a process. A process instance uses these variables to store specific information.
For example, the Sales Quote example defines several data objects used to store information about the sales quote. At run time, the process instance generates and stores specific values for these variables.
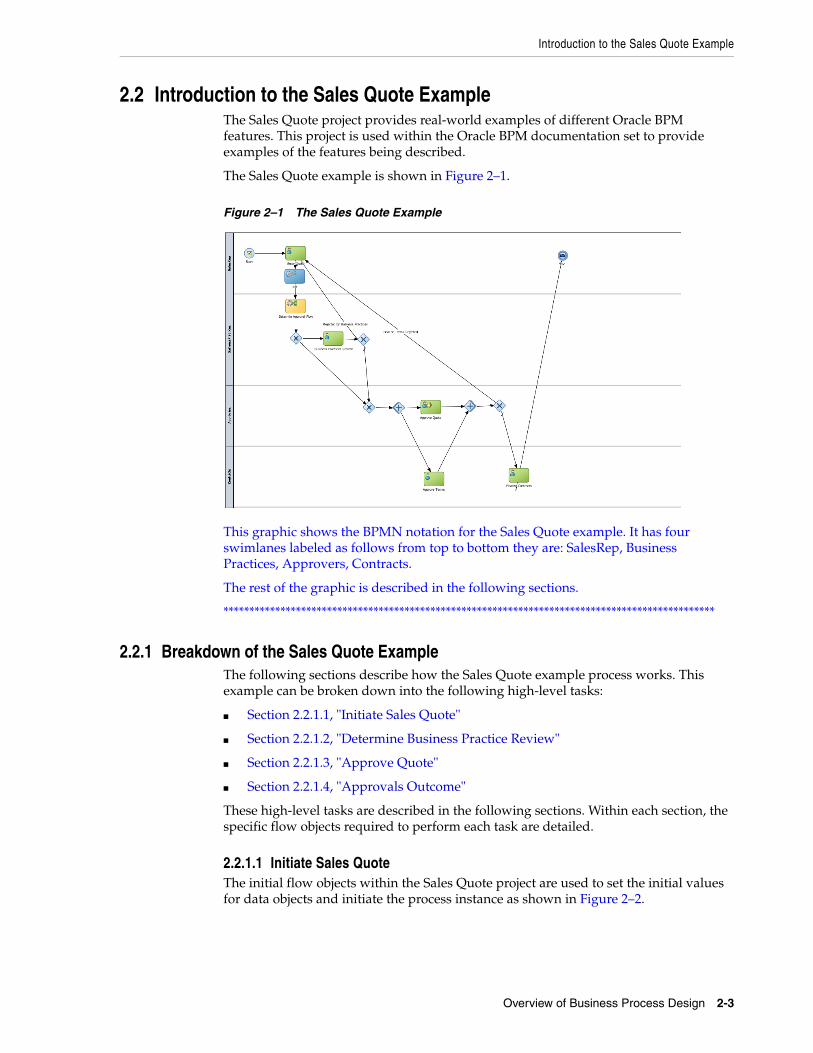
Introduction to the Sales Quote Example
Overview of Business Process Design 2-3
2.2 Introduction to the Sales Quote ExampleThe Sales Quote project provides real-world examples of different Oracle BPM features. This project is used within the Oracle BPM documentation set to provide examples of the features being described.
The Sales Quote example is shown in Figure 2–1.
Figure 2–1 The Sales Quote Example
This graphic shows the BPMN notation for the Sales Quote example. It has four swimlanes labeled as follows from top to bottom they are: SalesRep, Business Practices, Approvers, Contracts.
The rest of the graphic is described in the following sections.
***********************************************************************************************
2.2.1 Breakdown of the Sales Quote ExampleThe following sections describe how the Sales Quote example process works. This example can be broken down into the following high-level tasks:
■ Section 2.2.1.1, "Initiate Sales Quote"
■ Section 2.2.1.2, "Determine Business Practice Review"
■ Section 2.2.1.3, "Approve Quote"
■ Section 2.2.1.4, "Approvals Outcome"
These high-level tasks are described in the following sections. Within each section, the specific flow objects required to perform each task are detailed.
2.2.1.1 Initiate Sales QuoteThe initial flow objects within the Sales Quote project are used to set the initial values for data objects and initiate the process instance as shown in Figure 2–2.
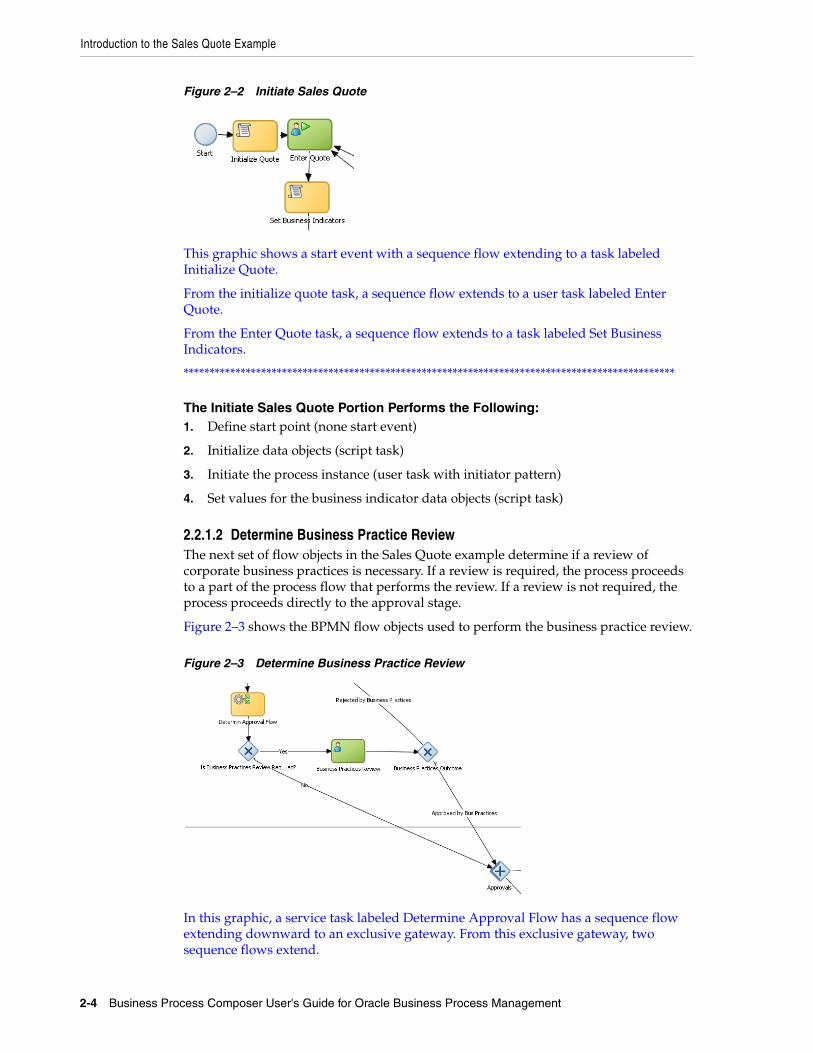
Introduction to the Sales Quote Example
2-4 Business Process Composer User's Guide for Oracle Business Process Management
Figure 2–2 Initiate Sales Quote
This graphic shows a start event with a sequence flow extending to a task labeled Initialize Quote.
From the initialize quote task, a sequence flow extends to a user task labeled Enter Quote.
From the Enter Quote task, a sequence flow extends to a task labeled Set Business Indicators.
***********************************************************************************************
The Initiate Sales Quote Portion Performs the Following:1. Define start point (none start event)
2. Initialize data objects (script task)
3. Initiate the process instance (user task with initiator pattern)
4. Set values for the business indicator data objects (script task)
2.2.1.2 Determine Business Practice ReviewThe next set of flow objects in the Sales Quote example determine if a review of corporate business practices is necessary. If a review is required, the process proceeds to a part of the process flow that performs the review. If a review is not required, the process proceeds directly to the approval stage.
Figure 2–3 shows the BPMN flow objects used to perform the business practice review.
Figure 2–3 Determine Business Practice Review
In this graphic, a service task labeled Determine Approval Flow has a sequence flow extending downward to an exclusive gateway. From this exclusive gateway, two sequence flows extend.
Introduction to the Sales Quote Example
Overview of Business Process Design 2-5
The first sequence flow, labeled yes, extends to a User task labeled Business Practices Review.
From the Business practices review task, a sequence flow extends to an exclusive gateway labeled Business practices Outcome.
From the first exclusive gateway mentioned earlier, a second sequence flow, labeled No, extends into the next swimlane to a parallel gateway labeled Approvals.
That Approvals parallel gateway has a sequence flow labeled Rejected by Business Practices extending to it from outside the graphic.
***********************************************************************************************
The following procedure demonstrates how a process path passes through the business practice review.
Determine Business Practice Review1. Determine Approval Flow (business rules task).
This stage begins with a business rules task which implements an Oracle Business Rule to determine whether a business practice review is required.
2. Check Approval Flow (exclusive gateway).
■ If Yes, perform Business Practice Review (user task).
■ If No, the process flow proceeds directly to the approve quote stage.
3. Approvals (parallel gateway).
2.2.1.3 Approve QuoteThe next set of flow objects in the Sales Quote example defines how the sales quote is approved. After the business practice review is finished, the quote moves to the approval phase as shown in Figure 2–4.
In this example, the approval process is defined by two separate flows that are executed simultaneously. These are:
■ Approve the sales quote.
This process path is also split into two paths. In this example, it is possible for the quote to be self approved, which means that the quote is approved based on certain criteria, or it may require explicit approval from a process participant.
■ Approve the terms of the contract related to the sales quote.
This process path requires a process participant to approve the terms of the sales contract.
After these parallel process paths complete, they are merged. The process path then proceeds to the approval outcome stage.

Introduction to the Sales Quote Example
2-6 Business Process Composer User's Guide for Oracle Business Process Management
Figure 2–4 Approve Quote
In this graphic, a parallel gateway, labeled Approvals, has two sequence flows extending from it.
The first sequence flow extends to an exclusive gateway, labeled Check for Self Approved.
From the Check for Self Approved, two sequence flows extend.
The first, a sequence flow with a tick, extends to a user task labeled Approve Quote.
From the Approve Quote task, a sequence flow extends to a parallel gateway labeled Approvals Merge.
From the Check for Self Approved task, a second sequence flow labeled Self Approved is true extends to a task labeled Set Approve Quote Outcome.
From the Set Approve Quote Outcome task, a sequence flow extends to the Approvals Merge parallel gateway.
From the Approvals parallel gateway mentioned earlier, a second sequence flow extends to a User task labeled Approve terms in the swimlane below.
From the Approve Terms task, a sequence flow extends to the Approvals Merge parallel gateway in the swimlane above.
***********************************************************************************************
Approve Quote1. Approvals (parallel gateway - split)
a. Check for self approval (gateway)
Approve Quote
Set Approve Quote Outcome
b. Approve Terms
2. Merge Approve Quote (parallel gateway - merge)
2.2.1.4 Approvals OutcomeThe approvals outcome stage represents the final stage of the Sales Quote example. It begins with a check to determine if the sales quote has been approved.
If the sales quote is approved, the process proceeds to the final process flow which proceeds to the end event.
If the sales quote is not approved, the process flow returns to the enter quote task where the quote must be reentered and the process repeats.

Introduction to the Sales Quote Example
Overview of Business Process Design 2-7
Figure 2–5 Approval Outcome
In this graphic, an exclusive gateway labeled Approvals Outcome has a sequence flow labeled Details and terms Approved extending into the next swimlane to a User Task labeled Finalize contracts.
From the Finalize Contracts task, a sequence flow extends to a service task labeled save Quote.
From the Save Quote task a sequence flow extends to an end event.
***********************************************************************************************
Approval Outcome1. Approvals outcome (exclusive gateway)
The approvals outcome is implemented using an exclusive gateway. This gateway contains two outgoing sequence flows which determine the path the process takes out of the exclusive gateway.
a. Approved
This is implemented with a default sequence flow.
Finalize Quote
Save Quote
End Event
b. Rejected: Sends the process flow back to the enter quote.
This is implemented with a conditional sequence flow. The expression used for this conditional sequence flow determines if the process path continues

Introduction to the Sales Quote Example
2-8 Business Process Composer User's Guide for Oracle Business Process Management

Introduction to Oracle Business Process Composer 3-1
3Introduction to Oracle Business Process
Composer
This chapter provides an introduction to the Oracle Business Process Composer application.
This chapter includes the following sections:
■ Section 3.1, "Oracle Business Process Composer Overview"
■ Section 3.2, "Overview of the Application Development Life Cycle"
■ Section 3.3, "Signing On to Oracle Business Process Composer"
■ Section 3.4, "Introduction to the Business Process Composer Application Interface"
3.1 Oracle Business Process Composer OverviewOracle Business Process Composer is a web-based application that enables process analysts to create and customize business processes. These processes are contained within an Oracle BPM project. Business Process Composer enables process analysts to easily collaborate with process developers who use Oracle BPM Studio to create process-based business applications.
See the following section for more information on the use cases for Business Process Composer.
3.1.1 Oracle Business Process Composer Use CasesThere are three typical use cases for Oracle Business Process Composer:
■ Create, edit and deploy projects based on project templates.
Project templates are created in Oracle BPM Studio and are stored within the Oracle BPM Metadata Service partition. Using Business Process Composer, you can use these templates to create new or modify existing business processes.
You can then re-publish them to the Oracle BPM Metadata Service partition or deploy them to the Oracle BPM run time.
See Section 7.2, "Using BPM Project Templates" for information on using project templates in Business Process Composer. For information on creating project templates see the Oracle BPM Modeling and Implementation Guide
■ Create new projects.

Overview of the Application Development Life Cycle
3-2 Business Process Composer User's Guide for Oracle Business Process Management
Business Process Composer enables you to create new BPM projects. These projects can be shared between Oracle BPM Studio and Business Process Composer.
New projects created in Business Process Composer often do not contain any of the implementation details required for an Oracle BPM application. Process developers can use Oracle BPM Studio to add the required implementation.
From Business Process Composer, you can save the project to the Oracle BPM repository where process developers can add the required technical implementation using Oracle BPM Studio. You can also import and export projects between Business Process Composer and Oracle BPM Studio.
■ Edit business rules for in-flight processes
You can use Business Process Composer to edit Oracle Business Rules in a running application. Oracle Business Rules enable you to define business policies within your process using the business rules task. You can easily change these policies at run time without having to remodel your business process or redeploy your business application.
3.2 Overview of the Application Development Life CycleOracle Business Process Composer is a collaboration tool that enables process analysts to easily interact with process developers. It provides a user-friendly interface for creating process-based business applications based on project templates. These templates are created using Oracle BPM Studio.
Business Process Composer also provides an environment for creating new BPM projects. These projects can easily be shared with process developers who are using Oracle BPM Studio to implement business processes as part of a business application.
The following sections describe typical scenarios by showing the interactions between different Oracle BPM components and the persona, including process analysts and process developers. However, the exact workflow you use depends on your business needs. There may be multiple iterations where process analysts and developers collaborate to create and refine a business process.
3.2.1 Workflow: Create Projects Based on Project TemplatesFigure 3–1 shows a typical workflow for using Oracle BPM Studio at the beginning of the development cycle to create process templates. These templates are used to create new Oracle BPM projects. These projects can edited by process analysts using Business Process Composer.

Overview of the Application Development Life Cycle
Introduction to Oracle Business Process Composer 3-3
Figure 3–1 Using BPM Studio to Create Project Templates
This graphic is a rectangle divided into three sections. The first section is labeled Creating Process Template (Process Developer), the second is labeled Implementation (Process Analyst), and the third is labeled Deployment (Process Analyst/Business Administrator)
The Creating Process Template (Process Developer) section contains a rectangle with the number 1 and labeled Oracle BPM Studio. From this rectangle, an arrow numbered two extends into the oval labeled MDS.
From the oval labeled MDS and arrow continues section to a rectangle numbered 3 and 4, and labeled Business Process Composer.
From this Business Process Composer rectangle in the Implementation section, two arrows extend.
The first arrow extends to an oval on the divider between the Implementation and Deployment sections. The oval is numbered 6a and labeled MDS.
From the oval labeled MDS, an arrow extends into the Deployment section to a rectangle labeled BPM Runtime.
The second arrow from the BPM Studio rectangle extends to a rectangle on the divider between the Implementation and Deployment sections. The rectangle is numbered 6b and labeled SAR File.
From the SAR File rectangle, an arrow extends to the BPM Runtime rectangle in the Deployment section mentioned earlier.
***********************************************************************************************
The following steps describe each stage of this workflow:
1. Create a project template using Oracle BPM Studio (process developer)
2. Publish the project template to the Oracle BPM Metadata Service (MDS) partition (process developer)
3. Create a project based on a project template using Business Process Composer. (process analyst)
4. Edit the processes within the project based on the edit policies defined in the template (process analyst).
5. Validate the project (process analyst).
6. Deploy the project or return the project to the process developer.

Overview of the Application Development Life Cycle
3-4 Business Process Composer User's Guide for Oracle Business Process Management
a. Deploy the project directly to Oracle BPM run time (process analyst, business administrator). This may require an approval workflow.
b. Republish the project to the Oracle BPM MDS partition. (process analyst) Republishing the project enables you to share it with other process analysts or with process developers who are responsible for implementing your business processes within an overall application.
c. Export the project as an SAR file (process analyst). This file can be deployed to Oracle BPM run time (process administrators).
3.2.2 Workflow: Creating New ProjectsFigure 3–2 shows a typical workflow for using Business Process Composer to perform the initial process modeling stages of the application development life cycle. This workflow involves using Business Process Composer to new BPM projects which can be opened in Oracle BPM Studio where process developers complete the implementation.
Figure 3–2 Using Oracle Business Process Composer to Create New Projects
This graphic is a rectangle divided into three sections. The first section is labeled Modeling (Process Analyst/Process Developer), the second is labeled Implementation (Process Developer), and the third is labeled Deployment (Process Developer/Business Administrator)
On the divider between the Modeling and Implementation sections, there is a rectangle numbered 1, 2, and 3, and labeled BPM Studio.
From the BPM Studio rectangle, an arrow extends to an oval on the divider between Implementation and Deployment. The oval is numbered 4 and labeled MDS.
An arrow extends from this oval to a rectangle in the Deployment section labeled BPM Runtime.
***********************************************************************************************
The following steps describe each stage of this workflow:
1. Create a new project using Business Process Composer (process analyst)
2. Save the project to the Oracle BPM (MDS) repository (process analyst)
3. Open the project in Oracle BPM Studio (process developer)
4. Implement the project as part of a process-based business application. (process developer)

Overview of the Application Development Life Cycle
Introduction to Oracle Business Process Composer 3-5
5. Deploy the project to run time or create a project template.
a. Deploy the process to run time (process developer, business administrator), or
b. Save the application as a project template (process developer)
c. Export the project as a SAR file (process analyst), which is then deployed to Oracle BPM run time (business administrator).
3.2.3 Workflow: Editing Business Rules at Run TimeFigure 3–3 shows the workflow for creating and deploying a process-based business application, then using Business Process Composer to edit the Business Rules at run time.
Figure 3–3 Using Oracle Business Process Composer to Edit Oracle Business Rules at Run Time
This graphic is a rectangle divided into three sections. The first section is labeled Process Modeling (Process Analyst, Process Developer), the second is labeled Deployment (Process Analyst, Process Developer), and the third is labeled Editing Oracle Business Rules (Process Analyst/ Process Owner)
The Process Modeling (Process Analyst, Process Developer) section contains two rectangles each with the number 1. They are labeled Oracle BPM Studio andOracle Business Process Composer.
From each rectangle, an arrow numbered two extends to the border between the Process Modeling and Deployment section to an oval labeled MDS.
From this MDS oval, an arrows extends to a rectangle labeled Oracle BPM Run Time in the Deployment section.
From the rectangle labeled Oracle BPM Run Time, an arrow extends to another oval labeled MDS that lies on the boundary between Deployment and Editing Oracle Business Rules.
From this oval labeled MDS, and arrow extends to a rectangle within the Editing Oracle Business Rules labeled Business Process Composer.
***********************************************************************************************
1. Model your business processes and create a process-based business application using Oracle BPM Suite. This can include a combination of the workflows defined in the previous sections. (process analyst / process developer)
2. Deploy the application to Oracle BPM run time. (process analyst / process developer)
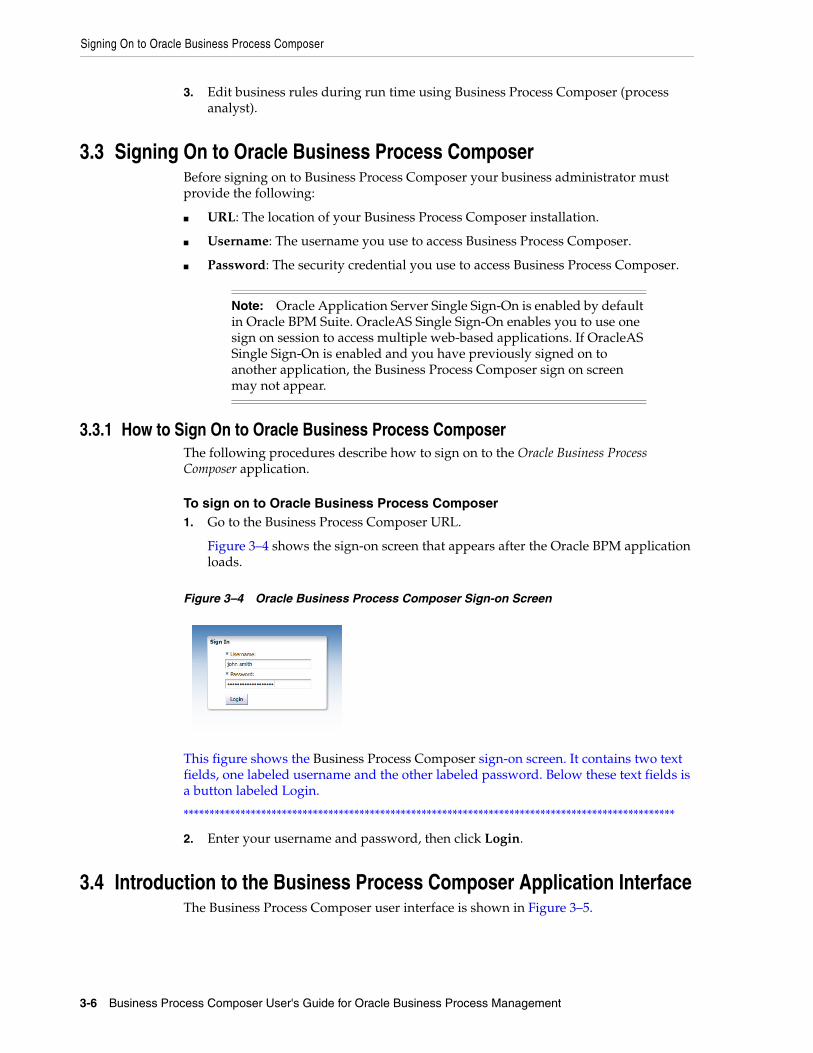
Signing On to Oracle Business Process Composer
3-6 Business Process Composer User's Guide for Oracle Business Process Management
3. Edit business rules during run time using Business Process Composer (process analyst).
3.3 Signing On to Oracle Business Process ComposerBefore signing on to Business Process Composer your business administrator must provide the following:
■ URL: The location of your Business Process Composer installation.
■ Username: The username you use to access Business Process Composer.
■ Password: The security credential you use to access Business Process Composer.
3.3.1 How to Sign On to Oracle Business Process ComposerThe following procedures describe how to sign on to the Oracle Business Process Composer application.
To sign on to Oracle Business Process Composer1. Go to the Business Process Composer URL.
Figure 3–4 shows the sign-on screen that appears after the Oracle BPM application loads.
Figure 3–4 Oracle Business Process Composer Sign-on Screen
This figure shows the Business Process Composer sign-on screen. It contains two text fields, one labeled username and the other labeled password. Below these text fields is a button labeled Login.
***********************************************************************************************
2. Enter your username and password, then click Login.
3.4 Introduction to the Business Process Composer Application InterfaceThe Business Process Composer user interface is shown in Figure 3–5.
Note: Oracle Application Server Single Sign-On is enabled by default in Oracle BPM Suite. OracleAS Single Sign-On enables you to use one sign on session to access multiple web-based applications. If OracleAS Single Sign-On is enabled and you have previously signed on to another application, the Business Process Composer sign on screen may not appear.
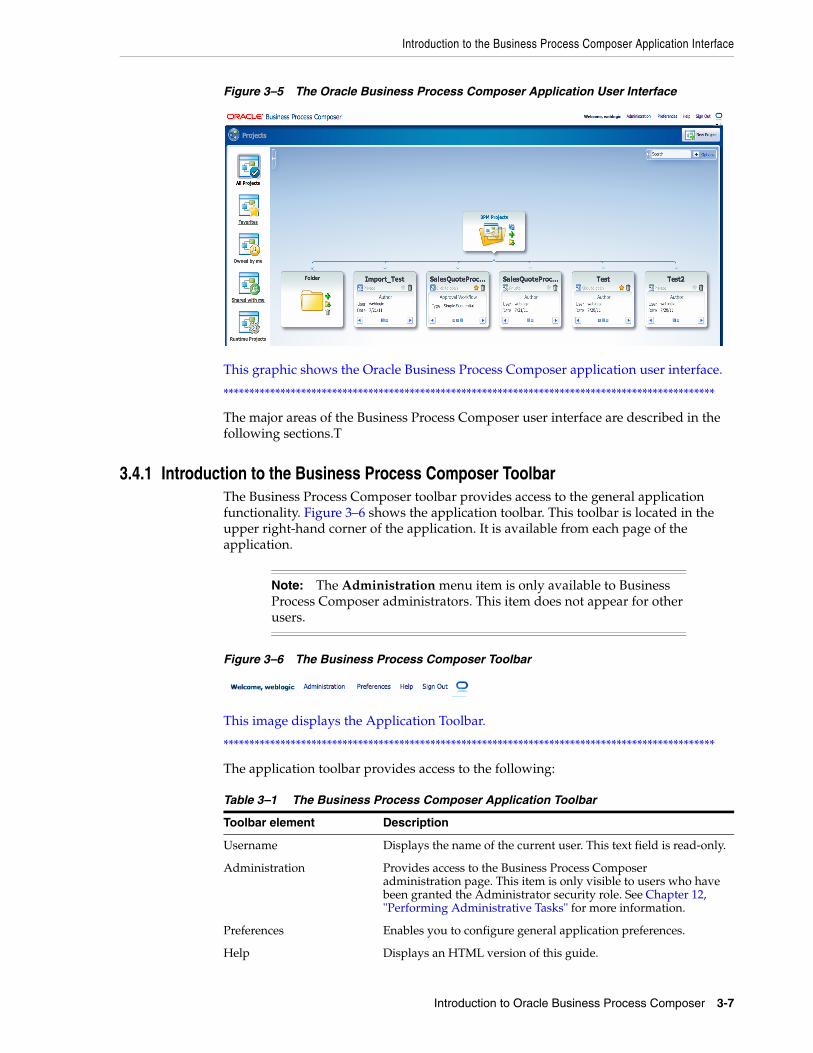
Introduction to the Business Process Composer Application Interface
Introduction to Oracle Business Process Composer 3-7
Figure 3–5 The Oracle Business Process Composer Application User Interface
This graphic shows the Oracle Business Process Composer application user interface.
***********************************************************************************************
The major areas of the Business Process Composer user interface are described in the following sections.T
3.4.1 Introduction to the Business Process Composer ToolbarThe Business Process Composer toolbar provides access to the general application functionality. Figure 3–6 shows the application toolbar. This toolbar is located in the upper right-hand corner of the application. It is available from each page of the application.
Figure 3–6 The Business Process Composer Toolbar
This image displays the Application Toolbar.
***********************************************************************************************
The application toolbar provides access to the following:
Note: The Administration menu item is only available to Business Process Composer administrators. This item does not appear for other users.
Table 3–1 The Business Process Composer Application Toolbar
Toolbar element Description
Username Displays the name of the current user. This text field is read-only.
Administration Provides access to the Business Process Composer administration page. This item is only visible to users who have been granted the Administrator security role. See Chapter 12, "Performing Administrative Tasks" for more information.
Preferences Enables you to configure general application preferences.
Help Displays an HTML version of this guide.

Introduction to the Business Process Composer Application Interface
3-8 Business Process Composer User's Guide for Oracle Business Process Management
3.4.2 Introduction to the Business Process Composer Welcome PageThe Business Process Composer application welcome page enables you to view and work with the project in the BPM repository. Figure 3–7 shows the project Welcome page. The components of this page is described in the following sections.
Figure 3–7 The Project Browser
This graphic displays the project browser.
***********************************************************************************************
Chapter 4, "Working with Projects and Project Templates" for information on using the application welcome page to work with BPM projects.
3.4.2.1 Project ViewsProject views enable you to view the project browser based on certain criteria. You can select a project view by selecting its icon from the left-hand side of the project welcome page as shown in Figure 3–7. The different types of project views are described in Table 3–2.
Sign Out Sign out the current user.
Network connectivity Shows if there is network activity. When there is no network activity, the icon appears as an "O."
Table 3–2 Project Views
Project view Description
All projects Shows all projects within the BPM repository that the current user has permissions to view or edit.
For Business Process Composer administrators this shows all projects that are not private. Private projects are only visible to the project owner.
Favorites Shows only the projects marked as favorites by the current user.
Owned by me Shows only the projects owned by the current user.
Shared with me Shows only the projects shared with the current user.
Runtime projects Shows only projects that have been deployed to runtime.
Table 3–1 (Cont.) The Business Process Composer Application Toolbar
Toolbar element Description

Introduction to the Business Process Composer Application Interface
Introduction to Oracle Business Process Composer 3-9
3.4.2.2 Project BrowserThe project browser provides hierarchical view of the BPM repository, including projects and project folders as shown in the center of figure Figure 3–7.
The project browser also enables you to create new projects and project folders and delete projects.
3.4.2.3 Control PanelThe control panel enables you to control how projects and project folders are displayed in the project browser. The project browser control panel is shown in Figure 3–8.
Figure 3–8 The Project Browser Control Panel
This graphic displays the Project Browser Control Panel.
***********************************************************************************************
3.4.2.4 SearchThe search field enables you to search for projects within the repository based on name, author, or description. The search field is available in the upper-right hand corner of the project welcome page as shown in Figure 3–7.
3.4.3 Introduction to the Business Process Composer Main MenuThe application main menu provides access to frequently used commands and functionality. This menu is accessible from the application and project welcome pages. It is accessible by clicking on the icon shown at the top of figureFigure 3–9.
Figure 3–9 Application Main Menu
This graphic displays the Application Main Menu.
***********************************************************************************************
The application main menu provides access to the menu items describe in Table 3–3.
Introduction to the Business Process Composer Application Interface
3-10 Business Process Composer User's Guide for Oracle Business Process Management
Table 3–3 Main Application Menu Items
Menu item Description
New Enables you to create a new BPM project.
Open Enables you to open BPM projects stored within the BPM repository.
Import Provides functionality for importing projects into the BPM repository.
Export Enables you to export projects to the local file system.
Edit Switches the current project to edit mode.
Save Saves changes made to the current project.
Save and release Saves changes made to the current project and releases the lock. This enables other uses who have access to begin editing the project.
Cancel Releases the lock held on the project without saving changes.
Validate project Validates the project.
Close project Closes the current project.

Part IIUsing Oracle Business Process Composer
This part describes how to use Business Process Composer to model your business processes. It includes a general overview of the application. It also contains a detailed description of Oracle’s BPMN 2.0 implementation.
This part contains the following chapters:
■ Chapter 4, "Working with Projects and Project Templates"
■ Chapter 5, "Working with Processes and the Process Editor"
■ Chapter 6, "Modeling Business Processes with Oracle BPM"
■ Chapter 7, "Working with the Project Life Cycle"
■ Chapter 8, "Using Oracle Business Rules"


Working with Projects and Project Templates 4-1
4Working with Projects and Project Templates
This chapter describes how to create and use projects using Oracle Business Process Composer.
This chapter includes the following sections:
■ Section 4.1, "Introduction to Oracle BPM Projects"
■ Section 4.2, "Introduction to the Oracle BPM Repository"
■ Section 4.3, "Introduction to the Project Welcome Page"
■ Section 4.4, "Sharing Projects with Other Users"
■ Section 4.5, "Creating and Working with Projects"
■ Section 4.6, "Using Guided Business Processes to Create Project Milestones"
■ Section 4.7, "Defining the Roles Used in a Project"
4.1 Introduction to Oracle BPM ProjectsProjects are the core element of an Oracle BPM application. BPM projects contain the resources used to create and support a business application. These include business processes and components of the business catalog including data objects, services, Business Rules, Human Tasks, and roles.
You can create new projects directly in Business Process Composer or you can create and edit projects based on project templates created using Oracle BPM Studio.
Oracle BPM projects promote collaboration between process analysts and process developers. Projects can be shared between Business Process Composer and Oracle BPM Studio using the BPM MDS repository. See Section 4.2, "Introduction to the Oracle BPM Repository" for more information.
Projects can also be validated and deployed to run time using Oracle Business Process Composer. See Section 7.5, "Deploying a Project" for more information.
See Section 3.2, "Overview of the Application Development Life Cycle" for information on how projects are created, edited and shared within the development life cycle.
4.1.1 Introduction to Project Components and ResourcesEach project contains one or more business processes and may include other resources used by the business processes or application. The latter include reusable resources that allow you to connect your application to other applications and systems.
Introduction to Oracle BPM Projects
4-2 Business Process Composer User's Guide for Oracle Business Process Management
4.1.1.1 Editable Project ResourcesUsing Business Process Composer you can create and edit the following project resources:
■ Processes
Processes are the core element of a business application. A process is a related set of tasks or activities. An Oracle BPM application can contain one or more processes. Business Process Composer enables you to create and edit BPMN processes.
From the BPM Project navigator you can create new processes and edit existing ones. See Chapter 5, "Working with Processes and the Process Editor" for information on creating and working with processes.
■ Human Tasks
Oracle Business Process Composer enables you to create and edit human tasks. Human tasks are used to define how users interact with your process-based applications.
From the BPM Project navigator you can create new human tasks and edit existing ones. See Chapter 11, "Working with Human Tasks" for more information. After creating a human task, they are accessible within the business catalog.
■ Activity Guide
An activity guide is part of Guided Business Processes that enables you to define milestones for a project. Each project contains one activity guide where you can define project milestones. Business Process Composer enables you to use milestones previously defined in a project template or create new milestones.
See Section 4.6, "Using Guided Business Processes to Create Project Milestones" for more information on creating and using project milestones.
■ Oracle Business Rules
Oracle Business Rules are statements that describe business policies or describe key business decisions. In Business Process Composer, Oracle Business Rules are editable components of a project, but they also appear as part of the business catalog.
See Chapter 8, "Using Oracle Business Rules" for information.
4.1.1.2 The Business CatalogProject templates may include resources defined in the business catalog. These are reusable services created by process developers using Oracle BPM Studio.
Note: Oracle BPM Studio enables you to view, create, and edit all elements of an Oracle BPM project. Some of these are not visible from Business Process Composer.
See the Oracle Fusion Middleware Modeling and Implementation Guide for Oracle Business Process Management for more information.
Note: You cannot create new business rules using Business Process Composer. You can only edit business rules that were added to the project using Oracle BPM Studio.
Introduction to Oracle BPM Projects
Working with Projects and Project Templates 4-3
Using Business Process Composer, process analysts can implement these reusable services within a BPM process. Although you cannot create or edit these components in Business Process Composer, you can assign them to specific BPMN artifacts.
Reusable project resources are accessible from the component palette. The reusable resources in the business catalog are:
■ Services
Services are used to connect a BPMN process with other processes, systems, and services, including BPEL processes and databases.
Using Business Process Composer you can create new services based on web services. See Section 9.1, "Working with Services" for more information.
You can also use other types of services that were created as part of the project template.
Within a BPMN process, services are implemented by assigning the service to a service task. See Section 6.4.1, "Introduction to the Service Task" for more information.
■ External references
References are the interfaces that you can use to define the interface of your BPMN processes. References are used for implementing message events and send and receive tasks with an interface.
See Section 6.4, "Communicating With Other Processes and Services" for more information.
■ Human Tasks
Human tasks enable you to define how end users interact with your BPMN processes. You can add human tasks to your business process by using the user task. You can assign a human task from the business catalog to each user task in your business process. See Section 6.3, "Adding User Interaction to Your Process" for information on using human tasks within a BPMN process.
■ Oracle Business Rules
Oracle business rules are statements that describe business policies or describe key business decisions. Business rules are integrated into a process using the business rules task.
See Chapter 8, "Using Oracle Business Rules" for information on working with Oracle Business Rules using Business Process Composer. See Section 6.5.2, "Introduction to the Business Rules Task" for more information on using the business rules task within a BPMN process.
4.1.1.2.1 Components of the Business Catalog that Can Be Edited or Created
Table 4–1 lists the components of the business catalog and shows which components can be created or edited using Oracle Business Process Composer.
Table 4–1 Editable Business Catalog Components
Business Catalog Component
Can be created using Business Process Composer?
Can be edited using Business Process Composer?
Business rules No Yes
Human tasks Yes Yes
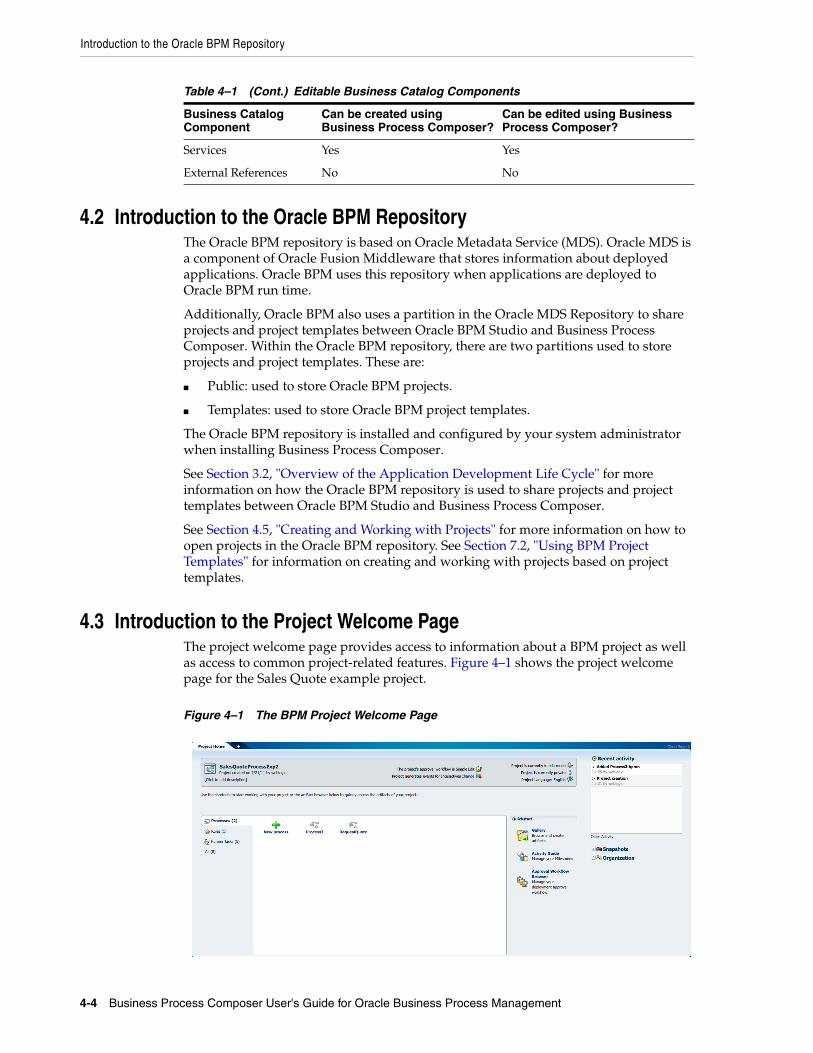
Introduction to the Oracle BPM Repository
4-4 Business Process Composer User's Guide for Oracle Business Process Management
4.2 Introduction to the Oracle BPM RepositoryThe Oracle BPM repository is based on Oracle Metadata Service (MDS). Oracle MDS is a component of Oracle Fusion Middleware that stores information about deployed applications. Oracle BPM uses this repository when applications are deployed to Oracle BPM run time.
Additionally, Oracle BPM also uses a partition in the Oracle MDS Repository to share projects and project templates between Oracle BPM Studio and Business Process Composer. Within the Oracle BPM repository, there are two partitions used to store projects and project templates. These are:
■ Public: used to store Oracle BPM projects.
■ Templates: used to store Oracle BPM project templates.
The Oracle BPM repository is installed and configured by your system administrator when installing Business Process Composer.
See Section 3.2, "Overview of the Application Development Life Cycle" for more information on how the Oracle BPM repository is used to share projects and project templates between Oracle BPM Studio and Business Process Composer.
See Section 4.5, "Creating and Working with Projects" for more information on how to open projects in the Oracle BPM repository. See Section 7.2, "Using BPM Project Templates" for information on creating and working with projects based on project templates.
4.3 Introduction to the Project Welcome PageThe project welcome page provides access to information about a BPM project as well as access to common project-related features. Figure 4–1 shows the project welcome page for the Sales Quote example project.
Figure 4–1 The BPM Project Welcome Page
Services Yes Yes
External References No No
Table 4–1 (Cont.) Editable Business Catalog Components
Business Catalog Component
Can be created using Business Process Composer?
Can be edited using Business Process Composer?

Introduction to the Project Welcome Page
Working with Projects and Project Templates 4-5
This graphic displays the Project Welcome page.
***********************************************************************************************
4.3.1 Introduction to the Project Information PaneThe project information panel displays general information about the project. Figure 4–2 shows an example of the project information pane for the SalesQuote demo process.
Figure 4–2 Project Information Pane
This graphic displays the Project Information Pane.
***********************************************************************************************
This pane displays the following information:
■ Description: provides a general description of the project.
■ Approval workflow: Specifies if an approval workflow has been defined for the project.
■ Generate events: Determines how events are generated for this project.
■ Edit mode: Specifies whether the current project is being edited.
■ Sharing: Lists the users or groups among whom the project is being shared.
■ Project language: Specifies the current language of the project.
4.3.2 Introduction to the Project Component PaneThe project component pane enables you to view and create processes and human tasks and view business rules. Figure 4–3 shows how the project component pane appears in the SalesQuote example project.
Figure 4–3 The Project Component Pane
This graphic displays the Project Component Pane.
***********************************************************************************************
Introduction to the Project Welcome Page
4-6 Business Process Composer User's Guide for Oracle Business Process Management
4.3.3 Introduction to the Quickstart MenuThe Quickstart menu enables you to quickly access the following common functionality within Business Process Composer:
■ Gallery: enables you to browse and create and browse processes and human tasks. You can also browse business rules.
■ Activity guide: enables you to create and manage milestones within your processes.
■ Approval workflow browser: enables you to view and manage the deployment approval workflow.
4.3.4 Introduction to the Recent Activity BrowserThe recent activity browser provides a history of the major changes made to the current BPM project.
See Section 4.5.11, "How to View the History of Changes Made to a Project" for information on how to view recent project activity.
4.3.5 Introduction to the Snapshot BrowserThe snapshot browser enables you to create and view project snapshots.
Project snapshots enable you to keep a record of the changes made to a project during the development life-cycle. See Section 7.3, "Using Project Snapshots" for more information,
4.3.6 Introduction to the Organization BrowserThe organization browser enables you to create and manage project roles.
4.3.7 Introduction to the Oracle Business Process Composer EditorsEditors enable you to work with various elements of an Oracle BPM project, including processes and components of the business catalog. Editors are displayed in the center of the Business Process Composer application.
Each editor appears as a tabbed pane in the Business Process Composer application, allowing you to open multiple resources at the same time.
The different types of editors available in Business Process Composer are described in the following sections.
4.3.7.1 Process EditorThe process editor enables you to view and edit business processes. You can access the process editor by opening a process from the project navigator.
The editor window also contains a component palette. The exact components available depend on the following:
■ In projects based on project templates, the component palette contains BPMN flow objects and elements from the business catalog. This includes services, Human Tasks, and Oracle Business Rules that are defined by the project template.
■ In new projects created in Business Process Composer, the component palette displays BPMN flow objects as well as business catalog elements that you have

Introduction to the Project Welcome Page
Working with Projects and Project Templates 4-7
created. Services and human tasks can be created directly in Business Process Composer.
See Chapter 5, "Working with Processes and the Process Editor" for more information.
4.3.7.2 Activity Guide EditorThe Activity Guide editor enables you to view, create, and edit milestones within an activity guide. You can access the Activity Guide editor by clicking the Activity Guide link in the Quickstart menu. See Section 4.6, "Using Guided Business Processes to Create Project Milestones".
4.3.7.3 Human Task EditorThe Human Task editor enables you edit human tasks that are included as part of the business catalog. See Chapter 11, "Working with Human Tasks" for more information.
4.3.7.4 Business Rules EditorThe business rules editor enables you to view and edit Oracle Business Rules. You can access the business rules editor by opening a business rule from the project navigator. See Section 8, "Using Oracle Business Rules" for more information.
4.3.7.5 Data Associations EditorThe data associations editor enables you to define the input and output for flow objects that contain implementations. To access the data associations editor, right-click a flow object within your business process and select Data Associations.
See Section 10.2, "Working with Data Objects and Data Associations" for information on using data associations.
4.3.7.6 Expression EditorThe expression editor enables you to define the expressions used within data associations and conditional sequence flows. See Section 10.4, "Introduction to Expressions" for information on using expressions and accessing the expression editor.
4.3.8 Introduction to the Supporting Browsers and EditorsBusiness Process Composer contains additional editors for viewing and editing other project components. These appear in the lower portion of the application window.
4.3.8.1 Project and Process Validation BrowserThe project and process browsers display any validation errors for each individual process or the whole project. See Section 4.5.8, "How to Validate a Project" for more information on project validation.
4.3.8.2 Documentation EditorThe documentation editor enables you create and edit documentation for your processes. See Section 5.7, "Documenting Your Process" for more information.
Note: These editors are not displayed by default. They appear after performing actions related to each window. However, you can display them manually by clicking the Restore Pane icon in the lower right corner of the Business Process Composer application.

Sharing Projects with Other Users
4-8 Business Process Composer User's Guide for Oracle Business Process Management
4.3.8.3 Approval Workflow BrowserThe approval workflow browser displays the status of a project within the approval workflow. Once all users defined as approvers have responded, the project can be deployed to Oracle BPM run time. See Section 7.5, "Deploying a Project" for more information.
4.4 Sharing Projects with Other UsersOracle BPM enables you to share projects with other BPC users. Shared projects are stored in the BPM repository. You can also control who has access to view or edit projects.
4.4.1 Private and Public ProjectsPrivate projects are can only be viewed or edited by the project owner. Public projects are viewable or editable by the project owner as well as other users who have the correct permissions.
See Section 4.5.5, "How to Share a Project with Other Users" for information on how to share projects.
4.4.2 Edit ModeShared projects have an edit mode that determines whether you can make changes or not. The edit mode has the following values:
■ Read-only: The project is open for viewing only. In this mode, some project functionality is unavailable.
■ Edit: The project is open for editing. In edit mode, you can make changes to the project. When a project is in editing mode, only the user editing the project can make changes. Other users with the correct permissions can view the project, but cannot make changes.
See Section 4.5.6, "How to Edit a Shared Project" for information on how to set the edit mode.
You can determine the current edit mode for a project in the project information pane as shown in Figure 4–2.
4.4.3 Project RolesProject roles define who has access to view and make changes to a project. There are three types of project roles defined as follows:
■ Owner: When a user creates a project, they become the owner of that project. You can also define another user as the owner of a project. The owner of a project can perform the following:
– Deploy a project
– Create a project snapshot
– Share a project with other users
– Delete a project
■ Editor: An editor can make changes to a project.
■ Viewer: A viewer can view a project, but cannot make any changes to it.

Creating and Working with Projects
Working with Projects and Project Templates 4-9
4.5 Creating and Working with ProjectsThe following sections provide information on how to create and use Oracle BPM projects.
4.5.1 How to Access the Project Welcome PageThe project welcome page is displayed by default when you open a project from the application welcome page. When you are editing a component within a project, you can return to the project welcome page by clicking the Project Home tab.
4.5.2 How to Create a New ProjectUsing the project navigator, you can create a new Oracle BPM project. Before creating a new project, you should decide whether to create it based on an existing project template or to create a new project.
New projects are not based on project templates. These projects contain only basic business processes created by process analysts. After you create a new project using Business Process Composer, you can use Oracle BPM Studio to finish the project implementation to publish the project or create project templates.
To create a new project using the project navigator:The project navigator enables you to create a new project quickly. After creating the project, you can edit additional project properties.
1. Start Oracle Business Process Composer.
2. From the project navigator, click New Project as shown in Figure 4–4.
Figure 4–4 The New Project Dialog
This graphic displays the New Project Dialog.
***********************************************************************************************
3. Click Next.
4. Enter a name for the project, then click Create Project.
To create a new project using the main menu:Creating a new project from the main menu enables you to configure project properties as well as select a project template.
1. Start Oracle Business Process Composer.
2. From the main menu, select New then Project.
3. Enter a name for the project.
4. Enter the following optional information:
■ Description: Provides a description of the project.
■ Folder: Enables you to specify a folder in the BPM repository where the project is stored.

Creating and Working with Projects
4-10 Business Process Composer User's Guide for Oracle Business Process Management
■ Use template: Creates the new project based on a project template. Click Choose to select the project template.
5. Select an optional deployment option from the drop-down list.
6. Click Finish to create the new project.
If you created a new project based on a template, the project is created with the required processes and business catalog elements. If you created new project without using a template, you must manually add the required processes.
See Chapter 5, "Working with Processes and the Process Editor" for information on creating and editing processes.
4.5.3 How to Open a Project Using the Application Welcome PageYou can open project directly from the application welcome page by clicking on the name of the project.
4.5.4 How to Open a Project Using the Main MenuYou can open a project using the main menu. This enables you to move directly from one project to another, for example, without having to return to the application welcome page.
To open a project:1. From the main menu, select Open, then Open Project.
2. Select the project you want to open, then click OK.
4.5.5 How to Share a Project with Other UsersYou share projects with other Business Process Composer users using the BPM repository.
To share a project publicly with all users:1. Open the project you want to share.
2. From the main menu, select Share.
3. Select the sharing visibility from the drop-down list.
■ Private
■ Team members only
■ Public
4. Click Share.
5. Click OK.
To share a project with specific users or groups:1. Open the project you want to share.
2. From the main menu, select Share.
3. Specify the users of groups you want to share the project
1. Click Choose.
2. From the drop-down list, select the scope:
Creating and Working with Projects
Working with Projects and Project Templates 4-11
All:
Users:
Groups:
3. Click Search.
4. Select an item from the Available column, then click Move.
5. Click OK.
4. Select a role from the drop-down list.
■ Owner
■ Editor
■ Viewer
5. Click Share.
6. Click Close.
4.5.6 How to Edit a Shared ProjectWhen you open a shared project, by default it is opened in view mode. If you have permissions to edit a project and the project is not locked by another user, you can edit the project.
To begin editing a project:To begin editing, click Edit at the top of the project welcome page
Once you have enable edit mode for a project, you can begin making changes to it. See Chapter 5, "Working with Processes and the Process Editor" for more information.
4.5.7 How to Save Changes to a ProjectYou can save changes to your project as you are editing processes and other project components. Changes are saved directly to the BPM repository.
To save changes to the current project:1. If you want to continue editing, click Save in the process editor toolbar.
All unsaved changes for each project component are saved. The project continues to be locked and you can continue editing
2. If you want to release the lock on the project, click Save and Release in the process editor toolbar.
All unsaved changes for each project component are saved. If project sharing is enabled, other Business Process Composer and Oracle BPM Studio users who have permissions begin editing the project You must switch to edit mode to make changes.
4.5.8 How to Validate a ProjectValidating a project enables you to check your project and processes for any errors. Business Process Composer displays these errors in an error browser. Business Process Composer has an error browser for the project and one for each process.
Figure 4–5 shows the types of errors displayed within the project error browser.

Creating and Working with Projects
4-12 Business Process Composer User's Guide for Oracle Business Process Management
Figure 4–5 The Project Error Browser
This graphic displays a tabbed pane called Project. Within the pane is a table that displays a toolbar with three items: the View menu, the Export menu, and Refresh tool.
The table contains two columns labeled: Source Node and Message/Description.
***********************************************************************************************
To validate a project:1. Open your project.
2. Ensure that you are editing the project.
3. From the main menu, select Validate Project.
After validating your project, any errors found are displayed in the error browsers for the project or process.
4.5.9 How to Discard Changes to a Shared ProjectWhile editing project elements, you can revert your changes and return to the most recent published version of a project.
To discard changes made to the current project:1. From the main menu, select Cancel.
2. Click OK to confirm discarding changes to the current project.
4.5.10 How to Close a ProjectTo close a project, select Close Project from the main menu.
4.5.11 How to View the History of Changes Made to a ProjectYou can view the history of major changes made to a project within the recent activity browser. This browser displays changes including the following:
■ Creating the project
■ Modifying resources
■ Creating processes or human tasks
Note: You cannot deploy projects that contain errors. You must correct any errors before the project can be deployed.
Note: After discarding your changes they cannot be recovered.

Using Guided Business Processes to Create Project Milestones
Working with Projects and Project Templates 4-13
To view the history of a project:1. Access the project welcome page.
Project changes are displayed in the Recent Activity pane.
2. To view the details of a specific change, click the expand icon next to it.
4.5.12 How to View and Edit Project PropertiesYou can view and edit project properties in the project information pane of the project welcome page. The project information pane is shown in Figure 4–2.
You can edit the following properties of a project from this pane:
■ Description: enables you to add an optional description of your project. This is useful when sharing your project with other users.
■ Approval workflow: enables you to define the approval workflow for the project. See Section 7.4, "Configuring Approval Workflow for a Project" for more information.
■ Event generation: enables you to configure how sampling points are generated for the project as a whole. Sampling points allow you to generate information about the performance of an flow object within in a running process. The data generated according to this configuration is stored in the Process Analytics Database.
See Appendix A.1, "Common Properties" for information on setting sampling point generation for individual flow objects. See Oracle Fusion Middleware Business Process Management User's Guide for general information about sampling points.
You can view the following project properties from the project information pane:
■ Edit mode: Displays the edit mode for the project. See Section 4.5.6, "How to Edit a Shared Project" for information on changing the edit mode of a project.
■ Sharing: Displays the sharing configuration of the project.
■ Project Language: Displays the project language.
4.5.13 How to Mark a Project as a FavoriteMarking a project as a favorite enables you to identify important or frequently used projects. In the project browser, you can choose to view only projects flagged as favorites.
To mark a project as a favorite, click the Mark project as favorite button in the upper right-hand corner.
4.6 Using Guided Business Processes to Create Project MilestonesThe following sections describe how to use Guided Business processes and project milestones.
4.6.1 Introduction to Guided Business ProcessesGuided Business Processes provide a guided visual representation of a process flow, improving the user experience by providing process participants with an encapsulated hierarchical view of the business process.
Guided Business Processes enable process designers to direct process participants to complete a business process through a set of guided steps associated with the process.

Using Guided Business Processes to Create Project Milestones
4-14 Business Process Composer User's Guide for Oracle Business Process Management
By following the steps outlined in a Guided Business Process, process participants require less training to complete a business process, and the results of the process are more predictable.
4.6.1.1 Introduction to Activity Guides and MilestonesA Guided Business Process is modeled as an activity guide that is based on a business process. The Activity Guide includes a set of Milestones. A milestone is a contained set of tasks that the process participant must complete. A milestone is complete when the user successfully runs a specific set of tasks in the milestone.
Each milestone is a specific set of human workflow tasks. Each human workflow task is itself a task flow that may require the collaboration of multiple participants in various roles. Depending on the nature of the task flows, a participant may save an unfinished task flow and go back to it at a later time.
4.6.2 How to Configure the Activity Guide and Create Project MilestonesUsing Business Process Composer, you can configure Guided Business Processes and add milestones to them.
To configure the activity guide for a project:1. Open your project.
2. From the Quickstart menu, select Activity Guide.
The activity guide editor is displayed.
3. Enter a title for the activity guide.
4. Configure the following optional properties:
■ Display Mode: Determines how milestones and tasks within the guided business process display links. If the milestone and tasks use another configuration, then the guided business process configuration is ignored.
Possible values are:
– Always: Always displays the milestone and task links for all the milestones in this guided business process.
– When Instantiated: Displays the milestone and task links only when one or more of the user tasks in the milestone are instantiated, for all the milestones in the guided business process.
■ Task Access: After the task is completed, the guided business process uses this configuration to display the links. If the task mode is active only, the tasks links are grayed out. If the task mode is any state, the tasks links remain enabled and a message appears when you run the task.
Possible values are:
– Active Only: The link to the task is enabled only when the task is active and the user can update it. When you complete the task the link to the task is grayed out.
– Any State: The link to the task is always enabled after you instantiate the task, even after you complete the task.
■ Root Process: Determines the process used for this Activity Guide. You can only define one guided business process per BPM project. This process is the root process.

Defining the Roles Used in a Project
Working with Projects and Project Templates 4-15
■ Description: Provides an optional description for the Activity Guide.
5. Click Save in the project toolbar.
To create a new milestone:1. Click New Milestone.
2. Select the milestone you just created from the list.
3. Configure the milestone as necessary.
4. Click Save in the project toolbar.
To add a user task to a milestone:1. Open the process where you want to add a milestone.
2. Right-click the user task you want to add to a milestone.
3. Select a milestone from the list, then click OK.
4.7 Defining the Roles Used in a ProjectThis section describes how to create project roles.
4.7.1 Introduction to Project RolesProject roles are used within your business processes to model the users or groups that are responsible for performing the work performed by you business process.
Roles enable you to define functional categories that correspond to job functions or responsibilities within your organization. Business Process Composer enables you to create and edit the required roles within your process and assign them to swimlanes. When an project is deployed to runtime, project roles are mapped to the real-world users and groups of your organization. More advanced mapping and configuration of project roles can be performed using BPM Studio or Oracle Business Process Management Workspace.
Project roles are defined for the entire project. This enables them to be shared by all the processes in your project. Within a process, roles are assigned to the horizontal swimlanes.
4.7.2 Working with Project RolesThe following procedures describe how to create and delete project roles.
How to create a project role:1. Access the project welcome page.
2. Expand Organization, then click the Add icon.
3. Provide a name for the new role, then click Add Role.
How to delete a project role:1. Access the project welcome page.
2. Expand Organization.
3. Select the role you want to delete, then click the Delete icon.

Defining the Roles Used in a Project
4-16 Business Process Composer User's Guide for Oracle Business Process Management

Working with Processes and the Process Editor 5-1
5Working with Processes and the Process
Editor
This chapter provides information about creating and using business processes in Oracle BPM. It provides a general introduction to business processes and describes the process editor window. It also provides procedural information for creating and using processes.
See Chapter 6, "Modeling Business Processes with Oracle BPM" for information on using Business Process Management Notation (BPMN) to design a business process.
This chapter includes the following sections:
■ Section 5.1, "Introduction to Business Processes"
■ Section 5.2, "Introduction to the Process Editor"
■ Section 5.3, "Working with Business Processes"
■ Section 5.4, "Working with Flow Elements"
■ Section 5.5, "Working with Business Catalog Components"
■ Section 5.6, "Working with Draft Processes"
■ Section 5.7, "Documenting Your Process"
5.1 Introduction to Business ProcessesA business process can be generally defined as a sequence of tasks that after it performed result in a well-defined outcome. Business processes are the core components of process-based business applications created with the Oracle BPM Suite.
Although projects are higher level wrappers that contain all the resources of a business application, the processes within the project determine how the application works. This flow is defined by various BPMN flow objects.
Business processes are generally created by process analysts who determine the business requirements that must be addressed and define the corresponding process flow.
There are different types of business processes that determine how a process behaves in relation to other processes. These are described in Figure 5–1.
Note: By default, new business processes are synchronous. After creating a new process you can change the type by editing the process.
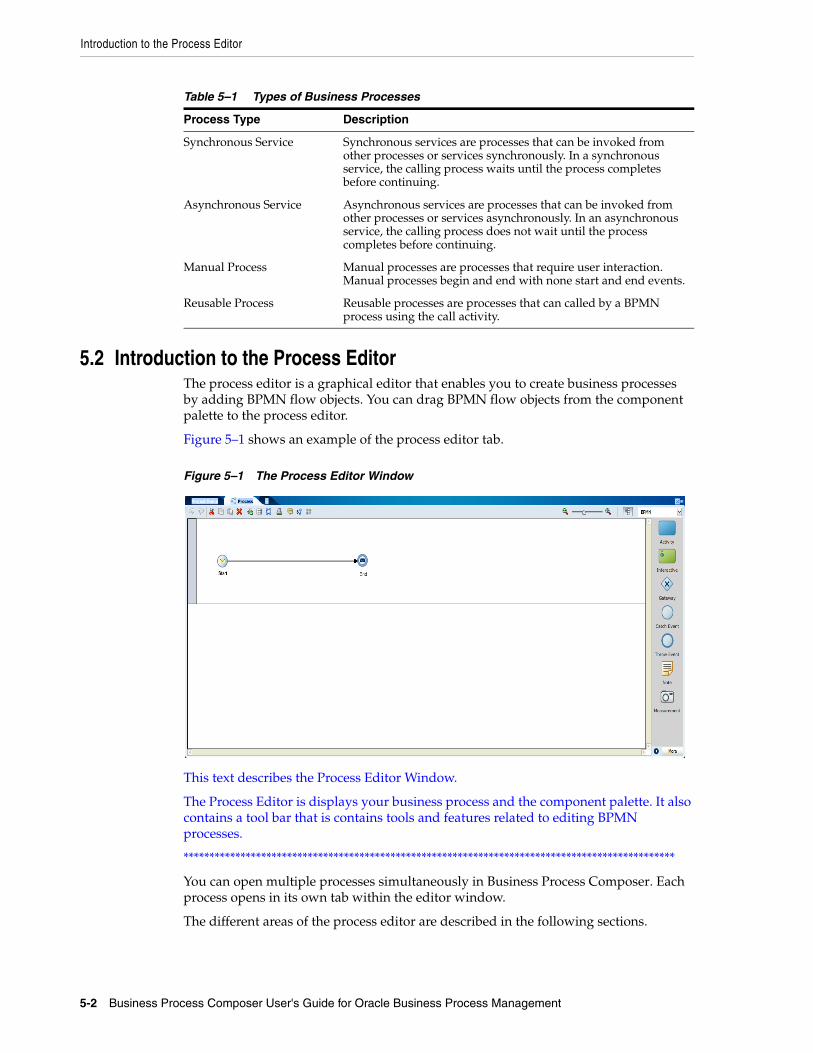
Introduction to the Process Editor
5-2 Business Process Composer User's Guide for Oracle Business Process Management
5.2 Introduction to the Process EditorThe process editor is a graphical editor that enables you to create business processes by adding BPMN flow objects. You can drag BPMN flow objects from the component palette to the process editor.
Figure 5–1 shows an example of the process editor tab.
Figure 5–1 The Process Editor Window
This text describes the Process Editor Window.
The Process Editor is displays your business process and the component palette. It also contains a tool bar that is contains tools and features related to editing BPMN processes.
***********************************************************************************************
You can open multiple processes simultaneously in Business Process Composer. Each process opens in its own tab within the editor window.
The different areas of the process editor are described in the following sections.
Table 5–1 Types of Business Processes
Process Type Description
Synchronous Service Synchronous services are processes that can be invoked from other processes or services synchronously. In a synchronous service, the calling process waits until the process completes before continuing.
Asynchronous Service Asynchronous services are processes that can be invoked from other processes or services asynchronously. In an asynchronous service, the calling process does not wait until the process completes before continuing.
Manual Process Manual processes are processes that require user interaction. Manual processes begin and end with none start and end events.
Reusable Process Reusable processes are processes that can called by a BPMN process using the call activity.
Introduction to the Process Editor
Working with Processes and the Process Editor 5-3
5.2.1 Introduction to the Process Editor ToolbarThe process editor window contains a toolbar enabling access to the Business Process Composer features described in Table 5–2.
5.2.2 Introduction to the Process Editor CanvasThe process editor canvas is the central area of the process editor window. It enables you to create the graphical representation of your process using BPMN flow objects. In addition to a process flow, the process editor canvas also displays swimlanes.
5.2.3 Introduction to the BPMN Component PaletteThe component palette appears within the editor window and enables you to add BPMN sequence flows and business catalog elements to your process. Figure 5–2 shows the component palette.
Table 5–2 Process Editor Menu
Menu Item Description
Undo Reverts the last change made to your process.
Redo Reverses the last undo action you performed.
Cut Cuts the selected items and copies them the clipboard.
Copy Copies the select items to the clipboard.
Paste Pastes the items currently in the clipboard.
Delete Deletes the selected elements from the process.
Autolayout Automatically adjusts the layout of your process.
Toggle grid visibility Shows or hides a grid in the process editor window.
Snap to grid Causes flow objects to be centered on the nearest grid axis. Any existing flow objects will automatically be centered. When adding new flow objects, they will automatically be centered when they are added.
This button is active only when toggle grid is enabled.
Print Prints the process using your browser’s printer setup.
Edit conversations Opens the conversations editor. This editor enables process developers to define the interface used to determine the input and output data objects.
Find process usage Determines what other processes within the current project call the current process.
View collaboration Switches the process editor to collaboration view.
Zoom slider Zooms in and out of your process.
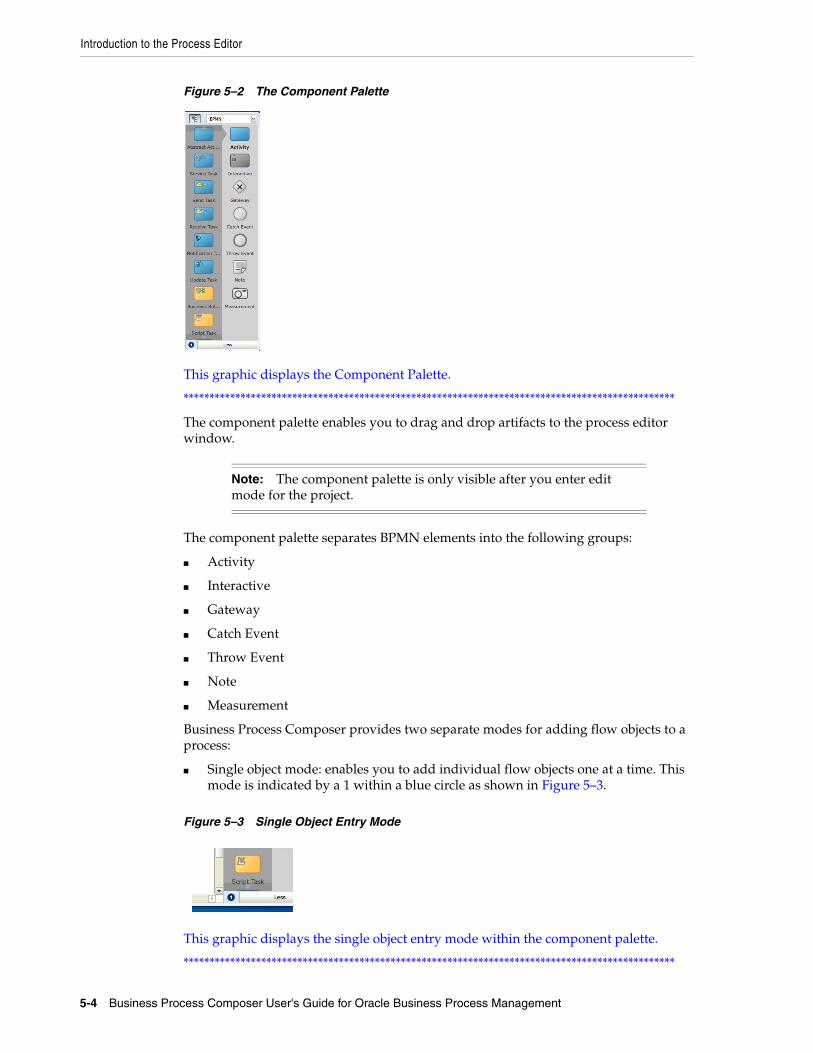
Introduction to the Process Editor
5-4 Business Process Composer User's Guide for Oracle Business Process Management
Figure 5–2 The Component Palette
This graphic displays the Component Palette.
***********************************************************************************************
The component palette enables you to drag and drop artifacts to the process editor window.
The component palette separates BPMN elements into the following groups:
■ Activity
■ Interactive
■ Gateway
■ Catch Event
■ Throw Event
■ Note
■ Measurement
Business Process Composer provides two separate modes for adding flow objects to a process:
■ Single object mode: enables you to add individual flow objects one at a time. This mode is indicated by a 1 within a blue circle as shown in Figure 5–3.
Figure 5–3 Single Object Entry Mode
This graphic displays the single object entry mode within the component palette.
***********************************************************************************************
Note: The component palette is only visible after you enter edit mode for the project.

Working with Business Processes
Working with Processes and the Process Editor 5-5
■ Multiple object mode: enables you to quickly add multiple flow objects of the same type. This mode is indicated by an "N" within a blue circle.
You can toggle between the two modes by clicking the blue circle.
5.2.4 Introduction to the Business CatalogThis panel enables you to select reusable services from the business catalog. Figure 5–4 shows the business catalog.
Figure 5–4 The Business Catalog
This graphic displays the business catalog.
***********************************************************************************************
These services are grouped according to the following categories:
■ Services
■ External references
■ Human tasks
■ Business rules
You can use Business Process Composer to assign reusable services from the business catalog to the corresponding flow objects.
See Section 4.1.1.2, "The Business Catalog" for more information.
5.3 Working with Business ProcessesThe following sections describe how to create, open, and delete business processes.
5.3.1 How to Create a New Business ProcessBusiness processes are created within an Oracle BPM project. You can add one or more processes to your project.
To create a new business process1. Open your project.
2. Access the project welcome page.
Note: External references and business rules cannot be created in Business Process Composer. They are created in Oracle BPM Studio and included as part of a project template.
You can use Business Process Composer to create services based on Web Services. However, other services based on adapters and other SOA components must be created in Oracle BPM Studio and included within a project template.

Working with Flow Elements
5-6 Business Process Composer User's Guide for Oracle Business Process Management
3. If you are editing a shared project, ensure that you are currently editing the project.
4. Click Processes, then click New Process.
5. Enter a name for the process, then click Create.
The new process appears in the list of processes.
New business processes are created with a start and end event connected by a default sequence flow.
See Section 6.2, "Defining the Start and End Point of a Process" for more information.
5.3.2 How to Open a Business ProcessAfter opening an Oracle BPM project, you can open any of the processes it contains. Processes are opened in the process editor window.
To open a business process1. Open your project.
2. Access the project welcome page.
3. Click Processes.
4. Click the name of the process you want to open.
The process opens in the process editor window. Before you can begin editing the process, you must ensure that you are in edit mode.
5.3.3 How to Delete a Business ProcessYou can delete processes from your project.
To delete a business process for a project:1. Open your project.
2. Access the project welcome page.
3. Click Processes.
4. Move the cursor over the name of the process you want to delete.
5. Click the delete icon, the click OK.
5.3.3.1 What You Need to Know About Deleting a Business ProcessWhen deleting a process you should ensure that there are no remaining references to the deleted process elsewhere in your project. For example, if the deleted process was invoked from another process through a message throw event, you must ensure that you have reconfigured the invoking process so it is no longer referring to the deleted process. An error should be displayed during validation if any remain references to the deleted process still exist
5.4 Working with Flow ElementsThis section describes the basic mechanics of using the process editor to add flow elements to a process. See Chapter 6, "Modeling Business Processes with Oracle BPM" for information on designing your business process using BPMN 2.0.

Working with Flow Elements
Working with Processes and the Process Editor 5-7
5.4.1 How to Add a Flow Object from the Component PaletteYou can add flow objects to your process by dragging them from the component palette onto the process editor canvas.
To add a flow element from the component palette:1. Open the process where you want to add flow elements.
2. Ensure you are in edit mode.
3. In the component palette, double-click the type of flow object you want to add.
4. Select the object entry mode you wish to use.
You can choose to enter a single flow object or multiple flow objects of the same type. See Section 5.2.3, "Introduction to the BPMN Component Palette" for more information.
5. Click and drag the flow object you want to add to the area in process editor canvas where you want to place it.
The cursor displays the icon associated with the type of flow object.
6. Position the cursor to the point in your process where you want to add the flow object, then right-click.
If you are in multiple object mode, you can continue clicking within the process editor canvas to add additional flow objects of the same type.
5.4.2 How to Cut, Copy or Delete a Flow ObjectWithin the process editor window, you can cut copy or delete flow objects.
To cut, copy, or delete a flow object:1. Select the flow object or sequence flow that you want to cut, copy, or delete.
2. Select Cut, Copy, or Delete from the process editor toolbar.
5.4.3 How to Paste a Flow Object in a ProcessYou can paste that you previously cut or copied.
To paste a flow object in a process:1. Right-click in the area of the process editor canvas where you want to paste a flow
object.
2. Select Paste.
Note: If you position the cursor over a sequence flow, Business Process Composer will automatically create incoming and outgoing sequence flows for the new flow object.
Note: When you cut or delete a flow object that contains incoming and outgoing sequence flow, Business Process Composer automatically connects it to the outgoing sequence flow. However, you may need to manually reconfigure the surrounding flow objects.
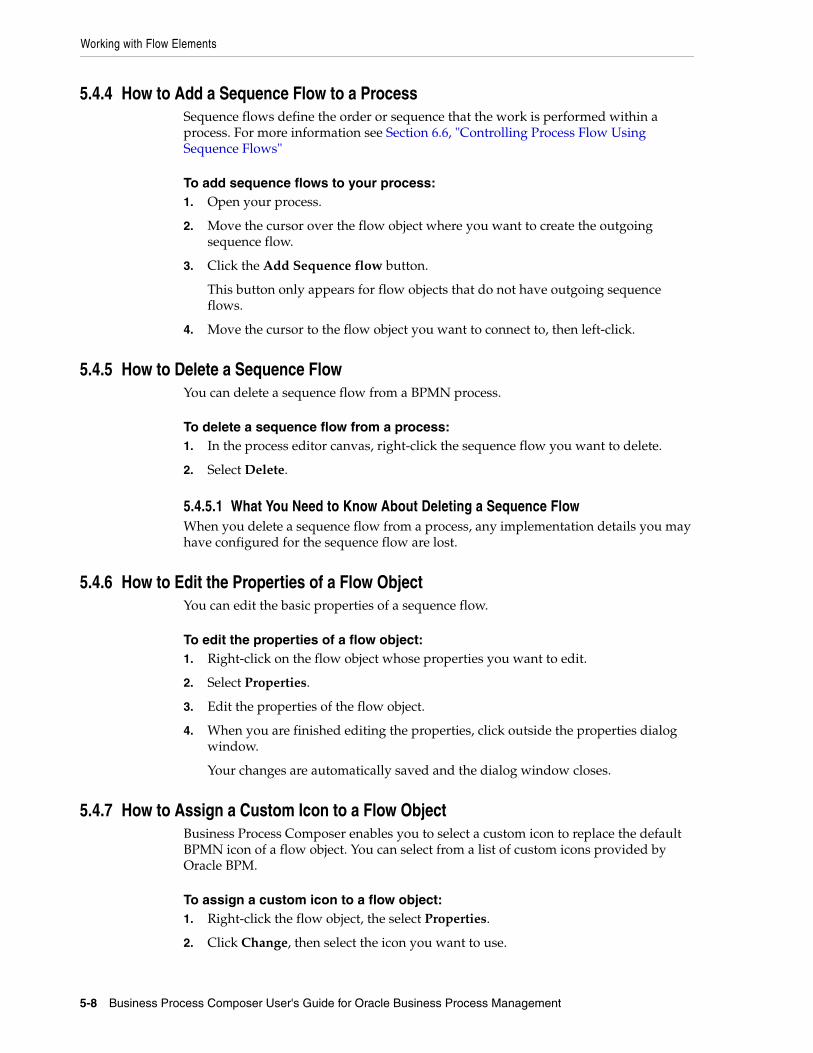
Working with Flow Elements
5-8 Business Process Composer User's Guide for Oracle Business Process Management
5.4.4 How to Add a Sequence Flow to a ProcessSequence flows define the order or sequence that the work is performed within a process. For more information see Section 6.6, "Controlling Process Flow Using Sequence Flows"
To add sequence flows to your process:1. Open your process.
2. Move the cursor over the flow object where you want to create the outgoing sequence flow.
3. Click the Add Sequence flow button.
This button only appears for flow objects that do not have outgoing sequence flows.
4. Move the cursor to the flow object you want to connect to, then left-click.
5.4.5 How to Delete a Sequence FlowYou can delete a sequence flow from a BPMN process.
To delete a sequence flow from a process:1. In the process editor canvas, right-click the sequence flow you want to delete.
2. Select Delete.
5.4.5.1 What You Need to Know About Deleting a Sequence FlowWhen you delete a sequence flow from a process, any implementation details you may have configured for the sequence flow are lost.
5.4.6 How to Edit the Properties of a Flow ObjectYou can edit the basic properties of a sequence flow.
To edit the properties of a flow object:1. Right-click on the flow object whose properties you want to edit.
2. Select Properties.
3. Edit the properties of the flow object.
4. When you are finished editing the properties, click outside the properties dialog window.
Your changes are automatically saved and the dialog window closes.
5.4.7 How to Assign a Custom Icon to a Flow ObjectBusiness Process Composer enables you to select a custom icon to replace the default BPMN icon of a flow object. You can select from a list of custom icons provided by Oracle BPM.
To assign a custom icon to a flow object:1. Right-click the flow object, the select Properties.
2. Click Change, then select the icon you want to use.
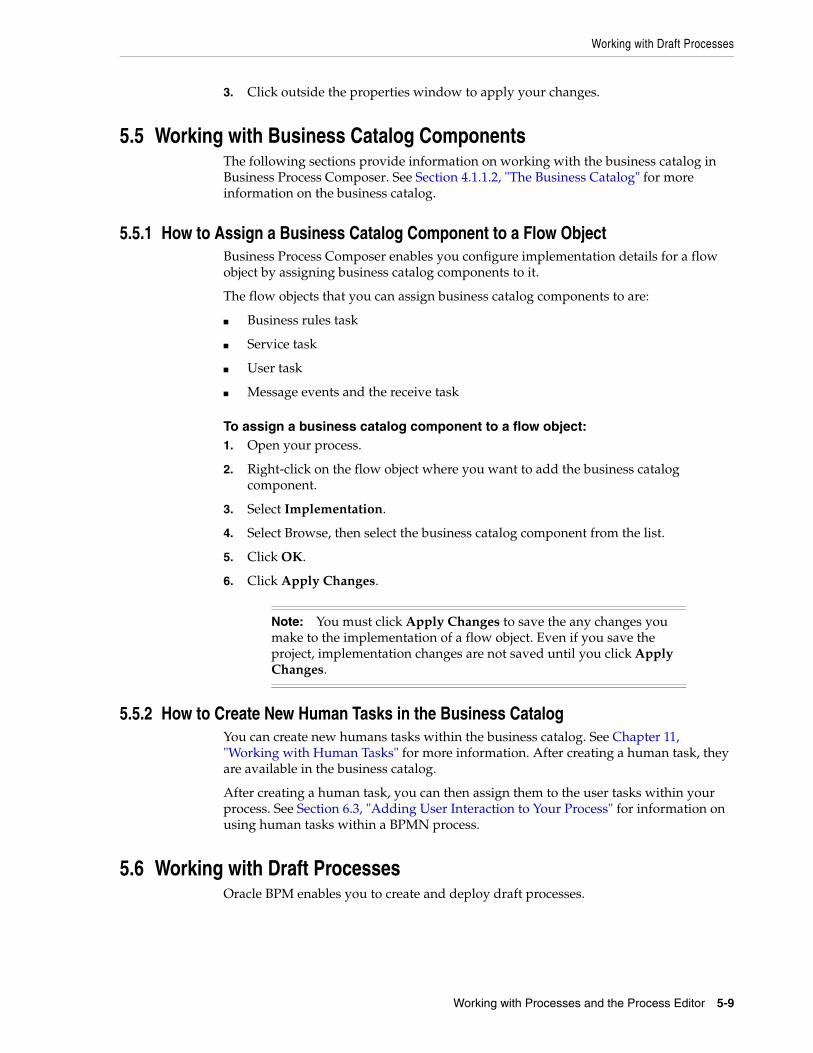
Working with Draft Processes
Working with Processes and the Process Editor 5-9
3. Click outside the properties window to apply your changes.
5.5 Working with Business Catalog ComponentsThe following sections provide information on working with the business catalog in Business Process Composer. See Section 4.1.1.2, "The Business Catalog" for more information on the business catalog.
5.5.1 How to Assign a Business Catalog Component to a Flow ObjectBusiness Process Composer enables you configure implementation details for a flow object by assigning business catalog components to it.
The flow objects that you can assign business catalog components to are:
■ Business rules task
■ Service task
■ User task
■ Message events and the receive task
To assign a business catalog component to a flow object:1. Open your process.
2. Right-click on the flow object where you want to add the business catalog component.
3. Select Implementation.
4. Select Browse, then select the business catalog component from the list.
5. Click OK.
6. Click Apply Changes.
5.5.2 How to Create New Human Tasks in the Business CatalogYou can create new humans tasks within the business catalog. See Chapter 11, "Working with Human Tasks" for more information. After creating a human task, they are available in the business catalog.
After creating a human task, you can then assign them to the user tasks within your process. See Section 6.3, "Adding User Interaction to Your Process" for information on using human tasks within a BPMN process.
5.6 Working with Draft ProcessesOracle BPM enables you to create and deploy draft processes.
Note: You must click Apply Changes to save the any changes you make to the implementation of a flow object. Even if you save the project, implementation changes are not saved until you click Apply Changes.
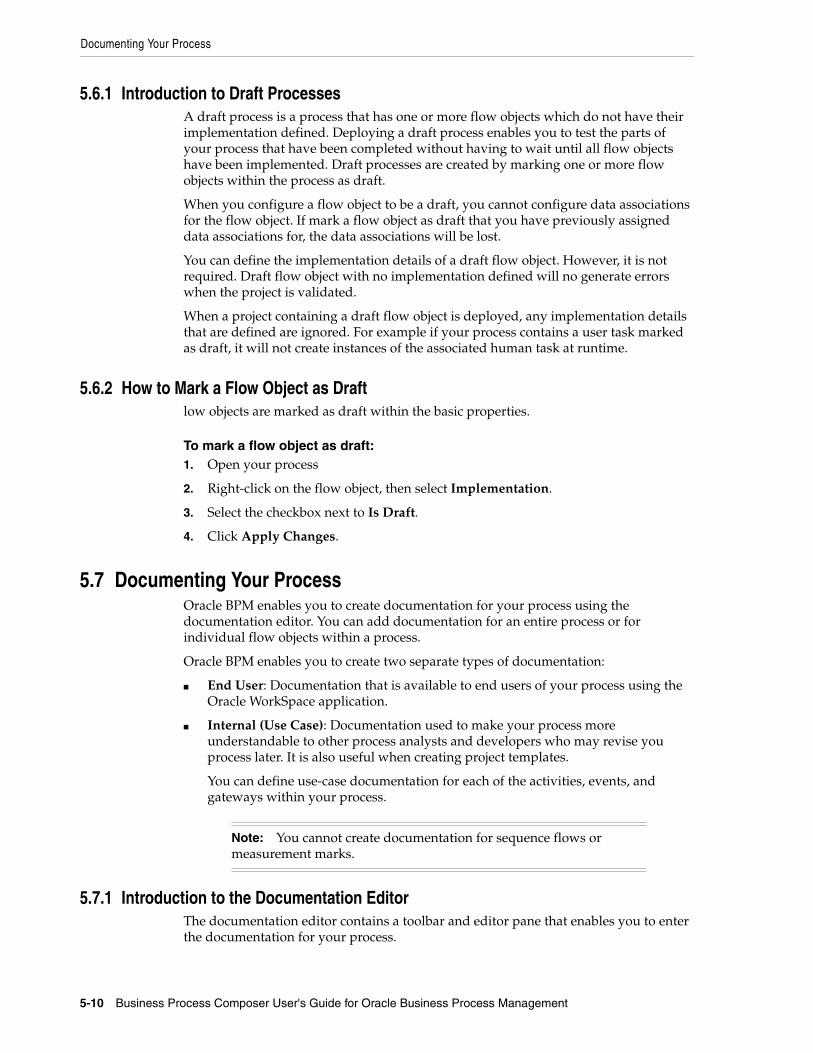
Documenting Your Process
5-10 Business Process Composer User's Guide for Oracle Business Process Management
5.6.1 Introduction to Draft ProcessesA draft process is a process that has one or more flow objects which do not have their implementation defined. Deploying a draft process enables you to test the parts of your process that have been completed without having to wait until all flow objects have been implemented. Draft processes are created by marking one or more flow objects within the process as draft.
When you configure a flow object to be a draft, you cannot configure data associations for the flow object. If mark a flow object as draft that you have previously assigned data associations for, the data associations will be lost.
You can define the implementation details of a draft flow object. However, it is not required. Draft flow object with no implementation defined will no generate errors when the project is validated.
When a project containing a draft flow object is deployed, any implementation details that are defined are ignored. For example if your process contains a user task marked as draft, it will not create instances of the associated human task at runtime.
5.6.2 How to Mark a Flow Object as Draftlow objects are marked as draft within the basic properties.
To mark a flow object as draft:1. Open your process
2. Right-click on the flow object, then select Implementation.
3. Select the checkbox next to Is Draft.
4. Click Apply Changes.
5.7 Documenting Your ProcessOracle BPM enables you to create documentation for your process using the documentation editor. You can add documentation for an entire process or for individual flow objects within a process.
Oracle BPM enables you to create two separate types of documentation:
■ End User: Documentation that is available to end users of your process using the Oracle WorkSpace application.
■ Internal (Use Case): Documentation used to make your process more understandable to other process analysts and developers who may revise you process later. It is also useful when creating project templates.
You can define use-case documentation for each of the activities, events, and gateways within your process.
5.7.1 Introduction to the Documentation EditorThe documentation editor contains a toolbar and editor pane that enables you to enter the documentation for your process.
Note: You cannot create documentation for sequence flows or measurement marks.

Documenting Your Process
Working with Processes and the Process Editor 5-11
Figure 5–5 The Documentation Editor
This text describes the Documentation Editor
***********************************************************************************************
5.7.1.1 Inserting Links in Your DocumentationWhen adding links in your documentation, you should include a full URL as part of the link. For example, you should refer to external links as http://www.oracle.com, instead of just www.oracle.com.
5.7.2 How to Add Documentation to Your ProcessBusiness Process Composer enables you to add documentation to your processes and the flow objects within your processes.
To add documentation to a process:1. Open your process.
2. Click Restore Pane to display the documentation editor. The Restore Pane icon is located in the lower right corner of the Business Process Composer application.
3. Click the Documentation tab, then select the tab for the process.
4. Select the type of documentation you want to create from the Documentation Type drop-down menu.
5. Enter your documentation in the editor window.
6. Click Apply to save your changes.
To add documentation to a specific flow object within a process:1. Open the process where you want to add documentation.
2. Right-click the flow object where you want to add documentation, then select Properties.
3. In the Properties dialog box, click Documentation.
4. Select the type of documentation you want to create from the Documentation Type drop-down menu.
5. Enter your documentation in the editor window.
6. Click Apply to save your changes.
Note: You should apply your changes before selecting another process or process element. If you navigate away from the documentation editor before applying your changes, they are not saved.
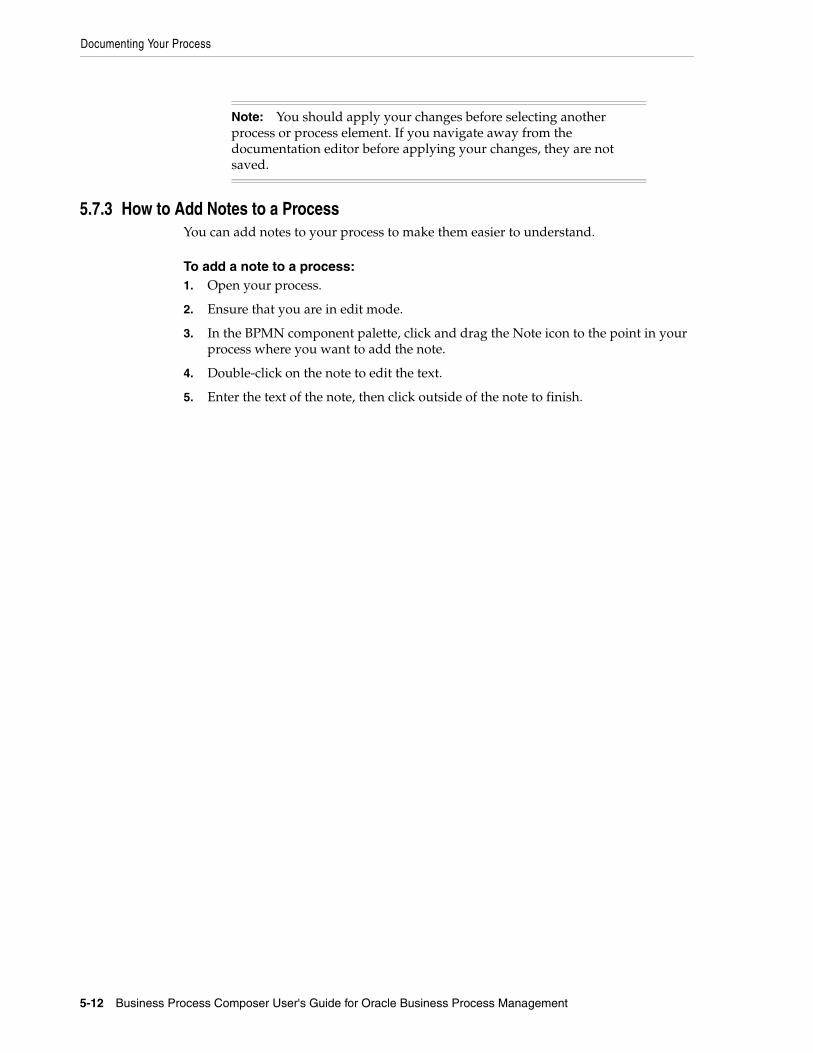
Documenting Your Process
5-12 Business Process Composer User's Guide for Oracle Business Process Management
5.7.3 How to Add Notes to a ProcessYou can add notes to your process to make them easier to understand.
To add a note to a process:1. Open your process.
2. Ensure that you are in edit mode.
3. In the BPMN component palette, click and drag the Note icon to the point in your process where you want to add the note.
4. Double-click on the note to edit the text.
5. Enter the text of the note, then click outside of the note to finish.
Note: You should apply your changes before selecting another process or process element. If you navigate away from the documentation editor before applying your changes, they are not saved.

Modeling Business Processes with Oracle BPM 6-1
6Modeling Business Processes with Oracle
BPM
This chapter describes how to use create and model business processes using Business Process Management Notation and Modeling (BPMN) within the Oracle Business Process Management Suite.
This chapter provides specific information on about Oracle’s implementation of BPMN 2.0. See Chapter 2, "Overview of Business Process Design" for a general introduction to BPMN using the Sales Quote example project. For general information about BPMN, including the formal specification, see http://www.bpmn.org.
This chapter is organized by the different types of tasks your business process must perform. It includes the following sections:
■ Section 6.1, "Using Swimlanes to Organize Your Process"
■ Section 6.2, "Defining the Start and End Point of a Process"
■ Section 6.3, "Adding User Interaction to Your Process"
■ Section 6.4, "Communicating With Other Processes and Services"
■ Section 6.5, "Adding Business Logic Using Oracle Business Rules"
■ Section 6.6, "Controlling Process Flow Using Sequence Flows"
■ Section 6.7, "Controlling Process Flow Using Gateways"
■ Section 6.8, "Controlling Process Flow Using Intermediate Events"
■ Section 6.9, "Using Subprocesses and Inline Handlers to Organize Your Process"
■ Section 6.10, "Changing the Value of Data Objects in Your Process"
■ Section 6.11, "Measuring Process Performance Using Measurement Marks"
6.1 Using Swimlanes to Organize Your ProcessThis section shows you how to organize your process using swimlanes. It also describes how to use roles to determine which members of your business organization are responsible for performing the work of your process-based application.
6.1.1 Introduction to RolesA key to designing a business process is determining the people and roles required to complete each of the tasks that require user interaction. Within your process, roles are used to model who is responsible for performing the work performed within your
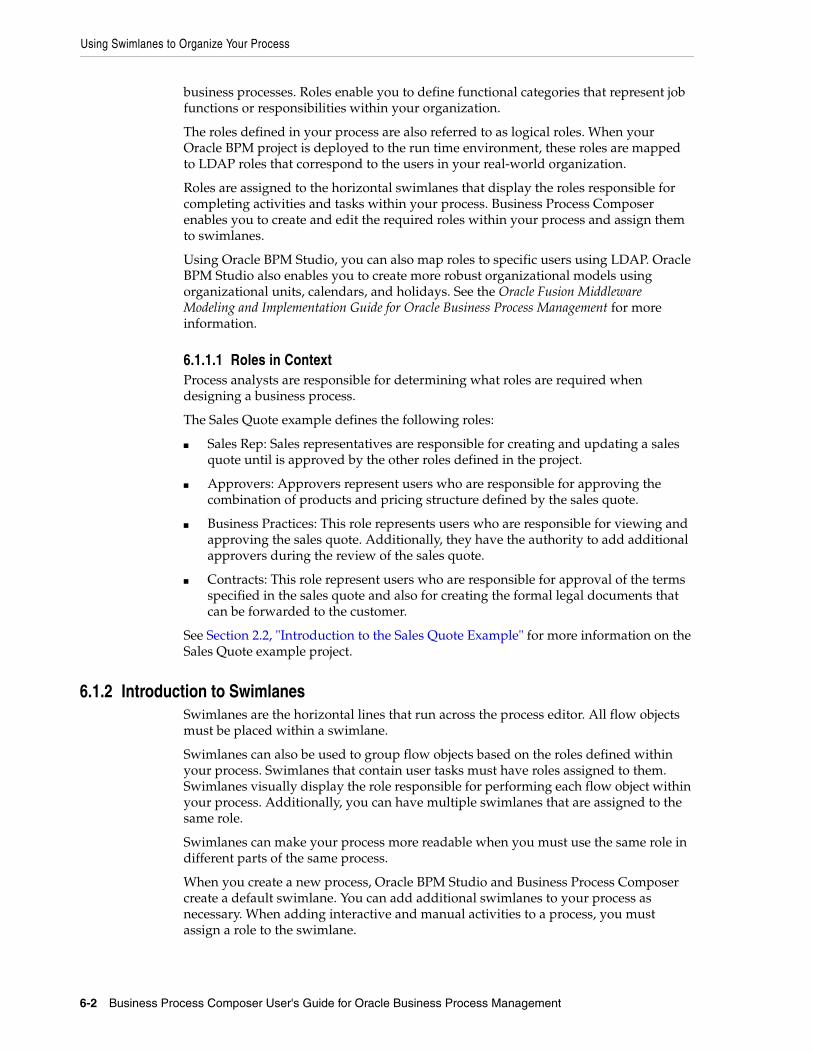
Using Swimlanes to Organize Your Process
6-2 Business Process Composer User's Guide for Oracle Business Process Management
business processes. Roles enable you to define functional categories that represent job functions or responsibilities within your organization.
The roles defined in your process are also referred to as logical roles. When your Oracle BPM project is deployed to the run time environment, these roles are mapped to LDAP roles that correspond to the users in your real-world organization.
Roles are assigned to the horizontal swimlanes that display the roles responsible for completing activities and tasks within your process. Business Process Composer enables you to create and edit the required roles within your process and assign them to swimlanes.
Using Oracle BPM Studio, you can also map roles to specific users using LDAP. Oracle BPM Studio also enables you to create more robust organizational models using organizational units, calendars, and holidays. See the Oracle Fusion Middleware Modeling and Implementation Guide for Oracle Business Process Management for more information.
6.1.1.1 Roles in ContextProcess analysts are responsible for determining what roles are required when designing a business process.
The Sales Quote example defines the following roles:
■ Sales Rep: Sales representatives are responsible for creating and updating a sales quote until is approved by the other roles defined in the project.
■ Approvers: Approvers represent users who are responsible for approving the combination of products and pricing structure defined by the sales quote.
■ Business Practices: This role represents users who are responsible for viewing and approving the sales quote. Additionally, they have the authority to add additional approvers during the review of the sales quote.
■ Contracts: This role represent users who are responsible for approval of the terms specified in the sales quote and also for creating the formal legal documents that can be forwarded to the customer.
See Section 2.2, "Introduction to the Sales Quote Example" for more information on the Sales Quote example project.
6.1.2 Introduction to SwimlanesSwimlanes are the horizontal lines that run across the process editor. All flow objects must be placed within a swimlane.
Swimlanes can also be used to group flow objects based on the roles defined within your process. Swimlanes that contain user tasks must have roles assigned to them. Swimlanes visually display the role responsible for performing each flow object within your process. Additionally, you can have multiple swimlanes that are assigned to the same role.
Swimlanes can make your process more readable when you must use the same role in different parts of the same process.
When you create a new process, Oracle BPM Studio and Business Process Composer create a default swimlane. You can add additional swimlanes to your process as necessary. When adding interactive and manual activities to a process, you must assign a role to the swimlane.
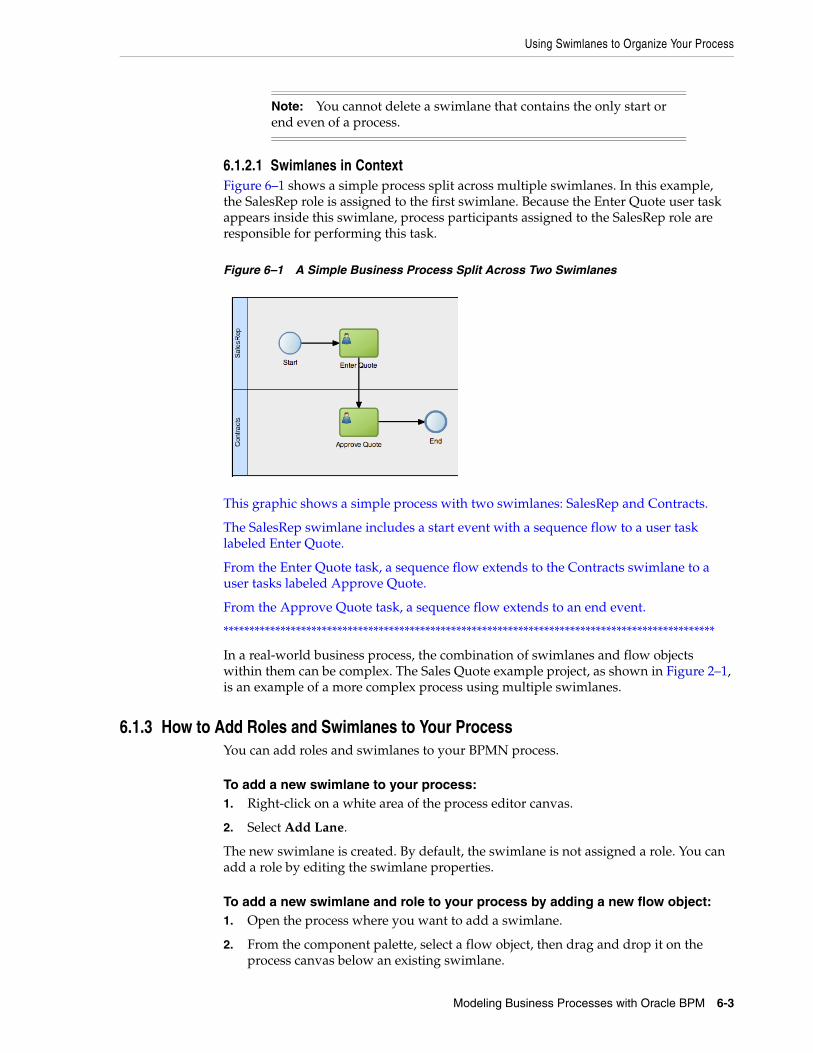
Using Swimlanes to Organize Your Process
Modeling Business Processes with Oracle BPM 6-3
6.1.2.1 Swimlanes in ContextFigure 6–1 shows a simple process split across multiple swimlanes. In this example, the SalesRep role is assigned to the first swimlane. Because the Enter Quote user task appears inside this swimlane, process participants assigned to the SalesRep role are responsible for performing this task.
Figure 6–1 A Simple Business Process Split Across Two Swimlanes
This graphic shows a simple process with two swimlanes: SalesRep and Contracts.
The SalesRep swimlane includes a start event with a sequence flow to a user task labeled Enter Quote.
From the Enter Quote task, a sequence flow extends to the Contracts swimlane to a user tasks labeled Approve Quote.
From the Approve Quote task, a sequence flow extends to an end event.
***********************************************************************************************
In a real-world business process, the combination of swimlanes and flow objects within them can be complex. The Sales Quote example project, as shown in Figure 2–1, is an example of a more complex process using multiple swimlanes.
6.1.3 How to Add Roles and Swimlanes to Your ProcessYou can add roles and swimlanes to your BPMN process.
To add a new swimlane to your process:1. Right-click on a white area of the process editor canvas.
2. Select Add Lane.
The new swimlane is created. By default, the swimlane is not assigned a role. You can add a role by editing the swimlane properties.
To add a new swimlane and role to your process by adding a new flow object:1. Open the process where you want to add a swimlane.
2. From the component palette, select a flow object, then drag and drop it on the process canvas below an existing swimlane.
Note: You cannot delete a swimlane that contains the only start or end even of a process.

Defining the Start and End Point of a Process
6-4 Business Process Composer User's Guide for Oracle Business Process Management
The new swimlane is created. By default, the swimlane is not assigned a role. You can add a role by editing the swimlane properties.
6.1.4 How to Edit Swimlane PropertiesYou can edit the properties of a swimlane in the process editor.
To edit swimlane properties:1. Move the cursor over the role name for the swimlane.
2. Click the Edit icon.
3. Determine if you want to use an existing role, or create a new one:
To assign an existing role to a swimlane:
1. Click the Use button.
2. Select a role from the drop-down list.
To assigning a new role to a swimlane:
1. Click the Create button.
2. .Enter the name of the new role in the text field.
4. If you want to optionally add a custom icon to a swimlane, click Change, then select the icon you want to use.
5. If you want to optionally change the background color of a swimlane:
1. Click Implementation.
2. In the implementation properties editor, enter the RGB value of the color or select a color from the color palette.
3. Click Apply Changes.
6.1.5 Sharing Roles Between Business Process Composer and BPM StudioOracle BPM Studio enables you to integrate roles within complex organization models based on organizational units, calendars and holidays.
When editing a project or creating a project based on a project template in Business Process Composer, you can access the roles defined within the project. However, you cannot view or edit the organizational information defined within the project.
Additionally, you can create new roles using Business Process Composer. These roles are incorporated as part of the overall organization information of the project.
6.2 Defining the Start and End Point of a ProcessThis section describes the BPMN flow objects used to define the start and end of a process.
6.2.1 Introduction to Start and End EventsStart events are BPMN flow objects that define the starting point of a process. There are different types of start events that determine how process instances are created.
End events, in contrast, define the end point of a process. There are different types of end events that determine what happens when the process instance is completed.

Defining the Start and End Point of a Process
Modeling Business Processes with Oracle BPM 6-5
Because start events define the beginning of a process, they do not have incoming sequence flows. Likewise, end events cannot have outgoing sequence flows.
However, except for the none end and start events, start and end events can have input and output to processes.
6.2.1.1 Specifying the Start Events for Different Types of ProcessesWhen you create a new process Business Process Composer creates a message start and message end event.
You can change these defaults depending on the type of business process you need to create. Table 6–1 shows the default start and end events for each type of process.
See Section 5.1, "Introduction to Business Processes" for more information on the different types of processes supported by Oracle BPM.
Subprocesses contain none start and end events by default. These are the required start and end events and cannot be changed.
Event subprocesses contain a message start and none end event by default. However, you can change the start event to reflect the type of event you are handling.
6.2.1.2 Using Multiple Start Events in a ProcessYou can define multiple start points in a BPMN process. Multiple start points enable you to specify multiple ways of creating a process instance, depending on which start event is used.
Figure 6–2 shows an example process that contains both a message start and timer start event.
Figure 6–2 Using Multiple Start Events within a Process
This graphic shows a process with two start events.
The first is a message start event labeled Start on Quote Message Receipt.
Note: In Oracle BPM, all BPMN processes must have at least one start and one end event.
Table 6–1 Start and End Events for Each Process Type
Process Type Default Start and End Event Types
Asynchronous service Message start and end event
Synchronous service Message start and end event
Manual process None start and end event

Defining the Start and End Point of a Process
6-6 Business Process Composer User's Guide for Oracle Business Process Management
From this message start event, a sequence flow extends to a script task labeled Initialize Quote.
From the Initialize Quote task a sequence flow extends to a user task labeled Process Quote Upon Message.
From the Process Quote Upon Message task, a sequence flow extends to an end event.
The second message is a timer start event labeled Start on Timer. From this event a sequence flow extends to a script task labeled Initialize Quote.
From the Initialize Quote task a sequence flow extends to a user task labeled Process Quote Timer.
From the Process Quote Timer task, a sequence flow extends to the same end event mentioned earlier.
***********************************************************************************************
This process can be started using a message event when called from another process or service. It can also be started based on a time interval if the process instance must be created automatically.
Using multiple start events enables you to have multiple ways of starting a process without having to create two separate processes.
6.2.1.3 Using Multiple End Events in a ProcessEnd events mark the end of a process path. When you have only one end event in your process and the token reaches the end event, the process is stopped when the end event is reached.
When you are using multiple end events, it is possible for different tokens to take different paths within a process. In typical cases, all parallel paths must reach an end event before the process is completed.
However, in the following special cases, a process instance can be stopped before all process paths have completed:
■ Error end event: When an error end event is reached, all process activity is stopped. Like the error throw event, the error end event stops the flow of a process. See Section 6.2.9, "Introduction to the Error End Event" for more information.
■ Terminate end event: The terminate end event causes all work on a process to stop immediately. There is no error handling or other clean up of the running process. See Section 6.2.11, "Introduction to the Terminate End Event" for more information.
6.2.2 Defining How a Process Instance is TriggeredOracle BPM supports the following ways of triggering a process instance:
■ Using a message, signal, or timer start event. See the following sections for more information:
Note: Message end events can only be used to terminate processes initiated by a message start event. Additionally, if you have multiple message end events associated with a message start event, each of these message end events must have the same quantity and type of output arguments.
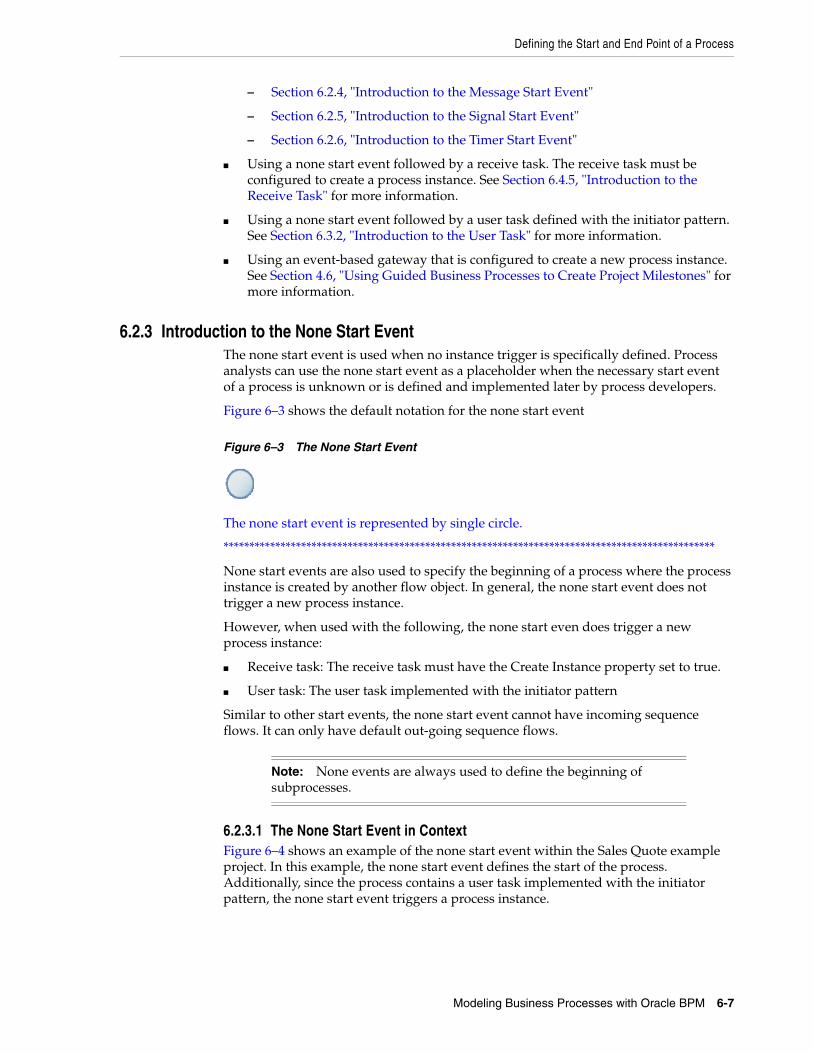
Defining the Start and End Point of a Process
Modeling Business Processes with Oracle BPM 6-7
– Section 6.2.4, "Introduction to the Message Start Event"
– Section 6.2.5, "Introduction to the Signal Start Event"
– Section 6.2.6, "Introduction to the Timer Start Event"
■ Using a none start event followed by a receive task. The receive task must be configured to create a process instance. See Section 6.4.5, "Introduction to the Receive Task" for more information.
■ Using a none start event followed by a user task defined with the initiator pattern. See Section 6.3.2, "Introduction to the User Task" for more information.
■ Using an event-based gateway that is configured to create a new process instance. See Section 4.6, "Using Guided Business Processes to Create Project Milestones" for more information.
6.2.3 Introduction to the None Start EventThe none start event is used when no instance trigger is specifically defined. Process analysts can use the none start event as a placeholder when the necessary start event of a process is unknown or is defined and implemented later by process developers.
Figure 6–3 shows the default notation for the none start event
Figure 6–3 The None Start Event
The none start event is represented by single circle.
***********************************************************************************************
None start events are also used to specify the beginning of a process where the process instance is created by another flow object. In general, the none start event does not trigger a new process instance.
However, when used with the following, the none start even does trigger a new process instance:
■ Receive task: The receive task must have the Create Instance property set to true.
■ User task: The user task implemented with the initiator pattern
Similar to other start events, the none start event cannot have incoming sequence flows. It can only have default out-going sequence flows.
6.2.3.1 The None Start Event in ContextFigure 6–4 shows an example of the none start event within the Sales Quote example project. In this example, the none start event defines the start of the process. Additionally, since the process contains a user task implemented with the initiator pattern, the none start event triggers a process instance.
Note: None events are always used to define the beginning of subprocesses.

Defining the Start and End Point of a Process
6-8 Business Process Composer User's Guide for Oracle Business Process Management
Figure 6–4 The None Start Event within the Sales Quote Example Process
This figure shows an example of the none start event. It shows three separate flow objects: a none start event, a script task, and a user task implemented with the initiator pattern.
***********************************************************************************************
6.2.3.2 Data AssociationsThe none start event does not accept process input arguments.
6.2.4 Introduction to the Message Start EventThe message start event triggers a process instance when a message is received. This message can be sent from another BPMN or BPEL process or from a service.
Messages are types of data used to of exchange information between processes. Just as data objects are used to define the data used within a project, messages are used to define the data used between processes or between a process and a service.
Figure 6–5 shows the default notation of the message start event.
Figure 6–5 The Message Start Event
The message start event is represented by a single circle with a yellow envelope icon in the middle.
***********************************************************************************************
Similar to other start events, the message start event cannot have incoming sequence flows. Message start events require a default outgoing sequence flow.
You can expose a BPMN process as a service that enables other processes and applications to invoke the process. To expose a process as a service, your process must begin with a message start event. Additionally, you must define the input arguments to the process which are the data objects passed to the message start event. See Section 10.5.1, "How to Define the Input Arguments for a Process" for more information.
6.2.4.1 The Message Start Event in ContextFigure 6–6 shows a modified version of the Sales Quote process. Here, the process begins with a message start event that initiates the process instance.

Defining the Start and End Point of a Process
Modeling Business Processes with Oracle BPM 6-9
Figure 6–6 The Message Start Event Within the Sales Quote Example Process
This figure shows an example of a message start event. It shows two separate flow objects: a message start event which initiates the process instance script task which is used to initialize the values of data objects passed to the process.
***********************************************************************************************
6.2.4.2 Using Process Input and Output ArgumentsThe message start event enables you to specify input and output arguments to a process. These arguments define the message that other processes or services must send to the process during invocation. See Section 10.5, "Defining Process Input and Output" for information on how to configure process input and output arguments.
6.2.5 Introduction to the Signal Start EventThe signal start event is similar to a message start event in that it is based on communication from another process or service. However, the message start event responds to a message sent to a specific process. In contrast, the signal start event is a response to a signal broadcast to multiple processes.
Signals can be broadcast from a BPMN process using the signal throw event. Using a combination of signal throw events and signal start events, you can invoke multiple processes simultaneously.
The signal start and throw events are added to a process by process developers. For information on implementing the signal throw event, see "Introduction to Communicating Between Processes Using Signal Events" in the Oracle Fusion Middleware Modeling and Implementation Guide for Oracle Business Process Management.
Figure 6–7 shows the default notation for the signal start event.
Figure 6–7 The Signal Start Event
The signal start event is represented by a single circle with a triangle in the middle.
***********************************************************************************************
6.2.5.1 The Signal Start Event in ContextThe signal start and throw events are added to a process and implemented by process developers.
6.2.6 Introduction to the Timer Start EventThe timer start event triggers the creation of a process instance based on a specific time condition. You can configure the timer start event to trigger a process instance based on the following:
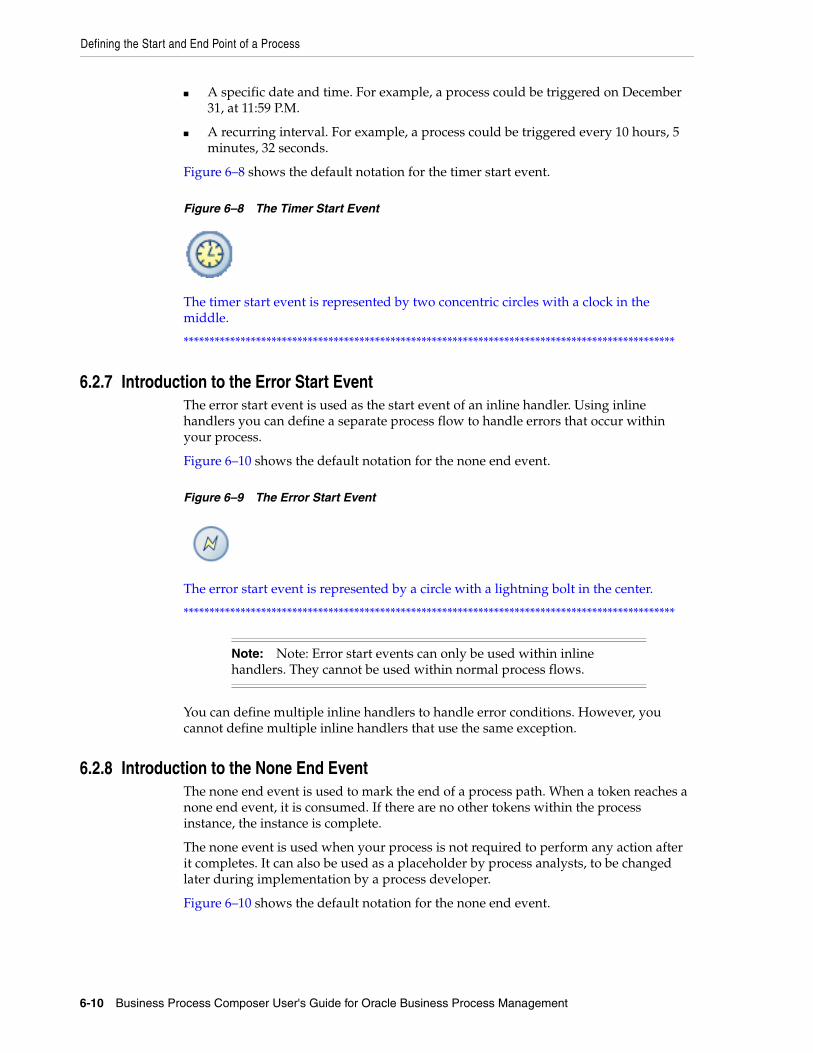
Defining the Start and End Point of a Process
6-10 Business Process Composer User's Guide for Oracle Business Process Management
■ A specific date and time. For example, a process could be triggered on December 31, at 11:59 P.M.
■ A recurring interval. For example, a process could be triggered every 10 hours, 5 minutes, 32 seconds.
Figure 6–8 shows the default notation for the timer start event.
Figure 6–8 The Timer Start Event
The timer start event is represented by two concentric circles with a clock in the middle.
***********************************************************************************************
6.2.7 Introduction to the Error Start EventThe error start event is used as the start event of an inline handler. Using inline handlers you can define a separate process flow to handle errors that occur within your process.
Figure 6–10 shows the default notation for the none end event.
Figure 6–9 The Error Start Event
The error start event is represented by a circle with a lightning bolt in the center.
***********************************************************************************************
You can define multiple inline handlers to handle error conditions. However, you cannot define multiple inline handlers that use the same exception.
6.2.8 Introduction to the None End EventThe none end event is used to mark the end of a process path. When a token reaches a none end event, it is consumed. If there are no other tokens within the process instance, the instance is complete.
The none event is used when your process is not required to perform any action after it completes. It can also be used as a placeholder by process analysts, to be changed later during implementation by a process developer.
Figure 6–10 shows the default notation for the none end event.
Note: Note: Error start events can only be used within inline handlers. They cannot be used within normal process flows.

Defining the Start and End Point of a Process
Modeling Business Processes with Oracle BPM 6-11
Figure 6–10 The None End Event
The none end event is represented by single circle.
***********************************************************************************************
The none end event is always used to mark the end of a subprocess and event subprocess.
6.2.8.1 The None End Event in ContextFigure 6–11 shows an example of the none end event within the Sales Quote example. In this example, the Sales Quote service task is used to save information about the sales quote to a database.
Figure 6–11 The None End Event Within the Sales Quote Example
This figure shows an example of the none end event. It shows three separate flow objects: a user task, a service task, and the none end event.
***********************************************************************************************
Because no other work can be performed when the token reaches the end of a process, a none end event is used. After all process tokens reach the none end event, the process instance completes.
6.2.9 Introduction to the Error End EventThe end error event is used when the end of a process is the result of an error condition.
Errors end events are typically used with the error boundary event. The error boundary event is used to change the process flow based on a specific error. This flow usually ends using an error end event. See Section 6.8.3, "Introduction to the Error Catch Event" for more information on using the error intermediate event.
Figure 6–12 shows the default notation for the error end event.
Figure 6–12 The Error End Event
The error end event is represented by two concentric circles with a lightning bolt in the middle.
***********************************************************************************************
For information implementing the error end event, see the Oracle Fusion Middleware Modeling and Implementation Guide for Oracle Business Process Management.

Adding User Interaction to Your Process
6-12 Business Process Composer User's Guide for Oracle Business Process Management
6.2.10 Introduction to the Message End EventThe message end event is used to send a message to another process or service when the process is completed. The message end event is always used with either a message start event or message catch event.
Figure 6–13 shows the default notation for the message end event.
Figure 6–13 The Message End Event
The message end event is represented by single circle with an envelope in the middle.
***********************************************************************************************
For information on how to configure process output arguments using message end events, see Section 10.5.3, "How to Define the Output Arguments for a Process".
6.2.11 Introduction to the Terminate End EventThe terminate end event is used to immediately stop a process. When a terminate end event is reached, the process stops immediately. There is no error handling or additional cleanup performed.
6.3 Adding User Interaction to Your ProcessMany business applications require interaction from process participants within your organization. This interaction can be as simple as entering information into a form or can involve multiple work flows and multiple users.
This section describes the BPMN flow objects that are used to model how process participants interact with your business processes. It contains the following sections:
■ Section 6.3.1, "Introduction to Human Workflow"
■ Section 6.3.2, "Introduction to the User Task"
■ Section 6.3.3, "Introduction to the Manual Task"
6.3.1 Introduction to Human WorkflowMany end-to-end business processes require manual interaction with the process. For example, users may be needed for approvals, exception management, or performing activities required to advance the business process.
Oracle Human Workflow provides comprehensive support for user participation by providing the following features:
■ Manual interactions with processes, including assignment and routing of tasks to the correct users or groups
Note: When creating a process that has multiple end events, you must ensure that any tokens that reach a message end event were created by a message start event. For example, you cannot use a message end event to end a process instance initiated by a timer start.
Adding User Interaction to Your Process
Modeling Business Processes with Oracle BPM 6-13
■ Deadlines, escalations, notifications, and other features required for ensuring the timely performance of a task.
■ Organization, filtering, prioritization, and other features required for process participants to productively perform their tasks.
■ Reports, reassignments, load balancing, and other features required by supervisors and business owners to manage the performance of tasks.
For more information, see "Getting Started with Human Workflow" in the Oracle Fusion Middleware Developer's Guide for Oracle SOA Suite.
6.3.1.1 Introduction to Human TasksHuman tasks are a component of Oracle Human Workflow. Human tasks enable you to interleave manual interactions with connectivity to systems and services within an end-to-end process flow. Human tasks are responsible for handling all interactions with users or groups participating in the business process. They do this by creating and tracking tasks for the appropriate users in the organization. Users typically access tasks through a variety of clients, including the worklist application, e-mail, portals, or custom applications.
Human tasks enable process developers to define how process participants interact with process-based applications created using Oracle BPM Suite and Oracle SOA Suite.
Using human tasks, process developers can define the interface and workflow for end user interaction by creating the following:
■ Roles and assignments
■ Deadlines and escalations
■ Presentations
Human tasks are reusable services that can be used within other processes that require the same UI. Human tasks are created using Oracle BPM Studio.
6.3.2 Introduction to the User TaskThe user task represents a part of your process where a process participant is required to perform work. This can be a simple interaction, such as entering a form, or part of a more complicated workflow that requires input from multiple process participants.
Figure 6–14 shows the default notation for the user task.
Figure 6–14 The User Task
The user task is represented by green rectangle with an icon in the middle. This figure shows a human icon representing the generic user task.
***********************************************************************************************
In the Oracle BPM Suite, process participants interact with your business application using the Oracle BPM WorkSpace. The specific user interface elements, including the screens and panels that process participants see, are created using human tasks.

Adding User Interaction to Your Process
6-14 Business Process Composer User's Guide for Oracle Business Process Management
When designing a process, process analysts often add the user task to a process diagram. Process developers then create the necessary human tasks and implement them as part of creating the overall process-based business application.
When a token reaches a user task, the corresponding human task is performed. The token waits until the human task is completed before continuing to the next flow object.
See Section 5.5.1, "How to Assign a Business Catalog Component to a Flow Object" for procedures on how to assign elements from the business catalog to a user task.
For information on how implementing user tasks, see "Using Human Tasks" in the Oracle Fusion Middleware Modeling and Implementation Guide for Oracle Business Process Management.
Similar to other flow objects, the user task may contain incoming and outgoing data associations.
User tasks may also contain incoming and default outgoing sequence flows.
6.3.2.1 The User Task in ContextIn the Sales Quote example, the Enter Quote task, shown in Figure 6–15, represents entering information about the quote.
Figure 6–15 The Enter Quote User Task
This graphic shows a start event with a sequence flow extending to a script task labeled Initialize Quote.
From the initialize quote task, a sequence flow extends to a user task labeled Enter Quote.
From the Enter Quote task, a sequence flow extends to a task labeled script Set Business Indicators.
***********************************************************************************************
After the user enters information about the sales quote, the process flow passes through the outgoing sequence flow to the next flow object in the process.
6.3.2.2 Using Interactive ActivitiesOracle BPM Studio enables you to add interactive activities to a process directly from the component palette. Interactive activities are short cuts based on the task routing and approval features of Oracle Human Workflow. See "Getting Started with Human Workflow" in Oracle Fusion Middleware Developer's Guide for Oracle SOA Suite for more information.
Table 6–2 shows the interactive activities that are available in Business Process Composer component palette.

Adding User Interaction to Your Process
Modeling Business Processes with Oracle BPM 6-15
6.3.2.3 Using the User Task in Project TemplatesUsing Oracle BPM Studio, you can add human tasks to the business catalog. Process analysts can use these in Business Process Composer when working with projects created from project templates.
When adding the user task to a project template to be used within Business Process Composer, follow these guidelines:
■ Process developers must create any required human task services within Oracle BPM Studio before using the template in Business Process Composer. Human tasks can be implemented within a user task or this implementation can be performed when editing the project based on the project template.
■ However, if the human task service is being implemented for a user task that is sealed within a project template, you must also perform the implementation before using the project template in Business Process Composer.
6.3.3 Introduction to the Manual TaskThe manual task represents a task performed by process participants that is outside the scope of Oracle BPM. Manual tasks are used as placeholders within your process to show work that is not managed by the BPMN service engine at run time. Additionally, manual tasks do not appear in the Oracle WorkSpace application.
Figure 6–16 shows the default notation for the manual task.
Figure 6–16 The Manual Task
The manual task is represented by green rectangle with a single hand in the middle.
***********************************************************************************************
Table 6–2 Interactive Activities
Pattern Description
Complex Uses a complex routing flow that is defined within the human task.
Management Uses the management chain pattern where the assignee is set to the management chain pattern for the process participant belonging to the group or role assigned to the swimlane.
FYI Bases assignment on the participant, role, or group defined in the swimlane. Similar to the user interactive activity, but the FYI activity does not wait until completion before continuing.
Group Uses the group vote pattern. The assignee for the task is automatically set to the role or group associated with the lane. This interactive activity can only be added to swimlanes that are assigned to roles or groups.
Initiator The initiator pattern is used to create a process instance.
Note: Manual tasks are not managed by Oracle BPM. The Oracle BPM run time does not track the start and completion of the manual task.

Communicating With Other Processes and Services
6-16 Business Process Composer User's Guide for Oracle Business Process Management
Manual tasks can only have one default incoming and one default outgoing sequence flow.
Unlike most BPMN flow objects, the manual task does not enable you to manipulate data objects. Data objects associated with the previous flow element are passed through as is to the next flow element.
6.3.3.1 The Manual Task in ContextIn the context of the Sales Quote example, a manual task can be added for printing and signing a copy of a formal contract as shown in Figure 6–17.
Figure 6–17 Example of a Manual Task
In this graphic, a sequence flow extends to a user task labeled Finalize Contracts.
From the Finalize Contracts task, a sequence flow extends to a manual task labeled Print and Sign Contract.
From the Print and Sign Contract task a sequence flow extends to a message end event.
***********************************************************************************************
In this example, signing the formal contract is something that you may want to explicitly show as part of your business process. However, because it is not managed by the BPMN Service Engine, a manual task is used.
6.3.4 Introduction to the Update TaskThe update task is used to perform operation on one or more Human Tasks. For example, you can use the update task perform actions like reassigning a task to another user.
Figure 6–18 shows the default notation for the update task.
Figure 6–18 The Update Task
The update task is represented by a blue rectangle containing the icon for a person and a green gear.
***********************************************************************************************
For more information on using the update task see Oracle Fusion Middleware Modeling and Implementation Guide for Oracle Business Process Management.
6.4 Communicating With Other Processes and ServicesOracle BPM enables you to define interactions across business processes within a process-oriented application. The following sections describe the BPMN flow objects used to model communication between processes.

Communicating With Other Processes and Services
Modeling Business Processes with Oracle BPM 6-17
This section describes how to use these flow objects to create process models using Business Process Composer. For information on how to implement these flow objects within a process-based application, see the Oracle Fusion Middleware Modeling and Implementation Guide for Oracle Business Process Management.
6.4.1 Introduction to the Service TaskThe service task enables you to communicate with other processes and services. Process analysts can add the service task when they know that a process must invoke an external service or process.
Process developers can then implement the necessary services. You can use the service task to invoke the following:
■ Other BPMN processes
■ BPEL processes
■ SOA service adapters
■ Mediators that are exposed as services
See Section 5.5.1, "How to Assign a Business Catalog Component to a Flow Object" for information on for procedures on how to assign elements from the business catalog to a service task.
The service task has similar behavior to the send and receive task pair and the message throw and catch event pair. The primary difference is that the service task is used to invoke processes and services synchronously. When the service task invokes a process or service, the token waits at the service task until a response is returned. After the response is received, the token continues to the next sequence flow in the process.
See "Using Service Tasks to Invoke Synchronous Operations in Services and BPMN Processes" in the Oracle Fusion Middleware Modeling and Implementation Guide for Oracle Business Process Management for more information on how to implement the service task with these types of processes and services.
Figure 6–19 shows the default notation for the service task.
Figure 6–19 The Service Task
The service task is represented by blue rectangle with two gears in the middle.
***********************************************************************************************
6.4.1.1 The Service Task in ContextFigure 6–20 shows an example of the service task used to save the finalized sales quote to a database.
Figure 6–20 The Service Task within the Sales Quote Example Process
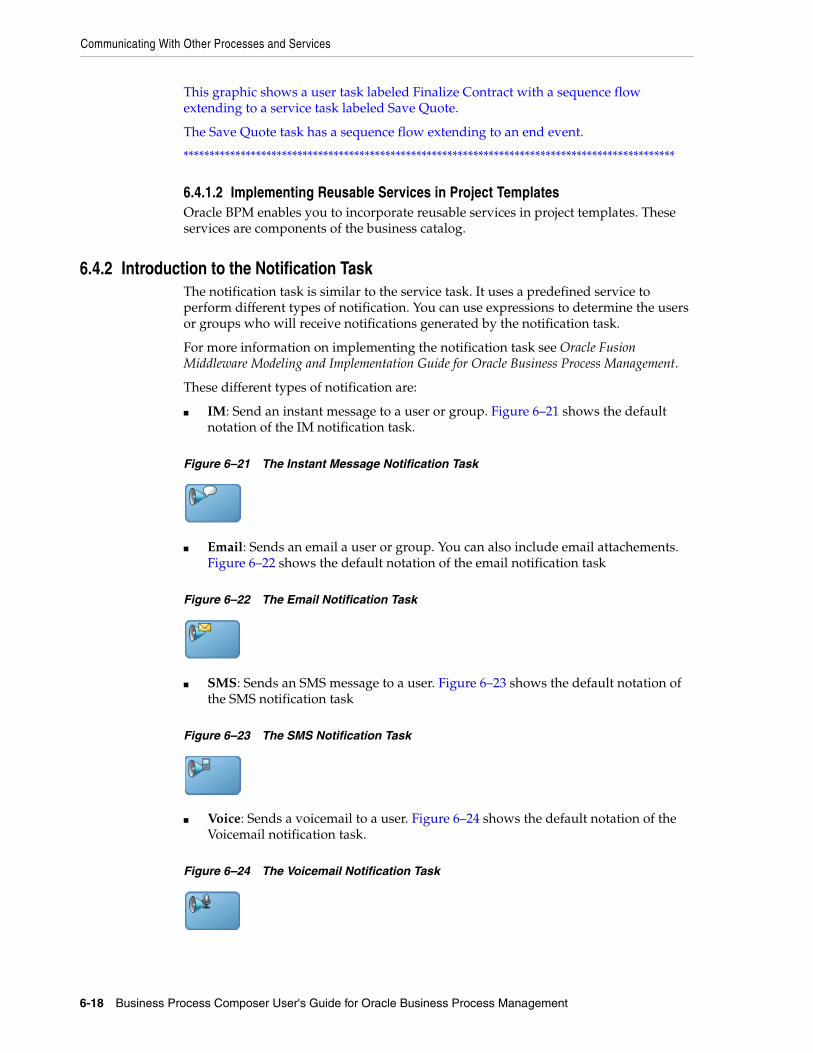
Communicating With Other Processes and Services
6-18 Business Process Composer User's Guide for Oracle Business Process Management
This graphic shows a user task labeled Finalize Contract with a sequence flow extending to a service task labeled Save Quote.
The Save Quote task has a sequence flow extending to an end event.
***********************************************************************************************
6.4.1.2 Implementing Reusable Services in Project TemplatesOracle BPM enables you to incorporate reusable services in project templates. These services are components of the business catalog.
6.4.2 Introduction to the Notification TaskThe notification task is similar to the service task. It uses a predefined service to perform different types of notification. You can use expressions to determine the users or groups who will receive notifications generated by the notification task.
For more information on implementing the notification task see Oracle Fusion Middleware Modeling and Implementation Guide for Oracle Business Process Management.
These different types of notification are:
■ IM: Send an instant message to a user or group. Figure 6–21 shows the default notation of the IM notification task.
Figure 6–21 The Instant Message Notification Task
■ Email: Sends an email a user or group. You can also include email attachements. Figure 6–22 shows the default notation of the email notification task
Figure 6–22 The Email Notification Task
■ SMS: Sends an SMS message to a user. Figure 6–23 shows the default notation of the SMS notification task
Figure 6–23 The SMS Notification Task
■ Voice: Sends a voicemail to a user. Figure 6–24 shows the default notation of the Voicemail notification task.
Figure 6–24 The Voicemail Notification Task

Communicating With Other Processes and Services
Modeling Business Processes with Oracle BPM 6-19
■ User: Sends a notification to a user based on the available notification types. For example, if a user has both a voicemail and email configured, the notification task will send both. Figure 6–25 shows the default notation of the User notification task.
Figure 6–25 The User Notification Task
6.4.3 Introduction to the Call ActivityThe call activity allows you to call a reusable process from within the current process. The process being called becomes a child process of the calling process. When calling a reusable process, the call activity of the parent process waits until the child process completes before continuing.
Figure 6–26 shows the default notation for the call activity.
Figure 6–26 The Call Activity
The call activity is represented by an empty rectangle.
***********************************************************************************************
Data objects of the parent process are not automatically available to the reusable process. Data objects must be passed to and from the child process using argument mapping of the call activity.
6.4.3.1 Reusable ProcessesOracle BPM supports a type of process called reusable processes. In BPMN terminology, this is sometimes referred to as a reusable subprocess. Reusable processes allow you to create processes that can be called from other BPMN processes.
Reusable processes allow you to create processes that can be called from other BPMN processes. For example all your processes may need to charge a credit card, so you can create a charge credit card reusable subprocess
Reusable processes have the following characteristics:
■ Must start with one none start event
■ Can contain multiple end events.
■ Can only be called by other BPMN processes.
6.4.4 Introduction to the Send TaskThe send task sends a message to a system or process outside the current process. After this message is sent, the task is complete and running of the process continues to the next task in the process flow.
The send task is frequently paired with the receive task to invoke a process or service and receive a response in return. The send and receive tasks are used to invoke
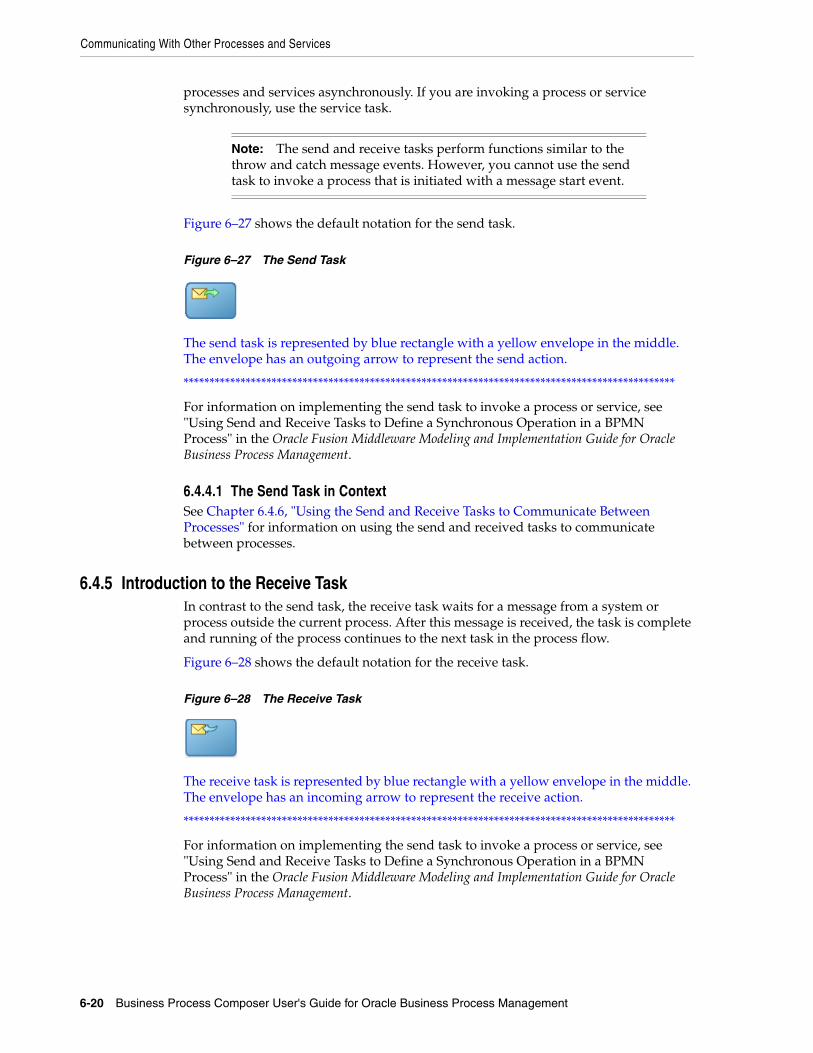
Communicating With Other Processes and Services
6-20 Business Process Composer User's Guide for Oracle Business Process Management
processes and services asynchronously. If you are invoking a process or service synchronously, use the service task.
Figure 6–27 shows the default notation for the send task.
Figure 6–27 The Send Task
The send task is represented by blue rectangle with a yellow envelope in the middle. The envelope has an outgoing arrow to represent the send action.
***********************************************************************************************
For information on implementing the send task to invoke a process or service, see "Using Send and Receive Tasks to Define a Synchronous Operation in a BPMN Process" in the Oracle Fusion Middleware Modeling and Implementation Guide for Oracle Business Process Management.
6.4.4.1 The Send Task in ContextSee Chapter 6.4.6, "Using the Send and Receive Tasks to Communicate Between Processes" for information on using the send and received tasks to communicate between processes.
6.4.5 Introduction to the Receive TaskIn contrast to the send task, the receive task waits for a message from a system or process outside the current process. After this message is received, the task is complete and running of the process continues to the next task in the process flow.
Figure 6–28 shows the default notation for the receive task.
Figure 6–28 The Receive Task
The receive task is represented by blue rectangle with a yellow envelope in the middle. The envelope has an incoming arrow to represent the receive action.
***********************************************************************************************
For information on implementing the send task to invoke a process or service, see "Using Send and Receive Tasks to Define a Synchronous Operation in a BPMN Process" in the Oracle Fusion Middleware Modeling and Implementation Guide for Oracle Business Process Management.
Note: The send and receive tasks perform functions similar to the throw and catch message events. However, you cannot use the send task to invoke a process that is initiated with a message start event.
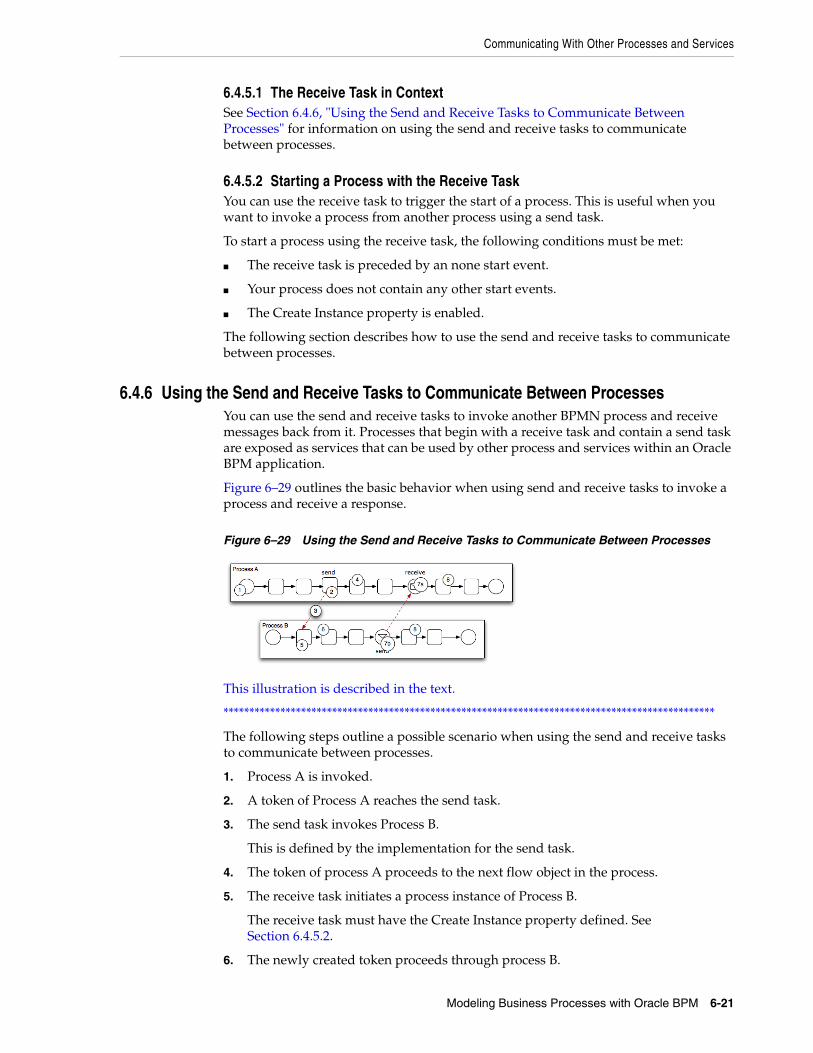
Communicating With Other Processes and Services
Modeling Business Processes with Oracle BPM 6-21
6.4.5.1 The Receive Task in ContextSee Section 6.4.6, "Using the Send and Receive Tasks to Communicate Between Processes" for information on using the send and receive tasks to communicate between processes.
6.4.5.2 Starting a Process with the Receive TaskYou can use the receive task to trigger the start of a process. This is useful when you want to invoke a process from another process using a send task.
To start a process using the receive task, the following conditions must be met:
■ The receive task is preceded by an none start event.
■ Your process does not contain any other start events.
■ The Create Instance property is enabled.
The following section describes how to use the send and receive tasks to communicate between processes.
6.4.6 Using the Send and Receive Tasks to Communicate Between ProcessesYou can use the send and receive tasks to invoke another BPMN process and receive messages back from it. Processes that begin with a receive task and contain a send task are exposed as services that can be used by other process and services within an Oracle BPM application.
Figure 6–29 outlines the basic behavior when using send and receive tasks to invoke a process and receive a response.
Figure 6–29 Using the Send and Receive Tasks to Communicate Between Processes
This illustration is described in the text.
***********************************************************************************************
The following steps outline a possible scenario when using the send and receive tasks to communicate between processes.
1. Process A is invoked.
2. A token of Process A reaches the send task.
3. The send task invokes Process B.
This is defined by the implementation for the send task.
4. The token of process A proceeds to the next flow object in the process.
5. The receive task initiates a process instance of Process B.
The receive task must have the Create Instance property defined. See Section 6.4.5.2.
6. The newly created token proceeds through process B.

Communicating With Other Processes and Services
6-22 Business Process Composer User's Guide for Oracle Business Process Management
7. Depending on the specific behavior of your process, the following scenarios may occur:
a. If the token of Process A reaches a receive task paired with a send task from Process B, the token of Process A waits until a response is received. After the response is received, the token of Process A continues to the next flow object.
b. If the token of Process B reaches a send task paired with a receive task in Process A, Process B sends a response to Process A. The token of Process B continues to the next flow object.
8. Both processes continue running. You can use subsequent send and receive pairs to define subsequent communication between the two processes.
6.4.7 Introduction to the Message Throw EventThe message throw event enables you to send a message to another process or service.
Figure 6–30 shows the default notation for the message throw event.
Figure 6–30 The Message Throw Event
The message throw is represented by two concentric circles with a blue envelope in the middle.
***********************************************************************************************
The throw message event can be used to invoke the following types of processes and services:
■ Other BPMN processes
■ BPEL processes
■ SOA service adapters
■ Mediators that are exposed as services
Process analysts may add message throw events to a process to define where a process must invoke another process or service. However, process developers are typically responsible for implementing the connectivity with other processes. Additionally, they are typically responsible for creating and implementing the services invoked by the message throw event.
For information on how to implement message throw events, see "Communicating With Other BPMN Processes and Services Using Message Events" in the Oracle Fusion Middleware Modeling and Implementation Guide for Oracle Business Process Management.
Message throw events are often used to invoke other BPMN processes by calling the message start event of another process. See Section 6.2.4, "Introduction to the Message Start Event" for more information.
Message throw events are also frequently used with message catch events to receive a response from the process or service invoked. However, they are always used asynchronously. After the message throw event sends a message to another process or service, the token immediately moves to the next flow object of the process.
If your process receives a response synchronously, use the service task to invoke the process or service. See Section 6.4.1, "Introduction to the Service Task" for more information.

Communicating With Other Processes and Services
Modeling Business Processes with Oracle BPM 6-23
6.4.8 Introduction to the Message Catch EventThe message catch intermediate event enables you to receive a message from another process or service.
Figure 6–31 shows the default notation for the message catch event.
Figure 6–31 The Message Catch Event
The message catch is represented by two concentric circles with a yellow envelope in the middle.
***********************************************************************************************
The message catch event is frequently used with the message throw event to communicate with another BPMN process. See Section 6.4.9 for information on how message throw events with message catch event.
For information on how to implement message throw events, see "Communicating With Other BPMN Processes and Services Using Message Events" in the Oracle Fusion Middleware Modeling and Implementation Guide for Oracle Business Process Management.
6.4.9 Using Message Throw and Catch Events to Communicate Between ProcessesYou can use combinations of throw and catch events to invoke and communicate with other BPMN processes. When using a throw event to invoke another process, the following conditions must be met:
■ The process being invoked must be an asynchronous process. Although you can use a message throw event to invoke a synchronous process, there is no mechanism for catching messages synchronously from the process.
If you invoke a synchronous process use the service task. See Section 6.4.1, "Introduction to the Service Task" for more information.
■ The first time you use a message throw event it must be paired to the message start event of the other process. This is required to trigger the process instance. After the instance has been triggered, you can use subsequent message throw events that are caught by the second process.
Processes that begin with a message start and end with a message end event are exposed as services that can be used by other process and services within an Oracle BPM application.
Processes invoked from another process are not considered child processes. This is important to consider when designing processes that use the terminate end event as a process end point. For example, a terminate event in the calling process does not stop processes invoked with a message throw event.
Figure 6–32 shows the basic behavior when using message throw and catch events to invoke a process and receive a response.
Note: The send and receive tasks perform functions similar to the throw and catch message events. However, you cannot use the message throw event to invoke a process that is initiated with a message receive task.
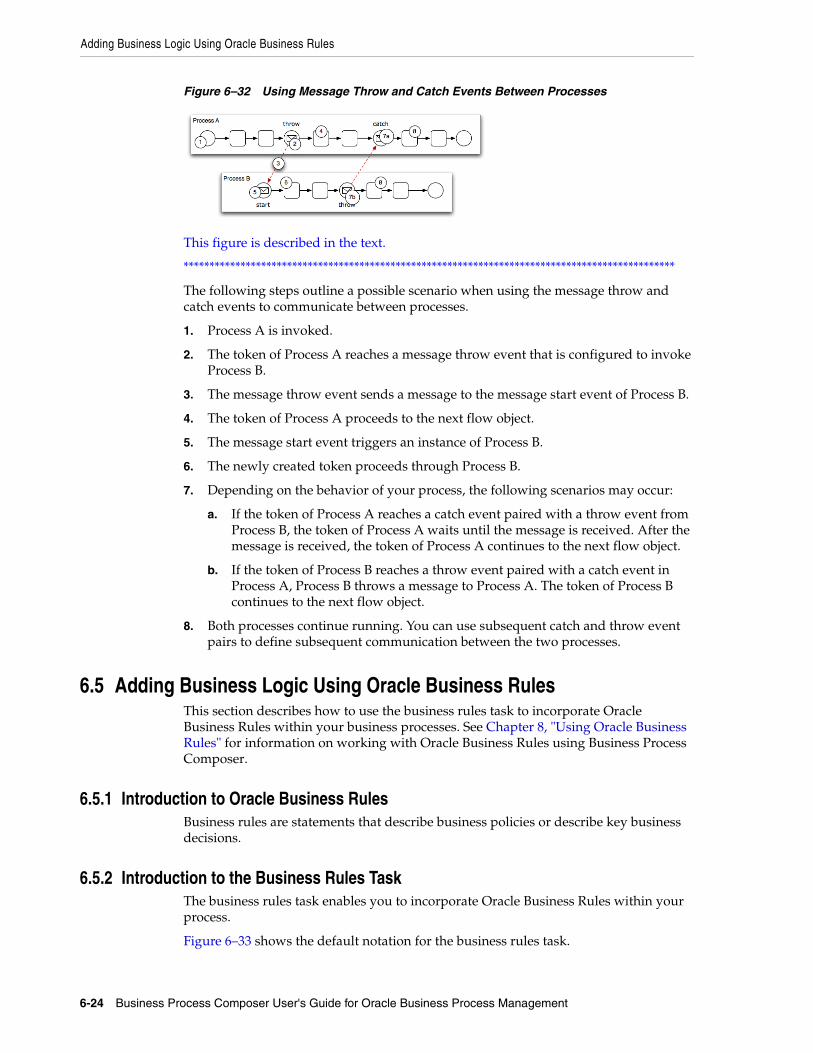
Adding Business Logic Using Oracle Business Rules
6-24 Business Process Composer User's Guide for Oracle Business Process Management
Figure 6–32 Using Message Throw and Catch Events Between Processes
This figure is described in the text.
***********************************************************************************************
The following steps outline a possible scenario when using the message throw and catch events to communicate between processes.
1. Process A is invoked.
2. The token of Process A reaches a message throw event that is configured to invoke Process B.
3. The message throw event sends a message to the message start event of Process B.
4. The token of Process A proceeds to the next flow object.
5. The message start event triggers an instance of Process B.
6. The newly created token proceeds through Process B.
7. Depending on the behavior of your process, the following scenarios may occur:
a. If the token of Process A reaches a catch event paired with a throw event from Process B, the token of Process A waits until the message is received. After the message is received, the token of Process A continues to the next flow object.
b. If the token of Process B reaches a throw event paired with a catch event in Process A, Process B throws a message to Process A. The token of Process B continues to the next flow object.
8. Both processes continue running. You can use subsequent catch and throw event pairs to define subsequent communication between the two processes.
6.5 Adding Business Logic Using Oracle Business RulesThis section describes how to use the business rules task to incorporate Oracle Business Rules within your business processes. See Chapter 8, "Using Oracle Business Rules" for information on working with Oracle Business Rules using Business Process Composer.
6.5.1 Introduction to Oracle Business RulesBusiness rules are statements that describe business policies or describe key business decisions.
6.5.2 Introduction to the Business Rules TaskThe business rules task enables you to incorporate Oracle Business Rules within your process.
Figure 6–33 shows the default notation for the business rules task.
Controlling Process Flow Using Sequence Flows
Modeling Business Processes with Oracle BPM 6-25
Figure 6–33 The Business Rule Task
The business rule task is represented by a rectangle with a gear icon in the center. The gear has two green arrows pointing outward.
***********************************************************************************************
There are two primary use cases for incorporating Oracle Business Rules within your business process.
■ Using structural rules
Structural rules enable you to perform calculations used within your business process. For example, you can use a business rule to calculate a credit score.
■ Using operative rules
Operative rules are used to make changes to the flow of your process. A typical use of an operative rule is to perform a check of the rule conditions within the rules catalog. Then, as part of the output data association, assign a value to a data object using an expression.
In this scenario, the business rules task is immediately followed by a gateway that is used to branch the process path according to the value of the data object.
See Section 6.5.2.1, "The Business Rule Task in Context" for information on how an operation rule is used within the Sales Quote example.
See Section 5.5.1, "How to Assign a Business Catalog Component to a Flow Object" for information on for procedures on how to assign elements from the business catalog to a business rules task.
6.5.2.1 The Business Rule Task in ContextFigure 6–34 shows an example of the business rules task within the Sales Quote example.
Figure 6–34 The Business Rules Task within the Sales Quote Example Process
This illustration is described in the text.
***********************************************************************************************
6.6 Controlling Process Flow Using Sequence FlowsThis section describes how to use sequence flows to define the behavior of your business process.

Controlling Process Flow Using Sequence Flows
6-26 Business Process Composer User's Guide for Oracle Business Process Management
6.6.1 Introduction to Sequence FlowsSequence flows define the order or sequence that work is performed within a process. Sequence flows connect the flow objects within your process and determine the path a process token follows through your process.
Incoming sequence flows are the sequence flows that lead into a flow object. Outgoing sequence flows are the sequence flows that determine the process path out of a flow object.
Most flow objects contain both incoming and outgoing sequence flows. Exceptions to this are start and end events. Start events can only contain outgoing sequence flows. End events can only contain incoming sequence flows. Additionally, event subprocesses do not have either incoming or outgoing sequence flows.
6.6.2 Introduction to Unconditional Sequence FlowsUnconditional sequence flows represent the typical path between two flow objects. Default sequence flows are displayed as a line with and arrow as shown in Figure 6–35.
Figure 6–35 The Unconditional Sequence Flow
This illustration is described in the text.
***********************************************************************************************
Most flow objects can contain only one default out going sequence flow. Only parallel gateways can contain multiple unconditional sequence flows which represent the parallel paths of your process.
Exclusive, inclusive, and conditional gateways cannot have unconditional outgoing sequence flows. These gateways use conditional and default sequence flows to determine the flow of your process.
6.6.3 Introduction to Conditional Sequence FlowsConditional sequence flows are used to control the flow of a process based on certain conditions. Like unconditional sequence flows, conditional sequence flows are displayed by an arrow lined arrow.
Figure 6–36 shows two outgoing conditional sequence flows and a default sequence flow.
Figure 6–36 Conditional and Default Sequence Flows
This graphic shows a process flow that passes to an exclusive gateway. From the exclusive gateway, there are two arrowed lines representing conditional sequence

Controlling Process Flow Using Gateways
Modeling Business Processes with Oracle BPM 6-27
flows that connect to two rectangles representing the conditional parts of a process flow. There is also an arrowed line with tic mark representing the default flow of the process path that is followed when none of the conditions evaluate to true.
***********************************************************************************************
Not all flow objects can use outgoing conditional sequence flows. Only the following types of gateways can have outgoing conditional sequence flows:
■ Exclusive gateways
■ Inclusive gateway (split)
The conditions used within a conditional sequence flow are defined using expressions. See Section 10.4, "Introduction to Expressions" for information on using the expression editor to define expressions.
6.6.4 Introduction to Default Sequence FlowsLike conditional sequence flows, default sequence flows are used as outgoing sequence flows to exclusive, inclusive, and conditional gateways. Default sequence flows represent the path your process will take out of these gateways when none of the conditions evaluate to true.
Default sequence flows are represented by an arrowed line with a tic mark on one end as shown in Figure 6–36.
6.7 Controlling Process Flow Using GatewaysThis section describes how to use gateways to control process flow and behavior.
6.7.1 Introduction to GatewaysGateways are flow elements that define the flow of your process. Gateways determine the path a token takes through a process. They define control points within your process by splitting and merging paths.
When possible, gateways are used for paths that are exceptions to or deviate from the default path of the process.
6.7.1.1 Split-Merge PairsThe following gateways require a split-merge pair:
■ Parallel gateway
■ Inclusive gateway
■ Complex gateway
When you add one of these gateways to a BPMN process, Oracle BPM Studio automatically creates the split and merge flow objects.
Although the merge portion of the gateway is required, you do not have to ensure that all paths out of the split return to the merge.
Although it is possible to have process paths that split at a gateway without merging through the gateway, this is not usually good practice. For more details on the merge behavior of gateways, see the following sections for each gateway type.

Controlling Process Flow Using Gateways
6-28 Business Process Composer User's Guide for Oracle Business Process Management
6.7.2 Introduction to the Exclusive GatewayThe exclusive gateway enables you to split your process into two or more paths. However, the process only continues down one of these paths even if multiple outgoing sequence flows are present. Exclusive gateways can have conditional outgoing sequence flows and must have at least one default outgoing sequence flow.
You can define expressions that are used to determine if your process continues down a conditional sequence flow. See Section 10.4, "Introduction to Expressions" for more information.
If your process has multiple outgoing sequence flows for an exclusive gateway, you can define the order in which they are evaluated. The order of evaluation is configured in the properties of the exclusive gateway.
If you have an exclusive gateway where more than one conditional evaluates to true, the process will continue down the first conditional sequence flow determined by this order.
Unlike other gateways, the exclusive gateway does not require a corresponding merge to be explicitly defined in your process after splitting.
Figure 6–37 shows the default notation for the exclusive gateway.
Figure 6–37 The Exclusive Gateway
The exclusive gateway is represented by a diamond-shaped icon with an X in the middle.
***********************************************************************************************
6.7.2.1 The Exclusive Gateway in ContextFigure 6–38 shows an example of the exclusive gateway used within the Sale Quote example. Here, the exclusive gateway is used to evaluate whether a review of business practices is required.
Figure 6–38 The Exclusive Gateway within the Sales Quote Example Process
Note: If you delete the merge gateway from a process, the corresponding split gateway is also deleted.

Controlling Process Flow Using Gateways
Modeling Business Processes with Oracle BPM 6-29
This figure shows an example of the exclusive gateway within the Sales Quote example. It contains an exclusive gateway that splits the process path in two, one path represents yes, the other no.
***********************************************************************************************
This evaluation is determined by the expression defined for the outgoing conditional sequence flow. If this evaluates to true, then the process flow proceeds down the Yes path. If it evaluates to false, then the process flow proceeds down the path of the default outgoing sequence flow.
6.7.2.2 Splitting and Merging Exclusive GatewaysWhen a token reaches an exclusive gateway the outgoing conditional sequence flows are evaluated until one of them evaluates to true. You can define the specific order in which these are evaluated by configuring a property for the exclusive gateway.
Based on this configuration, when the first conditional sequence flow evaluates to true, the token moves down this outgoing sequence flow to the next flow object. If you have multiple outgoing conditional sequence flows, you can determine the order in which they are evaluated.
If none of the outgoing conditional sequence flows evaluate to true, then the token moves down the default outgoing sequence flow. Therefore, you must define a default outgoing sequence flow for the exclusive gateway.
The exclusive gateway can also merge incoming sequence flows. However, there is no synchronization with other tokens that may be coming from other paths within the process flow.
6.7.3 Introduction to the Inclusive GatewayThe inclusive gateway enables you to split your process into two or more paths. Unlike the exclusive gateway, however, a token may flow down one or more of these paths depending on how the outgoing conditional sequence flows are evaluated.
You can have multiple outgoing conditional sequence flows for an inclusive gateway split. You must define at least one default sequence flow.
Figure 6–39 shows the default notation for the inclusive gateway split.
Figure 6–39 The Inclusive Gateway (Split)
The inclusive gateway split is represented by a diamond-shaped icon with a circle in the middle. It is shaded on the left-hand side to represent the split of the inclusive gateway.
***********************************************************************************************
Figure 6–40 shows the default notation for the inclusive gateway merge.
Note: If other tokens arrive at an exclusive gateway merge, then they are also passed through as is. If you are synchronizing tokens or perform evaluations on incoming sequence flows, you should use a different type of gateway.

Controlling Process Flow Using Gateways
6-30 Business Process Composer User's Guide for Oracle Business Process Management
Figure 6–40 The Inclusive Gateway (Merge)
The inclusive gateway merge is represented by a diamond-shaped icon with circle in the middle. It is shaded on the right-hand side to represent the merge of the inclusive gateway.
***********************************************************************************************
6.7.3.1 Splitting and Merging Inclusive GatewaysThe inclusive gateway splits a process similar to the exclusive gateway, but enables tokens to proceed down multiple outgoing sequence flow. When a token arrives at an inclusive gateway, the expressions of its conditional sequence flows are evaluated.
Next, a token is generated for each of the conditional sequence flows that evaluate to true. Additionally, a token is generated for the default sequence flow.
These tokens are joined at the merge of the inclusive gateway. When a token reaches the merge gateway, it waits until all of the tokens generated by the split have reached the merge. After all of the tokens have reached the merge of the inclusive gateway, the merge is complete, and the token continues to the next sequence flow after the gateway.
6.7.4 Introduction to the Parallel GatewayThe parallel gateway enables you to split your process into two or more paths when you want your process flow to follow all paths simultaneously. The parallel gateway is useful when your process must perform multiple tasks in parallel.
Figure 6–41 shows the default notation for the parallel gateway split.
Figure 6–41 The Parallel Gateway (Split)
The parallel gateway split is represented by a diamond-shaped icon with a plus sign in the middle. It is shaded on the left-hand side to represent the split of the parallel gateway.
***********************************************************************************************
Figure 6–42 shows the default notation for the parallel gateway merge.
Figure 6–42 The Parallel Gateway (Merge)
The parallel gateway merge is represented by a diamond-shaped icon with a plus sign in the middle. It is shaded on the right-hand side to represent the merge of the parallel gateway.
***********************************************************************************************
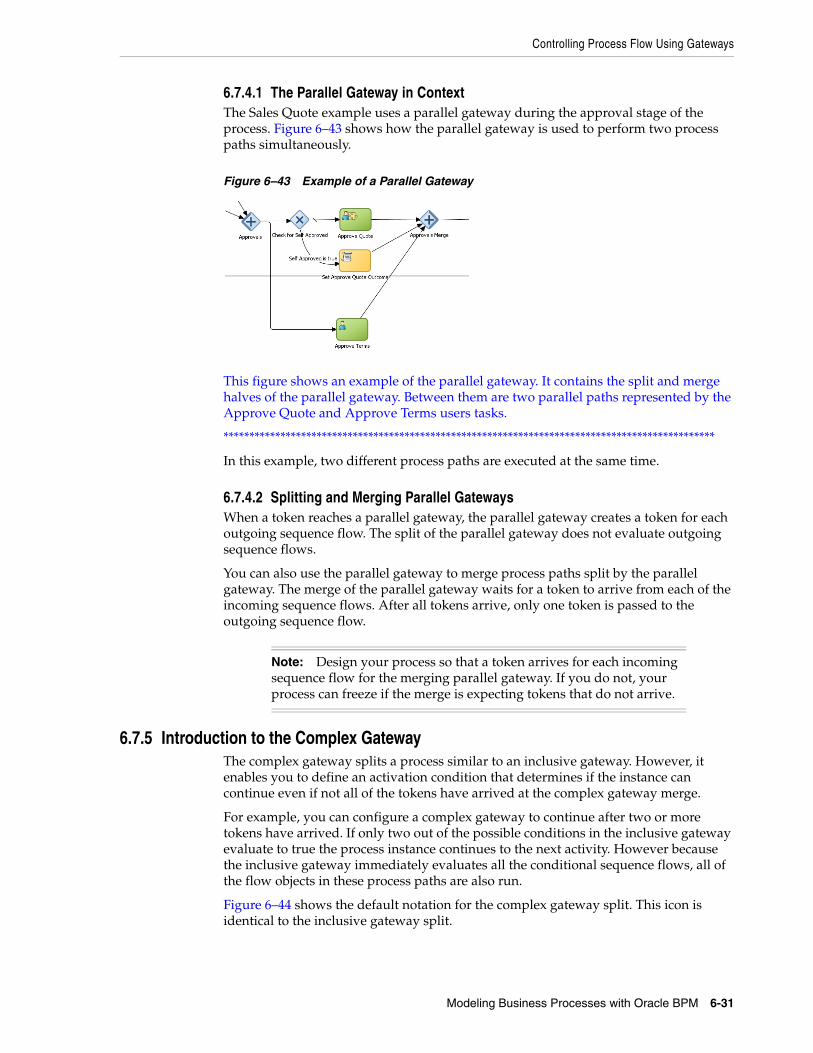
Controlling Process Flow Using Gateways
Modeling Business Processes with Oracle BPM 6-31
6.7.4.1 The Parallel Gateway in ContextThe Sales Quote example uses a parallel gateway during the approval stage of the process. Figure 6–43 shows how the parallel gateway is used to perform two process paths simultaneously.
Figure 6–43 Example of a Parallel Gateway
This figure shows an example of the parallel gateway. It contains the split and merge halves of the parallel gateway. Between them are two parallel paths represented by the Approve Quote and Approve Terms users tasks.
***********************************************************************************************
In this example, two different process paths are executed at the same time.
6.7.4.2 Splitting and Merging Parallel GatewaysWhen a token reaches a parallel gateway, the parallel gateway creates a token for each outgoing sequence flow. The split of the parallel gateway does not evaluate outgoing sequence flows.
You can also use the parallel gateway to merge process paths split by the parallel gateway. The merge of the parallel gateway waits for a token to arrive from each of the incoming sequence flows. After all tokens arrive, only one token is passed to the outgoing sequence flow.
6.7.5 Introduction to the Complex GatewayThe complex gateway splits a process similar to an inclusive gateway. However, it enables you to define an activation condition that determines if the instance can continue even if not all of the tokens have arrived at the complex gateway merge.
For example, you can configure a complex gateway to continue after two or more tokens have arrived. If only two out of the possible conditions in the inclusive gateway evaluate to true the process instance continues to the next activity. However because the inclusive gateway immediately evaluates all the conditional sequence flows, all of the flow objects in these process paths are also run.
Figure 6–44 shows the default notation for the complex gateway split. This icon is identical to the inclusive gateway split.
Note: Design your process so that a token arrives for each incoming sequence flow for the merging parallel gateway. If you do not, your process can freeze if the merge is expecting tokens that do not arrive.
Controlling Process Flow Using Gateways
6-32 Business Process Composer User's Guide for Oracle Business Process Management
Figure 6–44 The Complex Gateway (Split)
The complex gateway is represented by a diamond with an asterisk in the middle.
***********************************************************************************************
Figure 6–45 shows the default notation for the complex gateway merge.
Figure 6–45 The Complex Gateway (Merge)
The complex gateway is represented by a diamond with an asterisk in the middle.
***********************************************************************************************
6.7.6 Introduction to the Event-Based GatewayThe even-based gateway enables you to branch your process flow based on the possibility that an event may occur. Depending on the context, this may be one of several types of events.
The event-based gateway enables you to anticipate the possibility that several types of events may occur at a specific point in your process. It is similar to the exclusive gateway, but instead of choosing a path based on expressions, the event-based gateway chooses a path based on the occurrence of an event within your process.
For example, in an order processing process, you may reach a point in your process when there is no stock currently available. The process may need to wait until stock is available, but cannot wait indefinitely. By using an event-based gateway, your process can wait for a message saying new stock has been received (using a message catch event) or it can continue if no message is received after a certain amount of time has passed (using a timer event).
Figure 6–46 shows the default notation for the event-based gateway.
Figure 6–46 The Event-based Gateway
The event-based gateway is represented by a diamond-shaped icon with hexagon in the middle.
***********************************************************************************************
The event based gateway is different than other gateways in that decisions about process flow are based on an event rather than data-specific conditions.
The event based gateway is composed of the following:
■ The event-based gateway
■ Two or more target events. These can be of the following types:
– Message catch events

Controlling Process Flow Using Intermediate Events
Modeling Business Processes with Oracle BPM 6-33
When initiating a process using a message catch event, the process must be invoked using a message throw event.
– Timer catch events
Generally only one timer event is used following an event-based gateway.
– Receive tasks
You can use the receive task to initiate a process instance following an event-based gateway. However the process must be invoked from a send task within the calling process.
The target elements can only have incoming sequence flows from the event-based gateway. They cannot have sequence flows from other parts of the process.
Although the event-based gateway enables you to plan that multiple events may occur in your process, within the process instance, only one event is triggered. When the first event in the event-based gateway is triggered, the path that comes after that event is followed.
By default, when you add an event-based gateway to a process, it is created with a timer and message catch event.
6.7.6.1 Starting a Process with an Event-Based GatewayYou can also use an event-based gateway at the beginning of a process to create a new process instance. This is similar to having multiple start events within a process.
To enable an event-based gateway to create a new process instance, you must ensure the following:
■ You have enabled the Initiate property of the event-based gateway.
■ There are no incoming sequence flows to the event-based gateway.
Although the event-based gateway can be used to create a new process instance, it does not accept data input from another process. Any data that must be passed to the process instance must be configured using the target events.
6.8 Controlling Process Flow Using Intermediate EventsThis section describes intermediate events and describes how to use them to control the flow and behavior of your process.
6.8.1 Introduction to Intermediate EventsUnlike start and stop events, intermediate events occur during the flow of your process.
There are two types of intermediate events:
■ Normal flow events
Note: You cannot mix message events and receive tasks within the same event-based gateway.
Note: If you delete an event-based gateway, any outgoing sequence flow are also deleted. The associated events are not deleted.

Controlling Process Flow Using Intermediate Events
6-34 Business Process Composer User's Guide for Oracle Business Process Management
Normal flow events occur within the typical flow of your process.
■ Boundary events
Boundary events trigger an interruption with your process. Boundary events are associated with flow objects and can be configured to interrupt their usual behavior.
Boundary events behave similar to sequence flows in that they are used to determine the path a process takes between flow objects.
Boundary events can be divided into two types: interrupting and non interrupting.
6.8.2 Introduction to the Timer Catch EventTimer catch events enable you to control the flow of your process using a time condition. Possible uses of the time catch event include:
■ Creating a delay before running an activity
■ Configuring a deadline for an activity
■ Configuring a deadline for a process
■ Triggering additional activities after an elapsed time
Figure 6–47 shows the default notation for the timer catch event.
Figure 6–47 The Timer Catch Event
The timer catch event is represented by a two concentric circles with a clock icon in the middle.
***********************************************************************************************
You can use timer events as boundary events on an activity. Timer events can be defined as either interrupting or non interrupting boundary events.
When an interrupting timer event fires, the token leaves the main process flow to follow the flow the timer event defines. The flow that an interrupting timer event can return directly to the main process flow.
When a non interrupting event fires, a copy of the token is created and passes through the flow the timer event defines. The flow that a non interrupting event defines cannot return to the main process flow.
6.8.3 Introduction to the Error Catch EventError catch events are intermediate events used to handle an error that occurs within your process flow.
Error catch events are always used as boundary events and can be attached to the following:
■ Service Tasks
Note: You can also use inline handlers to handle error conditions that occur within your process.

Using Subprocesses and Inline Handlers to Organize Your Process
Modeling Business Processes with Oracle BPM 6-35
■ Call Activities
■ User Tasks
■ Send Tasks
■ Receive Tasks
■ Script Tasks
■ Rules Tasks
■ Subprocesses
Error catch events are always interrupting, meaning that they interrupt the usual flow of a process.
Figure 6–48 shows the default notation for the error catch event attached as a boundary event on a service task.
Figure 6–48 The Error Catch Event as a Boundary Event on a Service Task
This figure shows a service task with the error catch event as a boundary event. The service task is represented by a rectangular box containing two gears in the center. The error catch event is represented by two concentric circles with a lightning bolt in the center.
***********************************************************************************************
When a service or process fails with an error, the error catch event is triggered. This causes the process flow to follow the path of the outgoing sequence flow of the error catch event.
You can use this flow to define how you handle the error. This is handled in two ways:
■ The process flow returns to the main process flow. Any work that must be performed is handled within the error process flow before returning to the main flow.
■ The process flow continues to an end event. The process is stopped immediately. Process control is returned to the service or process that initiated the process.
6.9 Using Subprocesses and Inline Handlers to Organize Your ProcessYou can use subprocesses and inline handlers to organize your processes. This enables you to group functional areas together and also makes your processes more readable.
6.9.1 Introduction to SubprocessesSubprocesses allow you to group BPMN flow objects together to make your process more readable. In Oracle BPM, subprocesses are embedded subprocesses.
Note: If the boundary event is non-interrupting, the boundary flow cannot return to the main flow.

Using Subprocesses and Inline Handlers to Organize Your Process
6-36 Business Process Composer User's Guide for Oracle Business Process Management
Subprocesses are contained as part of the parent subprocess. Subprocesses must begin with a start none event and must end with a none end event.
Subprocesses can be expanded or collapsed. Figure 6–49 shows how a collapsed subprocess appears within a process.
Figure 6–49 Example of a Collapsed Subprocess
This figure shows an example of a collapsed subprocess. It shows three flow objects in a straight line: A service task, a subprocess, and a user task. Each is connected by a sequence flow. The collapsed subprocess displays a plus icon that expands the subprocess.
***********************************************************************************************
Figure 6–50 shows how an expanded subprocess appears within a process. When a subprocess is expanded, you can edit the flow objects within it. You can also click and drag the edge of the subprocess window to make the window larger or smaller.
Figure 6–50 Example of an Expanded Subprocess
This figure shows an example of an expanded subprocess. It shows three flow objects in a straight line: A service task, a subprocess, and a user task. Each is connected by a sequence flow. The expanded subprocess displays the flow objects contained within the subprocess. It also displays a minus icon that can be used to collapse the subprocess.
***********************************************************************************************
Similar to other types of processes, subprocesses have can contain start and end events and contain a separate process flow. A subprocess must begin with a none start event and end with a none end event. Subprocesses cannot contain swimlanes.
Subprocesses also behave similar to activities. They can have incoming and outgoing sequence flows. They also contain data associations that define the data objects used within the subprocesses.
Subprocesses can also contain timer, message, and error boundary events.
If necessary, your process can contain nested subprocesses. However, use nested subprocesses only when necessary to make your process more readable.
6.9.1.1 Subprocesses and Sequence FlowsThe flow objects within a subprocess cannot have sequence flows that connect to flow objects outside the subprocess.
Similar to other flow objects, subprocesses have incoming and outgoing sequence flows.

Using Subprocesses and Inline Handlers to Organize Your Process
Modeling Business Processes with Oracle BPM 6-37
6.9.1.2 Subprocesses in ContextFigure 6–51 show an example of a subprocess. In this example, a subprocess is used to group the service task used to process a sales quote.
Figure 6–51 Example of a Subprocess
This graphic shows a start event labeled Receive Quote From Supplier, which has a sequence flow extending to a User task labeled EnterQuote.
A sequence flow extends from the EnterQuote task to the expanded subprocess, illustrated as a rounded rectangle containing a process.
From the subprocess, a sequence flow extends to an end task labeled Send Response to Supplier.
***********************************************************************************************
6.9.1.3 Looping SubprocessesYou can configure a subprocess to repeat numerous times within the context of a process flow. This is something that a process analyst should consider when designing a process, but the implementation is performed by process developers.
6.9.2 Introduction to Inline HandlersInline handlers are types of subprocesses that allow you to model conditions that happen outside of a normal process flow.
Inline handlers can have the following start events:
■ Error start
■ Timer start
■ Message start
When you add an inline handler to your process, by default it is created with a message start event. You can change the type of start event if necessary.
Note: Looping cannot be configured using Oracle Business Process Composer. You must used Oracle BPM Studio to configure looping. See the Oracle Fusion Middleware Modeling and Implementation Guide for Oracle Business Process Management for more information.
Note: Inline handlers can only contain one start event. However, you can have multiple inline handlers within your process.

Changing the Value of Data Objects in Your Process
6-38 Business Process Composer User's Guide for Oracle Business Process Management
6.10 Changing the Value of Data Objects in Your ProcessThis section describes how to use the script task to change the values of data objects within your process. See Chapter 10, "Working with Data Objects and Expressions" for general information about data objects.
6.10.1 Introduction to the Script TaskThe script task is used to change values of data objects within your process. The script task is used when you want to show this change explicitly within your business process or when you must change the values of data objects outside of another flow object. It is often used to set initial values of data objects at the beginning of a process.
Figure 6–52 shows the default notation for the script task.
Figure 6–52 The Script Task
The script task is represented by a yellow rectangle with a scroll icon in the middle.
***********************************************************************************************
Script tasks are added to a process by process developers who are responsible for defining the behavior of data objects within a process and process-based application.
6.10.1.1 The Script Task in ContextFigure 6–53 shows two examples of the script task used at the beginning of the Sales Quote example. The Sales Quote example uses a script task to set initial values for data objects when the process instance is created and to set values for several business indicators.
Figure 6–53 The Script Task within the Sales Quote Example
This graphic shows a start event with a sequence flow extending to a script task labeled Initialize Quote.
From the initialize quote task, a sequence flow extends to a user task labeled Enter Quote.
From the Enter Quote task, a sequence flow extends to a script task labeled Set Business Indicators.
***********************************************************************************************
Project data objects are data objects that you define in a project. All processes within a project have access to the data object defined, though the value changes according to

Measuring Process Performance Using Measurement Marks
Modeling Business Processes with Oracle BPM 6-39
the process using them. In addition, the engine stores the value of those marked as business indicators to the process analytics databases if the project is configured to use them.
Figure 6–54 shows the data associations used to set initial values for the business indicators.
Figure 6–54 Data Associations Used by the Set Business Indicators Script Task
This figure shows how the data associations editor appears for the Set Business Indicators script task in the Sales Quote example. It contains two columns. On the left is a list of data objects representing the input arguments to the script task. On the right are the three data objects that these are mapped to.
***********************************************************************************************
As with other flow objects that accept data associations, you can use expressions to change the values of data objects. Figure 6–55 shows how an expression is used to change the value of the discount project variable.
Figure 6–55 Expression Used to Change the Value of Discount Project Variable
This figure shows an example of the expression editor show the expression used to define the value of the discount project variable. The value of the expression is:
round(quote.summary.effectiveDiscount * 100).
***********************************************************************************************
6.11 Measuring Process Performance Using Measurement MarksYou can measure process performance using measurement marks. Measurement marks enable you to measure a business indicator of type measure at a certain point in the process or in a section of the process.
For more information on using measurement marks and the Process Analytics database, see "Using Process Analytics" in the Oracle Fusion Middleware Modeling and Implementation Guide for Oracle Business Process Management.
A measurement mark stores the following data into the Process Analytics databases:
■ The value of the process default measures
■ The value of the measure business indicators associated with that measurement mark

Measuring Process Performance Using Measurement Marks
6-40 Business Process Composer User's Guide for Oracle Business Process Management
■ The value of the dimensions defined in the process
You can use one measurement mark to measure multiple business indicators.
When storing the value of a measure business indicator, the BPMN service engine also stores the value of the dimensions you defined in your process. Later on, when you build the dashboards to monitor your process, you can use these dimensions to group the values into different categories. For example, in the Sales Quote example you might want to view the total number of quotes approved by region.
The types of measurement marks you can define are:
■ Single measurement
■ Interval start
■ Interval stop
6.11.1 How to Add a Measurement Mark to a ProcessYou can add measurement marks to your business processes by dragging the from the component palette to the process editor canvas.
To add a single measurement mark to a process:1. Open the BPMN process.
2. In the Component Palette, expand the Artifacts section and select from following:
■ Start measurement mark
■ End measurement mark
■ Single measurement mark (Snapshot)
3. Place the measurement mark near the sequence flow where you want to measure a business indicator. When the sequence flow turns blue, drop the measurement mark.
4. Right-click the measurement mark and select Properties.
5. In the Name field, enter a name to identify the measurement mark.
6. In the Business Indicators section, select a business indicator from the list of available business indicators and move it to the Selected list using the arrows between the two lists.
7. Click OK.
Note: You can measure multiple business indicators in the same measurement mark.
Note: If you do not select a business indicator, then this measurement mark only stores the value of the default business indicators. If you want to add a business indicator without leaving the Measurement Mark Properties dialog, then click the New button under the Selected list.

Working with the Project Life Cycle 7-1
7Working with the Project Life Cycle
This chapter describes some of the advanced features related to BPM projects and how to work with them within the development life-cycle.
This chapter includes the following sections:
■ Section 7.1, "Importing and Exporting Projects"
■ Section 7.2, "Using BPM Project Templates"
■ Section 7.4, "Configuring Approval Workflow for a Project"
■ Section 7.5, "Deploying a Project"
7.1 Importing and Exporting ProjectsBusiness Process Composer enables you to import and export BPM projects as .exp files. This enables you to share projects directly with other Business Process Composer and BPM Studio users directly through the files system without having to use the BPM repository.
7.1.1 How to Import a Project from Your Local File SystemYou can import a BPM project that was previously exported and saved as a .EXP file. The imported project is stored in the BPM repository.
To import a project:1. Access the application welcome page.
2. From the main menu, select Import, then select Import Project
The main menu is accessible from the upper left-hand corner of the Business Process Composer user interface as shown in Figure 7–1.
Figure 7–1 The Application Composer Main Menu
This graphic displays the Application Composer Main Menu.
Using BPM Project Templates
7-2 Business Process Composer User's Guide for Oracle Business Process Management
***********************************************************************************************
3. Click Browse, then select the project file you want to import.
4. Click OK.
5. Enter a name for the project.
After you select a project file to import, the name field is automatically propagated.
6. Enter an optional description.
7. If you want to optionally select a folder within the BPM repository where the imported project will be created, click Browse, then select the folder.
8. Click OK to import the project into the BPM repository.
7.1.2 How to Export a Project to Your Local File SystemProjects exported from Business Process Composer can be imported into Oracle BPM Studio. Exporting a project to your local file system enables you to share projects without using the Oracle BPM MDS repository.
For information on importing a project into Oracle BPM Studio see the Oracle Fusion Middleware Modeling and Implementation Guide for Oracle Business Process Management.
To export a project as an EXP file:1. Open the project you want to export.
2. From the main menu, select Export, then select Export Project.
3. Choose a location on your local file system and click Save.
Your exported project is saved as a.EXP file on your local file system.
To export a project as an Oracle Tutor file:1. Open the project you want to export.
2. From the main menu, select Export, then select Export Oracle Tutor.
3. Select one of the following:
■ Active process: Selects the currently active process.
■ All open processes: Exports only the processes that are currently open.
■ All processes of project: Exports all of the processes of the current project.
4. Click OK.
The file is saved as a ZIP file on your file system.
7.2 Using BPM Project TemplatesThe following sections provides information how to create and use Oracle BPM projects.
7.2.1 Introduction to Project TemplatesProject templates enable business users to quickly create custom Oracle BPM applications and deploy them to runtime without assistance from developers. Using Oracle Business Process Composer business users can create new BPM projects based

Using BPM Project Templates
Working with the Project Life Cycle 7-3
on project templates. These projects contain BPMN process flows and can be deployed directly to run time.
Project templates enable you to incorporate reusable components and services including Human Tasks, Business Rules, and Adapters. These services are stored as part of the business catalog.
Business Process Composer users who have administrative privileges can also import project templates directly from their local file system. See Chapter 12, "Performing Administrative Tasks" for more information.
Using Oracle BPM Studio process developers can convert a normal project to a template and publish it to the Oracle BPM repository. After a template is available in the repository, you can create new projects based on the template using Business Process Composer.
See the Oracle Fusion Middleware Modeling and Implementation Guide for Oracle Business Process Management for more information on creating process templates.
Project templates are based on normal Oracle BPM projects and generally have all the required implementation and services defined in the business catalog. However, they often do not have all of the required services assigned to the necessary flow objects. After creating a new project based on a project template, a business analyst can assign business catalog components to the necessary flow objects.
The specific services required for each activity are defined by the editor policies of the project template. After the process analyst incorporates the required services, the project can be deployed to Oracle BPM run time.
7.2.1.1 Introduction to Edit PoliciesProject templates also allow you to define edit policies for processes and flow objects within a process. Edit policies determine what parts of a process can be changed or edited when creating a new project based on a project template. Edit policies are defined for the entire process. However, you can also define edit policies for individual flow objects.
See the Oracle Fusion Middleware Modeling and Implementation Guide for Oracle Business Process Management for information on defining edit policies in a process template.
Edit policies allow the creator of a project template to define what elements of a process can and cannot be changed when a project is created from a template.
7.2.1.1.1 Process Level Edit Policies Within a project template, each process contains an edit policy which determines the changes you can make to the process using Business Process Composer.
Table 7–1 describes the process level edit policies.
Note: You cannot change the edit policy settings of processes and elements using Business Process Composer.
Table 7–1 Process Level Edit Policies
Edit Policy Description
Activity Sealed User cannot make any changes to the activities within the process.

Using BPM Project Templates
7-4 Business Process Composer User's Guide for Oracle Business Process Management
7.2.1.1.2 Component Level Edit Policies Within a process, there are also edit policies that apply to the flow objects within a process. Component level edit policies can be configured for the flow objects within a process.
Table 7–2 describes the edit policies values that can be configured for component level edit policies.
7.2.1.2 Introduction to Using Data Objects and Variables in Project TemplatesA project template can define the data objects used within a project. These can be the Oracle BPM default types or complex data objects created by process template developers within Oracle BPM Studio.
When editing a project based on a project template in Business Process Composer, you can add and create new data objects as necessary. However, you can only create new data objects based on types that are previously defined in the project template. You cannot create new types of complex data objects.
You can use any of the data objects defined in a project template in data associations and expressions. See Section 10, "Working with Data Objects and Expressions" for more information.
7.2.2 Creating a Project Based on a Project TemplatesUsing Business Process Composer you can create new projects based on project templates.
To create a new project from a project template:1. Launch Oracle Business Process Composer.
2. From the main menu select New, then select New Project.
3. Enter a name for you project
4. Select Use Template, then click Choose.
5. Select the template you want to use.
6. Optionally, choose the folder where you want to store the new project.
7. Click Next
Flow Sealed The overall flow of the process cannot be changed. A user can edit specific implementation details, but cannot change the process flow
Table 7–2 Component Level Edit Policies
Edit Policy Description
Sealed The flow object cannot be modified
Can modify implementation The user may redefine this flow object if necessary.
Must implement The user is required to assign a component from the business catalog to this flow object for it to function correctly.
Use process permission Uses the default edit policy defined by the process.
Table 7–1 (Cont.) Process Level Edit Policies
Edit Policy Description
Using Project Snapshots
Working with the Project Life Cycle 7-5
8. From the drop-down list, choose the type of approval routing you want to configure for the project.
9. Click Choose, then select Users or Groups from the drop-down menu in the browser.
10. Click Search to see a list of available users or groups.
11. Select an item from the Available list, then click Move selected items to other list.
12. Click OK.
13. Click Finish to create the new project.
7.3 Using Project SnapshotsThe following sections describe how to use project snapshots.
7.3.1 Introduction to Project SnapshotsA project snapshot is a read-only copy of a project at a particular moment. Since snapshots are read-only, they cannot be modified or opened for editing. You can view the contents of a project snapshot as well as export and deploy a project based on a snapshot.
7.3.2 Working with Project SnapshotsThe procedures in this section describe how to create and manage project snapshots.
7.3.2.1 How to Create a New Project SnapshotYou can create a new project snapshot from the project welcome page.
To create a new project snapshot:Users with owner and editor permissions on a project can create new snapshots.
1. Go to the project welcome page, then expand Snapshots.
2. Click New.
3. Enter a name for your snapshot, then click Create Snapshot.
The snapshot appears in the list of snapshots defined for this project, including the date the snapshot was created and the user ID of the snapshot creator.
7.3.2.2 How to View the Contents of a Project SnapshotViewing the contents of a project snapshot enables you to view and compare previous version of a project with the current one.
To view the contents of a project snapshot:1. Go to the project welcome page.
2. Expand Snapshots, then click the name of the snapshot you want to view.
Note: You can change the type of approval routing after you create the new project.
Configuring Approval Workflow for a Project
7-6 Business Process Composer User's Guide for Oracle Business Process Management
Within the snapshot view, you can view the state of the processes, rules, and human tasks associated with the project.
7.3.2.3 How to Return to the Active Version of a ProjectTo return to the active version of a project from a project snapshot, click the Back to Active Version button at the top of the project welcome page.
7.3.2.4 How to Delete a Project SnapshotOnly users with owner permissions on a project can delete a project snapshot.
1. Open your project.
2. From the project welcome page, expand Snapshots.
3. Select the snapshot you want to delete from the list, then click Delete.
4. Click Yes to confirm that you want to delete the project snapshot.
Once you delete a project snapshot, it cannot be recovered.
7.3.2.5 How to Export a Project Snapshot1. Open your project.
2. View the project snapshot you want to export.
3. From the main menu, select Export, then Export Project.
4. Choose a location on your local file system and click Save.
The exported project snapshot is saved as a .EXP file on your file system.
7.3.2.6 How to Deploy a Project Snapshot1. Open your project.
2. View the project snapshot you want to deploy.
3. From the main menu, select Deploy Project.
4. Provide the information as shown in Figure 7–2.
5. Click Deploy.
7.4 Configuring Approval Workflow for a ProjectThe following sections describe how to configure the approval workflow for a project.
7.4.1 Introduction to Approval WorkflowApproval workflow defines the approval process that must be followed before an Oracle BPM project can be deployed to run time using Business Process Composer. You can define the approval workflow when you create a new project, or you can configure it later. You can view the approval workflow defined for a project in the project properties box of the project welcome page.
Table 7–3 describes the different types of approval workflow available in Oracle BPM.
Deploying a Project
Working with the Project Life Cycle 7-7
7.4.2 Working with Approval WorkflowThe following sections describe how to configure approval workflow for a project and how to perform approvals as part of the workflow.
7.4.2.1 How to Configure Approval Workflow for a ProjectBusiness Process Composer enables you to configure the type of approval workflow when you create a new project. You can also configure approval workflow after the project has been create.
To configure approval workflow for a project:1. Go to the project welcome page.
2. Ensure that you are editing the project.
3. Click Edit in the project information area.
4. Select the type of approval workflow, then click Apply.
5. Click Choose, then select Users or Groups from the drop-down menu in the browser.
6. Click Search to see a list of available users or groups.
7. Select an item from the Available list, then click Move selected items to other list.
8. Click OK.
9. Click Apply.
7.5 Deploying a ProjectYou can use Business Process Composer to deploy a project to the Oracle BPM run time. Deployment is available only within the same environment where the Business Process Composer application is installed.
7.5.1 Introduction to the Deployer Security RoleBusiness Process Composer uses the Deployer security role to allow process analysts and developers to deploy projects directly to Oracle BPM run time. When a user is assigned the Deployer security role, the Deploy Project option is available from the Tools menu.
You can assign this security role to users or groups using the Business Process Composer administration tool.
Table 7–3 Approval Routing
None No approval workflow is specified. Any user granted the deployer security role can deploy the project directly to Oracle BPM run time.
Simple Specifies only one approver in the workflow.
Simple Sequential Specifies a sequential list of approvers. All users must take action in order to approve deployment of the project.
Simple FYI Sends notification that a project is being deployed, but approval workflow does not wait for approvers to process the task.
Parallel Specifies a list of approvers who must approve the project deployment concurrently and in parallel.

Deploying a Project
7-8 Business Process Composer User's Guide for Oracle Business Process Management
7.5.2 How to Deploy a Project to Run TimeUsers who are assigned the deployer role can deploy projects directly to Oracle BPM run time. The deployer role does not require approval from other BPM users. The following procedures define how to deploy a project when approval workflow is not enabled.
To deploy a project to run time:1. From the main menu select Deployment, then select Deploy Project.Deploy
Project.
Business Process Composer validates the project. If there are no errors in the project, the deployment process continues.
2. Provide the required information in the Deploy Project dialog shown in Figure 7–2.
Figure 7–2 The Deploy Project Dialog
This graphic is described in the text.
***********************************************************************************************
The properties in the Deploy Project dialog are described in the following table.
Table 7–4 The Deploy Project Dialog Properties
Project Displays the name of the project
Version Use to select the version of the project you want to deploy. This can be the current version of the project or a project snapshot.
Last Revision ID Displays the revision ID of the most recent deployed version of the project.
New Revision ID Specifies a revision ID for the deployed application. This ID can must be of the form:
n0[.n1[.n2[.n3[.n4]]]][-milestone-name[milestone-number]/_patch-number.
Override the default deployment version
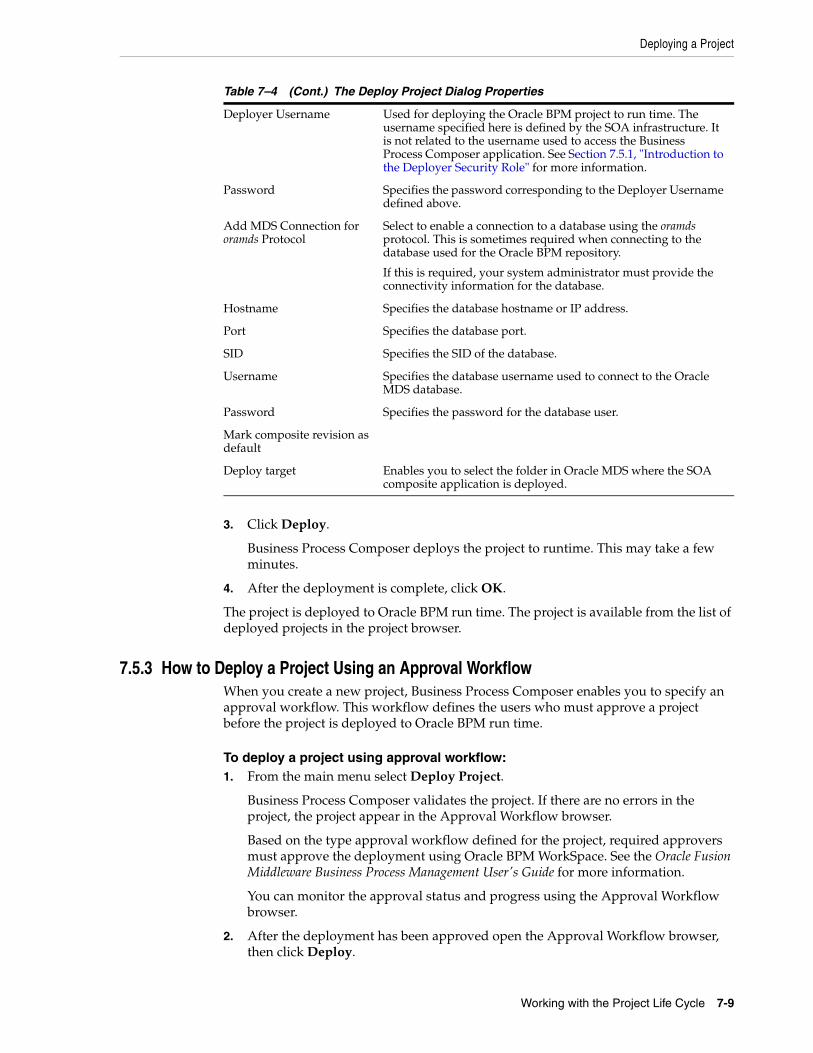
Deploying a Project
Working with the Project Life Cycle 7-9
3. Click Deploy.
Business Process Composer deploys the project to runtime. This may take a few minutes.
4. After the deployment is complete, click OK.
The project is deployed to Oracle BPM run time. The project is available from the list of deployed projects in the project browser.
7.5.3 How to Deploy a Project Using an Approval WorkflowWhen you create a new project, Business Process Composer enables you to specify an approval workflow. This workflow defines the users who must approve a project before the project is deployed to Oracle BPM run time.
To deploy a project using approval workflow:1. From the main menu select Deploy Project.
Business Process Composer validates the project. If there are no errors in the project, the project appear in the Approval Workflow browser.
Based on the type approval workflow defined for the project, required approvers must approve the deployment using Oracle BPM WorkSpace. See the Oracle Fusion Middleware Business Process Management User's Guide for more information.
You can monitor the approval status and progress using the Approval Workflow browser.
2. After the deployment has been approved open the Approval Workflow browser, then click Deploy.
Deployer Username Used for deploying the Oracle BPM project to run time. The username specified here is defined by the SOA infrastructure. It is not related to the username used to access the Business Process Composer application. See Section 7.5.1, "Introduction to the Deployer Security Role" for more information.
Password Specifies the password corresponding to the Deployer Username defined above.
Add MDS Connection for oramds Protocol
Select to enable a connection to a database using the oramds protocol. This is sometimes required when connecting to the database used for the Oracle BPM repository.
If this is required, your system administrator must provide the connectivity information for the database.
Hostname Specifies the database hostname or IP address.
Port Specifies the database port.
SID Specifies the SID of the database.
Username Specifies the database username used to connect to the Oracle MDS database.
Password Specifies the password for the database user.
Mark composite revision as default
Deploy target Enables you to select the folder in Oracle MDS where the SOA composite application is deployed.
Table 7–4 (Cont.) The Deploy Project Dialog Properties

Deploying a Project
7-10 Business Process Composer User's Guide for Oracle Business Process Management
7.5.4 How to Edit a Deployed ProjectYou can use Business Process Composer to open deployed Oracle BPM projects. Opening a deployed project enables you to edit the Oracle Business Rules contained in the project and deploy your changes back to Oracle BPM run time.
See Section 8.4, "Editing Oracle Business Rules at Run Time" for more information on editing Oracle Business Rules at run time.
To open a deployed project:1. Launch Business Process Composer.
2. From the main menu, select Open a Deployed Project.
3. Select a project from the Project navigator.
4. Click Refresh to ensure you see the latest contents of the Oracle BPM repository.
5. Click OK.
7.5.5 How to Generate a Project SAR FileYou can generate a project as a SAR file from Business Process Composer. Your system administrator can use this file to deploy a project using the Oracle Enterprise Manager administration console.
To generate a project SAR file:1. From the main menu, select Deployment, then select Generate Project SAR file.
Business Process Composer validates the project. If the project contains errors, these are displayed in the project validation tab.
2. Select the project version you want to use to generate the SAR file. This can be the current version of the project or a project snapshot.
3. Enter a revision ID.
4. If required, select the following options:
■ Override the default deployment version
■ Add MDS database connection for the oramds protocol: Select to enable a connection to a database using the oramds protocol. This is sometimes required when connecting to the database used for the Oracle BPM repository.
5. Click OK.
6. If the project contains no errors, click OK to save the SAR file to your local file system.
7.5.6 How to Generate a Deployment Plan
To generate a deployment plan:1. From the main menu, select Deployment, then select Generate Deployment Plan.
2. Select a location on your local file system, then click OK.
Using Oracle Business Rules 8-1
8Using Oracle Business Rules
This chapter describes how to use the Oracle Business Rules editor that is part of Business Process Composer. It contains a general introduction to Oracle Business Rules and provides tasks for working with them.
This chapter includes the following sections:
■ Section 8.1, "Introduction to Oracle Business Rules"
■ Section 8.2, "Introduction to the Business Process Composer Rules Editor"
■ Section 8.3, "Viewing and Editing Business Rules in Business Process Composer"
■ Section 8.4, "Editing Oracle Business Rules at Run Time"
■ Section 8.5, "Assigning a Rule to a Business Rules Task"
8.1 Introduction to Oracle Business RulesThis section provides a brief introduction to Oracle Business Rules.
Business rules are statements that describe business policies or describe key business decisions. For example, business rules include:
■ Business policies such as spending policies and approval matrices.
■ Constraints such as valid configurations or regulatory requirements.
■ Computations such as discounts or premiums.
■ Reasoning capabilities such as offers based on customer value.
For example, a car rental company might use the following business rule:
IFRental_application.driver age < 21THENmodify Rental_application(status: "Declined")
An airline might use a business rule such as the following:
IFFrequent_Flyer.total_miles > 10000THEN
Note: You cannot create new business rules or rules dictionaries using Business Process Composer. You can edit rules dictionaries that were defined as part of the business catalog of a project template.

Introduction to Oracle Business Rules
8-2 Business Process Composer User's Guide for Oracle Business Process Management
modify Frequent_Flyer (status : "GOLD")
A financial institution could use a business rule such as:
IFApplication_loan.income < 10000THENmodify Application_loan (deny: true)
These examples represent individual business rules. In practice, you can use Oracle Business Rules to combine many business rules or to use more complex tests.
Oracle Business Rules allow process analysts to change policies that are expressed as business rules, with little or no assistance from a process developers. Applications using Oracle Business Rules support continuous change that enables the applications to adapt to new government regulations, improvements in internal company processes, or changes in relationships between customers and suppliers.
Business rules follow an if-then structure and consists of two parts:
■ If part: a condition or pattern match.
■ Then part: a list of actions.
Alternatively, you can express rules in a spreadsheet-like format called a decision table.
8.1.1 Introduction to Rule ConditionsThe rule IF part is composed of conditional expressions, rule conditions, that refer to facts. For example:
IF Rental_application.driver age < 21
The conditional expression compares a business term (Rental_application.driver age) to the number 21 using a less than comparison.
The rule condition activates the rule whenever a combination of facts makes the conditional expression true. In some respects, the rule condition is like a query over the available facts in the Rules Engine, and for every row returned from the query the rule is activated.
8.1.2 Introduction to Rule ActionsThe rule THEN part contains the actions that are run when the rule is fired. A rule is fired after it is activated and selected among the other rule activations using conflict resolution mechanisms such as priority. A rule might perform several kinds of actions. An action can add facts, modify facts, or remove facts. An action can run a Java method or perform a function which may modify the status of facts or create facts.
Rules fire sequentially, not in parallel. Note that rule actions often change the set of rule activations and thus change the next rule to fire.
8.1.3 Introduction to Decision TablesA Decision Table is an alternative business rule format that is more compact and intuitive when many rules are needed to analyze many combinations of property values. You can use a Decision Table to create a set of rules that covers all combinations or where no two combinations conflict.

Introduction to the Business Process Composer Rules Editor
Using Oracle Business Rules 8-3
8.1.4 Introduction to Facts and BucketsetsIn Oracle Business Rules, facts are the objects that rules reason on. Each fact is an instance of a fact type. You must import or create one or more fact types before you can create rules.
In Oracle Business Rules a fact is an asserted instance of a class. The Oracle Business Rules run time or a developer writing in the RL Language uses the RL Language assert function to add an instance of a fact to the Oracle Business Rules Engine.
In Rules Designer you can define a variety of fact types based on, XML Schema, Java classes, Oracle RL definitions, and ADF Business Components view objects. In the Oracle Business Rules run time such fact type instances are called facts.
You can create bucketsets to define a list of values or a range of values of a specified type. After you create a bucketset you can associate the bucketset with a fact property of matching type. Oracle Business Rules uses the bucketsets that you define to specify constraints on the values associated with fact properties in rules or in Decision Tables. You can also use bucketsets to specify constraints for variable initial values and function return values or function argument values.
8.1.5 Introduction to RulesetsA ruleset is an Oracle Business Rules container for rules and Decision Tables. A ruleset provides a namespace, similar to a Java package, for rules and Decision Tables. In addition you can use rulesets to partially order rule firing.
8.1.6 Introduction to Decision FunctionsA decision function provides a contract for invoking rules from Java or SOA (from an SOA composite application or from a BPEL process). The contract includes input fact types, rulesets to run, and output fact types.
8.1.7 Introduction to Decision PointsOracle Business Rules SDK (Rules SDK) provides APIs that let you write applications that access, create, modify, and run rules in Oracle Business Rules dictionaries (and all the contents of a dictionary). The Rules SDK provides the Decision Point API to access and run rules or Decision Tables from a Java application.
8.1.8 Introduction to DictionariesA dictionary is an Oracle Business Rules container for facts, functions, globals, bucketsets, links, decision functions, and rulesets. A dictionary is an XML file that stores the application's rulesets and the data model. Dictionaries can link to other dictionaries. Oracle JDeveloper creates an Oracle Business Rules dictionary in a.rules file. You can create as many dictionaries as you need. A dictionary may contain any number of rulesets.
8.2 Introduction to the Business Process Composer Rules EditorThe Business Process Composer rules editor enables you to view and edit a rules dictionary. Rules dictionaries are displayed in a tabbed window similar to the process editor and data association editor.
This window is divided into two main areas:
■ A panel containing tabbed panes for globals, bucketsets, and rulesets.
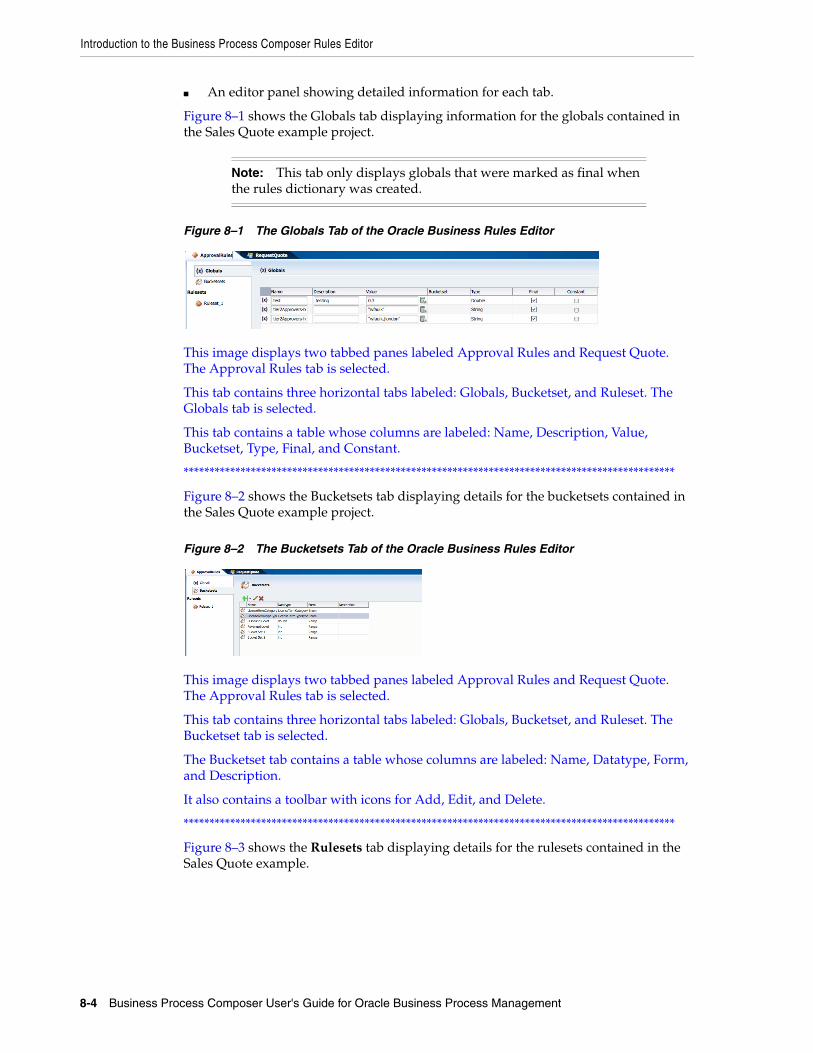
Introduction to the Business Process Composer Rules Editor
8-4 Business Process Composer User's Guide for Oracle Business Process Management
■ An editor panel showing detailed information for each tab.
Figure 8–1 shows the Globals tab displaying information for the globals contained in the Sales Quote example project.
Figure 8–1 The Globals Tab of the Oracle Business Rules Editor
This image displays two tabbed panes labeled Approval Rules and Request Quote. The Approval Rules tab is selected.
This tab contains three horizontal tabs labeled: Globals, Bucketset, and Ruleset. The Globals tab is selected.
This tab contains a table whose columns are labeled: Name, Description, Value, Bucketset, Type, Final, and Constant.
***********************************************************************************************
Figure 8–2 shows the Bucketsets tab displaying details for the bucketsets contained in the Sales Quote example project.
Figure 8–2 The Bucketsets Tab of the Oracle Business Rules Editor
This image displays two tabbed panes labeled Approval Rules and Request Quote. The Approval Rules tab is selected.
This tab contains three horizontal tabs labeled: Globals, Bucketset, and Ruleset. The Bucketset tab is selected.
The Bucketset tab contains a table whose columns are labeled: Name, Datatype, Form, and Description.
It also contains a toolbar with icons for Add, Edit, and Delete.
***********************************************************************************************
Figure 8–3 shows the Rulesets tab displaying details for the rulesets contained in the Sales Quote example.
Note: This tab only displays globals that were marked as final when the rules dictionary was created.

Viewing and Editing Business Rules in Business Process Composer
Using Oracle Business Rules 8-5
Figure 8–3 The Rulesets Tab of the Oracle Business Rules Editor
This image displays two tabbed panes labeled Approval Rules and Request Quote. The Approval Rules tab is selected.
This tab contains three horizontal tabs labeled: Globals, Bucketset, and Ruleset. The Ruleset tab is selected.
***********************************************************************************************
8.3 Viewing and Editing Business Rules in Business Process ComposerThe following sections provide specific procedures for viewing and editing Oracle Business Rules using Business Process Composer.
8.3.1 How to Open a Business RuleOracle Business Rules can be included as part of the reusable business catalog, enabling you to use business rules when editing Oracle BPM projects created from project templates.
To open a business rule from the Project Navigator:1. From the project welcome page, expand Business Rules, then click the name of
the rule you want to open.
The business rule appears in the rules editor. If you want to edit the rule, ensure that the project is in edit mode. By default, the Globals tab is displayed, as shown in Figure 8–1.
8.3.2 How to Add a BucketsetUsing Business Process Composer you can add new bucketsets to a rules dictionary.
To add a new bucketset:1. Open the rules dictionary where you want to edit the bucketset.
2. Select the Bucketsets tab. This displays a table listing the bucketsets in the dictionary as shown in Figure 8–2.
3. Click the Add Bucketset drop-down list, then select the type of bucket set you want to create.
■ List of values
■ List of ranges
4. Select the bucketset from the list, then click Edit Bucketset.
5. Edit the bucket set as required, then click OK.
Viewing and Editing Business Rules in Business Process Composer
8-6 Business Process Composer User's Guide for Oracle Business Process Management
8.3.3 How to Edit an Existing BucketsetIn Business Process Composer, selecting the Bucketsets tab shows you a table listing the bucketsets in the dictionary. To edit a bucketset, select the appropriate row and click the Edit icon. Depending on the type of the bucketset, Range, Enum, or LOV, this displays a corresponding Edit bucketset page.
You can create a Range Bucketset by clicking Add in the menu bar and selecting a type. This adds a new row in the Bucketsets table. Adding a bucket automatically adds an end point for a range bucket and a value for an LOV bucket based on the data type. You can modify the newly added bucket end point or value. Note that the alias is modified when an end point or value is changed.
To delete a bucketset, select a row and click Delete.
To edit a bucketset:1. Open the rules dictionary where you want to edit the bucketset.
2. Select the Bucketsets tab. This displays a table listing the bucketsets in the dictionary as shown in Figure 8–2.
3. Select the appropriate bucketset row and click the Edit Bucketset icon.
4. Use the Bucketset Editor to edit the appropriate fields in the bucketset.
5. Click OK to confirm the changes.
8.3.4 How to View Globals in the Oracle Rules DictionaryWhen you open a rules dictionary, Business Process Composer displays the Globals tab. The Globals tab only shows final global variables (global variables with Final option selected).
You cannot create or delete global variables. From the Globals tab, in edit mode you can edit the Name, Description, and Value fields. For the Value field, you can use the expression builder to set the value.
To view globals:1. Open the rules dictionary where you want to view globals.
2. Select the Globals tab. This displays a table listing the globals defined for this rules dictionary as shown in Figure 8–1.
8.3.5 How to Add a Rule to a RulesetUsing Business Process Composer you can edit, add, and delete rules in a ruleset.
To add a rule to a ruleset:1. Open the rules dictionary containing the ruleset where you want to add a rule.
2. Click the tab of the ruleset you want to edit. This displays a table listing the rulesets defined for this dictionary as shown in Figure 8–3
3. Click the New Rule icon.
4. Enter a name for the new rule.
5. Click the Show Advanced Settings icon.
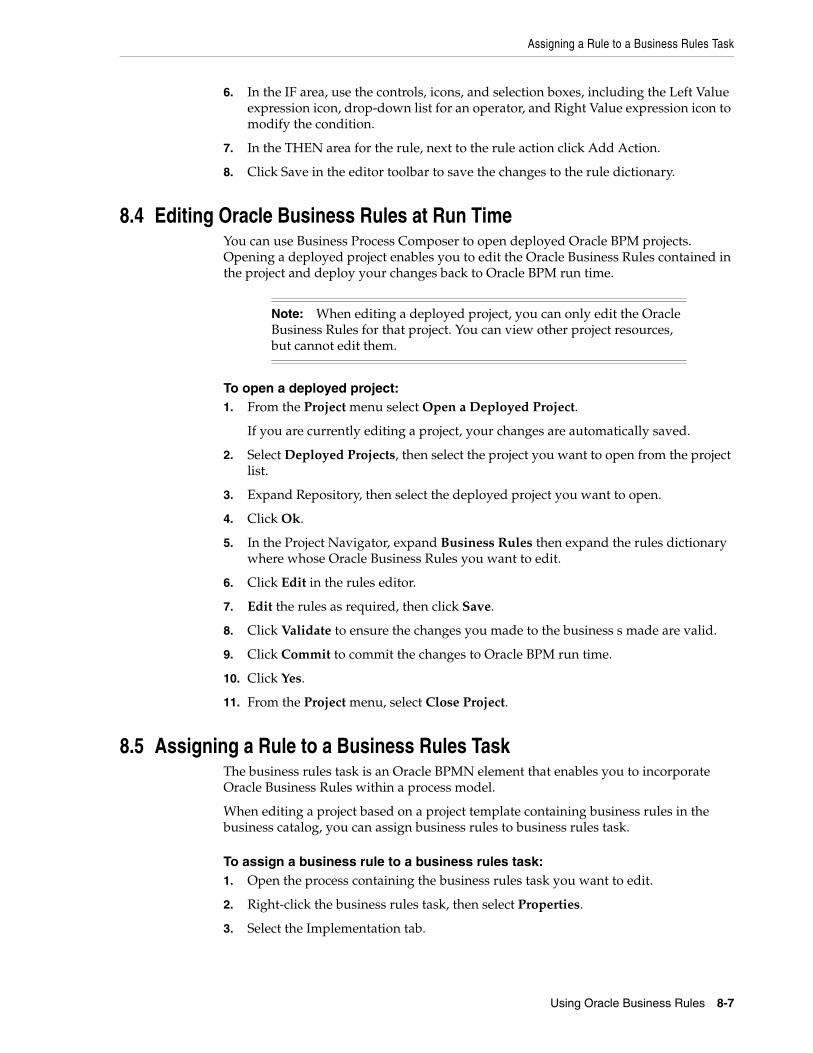
Assigning a Rule to a Business Rules Task
Using Oracle Business Rules 8-7
6. In the IF area, use the controls, icons, and selection boxes, including the Left Value expression icon, drop-down list for an operator, and Right Value expression icon to modify the condition.
7. In the THEN area for the rule, next to the rule action click Add Action.
8. Click Save in the editor toolbar to save the changes to the rule dictionary.
8.4 Editing Oracle Business Rules at Run TimeYou can use Business Process Composer to open deployed Oracle BPM projects. Opening a deployed project enables you to edit the Oracle Business Rules contained in the project and deploy your changes back to Oracle BPM run time.
To open a deployed project:1. From the Project menu select Open a Deployed Project.
If you are currently editing a project, your changes are automatically saved.
2. Select Deployed Projects, then select the project you want to open from the project list.
3. Expand Repository, then select the deployed project you want to open.
4. Click Ok.
5. In the Project Navigator, expand Business Rules then expand the rules dictionary where whose Oracle Business Rules you want to edit.
6. Click Edit in the rules editor.
7. Edit the rules as required, then click Save.
8. Click Validate to ensure the changes you made to the business s made are valid.
9. Click Commit to commit the changes to Oracle BPM run time.
10. Click Yes.
11. From the Project menu, select Close Project.
8.5 Assigning a Rule to a Business Rules TaskThe business rules task is an Oracle BPMN element that enables you to incorporate Oracle Business Rules within a process model.
When editing a project based on a project template containing business rules in the business catalog, you can assign business rules to business rules task.
To assign a business rule to a business rules task:1. Open the process containing the business rules task you want to edit.
2. Right-click the business rules task, then select Properties.
3. Select the Implementation tab.
Note: When editing a deployed project, you can only edit the Oracle Business Rules for that project. You can view other project resources, but cannot edit them.

Assigning a Rule to a Business Rules Task
8-8 Business Process Composer User's Guide for Oracle Business Process Management
4. Click Change. The displays the business rules browser containing a table of available business rules.
5. Double-click a rule from the table.
6. Click OK.
Part IIIAdvanced Business Process Composer
Functionality
This part describes advanced functionality of Business Process Composer that is targeted towards process developers who need to make changes to the implementation details of a BPM project.
This part contains the following chapters:
■ Chapter 9, "Advanced Business Process Composer Functionality"
■ Chapter 10, "Working with Data Objects and Expressions"
■ Chapter 11, "Working with Human Tasks"
■ Chapter 12, "Performing Administrative Tasks"


Advanced Business Process Composer Functionality 9-1
9Advanced Business Process Composer
Functionality
This chapter describes functionality of Business Process Composer related to technical implementation of a BPMN process. The functionality described in this chapter is generally performed by a process developer.
This chapter includes the following sections:
■ Section 9.1, "Working with Services"
■ Section 9.2, "Defining Conversations"
9.1 Working with ServicesThe following sections describe how to create services using Business Process Composer.
9.1.1 How to Create New Services in the Business CatalogBusiness Process Composer enables you to create new services in the business catalog. These services are based on standard Web Services.
Services based on web services are defined using a Web Services Description Language (WSDL) file. A WSDL file is an XML file used to describe how web services are implemented. When creating a new service using Business Process Composer, you can specify a WSDL file stored local on your machine or one that is available.
Process developers are responsible for providing a WSDL file or URL location.
To create a new service:1. Open the project where you want to create a new service.
2. From the main menu, select New then New Service.
3. Provide the following information:
■ Name: Defines the name of the service as it appears in the business catalog.
■ Type: Defines the type of service being created.
■ WSDL: The source of the WSDL used to create the new service can be one of the following:
– URL: Specifies the remote URL of the WSDL.
– File: Specifies either a WSDL or ZIP file on your local file system.
Defining Conversations
9-2 Business Process Composer User's Guide for Oracle Business Process Management
If using a ZIP file, it can include only WSDL and XSD files. The WSDL file should have valid references.
■ Port Type: Port type specifies the service used. A WSDL file exposes one or more port types.
■ Callback Type: Determines the call back type used for this web service. This is only applicable to asynchronous services.
■ Transaction Participation:
■ Version:
4. Click OK.
9.2 Defining ConversationsThe following sections describe how to edit conversations using Business Process Composer. For complete information see Oracle BPM Modeling and Implementation Guide.
9.2.1 Introduction to ConversationsConversations group the message exchange between two or more processes. The message exchange between processes is called collaboration. Within a project you can define multiple conversations that you can reuse amongst the processes in that project.
Collaboration diagrams allows you to view the process flow together with the interactions your process has with other participants in the conversation.
Your BPM project defines a conversation by default. If you do not want to define multiple conversations you must use this default conversation to gather all the message exchange amongst the processes in your project.
You can only define one default conversation per project. However you can modify your project to use a different default conversation than the one it uses by default.
The different types of conversations allow you to specify the different types of interaction your process can establish with other processes or services. The following list describes the different types of conversations:
■ Define Interface: use this type to define the operations that other services and processes can invoke to interact with a BPMN process.
■ Use Interface: use this type to configure your process to use an interface from a component in the Business Catalog.
■ Process Call: use this type to invoke another BPMN process.
■ Service Call: use this type to invoke a service defined in your BPM project.
9.2.2 Working with ConversationsThe following sections describe how to define and configure conversations using Business Process Composer.
9.2.2.1 How to define a conversation1. Open your process.
2. Click the Edit Conversation button in the process editor toolbar.
3. Click the Add Conversation button.

Defining Conversations
Advanced Business Process Composer Functionality 9-3
4. Provide a name for the conversation.
5. Select the type of conversation you want to define.
6. Click OK.
9.2.2.2 How to set the default conversation1. Open your process.
2. Click the Edit Conversation button in the process editor toolbar.
3. Select a conversation from the list, then click the Edit button.
4. Click the Default Conversation checkbox.
5. Click OK.
9.2.2.3 How to define a conversation for a BPMN flow object1. Open your process
2. Right-click one of the following types of BPMN flow objects:
■ Message events (throw and catch)
■ Send and receive tasks
■ Service tasks
You can only define conversations these BPM flow objects.
3. Select Implement.
4. In the Implementation tab, click the Browse button next to the Conversation text field.
5. Select a conversation from the list, then click OK.
9.2.2.4 How to view a collaboration diagramTo view the collaboration diagram for a process, click the View Collaboration button in the process editor toolbar.
Note: In collaboration view, you cannot make changes to the process. To return to normal process editing, click the View Collaboration button again.

Defining Conversations
9-4 Business Process Composer User's Guide for Oracle Business Process Management
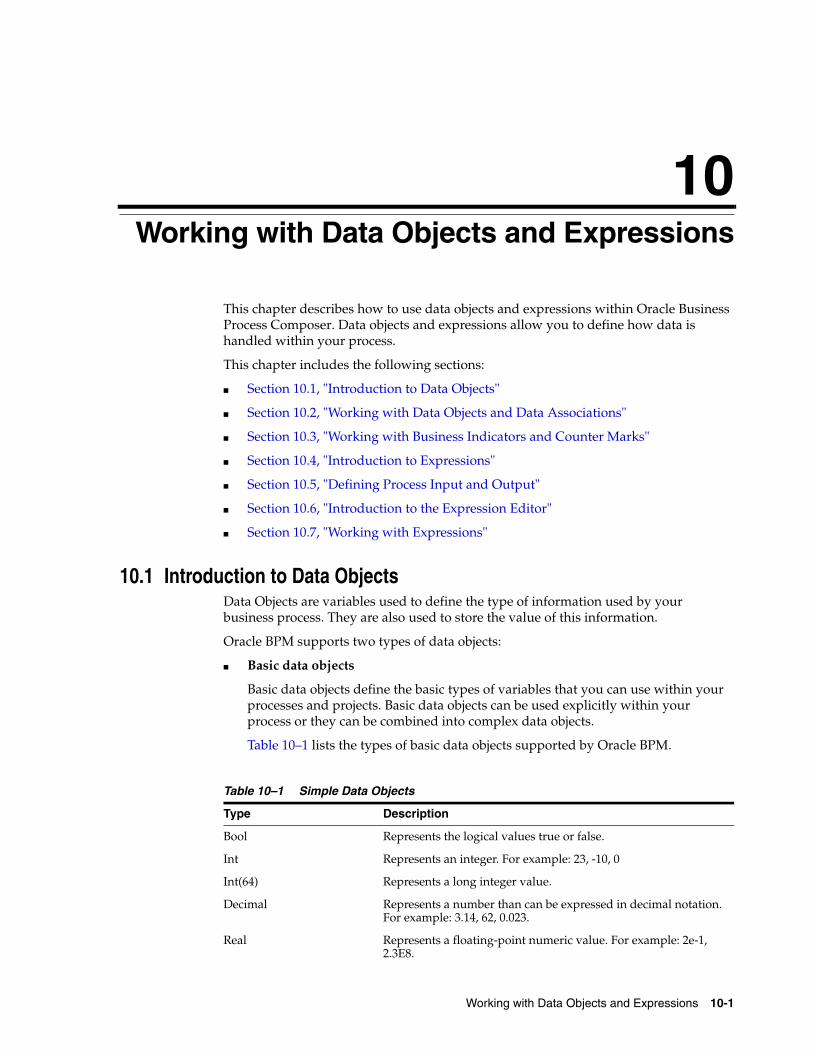
Working with Data Objects and Expressions 10-1
10Working with Data Objects and Expressions
This chapter describes how to use data objects and expressions within Oracle Business Process Composer. Data objects and expressions allow you to define how data is handled within your process.
This chapter includes the following sections:
■ Section 10.1, "Introduction to Data Objects"
■ Section 10.2, "Working with Data Objects and Data Associations"
■ Section 10.3, "Working with Business Indicators and Counter Marks"
■ Section 10.4, "Introduction to Expressions"
■ Section 10.5, "Defining Process Input and Output"
■ Section 10.6, "Introduction to the Expression Editor"
■ Section 10.7, "Working with Expressions"
10.1 Introduction to Data ObjectsData Objects are variables used to define the type of information used by your business process. They are also used to store the value of this information.
Oracle BPM supports two types of data objects:
■ Basic data objects
Basic data objects define the basic types of variables that you can use within your processes and projects. Basic data objects can be used explicitly within your process or they can be combined into complex data objects.
Table 10–1 lists the types of basic data objects supported by Oracle BPM.
Table 10–1 Simple Data Objects
Type Description
Bool Represents the logical values true or false.
Int Represents an integer. For example: 23, -10, 0
Int(64) Represents a long integer value.
Decimal Represents a number than can be expressed in decimal notation. For example: 3.14, 62, 0.023.
Real Represents a floating-point numeric value. For example: 2e-1, 2.3E8.
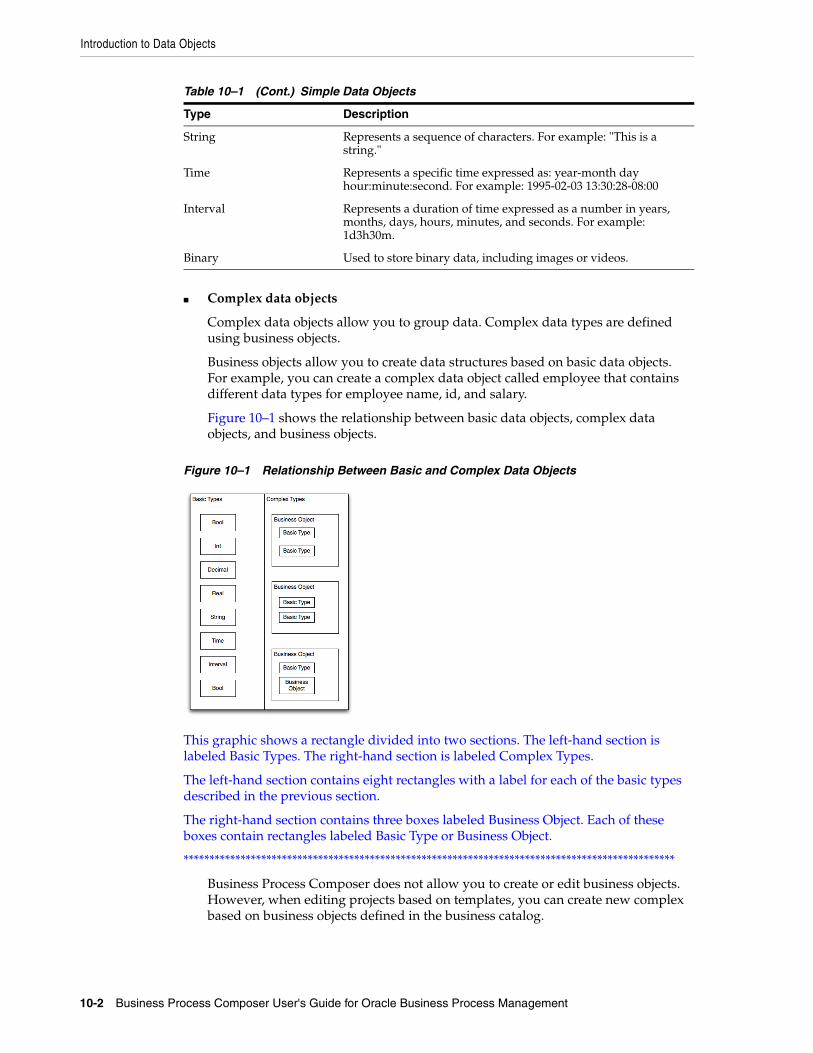
Introduction to Data Objects
10-2 Business Process Composer User's Guide for Oracle Business Process Management
■ Complex data objects
Complex data objects allow you to group data. Complex data types are defined using business objects.
Business objects allow you to create data structures based on basic data objects. For example, you can create a complex data object called employee that contains different data types for employee name, id, and salary.
Figure 10–1 shows the relationship between basic data objects, complex data objects, and business objects.
Figure 10–1 Relationship Between Basic and Complex Data Objects
This graphic shows a rectangle divided into two sections. The left-hand section is labeled Basic Types. The right-hand section is labeled Complex Types.
The left-hand section contains eight rectangles with a label for each of the basic types described in the previous section.
The right-hand section contains three boxes labeled Business Object. Each of these boxes contain rectangles labeled Basic Type or Business Object.
***********************************************************************************************
Business Process Composer does not allow you to create or edit business objects. However, when editing projects based on templates, you can create new complex based on business objects defined in the business catalog.
String Represents a sequence of characters. For example: "This is a string."
Time Represents a specific time expressed as: year-month day hour:minute:second. For example: 1995-02-03 13:30:28-08:00
Interval Represents a duration of time expressed as a number in years, months, days, hours, minutes, and seconds. For example: 1d3h30m.
Binary Used to store binary data, including images or videos.
Table 10–1 (Cont.) Simple Data Objects
Type Description

Introduction to Data Objects
Working with Data Objects and Expressions 10-3
10.1.1 Introduction to Process and Project Data ObjectsProcess data objects are data objects that are defined for a specific process. Similarly, project data objects are defined for an entire project.
Process data objects can be created from both basic and complex data objects. Project data objects can only be created from basic data types. This determines the scope of the variable.
Therefore, you can only use process data objects within the process where they are created, while project data objects are applicable to the entire project. This is known as variable scope.
Figure 10–2 shows the difference in scope between project and process variables.
Figure 10–2 Scope of Process and Project Data Objects
This figure shows the scope of project and process data objects.
***********************************************************************************************
Process data objects allow you to define data objects that are only used within a single process. When designing a process-based application, if you know that a data object is only used within a process, it is better to define it as a process data object to conserve system resources.
Project data objects allow you to share data between processes. For example, the Purchase Order process and the Request Approval process may both track the value of the employee that created the request, or the priority of the request.
Project data objects ensure that all processes in a project use the same data. Each process must assign and update the value of this data.
The main benefit of defining project data objects is that after publishing your project you can configure Oracle BPM WorkSpace views to display the values of those variables. This is possible only if you use project data objects.
Note: Although project data objects allow you to define data objects that are used by all processes in a project, they are not global data objects. Each process within your project uses its own version of the data object. Project data objects are not used to share data between processes.
Introduction to Data Objects
10-4 Business Process Composer User's Guide for Oracle Business Process Management
10.1.2 Using Data Objects in New BPM ProjectsWhen working with new projects created in Business Process Composer, you can create project and process data objects only for start and end message events. New projects created in Business Process Composer enable process analysts to define types of data objects used between process. These data objects can be incorporated by process developers as part of the implementation created in Oracle BPM Studio.
10.1.3 Using Data Objects in Projects Based on Project TemplatesProject templates allow you to create reusable components from the business catalog. In addition to services such as business rules and human tasks, you can also create business objects.
When creating an Oracle BPM project based on a project template, you can use the data objects defined in the business catalog within data associations. Also, you can create new project data objects using Business Process Composer.
Project variables can only be simple data objects based on created from basic data types.
10.1.4 Introduction to Data AssociationsData associations are used to pass the information stored in data objects in the following contexts:
■ To and from another process or service invoked from a BPMN process
■ To and from a Human Task service
■ To and from an Oracle Business Rule
■ To and from a script task. This BPMN flow object is used to pass data objects through data associations.
Table Figure 10–2 lists the flow objects where you can define data associations. It also lists the objects implemented.
Note: You cannot create new types of complex data objects in Business Process Composer.
Table 10–2 Flow Objects that Accept Data Associations
Flow Objects Implementation
Message start and end events
Services and other BPMN processes
Message throw and catch events
Services and other BPMN processes
Send and receive tasks Services and other BPMN processes
Script tasks Do not contain an implementation, are used to pass data objects through data associations.
User tasks Oracle Human Tasks
Business rule tasks Oracle Business Rules
Service Tasks Services and BPMN processes

Introduction to Data Objects
Working with Data Objects and Expressions 10-5
Data associations are used to define the input and output from a flow object to an external service or process. Figure 10–3 shows the relationship between a flow object, its corresponding implementation, and external processes or services.
The blue arrows represent the input and output arguments to the external process or service. These are defined using data associations.
Figure 10–3 Relationship between a Flow Object, Implementation and an External Service or Process
This figure shows the relationship between a flow object and its implementation.
***********************************************************************************************
It is important to note that although the inputs and outputs are defined in the data associations for a flow object, the defined values that are passed to the implemented systems and services. These systems and services are external to the process as shown in Figure 10–5.
Figure 10–4 Data Associations between a process
This graphic contains a long horizontal rectangle labeled BPMN process. Within the rectangle is a generic representation of a BPMN process containing squares and circles representing flow objects
Below the long rectangle are two squares labeled Human Task and BPMN process. These are connected to the BPMN process by blue arrows representing the data associations between the BPMN process and the implementation represented by the two squares.
***********************************************************************************************
You can use expression to evaluate and change the input and output values
10.1.5 Introduction to the Data Association EditorThe data associations editor enables you to configure the input and output values passed between a flow object and a its implementation.
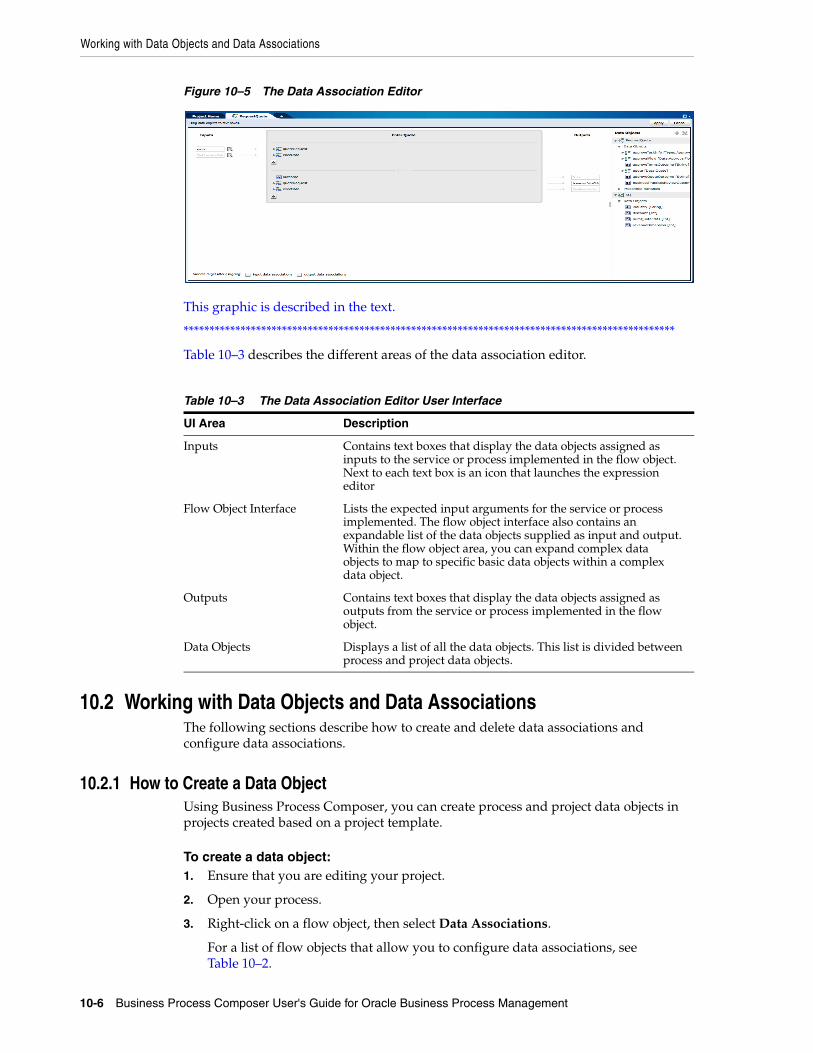
Working with Data Objects and Data Associations
10-6 Business Process Composer User's Guide for Oracle Business Process Management
Figure 10–5 The Data Association Editor
This graphic is described in the text.
***********************************************************************************************
Table 10–3 describes the different areas of the data association editor.
10.2 Working with Data Objects and Data AssociationsThe following sections describe how to create and delete data associations and configure data associations.
10.2.1 How to Create a Data ObjectUsing Business Process Composer, you can create process and project data objects in projects created based on a project template.
To create a data object:1. Ensure that you are editing your project.
2. Open your process.
3. Right-click on a flow object, then select Data Associations.
For a list of flow objects that allow you to configure data associations, see Table 10–2.
Table 10–3 The Data Association Editor User Interface
UI Area Description
Inputs Contains text boxes that display the data objects assigned as inputs to the service or process implemented in the flow object. Next to each text box is an icon that launches the expression editor
Flow Object Interface Lists the expected input arguments for the service or process implemented. The flow object interface also contains an expandable list of the data objects supplied as input and output. Within the flow object area, you can expand complex data objects to map to specific basic data objects within a complex data object.
Outputs Contains text boxes that display the data objects assigned as outputs from the service or process implemented in the flow object.
Data Objects Displays a list of all the data objects. This list is divided between process and project data objects.
Working with Business Indicators and Counter Marks
Working with Data Objects and Expressions 10-7
4. Select a processes or the project from the expandable list.
5. Click Add New Data Object.
6. Enter a name for your data object, then select a type from the drop-down menu.
7. Click Create
10.2.2 How to Delete a Data ObjectYou can delete a data object from a process or project.
To delete a data object:1. Open the process where you want to delete a data object. If you want to delete a
project data object, you can open any process in the project.
2. Right-click a flow object that supports data associations, then select Data Associations.
See Table 10–2 for the list of sequence flows that allow data associations.
3. In the Data Objects column, expand the process or project containing the data object you want to delete, then select the data object.
4. Click the Delete icon
10.2.2.1 What You Need to Know About Deleting Data ObjectsAfter deleting a data object, you must ensure that all references to it are removed. This includes any data associations and expressions that use the data object. If you do not remove references to the deleted data object, the project does not validate.
10.2.3 How to Configure Data Associations for a Flow ObjectYou can configure data associatons for flow objects.
To configure a data association for a flow object:1. Open the process where you want to configure data associations.
2. Right-click a flow object that enables data associations, then select Data Associations.
See Table 10–2 for the list of sequence flows that allow data associations.
3. From the data objects column on the right, select the data object you want to map as an input argument.
4. Click and drag the data object to an input text field.
10.3 Working with Business Indicators and Counter MarksThis section describes how to create business indicators and counter marks using Business Process Composer.
Note: You can delete simple and complex data objects. However, you cannot delete simple data objects within complex data objects.
Working with Business Indicators and Counter Marks
10-8 Business Process Composer User's Guide for Oracle Business Process Management
10.3.1 Introduction to Business Indicators and CountersBusiness Indicators are project data objects you use to store the value of the key performance indicators of your process. Although Oracle BPM allows you to create business indicators using different types of data objects, Business Process Composer only allows you to create business indicators used as counter marks.
Counters keep track of the number of times an instance completes a certain activity. You must use them with counter marks. The counter variable does not store the actual value, its value is always 1. The value that specifies the number of times an instance completes an activity is updated directly in the Process Analytics databases. To monitor the value of a counter business indicator, you must create a dashboard based on a counter mark that is configured to track this counter business indicator.
10.3.2 Introduction to Counter MarksCounter marks enable you to update the value of the counter business indicators defined for your process. A counter mark may update multiple counter mark business indicators. When a token arrives at an activity that has a counter mark defined, the BPM Service Engine updates the value of its associated counters in the Process Analytics databases. Each time the BPM Service Engine updates a counter business indicator, it adds one unit to the current value.
You can use counter marks for the following:
■ Auditing: The number of activities the instance completed combined with other performance measurements are important information for auditing the process.
■ Identifying performance issues: You can use a counter to identify performance issues within your process. Your process might be taking longer than expected because the instances are following a different path than expected or because the loop in an activity is running more times than it should. You can identify these situations by comparing the actual number of completed activities to the number you expected.
■ Identifying the process path the instance followed: You can mark different paths using different counter business indicators. When the instance reaches the end of the process, the path the instance followed has the greatest number of completed activities.
Typically you define one counter business indicator for each of the process paths you want to monitor. Then you add counter marks in all the activities that are part of that process path. Finally you associate the counter business indicators that correspond to the paths that activity is part of, to the counter mark.
10.3.3 How to Add a New Counter Mark to a ProcessYou can add new counter marks to activities and tasks within your process.
To add a new counter mark to a process1. Right-click on the task or activity where you want to add a counter mark.
Note: The actual value of the counter variable is stored in the Process Analytics databases. You must not use the counter variable in your process to perform any calculations because its default value never changes. The value of the counter variable is always equal to 1.

Introduction to Expressions
Working with Data Objects and Expressions 10-9
2. Select Implement.
3. If required, create a new business indicator.
1. Click the Add button.
2. Provide a name for the business indicator.
3. Click OK.
4. In the list of business indicators, select the check box next to the indicators you want to use for this flow object.
5. Click Apply Changes.
10.3.4 How to Delete a Counter MarkYou can delete the counter marks you have defined for a project.
To delete a counter mark:1. Right-click on the activity or task where you want to edit a counter mark.
2. Select Data Association.
3. In the list of Data Objects, expand the name of the project. This contains a list of all the project data object.
4. Select the counter mark you want to delete.
5. Click Remove Data Object.
6. Click Yes.
7. Click Apply.
10.4 Introduction to ExpressionsExpressions allow you to perform calculations on data objects.Using Business Process Composer, you can define and edit expressions in the following contexts:
■ Conditional sequence flows
■ Complex gateways
■ Timer events
■ Data associations
■ Notification tasks
Expressions do not allow you to directly reassign the values to data objects. However, you can use expressions to change the values passed to and from the implementation of a sequence flow. See Section 10.1.4, "Introduction to Data Associations" for more information.
10.4.1 Types of ExpressionsOracle Business Process Composer supports the following types of expressions:
■ Simple
■ Plain text
■ XML Literal

Introduction to Expressions
10-10 Business Process Composer User's Guide for Oracle Business Process Management
10.4.2 Simple ExpressionsSimple expressions are defined using a basic expression language supported by Oracle BPM.
10.4.2.1 Operator TypesSimple expressions support the following operator types:
■ Arithmetic Operators
■ Unary Operators
■ Equality and Relational Operators
■ Conditional Operators
You can use these operators to write expressions and conditions to define your process flow. Generally these expressions perform their calculations based on the data objects in your process. You can write expressions and conditions using the value of the data objects, but you cannot modify their value.
The following examples of expressions use operators:
■ totalAmount - discount
■ activationCount > 3
■ unitsSold <= 1200
Table 10–4, Table 10–5, Table 10–6, and Table 10–7 describe the supported operators in the simple expression builder.
Table 10–4 Arithmetic Operators
Operator Name Description
+ Addition Adds numeric data types.
Concatenates Strings.
- Subtraction Subtracts numeric data types.
* Multiplication Multiplies numeric data types.
/ Division Divides numeric data types.
rem Remainder Calculates the remainder of a division in which the divisor does not exactly divide the dividend.
( ) Precedence Indicates the order of evaluation of an arithmetic expression.
Table 10–5 Unary Operators
Operator Name Description
+ Plus Has no effect in the value of the numeric operand. Use it to indicate explicitly that a certain value is positive.
- Minus Negates an arithmetic expression.
* Not Logical complement operator. Negates the value of a boolean expression.

Defining Process Input and Output
Working with Data Objects and Expressions 10-11
10.4.2.2 Operator PrecedenceOperator precedence indicates the order in which the compiler evaluates them. You can change operator precedence in an expression by using parenthesis.
In Oracle BPM the operator precedence is:
■ Addition, Subtraction
■ Multiplication, Division, Remainder
■ Plus and Minus
■ Less than, Greater Than, Less Than or Equal to, Greater Than or Equal to
■ Equal, Not Equal
■ Not
■ Conditional And
■ Conditional Or
10.5 Defining Process Input and OutputWhen you add operations to a BPMN process, you are defining points in the process that other processes or services can use to communicate with it. The communication between processes and other processes or services generally requires an input and returns an output. The flow events that you use you to define the BPMN process operations enable you to define input and output arguments. These input and output arguments define the process input and output.
10.5.1 How to Define the Input Arguments for a ProcessWhen you create a process that begins with a message start event, you must define the input arguments to that are passed to that process.
Table 10–6 Equality and Relational Operators
Operator Name Description
= or == Equal Returns true is the first operand equals the second operand.
!= Not Equal Returns true is the first operand is not equal to the second operand.
> Greater Than Returns true if the first operand is greater than the second operand.
>= Greater Than or Equal to
Returns true if the first operand is greater than or equal to the second operand.
< Less Than Returns true if the first operand is less than the second operand.
<= Less Than or Equal to
Returns true if the first operand is less than or equal to the second operand.
Table 10–7 Conditional Operators
Operator Name Description
and Conditional And Returns true if both operands evaluate to true.
or Conditional Or Returns true if either operand evaluates to true.

Defining Process Input and Output
10-12 Business Process Composer User's Guide for Oracle Business Process Management
To define the input arguments for a process:1. Add a message start event to your process.
2. Right-click on the message start event, the select Properties.
3. Click the Implementation tab.
4. Select Define Interface.
5. Click the Add icon.
6. Determine the type of data object.
7. Click OK.
10.5.2 How to Define Data Associations for a Message Start EventAfter you have defined the input arguments to your process, you must map them to data objects in your process.
To define data associations for a message start event:1. Select the message start event of your process.
2. Click Data Associations.
3. Drag the data objects from the list on the right-hand side to the text boxes listed under Outputs.
4. Click Apply.
10.5.3 How to Define the Output Arguments for a ProcessWhen you create a process that contains message end events, you must define the output arguments for each end event. These are the output arguments for the process.
To define the output arguments for a process:1. Add a message end event to your process.
2. Right-click on the message end event, then select Properties.
3. Click the Implementation tab.
4. Select Define Interface.
5. Click the Add icon.
6. Determine the type of data object.
7. Click OK.
10.5.4 How to Define Data Association for a Message End EventAfter you have defined the output arguments for your process, you must map them to the data objects in your process.
To define data associations for a message end event:1. Select a message end event in your process.
2. Click Data Associations.
3. Drag the data objects from the list on the right-hand side to the text boxes listed under Inputs.

Working with Expressions
Working with Data Objects and Expressions 10-13
4. Click Apply.
10.6 Introduction to the Expression EditorThe expression editor provides a simple way of creating expressions by allowing you to select data objects and operators from a list and insert them into your expression. You can also enter the expression manually if necessary.
Figure 10–6 shows the expression editor user interface.
Figure 10–6 The Oracle Business Process Composer Expression Editor
This graphic displays the expression editor. It is divided into three main areas.
At the top is a text field that contains the expression. Below the text field is a button labeled Insert Into Expression.
The center section contains two tabbed panes labeled Data Objects and Operators. The Data Objects tab is selected. This tab displays all the data objects defined for the current project.
The bottom section contains a table that displays the name and description of the currently selected object in the center section.
***********************************************************************************************
10.7 Working with ExpressionsThe following sections describe how to define expressions using Business Process Composer.
Table 10–8 The Expression Editor User Interface
Area Description
Expression field Contains the text of the expression. You can edit this field directly, or use the Insert Into Expression tool.
Insert Into Expression Inserts the selected data object or operator into the expression.
Data Object and Operator Chooser
Contain tabbed panes that allow you to select the data object or operator you want to insert into the expression.
Description tab Provides a description of the selected operator.
Errors Displays errors in the current expression.
Working with Expressions
10-14 Business Process Composer User's Guide for Oracle Business Process Management
10.7.1 How to Define a Simple Expression for a Conditional Sequence FlowUsing Business Process Composer, you can create and edit expressions for conditional sequence flows. Conditional sequence use expression to determine the flow of your process.
To define an expression for a conditional sequence flow:1. Open your process.
2. Ensure that the project is in edit mode.
3. Click the edit icon for the conditional sequence flow you want to edit.
4. Click Implementation.
5. Click Edit.
The expression editor window displays.
6. Add any required data objects and operators.
To add a data object to an expression:
a. Select the Data Objects tab.
b. Select a data object from the list.
If you add a basic data object that is part of a complex data objects, expand the complex data object and select the basic data object.
c. Click Insert Into Expression
To add an operator to an expression:
a. Select the Operators tab.
b. From the expandable list, select the operator you want to add.
c. Click Insert Into Expression.
7. Click the Error tab, then verify that there are no errors in your expression.
8. Click OK.
9. Click Apply Changes in the Implementation tab.
10.7.2 How to Define a Simple Expression in Data AssociationsUsing Business Process Composer, you can create and edit expressions for Data associations. Data associations use expression to alter the values data objects passed as inputs. and outputs.
To define an expression within a data association input or output:1. Open your process.
2. Ensure that the project is in edit mode.
3. Right-click a flow object within your process then select Data Associations.
4. Click Launch Expression Builder.
5. Add any required data objects and operators.
To add a data object to an expression:
a. Select the Data Objects tab.
b. Select a data object from the list.

Working with Expressions
Working with Data Objects and Expressions 10-15
If you add a basic data object that is part of a complex data objects, expand the complex data object and select the basic data object.
c. Click Insert Into Expression
To add an operator to an expression:
a. Select the Operators tab.
b. From the expandable list, select the operator you want to add.
c. Click Insert Into Expression.
6. Click the Error tab, then verify that there are no errors in your expression.
7. Click OK.

Working with Expressions
10-16 Business Process Composer User's Guide for Oracle Business Process Management

Working with Human Tasks 11-1
11Working with Human Tasks
This chapter describes how to create and edit human tasks using Oracle Business Process Composer.
This chapter includes the following sections:
■ Section 11.1, "Understanding Human Tasks"
■ Section 11.2, "Introduction to the Human Task Editor"
■ Section 11.3, "Working with Human Tasks"
11.1 Understanding Human TasksHuman Workflow is a component of the Oracle SOA and BPM suites that allow you to define how users interact with your business applications. Human Workflow also provides a runtime environment for managing this interaction.
Human tasks are the specific component of Oracle Human Workflow that allows you to define the user interaction of your application. Oracle Business Process Composer enables you to create and edit human tasks.
Human tasks enable you to specify the following:
■ Routing
■ Assignment
■ Deadlines
■ Notification
■ Presentations
■ Task data
These components are described in the following sections.
11.1.1 Introduction to Routing and ParticipantsHuman tasks enable you to determine the order in which users perform different tasks within your application. This order is the routing of the human task. Participants are
Note: Not all properties of human tasks can be created or edited using Oracle Business Process Composer. To create and edit these properties, you must use Oracle JDeveloper. See the Oracle BPM Modeling and Implementation Guide for more information.

Understanding Human Tasks
11-2 Business Process Composer User's Guide for Oracle Business Process Management
the users or groups that are responsible for performing each task. You can use the human task editor specify the routing flow and participant for a user task.
11.1.1.1 Participant TypesHuman tasks support the following patterns for common routing scenarios:
■ Single approver
This is the simple case where a participant maps to a user, group, or role. See Section 11.1.2, "Introduction to Participant Assignment" for more information.
For example, a vacation request is assigned to a manager. The manager must act on the request task three days before the vacation starts. If the manager formally approves or rejects the request, the employee is notified with the decision. If the manager does not act on the task, the request is treated as rejected. Notification actions similar to the formal rejection are taken.
■ Parallel
This participant indicates that a set of people must work in parallel. This pattern is commonly used for voting.
For example, multiple users in a hiring situation must vote to hire or reject an applicant. You specify the voting percentage that is needed for the outcome to take effect, such as a majority vote or a unanimous vote.
■ FYI
This participant also maps to a single user, group, or role, just as in single approver. However, this pattern indicates that the participant just receives a notification task and the business process does not wait for the participant’s response. FYI participants cannot directly impact the outcome of a task, but in some cases can provide comments or add attachments.
For example, a regional sales office is notified that a candidate for employment has been approved for hire by the regional manager and their candidacy is being passed onto the state wide manager for approval or rejection.
■ Serial
This participant indicates that a set of users must work in sequence. While working in sequence can be specified in the routing policy by using multiple participants in sequence, this pattern is useful when the set of people is dynamic. The most common scenario for this is management chain escalation, which is done by specifying that the list is based on a management chain within the specification of this pattern.
11.1.1.2 Routing TypesFigure 11–1 show a basic routing that contains only one participant.
Figure 11–1 Basic Routing with a Single Participant

Understanding Human Tasks
Working with Human Tasks 11-3
This figure shows a basic routing with a single participant. On the far left is a circle that indicates the beginning of the flow.
In the center is a grey box containing an icon in the form of a person. It is labelled Participant 1.
On the right is another circle that indicates the end of the flow.
***********************************************************************************************
However, human tasks support more complex types of routing that give you more control. These routing types are:
■ Sequential
In sequential routing different participants act on a task sequentially. Figure 11–2 shows an example of sequential routing. In this example, Participant_1 is the first participant in the routing flow. After Participant_1 finishes acting on a task, the task is passed to Particpant_2. After Participant_2 finishes acting on the task, the human task is completed.
Figure 11–2 Example of Sequential Task Routing
This graphic displays a sequential task routing with two participants. On the far left is a circle that indicates the beginning of the flow.
In the center is a grey box containing two icons in the form of a person. The one on the left is labelled Participant 1. The one on the right is labeled Participant 2.
On the right is another circle that represents the end of the flow.
***********************************************************************************************
■ Parallel
In parallel routing, participants act on a task simultaneously. Figure 11–3 shows an example of parallel routing. In this example, both Participant_1 and Participant_2 act on the task at the same time.
Parallel routing allows you to define an outcome for the routing that determines how the task flow continues to the next participant after the parallel block. See Section 11.1.1.3, "Outcome" for more information.

Understanding Human Tasks
11-4 Business Process Composer User's Guide for Oracle Business Process Management
Figure 11–3 Example of Parallel Task Routing
This graphic displays a parallel task routing with two participants. On the far left is a circle that indicates the beginning of the flow.
In the center is a grey box containing two icons in the form of a person. The one at the top is labelled Participant 1. The bottom one is labeled Participant 2.
On the right is another circle that represents the end of the flow.
***********************************************************************************************
11.1.1.3 OutcomeOutcome specifies possible outcome arguments of the Human Task. Oracle BPM Worklist displays the possible outcomes you select as the available tasks to perform at run time.
You can specify a voted-upon outcome that overrides the default outcomes selected in the Default Outcomes list. This outcome takes effect if the required percentage is reached. Outcomes are evaluated in the order listed in the table as shown in.
See Section 11.3.4, "How to Configure the Outcome for Parallel Routing" for information on how to configure outcome.
11.1.2 Introduction to Participant AssignmentParticipant assignment is the process of mapping human task participants to the people in your organization that will use your application. This is done by mapping each participant to one of the following:
■ Users
You can assign individual users to act upon tasks. For example, you may assign users jlondon or jstein to a particular task. Users are defined in an identity store configured with the SOA Infrastructure. These users can be in the embedded LDAP of Oracle WebLogic Server, Oracle Internet Directory, or a third party LDAP directory.
As with users, groups are defined in the identity store of the SOA Infrastructure.
■ Groups
You can assign groups to act upon tasks. Groups contain individual users who can claim and act upon a task. For example, users jcooper and fkafka may be members of the group LoanAgentGroup that you assign to act upon the task.
■ Application Roles
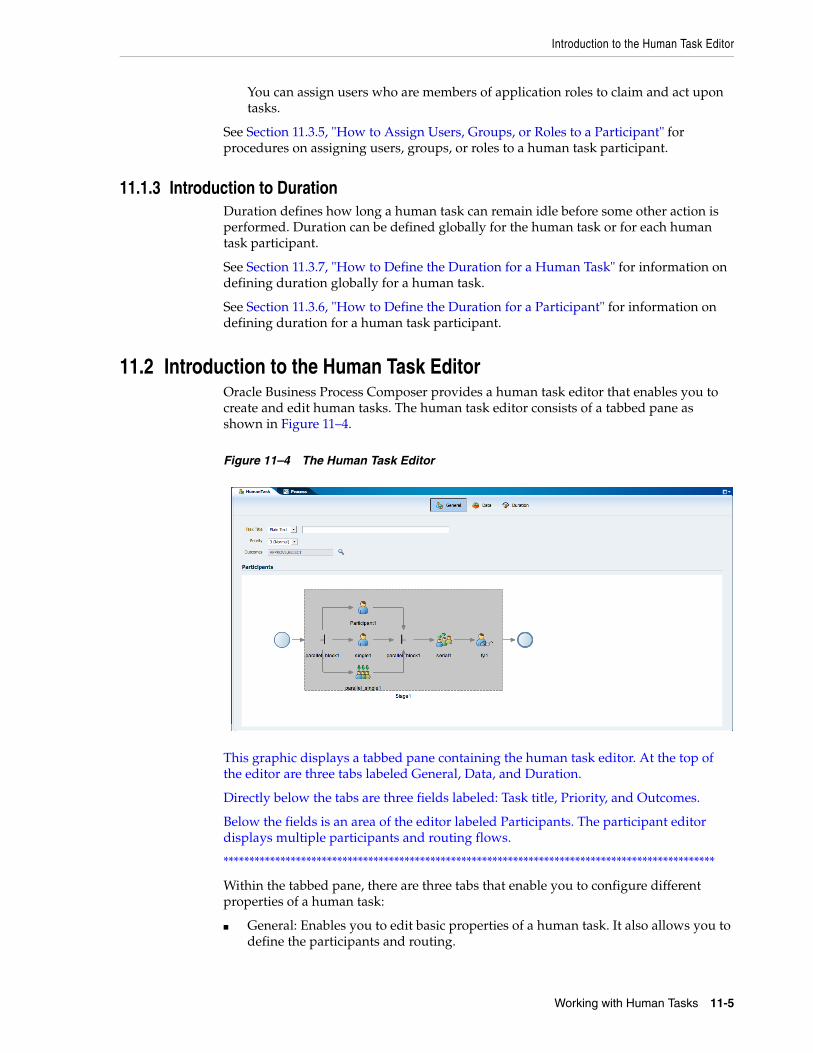
Introduction to the Human Task Editor
Working with Human Tasks 11-5
You can assign users who are members of application roles to claim and act upon tasks.
See Section 11.3.5, "How to Assign Users, Groups, or Roles to a Participant" for procedures on assigning users, groups, or roles to a human task participant.
11.1.3 Introduction to DurationDuration defines how long a human task can remain idle before some other action is performed. Duration can be defined globally for the human task or for each human task participant.
See Section 11.3.7, "How to Define the Duration for a Human Task" for information on defining duration globally for a human task.
See Section 11.3.6, "How to Define the Duration for a Participant" for information on defining duration for a human task participant.
11.2 Introduction to the Human Task EditorOracle Business Process Composer provides a human task editor that enables you to create and edit human tasks. The human task editor consists of a tabbed pane as shown in Figure 11–4.
Figure 11–4 The Human Task Editor
This graphic displays a tabbed pane containing the human task editor. At the top of the editor are three tabs labeled General, Data, and Duration.
Directly below the tabs are three fields labeled: Task title, Priority, and Outcomes.
Below the fields is an area of the editor labeled Participants. The participant editor displays multiple participants and routing flows.
***********************************************************************************************
Within the tabbed pane, there are three tabs that enable you to configure different properties of a human task:
■ General: Enables you to edit basic properties of a human task. It also allows you to define the participants and routing.

Working with Human Tasks
11-6 Business Process Composer User's Guide for Oracle Business Process Management
■ Data: Enables you to configure task data.
■ Duration: Enables you to configure the duration globally for the human task.
11.3 Working with Human TasksThe following sections describe how to create and edit human tasks.
11.3.1 How to Create New Human TaskOracle Business Process Composer enables you to create new human tasks. These are stored in the business catalog and can be incorporated within your business processes.
To create a new human task:1. Open the project where you want to create a new human task.
2. Ensure the project is in edit mode.
3. From the project welcome page, select Human Tasks.
4. Click New Human Task.
5. Provide a name for the new human task, then click Create.
The new human task is displayed in list of human tasks.
Human tasks are available in the business catalog. You can incorporate it within a BPMN process by assuaging it to a user task. See Section 6.3.2, "Introduction to the User Task" for more information.
11.3.2 How to Open a Human TaskYou can open an existing human task for viewing or editing.
To open an existing human task:1. Open the project containing the human task you want to view or edit.
2. Ensure the project is in edit mode.
3. From the project welcome page, select Human Tasks.
4. Click the name of the human task you want to open.
The human task is opened in the human task editor. See Section 11.2, "Introduction to the Human Task Editor" for more information.
11.3.3 How to Add Participants to a Human TaskUsing the human task editor, you can add additional participants to a human task.
To add participants to a human task:1. Open the human task.
2. Select the General tab.
3. In the Participants editor, select an existing participant.
4. Click the Add icon, then select one of the following routing types:
■ Sequential
■ Parallel
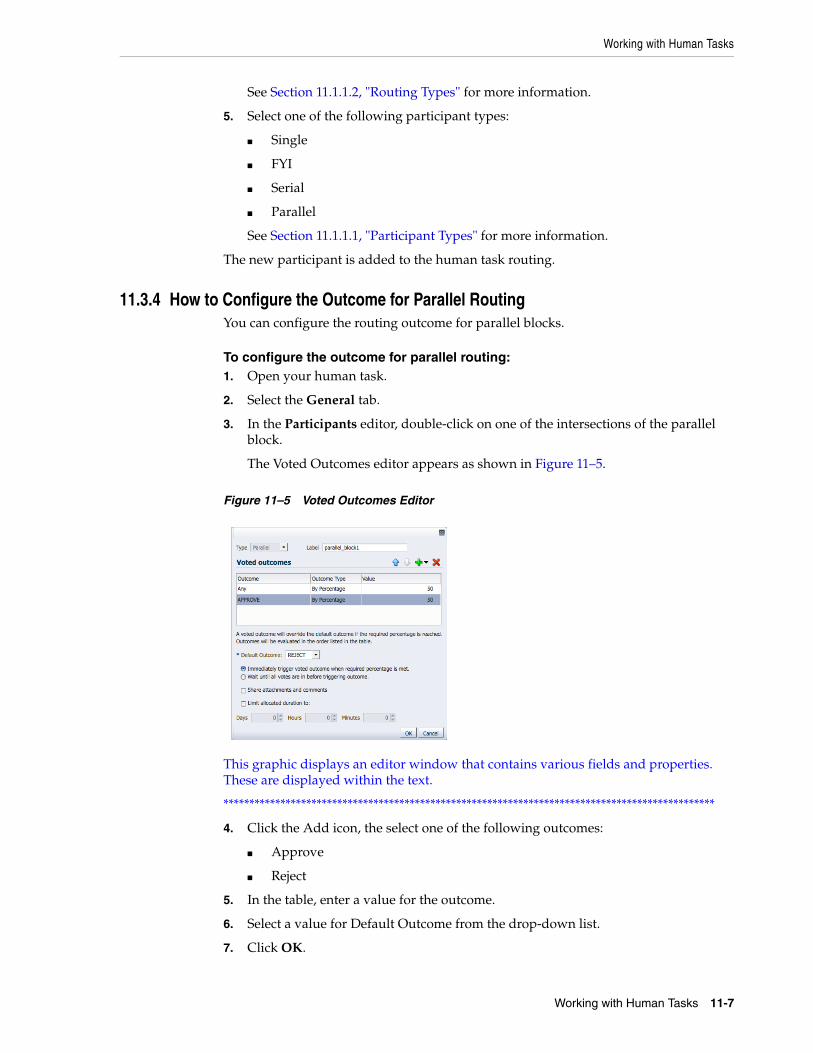
Working with Human Tasks
Working with Human Tasks 11-7
See Section 11.1.1.2, "Routing Types" for more information.
5. Select one of the following participant types:
■ Single
■ FYI
■ Serial
■ Parallel
See Section 11.1.1.1, "Participant Types" for more information.
The new participant is added to the human task routing.
11.3.4 How to Configure the Outcome for Parallel RoutingYou can configure the routing outcome for parallel blocks.
To configure the outcome for parallel routing:1. Open your human task.
2. Select the General tab.
3. In the Participants editor, double-click on one of the intersections of the parallel block.
The Voted Outcomes editor appears as shown in Figure 11–5.
Figure 11–5 Voted Outcomes Editor
This graphic displays an editor window that contains various fields and properties. These are displayed within the text.
***********************************************************************************************
4. Click the Add icon, the select one of the following outcomes:
■ Approve
■ Reject
5. In the table, enter a value for the outcome.
6. Select a value for Default Outcome from the drop-down list.
7. Click OK.
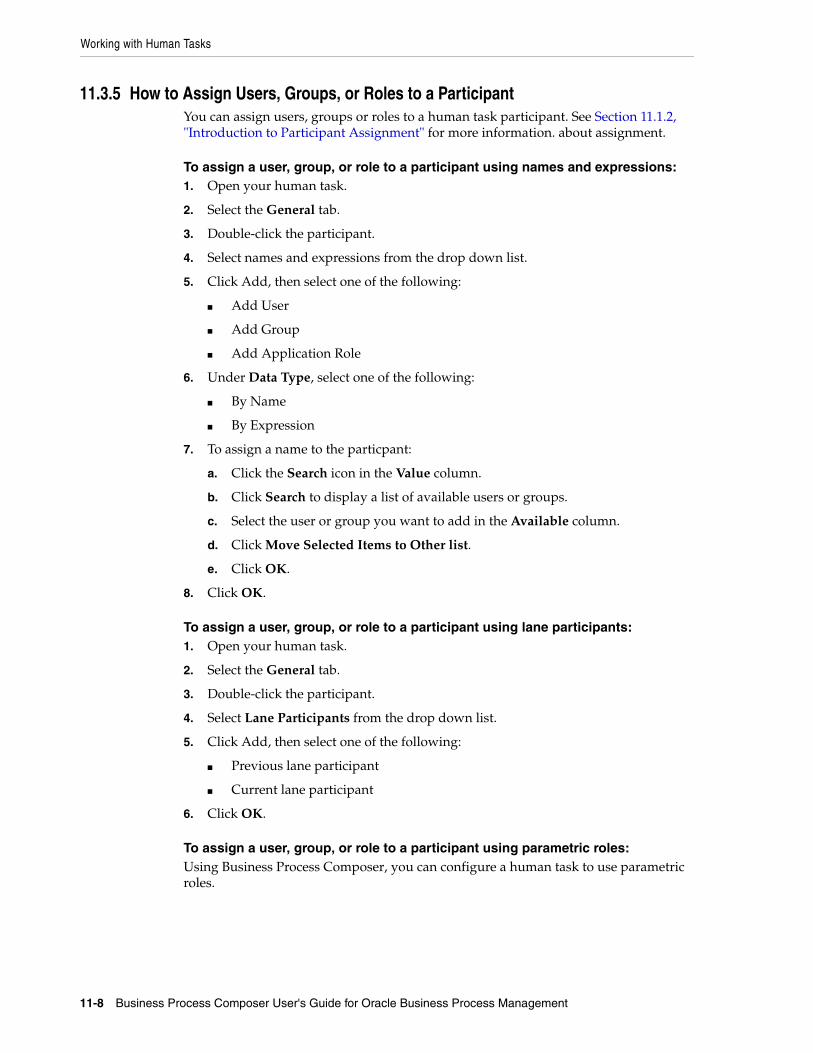
Working with Human Tasks
11-8 Business Process Composer User's Guide for Oracle Business Process Management
11.3.5 How to Assign Users, Groups, or Roles to a ParticipantYou can assign users, groups or roles to a human task participant. See Section 11.1.2, "Introduction to Participant Assignment" for more information. about assignment.
To assign a user, group, or role to a participant using names and expressions:1. Open your human task.
2. Select the General tab.
3. Double-click the participant.
4. Select names and expressions from the drop down list.
5. Click Add, then select one of the following:
■ Add User
■ Add Group
■ Add Application Role
6. Under Data Type, select one of the following:
■ By Name
■ By Expression
7. To assign a name to the particpant:
a. Click the Search icon in the Value column.
b. Click Search to display a list of available users or groups.
c. Select the user or group you want to add in the Available column.
d. Click Move Selected Items to Other list.
e. Click OK.
8. Click OK.
To assign a user, group, or role to a participant using lane participants:1. Open your human task.
2. Select the General tab.
3. Double-click the participant.
4. Select Lane Participants from the drop down list.
5. Click Add, then select one of the following:
■ Previous lane participant
■ Current lane participant
6. Click OK.
To assign a user, group, or role to a participant using parametric roles:Using Business Process Composer, you can configure a human task to use parametric roles.

Working with Human Tasks
Working with Human Tasks 11-9
1. Open your human task.
2. Select the General tab.
3. Double-click the participant.
4. Select Parametric Role from the drop down list.
5. Click OK.
11.3.6 How to Define the Duration for a ParticipantYou can define the duration for each participant within a human task.
Additionally, you can define duration for the entire human task. See Section 11.3.7, "How to Define the Duration for a Human Task" for more information.
To create task data for a human task:1. Open the human task where you want to assign a user, group, or role to a
participant.
2. Select the Data tab.
3. Click the Add button.
4. Select one of the following:
■ string
■ int
■ boolean
■ TaskExecutionData
The task data appears in Task Data table.
5. Enter a name for the new task data in the table.
11.3.7 How to Define the Duration for a Human TaskYou can define the duration globally for a human task.
Additionally, you can define duration for each process participant within the human task. See Section 11.3.6, "How to Define the Duration for a Participant" for more information.
To define a duration for a human task:1. Open the human task where you want to define the duration.
2. Select the General tab.
3. Double-click the participant.
4. From the Add drop-down menu, select one of the following:
■ Add User
Note: Although you can configure a human task to use parametric roles, you cannot create or configure the parametric roles using Business Process Composer. These must be created and assigned to the human task using Process Workspace or Oracle BPM Studio.

Working with Human Tasks
11-10 Business Process Composer User's Guide for Oracle Business Process Management
■ Add Group
■ Add Application Role
5. Click OK.
11.3.8 How to Create Task Data for a Human TaskUsing the human task editor, you can define the data types used within the human task. This data is used to store the information entered during user interaction.
To create task data for a human task:1. Open the human task where you want to create task data.
2. Select the Data tab.
3. Click the Add button.
4. Select one of the following:
■ string
■ int
■ boolean
■ TaskExecutionData
The task data appears in Task Data table.
5. Enter a name for the new task data in the table
11.3.9 How to Specify the Presentation of a Human TaskPresentations define the user interface of your application. Oracle Business Process Composer does not allow you to view or edit the presentation of a human task. However, you can specify the connectivity information used to access the presentation at runtime.
To specify the presentation of a human task:1. Open the human task whose presentation you want to specify.
2. Select the Data tab.
3. Expand Presentation.
4. Enter the following:
■ Hostname: Specifies the hostname of the server where the presentation is deployed.
■ HTTP Port: Specifies the port of the server where the presentation is deployed.
■ HTTPS Port: Specifies the secure port of the server where the presentation is deployed.
■ URI: Specifies the Uniform Resource Indicator of the presentation.
5. Click OK.
Note: This information should be provided by a process developer or administrator.

Performing Administrative Tasks 12-1
12Performing Administrative Tasks
This chapter describes how to perform administrative using Oracle Business Process Composer.
This chapter includes the following sections:
■ Section 12.1, "Introduction to Business Process Composer Administration"
■ Section 12.2, "How to Assign Global Roles"
■ Section 12.3, "How to Delete a Project or Project Template"
■ Section 12.4, "How to Configure on a Project"
■ Section 12.5, "How to Release the Lock on a Shared Project"
■ Section 12.6, "How to Import a Project Template"
12.1 Introduction to Business Process Composer AdministrationBusiness Process Composer enables you to assign administor priviledges to a user. Administrators can perform the following tasks:
■ Assign global roles to users.
■ Delete shared projects and project templates.
■ Release locks on shared projects.
■ Configure permissions on projects.
■ Import project templates.
12.2 How to Assign Global RolesIn addition to assigning project permissions for individual projects, BPM Composer enables administrators to assign permissions globally. The following global roles are available:
Note: The procedures described in this chapter can only be performed by users who have been granted the Project Administrator security role.
Note: Administrators cannot perform tasks on private projects. Only the project owner has access to private projects.

How to Delete a Project or Project Template
12-2 Business Process Composer User's Guide for Oracle Business Process Management
■ SOA Designer: The SOA Designer role is a security role shared with the SOA infrastructure. Business Process Composer uses this role to enable users. See Section 8.4, "Editing Oracle Business Rules at Run Time" for more information..
and groups to edit Oracle Business Rules at run time.
■ Project Administrator: Users or groups assigned this role can perform the following actions on all shared projects:
– Remove projects
– Deploy projects
– Define project permissions
– Create project snapshots
To assign a global role:1. Login to Business Process Composer as a user with administrator priviledges.
2. Click Administration.
3. Select Role Mapping.
4. Select a role from the drop-down list.
5. Click Choose:
a. Select from the following:
All:
Users:
Groups:
b. Click Search to view a list of all available users or groups.
c. In the Available column, select the users or groups you want to add.
d. Click Move Selected Item to Other List.
e. Click OK.
12.3 How to Delete a Project or Project Template
To delete a shared project:1. Login to Business Process Composer as a user with administrator priviledges.
2. Click Administration.
3. Select Project Management or Template Management.
4. Select a project or project template from the table.
5. Click Delete.
6. Click Yes to confirm that you want to delete the project.
12.4 How to Configure on a Project
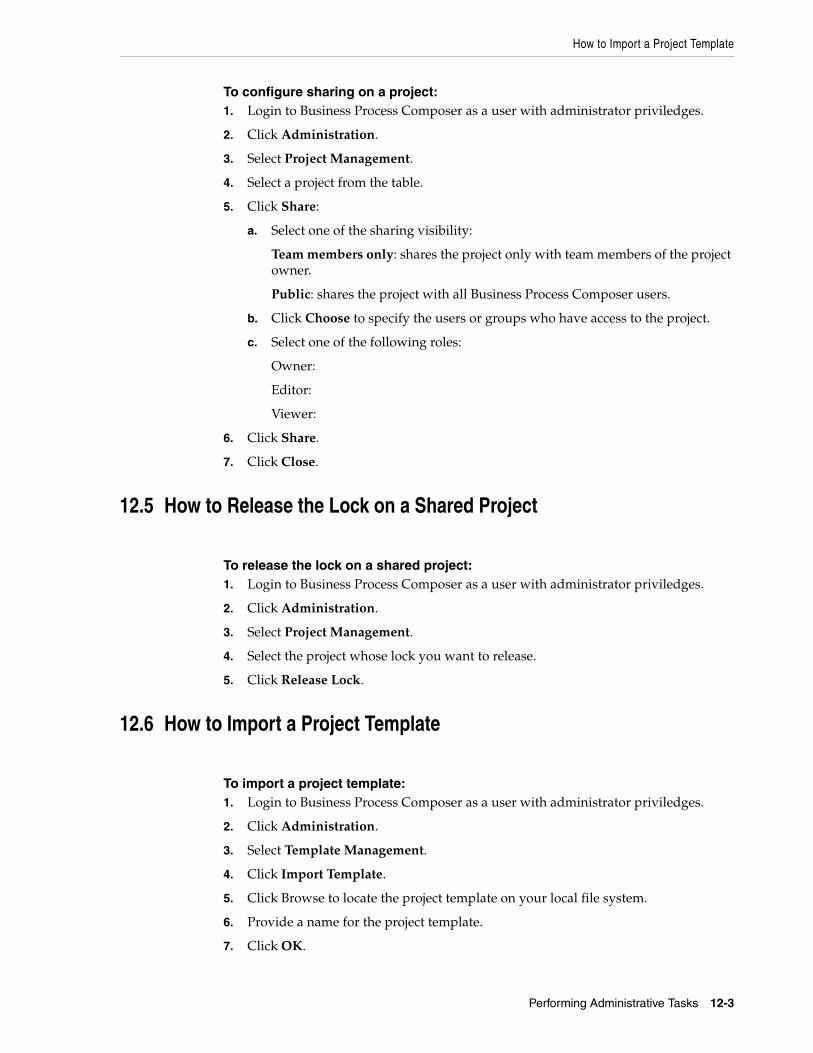
How to Import a Project Template
Performing Administrative Tasks 12-3
To configure sharing on a project:1. Login to Business Process Composer as a user with administrator priviledges.
2. Click Administration.
3. Select Project Management.
4. Select a project from the table.
5. Click Share:
a. Select one of the sharing visibility:
Team members only: shares the project only with team members of the project owner.
Public: shares the project with all Business Process Composer users.
b. Click Choose to specify the users or groups who have access to the project.
c. Select one of the following roles:
Owner:
Editor:
Viewer:
6. Click Share.
7. Click Close.
12.5 How to Release the Lock on a Shared Project
To release the lock on a shared project:1. Login to Business Process Composer as a user with administrator priviledges.
2. Click Administration.
3. Select Project Management.
4. Select the project whose lock you want to release.
5. Click Release Lock.
12.6 How to Import a Project Template
To import a project template:1. Login to Business Process Composer as a user with administrator priviledges.
2. Click Administration.
3. Select Template Management.
4. Click Import Template.
5. Click Browse to locate the project template on your local file system.
6. Provide a name for the project template.
7. Click OK.

How to Import a Project Template
12-4 Business Process Composer User's Guide for Oracle Business Process Management

A
BPMN Flow Object Property Reference A-1
ABPMN Flow Object Property Reference
This appendix provides information for each of the BPMN flow object properties. It contains these topics:
■ Section A.1, "Common Properties"
■ Section A.2, "Activity Properties"
■ Section A.3, "Gateway Properties"
■ Section A.4, "Event Properties"
■ Section A.5, "Measurement Mark Properties"
■ Section A.6, "Sequence Flow Properties"
A.1 Common PropertiesThis section describes common properties shared by multiple BPMN flow objects.
A.1.1 Basic TabTable A–1 lists the properties that are shared by all activities and gateways. These properties appear in the Basic tab.
Table A–1 Common Properties for Activities and Gateways - Basic Tab
Property Description
Name Defines the name of this flow object. This becomes the name of the flow object within your process.
Description Provides an optional description of this flow object. Adding a description can make your process more readable.

Activity Properties
A-2 Oracle Fusion Middleware User's Guide for Oracle Business Process Management
A.2 Activity PropertiesThe following sections describe the properties of each BPMN activities supported by the Oracle BPM Suite.
A.2.1 User TaskThe user task represents a part of your process where a process participant is required to perform work.
See Section 6.3.2, "Introduction to the User Task" for more information.
A.2.1.1 Basic TabThe basic tab of the user task contains properties shared by multiple BPMN flow objects. See Section A.1, "Common Properties" for a list of these properties.
Sampling Point Use to configure sampling points for this flow object.
■ Inherit Process Default: Select to use the default sampling configuration defined at the process level.
■ Generate: Select to generate sampling point data for this activity. This will override the default configuration defined at the process or project level.
■ Do Not Generate: Select to not generate sampling point data. This is primarily used for performance reasons.
Sampling points enable you to generate information about the performance of an flow object within in a running process. The data generated according to this configuration is stored in the Process Analytics Database.
Sampling point generation specified at the project level is applied to all of the processes within the project. See Section 4.5.12, "How to View and Edit Project Properties" for procedures for setting sampling point for a project.
However, you can override project-level settings within a process. Likewise, sampling point generation specified at the process level is applied to all of the flow objects within the process. You can also override process-level settings within each flow object.
Overriding sampling point generation at the project or process level is usually done to improve performance. For example, if your project contains a process that contains a great number of activities and you are not interested in obtaining process metrics for this process, you might choose to set its sampling point configuration so that the process does not generate sampling points.
Likewise, if you are interested in measuring only one process within your project, you might choose to set the project not to generate sampling point and configure that particular process to generate sampling points.
By default, the project sampling configuration is set to generate sampling points only for interactive activities.
Table A–1 (Cont.) Common Properties for Activities and Gateways - Basic Tab
Property Description

Activity Properties
BPMN Flow Object Property Reference A-3
A.2.1.2 Counter Tab
A.2.1.3 Implementation TabTable A–3 describes the properties that can be edited from the Implementation tab.
A.2.2 Manual TaskThe manual task represents a task within a process that is performed by process participants that is outside of the scope of Oracle BPM.
See Section 6.3.3, "Introduction to the Manual Task" for more information.
A.2.2.1 Basic TabThe basic tab of the manual task contains properties shared by multiple BPMN flow objects. See Section A.1, "Common Properties" for a list of these properties.
A.2.3 Service TaskThe service task enables you to communicate with other processes and services.
See Section 6.4.1, "Introduction to the Service Task" for more information.
A.2.3.1 Basic TabThe basic tab of the service task contains properties shared by multiple BPMN flow objects. See Section A.1, "Common Properties" for a list of these properties.
A.2.3.2 Implementation TabTable A–4 describes the properties that can be edited from the Implementation tab when you select the Service option.
Table A–2 User Task Properties - Counter Tab
Property Description
Business Indicators Defines the business indicator used as the counter for the human task.
See Section 10.3, "Working with Business Indicators and Counter Marks" for more information.
Table A–3 User Task Properties - Implementation Tab
Property Description
Human Task Defines the name of the human task assigned to this user task. You can select a list of human tasks in the business catalog.
Pattern Displays the pattern used for this human task.
Re-initiate Restarts the approval process from the beginning.
Table A–4 Service Task Properties - Implementation Tab (When Service is Selected)
Property Description
Service Determines the service called by the service task. This service is defined in the business catalog.
Operation Defines which operation within the service is invoked.

Activity Properties
A-4 Oracle Fusion Middleware User's Guide for Oracle Business Process Management
A.2.4 Send TaskThe send task sends a message to a system or process outside the current process.
See Section 6.4.4, "Introduction to the Send Task" for more information.
A.2.4.1 Basic TabThe basic tab of the send task contains properties shared by multiple BPMN flow objects. See Section A.1, "Common Properties" for a list of these properties.
A.2.4.2 Implementation TabTable A–6 describes basic implementation properties of the send task.
Table A–7 describes the implementation properties available when Initiates is selected.
Table A–8 describes the implementation properties when Continues is selected.
Table A–5 Service Task Properties - Implementation Tab (When Process is Selected)
Property Description
Process Determines the BPMN process called by the service task.
Node Determines the flow object called by the service task.
Table A–6 Send Task Properties - Implementation Tab
Property Description
Type Defines how the conversation of the send task is implemented. A conversation defines the sequence of a group of send and receive tasks that communicate with other processes or services. A send task can start a conversation with another process or service, or continue a conversation initiated by a previous send task.
Possible values are:
■ Initiates: Invokes another BPMN process or service.
■ Continues: Continues the conversation of a process that was previously invoked.
Table A–7 Send Task Properties - Implementation Tab (When Initiates is Selected)
Property Description
Implementation The implementation drop-down menu enables you to determine how the send task is implemented.
■ Not Implemented: No implementation is specified.
■ Service Call: Configures the send task to invoke a service contained in the business catalog.
Name: Determines the service invoked by the send task.
Operation: Defines which operation within the service is invoked.
■ Process Call: Configures the send task to invoke another BPMN process.
Process: Determines the BPMN process called by the service task.
Node: Determines the flow object called by the service task

Activity Properties
BPMN Flow Object Property Reference A-5
A.2.5 Receive TaskThe receive task waits for a message from a system or process outside the current process.
See Section 6.4.5, "Introduction to the Receive Task" for more information.
A.2.5.1 Basic TabThe basic tab of the receive task contains properties shared by multiple BPMN flow objects. See Section A.1, "Common Properties" for a list of these properties.
A.2.5.2 Implementation TabTable A–9 describes basic implementation properties of the receive task.
Table A–10 describes the implementation properties when Initiates is selected.
Table A–8 Send Task Properties - Implementation Tab (When Continues is Selected)
Property Description
Initiator Node Determines the receive task that precedes this send task within the conversation.
Table A–9 Receive Task Properties - Implementation Tab
Property Description
Create Instance Determines that the receive task will create a new process instance.
Type Determines how the conversation of the receive task is implemented. A conversation defines the sequence of a group of send and receive tasks that communicate with other processes or services. A send task can start a conversation with another process or service, or continue a conversation initiated by a previous send task.
Possible values are:
■ Initiates: Invokes another BPMN process or service.
■ Continues: Continues the conversation of a process that was previously invoked.

Activity Properties
A-6 Oracle Fusion Middleware User's Guide for Oracle Business Process Management
Table A–11 describes the implementation properties when Continues is selected.
A.2.6 Business Rule TaskThe business rules task enables you to incorporate Oracle Business Rules within your process.
See Section 6.5.2, "Introduction to the Business Rules Task" for more information.
A.2.6.1 Basic TabThe basic tab of the business rules task contains properties shared by multiple BPMN flow objects. See Section A.1, "Common Properties" for a list of these properties.
A.2.6.2 Implementation TabTable A–12 describes the properties that can be edited from the Implementation tab.
A.2.7 Script TaskThe script task is used to change values of data objects within your process
Table A–10 Receive Task Properties - Implementation Tab (When Initiates is Selected)
Property Description
Implementation Enables you to determine how the receive task defines a conversation with the send task that invokes it.
■ Not Implemented: No implementation is specified.
■ Define Interface: Enables you to define how the process is exposed as a service to other BPMN processes and services.
Argument definition: Defines the arguments required by the receive task. These are the arguments passed to the process from the invoking process or services.
Type: Defines whether the process is invoke synchronously or asynchronously.
Operation Name: Defines the name of the operation for this receive task. Other processes and services that invoke this receive task use this operation name.
■ Use From Catalog: Enables you to select an interface defined in the business catalog.
Name: Defines the name of the interface.
Operation: Determines the operation within the interface used by the receive task.
Table A–11 Receive Task Properties - Implementation Tab (When Continues is Selected)
Property Description
Initiator Node Allows you to select the send or receive task in the current process that precedes this receive task.
Table A–12 Business Rule Task Properties - Implementation Tab
Property Description
Rule Determines the business rule assigned to this business rules task.
Operation Specifies the decision function of the rule specified above.

Activity Properties
BPMN Flow Object Property Reference A-7
See Section 6.10.1, "Introduction to the Script Task" for more information.
A.2.7.1 Basic TabThe basic tab of the script task contains properties shared by multiple BPMN flow objects. See Section A.1, "Common Properties" for a list of theseS properties.
A.2.8 Call ActivityThe call activity allows you to call a reusable process from within the current process.
See Section 6.4.3, "Introduction to the Call Activity" for more information.
A.2.8.1 Basic TabThe basic tab of the call activity contains properties shared by multiple BPMN flow objects. See Section A.1, "Common Properties" for a list of these properties.
A.2.8.2 Implementation TabTable A–13 describes the properties that can be edited from the Implementation tab.
A.2.9 SubprocessesSubprocesses allow you to group BPMN flow objects together to make your process more readable.
See Section 6.9.1, "Introduction to Subprocesses" for more information.
A.2.9.1 Basic TabThe basic tab of subprocesses contains properties shared by multiple BPMN flow objects. See Section A.1, "Common Properties" for a list of these properties.
A.2.9.2 Loop Characteristics TabTable A–14 describes the properties that can be edited from the Loop Characteristics tab.
A.2.9.3 Argument Definitions TabTable A–15 describes the properties that can be edited from the Argument Definitions tab.
Table A–13 Call Activity Properties - Implementation Tab
Property Description
Process Specifies the BPMN process invoked by the call activity.
Table A–14 Subprocesses Properties - Loop Characteristics Tab
Property Description
Loop characteristics Determines how many time the subprocess will repeat. This property is read-only Oracle Business Process Composer.
Table A–15 Subprocesses Properties - Argument Definition Tab
Property Description
Inputs Defines the input arguments to the subprocesses.

Gateway Properties
A-8 Oracle Fusion Middleware User's Guide for Oracle Business Process Management
A.2.10 Inline HandlersInline handlers are types of subprocesses that allow you to model conditions that happen outside of a normal process flow.
See Section 6.9.2, "Introduction to Inline Handlers" for more information.
A.2.10.1 Basic TabThe basic tab of inline handlers contains properties shared by multiple BPMN flow objects. See Section A.1, "Common Properties" for a list of these properties.
A.3 Gateway PropertiesThe following sections describe the properties for each BPMN gateway.
A.3.1 Exclusive GatewayThe exclusive gateway enables you to split a process into two or more paths.
See Section 6.7.2, "Introduction to the Exclusive Gateway" for more information.
A.3.1.1 Basic TabThe basic tab of the exclusive gateway contains properties shared by multiple BPMN flow objects. See Section A.1, "Common Properties" for a list of these properties.
A.3.1.2 Outflows Order TabTable A–16 describes the properties that can be edited from the Outflows Order tab.
A.3.2 Inclusive GatewayThe inclusive gateway enables you to split your process into two or more paths.
See Section 6.7.3, "Introduction to the Inclusive Gateway" for more information.
A.3.2.1 Basic TabThe basic tab of the inclusive gateway contains properties shared by multiple BPMN flow objects. See Section A.1, "Common Properties" for a list of these properties.
A.3.3 Parallel GatewayThe parallel gateway enables you to split your process into two or more paths when you want your process flow to follow all paths simultaneously.
See Section 6.7.4, "Introduction to the Parallel Gateway" for more information.
Outputs Defines the output arguments passed from the subprocess.
Table A–16 Exclusive Gateway Properties - Outflows Order Tab
Property Description
Order Enables you to determine the order in which outgoing sequence flows are evaluated. The first condition that evaluates to true determines the path the process follows.
Table A–15 (Cont.) Subprocesses Properties - Argument Definition Tab
Property Description

Event Properties
BPMN Flow Object Property Reference A-9
A.3.3.1 Basic TabThe basic tab of the parallel gateway contains properties shared by multiple BPMN flow objects. See Section A.1, "Common Properties" for a list of these properties.
A.3.4 Complex GatewayThe complex gateway splits a process similar to an inclusive gateway. However, it enables you to define a condition that determines if the instance can continue even if not all of the tokens have arrived at the complex gateway merge.
See Section 6.7.5, "Introduction to the Complex Gateway" for more information.
A.3.4.1 Basic TabThe basic tab of the complex gateway contains properties shared by multiple BPMN flow objects. See Section A.1, "Common Properties" for a list of these properties.
A.3.4.2 Implementation TabTable A–17 describes the properties that can be edited from the Implementation tab.
A.3.5 Event-Based GatewayThe even based gateway enables you to branch your process flow based on the possibility that an event may occur.
See Section 6.7.6, "Introduction to the Event-Based Gateway" for more information.
A.3.5.1 Basic TabThe basic tab of the event-based gateway contains properties shared by multiple BPMN flow objects. See Section A.1, "Common Properties" for a list of these properties.
A.3.5.2 Outflows OrderTable A–18 describes the properties available in the Outflows Order tab.
A.4 Event PropertiesThe following sections describe the properties for each type of events supported by Oracle BPM.
Table A–17 Complex Gateway Properties - Implementation Tab
Property Description
Activation Condition Enables you to define a condition that specifies when the gateway releases the tokens that arrive to it. Each time a new token arrives to the complex gateway the BPMN Service Engine evaluates this condition.
If the condition evaluates to true, then the complex gateway releases all the tokens that arrived until that moment.
Table A–18 Event-Based Gateway Properties - Outflows Order Tab
Property Description
Instantiate Causes the event-based gateway to create a new process instance.

Event Properties
A-10 Oracle Fusion Middleware User's Guide for Oracle Business Process Management
A.4.1 The None Start EventThe none start event is used when no instance trigger is specifically defined.
See Section 6.2.3, "Introduction to the None Start Event" for more information.
A.4.1.1 Basic TabTable A–19 describes the properties available in the Basic tab.
A.4.2 The Message Start EventThe message start event triggers a process instance when a message is received.
See Section 6.2.4, "Introduction to the Message Start Event" for more information.
A.4.2.1 Basic TabTable A–20 describes the properties available in the Basic tab.
A.4.2.2 Implementation TabTable A–21 describes the basic properties that can be edited from the Implementation tab.
Table A–19 None Start Event Properties - Basic Tab
Property Description
Name Defines the name of this flow object. This becomes the name of the flow object within your process.
Description Provides an optional description of this flow object. Adding a description can make your process more readable.
Table A–20 Message Start Event Properties - Basic Tab
Property Description
Name Defines the name of this flow object. This becomes the name of the flow object within your process.
Description Provides an optional description of this flow object. Adding a description can make your process more readable.
Table A–21 Message Start Properties - Implementation Tab
Property Description
Type This property is read-only for message start events. Message start events can only initiate a conversation between two processes.
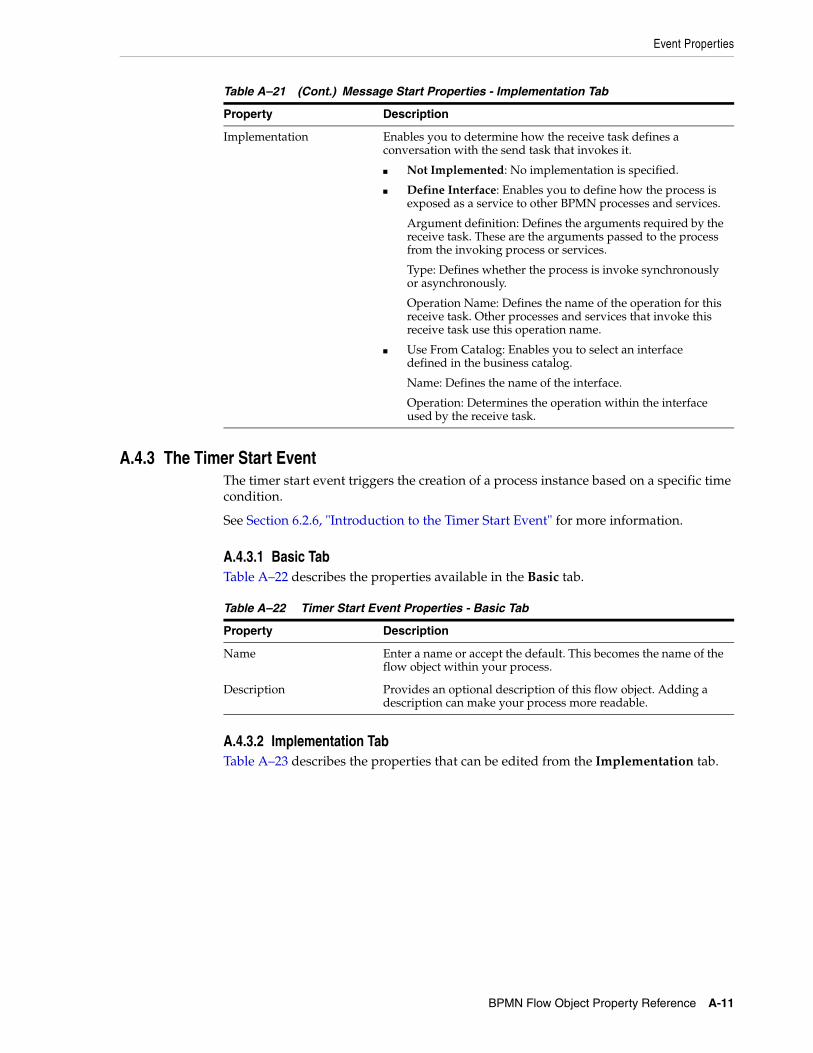
Event Properties
BPMN Flow Object Property Reference A-11
A.4.3 The Timer Start EventThe timer start event triggers the creation of a process instance based on a specific time condition.
See Section 6.2.6, "Introduction to the Timer Start Event" for more information.
A.4.3.1 Basic TabTable A–22 describes the properties available in the Basic tab.
A.4.3.2 Implementation TabTable A–23 describes the properties that can be edited from the Implementation tab.
Implementation Enables you to determine how the receive task defines a conversation with the send task that invokes it.
■ Not Implemented: No implementation is specified.
■ Define Interface: Enables you to define how the process is exposed as a service to other BPMN processes and services.
Argument definition: Defines the arguments required by the receive task. These are the arguments passed to the process from the invoking process or services.
Type: Defines whether the process is invoke synchronously or asynchronously.
Operation Name: Defines the name of the operation for this receive task. Other processes and services that invoke this receive task use this operation name.
■ Use From Catalog: Enables you to select an interface defined in the business catalog.
Name: Defines the name of the interface.
Operation: Determines the operation within the interface used by the receive task.
Table A–22 Timer Start Event Properties - Basic Tab
Property Description
Name Enter a name or accept the default. This becomes the name of the flow object within your process.
Description Provides an optional description of this flow object. Adding a description can make your process more readable.
Table A–21 (Cont.) Message Start Properties - Implementation Tab
Property Description

Event Properties
A-12 Oracle Fusion Middleware User's Guide for Oracle Business Process Management
A.4.4 The Signal Start EventThe signal start event is similar to a message start event in that it is based on communication from another process or service.
See Section 6.2.5, "Introduction to the Signal Start Event" for more information.
A.4.4.1 Basic TabTable A–24 describes the properties that can be edited from the Basic tab.
A.4.4.2 Implementation TabTable A–25 describes the properties that can be edited from the Implementation tab.
A.4.5 The Error Start EventThe error start event is used as the start event of an inline handler.
See Section 6.2.7, "Introduction to the Error Start Event" for more information.
A.4.5.1 Basic TabTable A–26 describes the properties that can be edited from the Basic tab.
Table A–23 Timer Start Event Properties - Implementation Tab
Property Description
Due Type .Determines whether the timer start event creates a process instance based on a specific date or after a specific interval has passed.
■ Date: Enables you to specify the date and time when the timer start event creates a new process instance. The time and date are specified according to the following format:
day/month/year hour:minute PM/AM
■ Interval: Enables you to specify the interval that the timer even waits to create a new process instance. This is specified in months, days, hours, seconds according to the following format:
<number>M,<number>d,<number>h,<number>s
Expression Mode Enables you to define either the date or interval using an expression.
Table A–24 SIgnal Start Event Properties - Basic Tab
Property Description
Name Enter a name or accept the default. This becomes the name of the flow object within your process.
Description Provides an optional description of this flow object. Adding a description can make your process more readable.
Table A–25 SIgnal Start Event Properties - Implementation Tab
Property Description
Event Defines the event used to trigger the signal start event. Events are defined in the business catalog.

Event Properties
BPMN Flow Object Property Reference A-13
A.4.5.2 Implementation TabTable A–27 describes the properties that can be edited from the Implementation tab.
A.4.6 None Catch EventThe none catch event is used as a place holder in your process.
A.4.6.1 Basic TabThe basic tab of the none catch event contains properties shared by multiple BPMN flow objects. See Section A.1, "Common Properties" for a list of these properties.
A.4.7 Message Catch EventThe message catch event enables you to receive a message from another process or service.
See Section 6.4.8, "Introduction to the Message Catch Event" for more information.
A.4.7.1 Basic TabThe basic tab of the message catch event contains properties shared by multiple BPMN flow objects. See Section A.1, "Common Properties" for a list of these properties.
A.4.7.2 Implementation TabTable A–28 describes basic implementation properties of the receive task.
Table A–26 Error Start Event Properties - Basic Tab
Property Description
Name Enter a name or accept the default. This becomes the name of the flow object within your process.
Description Provides an optional description of this flow object. Adding a description can make your process more readable.
Table A–27 Error Start Event Properties - Implementation Tab
Property Description
Exception .Defines the error exception implemented by the error start event. This is stored in the business catalog.
Catch all Business Exceptions
Select to allow the catch event to catch any business exception.
Catch all System Exceptions Select to allow the catch event to catch any system exception

Event Properties
A-14 Oracle Fusion Middleware User's Guide for Oracle Business Process Management
Table A–29 describes the implementation properties when Initiates is selected.
Table A–30 describes the implementation properties when Continues is selected.
A.4.8 Timer Catch EventTimer catch events enable you to control the flow of your process using a time condition.
See Section 6.8.2, "Introduction to the Timer Catch Event" for more information.
Table A–28 Message Catch Properties - Implementation Tab
Property Description
Type Determines how the conversation of the message catch event is implemented. A conversation defines the sequence of a group of message events that communicate with other processes or services. A message event can start a conversation with another process or service, or continue a conversation initiated by a previous message event.
Possible values are:
■ Initiates: Invokes another BPMN process or service.
■ Continues: Continues the conversation of a process that was previously invoked.
Table A–29 Message Catch Properties - Implementation Tab (When Initiates is Selected)
Property Description
Implementation Enables you to determine how the message catch event defines a conversation with the process or service that invokes it.
■ Not Implemented: No implementation is specified.
■ Define Interface: Enables you to define how the process is exposed as a service to other BPMN processes and services.
Argument definition: Defines the arguments required by the message catch event. These are the arguments passed to the process from the invoking process or services.
Type: Defines whether the process is invoked synchronously or asynchronously.
Operation Name: Defines the name of the operation for this message catch event. Other processes and services that invoke this message catch use this operation name.
■ Use From Catalog: Enables you to select an interface defined in the business catalog.
Name: Defines the name of the interface.
Operation: Determines the operation within the interface used by the message catch event.
Table A–30 Message Catch Properties - Implementation Tab (When Continues is Selected)
Property Description
Initiator Node Allows you to select the message event in the current process that precedes this message catch event.

Event Properties
BPMN Flow Object Property Reference A-15
A.4.8.1 Basic TabThe basic tab of the timer catch event contains properties shared by multiple BPMN flow objects. See Section A.1, "Common Properties" for a list of these properties.
A.4.8.2 Implementation TabTable A–31 describes the properties that can be edited from the Implementation tab.
A.4.9 Error Catch EventError catch events are intermediate events used to handle an error that occurs within your process flow.
A.4.9.1 Basic TabThe basic tab of the error boundary catch event contains properties shared by multiple BPMN flow objects. See Section A.1, "Common Properties" for a list of these properties.
A.4.9.2 Implementation TabTable A–32 describes the properties that can be edited from the Implementation tab.
A.4.10 Message Throw EventThe message throw event enables you to send a message to another process or service.
A.4.10.1 Basic Tab
Table A–31 Timer Catch Event Properties - Implementation Tab
Property Description
Due Type .Determines whether the timer catch event creates a process instance based on a specific date or after a specific interval has passed.
■ Date: Enables you to specify the date and time when the timer catch event is triggered. The time and date are specified according to the following format:
day/month/year hour:minute PM/AM
■ Interval: Enables you to specify the interval that the timer even waits trigger the event. This is specified in months, days, hours, seconds according to the following format:
<number>M,<number>d,<number>h,<number>s
Expression Mode Enables you to define either the date or interval using an expression.
Table A–32 Error Catch Event Properties - Implementation Tab
Property Description
Exception Defines the error exception implemented by the error catch event. This is stored in the business catalog.
Catch all Business Exceptions
Select to allow the error catch event to catch any business exception.
Catch all System Exceptions Select to allow the error catch event to catch any system exception
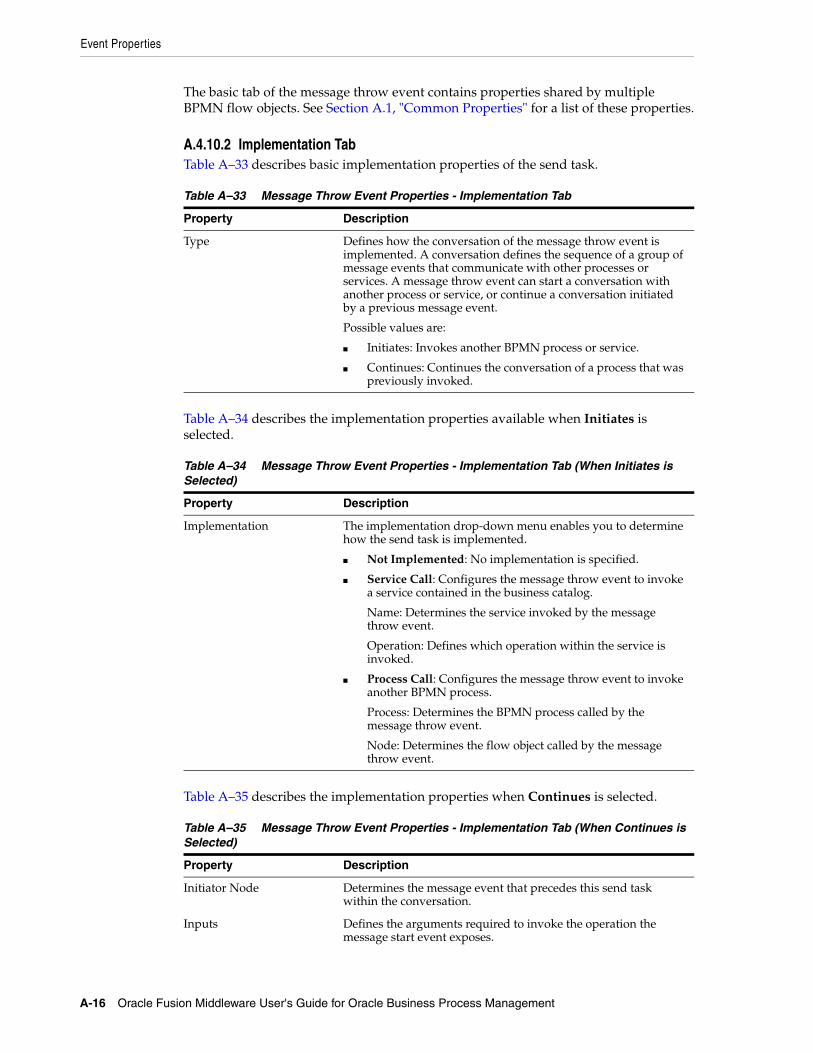
Event Properties
A-16 Oracle Fusion Middleware User's Guide for Oracle Business Process Management
The basic tab of the message throw event contains properties shared by multiple BPMN flow objects. See Section A.1, "Common Properties" for a list of these properties.
A.4.10.2 Implementation TabTable A–33 describes basic implementation properties of the send task.
Table A–34 describes the implementation properties available when Initiates is selected.
Table A–35 describes the implementation properties when Continues is selected.
Table A–33 Message Throw Event Properties - Implementation Tab
Property Description
Type Defines how the conversation of the message throw event is implemented. A conversation defines the sequence of a group of message events that communicate with other processes or services. A message throw event can start a conversation with another process or service, or continue a conversation initiated by a previous message event.
Possible values are:
■ Initiates: Invokes another BPMN process or service.
■ Continues: Continues the conversation of a process that was previously invoked.
Table A–34 Message Throw Event Properties - Implementation Tab (When Initiates is Selected)
Property Description
Implementation The implementation drop-down menu enables you to determine how the send task is implemented.
■ Not Implemented: No implementation is specified.
■ Service Call: Configures the message throw event to invoke a service contained in the business catalog.
Name: Determines the service invoked by the message throw event.
Operation: Defines which operation within the service is invoked.
■ Process Call: Configures the message throw event to invoke another BPMN process.
Process: Determines the BPMN process called by the message throw event.
Node: Determines the flow object called by the message throw event.
Table A–35 Message Throw Event Properties - Implementation Tab (When Continues is Selected)
Property Description
Initiator Node Determines the message event that precedes this send task within the conversation.
Inputs Defines the arguments required to invoke the operation the message start event exposes.
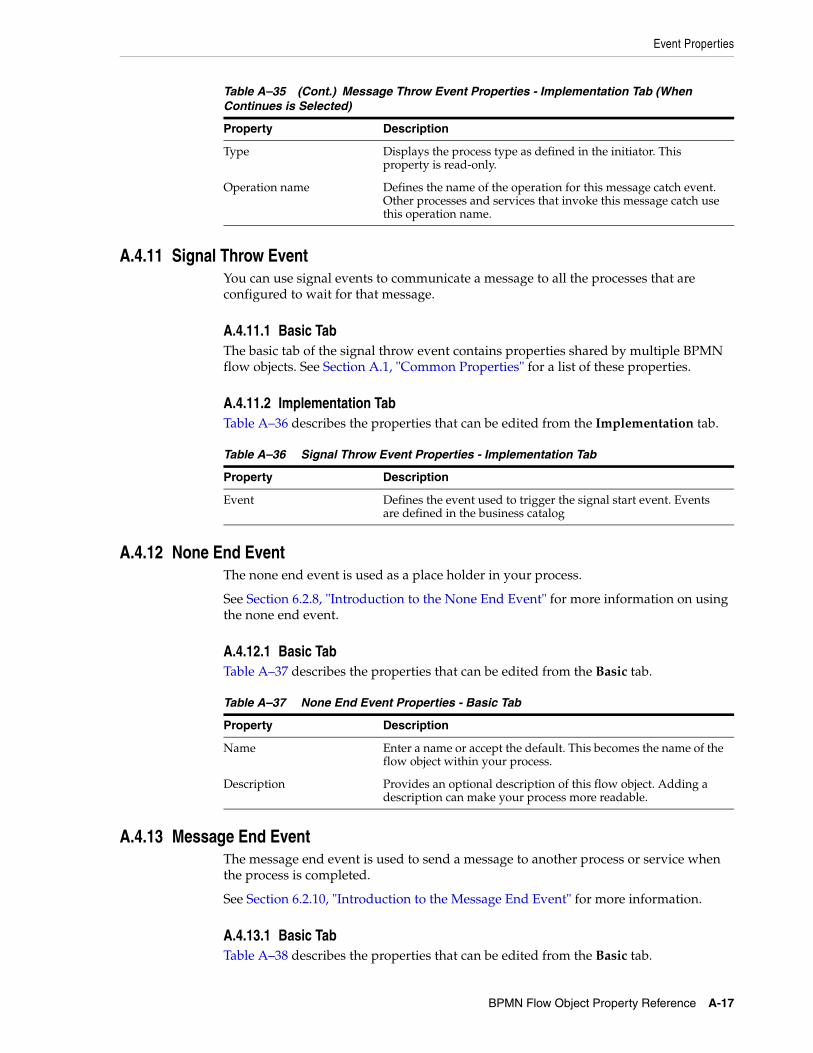
Event Properties
BPMN Flow Object Property Reference A-17
A.4.11 Signal Throw EventYou can use signal events to communicate a message to all the processes that are configured to wait for that message.
A.4.11.1 Basic TabThe basic tab of the signal throw event contains properties shared by multiple BPMN flow objects. See Section A.1, "Common Properties" for a list of these properties.
A.4.11.2 Implementation TabTable A–36 describes the properties that can be edited from the Implementation tab.
A.4.12 None End EventThe none end event is used as a place holder in your process.
See Section 6.2.8, "Introduction to the None End Event" for more information on using the none end event.
A.4.12.1 Basic TabTable A–37 describes the properties that can be edited from the Basic tab.
A.4.13 Message End EventThe message end event is used to send a message to another process or service when the process is completed.
See Section 6.2.10, "Introduction to the Message End Event" for more information.
A.4.13.1 Basic TabTable A–38 describes the properties that can be edited from the Basic tab.
Type Displays the process type as defined in the initiator. This property is read-only.
Operation name Defines the name of the operation for this message catch event. Other processes and services that invoke this message catch use this operation name.
Table A–36 Signal Throw Event Properties - Implementation Tab
Property Description
Event Defines the event used to trigger the signal start event. Events are defined in the business catalog
Table A–37 None End Event Properties - Basic Tab
Property Description
Name Enter a name or accept the default. This becomes the name of the flow object within your process.
Description Provides an optional description of this flow object. Adding a description can make your process more readable.
Table A–35 (Cont.) Message Throw Event Properties - Implementation Tab (When Continues is Selected)
Property Description
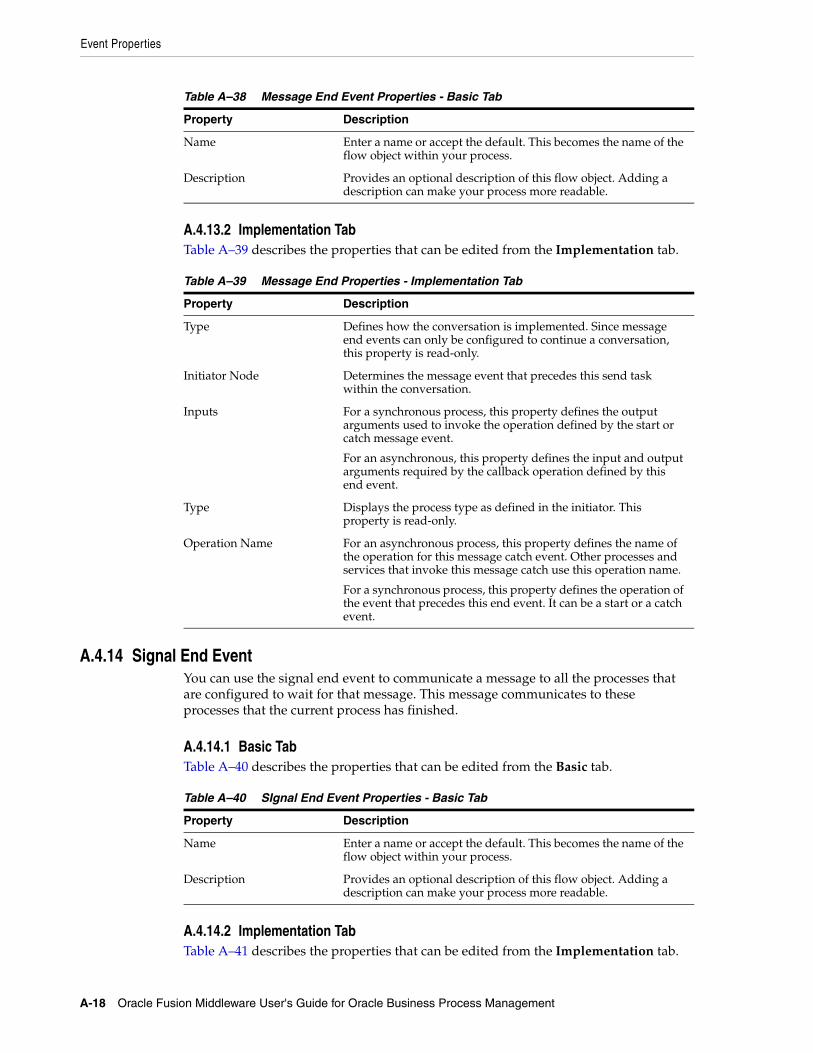
Event Properties
A-18 Oracle Fusion Middleware User's Guide for Oracle Business Process Management
A.4.13.2 Implementation TabTable A–39 describes the properties that can be edited from the Implementation tab.
A.4.14 Signal End EventYou can use the signal end event to communicate a message to all the processes that are configured to wait for that message. This message communicates to these processes that the current process has finished.
A.4.14.1 Basic TabTable A–40 describes the properties that can be edited from the Basic tab.
A.4.14.2 Implementation TabTable A–41 describes the properties that can be edited from the Implementation tab.
Table A–38 Message End Event Properties - Basic Tab
Property Description
Name Enter a name or accept the default. This becomes the name of the flow object within your process.
Description Provides an optional description of this flow object. Adding a description can make your process more readable.
Table A–39 Message End Properties - Implementation Tab
Property Description
Type Defines how the conversation is implemented. Since message end events can only be configured to continue a conversation, this property is read-only.
Initiator Node Determines the message event that precedes this send task within the conversation.
Inputs For a synchronous process, this property defines the output arguments used to invoke the operation defined by the start or catch message event.
For an asynchronous, this property defines the input and output arguments required by the callback operation defined by this end event.
Type Displays the process type as defined in the initiator. This property is read-only.
Operation Name For an asynchronous process, this property defines the name of the operation for this message catch event. Other processes and services that invoke this message catch use this operation name.
For a synchronous process, this property defines the operation of the event that precedes this end event. It can be a start or a catch event.
Table A–40 SIgnal End Event Properties - Basic Tab
Property Description
Name Enter a name or accept the default. This becomes the name of the flow object within your process.
Description Provides an optional description of this flow object. Adding a description can make your process more readable.

Event Properties
BPMN Flow Object Property Reference A-19
A.4.15 Error End EventThe end error event is used when the end of a process is the result of an error condition.
See Section 6.2.9, "Introduction to the Error End Event" for more information.
A.4.15.1 Basic TabTable A–42 describes the properties that can be edited from the Basic tab.
A.4.15.2 Implementation TabTable A–43 describes the properties that can be edited from the Implementation tab.
A.4.16 Terminate End EventThe terminate end event is used to immediately stop a process. When a terminate end event is reached, the process stops immediately.
See Section 6.2.11, "Introduction to the Terminate End Event" for more information.
A.4.16.1 Basic TabTable A–44 describes the properties that can be edited from the Basic tab.
Table A–41 SIgnal End Event Properties - Implementation Tab
Property Description
Event Defines the event used to trigger the signal start event. Events are defined in the business catalog.
Table A–42 Error End Event Properties - Basic Tab
Property Description
Name Enter a name or accept the default. This becomes the name of the flow object within your process.
Description Provides an optional description of this flow object. Adding a description can make your process more readable.
Table A–43 Error End Event Properties - Implementation Tab
Property Description
Exception Defines the error exception implemented by the error catch event. This is stored in the business catalog.
Table A–44 Terminate End Event Properties - Basic Tab
Property Description
Name Enter a name or accept the default. This becomes the name of the flow object within your process.
Description Provides an optional description of this flow object. Adding a description can make your process more readable.

Measurement Mark Properties
A-20 Oracle Fusion Middleware User's Guide for Oracle Business Process Management
A.5 Measurement Mark PropertiesMeasurement marks enable you to measure a business indicator of type measure at a certain point in the process or in a section of the process. The following types of measurement marks are supported:
■ Start Measurement Mark
■ End Measurement Mark
■ Snapshots
.
A.6 Sequence Flow PropertiesSequence flows define the order or sequence that work is performed within a process. The following sections describe the sequence flow properties you can edit using Oracle Business Process Composer.
A.6.1 Default Sequence FlowTable A–46 describes the properties of default sequence flows.
A.6.2 Normal Sequence Flow
Table A–47 describes the properties of default sequence flows.
Table A–45 Measurement Mark Properties
Property Description
Name Defines the name for this measurement mark.
Description .Provides an optional description for this measurement mark.
Type Displays the type of measurement mark. This property is read-only.
Business Indicators Defines the business indicators assigned to this measurement mark.
See Section 10.3, "Working with Business Indicators and Counter Marks" for more information.
Table A–46 Default Sequence Flow Properties - Basic Tab
Property Description
Name Defines the name of this sequence flow. This name appears next to the sequence flow in your process diagram.
Description Provides an optional description of this sequence flow. Adding a description can make your process more readable.
Table A–47 Normal Sequence Flow Properties - Basic Tab
Property Description
Name Defines the name of this sequence flow. This name appears next to the sequence flow in your process diagram.

Sequence Flow Properties
BPMN Flow Object Property Reference A-21
A.6.3 Conditional Sequence Flow
Table A–48 describes the properties of default sequence flows.
Description Provides an optional description of this sequence flow. Adding a description can make your process more readable.
Table A–48 Conditional Sequence Flow Properties - Basic Tab
Property Description
Name Defines the name of this sequence flow. This name appears next to the sequence flow in your process diagram.
Description Provides an optional description of this sequence flow. Adding a description can make your process more readable.
Condition Specifies the expression used to evaluate this conditional sequence flow. You can define an expression by clicking Edit to launch the expression editor.
See Section A.3.1, "Exclusive Gateway" for more information on configuring the order in which conditional sequence flows are evaluated.
Table A–47 (Cont.) Normal Sequence Flow Properties - Basic Tab
Property Description

Sequence Flow Properties
A-22 Oracle Fusion Middleware User's Guide for Oracle Business Process Management