Embed Size (px)
Citation preview

Storing the nations grain
www.hesilos.com
OperationManual

www.hesilos.com
Storing the nations grain
Silo Operation Manual
Silo Operation Guide
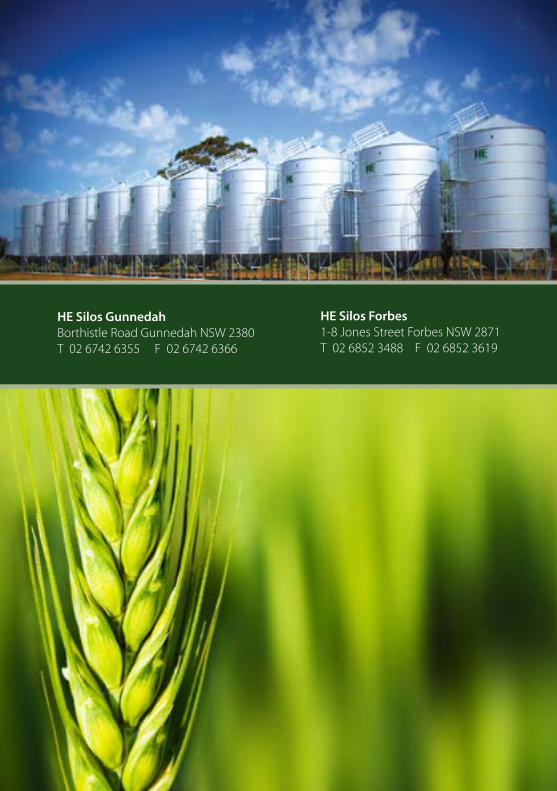
HE Silos GunnedahBorthistle Road, Gunnedah NSW 2380T 02 6742 6355 F 02 6742 6366
For onsite bulk storage contact Free call: 1300 764 700
HE Silos Forbes1-8 Jones Street, Forbes NSW 2871T 02 6852 3488 F 02 6852 3619Free Call 1800 046 046
Revised October 2015
Compiled by HE Silos
SILO OPERATION GUIDE • 1
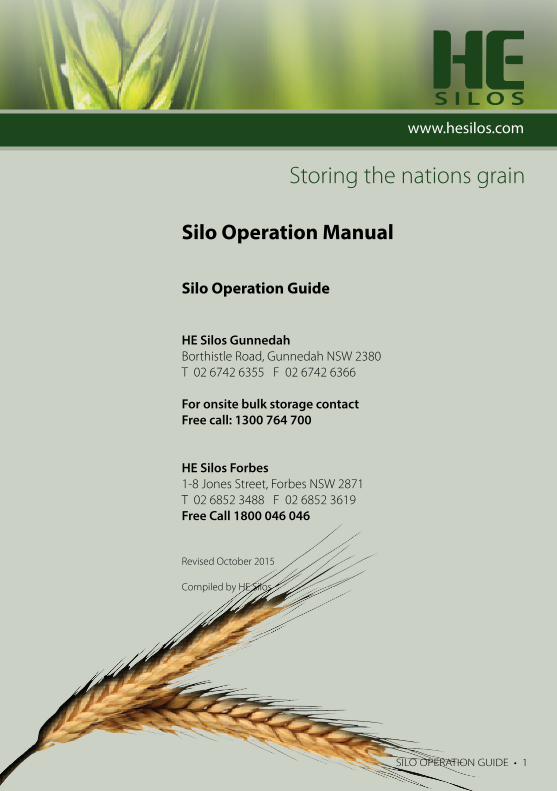
INSTALLATIONSite Preparation 3Dangers Vehicle Movement Soil Specification
Elevated Silo Pad 3 Concrete Specifications Reo BarFixing Silo to Silo Pad 4 Clearances Hold Down Points
Site Maintenance 4 Precautions
SILO SAFETYSafety in HE Silos 4 Features Precautions
SILO OPERATION Lid Opener 5 Windows 5 Outlets, eg Bagging Off Chute 5 Ladders 5 Annual Checks 6 How to Fill a Silo 6 How to Fill a Meal Mix Site (60º cone) 7 How to unload the Silo 7 Maintaining Grain Quality 8 Fumigating 9 Entry into Silo 11
SILO MAINTENANCE Cleaning 12 Seals 12 Silo fixture to concrete pad 12 Maintenance Procedure 13 Maximum Capacities in Silos 14
EMERGENCY PROCEDURES Fire 14 Structural 14 Entrapment 14 Spare Parts 14 Critical Safety Maintenance 14 Operator Training 15 Sensible Grain Storage 15 Flat Bottom Silos Unloading Procedures 16 Warranty 17
FOR MORE INFORMATIONPlease refer to the GRDC(Grain Research and Development Corporation)website for update information
2 • SILO OPERATION GUIDE
Silo Operation Manual
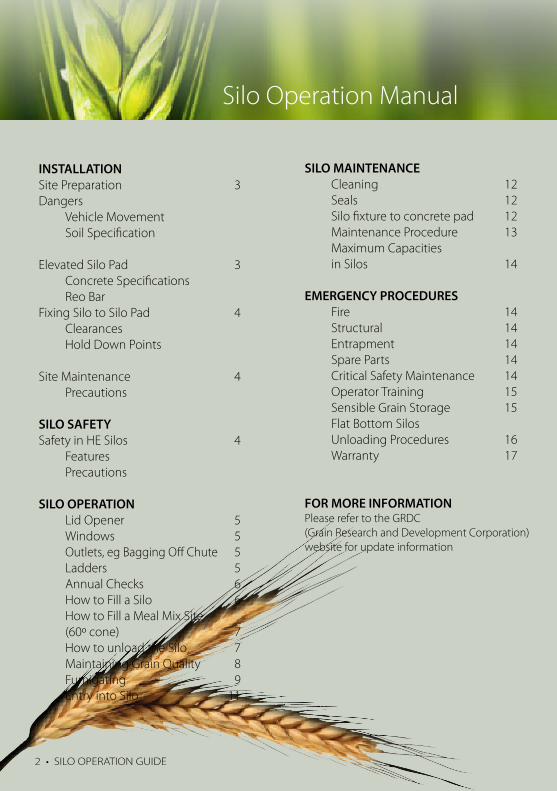
INSTALLATION - Site Preparation
The concrete pad should be on flat level ground with ample truck access.
Precautions to be taken:• Concrete silo pad must be level as well as surroundings.• The ground must be natural hard compacted soil.• Truck must be able to easy access the point for loading and unloading.• Maximum clearance to power lines
Proposed location of the container to be evaluated?
Factors to consider Yes No Not ApplicableCan the ground or surface support the loads?
Is drainage adequate to prevent flooding or
Subsidence of the foundations or land surface?
Have foundations been installed in accordance with
the silo manufacturer’s instructions?
Are distances from overhead power lines sufficient for
work procedures (eg, Using rods from top hatch?)
Can augers or other conveyors operate at a safe
distance from overhead power lines?
Is access to load and unload trucks and chaser bins
safe? (eg, No danger of contact with power lines, level
ground when tipping.)
Is access by vehicles to and from public roads safe?
Are distances from other buildings and facilities
sufficient to allow safe access and egress from work areas?
Elevated Silo Concrete Pad• Minimum 25mps strength
• F82 mesh required embedded 50mm
• Concrete slab specifications available by contacting HE Silos
SILO OPERATION GUIDE • 3

Fixing Silo to Concrete Pad
• More than 3mm clearance between silo base ring and concrete pad must be filled with spacer.• Fix with eight 10mm screwbolts at four points• HE Silos will bolt down the silos, but accept NO responsibility and offer no guarantee that the silo will not blow over, due to concrete slab strength quality.
Site Maintenance• Silo site needs to be free of livestock.
• Beware of water erosion around concrete pad.
HE Silos - Silo Safety• DANGER! - Insure the lock ladder is in the closed position after use.
• The remote lid opener handle is under tension. Beware when closing!
• Silo site needs to be free of livestock.
HE Silos has produced this silo according to requirements laid down by the statutory authority
of the state and existing at the time of manufacture. Standard code - Occupational Health and
Safety Act 2001 and Australian Standard Codes such as AS 1657 for ladders and catwalks.
Safety features have been incorporated into the design and the following information is provided
that is needed for the safe installation, operation and maintenance of the silo.
The design has taken into account most variations that can occur in the displacement of grain
or other substances that may be stored in this silo, and follows the relevant design codes and
standards. Loads on Bulk Solids Containers Australian Standard Codes AS 3774.
This silo has been designed to store wheat, oats, barley, canola, triticale
sorghum, lupin, corn only.
Fertiliser should be stored in a purpose-built silo.
Specially designed 60ºC cone silos are designed only to store mill mix or feed mix
(maximum 650kg/m3).
4 • SILO OPERATION GUIDE

Silo Operation
Lid Opener - by pulling the lid handle down, the lid opens by pulling against a spring, to allow the lid to close, return handle to close position. CAUTION Lid handle under pressure.
Outlets - ensure all outlets (including manhole) are closed before loading silo.
Ladders - remain on ladder when accessing centre hatch.
• Safety harness must be worn when climbing the ladder to access centre inlet. Fasten safety harness line to safety ring on top of silo. • Enclosed shoes must be worn when climbing ladder. • Lock ladder into closed position after use. • Maximum load on ladders is 150 kgs.
Safety GridsThe upper hatches are fitted with permanently mounted safety grids. DO NOT remove thesesafety items.
Warning SignsThis silo is fitted with warning signs. If these fade or fall off, ask your manufacturerfor replacements.
SILO OPERATION GUIDE • 5
Annual Checks
• Silos must be inspected regularly for corrosion. Corrosion of the lower sheets of any silo may eventually lead to failure.• Once a year, pressurize your sealed silos to check if they are gas-tight. A silo which does not meet the standard, will allow gas to leak out. The concentration of the fumigant will be reduced, and there is a chance of insect survival. These insects will have a resistance to the fumigant.• Sealing can be checked using a standard portable medium size farm air-compressor attached to the tubeless valve fitted to the silo wall. The pressure needs to change 25mm on the oil gauge.• It is best to check the silo under stable weather conditions, eg, full sun or full cloud. Fluctuating temperatures will result in different pressure readings.• Under poor weather conditions, or if it is a very leaky silo, a farm compressor will have difficulty in maintaining the pressure for the silo.
How to Fill a Silo• Open the top centre lid• Close Manhole lid and outlet - if sealed silo, fit sealed clamp on bottom hatch to outlet• Ensure auger is empty• Move auger into the centre fill hole• Commence filling, ensuring that auger is not resting on the silo.
6 • SILO OPERATION GUIDE
How to Fill a Meal Mix Silo
• Open top hatch and fill through centrefill.
• Connect camlock fitting to blower pipe, and commence filling, ensuring that product is not blowing out the breather pipe. This would indicate that the silo is full or has too much pressure.
How to Unload the Silo• Open top centre fill
• Start auger
• Open outlet to the desired rate determined by the size and speed of the auger
• Once the required amount of product is withdrawn from the silo, close the outlet, allowing the auger to empty.
• Close top centre fill after completion
SILO OPERATION GUIDE • 7

Maintain Grain Quality
• Store only dry and clean grain to ensure quality is maintained and a good product is retrieved. As a guide, the commodity should contain no more seconds or foreign seeds, or other material, than is allowed by central storage operations.
• Moisture control in on farm-stored grain is essential. The drier the grain, the better. In a silo which will remain sealed, do not store cereal grain above 12% moisture content.
• If the silo is fitted with aeration fans, a higher moisture content product may be stored. Consult a storage specialist before putting high-moisture product into long-term storage.
• To avoid problems, always test the grain going into the silos with a calibrated moisture meter.
• Moisture Migration - silo operators often blame leaks in the roof or wall for moisture problems. Moisture in a sealed silo is more likely to come from the stored grain, weed seeds, or respiration of insects or mites. Free moisture that is present in the grain in a silo will usually be carried upwards by the convection currents of air that circulate in the silo (see diagram for typical flow pattern). These air currents are created by the temperature difference between the warm grain in the centre of the silo and the cools walls, or vice versa.
• Although there is always a degree of moisture migration in a silo, it is unlikely to cause problems. If the grain is below 12% moisture content, insects are usually eliminated.
• Refer to GRDC (Grain Research and Development Corporation) website for more advice.
8 • SILO OPERATION GUIDE
Diagram of typical air flow pattern
Condensation & possible wet grain
Grain stayswarm for a long period after harvest
Cool outside
Cool Air Cool Air
WarmMoist
Air
➤
➤ ➤ ➤
➤➤ ➤
Fumigation Chamber
A sealed silo is an excellent fumigation chamber. It’s design enables it to hold a lethalconcentration of gas long enough to control insects at all stages of their life cycle(egg, larvae, pupae and adult).
Fumigation will fail if the silo leaks. When wind blows across a leaky silo, the “chimneyeffect” caused by the pressure differences, which draws gas out of the silo.
Adult insects may still die because they can tolerate only low concentrations of gases.Most eggs and larvae will survive because they are more tolerant to the gas.
Sufficient time must be allowed to circulate the gas released from the tablets.The gas must remain concentrated for a 7 to 10 day fumigation period,depending on grain temperature. Refer to fumigate manufacturer.
The tablets should be placed only onto an aluminum tray in the headspace.Before removing the trays, make sure the tablets have fully decomposed and onlypowder remains.
Sachets of phosphine may be hung in the headspace. Be careful with the residue.It is still a dangerous product.
Do not fumigate when grain temperatures are below 15ºC, or when grain moisturecontent is below 9%. If fumigation is essential, caution must be exercised when openingthe silo after fumigating. The low atmosphere moisture content may be insufficient toliberate fully the gas from the tablets or sachets.
In a silo sealed to the standard outlined in this manual, a dose rate will depend onfumigate manufacture procedures.
SILO OPERATION GUIDE • 9
Fumigation
• Fumigation must be carried out only in a well-sealed silo. Be careful with Phosphine.
• Phosphine is lethal to all forms of life. Read the label and follow the manufacturer’s instructions carefully.
• Open the phosphine container in the open air, not in a shed or silo. Stand upwind and hold the container away from your face when opening it and/or applying the tablets of sachets.
• Wear PVC gloves and mask when handling phosphine tablets. Have another person standing by when you are fumigating.
• Refer to the manufacturer’s safety instructions when using cylinders of phosphine gas.
• Do the job from the outside. Do not enter a silo unless you have to, and never enter after phosphine has been applied. Clearly mark all areas under fumigation with “Danger - Under Fumigation” signs. Warn all personnel on the property (particularly children) of the dangers.
• More details Refer to material safety data sheet from the manufacturer of the product.
10 • SILO OPERATION GUIDE
Entry Into Silo
The only entry into a silo is through the manhole hatch. Wear an air-suppliedrespirator when fumigating or working in a silo that has been fumigated and notventilated. Phosphine levels must be checked with gas indicator tubes.
Before entering the silo, open top hatches and bottom hatches. Then allow 7 to 10days ventilation to clear the gas. This depends on wind conditions and size of silo.
Forced ventilation, using aeration fans if fitted, reduces the period needed toclear the gas.
A silo is considered a confined space by having limited means of entry, therefore,confined Space Procedures apply but not limited to 1. Air out silo from 10-14 days, depending on outside temperature. (Use aeration fans to lower withholding time, OR
2. Use a Phosphine Gas Indicator tube to detect gas within the silo. You must not enter the silo if Phosphine levels are in excess of 0.2 parts per million (ppm). THEN 3. Have a support person on the outside whilst you are in the silo. DO NOT do any hot work in a dirty silo (eg, welding, grinding).
4. Refer to Confined Space Procedures.
SILO OPERATION GUIDE • 11
Silo Maintenance
Cleaning
• To ensure silo does not get re-infested with insects, remove all grain by either sweeping or washing out the silo with water.
• Ensure that water stays away from any electrical connections or leads.
Seals
• Inlet seals are a sticky back closed cell foam tape.
• Outlet seals are insertion rubber.
• Oil bottle allows the silo to breathe due to pressure differences and filters the air going into the silo (same as a manometer).
Silo to Concrete Pad
• Ensure anchorage points are still fastened and in good condition.
• Silo ring should be free of rotting material.
Regular Maintains Checklist
• The check list on page 13 should be photocopied and used at least annually to assess if any maintenance is required.
12 • SILO OPERATION GUIDE
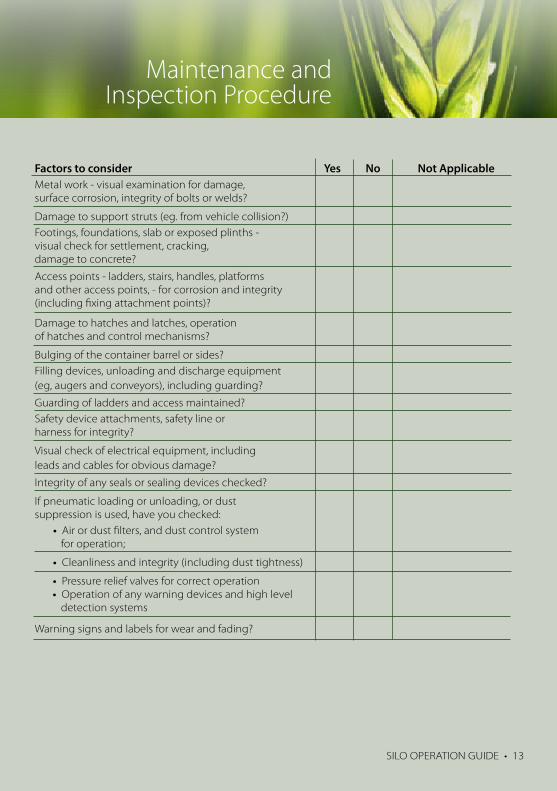
Maintenance and Inspection Procedure
Factors to consider Yes No Not ApplicableMetal work - visual examination for damage,surface corrosion, integrity of bolts or welds?
Damage to support struts (eg. from vehicle collision?)
Footings, foundations, slab or exposed plinths -visual check for settlement, cracking,damage to concrete?
Access points - ladders, stairs, handles, platformsand other access points, - for corrosion and integrity(including fixing attachment points)?
Damage to hatches and latches, operation of hatches and control mechanisms?
Bulging of the container barrel or sides?
Filling devices, unloading and discharge equipment(eg, augers and conveyors), including guarding?
Guarding of ladders and access maintained?
Safety device attachments, safety line orharness for integrity?
Visual check of electrical equipment, includingleads and cables for obvious damage?
Integrity of any seals or sealing devices checked?
If pneumatic loading or unloading, or dustsuppression is used, have you checked:
• Air or dust filters, and dust control system
for operation;
• Cleanliness and integrity (including dust tightness)
• Pressure relief valves for correct operation • Operation of any warning devices and high level
detection systems
Warning signs and labels for wear and fading?
SILO OPERATION GUIDE • 13
Maximum Capacities in Silos of Grain
Grain silos - maximum bulk density of 850kg/m3 bulk density.
Fertiliser silos - maximum bulk density of 1400kg/m3.
Meal mix or Mash silos (feed mix) - maximum bulk density of 650kg/m3.
Emergency ProceduresFire dial 000Structural dial 1800 764 700Entrapment dial 000
Spare PartsIf you are unable to buy the seals from your local hardware store, then ring ourtoll free number to order the seals.
1. Top inlet gasket.2. Manhole gasket.3. Outlet rubber.4. Tubeless valve.5. Oil bottle.6. Oil bottle elbow.
Critical Safety Maintenance1. Top inlet gasket - 2.4 long, 12mm thick, 19-25mm wide.2. Manhole gasket - 1.8m long, 12mm thick, 19-25mm wide.3. Outlet slide - 3.5mm insertion rubber.
The sealing gaskets must be kept in good condition to ensure optimum results in asealed silo. The sealing gaskets should be available at your local hardware shop.
If not, please phone HE Silos
14 • SILO OPERATION GUIDE
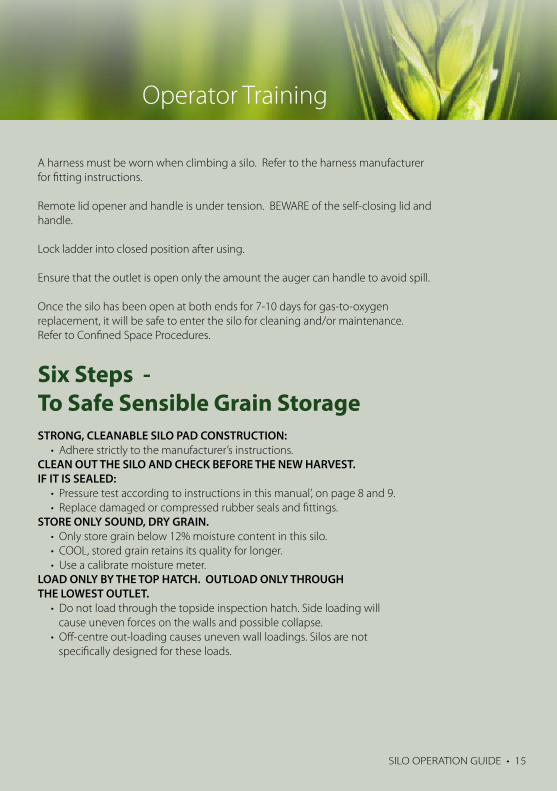
Operator Training
A harness must be worn when climbing a silo. Refer to the harness manufacturerfor fitting instructions.
Remote lid opener and handle is under tension. BEWARE of the self-closing lid andhandle.
Lock ladder into closed position after using.
Ensure that the outlet is open only the amount the auger can handle to avoid spill.
Once the silo has been open at both ends for 7-10 days for gas-to-oxygenreplacement, it will be safe to enter the silo for cleaning and/or maintenance.Refer to Confined Space Procedures.
Six Steps -To Safe Sensible Grain StorageSTRONG, CLEANABLE SILO PAD CONSTRUCTION: • Adhere strictly to the manufacturer’s instructions.CLEAN OUT THE SILO AND CHECK BEFORE THE NEW HARVEST.IF IT IS SEALED: • Pressure test according to instructions in this manual’, on page 8 and 9. • Replace damaged or compressed rubber seals and fittings.STORE ONLY SOUND, DRY GRAIN. • Only store grain below 12% moisture content in this silo. • COOL, stored grain retains its quality for longer. • Use a calibrate moisture meter.LOAD ONLY BY THE TOP HATCH. OUTLOAD ONLY THROUGHTHE LOWEST OUTLET. • Do not load through the topside inspection hatch. Side loading will cause uneven forces on the walls and possible collapse. • Off-centre out-loading causes uneven wall loadings. Silos are not specifically designed for these loads.
SILO OPERATION GUIDE • 15
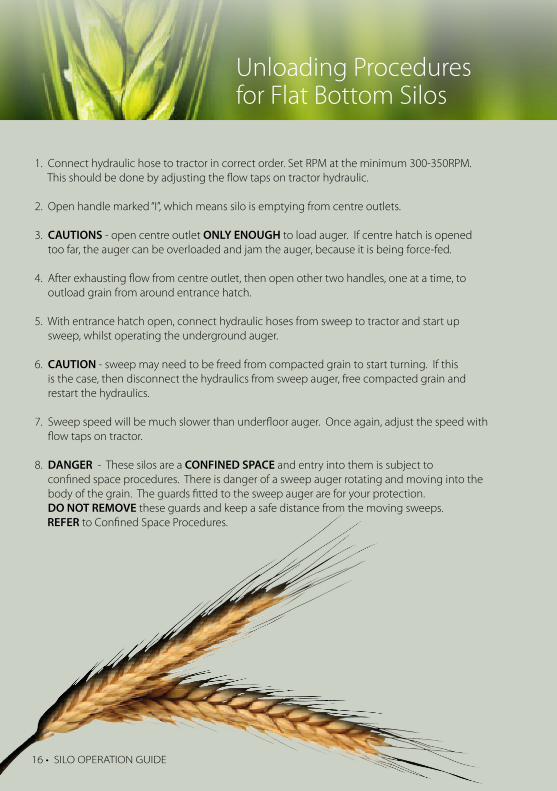
Unloading Procedures for Flat Bottom Silos
1. Connect hydraulic hose to tractor in correct order. Set RPM at the minimum 300-350RPM. This should be done by adjusting the flow taps on tractor hydraulic.
2. Open handle marked “I”, which means silo is emptying from centre outlets.
3. CAUTIONS - open centre outlet ONLY ENOUGH to load auger. If centre hatch is opened too far, the auger can be overloaded and jam the auger, because it is being force-fed.
4. After exhausting flow from centre outlet, then open other two handles, one at a time, to outload grain from around entrance hatch.
5. With entrance hatch open, connect hydraulic hoses from sweep to tractor and start up sweep, whilst operating the underground auger.
6. CAUTION - sweep may need to be freed from compacted grain to start turning. If this is the case, then disconnect the hydraulics from sweep auger, free compacted grain and restart the hydraulics.
7. Sweep speed will be much slower than underfloor auger. Once again, adjust the speed with flow taps on tractor.
8. DANGER - These silos are a CONFINED SPACE and entry into them is subject to confined space procedures. There is danger of a sweep auger rotating and moving into the body of the grain. The guards fitted to the sweep auger are for your protection. DO NOT REMOVE these guards and keep a safe distance from the moving sweeps. REFER to Confined Space Procedures.
16 • SILO OPERATION GUIDE
Warranty HE Silos Gunnedah warrants its en3re product range against faulty material and workmanship for a period of 5 years from date of delivery, providing the silo is mounted on to a good sound concrete founda3on as per a structural engineer.
Exclusions HE Silos Gunnedah will not warrant structural issues caused by inappropriate founda3ons. Our slab specifica3ons are to be used as a guide only. HE Silos recommends you consult a structural engineer
For Silos within a 5km radius of any coastline or salt water source, our steel will not be warranted against rust as per BHP’s own warranty terms.
HE Silos will not warrant any damage caused by malfunc3on or failure resul3ng from misuse, neglect, abuse or for a purpose for which it was not designed for. HE Silos will not warrant repairs, altera3ons or modifica3ons that have been aFempted by others than HE Silos authorized personal.
A warranty claim is not valid for damaged caused by vehicles or other machinery and general everyday maintenance caused by wear & tear.
HE Silos does not warrant the installa3on or instalment by HE silos authorised personal of other manufacturer’s or supplier’s products and equipment that are outside of HE Silos product range.
Kind Regards,
MDarryl Morrison Managing Director
HE Silos “Storing the Na2ons Grain”
HE Silos30 Borthistle Road
Gunnedah NSW 2380 Ph: 02 6742 6355Fax: 02 6742 6366
ABN 27 974 426 615
Storing the nations grains
Warranty
HE Silos Gunnedah warrants its entire product range against faulty material and workmanship for a period of
5 years from date of delivery providing the silo is mounted on to a sound concrete foundation prepared to the
appropriate Australian Standard. If goods are found to be faulty or defective HE Silos will repair or replace the
goods, or wholly or partly recompense the consumer. The costs directly associated with a valid claim will be
covered by HE Silos. This representation does not extend to ancillary expenses.
If you have any concerns it is necessary for you to cease using the goods when the fault arises, contact HE Silos
immediately to notify the alleged defect. Failure to do so will void the warranty (see exclusions below).
Exclusions
HE Silos Gunnedah will not warrant structural issues caused by inappropriate foundations. Our foundation
specifications are to be used as a guide only. HE Silos recommends you consult a structural engineer.
HE Silos will not warrant any damage caused by malfunction or failure resulting from misuse, neglect,
abuse or for a purpose for which it was not designed. HE Silos will not warrant repairs, alterations or
modifications that have been attempted by any persons other than HE Silos’ authorized personnel.
A warranty claim is not available for damage caused by vehicles or other machinery, or general and everyday
maintenance caused by wear & tear. HE Silos does not warrant the installation or instalment by HE Silos’
personnel of other manufacturers or suppliers products and equipment that are outside of HE Silos
product range.
The benefits provided to you the consumer by the warranty are in addition to other rights and remedies
available to the consumer under the law “Our goods come with guarantees that cannot be excluded under the
Australian Consumer Law. You are entitled to a replacement or refund for a major failure and compensation for
any other reasonably foreseeable loss or damage. You are also entitled to have the goods repaired or replaced
if the goods fail to be of acceptable quality and the failure does not amount to a major failure.”
Warranty HE Silos Gunnedah warrants its en3re product range against faulty material and workmanship for a period of 5 years from date of delivery, providing the silo is mounted on to a good sound concrete founda3on as per a structural engineer.
Exclusions HE Silos Gunnedah will not warrant structural issues caused by inappropriate founda3ons. Our slab specifica3ons are to be used as a guide only. HE Silos recommends you consult a structural engineer
For Silos within a 5km radius of any coastline or salt water source, our steel will not be warranted against rust as per BHP’s own warranty terms.
HE Silos will not warrant any damage caused by malfunc3on or failure resul3ng from misuse, neglect, abuse or for a purpose for which it was not designed for. HE Silos will not warrant repairs, altera3ons or modifica3ons that have been aFempted by others than HE Silos authorized personal.
A warranty claim is not valid for damaged caused by vehicles or other machinery and general everyday maintenance caused by wear & tear.
HE Silos does not warrant the installa3on or instalment by HE silos authorised personal of other manufacturer’s or supplier’s products and equipment that are outside of HE Silos product range.
Kind Regards,
MDarryl Morrison Managing Director
HE Silos “Storing the Na2ons Grain”
HE Silos30 Borthistle Road
Gunnedah NSW 2380 Ph: 02 6742 6355Fax: 02 6742 6366
ABN 27 974 426 615
2017
HE Silos Forbes1-8 Jones Street Forbes NSW 2871T 02 6852 3488 F 02 6852 3619
HE Silos GunnedahBorthistle Road Gunnedah NSW 2380T 02 6742 6355 F 02 6742 6366


![CONSTRUCTION, OPERATION & MAINTENANCE OF SILO …fci.gov.in/app2/webroot/upload/FCI_DCA_DBFOO_DRAFT.pdf · [Version Date : 21.11.2013] Page 4 7.3. Disclosure..... 51](https://img.pdfslide.us/doc/110x75/5f97504c3ce77475444f0042/construction-operation-maintenance-of-silo-fcigovinapp2webrootuploadfcidcadbfoodraftpdf.jpg)