Embed Size (px)
Citation preview

Operating instructionsMETTLER TOLEDOPG-S balances (0.1 g, 1 g)
METTLER TOLEDO
PG5001-S
FACT
Max 5100gMin
0.5g

Overview of your PG-S balance
Bottom view PG-S
Front view PG-S
Display PG-S
METTLER TOLEDO
PG5001-S
FACT
Max 5100gMin
0.5g
2
3
5
17
12
10
16
18 19 20 21
15 14 13
1
89 7 6
11
4
Rear view PG-S

Display, controls and connections of your PG-S balance
Front view
No. Designation
1 Display
2 Weighing pan
03 Leveling foot
04 Control keys
05 Model-specific data and type designation
Display
No. Designation
12 DeltaTrac
13 Weighing units
14 Alphanumeric display
15 Symbol of the stability detector
16 Symbol for calculated result
17 Status indicator of the vibration adapter
18 Status indicator of the weighing process adapter
19 Status indicator of the repeatability
20 Special symbols (e.g. for net weight)
21 Display of adjustment mode
Rear/bottom view
No. Designation
06 RS232C interface connection
07 Leveling control
08 Eye for antitheft device
09 Connection for AC adapter
10 Hanger for below-the-scale weighings
11 Fastening for auxiliary display

Contents
4
Contents1. Getting to know your PG-S balance␣ .......................................................................................... 61.1 Introduction .............................................................................................................................. 61.2 Overview of the PG-S balances ................................................................................................... 61.3 What you should know about these instructions ........................................................................... 71.4 Safety has priority ..................................................................................................................... 8
2. Putting the balance into operation␣ ........................................................................................... 92.1 Unpacking and checking the standard equipment ......................................................................... 92.2 Location selection or location change.......................................................................................... 102.3 Leveling the balance ................................................................................................................. 112.4 Power supply ........................................................................................................................... 112.5 Adjusting (calibrating) the balance ............................................................................................. 12
3. Weighing made simple␣ ........................................................................................................... 133.1 Switching the balance on and off ................................................................................................ 133.2 Zeroing the scale ...................................................................................................................... 143.3 Taring the balance .................................................................................................................... 143.4 Performing a simple weighing .................................................................................................... 153.5 Weighing with the analog display – DeltaTrac .............................................................................. 153.6 DeltaRange® balances with movable fine range ............................................................................ 163.7 Switching weighing units ........................................................................................................... 163.8 Printing out the weighing result and transferring data .................................................................... 17
4. The menu␣ ............................................................................................................................... 184.1 What is the menu? .................................................................................................................... 184.2 Menu operation ........................................................................................................................ 194.3 Reset ....................................................................................................................................... 214.4 Selection of the adjustment (calibration) and test function ............................................................. 214.5 Switching automatic adjustment call-up on or off .......................................................................... 224.6 Preselecting a function .............................................................................................................. 234.7 Setting the vibration adapter ....................................................................................................... 244.8 Setting the weighing process adapter .......................................................................................... 244.9 Selecting repeatability ................................................................................................................ 254.10 Selecting weighing unit 1 ........................................................................................................... 264.11 Selecting weighing unit 2 ........................................................................................................... 274.12 Switching automatic zero correction (Autozero) on or off ............................................................... 28

Contents
5
4.13 Preselecting automatic shutdown ............................................................................................... 284.14 Selecting the power-up mode ..................................................................................................... 294.15 Setting display of the icons ........................................................................................................ 304.16 Selecting peripheral device ......................................................................................................... 304.17 Selecting data transfer mode ...................................................................................................... 304.18 Selecting data transfer format ..................................................................................................... 314.19 Setting baud rate (data transfer rate) ........................................................................................... 324.20 Setting parity/bit ........................................................................................................................ 324.21 Setting handshake .................................................................................................................... 334.22 Printing out or saving menu settings ........................................................................................... 334.23 Canceling secure function .......................................................................................................... 34
5. Special applications and functions ␣ .......................................................................................... 355.1 Piece counting ......................................................................................................................... 355.2 Percent weighing ...................................................................................................................... 375.3 Formula weighing ..................................................................................................................... 385.4 Dynamic weighing of unstable weighing samples......................................................................... 425.5 Below-the-balance weighings .................................................................................................... 445.6 Adjustment (calibration) with internal weight ................................................................................ 455.7 Adjustment (calibration) with external weights (VariCal) ................................................................ 475.8 Test of the balance with internal weight or external weights ............................................................ 49
6 Further important information␣ .................................................................................................. 526.1 Error messages ........................................................................................................................ 526.2 Preventive maintenance and care ............................................................................................... 536.3 Changing the protective cover .................................................................................................... 546.4 RS232C interface ...................................................................................................................... 546.5 LocalCAN universal interface ...................................................................................................... 55
7. Technical data and optional equipment ␣ .................................................................................... 567.1 Technical data of the PG-S balances ........................................................................................... 567.2 Dimensions ............................................................................................................................. 587.3 Optional equipment ................................................................................................................... 59
8. Appendix ␣ ............................................................................................................................... 618.1 Overview of menu ..................................................................................................................... 618.2 Conversion table for weight units ................................................................................................ 628.3 SOP (Standard Operating Procedure) .......................................................................................... 638.4 Index ....................................................................................................................................... 65

Getting to know your PG-S balance
6
1. Getting to know your PG-S balanceThis section provides you with detailed information on your PG-S balance. Please read through the section carefully evenif you already have experience with METTLER TOLEDO balances and scales and be sure to familiarize yourself with thesafety notes!
1.1 IntroductionThank you for deciding to purchase a balance from METTLER TOLEDO.
The precision balances of the PG-S line combine a wide range of weighing functions and setting possibilities with excep-tional ease of operation.
Please read through these operating instructions thoroughly so that you can exploit all the possibilities offered by yourbalance to the full.
These operating instructions apply to all balances of the PG-S line with a readability in the range 0.1 g/1 g. However, thevarious models have different equipment and performance features. Where this is important for the operation, specialmention is made in the text.
1.2 Overview of the PG-S balancesThe PG-S balance family comprises various precision balances which differ according to their weighing range, resolutionand equipment features.
The models of the PG-S line have the following features:
– Extremely rugged and chemically resistant construction.– Convenient keypad for one-hand operation and large size, easily readable display.– FACT (Fully Automatic Calibration Technology), fully automatic, motorized adjustment (calibration) with internal weight.– Built-in functions for piece counting, percent weighing, formula weighing and dynamic weight determination.– Built-in RS232C interface.– Optional LocalCAN universal interface allows the attachment of up to 5 peripheral devices.– Integrated short-form operating instructions to facilitate your daily work.– Dynamic graphic indicator (DeltaTrac) for analog display of the weighing range still remaining.
A brief word regarding standards, directives and procedures for quality assurance: Your PG-S balance conforms with allcommon standards and directives. It supports standard procedures, handicaps, work techniques and records as requiredby GLP (Good Laboratory Practice) and SOP (Standard Operating Procedure). Recording of the sequences of operationsand adjustment work is highly important in this connection: we recommend use of the METTLER TOLEDO LC-P45 Printerhere. Your PG-S balance has a CE declaration of conformity and METTLER TOLEDO as the manufacturer has been awar-ded ISO 9001 certification.
Certified versions of PG-S balances are also available, please ask your nearest METTLER TOLEDO dealer.

Getting to know your PG-S balance
7
1.3 What you should know about these instructionsThese instructions contain orientation aids which facilitate your search for the desired information:
Key designations are enclosed in double angle brackets(e.g. «On/Off» or «±»).
The keys of your PG-S balance have two assignments. The first function of a key(e.g. «Ç») is always available by pressing the key briefly, whereas the secondfunction (e.g. «Cal.») is called up by pressing and holding the key:
This symbol indicates a brief keystroke.
This symbol indicates a long, sustained keystroke (approx. 2␣ seconds).
This representation symbolizes the current display of your balance.
This representation symbolizes a flashing element in the display of your balance.
These symbols indicate safety and hazard instructions which must be compliedwith. Nonconformance with such instructions can lead to personal injuries to theuser, damage to the balance or other tangible assets or to malfunctions.
This symbol indicates additional information and instructions which facilitate yourhandling of the balance and contribute to proper and economical use.
CalÇ
50=1 g
long

Getting to know your PG-S balance
8
1.4 Safety has priorityPlease note the following instructions for safe and problem-free operation of your PG-S balance.
Read through these operating instructions carefully even if you already have experience with METTLERTOLEDO balances and scales.
It is essential to note the instructions in section 2 when putting your new balance into operation.
PG-S balances may be used only indoors in closed rooms.
The PG-S balances may not be operated in a hazardous environment and only when attached to recep-tacle outlets with a ground connection.
Use only the included PG-S power cable.
Operate and use your PG-S balance only in accordance with the instructions in these operating instruc-tions and short-form operating instructions.
Use only optional equipment and peripherals supplied by METTLER TOLEDO with your PG-S balance;these have been optimally matched to your balance.
Your PG-S balance has a very rugged construction, but it is still a precision instrument. Treat it with theappropriate care and it will thank you with years of trouble-free operation.
Never operate the keypad of your PG-S balance with sharp objects!
Never open the balance, it contains no parts which can be maintained, repaired or replaced by the user.In the unlikely event you experience problems with your balance, please contact your responsibleMETTLER TOLEDO dealer.

Putting the balance into operation
9
2. Putting the balance into operationIn this section you will learn how you unpack and set up your new balance and prepare it for operation. On completion ofthe steps described in this section, your balance is ready for operation.
2.1 Unpacking and checking the standard equipment
PG-S balances are supplied in an environmentally harmless package.Please check the standard equipment of your balance for completeness:
– Operating instructions– Weighing pan (1)– Pan mount (2)– Protective cover (3)– Power cable– Description of interface commands
(Reference manual MT-SICS, available in English only)
Store all parts of the packaging in a safe place. This packaging guarantees thebest possible protection for the transport of your balance.
METTLER TOLEDO
PG5001-S
FACT
Max 5100gMin
0.5g
1
3
2
XKD 02

Putting the balance into operation
10
Never operate scale in a hazardous environment.
Firm, vibration-free position as horizontal as possible. The foundation must be capable of safelysupporting the weight of the fully loaded scale.
No excessive fluctuations in temperature.
No direct sunlight.
No powerful drafts (e.g. from fans).
2.2 Location selection or location changeYour balance is a precision instrument and will thank you for an optimum location with high accuracy and dependability:

Putting the balance into operation
11
2.3 Leveling the balanceTo assure repeatable weighing results at all times, the balance must be exactly horizontal. To compensate minor uneven-ness at its location, the balance can be leveled:
Turn the leveling feet of the balance housing until the air bubble is in the center ofthe level control.
The balance must be releveled each time its location is changed.
2.4 Power supply
On delivery the PG-S balances are set to the line voltage of their country of destination.
OFF
+75 +30
OnOff
First check whether the voltage printed on the model plate of the balance match-es your local line voltage. If this is not the case, on no account connect thebalance to the power supply, but contact your METTLER TOLEDO dealer.
Connect the balance to the power supply. Connect the balance only to powerreceptacles with a ground contact and never use an extension cable withoutan equipment grounding conductor!
Note:Route the connection cable so that it does not touch the weighing pan and suchthat it can not be damaged or hinder your daily operations!
The balance now performs a self-test in which all display segments light upbriefly. “OFF” then appears in the display (“OFF” indicates that the balance hasbeen disconnected from the power supply).
Press the «On/Off» key. The display briefly provides information on the installedsoftware version and the normal weight display then appears.
Allow your balance to warm up for 30 minutes to enable it to adapt itself to theambient conditions.

Putting the balance into operation
12
-- BALANCE CALIBRATION -03.10.97 11:23:34
METTLER TOLEDOType: PG5001-SSNR: 1105238536SW: 1.75 1.30
Internal Cal. done
Signature:
.........................--------- END -----------
2.5 Adjusting (calibrating) the balanceAn adjustment (i.e. an adjustment to the acceleration due to gravity) is neededwhen putting into operation for the first time and after every location change. Incolloquial language, this operation is frequently also referred to as “calibration”(to avoid misunderstandings, this term is enclosed in brackets when neces-sary). You should also adjust (calibrate) your balance at regular intervals inweighing operations to obtain precise results. If you work according to GLP (GoodLaboratory Practice) and SOP (Standard Operating␣ Procedure), please note thestipulated intervals for the adjustment (calibration).
With PG-S balances you have various possibilities for adjusting (calibrating) orchecking the balance. You have a choice between– Adjustment (calibration) or checking the balance,
– internal or external weights,
– automatic or manual initiation of the adjustment operation
The factory setting is fully automatic adjustment (calibration) FACT (Fully Auto-matic Calibration Technology) with the internal weight. In this setting, you haveno need worry about adjusting (calibrating) your balance.The balance adjusts itself automatically– after the warm-up phase on connection to the power supply,
– in the case of certified balances, during the warm-up phase (after powerfailure),
– when a change in the ambient conditions, e.g. the temperature could lead toa noticeable deviation in the measurement.
If your balance is attached to a printer, the adjustment (calibration) is auto-matically printed out in conformance with GLP. The record opposite is a speci-men printed out with the METTLER TOLEDO LC-P45 Printer.

Weighing made simple
13
3. Weighing made simpleThis section shows you how to perform simple weighings, how you can accelerate the weighing process and print out theweighing result and transfer data.
3.1 Switching the balance on and offYour balance is set in the factory so that it automatically switches to the weighing mode when you load a weight in thestandby mode.
To switch the balance on, press the «On/Off» key briefly. As soon as the nor-mal weight display appears, your balance is ready to weigh.
NoteIn section 4.14 you will learn how to perform a display test in which all seg-ments of the display light up briefly when you switch on the balance.
To switch the balance off, press the «On/Off» key and keep it pressed until themessage “OFF” appears in the display.
After it has been switched off, your balance is in the standby mode. If you wish toperform a weighing, you need now only place the sample on the weighing panand the balance immediately displays the result. There is no need to switch it onwith the «On/Off» key (see also section 4.14).
As your balance needs no warm-up time when in the standby mode and is im-mediately ready for weighing, we advise you to switch the instrument off only byuse of the «On/Off» key and not to disconnect it from the power supply. This alsoensures that the balance is always in thermal equilibrium.
OnOff
=0 g
OnOff
OFF
long

Weighing made simple
14
3.2 Zeroing the scaleAs a result of environmental influences, your balance may not show exactly «0.0» even though the weighing pan isunloaded. However, you can reset the display of your balance to zero at any time to ensure that the weighing really startsat zero.
If you wish to tare a container, place it on the weighing pan.
Press the «#» key briefly to start the taring operation.
Taring runs automatically. If you tare the balance when it is unstable, the taringprocedure will be shown in the display by horizontal segments.
On completion of taring, the zero display and the symbol “Net” for net weightappear. Your balance is again ready for weighing.
When the balance is unloaded, the stored tare value is shown with a negativesign.
The current tare value remains stored until the next taring or zeroing or until thebalance is switched off.
#
------
=0 g
The balance does not show exactly zero even though the weighing pan is un-loaded.
Press the «ÇÇÇÇÇ» key and the balance resets the display to zero.
3.3 Taring the balanceThe weight of any weighing container can be “tared” at a keystroke to set the display to zero. The taring range covers theentire weighing range of your balance.
Ç
=2 g
Net

Weighing made simple
15
3.4 Performing a simple weighingPerforming a simple weighing is described only for the sake of completeness as this operation comprises only two worksteps.
After you have tared the balance, place the weighing sample on the pan.
Wait until the circular symbol of the stability detector fades. Fading of the sym-bol indicates that the weighing result is stable.
Now read off the weight in the display.
40=6 g
50=5 g
3.5 Weighing with the analog display – DeltaTracDeltaTrac is a dynamic graphic indicator which shows the weighing range inuse and that still available. You can thus recognize at a glance when the load onthe balance approaches the maximum capacity.
NoteYou can use the «“» key to switch from the dynamic graphic indicator to adisplay with two pointers and two tolerance marks (for percent weighing). Thisenables you to determine the position of the weighing result in regard to thetarget weight quicker (see section 5.2). The tolerance range is ±2.5␣ % of thetarget weight. The setting of this tolerance range is fixed and can be changedonly via the interface.
0 % in use 15 % in use
55 % in use 95 % in use
Weight within tolerance
METTLER TOLEDO
PG5001-S
XKD 04

Weighing made simple
16
#
3.7 Switching weighing unitsYour balance can display the weighing result in two different weighing units. How you preselect the two weighing units isdescribed in sections 4.10 and 4.11.
You can switch between the two weighing units at a keystroke:
5200 g
F
3.6 DeltaRange® balances with movable fine rangeMETTLER TOLEDO DeltaRange® balances have a movable fine range with 10 times higher readability. An additionaldecimal place always appears in the display of this fine range. Thanks to the DeltaRange function, you have the possibil-ity to weigh small amounts of samples into heavy weighing containers.
The illustration opposite shows the principle of the movable fine range in whichone extra decimal place is shown (in this example, the movable fine rangeencompasses 2400 grams).
After the balance has been switched on, METTLER TOLEDO DeltaRange® bal-ances operate in the fine range as standard.
If the fine range in the display is exceeded, the balance display automaticallyswitches to the lower readability.
However, the fine range can always be recalled by taring the balance again.
=0 g
4600 g
=0 g
0 g 12100 g
1 g 1 g0.1 mg0.1 g
2400 g
The balance shows the result in weighing unit 1.
Press the «“» key briefly.

Weighing made simple
17
The balance shows the result in weighing unit 2. By pressing the «“» keyagain, you can return to weighing unit 1.
NotesIf an additional unit (e.g. “%” or “PCS”) is displayed when switching betweenthe two weighing units, you have preselected a function in the menu. You willfind further information on the functions in sections 4.6 and 5.1 through 5.4.
You will find a table of the conversion factors between the various weighing unitsin section 8.2.
%200 kg
3.8 Printing out the weighing result and transferring dataIf your balance is connected to a printer via the RS232C interface or via the LocalCAN universal interface, you can transfercurrent weighing results, identifications and other data to the attached device with a single keystroke.
Press the «±» key briefly. As soon as the weighing result is stable, the statusindicator of the readability fades and the result is transferred to the attached de-vice.
You will find additional information on the attachment of a printer in sections6.4 and 6.5 and in the documentation accompanying your printer.
Menu
56"6 g

The menu
18
4. The menu4.1 What is the menu?The menu allows you to match your balance to your specific weighing needs. In the menu you can change the settings ofyour balance and activate functions.
1. Reset: Call-up of the factory setting.2. Adjustment (calibration): Default settings for the type and testing of the adjustment (calibration).3. Automatic adj. call-up 1) 6): Switch adjustment call-up to the display on or off.4. Function 2): Preselec. of the func. you wish to have available in weighing operation at a keystroke.5. Vibration adapter: Matching the balance to the ambient conditions.6. Weighing process adapter: Matching the balance to different types of weighing.7. Repeatability: Selection of the repeatability of the weighing results.8. Weighing unit 1 1): Specification of the 1st weighing unit in which the balance should show the result.9. Weighing unit 2 2): Specification of the 2nd weighing unit in which the balance should show the result.10. Autozero: Switching the automatic zero correction (Autozero) on or off.11. Automatic shutdown: Preselection of the time after which the balance should be switched off automatically.12. Power-up mode 1): Start without or with display test.13. Icons: On or off switching of the icons.14. Peripheral unit 3): Attachment to a printer or host.
15. Send commands 4): Selection of data transfer mode.
16. Send format 4) 5): Selection of data transfer format.17. Baud rate 3): Matching the transfer speed.18. Parity/bit 3): Matching the character format.19. Handshake 3): Transfer protocol20. Settings: Saving or printing out all menu settings.1) With certified balances, these menu options have a fixed setting and can not be changed.2) With certified balances, only those weighing units/functions allowed by national weights and measures legislation can be selected.3) These menu options are shown only if your balance is equipped with an RS232C interface.4) These menu options are shown only if “HoSt” has been selected in menu option 14.5) These menu options are shown only if “S.oFF” has not been selected in menu option 15.6) This menu option is shown only if “FACT” or “CAL oFF” has not been selected in menu option 2.
Note: You will find a graphical overview of the entire menu with all setting possibi-lities in section 8.1.
6ood2
Qu. STArT
2
BD 2400
FACT
Unit 2 kg
HS oFF
Å" on
F nonEInFo oFFCal
rESEt
ÅoFF -on
7B-E LiST
SECUrEd
S. off S. SICS
PrinTEr
4. Function 2)
8. Weighing unit 1 1)9. Weighing unit 2 2)
5. Vibration adapter6. Weighing process adapter 7. Repeatability
19. Handshake 3)
10. Autozero
17. Bau rate 3)
2. Adjustment
12. Power-up mode 1)
Unit 1 g
3. Automatic adjustm. call-up 1) 6)1. Reset
11. Autom. shutdown13. Icons14. Peripheral unit 3)
18. Parity/bit 3) 20. Settings15. Data transfer mode 4) 16. Data transfer format 4) 5)
The menu contains 20 different options, each of which allows you various selection possibilities.

The menu
19
4.2 Menu operationIn this section you will learn how to work with the menu. Information regarding the individual menu options and theavailable settings can be found in the following sections.
How to change from the weighing mode to the menuThe balance is operating in the normal weighing mode.
Press the «Menu» key and keep it pressed until the balance switches to the menu.
After release of the «Menu» key, the balance shows the first option directly (“Re-set”) with the current setting.
How to select the menu optionsPress the «±» key briefly.
The next menu option appears in the display. Each time the «±» key is pres-sed, the balance switches to the following menu option.
After the last menu option (“Settings”), the first menu option (“Reset”) is againshown.
50"6 g
Ÿ≈ENUMenu
long
Menu
○
○
○
○
○
○
○
○
rESEt
fACT
rESEt

The menu
20
How to select the desired setting in a menu optionPress the «“» key briefly. The display shows the next setting available in theselected menu option. Each time the «“» key is pressed, the balance switchesto the next setting. After the last setting, the first is again shown.
How to save your settings and quit the menuAfter you have made all settings in the individual menu options, press the «Menu»key and keep it pressed until the balance returns to the weighing mode.
Before the normal weighing result display reappears, the balance briefly con-firms saving of the settings.
How to quit the menu without saving your settingsBy pressing the «C» key briefly (your attention is drawn to the termination by adouble beep), you can return to the weighing mode at any time without chan-ging the stored settings.
If you do not press a key for 45 seconds, the balance automatically returns tothe weighing mode. Changes you have made in the menu are not saved!
Unit 1 g
Unit 1 kgF
Menu
long
StorEd
Unit 1 kg
%026 kg
C
=0 g
x times

The menu
21
4.3 ResetIn this menu option you have the possibility to reset all menu settings to the factory setting.
Resetting settings to factory settingIf you select this option and then save and quit the menu, all menu settings arereset to the values set in the factory.
Before the return to the weighing mode, the resetting is briefly confirmed in thedisplay.
rESEt
r donE
long
4.4 Selection of the adjustment (calibration) and test functionYour balance can be adjusted (calibrated) with internal or external weights. The balance can also be checked by a testwith internal or external weights. If you have attached a printer to your balance, the data of the adjustment (calibration)and the results of the test are printed out following GLP recommendations.
CAL int
fACT
The following settings are available:
Fully automatic internal adjustment (calibration) FACT (FullyAutomatic Calibration Technology)This is the factory setting. The balance adjusts (calibrates) itself fully automat-ically– after the warm-up phase following connection to the power supply,
– when a change in the ambient conditions, e.g. the temperature could lead toa noticeable measurement deviation,
– with certified balances, always independent of the settings in menu optionAdjustment.
Internal adjustment (calibration)Adjustment (calibration) is performed at a keystroke with the built-in weight.
Adjustment (calibration) with external weights (VariCal)Adjustment (calibration) is performed with a selectable* external weight.
* This function is blocked for certified balances.UAr∫CAL

The menu
22
4.5 Switching automatic adjustment call-up on or offIn this menu option you can switch the call-up of the automatic adjustment (calibration) or test on or off.
Note: If you have set «FACT» in the menu option Adjustment (calibration), the automatic adjustment call-up is alwaysactive and will thus be skipped in the menu. It becomes active again as soon as «FACT» is switched off.
The following settings are available:
Automatic adjustment (calibration) or test call-up switched onThis is the factory setting. The balance prompts you with a flashing «Cal» in thedisplay to adjust (calibrate) or test it with the internal weight or external weights.The call-up is triggered by, e.g. temperature changes of the surroundings.
Automatic adjustment (calibration) or test call-up switched offThe automatic adjustment or test call-up is switched off.
NoteWith the certified versions of balances, call up of the automatic adjustment ortest can not be selected, i.e. FACT is always active.
InFo on
Cal
InFo oFF
Cal
tESt int
tESt E
Test of the balance with internal weightIn this setting the accuracy test of the balance is performed with the internalweight.
Test of the balance with external weightsThe accuracy of the balance can be checked with any external weight.
You will find information on how to perform the adjustment and test function insections 2.5, 5.6, 5.7 and 5.8.
Switching off the adjustment and test functionThe adjustment or test is switched off with the CAL key.
NoteIrrespective of the settings in the menu option Adjustment (Calibration), the fullyautomatic adjustment FACT is always active with certified balances.
CAL oFF

The menu
23
4.6 Preselecting a functionIn this menu option you can preselect a function which you then have available in the weighing mode at a keystroke.
Note: With certified balances, only the functions allowed by the national weights and measures legislation are available.
The following functions are available:
No function preselectedThere is no function available in the weighing mode (factory setting).
Piece countingYour balance counts the pieces which you place in or remove from the weig-hing container.
Percent weighingYour balance allows you to weigh in to a preselected value or it determinespercent weight differences.
Simple formula weighingThe formula weighing function allows you to weigh in up to 255 individualcomponents, store their weights and totalize these. If your balance is connec-ted to a printer, all individual weights and the total weight of all components areprinted out. In addition, up to 99 weighing containers can be tared. Your balan-ce can save and print out the total weight of all weighing containers.
Dynamic weighing with automatic startYour balance determines an average weighing result over a preset time inter-val. This setting is suitable for unstable weighing samples (e.g. animals). Withthis setting, the dynamic weighing starts automatically.
Dynamic weighing with manual startAnalogous to dynamic weighing with automatic start, but the weighing cyclemust be started manually.
You will find details on how to work with the functions in section 5.
F nonE
F count
F 100 %
ForŸ≈ulA
F dYn A
F dYn Ÿ≈
F count
PCS
Stk
The menu
24
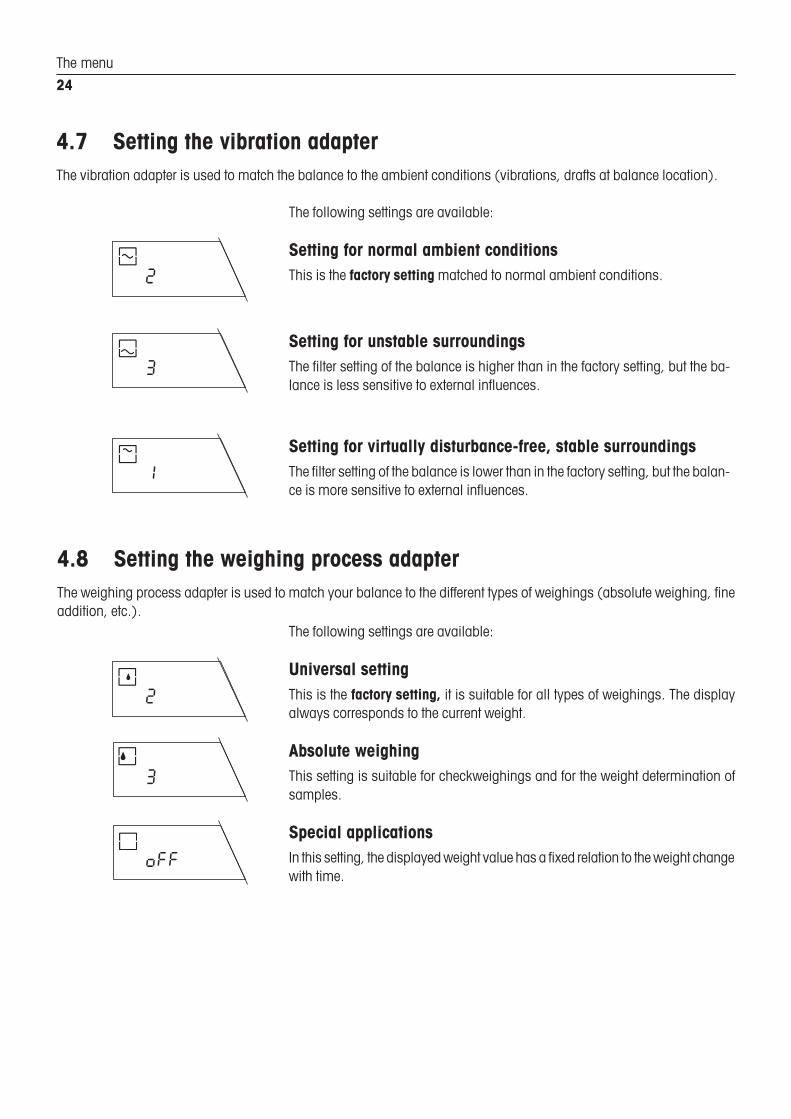
4.7 Setting the vibration adapterThe vibration adapter is used to match the balance to the ambient conditions (vibrations, drafts at balance location).
The following settings are available:
Setting for normal ambient conditionsThis is the factory setting matched to normal ambient conditions.
Setting for unstable surroundingsThe filter setting of the balance is higher than in the factory setting, but the ba-lance is less sensitive to external influences.
Setting for virtually disturbance-free, stable surroundingsThe filter setting of the balance is lower than in the factory setting, but the balan-ce is more sensitive to external influences.
2
3
1
4.8 Setting the weighing process adapterThe weighing process adapter is used to match your balance to the different types of weighings (absolute weighing, fineaddition, etc.).
The following settings are available:
Universal settingThis is the factory setting, it is suitable for all types of weighings. The displayalways corresponds to the current weight.
Absolute weighingThis setting is suitable for checkweighings and for the weight determination ofsamples.
Special applicationsIn this setting, the displayed weight value has a fixed relation to the weight changewith time.
2
3
oFF

The menu
25
Fine additionThis setting is suitable for the weighing in of fine powders, small amounts ofliquids, etc.
1
4.9 Selecting repeatabilityIn the left lower corner of the display you will find the circular symbol of the stability detector. As soon as the weighingresult is within specified limit values over a certain time interval, the weighing result is considered stable and the symbolfor the stability detector fades. With the setting for the repeatability (“Repro-Set”), you determine the time interval overwhich the result must lie within the limit values for it to be considered stable. The better the repeatability, the longer theweighing process lasts.
The following settings are available:
Good repeatabilityThe weight display is released as stable quickly, this is the factory setting.
Very good repeatabilitySlower release until stable weight display.
Best possible repeatabilityStable weight display is not released until several seconds without change.
Normal repeatabilityThe weight display is released as stable very quickly, in other words:The display for the stability detector fades very quickly.
Good
bEttEr
bESt
Std

The menu
26
4.10 Selecting weighing unit 1In this menu option you specify the unit* in which the weighing result should be displayed.
The following units * are available:
Display Designation
g gram
kg kilogram
lb pound
oz ounce
ozt troy ounce
GN grain
dwt pennyweight
ct carat
mo momme
m mesghal
You will find a table with the conversion factors for the different units in section8.2 of these operating instructions.
* With certified balances, the weighing unit has a fixed setting g (gram) andcan not be changed.
Unit 1 g

The menu
27
4.11 Selecting weighing unit 2In this menu option you specify the additional unit* in which the weighing result should be displayed.
The following units are available:
Display Designation
g gram
kg kilogram
lb pound
oz ounce
ozt troy ounce
GN grain
dwt pennyweight
ct carat
mo momme
m mesghal
H tl Hong Kong taels
S tl Singapore taels
t tl Taiwan taels
You will find a table with the conversion factors for the different units in section8.2 of these operating instructions.
* With certified balances, only those weighing units allowed by the respectivenational weights and measures legislation can be selected.
Unit 2 g

The menu
28
4.13 Preselecting automatic shutdownWhen the automatic shutdown is activated, the balance automatically switches itself off after a preselected time (calcula-ted from the last operation) and is switched to the standby mode.
The following settings are available:
No automatic shutdownThe automatic shutdown is deactivated (factory setting).
Automatic shutdown after 2 minutesAs soon as the balance has not been operated for 2 minutes, it switches itself offautomatically.
ÅoFF -
ÅoFF 2`
4.12 Switching automatic zero correction (Autozero) on or offThis menu option allows you to switch the automatic zero correction on or off. When it is switched on (factory setting), thezero point is automatically corrected for drift or contamination of the weighing pan.
The following settings are available:
Autozero switched onThis is the factory setting. The zero point is automatically corrected.
Autozero switched offThe zero point is not automatically corrected. This setting is advantageous forspecial applications (e.g. evaporation measurements).
NoteWith certified balances, this setting is possible only with a resolution of 10 d.
A" on
A" oFF

The menu
29
ÅoFF 5`
ÅoFF 10`
Automatic shutdown after 5 minutesAs soon as the balance has not been operated for 5 minutes, it switches itself offautomatically.
Automatic shutdown after 10 minutesAs soon as the balance has not been operated for 10 minutes, it switches itselfoff automatically.
4.14 Selecting the power-up modeYou can set your balance such that it either immediately starts from the standby mode when you load a weight or it mustbe switched on with the «On/Off» key after which it then performs a display test.
The following settings are available:
Quickstart*This is the factory setting. The balance can be started directly from the standbymode and is immediately ready for weighing. You can load the weight in thestandby mode and the balance immediately shows the current weighing result.
* Quickstart is not possible with certified balances.
Start with display testYou must switch on the balance with the «On/Off» key. After it has been swit-ched on, it performs a display test in which all display elements light up. Oncompletion of the test, the balance is ready for weighing.
NoteIf the balance has been disconnected from the power supply, it always performsa display test after it has been switched on again, even if the “Quickstart” settinghas been selected.
qÙ StArt
FÙ StArt

The menu
30
4.15 Setting display of the icons
on
AuTo oFF
All icons appear in the display.
If desired, you can also switch off the icons. They disappear after about 10 se-conds after you have quit the menu or after about 3 min. after the balance hasbeen switched on.
Note: The menu options 4.16–4.21 are shown only if your balance is equippedwith an RS232C interface.
PrintEr
Host
4.16 Selecting peripheral deviceIn this menu option you can select the desired peripheral unit. The balance stores the corresponding settings (4.17–4.21) for each peripheral unit separately.
Attachment to a printer (e.g. METTLER TOLEDO LC-P45 Printer).Factory setting : bd 2400, 7b–E, HS OFF
Attachment to any peripheral unit.Factory setting: S. oFF, bd 9600, 8b–no, HS Soft
4.17 Selecting data transfer modeIn this menu block you tell the balance how a value should be transferred to a peripheral device (e.g. LC-P45). This menuoption appears only if the setting “HoSt” has been selected in the menu option “Selecting peripheral device” (section4.16).
Data transfer mode switched off
The next possible stable value will be transferred after triggering of the Print/Transfer command.
S. oFF
S. STb

The menu
31
S. ALL
S. AuTo
The current value will be transferred after triggering of the Print/Transfer com-mand.
Only stable values will be automatically transferred after every weight change.
All values will be automatically transferred.
NoteThe menu option “Data transfer mode” appears only if “HoSt” has been selectedin the menu option “Selecting peripheral device” (see also section 8.1).
S. ConT
4.18 Selecting data transfer formatWith this setting the data transfer formats described in MT-SICS are used. Youwill find the description in the enclosed description of the operating instructions(Reference manual MT-SICS).
With this setting the data transfer formats of the PM balances are used.
NoteIf you wish to use other data transfer formats of the PM balances with yourPG-S balance, please use the optional R/G-M emulation software cassette whichemulates all interface commands of the PM balances (see section 7.3).
The interface is unidirectional. Incoming interface commands in the setting “S.␣ PM”are not processed further.
The menu option “Selecting data transfer format” appears only if the setting“S. oFF” has not been selected in the menu option “Selecting data transfer mode”(see also section 8.1).
S. SICS
S. PŸ≈

The menu
32
7B-E
7B-mo
8B-mo
7B-odd
○
○
○
○
bd 1200
bd 2400
4.19 Setting baud rate (data transfer rate)The data transfer rate (baud rate) determines the speed of the transfer via the serial interface. The unit is baud (1 baud(bd) = 1␣ bit/second).
The following settings are available:
150 bd, 300 bd, 600 bd, 1200 bd, 2400 bd, 4800 bd and 9600 bd
4.20 Setting parity/bitIn this menu option you can set the character format for the attached peripheral unit.
The following settings are available:
7 bit/even parity
7 bit/no parity
8 bit/no parity
7 bit/odd parity

The menu
33
4.22 Printing out or saving menu settingsIn this menu option you have the possibility to save all menu settings. You can also print out all current settings of themenu assuming your balance is connected to a printer.
LiSt
4.21 Setting handshakeIn this menu option the data transfer can be matched to various serial receivers.
HS oFF
HS SoFt
HS HArd
The following settings are available:
No handshake
Software handshake (XON/XOFF)
Hardware handshake
NoteIf you have selected this setting, the attached peripheral unit must be switchedon. If the peripheral unit is switched off, the balance will be blocked.
As soon as you save your settings and quit the menu, all settings defined in themenu are recorded on the attached printer.
With “secure 1” you can protect the menu settings against inadvertent changes.
With “secure 2” you can protect both the menu settings and also the Ç key,which triggers the adjustment function or lowers the readability of the display,against inadvertent changes.
NoteIf the adjustment function “FACT” is set in the menu option, the PG-S balancealso automatically performs an internal adjustment in the setting “secure 2”.
SECUrE 1
SECUrE 2

The menu
34
F
The record shown opposite is a specimen which can be printed out, e.g. withthe METTLER TOLEDO LC-P45 Printer. Depending on the selected settings andthe selected connection with LocalCAN or RS232 interface, the representationmay differ from the example shown.
OPEn
Menu
long
SECUrEd
Menu
long
Step 1
Step 2
-------- LIST ----------
03.10.97 16:49:06
METTLER TOLEDOBalanceType: PG5001-SSNR: 1113170358
SW-Ver.: 1.75 1.30Cal: FACTFunction: noneVibr.: 2Wghpro.: 2Repro.: goodUnit 1: gUnit 2: kgA.Zero: onA.off: -Start: Qu. StartIcons: onOutput: PrinterBaud: 2400Bit: 7Parity: evenHandshake: off--------- END ----------
Step 3
4.23 Canceling secure functionIf “secure” is selected in the menu, “secure” appears when it is reentered (initia-ted by the menu key). If you do not press the «“» key for more than 3 seconds,the balance automatically returns to the weighing mode (menu remains blok-ked).
After the «“» key has been pressed, “Open” appears. Confirm this within 3␣ se-conds by pressing and holding the menu key, entry into the menu is then possi-ble again (menu open).
NoteThe release applies to “SECUrE 1” and “SECUrE 2”.

Special applications and functions
35
5. Special applications and functionsYour balance can do more than just weigh. Built-in applications and functions expand the possibilities of your balanceand facilitate your daily work. The following sections will acquaint you with these applications and functions.
5.1 Piece countingPiece counting presupposes that you have preselected the function “F count” in the menu (see section 4.6).
Load the empty container.
Press the «#» key to tare the balance.
Your balance now needs the weight of a reference piece number. Press andhold the «F» key until you are prompted to load the reference pieces.
Your balance suggest “10” as reference piece number. You can accept thissuggestion or select one of the the available reference piece numbers (20, 30,50, 100 or 5 pieces ) by briefly pressing the «“» key.
NoteWe advise you to select a reference piece number as large as possible as thebalance determines the average weight per piece and saves it as the referenceweight. As it is seldom the case that all pieces have the exactly the same weight,the accuracy of the reference weight increases with increasing reference piecenumber.
#
=0 g
F
long
SEt 10
Stk
SEt 10
Stk
F
SEt 20
Stk
METTLER TOLEDO
PG5001-S
XKD 05

Special applications and functions
36
Now load the selected number of reference pieces.
Then briefly press the «±» key. As long as the horizontal dashes are displayed,the balance is calculating the reference weight.
NoteIf you do not press a key for 45 seconds, the balance returns to the weighingmode.
After your balance has determined the reference weight, it shows the correct piecenumber and is now ready for piece counting.
You can use the «“» key at any time to switch the display between the piecenumber display, weighing unit 1 and weighing unit 2.
NoteThe current set weight remains stored until it is redetermined or the power supplyof the balance is interrupted.
If a printer is connected to your balance, the reference weight, the reference piecenumber, the total piece count as well as the net weight of the total piece countare printed out.
NoteIf a printer is attached, you can start a new piece counting with the «Ç» key.
Menu
------
20
Stk
F
F
=5506 kg
---- PIECE COUNTING ----
APW 0.19990000 g Out of: 100 Stk
100 Stk
Net 20.0 g --------- END ----------
0
StkÇ
55=6 g
METTLER TOLEDO
PG5001-S
XKD 06

Special applications and functions
37
5.2 Percent weighingThe “Percent weighing” function allows you to weigh in to a preset value (100 %) and determine the deviations from thistarget value. The DeltaTrac helps you quickly determine the position of the sample weight regarding the tolerances (seesection 3.4).
Percent weighing presupposes that you have preselected the function “F 100 %” in the menu (see section 4.6).
If you are working with a weighing container, place this on the pan and tare thebalance with the «#» key.
Your balance needs a reference weight that should correspond to 100%. Pressand hold the «F» key until you are prompted to load the reference weight. Nowload the reference weight.
Then briefly press the «±» key. As long as the horizontal dashes are shown,your balance is calculating the reference weight.
NoteIf you do not press a key for 45 seconds, the balance returns to the weighingmode.
On completion of the weighing-in procedure, your balance is ready for percentweighing.
You can use the «“» key at any time to switch the display between percentdisplay, weighing unit 1 and weighing unit 2.
NoteThe current piece weight remains stored until it is redetermined or the powersupply of the balance is interrupted.
The position of the sample weight regarding the tolerances can be quicklydetermined with the DeltaTrac. The taring range is ±2.5␣ % of the target weight.The setting of this tolerance range is fixed and can be changed only via theinterface.
F
long
SEt 100 %
Menu
------
10=0 %
F
F
+2135 kg
121*5 g
Weight within tolerance
METTLER TOLEDO
PG5001-S
XKD 07

Special applications and functions
38
5.3 Formula weighingWith the formula weighing function you can weigh and totalize individual weights (components). Your balance processesup to 255 components per formula weighing operation. In addition, you can tare up to 99 weighing containers for eachformula weighing operation. If your balance is connected to a printer, the entire formula weighing operation can berecorded.
Formula weighing presupposes that the function “Formula” has been preselected in the menu (see section 4.6).
Unload the weighing pan.
Press the «“» key briefly and the display confirms that the formula weighingfunction is active.
After 2 seconds, the normal weight display appears.
If you wish to tare a weighing container, place this on the pan.
Then press the «#» key briefly.
If your balance is connected to a printer, the tare weight is printed out.
ForŸ≈ulAF
=0 g
#Net
=0 g
----- FORMULATION ------
T 1 100.8 g
METTLER TOLEDO
PG5001-S
XKD 07

Special applications and functions
39
Add the first container to the weighing container.
Then press the «“» key briefly. The display shows “- 1 -” briefly to confirm theweighing in of the first component.
After weighing in of the first component, the display is reset to zero and thebalance is now ready for weighing in of the second component.
If a printer is attached, the weight of the components is printed out.
Now weigh in the additional components as described above.
As soon as you have weighed in all components, press the «±» key briefly toend the formula weighing operation. The total weight of all individual compo-nents is displayed briefly.
The balance then returns to the normal weighing mode.
The weight memories for tare and net total are now cleared and the balance isready for the next formula.
- 1 -F
Net
=0 g
----- FORMULATION ------
T 1 100.2 g
1 Comp. 12.0 g
Menu
Net T
17(6 g
=0 g
METTLER TOLEDO
PG5001-S
XKD 04

Special applications and functions
40
If a printer is attached to your balance, a record with the net total weight of allcomponents “N total”, the tare weight (weight of the weighing container) “T total”and the total weight (total weight of all components plus tare weight) “G” isprinted out.
During the formula weighing operation you can increasethe net total weight to a desired valuePress and hold the «F» key until the net total weight of all components weighedin so far is displayed.
Now add the component to the container until the desired net total weight isreached.
Press the «“» key briefly and the desired weight is confirmed as an additionalcomponent.
During the formula weighing operation you can always displaythe totalized total weight and the number of componentsweighed in so farPress and hold the «F» key until the weight of all components weighed in so faris displayed.
----- FORMULATION ------
T 1 100.2 g
1 Comp. 12.0 g2 Comp. 2.5 g3 Comp. 3.3 g
T total 100.2 gG 118.1 g
N total 17.8 g--------- END ---------
F
long
1/8 g
F
2%0 g
F
long
1/8 g
Net T
Net T
Net T
METTLER TOLEDO
PG5001-S
XKD 08

Special applications and functions
41
Press and hold the «F» key again until the number “n” of all components weighedin so far is displayed.
Press and hold the «F» key until the balance switches back to the weight display.You can now weigh in additional components.
During the formula weighing operation you can always tareadditional weighing containersPlace the additional weighing container on the weighing pan next to weighingcontainers already tared.
Press the «#» key briefly. The balance is now tared with the additional weightof the new weighing container. If your balance is connected to a printer, the tareweight of the new container is printed out. You can now weigh in additionalcomponents.
If you print out the results at the end of the formula weighing operation, all tareweights are totalized and the total weight of all tare containers (“T total”) isrecorded.
n 3F
long
FNet
long
=0 g
43"1 g
#
T 2 432.1 g
T total 1434.9 gG 1613.5 g
N total 178.6 g--------- END ---------
=0 gNet
METTLER TOL
PG5001-S
XKG 09

Special applications and functions
42
5.4 Dynamic weighing of unstable weighing samplesThe functions “Dynamic weighing with automatic start” and “Dynamic weighing with manual start” facilitate your weighingof unstable weighing samples (e.g. animals). With this type of weighing, your balance determines the weight over aparticular time period and calculates a representative mean value.
Dynamic weighing presupposes that you have preselected the function “F dyn A” or “F dyn M” in the menu (seesection␣ 4.6).
If you are working with a weighing container, place it on the weighing pan in thenormal weighing mode.
Press the «#» key to tare the balance.
Press the «“» key briefly. The symbol of the weighing process adapter in thedisplay confirms that dynamic weighing has been activated.
Your balance is set in the factory so that the weight is determined over a periodof 3 seconds. You need perform the following 3 steps only if you wish to changethis time interval.
Press and hold the «F» key until the time display appears.
1ç4 g
#
=0 g
F
=0 g
t ≠ 3”F
long
METTLER TOLEDO
PG5001-S
XKD 07

Special applications and functions
43
Menu
Menu
○
○
○
○
-- 5 --
-- 1 --
By pressing the «“» key briefly, you can select one of the available timeintervals (1, 2, 3, 5, 10 or 20 seconds).
NotesThe more unstable the weighing sample, the longer the time interval whichshould be selected.If you do not press a key for 45 seconds, the balance quits the display withoutchanging the inputted value.
Then press the «±» key briefly to confirm the selected time interval.
Your balance is now ready for dynamic weighing.
Load the weighing sample.
If you have selected the function “Dynamic weighing with automatic start” in themenu, the weighing starts automatically on relative stability. However, theweighing sample must weigh at least 5 grams.
If you have selected the function “Dynamic weighing with manual start” in themenu, press the «±» key briefly to start the weighing.
The remaining weighing time (in seconds) is displayed continuously.
On elapse of the weighing time, read off the result. The asterisk symbol “*” lightsup in the lower left corner of the display. This symbol indicates that the value isthe mean value of the performed weighings, in other words a calculated result.The result remains in the display until the weighing sample is removed. If youwish to weigh the same weighing sample again, press the «±» key briefly.
t ≠ 3”
F
t ≠ 5”
=0 g
‹ 9%9 g
9%9 g

Special applications and functions
44
The set weighing time (time interval) remains stored until it is changed or thepower supply of the balance is interrupted.
By briefly pressing the «“» key, you can switch between the normal weighingmode and dynamic weighing at any time.
By pressing and holding the «F» key when in the dynamic weighing mode, youcan recall the preselected time interval to the display and change it.
5.5 Below-the-balance weighingsYour PG-S balance is equipped with a hanger for weighings below the weighing pan.
Carefully turn the balance over and detach the cover of the hanger (use ascrewdriver if necessary). Store the cover in a safe place to ensure it is not lost.
Fasten a suitable suspension device to the hook of the hanger to accommodatethe weighing sample. You can use the hanger to perform weighings up to thenominal load of your balance model.
NoteOn completion of the below-the-balance weighing, re-attach the cover of thehanger.

Special applications and functions
45
CAL intCalÇ
long
5.6 Adjustment (calibration) with internal weightDepending on the setting selected in the menu (see section 4.4), the adjustment (calibration) can be performed with thebuilt-in, internal weight fully automatically (FACT) or semi-automatically.
Fully automatic internal adjustment (calibration) FACTYour balance is set in the factory for the fully automatic adjustment with theinternal adjustment weight. You are already familiar with this setting fromsections 2.5 and 4.4.
Semi-automatic adjustment (calibration)If your balance is outside the adjustment tolerance and depending on whetheryou have set the automatic adjustment call-up in the menu (see section 4.5),the balance uses a flashing «Cal» in the display to prompt you to adjust(calibrate) with the internal weight at a keystroke. With certified balances, theadjustment (calibration) with the internal weight is performed automatically inaccordance with the national weights and measures legislation. An adjustment(calibration) with external weights is not allowed by the weights and measureslegislation.
If you wish to adjust your balance with an internal weight, proceed as follows:
Make sure that “FACT” or the “Adjustment (calibration) with internal weight(Cal int)” is selected in the menu (see section 4.4).
Ensure that the weighing pan is unloaded. There is no need to tare the balancebefore the adjustment (calibration).
Start the adjustment operation by pressing and holding the «Cal» key. Thebalance briefly shows that adjustment (calibration) is being performed with theinternal weight.
NoteIf “SECUrEd 2” is switched on in the menu, the Cal
Ç key is blocked.
Special applications and functions
46
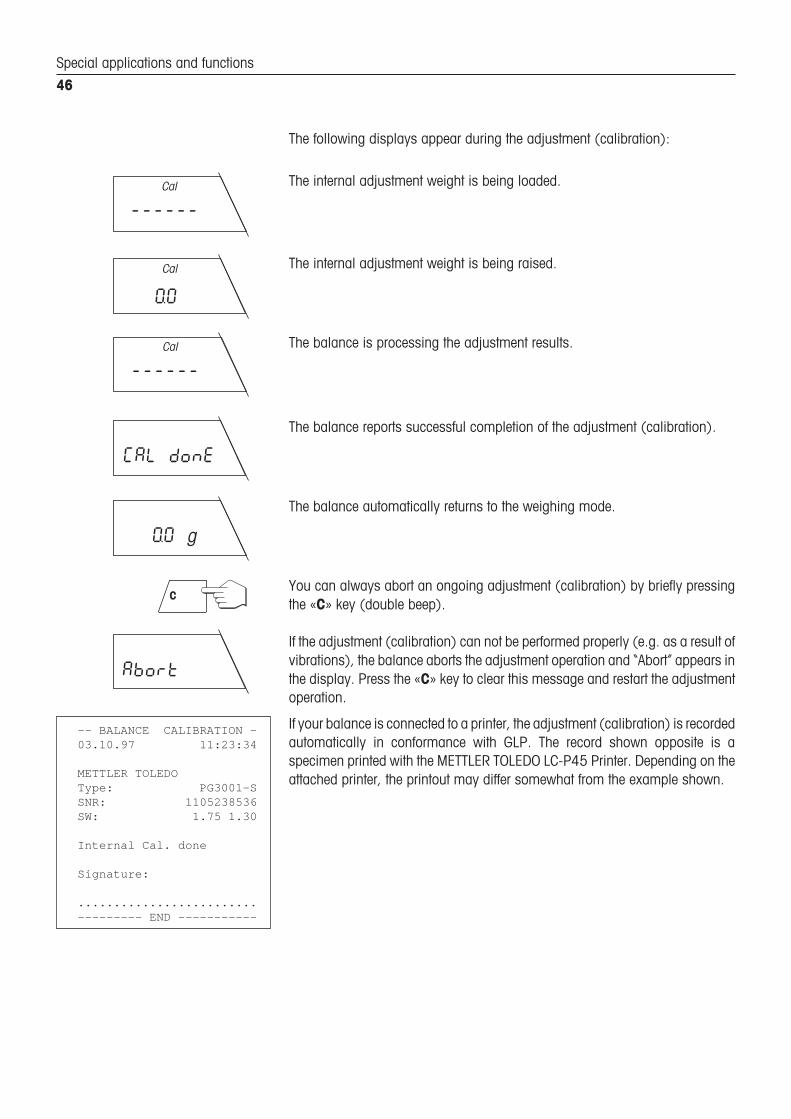
The following displays appear during the adjustment (calibration):
The internal adjustment weight is being loaded.
The internal adjustment weight is being raised.
The balance is processing the adjustment results.
The balance reports successful completion of the adjustment (calibration).
The balance automatically returns to the weighing mode.
You can always abort an ongoing adjustment (calibration) by briefly pressingthe «C» key (double beep).
If the adjustment (calibration) can not be performed properly (e.g. as a result ofvibrations), the balance aborts the adjustment operation and “Abort” appears inthe display. Press the «C» key to clear this message and restart the adjustmentoperation.
If your balance is connected to a printer, the adjustment (calibration) is recordedautomatically in conformance with GLP. The record shown opposite is aspecimen printed with the METTLER TOLEDO LC-P45 Printer. Depending on theattached printer, the printout may differ somewhat from the example shown.
Cal
------
Cal
=0
Cal
------
CAL donE
=0 g
C
Abort
-- BALANCE CALIBRATION -03.10.97 11:23:34
METTLER TOLEDOType: PG3001-SSNR: 1105238536SW: 1.75 1.30
Internal Cal. done
Signature:
.........................--------- END -----------

Special applications and functions
47
5.7 Adjustment (calibration) with external weights (VariCal)Depending on the setting selected in the menu (see section 4.4), the adjustment (calibration) can be performed with thebuilt-in weight or with external weights. In the factory setting, the balance is set to adjustment with the internal weight, whichyou are already familiar with from section 2.5.
CalÇ
UAr∫ CAL
long
CAL 1000 g
CAL 2000 gF
200=0 g
Cal
Menu
------
Cal
If you wish to adjust your balance with external weights, proceed as follows:*
* The adjustment (calibration) with external weights is not possible with certifiedbalances.
Make sure that “Adjustment (calibration) with external weights (VariCal)”is selected in the menu (see section 4.4).
Ensure that the weighing pan is unloaded. There is no need to tare the balancebefore the adjustment (calibration).
Start the adjustment operation by pressing and holding the «Cal» key. Thebalance shows briefly that adjustment is being performed with external weights.
The balance now prompts you to select the desired weight. If you do not pressa key for 3 seconds, the balance automatically initiates the adjustment process.
If you do not wish to adjust with the suggested weight, you can select a differentweight by pressing the «“» key briefly. The available weights depend on thebalance model.
Confirm the selected weight with the «±» key. This initiates the adjustmentprocess. The balance determines the zero point.
You are then prompted to load the weight.

Special applications and functions
48
Place the requested weight in the middle of the weighing pan.
During the adjustment the horizontal segments are displayed.
NoteYou can abort the ongoing adjustment at any time by pressing the «C» key briefly.
On completion of the adjustment operation, you are prompted to remove theweight. Lift the weight off the weighing pan.
After removal of the weight, the balance shows the end of the adjustmentoperation and then returns to the weighing mode.
NoteIf the adjustment (calibration) can not be performed properly (e.g. as a result ofvibrations), the balance aborts the adjustment operation and “Abort” appears inthe display. Press the «C» key to clear this message and restart the adjustmentoperation.
If your balance is connected to a printer, the adjustment is recorded automaticallyin conformance with GLP. The record shown opposite is a specimen printed withthe METTLER TOLEDO LC-P45 Printer. Depending on the attached printer, theprintout may differ somewhat from the example shown.
Cal
------
=0 g
CAL donE
Abort
C
-- BALANCE CALIBRATION -03.10.97 11:34:23
METTLER TOLEDType: PG5001-SSNR: 1105238536SW: 1.75 1.30
Weight ID: ..............Weight: 1000.0 g
External Cal. done
Signature:
.........................--------- END -----------
METTLER TOLEDO
PG5001-S
XKD 10

Special applications and functions
49
5.8 Test of the balance with internal weight or external weightsYou can always test the accuracy of your balance. This test is performed either with the built-in weight or with externalweights, depending on your setting in the menu (see section 4.4).
Test of the balance with the internal weightMake sure that the “Test of the balance with the internal weight” (test int) isselected in the menu (see section 4.4).
Ensure that the weighing pan is unloaded. There is no need to tare the balancebefore the test.
Initiate the test procedure by pressing and holding the «Cal» key. The balancebriefly confirms that the test is being performed with the internal weight.
The following displays appear during the test:
The balance determines the zero point.
The balance is processing the results of the test.
The balance confirms that the test has been performed.
Over a period of 10 seconds, the balance now shows the difference (deviation)between the adjustment (calibration) and the current test weighing.
On completion of the test, the balance automatically returns to the weighingmode.
CalÇ
tESt int
long
=0
tSt donE
d =2
------
------
Special applications and functions
50
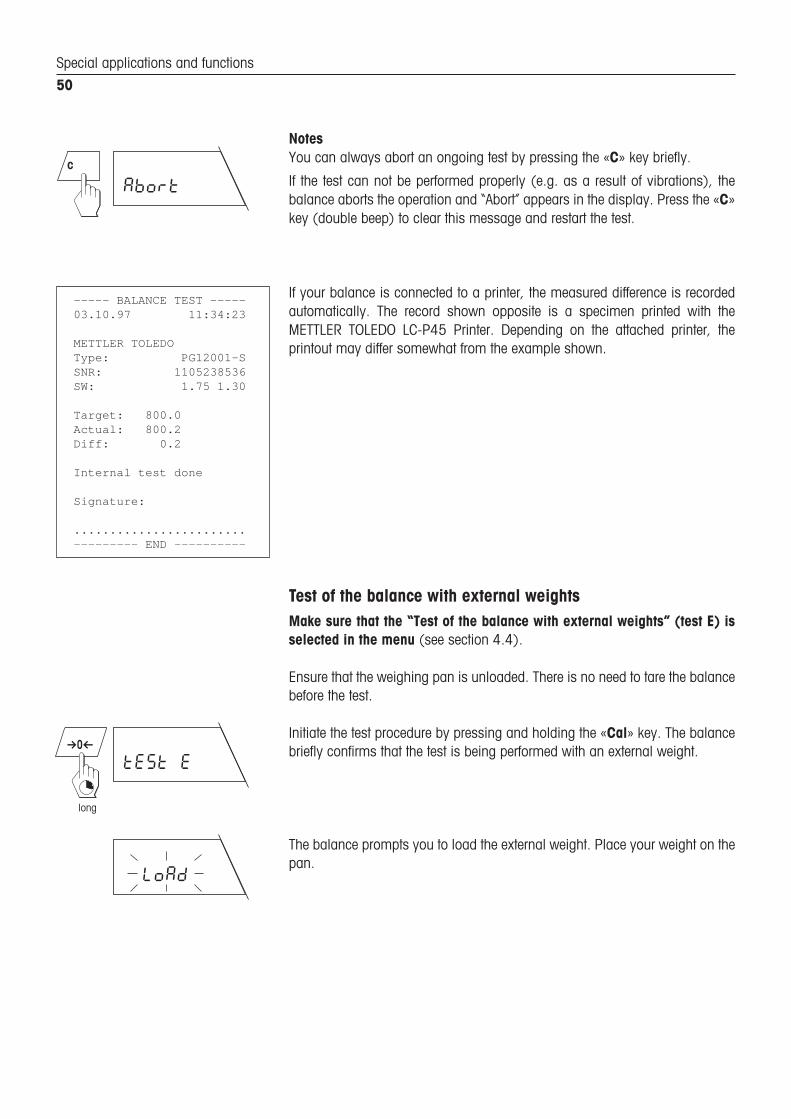
NotesYou can always abort an ongoing test by pressing the «C» key briefly.
If the test can not be performed properly (e.g. as a result of vibrations), thebalance aborts the operation and “Abort” appears in the display. Press the «C»key (double beep) to clear this message and restart the test.
If your balance is connected to a printer, the measured difference is recordedautomatically. The record shown opposite is a specimen printed with theMETTLER TOLEDO LC-P45 Printer. Depending on the attached printer, theprintout may differ somewhat from the example shown.
Test of the balance with external weightsMake sure that the “Test of the balance with external weights” (test E) isselected in the menu (see section 4.4).
Ensure that the weighing pan is unloaded. There is no need to tare the balancebefore the test.
Initiate the test procedure by pressing and holding the «Cal» key. The balancebriefly confirms that the test is being performed with an external weight.
The balance prompts you to load the external weight. Place your weight on thepan.
Abort
C
----- BALANCE TEST -----03.10.97 11:34:23
METTLER TOLEDOType: PG12001-SSNR: 1105238536SW: 1.75 1.30
Target: 800.0Actual: 800.2Diff: 0.2
Internal test done
Signature:
........................--------- END ----------
tESt EÇ
long
LoAd

Special applications and functions
51
During the test, the horizontal segments are displayed.
The balance now prompts you to remove your weight. Lift off the weight.
After removal of the weight, the balance processes the results of the test.
The balance confirms that the test has been performed and then automaticallyreturns to the weighing mode.
NotesYou can always abort an ongoing test by pressing the «C» key briefly.
If the test can not be performed properly (e.g. as a result of vibrations), thebalance aborts the operation and “Abort” appears in the display. Press the «C»key (double beep) to clear this message and restart the test.
If your balance is connected to a printer, the measured weight of the external testweight is recorded automatically. You can now enter the target weight (“Target”)and the difference (“Diff”) in the record by hand. The record shown opposite isa specimen printed out with the METTLER TOLEDO LC-P45 Printer. Dependingon the attached printer, the printout may differ somewhat from the exampleshown.
------
=0 g
------
tSt donE
Abort
C
----- BALANCE TEST -----03.10.97 15:21:17
METTLER TOLEDOType: PG5001-SSNR: 1105238536SW: 1.75 1.30
Weight ID: .............
Target: .............Actual: 2000.0 gDiff: .............
External test done
Signature:
........................--------- END ----------

Further important information regarding your PG-S balance
52
6 Further important information
6.1 Error messagesError messages in the display draw your attention to incorrect operation or that the balance could not execute a procedureproperly.
Error message Cause Rectification
Overload
Underload
No function preselected
No stability– On taring or adjustment (calibration)– On loading the reference weight for the
functions “Piece counting” or “Percentweighing”.
No or wrong adjustment weight
Faulty reference(Reference weight or reference piece numbertoo low)
Internal faultError Nos 4, 5, 6 and 7 signal internalbalance problems
íååååì
Unload weighing pan
Check that the weighing pan is positionedcorrectly.
Preselect desired function in the menu.
Ensure more stable ambient conditions. Ifnot possible, check settings of the repeat-ability and vibration adapter (see sections4.9 and 4.7).
Load requested weight.
Increase reference weight or reference piecenumber.
Inform METTLER TOLEDO customer serv-ice
○
○
○
ñ----ó
F nonE
Error 1
Error 2
Error 3
Error 4
Error 7

Further important information regarding your PG-S balance
53
PG-S 13
Error in zero setting (certifiable balancesonly)Zero setting outside zero setting range
Negative taring rangeThe balance has been tared, the tare re-moved (negative tare weight) and an at-tempt has been made to retare the balance
Wrong or missing weighing pan
Adjustment (calibration) or test could not beperformed properly.
The balance aborts the procedure. This errormessage is caused by external disturbinginfluences (e.g. vibrations or powerfuldrafts).
In the menu option Handshake, setting “HSHard” selected.
Error message Cause Rectification
Ensure that zero setting is performed in theadmissible range of ±2% of the full loadand not on underload or overload.
Reset balance to zero with the «Ç» keyand repeat taring operation
Mount correct weighing pan.Unload weighing pan.
Press «C» key (a double beep sounds asconfirmation) to clear the error message.
Close all draft shield doors.
Possibly select a more suitable location forthe balance.
Switch on attached peripheral device.
6.2 Preventive maintenance and careServicingRegular servicing of your balance by an authorized service engineer ensures constant accuracy for years to come andprolongs the lifetime of the instrument. Ask your METTLER TOLEDO dealer for details of the available service options.
CleaningThe balance housing and the weighing pan are made of high-grade, resistantmaterials. All commercially available cleaning agents may thus be used forcleaning.
PG-S balances can best be cleaned with a damp cloth.
Balance blocked
Error 8
PrESS 0
=0
Abort

Further important information regarding your PG-S balance
54
PG-S 16
15
9 6
RxD
DATA
TxD
IN 1)SGND
OUT 2)
«HAND-SHAKE»
6.3 Changing the protective cover
6.4 RS232C interface
Each PG-S balance is equipped with an RS232C interface as standard for theattachment of a peripheral device (e.g. printer or computer).– 9-pin socket– Matching to the other device (transfer parameters) is possible via the menu
settings (see sections 4.16–4.21)
The versatile features of the PG-S balances regarding documentation of theresults can not be utilized to the full until a printer, e.g. the LC-P45 from METTLERTOLEDO is attached. The printed results make a decisive contribution to a simpleworking procedure following GLP/GMP.
NotesIf you wish to attach several peripheral devices at the same time, it is simple toretrofit your PG-S balance with the LocalCAN universal interface (see section6.5).You will find a detailed description of the available interface commands in theenclosed brochure “Reference manual MT-SICS”.
If you operate your balance in an environment liable to cause contamination, werecommend you cover it with the supplied transparent protective cover for thekeypad and display.
Contaminated protective covers of all balance models can be changed, seeOptional equipment in section 7.3.
Cleaning beneath the weighing pan– Remove the weighing pan and the pan mount.– You can now clean the dirty parts under running water.
1) Ready to send2) Ready to receive
METTLER TOLEDO
PG5001-S
FACT
Max 5100gMin
0.5g
XKD 03

Further important information regarding your PG-S balance
55
12
43
6.5 LocalCAN universal interfaceAs an option, your PG-S balance can be retrofitted with a LocalCAN universal interface. As you can attach up to fiveperipheral units at the same time, it offers you a high degree of flexibility in data interchange.Peripheral units (see section 7.3) from METTLER TOLEDO which have the connection cable as part of their standardequipment can be attached in a simple manner to the balance.The communication is particularly well supported by the commands of the standard and extended command set. Thereference manual (705184) that you received with the LC-RS or LC-CL cable describes the functioning of these commandsin an easily surveyed manner.
The features and benefits of the LocalCAN universal interface can be summarizedas follows:
– Attachment of up to five peripheral units to a balance at the same time.– Support of standard interfaces such as RS232C or CL.– Rugged, 4-pin connector with reversed voltage and pullout protection.– Dependable data transfer thanks to built-in CAN controller.– Open cabling system, i.e. each peripheral unit except auxiliary displays have
an additional connection.– Simple configuration of the parameters without recourse to the operating
instructions of the PG-S balance.
The versatile features of the PG-S balances regarding documentation of theresults can not be utilized to the full until a printer, e.g. the LC-P45 from METTLERTOLEDO is attached. The printed results make a decisive contribution to a simpleworking procedure following GLP/GMP.
Technical data of the LocalCAN universal interface
Cable length between two devices, maximum 10 m.Total cable lengths of all attached devices, maximum 15 m.
Pin assignment (balance end)
Pin No. Signal
1 negative signal line (–CAN)
2 positive signal line (+CAN)
3 plus pin of power supply (V CAN) for peripherals
4 minus pin of power supply (0 V) for peripherals
XKD 11

Technical data and optional equipment
56
7. Technical data and optional equipment7.1 Technical data of the PG-S balances
Power supply100…240 V, 50/60 Hz, 9…20VA
Ambient conditions for PG-S balancesHeight above sea leve up to 4000 mTemperature 5–40º CAtmospheric humidity max. 85% RH @ +30° COvervoltage category IIPollution degree 2
Standard equipment• RS232C interface• Protective cover• Feedthrough for below-the-balance weighing• Device for theft protection• Device for stand fastening• Operating instructions• Description of interface commands (Reference manual MT-SICS)

Technical data and optional equipment
57
Technical data PG3001-S PG5001-S PG8001-S
Readability 0.1 g 0.1 g 0.1 g
Maximum capacity 3100 g 5100 g 8100 g
Taring range 0 ... 3100 g 0 ... 5100 g 0 ... 8100 g
Repeatability (s) 0.08 g 0.08 g 0.08 g
Linearity 1) ±0.1 g ±0.1 g ±0.1 g
Stabilization time (typical) 1…2 s 1…2 s 1…2 s
Adjustment internal, fully automatic motorized initiation (FACT)• with internal weight test possibility for checking the sensitivity• with external weights 2 / 3 kg 2 / 3 / 4 / 5 kg 4 / 5 / 6 / 7 / 8 kg
Sensitivity• Temperature drift 1) 2) ±10 ppm / °C• Long-term drift 1) 3) ±0.007 %
Weighing pan 240x240 mm 240x240 mm 240x240 mm
Dimensions (w/h/d) 240x100x366 mm 240x100x366 mm 240x100x366 mm
Net weight 6 kg 6 kg 6 kg
Technical data PG8000-S PG12001-S PG12001-SDeltaRange®
Readability 1 g 0.1 g 0.1 g/1 g
Maximum capacity 8100 g 12100 g 12100 g
Fine range – – 2400 g
Taring range 0 ... 8100 g 0 ... 12100 g 0 ... 12100 g
Repeatability (s) 0.3 g 0.08 g 0.08 g/0.3 g
Linearity 1) ±0.5 g ±0.1 g ±0.1g/±0.5 g
Stabilization time (typical) 1…2 s 1…2 s 1…2 s
Adjustment internal, fully automatic motorized initiation (FACT)• with internal weight test possibility for checking the sensitivity• with external weights 4 / 5 / 6 / 7 / 8 kg 4 / 5 / 6 / 7 / 8 / 9 / 10 / 11 / 12 kg 4 / 5 / 6 / 7 / 8 / 9 / 10 / 11 / 12 kg
Sensitivity• Temperature drift 1) 2) ±10 ppm / °C• Long-term drift 1) 3) ±0.007 %
Weighing pan 240x240 mm 240x240 mm 240x240 mm
Dimensions (w/h/d) 240x100x366 mm 240x100x366 mm 240x100x366 mm
Net weight 6 kg 6 kg 6 kg
1) In the temperature range 15 ... 30 °C2) 1 ppm = 1/1 000 000 (referred to the current weight display)3) Sensitivity deviation/year after first-time startup with self-calibration FACT switched on

Technical data and optional equipment
58
7.2 Dimensions
131
225
240
194
345
240
100
366
191
280 42
14
10

Technical data and optional equipment
59
7.3 Optional equipmentWith optional equipment from the METTLER TOLEDO product range, you can enhance the functionality of your PG-Sbalance. You have the following options available:
Normal paper printers
LC-P45 Printer: Printer with built-in applications (calibration and adjustment records conform-ing to GLP, statistical evaluations, totalization functions, etc.)
LC-P43 Printer (only with LC option): Printer for recording the results
GA42 Printer (only with RS232C): Printer for recording the results
Cables and cabling accessories
RS9–RS25: (m/f), length 2 m
RS9–RS9: (m/f), length 1 m
RS9–RS9: (m/m), length1 m
Antitheft device
Steel cable with lock
LC option LocalCAN universal interface (LC-G)
Protective covers
Protective cover for the entire PG-S balance
R/G-M emulation
Software cassette emulates interface commands and menu options of the PM balances.For the use of PG-S balances in systems together with PM balances.
Weights
Available as OIML weights (E2 and F1, with certificate) or as adjustment (calibration) weights(not OIML): 20 g, 50 g, 100 g and 200 g
LC-P45
LC-P43
GA-42
11101052
11101051
21250066
590101
11101055
11101643
21201308
on request

Technical data and optional equipment
60
229140
229150
229100
229070
229060
229050
229065
229130
239270
229115
229116
229118
229145
238495238494
This optional equipment can be used only with the LocalCAN universal interface!
Auxiliary displays
LC-AD: Auxiliary display, active, with bench stand
LC-ADS: Auxiliary display, active, with balance stand for PG-S
LC-PD: LCD auxiliary display, passive, with bench stand
LC-PDS: LCD auxiliary display, passive, with balance stand for PG-S
Foot switch
LC-FS: Foot switch with adjustable function
Cables and cabling accessories
LC-RS25: Cable for the attachment of a printer or computer with RS-232C, 25-pin(m/f), such as IBM XT or compatibles
LC-RS9: Cable for the attachment of a computer with RS-232C, 9-pinsuch as IBM AT or compatibles
LC-CL: Cable for the attachment of a device with METTLER TOLEDO CL interface (5-pin)
LC-LC03: Extension cable for LocalCAN, 0.3 m
LC-LC2: Extension cable for LocalCAN, 2 m
LC-LC5: Extension cable for LocalCAN, 5 m
LC-LCT: T-piece for LocalCAN
Bar-code reader: LC-BCR usable for operation of the application softwareDifferential Weighing 238494
Differential weighing
Application software for differential weighing with bar-code reader LC-BCRApplication software for differential weighing
Operating or installation instructions are enclosed with many of the options. For further information and for details on howto order the optional equipment, please contact your nearest METTLER TOLEDO dealer.

Appendix
61
8. Appendix8.1 Overview of menu
1) With certified balances, these menu options have a fixed setting and can not be changed.2) With certified balances, only the weighing units/functions allowed by the respective national weights and measures legislation may be selected.3) These menu options are shown only if your balance is equipped with an RS232C interface.4) These menu options are shown only if “HoSt” has been selected in menu option 14.5) These menu options are shown only if “S.oFF” has not been selected in menu option 15.6) This menu option is shown only if “FACT” or “CAL oFF” has not been selected in menu option 2
“
F nonE
Unit 1
F count
F 100
F dYn A
F dYn Ÿ≈
ForŸ≈UlA
kg
g
Unit 1m
Unit 1mo
Unit 1
ctUnit 1
Unit 2
Unit 2
g
Unit 2ozt
GN
tl
tl
Unit2 Stl
Unit 2
mUnit 2
mo
Unit2 H
Unit2 t
2
31 1 3
OFF
bEttEr
6ood
bESt
Std
ÅoFF 2'
ÅoFF 5'
[AL oFF
tESt int
tESt E
A" oFF FÙ StArt
2
ozUnit 2
dwtUnit 1
lbUnit 2
HoST
7B-no
7B-E
8B-no
7B-odd
BD 2400
BD 4800
BD 9600BD 600
BD 1200
BD 300
F count[ALimT
BD 150
HS oFF
HS SoFtHS HArd
kgUnit 2
S. STb
S. AuTo
S. ConT
S. ALL S. PŸ≈
4 Function 2)
8 Weighing unit 1 1) 9 Weighing unit 2 2)
5 Vibration adapter6 Weighing process adapter
20 Settings
Weighing mode
Menu
7 Repeatability
11 Autom. shutdown 12 Power-up mode 1)10 Autozero
3 Autom. adjustm. call-up1) 6)2 Adjustment
LiST
A" on qÙ StArt
Cal
Cal
lnFo oFF
InFo on
ÅoFF -
fA[T
1 Reset
rESEt
13 Icons
on
14 Peripheral unit 3)
PòinTEò
18 Parity/bit 3)17 Baud rate 3)
PCS
Stk
SECUrEd OPEn
19 Handshake 3)
Unit 1
Unit 1
lb
Unit 1
oz
Unit 1
ozt
GN
dwtUnit 2Unit 2
ct
15 Send commands 4)
S. oFF16 Send format 5)
S. SICS
UAri CAL
SECUòE1SECUòE2
ÅoFF 10' AuToOFF
see key 4), 5)

Appendix
62
8.2 Conversion table for weight units
Unit Gram Milligram Ounce Troy ounce Grain Pennyweightg mg oz ozt GN dwt
(avdp)
1 g 1 1000 0.03527396 0.03215075 15.43236 0.6430149
1 mg 0.001 1 0.0000352740 0.0000321508 0.01543236 0.000643015
1 oz 28.34952 28349.52 1 0.9114585 437.500 18.22917
1 ozt 31.10347 31103.47 1.097143 1 480 20
1 GN 0.06479891 64.79891 0.002285714 0.002083333 1 0.04166667
1 dwt 1.555174 1555.174 0.05485714 0.05 24 1
1 ct/C.M. 0.2 200 0.007054792 0.006430150 3.086472 0.1286030
1 mo 3.75 3750 0.1322774 0.1205653 57.87134 2.411306
1 m 4.608316 4608.316 0.1625536 0.1481608 71.11718 2.963216
1 tl (HK) 37.429 37429 1.320269 1.203370 577.6178 24.06741
1 tl (SGP/Mal) 37.79937 37799.37 1.333333 1.215278 583.3334 24.30556
1 tl (Taiwan) 37.5 37500 1.322773 1.205653 578.7134 24.11306
Unit Carat Momme Mesghal Tael Tael Taelct/C.M. mo m tl tl tl(metr.) (Hong Kong) (Singapore) (Taiwan)koil (Malaysia)
1 g 5 0.2666667 0.216999 0.02671725 0.02645547 0.02666667
1 mg 0.005 0.000266667 0.000216999 0.0000267173 0.0000264555 0.0000266667
1 oz 141.7476 7.559873 6.151819 0.7574213 0.75 0.7559874
1 ozt 155.5174 8.294260 6.749423 0.8309993 0.8228570 0.8294261
1 GN 0.3239946 0.01727971 0.01406130 0.001731249 0.001714286 0.001727971
1 dwt 7.775869 0.4147130 0.3374712 0.04154997 0.04114285 0.04147131
1 ct/C.M. 1 0.05333333 0.04339980 0.005343450 0.005291094 0.005333333
1 mo 18.75 1 0.8137461 0.1001897 0.09920800 0.1
1 m 23.04158 1.228884 1 0.1231215 0.1219152 0.1228884
1 tl (HK) 187.1450 9.981068 8.122056 1 0.9902018 0.9981068
1 tl (SGP/Mal) 188.9968 10.07983 8.202425 1.009895 1 1.007983
1 tl (Taiwan) 187.5 10 8.137461 1.001897 0.9920800 1

Appendix
63
8.3 SOP (Standard Operating Procedure)In the documentation of a GLP test, the SOPs represent a relatively small but none the less very important part.
Practical experience has confirmed that SOPs produced in-house can be followed much better than those produced byan external, anonymous source.
In what follows , you will find a brief overview of the responsibilities in regard to SOPs, as well as a check list for theproduction of an SOP.
Responsibilities in regard to SOPs
Head of the inspection and test arranges the production of SOPs
equipment approves SOPs with date and signature
Test director ensures that SOPs are available
approves SOPs on behalf of the management
Personnel follow the SOPs and other directives
GLP quality assurance checks that valid SOPs are available
checks that SOPs are followed
checks whether and how modifications are documented

Appendix
64
Check list for the production of SOPs
Administrative matters Yes No
1. Use of SOP blank forms
2. Name of the inspection and test equipment
3. Date (production date of the SOP)
4. Filing identifier (code plan) for SOPs
5. Number of pages (1 of n)
6. Title
7. Date of putting into force
8. Modification information
9. Names of people (departments) responsible for the implementation
10. Date and signatures:
a) author(s)
b) checker
c) person authorized for approval
11. Distribution list
Contents of the SOP Yes No
1. Introduction and aim
2. Required material
3. Description of the work steps
4. Description of the documentation
5. Data processing and evaluation
6. Documentation, samples, etc. to be stored
7. Archiving directions

Appendix
65
AAbort 46, 48, 50, 51, 53Absolute weighing 24Accuracy test 22Adjustment operation 12Adjustment to acceleration due to gravity 12Adjustment tolerance 45Adjustment weight 52Adjustment 12, 21, 57Ambient conditions 11, 12, 18, 21, 24, 52, 56Animals 42Antitheft device 59Asterisk 43Atmospheric humidity 56Automatic adjustment call-up 22Automatic shutdown 28Automatic zero correction 28Autozero 28Auxiliary display 60
BBackweighing 60Bar-code reader 60Baud rate 32Below-the-balance weighings 44Brief keystroke 7
CCables 59, 60Care 53CE declaration of conformity 6Checkweighing 24Cleaning 53Components 38, 40, 41
Computers 54Conversion table for weight unit 62
DData transfer rate 32Data 17DeltaRange® 16DeltaTrac 15, 37Deviation 51Dimensions 57Display test 13, 18, 29Double beep 20Drift 28Dynamic weighing 23, 42
EEquipment features 6Error messages 52Evaporation measurements 28
FF count 35FACT 12, 21, 45Factory setting 21Fine addition 24, 25Fine range 16Foot switch 60Formula weighing 23, 38Formula 38Function 23, 35
8.4 Index

Appendix
66
GGLP 6, 12, 21, 54, 55, 59, 63Good Laboratory Practice 6, 12Graphic indicator 16
HHandshake 18, 33Hazardous environment 8
IIcons 30Individual components 39Interface 60Internal adjustment 21ISO 9001 6
KKey designations 7Keypad 8
LLeveling the balance 11Linearity 57List 33LocalCAN universal interface 55, 59Location change 10Location selection 10
MMaximum capacity 57Menu options 19Menu overview 61Menu settings 33Menu 18, 61
NN total 40Net total weight 40Net weight 57
OOn and off switching 13Open 34Optional equipment 56, 59Overload 52
PPackaging 9Percent weighing 23, 37Peripheral device 30, 32, 33, 54, 55Piece counting 23, 35Pin assignment 55Power cable 8Power supply 11, 36, 37, 44Power-up mode 29Printer 17, 33, 34, 46, 48, 50, 51, 54, 59Printing out settings 33Protective cover 54, 59Putting into operation 9
QQuickstart 29
RReadability 16, 57Record 12, 34, 40, 46, 48, 50, 51Reference piece number 35, 52Reference weight 35, 36, 37, 52Reference 52
Appendix
67
Repeatability 25, 52, 57Repro-Set 25Reset 21RS232C interface 54
SSafety 7, 8Saving settings 20Secure 33Self-test 11Serial interface 32Service 53Settings 19Short-form operating instructions 6Software version 11SOP 6, 12, 63Stability detector 15, 25Stability 43Stabilization time 57Standard equipment 9Standard Operating Procedure 6, 12, 63Standby mode 14Standby 28, 29
TT total 40Target weight 51Taring range 14, 57Taring 14Technical data 56Temperature 12, 21, 56Test of the balance 22, 49, 50Testing 12, 49Thermal equilibrium 13Tolerance marks 15Tolerances 37
Total weight 39
UUnderload 52Unit 26, 27Unstable weighing samples 23, 42
VVariCal 21, 45, 47Vibration adapter 24, 52
WWarm-up phase 12, 21Warm-up time 13Weighing container 14, 41Weighing mode 19Weighing pan 53, 57Weighing process adapter 24, 42Weighing result 17Weighing unit 16, 17, 26, 27Weights 12, 21
ZZero point 28

To protect your METTLER TOLEDO product's future:METTLER TOLEDO Service assures the quality, measuring accuracy andpreservation of value of all METTLER TOLEDO products for years to come.Please send for full details of our attractive terms of service.Thank you.
Subject to technical changes and to the availabilityof the accessories supplied with the instrument.
© Mettler-Toledo GmbH 2002 21203050B Printed in Switzerland 0206/2.12
Mettler-Toledo GmbH, Laboratory & Weighing Technologies, CH-8606 Greifensee, SwitzerlandPhone +41-1-944 22 11, Fax +41-1-944 30 60, Internet: http://www.mt.com
*P21203050*
Printed on recycled paper. Because we care.