Embed Size (px)
DESCRIPTION
IT
Citation preview
6/9/2015 How To Setup and Configure an OpenVPN Server on CentOS 7 | DigitalOcean
https://www.digitalocean.com/community/tutorials/howtosetupandconfigureanopenvpnserveroncentos7 1/19
Community
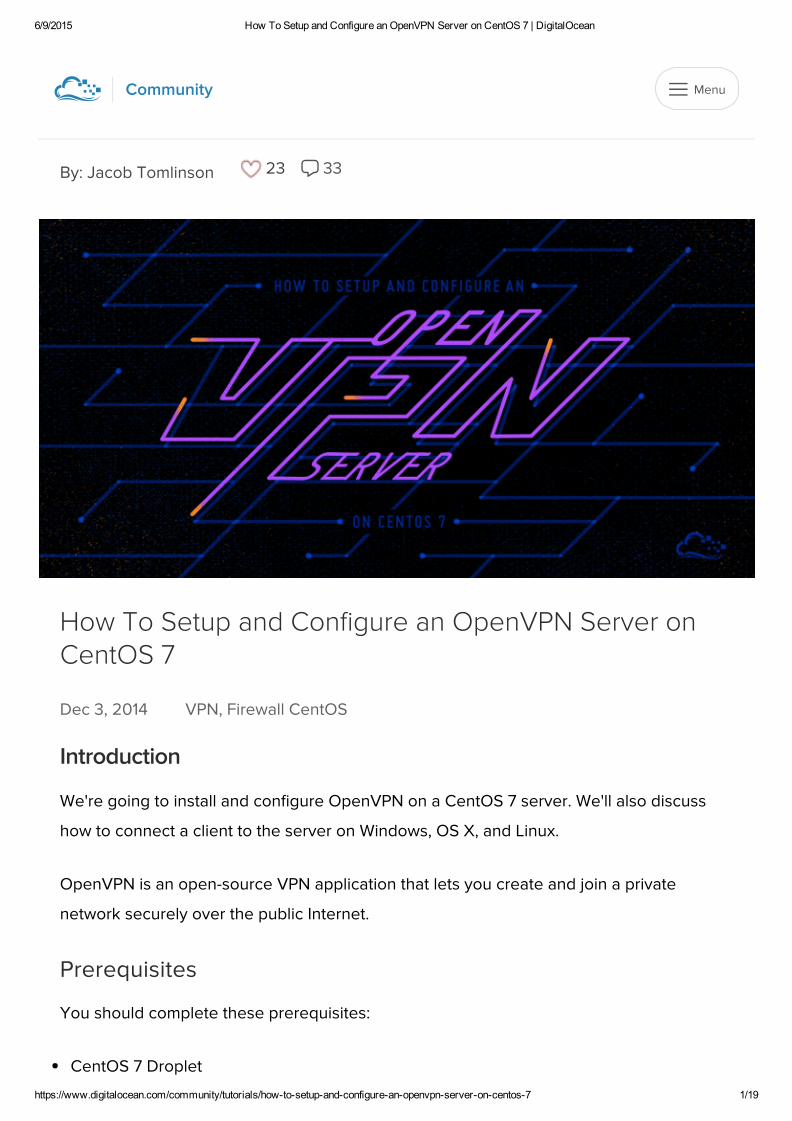
How To Setup and Configure an OpenVPN Server onCentOS 7
Dec 3, 2014 VPN, Firewall CentOS
Introduction
We're going to install and configure OpenVPN on a CentOS 7 server. We'll also discuss
how to connect a client to the server on Windows, OS X, and Linux.
OpenVPN is an open-source VPN application that lets you create and join a private
network securely over the public Internet.
Prerequisites
You should complete these prerequisites:
CentOS 7 Droplet
By: Jacob Tomlinson 23 33
Menu
6/9/2015 How To Setup and Configure an OpenVPN Server on CentOS 7 | DigitalOcean
https://www.digitalocean.com/community/tutorials/howtosetupandconfigureanopenvpnserveroncentos7 2/19
root access to the server (several steps cannot be completed with just sudo access)
Domain or subdomain that resolves to your server that you can use for the certificates
Before we start we'll need to install the Extra Packages for Enterprise Linux (EPEL)
repository. This is because OpenVPN isn't available in the default CentOS repositories.
The EPEL repository is an additional repository managed by the Fedora Project containing
non-standard but popular packages.
yum install epel‐release
Step 1 — Installing OpenVPN
First we need to install OpenVPN. We'll also install Easy RSA for generating our SSL key
pairs, which will secure our VPN connections.
yum install openvpn easy‐rsa ‐y
Step 2 — Configuring OpenVPN
OpenVPN has example configuration files in its documentation directory. We're going to
copy the sample server.conf file as a starting point for our own configuration file.
cp /usr/share/doc/openvpn‐*/sample/sample‐config‐files/server.conf /etc/openvpn
Let's open the file for editing.
vi /etc/openvpn/server.conf
There are a few lines we need to change in this file. Most of the lines just need to be
uncommented (remove the ;). Other changes are marked in red.
When we generate our keys later, the default Diffie-Hellman encryption length for Easy
RSA will be 2048 bytes, so we need to change the dh filename to dh2048.pem .
dh dh2048.pem
6/9/2015 How To Setup and Configure an OpenVPN Server on CentOS 7 | DigitalOcean
https://www.digitalocean.com/community/tutorials/howtosetupandconfigureanopenvpnserveroncentos7 3/19
We need to uncomment the push "redirect‐gateway def1 bypass‐dhcp" line, which
tells the client to redirect all traffic through our OpenVPN.
push "redirect‐gateway def1 bypass‐dhcp"
Next we need to provide DNS servers to the client, as it will not be able to use the default
DNS servers provided by your Internet service provider. We're going to use Google's
public DNS servers, 8.8.8.8 and 8.8.4.4 .
Do this by uncommenting the push "dhcp‐option DNS lines and updating the IP
addresses.
push "dhcp‐option DNS 8.8.8.8"push "dhcp‐option DNS 8.8.4.4"
We want OpenVPN to run with no privileges once it has started, so we need to tell it to run
with a user and group of nobody . To enable this you'll need to uncomment these lines:
user nobodygroup nobody
Save and exit the OpenVPN server configuration file.
Step 3 — Generating Keys and Certificates
Now that the server is configured we'll need to generate our keys and certificates. Easy
RSA installs some scripts to generate these keys and certificates.
Let's create a directory for the keys to go in.
mkdir ‐p /etc/openvpn/easy‐rsa/keys
We also need to copy the key and certificate generation scripts into the directory.
cp ‐rf /usr/share/easy‐rsa/2.0/* /etc/openvpn/easy‐rsa
6/9/2015 How To Setup and Configure an OpenVPN Server on CentOS 7 | DigitalOcean
https://www.digitalocean.com/community/tutorials/howtosetupandconfigureanopenvpnserveroncentos7 4/19
To make life easier for ourselves we're going to edit the default values the script
uses so we don't have to type our information in each time. This information is stored
in the vars file so let's open this for editing.
vi /etc/openvpn/easy‐rsa/vars
We're going to be changing the values that start with KEY_ . Update the following values to
be accurate for your organization.
The ones that matter the most are:
KEY_NAME : You should enter server here; you could enter something else, but then
you would also have to update the configuration files that reference server.key and
server.crt
KEY_CN : Enter the domain or subdomain that resolves to your server
For the other values, you can enter information for your organization based on the variable
name.
. . .
# These are the default values for fields# which will be placed in the certificate.# Don't leave any of these fields blank.export KEY_COUNTRY="US"export KEY_PROVINCE="NY"export KEY_CITY="New York"export KEY_ORG="DigitalOcean"export KEY_EMAIL="[email protected]"export KEY_OU="Community"
# X509 Subject Fieldexport KEY_NAME="server"
. . .
export KEY_CN=openvpn.example.com
6/9/2015 How To Setup and Configure an OpenVPN Server on CentOS 7 | DigitalOcean
https://www.digitalocean.com/community/tutorials/howtosetupandconfigureanopenvpnserveroncentos7 5/19
. . .
We're also going to remove the chance of our OpenSSL configuration not loading due to
the version being undetectable. We're going to do this by copying the required
configuration file and removing the version number.
cp /etc/openvpn/easy‐rsa/openssl‐1.0.0.cnf /etc/openvpn/easy‐rsa/openssl.cnf
To start generating our keys and certificates we need to move into our easy‐rsa
directory and source in our new variables.
cd /etc/openvpn/easy‐rsasource ./vars
Then we will clean up any keys and certificates which may already be in this folder and
generate our certificate authority.
./clean‐all
When you build the certificate authority, you will be asked to enter all the information we
put into the vars file, but you will see that your options are already set as the defaults. So,
you can just press ENTER for each one.
./build‐ca
The next things we need to generate will are the key and certificate for the server. Again
you can just go through the questions and press ENTER for each one to use your defaults.
At the end, answer Y (yes) to commit the changes.
./build‐key‐server server
We also need to generate a Diffie-Hellman key exchange file. This command will take a
×
6/9/2015 How To Setup and Configure an OpenVPN Server on CentOS 7 | DigitalOcean
https://www.digitalocean.com/community/tutorials/howtosetupandconfigureanopenvpnserveroncentos7 6/19
minute or two to complete:
./build‐dh
That's it for our server keys and certificates. Copy them all into our OpenVPN directory.
cd /etc/openvpn/easy‐rsa/keyscp dh2048.pem ca.crt server.crt server.key /etc/openvpn
All of our clients will also need certificates to be able to authenticate. These keys and
certificates will be shared with your clients, and it's best to generate separate keys and
certificates for each client you intend on connecting.
Make sure that if you do this you give them descriptive names, but for now we're going to
have one client so we'll just call it client .
cd /etc/openvpn/easy‐rsa./build‐key client
That's it for keys and certificates.
Step 4 — Routing
To keep things simple we're going to do our routing directly with iptables rather than the
new firewalld.
First, make sure the iptables service is installed and enabled.
yum install iptables‐services ‐ysystemctl mask firewalldsystemctl enable iptablessystemctl stop firewalldsystemctl start iptablesiptables ‐‐flush
Next we'll add a rule to iptables to forward our routing to our OpenVPN subnet, and save
this rule.
×Get the latest tutorials on SysAdmin and open source topics.
Sign Up
SCROLL TO TOP
6/9/2015 How To Setup and Configure an OpenVPN Server on CentOS 7 | DigitalOcean
https://www.digitalocean.com/community/tutorials/howtosetupandconfigureanopenvpnserveroncentos7 7/19
iptables ‐t nat ‐A POSTROUTING ‐s 10.8.0.0/24 ‐o eth0 ‐j MASQUERADEiptables‐save > /etc/sysconfig/iptables
Then we must enable IP forwarding in sysctl . Open sysctl.conf for editing.
vi /etc/sysctl.conf
Add the following line at the top of the file:
net.ipv4.ip_forward = 1
Then restart the network service so the IP forwarding will take effect.
systemctl restart network.service
Step 5 — Starting OpenVPN
Now we're ready to run our OpenVPN service. So lets add it to systemctl :
systemctl ‐f enable [email protected]
Start OpenVPN:
systemctl start [email protected]
Well done; that's all the server-side configuration done for OpenVPN.
Next we'll talk about how to connect a client to the server.
Step 6 — Configuring a Client
Regardless of your client machine's operating system, you will definitely need a copy of
the ca certificate from the server, along with the client key and certificate.
Locate the following files on the server. If you generated multiple client keys with unique
6/9/2015 How To Setup and Configure an OpenVPN Server on CentOS 7 | DigitalOcean
https://www.digitalocean.com/community/tutorials/howtosetupandconfigureanopenvpnserveroncentos7 8/19
descriptive names, then the key and certificate names will be different. In this article we
used client .
/etc/openvpn/easy‐rsa/keys/ca.crt/etc/openvpn/easy‐rsa/keys/client.crt/etc/openvpn/easy‐rsa/keys/client.key
Copy these three files to your client machine. You can use SFTP or your preferred
method. You could even open the files in your text editor and copy and paste the contents
into new files on your client machine.
Just make sure you make a note of where you save them.
We're going to create a file called client.ovpn . This is a configuration file for an
OpenVPN client, telling it how to connect to the server.
You'll need to change the first line to reflect the name you gave the client in your key
and certificate; in our case, this is just client
You also need to update the IP address from your_server_ip to the IP address of
your server; port 1194 can stay the same
Make sure the paths to your key and certificate files are correct
clientdev tunproto udpremote your_server_ip 1194resolv‐retry infinitenobindpersist‐keypersist‐tuncomp‐lzoverb 3ca /path/to/ca.crtcert /path/to/client.crtkey /path/to/client.key
This file can now be used by any OpenVPN client to connect to your server.
6/9/2015 How To Setup and Configure an OpenVPN Server on CentOS 7 | DigitalOcean
https://www.digitalocean.com/community/tutorials/howtosetupandconfigureanopenvpnserveroncentos7 9/19
Windows:
On Windows, you will need the official OpenVPN Community Edition binaries which come
with a GUI. Then, place your .ovpn configuration file into the proper directory,
C:\Program Files\OpenVPN\config , and click Connect in the GUI. OpenVPN GUI on
Windows must be executed with administrative privileges.
OS X:
On Mac OS X, the open source application Tunnelblick provides an interface similar to the
OpenVPN GUI on Windows, and comes with OpenVPN and the required TUN/TAP drivers.
As with Windows, the only step required is to place your .ovpn configuration file into the
~/Library/Application
Support/Tunnelblick/Configurations directory. Or, you can double-click on your
.ovpn file.
Linux:
On Linux, you should install OpenVPN from your distribution's official repositories. You can
then invoke OpenVPN by executing:
sudo openvpn ‐‐config ~/path/to/client.ovpn
Conclusion
Congratulations! You should now have a fully operational virtual private network running
on your OpenVPN server.
After you establish a successful client connection, you can verify that your traffic is being
routed through the VPN by checking Google to reveal your public IP.
ShareHeart 23 Subscribe
6/9/2015 How To Setup and Configure an OpenVPN Server on CentOS 7 | DigitalOcean
https://www.digitalocean.com/community/tutorials/howtosetupandconfigureanopenvpnserveroncentos7 10/19
Author:Jacob Tomlinson
Spin up an SSD cloud server in under a minute.Simple setup. Full root access.
Straightforward pricing.
DEPLOY SERVER
Related Tutorials
How To Setup Your Own VPN With PPTP
3 Ways to Securely Browse the Internet with OpenVPN on Debian 8
How To Set Up an OpenVPN Server on Debian 8
How To Configure and Connect to a Private OpenVPN Server on FreeBSD 10.1
7 Security Measures to Protect your Servers
33 Comments

6/9/2015 How To Setup and Configure an OpenVPN Server on CentOS 7 | DigitalOcean
https://www.digitalocean.com/community/tutorials/howtosetupandconfigureanopenvpnserveroncentos7 11/19
Log In to Comment
Leave a comment...
nickf December 8, 2014
Thanks for the guide, Jacob.
I am having issues connecting clients to the openvpn server. I have checked that the
necessary udp ports are open and forwarded. Do you have any suggestions on
what else I can try? Unfortunately the documentation for CentOS 7 is pretty limited.
Thanks!
Here are the errors:
TLS Error: TLS key negotiation failed to occur within 60 seconds (check your
network connectivity)
TLS Error: TLS handshake failed
WARNING: No server certificate verification method has been enabled. See
http://openvpn.net/howto.html#mitm for more info.
rkovacic December 10, 2014
Is your client.ovpn file configured correctly? Did you replace the values?
nickf December 10, 2014
I actually got it working. For some reason I had to change the protocol
from udp to tcp to get the firewall to forward the packets correctly.
Now if I can just figure out the ethernet bridging...
nickf December 10, 2014
Update--got bridging working as well. In case anyone else struggles with
it, make sure your NIC or virtual nic is set to promiscuous mode. Otherwise
the packets from a client won't reach the local LAN.

6/9/2015 How To Setup and Configure an OpenVPN Server on CentOS 7 | DigitalOcean
https://www.digitalocean.com/community/tutorials/howtosetupandconfigureanopenvpnserveroncentos7 12/19
q23 December 11, 2014
A suggestion: .ovpn files support inline certificates and keys. Instead of having to
mess around with multiple files and multiple paths, you can just copy and paste
everything from -----BEGIN {CERTIFICATE,RSA PRIVATE KEY}----- to -----END
{CERTIFICATE,RSA PRIVATE KEY}----- in between tags for each one: <ca> for the CA
public key, <cert> for the server or client's public key, <key> for the server or client's
private key, and <tls-auth> for the static key if you're using it.
That way, you can have it all packaged up nicely in one .ovpn file instead of having
3-4 files. Makes it a lot easier to use the OpenVPN for Android client, too.
1
RishavAnand December 19, 2014
can two users connect at the same time ?
and instead of .key file can there be an option for username & password ?
giuseppelomba December 22, 2014
I followed this and installed successfully, but when i start openvpn i don't have
internet access. why is this?
AlpineLakes August 31, 2015
Seems odd. If anything following the steps literally will leave your iptables
in a fairly open state with a default ACCEPT policy on the OUTPUT chain I
believe. What does iptables ‐L ‐‐line‐numbers ‐‐verbose andiptables ‐S have to say? Also, just for grins I wonder what systemctlstatus firewalld and systemctl status NetworkManager have tosay?
pshinghal December 26, 2014
Thanks for the guide! I think the first line of the .ovpn file shouldn't be in red, though.
I used a unique name for my client, but using that name as the first line didn't work.
When I changed the first line back to "client", it worked fine. I might be missing
something, though.
freshscaped December 29, 2014
Did you name the file the same as the first line or did you call it

6/9/2015 How To Setup and Configure an OpenVPN Server on CentOS 7 | DigitalOcean
https://www.digitalocean.com/community/tutorials/howtosetupandconfigureanopenvpnserveroncentos7 13/19
client.ovpn?
pshinghal December 30, 2014
I named it the same as the first line, my-client-name.ovpn
freshscaped December 30, 2014
Thanks. Did you only have to change the first line, or the name of the file
too? I'm getting the impression each and every detail has to be correct
and I'm not finding enough specific clear guidance so am having to use a
lot of guesswork.
pshinghal January 3, 2015
When I "opened" my my-client-name.ovpn file with Tunnelblick, it installed
the configuration in the app support directory. There, it renamed the ovpn
file to config.ovpn
The key and certs retained their old names. In config.ovpn, I had to
change the first line from my-client-name to client
1
freshscaped December 28, 2014
Why Google's DDNS servers? Why not DigitalOcean's or anybody else's?
freshscaped December 29, 2014
There appears to be some confusion here. You say change KEY_CN in
/etc/openvpn/easy-rsa/vars but the comments within the file say only uncomment
this if you wish to use the same common name for all clients. The advice would
appear to be that it is better to have a separate name and key pair for each client.
Which is correct, please?
AlpineLakes August 26, 2015
I have the same question. Note that in How To Secure Traffic Between
VPS Using OpenVPN
Sep 26, 2013 VPN, Security, Networking, System Tools Ubuntu (published
a year earlier) KEY_CN seems to be omitted from similar directions.
I'm going to proceed under the assumption that KEY_CN should not bedefined. If I don't reply to this comment, assume it worked :)
6/9/2015 How To Setup and Configure an OpenVPN Server on CentOS 7 | DigitalOcean
https://www.digitalocean.com/community/tutorials/howtosetupandconfigureanopenvpnserveroncentos7 14/19
LinuxFreakazoid January 8, 2015
The gui says im connected but my ip does not change. Help please!
eNkrypt January 14, 2015
Hey, thanks for the tutorial. I seem to be having a problem though. I am unable to
connect to the server from the client. It simply times out. I assume it's some sort of
firewall rule that is blocking it. However, when I run a "nmap -sU -p 1194" i get a
"1194/udp open|filtered openvpn" so it seems to be open. When I run a "systemctl
status [email protected]" I get:
[email protected] - OpenVPN Robust And Highly Flexible Tunneling
Application On server
Loaded: loaded (/usr/lib/systemd/system/[email protected]; enabled) Active: active (running) since Wed 2015‐01‐14 18:26:05 UTC; 1h 31min ago Process: 7020 ExecStart=/usr/sbin/openvpn ‐‐daemon ‐‐writepid /var/run/openvpn/%i.pid ‐‐cd /etc/openvpn/ ‐‐config %i.conf (code=exited, status=0/SUCCESS) Main PID: 7027 (openvpn) CGroup: /system.slice/system‐openvpn.slice/[email protected] └─7027 /usr/sbin/openvpn ‐‐daemon ‐‐writepid /var/run/openvpn/server.pid ‐‐cd /etc/openvpn/ ‐‐co...
Jan 14 18:26:05 <REDACTED>.net systemd[1]: Started OpenVPN Robust And Highly Flexible Tunneli...er.Hint: Some lines were ellipsized, use ‐l to show in full.
It appears to be up and running. I tried it both from my phone (which has no
firewalls) and my work computer - both don't work. Any idea what could be causing
the client to timeout when trying to connect?
Thanks again!
camhart April 21, 2015
I'm having this same issue... did you ever get it figured out?
pin February 28, 2015
I notice in article 'https://www.digitalocean.com/community/tutorials/how-to-set-up-
an-openvpn-server-on-ubuntu-14-04', you can find some additional writeup about
how to connect to OpenVPN with iOS. Pretty interesting.
6/9/2015 How To Setup and Configure an OpenVPN Server on CentOS 7 | DigitalOcean
https://www.digitalocean.com/community/tutorials/howtosetupandconfigureanopenvpnserveroncentos7 15/19
ALKateb March 1, 2015
"You'll need to change the first line to reflect the name you gave the client in your
key and certificate; in our case, this is just client"
I do not think this part is true, "client" here is a keyword, to let the software know the
following is client configuration
Great tutrorial, thanks a lot
1
Oniled March 16, 2015
so I tried these instructions with CentOS7 and they didn't work for me. When I chose
to use firewalld instead of IP Tables, I got it working. Here's my steps, using mostly
the instructions in this article.
Log into the server as root
Prereqs - same as instructions
Step 1 - same as instructions
Step 2 - same as instructions
Step 3 - same as instructions
Step 4 - completely different instructions. we'll use the built in
firewalld with CentOS instead of using IPTables
open up shell
run "iptables -t nat -A POSTROUTING -s 10.8.0.0/24 -o eth0 -j
MASQUERADE"
run "iptables-save > /etc/sysconfig/iptables"
vi /etc/sysctl.conf
Add the following line at the top of the file "net.ipv4.ip_forward = 1"
save and exit the file
run "systemctl restart network.service" so the IP forwarding will
take effect
Step 5 - same steps and then
after OpenVPN service is started
run "firewall-cmd --add-service openvpn"
run "firewall-cmd --permanent --add-service openvpn" to
confirm it worked, run "firewall-cmd --list-services"
run "firewall-cmd --add-masquerade"
run "firewall-cmd --permanent --add-masquerade"
to confirm it worked, run "firewall-cmd --query-
masquerade"
6/9/2015 How To Setup and Configure an OpenVPN Server on CentOS 7 | DigitalOcean
https://www.digitalocean.com/community/tutorials/howtosetupandconfigureanopenvpnserveroncentos7 16/19
Step 6 - same as instructions
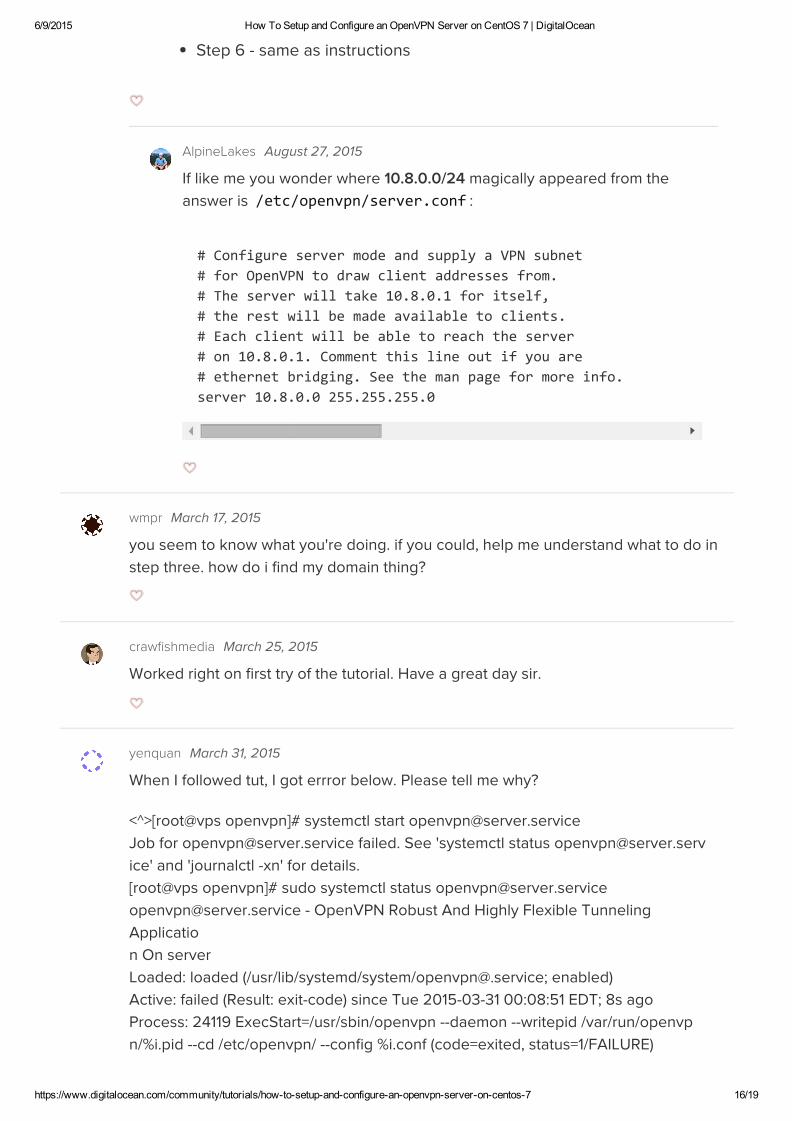
AlpineLakes August 27, 2015
If like me you wonder where 10.8.0.0/24 magically appeared from the
answer is /etc/openvpn/server.conf :
# Configure server mode and supply a VPN subnet # for OpenVPN to draw client addresses from. # The server will take 10.8.0.1 for itself, # the rest will be made available to clients. # Each client will be able to reach the server # on 10.8.0.1. Comment this line out if you are # ethernet bridging. See the man page for more info. server 10.8.0.0 255.255.255.0
wmpr March 17, 2015
you seem to know what you're doing. if you could, help me understand what to do in
step three. how do i find my domain thing?
crawfishmedia March 25, 2015
Worked right on first try of the tutorial. Have a great day sir.
yenquan March 31, 2015
When I followed tut, I got errror below. Please tell me why?
<^>[root@vps openvpn]# systemctl start [email protected]
Job for [email protected] failed. See 'systemctl status [email protected]
ice' and 'journalctl -xn' for details.
[root@vps openvpn]# sudo systemctl status [email protected]
[email protected] - OpenVPN Robust And Highly Flexible Tunneling
Applicatio
n On server
Loaded: loaded (/usr/lib/systemd/system/[email protected]; enabled)
Active: failed (Result: exit-code) since Tue 2015-03-31 00:08:51 EDT; 8s ago
Process: 24119 ExecStart=/usr/sbin/openvpn --daemon --writepid /var/run/openvp
n/%i.pid --cd /etc/openvpn/ --config %i.conf (code=exited, status=1/FAILURE)
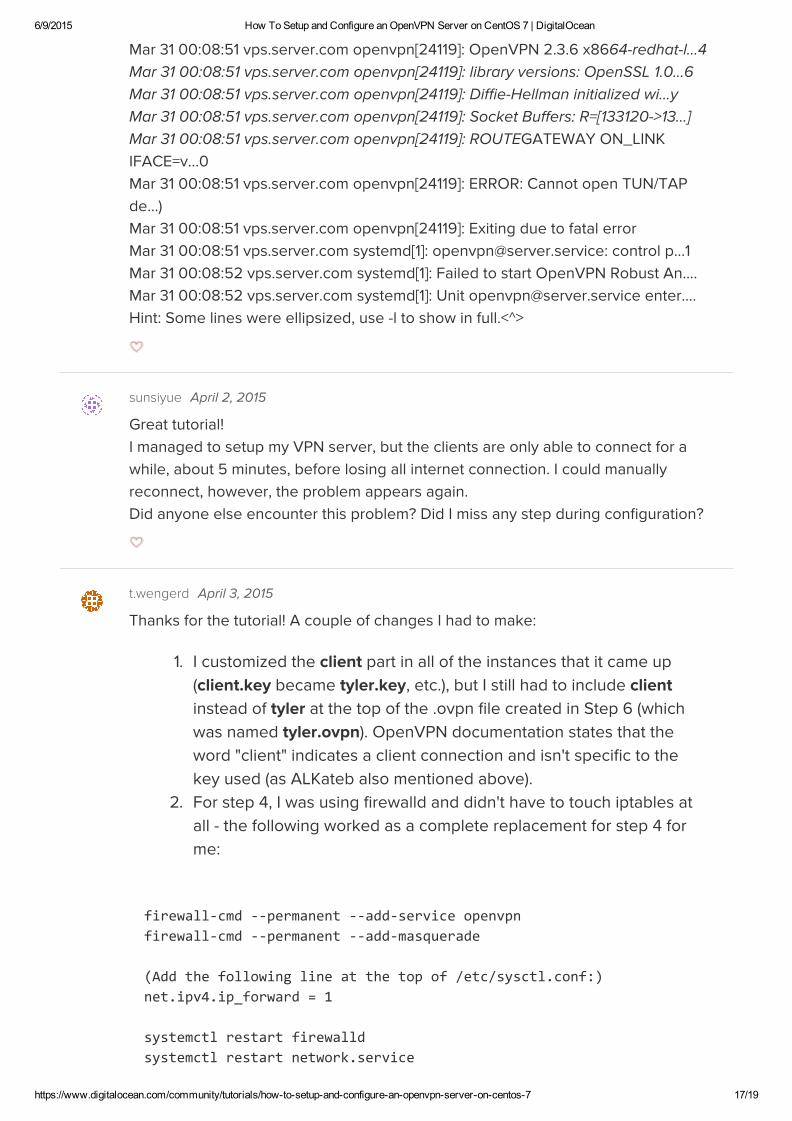
6/9/2015 How To Setup and Configure an OpenVPN Server on CentOS 7 | DigitalOcean
https://www.digitalocean.com/community/tutorials/howtosetupandconfigureanopenvpnserveroncentos7 17/19
Mar 31 00:08:51 vps.server.com openvpn[24119]: OpenVPN 2.3.6 x8664-redhat-l...4
Mar 31 00:08:51 vps.server.com openvpn[24119]: library versions: OpenSSL 1.0...6
Mar 31 00:08:51 vps.server.com openvpn[24119]: Diffie-Hellman initialized wi...y
Mar 31 00:08:51 vps.server.com openvpn[24119]: Socket Buffers: R=[133120->13...]
Mar 31 00:08:51 vps.server.com openvpn[24119]: ROUTEGATEWAY ON_LINK
IFACE=v...0
Mar 31 00:08:51 vps.server.com openvpn[24119]: ERROR: Cannot open TUN/TAP
de...)
Mar 31 00:08:51 vps.server.com openvpn[24119]: Exiting due to fatal error
Mar 31 00:08:51 vps.server.com systemd[1]: [email protected]: control p...1
Mar 31 00:08:52 vps.server.com systemd[1]: Failed to start OpenVPN Robust An....
Mar 31 00:08:52 vps.server.com systemd[1]: Unit [email protected] enter....
Hint: Some lines were ellipsized, use -l to show in full.<^>
sunsiyue April 2, 2015
Great tutorial!
I managed to setup my VPN server, but the clients are only able to connect for a
while, about 5 minutes, before losing all internet connection. I could manually
reconnect, however, the problem appears again.
Did anyone else encounter this problem? Did I miss any step during configuration?
t.wengerd April 3, 2015
Thanks for the tutorial! A couple of changes I had to make:
1. I customized the client part in all of the instances that it came up
(client.key became tyler.key, etc.), but I still had to include client
instead of tyler at the top of the .ovpn file created in Step 6 (which
was named tyler.ovpn). OpenVPN documentation states that the
word "client" indicates a client connection and isn't specific to the
key used (as ALKateb also mentioned above).
2. For step 4, I was using firewalld and didn't have to touch iptables at
all - the following worked as a complete replacement for step 4 for
me:
firewall‐cmd ‐‐permanent ‐‐add‐service openvpnfirewall‐cmd ‐‐permanent ‐‐add‐masquerade
(Add the following line at the top of /etc/sysctl.conf:)net.ipv4.ip_forward = 1
systemctl restart firewalldsystemctl restart network.service
6/9/2015 How To Setup and Configure an OpenVPN Server on CentOS 7 | DigitalOcean
https://www.digitalocean.com/community/tutorials/howtosetupandconfigureanopenvpnserveroncentos7 18/19
2
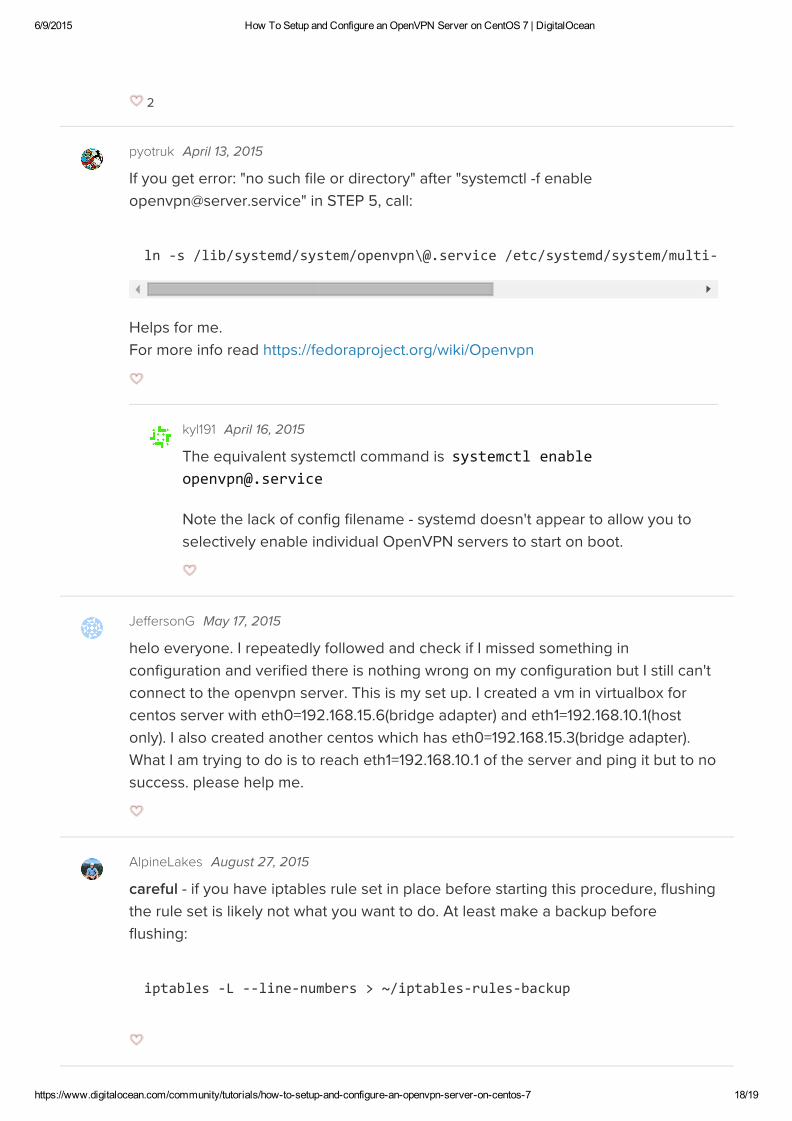
pyotruk April 13, 2015
If you get error: "no such file or directory" after "systemctl -f enable
[email protected]" in STEP 5, call:
ln ‐s /lib/systemd/system/openvpn\@.service /etc/systemd/system/multi‐user.target.wants/openvpn\@server.service
Helps for me.
For more info read https://fedoraproject.org/wiki/Openvpn
kyl191 April 16, 2015
The equivalent systemctl command is systemctl [email protected]
Note the lack of config filename - systemd doesn't appear to allow you to
selectively enable individual OpenVPN servers to start on boot.
JeffersonG May 17, 2015
helo everyone. I repeatedly followed and check if I missed something in
configuration and verified there is nothing wrong on my configuration but I still can't
connect to the openvpn server. This is my set up. I created a vm in virtualbox for
centos server with eth0=192.168.15.6(bridge adapter) and eth1=192.168.10.1(host
only). I also created another centos which has eth0=192.168.15.3(bridge adapter).
What I am trying to do is to reach eth1=192.168.10.1 of the server and ping it but to no
success. please help me.
AlpineLakes August 27, 2015
careful - if you have iptables rule set in place before starting this procedure, flushing
the rule set is likely not what you want to do. At least make a backup before
flushing:
iptables ‐L ‐‐line‐numbers > ~/iptables‐rules‐backup

6/9/2015 How To Setup and Configure an OpenVPN Server on CentOS 7 | DigitalOcean
https://www.digitalocean.com/community/tutorials/howtosetupandconfigureanopenvpnserveroncentos7 19/19
Copyright © 2015 DigitalOcean™ Inc.
Community Tutorials Questions Projects Tags RSS
Terms, Privacy, & Copyright Security Report a Bug Get Paid to Write
This work is licensed under a CreativeCommons Attribution-NonCommercial-ShareAlike 4.0 International License.
Load More Comments