Embed Size (px)
Citation preview

opengl
#opengl
Table of Contents
About 1
Chapter 1: Getting started with opengl 2
Remarks 2
Versions 2
Examples 3
Obtaining OpenGL 3
Linux 3
Microsoft Windows 3
Manual OpenGL setup on Windows 4
Windows components for OpenGL 4
WGL 4
Graphics device interface (GDI) 4
Basic setup 4
Creating a window 4
Pixel format 6
Rendering context 6
Getting OpenGL functions 7
Better setup 8
OpenGL profiles 9
OpenGL extensions 9
Advanced pixel format and context creation 9
Creating OpenGL 4.1 with C++ and Cocoa 14
Cross Platform OpenGL context creation (using SDL2) 22
Setup Modern OpenGL 4.1 on macOS (Xcode, GLFW and GLEW) 23
Create Opengl Context with Java and LWJGL 3.0 39
Chapter 2: 3d Math 41
Examples 41
Introduction to matrices 41
Chapter 3: Basic Lighting 47
Examples 47
Phong Lighting Model 47
How it works 48
Chapter 4: Encapsulating OpenGL objects with C++ RAII 54
Introduction 54
Remarks 54
Examples 54
In C++98/03 54
In C++11 and later 55
Chapter 5: Framebuffers 58
Examples 58
Basics of framebuffers 58
Limits 59
Using the framebuffer 59
Chapter 6: Instancing 62
Introduction 62
Examples 62
Instancing by Vertex Attribute Arrays 62
Instanced Array Code 62
Chapter 7: OGL view and projection 65
Introduction 65
Examples 65
Implement a camera in OGL 4.0 GLSL 400 65
Set up the perspective - Projection matrix 66
Set up the look at the scene - View matrix 68
Chapter 8: OpenGL context creation. 75
Examples 75
Creating a basic window 75
Adding hints to the window 75
Chapter 9: Program Introspection 77
Introduction 77
Examples 77
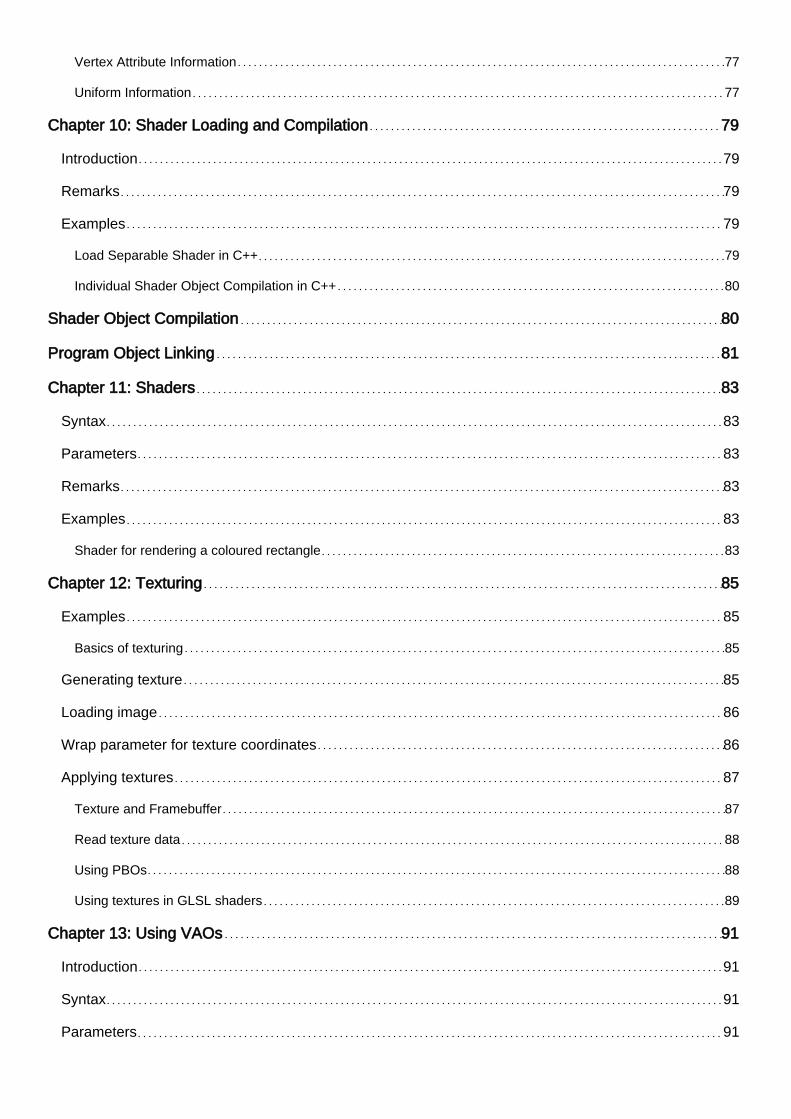
Vertex Attribute Information 77
Uniform Information 77
Chapter 10: Shader Loading and Compilation 79
Introduction 79
Remarks 79
Examples 79
Load Separable Shader in C++ 79
Individual Shader Object Compilation in C++ 80
Shader Object Compilation 80
Program Object Linking 81
Chapter 11: Shaders 83
Syntax 83
Parameters 83
Remarks 83
Examples 83
Shader for rendering a coloured rectangle 83
Chapter 12: Texturing 85
Examples 85
Basics of texturing 85
Generating texture 85
Loading image 86
Wrap parameter for texture coordinates 86
Applying textures 87
Texture and Framebuffer 87
Read texture data 88
Using PBOs 88
Using textures in GLSL shaders 89
Chapter 13: Using VAOs 91
Introduction 91
Syntax 91
Parameters 91

Remarks 92
Examples 92
Version 3.0 92
Version 4.3 92
Credits 94

About
You can share this PDF with anyone you feel could benefit from it, downloaded the latest version from: opengl
It is an unofficial and free opengl ebook created for educational purposes. All the content is extracted from Stack Overflow Documentation, which is written by many hardworking individuals at Stack Overflow. It is neither affiliated with Stack Overflow nor official opengl.
The content is released under Creative Commons BY-SA, and the list of contributors to each chapter are provided in the credits section at the end of this book. Images may be copyright of their respective owners unless otherwise specified. All trademarks and registered trademarks are the property of their respective company owners.
Use the content presented in this book at your own risk; it is not guaranteed to be correct nor accurate, please send your feedback and corrections to [email protected]
https://riptutorial.com/ 1
Chapter 1: Getting started with opengl
Remarks
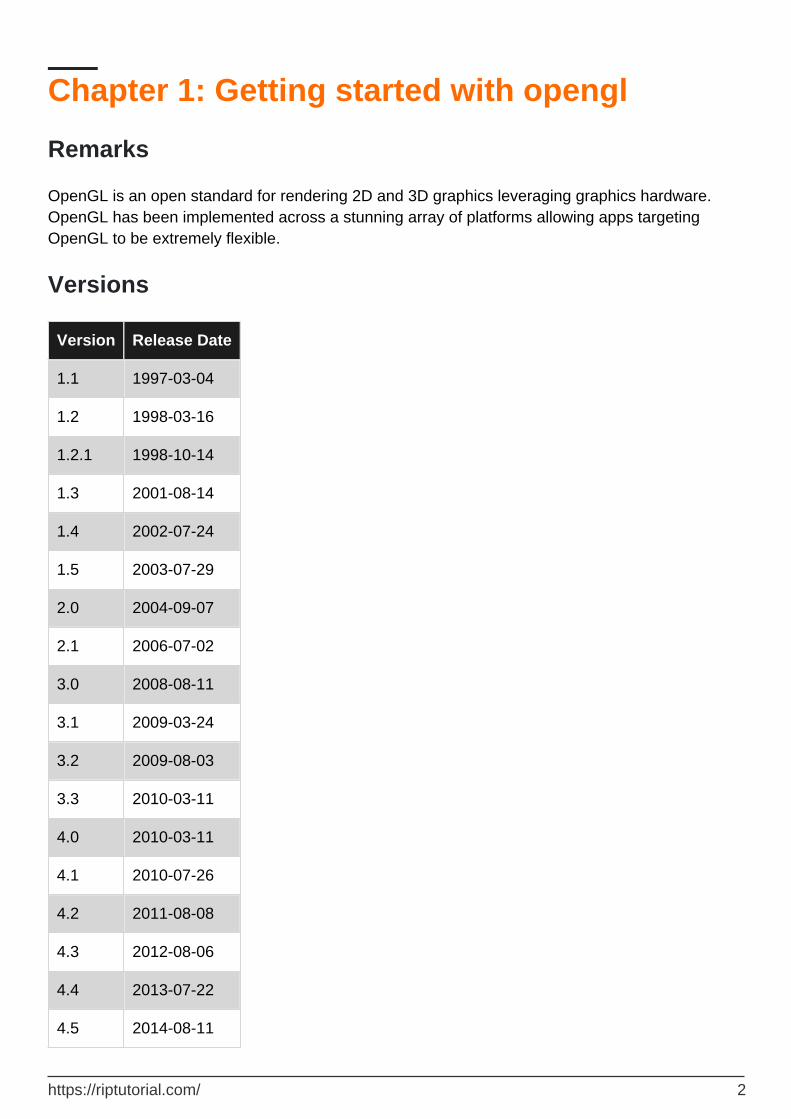
OpenGL is an open standard for rendering 2D and 3D graphics leveraging graphics hardware. OpenGL has been implemented across a stunning array of platforms allowing apps targeting OpenGL to be extremely flexible.
Versions
Version Release Date
1.1 1997-03-04
1.2 1998-03-16
1.2.1 1998-10-14
1.3 2001-08-14
1.4 2002-07-24
1.5 2003-07-29
2.0 2004-09-07
2.1 2006-07-02
3.0 2008-08-11
3.1 2009-03-24
3.2 2009-08-03
3.3 2010-03-11
4.0 2010-03-11
4.1 2010-07-26
4.2 2011-08-08
4.3 2012-08-06
4.4 2013-07-22
4.5 2014-08-11
https://riptutorial.com/ 2
Examples
Obtaining OpenGL
One of the most common misconceptions about OpenGL is, that it were a library that could be installed from 3rd party sources. This misconception leads to many questions in the form "how to I install OpenGL" or "where to download the OpenGL SDK".
This is not how OpenGL finds the way into computer system. OpenGL by itself is merely a set of specifications on what commands an implementation must follow. So it's the implementation that matters. And for the time being, OpenGL implementations are part of the GPU drivers. This might change in the future, when new GPU programming interface allow to truly implement OpenGL as a library, but for now it's a programming API towards the graphics drivers.
When OpenGL got first released the API somehow found its way into the ABI (Application Binary Interface) contract of Windows, Solaris and Linux (LSB-4 Desktop) in addition to it's origin Sun Irix. Apple followed and in fact integrated OpenGL so deep into MacOS X, that the OpenGL version available is tightly coupled to the version of MacOS X installed. This has the notable effect, that system programming environments for these operating systems (i.e. the compiler and linker toolchain that natively targets these systems) must deliver also OpenGL API definitions. Such it is not necessary to actually install an SDK for OpenGL. It is technically possible to program OpenGL on these operating systems without the requirement to install a dedicated SDK, assuming that a build environment following the targeted ABI is installed.
A side effect of these strict ABI rules is, that the OpenGL version exposed through the binding interface is a lowest common denominator that programs running on the target platform may expect to be available. Hence modern OpenGL features are to be accessed through the extension mechanism, which is described in depth separately.
Linux
In Linux it is quite common to compartmentize the development packages for different aspects of the system, so that these can be updated individually. In most Linux distributions the development files for OpenGL are contained in a dedicated package, that is usually a dependency for a desktop application development meta-package. So installing the OpenGL development files for Linux is usually taken care of with the installation of the desktop development meta package/s.*
Microsoft Windows
The API binding library opengl32.dll (named so for both 32 bit and 64 bit versions of Windows) is shipped by default with every Windows version since Windows NT-4 and Windows 95B (both ca. 1997). However this DLL does not provide an actual OpenGL implementation (apart from a software fallback which sole purpose is to act as a safety net for programs if no other OpenGL implementation is installed). This DLL belongs to Windows and must not be altered or moved! Modern OpenGL versions are shipped as part of the so called Installable Client Driver (ICD) and accessed through the default opengl32.dll that comes pre-installed with every version of Windows.
https://riptutorial.com/ 3
It was decided internally by Microsoft, however, that graphics drivers installed through Windows Update would not install/update a OpenGL ICD. As such fresh installations of Windows with drivers installed automatically are lacking support for modern OpenGL features. To obtain an OpenGL ICD with modern features, graphics drivers must be downloaded directly from the GPU vendor's website and installed manually.
Regarding development no extra steps must be taken per-se. All C/C++ compilers following the Windows ABI specifications ship with headers and the linker stub (opengl32.lib) required to build and link executables that make use of OpenGL.
Manual OpenGL setup on Windows
Full example code included at the end
Windows components for OpenGL
WGL
WGL (can be pronounced wiggle) stands for "Windows-GL", as in "an interface between Windows and OpenGL" - a set of functions from the Windows API to communicate with OpenGL. WGL functions have a wgl prefix and its tokens have a WGL_ prefix.
Default OpenGL version supported on Microsoft systems is 1.1. That is a very old version (most recent one is 4.5). The way to get the most recent versions is to update your graphics drivers, but your graphics card must support those new versions.
Full list of WGL functions can be found here.
Graphics device interface (GDI)
GDI (today updated to GDI+) is a 2D drawing interface that allows you to draw onto a window in Windows. You need GDI to initialize OpenGL and allow it to interact with it (but will not actually use GDI itself).
In GDI, each window has a device context (DC) that is used to identify the drawing target when calling functions (you pass it as a parameter). However, OpenGL uses its own rendering context (RC). So, DC will be used to create RC.
Basic setup
Creating a window
So for doing things in OpenGL, we need RC, and to get RC, we need DC, and to get DC we need
https://riptutorial.com/ 4
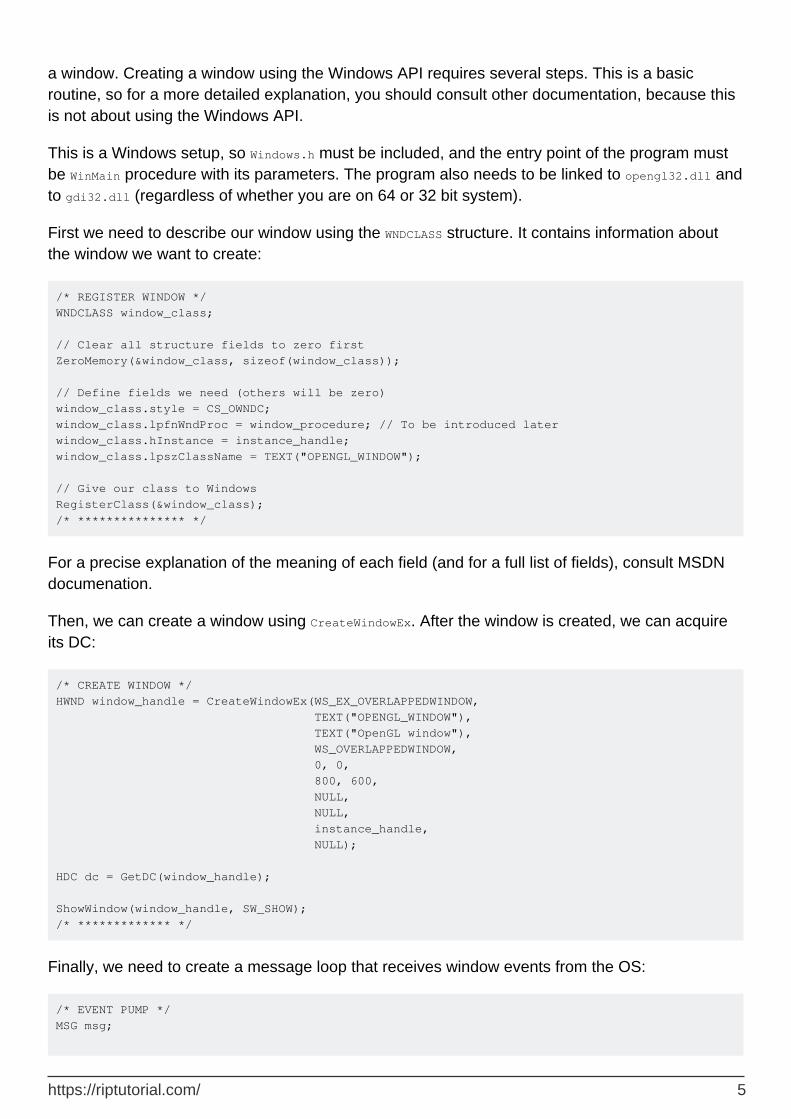
a window. Creating a window using the Windows API requires several steps. This is a basic routine, so for a more detailed explanation, you should consult other documentation, because this is not about using the Windows API.
This is a Windows setup, so Windows.h must be included, and the entry point of the program must be WinMain procedure with its parameters. The program also needs to be linked to opengl32.dll and to gdi32.dll (regardless of whether you are on 64 or 32 bit system).
First we need to describe our window using the WNDCLASS structure. It contains information about the window we want to create:
/* REGISTER WINDOW */ WNDCLASS window_class; // Clear all structure fields to zero first ZeroMemory(&window_class, sizeof(window_class)); // Define fields we need (others will be zero) window_class.style = CS_OWNDC; window_class.lpfnWndProc = window_procedure; // To be introduced later window_class.hInstance = instance_handle; window_class.lpszClassName = TEXT("OPENGL_WINDOW"); // Give our class to Windows RegisterClass(&window_class); /* *************** */
For a precise explanation of the meaning of each field (and for a full list of fields), consult MSDN documenation.
Then, we can create a window using CreateWindowEx. After the window is created, we can acquire its DC:
/* CREATE WINDOW */ HWND window_handle = CreateWindowEx(WS_EX_OVERLAPPEDWINDOW, TEXT("OPENGL_WINDOW"), TEXT("OpenGL window"), WS_OVERLAPPEDWINDOW, 0, 0, 800, 600, NULL, NULL, instance_handle, NULL); HDC dc = GetDC(window_handle); ShowWindow(window_handle, SW_SHOW); /* ************* */
Finally, we need to create a message loop that receives window events from the OS:
/* EVENT PUMP */ MSG msg;
https://riptutorial.com/ 5
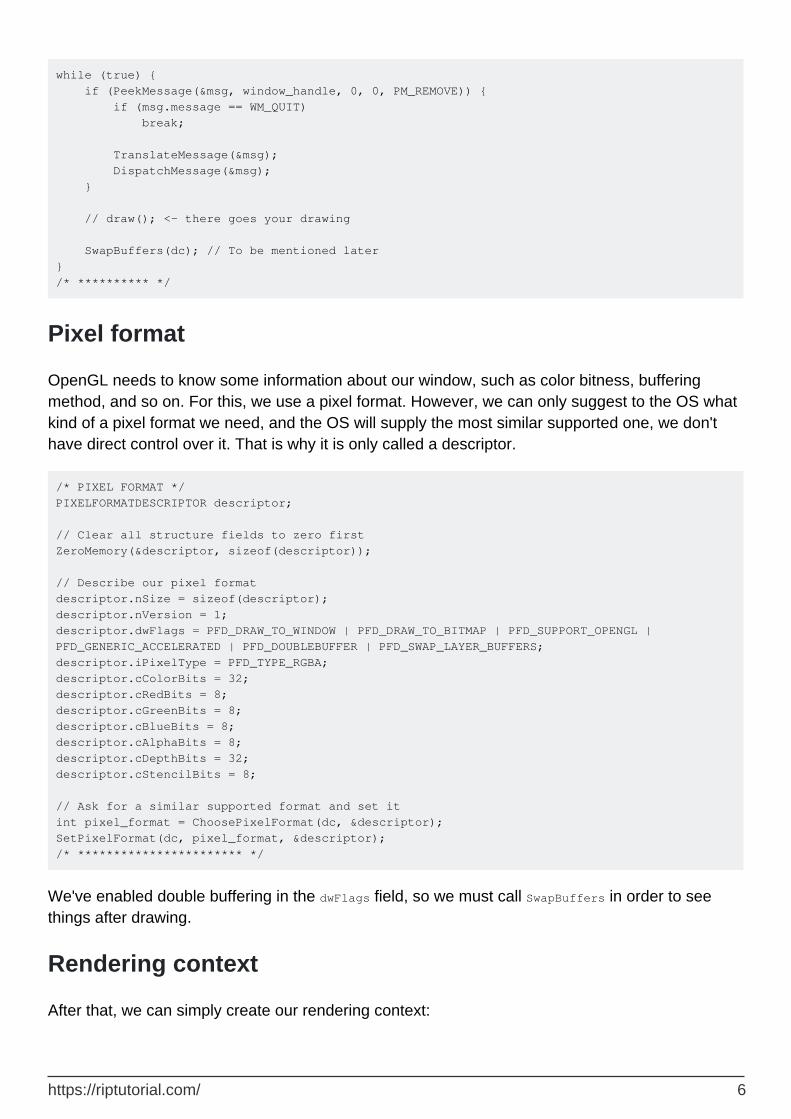
while (true) { if (PeekMessage(&msg, window_handle, 0, 0, PM_REMOVE)) { if (msg.message == WM_QUIT) break; TranslateMessage(&msg); DispatchMessage(&msg); } // draw(); <- there goes your drawing SwapBuffers(dc); // To be mentioned later } /* ********** */
Pixel format
OpenGL needs to know some information about our window, such as color bitness, buffering method, and so on. For this, we use a pixel format. However, we can only suggest to the OS what kind of a pixel format we need, and the OS will supply the most similar supported one, we don't have direct control over it. That is why it is only called a descriptor.
/* PIXEL FORMAT */ PIXELFORMATDESCRIPTOR descriptor; // Clear all structure fields to zero first ZeroMemory(&descriptor, sizeof(descriptor)); // Describe our pixel format descriptor.nSize = sizeof(descriptor); descriptor.nVersion = 1; descriptor.dwFlags = PFD_DRAW_TO_WINDOW | PFD_DRAW_TO_BITMAP | PFD_SUPPORT_OPENGL | PFD_GENERIC_ACCELERATED | PFD_DOUBLEBUFFER | PFD_SWAP_LAYER_BUFFERS; descriptor.iPixelType = PFD_TYPE_RGBA; descriptor.cColorBits = 32; descriptor.cRedBits = 8; descriptor.cGreenBits = 8; descriptor.cBlueBits = 8; descriptor.cAlphaBits = 8; descriptor.cDepthBits = 32; descriptor.cStencilBits = 8; // Ask for a similar supported format and set it int pixel_format = ChoosePixelFormat(dc, &descriptor); SetPixelFormat(dc, pixel_format, &descriptor); /* *********************** */
We've enabled double buffering in the dwFlags field, so we must call SwapBuffers in order to see things after drawing.
Rendering context
After that, we can simply create our rendering context:
https://riptutorial.com/ 6
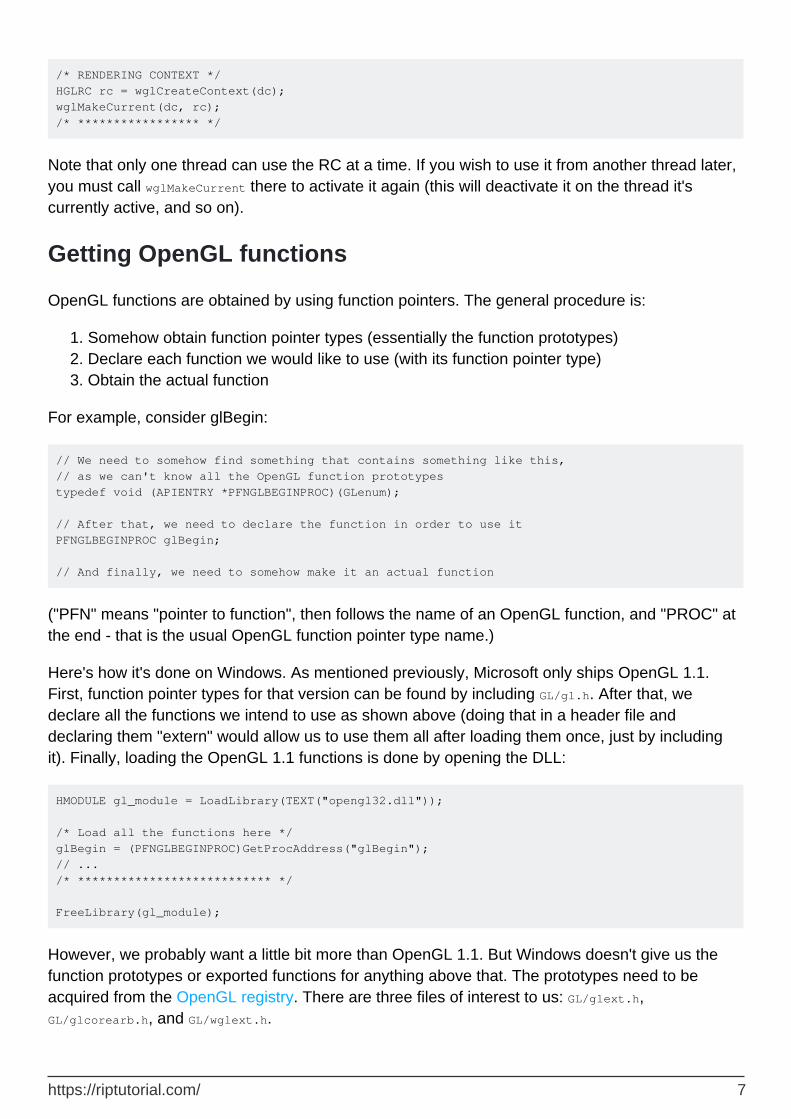
/* RENDERING CONTEXT */ HGLRC rc = wglCreateContext(dc); wglMakeCurrent(dc, rc); /* ***************** */
Note that only one thread can use the RC at a time. If you wish to use it from another thread later, you must call wglMakeCurrent there to activate it again (this will deactivate it on the thread it's currently active, and so on).
Getting OpenGL functions
OpenGL functions are obtained by using function pointers. The general procedure is:
Somehow obtain function pointer types (essentially the function prototypes)1. Declare each function we would like to use (with its function pointer type)2. Obtain the actual function3.
For example, consider glBegin:
// We need to somehow find something that contains something like this, // as we can't know all the OpenGL function prototypes typedef void (APIENTRY *PFNGLBEGINPROC)(GLenum); // After that, we need to declare the function in order to use it PFNGLBEGINPROC glBegin; // And finally, we need to somehow make it an actual function
("PFN" means "pointer to function", then follows the name of an OpenGL function, and "PROC" at the end - that is the usual OpenGL function pointer type name.)
Here's how it's done on Windows. As mentioned previously, Microsoft only ships OpenGL 1.1. First, function pointer types for that version can be found by including GL/gl.h. After that, we declare all the functions we intend to use as shown above (doing that in a header file and declaring them "extern" would allow us to use them all after loading them once, just by including it). Finally, loading the OpenGL 1.1 functions is done by opening the DLL:
HMODULE gl_module = LoadLibrary(TEXT("opengl32.dll")); /* Load all the functions here */ glBegin = (PFNGLBEGINPROC)GetProcAddress("glBegin"); // ... /* *************************** */ FreeLibrary(gl_module);
However, we probably want a little bit more than OpenGL 1.1. But Windows doesn't give us the function prototypes or exported functions for anything above that. The prototypes need to be acquired from the OpenGL registry. There are three files of interest to us: GL/glext.h, GL/glcorearb.h, and GL/wglext.h.
https://riptutorial.com/ 7

In order to complete GL/gl.h provided by Windows, we need GL/glext.h. It contains (as described by the registry) "OpenGL 1.2 and above compatibility profile and extension interfaces" (more about profiles and extensions later, where we'll see that it's actually not a good idea to use those two files).
The actual functions need to be obtained by wglGetProcAddress (no need for opening the DLL for this guy, they aren't in there, just use the function). With it, we can fetch all the functions from OpenGL 1.2 and above (but not 1.1). Note that, in order for it to function properly, the OpenGL rendering context must be created and made current. So, for example, glClear:
// Include the header from the OpenGL registry for function pointer types // Declare the functions, just like before PFNGLCLEARPROC glClear; // ... // Get the function glClear = (PFNGLCLEARPROC)wglGetProcAddress("glClear");
We can actually build a wrapper get_proc procedure that uses both wglGetProcAddress and GetProcAddress:
// Get function pointer void* get_proc(const char *proc_name) { void *proc = (void*)wglGetProcAddress(proc_name); if (!proc) proc = (void*)GetProcAddress(gl_module, proc_name); // gl_module must be somewhere in reach return proc; }
So to wrap up, we would create a header file full of function pointer declarations like this:
extern PFNGLCLEARCOLORPROC glClearColor; extern PFNGLCLEARDEPTHPROC glClearDepth; extern PFNGLCLEARPROC glClear; extern PFNGLCLEARBUFFERIVPROC glClearBufferiv; extern PFNGLCLEARBUFFERFVPROC glClearBufferfv; // And so on...
We can then create a procedure like load_gl_functions that we call only once, and works like so:
glClearColor = (PFNGLCLEARCOLORPROC)get_proc("glClearColor"); glClearDepth = (PFNGLCLEARDEPTHPROC)get_proc("glClearDepth"); glClear = (PFNGLCLEARPROC)get_proc("glClear"); glClearBufferiv = (PFNGLCLEARBUFFERIVPROC)get_proc("glClearBufferiv"); glClearBufferfv = (PFNGLCLEARBUFFERFVPROC)get_proc("glClearBufferfv");
And you're all set! Just include the header with the function pointers and GL away.
https://riptutorial.com/ 8

Better setup
OpenGL profiles
OpenGL has been in development for over 20 years, and the developers were always strict about backwards compatibility (BC). Adding a new feature is very hard because of that. Thus, in 2008, it was separated into two "profiles". Core and compatibility. Core profile breaks BC in favor of performance improvements and some of the new features. It even completely removes some legacy features. Compatibility profile maintains BC with all versions down to 1.0, and some new features are not available on it. It is only to be used for old, legacy systems, all new applications should use the core profile.
Because of that, there is a problem with our basic setup - it only provides the context that is backwards compatible with OpenGL 1.0. The pixel format is limited too. There is a better approach, using extensions.
OpenGL extensions
Any addition to the original functionality of OpenGL are called extensions. Generally, they can either make some things legal that weren't before, extend parameter value range, extend GLSL, and even add completely new functionality.
There are three major groups of extensions: vendor, EXT, and ARB. Vendor extensions come from a specific vendor, and they have a vendor specific mark, like AMD or NV. EXT extensions are made by several vendors working together. After some time, they may become ARB extensions, which are all the officially supported ones and ones approved by ARB.
To acquire function pointer types and function prototypes of all the extensions and as mentioned before, all the function pointer types from OpenGL 1.2 and greater, one must download the header files from the OpenGL registry. As discussed, for new applications it's better to use core profile, so it would be preferrable to include GL/glcorearb.h instead of GL/gl.h and GL/glext.h (if you are using GL/glcorearb.h then don't include GL/gl.h).
There are also extensions for the WGL, in GL/wglext.h. For example, the function for getting the list of all supported extensions is actually an extension itself, the wglGetExtensionsStringARB (it returns a big string with a space-separated list of all the supported extensions).
Getting extensions is handled via wglGetProcAddress too, so we can just use our wrapper like before.
Advanced pixel format and context creation
The WGL_ARB_pixel_format extension allows us the advanced pixel format creation. Unlike before, we don't use a struct. Instead, we pass the list of wanted attributes.
https://riptutorial.com/ 9
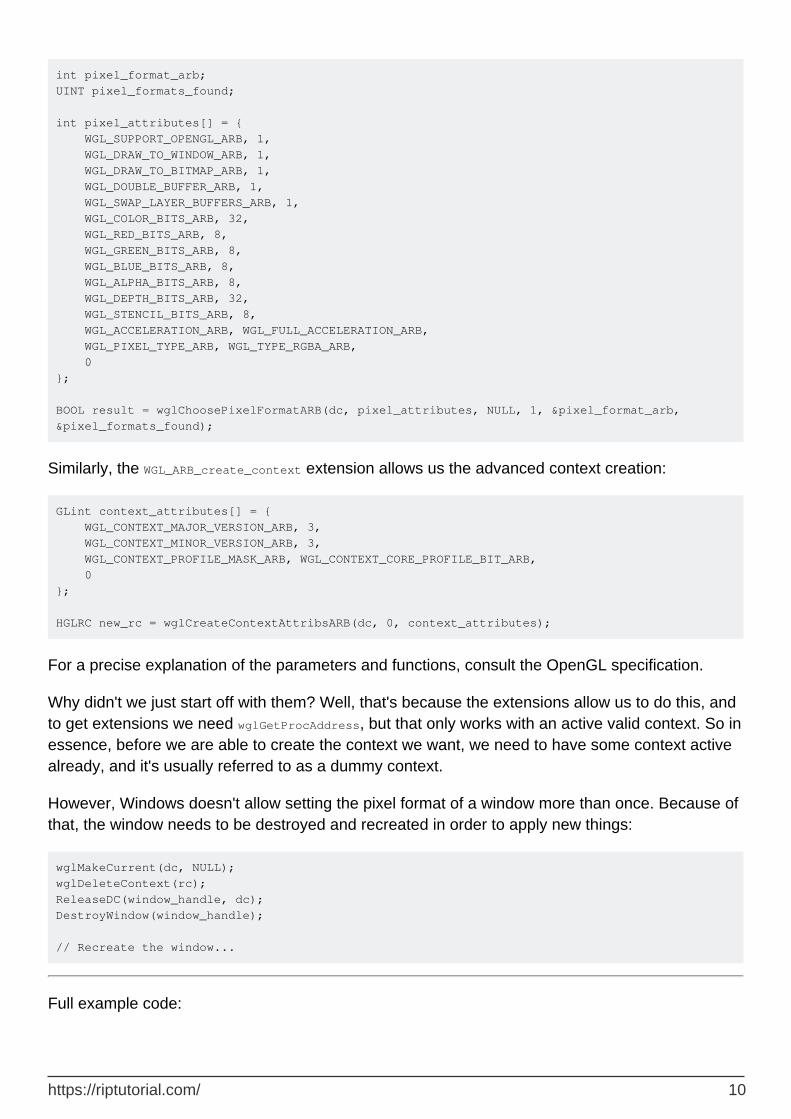
int pixel_format_arb; UINT pixel_formats_found; int pixel_attributes[] = { WGL_SUPPORT_OPENGL_ARB, 1, WGL_DRAW_TO_WINDOW_ARB, 1, WGL_DRAW_TO_BITMAP_ARB, 1, WGL_DOUBLE_BUFFER_ARB, 1, WGL_SWAP_LAYER_BUFFERS_ARB, 1, WGL_COLOR_BITS_ARB, 32, WGL_RED_BITS_ARB, 8, WGL_GREEN_BITS_ARB, 8, WGL_BLUE_BITS_ARB, 8, WGL_ALPHA_BITS_ARB, 8, WGL_DEPTH_BITS_ARB, 32, WGL_STENCIL_BITS_ARB, 8, WGL_ACCELERATION_ARB, WGL_FULL_ACCELERATION_ARB, WGL_PIXEL_TYPE_ARB, WGL_TYPE_RGBA_ARB, 0 }; BOOL result = wglChoosePixelFormatARB(dc, pixel_attributes, NULL, 1, &pixel_format_arb, &pixel_formats_found);
Similarly, the WGL_ARB_create_context extension allows us the advanced context creation:
GLint context_attributes[] = { WGL_CONTEXT_MAJOR_VERSION_ARB, 3, WGL_CONTEXT_MINOR_VERSION_ARB, 3, WGL_CONTEXT_PROFILE_MASK_ARB, WGL_CONTEXT_CORE_PROFILE_BIT_ARB, 0 }; HGLRC new_rc = wglCreateContextAttribsARB(dc, 0, context_attributes);
For a precise explanation of the parameters and functions, consult the OpenGL specification.
Why didn't we just start off with them? Well, that's because the extensions allow us to do this, and to get extensions we need wglGetProcAddress, but that only works with an active valid context. So in essence, before we are able to create the context we want, we need to have some context active already, and it's usually referred to as a dummy context.
However, Windows doesn't allow setting the pixel format of a window more than once. Because of that, the window needs to be destroyed and recreated in order to apply new things:
wglMakeCurrent(dc, NULL); wglDeleteContext(rc); ReleaseDC(window_handle, dc); DestroyWindow(window_handle); // Recreate the window...
Full example code:
https://riptutorial.com/ 10

/* We want the core profile, so we include GL/glcorearb.h. When including that, then GL/gl.h should not be included. If using compatibility profile, the GL/gl.h and GL/glext.h need to be included. GL/wglext.h gives WGL extensions. Note that Windows.h needs to be included before them. */ #include <cstdio> #include <Windows.h> #include <GL/glcorearb.h> #include <GL/wglext.h> LRESULT CALLBACK window_procedure(HWND, UINT, WPARAM, LPARAM); void* get_proc(const char*); /* gl_module is for opening the DLL, and the quit flag is here to prevent quitting when recreating the window (see the window_procedure function) */ HMODULE gl_module; bool quit = false; /* OpenGL function declarations. In practice, we would put these in a separate header file and add "extern" in front, so that we can use them anywhere after loading them only once. */ PFNWGLGETEXTENSIONSSTRINGARBPROC wglGetExtensionsStringARB; PFNWGLCHOOSEPIXELFORMATARBPROC wglChoosePixelFormatARB; PFNWGLCREATECONTEXTATTRIBSARBPROC wglCreateContextAttribsARB; PFNGLGETSTRINGPROC glGetString; int WINAPI WinMain(HINSTANCE instance_handle, HINSTANCE prev_instance_handle, PSTR cmd_line, int cmd_show) { /* REGISTER WINDOW */ WNDCLASS window_class; // Clear all structure fields to zero first ZeroMemory(&window_class, sizeof(window_class)); // Define fields we need (others will be zero) window_class.style = CS_HREDRAW | CS_VREDRAW | CS_OWNDC; window_class.lpfnWndProc = window_procedure; window_class.hInstance = instance_handle; window_class.lpszClassName = TEXT("OPENGL_WINDOW"); // Give our class to Windows RegisterClass(&window_class); /* *************** */ /* CREATE WINDOW */ HWND window_handle = CreateWindowEx(WS_EX_OVERLAPPEDWINDOW, TEXT("OPENGL_WINDOW"), TEXT("OpenGL window"), WS_OVERLAPPEDWINDOW, 0, 0, 800, 600, NULL, NULL, instance_handle, NULL);
https://riptutorial.com/ 11
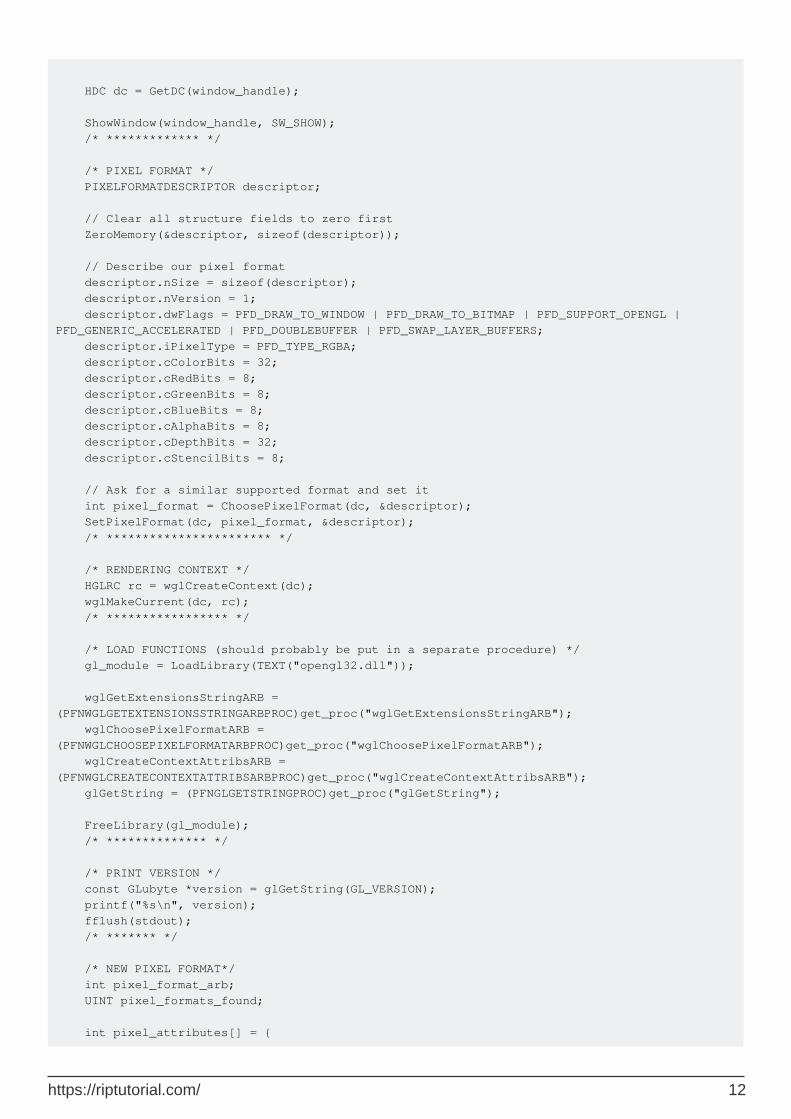
HDC dc = GetDC(window_handle); ShowWindow(window_handle, SW_SHOW); /* ************* */ /* PIXEL FORMAT */ PIXELFORMATDESCRIPTOR descriptor; // Clear all structure fields to zero first ZeroMemory(&descriptor, sizeof(descriptor)); // Describe our pixel format descriptor.nSize = sizeof(descriptor); descriptor.nVersion = 1; descriptor.dwFlags = PFD_DRAW_TO_WINDOW | PFD_DRAW_TO_BITMAP | PFD_SUPPORT_OPENGL | PFD_GENERIC_ACCELERATED | PFD_DOUBLEBUFFER | PFD_SWAP_LAYER_BUFFERS; descriptor.iPixelType = PFD_TYPE_RGBA; descriptor.cColorBits = 32; descriptor.cRedBits = 8; descriptor.cGreenBits = 8; descriptor.cBlueBits = 8; descriptor.cAlphaBits = 8; descriptor.cDepthBits = 32; descriptor.cStencilBits = 8; // Ask for a similar supported format and set it int pixel_format = ChoosePixelFormat(dc, &descriptor); SetPixelFormat(dc, pixel_format, &descriptor); /* *********************** */ /* RENDERING CONTEXT */ HGLRC rc = wglCreateContext(dc); wglMakeCurrent(dc, rc); /* ***************** */ /* LOAD FUNCTIONS (should probably be put in a separate procedure) */ gl_module = LoadLibrary(TEXT("opengl32.dll")); wglGetExtensionsStringARB = (PFNWGLGETEXTENSIONSSTRINGARBPROC)get_proc("wglGetExtensionsStringARB"); wglChoosePixelFormatARB = (PFNWGLCHOOSEPIXELFORMATARBPROC)get_proc("wglChoosePixelFormatARB"); wglCreateContextAttribsARB = (PFNWGLCREATECONTEXTATTRIBSARBPROC)get_proc("wglCreateContextAttribsARB"); glGetString = (PFNGLGETSTRINGPROC)get_proc("glGetString"); FreeLibrary(gl_module); /* ************** */ /* PRINT VERSION */ const GLubyte *version = glGetString(GL_VERSION); printf("%s\n", version); fflush(stdout); /* ******* */ /* NEW PIXEL FORMAT*/ int pixel_format_arb; UINT pixel_formats_found; int pixel_attributes[] = {
https://riptutorial.com/ 12
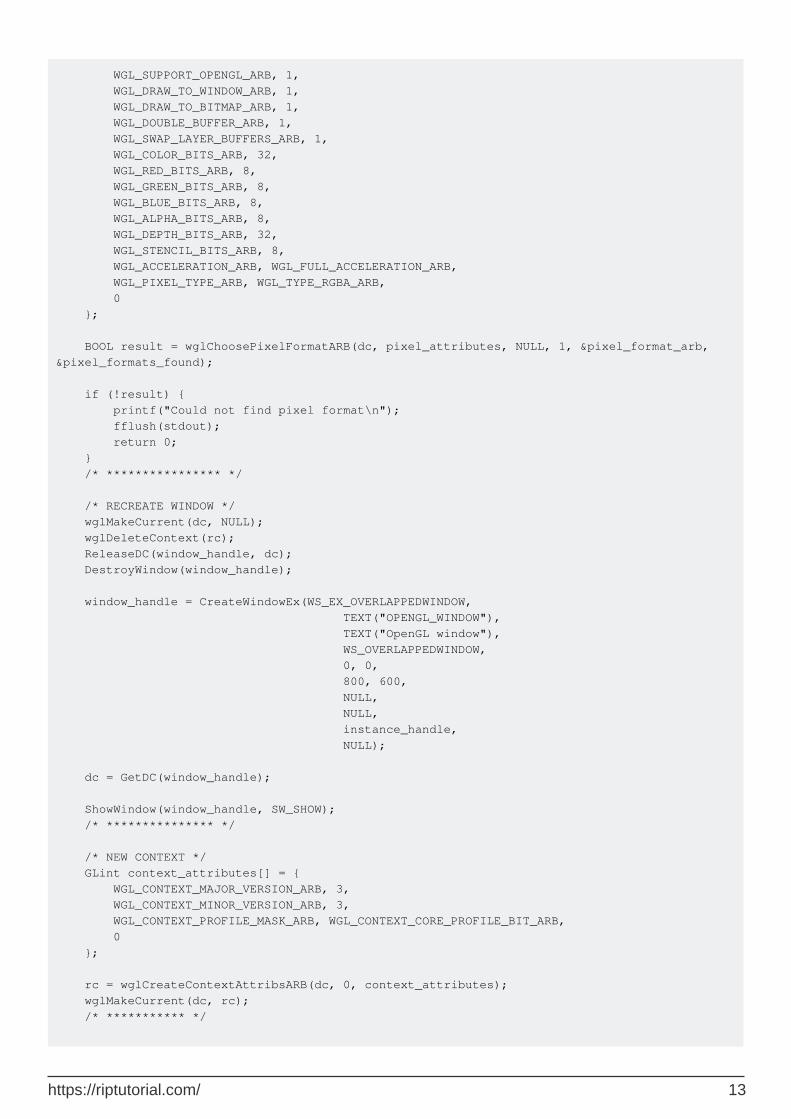
WGL_SUPPORT_OPENGL_ARB, 1, WGL_DRAW_TO_WINDOW_ARB, 1, WGL_DRAW_TO_BITMAP_ARB, 1, WGL_DOUBLE_BUFFER_ARB, 1, WGL_SWAP_LAYER_BUFFERS_ARB, 1, WGL_COLOR_BITS_ARB, 32, WGL_RED_BITS_ARB, 8, WGL_GREEN_BITS_ARB, 8, WGL_BLUE_BITS_ARB, 8, WGL_ALPHA_BITS_ARB, 8, WGL_DEPTH_BITS_ARB, 32, WGL_STENCIL_BITS_ARB, 8, WGL_ACCELERATION_ARB, WGL_FULL_ACCELERATION_ARB, WGL_PIXEL_TYPE_ARB, WGL_TYPE_RGBA_ARB, 0 }; BOOL result = wglChoosePixelFormatARB(dc, pixel_attributes, NULL, 1, &pixel_format_arb, &pixel_formats_found); if (!result) { printf("Could not find pixel format\n"); fflush(stdout); return 0; } /* **************** */ /* RECREATE WINDOW */ wglMakeCurrent(dc, NULL); wglDeleteContext(rc); ReleaseDC(window_handle, dc); DestroyWindow(window_handle); window_handle = CreateWindowEx(WS_EX_OVERLAPPEDWINDOW, TEXT("OPENGL_WINDOW"), TEXT("OpenGL window"), WS_OVERLAPPEDWINDOW, 0, 0, 800, 600, NULL, NULL, instance_handle, NULL); dc = GetDC(window_handle); ShowWindow(window_handle, SW_SHOW); /* *************** */ /* NEW CONTEXT */ GLint context_attributes[] = { WGL_CONTEXT_MAJOR_VERSION_ARB, 3, WGL_CONTEXT_MINOR_VERSION_ARB, 3, WGL_CONTEXT_PROFILE_MASK_ARB, WGL_CONTEXT_CORE_PROFILE_BIT_ARB, 0 }; rc = wglCreateContextAttribsARB(dc, 0, context_attributes); wglMakeCurrent(dc, rc); /* *********** */
https://riptutorial.com/ 13
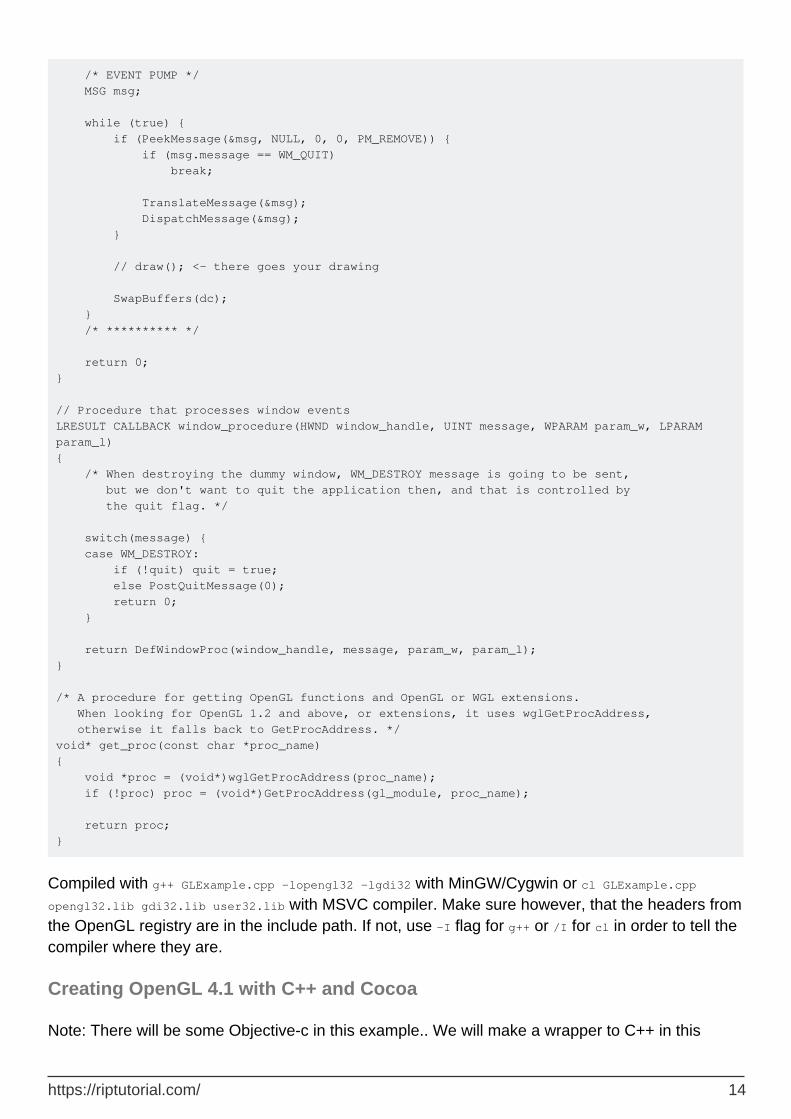
/* EVENT PUMP */ MSG msg; while (true) { if (PeekMessage(&msg, NULL, 0, 0, PM_REMOVE)) { if (msg.message == WM_QUIT) break; TranslateMessage(&msg); DispatchMessage(&msg); } // draw(); <- there goes your drawing SwapBuffers(dc); } /* ********** */ return 0; } // Procedure that processes window events LRESULT CALLBACK window_procedure(HWND window_handle, UINT message, WPARAM param_w, LPARAM param_l) { /* When destroying the dummy window, WM_DESTROY message is going to be sent, but we don't want to quit the application then, and that is controlled by the quit flag. */ switch(message) { case WM_DESTROY: if (!quit) quit = true; else PostQuitMessage(0); return 0; } return DefWindowProc(window_handle, message, param_w, param_l); } /* A procedure for getting OpenGL functions and OpenGL or WGL extensions. When looking for OpenGL 1.2 and above, or extensions, it uses wglGetProcAddress, otherwise it falls back to GetProcAddress. */ void* get_proc(const char *proc_name) { void *proc = (void*)wglGetProcAddress(proc_name); if (!proc) proc = (void*)GetProcAddress(gl_module, proc_name); return proc; }
Compiled with g++ GLExample.cpp -lopengl32 -lgdi32 with MinGW/Cygwin or cl GLExample.cpp opengl32.lib gdi32.lib user32.lib with MSVC compiler. Make sure however, that the headers from the OpenGL registry are in the include path. If not, use -I flag for g++ or /I for cl in order to tell the compiler where they are.
Creating OpenGL 4.1 with C++ and Cocoa
Note: There will be some Objective-c in this example.. We will make a wrapper to C++ in this
https://riptutorial.com/ 14
example, So don't worry to much about it.
First start Xcode and create a project.
And select a Cocoa application
https://riptutorial.com/ 15
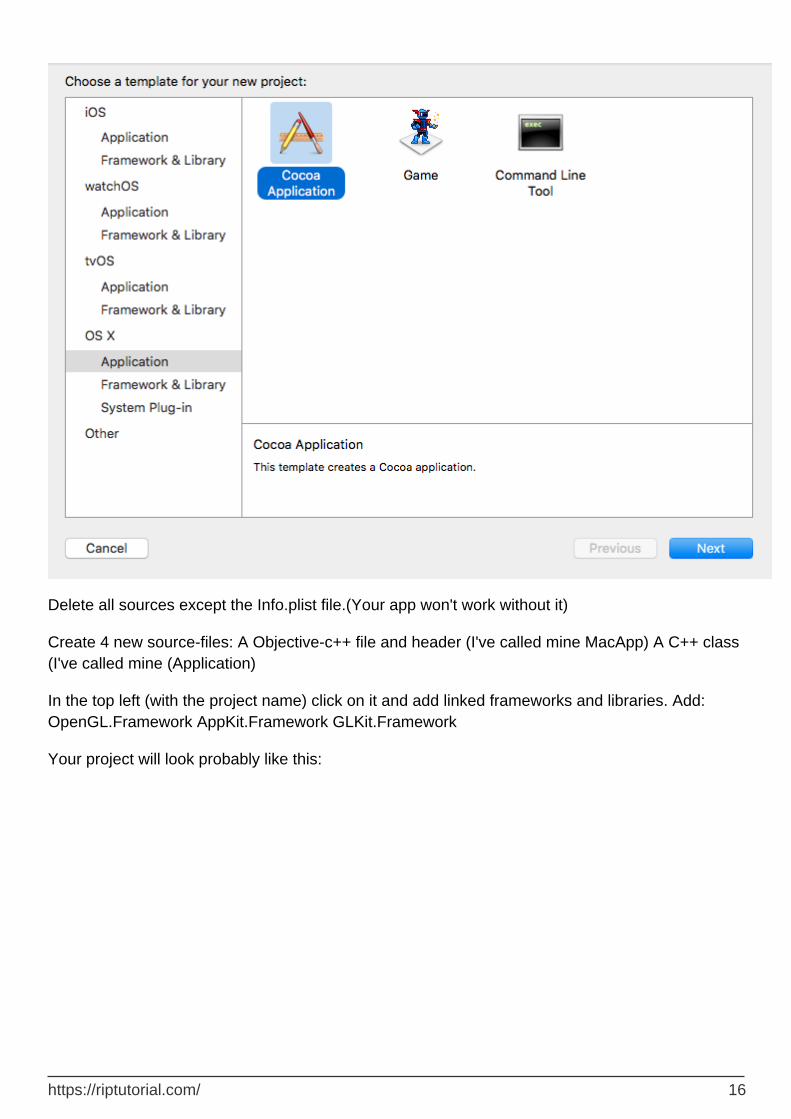
Delete all sources except the Info.plist file.(Your app won't work without it)
Create 4 new source-files: A Objective-c++ file and header (I've called mine MacApp) A C++ class (I've called mine (Application)
In the top left (with the project name) click on it and add linked frameworks and libraries. Add: OpenGL.Framework AppKit.Framework GLKit.Framework
Your project will look probably like this:
https://riptutorial.com/ 16

NSApplication is the main class you use while creating a MacOS app. It allows you to register windows and catch events.
We want to register (our own) window to the NSApplication. First create in your objective-c++ header a objective-c class that inherits from NSWindow and implements NSApplicationDelegate The NSWindow needs a pointer to the C++ application, A openGL View and a timer for the draw loop
https://riptutorial.com/ 17
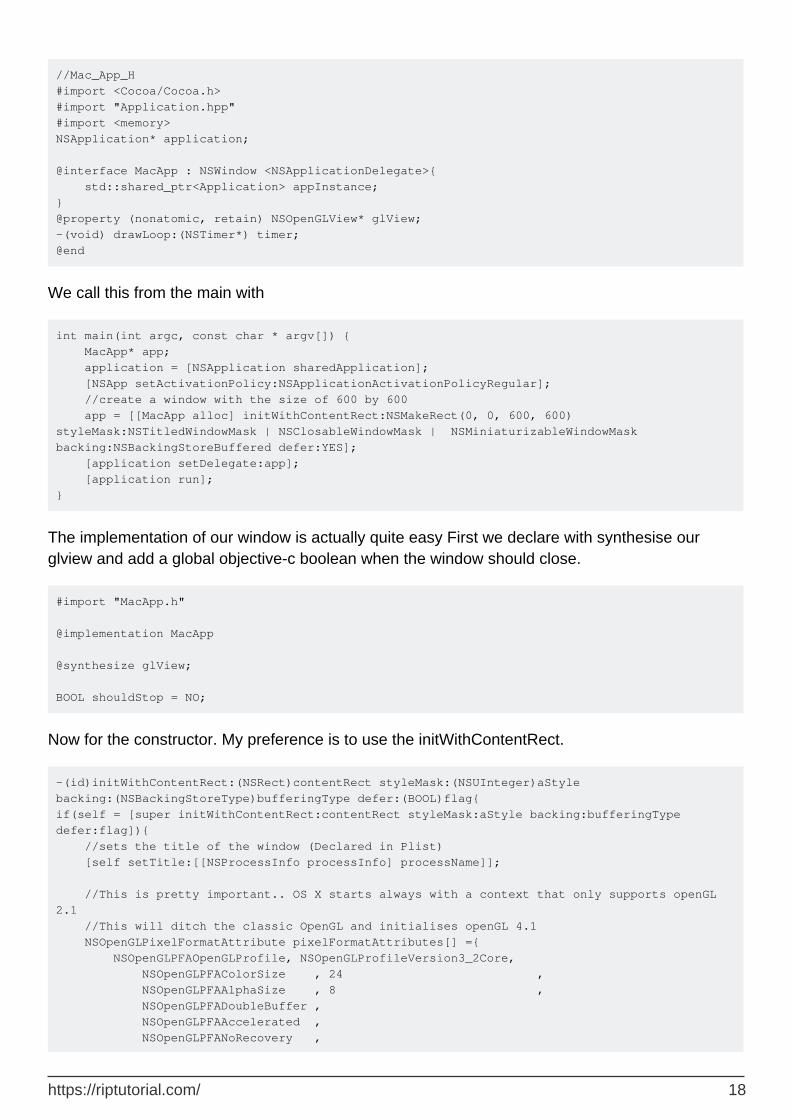
//Mac_App_H #import <Cocoa/Cocoa.h> #import "Application.hpp" #import <memory> NSApplication* application; @interface MacApp : NSWindow <NSApplicationDelegate>{ std::shared_ptr<Application> appInstance; } @property (nonatomic, retain) NSOpenGLView* glView; -(void) drawLoop:(NSTimer*) timer; @end
We call this from the main with
int main(int argc, const char * argv[]) { MacApp* app; application = [NSApplication sharedApplication]; [NSApp setActivationPolicy:NSApplicationActivationPolicyRegular]; //create a window with the size of 600 by 600 app = [[MacApp alloc] initWithContentRect:NSMakeRect(0, 0, 600, 600) styleMask:NSTitledWindowMask | NSClosableWindowMask | NSMiniaturizableWindowMask backing:NSBackingStoreBuffered defer:YES]; [application setDelegate:app]; [application run]; }
The implementation of our window is actually quite easy First we declare with synthesise our glview and add a global objective-c boolean when the window should close.
#import "MacApp.h" @implementation MacApp @synthesize glView; BOOL shouldStop = NO;
Now for the constructor. My preference is to use the initWithContentRect.
-(id)initWithContentRect:(NSRect)contentRect styleMask:(NSUInteger)aStyle backing:(NSBackingStoreType)bufferingType defer:(BOOL)flag{ if(self = [super initWithContentRect:contentRect styleMask:aStyle backing:bufferingType defer:flag]){ //sets the title of the window (Declared in Plist) [self setTitle:[[NSProcessInfo processInfo] processName]]; //This is pretty important.. OS X starts always with a context that only supports openGL 2.1 //This will ditch the classic OpenGL and initialises openGL 4.1 NSOpenGLPixelFormatAttribute pixelFormatAttributes[] ={ NSOpenGLPFAOpenGLProfile, NSOpenGLProfileVersion3_2Core, NSOpenGLPFAColorSize , 24 , NSOpenGLPFAAlphaSize , 8 , NSOpenGLPFADoubleBuffer , NSOpenGLPFAAccelerated , NSOpenGLPFANoRecovery ,
https://riptutorial.com/ 18
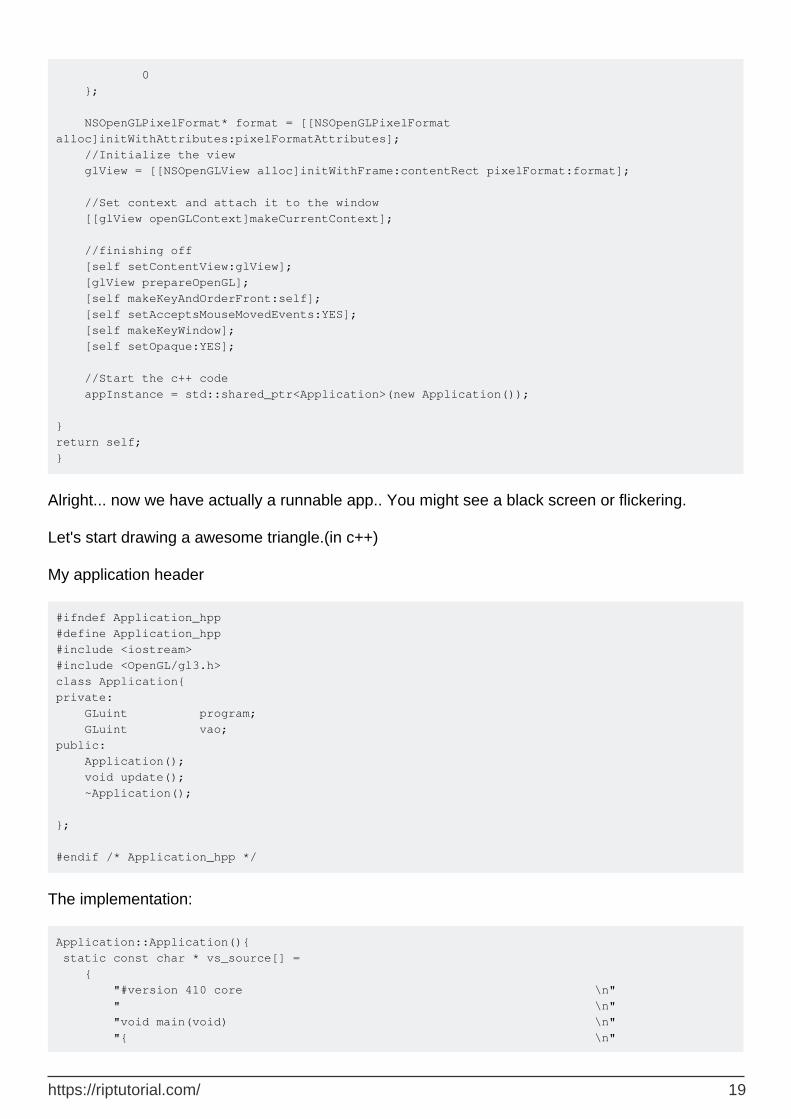
0 }; NSOpenGLPixelFormat* format = [[NSOpenGLPixelFormat alloc]initWithAttributes:pixelFormatAttributes]; //Initialize the view glView = [[NSOpenGLView alloc]initWithFrame:contentRect pixelFormat:format]; //Set context and attach it to the window [[glView openGLContext]makeCurrentContext]; //finishing off [self setContentView:glView]; [glView prepareOpenGL]; [self makeKeyAndOrderFront:self]; [self setAcceptsMouseMovedEvents:YES]; [self makeKeyWindow]; [self setOpaque:YES]; //Start the c++ code appInstance = std::shared_ptr<Application>(new Application()); } return self; }
Alright... now we have actually a runnable app.. You might see a black screen or flickering.
Let's start drawing a awesome triangle.(in c++)
My application header
#ifndef Application_hpp #define Application_hpp #include <iostream> #include <OpenGL/gl3.h> class Application{ private: GLuint program; GLuint vao; public: Application(); void update(); ~Application(); }; #endif /* Application_hpp */
The implementation:
Application::Application(){ static const char * vs_source[] = { "#version 410 core \n" " \n" "void main(void) \n" "{ \n"
https://riptutorial.com/ 19
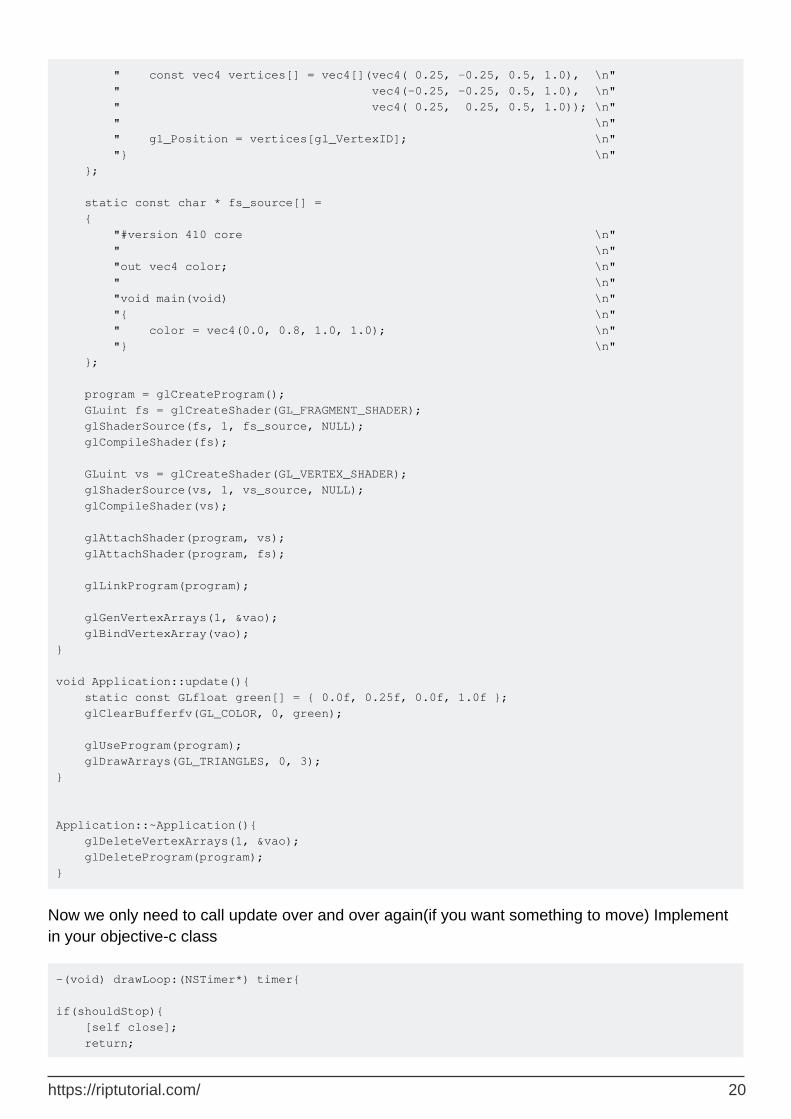
" const vec4 vertices[] = vec4[](vec4( 0.25, -0.25, 0.5, 1.0), \n" " vec4(-0.25, -0.25, 0.5, 1.0), \n" " vec4( 0.25, 0.25, 0.5, 1.0)); \n" " \n" " gl_Position = vertices[gl_VertexID]; \n" "} \n" }; static const char * fs_source[] = { "#version 410 core \n" " \n" "out vec4 color; \n" " \n" "void main(void) \n" "{ \n" " color = vec4(0.0, 0.8, 1.0, 1.0); \n" "} \n" }; program = glCreateProgram(); GLuint fs = glCreateShader(GL_FRAGMENT_SHADER); glShaderSource(fs, 1, fs_source, NULL); glCompileShader(fs); GLuint vs = glCreateShader(GL_VERTEX_SHADER); glShaderSource(vs, 1, vs_source, NULL); glCompileShader(vs); glAttachShader(program, vs); glAttachShader(program, fs); glLinkProgram(program); glGenVertexArrays(1, &vao); glBindVertexArray(vao); } void Application::update(){ static const GLfloat green[] = { 0.0f, 0.25f, 0.0f, 1.0f }; glClearBufferfv(GL_COLOR, 0, green); glUseProgram(program); glDrawArrays(GL_TRIANGLES, 0, 3); } Application::~Application(){ glDeleteVertexArrays(1, &vao); glDeleteProgram(program); }
Now we only need to call update over and over again(if you want something to move) Implement in your objective-c class
-(void) drawLoop:(NSTimer*) timer{ if(shouldStop){ [self close]; return;
https://riptutorial.com/ 20
} if([self isVisible]){ appInstance->update(); [glView update]; [[glView openGLContext] flushBuffer]; } }
And add the this method in the implementation of your objective-c class:
- (void)applicationDidFinishLaunching:(NSNotification *)notification { [NSTimer scheduledTimerWithTimeInterval:0.000001 target:self selector:@selector(drawLoop:) userInfo:nil repeats:YES]; }
this will call the update function of your c++ class over and over again(each 0.000001 seconds to be precise)
To finish up we close the window when the close button is pressed:
- (BOOL)applicationShouldTerminateAfterLastWindowClosed:(NSApplication *)theApplication{ return YES; } - (void)applicationWillTerminate:(NSNotification *)aNotification{ shouldStop = YES; }
Congratulations, now you have a awesome window with a OpenGL triangle without any third party frameworks.
https://riptutorial.com/ 21
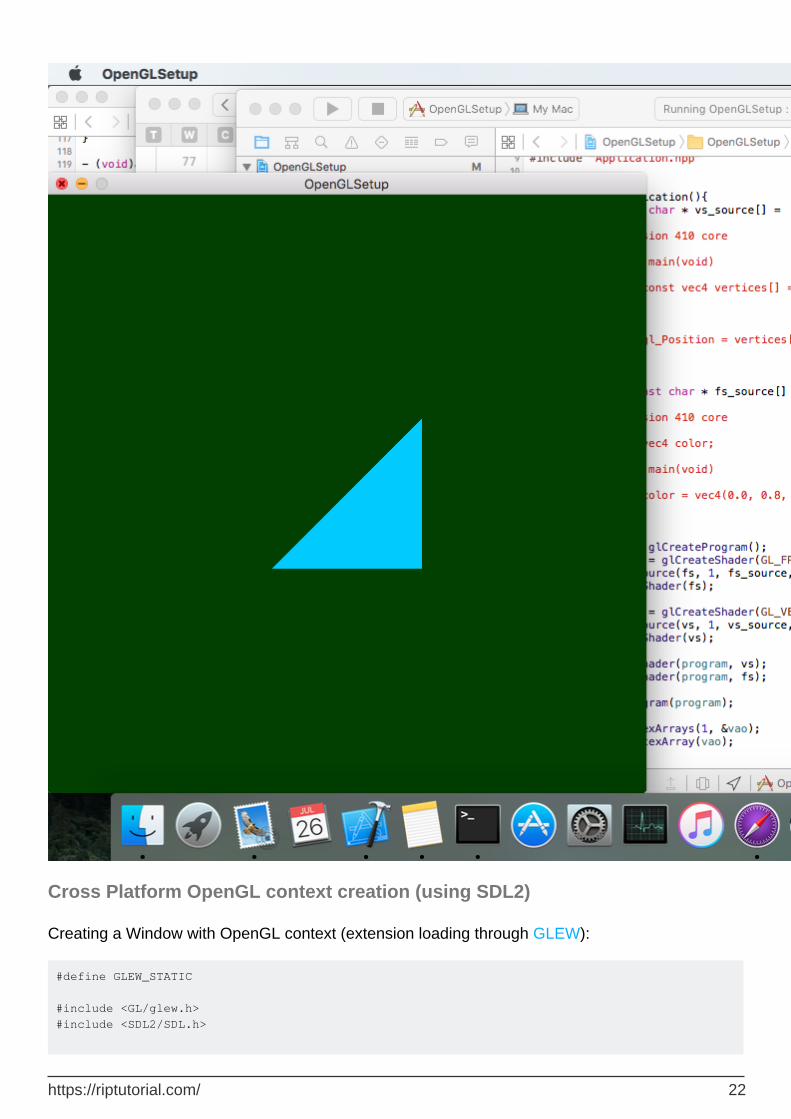
Cross Platform OpenGL context creation (using SDL2)
Creating a Window with OpenGL context (extension loading through GLEW):
#define GLEW_STATIC #include <GL/glew.h> #include <SDL2/SDL.h>
https://riptutorial.com/ 22

int main(int argc, char* argv[]) { SDL_Init(SDL_INIT_VIDEO); /* Initialises Video Subsystem in SDL */ /* Setting up OpenGL version and profile details for context creation */ SDL_GL_SetAttribute(SDL_GL_CONTEXT_PROFILE_MASK, SDL_GL_CONTEXT_PROFILE_CORE); SDL_GL_SetAttribute(SDL_GL_CONTEXT_MAJOR_VERSION, 3); SDL_GL_SetAttribute(SDL_GL_CONTEXT_MINOR_VERSION, 2); /* A 800x600 window. Pretty! */ SDL_Window* window = SDL_CreateWindow ( "SDL Context", SDL_WINDOWPOS_UNDEFINED, SDL_WINDOWPOS_UNDEFINED, 800, 600, SDL_WINDOW_OPENGL ); /* Creating OpenGL Context */ SDL_GLContext gl_context = SDL_GL_CreateContext(window); /* Loading Extensions */ glewExperimental = GL_TRUE; glewInit(); /* The following code is for error checking. * If OpenGL has initialised properly, this should print 1. * Remove it in production code. */ GLuint vertex_buffer; glGenBuffers(1, &vertex_buffer); printf("%u\n", vertex_buffer); /* Error checking ends here */ /* Main Loop */ SDL_Event window_event; while(1) { if (SDL_PollEvent(&window_event)) { if (window_event.type == SDL_QUIT) { /* If user is exiting the application */ break; } } /* Swap the front and back buffer for flicker-free rendering */ SDL_GL_SwapWindow(window); } /* Freeing Memory */ glDeleteBuffers(1, &vertex_buffer); SDL_GL_DeleteContext(gl_context); SDL_Quit(); return 0; }
Setup Modern OpenGL 4.1 on macOS (Xcode, GLFW and GLEW)
1. Install GLFW
https://riptutorial.com/ 23

First step is to create an OpenGL window. GLFW is an Open Source, multi-platform library for creating windows with OpenGL, to install GLFW first download its files from www.glfw.org
Extract the GLFW folder and its contents will look like this
https://riptutorial.com/ 24

Download and install CMake to build GLFW. Goto www.cmake.org/download/, download CMake and install for MAC OS X
https://riptutorial.com/ 25

If Xcode is not installed. Download and install Xcode from Mac App Store.
Create a new folder Build inside the GLFW folder
https://riptutorial.com/ 26
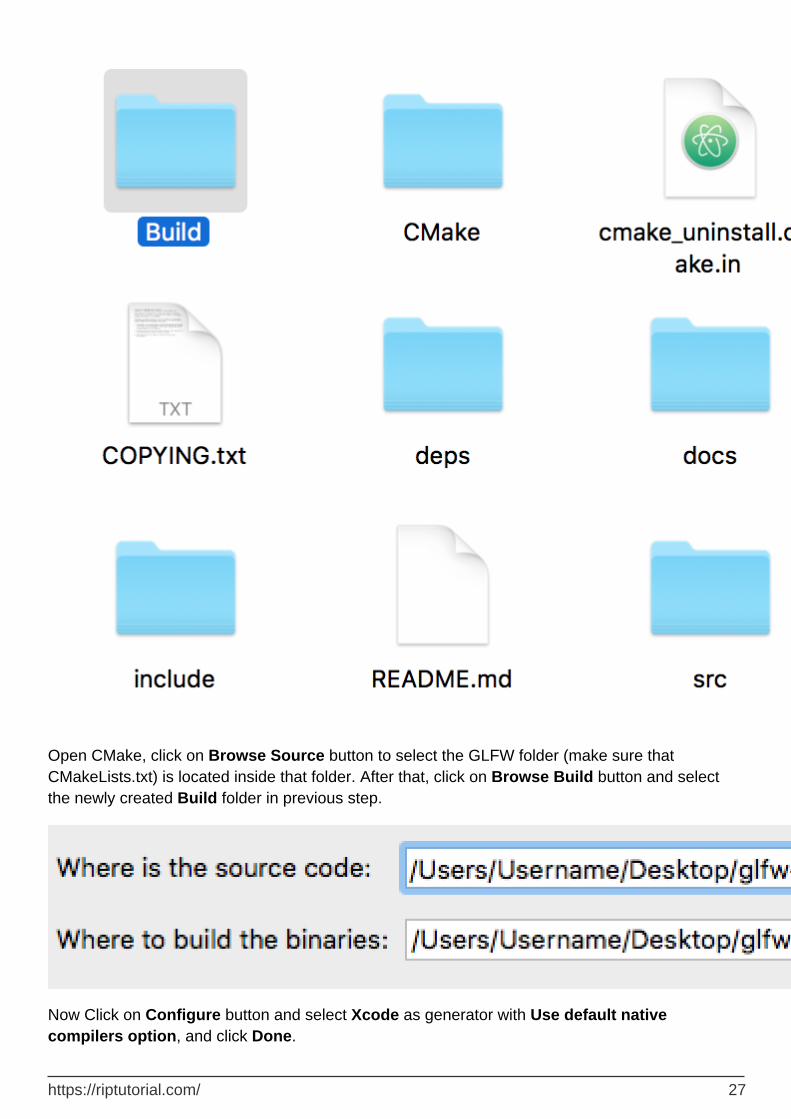
Open CMake, click on Browse Source button to select the GLFW folder (make sure that CMakeLists.txt) is located inside that folder. After that, click on Browse Build button and select the newly created Build folder in previous step.
Now Click on Configure button and select Xcode as generator with Use default native compilers option, and click Done.
https://riptutorial.com/ 27
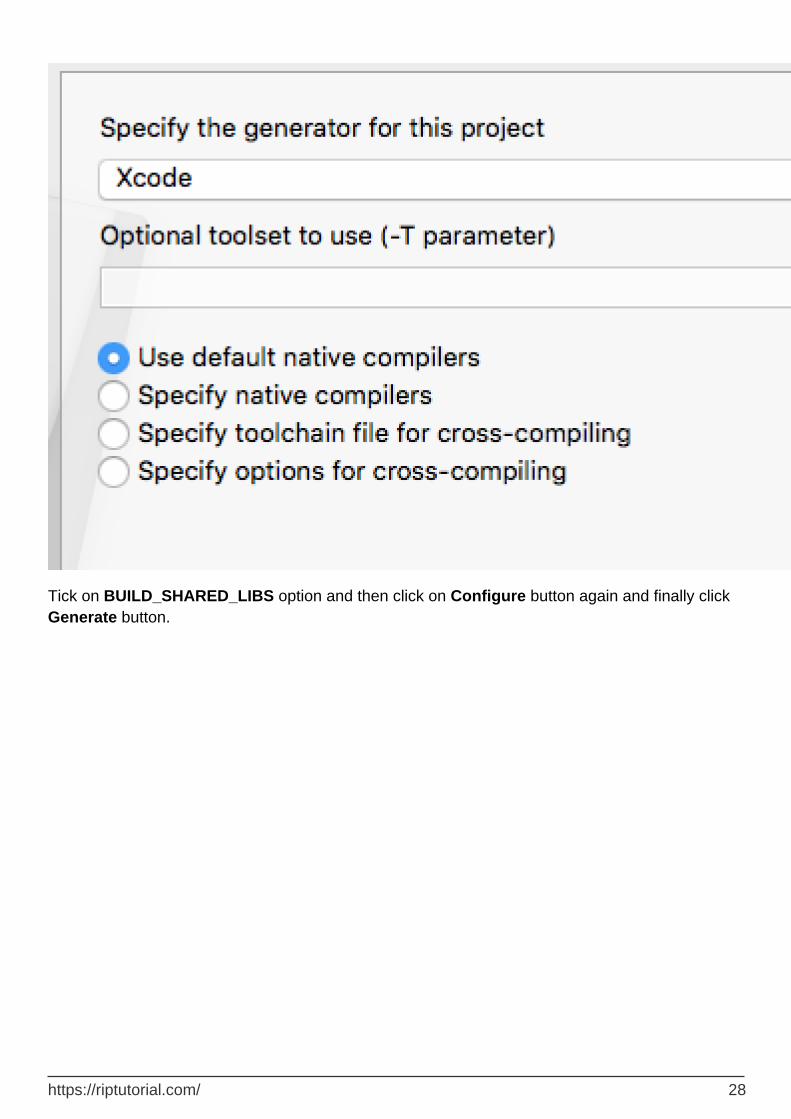
Tick on BUILD_SHARED_LIBS option and then click on Configure button again and finally click Generate button.
https://riptutorial.com/ 28
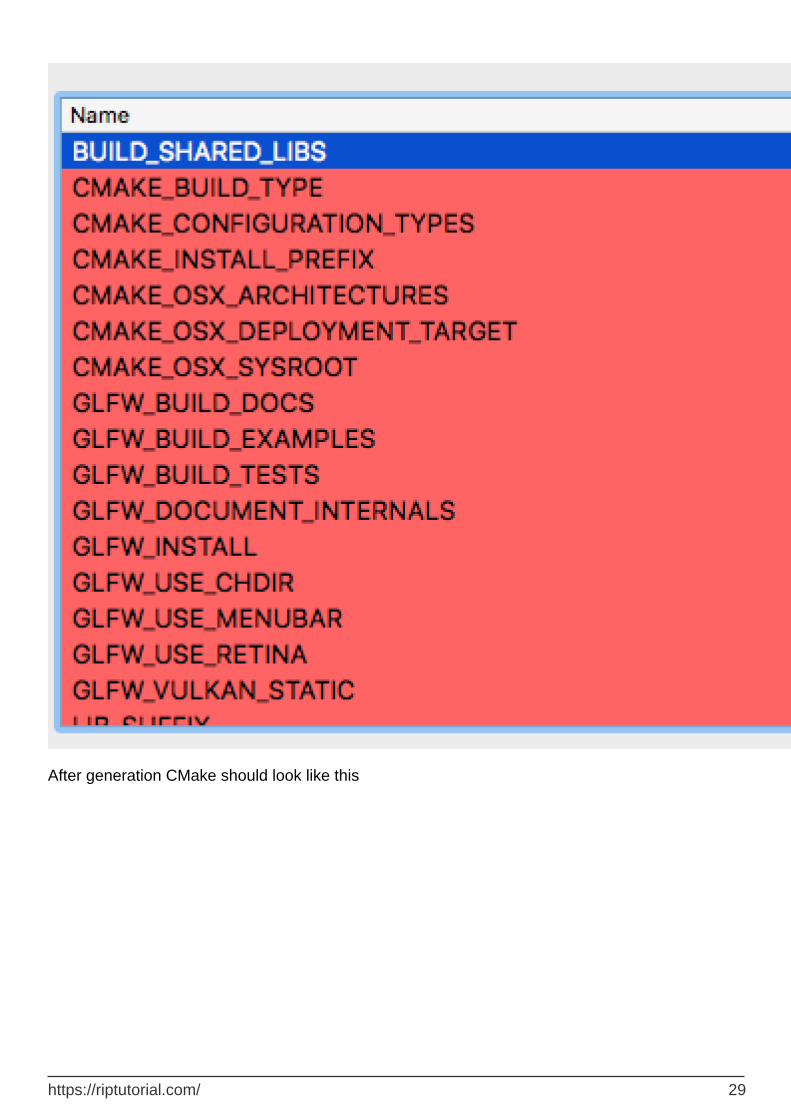
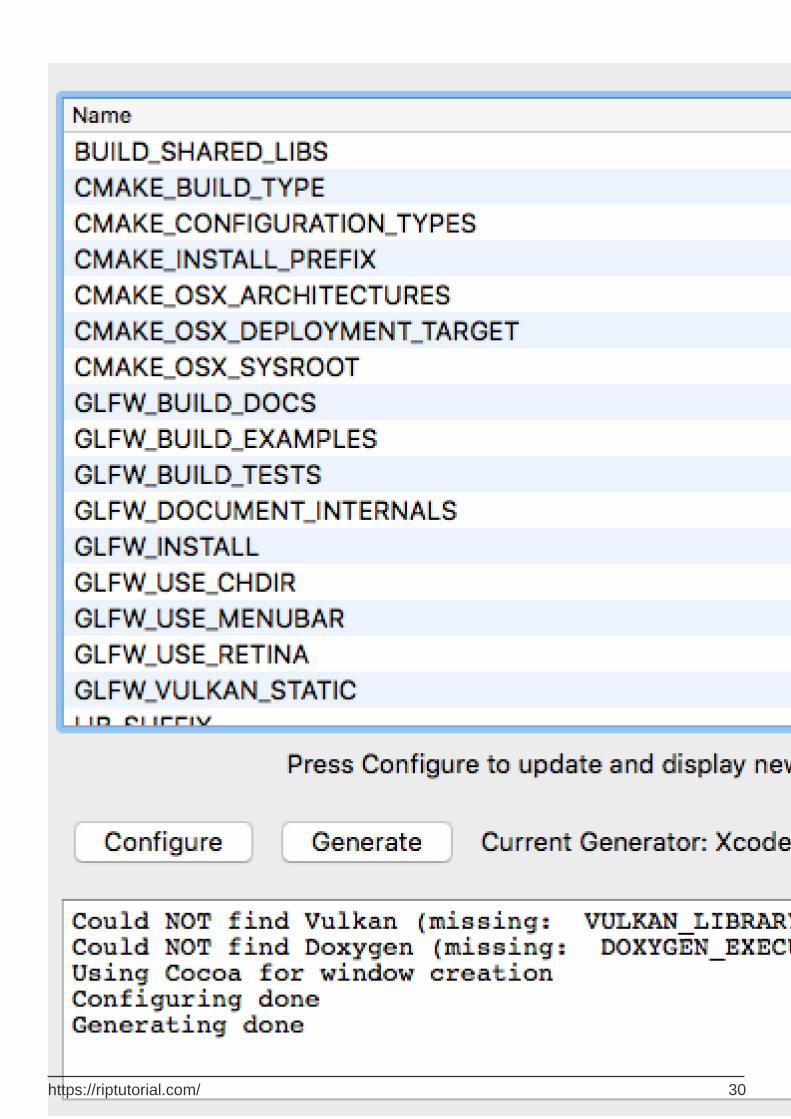
After generation CMake should look like this
https://riptutorial.com/ 29
Now Open Finder and goto /usr, create a folder name local if not already there. Open the local
https://riptutorial.com/ 30
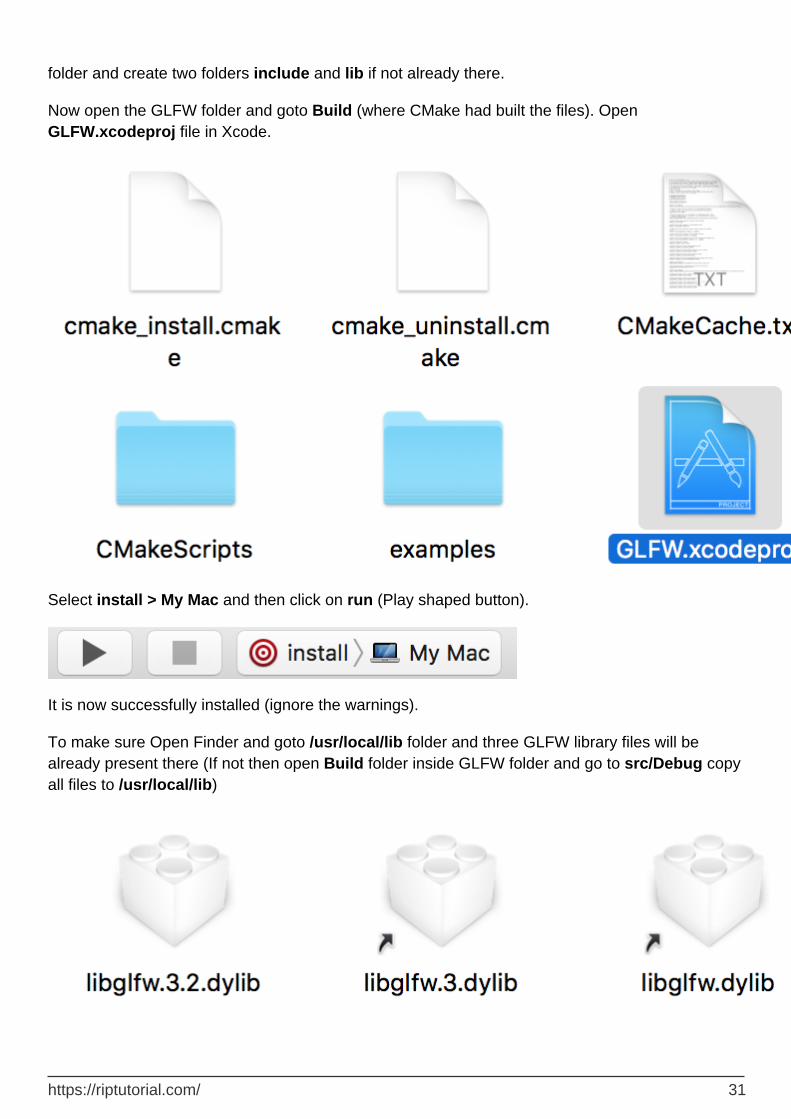
folder and create two folders include and lib if not already there.
Now open the GLFW folder and goto Build (where CMake had built the files). Open GLFW.xcodeproj file in Xcode.
Select install > My Mac and then click on run (Play shaped button).
It is now successfully installed (ignore the warnings).
To make sure Open Finder and goto /usr/local/lib folder and three GLFW library files will be already present there (If not then open Build folder inside GLFW folder and go to src/Debug copy all files to /usr/local/lib)
https://riptutorial.com/ 31

Open Finder and goto /usr/local/include and a GLFW folder will be already present there with two header files inside it by name of glfw3.h and glfw3native.h
2. Install GLEW
GLEW is a cross-platform library that helps in querying and loading OpenGL extensions. It provides run-time mechanisms for determining which OpenGL extensions are supported on the target platform. It is only for modern OpenGL (OpenGL version 3.2 and greater which requires functions to be determined at runtime). To install first download its files from glew.sourceforge.net
Extract the GLFW folder and its contents will look like this.
https://riptutorial.com/ 32
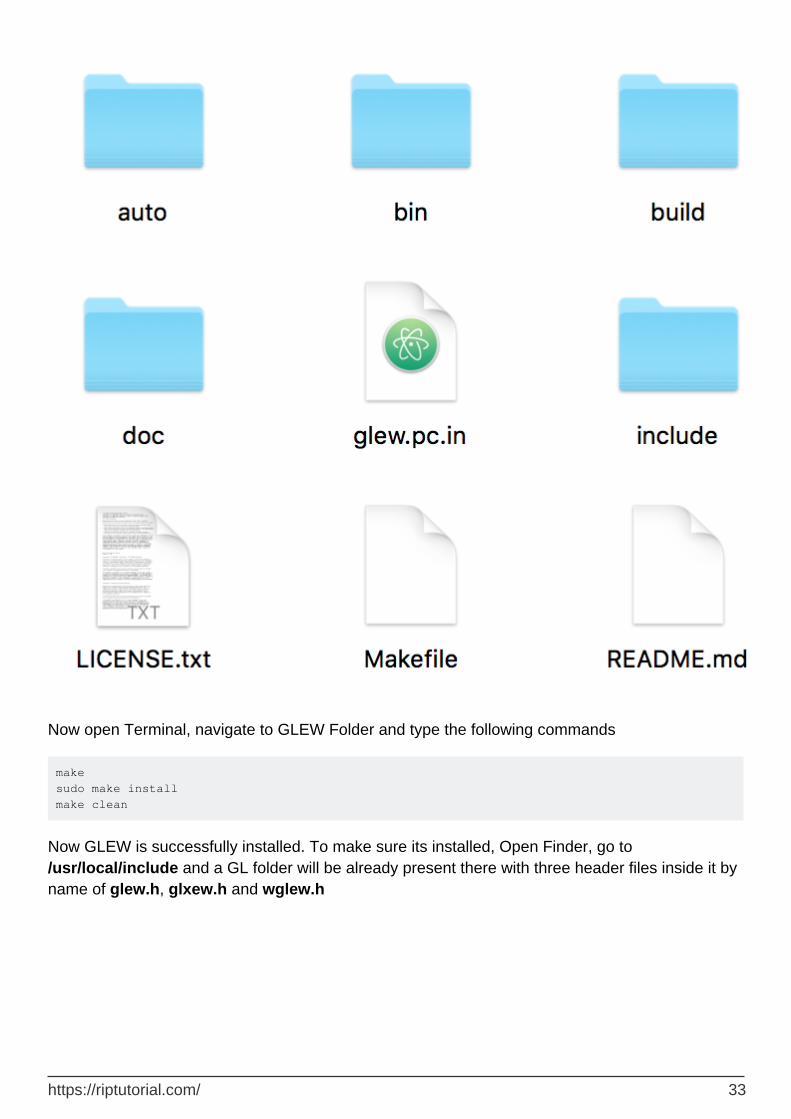
Now open Terminal, navigate to GLEW Folder and type the following commands
make sudo make install make clean
Now GLEW is successfully installed. To make sure its installed, Open Finder, go to /usr/local/include and a GL folder will be already present there with three header files inside it by name of glew.h, glxew.h and wglew.h
https://riptutorial.com/ 33
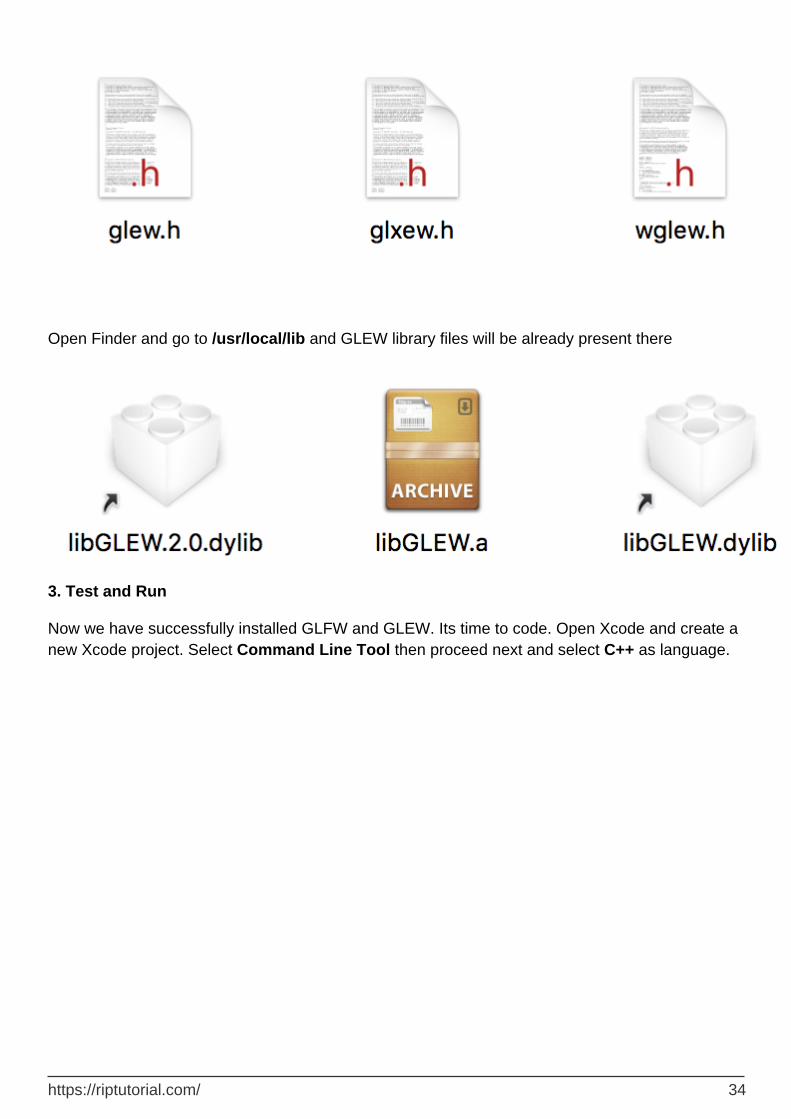
Open Finder and go to /usr/local/lib and GLEW library files will be already present there
3. Test and Run
Now we have successfully installed GLFW and GLEW. Its time to code. Open Xcode and create a new Xcode project. Select Command Line Tool then proceed next and select C++ as language.
https://riptutorial.com/ 34
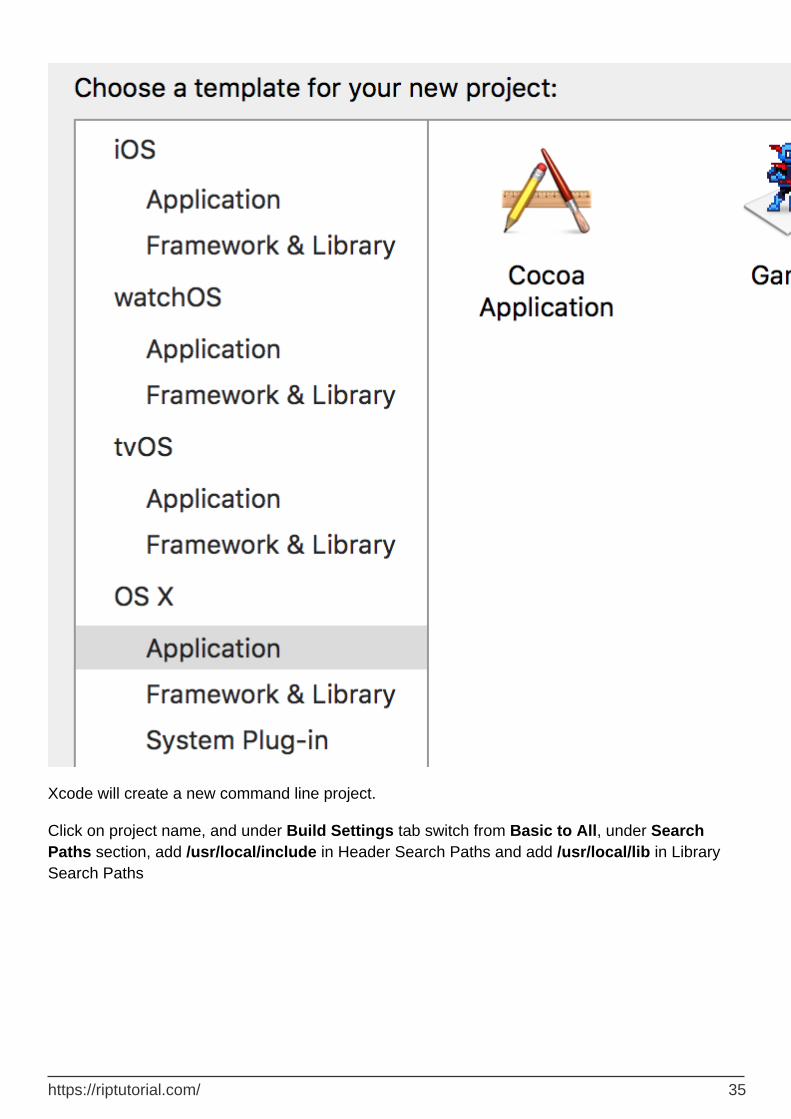
Xcode will create a new command line project.
Click on project name, and under Build Settings tab switch from Basic to All, under Search Paths section, add /usr/local/include in Header Search Paths and add /usr/local/lib in Library Search Paths
https://riptutorial.com/ 35

Click on project name, and under Build Phases tab and under Link With Binary Libraries add OpenGL.framework and also add recently created GLFW and GLEW libraries from /usr/local/lib
https://riptutorial.com/ 36

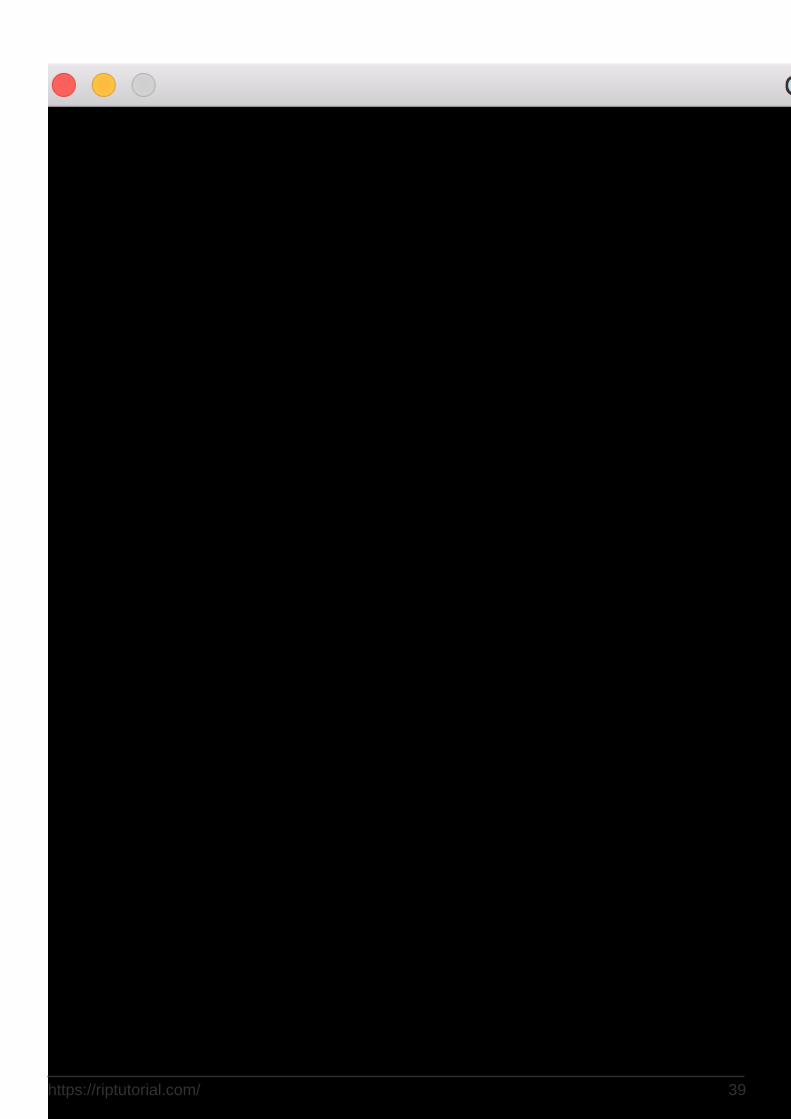
Now we are ready to code in Modern Open GL 4.1 on macOS using C++ and Xcode. The following code will create an OpenGL Window using GLFW with Blank Screen Output.
#include <GL/glew.h> #include <GLFW/glfw3.h> // Define main function int main() { // Initialize GLFW glfwInit(); // Define version and compatibility settings glfwWindowHint(GLFW_CONTEXT_VERSION_MAJOR, 3); glfwWindowHint(GLFW_CONTEXT_VERSION_MINOR, 2); glfwWindowHint(GLFW_OPENGL_PROFILE,GLFW_OPENGL_CORE_PROFILE); glfwWindowHint(GLFW_OPENGL_FORWARD_COMPAT, GL_TRUE); glfwWindowHint(GLFW_RESIZABLE, GL_FALSE); // Create OpenGL window and context GLFWwindow* window = glfwCreateWindow(800, 600, "OpenGL", NULL, NULL); glfwMakeContextCurrent(window);
https://riptutorial.com/ 37
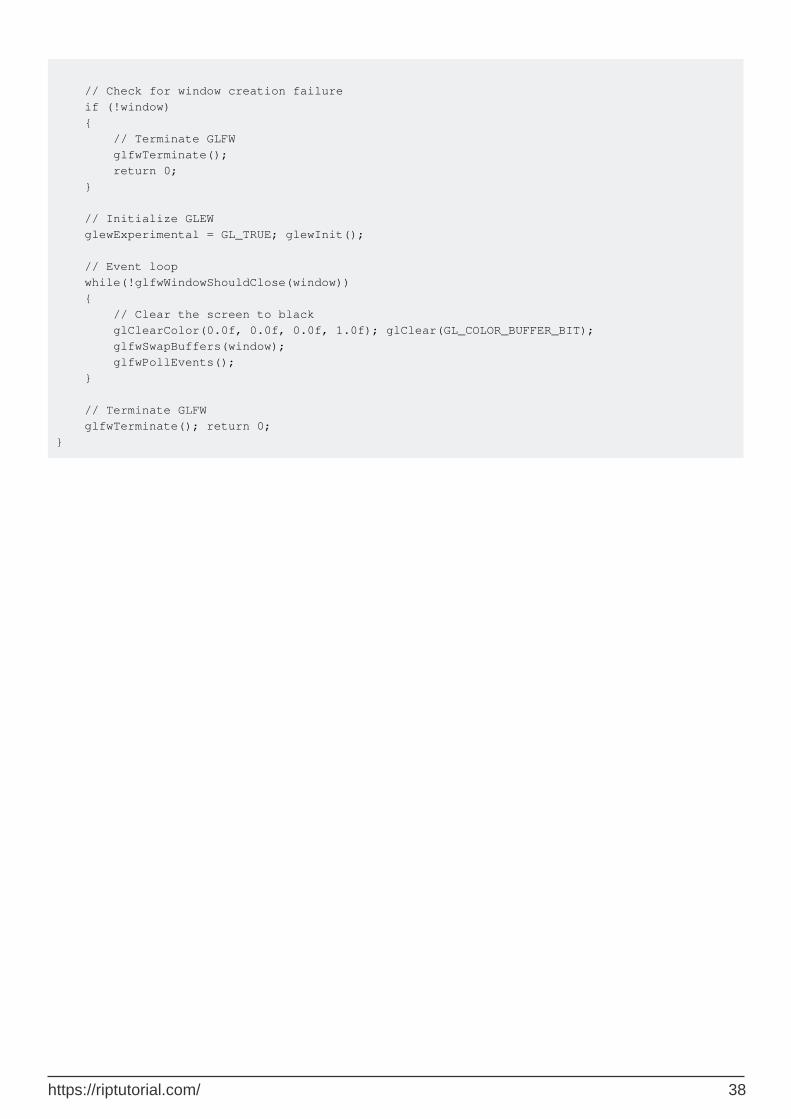
// Check for window creation failure if (!window) { // Terminate GLFW glfwTerminate(); return 0; } // Initialize GLEW glewExperimental = GL_TRUE; glewInit(); // Event loop while(!glfwWindowShouldClose(window)) { // Clear the screen to black glClearColor(0.0f, 0.0f, 0.0f, 1.0f); glClear(GL_COLOR_BUFFER_BIT); glfwSwapBuffers(window); glfwPollEvents(); } // Terminate GLFW glfwTerminate(); return 0; }
https://riptutorial.com/ 38
Create Opengl Context with Java and LWJGL 3.0
In this example code we will create A blank Opengl Window using LWJGL 3.0+, this doesn't conta
Create a class name WindowManager that will contain all the boiler plate code for creating a 1.
WindowManager.java
import org.lwjgl.glfw.*;
Next create a class that contain main rendering loop ,which will call all the above function cr2.
OpenGlMain.java
import org.lwjgl.opengl.GL;
For further detail checkout official LWJGL Guide
Read Getting started with opengl online:
https://riptutorial.com/ 39

https://riptutorial.com/opengl/topic/814/getting-started-with-opengl
https://riptutorial.com/ 40
Chapter 2: 3d Math
Examples
Introduction to matrices
When you are programming in OpenGL or any other graphics api you will hit a brick wall when you are not that good in math. Here I will explain with example code how you can achieve movement/scaling and many other cool stuff with your 3d object.
Let's take a real life case... You've made a awesome (three dimensional) cube in OpenGL and you want to move it to any direction.
glUseProgram(cubeProgram) glBindVertexArray(cubeVAO) glEnableVertexAttribArray ( 0 ); glDrawArrays ( GL_TRIANGLES, 0,cubeVerticesSize)
In game engines like Unity3d this would be easy. You would just call transform.Translate() and be done with it, but OpenGL does not include a math library.
A good math library is glm but to get my point across I will code all the (important) mathematical methods for you out.
First we must understand that a 3d object in OpenGL contains a lot of information, there are many variables that depend on each other. A smart way to manage all these variables is by using matrices.
A matrix is a collection of variables written in columns and rows. A matrix can be 1x1, 2x4 or any arbitrary number.
[1|2|3] [4|5|6] [7|8|9] //A 3x3 matrix
You can do really cool stuff with them... but how can they help me with moving my cube? To actually understand this we first need to know several things.
How do you make a matrix from a position?•How do you translate a matrix?•How do you pass it to OpenGL?•
Let's make a class containing all our important matrix data and methods (written in c++)
template<typename T> //Very simple vector containing 4 variables struct Vector4{ T x, y, z, w;
https://riptutorial.com/ 41
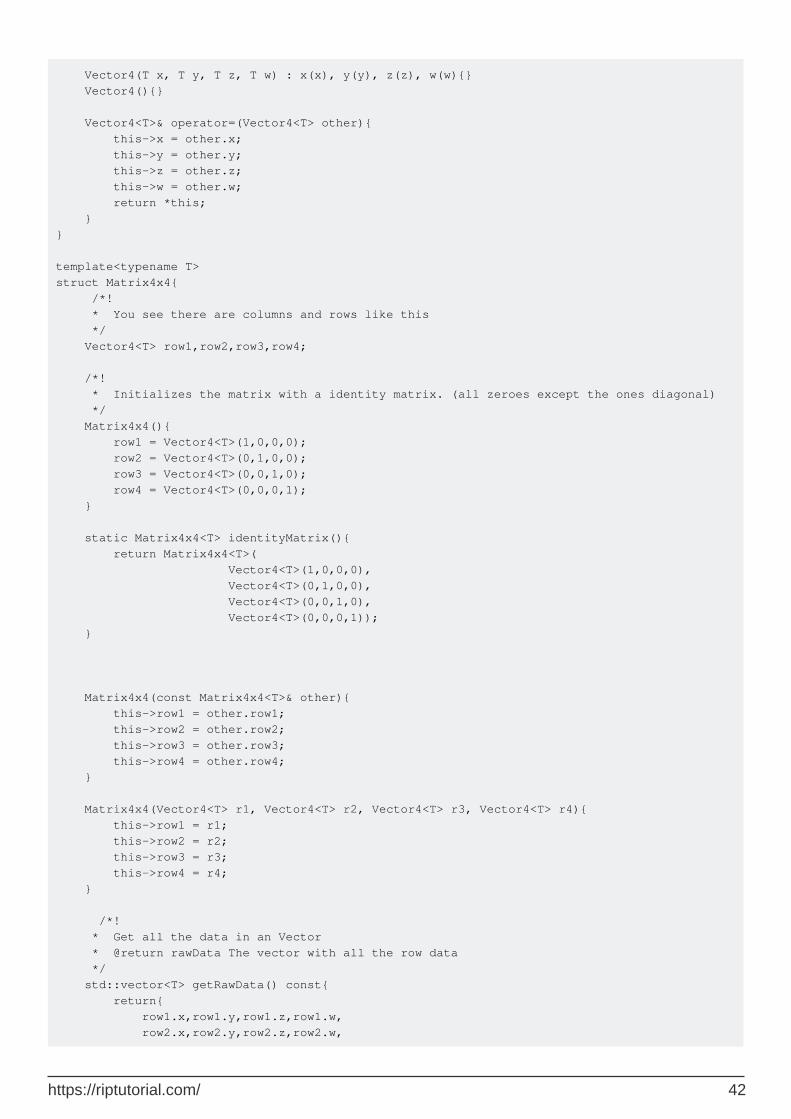
Vector4(T x, T y, T z, T w) : x(x), y(y), z(z), w(w){} Vector4(){} Vector4<T>& operator=(Vector4<T> other){ this->x = other.x; this->y = other.y; this->z = other.z; this->w = other.w; return *this; } } template<typename T> struct Matrix4x4{ /*! * You see there are columns and rows like this */ Vector4<T> row1,row2,row3,row4; /*! * Initializes the matrix with a identity matrix. (all zeroes except the ones diagonal) */ Matrix4x4(){ row1 = Vector4<T>(1,0,0,0); row2 = Vector4<T>(0,1,0,0); row3 = Vector4<T>(0,0,1,0); row4 = Vector4<T>(0,0,0,1); } static Matrix4x4<T> identityMatrix(){ return Matrix4x4<T>( Vector4<T>(1,0,0,0), Vector4<T>(0,1,0,0), Vector4<T>(0,0,1,0), Vector4<T>(0,0,0,1)); } Matrix4x4(const Matrix4x4<T>& other){ this->row1 = other.row1; this->row2 = other.row2; this->row3 = other.row3; this->row4 = other.row4; } Matrix4x4(Vector4<T> r1, Vector4<T> r2, Vector4<T> r3, Vector4<T> r4){ this->row1 = r1; this->row2 = r2; this->row3 = r3; this->row4 = r4; } /*! * Get all the data in an Vector * @return rawData The vector with all the row data */ std::vector<T> getRawData() const{ return{ row1.x,row1.y,row1.z,row1.w, row2.x,row2.y,row2.z,row2.w,
https://riptutorial.com/ 42

row3.x,row3.y,row3.z,row3.w, row4.x,row4.y,row4.z,row4.w }; } }
First we notice a very peculiar thing in the default constructor of a 4 by 4 matrix. When called it doesn't start all on zero but like:
[1|0|0|0] [0|1|0|0] [0|0|1|0] [0|0|0|1] //A identity 4 by 4 matrix
All matrices should start with ones on the diagonal. (just because >.<)
Alright so let's declare at our epic cube a 4 by 4 matrix.
glUseProgram(cubeProgram) Matrix4x4<float> position; glBindVertexArray(cubeVAO) glUniformMatrix4fv(shaderRef, 1, GL_TRUE, cubeData); glEnableVertexAttribArray ( 0 ); glDrawArrays ( GL_TRIANGLES, 0,cubeVerticesSize)
Now we actually have all our variables we can finally start to do some math! Let's do translation. If you have programmed in Unity3d you might remember a Transform.Translate function. Let's implement it in our own matrix class
/*! * Translates the matrix to * @param vector, The vector you wish to translate to */ static Matrix4x4<T> translate(Matrix4x4<T> mat, T x, T y, T z){ Matrix4x4<T> result(mat); result.row1.w += x; result.row2.w += y; result.row3.w += z; return result; }
This is all the math needed to move the cube around(Not rotation or scaling mind you) It works at all the angles. Let's implement this in our real life scenario
glUseProgram(cubeProgram) Matrix4x4<float> position; position = Matrix4x4<float>::translate(position, 1,0,0); glBindVertexArray(cubeVAO) glUniformMatrix4fv(shaderRef, 1, GL_TRUE, &position.getRawData()[0]); glEnableVertexAttribArray ( 0 ); glDrawArrays ( GL_TRIANGLES, 0,cubeVerticesSize)
Our shader needs to use our marvellous matrix
https://riptutorial.com/ 43
#version 410 core uniform mat4 mv_matrix; layout(location = 0) in vec4 position; void main(void){ gl_Position = v_matrix * position; }
And it should work.... but it seems we already have a bug in our program. When you move along the z axis your object seems to disappear right into thin air. This is because we don't have a projection matrix. To solve this bug we need to know two things:
How does a projection matrix look like?1. How can we combine it with our position matrix?2.
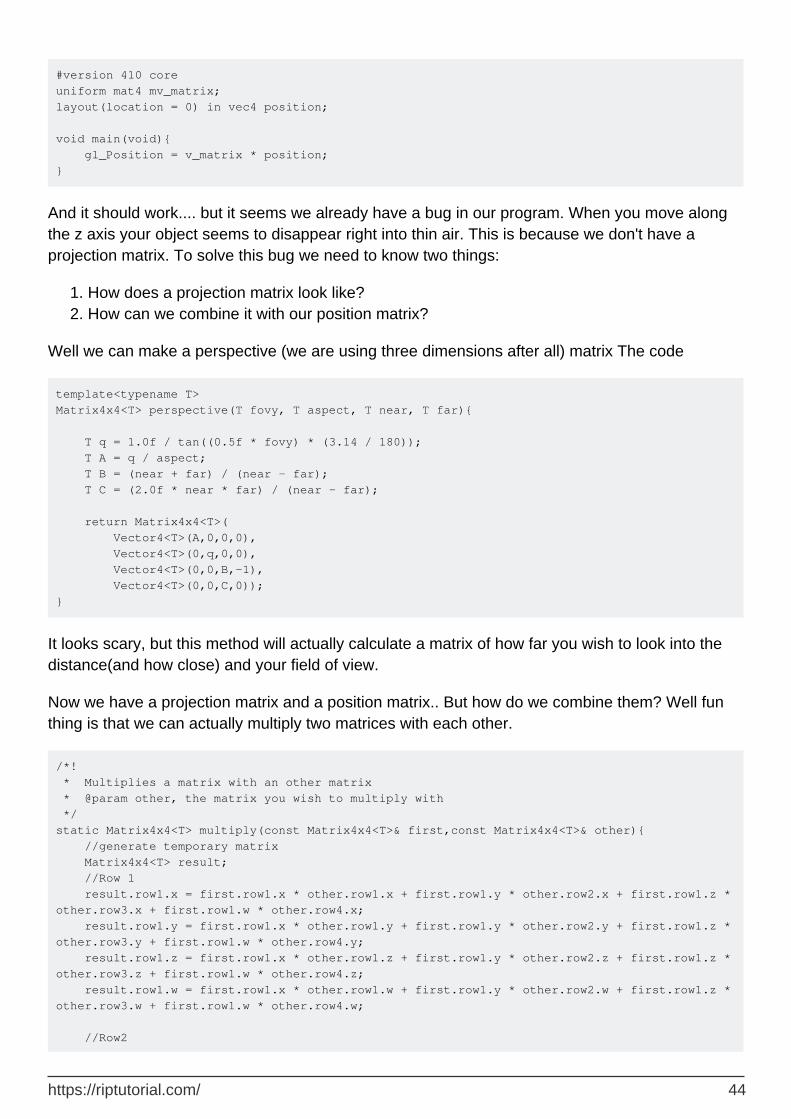
Well we can make a perspective (we are using three dimensions after all) matrix The code
template<typename T> Matrix4x4<T> perspective(T fovy, T aspect, T near, T far){ T q = 1.0f / tan((0.5f * fovy) * (3.14 / 180)); T A = q / aspect; T B = (near + far) / (near - far); T C = (2.0f * near * far) / (near - far); return Matrix4x4<T>( Vector4<T>(A,0,0,0), Vector4<T>(0,q,0,0), Vector4<T>(0,0,B,-1), Vector4<T>(0,0,C,0)); }
It looks scary, but this method will actually calculate a matrix of how far you wish to look into the distance(and how close) and your field of view.
Now we have a projection matrix and a position matrix.. But how do we combine them? Well fun thing is that we can actually multiply two matrices with each other.
/*! * Multiplies a matrix with an other matrix * @param other, the matrix you wish to multiply with */ static Matrix4x4<T> multiply(const Matrix4x4<T>& first,const Matrix4x4<T>& other){ //generate temporary matrix Matrix4x4<T> result; //Row 1 result.row1.x = first.row1.x * other.row1.x + first.row1.y * other.row2.x + first.row1.z * other.row3.x + first.row1.w * other.row4.x; result.row1.y = first.row1.x * other.row1.y + first.row1.y * other.row2.y + first.row1.z * other.row3.y + first.row1.w * other.row4.y; result.row1.z = first.row1.x * other.row1.z + first.row1.y * other.row2.z + first.row1.z * other.row3.z + first.row1.w * other.row4.z; result.row1.w = first.row1.x * other.row1.w + first.row1.y * other.row2.w + first.row1.z * other.row3.w + first.row1.w * other.row4.w; //Row2
https://riptutorial.com/ 44
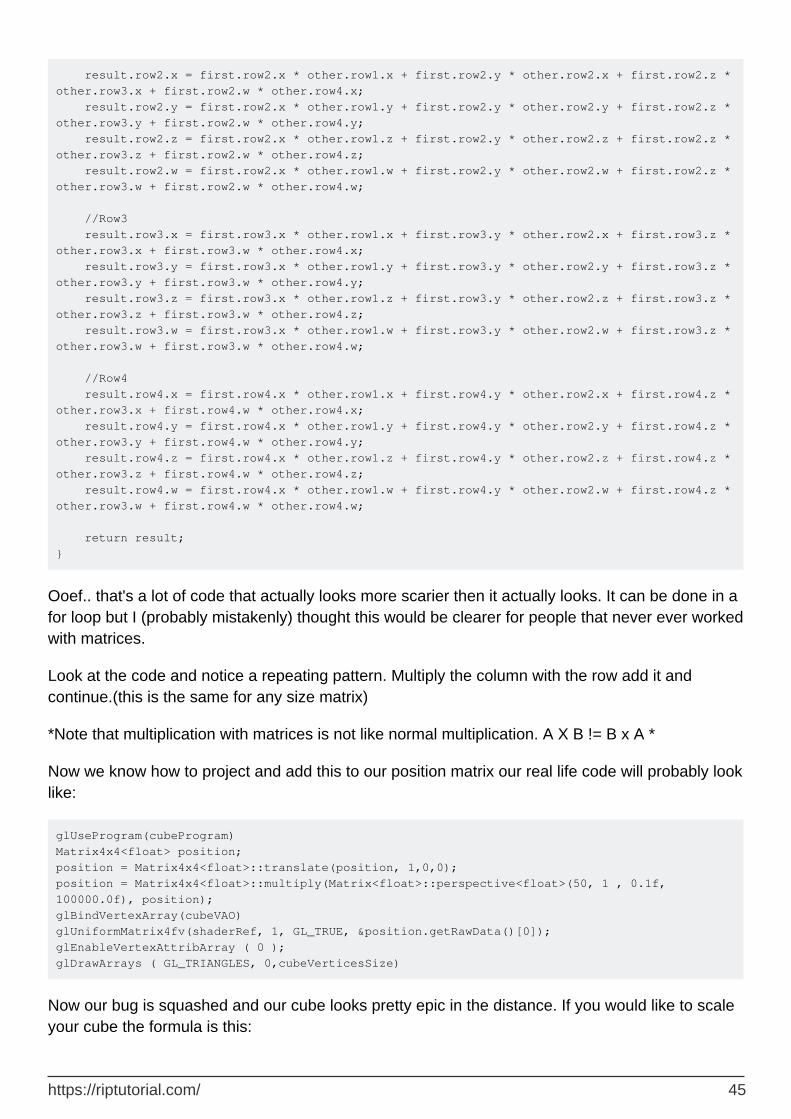
result.row2.x = first.row2.x * other.row1.x + first.row2.y * other.row2.x + first.row2.z * other.row3.x + first.row2.w * other.row4.x; result.row2.y = first.row2.x * other.row1.y + first.row2.y * other.row2.y + first.row2.z * other.row3.y + first.row2.w * other.row4.y; result.row2.z = first.row2.x * other.row1.z + first.row2.y * other.row2.z + first.row2.z * other.row3.z + first.row2.w * other.row4.z; result.row2.w = first.row2.x * other.row1.w + first.row2.y * other.row2.w + first.row2.z * other.row3.w + first.row2.w * other.row4.w; //Row3 result.row3.x = first.row3.x * other.row1.x + first.row3.y * other.row2.x + first.row3.z * other.row3.x + first.row3.w * other.row4.x; result.row3.y = first.row3.x * other.row1.y + first.row3.y * other.row2.y + first.row3.z * other.row3.y + first.row3.w * other.row4.y; result.row3.z = first.row3.x * other.row1.z + first.row3.y * other.row2.z + first.row3.z * other.row3.z + first.row3.w * other.row4.z; result.row3.w = first.row3.x * other.row1.w + first.row3.y * other.row2.w + first.row3.z * other.row3.w + first.row3.w * other.row4.w; //Row4 result.row4.x = first.row4.x * other.row1.x + first.row4.y * other.row2.x + first.row4.z * other.row3.x + first.row4.w * other.row4.x; result.row4.y = first.row4.x * other.row1.y + first.row4.y * other.row2.y + first.row4.z * other.row3.y + first.row4.w * other.row4.y; result.row4.z = first.row4.x * other.row1.z + first.row4.y * other.row2.z + first.row4.z * other.row3.z + first.row4.w * other.row4.z; result.row4.w = first.row4.x * other.row1.w + first.row4.y * other.row2.w + first.row4.z * other.row3.w + first.row4.w * other.row4.w; return result; }
Ooef.. that's a lot of code that actually looks more scarier then it actually looks. It can be done in a for loop but I (probably mistakenly) thought this would be clearer for people that never ever worked with matrices.
Look at the code and notice a repeating pattern. Multiply the column with the row add it and continue.(this is the same for any size matrix)
*Note that multiplication with matrices is not like normal multiplication. A X B != B x A *
Now we know how to project and add this to our position matrix our real life code will probably look like:
glUseProgram(cubeProgram) Matrix4x4<float> position; position = Matrix4x4<float>::translate(position, 1,0,0); position = Matrix4x4<float>::multiply(Matrix<float>::perspective<float>(50, 1 , 0.1f, 100000.0f), position); glBindVertexArray(cubeVAO) glUniformMatrix4fv(shaderRef, 1, GL_TRUE, &position.getRawData()[0]); glEnableVertexAttribArray ( 0 ); glDrawArrays ( GL_TRIANGLES, 0,cubeVerticesSize)
Now our bug is squashed and our cube looks pretty epic in the distance. If you would like to scale your cube the formula is this:
https://riptutorial.com/ 45

/*! * Scales the matrix with given vector * @param s The vector you wish to scale with */ static Matrix4x4<T> scale(const Matrix4x4<T>& mat, T x, T y, T z){ Matrix4x4<T> tmp(mat); tmp.row1.x *= x; tmp.row2.y *= y; tmp.row3.z *= z; return tmp; }
You only need to adjust the diagonal variables.
For rotation you need to take a closer look at Quaternions.
Read 3d Math online: https://riptutorial.com/opengl/topic/4063/3d-math
https://riptutorial.com/ 46
Chapter 3: Basic Lighting
Examples
Phong Lighting Model
NOTE: This example is WIP, it will be updated with diagrams, images, more examples, etc.
What is Phong?
Phong is a very basic, but real looking light model for surfaces that has three parts: ambient, diffuse, and specular lighting.
Ambient Lighting:
Ambient lighting is the simplest of the three parts to understand and calculate. Ambient lighting is light that floods the scene and lights up the object evenly in all directions.
The two variables in ambient lighting are the strength of the ambient and the color of the ambient. In your fragment shader, the following will work for ambient:
in vec3 objColor; out vec3 finalColor; uniform vec3 lightColor; void main() { float ambientStrength = 0.3f; vec3 ambient = lightColor * ambientStrength; finalColor = ambient * objColor; }
Diffuse Lighting:
Diffuse lighting is slightly more complex then ambient. Diffuse lighting is directional light, essentially meaning that faces facing towards the light source will be better illuminated and faces pointing away will be darker due to how the light is hitting them.
Note: diffuse lighting will require the use of normals for each face which I will not show how to calculate here. If you want to learn how to do this, check out the 3D math page.
To model the reflection of light in computer graphics is used a Bidirectional reflectance distribution function (BRDF). BRDF is a function that gives the relation between the light reflected along an outgoing direction and the light incident from an incoming direction.
A perfect diffuse surface has a BRDF that has the same value for all incident and outgoing directions. This substantially reduces the computations and thus it is commonly used to model
https://riptutorial.com/ 47
diffuse surfaces as it is physically plausible, even though there are no pure diffuse materials in the real world. This BRDF is called Lambertian reflection because it obeys Lambert's cosine law.
Lambertian reflection is often used as a model for diffuse reflection. This technique causes all closed polygons (such as a triangle within a 3D mesh) to reflect light equally in all directions when rendered The diffusion coefficient is calculated from the angle between the normal vector and the light vector.
f_Lambertian = max( 0.0, dot( N, L )
where N is the normal vector of the surface, and L is the vector towards to the light source.
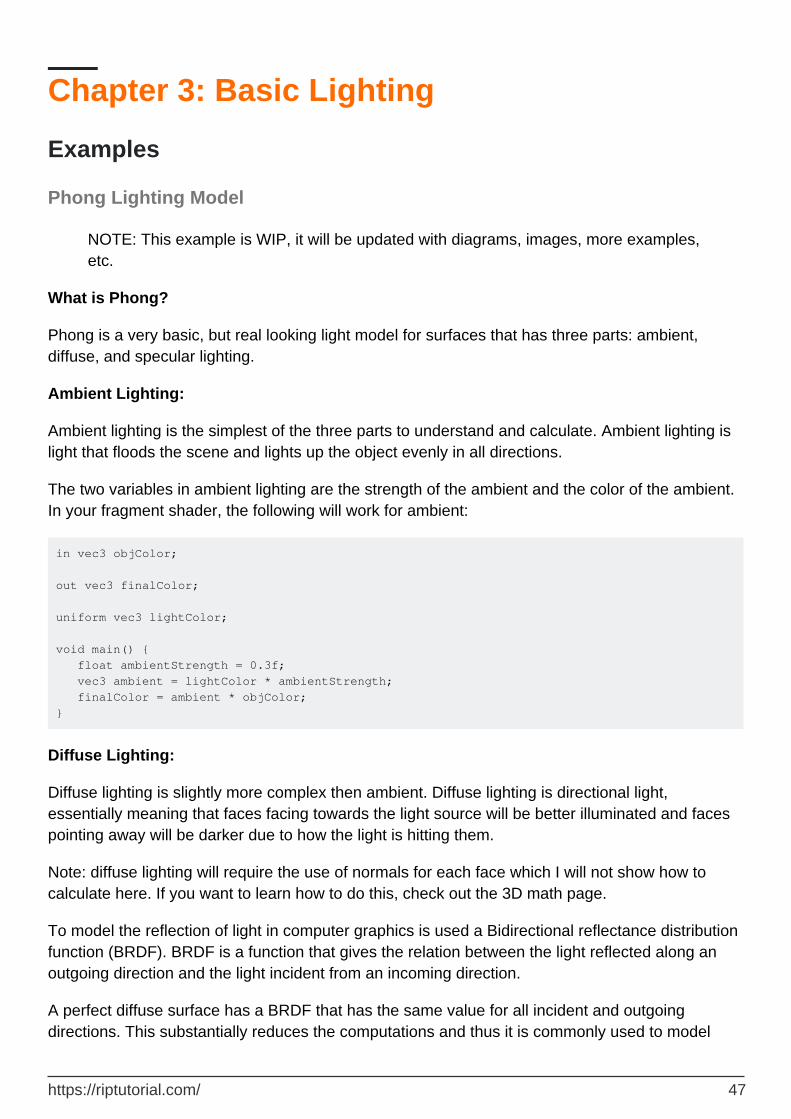
How it works
In general The dot product of 2 vectors is equal the cosine of the angle between the 2 vectors multiplied by the magnitude (lenght) of both vectors.
dot( A, B ) == length( A ) * length( B ) * cos( angle_A_B )
This follows, that the dot product of 2 unit vectors is equal the cosine of the angle between the 2 vectors, because the length of a unit vector is 1.
uA = normalize( A ) uB = normalize( B ) cos( angle_A_B ) == dot( uA, uB )
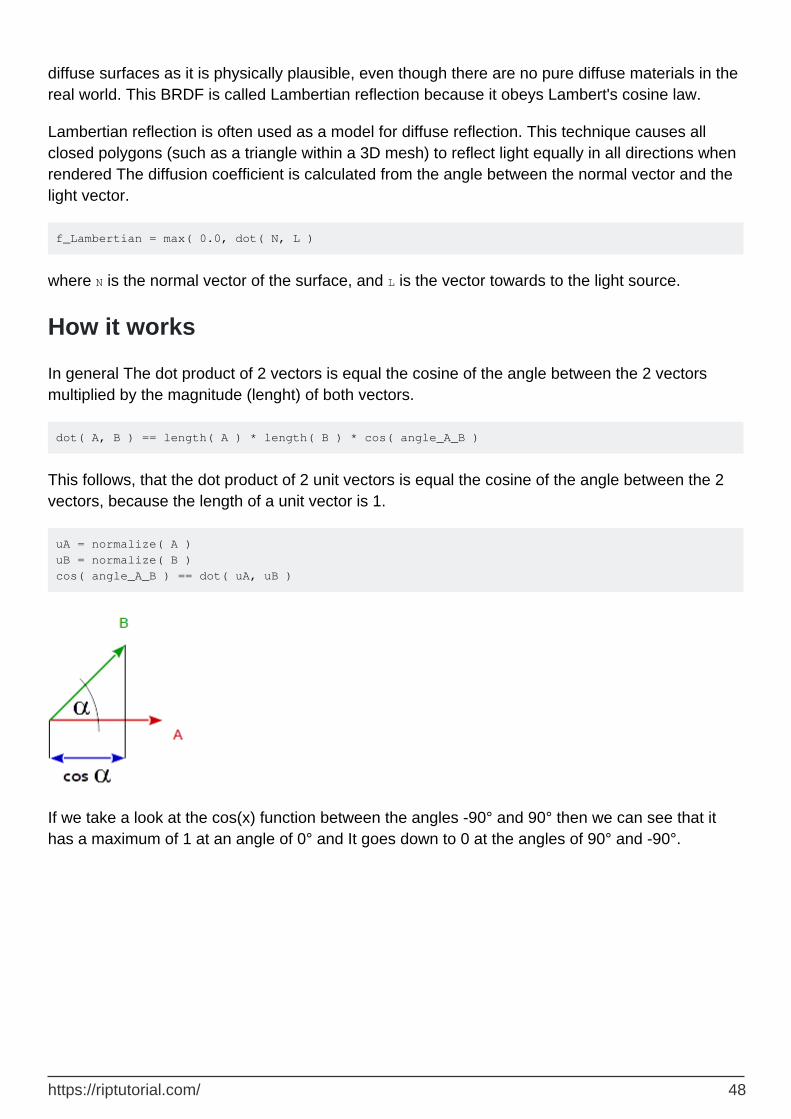
If we take a look at the cos(x) function between the angles -90° and 90° then we can see that it has a maximum of 1 at an angle of 0° and It goes down to 0 at the angles of 90° and -90°.
https://riptutorial.com/ 48
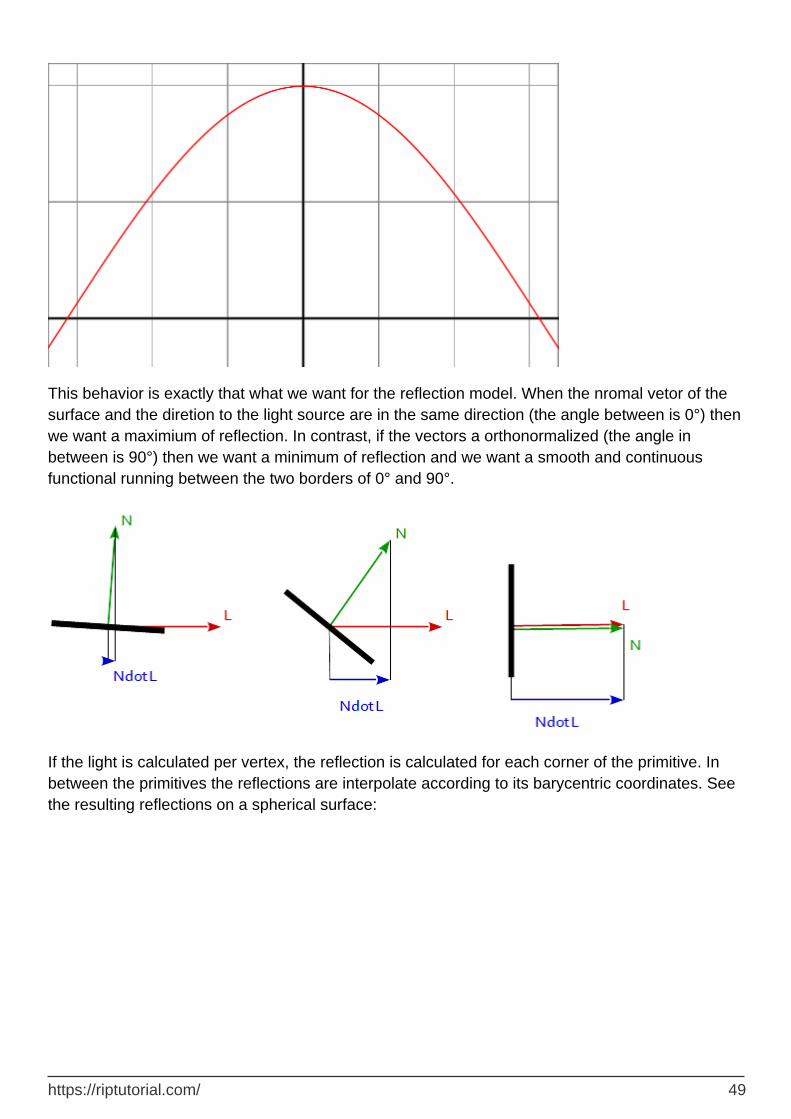
This behavior is exactly that what we want for the reflection model. When the nromal vetor of the surface and the diretion to the light source are in the same direction (the angle between is 0°) then we want a maximium of reflection. In contrast, if the vectors a orthonormalized (the angle in between is 90°) then we want a minimum of reflection and we want a smooth and continuous functional running between the two borders of 0° and 90°.
If the light is calculated per vertex, the reflection is calculated for each corner of the primitive. In between the primitives the reflections are interpolate according to its barycentric coordinates. See the resulting reflections on a spherical surface:
https://riptutorial.com/ 49
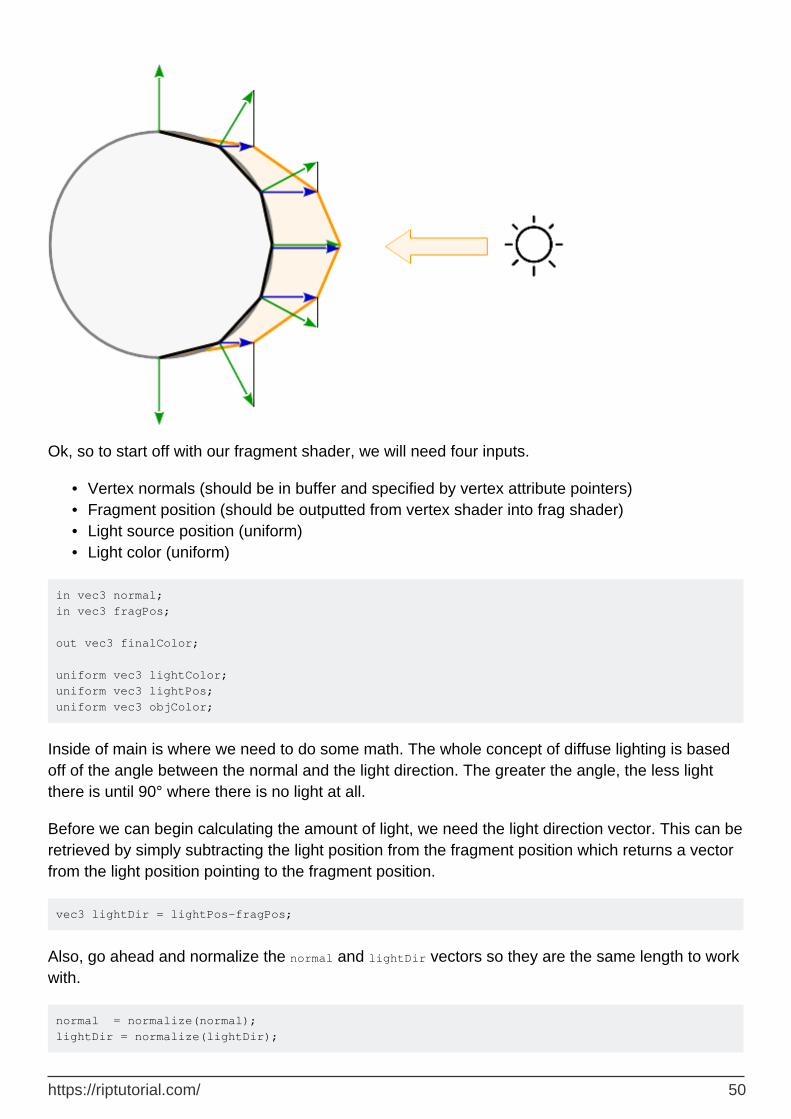
Ok, so to start off with our fragment shader, we will need four inputs.
Vertex normals (should be in buffer and specified by vertex attribute pointers)•Fragment position (should be outputted from vertex shader into frag shader)•Light source position (uniform)•Light color (uniform)•
in vec3 normal; in vec3 fragPos; out vec3 finalColor; uniform vec3 lightColor; uniform vec3 lightPos; uniform vec3 objColor;
Inside of main is where we need to do some math. The whole concept of diffuse lighting is based off of the angle between the normal and the light direction. The greater the angle, the less light there is until 90° where there is no light at all.
Before we can begin calculating the amount of light, we need the light direction vector. This can be retrieved by simply subtracting the light position from the fragment position which returns a vector from the light position pointing to the fragment position.
vec3 lightDir = lightPos-fragPos;
Also, go ahead and normalize the normal and lightDir vectors so they are the same length to work with.
normal = normalize(normal); lightDir = normalize(lightDir);
https://riptutorial.com/ 50

Now that we have our vectors, we can calculate the difference between them. To do this, we are going to use the dot product function. Basically, this takes 2 vectors and returns the cos() of the angle formed. This is perfect because at 90 degrees it will yield 0 and at 0 degrees it will yield 1. As a result, when the light is pointing directly at the object it will be fully lit and vice versa.
float diff = dot(normal, lightDir);
There is one more thing we have to do to the calculated number, we need to make sure it is always positive. If you think about it, a negative number doesn't make sense in context because that means the light is behind the face. We could use an if statement, or we can use the max() function which returns the maximum of two inputs.
diff = max(diff, 0.0);
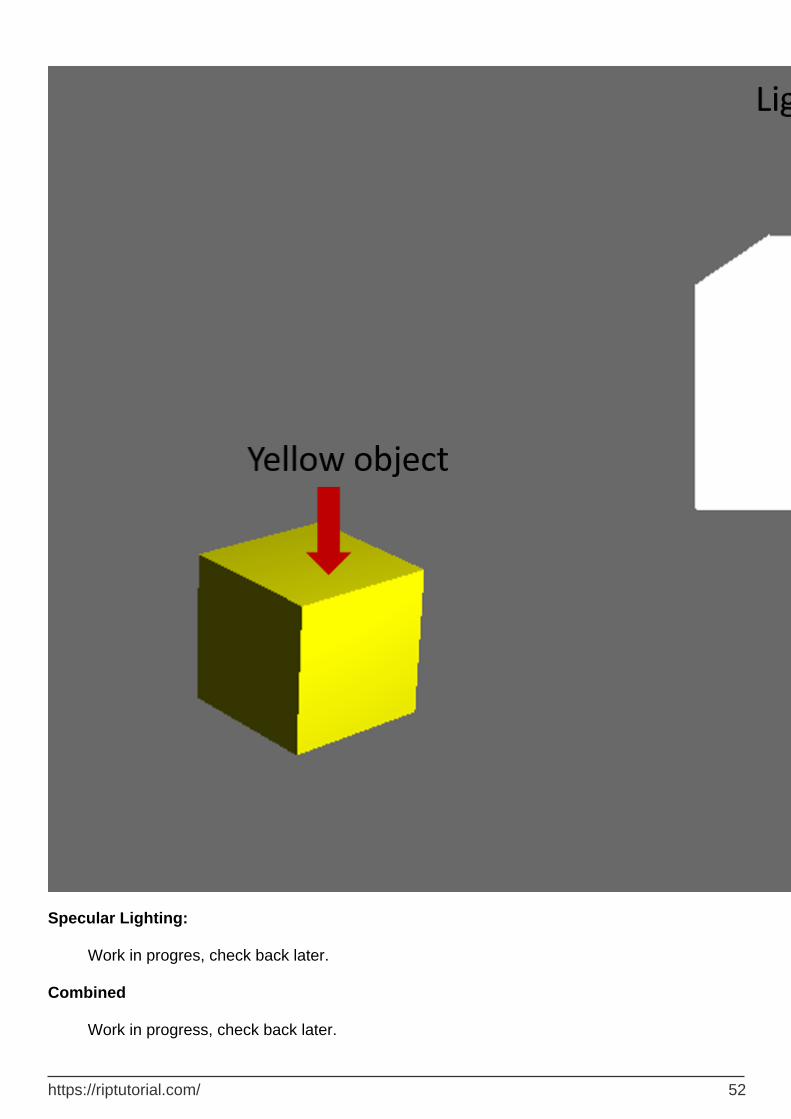
With that done, we are now ready to calculate the final output color for the fragment.
vec3 diffuse = diff * lightColor; finalColor = diffuse * objColor;
It should look like this:
https://riptutorial.com/ 51
Specular Lighting:
Work in progres, check back later.
Combined
Work in progress, check back later.
https://riptutorial.com/ 52

The below code and image show these three lighting concepts combined.
Read Basic Lighting online: https://riptutorial.com/opengl/topic/4209/basic-lighting
https://riptutorial.com/ 53
Chapter 4: Encapsulating OpenGL objects with C++ RAII
Introduction
Examples of various ways to have OpenGL objects work with C++ RAII.
Remarks
RAII encapsulation of OpenGL objects has dangers. The most unavoidable is that OpenGL objects are associated with the OpenGL context that created them. So the destruction of a C++ RAII object must be done in a OpenGL context which shares ownership of the OpenGL object managed by that C++ object.
This also means that if all contexts which own the object are destroyed, then any existing RAII encapsulated OpenGL objects will try to destroy objects which no longer exist.
You must take manual steps to deal with context issues like this.
Examples
In C++98/03
Encapsulating an OpenGL object in C++98/03 requires obeying the C++ rule of 3. This means adding a copy constructor, copy assignment operator, and destructor.
However, copy constructors should logically copy the object. And copying an OpenGL object is a non-trivial undertaking. Equally importantly, it's almost certainly something that the user does not wish to do.
So we will instead make the object non-copyable:
class BufferObject { public: BufferObject(GLenum target, GLsizeiptr size, const void *data, GLenum usage) { glGenBuffers(1, &object_); glBindBuffer(target, object_); glBufferData(target, size, data, usage); glBindBuffer(target, 0); } ~BufferObject() { glDeleteBuffers(1, &object_); }
https://riptutorial.com/ 54

//Accessors and manipulators void Bind(GLenum target) const {glBindBuffer(target, object_);} GLuint GetObject() const {return object_;} private: GLuint object_; //Prototypes, but no implementation. BufferObject(const BufferObject &); BufferObject &operator=(const BufferObject &); };
The constructor will create the object and initialize the buffer object's data. The destructor will destroy the object. By declaring the copy constructor/assignment without defining them, the linker will give an error if any code tries to call them. And by declaring them private, only members of BufferObject will even be able to call them.
Note that BufferObject does not retain the target passed to the constructor. That is because an OpenGL buffer object can be used with any target, not just the one it was initially created with. This is unlike texture objects, which must always be bound to the target they were initially created with.
Because OpenGL is very dependent on binding objects to the context for various purposes, it is often useful to have RAII-style scoped object binding as well. Because different objects have different binding needs (some have targets, others do not), we have to implement one for each object individually.
class BindBuffer { public: BindBuffer(GLenum target, const BufferObject &buff) : target_(target) { buff.Bind(target_); } ~BindBuffer() { glBindBuffer(target_, 0); } private: GLenum target_; //Also non-copyable. BindBuffer(const BindBuffer &); BindBuffer &operator=(const BindBuffer &); };
BindBuffer is non-copyable, since copying it makes no sense. Note that it does not retain access to the BufferObject it binds. That is because it is unnecessary.
In C++11 and later
https://riptutorial.com/ 55
C++11 offers tools that enhance the functionality of RAII-encapsulated OpenGL objects. Without C++11 features like move semantics, such objects would have to be dynamically allocated if you want to pass them around, since they cannot be copied. Move support allows them to be passed back and forth like normal values, though not by copying:
class BufferObject { public: BufferObject(GLenum target, GLsizeiptr size, const void *data, GLenum usage) { glGenBuffers(1, &object_); glBindBuffer(target, object_); glBufferData(target, size, data, usage); glBindBuffer(target, 0); } //Cannot be copied. BufferObject(const BufferObject &) = delete; BufferObject &operator=(const BufferObject &) = delete; //Can be moved BufferObject(BufferObject &&other) noexcept : object_(other.Release()) {} //Self-assignment is OK with this implementation. BufferObject &operator=(BufferObject &&other) noexcept { Reset(other.Release()); } //Destroys the old buffer and claims ownership of a new buffer object. //It's OK to call glDeleteBuffers on buffer object 0. GLuint Reset(GLuint object = 0) { glDeleteBuffers(1, &object_); object_ = object; } //Relinquishes ownership of the object without destroying it GLuint Release() { GLuint ret = object_; object_ = 0; return ret; } ~BufferObject() { Reset(); } //Accessors and manipulators void Bind(GLenum target) const {glBindBuffer(target, object_);} GLuint GetObject() const {return object_;} private: GLuint object_; };
https://riptutorial.com/ 56
Such a type can be returned by a function:
BufferObject CreateStaticBuffer(GLsizeiptr byteSize) {return BufferObject(GL_ARRAY_BUFFER, byteSize, nullptr, GL_STATIC_DRAW);}
Which allows you to store them in your own (implicitly move-only) types:
struct Mesh { public: private: //Default member initializer. BufferObject buff_ = CreateStaticBuffer(someSize); };
A scoped binder class can also have move semantics, thus allowing the binder to be returned from functions and stored in C++ standard library containers:
class BindBuffer { public: BindBuffer(GLenum target, const BufferObject &buff) : target_(target) { buff.Bind(target_); } //Non-copyable. BindBuffer(const BindBuffer &) = delete; BindBuffer &operator=(const BindBuffer &) = delete; //Move-constructible. BindBuffer(BindBuffer &&other) noexcept : target_(other.target_) { other.target_ = 0; } //Not move-assignable. BindBuffer &operator=(BindBuffer &&) = delete; ~BindBuffer() { //Only unbind if not moved from. if(target_) glBindBuffer(target_, 0); } private: GLenum target_; };
Note that the object is move constructible but not move-assignable. The idea with this is to prevent rebinding of a scoped buffer binding. Once it is set, the only thing that can unset it is being moved from.
Read Encapsulating OpenGL objects with C++ RAII online: https://riptutorial.com/opengl/topic/7556/encapsulating-opengl-objects-with-cplusplus-raii
https://riptutorial.com/ 57
Chapter 5: Framebuffers
Examples
Basics of framebuffers
Framebuffer is a type of buffer which stores color values, depth and stencil information of pixels in memory. When you draw something in OpenGL the output is stored in the default framebuffer and then you actually see the color values of this buffer on screen. You can also make your own framebuffer which can be used for a lot of cool post-processing effects such as gray-scale, blur, depth of field, distortions, reflections...
To start of you need to create a framebuffer object (FBO) and bind it like any other object in OpenGL:
unsigned int FBO; glGenFramebuffers(1, &FBO); glBindFramebuffer(GL_FRAMEBUFFER, FBO);
Now you have to add at least one attachment (color, depth or stencil) to the framebuffer. An attachment is a memory location that acts as a buffer for the framebuffer. It can either be a texture, or a renderbuffer object. The advantage of using a texture is that you can easily use this texture in a post-processing shaders. Creating the texture is similar as a normal texture:
unsigned int texture; glGenTextures(1, &texture); glBindTexture(GL_TEXTURE_2D, texture); glTexImage2D(GL_TEXTURE_2D, 0, GL_RGB, width, height, 0, GL_RGB, GL_UNSIGNED_BYTE, NULL); glTexParameteri(GL_TEXTURE_2D, GL_TEXTURE_MIN_FILTER, GL_LINEAR); glTexParameteri(GL_TEXTURE_2D, GL_TEXTURE_MAG_FILTER, GL_LINEAR); glTexParameteri(GL_TEXTURE_2D, GL_TEXTURE_WRAP_S, GL_CLAMP_TO_EDGE); glTexParameteri(GL_TEXTURE_2D, GL_TEXTURE_WRAP_T, GL_CLAMP_TO_EDGE);
The width and height should be the same as your rendering window size. The texture data pointer is NULL because you only want to allocate the memory and not fill the texture with any data. The texture is ready so you can actually attach it to the framebuffer:
glFramebufferTexture2D(GL_FRAMEBUFFER, GL_COLOR_ATTACHMENT0, GL_TEXTURE_2D, texture, 0);
Your framebuffer should be ready to use now but you may want to also add depth attachment or both depth and stencil attachments. If you want to add those as texture attachments (and use them for some processing) you can create another textures like above. The only difference would be in these lines:
glTexImage2D( GL_TEXTURE_2D, 0, GL_DEPTH_COMPONENT, width, height, 0,
https://riptutorial.com/ 58
GL_DEPTH_COMPONENT, GL_FLOAT, NULL ); glFramebufferTexture2D(GL_FRAMEBUFFER, GL_DEPTH_ATTACHMENT, GL_TEXTURE_2D, texture, 0);
Or these if you want to use depth and stencil attachment in a single texture:
glTexImage2D( GL_TEXTURE_2D, 0, GL_DEPTH24_STENCIL8, width, height, 0, GL_DEPTH_STENCIL, GL_UNSIGNED_INT_24_8, NULL ); glFramebufferTexture2D(GL_FRAMEBUFFER, GL_DEPTH_STENCIL_ATTACHMENT, GL_TEXTURE_2D, texture, 0);
You can also use a renderbuffer instead of a texture as an attachment for depth and stencil buffers if don't want to process the values later. (It will be explained in another example...)
You can check if the framebuffer is successfully created and completed without any errors:
if(glCheckFramebufferStatus(GL_FRAMEBUFFER) == GL_FRAMEBUFFER_COMPLETE) // do something...
And finally don't forget to unbind the framebuffer so that you don't accidentally render to it:
glBindFramebuffer(GL_FRAMEBUFFER, 0);
Limits
The maximum number of color buffers which can be attached to a single frame buffer can be determined by the OGL function glGetIntegerv, by using the parameter GL_MAX_COLOR_ATTACHMENTS:
GLint maxColAttchments = 0; glGetIntegerv( GL_MAX_COLOR_ATTACHMENTS, &maxColAttchments );
Using the framebuffer
The usage is quite straightforward. Firstly you bind your framebuffer and render your scene into it. But you won't actually see anything yet because your renderbuffer is not visible. So the second part is to render your framebuffer as a texture of a fullscreen quad onto the screen. You can just render it as it is or do some post-processing effects.
Here are the vertices for a fullscreen quad:
float vertices[] = { // positions texture coordinates -1.0f, 1.0f, 0.0f, 1.0f, -1.0f, -1.0f, 0.0f, 0.0f, 1.0f, -1.0f, 1.0f, 0.0f,
https://riptutorial.com/ 59
-1.0f, 1.0f, 0.0f, 1.0f, 1.0f, -1.0f, 1.0f, 0.0f, 1.0f, 1.0f, 1.0f, 1.0f };
You will need to store them in a VBO or render using attribute pointers. You will also need some basic shader program for rendering the fullscreen quad with texture.
Vertex shader:
in vec2 position; in vec2 texCoords; out vec2 TexCoords; void main() { gl_Position = vec4(position.x, position.y, 0.0, 1.0); TexCoords = texCoords; }
Fragment shader:
in vec2 TexCoords; out vec4 color; uniform sampler2D screenTexture; void main() { color = texture(screenTexture, TexCoords); }
Note: You may need to adjust the shaders for your version of GLSL.
Now you can do the actual rendering. As described above, the first thing is to render the scene into your FBO. To do that you simply bind your FBO, clear it and draw the scene:
glBindFramebuffer(GL_FRAMEBUFFER, FBO); glClearColor(0.0f, 0.0f, 0.0f, 1.0f); glClear(GL_COLOR_BUFFER_BIT | GL_DEPTH_BUFFER_BIT); // draw your scene here...
Note: In glClear function you should specify all framebuffer attachments you are using (In this example color and depth attachment).
Now you can render your FBO as a fullscreen quad on the default framebuffer so that you can see it. To do this you simply unbind your FBO and render the quad:
glBindFramebuffer(GL_FRAMEBUFFER, 0); // unbind your FBO to set the default framebuffer glClearColor(0.0f, 0.0f, 0.0f, 1.0f); glClear(GL_COLOR_BUFFER_BIT | GL_DEPTH_BUFFER_BIT);
https://riptutorial.com/ 60

shader.Use(); // shader program for rendering the quad glBindTexture(GL_TEXTURE_2D, texture); // color attachment texture glBindBuffer(GL_ARRAY_BUFFER, VBO); // VBO of the quad // You can also use VAO or attribute pointers instead of only VBO... glDrawArrays(GL_TRIANGLES, 0, 6); glBindBuffer(GL_ARRAY_BUFFER, 0);
And that's all! If you have done everything correctly you should see the same scene as before but rendered on a fullscreen quad. The visual output is the same as before but now you can easily add post-processing effects just by editing the fragment shader. (I will add effects in another example(s) and link it here)
Read Framebuffers online: https://riptutorial.com/opengl/topic/7038/framebuffers
https://riptutorial.com/ 61

Chapter 6: Instancing
Introduction
Instancing is a rendering technique that allows us to draw multiple copies of the same object in one draw call. It is usually used to render particles, foliage or large amounts of any other types of objects.
Examples
Instancing by Vertex Attribute Arrays
3.3
Instancing can be done via modifications to how vertex attributes are provided to the vertex shader. This introduces a new way of accessing attribute arrays, allowing them to provide per-instance data that looks like a regular attribute.
A single instance represents one object or group of vertices (one grass leaf etc). Attributes associated with instanced arrays only advance between instances; unlike regular vertex attributes, they do not get a new value per-vertex.
To specify that an attribute array is instanced, use this call:
glVertexAttribDivisor(attributeIndex, 1);
This sets vertex array object state. The "1" means that the attribute is advanced for each instance. Passing a 0 turns off instancing for the attribute.
In the shader, the instanced attribute looks like any other vertex attribute:
in vec3 your_instanced_attribute;
To render multiple instances, you can invoke one of the Instanced forms of the value glDraw* calls. For example, this will draw 1000 instances, with each instance consisting of 3 vertices:
glDrawArraysInstanced(GL_TRIANGLES, 0, 3, 1000);
Instanced Array Code
Setting up VAOs, VBOs and the attributes:
// List of 10 triangle x-offsets (translations) GLfloat translations[10]; GLint index = 0;
https://riptutorial.com/ 62
for (GLint x = 0; x < 10; x++) { translations[index++] = (GLfloat)x / 10.0f; } // vertices GLfloat vertices[] = { 0.0f, 0.05f, 0.05f, -0.05f, -0.05f, -0.05f, 0.0f, -0.1f, }; // Setting VAOs and VBOs GLuint meshVAO, vertexVBO, instanceVBO; glGenVertexArrays(1, &meshVAO); glGenBuffers(1, &instanceVBO); glGenBuffers(1, &vertexVBO); glBindVertexArray(meshVAO); glBindBuffer(GL_ARRAY_BUFFER, vertexVBO); glBufferData(GL_ARRAY_BUFFER, sizeof(vertices), vertices, GL_STATIC_DRAW); glEnableVertexAttribArray(0); glVertexAttribPointer(0, 2, GL_FLOAT, GL_FALSE, 2 * sizeof(GLfloat), (GLvoid*)0); glBindBuffer(GL_ARRAY_BUFFER, instanceVBO); glBufferData(GL_ARRAY_BUFFER, sizeof(translations), translations, GL_STATIC_DRAW); glEnableVertexAttribArray(1); glVertexAttribPointer(1, 1, GL_FLOAT, GL_FALSE, sizeof(GLfloat), (GLvoid*)0); glVertexAttribDivisor(1, 1); // This sets the vertex attribute to instanced attribute. glBindBuffer(GL_ARRAY_BUFFER, 0); glBindVertexArray(0);
Draw call:
glBindVertexArray(meshVAO); glDrawArraysInstanced(GL_TRIANGLE_STRIP, 0, 4, 10); // 10 diamonds, 4 vertices per instance glBindVertexArray(0);
Vertex shader:
#version 330 core layout(location = 0) in vec2 position; layout(location = 1) in float offset; void main() { gl_Position = vec4(position.x + offset, position.y, 0.0, 1.0); }
Fragment shader:
#version 330 core layout(location = 0) out vec4 color;
https://riptutorial.com/ 63

void main() { color = vec4(1.0, 1.0, 1.0, 1.0f); }
Read Instancing online: https://riptutorial.com/opengl/topic/8647/instancing
https://riptutorial.com/ 64
Chapter 7: OGL view and projection
Introduction
About model matrix, view matrix, orthographic- and perspective projection
Examples
Implement a camera in OGL 4.0 GLSL 400
If we want to look at a scene as if we had photographed it with a camera, we must first define some things:
The position from which the scene is viewed, the eye position pos.•The point we look at in the scene (target). It is also common to define the direction in which we look. Technically we need a line of sight. One straight in space is mathematically defined either by 2 points or by a point and a vector. The first part of the definition is the eye position and the 2nd is either the target or the line of sight vector los.
•
The direction upwards up.•The field of view 'fov_y. This means the angle between the two straight lines, starting at the eye position and ending at the leftmost point and the rightmost point, which can be seen simultaneously.
•
The large and the aspect ratio of the viewport to which we project our image vp.•The near plane near and the far plane far. The near plane is distance from the eye position to the plane from where the objects become visible to us. The far plane is the distance from the eye position to the plane to which the objects of the scene are visible to us. An explanation of what the near plane and far plane are needed will follow later..
•
A definition of this data in C++ and in Python may look like this:
C++
using TVec3 = std::array<float,3>; struct Camera { TVec3 pos {0.0, -8.0, 0.0}; TVec3 target {0.0, 0.0, 0.0}; TVec3 up {0.0, 0.0, 1.0}; float fov_y {90.0}; TSize vp {800, 600}; float near {0.5}; float far {100.0}; };
Python
class Camera:
https://riptutorial.com/ 65
def __init__(self): self.pos = (0, -8, 0) self.target = (0, 0, 0) self.up = (0, 0, 1) self.fov_y = 90 self.vp = (800, 600) self.near = 0.5 self.far = 100.0
In order to take all this information into consideration when drawing a scene, a projection matrix and a view matrix are usually used. In order to arrange the individual parts of a scene in the scene, model matrices are used. However, these are mentioned here only for the sake of completeness and will not be dealt with here.
Projection matrix: The projection matrix describes the mapping from 3D points in the world as they are seen from of a pinhole camera, to 2D points of the viewport.
•
View matrix: The view matrix defines the eye position and the viewing direction on the scene.•
Model matrix: The model matrix defines the location and the relative size of an object in the scene.
•
After we have filled the data structures above with the corresponding data, we have to translate them into the appropriate matrices. In the OGL compatibility mode, this can be done with the gluLookAt and gluPerspective functions that set the built in uniforms gl_ModelViewMatrix, gl_NormalMatrix, and gl_ModelViewProjectionMatrix. In OGL 3.1 and GLSL #version 150 the built in uniforms were removed, because the entire fixed-function matrix stack became deprecated. If we want to use OGL high level shader with GLSL version 330 or even higher we have to define and set the matrix uniforms our self (Apart from the use of GLSL compatibility keyword).
Set up the perspective - Projection matrix
A point on the viewport is visible when it is in the native AABB (axis aligned bounding box) defined by the points (-1.0, -1.0, -1.0) and (1.0, 1.0, 1.0). This is called the Normalized Device Coordinates (NDC). A point with the coordinates (-1.0, -1.0, z) will be painted to the lower left corner of the viewport and a point with the coordinates (1.0, 1.0, z) will be painted to the upper right corner of the viewport. The Z-coordinate is mapped from the interval (-1.0, 1.0) to the interval (0.0, 1.0) and written into the Z-buffer.
All we can see from the scene is within a 4-sided pyramid. The top of the pyramid is the eye position. The 4 sides of the pyramid are defined by the filed of view (fov_y) and the aspect ratio (vp[0]/vp[1]). The projection matrix has to map the points from inside the pyramid to the NDC defined by the points (-1.0, -1.0, -1.0) and (1.0, 1.0, 1.0). At this point our pyramid is infinite, it has no end in depth and we can not map an infinite space to a finite one. For this we now need the near plane and the far plane, they transform the pyramid into a frustum by cutting the top and limiting the pyramid in the depth. The near plane and the far plane have to be chosen in such a way that they include everything that should be visible from the scene.
https://riptutorial.com/ 66

The mapping from the points within a frustum to the NDC is pure mathematics and can be generally solved. The development of the formulas were often discussed and repeatedly published throughout the web. Since you can not insert a LaTeX formula into a Stack Overflow documentation this is dispensed with here and only the completed C++ and Python source code is added. Note that the eye coordinates are defined in the right-handed coordinate system, but NDC uses the left-handed coordinate system. The projection matrix is calculated from, the field of view fov_y, the aspect ratio vp[0]/vp[1], the near plane nearand the far plane far.
C++
using TVec4 = std::array< float, 4 >; using TMat44 = std::array< TVec4, 4 >; TMat44 Camera::Perspective( void ) { float fn = far + near; float f_n = far - near; float r = (float)vp[0] / vp[1]; float t = 1.0f / tan( ToRad( fov_y ) / 2.0f ); return TMat44{ TVec4{ t / r, 0.0f, 0.0f, 0.0f }, TVec4{ 0.0f, t, 0.0f, 0.0f }, TVec4{ 0.0f, 0.0f, -fn / f_n, -1.0 }, TVec4{ 0.0f, 0.0f, -2.0f * far * near / f_n, 0.0f } }; }
Python
def Perspective(self): fn, = self.far + self.near f_n = self.far - self.near r = self.vp[0] / self.vp[1] t = 1 / math.tan( math.radians( self.fov_y ) / 2 ) return numpy.matrix( [ [ t/r, 0, 0, 0 ], [ 0, t, 0, 0 ],
https://riptutorial.com/ 67
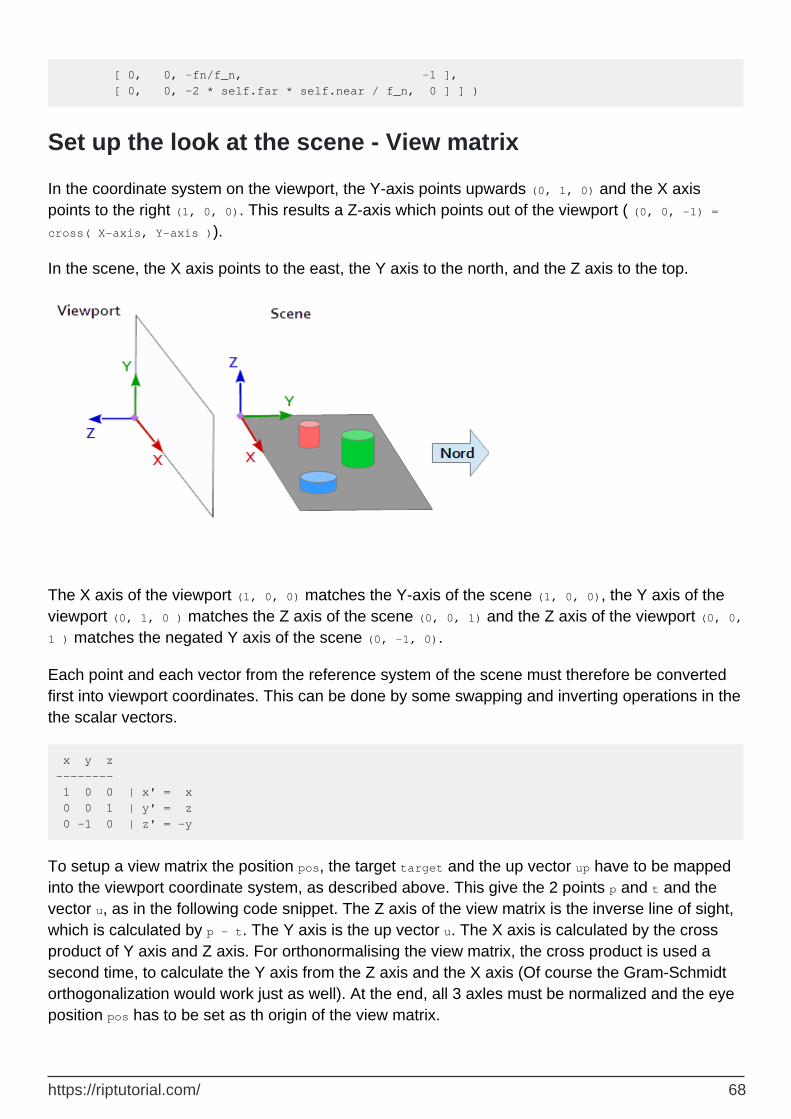
[ 0, 0, -fn/f_n, -1 ], [ 0, 0, -2 * self.far * self.near / f_n, 0 ] ] )
Set up the look at the scene - View matrix
In the coordinate system on the viewport, the Y-axis points upwards (0, 1, 0) and the X axis points to the right (1, 0, 0). This results a Z-axis which points out of the viewport ( (0, 0, -1) = cross( X-axis, Y-axis )).
In the scene, the X axis points to the east, the Y axis to the north, and the Z axis to the top.
The X axis of the viewport (1, 0, 0) matches the Y-axis of the scene (1, 0, 0), the Y axis of the viewport (0, 1, 0 ) matches the Z axis of the scene (0, 0, 1) and the Z axis of the viewport (0, 0, 1 ) matches the negated Y axis of the scene (0, -1, 0).
Each point and each vector from the reference system of the scene must therefore be converted first into viewport coordinates. This can be done by some swapping and inverting operations in the the scalar vectors.
x y z -------- 1 0 0 | x' = x 0 0 1 | y' = z 0 -1 0 | z' = -y
To setup a view matrix the position pos, the target target and the up vector up have to be mapped into the viewport coordinate system, as described above. This give the 2 points p and t and the vector u, as in the following code snippet. The Z axis of the view matrix is the inverse line of sight, which is calculated by p - t. The Y axis is the up vector u. The X axis is calculated by the cross product of Y axis and Z axis. For orthonormalising the view matrix, the cross product is used a second time, to calculate the Y axis from the Z axis and the X axis (Of course the Gram-Schmidt orthogonalization would work just as well). At the end, all 3 axles must be normalized and the eye position pos has to be set as th origin of the view matrix.
https://riptutorial.com/ 68
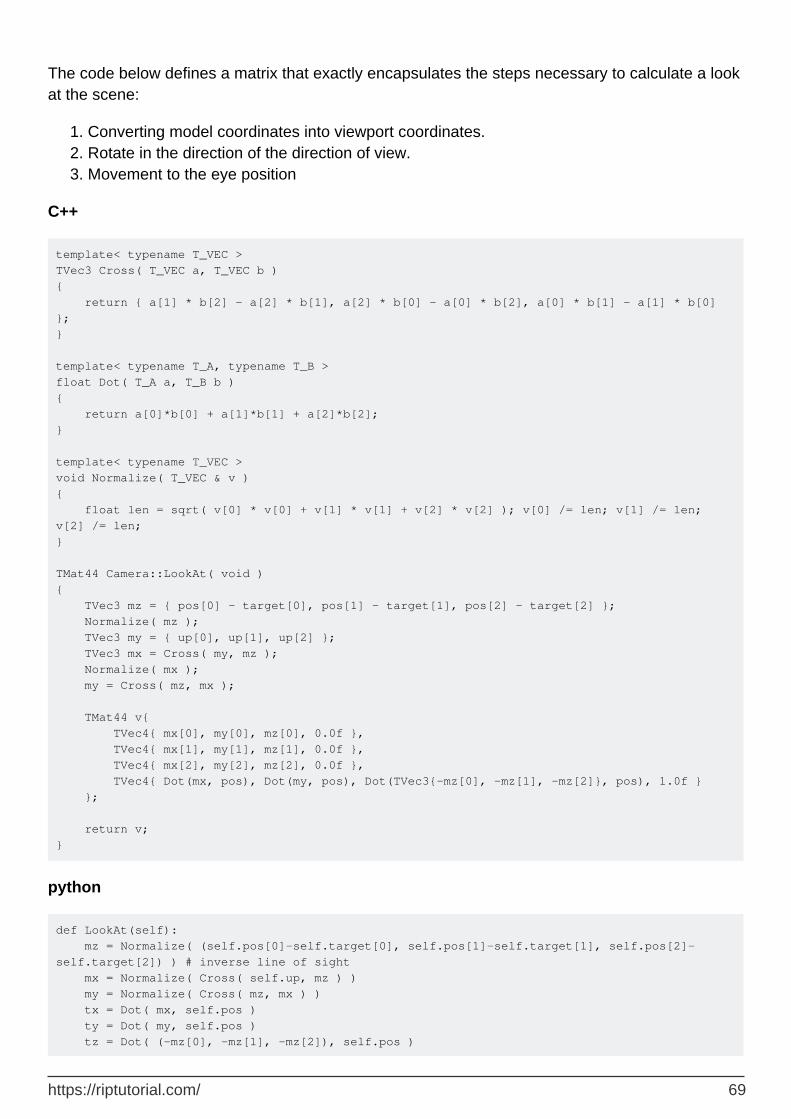
The code below defines a matrix that exactly encapsulates the steps necessary to calculate a look at the scene:
Converting model coordinates into viewport coordinates.1. Rotate in the direction of the direction of view.2. Movement to the eye position3.
C++
template< typename T_VEC > TVec3 Cross( T_VEC a, T_VEC b ) { return { a[1] * b[2] - a[2] * b[1], a[2] * b[0] - a[0] * b[2], a[0] * b[1] - a[1] * b[0] }; } template< typename T_A, typename T_B > float Dot( T_A a, T_B b ) { return a[0]*b[0] + a[1]*b[1] + a[2]*b[2]; } template< typename T_VEC > void Normalize( T_VEC & v ) { float len = sqrt( v[0] * v[0] + v[1] * v[1] + v[2] * v[2] ); v[0] /= len; v[1] /= len; v[2] /= len; } TMat44 Camera::LookAt( void ) { TVec3 mz = { pos[0] - target[0], pos[1] - target[1], pos[2] - target[2] }; Normalize( mz ); TVec3 my = { up[0], up[1], up[2] }; TVec3 mx = Cross( my, mz ); Normalize( mx ); my = Cross( mz, mx ); TMat44 v{ TVec4{ mx[0], my[0], mz[0], 0.0f }, TVec4{ mx[1], my[1], mz[1], 0.0f }, TVec4{ mx[2], my[2], mz[2], 0.0f }, TVec4{ Dot(mx, pos), Dot(my, pos), Dot(TVec3{-mz[0], -mz[1], -mz[2]}, pos), 1.0f } }; return v; }
python
def LookAt(self): mz = Normalize( (self.pos[0]-self.target[0], self.pos[1]-self.target[1], self.pos[2]-self.target[2]) ) # inverse line of sight mx = Normalize( Cross( self.up, mz ) ) my = Normalize( Cross( mz, mx ) ) tx = Dot( mx, self.pos ) ty = Dot( my, self.pos ) tz = Dot( (-mz[0], -mz[1], -mz[2]), self.pos )
https://riptutorial.com/ 69
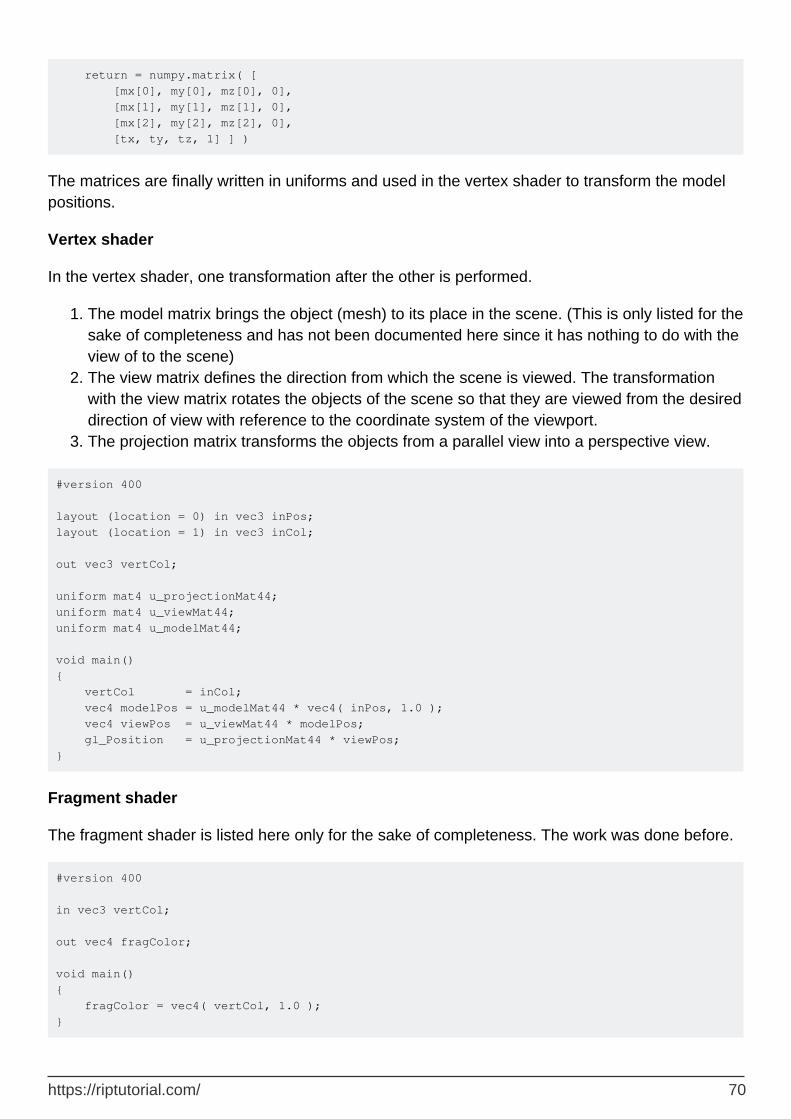
return = numpy.matrix( [ [mx[0], my[0], mz[0], 0], [mx[1], my[1], mz[1], 0], [mx[2], my[2], mz[2], 0], [tx, ty, tz, 1] ] )
The matrices are finally written in uniforms and used in the vertex shader to transform the model positions.
Vertex shader
In the vertex shader, one transformation after the other is performed.
The model matrix brings the object (mesh) to its place in the scene. (This is only listed for the sake of completeness and has not been documented here since it has nothing to do with the view of to the scene)
1.
The view matrix defines the direction from which the scene is viewed. The transformation with the view matrix rotates the objects of the scene so that they are viewed from the desired direction of view with reference to the coordinate system of the viewport.
2.
The projection matrix transforms the objects from a parallel view into a perspective view.3.
#version 400 layout (location = 0) in vec3 inPos; layout (location = 1) in vec3 inCol; out vec3 vertCol; uniform mat4 u_projectionMat44; uniform mat4 u_viewMat44; uniform mat4 u_modelMat44; void main() { vertCol = inCol; vec4 modelPos = u_modelMat44 * vec4( inPos, 1.0 ); vec4 viewPos = u_viewMat44 * modelPos; gl_Position = u_projectionMat44 * viewPos; }
Fragment shader
The fragment shader is listed here only for the sake of completeness. The work was done before.
#version 400 in vec3 vertCol; out vec4 fragColor; void main() { fragColor = vec4( vertCol, 1.0 ); }
https://riptutorial.com/ 70
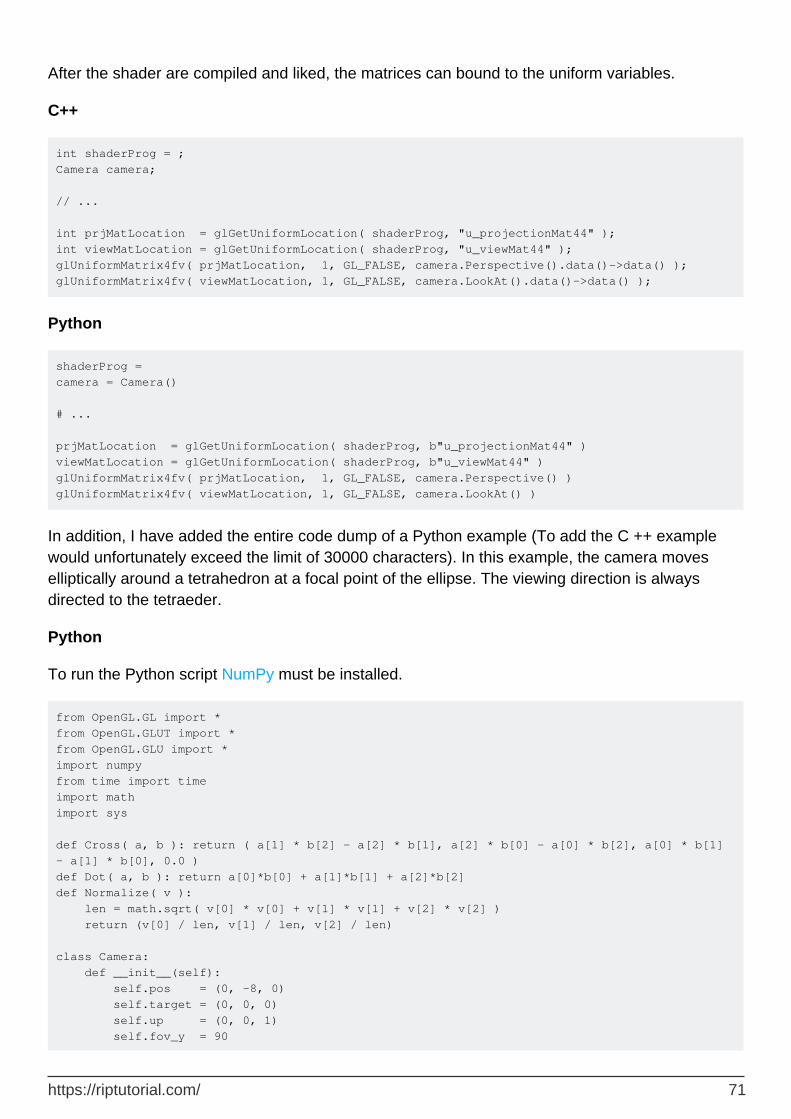
After the shader are compiled and liked, the matrices can bound to the uniform variables.
C++
int shaderProg = ; Camera camera; // ... int prjMatLocation = glGetUniformLocation( shaderProg, "u_projectionMat44" ); int viewMatLocation = glGetUniformLocation( shaderProg, "u_viewMat44" ); glUniformMatrix4fv( prjMatLocation, 1, GL_FALSE, camera.Perspective().data()->data() ); glUniformMatrix4fv( viewMatLocation, 1, GL_FALSE, camera.LookAt().data()->data() );
Python
shaderProg = camera = Camera() # ... prjMatLocation = glGetUniformLocation( shaderProg, b"u_projectionMat44" ) viewMatLocation = glGetUniformLocation( shaderProg, b"u_viewMat44" ) glUniformMatrix4fv( prjMatLocation, 1, GL_FALSE, camera.Perspective() ) glUniformMatrix4fv( viewMatLocation, 1, GL_FALSE, camera.LookAt() )
In addition, I have added the entire code dump of a Python example (To add the C ++ example would unfortunately exceed the limit of 30000 characters). In this example, the camera moves elliptically around a tetrahedron at a focal point of the ellipse. The viewing direction is always directed to the tetraeder.
Python
To run the Python script NumPy must be installed.
from OpenGL.GL import * from OpenGL.GLUT import * from OpenGL.GLU import * import numpy from time import time import math import sys def Cross( a, b ): return ( a[1] * b[2] - a[2] * b[1], a[2] * b[0] - a[0] * b[2], a[0] * b[1] - a[1] * b[0], 0.0 ) def Dot( a, b ): return a[0]*b[0] + a[1]*b[1] + a[2]*b[2] def Normalize( v ): len = math.sqrt( v[0] * v[0] + v[1] * v[1] + v[2] * v[2] ) return (v[0] / len, v[1] / len, v[2] / len) class Camera: def __init__(self): self.pos = (0, -8, 0) self.target = (0, 0, 0) self.up = (0, 0, 1) self.fov_y = 90
https://riptutorial.com/ 71
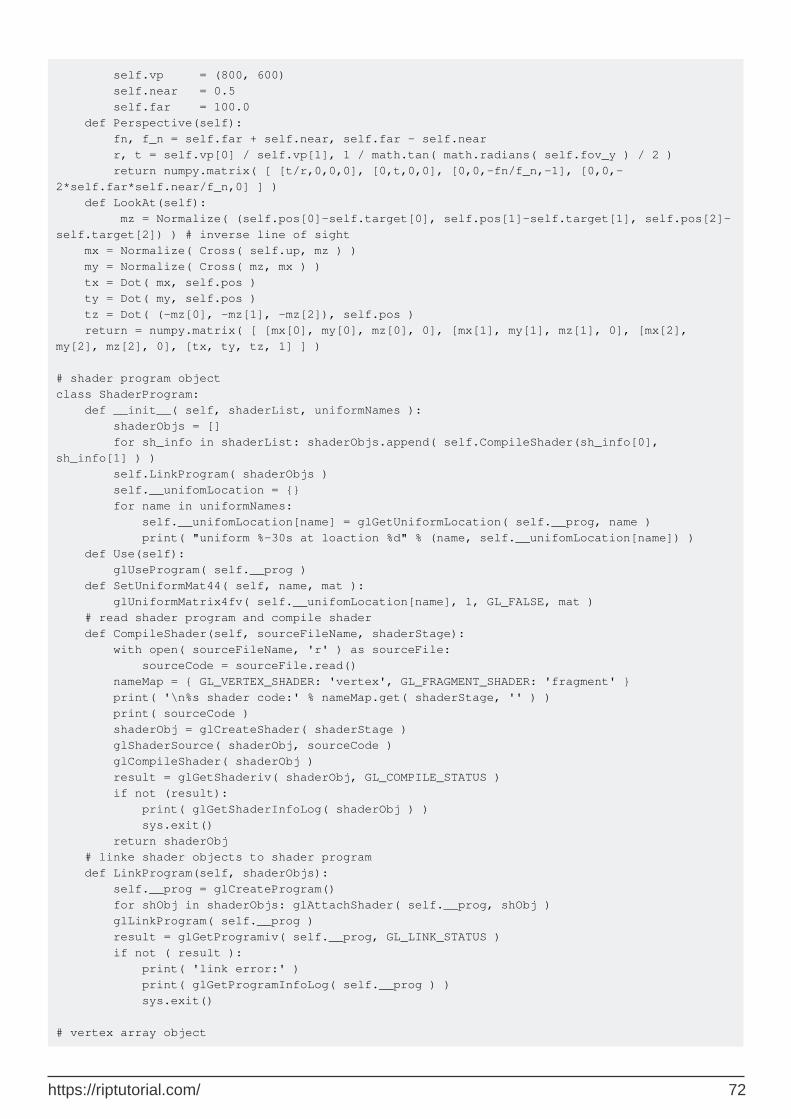
self.vp = (800, 600) self.near = 0.5 self.far = 100.0 def Perspective(self): fn, f_n = self.far + self.near, self.far - self.near r, t = self.vp[0] / self.vp[1], 1 / math.tan( math.radians( self.fov_y ) / 2 ) return numpy.matrix( [ [t/r,0,0,0], [0,t,0,0], [0,0,-fn/f_n,-1], [0,0,-2*self.far*self.near/f_n,0] ] ) def LookAt(self): mz = Normalize( (self.pos[0]-self.target[0], self.pos[1]-self.target[1], self.pos[2]-self.target[2]) ) # inverse line of sight mx = Normalize( Cross( self.up, mz ) ) my = Normalize( Cross( mz, mx ) ) tx = Dot( mx, self.pos ) ty = Dot( my, self.pos ) tz = Dot( (-mz[0], -mz[1], -mz[2]), self.pos ) return = numpy.matrix( [ [mx[0], my[0], mz[0], 0], [mx[1], my[1], mz[1], 0], [mx[2], my[2], mz[2], 0], [tx, ty, tz, 1] ] ) # shader program object class ShaderProgram: def __init__( self, shaderList, uniformNames ): shaderObjs = [] for sh_info in shaderList: shaderObjs.append( self.CompileShader(sh_info[0], sh_info[1] ) ) self.LinkProgram( shaderObjs ) self.__unifomLocation = {} for name in uniformNames: self.__unifomLocation[name] = glGetUniformLocation( self.__prog, name ) print( "uniform %-30s at loaction %d" % (name, self.__unifomLocation[name]) ) def Use(self): glUseProgram( self.__prog ) def SetUniformMat44( self, name, mat ): glUniformMatrix4fv( self.__unifomLocation[name], 1, GL_FALSE, mat ) # read shader program and compile shader def CompileShader(self, sourceFileName, shaderStage): with open( sourceFileName, 'r' ) as sourceFile: sourceCode = sourceFile.read() nameMap = { GL_VERTEX_SHADER: 'vertex', GL_FRAGMENT_SHADER: 'fragment' } print( '\n%s shader code:' % nameMap.get( shaderStage, '' ) ) print( sourceCode ) shaderObj = glCreateShader( shaderStage ) glShaderSource( shaderObj, sourceCode ) glCompileShader( shaderObj ) result = glGetShaderiv( shaderObj, GL_COMPILE_STATUS ) if not (result): print( glGetShaderInfoLog( shaderObj ) ) sys.exit() return shaderObj # linke shader objects to shader program def LinkProgram(self, shaderObjs): self.__prog = glCreateProgram() for shObj in shaderObjs: glAttachShader( self.__prog, shObj ) glLinkProgram( self.__prog ) result = glGetProgramiv( self.__prog, GL_LINK_STATUS ) if not ( result ): print( 'link error:' ) print( glGetProgramInfoLog( self.__prog ) ) sys.exit() # vertex array object
https://riptutorial.com/ 72
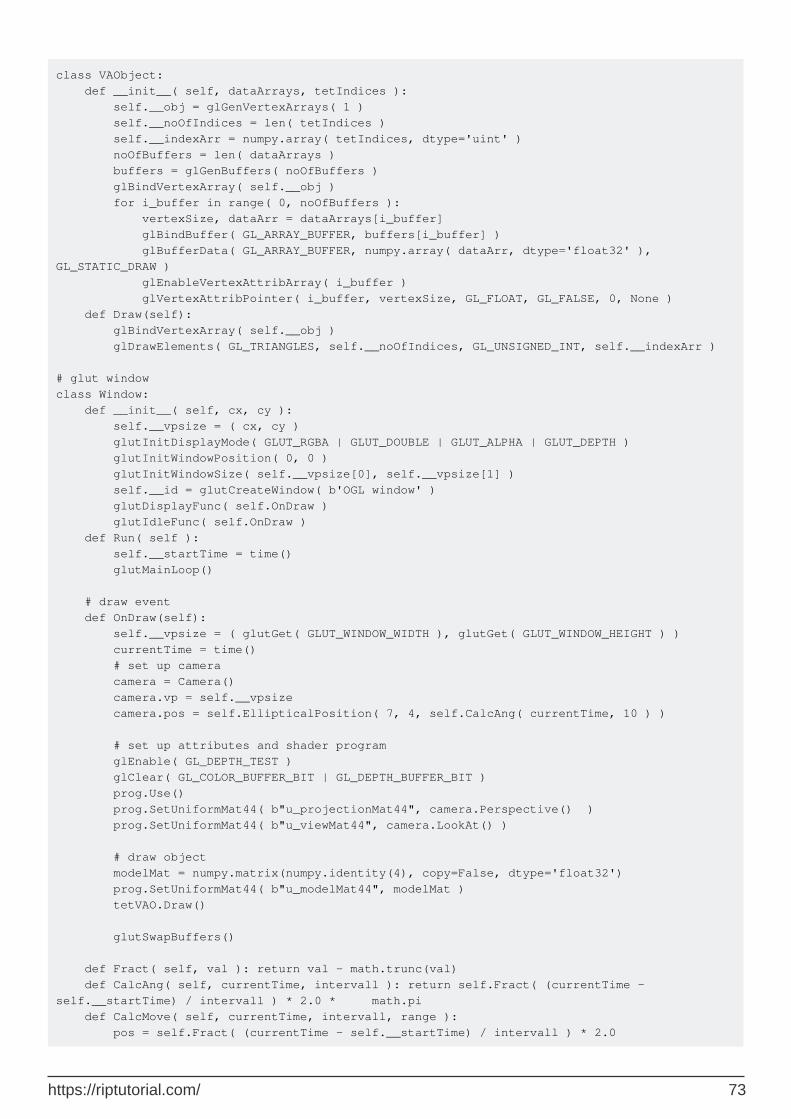
class VAObject: def __init__( self, dataArrays, tetIndices ): self.__obj = glGenVertexArrays( 1 ) self.__noOfIndices = len( tetIndices ) self.__indexArr = numpy.array( tetIndices, dtype='uint' ) noOfBuffers = len( dataArrays ) buffers = glGenBuffers( noOfBuffers ) glBindVertexArray( self.__obj ) for i_buffer in range( 0, noOfBuffers ): vertexSize, dataArr = dataArrays[i_buffer] glBindBuffer( GL_ARRAY_BUFFER, buffers[i_buffer] ) glBufferData( GL_ARRAY_BUFFER, numpy.array( dataArr, dtype='float32' ), GL_STATIC_DRAW ) glEnableVertexAttribArray( i_buffer ) glVertexAttribPointer( i_buffer, vertexSize, GL_FLOAT, GL_FALSE, 0, None ) def Draw(self): glBindVertexArray( self.__obj ) glDrawElements( GL_TRIANGLES, self.__noOfIndices, GL_UNSIGNED_INT, self.__indexArr ) # glut window class Window: def __init__( self, cx, cy ): self.__vpsize = ( cx, cy ) glutInitDisplayMode( GLUT_RGBA | GLUT_DOUBLE | GLUT_ALPHA | GLUT_DEPTH ) glutInitWindowPosition( 0, 0 ) glutInitWindowSize( self.__vpsize[0], self.__vpsize[1] ) self.__id = glutCreateWindow( b'OGL window' ) glutDisplayFunc( self.OnDraw ) glutIdleFunc( self.OnDraw ) def Run( self ): self.__startTime = time() glutMainLoop() # draw event def OnDraw(self): self.__vpsize = ( glutGet( GLUT_WINDOW_WIDTH ), glutGet( GLUT_WINDOW_HEIGHT ) ) currentTime = time() # set up camera camera = Camera() camera.vp = self.__vpsize camera.pos = self.EllipticalPosition( 7, 4, self.CalcAng( currentTime, 10 ) ) # set up attributes and shader program glEnable( GL_DEPTH_TEST ) glClear( GL_COLOR_BUFFER_BIT | GL_DEPTH_BUFFER_BIT ) prog.Use() prog.SetUniformMat44( b"u_projectionMat44", camera.Perspective() ) prog.SetUniformMat44( b"u_viewMat44", camera.LookAt() ) # draw object modelMat = numpy.matrix(numpy.identity(4), copy=False, dtype='float32') prog.SetUniformMat44( b"u_modelMat44", modelMat ) tetVAO.Draw() glutSwapBuffers() def Fract( self, val ): return val - math.trunc(val) def CalcAng( self, currentTime, intervall ): return self.Fract( (currentTime - self.__startTime) / intervall ) * 2.0 * math.pi def CalcMove( self, currentTime, intervall, range ): pos = self.Fract( (currentTime - self.__startTime) / intervall ) * 2.0
https://riptutorial.com/ 73
pos = pos if pos < 1.0 else (2.0-pos) return range[0] + (range[1] - range[0]) * pos def EllipticalPosition( self, a, b, angRag ): a_b = a * a - b * b ea = 0 if (a_b <= 0) else math.sqrt( a_b ) eb = 0 if (a_b >= 0) else math.sqrt( -a_b ) return ( a * math.sin( angRag ) - ea, b * math.cos( angRag ) - eb, 0 ) # initialize glut glutInit() # create window wnd = Window( 800, 600 ) # define tetrahedron vertex array opject sin120 = 0.8660254 tetVAO = VAObject( [ (3, [ 0.0, 0.0, 1.0, 0.0, -sin120, -0.5, sin120 * sin120, 0.5 * sin120, -0.5, -sin120 * sin120, 0.5 * sin120, -0.5 ]), (3, [ 1.0, 0.0, 0.0, 1.0, 1.0, 0.0, 0.0, 0.0, 1.0, 0.0, 1.0, 0.0, ]) ], [ 0, 1, 2, 0, 2, 3, 0, 3, 1, 1, 3, 2 ] ) # load, compile and link shader prog = ShaderProgram( [ ('python/ogl4camera/camera.vert', GL_VERTEX_SHADER), ('python/ogl4camera/camera.frag', GL_FRAGMENT_SHADER) ], [b"u_projectionMat44", b"u_viewMat44", b"u_modelMat44"] ) # start main loop wnd.Run()
Read OGL view and projection online: https://riptutorial.com/opengl/topic/10680/ogl-view-and-projection
https://riptutorial.com/ 74
Chapter 8: OpenGL context creation.
Examples
Creating a basic window
This tutorial assumes you already have a working OpenGL environment with all necessary libraries and headers available.
#include <GL\glew.h> //Include GLEW for function-pointers etc. #include <GLFW\GLFW3.h> //Include GLFW for windows, context etc. //Important note: GLEW must NEVER be included after //gl.h is already included(which is included in glew.h //and glfw3.h) so if you want to include one of these //headers again, wrap them //into #ifndef __gl_h_ directives just to be sure GLFWwindow* window; //This is the GLFW handle for a window, it is used in several //GLFW functions, so make sure it is accessible void createWindow() { glewExperimental = GL_TRUE; //This is required to use functions not included //in opengl.lib if(!glfwInit()) //Inititalizes the library return; glfwDefaultWindowHints(); //See second example window = glfwCreateWindow(WIDTH, HEIGHT, title, NULL, NULL); //Creates a window with the following parameters: // + int width: Width of the window to be created // + int height: Height of the window to be created // + const char* title: Title of the window to be created // + GLFWmonitor* monitor: If this parameter is non-NULL, the window will be // created in fullscreen mode, covering the specified monitor. Monitors can be // queried using either glfwGetPrimaryMonitor() or glfwGetMonitors() // + GLFWwindow* share: For more information about this parameter, please // consult the documentation glfwMakeContextCurrent(window); //Creates a OpenGL context for the specified window glfwSwapInterval(0); //Specifies how many monitor-refreshes GLFW should wait, before swapping the //backbuffer and the displayed frame. Also know as V-Sync glewInit(); //Initializes GLEW }
Adding hints to the window
glfwDefaultWindowHints(); glfwWindowHint(GLFW_RESIZABLE, GL_FALSE);
https://riptutorial.com/ 75

glfwWindowHint(GLFW_SAMPLES, 4); glfwWindowHint(GLFW_VISIBLE, GL_FALSE); //Window hints are used to manipulate the behavior of later created windows //As the name suggests, they are only hints, not hard constraints, which means //that there is no guarantee that they will take effect. //GLFW_RESIZABLE controls if the window should be scalable by the user //GLFW_SAMPLES specifies how many samples there should be used for MSAA //GLFW_VISIBLE specifies if the window should be shown after creation. If false, it // can later be shown using glfwShowWindow() //For additional windowhints please consult the documentation
Read OpenGL context creation. online: https://riptutorial.com/opengl/topic/6194/opengl-context-creation-
https://riptutorial.com/ 76
Chapter 9: Program Introspection
Introduction
A number of features of program objects can be fetched through the program API.
Examples
Vertex Attribute Information
Information about vertex attributes can be retrieved with the OGL function glGetProgram and the parameters GL_ACTIVE_ATTRIBUTES and GL_ACTIVE_ATTRIBUTE_MAX_LENGTH.
The location of an active shader attribute can be determined by the OGL function glGetAttribLocation, by the index of the attribute.
GLuint shaderProg = ...; std::map< std::string, GLint > attributeLocation; GLint maxAttribLen, nAttribs; glGetProgramiv( shaderProg, GL_ACTIVE_ATTRIBUTES, &nAttribs ); glGetProgramiv( shaderProg, GL_ACTIVE_ATTRIBUTE_MAX_LENGTH, &maxAttribLen GLint written, size; GLenum type; std::vector< GLchar >attrName( maxAttribLen ); for( int attribInx = 0; attribInx < nAttribs; attribInx++ ) { glGetActiveAttrib( shaderProg, attribInx, maxAttribLen, &written, &size, &type, &attrName[0] ); attributeLocation[attrName] = glGetAttribLocation( shaderProg, attrName.data() ); }
Uniform Information
Information about active uniforms in a program can be retrieved with the OGL function glGetProgram and the parameters GL_ACTIVE_UNIFORMS and GL_ACTIVE_UNIFORM_MAX_LENGTH.
The location of an active shader uniform variable can be determined by the OGL function glGetActiveUniform, by the index of the attribute.
GLuint shaderProg = ...; std::map< std::string, GLint > unifomLocation; GLint maxUniformLen, nUniforms; glGetProgramiv( shaderProg, GL_ACTIVE_UNIFORMS, &nUniforms ); glGetProgramiv( shaderProg, GL_ACTIVE_UNIFORM_MAX_LENGTH, &maxUniformLen ); GLint written, size; GLenum type; std::vector< GLchar >uniformName( maxUniformLen );
https://riptutorial.com/ 77

for( int uniformInx = 0; uniformInx < nUniforms; uniformInx++ ) { glGetActiveUniform( shaderProg, uniformInx, maxUniformLen, &written, &size, &type, &uniformName[0] ); unifomLocation[uniformName] = glGetUniformLocation( shaderProg, uniformName.data() ); }
Read Program Introspection online: https://riptutorial.com/opengl/topic/10805/program-introspection
https://riptutorial.com/ 78
Chapter 10: Shader Loading and Compilation
Introduction
These examples demonstrate various ways to load and compile shaders. All examples must include error handling code.
Remarks
Shader objects, as created from glCreateShader do not do much. They contain the compiled code for a single stage, but they do not even have to contain the complete compiled code for that stage. In many ways, they work like C and C++ object files.
Program objects contain the final linked program. But they also hold the state for the program's uniform values, as well as a number of other state data. They have APIs for introspecting the shader's interface data (though it only became comprehensive in GL 4.3). Program objects are what defines the shader code that you use when rendering.
Shader objects, once used to link a program, are no longer needed unless you intend to use them to link other programs.
Examples
Load Separable Shader in C++
4.1
This code loads, compiles, and links a single file that creates a separate shader program for a single stage. If there are errors, it will get the info-log for those errors.
The code uses some commonly-available C++11 functionality.
#include <string> #include <fstream> //In C++17, we could take a `std::filesystem::path` instead of a std::string //for the filename. GLuint CreateSeparateProgram(GLenum stage, const std::string &filename) { std::ifstream input(filename.c_str(), std::ios::in | std::ios::binary | std::ios::ate); //Figure out how big the file is. auto fileSize = input.tellg(); input.seekg(0, ios::beg); //Read the whole file. std::string fileData(fileSize); input.read(&fileData[0], fileSize); input.close();
https://riptutorial.com/ 79
//Compile&link the file auto fileCstr = (const GLchar *)fileData.c_str(); auto program = glCreateShaderProgramv(stage, 1, &fileCstr); //Check for errors GLint isLinked = 0; glGetProgramiv(program, GL_LINK_STATUS, &isLinked); if(isLinked == GL_FALSE) { //Note: maxLength includes the NUL terminator. GLint maxLength = 0; glGetProgramiv(program, GL_INFO_LOG_LENGTH, &maxLength); //C++11 does not permit you to overwrite the NUL terminator, //even if you are overwriting it with the NUL terminator. //C++17 does, so you could subtract 1 from the length and skip the `pop_back`. std::basic_string<GLchar> infoLog(maxLength); glGetProgramInfoLog(program, maxLength, &maxLength, &infoLog[0]); infoLog.pop_back(); //The program is useless now. So delete it. glDeleteProgram(program); //Use the infoLog in whatever manner you deem best. //Exit with failure. return 0; } return program; }
Individual Shader Object Compilation in C++
The traditional GLSL compilation model involves compiling code for a shader stage into a shader object, then linking multiple shader objects (covering all of the stages you want to use) into a single program object.
Since 4.2, program objects can be created that have only one shader stage. This method links all shader stages into a single program.
Shader Object Compilation
#include <string> #include <fstream> //In C++17, we could take a `std::filesystem::path` instead of a std::string //for the filename. GLuint CreateShaderObject(GLenum stage, const std::string &filename) { std::ifstream input(filename.c_str(), std::ios::in | std::ios::binary | std::ios::ate); //Figure out how big the file is. auto fileSize = input.tellg();
https://riptutorial.com/ 80
input.seekg(0, ios::beg); //Read the whole file. std::string fileData(fileSize); input.read(&fileData[0], fileSize); input.close(); //Create a shader name auto shader = glCreateShader(stage); //Send the shader source code to GL auto fileCstr = (const GLchar *)fileData.c_str(); glShaderSource(shader, 1, &fileCstr, nullptr); //Compile the shader glCompileShader(shader); GLint isCompiled = 0; glGetShaderiv(shader, GL_COMPILE_STATUS, &isCompiled); if(isCompiled == GL_FALSE) { GLint maxLength = 0; glGetShaderiv(shader, GL_INFO_LOG_LENGTH, &maxLength); //C++11 does not permit you to overwrite the NUL terminator, //even if you are overwriting it with the NUL terminator. //C++17 does, so you could subtract 1 from the length and skip the `pop_back`. std::basic_string<GLchar> infoLog(maxLength); glGetShaderInfoLog(shader, maxLength, &maxLength, &infoLog[0]); infoLog.pop_back(); //We don't need the shader anymore. glDeleteShader(shader); //Use the infoLog as you see fit. //Exit with failure. return 0; } return shader; }
Program Object Linking
#include <string> GLuint LinkProgramObject(vector<GLuint> shaders) { //Get a program object. auto program = glCreateProgram(); //Attach our shaders to our program for(auto shader : shaders) glAttachShader(program, shader); //Link our program glLinkProgram(program);
https://riptutorial.com/ 81
//Note the different functions here: glGetProgram* instead of glGetShader*. GLint isLinked = 0; glGetProgramiv(program, GL_LINK_STATUS, (int *)&isLinked); if(isLinked == GL_FALSE) { GLint maxLength = 0; glGetProgramiv(program, GL_INFO_LOG_LENGTH, &maxLength); //C++11 does not permit you to overwrite the NUL terminator, //even if you are overwriting it with the NUL terminator. //C++17 does, so you could subtract 1 from the length and skip the `pop_back`. std::basic_string<GLchar> infoLog(maxLength); glGetProgramInfoLog(program, maxLength, &maxLength, &infoLog[0]); infoLog.pop_back(); //We don't need the program anymore. glDeleteProgram(program); //Use the infoLog as you see fit. //Exit with failure return 0; } //Always detach shaders after a successful link. for(auto shader : shaders) gldetachShader(program, shader); return program; }
Read Shader Loading and Compilation online: https://riptutorial.com/opengl/topic/8685/shader-loading-and-compilation
https://riptutorial.com/ 82
Chapter 11: Shaders
Syntax
#version version_number // Which GLSL version we are using•void main() { /* Code */ } // Shader's main function•in type name; // Specifies an input parameter - GLSL 1.30•out type name; // Specifies an output parameter - GLSL 1.30•inout type name; // Parameter for both input and output - GLSL 1.30•
Parameters
Parameter Details
type The parameter's type, it has to be a GLSL built-in type.
Remarks
To specify which version of GLSL should be used to compile a shader, use the version preprocessor e.g. #version 330. Each version of OpenGL is required to support specific versions of GLSL. If a #version preprocessor is not defined at the top of a shader, the default version 1.10 is used.
Examples
Shader for rendering a coloured rectangle
A shader program, in the OpenGL sense, contains a number of different shaders. Any shader program must have at least a vertex shader, that calculates the position of the points on the screen, and a fragment shader, that calculates the colour of each pixel. (Actually the story is longer and more complex, but anyway...)
The following shaders are for #version 110, but should illustrate some points:
Vertex shader:
#version 110 // x and y coordinates of one of the corners attribute vec2 input_Position; // rgba colour of the corner. If all corners are blue, // the rectangle is blue. If not, the colours are // interpolated (combined) towards the center of the rectangle attribute vec4 input_Colour;
https://riptutorial.com/ 83
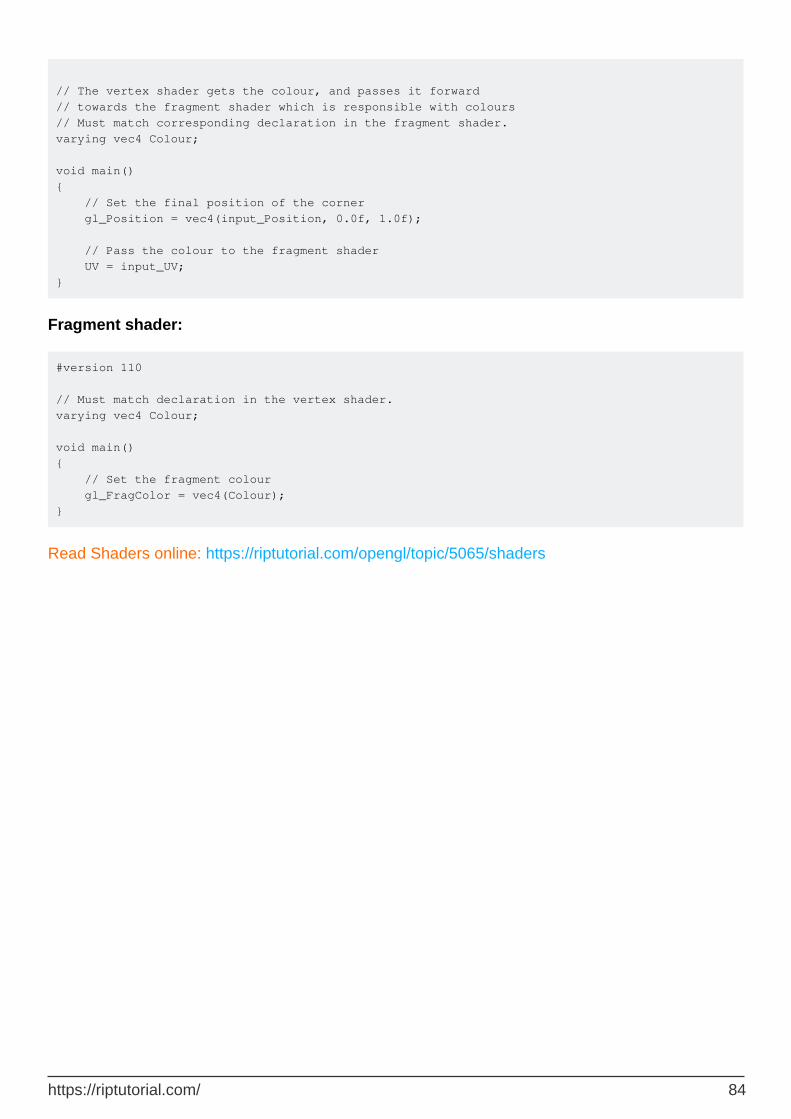
// The vertex shader gets the colour, and passes it forward // towards the fragment shader which is responsible with colours // Must match corresponding declaration in the fragment shader. varying vec4 Colour; void main() { // Set the final position of the corner gl_Position = vec4(input_Position, 0.0f, 1.0f); // Pass the colour to the fragment shader UV = input_UV; }
Fragment shader:
#version 110 // Must match declaration in the vertex shader. varying vec4 Colour; void main() { // Set the fragment colour gl_FragColor = vec4(Colour); }
Read Shaders online: https://riptutorial.com/opengl/topic/5065/shaders
https://riptutorial.com/ 84
Chapter 12: Texturing
Examples
Basics of texturing
A texture is a form of data storage that allows convenient access not just to particular data entries, but also to sample points mixing (interpolating) multiple entries together.
In OpenGL textures can be used for many things, but most commonly it's mapping an image to a polygon (for example a triangle). In order to map the texture to a triangle (or another polygon) we have to tell each vertex which part of the texture it corresponds to. We assign a texture coordinate to each vertex of a polygon and it will be then interpolated between all fragments in that polygon. Texture coordinates typically range from 0 to 1 in the x and y axis as shown in the image below:
The texture coordinates of this triangle would look like this:
GLfloat texCoords[] = { 0.0f, 0.0f, // Lower-left corner 1.0f, 0.0f, // Lower-right corner 0.5f, 1.0f // Top-center corner };
Put those coordinates into VBO (vertex buffer object) and create a new attribute for the shader. You should already have at least one attribute for the vertex positions so create another for the texture coordinates.
Generating texture
First thing to do will be to generate a texture object which will be referenced by an ID which will be stored in an unsigned int texture:
https://riptutorial.com/ 85
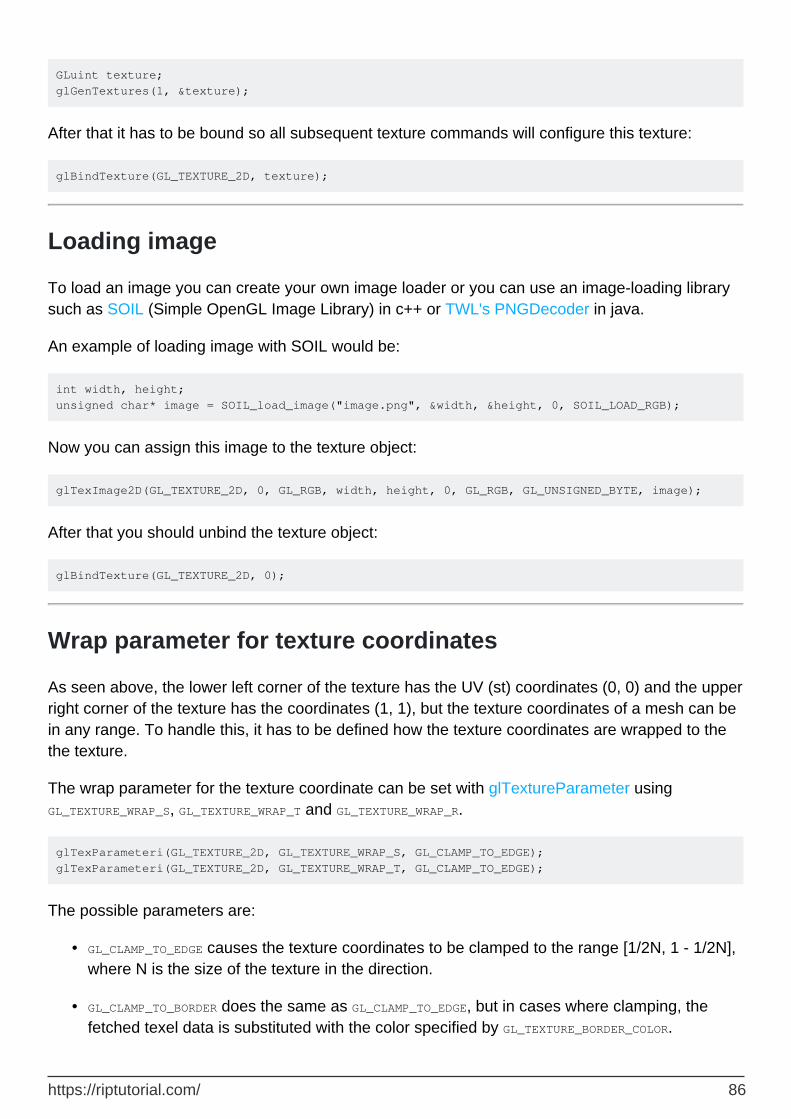
GLuint texture; glGenTextures(1, &texture);
After that it has to be bound so all subsequent texture commands will configure this texture:
glBindTexture(GL_TEXTURE_2D, texture);
Loading image
To load an image you can create your own image loader or you can use an image-loading library such as SOIL (Simple OpenGL Image Library) in c++ or TWL's PNGDecoder in java.
An example of loading image with SOIL would be:
int width, height; unsigned char* image = SOIL_load_image("image.png", &width, &height, 0, SOIL_LOAD_RGB);
Now you can assign this image to the texture object:
glTexImage2D(GL_TEXTURE_2D, 0, GL_RGB, width, height, 0, GL_RGB, GL_UNSIGNED_BYTE, image);
After that you should unbind the texture object:
glBindTexture(GL_TEXTURE_2D, 0);
Wrap parameter for texture coordinates
As seen above, the lower left corner of the texture has the UV (st) coordinates (0, 0) and the upper right corner of the texture has the coordinates (1, 1), but the texture coordinates of a mesh can be in any range. To handle this, it has to be defined how the texture coordinates are wrapped to the the texture.
The wrap parameter for the texture coordinate can be set with glTextureParameter using GL_TEXTURE_WRAP_S, GL_TEXTURE_WRAP_T and GL_TEXTURE_WRAP_R.
glTexParameteri(GL_TEXTURE_2D, GL_TEXTURE_WRAP_S, GL_CLAMP_TO_EDGE); glTexParameteri(GL_TEXTURE_2D, GL_TEXTURE_WRAP_T, GL_CLAMP_TO_EDGE);
The possible parameters are:
GL_CLAMP_TO_EDGE causes the texture coordinates to be clamped to the range [1/2N, 1 - 1/2N], where N is the size of the texture in the direction.
•
GL_CLAMP_TO_BORDER does the same as GL_CLAMP_TO_EDGE, but in cases where clamping, the fetched texel data is substituted with the color specified by GL_TEXTURE_BORDER_COLOR.
•
https://riptutorial.com/ 86
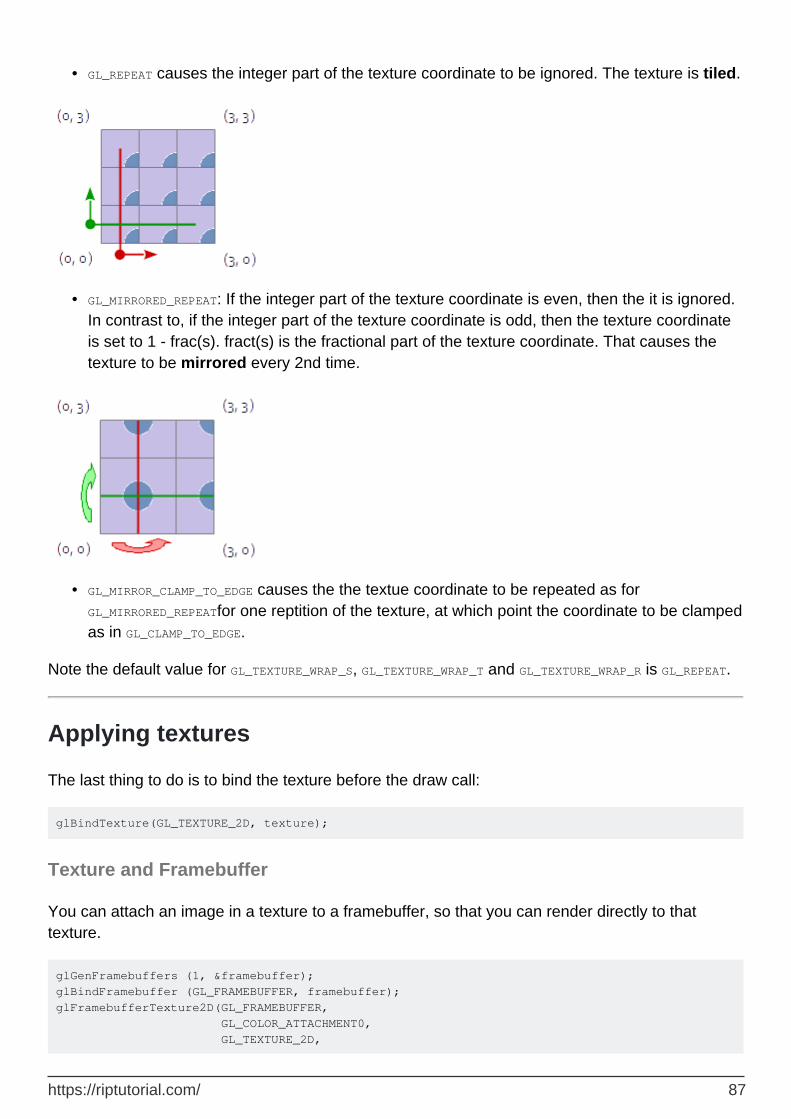
GL_REPEAT causes the integer part of the texture coordinate to be ignored. The texture is tiled.•
GL_MIRRORED_REPEAT: If the integer part of the texture coordinate is even, then the it is ignored. In contrast to, if the integer part of the texture coordinate is odd, then the texture coordinate is set to 1 - frac(s). fract(s) is the fractional part of the texture coordinate. That causes the texture to be mirrored every 2nd time.
•
GL_MIRROR_CLAMP_TO_EDGE causes the the textue coordinate to be repeated as for GL_MIRRORED_REPEATfor one reptition of the texture, at which point the coordinate to be clamped as in GL_CLAMP_TO_EDGE.
•
Note the default value for GL_TEXTURE_WRAP_S, GL_TEXTURE_WRAP_T and GL_TEXTURE_WRAP_R is GL_REPEAT.
Applying textures
The last thing to do is to bind the texture before the draw call:
glBindTexture(GL_TEXTURE_2D, texture);
Texture and Framebuffer
You can attach an image in a texture to a framebuffer, so that you can render directly to that texture.
glGenFramebuffers (1, &framebuffer); glBindFramebuffer (GL_FRAMEBUFFER, framebuffer); glFramebufferTexture2D(GL_FRAMEBUFFER, GL_COLOR_ATTACHMENT0, GL_TEXTURE_2D,
https://riptutorial.com/ 87
texture, 0);
Note: you can't read and write from same texture in same render task, because it call undefined behaviour. But you can use: glTextureBarrier() between render calls for this.
Read texture data
You can read texture data with function glGetTexImage:
char *outBuffer = malloc(buf_size); glActiveTexture(GL_TEXTURE0); glBindTexture(GL_TEXTURE_2D, texture); glGetTexImage(GL_TEXTURE_2D, 0, GL_RGBA, GL_UNSIGNED_BYTE, outBuffer);
Note: texture type and format are only for example and can be different.
Using PBOs
If you bind a buffer to GL_PIXEL_UNPACK_BUFFER then the data parameter in glTexImage2D is a offset into that buffer.
This means that the glTexImage2D doesn't need to wait for all the data to be copied out of the application's memory before it can return, reducing overhead in the main thread.
glGenBuffers(1, &pbo); glBindBuffer(GL_PIXEL_UNPACK_BUFFER, pbo); glBufferData(GL_PIXEL_UNPACK_BUFFER, width*height*3, NULL, GL_STREAM_DRAW); void* mappedBuffer = glMapBuffer(GL_PIXEL_UNPACK_BUFFER, GL_WRITE_ONLY); //write data into the mapped buffer, possibly in another thread. int width, height; unsigned char* image = SOIL_load_image("image.png", &width, &height, 0, SOIL_LOAD_RGB); memcpy(mappedBuffer, image, width*height*3); SOIL_free_image(image); // after reading is complete back on the main thread glBindBuffer(GL_PIXEL_UNPACK_BUFFER, pbo); glUnmapBuffer(GL_PIXEL_UNPACK_BUFFER); glTexImage2D(GL_TEXTURE_2D, 0, GL_RGB, width, height, 0, GL_RGB, GL_UNSIGNED_BYTE, 0);
But where PBOs really shine is when you need to read the result of a render back into application memory. To read pixel data into a buffer bind it to GL_PIXEL_PACK_BUFFER then the data parameter of glGetTexImage will be an offset into that buffer:
glGenBuffers(1, &pbo);
https://riptutorial.com/ 88
glBindBuffer(GL_PIXEL_PACK_BUFFER, pbo); glBufferData(GL_PIXEL_PACK_BUFFER, buf_size, NULL, GL_STREAM_COPY); glActiveTexture(GL_TEXTURE0); glBindTexture(GL_TEXTURE_2D, texture); glGetTexImage(GL_TEXTURE_2D, 0, GL_RGBA, GL_UNSIGNED_BYTE, null); //ensure we don't try and read data before the transfer is complete GLsync sync = glFenceSync(GL_SYNC_GPU_COMMANDS_COMPLETE, 0); // then regularly check for completion GLint result; glGetSynciv(sync, GL_SYNC_STATUS, sizeof(result), NULL, &result); if(result == GL_SIGNALED){ glBindBuffer(GL_PIXEL_PACK_BUFFER, pbo); void* mappedBuffer = glMapBuffer(GL_PIXEL_PACK_BUFFER, GL_READ_ONLY); //now mapped buffer contains the pixel data glUnmapBuffer(GL_PIXEL_PACK_BUFFER); }
Using textures in GLSL shaders
The vertex shader only accepts the texture coordinates as a vertex attribute and forwards the coordinates to the fragment shader. By default, it will also guarantee that the fragment will receive the properly interpolated coordinate based on its position in a triangle:
layout (location = 0) in vec3 position; layout (location = 1) in vec2 texCoordIn; out vec2 texCoordOut; void main() { gl_Position = vec4(position, 1.0f); texCoordOut = texCoordIn; }
The fragment shader then accepts the texCoord output variable as an input variable. You can then add a texture to the fragment shader by declaring a uniform sampler2D. To sample a fragment of the texture we use a built-in function texture which has two parameters. First is the texture we want to sample from and the second is the coordinate of this texture:
in vec2 texCoordOut; out vec4 color; uniform sampler2D image; void main()
https://riptutorial.com/ 89

{ color = texture(image, texCoordOut); }
Note that image isn't the direct texture id here. It's the id of the texture unit that will be sampled. In turn, textures aren't bound to programs directly; they are bound to texture units. This is achieved by first making the texture unit active with glActiveTexture, and then calling glBindTexture will affect this particular texture unit. However, since the default texture unit is texture unit 0, programs using one texture can be made simpler omitting this call.
Read Texturing online: https://riptutorial.com/opengl/topic/3461/texturing
https://riptutorial.com/ 90
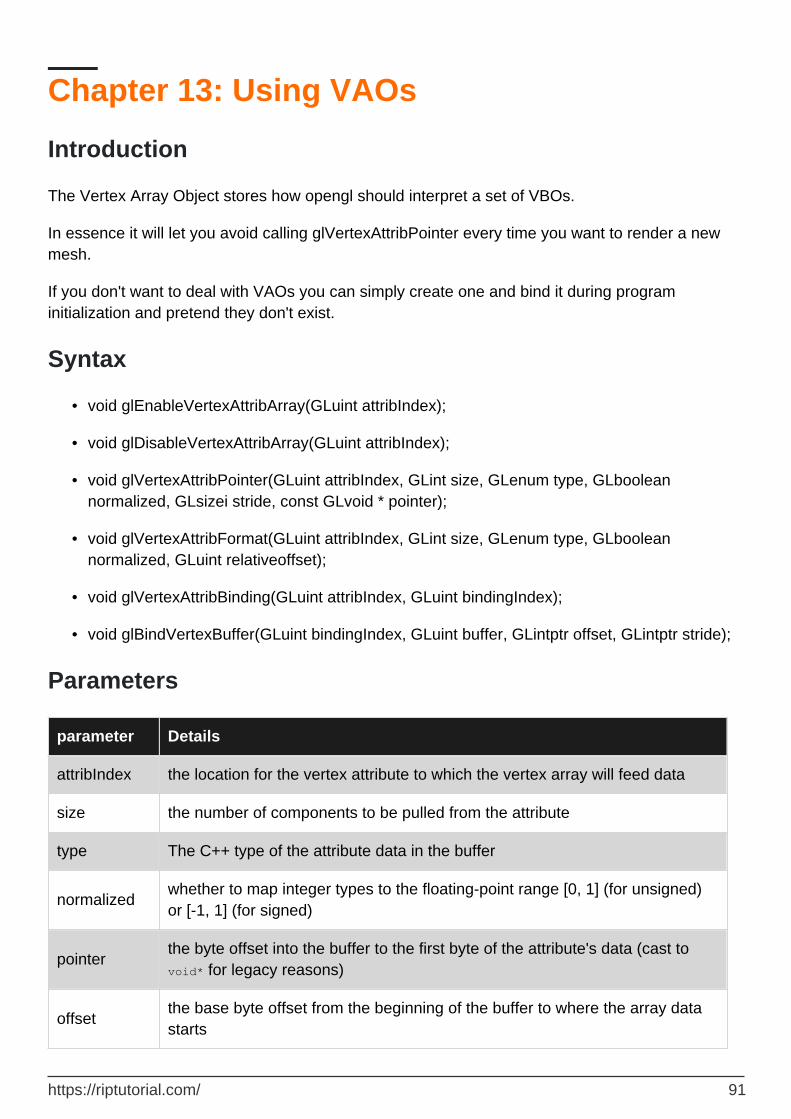
Chapter 13: Using VAOs
Introduction
The Vertex Array Object stores how opengl should interpret a set of VBOs.
In essence it will let you avoid calling glVertexAttribPointer every time you want to render a new mesh.
If you don't want to deal with VAOs you can simply create one and bind it during program initialization and pretend they don't exist.
Syntax
void glEnableVertexAttribArray(GLuint attribIndex);•
void glDisableVertexAttribArray(GLuint attribIndex);•
void glVertexAttribPointer(GLuint attribIndex, GLint size, GLenum type, GLboolean normalized, GLsizei stride, const GLvoid * pointer);
•
void glVertexAttribFormat(GLuint attribIndex, GLint size, GLenum type, GLboolean normalized, GLuint relativeoffset);
•
void glVertexAttribBinding(GLuint attribIndex, GLuint bindingIndex);•
void glBindVertexBuffer(GLuint bindingIndex, GLuint buffer, GLintptr offset, GLintptr stride);•
Parameters
parameter Details
attribIndex the location for the vertex attribute to which the vertex array will feed data
size the number of components to be pulled from the attribute
type The C++ type of the attribute data in the buffer
normalizedwhether to map integer types to the floating-point range [0, 1] (for unsigned) or [-1, 1] (for signed)
pointerthe byte offset into the buffer to the first byte of the attribute's data (cast to void* for legacy reasons)
offsetthe base byte offset from the beginning of the buffer to where the array data starts
https://riptutorial.com/ 91
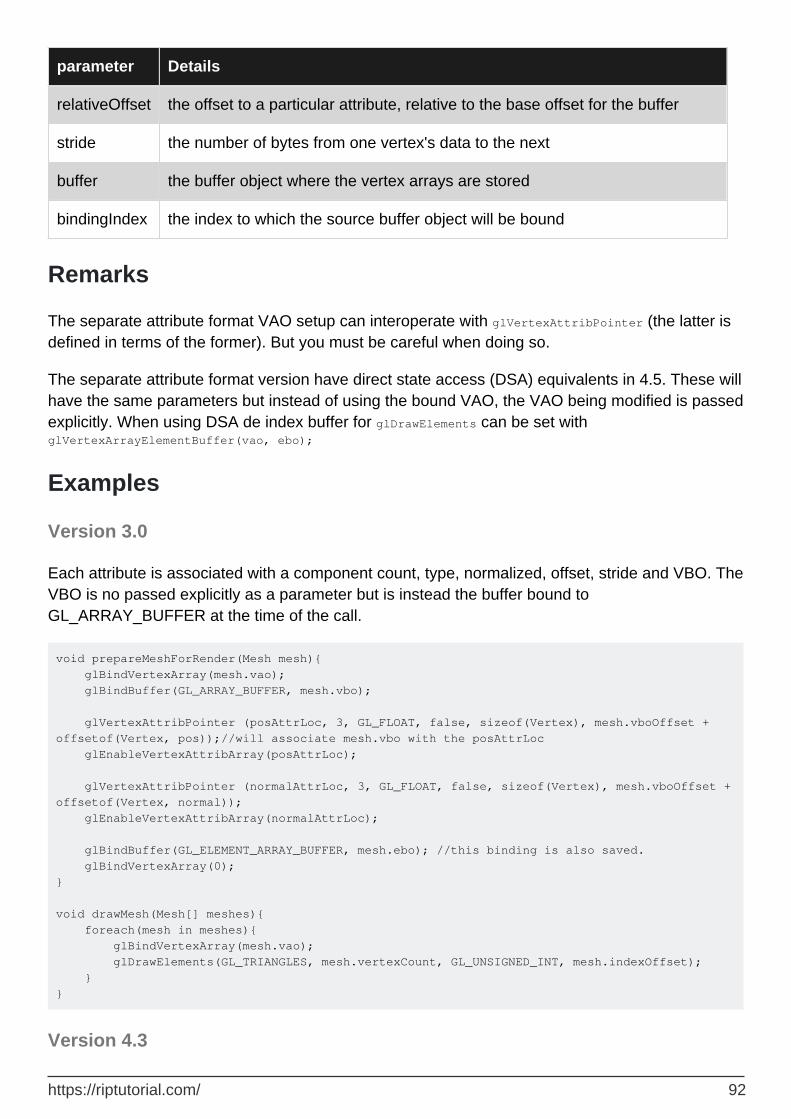
parameter Details
relativeOffset the offset to a particular attribute, relative to the base offset for the buffer
stride the number of bytes from one vertex's data to the next
buffer the buffer object where the vertex arrays are stored
bindingIndex the index to which the source buffer object will be bound
Remarks
The separate attribute format VAO setup can interoperate with glVertexAttribPointer (the latter is defined in terms of the former). But you must be careful when doing so.
The separate attribute format version have direct state access (DSA) equivalents in 4.5. These will have the same parameters but instead of using the bound VAO, the VAO being modified is passed explicitly. When using DSA de index buffer for glDrawElements can be set with glVertexArrayElementBuffer(vao, ebo);
Examples
Version 3.0
Each attribute is associated with a component count, type, normalized, offset, stride and VBO. The VBO is no passed explicitly as a parameter but is instead the buffer bound to GL_ARRAY_BUFFER at the time of the call.
void prepareMeshForRender(Mesh mesh){ glBindVertexArray(mesh.vao); glBindBuffer(GL_ARRAY_BUFFER, mesh.vbo); glVertexAttribPointer (posAttrLoc, 3, GL_FLOAT, false, sizeof(Vertex), mesh.vboOffset + offsetof(Vertex, pos));//will associate mesh.vbo with the posAttrLoc glEnableVertexAttribArray(posAttrLoc); glVertexAttribPointer (normalAttrLoc, 3, GL_FLOAT, false, sizeof(Vertex), mesh.vboOffset + offsetof(Vertex, normal)); glEnableVertexAttribArray(normalAttrLoc); glBindBuffer(GL_ELEMENT_ARRAY_BUFFER, mesh.ebo); //this binding is also saved. glBindVertexArray(0); } void drawMesh(Mesh[] meshes){ foreach(mesh in meshes){ glBindVertexArray(mesh.vao); glDrawElements(GL_TRIANGLES, mesh.vertexCount, GL_UNSIGNED_INT, mesh.indexOffset); } }
Version 4.3
https://riptutorial.com/ 92
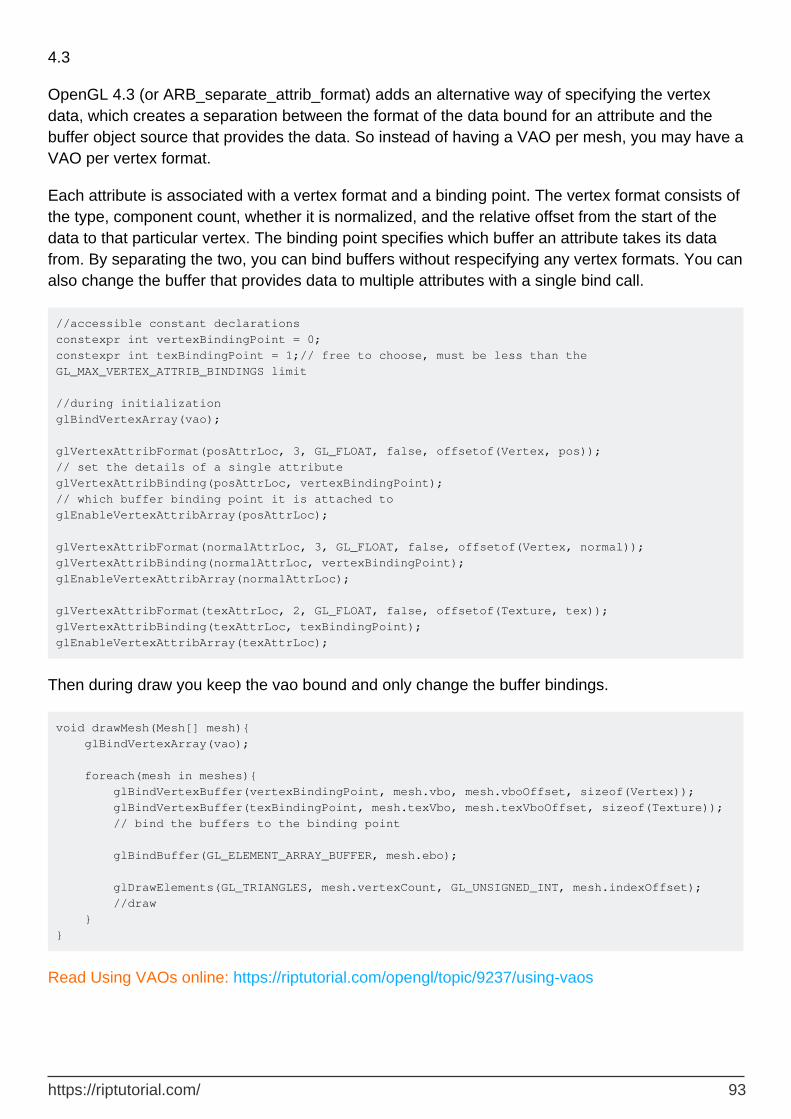
4.3
OpenGL 4.3 (or ARB_separate_attrib_format) adds an alternative way of specifying the vertex data, which creates a separation between the format of the data bound for an attribute and the buffer object source that provides the data. So instead of having a VAO per mesh, you may have a VAO per vertex format.
Each attribute is associated with a vertex format and a binding point. The vertex format consists of the type, component count, whether it is normalized, and the relative offset from the start of the data to that particular vertex. The binding point specifies which buffer an attribute takes its data from. By separating the two, you can bind buffers without respecifying any vertex formats. You can also change the buffer that provides data to multiple attributes with a single bind call.
//accessible constant declarations constexpr int vertexBindingPoint = 0; constexpr int texBindingPoint = 1;// free to choose, must be less than the GL_MAX_VERTEX_ATTRIB_BINDINGS limit //during initialization glBindVertexArray(vao); glVertexAttribFormat(posAttrLoc, 3, GL_FLOAT, false, offsetof(Vertex, pos)); // set the details of a single attribute glVertexAttribBinding(posAttrLoc, vertexBindingPoint); // which buffer binding point it is attached to glEnableVertexAttribArray(posAttrLoc); glVertexAttribFormat(normalAttrLoc, 3, GL_FLOAT, false, offsetof(Vertex, normal)); glVertexAttribBinding(normalAttrLoc, vertexBindingPoint); glEnableVertexAttribArray(normalAttrLoc); glVertexAttribFormat(texAttrLoc, 2, GL_FLOAT, false, offsetof(Texture, tex)); glVertexAttribBinding(texAttrLoc, texBindingPoint); glEnableVertexAttribArray(texAttrLoc);
Then during draw you keep the vao bound and only change the buffer bindings.
void drawMesh(Mesh[] mesh){ glBindVertexArray(vao); foreach(mesh in meshes){ glBindVertexBuffer(vertexBindingPoint, mesh.vbo, mesh.vboOffset, sizeof(Vertex)); glBindVertexBuffer(texBindingPoint, mesh.texVbo, mesh.texVboOffset, sizeof(Texture)); // bind the buffers to the binding point glBindBuffer(GL_ELEMENT_ARRAY_BUFFER, mesh.ebo); glDrawElements(GL_TRIANGLES, mesh.vertexCount, GL_UNSIGNED_INT, mesh.indexOffset); //draw } }
Read Using VAOs online: https://riptutorial.com/opengl/topic/9237/using-vaos
https://riptutorial.com/ 93

Credits
S. No
Chapters Contributors
1Getting started with opengl
ammar26, Ashwin Gupta, Bogdan0804, CaseyB, Community, datenwolf, Franko L. Tokalić, genpfault, L-X, Naman Dixit, Nicol Bolas, Nox, Valvy
2 3d Math Ashwin Gupta, Franko L. Tokalić, Valvy, Wyck
3 Basic Lighting Ashwin Gupta, Elouarn Laine, Rabbid76
4Encapsulating OpenGL objects with C++ RAII
0x499602D2, Nicol Bolas
5 Framebuffers MarGenDo, Rabbid76
6 Instancing MarGenDo, Nicol Bolas
7OGL view and projection
Matej Kormuth, Rabbid76, SurvivalMachine
8OpenGL context creation.
Dynamitos
9Program Introspection
Nicol Bolas, Rabbid76
10Shader Loading and Compilation
Nicol Bolas, Rabbid76
11 ShadersFedeWar, genpfault, George, MarGenDo, nica.dan.cs, Nicol Bolas
12 TexturingBartek Banachewicz, genpfault, George, MarGenDo, Nicol Bolas, Rabbid76, ratchet freak
13 Using VAOs Nicol Bolas, ratchet freak
https://riptutorial.com/ 94