Embed Size (px)
DESCRIPTION
Tutorial sobre o framework de Creative Code OpenFrameworks
Citation preview
openFrameworksBeginning to use C++
Download OF http://www.openframeworks.cc/Download Code::Blocks (an IDE) http://www.openframeworks.cc/setup/codeblocks
Or Visual StudioOr Xcode for Mac users
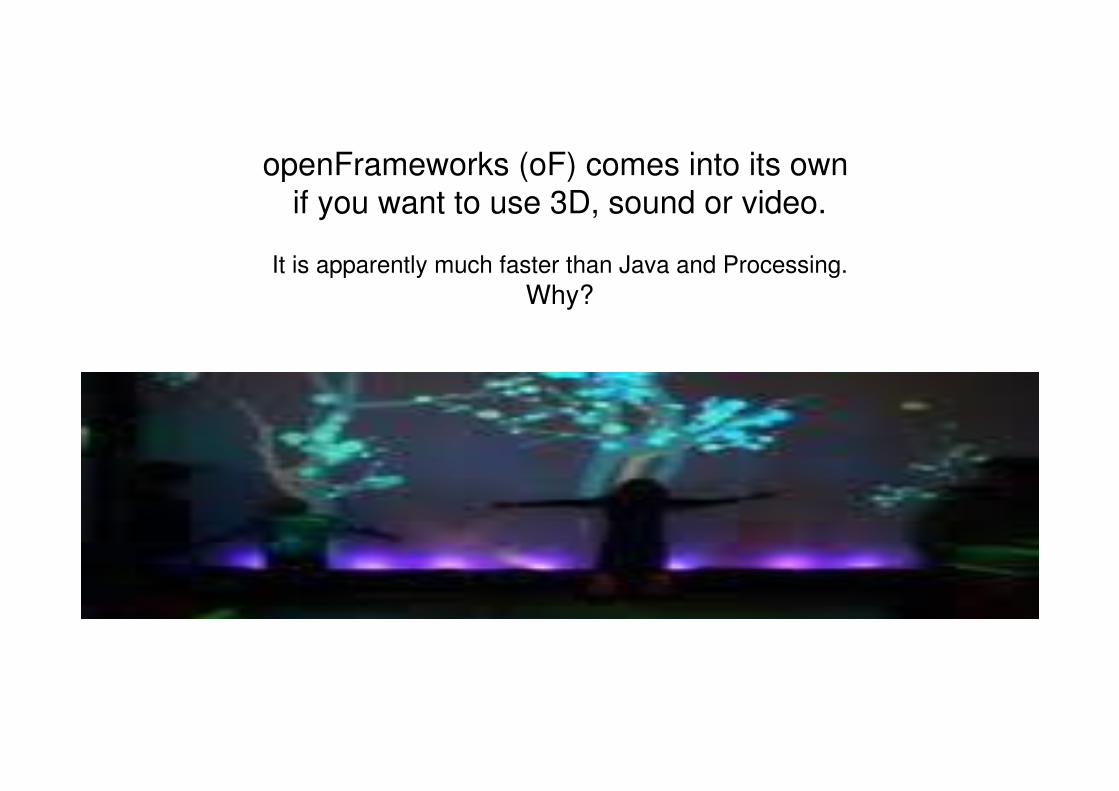
openFrameworks (oF) comes into its own if you want to use 3D, sound or video.
It is apparently much faster than Java and Processing.
Why?
But you cant embed it in an Applet like Java and Processing…
C++ Allows direct calls to native system libraries.
And explicit memory management,
C++ Supports destructors.
C++ is normally compiled directly to machine code
which is then executed directly by the operating system.
Java/Processing is normally compiled to byte-code which the
Java virtual machine (JVM) then either interprets or JIT
compiles to machine code and then executes.
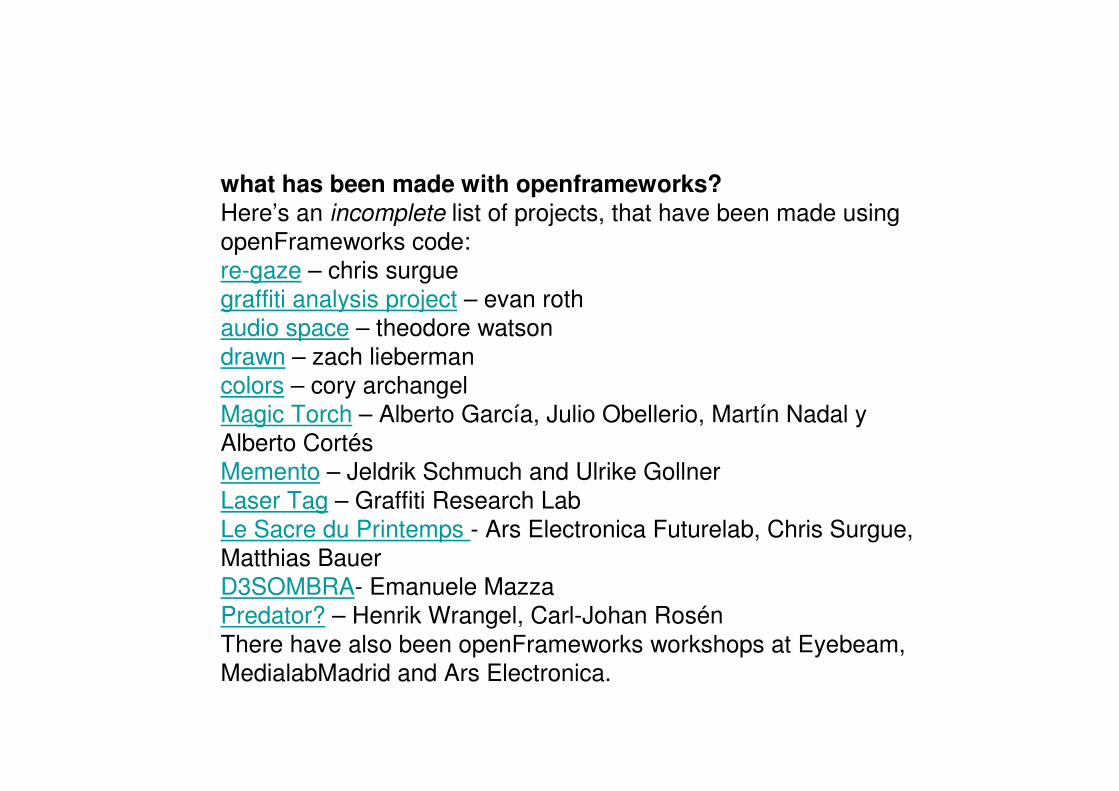
what has been made with openframeworks?
Here’s an incomplete list of projects, that have been made using
openFrameworks code:
re-gaze – chris surgue
graffiti analysis project – evan roth
audio space – theodore watson
drawn – zach lieberman
colors – cory archangel
Magic Torch – Alberto García, Julio Obellerio, Martín Nadal y
Alberto Cortés
Memento – Jeldrik Schmuch and Ulrike Gollner
Laser Tag – Graffiti Research Lab
Le Sacre du Printemps - Ars Electronica Futurelab, Chris Surgue,
Matthias Bauer
D3SOMBRA- Emanuele Mazza
Predator? – Henrik Wrangel, Carl-Johan Rosén
There have also been openFrameworks workshops at Eyebeam,
MedialabMadrid and Ars Electronica.
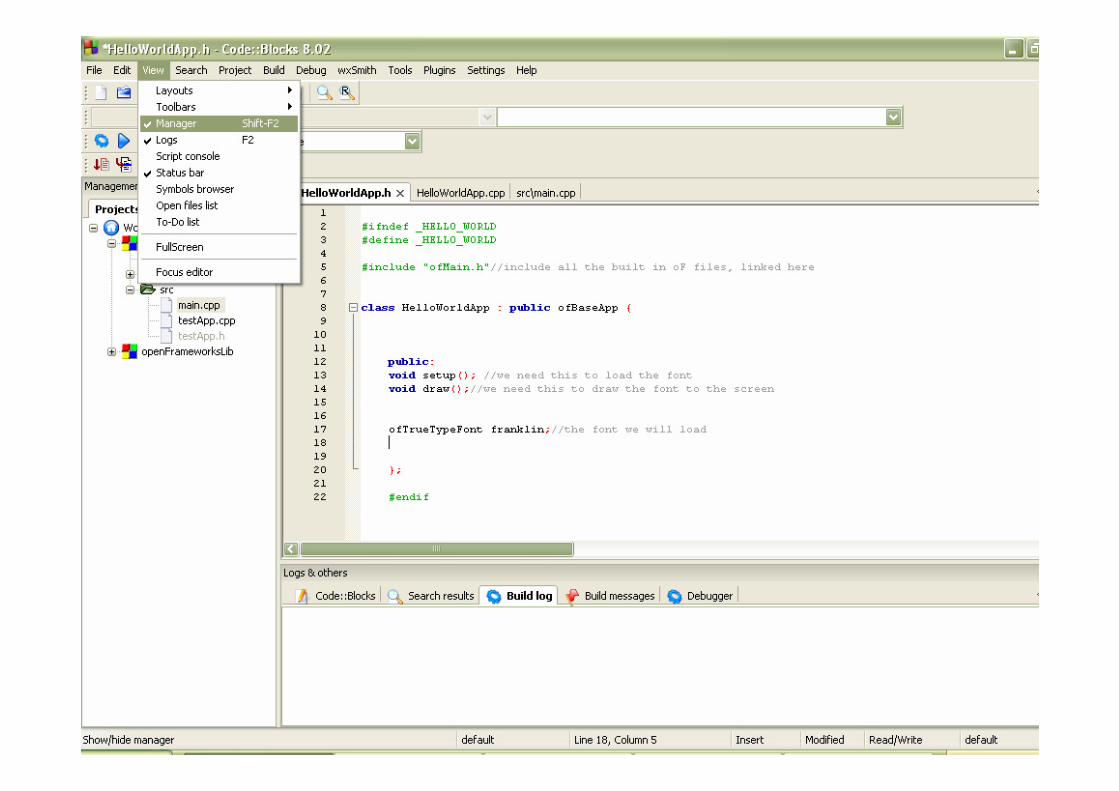
Open Code::Blocks(or your C++ IDE of choice)
A first program
We’ll use OF’s handy project templates
Look in the OF apps >>examples folder,
on my laptop its:
C:\Documents and Settings\student\My Documents\myOF\\of_preRelease_v0061_win_cb_FAT\of_preRelease_v0061_win_cb_FAT\apps\examples\ emptyExample
Copy the emptyExample folder and rename the folder
LessonOne

Our first program will be spread over three files:
HelloWorldApp.h (h = header file, a bit like a blue-print or empty structure with no implementation detail)
HelloWorldApp.cpp (a C++ file, here we’ll do new stuff and define our functions etc)
main.cpp (another C++ file, like a Java application every oF C++ program needs a mainmethod (or function) to get it going). We’ll use the one we’re taking from the template but
make a few changes to it.
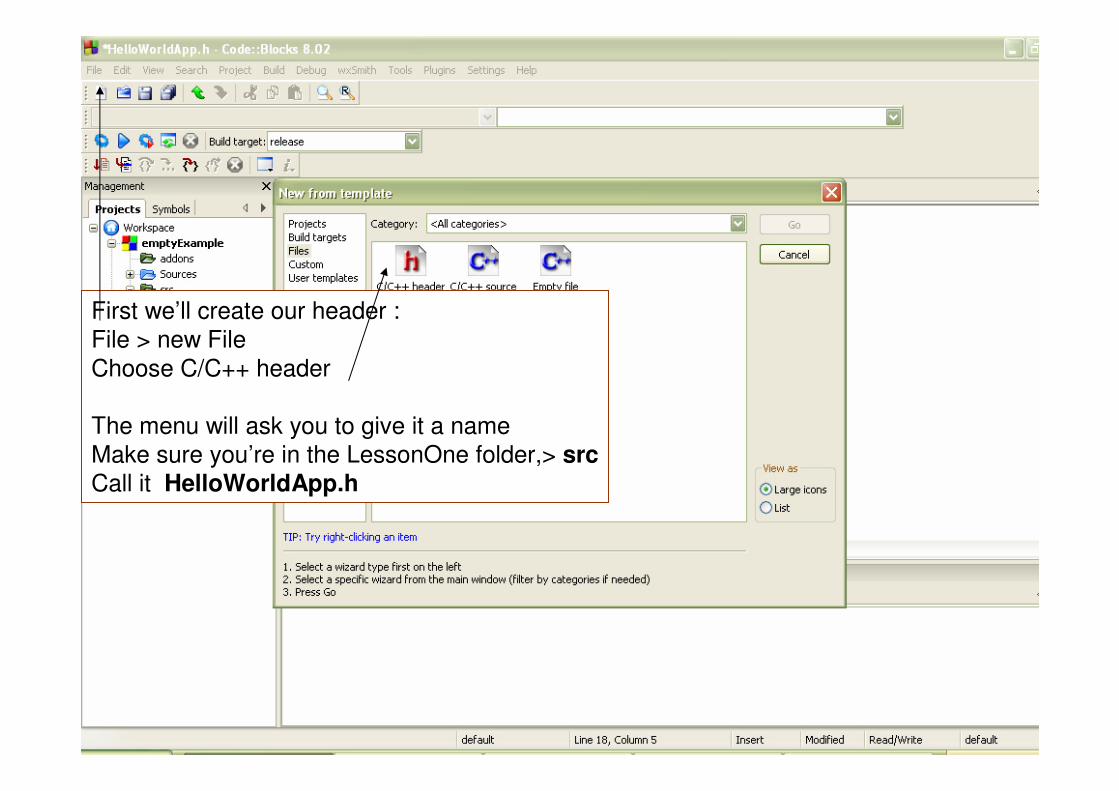
First we’ll create our header :
File > new File
Choose C/C++ header
The menu will ask you to give it a name
Make sure you’re in the LessonOne folder,> srcCall it HelloWorldApp.h
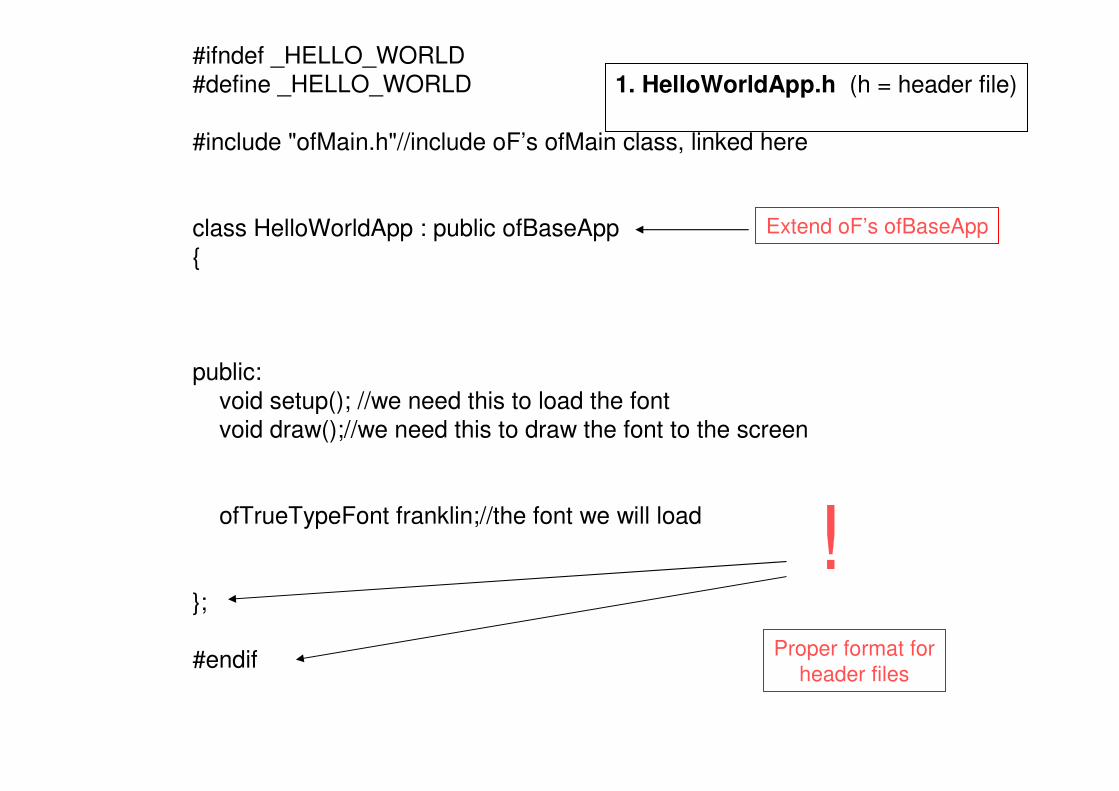
#ifndef _HELLO_WORLD
#define _HELLO_WORLD
#include "ofMain.h"//include oF’s ofMain class, linked here
class HelloWorldApp : public ofBaseApp
{
public:
void setup(); //we need this to load the font
void draw();//we need this to draw the font to the screen
ofTrueTypeFont franklin;//the font we will load
};
#endif
1. HelloWorldApp.h (h = header file)
!
Extend oF’s ofBaseApp
Proper format for
header files

2. HelloWorldApp.cpp(define what we want to happen)
Now go to File > New File
And choose a C++ file, call it
HelloWorldApp.cppwhen it asks for a name
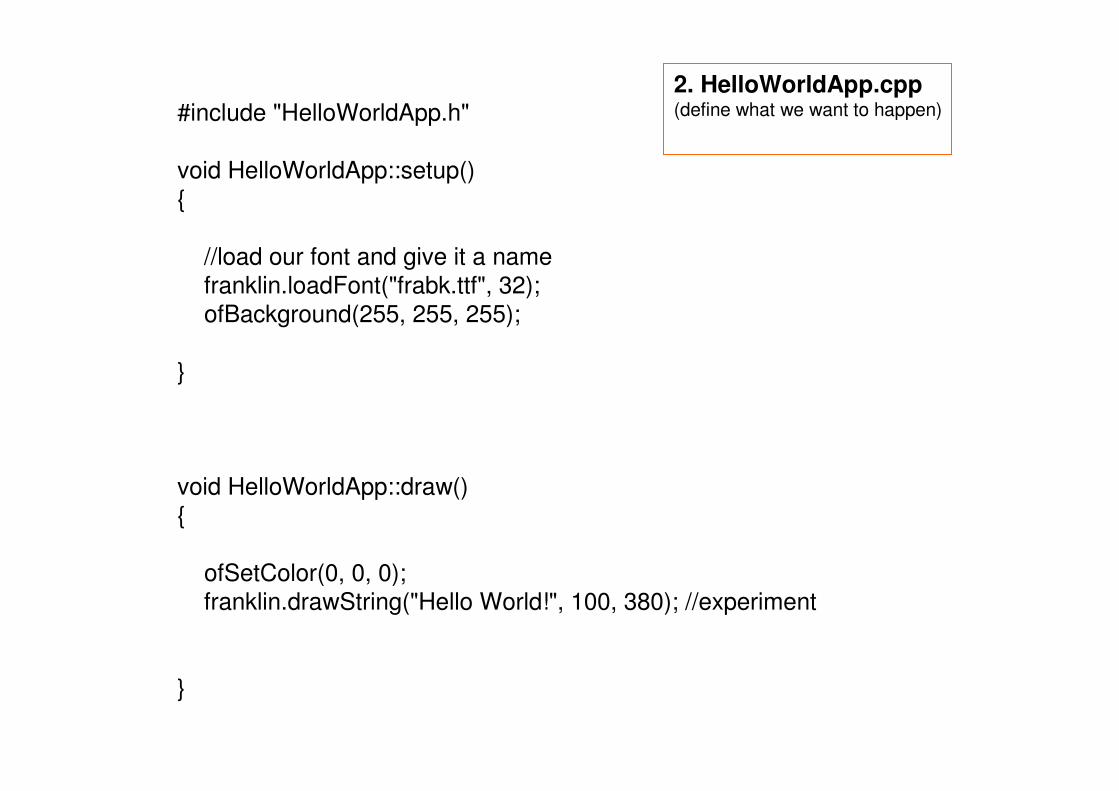
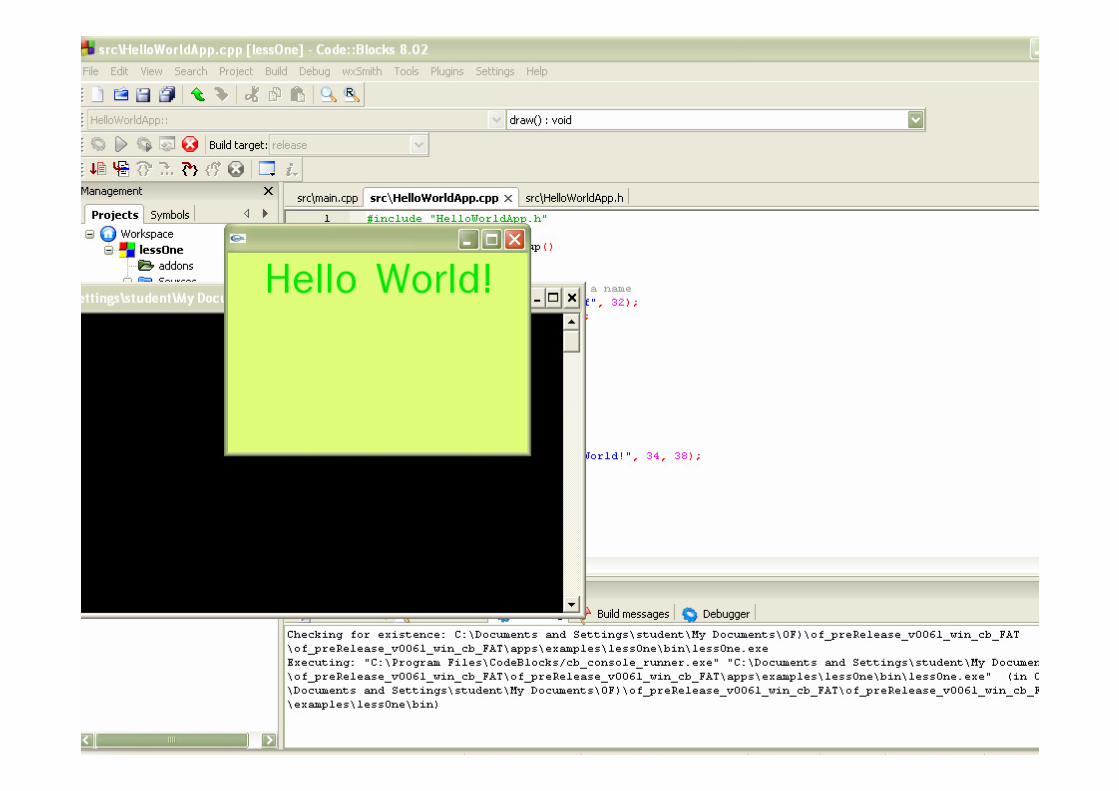
2. HelloWorldApp.cpp(define what we want to happen)#include "HelloWorldApp.h"
void HelloWorldApp::setup()
{
//load our font and give it a name
franklin.loadFont("frabk.ttf", 32);
ofBackground(255, 255, 255);
}
void HelloWorldApp::draw()
{
ofSetColor(0, 0, 0);
franklin.drawString("Hello World!", 100, 380); //experiment
}
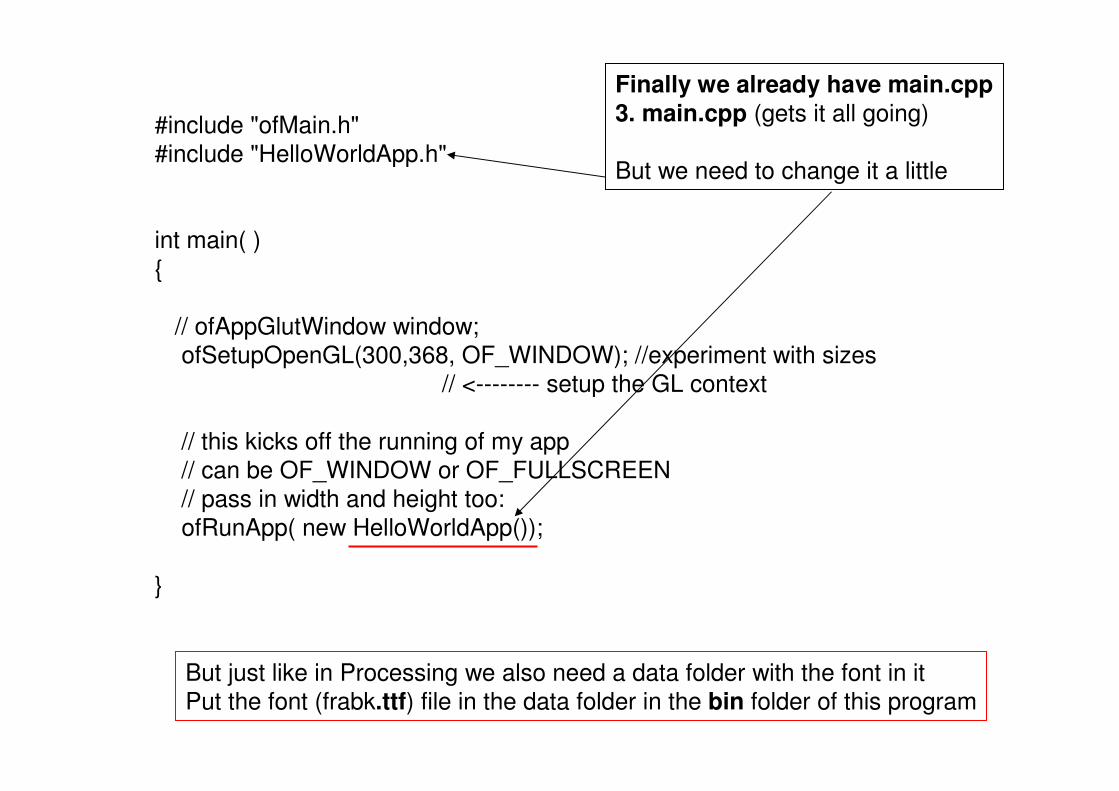
Finally we already have main.cpp
3. main.cpp (gets it all going)
But we need to change it a little
#include "ofMain.h"
#include "HelloWorldApp.h"
int main( )
{
// ofAppGlutWindow window;
ofSetupOpenGL(300,368, OF_WINDOW); //experiment with sizes
// <-------- setup the GL context
// this kicks off the running of my app
// can be OF_WINDOW or OF_FULLSCREEN
// pass in width and height too:
ofRunApp( new HelloWorldApp());
}
But just like in Processing we also need a data folder with the font in it
Put the font (frabk.ttf) file in the data folder in the bin folder of this program

Build and run the code
How Classes Work in C++ (Two Files!?)C++ classes comprise of two files. It helps to think of these two classes as a recipe. The header file (.h) is like the list of ingredients, and contains: Any preprocessor statements there to prevent multiple header definitions Any include statements to other classes Any class extension statements Any variables local to the class Prototypes of any functions to be contained in the class And the security settings of these functions and variables (e.g. public, private, protected, etc). and a body file (.cpp) which is like the instructions on what to do with the ingredients and contains: An include statement that references the .h file All of the code to fill in the function prototypes. To explore this more, open up the testApp.cpp and testApp.h files.
In c++ you must define your classes in your header before you use them. This is called prototyping.
Inside the Open Frameworks apps folder you will find examples of how to use various parts of openFrameworks. Inside the folder for each example is a project file that can be opened from your IDE. In code::blocks this is the .cbpfile. In xcode it is the .xcodeproj file.
2) if you want to make a new project:
--------------------------------------------------------------------------------
a) copy the folder inside of apps and paste in the same directory
ie (copy "emptyExample" and paste "copy of emptyExample")
b) rename the folder, and inside the folder, rename the .cbp and .workspace
c) open the .cbp file with a text editor. change the occurances of the old name to the new name:
line 5: <Option title="emptyExample" />line 11: <Option output="bin\emptyExample" prefix_auto="1" extension_auto="1" />
line 18: <Option output="bin\emptyExample_DEBUG" prefix_auto="1" extension_auto="1" />
for example, if I copied emptyexample and wanted to call it "coolExample" would look like:
line 5: <Option title="coolExample" />
line 11: <Option output="bin\coolExample" prefix_auto="1" extension_auto="1" />
line 18: <Option output="bin\coolExample_DEBUG" prefix_auto="1" extension_auto="1" />
in the solution file, change the name of .cbp file:
line 4: <Project filename="emptyExample.cbp" active="1" />
to whatever you've renamed the cbp to.
as always if you have issues, check or post on the forum: openframeworks.cc/forum
have fun!
oF provides this information,but our previous way of making aproject will also work. If you change theName of the project files (.cbp etc) you’llneed to follow these instructions
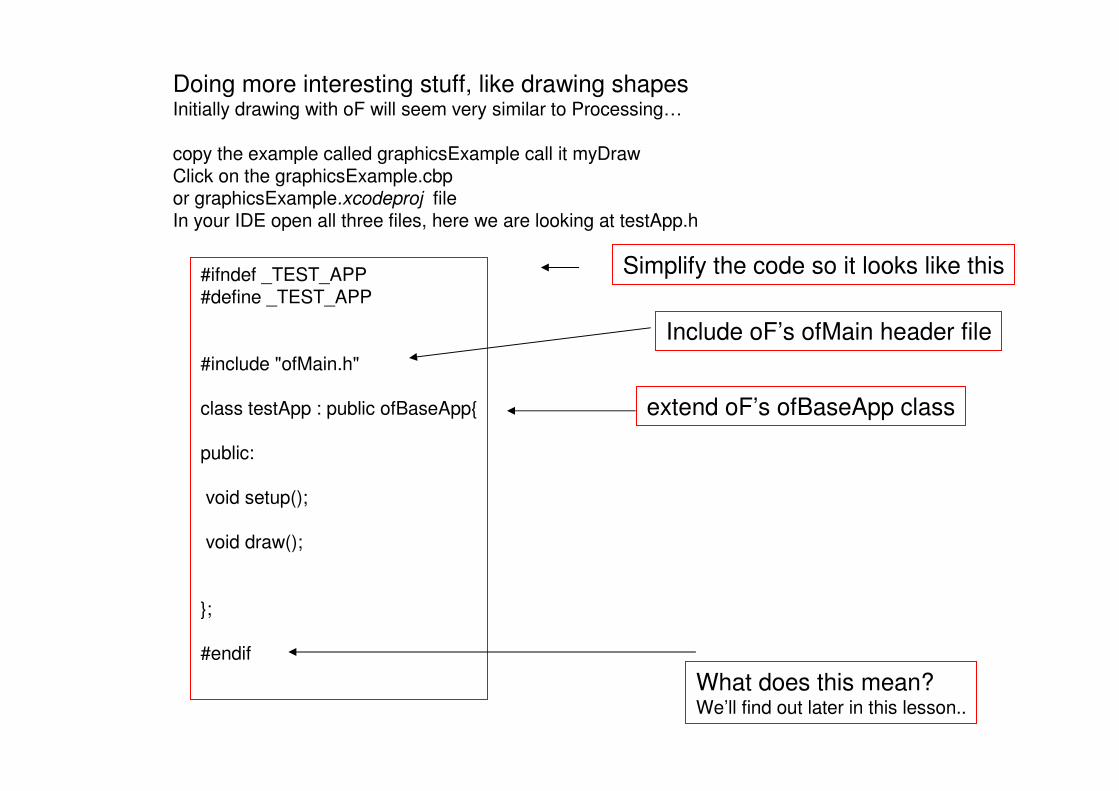
Doing more interesting stuff, like drawing shapesInitially drawing with oF will seem very similar to Processing…
copy the example called graphicsExample call it myDrawClick on the graphicsExample.cbpor graphicsExample.xcodeproj fileIn your IDE open all three files, here we are looking at testApp.h
#ifndef _TEST_APP#define _TEST_APP
#include "ofMain.h"
class testApp : public ofBaseApp{
public:
void setup();
void draw();
};
#endif
What does this mean?We’ll find out later in this lesson..
Simplify the code so it looks like this
Include oF’s ofMain header file
extend oF’s ofBaseApp class
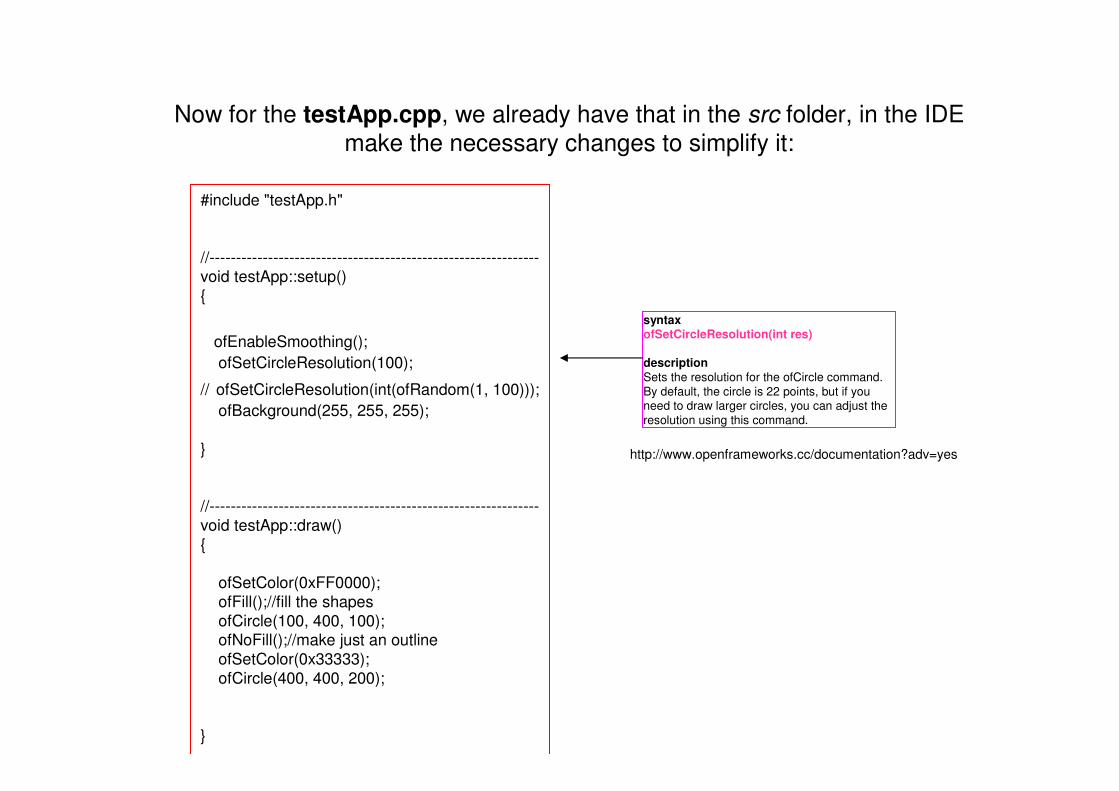
Now for the testApp.cpp, we already have that in the src folder, in the IDE
make the necessary changes to simplify it:
#include "testApp.h"
//--------------------------------------------------------------void testApp::setup()
{
ofEnableSmoothing();
ofSetCircleResolution(100);
// ofSetCircleResolution(int(ofRandom(1, 100)));
ofBackground(255, 255, 255);
}
//--------------------------------------------------------------
void testApp::draw()
{
ofSetColor(0xFF0000);
ofFill();//fill the shapes
ofCircle(100, 400, 100);ofNoFill();//make just an outline
ofSetColor(0x33333);
ofCircle(400, 400, 200);
}
syntax ofSetCircleResolution(int res)
description Sets the resolution for the ofCircle command.
By default, the circle is 22 points, but if you need to draw larger circles, you can adjust the
resolution using this command.
http://www.openframeworks.cc/documentation?adv=yes
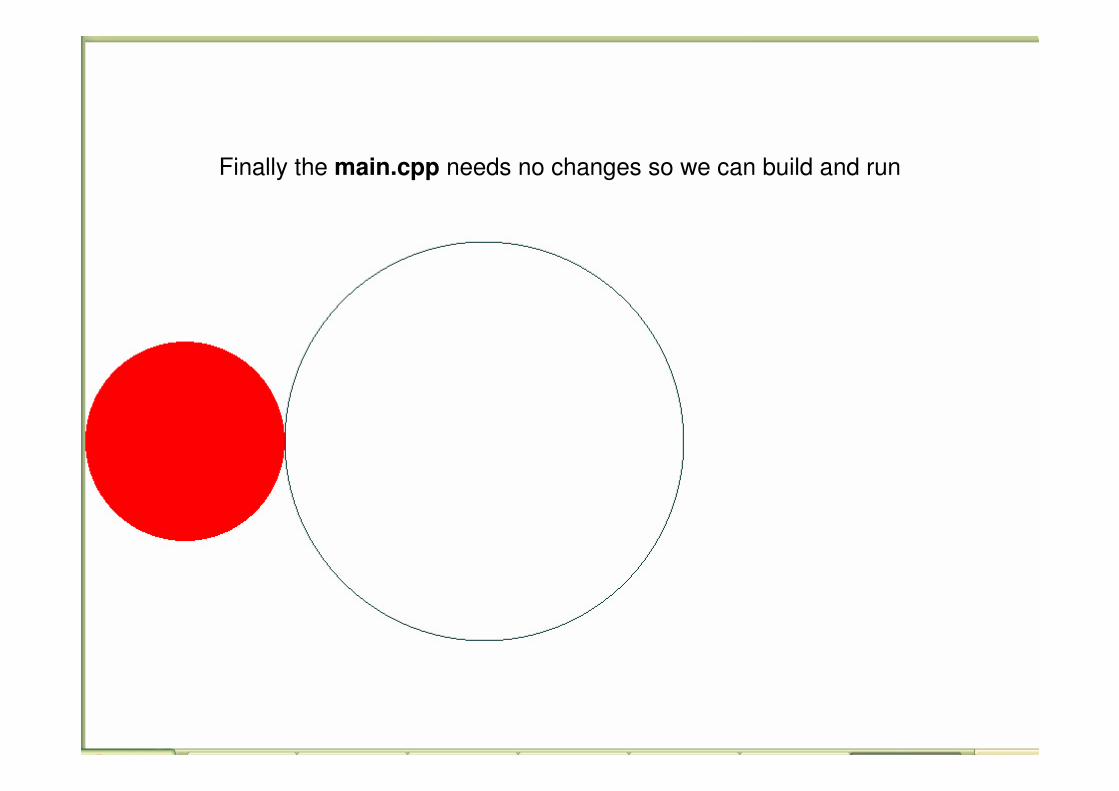
Finally the main.cpp needs no changes so we can build and run
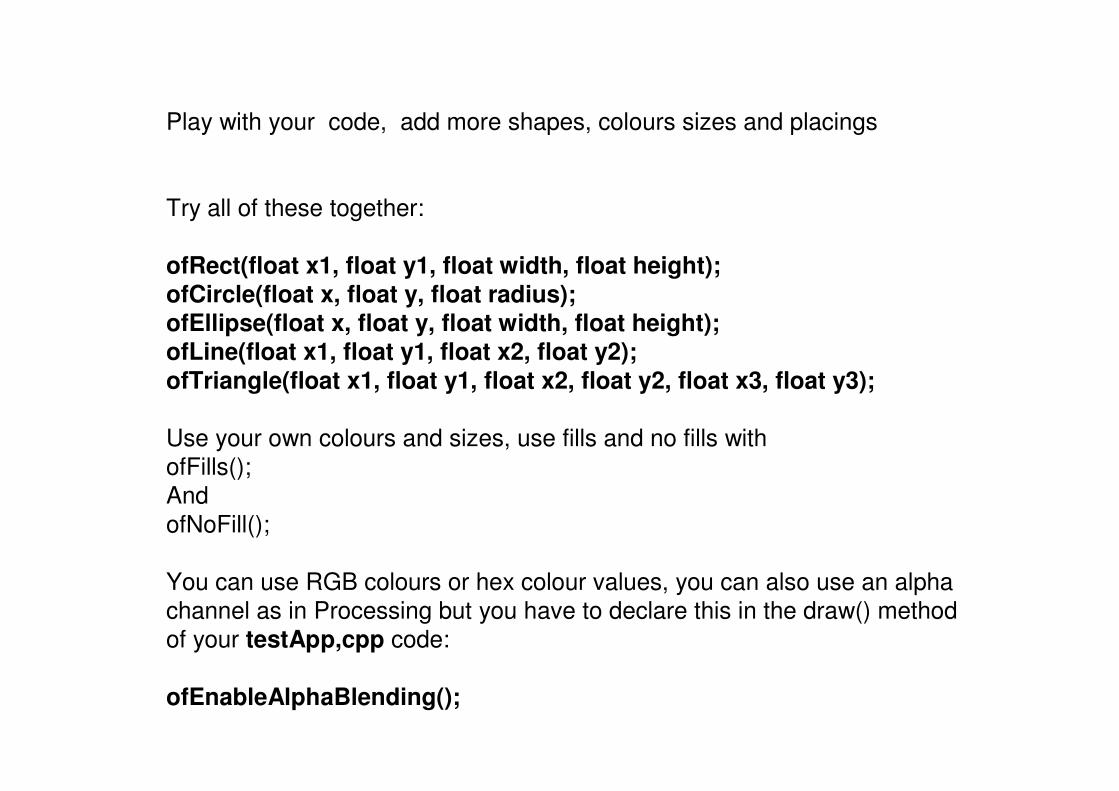
Play with your code, add more shapes, colours sizes and placings
Try all of these together:
ofRect(float x1, float y1, float width, float height); ofCircle(float x, float y, float radius);ofEllipse(float x, float y, float width, float height);ofLine(float x1, float y1, float x2, float y2);
ofTriangle(float x1, float y1, float x2, float y2, float x3, float y3);
Use your own colours and sizes, use fills and no fills with
ofFills();
And
ofNoFill();
You can use RGB colours or hex colour values, you can also use an alpha
channel as in Processing but you have to declare this in the draw() method
of your testApp,cpp code:
ofEnableAlphaBlending();

Fourth parameter = alpha channel
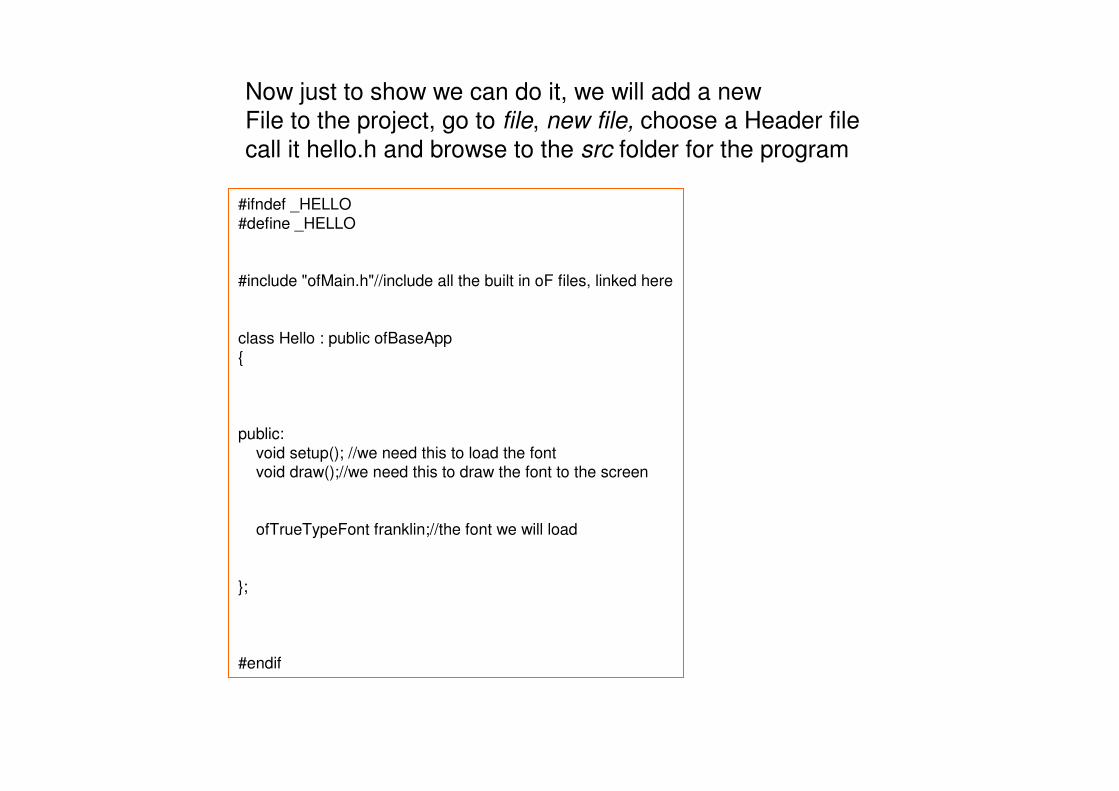
Now just to show we can do it, we will add a new
File to the project, go to file, new file, choose a Header file
call it hello.h and browse to the src folder for the program
#ifndef _HELLO
#define _HELLO
#include "ofMain.h"//include all the built in oF files, linked here
class Hello : public ofBaseApp
{
public:
void setup(); //we need this to load the fontvoid draw();//we need this to draw the font to the screen
ofTrueTypeFont franklin;//the font we will load
};
#endif
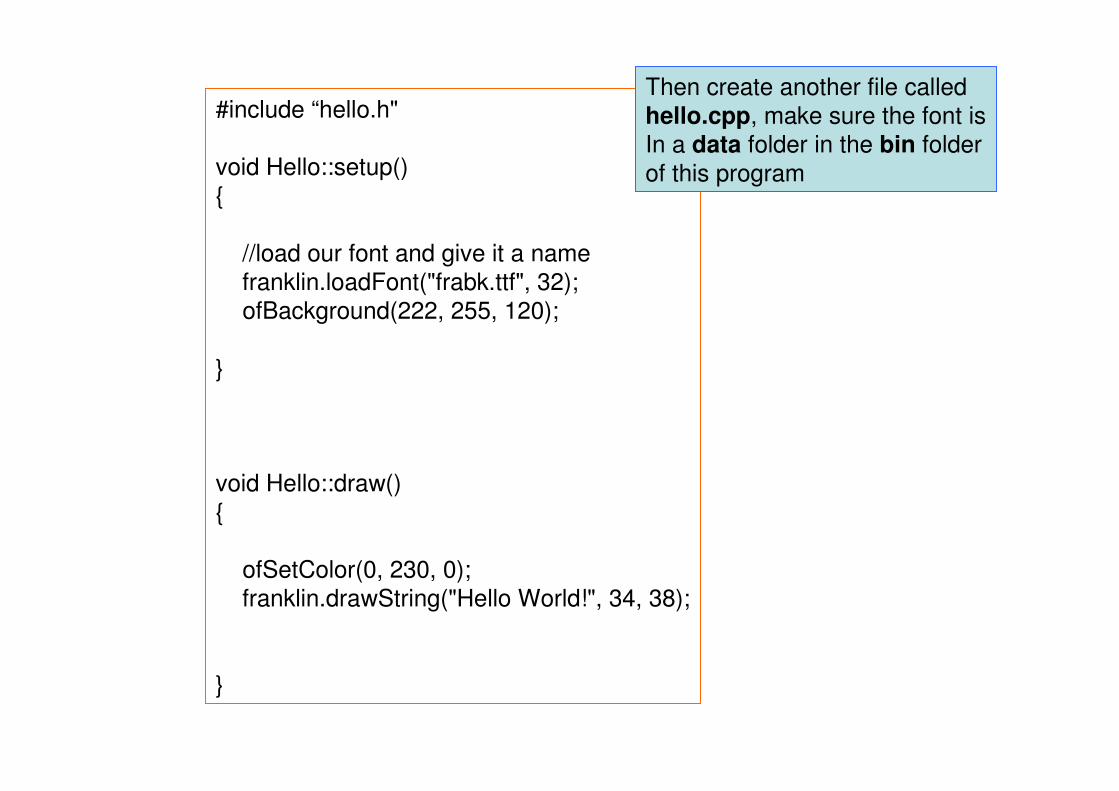
#include “hello.h"
void Hello::setup()
{
//load our font and give it a name
franklin.loadFont("frabk.ttf", 32);
ofBackground(222, 255, 120);
}
void Hello::draw()
{
ofSetColor(0, 230, 0);
franklin.drawString("Hello World!", 34, 38);
}
Then create another file called
hello.cpp, make sure the font is
In a data folder in the bin folder
of this program
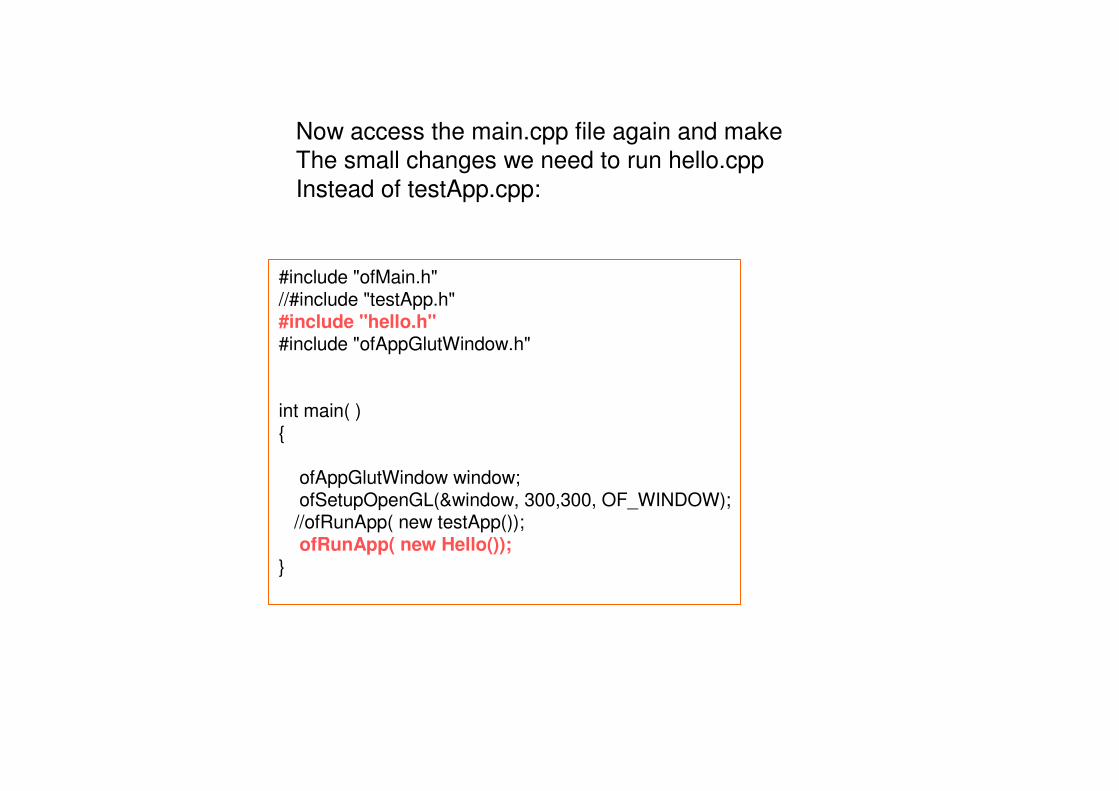
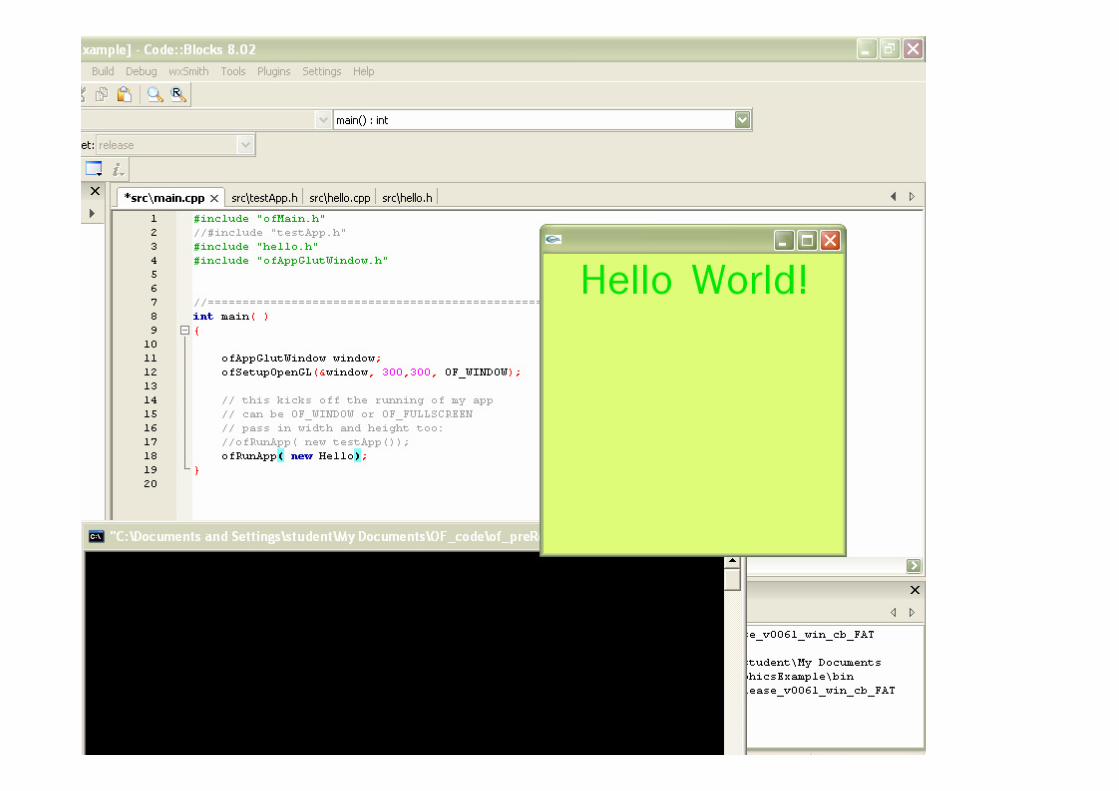
Now access the main.cpp file again and make
The small changes we need to run hello.cpp
Instead of testApp.cpp:
#include "ofMain.h"//#include "testApp.h"#include "hello.h"#include "ofAppGlutWindow.h"
int main( ){
ofAppGlutWindow window;ofSetupOpenGL(&window, 300,300, OF_WINDOW);
//ofRunApp( new testApp());ofRunApp( new Hello());
}
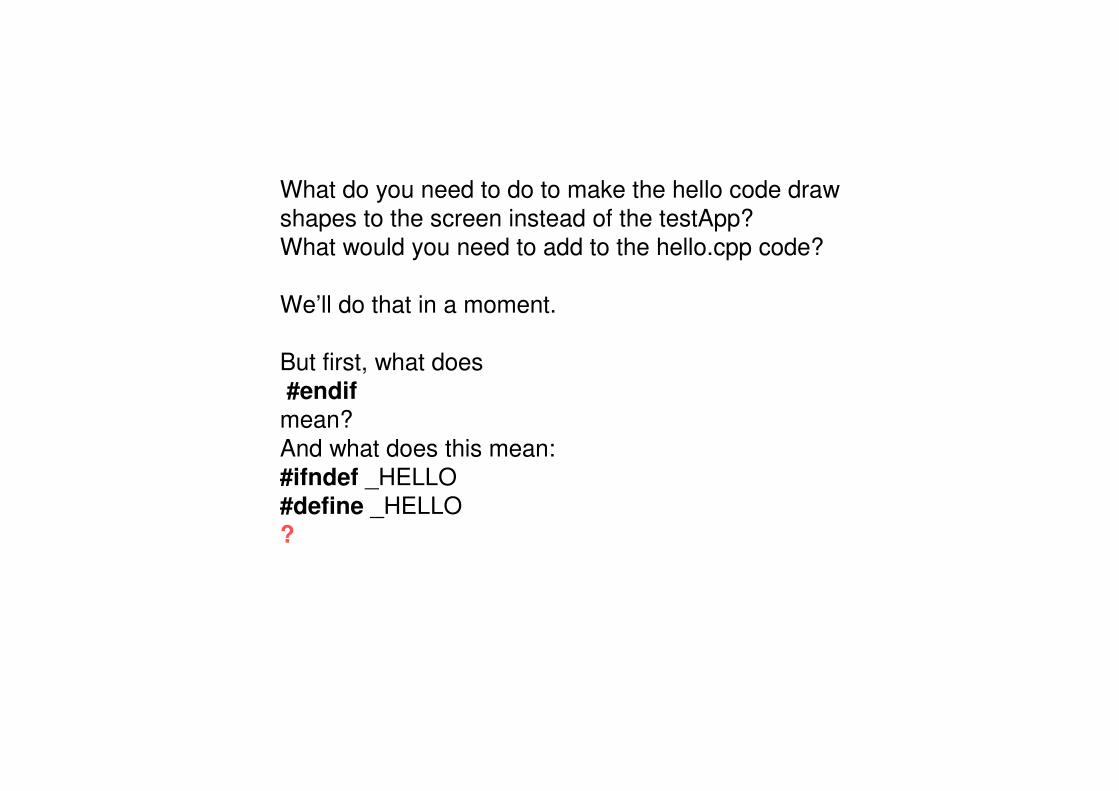
What do you need to do to make the hello code draw
shapes to the screen instead of the testApp?
What would you need to add to the hello.cpp code?
We’ll do that in a moment.
But first, what does
#endifmean?
And what does this mean:
#ifndef _HELLO
#define _HELLO
?
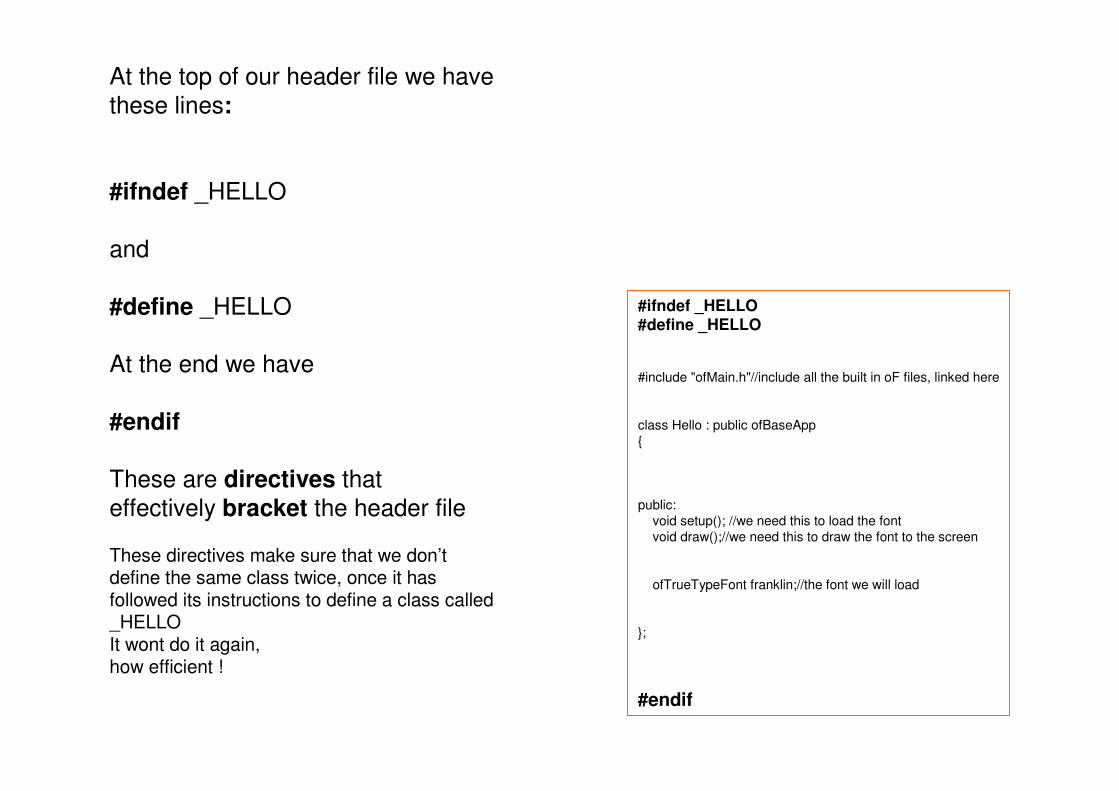
At the top of our header file we have
these lines:
#ifndef _HELLO
and
#define _HELLO
At the end we have
#endif
These are directives that
effectively bracket the header file
These directives make sure that we don’tdefine the same class twice, once it has followed its instructions to define a class called_HELLOIt wont do it again, how efficient !
#ifndef _HELLO#define _HELLO
#include "ofMain.h"//include all the built in oF files, linked here
class Hello : public ofBaseApp
{
public:
void setup(); //we need this to load the font
void draw();//we need this to draw the font to the screen
ofTrueTypeFont franklin;//the font we will load
};
#endif
Next time you open the code you may
Have to go to project>>>add files in the IDE
And add the hello.cpp and hello.h files
select all for the files to be ‘debug’ and ‘release’
In the menu that appears when you add files to your
Project. If you saved everything carefully the files should all be there
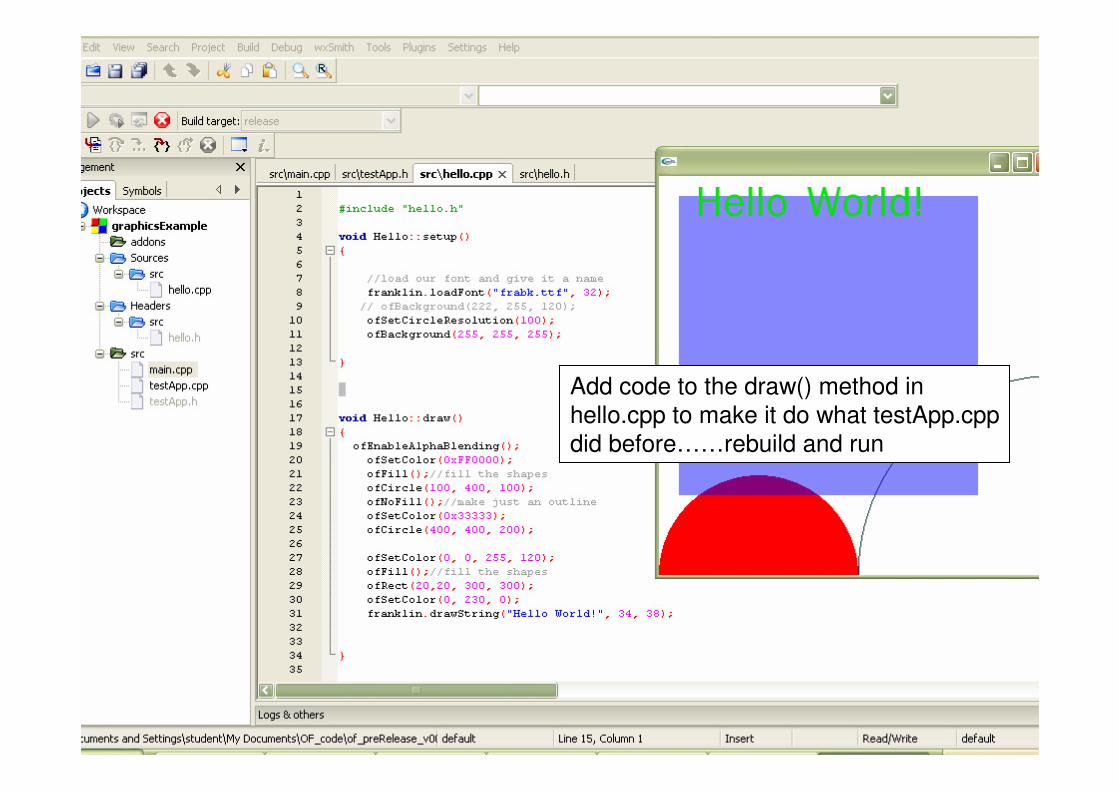
Add code to the draw() method in
hello.cpp to make it do what testApp.cpp
did before……rebuild and run
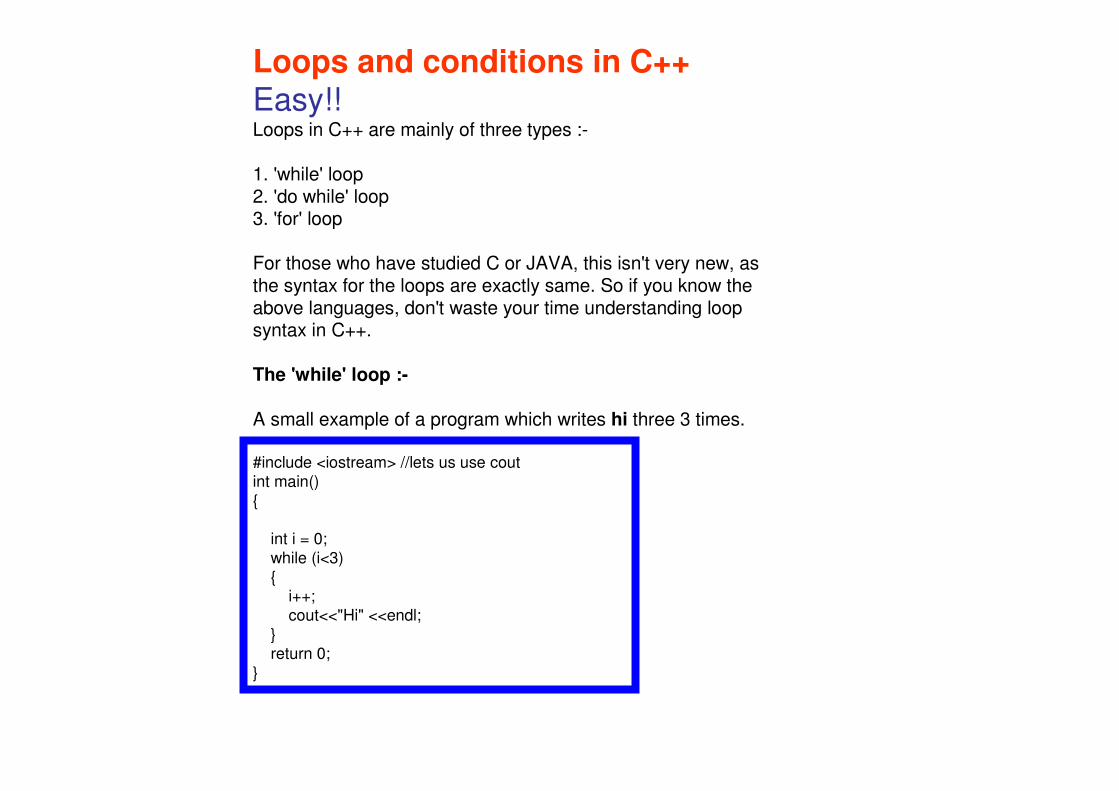
Loops and conditions in C++Easy!!Loops in C++ are mainly of three types :-
1. 'while' loop2. 'do while' loop3. 'for' loop
For those who have studied C or JAVA, this isn't very new, as the syntax for the loops are exactly same. So if you know the above languages, don't waste your time understanding loop syntax in C++.
The 'while' loop :-
A small example of a program which writes hi three 3 times.
#include <iostream> //lets us use cout
int main()
{
int i = 0;
while (i<3)
{i++;
cout<<"Hi" <<endl;
}
return 0;
}
C++ basicsPointers and references
& dereferences
Efficient programming by
managing memory• & = a reference operator
• It refers to the address of a variable
• Using * infront of a variable means it will be a pointer: i.e int* pVariable;
• This * has 2 uses, it is also a dereference operator. Confusingly 2 different things are represented by the same sign…(of course we also know it as the multiplication sign, the clever compiler understands all these meanings by context).
• As a dereference operator you use * to point to the value of the variable you want to access (not the address).
THIS WILL BECOME CLEAR IN THE FOLLOWING SLIDES
http://www.cplusplus.com/doc/tutorial/pointers/
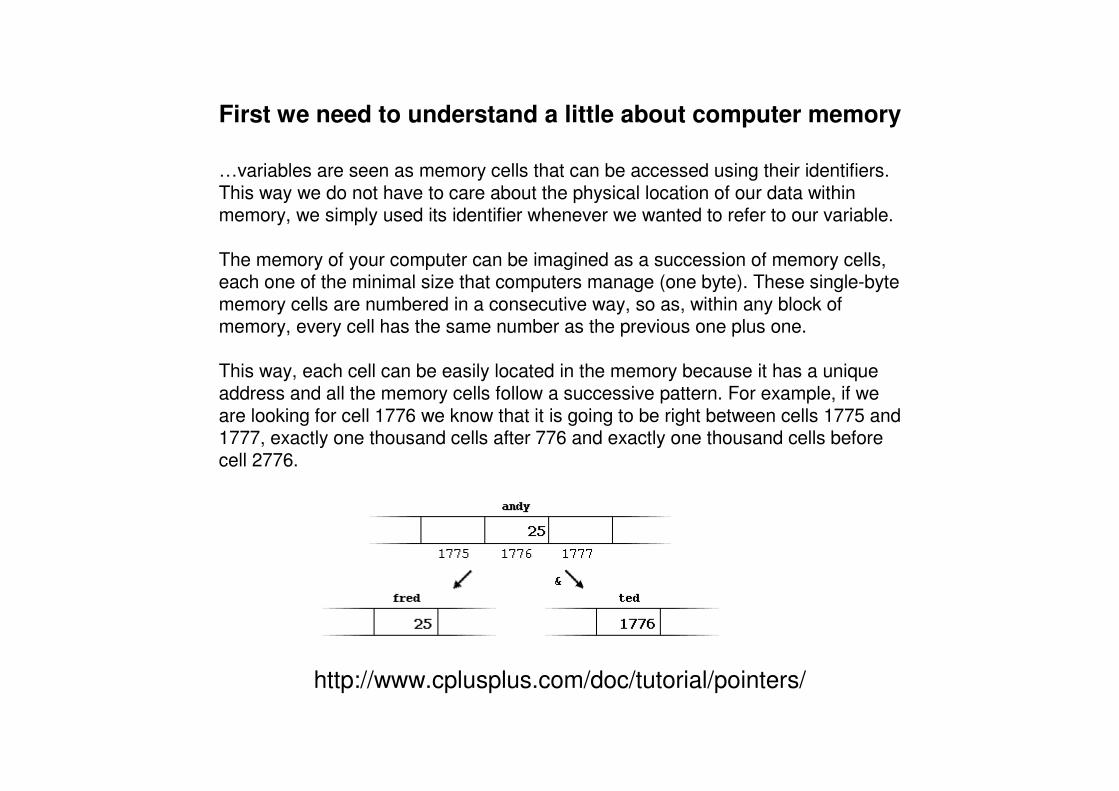
…variables are seen as memory cells that can be accessed using their identifiers. This way we do not have to care about the physical location of our data within memory, we simply used its identifier whenever we wanted to refer to our variable.
The memory of your computer can be imagined as a succession of memory cells, each one of the minimal size that computers manage (one byte). These single-byte memory cells are numbered in a consecutive way, so as, within any block of memory, every cell has the same number as the previous one plus one.
This way, each cell can be easily located in the memory because it has a unique address and all the memory cells follow a successive pattern. For example, if we are looking for cell 1776 we know that it is going to be right between cells 1775 and 1777, exactly one thousand cells after 776 and exactly one thousand cells before cell 2776.
First we need to understand a little about computer memory
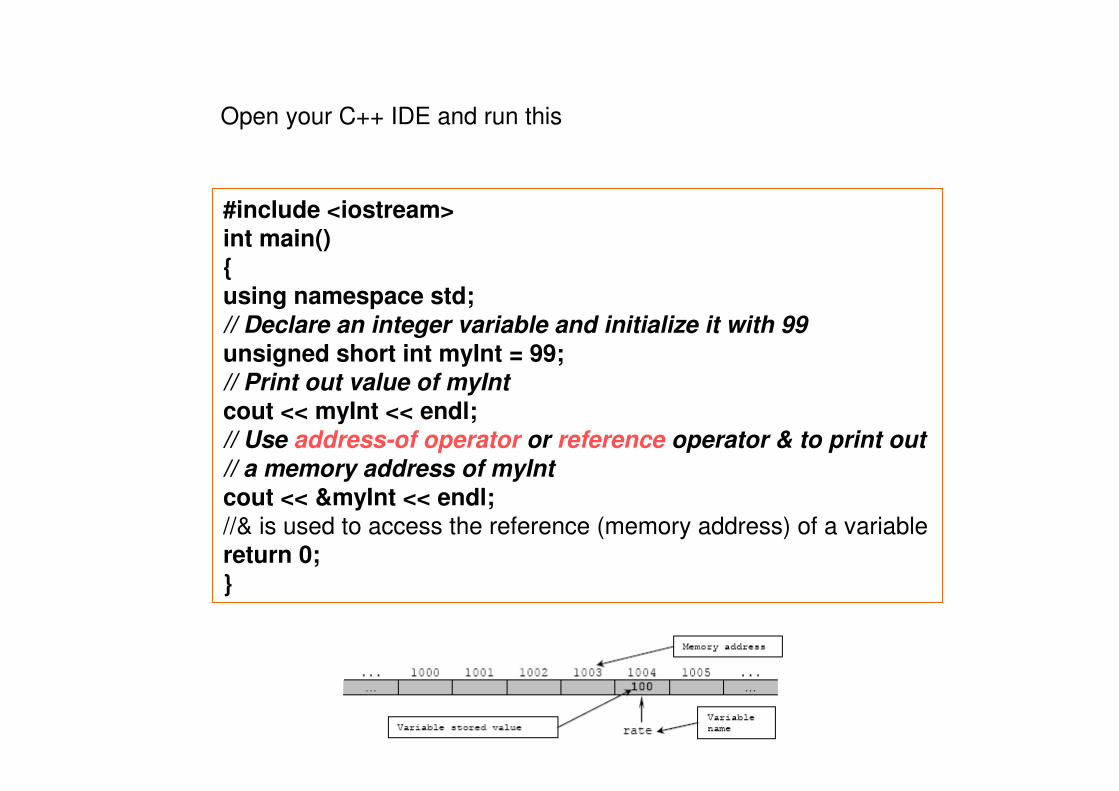
#include <iostream>int main(){using namespace std;
// Declare an integer variable and initialize it with 99
unsigned short int myInt = 99;// Print out value of myInt
cout << myInt << endl;// Use address-of operator or reference operator & to print out
// a memory address of myInt
cout << &myInt << endl;//& is used to access the reference (memory address) of a variable
return 0;}
Open your C++ IDE and run this
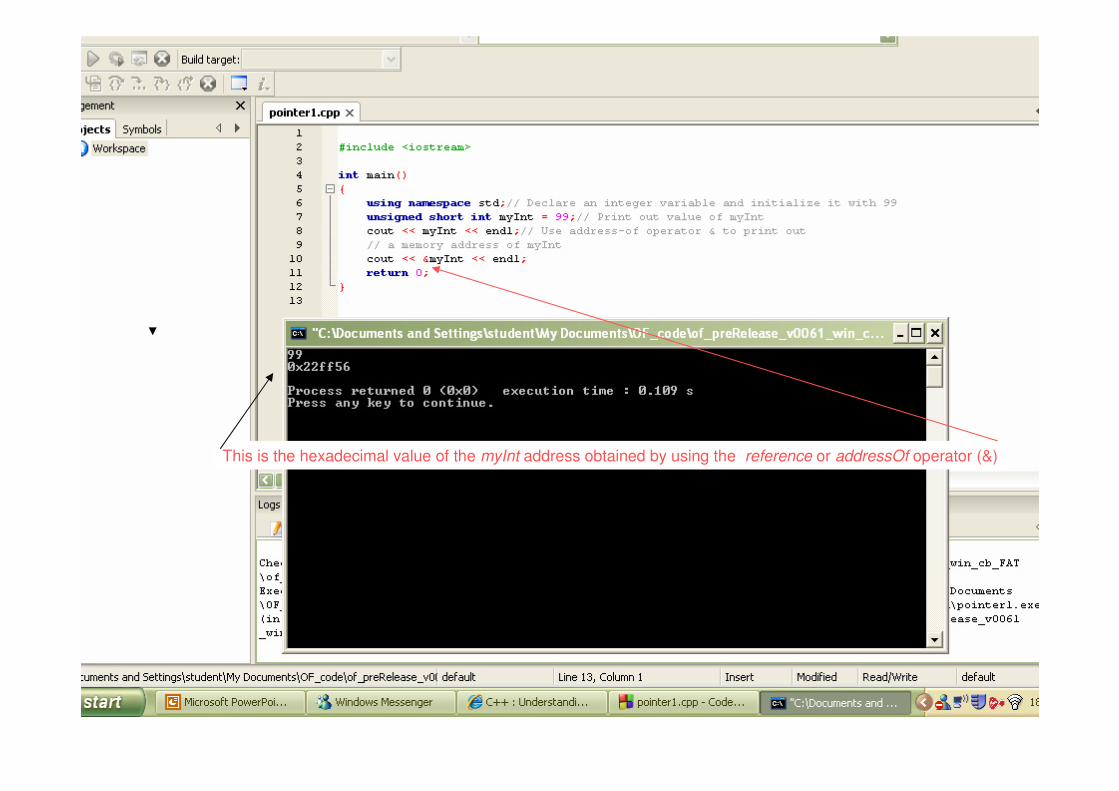
This is the hexadecimal value of the myInt address obtained by using the reference or addressOf operator (&)
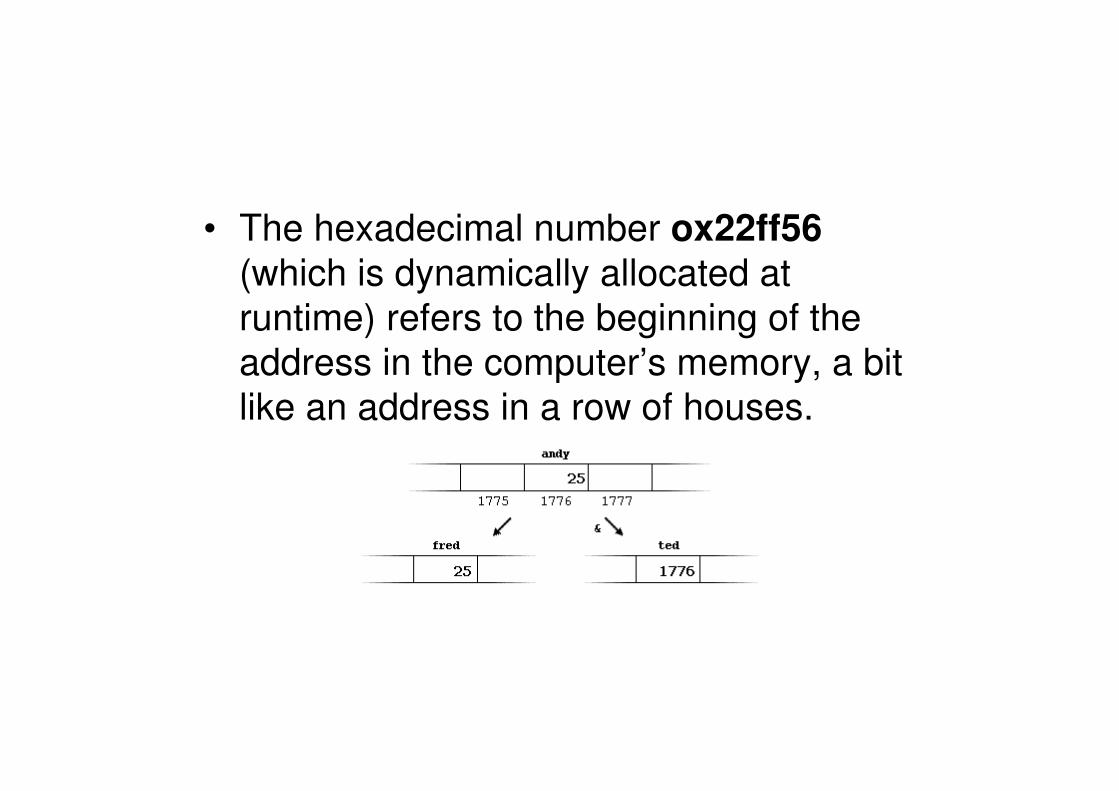
• The hexadecimal number ox22ff56
(which is dynamically allocated at
runtime) refers to the beginning of the
address in the computer’s memory, a bit
like an address in a row of houses.
Reference operator (&)As soon as we declare a variable, the amount of memory needed is assigned for it at a specific location in memory (its memory address). We generally do not actively decide the exact location of the variable within the panel of cells that we have imagined the memory to be - Fortunately, that is a task automatically performed by the operating system during runtime. However, in some cases we may be interested in knowing the address where our variable is being stored during runtime in order to operate with relative positions to it.
The address that locates a variable within memory is what we call a reference to that variable. This reference to a variable can be obtained by preceding the identifier of a variable with an ampersand sign (&), known as reference operator, and which can be literally translated as "address of". For example:
ted = &andy;
This would assign to ted the address of variable andy, since when preceding the name of the variable andy with the reference operator (&) we are no longer talking about the content of the variable itself, but about its reference (i.e., its address in memory).
From now on we are going to assume that andy is placed during runtime in the memory address 1776. This number (1776) is just an arbitrary assumption we are inventing right now in order to help clarify some concepts in this tutorial, but in reality, we cannot know before runtime the real value the address of a variable will have in memory.
Consider the following code fragment:
andy = 25;fred = andy;ted = &andy;
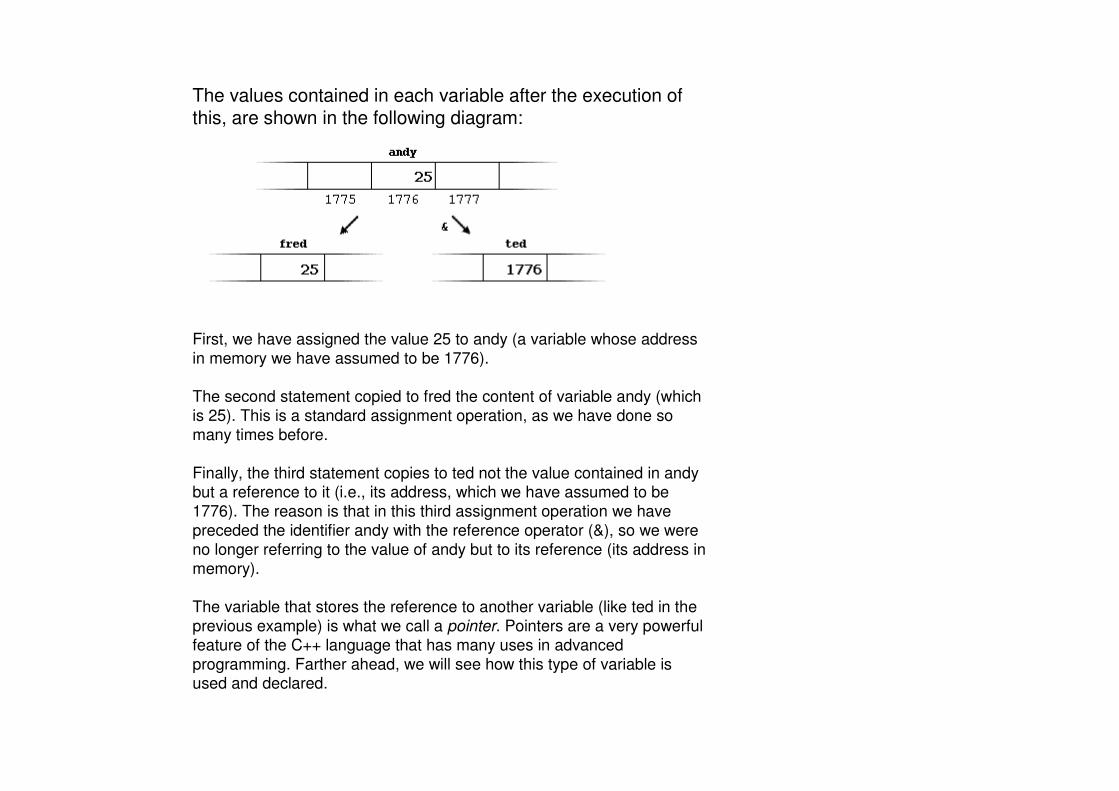
The values contained in each variable after the execution of this, are shown in the following diagram:
First, we have assigned the value 25 to andy (a variable whose address
in memory we have assumed to be 1776).
The second statement copied to fred the content of variable andy (which
is 25). This is a standard assignment operation, as we have done so
many times before.
Finally, the third statement copies to ted not the value contained in andybut a reference to it (i.e., its address, which we have assumed to be
1776). The reason is that in this third assignment operation we have
preceded the identifier andy with the reference operator (&), so we were
no longer referring to the value of andy but to its reference (its address in
memory).
The variable that stores the reference to another variable (like ted in the
previous example) is what we call a pointer. Pointers are a very powerful
feature of the C++ language that has many uses in advanced
programming. Farther ahead, we will see how this type of variable is used and declared.
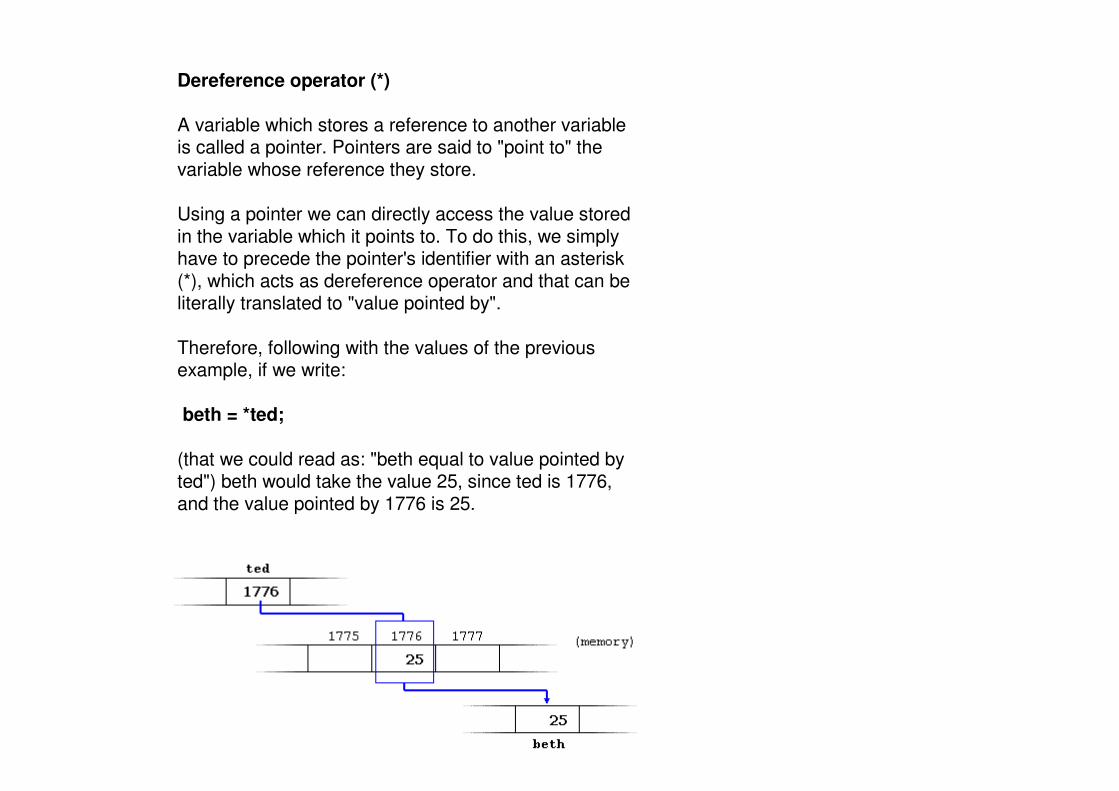
Dereference operator (*)
A variable which stores a reference to another variable is called a pointer. Pointers are said to "point to" the variable whose reference they store.
Using a pointer we can directly access the value stored in the variable which it points to. To do this, we simply have to precede the pointer's identifier with an asterisk (*), which acts as dereference operator and that can be literally translated to "value pointed by".
Therefore, following with the values of the previous example, if we write:
beth = *ted;
(that we could read as: "beth equal to value pointed by ted") beth would take the value 25, since ted is 1776, and the value pointed by 1776 is 25.
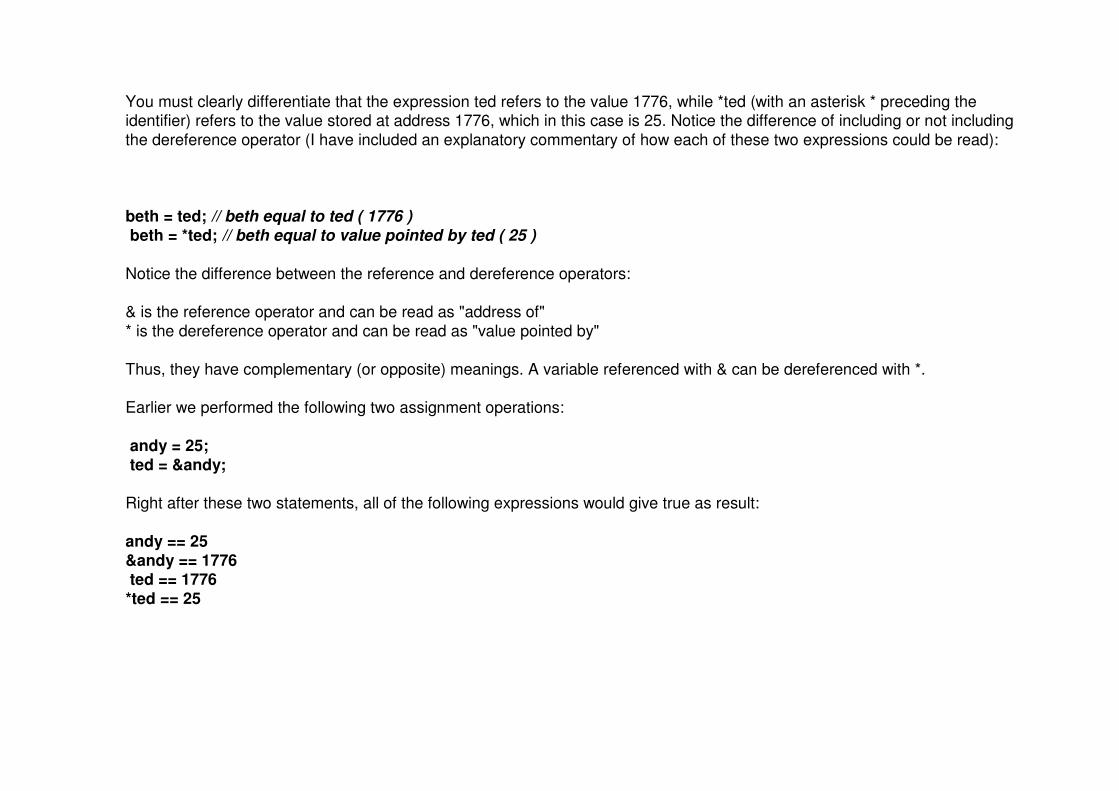
You must clearly differentiate that the expression ted refers to the value 1776, while *ted (with an asterisk * preceding the identifier) refers to the value stored at address 1776, which in this case is 25. Notice the difference of including or not including
the dereference operator (I have included an explanatory commentary of how each of these two expressions could be read):
beth = ted; // beth equal to ted ( 1776 )
beth = *ted; // beth equal to value pointed by ted ( 25 )
Notice the difference between the reference and dereference operators:
& is the reference operator and can be read as "address of"
* is the dereference operator and can be read as "value pointed by"
Thus, they have complementary (or opposite) meanings. A variable referenced with & can be dereferenced with *.
Earlier we performed the following two assignment operations:
andy = 25;ted = &andy;
Right after these two statements, all of the following expressions would give true as result:
andy == 25 &andy == 1776ted == 1776
*ted == 25

The first expression is quite clear considering that the assignment operation
performed on andy was andy=25. The second one uses the reference
operator (&), which returns the address of variable andy, which we assumed it
to have a value of 1776. The third one is somewhat obvious since the second
expression was true and the assignment operation performed on ted was
ted=&andy. The fourth expression uses the dereference operator (*) that, as
we have just seen, can be read as "value pointed by", and the value pointed
by ted is indeed 25.
So, after all that, you may also infer that for as long as the address pointed by
ted remains unchanged the following expression will also be true:
*ted == andy
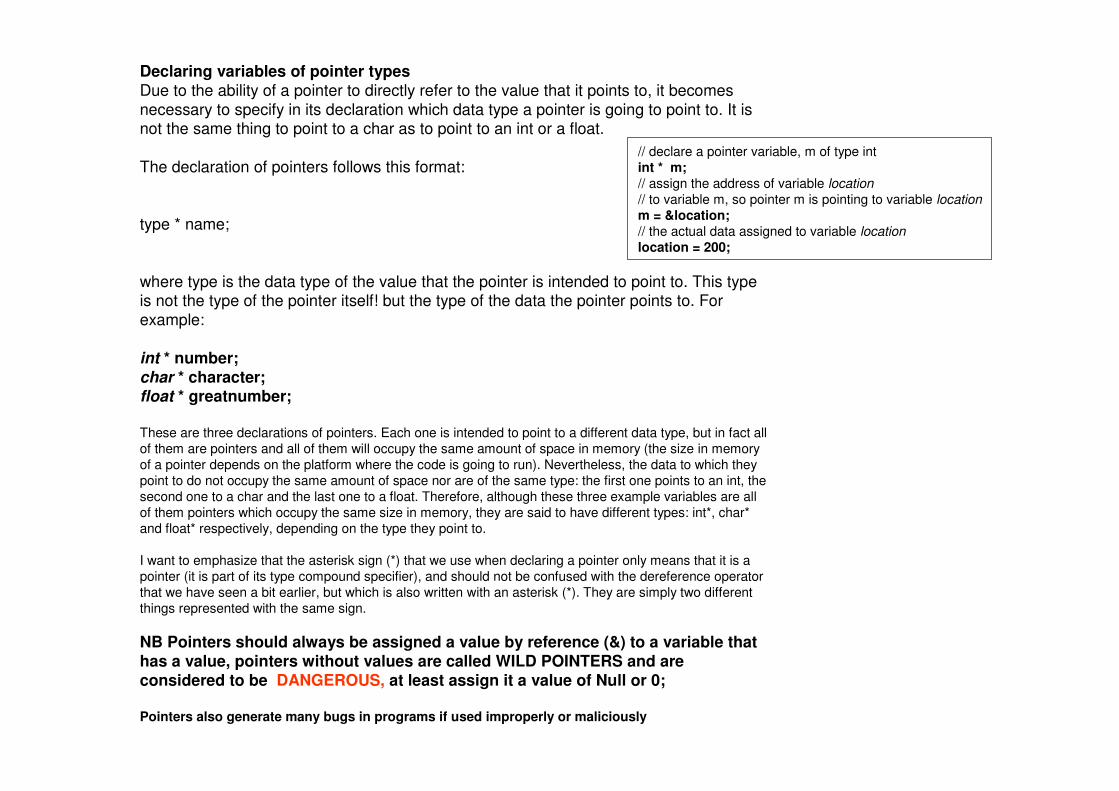
Declaring variables of pointer typesDue to the ability of a pointer to directly refer to the value that it points to, it becomes
necessary to specify in its declaration which data type a pointer is going to point to. It is not the same thing to point to a char as to point to an int or a float.
The declaration of pointers follows this format:
type * name;
where type is the data type of the value that the pointer is intended to point to. This type is not the type of the pointer itself! but the type of the data the pointer points to. For
example:
int * number;char * character; float * greatnumber;
These are three declarations of pointers. Each one is intended to point to a different data type, but in fact all
of them are pointers and all of them will occupy the same amount of space in memory (the size in memory
of a pointer depends on the platform where the code is going to run). Nevertheless, the data to which they
point to do not occupy the same amount of space nor are of the same type: the first one points to an int, the
second one to a char and the last one to a float. Therefore, although these three example variables are all
of them pointers which occupy the same size in memory, they are said to have different types: int*, char*
and float* respectively, depending on the type they point to.
I want to emphasize that the asterisk sign (*) that we use when declaring a pointer only means that it is a
pointer (it is part of its type compound specifier), and should not be confused with the dereference operator
that we have seen a bit earlier, but which is also written with an asterisk (*). They are simply two different
things represented with the same sign.
NB Pointers should always be assigned a value by reference (&) to a variable that has a value, pointers without values are called WILD POINTERS and are considered to be DANGEROUS, at least assign it a value of Null or 0;
Pointers also generate many bugs in programs if used improperly or maliciously
// declare a pointer variable, m of type int
int * m;
// assign the address of variable location
// to variable m, so pointer m is pointing to variable location
m = &location;
// the actual data assigned to variable location
location = 200;
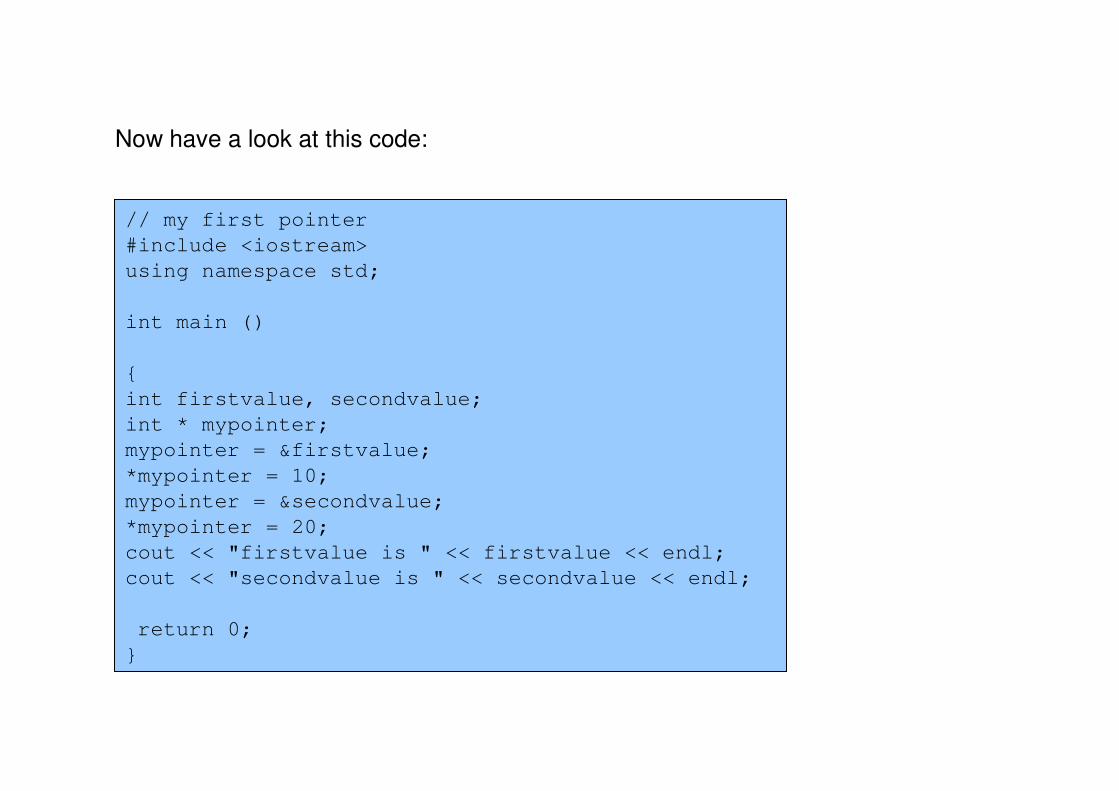
Now have a look at this code:
// my first pointer
#include <iostream>
using namespace std;
int main ()
{
int firstvalue, secondvalue;
int * mypointer;
mypointer = &firstvalue;
*mypointer = 10;
mypointer = &secondvalue;
*mypointer = 20;
cout << "firstvalue is " << firstvalue << endl;
cout << "secondvalue is " << secondvalue << endl;
return 0;
}
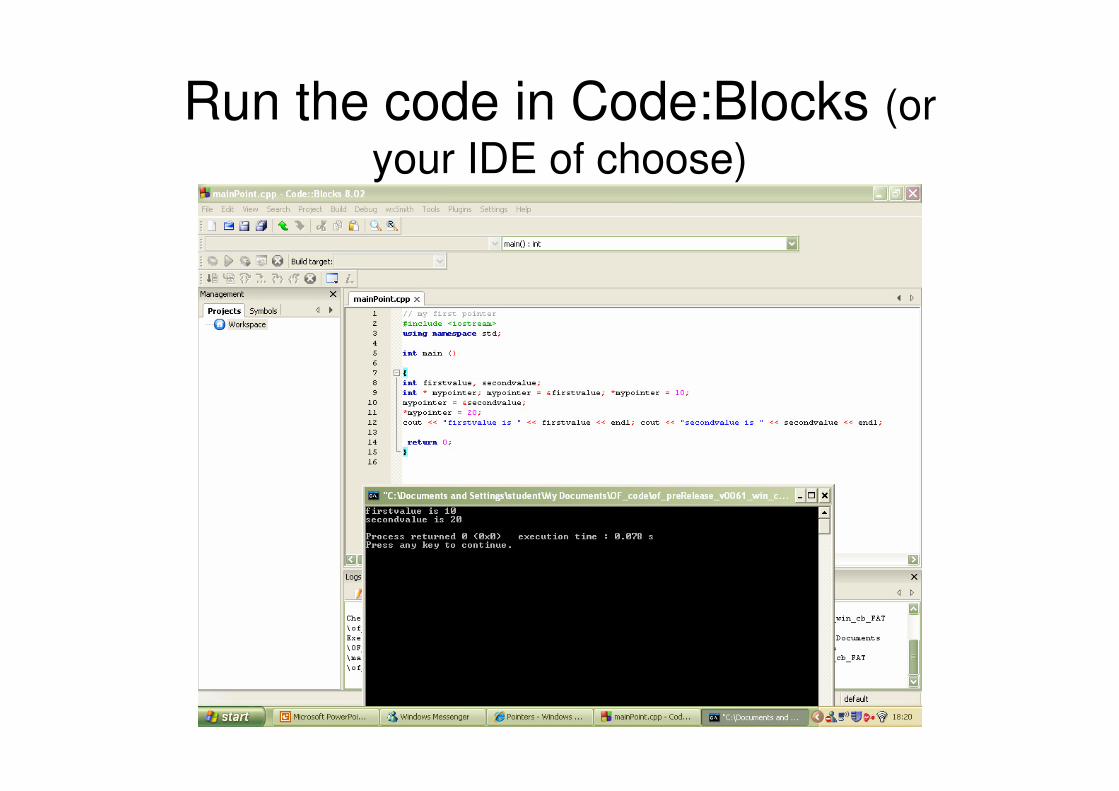
Run the code in Code:Blocks (or
your IDE of choose)
Notice that even though we have never directly set a value to either
firstvalue or secondvalue, both end up with a value set indirectly through
the use of mypointer. This is the procedure:
First, we have assigned as value of mypointer a reference to firstvalue
using the reference operator (&). And then we have assigned the value
10 to the memory location pointed by mypointer, that because at this
moment is pointing to the memory location of firstvalue, this in fact
modifies the value of firstvalue.
In order to demonstrate that a pointer may take several different values
during the same program I have repeated the process with secondvalue
and that same pointer, mypointer.
Why is this useful?
from
http://www.linuxconfig.org/c-understanding-pointers
The ability of C++ to access memory directly by pointers makes C++
favorable over some other languages such as Visual Basic, C# or
Java. Accessing variables directly by pointers rather than through
their memory location results in increased efficiency and flexibility of
written code. However, as it can be expected, increased efficiency
takes its cost, because using any low-level tool such as a pointer
means intensified difficulty in their implementation. The most common
use of pointers includes:
Data management on the free store*Accessing class member data and functions
Passing variables by reference to functions
*The free store is a pool of memory available for you to allocate (and deallocate) storage for objects during the execution of your program. The new and delete operators are used to allocate and deallocate free store, respectively.
When to use pointers
• See Programming Interactivity p147
• Note that by using pointers you can change the value of variables passed to a method
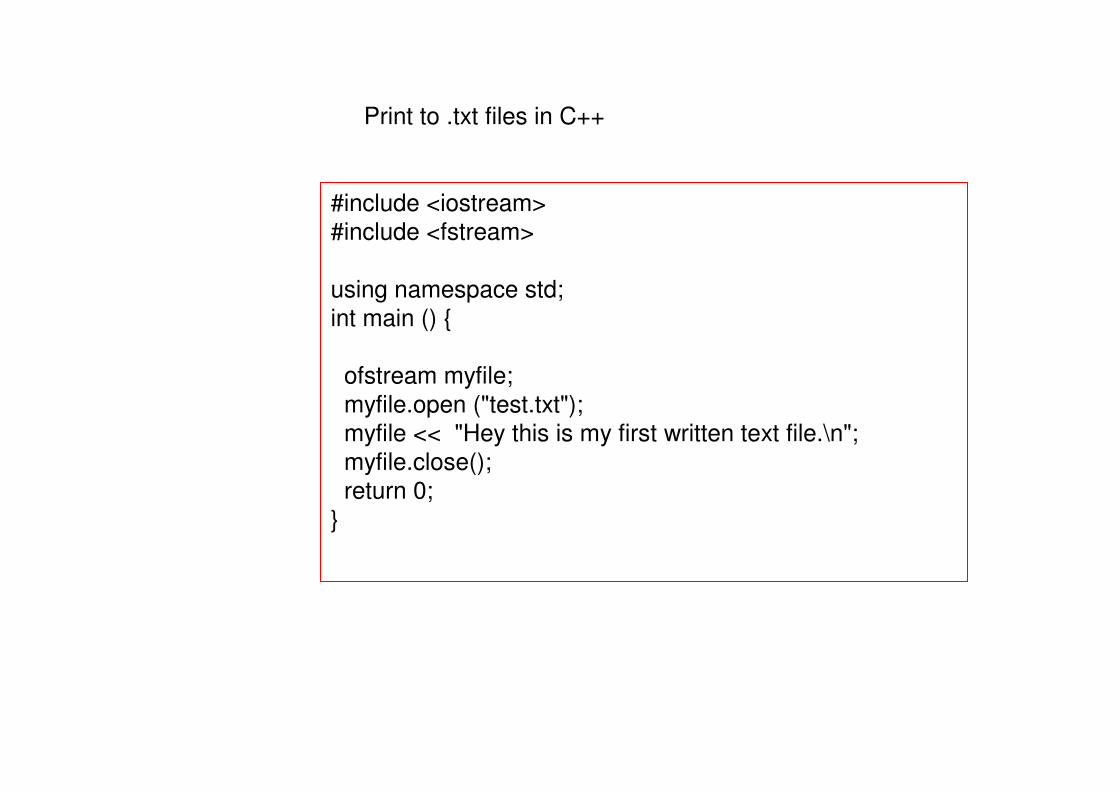
#include <iostream>
#include <fstream>
using namespace std;
int main () {
ofstream myfile;
myfile.open ("test.txt");
myfile << "Hey this is my first written text file.\n";
myfile.close();
return 0;
}
Print to .txt files in C++
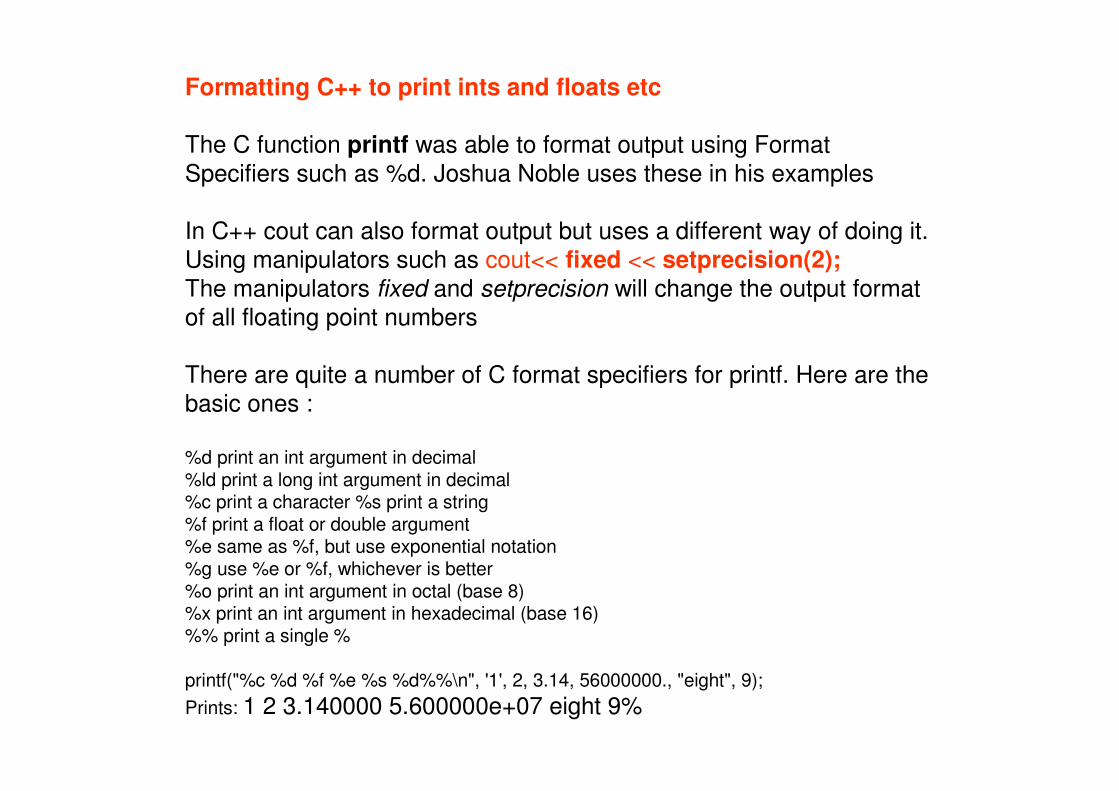
Formatting C++ to print ints and floats etc
The C function printf was able to format output using Format
Specifiers such as %d. Joshua Noble uses these in his examples
In C++ cout can also format output but uses a different way of doing it.
Using manipulators such as cout<< fixed << setprecision(2);
The manipulators fixed and setprecision will change the output format
of all floating point numbers
There are quite a number of C format specifiers for printf. Here are the
basic ones :
%d print an int argument in decimal %ld print a long int argument in decimal %c print a character %s print a string %f print a float or double argument %e same as %f, but use exponential notation %g use %e or %f, whichever is better %o print an int argument in octal (base 8) %x print an int argument in hexadecimal (base 16) %% print a single %
printf("%c %d %f %e %s %d%%\n", '1', 2, 3.14, 56000000., "eight", 9);
Prints: 1 2 3.140000 5.600000e+07 eight 9%
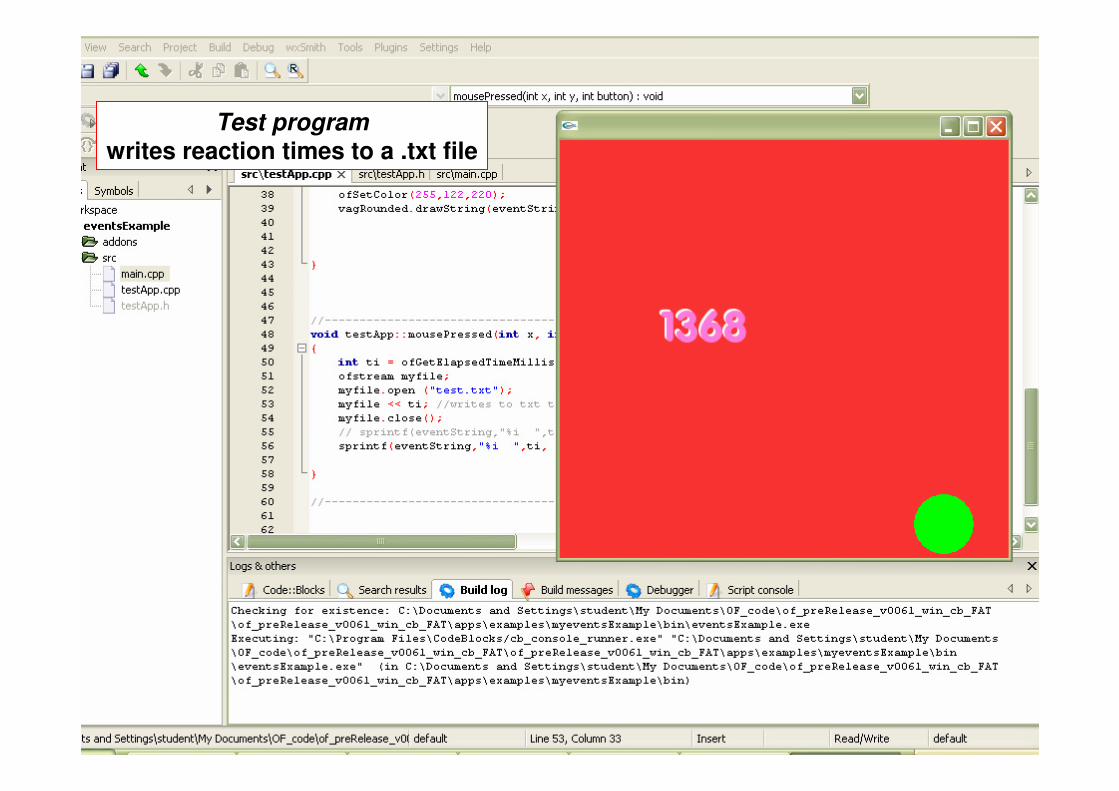
Test program
writes reaction times to a .txt file
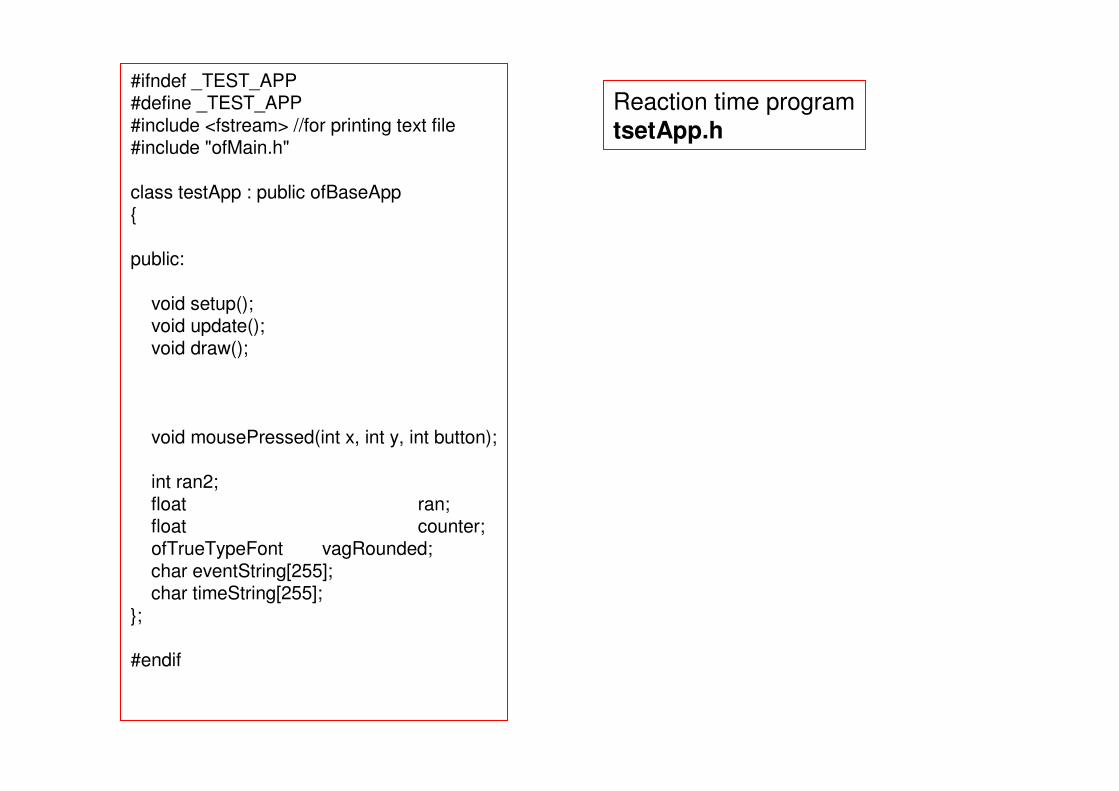
#ifndef _TEST_APP#define _TEST_APP#include <fstream> //for printing text file#include "ofMain.h"
class testApp : public ofBaseApp{
public:
void setup();void update();void draw();
void mousePressed(int x, int y, int button);
int ran2;float ran;float counter;ofTrueTypeFont vagRounded;char eventString[255];char timeString[255];
};
#endif
Reaction time program
tsetApp.h
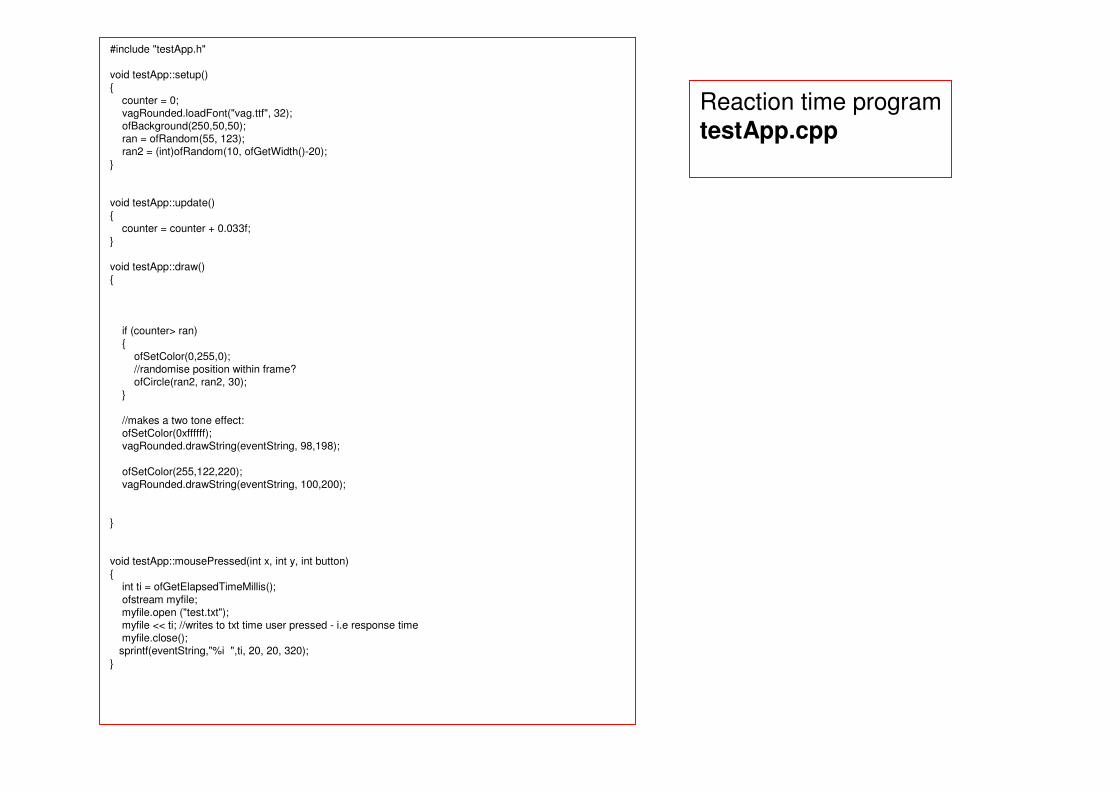
#include "testApp.h"
void testApp::setup(){
counter = 0;vagRounded.loadFont("vag.ttf", 32);ofBackground(250,50,50);ran = ofRandom(55, 123);ran2 = (int)ofRandom(10, ofGetWidth()-20);
}
void testApp::update(){
counter = counter + 0.033f;}
void testApp::draw(){
if (counter> ran){
ofSetColor(0,255,0);//randomise position within frame?ofCircle(ran2, ran2, 30);
}
//makes a two tone effect:ofSetColor(0xffffff);vagRounded.drawString(eventString, 98,198);
ofSetColor(255,122,220);vagRounded.drawString(eventString, 100,200);
}
void testApp::mousePressed(int x, int y, int button){
int ti = ofGetElapsedTimeMillis();
ofstream myfile;myfile.open ("test.txt");myfile << ti; //writes to txt time user pressed - i.e response timemyfile.close();sprintf(eventString,"%i ",ti, 20, 20, 320);
}
Reaction time program
testApp.cpp

#include "ofMain.h"
#include <iostream>
#include "testApp.h"
#include "ofAppGlutWindow.h"
int main( )
{
ofAppGlutWindow window;
ofSetupOpenGL(&window, 450,400, OF_WINDOW);
// this kicks off the running of my app
// can be OF_WINDOW or OF_FULLSCREEN
// pass in width and height too:
ofRunApp( new testApp());
}
Reaction time program
Main.cppThe .txt file is printed in
The bin folder

Importing libraries
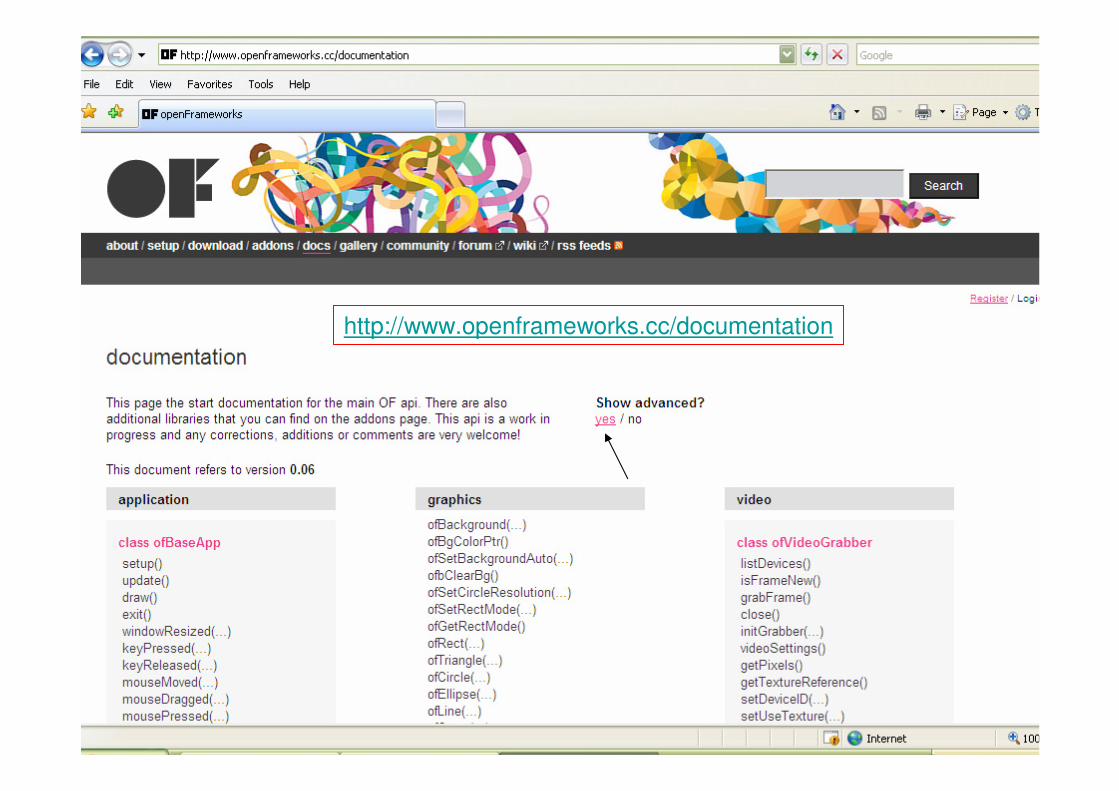
http://www.openframeworks.cc/documentation
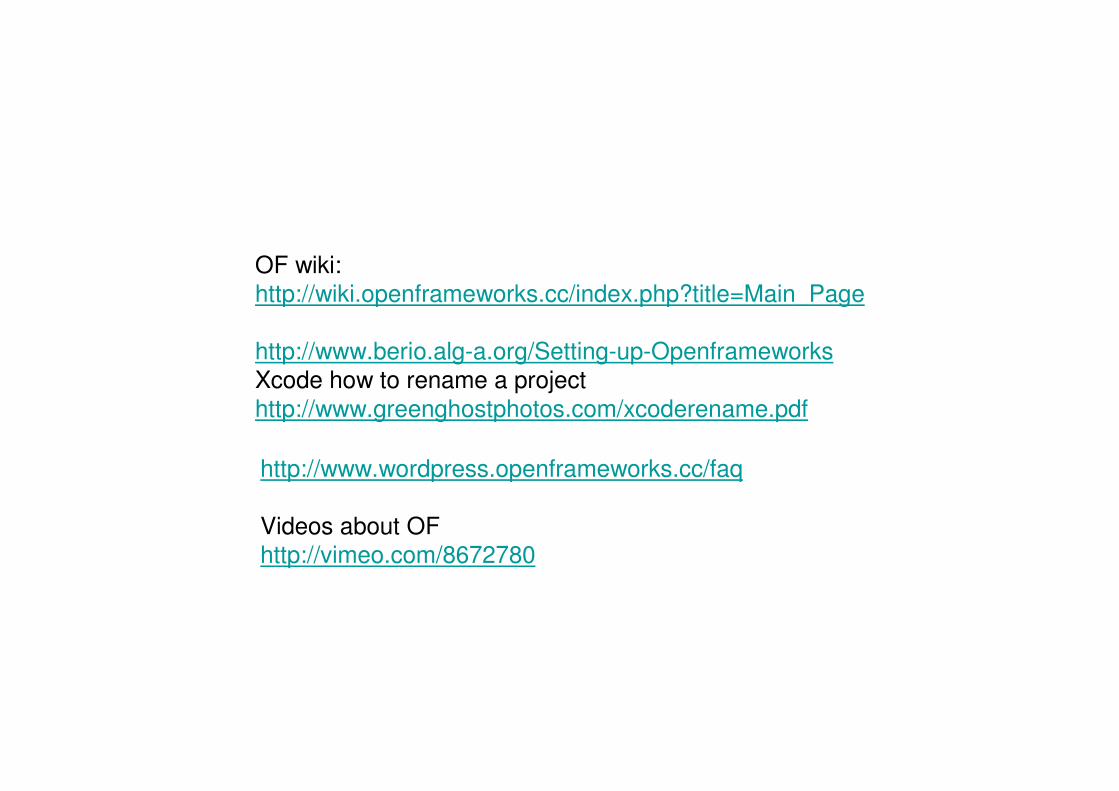
OF wiki:
http://wiki.openframeworks.cc/index.php?title=Main_Page
http://www.berio.alg-a.org/Setting-up-Openframeworks
Xcode how to rename a project
http://www.greenghostphotos.com/xcoderename.pdf
http://www.wordpress.openframeworks.cc/faq
Videos about OF
http://vimeo.com/8672780


![Open CourseWare [CS Open CourseWare] · 2019-02-26 · ˇ /frameworks/base/services/java/... /frameworks/base/services/jni / /hardware/libhardware / /device/[MANUF.]/[DEVICE] /sdk/emulator](https://img.pdfslide.us/doc/110x75/5f4a44d33e59663569640a57/open-courseware-cs-open-courseware-2019-02-26-frameworksbaseservicesjava.jpg)