Embed Size (px)
Citation preview
Office Proficiency Assessment and Certification®
Candidate Manual
By Biddle Consulting Group, Inc.
Version 10
Microsoft Windows®, Microsoft Office®, Microsoft Excel®, Microsoft Word®, Microsoft Access®, Microsoft PowerPoint®, Microsoft Outlook®, and FoxPro for Windows® are registered trade marks of Microsoft Corporation. dBASE® III, dBASE® IV, dBASE® for Windows are registered trademarks of dBASE, Inc. Lotus 1•2•3®, Lotus 1•2•3 for Windows are registered trademarks of IBM Corporation. WordPerfect® and WordPerfect® for Windows, and are trademarks of Corel Corporation. QuickBooks® is a registered trademark of Intuit, Inc. Copyright © 2009 Biddle Consulting Group, Inc. Revision, Version 10, November 2009 System Development and Distribution by:
The OPAC System - Candidate Manual Contents • i
Contents Overview.........................................................................................................1
Using the Candidate Program ....................................................................................................1 Understanding and Using a Mouse ............................................................................................2 Using this Manual ......................................................................................................................3
Sign On ...........................................................................................................5 Candidate Registration ...............................................................................................................5
Test Selection.................................................................................................7 AutoTest Mode ..........................................................................................................................7 Standard Test Selection Mode....................................................................................................8
Software Selection.........................................................................................9 Selecting Software - External Applications ...............................................................................9
Help in OPAC................................................................................................11 OPAC System Help..................................................................................................................11
Testing In OPAC...........................................................................................13 Test Overview ..........................................................................................................................13
Finding a Test in This Manual ...................................................................................13 Test Instructions.........................................................................................................13 Time Limits ...............................................................................................................14 Practice Tests .............................................................................................................14
Computer Tests ........................................................................................................................15 Windows ....................................................................................................................16 Windows XP..............................................................................................................18 Windows Vista...........................................................................................................20 Editing/Formatting from Rough Draft .......................................................................22 Advanced Editing/Formatting from Rough Draft ......................................................24 Spreadsheet ................................................................................................................26 Basic Excel ................................................................................................................28 Basic Word ................................................................................................................30 Intermediate Excel .....................................................................................................32 Intermediate Word .....................................................................................................34 PowerPoint.................................................................................................................36 Database.....................................................................................................................38 Outlook 2003 .............................................................................................................40 QuickBooks ...............................................................................................................42
Keyboarding Tests ...................................................................................................................45 Keyboarding...............................................................................................................46 Keyboarding 2............................................................................................................48
ii • Contents The OPAC System - Candidate Manual
10-Key .......................................................................................................................50 Data Entry 1: Vendor ................................................................................................52 Data Entry 2: Inventory ............................................................................................54 Data Entry 3: Invoice ................................................................................................56
Clerical Tests............................................................................................................................59 Formatting a Letter ....................................................................................................60 Transcription..............................................................................................................62 Composing Minutes...................................................................................................64 Alphabetic Filing .......................................................................................................66 Numeric Filing...........................................................................................................68 Proofreading 1............................................................................................................70 Proofreading 2............................................................................................................72 Spelling ......................................................................................................................74 Reading Comprehension............................................................................................76 Proofreading Practice.................................................................................................78
Financial Tests .........................................................................................................................81 Bank Reconciliation...................................................................................................82 Bank Deposit..............................................................................................................84 Petty Cash ..................................................................................................................86 Basic Math .................................................................................................................88
Professional Tests.....................................................................................................................91 Legal Keyboarding ....................................................................................................92 Legal Proofreading ....................................................................................................94 Legal Terminology ....................................................................................................96 Legal Transcription....................................................................................................98 Medical Keyboarding...............................................................................................100 Medical Proofreading...............................................................................................102 Medical Terminology...............................................................................................104 Medical Transcription..............................................................................................106
Other Tests .............................................................................................................................109 Taking Other Tests...................................................................................................110 Customer Service: Telephone .................................................................................111 Telephone Order Entry ............................................................................................112 Record Locating.......................................................................................................113 Applying Policies.....................................................................................................114 Sentence Clarity.......................................................................................................115 Custom Tests............................................................................................................116 Custom Keyboarding Tests......................................................................................117 Pre-Assessment Practice Tests.................................................................................118 Personality Testing ..................................................................................................119

The OPAC System - Candidate Manual Using the Candidate Program • 1
Overview
Using the Candidate Program The Candidate Program portion of The OPAC System is comprised of this manual, the Test Documents booklets, and the software screens. The OPAC System is designed as a job-related, computerized method of evaluating skills needed in today’s office. It consists of six test sections, plus software selection options for testing on a variety of popular software packages. The test sections are:
1. Computer 2. Keyboarding 3. Clerical 4. Financial 5. Professional 6. Other
The Test Administrator will assign a single test or a series of tests. Some of the tests require knowledge of specific software packages, such as word processing, spreadsheet, or database programs. Both this manual and The OPAC System screens will provide instructions for taking each test. It is important that both sets of instructions are read prior to starting a test. Some of the tests are timed. The time allotted will be displayed. If you do not fully understand the instructions for a test, do not hesitate to ask the Test Administrator for assistance.
This Program uses a mouse to select test options. If you are unfamiliar with using a mouse, read the next section - Understanding and Using a Mouse. If you are familiar with using a mouse, skip to the Using This Manual section.
2 • Understanding and Using a Mouse The OPAC System - Candidate Manual
Understanding and Using a Mouse
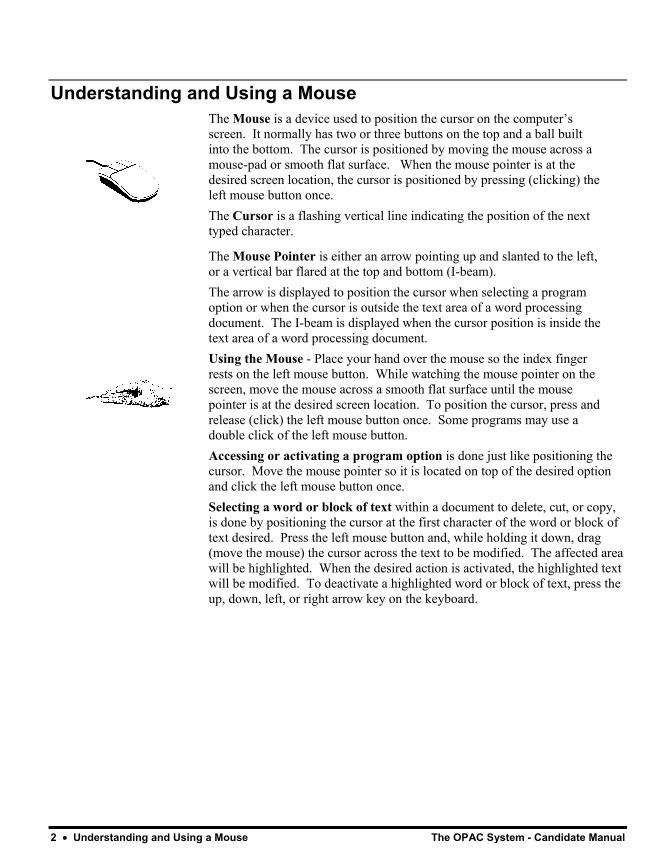
The Mouse is a device used to position the cursor on the computer’s screen. It normally has two or three buttons on the top and a ball built into the bottom. The cursor is positioned by moving the mouse across a mouse-pad or smooth flat surface. When the mouse pointer is at the desired screen location, the cursor is positioned by pressing (clicking) the left mouse button once. The Cursor is a flashing vertical line indicating the position of the next typed character.
The Mouse Pointer is either an arrow pointing up and slanted to the left, or a vertical bar flared at the top and bottom (I-beam). The arrow is displayed to position the cursor when selecting a program option or when the cursor is outside the text area of a word processing document. The I-beam is displayed when the cursor position is inside the text area of a word processing document.
Using the Mouse - Place your hand over the mouse so the index finger rests on the left mouse button. While watching the mouse pointer on the screen, move the mouse across a smooth flat surface until the mouse pointer is at the desired screen location. To position the cursor, press and release (click) the left mouse button once. Some programs may use a double click of the left mouse button. Accessing or activating a program option is done just like positioning the cursor. Move the mouse pointer so it is located on top of the desired option and click the left mouse button once. Selecting a word or block of text within a document to delete, cut, or copy, is done by positioning the cursor at the first character of the word or block of text desired. Press the left mouse button and, while holding it down, drag (move the mouse) the cursor across the text to be modified. The affected area will be highlighted. When the desired action is activated, the highlighted text will be modified. To deactivate a highlighted word or block of text, press the up, down, left, or right arrow key on the keyboard.
The OPAC System - Candidate Manual Using this Manual • 3
Using this Manual This manual provides:
1. A brief explanation of skills measured in each test. 2. Instructions on how to take each test. 3. Examples of screens encountered when taking each test.
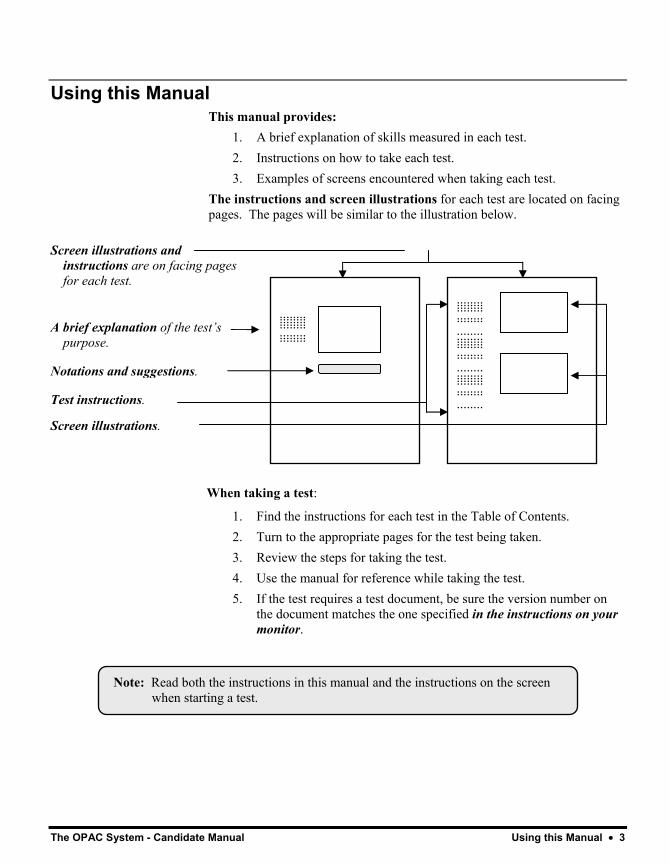
The instructions and screen illustrations for each test are located on facing pages. The pages will be similar to the illustration below.
When taking a test:
1. Find the instructions for each test in the Table of Contents. 2. Turn to the appropriate pages for the test being taken. 3. Review the steps for taking the test. 4. Use the manual for reference while taking the test. 5. If the test requires a test document, be sure the version number on
the document matches the one specified in the instructions on your monitor.
Note: Read both the instructions in this manual and the instructions on the screen when starting a test.
........ ........ ........ ........ ........ ........ ........ ........
........ ........ ........ ........ ........ ........ ........ ........ ........ ........ ........ ........ ........ ........ ........ ........ ........ ........ ........ ........ ........
Screen illustrations and instructions are on facing pages for each test.
A brief explanation of the test’s purpose.
Notations and suggestions.
Test instructions.
Screen illustrations.

The OPAC System - Candidate Manual
The OPAC System - Candidate Manual Sign On • 5
Sign On
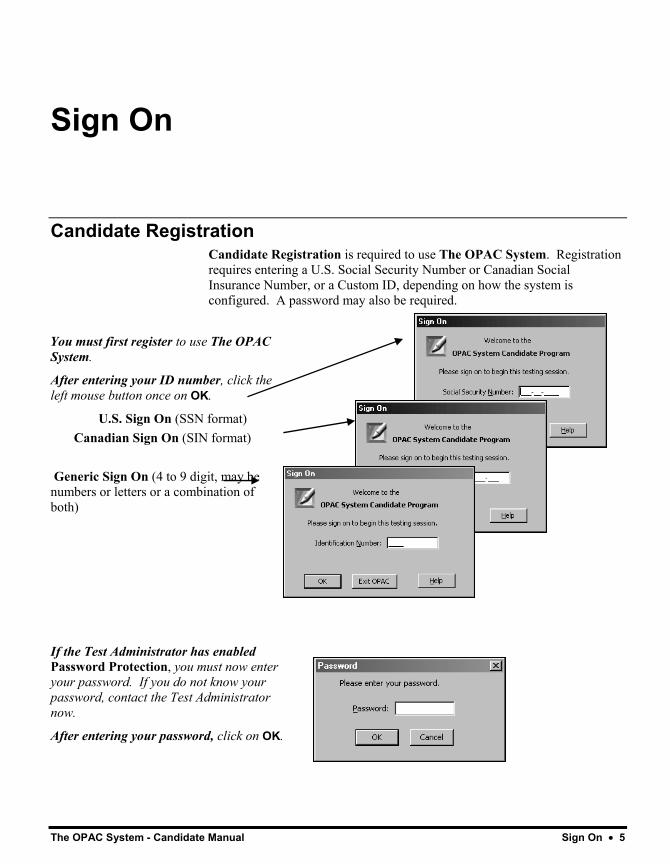
Candidate Registration Candidate Registration is required to use The OPAC System. Registration requires entering a U.S. Social Security Number or Canadian Social Insurance Number, or a Custom ID, depending on how the system is configured. A password may also be required.
You must first register to use The OPAC System.
After entering your ID number, click the left mouse button once on OK.
U.S. Sign On (SSN format) Canadian Sign On (SIN format) Generic Sign On (4 to 9 digit, may be numbers or letters or a combination of both)
If the Test Administrator has enabled Password Protection, you must now enter your password. If you do not know your password, contact the Test Administrator now.
After entering your password, click on OK.
6 • Sign On The OPAC System - Candidate Manual
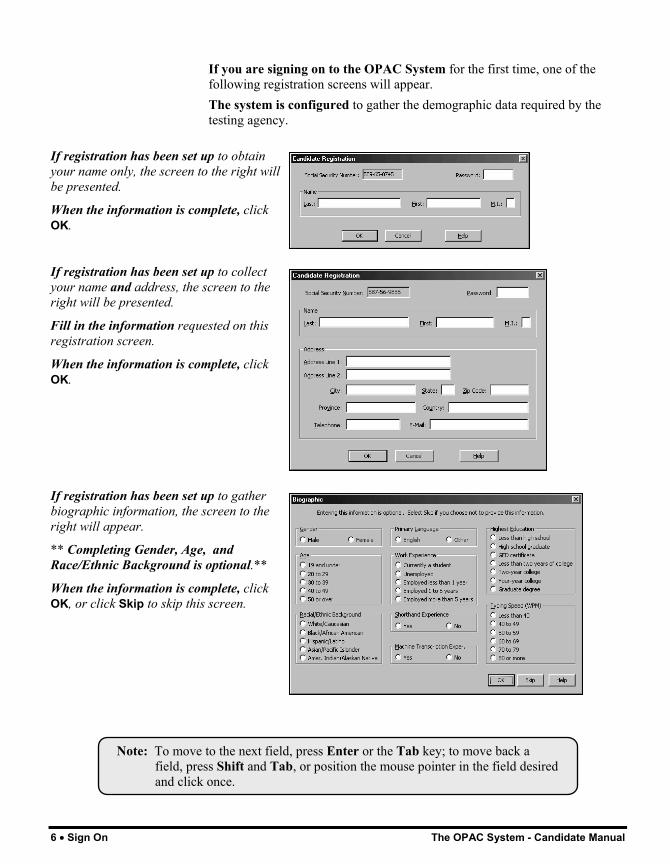
If you are signing on to the OPAC System for the first time, one of the following registration screens will appear. The system is configured to gather the demographic data required by the testing agency.
If registration has been set up to obtain your name only, the screen to the right will be presented.
When the information is complete, click OK.
If registration has been set up to collect your name and address, the screen to the right will be presented.
Fill in the information requested on this registration screen.
When the information is complete, click OK.
If registration has been set up to gather biographic information, the screen to the right will appear.
** Completing Gender, Age, and Race/Ethnic Background is optional.**
When the information is complete, click OK, or click Skip to skip this screen.
Note: To move to the next field, press Enter or the Tab key; to move back a field, press Shift and Tab, or position the mouse pointer in the field desired and click once.
The OPAC System - Candidate Manual Test Selection • 7
Test Selection
AutoTest Mode A preset list of test units will be presented on the screen, to be completed in the order listed, unless you are required to select an AutoTest Code from a drop down list. You select the AutoText Code – If the AutoTest Code box appears, then you need to select the AutoTest Code the Test Administrator specified. Begin Test – Click to begin the first test unit. Skip Test – Click to skip the test unit at the top of the list. You will not be
able to come back to this test. End Testing Session – This will Stop this testing session immediately and
your test session will end. You will be returned to the Sign On window.
Follow these instructions:
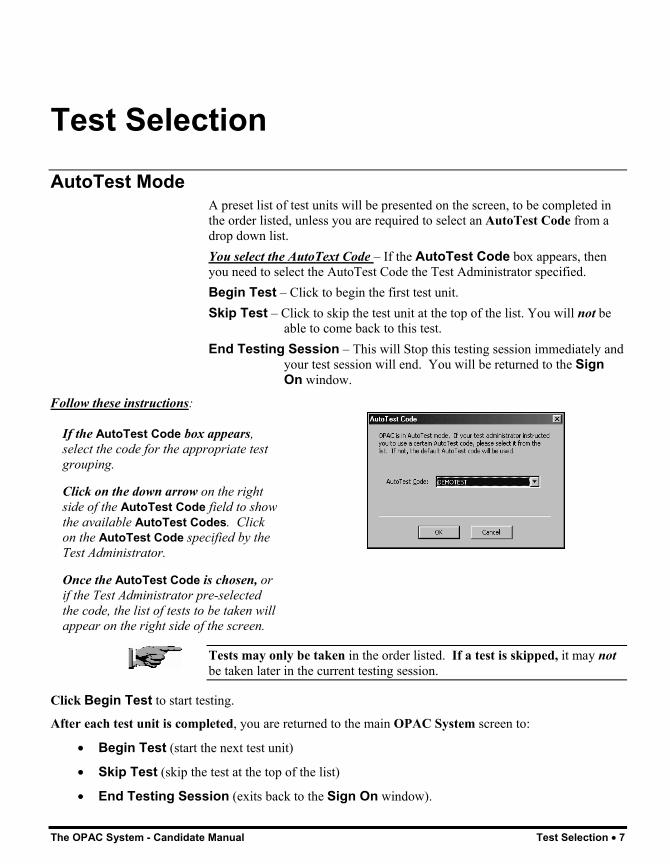
If the AutoTest Code box appears, select the code for the appropriate test grouping.
Click on the down arrow on the right side of the AutoTest Code field to show the available AutoTest Codes. Click on the AutoTest Code specified by the Test Administrator.
Once the AutoTest Code is chosen, or if the Test Administrator pre-selected the code, the list of tests to be taken will appear on the right side of the screen.
Tests may only be taken in the order listed. If a test is skipped, it may not be taken later in the current testing session.
Click Begin Test to start testing.
After each test unit is completed, you are returned to the main OPAC System screen to:
• Begin Test (start the next test unit)
• Skip Test (skip the test at the top of the list)
• End Testing Session (exits back to the Sign On window).
8 • Test Selection The OPAC System - Candidate Manual
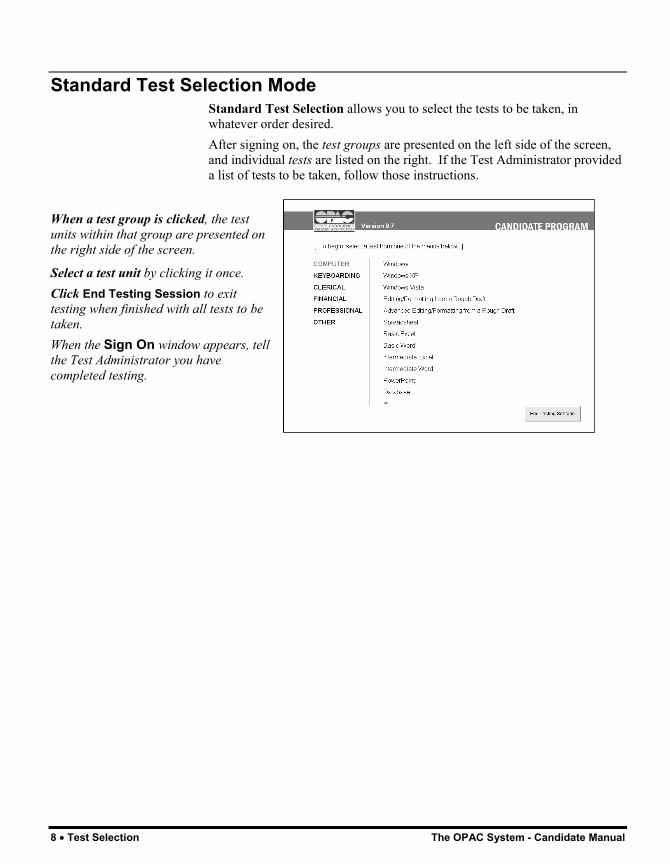
Standard Test Selection Mode Standard Test Selection allows you to select the tests to be taken, in whatever order desired. After signing on, the test groups are presented on the left side of the screen, and individual tests are listed on the right. If the Test Administrator provided a list of tests to be taken, follow those instructions.
When a test group is clicked, the test units within that group are presented on the right side of the screen.
Select a test unit by clicking it once. Click End Testing Session to exit testing when finished with all tests to be taken. When the Sign On window appears, tell the Test Administrator you have completed testing.
The OPAC System - Candidate Manual Software Selection • 9
Software Selection
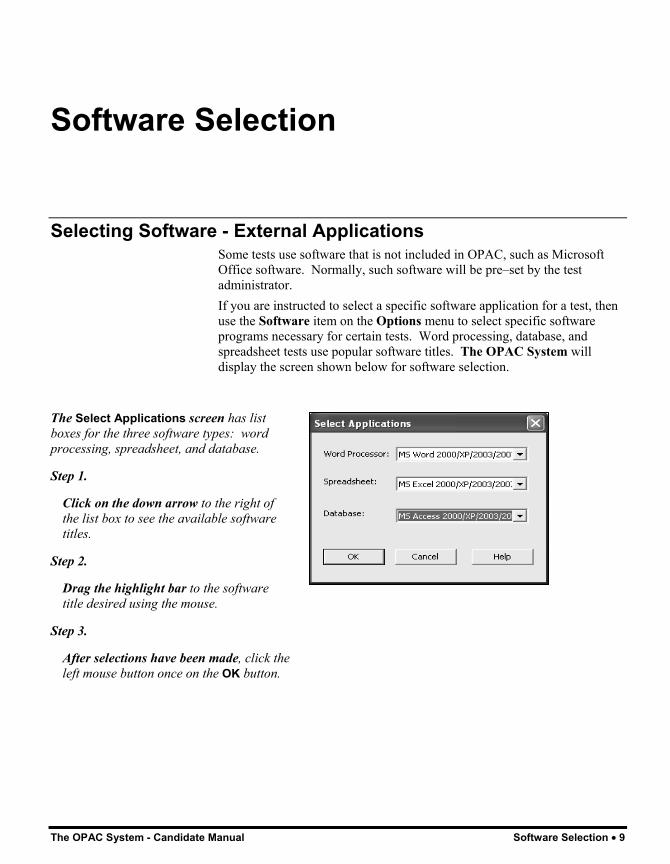
Selecting Software - External Applications Some tests use software that is not included in OPAC, such as Microsoft Office software. Normally, such software will be pre–set by the test administrator. If you are instructed to select a specific software application for a test, then use the Software item on the Options menu to select specific software programs necessary for certain tests. Word processing, database, and spreadsheet tests use popular software titles. The OPAC System will display the screen shown below for software selection.
The Select Applications screen has list boxes for the three software types: word processing, spreadsheet, and database.
Step 1.
Click on the down arrow to the right of the list box to see the available software titles.
Step 2.
Drag the highlight bar to the software title desired using the mouse.
Step 3.
After selections have been made, click the left mouse button once on the OK button.

The OPAC System - Candidate Manual

The OPAC System - Candidate Manual Help in OPAC • 11
Help in OPAC
OPAC System Help Help is available at all times through the standard Windows Help System. The OPAC System provides both standard Windows help and context-sensitive help.
1. To access OPAC System help, click on the Help menu at the top of the screen. Then choose the option desired.
2. Pressing F1 provides direct access to Help for the screen on which you are located.
Help is provided using standard Windows help. The screen to the right illustrates the help menu.
To access Help within most areas, press the F1 key on the keyboard, or click on Help at the top of the screen. Some tests have no help available.
When the help screen appears, click the left mouse button once on the topic desired.
Refer to a Microsoft Windows manual for detailed information about help for Windows.
Note: For information on Windows help, refer to the Windows user manual.

The OPAC System - Candidate Manual
OPAC System Tests Test Overview • 13
Testing In OPAC
Test Overview The OPAC System tests are sorted by test group:
• Computer • Keyboarding • Clerical • Financial • Professional • Other
If Standard Test Selection is implemented, clicking the mouse on the test group title on the left side of the screen will list the tests within that test group on the right side of the screen. Click on the name of the desired test to begin the testing process.
If AutoTest is implemented, then the tests to be taken will be listed on the screen in the order to be taken. Simply click Begin Test to start the testing process. If an AutoTest Code has not already been selected by the Test Administrator, then you will need to select one from the list provided. For more details on AutoTest, see AutoTest on page 7.
Each group of tests in this manual is preceded by a title page for the test group with a brief explanation of test content. Each test unit in this manual includes two pages of text and screen shots that explain how to take the test, and what to expect on the computer screen.
Finding a Test in This Manual The footer on each test page in this manual shows the Test name on the outside edge of the page, and the Test Group name on the inside edge.
Test Instructions Follow the test instructions closely, both in this manual and on the computer screen, to ensure proper completion of the tests and attainment of the maximum score. You will be provided with Test Documents booklets if they are required for any of the tests you are assigned.
14 • Time Limits OPAC System Tests
Time Limits A time limit may be implemented on some of the tests. If this is the case, a “time box” will appear on the screen prior to the test to announce the amount of time allowed. During the test, either a box will appear that displays the time remaining, or the time remaining will be displayed in the lower right–had corner of the test screen.
Practice Tests A “practice test” may be implemented on some tests prior to the “live” test. If this is the case, a box will appear prior to the practice test announcing that it is a practice, at which point you may elect to take the practice test, or cancel it and proceed directly to the live test. If a time limit is imposed on the practice test, the time allowed will be announced in the screen prior to beginning the practice test.
OPAC System Tests Computer Tests • 15
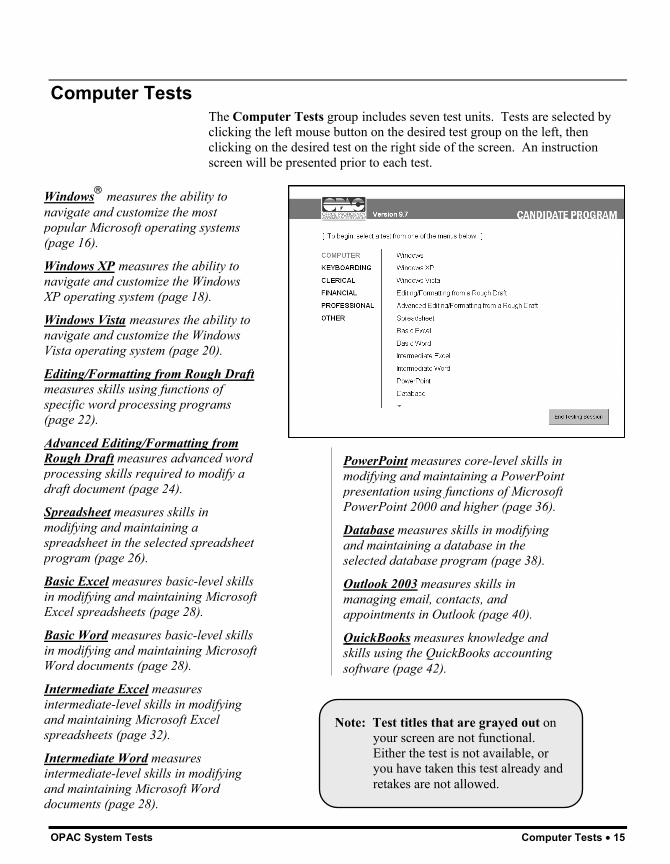
Computer Tests The Computer Tests group includes seven test units. Tests are selected by clicking the left mouse button on the desired test group on the left, then clicking on the desired test on the right side of the screen. An instruction screen will be presented prior to each test.
Note: Test titles that are grayed out on
your screen are not functional. Either the test is not available, or you have taken this test already and retakes are not allowed.
PowerPoint measures core-level skills in modifying and maintaining a PowerPoint presentation using functions of Microsoft PowerPoint 2000 and higher (page 36).
Database measures skills in modifying and maintaining a database in the selected database program (page 38).
Outlook 2003 measures skills in managing email, contacts, and appointments in Outlook (page 40).
QuickBooks measures knowledge and skills using the QuickBooks accounting software (page 42).
Windows® measures the ability to navigate and customize the most popular Microsoft operating systems (page 16).
Windows XP measures the ability to navigate and customize the Windows XP operating system (page 18).
Windows Vista measures the ability to navigate and customize the Windows Vista operating system (page 20).
Editing/Formatting from Rough Draft measures skills using functions of specific word processing programs (page 22).
Advanced Editing/Formatting from Rough Draft measures advanced word processing skills required to modify a draft document (page 24).
Spreadsheet measures skills in modifying and maintaining a spreadsheet in the selected spreadsheet program (page 26).
Basic Excel measures basic-level skills in modifying and maintaining Microsoft Excel spreadsheets (page 28).
Basic Word measures basic-level skills in modifying and maintaining Microsoft Word documents (page 28).
Intermediate Excel measures intermediate-level skills in modifying and maintaining Microsoft Excel spreadsheets (page 32).
Intermediate Word measures intermediate-level skills in modifying and maintaining Microsoft Word documents (page 28).
16 • Windows Computer Tests
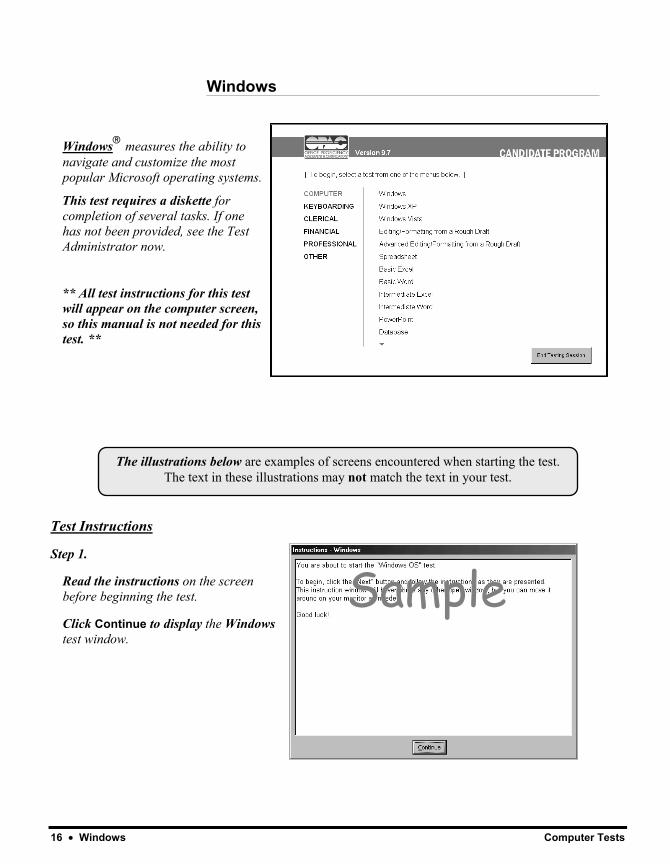
The illustrations below are examples of screens encountered when starting the test. The text in these illustrations may not match the text in your test.
Windows
Windows® measures the ability to navigate and customize the most popular Microsoft operating systems.
This test requires a diskette for completion of several tasks. If one has not been provided, see the Test Administrator now.
** All test instructions for this test will appear on the computer screen, so this manual is not needed for this test. **
Test Instructions
Step 1.
Read the instructions on the screen before beginning the test.
Click Continue to display the Windows test window.
Sample
Computer Tests Windows • 17
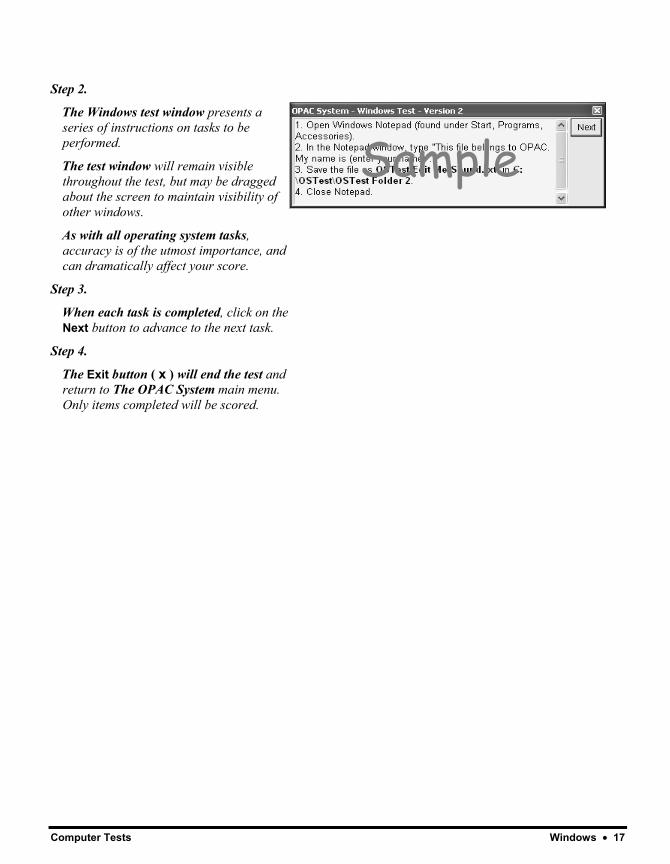
Step 2.
The Windows test window presents a series of instructions on tasks to be performed.
The test window will remain visible throughout the test, but may be dragged about the screen to maintain visibility of other windows.
As with all operating system tasks, accuracy is of the utmost importance, and can dramatically affect your score.
Step 3.
When each task is completed, click on the Next button to advance to the next task.
Step 4.
The Exit button ( x ) will end the test and return to The OPAC System main menu. Only items completed will be scored.
Sample
18 • Windows XP Computer Tests
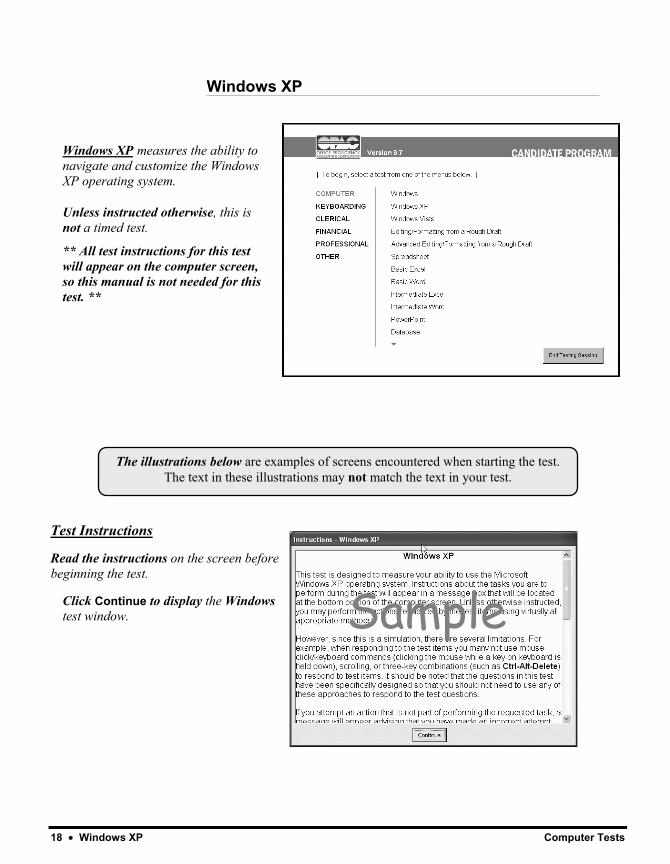
The illustrations below are examples of screens encountered when starting the test. The text in these illustrations may not match the text in your test.
Windows XP
Windows XP measures the ability to navigate and customize the Windows XP operating system.
Unless instructed otherwise, this is not a timed test.
** All test instructions for this test will appear on the computer screen, so this manual is not needed for this test. **
Test Instructions
Read the instructions on the screen before beginning the test.
Click Continue to display the Windows test window.
Sample
Computer Tests Windows XP • 19
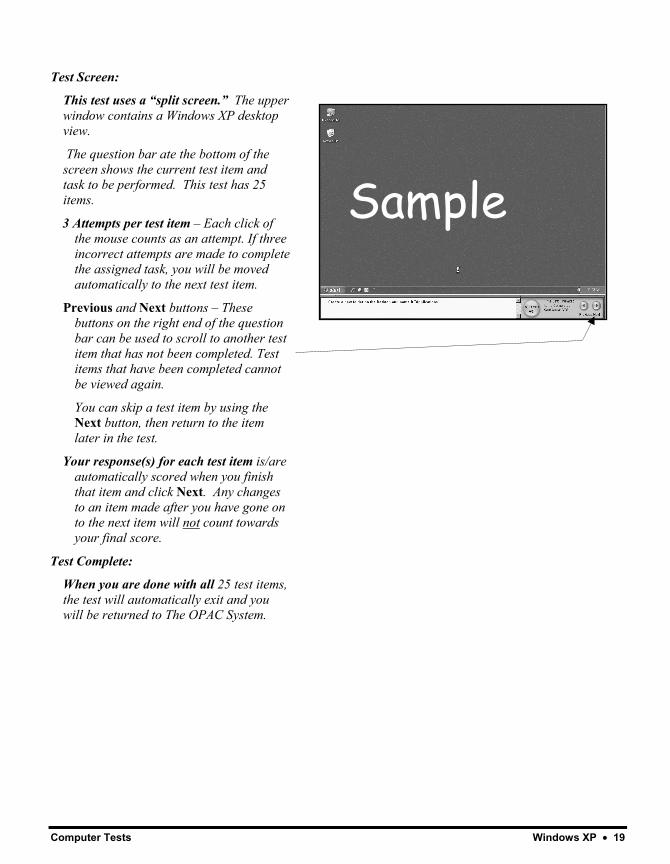
Test Screen:
This test uses a “split screen.” The upper window contains a Windows XP desktop view.
The question bar ate the bottom of the screen shows the current test item and task to be performed. This test has 25 items.
3 Attempts per test item – Each click of the mouse counts as an attempt. If three incorrect attempts are made to complete the assigned task, you will be moved automatically to the next test item.
Previous and Next buttons – These buttons on the right end of the question bar can be used to scroll to another test item that has not been completed. Test items that have been completed cannot be viewed again.
You can skip a test item by using the Next button, then return to the item later in the test.
Your response(s) for each test item is/are automatically scored when you finish that item and click Next. Any changes to an item made after you have gone on to the next item will not count towards your final score.
Test Complete:
When you are done with all 25 test items, the test will automatically exit and you will be returned to The OPAC System.
Sample
20 • Windows Vista Computer Tests
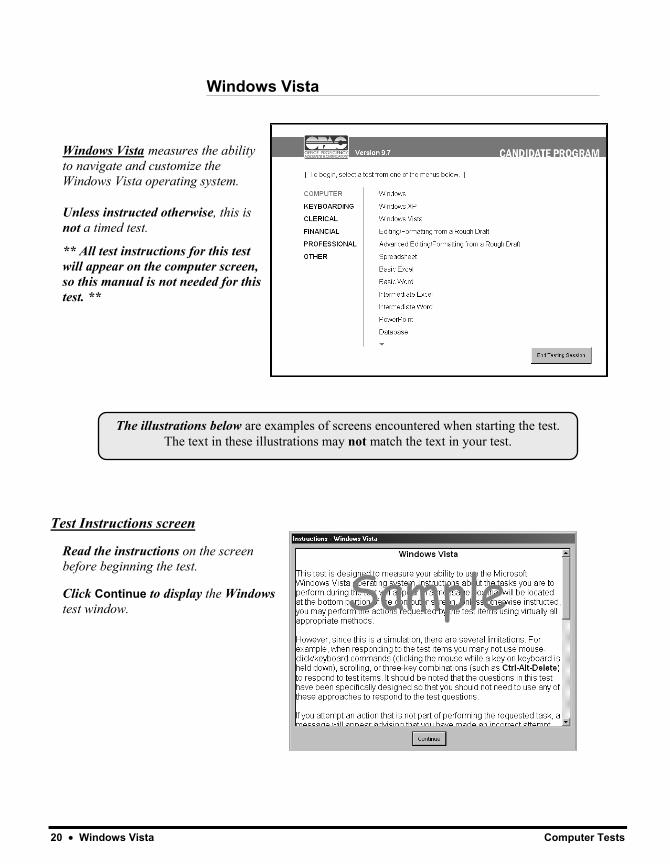
The illustrations below are examples of screens encountered when starting the test. The text in these illustrations may not match the text in your test.
Windows Vista
Windows Vista measures the ability to navigate and customize the Windows Vista operating system.
Unless instructed otherwise, this is not a timed test.
** All test instructions for this test will appear on the computer screen, so this manual is not needed for this test. **
Test Instructions screen
Read the instructions on the screen before beginning the test.
Click Continue to display the Windows test window.
Sample

Computer Tests Windows Vista • 21
Test Screen:
This test uses a “split screen.” The upper window contains a Windows XP desktop view.
The question bar ate the bottom of the screen shows the current test item and task to be performed. This test has 25 items.
3 Attempts per test item – Each click of the mouse counts as an attempt. If three incorrect attempts are made to complete the assigned task, you will be moved automatically to the next test item.
Previous and Next buttons – These buttons on the right end of the question bar can be used to scroll to another test item that has not been completed. Test items that have been completed cannot be viewed again.
You can skip a test item by using the Next button, then return to the item later in the test.
Your response(s) for each test item is/are automatically scored when you finish that item and click Next. Any changes to an item made after you have gone on to the next item will not count towards your final score.
Test Complete:
When you are done with all 25 test items, the test will automatically exit and you will be returned to The OPAC System.
Sample
22 • Editing/Formatting from Rough Draft Computer Tests
The illustrations below are examples of screens encountered when starting the test. The text in these illustrations may not match the text in your test.
Editing/Formatting from Rough Draft
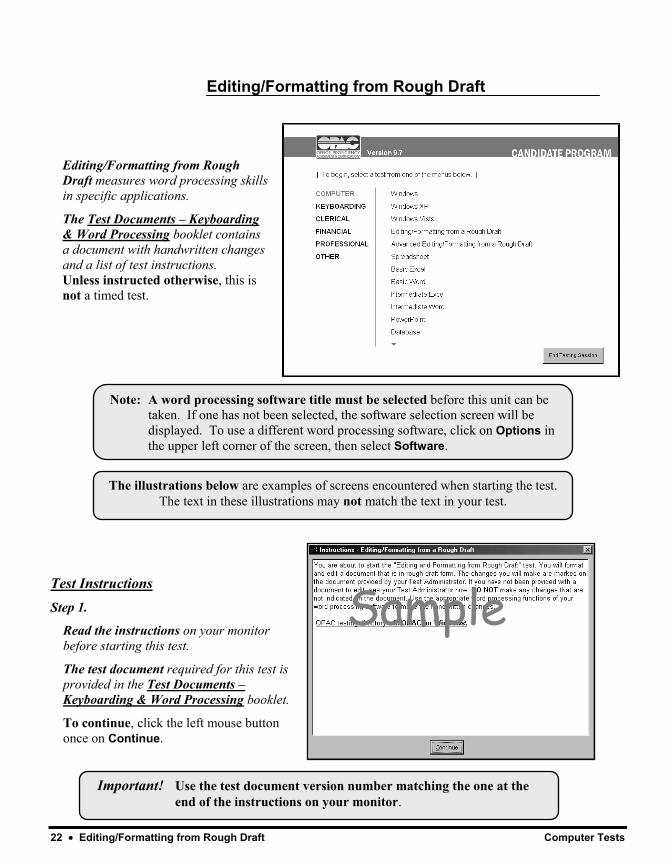
Editing/Formatting from Rough Draft measures word processing skills in specific applications.
The Test Documents – Keyboarding & Word Processing booklet contains a document with handwritten changes and a list of test instructions. Unless instructed otherwise, this is not a timed test.
Test Instructions Step 1.
Read the instructions on your monitor before starting this test.
The test document required for this test is provided in the Test Documents – Keyboarding & Word Processing booklet.
To continue, click the left mouse button once on Continue.
Sample
Note: A word processing software title must be selected before this unit can be taken. If one has not been selected, the software selection screen will be displayed. To use a different word processing software, click on Options in the upper left corner of the screen, then select Software.
Important! Use the test document version number matching the one at the end of the instructions on your monitor.
Computer Tests Editing/Formatting from Rough Draft • 23
Step 2.
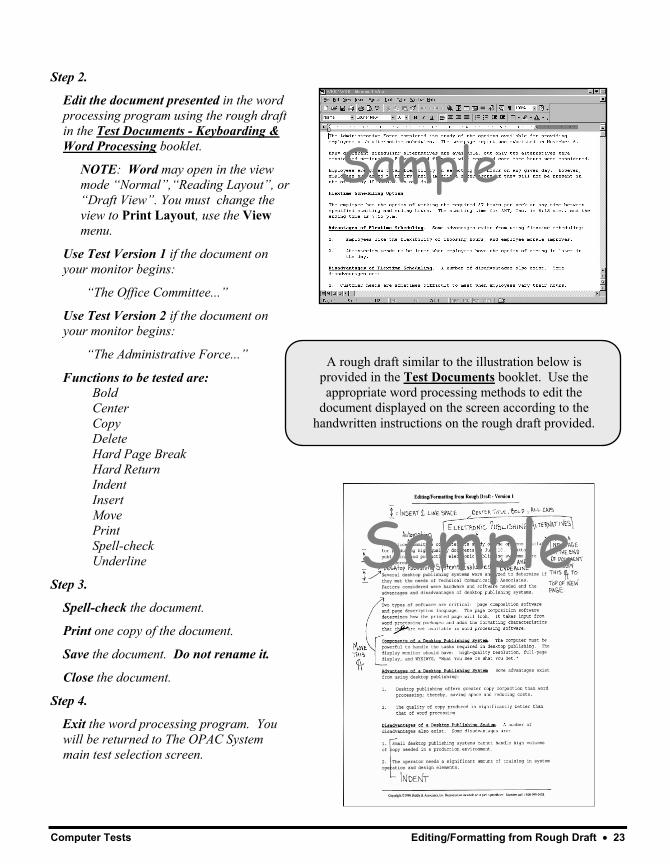
Edit the document presented in the word processing program using the rough draft in the Test Documents - Keyboarding & Word Processing booklet.
NOTE: Word may open in the view mode “Normal”,“Reading Layout”, or “Draft View”. You must change the view to Print Layout, use the View menu.
Use Test Version 1 if the document on your monitor begins:
“The Office Committee...”
Use Test Version 2 if the document on your monitor begins:
“The Administrative Force...”
Functions to be tested are: Bold Center Copy Delete Hard Page Break Hard Return Indent Insert Move Print Spell-check Underline
Step 3.
Spell-check the document.
Print one copy of the document.
Save the document. Do not rename it.
Close the document.
Step 4.
Exit the word processing program. You will be returned to The OPAC System main test selection screen.
A rough draft similar to the illustration below is provided in the Test Documents booklet. Use the appropriate word processing methods to edit the
document displayed on the screen according to the handwritten instructions on the rough draft provided.
Sample
Sample
Sample
24 • Advanced Editing/Formatting from Rough Draft Computer Tests
The illustrations below are examples of screens encountered when starting the test. The text in these illustrations may not match the text in your test.
Advanced Editing/Formatting from Rough Draft
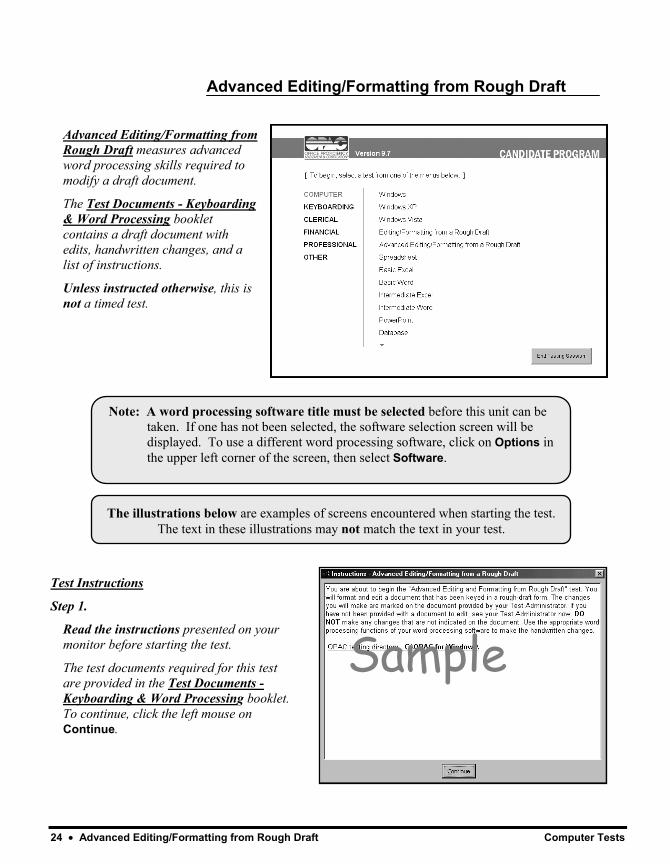
Advanced Editing/Formatting from Rough Draft measures advanced word processing skills required to modify a draft document.
The Test Documents - Keyboarding & Word Processing booklet contains a draft document with edits, handwritten changes, and a list of instructions.
Unless instructed otherwise, this is not a timed test.
Test Instructions
Step 1.
Read the instructions presented on your monitor before starting the test.
The test documents required for this test are provided in the Test Documents - Keyboarding & Word Processing booklet. To continue, click the left mouse on Continue.
Note: A word processing software title must be selected before this unit can be taken. If one has not been selected, the software selection screen will be displayed. To use a different word processing software, click on Options in the upper left corner of the screen, then select Software.
Sample
Computer Tests Advanced Editing/Formatting from Rough Draft • 25
Step 2.
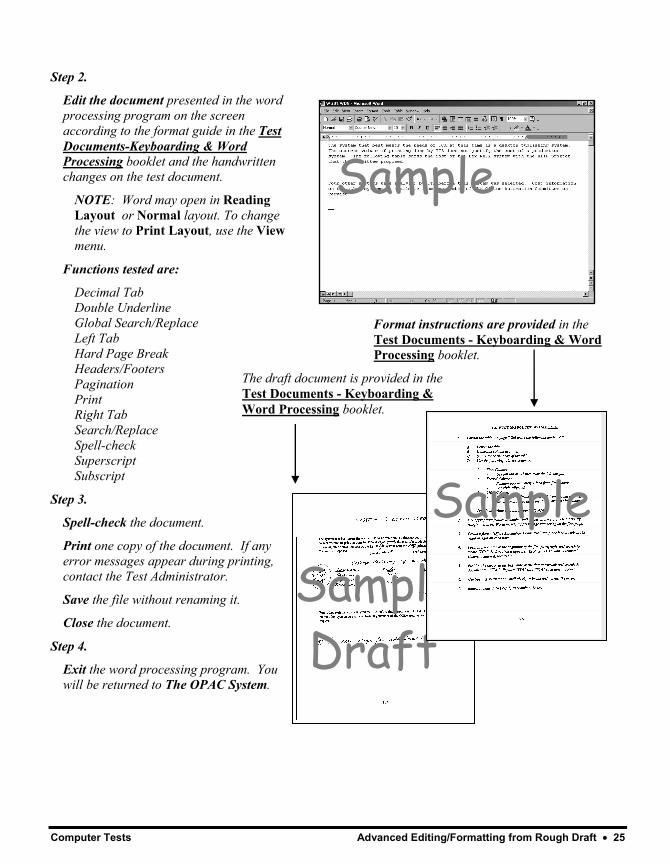
Edit the document presented in the word processing program on the screen according to the format guide in the Test Documents-Keyboarding & Word Processing booklet and the handwritten changes on the test document.
NOTE: Word may open in Reading Layout or Normal layout. To change the view to Print Layout, use the View menu.
Functions tested are:
Decimal Tab Double Underline Global Search/Replace Left Tab Hard Page Break Headers/Footers Pagination Print Right Tab Search/Replace Spell-check Superscript Subscript
Step 3.
Spell-check the document.
Print one copy of the document. If any error messages appear during printing, contact the Test Administrator.
Save the file without renaming it.
Close the document.
Step 4.
Exit the word processing program. You will be returned to The OPAC System.
Format instructions are provided in the Test Documents - Keyboarding & Word Processing booklet.
The draft document is provided in the Test Documents - Keyboarding & Word Processing booklet.
SampleDraft
Sample
Sample
26 • Spreadsheet Computer Tests
The illustrations below are examples of screens encountered when starting the test. The text in these illustrations may not match the text in your test.
Spreadsheet
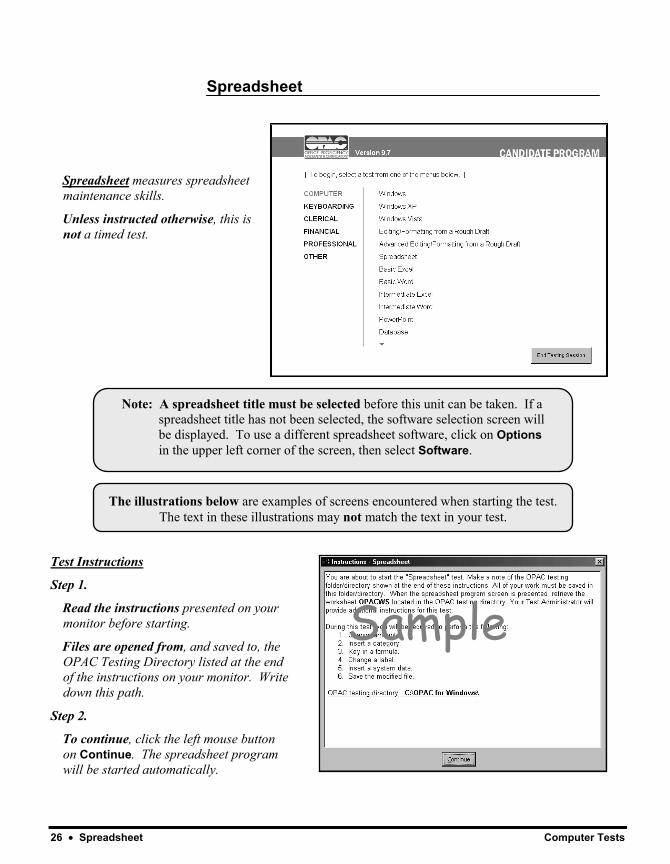
Spreadsheet measures spreadsheet maintenance skills.
Unless instructed otherwise, this is not a timed test.
Test Instructions
Step 1.
Read the instructions presented on your monitor before starting.
Files are opened from, and saved to, the OPAC Testing Directory listed at the end of the instructions on your monitor. Write down this path.
Step 2.
To continue, click the left mouse button on Continue. The spreadsheet program will be started automatically.
Sample
Note: A spreadsheet title must be selected before this unit can be taken. If a spreadsheet title has not been selected, the software selection screen will be displayed. To use a different spreadsheet software, click on Options in the upper left corner of the screen, then select Software.
Computer Tests Spreadsheet • 27
Step 3.
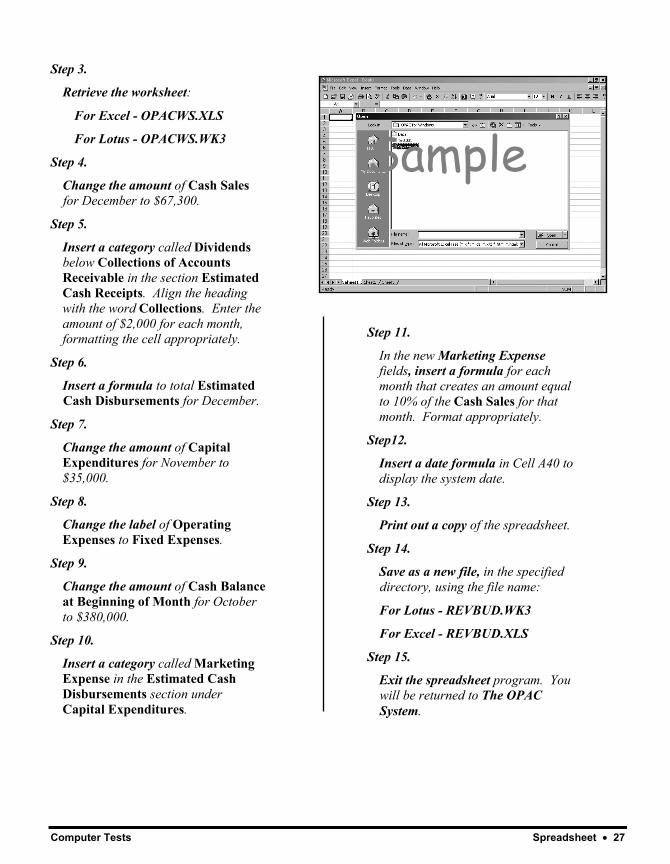
Retrieve the worksheet:
For Excel - OPACWS.XLS
For Lotus - OPACWS.WK3
Step 4.
Change the amount of Cash Sales for December to $67,300.
Step 5.
Insert a category called Dividends below Collections of Accounts Receivable in the section Estimated Cash Receipts. Align the heading with the word Collections. Enter the amount of $2,000 for each month, formatting the cell appropriately.
Step 6.
Insert a formula to total Estimated Cash Disbursements for December.
Step 7.
Change the amount of Capital Expenditures for November to $35,000.
Step 8.
Change the label of Operating Expenses to Fixed Expenses.
Step 9.
Change the amount of Cash Balance at Beginning of Month for October to $380,000.
Step 10.
Insert a category called Marketing Expense in the Estimated Cash Disbursements section under Capital Expenditures.
Step 11.
In the new Marketing Expense fields, insert a formula for each month that creates an amount equal to 10% of the Cash Sales for that month. Format appropriately.
Step12.
Insert a date formula in Cell A40 to display the system date.
Step 13.
Print out a copy of the spreadsheet.
Step 14.
Save as a new file, in the specified directory, using the file name:
For Lotus - REVBUD.WK3
For Excel - REVBUD.XLS
Step 15.
Exit the spreadsheet program. You will be returned to The OPAC System.
Sample
28 • Basic Excel Computer Tests
The illustrations below are examples of screens encountered when starting the test. The text in these illustrations may not match the text in your test.
Basic Excel
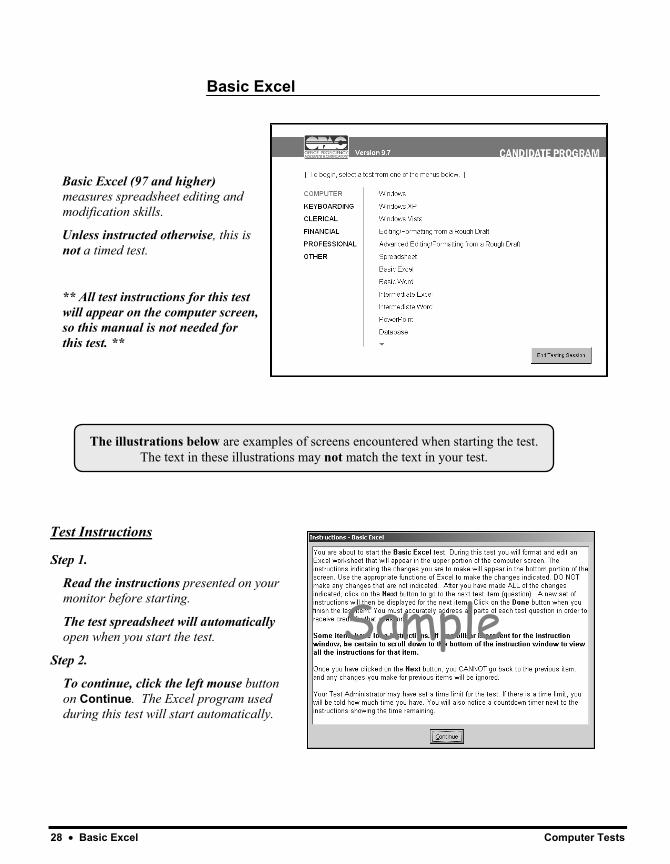
Basic Excel (97 and higher) measures spreadsheet editing and modification skills.
Unless instructed otherwise, this is not a timed test.
** All test instructions for this test will appear on the computer screen, so this manual is not needed for this test. **
Test Instructions
Step 1.
Read the instructions presented on your monitor before starting.
The test spreadsheet will automatically open when you start the test.
Step 2.
To continue, click the left mouse button on Continue. The Excel program used during this test will start automatically.
Sample
Computer Tests Basic Excel • 29
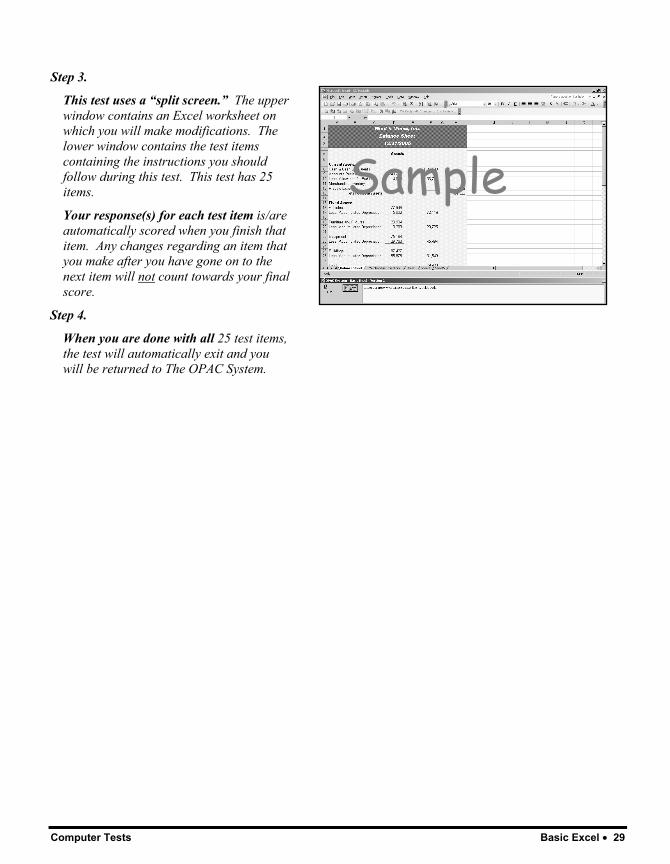
Step 3.
This test uses a “split screen.” The upper window contains an Excel worksheet on which you will make modifications. The lower window contains the test items containing the instructions you should follow during this test. This test has 25 items.
Your response(s) for each test item is/are automatically scored when you finish that item. Any changes regarding an item that you make after you have gone on to the next item will not count towards your final score.
Step 4.
When you are done with all 25 test items, the test will automatically exit and you will be returned to The OPAC System.
Sample
30 • Basic Word Computer Tests
The illustrations below are examples of screens encountered when starting the test. The text in these illustrations may not match the text in your test.
Basic Word
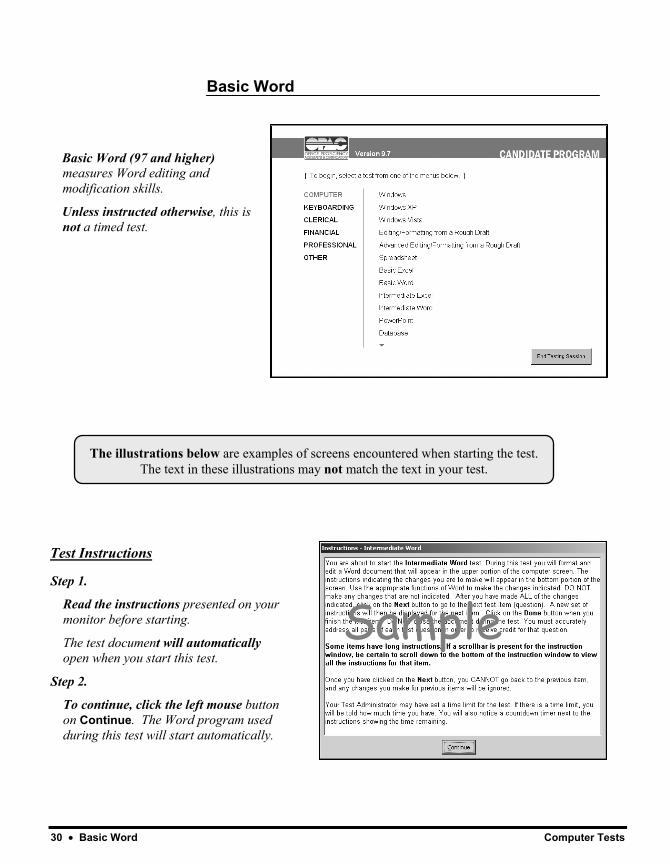
Basic Word (97 and higher) measures Word editing and modification skills.
Unless instructed otherwise, this is not a timed test.
Test Instructions
Step 1.
Read the instructions presented on your monitor before starting.
The test document will automatically open when you start this test.
Step 2.
To continue, click the left mouse button on Continue. The Word program used during this test will start automatically.
Sample
Computer Tests Basic Word • 31
Step 3.
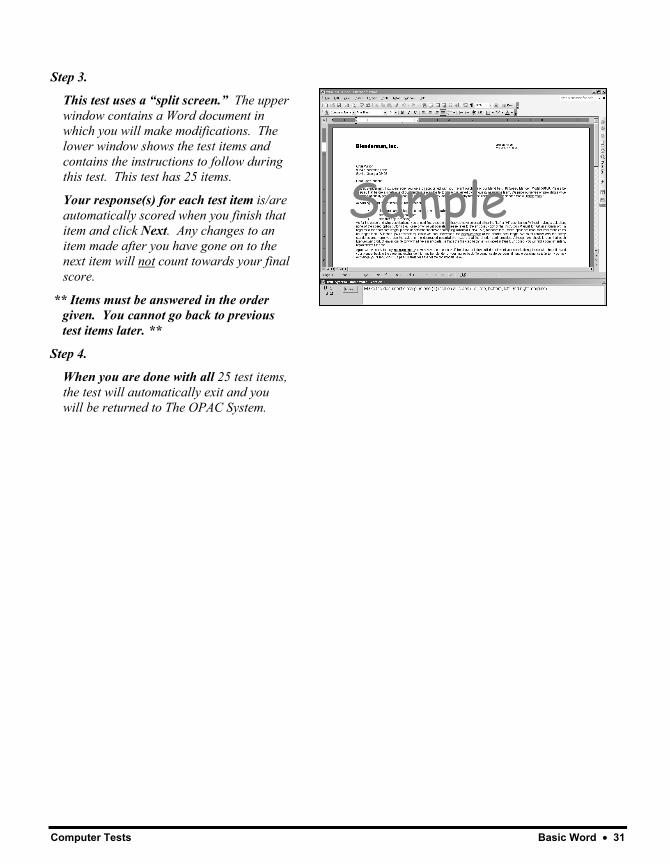
This test uses a “split screen.” The upper window contains a Word document in which you will make modifications. The lower window shows the test items and contains the instructions to follow during this test. This test has 25 items.
Your response(s) for each test item is/are automatically scored when you finish that item and click Next. Any changes to an item made after you have gone on to the next item will not count towards your final score.
** Items must be answered in the order given. You cannot go back to previous test items later. **
Step 4.
When you are done with all 25 test items, the test will automatically exit and you will be returned to The OPAC System.
Sample
32 • Intermediate Excel Computer Tests
The illustrations below are examples of screens encountered when starting the test. The text in these illustrations may not match the text in your test.
Intermediate Excel
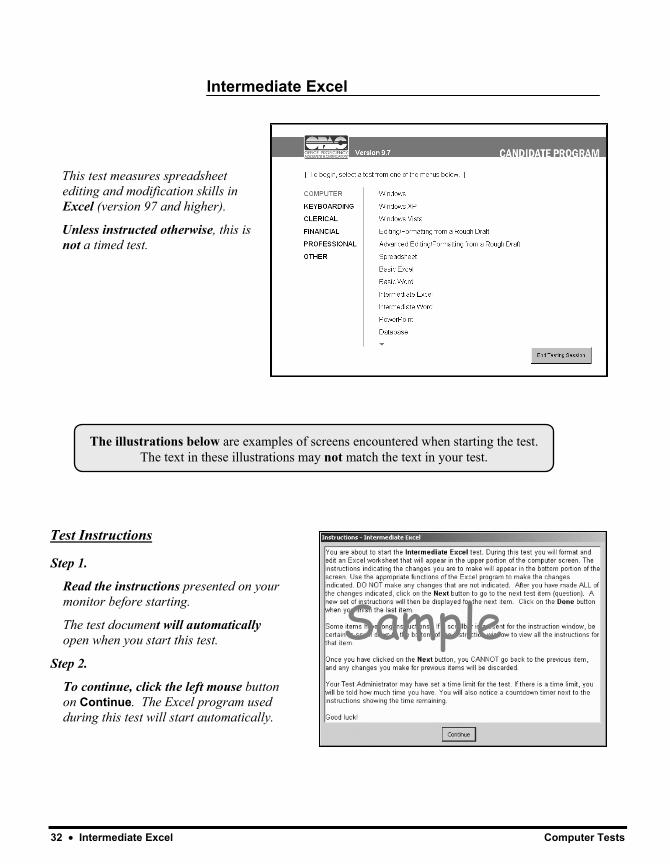
This test measures spreadsheet editing and modification skills in Excel (version 97 and higher).
Unless instructed otherwise, this is not a timed test.
Test Instructions
Step 1.
Read the instructions presented on your monitor before starting.
The test document will automatically open when you start this test.
Step 2.
To continue, click the left mouse button on Continue. The Excel program used during this test will start automatically.
Sample
Computer Tests Intermediate Excel • 33
Step 3.
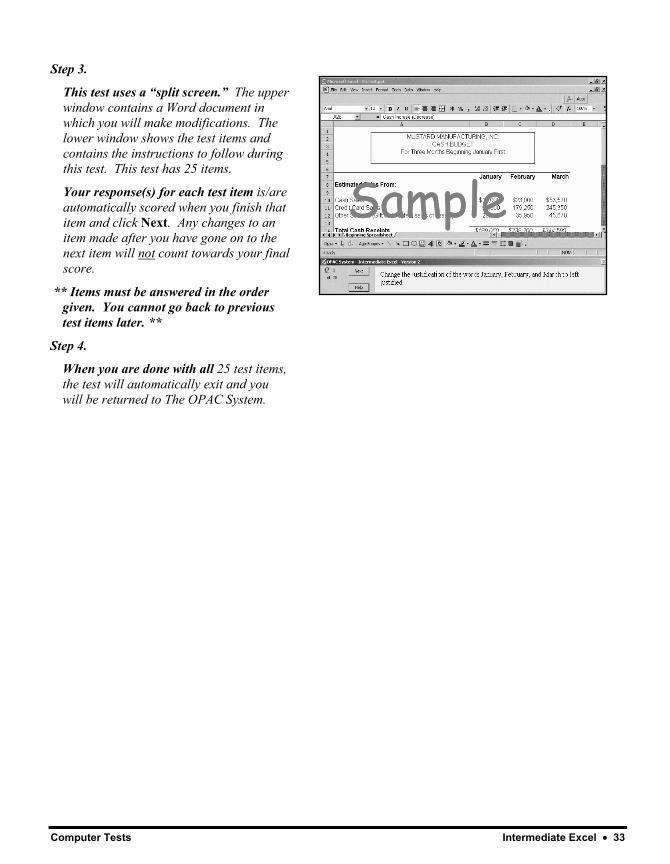
This test uses a “split screen.” The upper window contains a Word document in which you will make modifications. The lower window shows the test items and contains the instructions to follow during this test. This test has 25 items.
Your response(s) for each test item is/are automatically scored when you finish that item and click Next. Any changes to an item made after you have gone on to the next item will not count towards your final score.
** Items must be answered in the order given. You cannot go back to previous test items later. **
Step 4.
When you are done with all 25 test items, the test will automatically exit and you will be returned to The OPAC System.
Sample Sample
34 • Intermediate Word Computer Tests
The illustrations below are examples of screens encountered when starting the test. The text in these illustrations may not match the text in your test.
All test instructions and test items for this test are displayed on the computer screen.
Intermediate Word
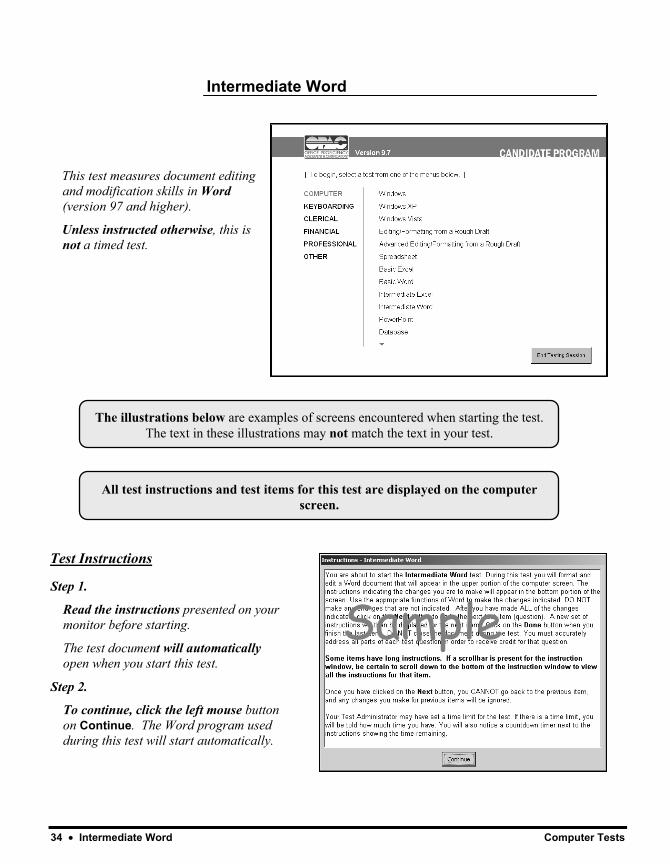
This test measures document editing and modification skills in Word (version 97 and higher).
Unless instructed otherwise, this is not a timed test.
Test Instructions
Step 1.
Read the instructions presented on your monitor before starting.
The test document will automatically open when you start this test.
Step 2.
To continue, click the left mouse button on Continue. The Word program used during this test will start automatically.
Sample
Computer Tests Intermediate Word • 35
Step 3.
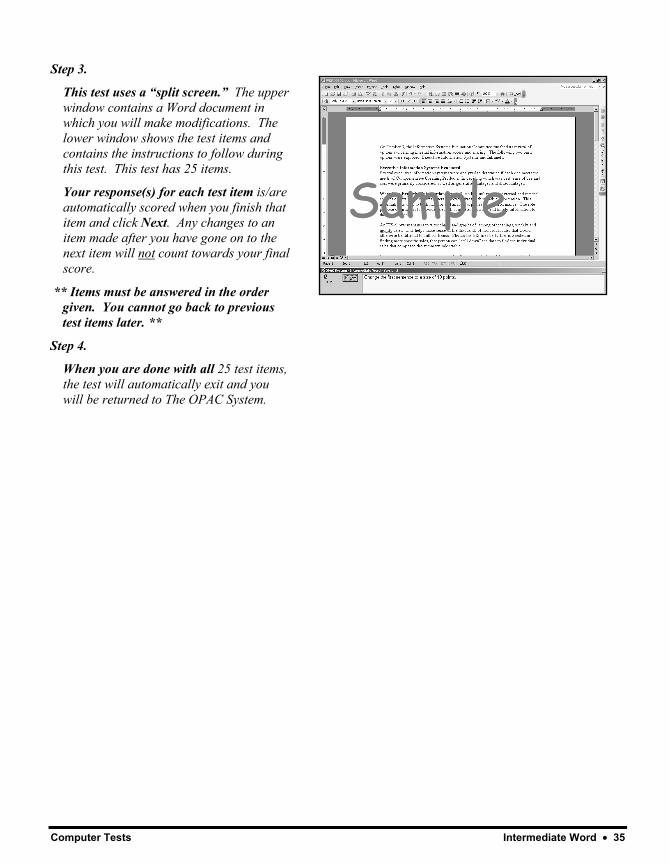
This test uses a “split screen.” The upper window contains a Word document in which you will make modifications. The lower window shows the test items and contains the instructions to follow during this test. This test has 25 items.
Your response(s) for each test item is/are automatically scored when you finish that item and click Next. Any changes to an item made after you have gone on to the next item will not count towards your final score.
** Items must be answered in the order given. You cannot go back to previous test items later. **
Step 4.
When you are done with all 25 test items, the test will automatically exit and you will be returned to The OPAC System.
Sample Sample
36 • PowerPoint Computer Tests
The illustrations below are examples of screens encountered when starting the test. The text in these illustrations may not match the text in your test.
All test instructions and test items for this test are displayed on the computer screen.
PowerPoint
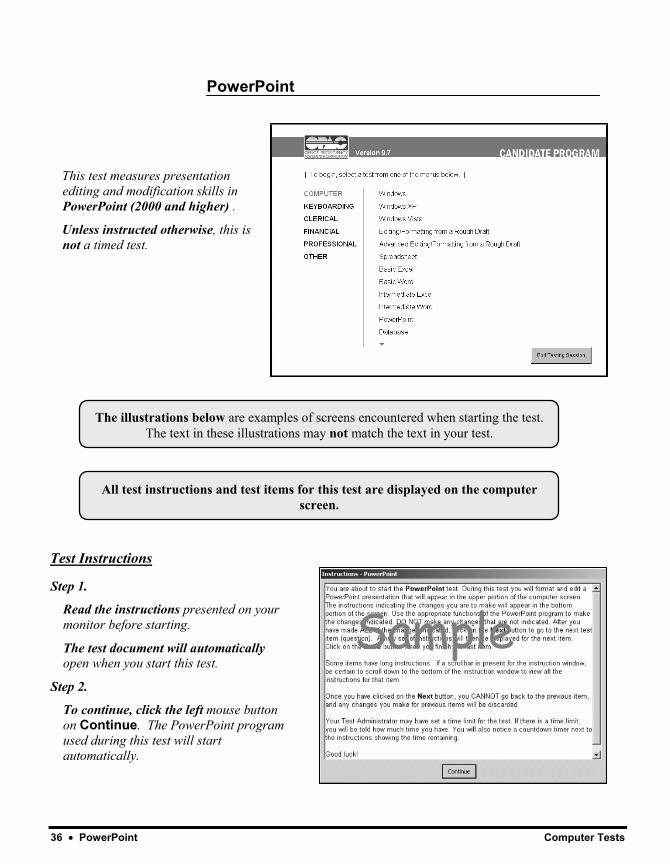
This test measures presentation editing and modification skills in PowerPoint (2000 and higher) .
Unless instructed otherwise, this is not a timed test.
Test Instructions
Step 1.
Read the instructions presented on your monitor before starting.
The test document will automatically open when you start this test.
Step 2.
To continue, click the left mouse button on Continue. The PowerPoint program used during this test will start automatically.
Sample
Computer Tests PowerPoint • 37
Step 3.
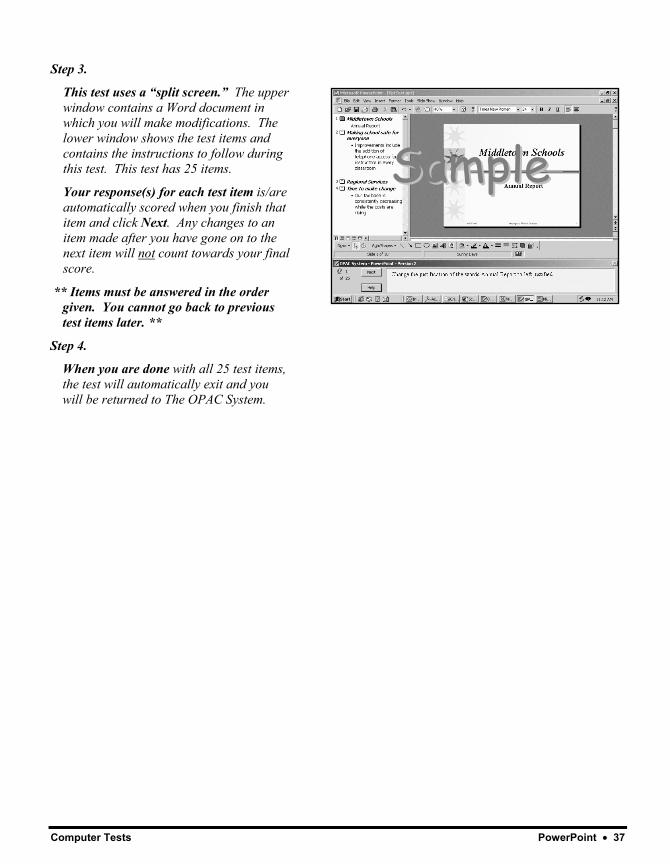
This test uses a “split screen.” The upper window contains a Word document in which you will make modifications. The lower window shows the test items and contains the instructions to follow during this test. This test has 25 items.
Your response(s) for each test item is/are automatically scored when you finish that item and click Next. Any changes to an item made after you have gone on to the next item will not count towards your final score.
** Items must be answered in the order given. You cannot go back to previous test items later. **
Step 4.
When you are done with all 25 test items, the test will automatically exit and you will be returned to The OPAC System.
SSaammppllee
38 • Database Computer Tests
Database
Test Instructions
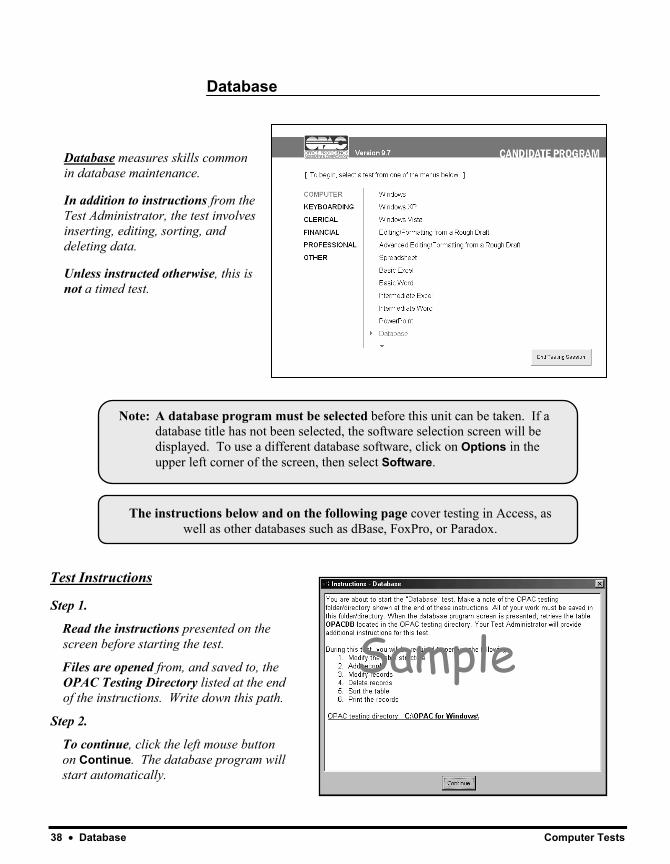
Step 1.
Read the instructions presented on the screen before starting the test.
Files are opened from, and saved to, the OPAC Testing Directory listed at the end of the instructions. Write down this path.
Step 2.
To continue, click the left mouse button on Continue. The database program will start automatically.
Database measures skills common in database maintenance.
In addition to instructions from the Test Administrator, the test involves inserting, editing, sorting, and deleting data.
Unless instructed otherwise, this is not a timed test.
Note: A database program must be selected before this unit can be taken. If a database title has not been selected, the software selection screen will be displayed. To use a different database software, click on Options in the upper left corner of the screen, then select Software.
The instructions below and on the following page cover testing in Access, as well as other databases such as dBase, FoxPro, or Paradox.
Sample
Computer Tests Database • 39
Step 9.
In Access, close the table, then open the query OPACDB1.
In other databases, close the file OPACDB.DBF, then open the file OPACDB1.DBF.
Step 10.
Edit the record for Mrs. Becky Dinkins by changing the address to:
74 Sunrise Road
(If the record is not found, make the change to the first record.)
Step 11.
In Access, print out a copy of the records.
In other databases, print out a copy of the file.
Step 12.
Exit Access or other database system. You will be returned to The OPAC System.
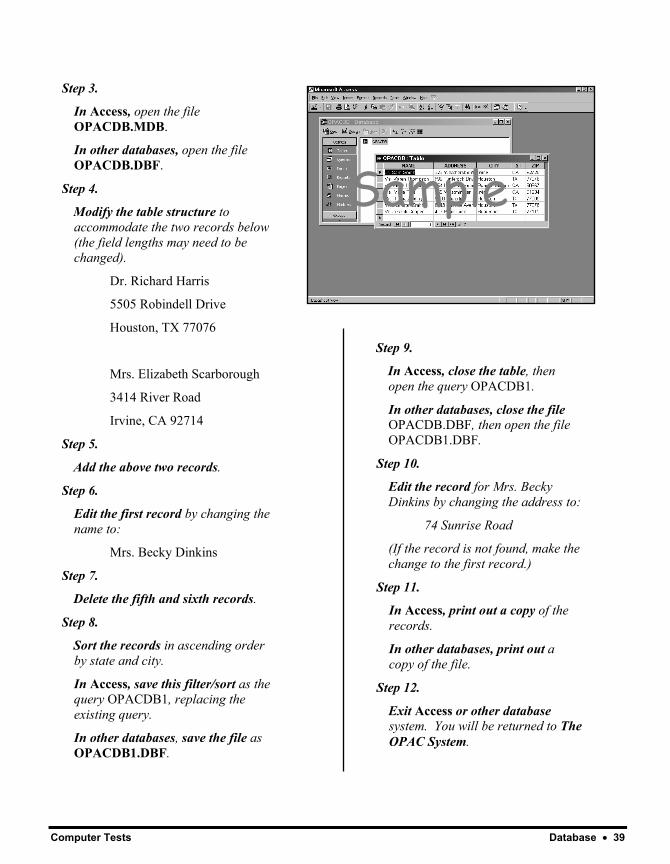
Step 3.
In Access, open the file OPACDB.MDB.
In other databases, open the file OPACDB.DBF.
Step 4.
Modify the table structure to accommodate the two records below (the field lengths may need to be changed).
Dr. Richard Harris
5505 Robindell Drive
Houston, TX 77076
Mrs. Elizabeth Scarborough
3414 River Road
Irvine, CA 92714
Step 5.
Add the above two records.
Step 6.
Edit the first record by changing the name to:
Mrs. Becky Dinkins
Step 7.
Delete the fifth and sixth records.
Step 8.
Sort the records in ascending order by state and city.
In Access, save this filter/sort as the query OPACDB1, replacing the existing query.
In other databases, save the file as OPACDB1.DBF.
Sample
40 • Outlook 2003 Computer Tests
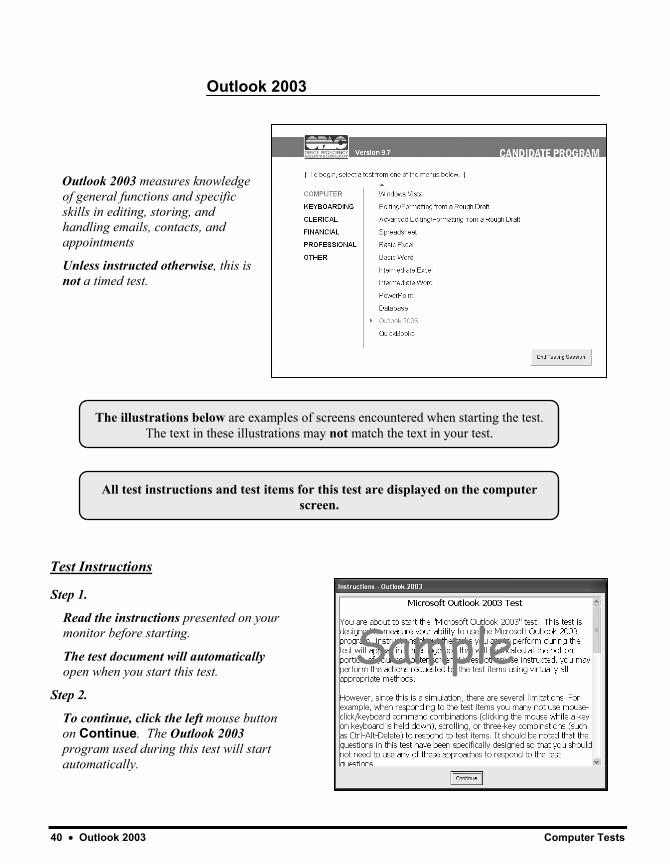
All test instructions and test items for this test are displayed on the computer screen.
The illustrations below are examples of screens encountered when starting the test. The text in these illustrations may not match the text in your test.
Outlook 2003
Outlook 2003 measures knowledge of general functions and specific skills in editing, storing, and handling emails, contacts, and appointments
Unless instructed otherwise, this is not a timed test.
Test Instructions
Step 1.
Read the instructions presented on your monitor before starting.
The test document will automatically open when you start this test.
Step 2.
To continue, click the left mouse button on Continue. The Outlook 2003 program used during this test will start automatically.
Sample
Computer Tests Outlook 2003 • 41
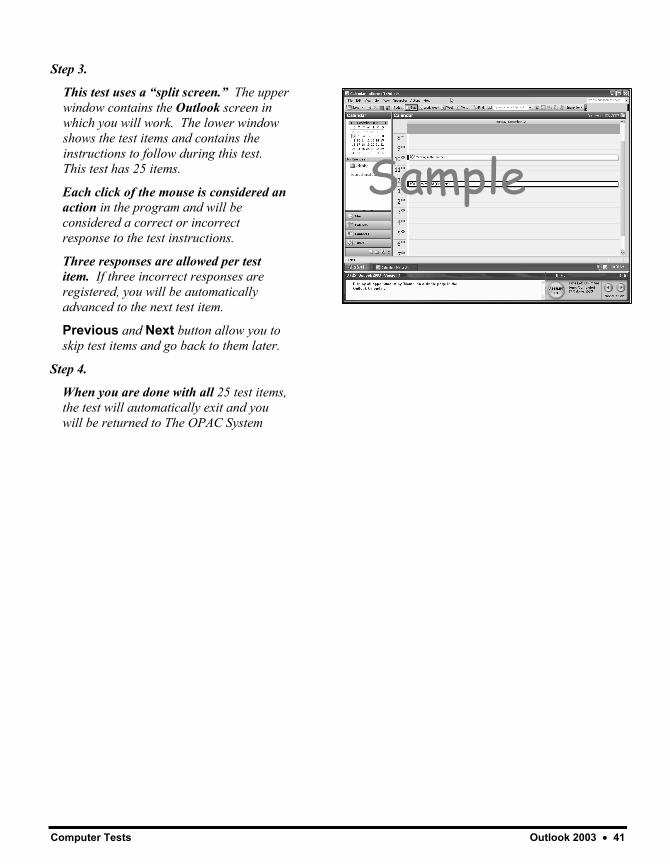
Step 3.
This test uses a “split screen.” The upper window contains the Outlook screen in which you will work. The lower window shows the test items and contains the instructions to follow during this test. This test has 25 items.
Each click of the mouse is considered an action in the program and will be considered a correct or incorrect response to the test instructions.
Three responses are allowed per test item. If three incorrect responses are registered, you will be automatically advanced to the next test item.
Previous and Next button allow you to skip test items and go back to them later.
Step 4.
When you are done with all 25 test items, the test will automatically exit and you will be returned to The OPAC System
Sample Sample
42 • QuickBooks Computer Tests
The illustrations below are examples of screens encountered when starting the test. The text in these illustrations may not match the text in your test.
All test instructions and test items for this test are displayed on the computer screen.
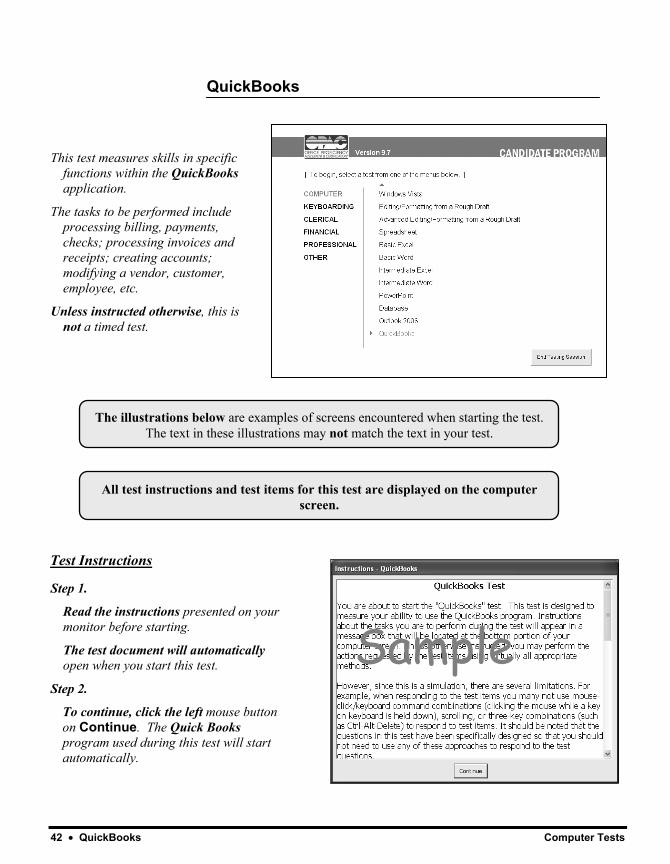
QuickBooks
This test measures skills in specific functions within the QuickBooks application.
The tasks to be performed include processing billing, payments, checks; processing invoices and receipts; creating accounts; modifying a vendor, customer, employee, etc.
Unless instructed otherwise, this is not a timed test.
Test Instructions
Step 1.
Read the instructions presented on your monitor before starting.
The test document will automatically open when you start this test.
Step 2.
To continue, click the left mouse button on Continue. The Quick Books program used during this test will start automatically.
Sample
Computer Tests QuickBooks • 43
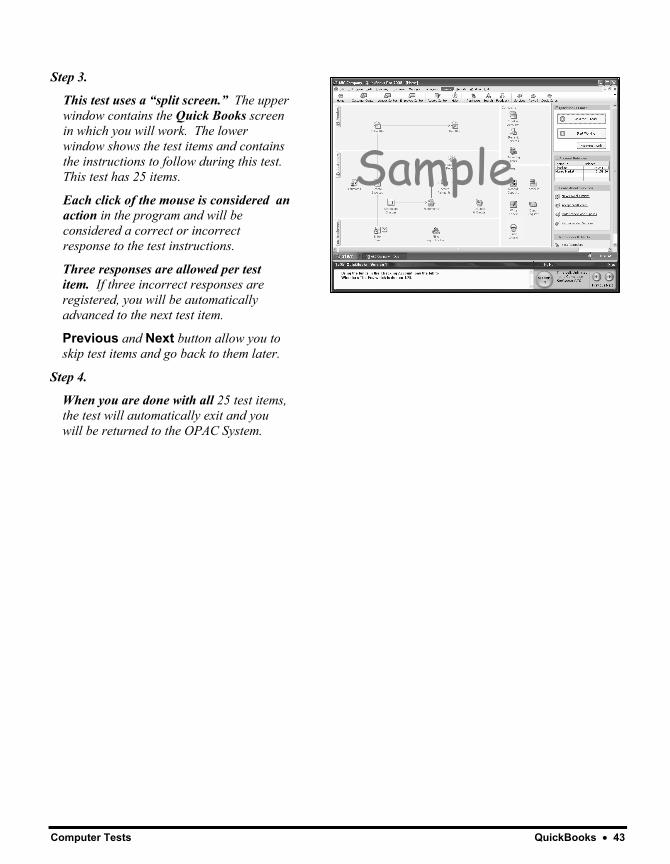
Step 3.
This test uses a “split screen.” The upper window contains the Quick Books screen in which you will work. The lower window shows the test items and contains the instructions to follow during this test. This test has 25 items.
Each click of the mouse is considered an action in the program and will be considered a correct or incorrect response to the test instructions.
Three responses are allowed per test item. If three incorrect responses are registered, you will be automatically advanced to the next test item.
Previous and Next button allow you to skip test items and go back to them later.
Step 4.
When you are done with all 25 test items, the test will automatically exit and you will be returned to the OPAC System.
Sample

The OPAC System - Candidate Manual
Keyboarding Tests Keyboarding Tests • 45
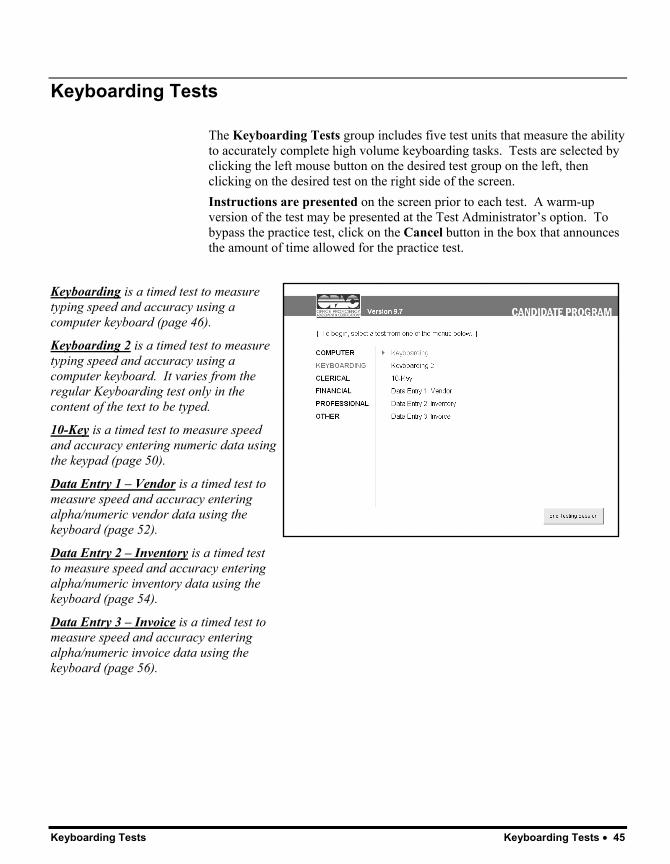
Keyboarding Tests The Keyboarding Tests group includes five test units that measure the ability to accurately complete high volume keyboarding tasks. Tests are selected by clicking the left mouse button on the desired test group on the left, then clicking on the desired test on the right side of the screen. Instructions are presented on the screen prior to each test. A warm-up version of the test may be presented at the Test Administrator’s option. To bypass the practice test, click on the Cancel button in the box that announces the amount of time allowed for the practice test.
Keyboarding is a timed test to measure typing speed and accuracy using a computer keyboard (page 46).
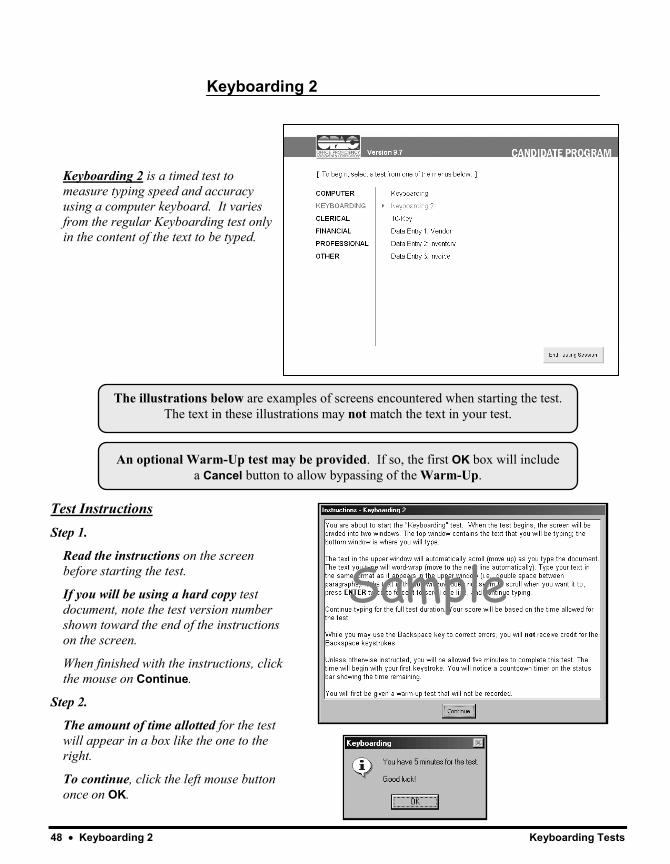
Keyboarding 2 is a timed test to measure typing speed and accuracy using a computer keyboard. It varies from the regular Keyboarding test only in the content of the text to be typed.
10-Key is a timed test to measure speed and accuracy entering numeric data using the keypad (page 50).
Data Entry 1 – Vendor is a timed test to measure speed and accuracy entering alpha/numeric vendor data using the keyboard (page 52).
Data Entry 2 – Inventory is a timed test to measure speed and accuracy entering alpha/numeric inventory data using the keyboard (page 54).
Data Entry 3 – Invoice is a timed test to measure speed and accuracy entering alpha/numeric invoice data using the keyboard (page 56).
46 • Keyboarding Keyboarding Tests
The illustrations below are examples of screens encountered when starting the test. The text in these illustrations may not match the text in your test.
Keyboarding
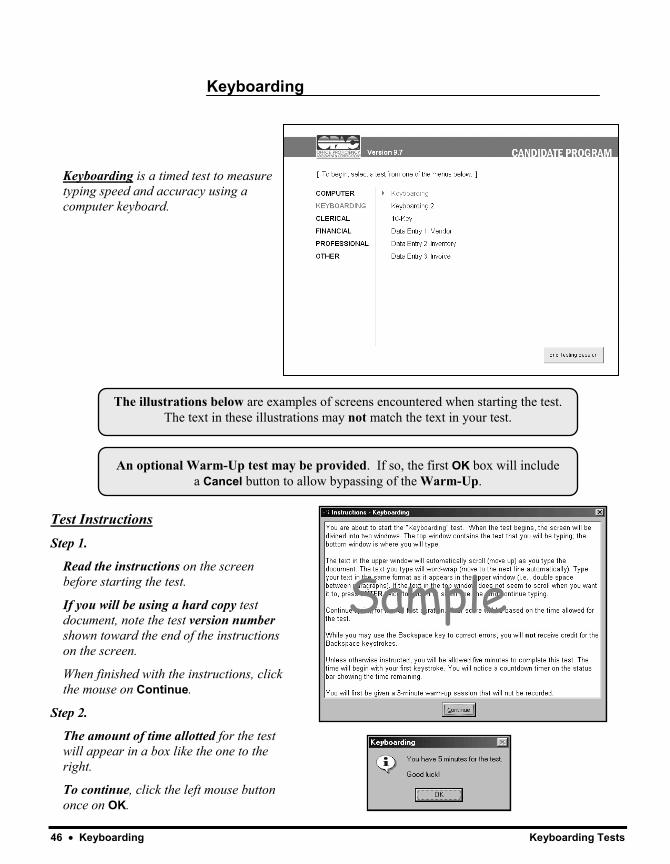
Keyboarding is a timed test to measure typing speed and accuracy using a computer keyboard.
Test Instructions Step 1.
Read the instructions on the screen before starting the test.
If you will be using a hard copy test document, note the test version number shown toward the end of the instructions on the screen.
When finished with the instructions, click the mouse on Continue.
Step 2.
The amount of time allotted for the test will appear in a box like the one to the right.
To continue, click the left mouse button once on OK.
An optional Warm-Up test may be provided. If so, the first OK box will include a Cancel button to allow bypassing of the Warm-Up.
Sample
Keyboarding Tests Keyboarding • 47
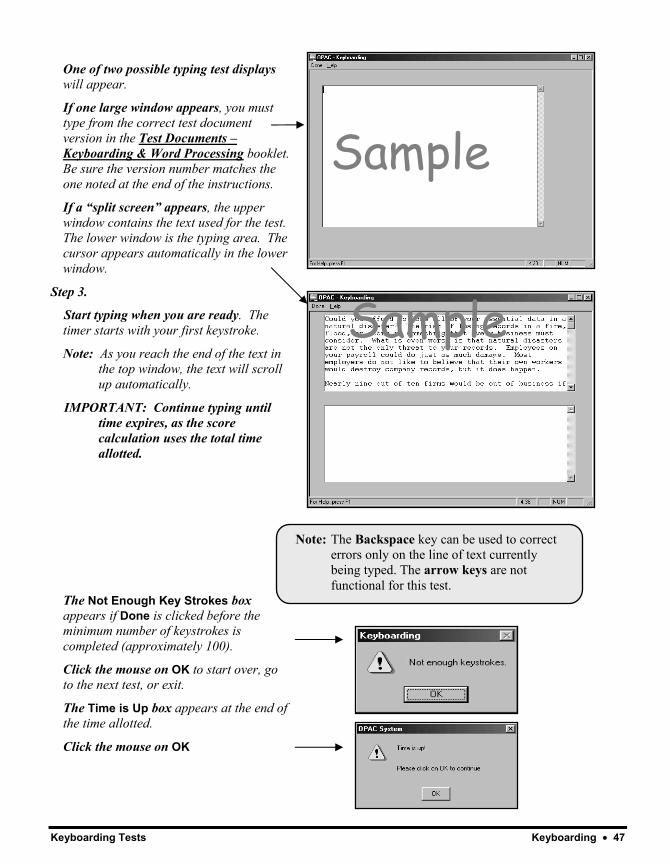
One of two possible typing test displays will appear.
If one large window appears, you must type from the correct test document version in the Test Documents – Keyboarding & Word Processing booklet. Be sure the version number matches the one noted at the end of the instructions.
If a “split screen” appears, the upper window contains the text used for the test. The lower window is the typing area. The cursor appears automatically in the lower window.
Step 3.
Start typing when you are ready. The timer starts with your first keystroke.
Note: As you reach the end of the text in the top window, the text will scroll up automatically.
IMPORTANT: Continue typing until time expires, as the score calculation uses the total time allotted.
The Not Enough Key Strokes box appears if Done is clicked before the minimum number of keystrokes is completed (approximately 100).
Click the mouse on OK to start over, go to the next test, or exit.
The Time is Up box appears at the end of the time allotted.
Click the mouse on OK
Sample
Sample
Note: The Backspace key can be used to correct errors only on the line of text currently being typed. The arrow keys are not functional for this test.
48 • Keyboarding 2 Keyboarding Tests
The illustrations below are examples of screens encountered when starting the test. The text in these illustrations may not match the text in your test.
Keyboarding 2
Keyboarding 2 is a timed test to measure typing speed and accuracy using a computer keyboard. It varies from the regular Keyboarding test only in the content of the text to be typed.
Test Instructions Step 1.
Read the instructions on the screen before starting the test.
If you will be using a hard copy test document, note the test version number shown toward the end of the instructions on the screen.
When finished with the instructions, click the mouse on Continue.
Step 2.
The amount of time allotted for the test will appear in a box like the one to the right.
To continue, click the left mouse button once on OK.
An optional Warm-Up test may be provided. If so, the first OK box will include a Cancel button to allow bypassing of the Warm-Up.
Sample
Keyboarding Tests Keyboarding 2 • 49
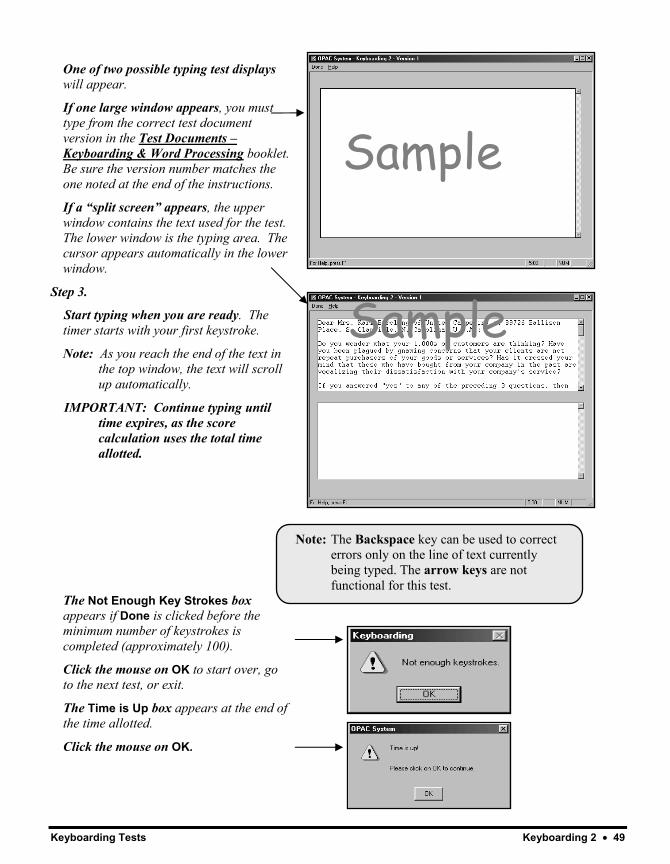
One of two possible typing test displays will appear.
If one large window appears, you must type from the correct test document version in the Test Documents – Keyboarding & Word Processing booklet. Be sure the version number matches the one noted at the end of the instructions.
If a “split screen” appears, the upper window contains the text used for the test. The lower window is the typing area. The cursor appears automatically in the lower window.
Step 3.
Start typing when you are ready. The timer starts with your first keystroke.
Note: As you reach the end of the text in the top window, the text will scroll up automatically.
IMPORTANT: Continue typing until time expires, as the score calculation uses the total time allotted.
The Not Enough Key Strokes box appears if Done is clicked before the minimum number of keystrokes is completed (approximately 100).
Click the mouse on OK to start over, go to the next test, or exit.
The Time is Up box appears at the end of the time allotted.
Click the mouse on OK.
Sample
Sample
Note: The Backspace key can be used to correct errors only on the line of text currently being typed. The arrow keys are not functional for this test.
50 • 10-Key Keyboarding Tests
The illustrations below are examples of screens encountered when starting the test. The text in these illustrations may not match the text in your test.
10-Key
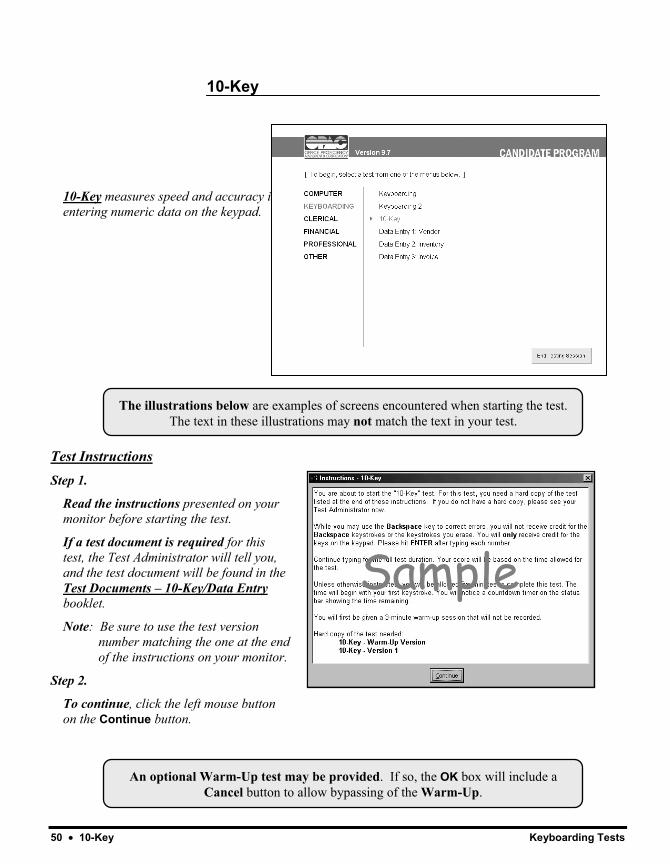
10-Key measures speed and accuracy in entering numeric data on the keypad.
Test Instructions Step 1.
Read the instructions presented on your monitor before starting the test.
If a test document is required for this test, the Test Administrator will tell you, and the test document will be found in the Test Documents – 10-Key/Data Entry booklet.
Note: Be sure to use the test version number matching the one at the end of the instructions on your monitor.
Step 2.
To continue, click the left mouse button on the Continue button.
Sample
An optional Warm-Up test may be provided. If so, the OK box will include a Cancel button to allow bypassing of the Warm-Up.
Keyboarding Tests 10-Key • 51
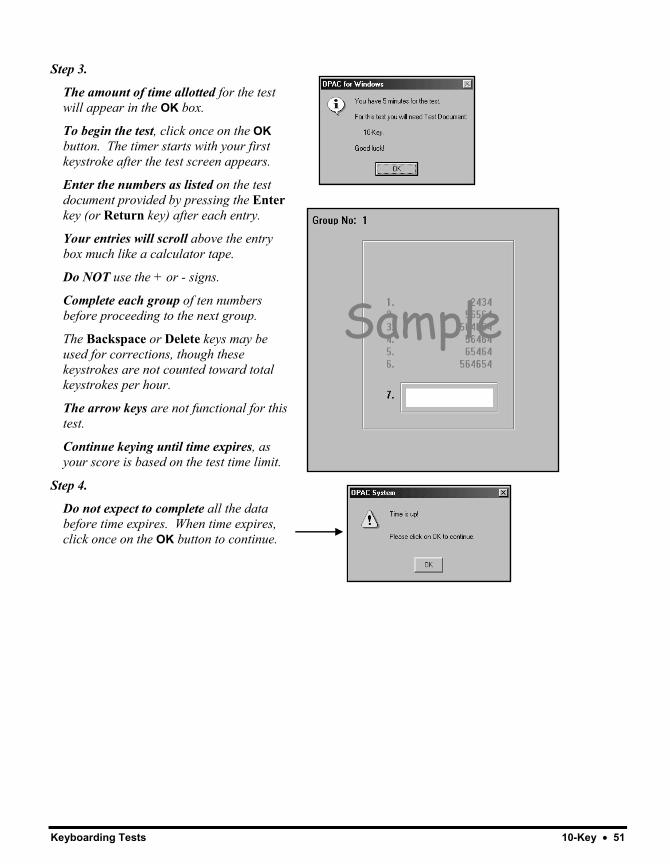
Step 3.
The amount of time allotted for the test will appear in the OK box.
To begin the test, click once on the OK button. The timer starts with your first keystroke after the test screen appears.
Enter the numbers as listed on the test document provided by pressing the Enter key (or Return key) after each entry.
Your entries will scroll above the entry box much like a calculator tape.
Do NOT use the + or - signs.
Complete each group of ten numbers before proceeding to the next group.
The Backspace or Delete keys may be used for corrections, though these keystrokes are not counted toward total keystrokes per hour.
The arrow keys are not functional for this test.
Continue keying until time expires, as your score is based on the test time limit.
Step 4.
Do not expect to complete all the data before time expires. When time expires, click once on the OK button to continue.
Sample
52 • Data Entry 1: Vendor Keyboarding Tests
The illustrations below are examples of screens encountered when starting the test. The text in these illustrations may not match the text in your test.
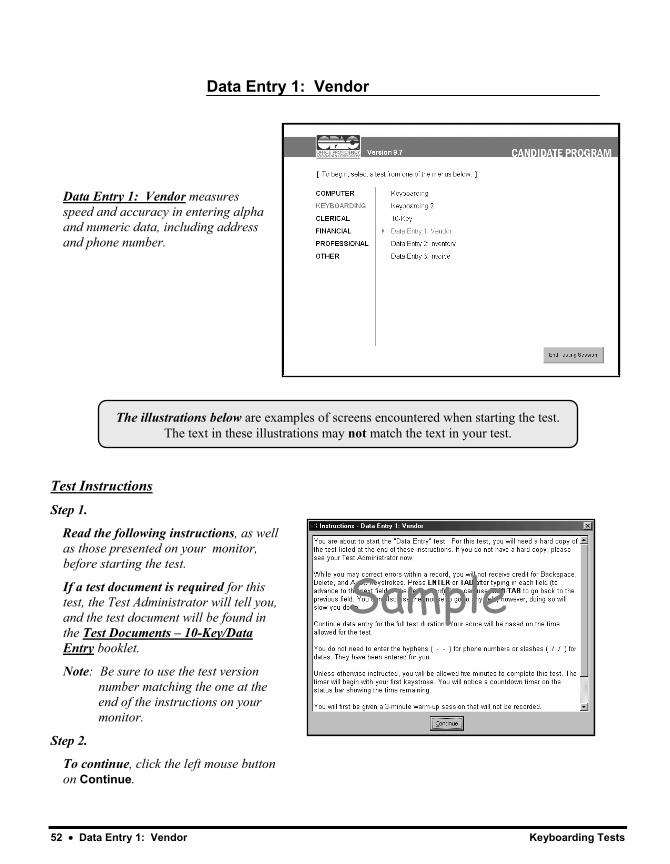
Data Entry 1: Vendor
Data Entry 1: Vendor measures speed and accuracy in entering alpha and numeric data, including address and phone number.
Test Instructions Step 1.
Read the following instructions, as well as those presented on your monitor, before starting the test.
If a test document is required for this test, the Test Administrator will tell you, and the test document will be found in the Test Documents – 10-Key/Data Entry booklet.
Note: Be sure to use the test version number matching the one at the end of the instructions on your monitor.
Step 2.
To continue, click the left mouse button on Continue.
Sample
Keyboarding Tests Data Entry 1: Vendor • 53
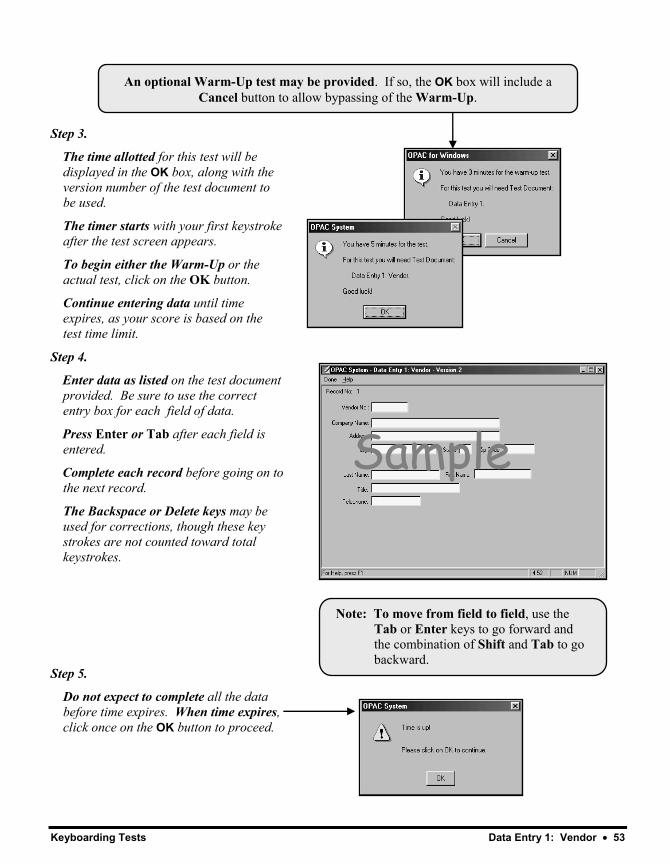
Step 3.
The time allotted for this test will be displayed in the OK box, along with the version number of the test document to be used.
The timer starts with your first keystroke after the test screen appears.
To begin either the Warm-Up or the actual test, click on the OK button.
Continue entering data until time expires, as your score is based on the test time limit.
Step 4.
Enter data as listed on the test document provided. Be sure to use the correct entry box for each field of data.
Press Enter or Tab after each field is entered.
Complete each record before going on to the next record.
The Backspace or Delete keys may be used for corrections, though these key strokes are not counted toward total keystrokes.
Step 5.
Do not expect to complete all the data before time expires. When time expires, click once on the OK button to proceed.
Sample
An optional Warm-Up test may be provided. If so, the OK box will include a Cancel button to allow bypassing of the Warm-Up.
Note: To move from field to field, use the Tab or Enter keys to go forward and the combination of Shift and Tab to go backward.
54 • Data Entry 2: Inventory Keyboarding Tests
The illustrations below are examples of screens encountered when starting the test. The text in these illustrations may not match the text in your test.
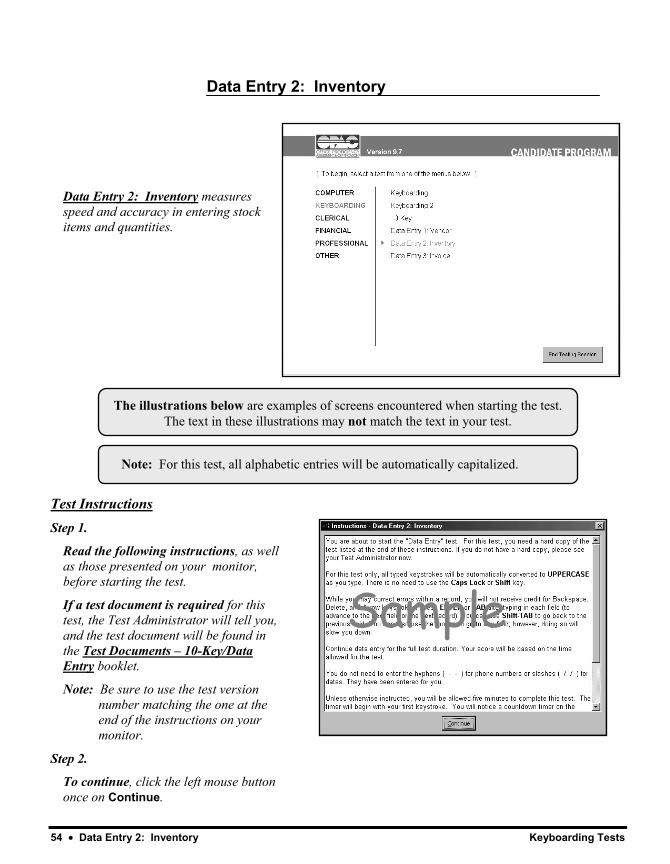
Data Entry 2: Inventory
Data Entry 2: Inventory measures speed and accuracy in entering stock items and quantities.
Test Instructions Step 1.
Read the following instructions, as well as those presented on your monitor, before starting the test.
If a test document is required for this test, the Test Administrator will tell you, and the test document will be found in the Test Documents – 10-Key/Data Entry booklet.
Note: Be sure to use the test version number matching the one at the end of the instructions on your monitor.
Step 2.
To continue, click the left mouse button once on Continue.
Note: For this test, all alphabetic entries will be automatically capitalized.
Sample
Keyboarding Tests Data Entry 2: Inventory • 55
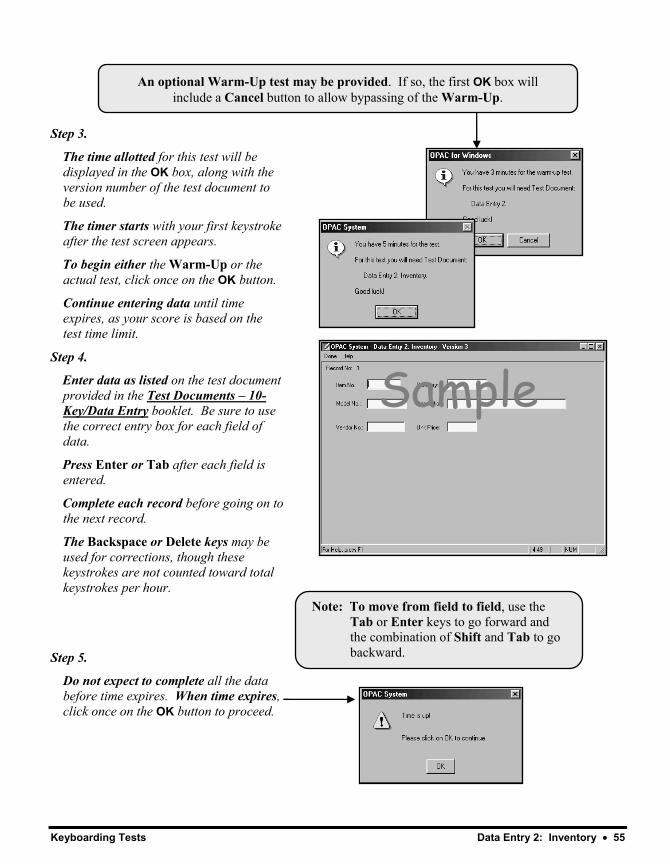
Step 3.
The time allotted for this test will be displayed in the OK box, along with the version number of the test document to be used.
The timer starts with your first keystroke after the test screen appears.
To begin either the Warm-Up or the actual test, click once on the OK button.
Continue entering data until time expires, as your score is based on the test time limit.
Step 4.
Enter data as listed on the test document provided in the Test Documents – 10-Key/Data Entry booklet. Be sure to use the correct entry box for each field of data.
Press Enter or Tab after each field is entered.
Complete each record before going on to the next record.
The Backspace or Delete keys may be used for corrections, though these keystrokes are not counted toward total keystrokes per hour.
Step 5.
Do not expect to complete all the data before time expires. When time expires, click once on the OK button to proceed.
An optional Warm-Up test may be provided. If so, the first OK box will include a Cancel button to allow bypassing of the Warm-Up.
Sample
Note: To move from field to field, use the Tab or Enter keys to go forward and the combination of Shift and Tab to go backward.
56 • Data Entry 3: Invoice Keyboarding Tests
The illustrations below are examples of screens encountered when starting the test. The text in these illustrations may not match the text in your test.
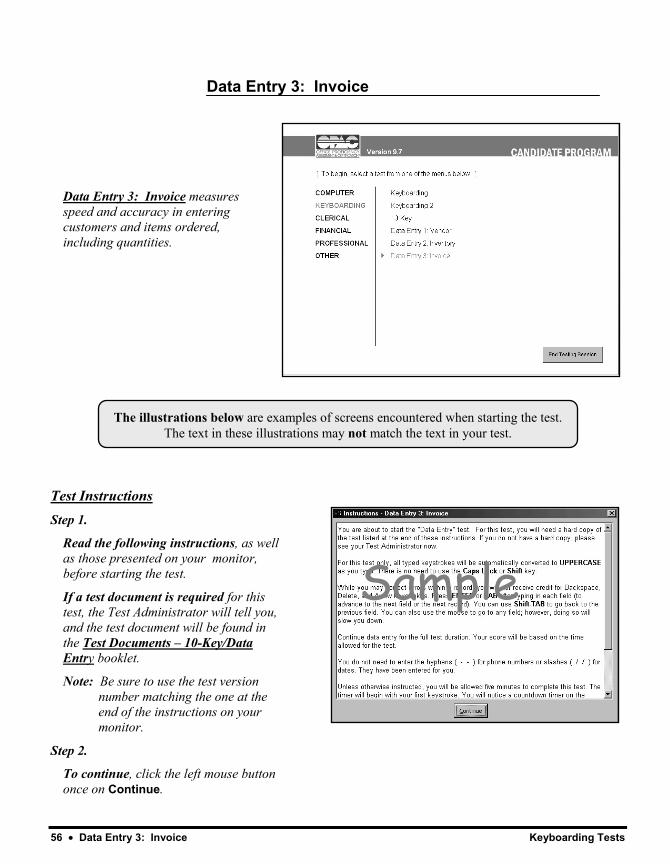
Data Entry 3: Invoice
Data Entry 3: Invoice measures speed and accuracy in entering customers and items ordered, including quantities.
Test Instructions Step 1.
Read the following instructions, as well as those presented on your monitor, before starting the test.
If a test document is required for this test, the Test Administrator will tell you, and the test document will be found in the Test Documents – 10-Key/Data Entry booklet.
Note: Be sure to use the test version number matching the one at the end of the instructions on your monitor.
Step 2.
To continue, click the left mouse button once on Continue.
Sample

Keyboarding Tests Data Entry 3: Invoice • 57
Step 3.
The time allotted for this test will be displayed in the OK box, along with the version number of the test document to be used.
The timer starts with your first keystroke after the test screen appears.
To begin either the Warm-Up or the actual test, click once on the OK button.
Continue entering data until time expires, as your score is based on the test time limit.
Step 4.
Enter data as listed on the test document provided. Be sure to use the correct entry box for each field of data.
Press Enter or Tab after each field is entered.
Complete each record before going on to the next record.
The Backspace or Delete keys may be used for corrections, though these keystrokes are not counted toward total keystrokes per hour.
Step 5.
Do not expect to complete all the data before time expires. When time expires, click once on the OK button to proceed.
Note: An optional Warm-Up test may be provided. If so, the first OK box will include a Cancel button to allow bypassing of the Warm-Up test.
Sample
Note: To move from field to field, use the Tab or Enter keys to go forward and the combination of Shift and Tab to go backward.

Keyboarding Tests
OPAC System Tests Clerical Tests • 59
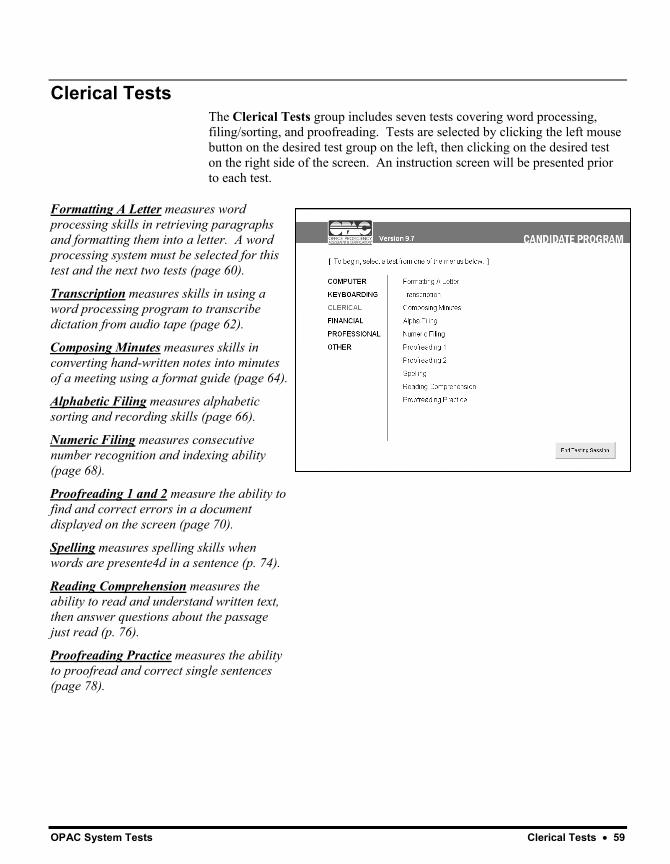
Clerical Tests The Clerical Tests group includes seven tests covering word processing, filing/sorting, and proofreading. Tests are selected by clicking the left mouse button on the desired test group on the left, then clicking on the desired test on the right side of the screen. An instruction screen will be presented prior to each test.
Formatting A Letter measures word processing skills in retrieving paragraphs and formatting them into a letter. A word processing system must be selected for this test and the next two tests (page 60).
Transcription measures skills in using a word processing program to transcribe dictation from audio tape (page 62).
Composing Minutes measures skills in converting hand-written notes into minutes of a meeting using a format guide (page 64).
Alphabetic Filing measures alphabetic sorting and recording skills (page 66).
Numeric Filing measures consecutive number recognition and indexing ability (page 68).
Proofreading 1 and 2 measure the ability to find and correct errors in a document displayed on the screen (page 70).
Spelling measures spelling skills when words are presente4d in a sentence (p. 74).
Reading Comprehension measures the ability to read and understand written text, then answer questions about the passage just read (p. 76).
Proofreading Practice measures the ability to proofread and correct single sentences (page 78).
60 • Formatting a Letter Clerical Tests
The illustrations below are examples of screens encountered when starting the test. The text in these illustrations may not match the text in your test.
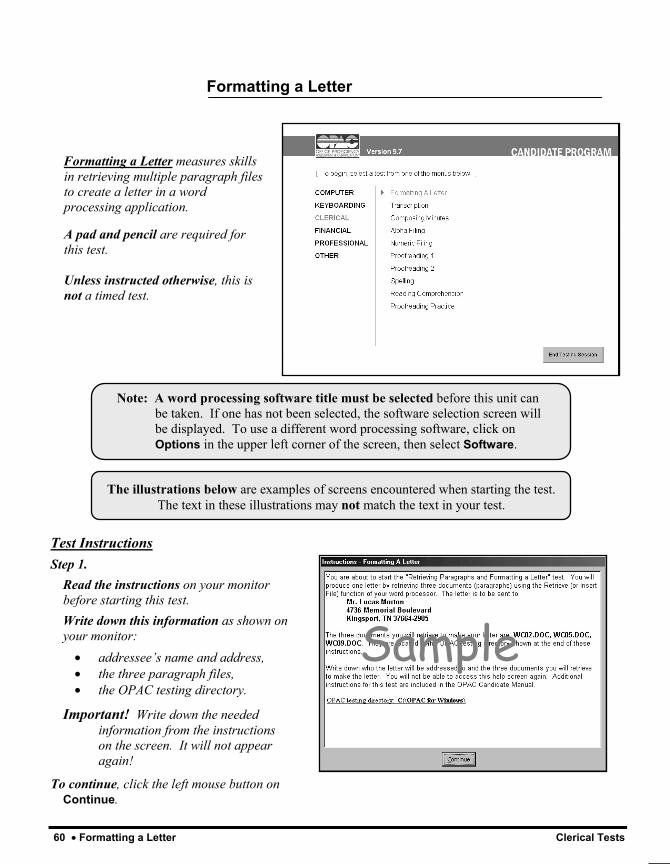
Formatting a Letter
Test Instructions Step 1.
Read the instructions on your monitor before starting this test. Write down this information as shown on your monitor:
• addressee’s name and address, • the three paragraph files, • the OPAC testing directory.
Important! Write down the needed information from the instructions on the screen. It will not appear again!
To continue, click the left mouse button on Continue.
Formatting a Letter measures skills in retrieving multiple paragraph files to create a letter in a word processing application.
A pad and pencil are required for this test. Unless instructed otherwise, this is not a timed test.
Sample
Note: A word processing software title must be selected before this unit can be taken. If one has not been selected, the software selection screen will be displayed. To use a different word processing software, click on Options in the upper left corner of the screen, then select Software.
OPAC System Tests Formatting a Letter • 61
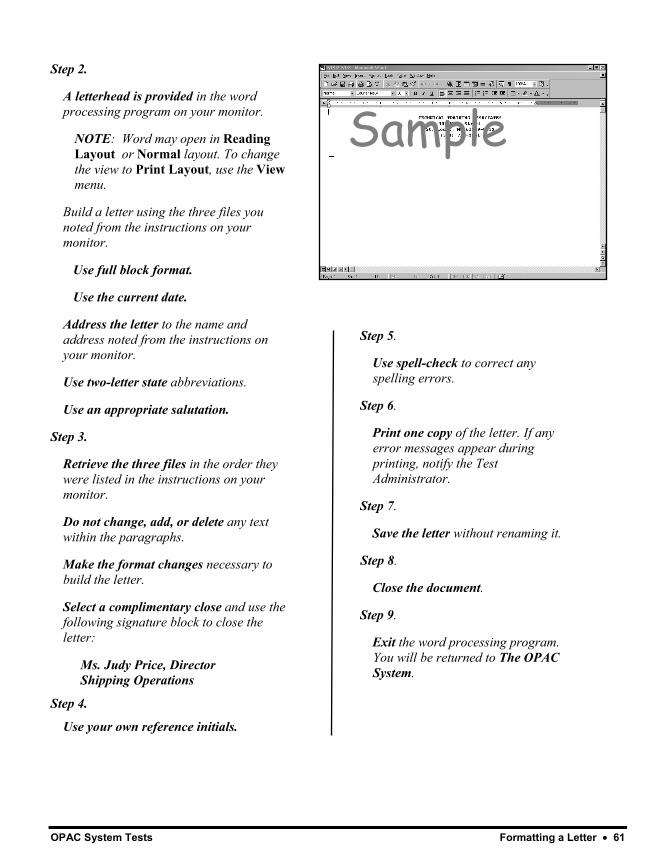
Step 2.
A letterhead is provided in the word processing program on your monitor.
NOTE: Word may open in Reading Layout or Normal layout. To change the view to Print Layout, use the View menu.
Build a letter using the three files you noted from the instructions on your monitor.
Use full block format.
Use the current date.
Address the letter to the name and address noted from the instructions on your monitor.
Use two-letter state abbreviations.
Use an appropriate salutation.
Step 3.
Retrieve the three files in the order they were listed in the instructions on your monitor.
Do not change, add, or delete any text within the paragraphs.
Make the format changes necessary to build the letter.
Select a complimentary close and use the following signature block to close the letter:
Ms. Judy Price, Director Shipping Operations
Step 4.
Use your own reference initials.
Sample
Step 5.
Use spell-check to correct any spelling errors.
Step 6.
Print one copy of the letter. If any error messages appear during printing, notify the Test Administrator.
Step 7.
Save the letter without renaming it.
Step 8.
Close the document.
Step 9.
Exit the word processing program. You will be returned to The OPAC System.
62 • Transcription Clerical Tests
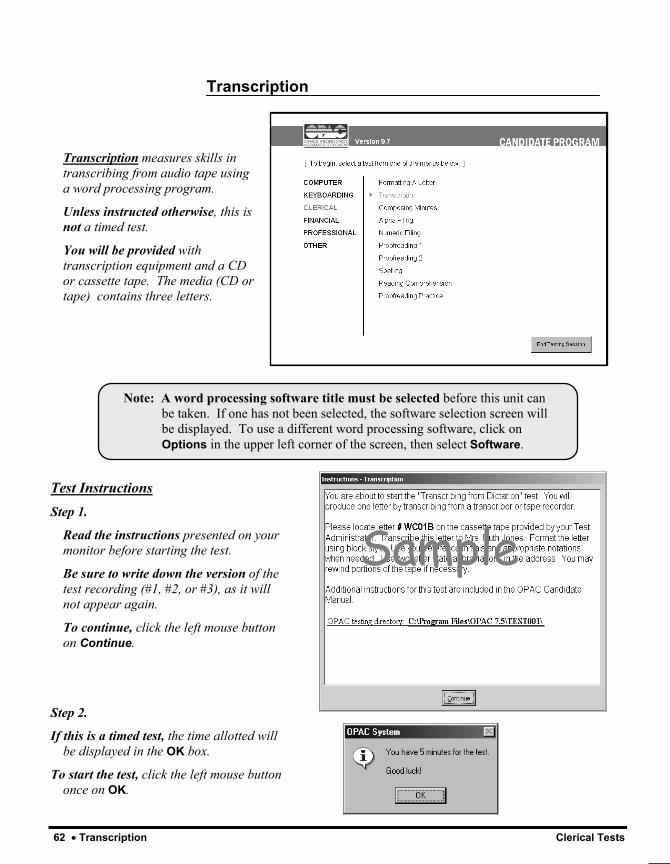
Transcription
Transcription measures skills in transcribing from audio tape using a word processing program.
Unless instructed otherwise, this is not a timed test.
You will be provided with transcription equipment and a CD or cassette tape. The media (CD or tape) contains three letters.
Test Instructions Step 1.
Read the instructions presented on your monitor before starting the test.
Be sure to write down the version of the test recording (#1, #2, or #3), as it will not appear again.
To continue, click the left mouse button on Continue.
Step 2.
If this is a timed test, the time allotted will be displayed in the OK box.
To start the test, click the left mouse button once on OK.
Note: A word processing software title must be selected before this unit can be taken. If one has not been selected, the software selection screen will be displayed. To use a different word processing software, click on Options in the upper left corner of the screen, then select Software.
Sample
OPAC System Tests Transcription • 63
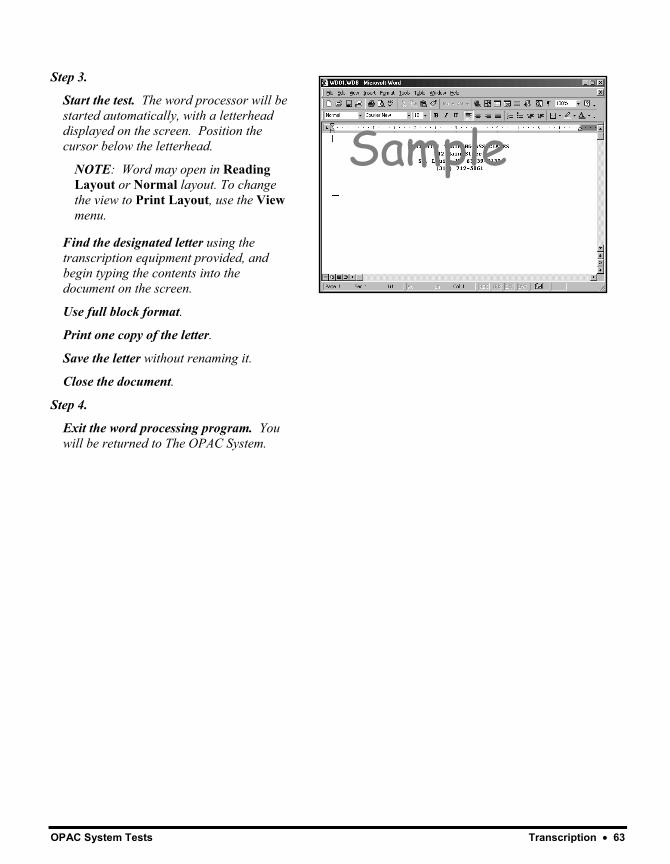
Step 3.
Start the test. The word processor will be started automatically, with a letterhead displayed on the screen. Position the cursor below the letterhead.
NOTE: Word may open in Reading Layout or Normal layout. To change the view to Print Layout, use the View menu.
Find the designated letter using the transcription equipment provided, and begin typing the contents into the document on the screen.
Use full block format.
Print one copy of the letter.
Save the letter without renaming it.
Close the document.
Step 4.
Exit the word processing program. You will be returned to The OPAC System.
Sample
64 • Composing Minutes Clerical Tests
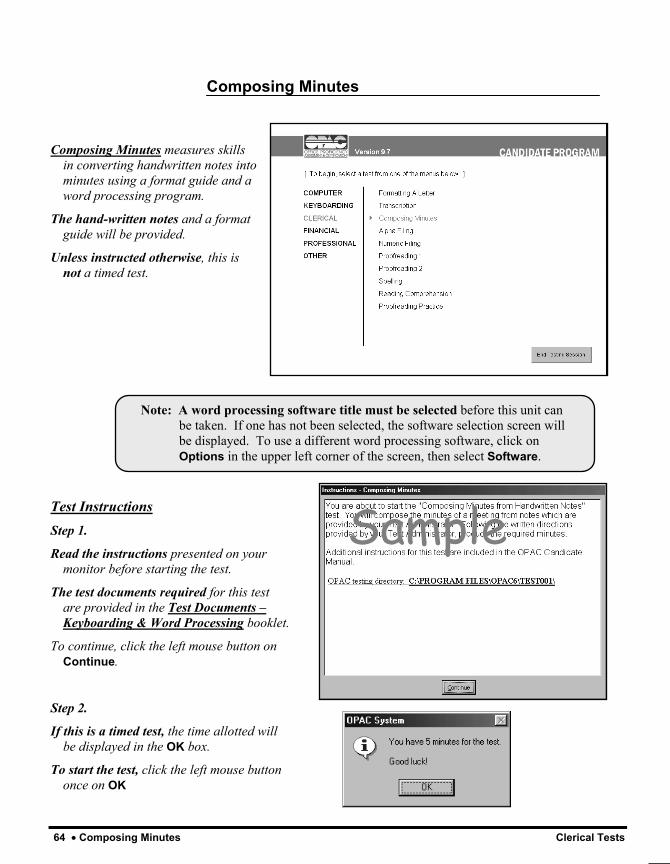
Composing Minutes
Composing Minutes measures skills in converting handwritten notes into minutes using a format guide and a word processing program.
The hand-written notes and a format guide will be provided.
Unless instructed otherwise, this is not a timed test.
Test Instructions Step 1.
Read the instructions presented on your monitor before starting the test.
The test documents required for this test are provided in the Test Documents – Keyboarding & Word Processing booklet.
To continue, click the left mouse button on Continue.
Step 2.
If this is a timed test, the time allotted will be displayed in the OK box.
To start the test, click the left mouse button once on OK
Note: A word processing software title must be selected before this unit can be taken. If one has not been selected, the software selection screen will be displayed. To use a different word processing software, click on Options in the upper left corner of the screen, then select Software.
Sample
OPAC System Tests Composing Minutes • 65
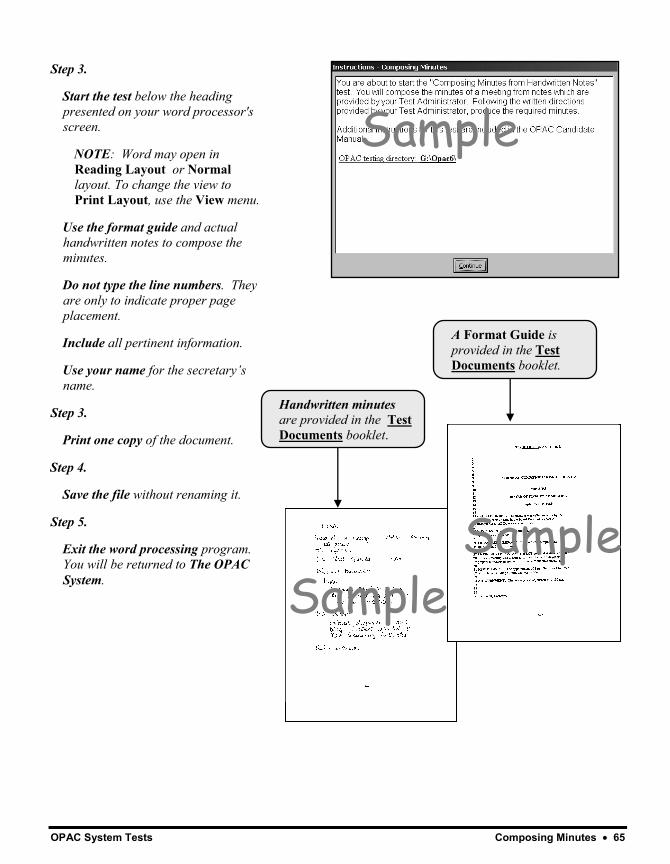
Step 3.
Start the test below the heading presented on your word processor's screen.
NOTE: Word may open in Reading Layout or Normal layout. To change the view to Print Layout, use the View menu.
Use the format guide and actual handwritten notes to compose the minutes.
Do not type the line numbers. They are only to indicate proper page placement.
Include all pertinent information.
Use your name for the secretary’s name.
Step 3.
Print one copy of the document.
Step 4.
Save the file without renaming it.
Step 5.
Exit the word processing program. You will be returned to The OPAC System.
A Format Guide is provided in the Test Documents booklet.
Handwritten minutes are provided in the Test Documents booklet.
Sample
Sample
Sample
66 • Alphabetic Filing Clerical Tests
The illustrations below are examples of screens encountered when starting the test. The text in these illustrations may not match the text in your test.
Alphabetic Filing
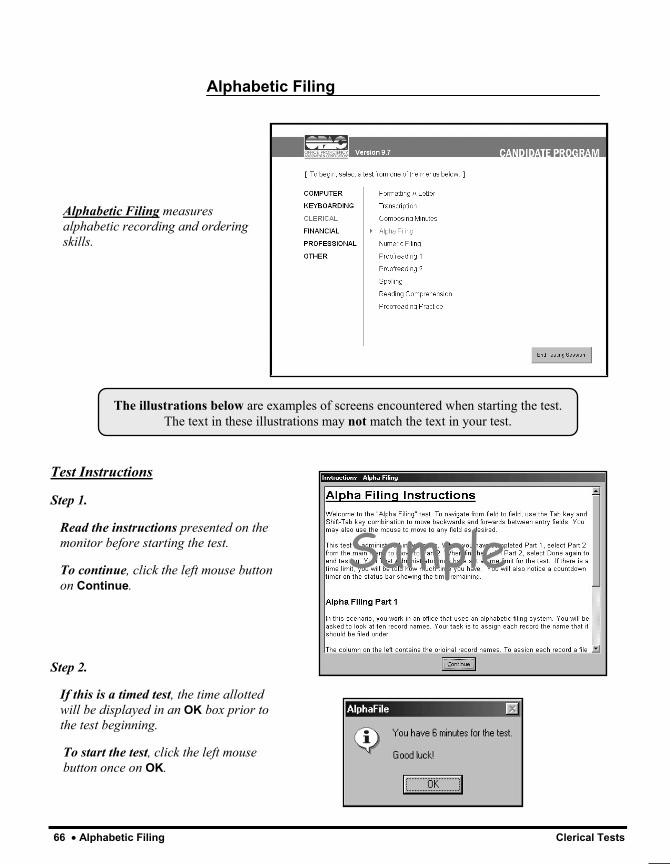
Alphabetic Filing measures alphabetic recording and ordering skills.
Test Instructions
Step 1.
Read the instructions presented on the monitor before starting the test.
To continue, click the left mouse button on Continue.
Step 2.
If this is a timed test, the time allotted will be displayed in an OK box prior to the test beginning.
To start the test, click the left mouse button once on OK.
Sample
OPAC System Tests Alphabetic Filing • 67
#3
#5
#6
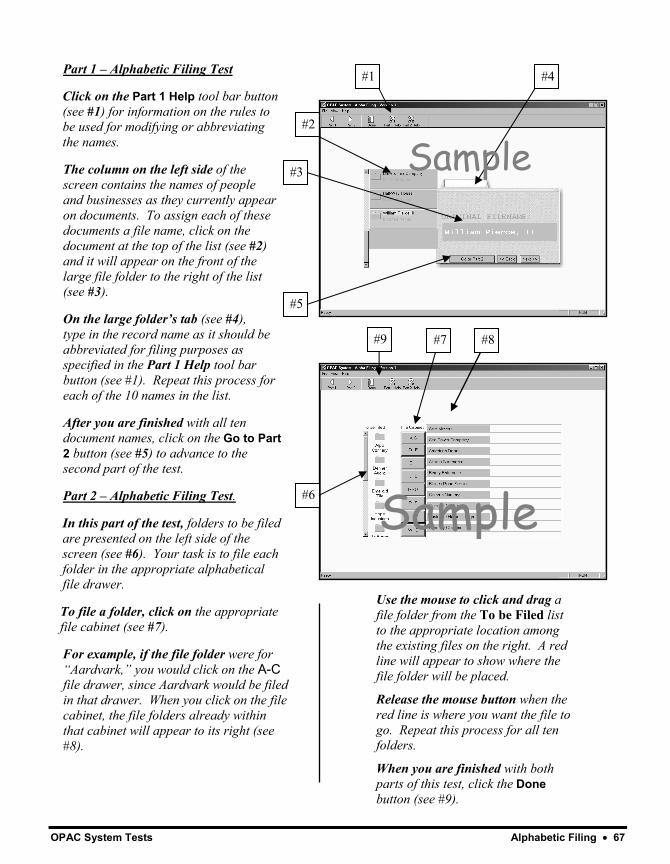
Part 1 – Alphabetic Filing Test
Click on the Part 1 Help tool bar button (see #1) for information on the rules to be used for modifying or abbreviating the names.
The column on the left side of the screen contains the names of people and businesses as they currently appear on documents. To assign each of these documents a file name, click on the document at the top of the list (see #2) and it will appear on the front of the large file folder to the right of the list (see #3).
On the large folder’s tab (see #4), type in the record name as it should be abbreviated for filing purposes as specified in the Part 1 Help tool bar button (see #1). Repeat this process for each of the 10 names in the list.
After you are finished with all ten document names, click on the Go to Part 2 button (see #5) to advance to the second part of the test.
Part 2 – Alphabetic Filing Test.
In this part of the test, folders to be filed are presented on the left side of the screen (see #6). Your task is to file each folder in the appropriate alphabetical file drawer.
To file a folder, click on the appropriate file cabinet (see #7).
For example, if the file folder were for “Aardvark,” you would click on the A-C file drawer, since Aardvark would be filed in that drawer. When you click on the file cabinet, the file folders already within that cabinet will appear to its right (see #8).
#1
Use the mouse to click and drag a file folder from the To be Filed list to the appropriate location among the existing files on the right. A red line will appear to show where the file folder will be placed.
Release the mouse button when the red line is where you want the file to go. Repeat this process for all ten folders.
When you are finished with both parts of this test, click the Done button (see #9).
#4
#9 #7
Sample
Sample
#8
#2

68 • Numeric Filing Clerical Tests
The illustrations below are examples of screens encountered when starting the test. The text in these illustrations may not match the text in your test.
Numeric Filing
Numeric Filing contains two parts:
Part I tests consecutive number recognition.
Part II tests indexing accuracy.
Test Instructions
Step 1.
Read the instructions presented on the monitor before starting the test.
To continue, click the left mouse button on Continue.
Step 2.
If this is a timed test, the time allotted will be displayed in an OK box prior to the test beginning.
To start the test, click the left mouse button on OK.
Sample
OPAC System Tests Numeric Filing • 69
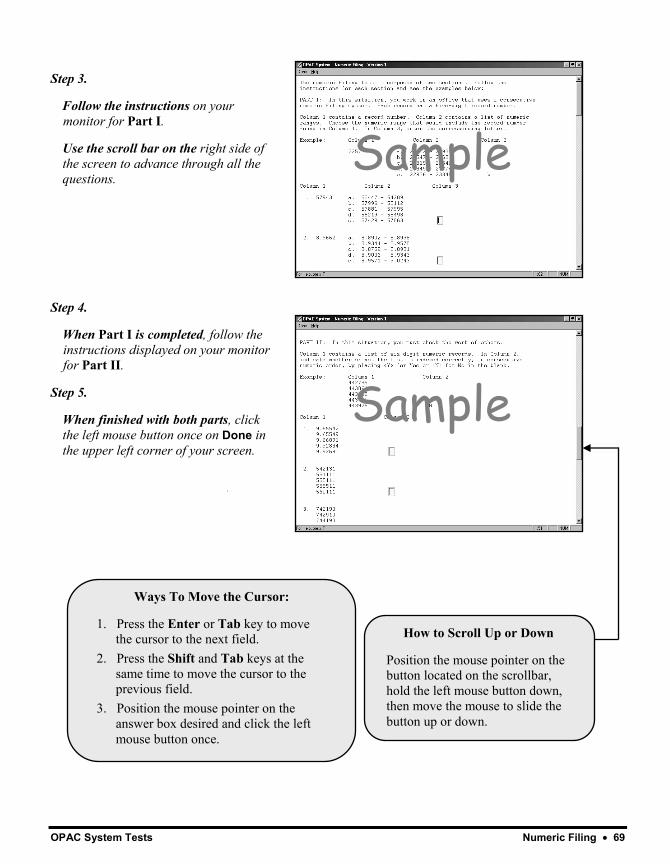
Step 3.
Follow the instructions on your monitor for Part I.
Use the scroll bar on the right side of the screen to advance through all the questions.
Step 4.
When Part I is completed, follow the instructions displayed on your monitor for Part II.
Step 5.
When finished with both parts, click the left mouse button once on Done in the upper left corner of your screen.
Sample
Ways To Move the Cursor:
1. Press the Enter or Tab key to move the cursor to the next field.
2. Press the Shift and Tab keys at the same time to move the cursor to the previous field.
3. Position the mouse pointer on the answer box desired and click the left mouse button once.
How to Scroll Up or Down
Position the mouse pointer on the button located on the scrollbar, hold the left mouse button down, then move the mouse to slide the button up or down.
Sample

70 • Proofreading 1 Clerical Tests
Proofreading 1 measures the ability to proofread and correct errors in a document displayed on the screen.
The illustrations below are examples of screens encountered when starting the test. The text in these illustrations may not match the text in your test.
Test Instructions
Step 1.
Read the instructions presented on your monitor before starting the test.
To continue, click the left mouse button on Continue.
Step 2.
If this is a timed test, the time allotted will be displayed in an OK box prior to the test beginning.
To start the test, click the left mouse button once on OK.
Proofreading 1
Sample
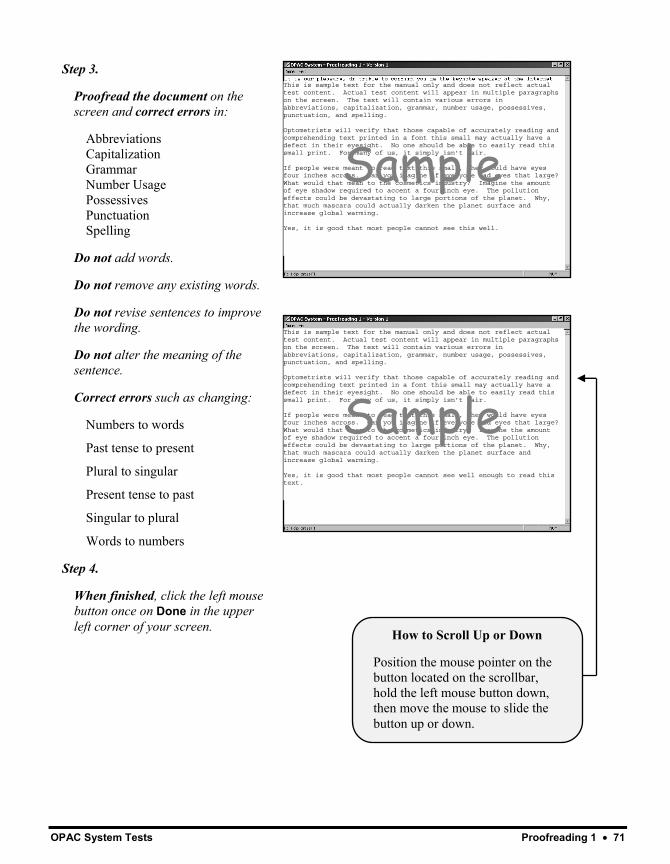
OPAC System Tests Proofreading 1 • 71
This is sample text for the manual only and does not reflect actual test content. Actual test content will appear in multiple paragraphs on the screen. The text will contain various errors in abbreviations, capitalization, grammar, number usage, possessives, punctuation, and spelling. Optometrists will verify that those capable of accurately reading and comprehending text printed in a font this small may actually have a defect in their eyesight. No one should be able to easily read this small print. For many of us, it simply isn’t fair. If people were meant to read text this small, they would have eyes four inches across. Can you imagine if everyone had eyes that large? What would that mean to the cosmetics industry? Imagine the amount of eye shadow required to accent a four inch eye. The pollution effects could be devastating to large portions of the planet. Why, that much mascara could actually darken the planet surface and increase global warming. Yes, it is good that most people cannot see this well.
Step 3.
Proofread the document on the screen and correct errors in:
Abbreviations Capitalization Grammar Number Usage Possessives Punctuation Spelling
Do not add words.
Do not remove any existing words.
Do not revise sentences to improve the wording.
Do not alter the meaning of the sentence.
Correct errors such as changing:
Numbers to words
Past tense to present
Plural to singular
Present tense to past
Singular to plural
Words to numbers
Step 4.
When finished, click the left mouse button once on Done in the upper left corner of your screen.
This is sample text for the manual only and does not reflect actual test content. Actual test content will appear in multiple paragraphs on the screen. The text will contain various errors in abbreviations, capitalization, grammar, number usage, possessives, punctuation, and spelling. Optometrists will verify that those capable of accurately reading and comprehending text printed in a font this small may actually have a defect in their eyesight. No one should be able to easily read this small print. For many of us, it simply isn’t fair. If people were meant to read text this small, they would have eyes four inches across. Can you imagine if everyone had eyes that large? What would that mean to the cosmetics industry? Imagine the amount of eye shadow required to accent a four inch eye. The pollution effects could be devastating to large portions of the planet. Why, that much mascara could actually darken the planet surface and increase global warming. Yes, it is good that most people cannot see well enough to read this text.
Sample
Sample
How to Scroll Up or Down
Position the mouse pointer on the button located on the scrollbar, hold the left mouse button down, then move the mouse to slide the button up or down.
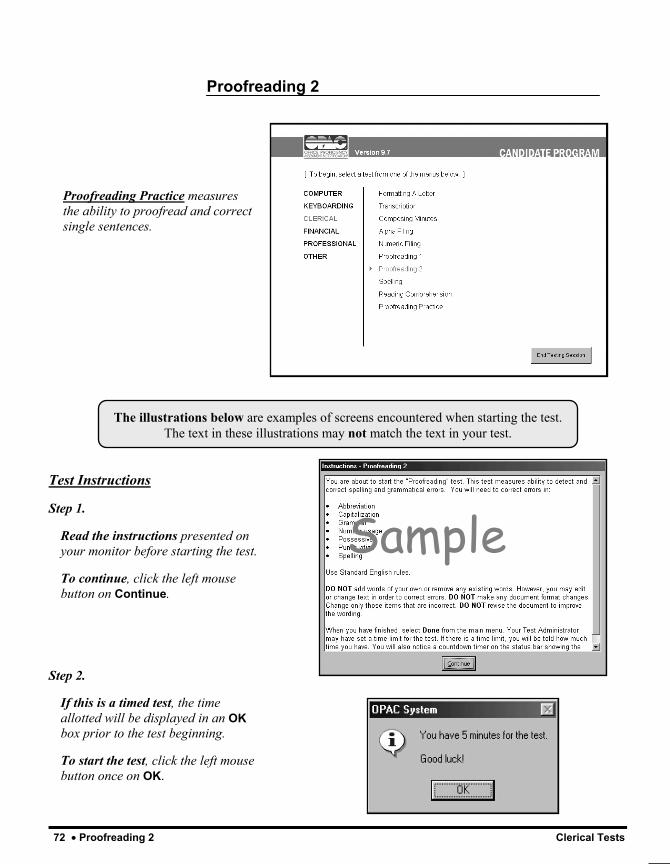
72 • Proofreading 2 Clerical Tests
Test Instructions
Step 1.
Read the instructions presented on your monitor before starting the test.
To continue, click the left mouse button on Continue.
Step 2.
If this is a timed test, the time allotted will be displayed in an OK box prior to the test beginning.
To start the test, click the left mouse button once on OK.
The illustrations below are examples of screens encountered when starting the test. The text in these illustrations may not match the text in your test.
Proofreading 2
Proofreading Practice measures the ability to proofread and correct single sentences.
Sample
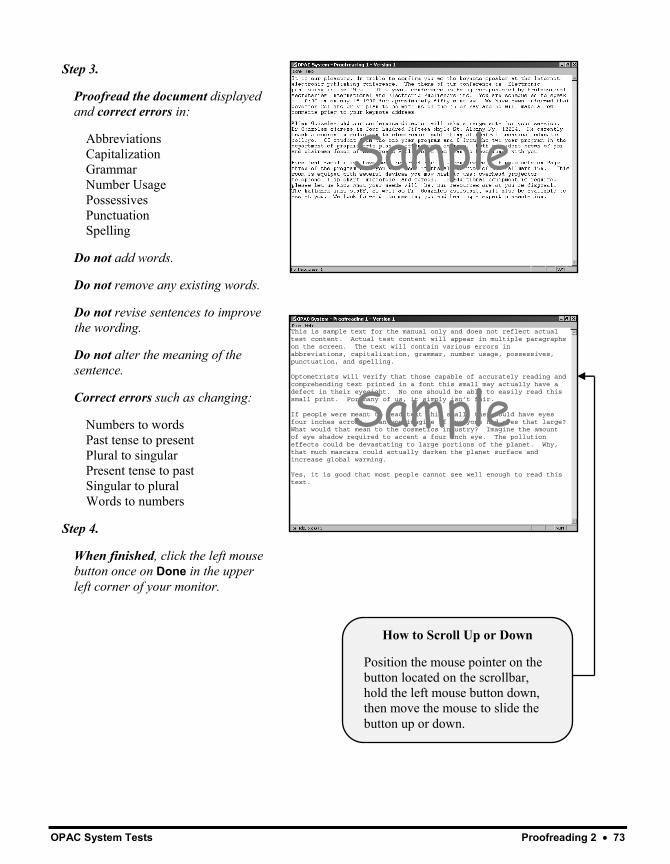
OPAC System Tests Proofreading 2 • 73
Step 3.
Proofread the document displayed and correct errors in:
Abbreviations Capitalization Grammar Number Usage Possessives Punctuation Spelling
Do not add words.
Do not remove any existing words.
Do not revise sentences to improve the wording.
Do not alter the meaning of the sentence.
Correct errors such as changing:
Numbers to words Past tense to present Plural to singular Present tense to past Singular to plural Words to numbers
Step 4.
When finished, click the left mouse button once on Done in the upper left corner of your monitor.
This is sample text for the manual only and does not reflect actual test content. Actual test content will appear in multiple paragraphs on the screen. The text will contain various errors in abbreviations, capitalization, grammar, number usage, possessives, punctuation, and spelling. Optometrists will verify that those capable of accurately reading and comprehending text printed in a font this small may actually have a defect in their eyesight. No one should be able to easily read this small print. For many of us, it simply isn’t fair. If people were meant to read text this small, they would have eyes four inches across. Can you imagine if everyone had eyes that large? What would that mean to the cosmetics industry? Imagine the amount of eye shadow required to accent a four inch eye. The pollution effects could be devastating to large portions of the planet. Why, that much mascara could actually darken the planet surface and increase global warming. Yes, it is good that most people cannot see well enough to read this text.
Sample
Sample
How to Scroll Up or Down
Position the mouse pointer on the button located on the scrollbar, hold the left mouse button down, then move the mouse to slide the button up or down.
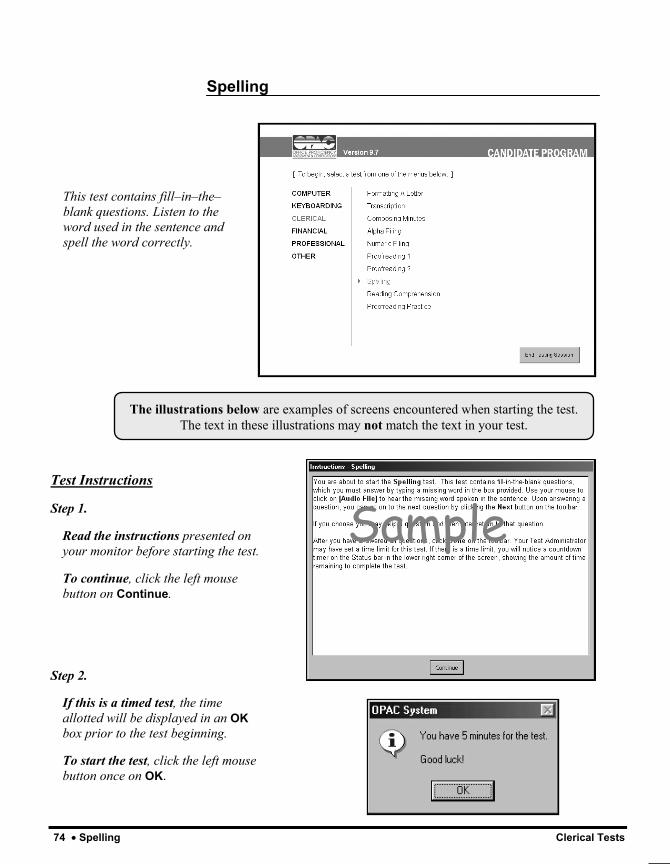
74 • Spelling Clerical Tests
The illustrations below are examples of screens encountered when starting the test. The text in these illustrations may not match the text in your test.
Test Instructions
Step 1.
Read the instructions presented on your monitor before starting the test.
To continue, click the left mouse button on Continue.
Step 2.
If this is a timed test, the time allotted will be displayed in an OK box prior to the test beginning.
To start the test, click the left mouse button once on OK.
Spelling
This test contains fill–in–the–blank questions. Listen to the word used in the sentence and spell the word correctly.
Sample
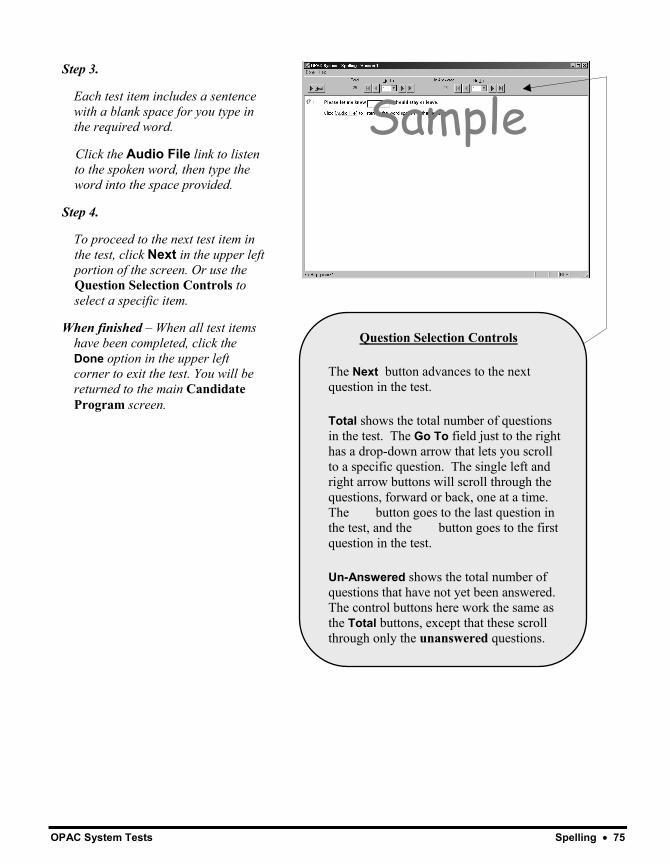
OPAC System Tests Spelling • 75
Step 3.
Each test item includes a sentence with a blank space for you type in the required word.
Click the Audio File link to listen to the spoken word, then type the word into the space provided.
Step 4.
To proceed to the next test item in the test, click Next in the upper left portion of the screen. Or use the Question Selection Controls to select a specific item.
When finished – When all test items have been completed, click the Done option in the upper left corner to exit the test. You will be returned to the main Candidate Program screen.
Sample
Question Selection Controls
The Next button advances to the next question in the test.
Total shows the total number of questions in the test. The Go To field just to the right has a drop-down arrow that lets you scroll to a specific question. The single left and right arrow buttons will scroll through the questions, forward or back, one at a time. The button goes to the last question in the test, and the button goes to the first question in the test.
Un-Answered shows the total number of questions that have not yet been answered. The control buttons here work the same as the Total buttons, except that these scroll through only the unanswered questions.
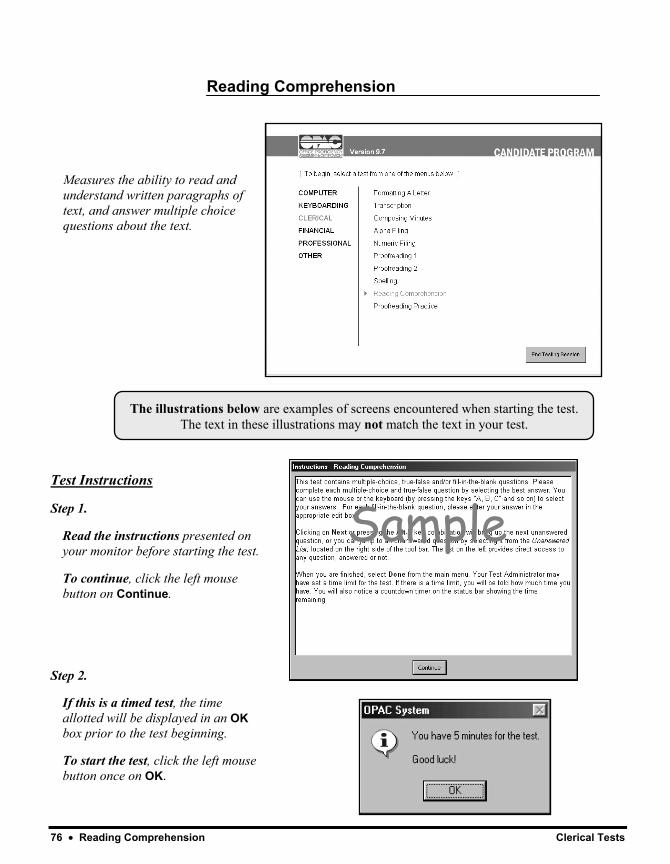
76 • Reading Comprehension Clerical Tests
Test Instructions
Step 1.
Read the instructions presented on your monitor before starting the test.
To continue, click the left mouse button on Continue.
Step 2.
If this is a timed test, the time allotted will be displayed in an OK box prior to the test beginning.
To start the test, click the left mouse button once on OK.
The illustrations below are examples of screens encountered when starting the test. The text in these illustrations may not match the text in your test.
Reading Comprehension
Measures the ability to read and understand written paragraphs of text, and answer multiple choice questions about the text.
Sample
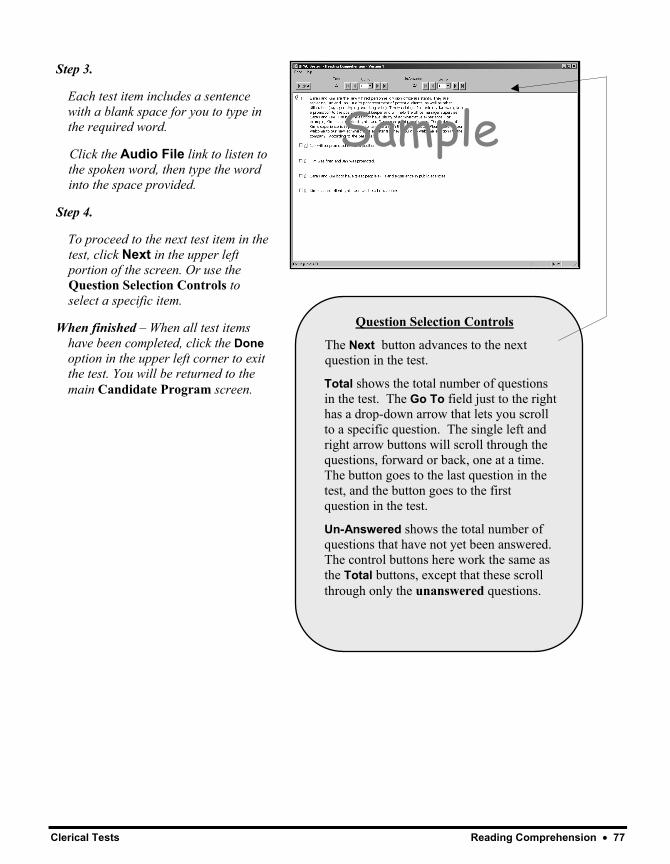
Clerical Tests Reading Comprehension • 77
Step 3.
Each test item includes a sentence with a blank space for you to type in the required word.
Click the Audio File link to listen to the spoken word, then type the word into the space provided.
Step 4.
To proceed to the next test item in the test, click Next in the upper left portion of the screen. Or use the Question Selection Controls to select a specific item.
When finished – When all test items have been completed, click the Done option in the upper left corner to exit the test. You will be returned to the main Candidate Program screen.
Sample
Question Selection Controls
The Next button advances to the next question in the test.
Total shows the total number of questions in the test. The Go To field just to the right has a drop-down arrow that lets you scroll to a specific question. The single left and right arrow buttons will scroll through the questions, forward or back, one at a time. The button goes to the last question in the test, and the button goes to the first question in the test.
Un-Answered shows the total number of questions that have not yet been answered. The control buttons here work the same as the Total buttons, except that these scroll through only the unanswered questions.

78 • Proofreading Practice Clerical Tests
The illustrations below are examples of screens encountered when starting the test. The text in these illustrations may not match the text in your test.
Proofreading Practice
Proofreading Practice measures the ability to proofread and correct single sentences.
Test Instructions
Step 1.
Read the instructions presented on your monitor before starting the test.
To continue, click the left mouse button on Continue.
Step 2.
If this is a timed test, the time allotted will be displayed in an OK box prior to the test beginning.
To start the test, click the left mouse button once on OK.
Sample
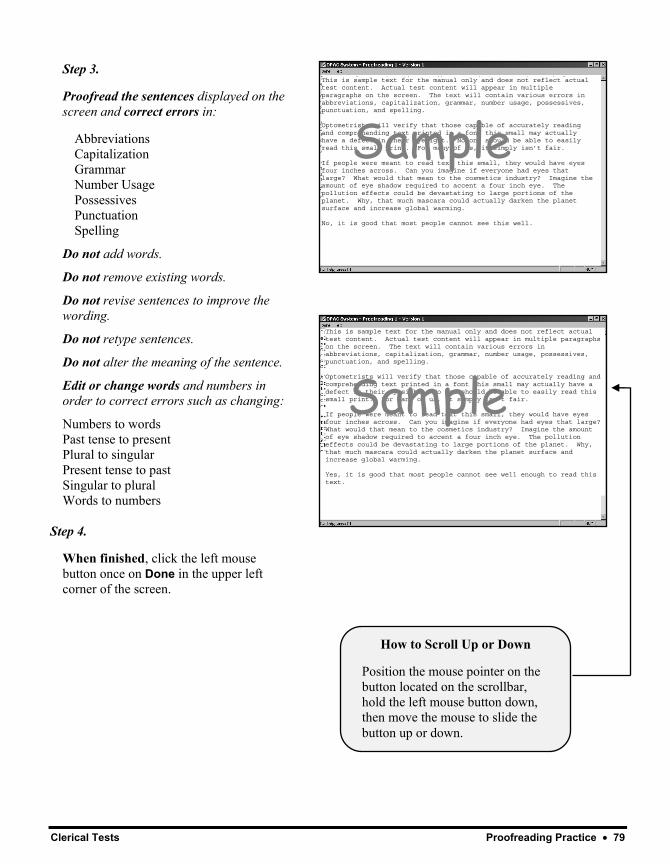
Clerical Tests Proofreading Practice • 79
Step 3.
Proofread the sentences displayed on the screen and correct errors in:
Abbreviations Capitalization Grammar Number Usage Possessives Punctuation Spelling
Do not add words.
Do not remove existing words.
Do not revise sentences to improve the wording.
Do not retype sentences.
Do not alter the meaning of the sentence.
Edit or change words and numbers in order to correct errors such as changing:
Numbers to words Past tense to present Plural to singular Present tense to past Singular to plural Words to numbers
Step 4.
When finished, click the left mouse button once on Done in the upper left corner of the screen.
This is sample text for the manual only and does not reflect actual test content. Actual test content will appear in multiple paragraphs on the screen. The text will contain various errors in abbreviations, capitalization, grammar, number usage, possessives, punctuation, and spelling. Optometrists will verify that those capable of accurately reading and comprehending text printed in a font this small may actually have a defect in their eyesight. No one should be able to easily read this small print. For many of us, it simply isn’t fair. If people were meant to read text this small, they would have eyes four inches across. Can you imagine if everyone had eyes that large? What would that mean to the cosmetics industry? Imagine the amount of eye shadow required to accent a four inch eye. The pollution effects could be devastating to large portions of the planet. Why, that much mascara could actually darken the planet surface and increase global warming. No, it is good that most people cannot see this well.
Sample
This is sample text for the manual only and does not reflect actual test content. Actual test content will appear in multiple paragraphs on the screen. The text will contain various errors in abbreviations, capitalization, grammar, number usage, possessives, punctuation, and spelling. Optometrists will verify that those capable of accurately reading and comprehending text printed in a font this small may actually have a defect in their eyesight. No one should be able to easily read this small print. For many of us, it simply isn’t fair. If people were meant to read text this small, they would have eyes four inches across. Can you imagine if everyone had eyes that large? What would that mean to the cosmetics industry? Imagine the amount of eye shadow required to accent a four inch eye. The pollution effects could be devastating to large portions of the planet. Why, that much mascara could actually darken the planet surface and increase global warming. Yes, it is good that most people cannot see well enough to read this text.
Sample
How to Scroll Up or Down
Position the mouse pointer on the button located on the scrollbar, hold the left mouse button down, then move the mouse to slide the button up or down.

The OPAC System - Candidate Manual
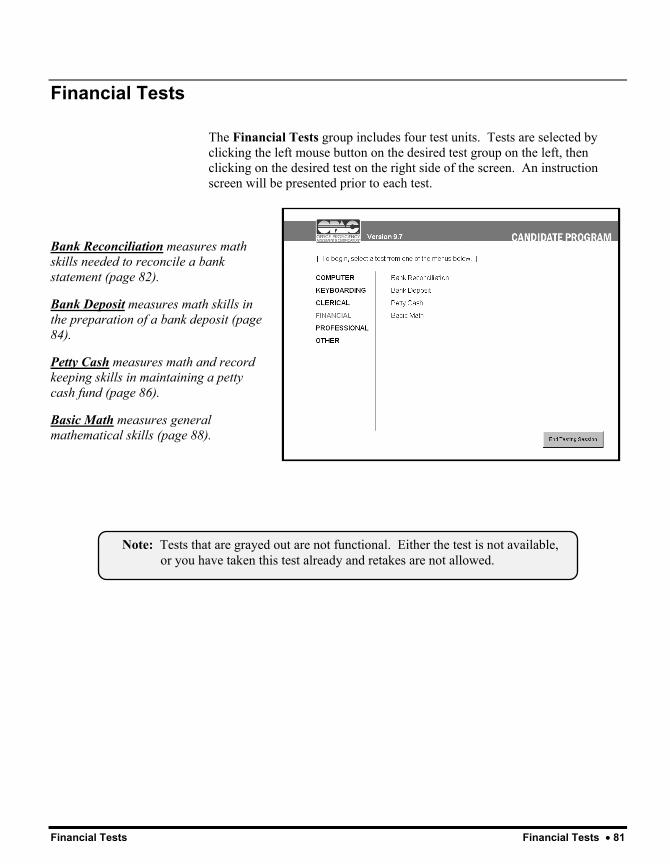
Financial Tests Financial Tests • 81
Financial Tests The Financial Tests group includes four test units. Tests are selected by clicking the left mouse button on the desired test group on the left, then clicking on the desired test on the right side of the screen. An instruction screen will be presented prior to each test.
Bank Reconciliation measures math skills needed to reconcile a bank statement (page 82).
Bank Deposit measures math skills in the preparation of a bank deposit (page 84).
Petty Cash measures math and record keeping skills in maintaining a petty cash fund (page 86).
Basic Math measures general mathematical skills (page 88).
Note: Tests that are grayed out are not functional. Either the test is not available, or you have taken this test already and retakes are not allowed.
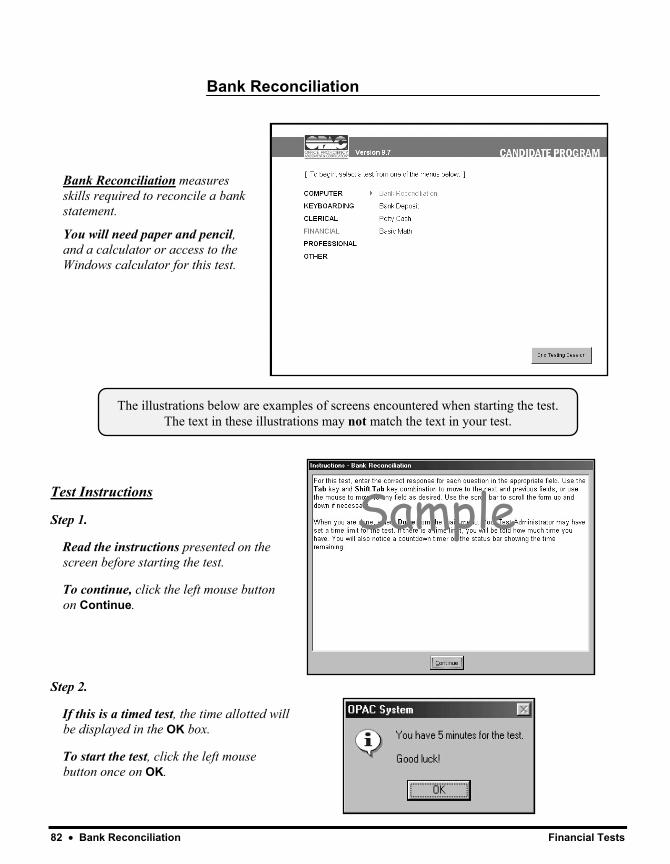
82 • Bank Reconciliation Financial Tests
The illustrations below are examples of screens encountered when starting the test. The text in these illustrations may not match the text in your test.
Bank Reconciliation
Bank Reconciliation measures skills required to reconcile a bank statement.
You will need paper and pencil, and a calculator or access to the Windows calculator for this test.
Test Instructions
Step 1.
Read the instructions presented on the screen before starting the test.
To continue, click the left mouse button on Continue.
Step 2.
If this is a timed test, the time allotted will be displayed in the OK box.
To start the test, click the left mouse button once on OK.
Sample
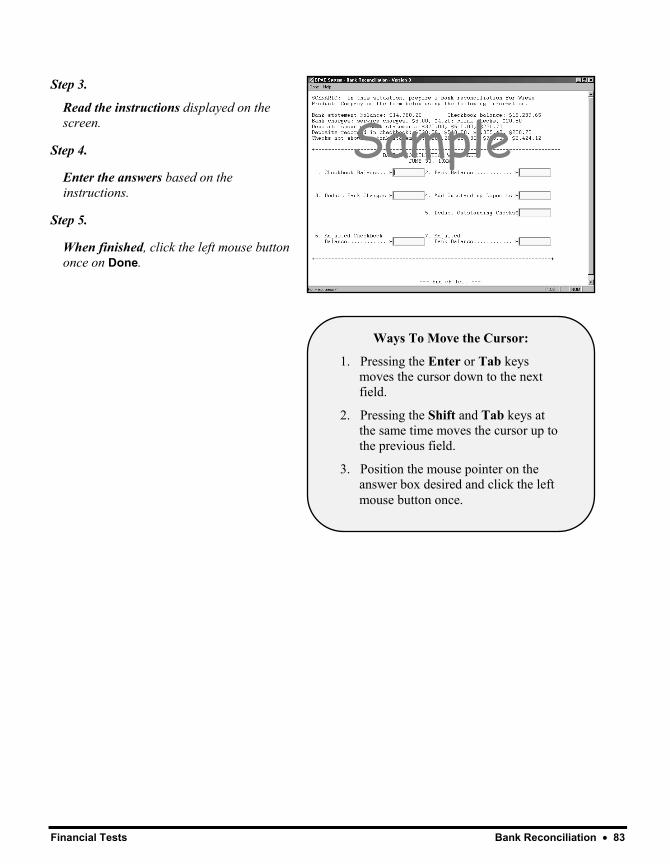
Financial Tests Bank Reconciliation • 83
Ways To Move the Cursor:
1. Pressing the Enter or Tab keys moves the cursor down to the next field.
2. Pressing the Shift and Tab keys at the same time moves the cursor up to the previous field.
3. Position the mouse pointer on the answer box desired and click the left mouse button once.
Step 3.
Read the instructions displayed on the screen.
Step 4.
Enter the answers based on the instructions.
Step 5.
When finished, click the left mouse button once on Done.
Sample
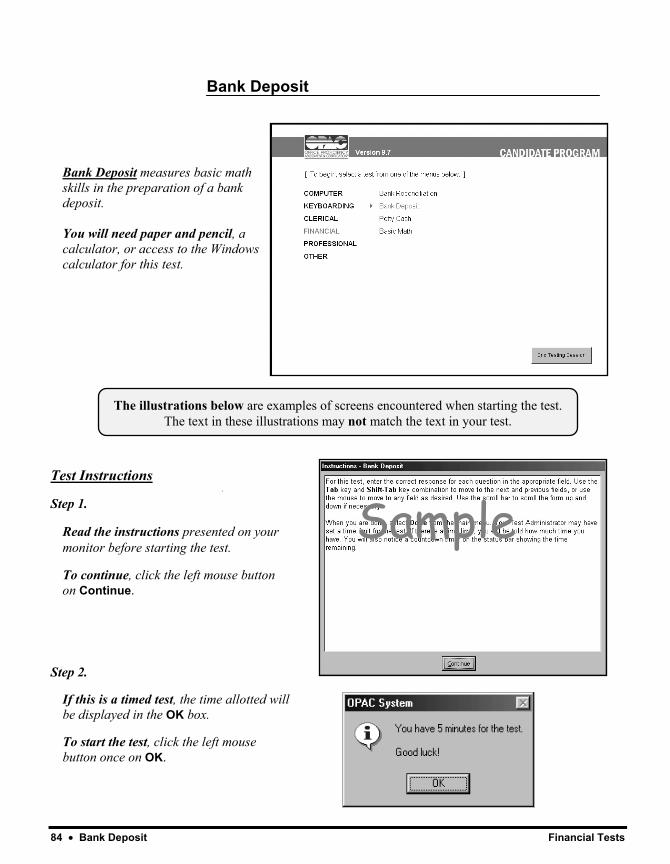
84 • Bank Deposit Financial Tests
The illustrations below are examples of screens encountered when starting the test. The text in these illustrations may not match the text in your test.
Bank Deposit
Bank Deposit measures basic math skills in the preparation of a bank deposit. You will need paper and pencil, a calculator, or access to the Windows calculator for this test.
Test Instructions
Step 1.
Read the instructions presented on your monitor before starting the test.
To continue, click the left mouse button on Continue.
Step 2.
If this is a timed test, the time allotted will be displayed in the OK box.
To start the test, click the left mouse button once on OK.
Sample
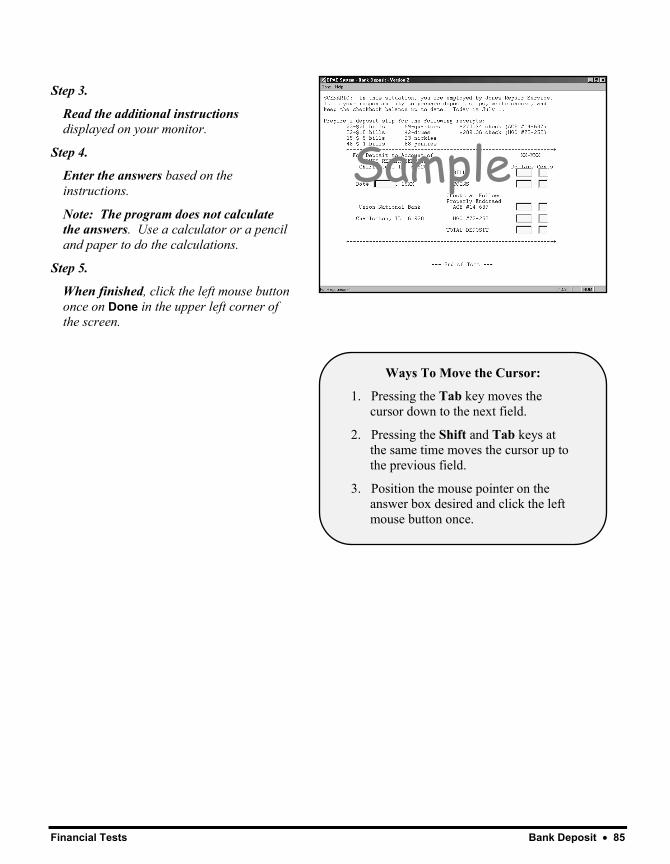
Financial Tests Bank Deposit • 85
Step 3.
Read the additional instructions displayed on your monitor.
Step 4.
Enter the answers based on the instructions.
Note: The program does not calculate the answers. Use a calculator or a pencil and paper to do the calculations.
Step 5.
When finished, click the left mouse button once on Done in the upper left corner of the screen.
Ways To Move the Cursor:
1. Pressing the Tab key moves the cursor down to the next field.
2. Pressing the Shift and Tab keys at the same time moves the cursor up to the previous field.
3. Position the mouse pointer on the answer box desired and click the left mouse button once.
Sample
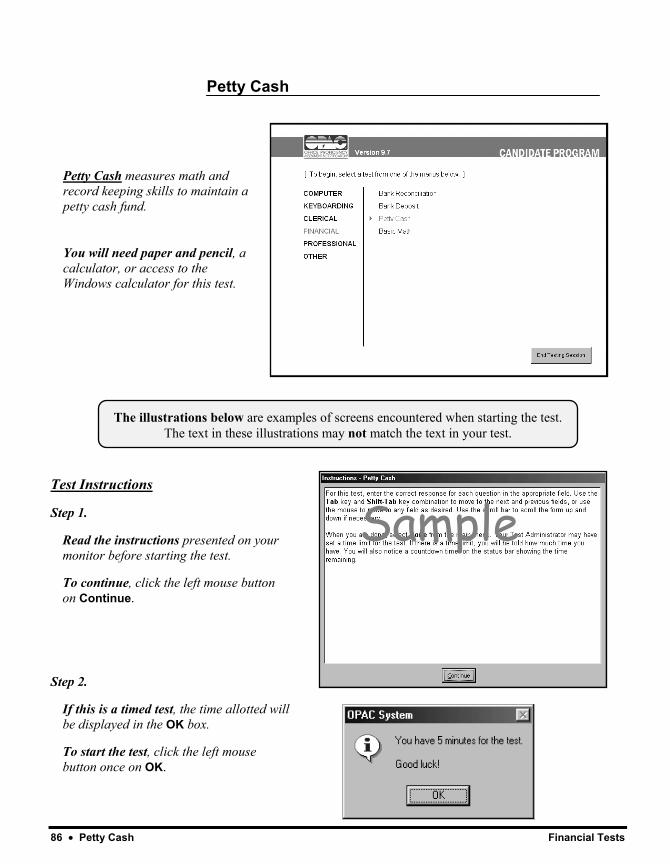
86 • Petty Cash Financial Tests
The illustrations below are examples of screens encountered when starting the test. The text in these illustrations may not match the text in your test.
Petty Cash
Petty Cash measures math and record keeping skills to maintain a petty cash fund.
You will need paper and pencil, a calculator, or access to the Windows calculator for this test.
Test Instructions
Step 1.
Read the instructions presented on your monitor before starting the test.
To continue, click the left mouse button on Continue.
Step 2.
If this is a timed test, the time allotted will be displayed in the OK box.
To start the test, click the left mouse button once on OK.
Sample
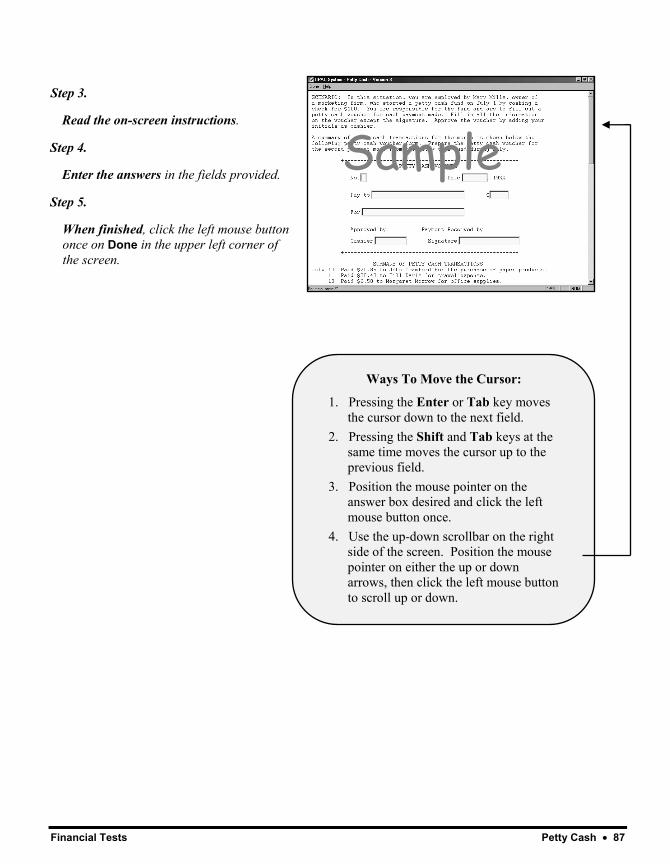
Financial Tests Petty Cash • 87
Ways To Move the Cursor:
1. Pressing the Enter or Tab key moves the cursor down to the next field.
2. Pressing the Shift and Tab keys at the same time moves the cursor up to the previous field.
3. Position the mouse pointer on the answer box desired and click the left mouse button once.
4. Use the up-down scrollbar on the right side of the screen. Position the mouse pointer on either the up or down arrows, then click the left mouse button to scroll up or down.
Step 3.
Read the on-screen instructions.
Step 4.
Enter the answers in the fields provided.
Step 5.
When finished, click the left mouse button once on Done in the upper left corner of the screen.
Sample
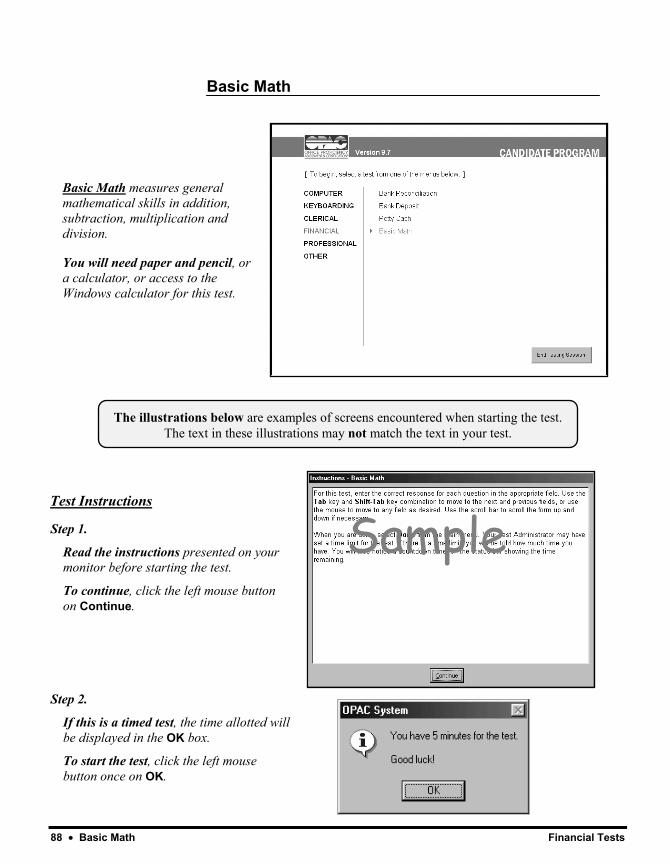
88 • Basic Math Financial Tests
The illustrations below are examples of screens encountered when starting the test. The text in these illustrations may not match the text in your test.
Basic Math
Basic Math measures general mathematical skills in addition, subtraction, multiplication and division. You will need paper and pencil, or a calculator, or access to the Windows calculator for this test.
Test Instructions
Step 1.
Read the instructions presented on your monitor before starting the test.
To continue, click the left mouse button on Continue.
Step 2.
If this is a timed test, the time allotted will be displayed in the OK box.
To start the test, click the left mouse button once on OK.
Sample
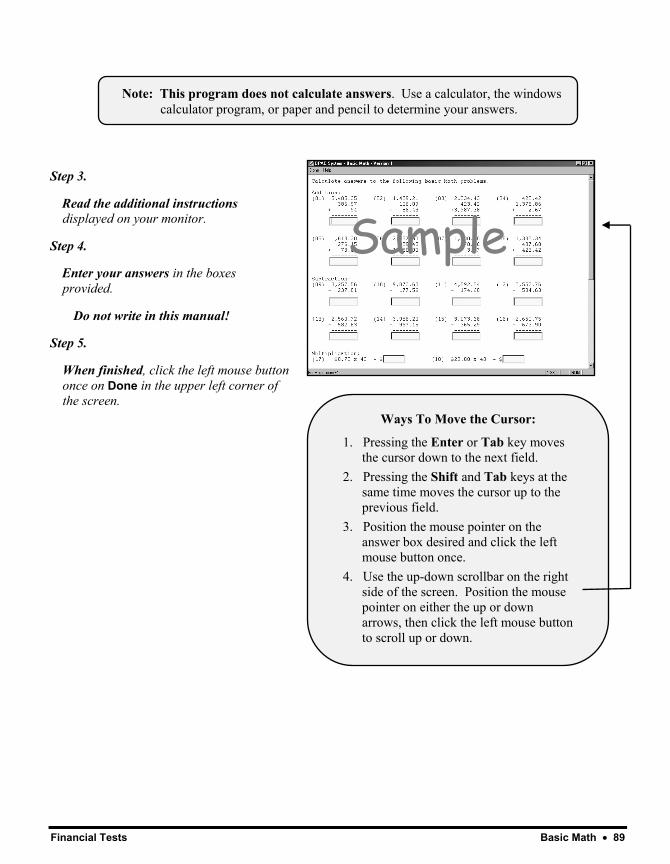
Financial Tests Basic Math • 89
Note: This program does not calculate answers. Use a calculator, the windows calculator program, or paper and pencil to determine your answers.
Ways To Move the Cursor:
1. Pressing the Enter or Tab key moves the cursor down to the next field.
2. Pressing the Shift and Tab keys at the same time moves the cursor up to the previous field.
3. Position the mouse pointer on the answer box desired and click the left mouse button once.
4. Use the up-down scrollbar on the right side of the screen. Position the mouse pointer on either the up or down arrows, then click the left mouse button to scroll up or down.
Step 3.
Read the additional instructions displayed on your monitor.
Step 4.
Enter your answers in the boxes provided.
Do not write in this manual!
Step 5.
When finished, click the left mouse button once on Done in the upper left corner of the screen.
Sample

Financial Tests
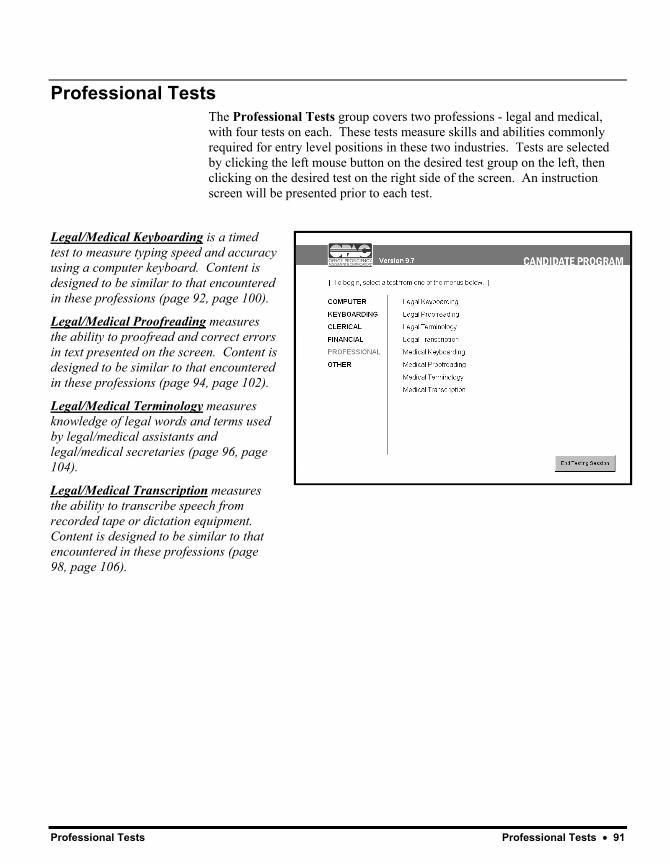
Professional Tests Professional Tests • 91
Professional Tests The Professional Tests group covers two professions - legal and medical, with four tests on each. These tests measure skills and abilities commonly required for entry level positions in these two industries. Tests are selected by clicking the left mouse button on the desired test group on the left, then clicking on the desired test on the right side of the screen. An instruction screen will be presented prior to each test.
Legal/Medical Keyboarding is a timed test to measure typing speed and accuracy using a computer keyboard. Content is designed to be similar to that encountered in these professions (page 92, page 100).
Legal/Medical Proofreading measures the ability to proofread and correct errors in text presented on the screen. Content is designed to be similar to that encountered in these professions (page 94, page 102).
Legal/Medical Terminology measures knowledge of legal words and terms used by legal/medical assistants and legal/medical secretaries (page 96, page 104).
Legal/Medical Transcription measures the ability to transcribe speech from recorded tape or dictation equipment. Content is designed to be similar to that encountered in these professions (page 98, page 106).
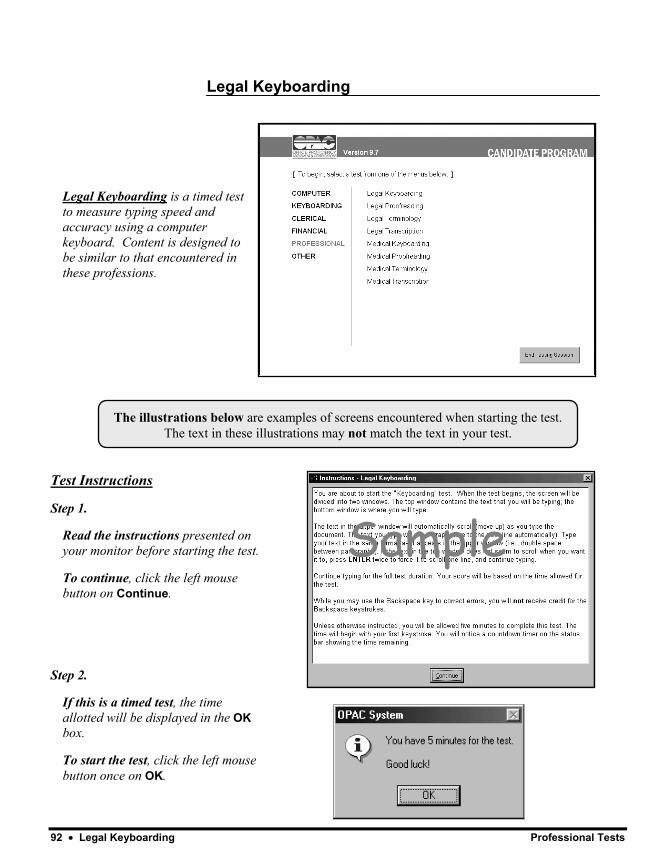
92 • Legal Keyboarding Professional Tests
The illustrations below are examples of screens encountered when starting the test. The text in these illustrations may not match the text in your test.
Legal Keyboarding
Legal Keyboarding is a timed test to measure typing speed and accuracy using a computer keyboard. Content is designed to be similar to that encountered in these professions.
Sample
Test Instructions
Step 1.
Read the instructions presented on your monitor before starting the test.
To continue, click the left mouse button on Continue.
Step 2.
If this is a timed test, the time allotted will be displayed in the OK box.
To start the test, click the left mouse button once on OK.

Professional Tests Legal Keyboarding • 93
One of two possible typing test displays will appear.
If one large window appears, you must type from the correct test document version in the Test Documents – Keyboarding/Word Processing booklet. Be sure the version number matches the one noted at the end of the screen instructions.
If a “split screen” window appears, the upper pane contains the text used for the test. The lower window is the typing area. The cursor appears automatically in the lower window.
Step 3.
Begin typing when you are ready. The timer starts with your first keystroke.
Note: As you reach the end of the text in the top window, the text will scroll up automatically
Continue typing until time expires, as the score calculation uses the total time allotted.
NOTE on Scrolling the text: Press Enter twice at the end of each paragraph to leave a blank line between paragraphs.
If the text–to–be–typed does not scroll, either press enter again at the end of the paragraph in your text to make the text scroll, or use the scroll bar to scroll the text.
Sample
Sample
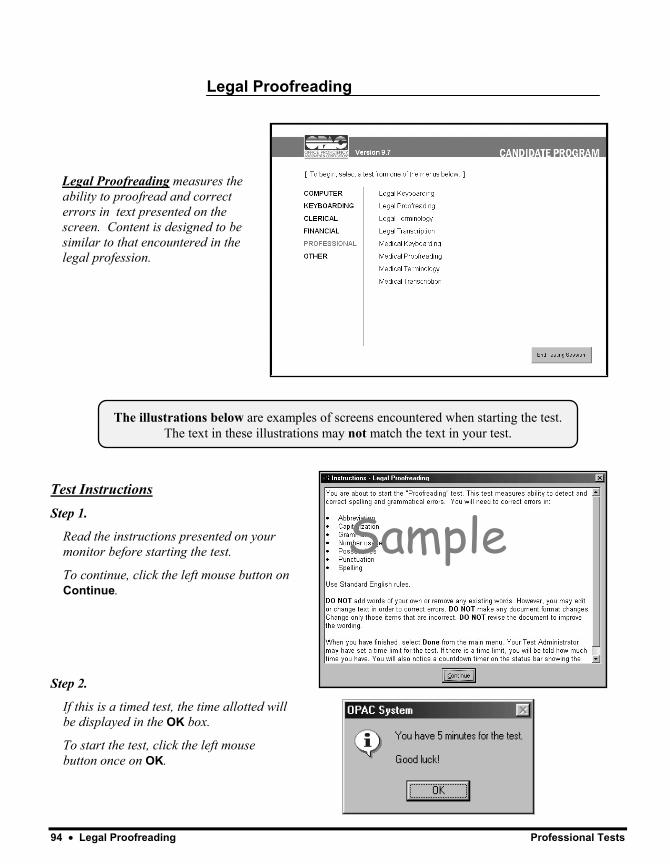
94 • Legal Proofreading Professional Tests
The illustrations below are examples of screens encountered when starting the test. The text in these illustrations may not match the text in your test.
Legal Proofreading
Legal Proofreading measures the ability to proofread and correct errors in text presented on the screen. Content is designed to be similar to that encountered in the legal profession.
Test Instructions Step 1.
Read the instructions presented on your monitor before starting the test.
To continue, click the left mouse button on Continue.
Step 2.
If this is a timed test, the time allotted will be displayed in the OK box.
To start the test, click the left mouse button once on OK.
Sample
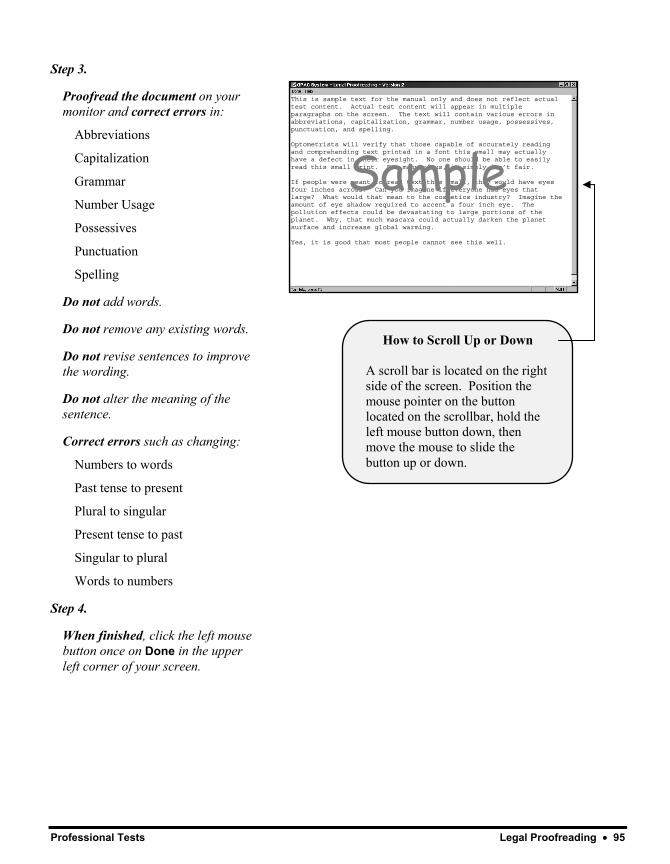
Professional Tests Legal Proofreading • 95
Step 3.
Proofread the document on your monitor and correct errors in:
Abbreviations
Capitalization
Grammar
Number Usage
Possessives
Punctuation
Spelling
Do not add words.
Do not remove any existing words.
Do not revise sentences to improve the wording.
Do not alter the meaning of the sentence.
Correct errors such as changing:
Numbers to words
Past tense to present
Plural to singular
Present tense to past
Singular to plural
Words to numbers
Step 4.
When finished, click the left mouse button once on Done in the upper left corner of your screen.
This is sample text for the manual only and does not reflect actual test content. Actual test content will appear in multiple paragraphs on the screen. The text will contain various errors in abbreviations, capitalization, grammar, number usage, possessives, punctuation, and spelling. Optometrists will verify that those capable of accurately reading and comprehending text printed in a font this small may actually have a defect in their eyesight. No one should be able to easily read this small print. For many of us, it simply isn’t fair. If people were meant to read text this small, they would have eyes four inches across. Can you imagine if everyone had eyes that large? What would that mean to the cosmetics industry? Imagine the amount of eye shadow required to accent a four inch eye. The pollution effects could be devastating to large portions of the planet. Why, that much mascara could actually darken the planet surface and increase global warming. Yes, it is good that most people cannot see this well.
How to Scroll Up or Down
A scroll bar is located on the right side of the screen. Position the mouse pointer on the button located on the scrollbar, hold the left mouse button down, then move the mouse to slide the button up or down.
Sample
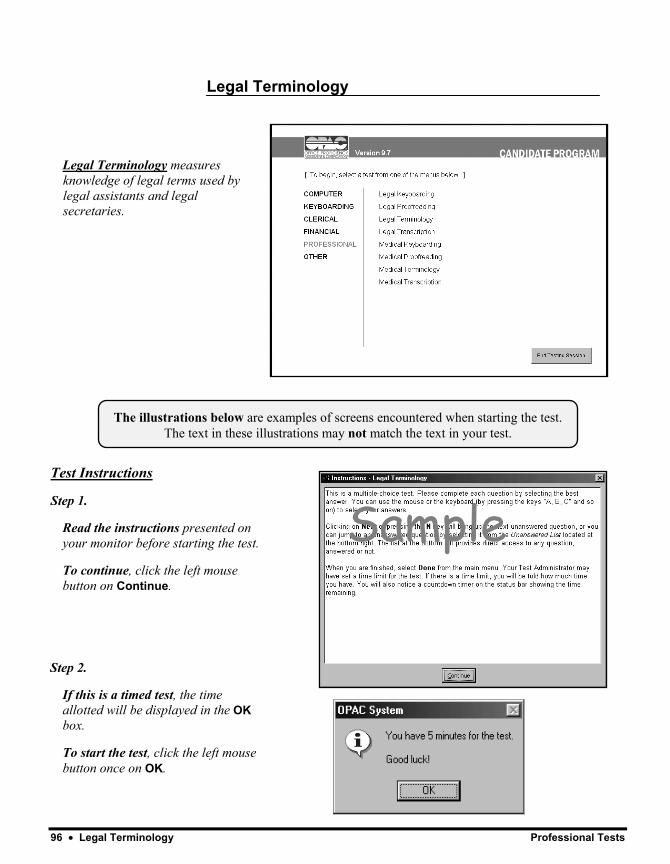
96 • Legal Terminology Professional Tests
The illustrations below are examples of screens encountered when starting the test. The text in these illustrations may not match the text in your test.
Legal Terminology
Legal Terminology measures knowledge of legal terms used by legal assistants and legal secretaries.
Test Instructions
Step 1.
Read the instructions presented on your monitor before starting the test.
To continue, click the left mouse button on Continue.
Step 2.
If this is a timed test, the time allotted will be displayed in the OK box.
To start the test, click the left mouse button once on OK.
Sample
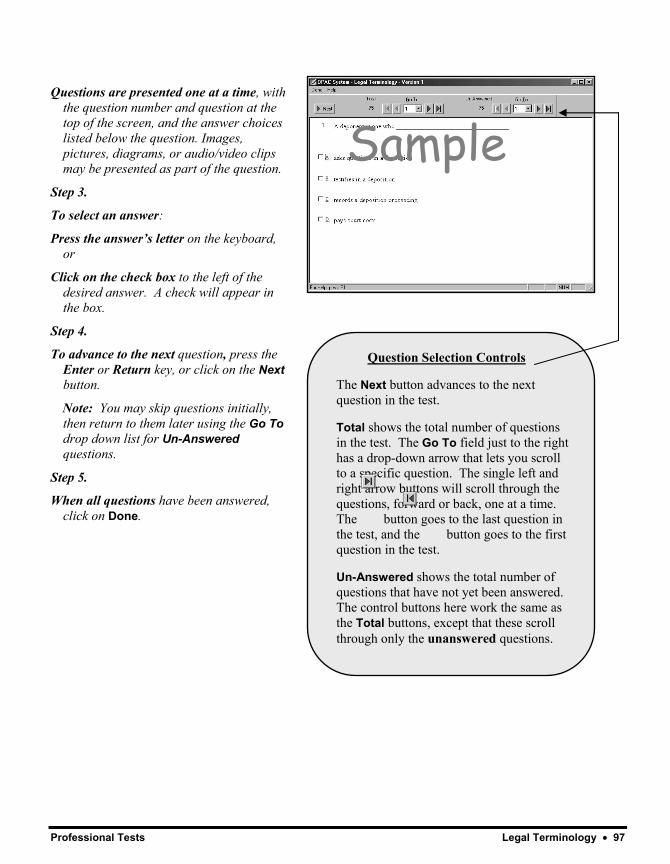
Professional Tests Legal Terminology • 97
Questions are presented one at a time, with the question number and question at the top of the screen, and the answer choices listed below the question. Images, pictures, diagrams, or audio/video clips may be presented as part of the question.
Step 3.
To select an answer:
Press the answer’s letter on the keyboard, or
Click on the check box to the left of the desired answer. A check will appear in the box.
Step 4.
To advance to the next question, press the Enter or Return key, or click on the Next button.
Note: You may skip questions initially, then return to them later using the Go To drop down list for Un-Answered questions.
Step 5.
When all questions have been answered, click on Done.
Question Selection Controls
The Next button advances to the next question in the test.
Total shows the total number of questions in the test. The Go To field just to the right has a drop-down arrow that lets you scroll to a specific question. The single left and right arrow buttons will scroll through the questions, forward or back, one at a time. The button goes to the last question in the test, and the button goes to the first question in the test.
Un-Answered shows the total number of questions that have not yet been answered. The control buttons here work the same as the Total buttons, except that these scroll through only the unanswered questions.
Sample
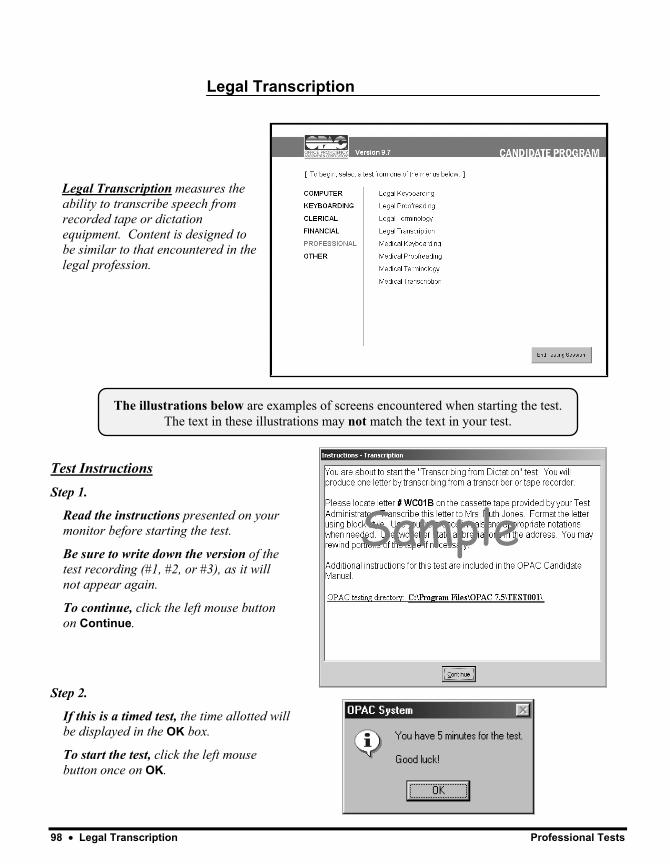
98 • Legal Transcription Professional Tests
The illustrations below are examples of screens encountered when starting the test. The text in these illustrations may not match the text in your test.
Legal Transcription
Legal Transcription measures the ability to transcribe speech from recorded tape or dictation equipment. Content is designed to be similar to that encountered in the legal profession.
Test Instructions Step 1.
Read the instructions presented on your monitor before starting the test.
Be sure to write down the version of the test recording (#1, #2, or #3), as it will not appear again.
To continue, click the left mouse button on Continue.
Step 2.
If this is a timed test, the time allotted will be displayed in the OK box.
To start the test, click the left mouse button once on OK.
Sample
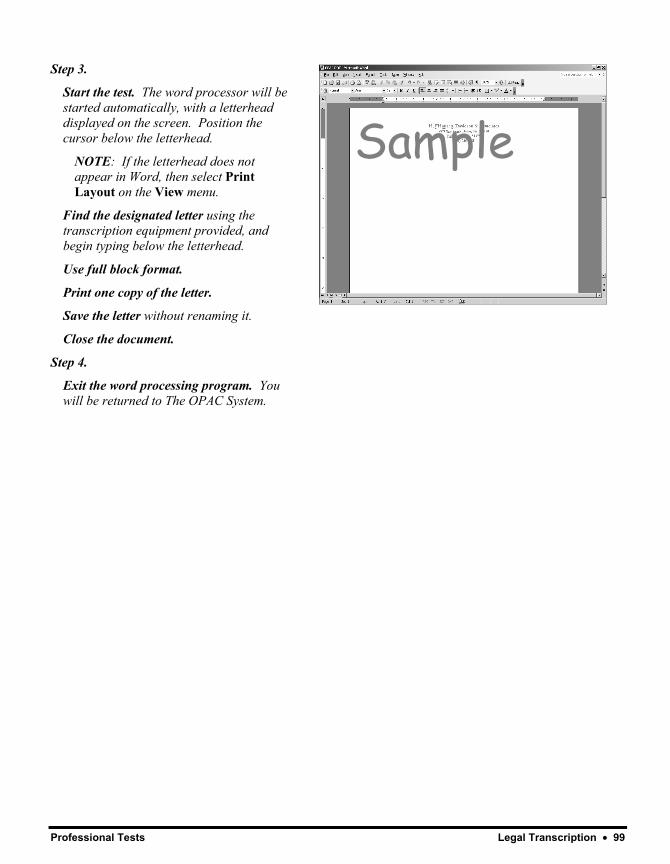
Professional Tests Legal Transcription • 99
Step 3.
Start the test. The word processor will be started automatically, with a letterhead displayed on the screen. Position the cursor below the letterhead.
NOTE: If the letterhead does not appear in Word, then select Print Layout on the View menu.
Find the designated letter using the transcription equipment provided, and begin typing below the letterhead.
Use full block format.
Print one copy of the letter.
Save the letter without renaming it.
Close the document.
Step 4.
Exit the word processing program. You will be returned to The OPAC System.
Sample
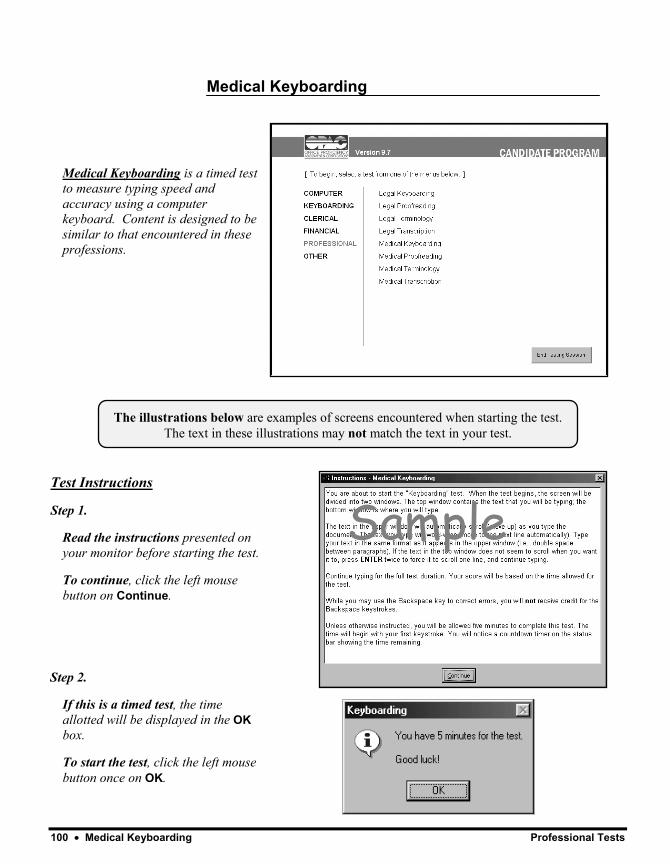
100 • Medical Keyboarding Professional Tests
The illustrations below are examples of screens encountered when starting the test. The text in these illustrations may not match the text in your test.
Medical Keyboarding
Medical Keyboarding is a timed test to measure typing speed and accuracy using a computer keyboard. Content is designed to be similar to that encountered in these professions.
Test Instructions
Step 1.
Read the instructions presented on your monitor before starting the test.
To continue, click the left mouse button on Continue.
Step 2.
If this is a timed test, the time allotted will be displayed in the OK box.
To start the test, click the left mouse button once on OK.
Sample
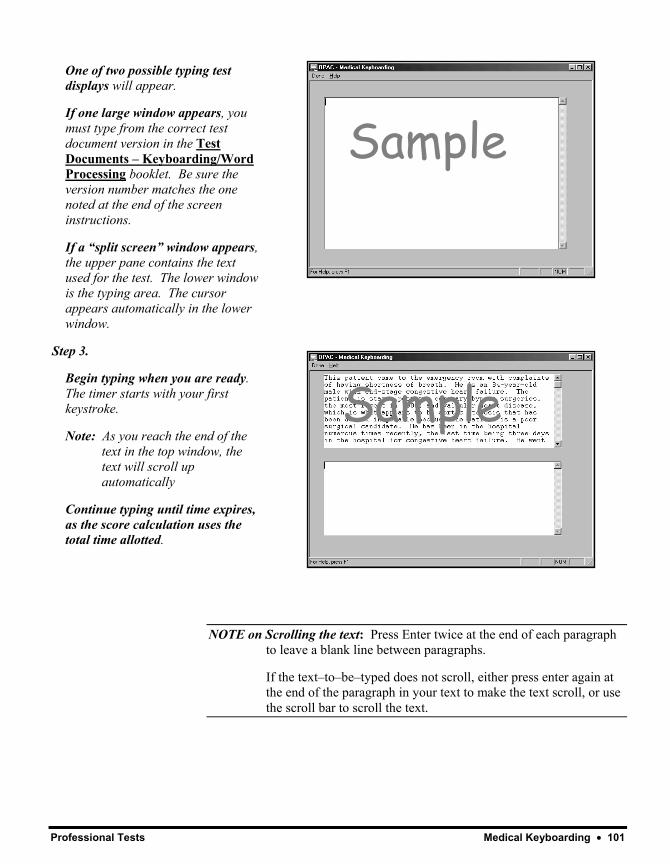
Professional Tests Medical Keyboarding • 101
NOTE on Scrolling the text: Press Enter twice at the end of each paragraph to leave a blank line between paragraphs.
If the text–to–be–typed does not scroll, either press enter again at the end of the paragraph in your text to make the text scroll, or use the scroll bar to scroll the text.
One of two possible typing test displays will appear.
If one large window appears, you must type from the correct test document version in the Test Documents – Keyboarding/Word Processing booklet. Be sure the version number matches the one noted at the end of the screen instructions.
If a “split screen” window appears, the upper pane contains the text used for the test. The lower window is the typing area. The cursor appears automatically in the lower window.
Step 3.
Begin typing when you are ready. The timer starts with your first keystroke.
Note: As you reach the end of the text in the top window, the text will scroll up automatically
Continue typing until time expires, as the score calculation uses the total time allotted.
Sample
Sample
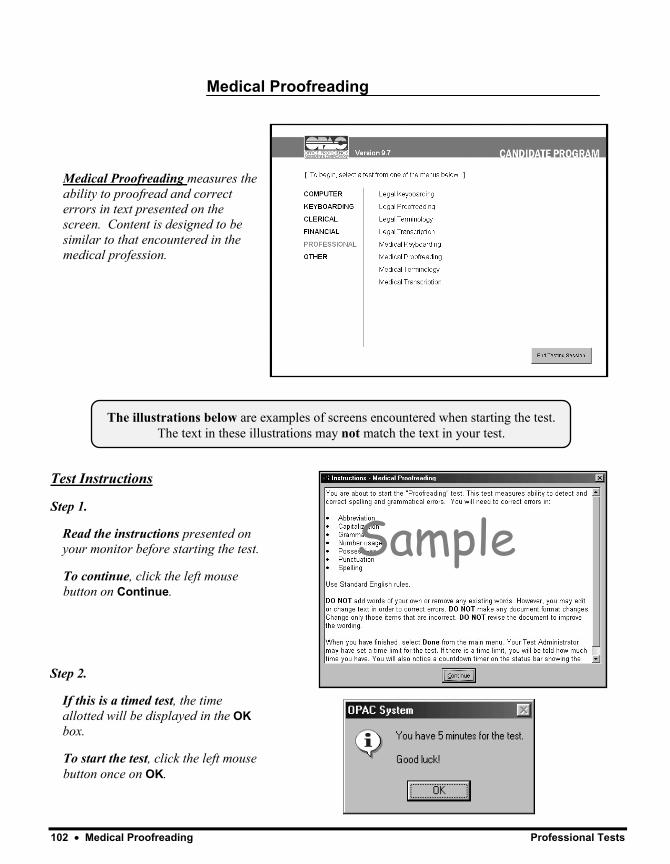
102 • Medical Proofreading Professional Tests
The illustrations below are examples of screens encountered when starting the test. The text in these illustrations may not match the text in your test.
Medical Proofreading
Medical Proofreading measures the ability to proofread and correct errors in text presented on the screen. Content is designed to be similar to that encountered in the medical profession.
Test Instructions
Step 1.
Read the instructions presented on your monitor before starting the test.
To continue, click the left mouse button on Continue.
Step 2.
If this is a timed test, the time allotted will be displayed in the OK box.
To start the test, click the left mouse button once on OK.
Sample
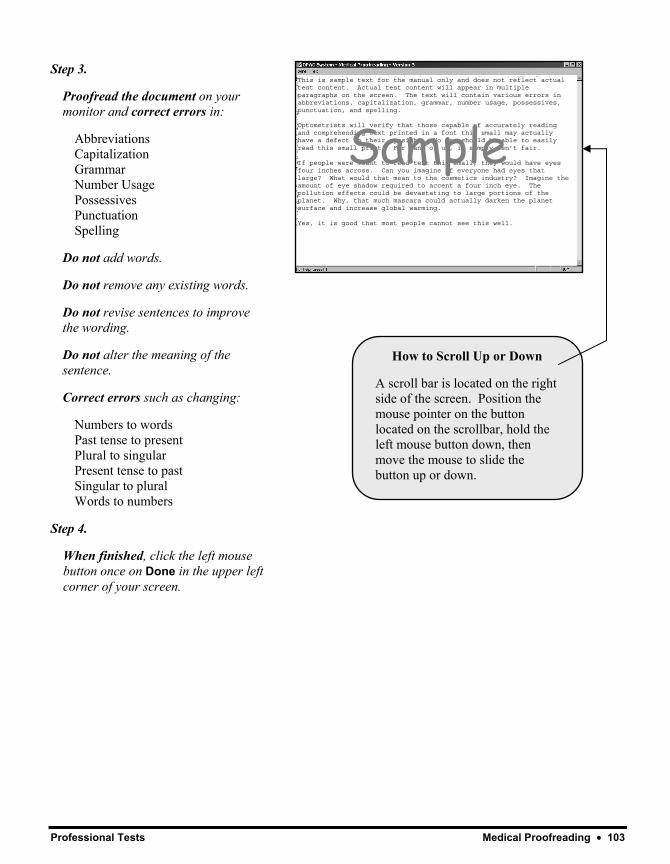
Professional Tests Medical Proofreading • 103
This is sample text for the manual only and does not reflect actual test content. Actual test content will appear in multiple paragraphs on the screen. The text will contain various errors in abbreviations, capitalization, grammar, number usage, possessives, punctuation, and spelling. Optometrists will verify that those capable of accurately reading and comprehending text printed in a font this small may actually have a defect in their eyesight. No one should be able to easily read this small print. For many of us, it simply isn’t fair. If people were meant to read text this small, they would have eyes four inches across. Can you imagine if everyone had eyes that large? What would that mean to the cosmetics industry? Imagine the amount of eye shadow required to accent a four inch eye. The pollution effects could be devastating to large portions of the planet. Why, that much mascara could actually darken the planet surface and increase global warming. Yes, it is good that most people cannot see this well.
Sample
Step 3.
Proofread the document on your monitor and correct errors in:
Abbreviations Capitalization Grammar Number Usage Possessives Punctuation Spelling
Do not add words.
Do not remove any existing words.
Do not revise sentences to improve the wording.
Do not alter the meaning of the sentence.
Correct errors such as changing:
Numbers to words Past tense to present Plural to singular Present tense to past Singular to plural Words to numbers
Step 4.
When finished, click the left mouse button once on Done in the upper left corner of your screen.
How to Scroll Up or Down
A scroll bar is located on the right side of the screen. Position the mouse pointer on the button located on the scrollbar, hold the left mouse button down, then move the mouse to slide the button up or down.
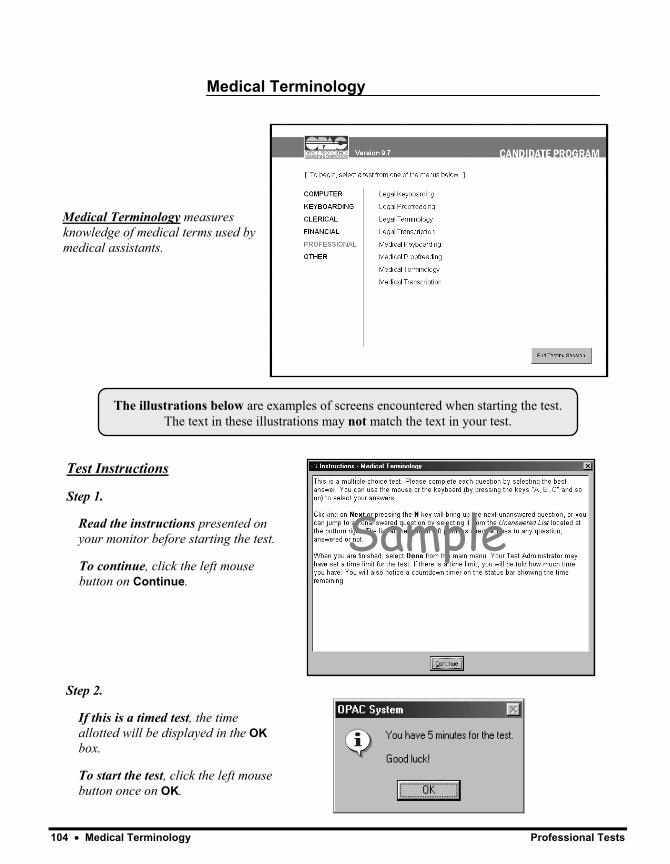
104 • Medical Terminology Professional Tests
The illustrations below are examples of screens encountered when starting the test. The text in these illustrations may not match the text in your test.
Medical Terminology
Medical Terminology measures knowledge of medical terms used by medical assistants.
Sample
Test Instructions
Step 1.
Read the instructions presented on your monitor before starting the test.
To continue, click the left mouse button on Continue.
Step 2.
If this is a timed test, the time allotted will be displayed in the OK box.
To start the test, click the left mouse button once on OK.
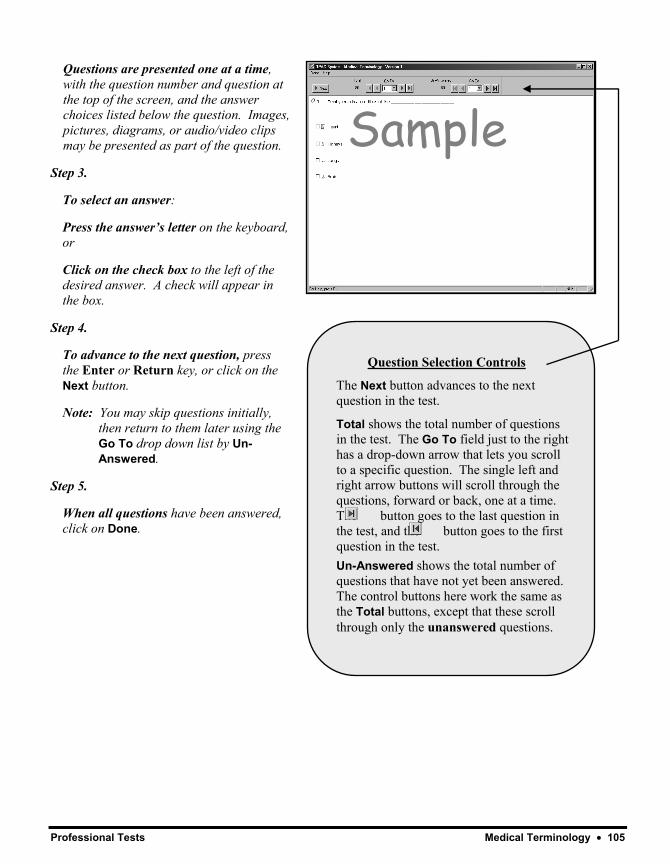
Professional Tests Medical Terminology • 105
Questions are presented one at a time, with the question number and question at the top of the screen, and the answer choices listed below the question. Images, pictures, diagrams, or audio/video clips may be presented as part of the question.
Step 3.
To select an answer:
Press the answer’s letter on the keyboard, or
Click on the check box to the left of the desired answer. A check will appear in the box.
Step 4.
To advance to the next question, press the Enter or Return key, or click on the Next button.
Note: You may skip questions initially, then return to them later using the Go To drop down list by Un-Answered.
Step 5.
When all questions have been answered, click on Done.
Question Selection Controls
The Next button advances to the next question in the test.
Total shows the total number of questions in the test. The Go To field just to the right has a drop-down arrow that lets you scroll to a specific question. The single left and right arrow buttons will scroll through the questions, forward or back, one at a time. The button goes to the last question in the test, and the button goes to the first question in the test. Un-Answered shows the total number of questions that have not yet been answered. The control buttons here work the same as the Total buttons, except that these scroll through only the unanswered questions.
Sample
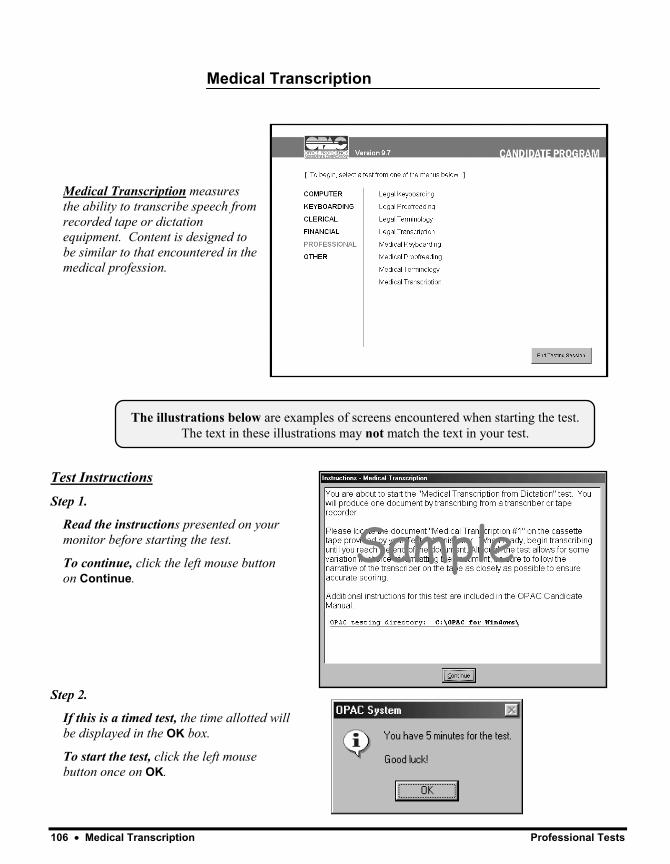
106 • Medical Transcription Professional Tests
The illustrations below are examples of screens encountered when starting the test. The text in these illustrations may not match the text in your test.
Medical Transcription
Medical Transcription measures the ability to transcribe speech from recorded tape or dictation equipment. Content is designed to be similar to that encountered in the medical profession.
Test Instructions Step 1.
Read the instructions presented on your monitor before starting the test.
To continue, click the left mouse button on Continue.
Step 2.
If this is a timed test, the time allotted will be displayed in the OK box.
To start the test, click the left mouse button once on OK.
Sample
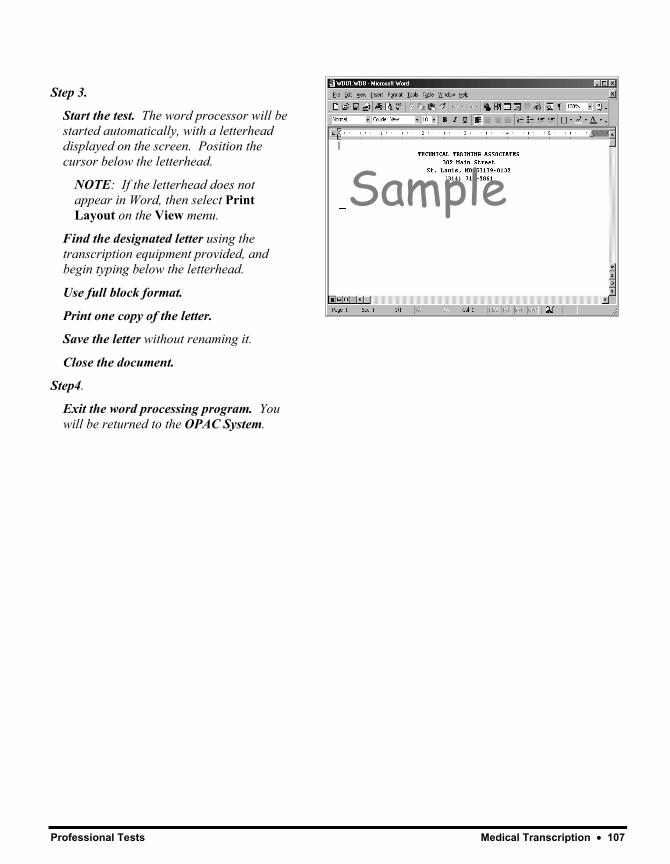
Professional Tests Medical Transcription • 107
Step 3.
Start the test. The word processor will be started automatically, with a letterhead displayed on the screen. Position the cursor below the letterhead.
NOTE: If the letterhead does not appear in Word, then select Print Layout on the View menu.
Find the designated letter using the transcription equipment provided, and begin typing below the letterhead.
Use full block format.
Print one copy of the letter.
Save the letter without renaming it.
Close the document.
Step4.
Exit the word processing program. You will be returned to the OPAC System.
Sample

Professional Tests
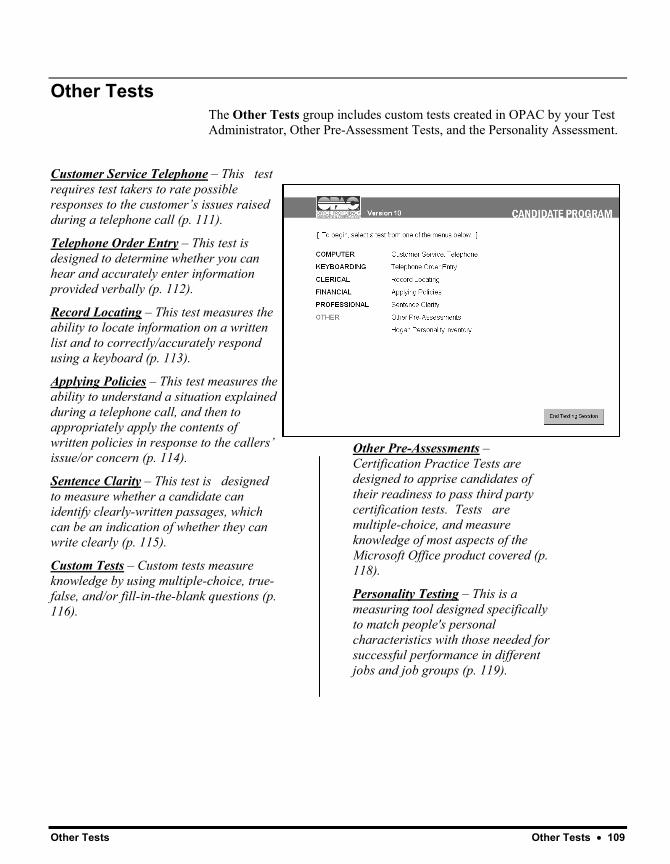
Other Tests Other Tests • 109
Other Tests The Other Tests group includes custom tests created in OPAC by your Test Administrator, Other Pre-Assessment Tests, and the Personality Assessment.
Customer Service Telephone – This test requires test takers to rate possible responses to the customer’s issues raised during a telephone call (p. 111).
Telephone Order Entry – This test is designed to determine whether you can hear and accurately enter information provided verbally (p. 112).
Record Locating – This test measures the ability to locate information on a written list and to correctly/accurately respond using a keyboard (p. 113).
Applying Policies – This test measures the ability to understand a situation explained during a telephone call, and then to appropriately apply the contents of written policies in response to the callers’ issue/or concern (p. 114).
Sentence Clarity – This test is designed to measure whether a candidate can identify clearly-written passages, which can be an indication of whether they can write clearly (p. 115).
Custom Tests – Custom tests measure knowledge by using multiple-choice, true-false, and/or fill-in-the-blank questions (p. 116).
Other Pre-Assessments – Certification Practice Tests are designed to apprise candidates of their readiness to pass third party certification tests. Tests are multiple-choice, and measure knowledge of most aspects of the Microsoft Office product covered (p. 118).
Personality Testing – This is a measuring tool designed specifically to match people's personal characteristics with those needed for successful performance in different jobs and job groups (p. 119).
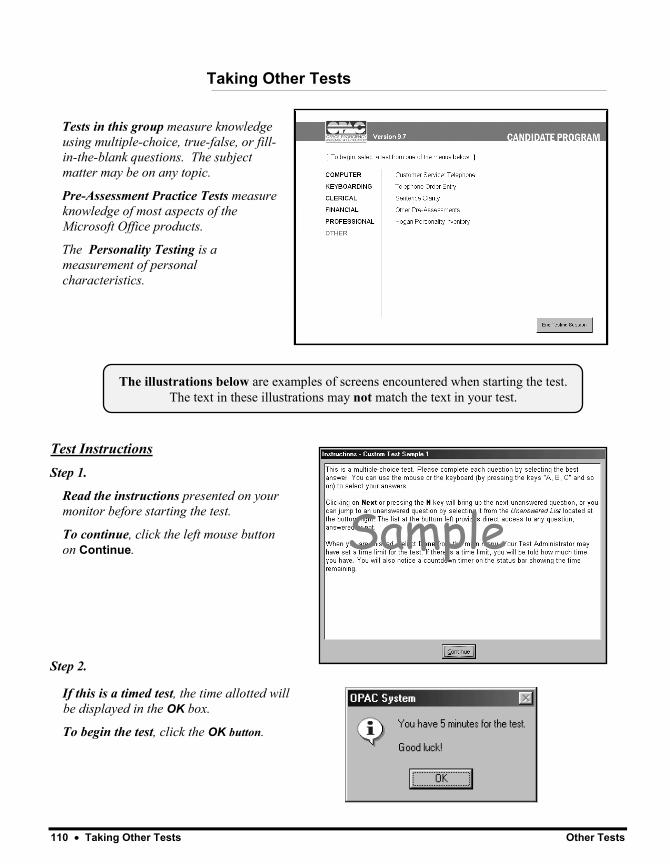
110 • Taking Other Tests Other Tests
The illustrations below are examples of screens encountered when starting the test. The text in these illustrations may not match the text in your test.
Taking Other Tests
Tests in this group measure knowledge using multiple-choice, true-false, or fill-in-the-blank questions. The subject matter may be on any topic.
Pre-Assessment Practice Tests measure knowledge of most aspects of the Microsoft Office products.
The Personality Testing is a measurement of personal characteristics.
Test Instructions Step 1.
Read the instructions presented on your monitor before starting the test.
To continue, click the left mouse button on Continue.
Step 2.
If this is a timed test, the time allotted will be displayed in the OK box.
To begin the test, click the OK button.
Sample
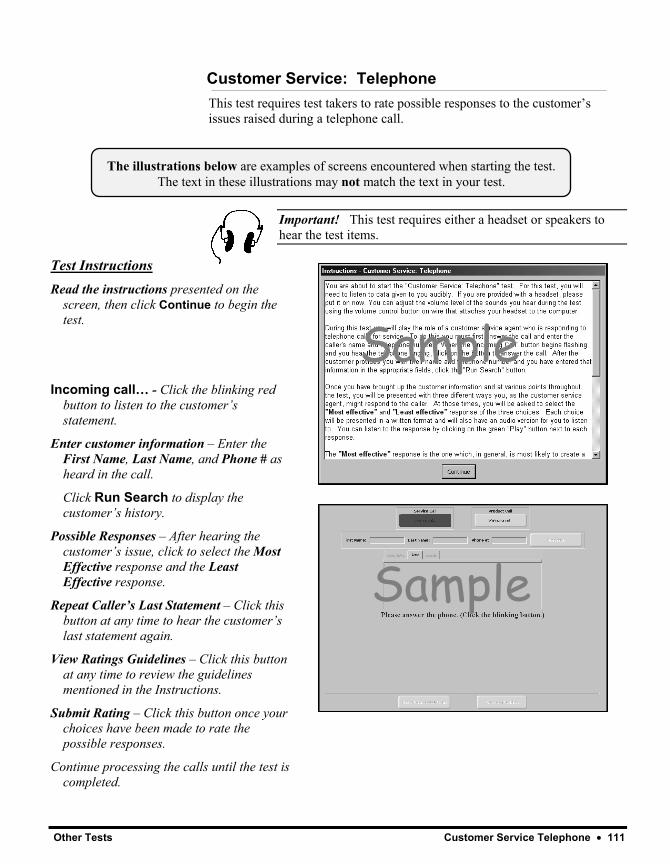
Other Tests Customer Service Telephone • 111
The illustrations below are examples of screens encountered when starting the test. The text in these illustrations may not match the text in your test.
Customer Service: Telephone This test requires test takers to rate possible responses to the customer’s issues raised during a telephone call.
Important! This test requires either a headset or speakers to hear the test items.
Test Instructions Read the instructions presented on the
screen, then click Continue to begin the test.
Incoming call… - Click the blinking red button to listen to the customer’s statement.
Enter customer information – Enter the First Name, Last Name, and Phone # as heard in the call.
Click Run Search to display the customer’s history.
Possible Responses – After hearing the customer’s issue, click to select the Most Effective response and the Least Effective response.
Repeat Caller’s Last Statement – Click this button at any time to hear the customer’s last statement again.
View Ratings Guidelines – Click this button at any time to review the guidelines mentioned in the Instructions.
Submit Rating – Click this button once your choices have been made to rate the possible responses.
Continue processing the calls until the test is completed.
Sample
Sample
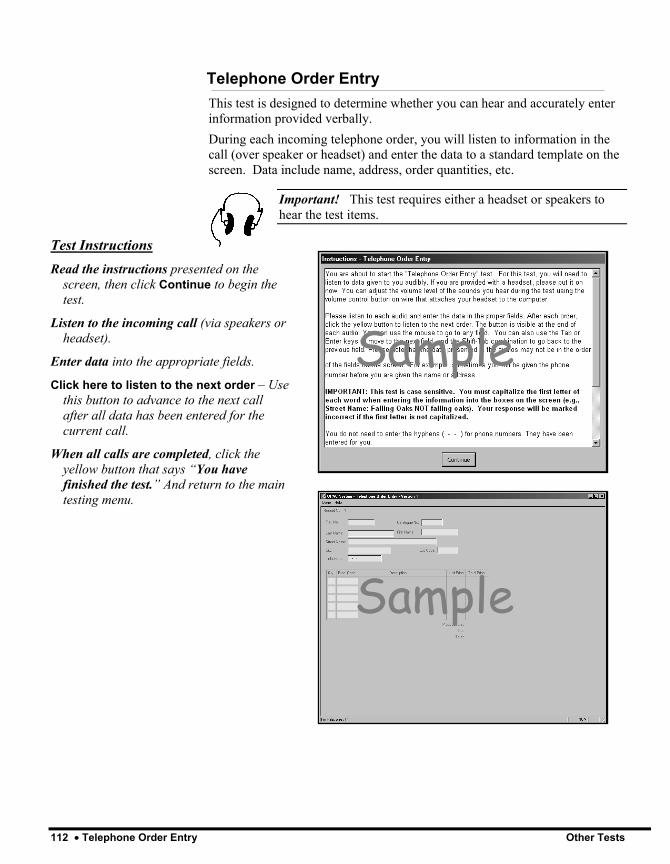
112 • Telephone Order Entry Other Tests
Telephone Order Entry This test is designed to determine whether you can hear and accurately enter information provided verbally. During each incoming telephone order, you will listen to information in the call (over speaker or headset) and enter the data to a standard template on the screen. Data include name, address, order quantities, etc.
Important! This test requires either a headset or speakers to hear the test items.
Test Instructions Read the instructions presented on the
screen, then click Continue to begin the test.
Listen to the incoming call (via speakers or headset).
Enter data into the appropriate fields.
Click here to listen to the next order – Use this button to advance to the next call after all data has been entered for the current call.
When all calls are completed, click the yellow button that says “You have finished the test.” And return to the main testing menu.
Sample
Sample
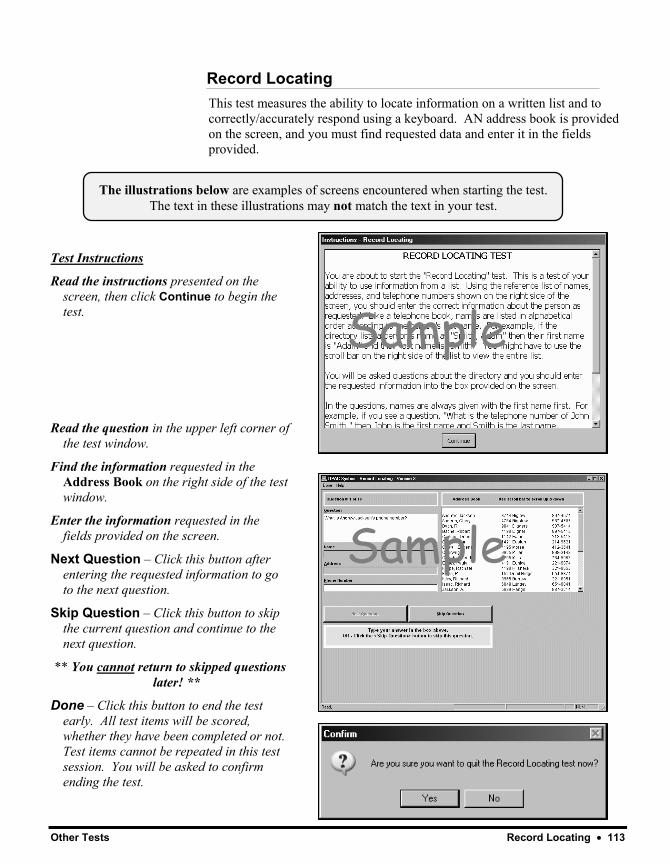
Other Tests Record Locating • 113
The illustrations below are examples of screens encountered when starting the test. The text in these illustrations may not match the text in your test.
Record Locating This test measures the ability to locate information on a written list and to correctly/accurately respond using a keyboard. AN address book is provided on the screen, and you must find requested data and enter it in the fields provided.
Test Instructions
Read the instructions presented on the screen, then click Continue to begin the test.
Read the question in the upper left corner of the test window.
Find the information requested in the Address Book on the right side of the test window.
Enter the information requested in the fields provided on the screen.
Next Question – Click this button after entering the requested information to go to the next question.
Skip Question – Click this button to skip the current question and continue to the next question.
** You cannot return to skipped questions later! **
Done – Click this button to end the test early. All test items will be scored, whether they have been completed or not. Test items cannot be repeated in this test session. You will be asked to confirm ending the test.
Sample
Sample
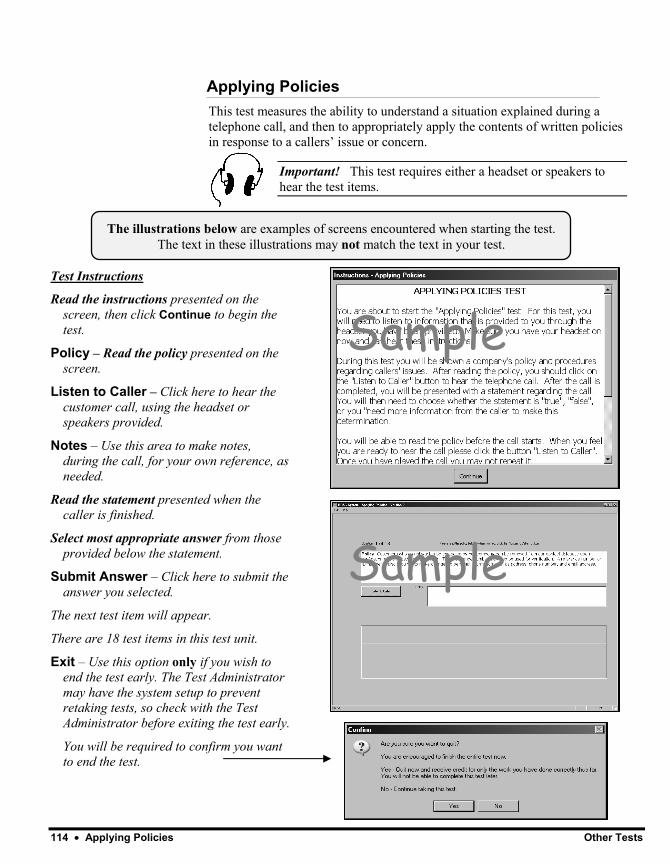
114 • Applying Policies Other Tests
The illustrations below are examples of screens encountered when starting the test. The text in these illustrations may not match the text in your test.
Applying Policies This test measures the ability to understand a situation explained during a telephone call, and then to appropriately apply the contents of written policies in response to a callers’ issue or concern.
Important! This test requires either a headset or speakers to hear the test items.
Test Instructions
Read the instructions presented on the screen, then click Continue to begin the test.
Policy – Read the policy presented on the screen.
Listen to Caller – Click here to hear the customer call, using the headset or speakers provided.
Notes – Use this area to make notes, during the call, for your own reference, as needed.
Read the statement presented when the caller is finished.
Select most appropriate answer from those provided below the statement.
Submit Answer – Click here to submit the answer you selected.
The next test item will appear.
There are 18 test items in this test unit.
Exit – Use this option only if you wish to end the test early. The Test Administrator may have the system setup to prevent retaking tests, so check with the Test Administrator before exiting the test early.
You will be required to confirm you want to end the test.
Sample
Sample
Sample
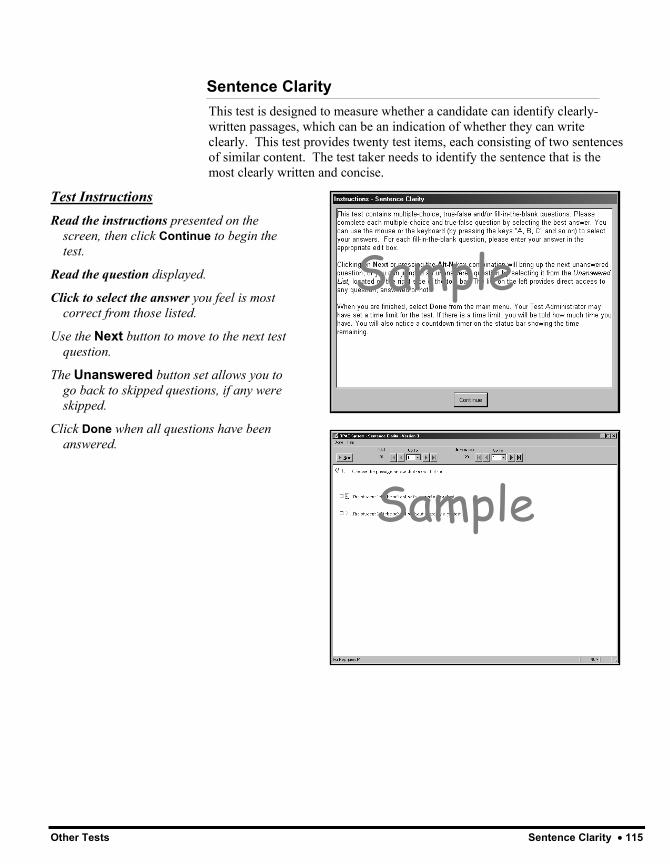
Other Tests Sentence Clarity • 115
Sentence Clarity This test is designed to measure whether a candidate can identify clearly-written passages, which can be an indication of whether they can write clearly. This test provides twenty test items, each consisting of two sentences of similar content. The test taker needs to identify the sentence that is the most clearly written and concise.
Test Instructions Read the instructions presented on the
screen, then click Continue to begin the test.
Read the question displayed.
Click to select the answer you feel is most correct from those listed.
Use the Next button to move to the next test question.
The Unanswered button set allows you to go back to skipped questions, if any were skipped.
Click Done when all questions have been answered.
Sample
Sample

116 • Custom Tests Other Tests
Custom Tests Custom tests measure specific knowledge by using multiple-choice, true-false, and fill-in-the-blank questions. Questions may contain sounds, images, or movies. Select a test by clicking the mouse on the desired test on the right side of the screen. An instruction screen will be presented prior to each test, along with a time limit announcement if the test is timed.

Other Tests Custom Keyboarding Tests • 117
Custom Keyboarding Tests These are Keyboarding tests with custom text content. These will appear in the same testing format as the standard Keyboarding tests. For detailed instructions, see p. 46.

118 • Pre-Assessment Practice Tests Other Tests
Pre-Assessment Practice Tests Certification Practice Tests are designed to apprise candidates of their readiness to pass third party certification tests. Tests are multiple-choice, and measure knowledge of most aspects of the Microsoft Office product covered.

The OPAC System - Candidate Manual Personality Testing • 119
Personality Testing Personality Assessment is a separate program that is partially integrated with the OPAC System. The Personality Assessment test scores will be automatically emailed directly to the test administrator shortly after its completion.
Toll Free: (800) 999-0438 193 Blue Ravine Road, Suite 270, Folsom, CA 95630 (916) 294-4250 • Fax: (916) 294-4255 Web sites: OPAC System (office skills assessment): www.opac.com, EEO/AAP Consulting and Software: www.biddle.com, CritiCall (dispatcher assessment): www.criticall911.com, Fire & Police Selection, Inc. (assessment products and services): www.fpsi.com