Embed Size (px)
Citation preview
Unrestricted
OntarioSecurityTesting.ca Training Registration Venue Training Entity User Guide
Unrestricted
2 Training Entity User Guide Unrestricted
Table of Contents OntarioSecurityTesting.ca ............................................................................................................................. 1
Table of Contents .......................................................................................................................................... 2
1.0 Introduction ...................................................................................................................................... 3
2.0 Registering for a TRV Account ............................................................................................................... 4
2.A Accessing the TRV ............................................................................................................................... 4
2.B Signing Up for Your New Account ..................................................................................................... 5
2.C Confirming Your Registration and Identity Through Email ................................................................ 6
2.D Completing the Training Entity Identification Form (TEIF) for Your TRV Account ........................... 7
2.E Uploading the Signed Training Entity Identification Form (TEIF) ..................................................... 8
2.F MCSCS Review ................................................................................................................................... 9
3.0 Working with Candidate Records ......................................................................................................... 10
Managing Your Student/Candidate Records .......................................................................................... 10
Adding a Candidate ................................................................................................................................. 10
Uploading a Batch of Candidates from One File ..................................................................................... 14
Downloading the TRV Batch Microsoft Excel Template ..................................................................... 14
Uploading the Populated TRV Batch Microsoft Excel Template ......................................................... 14
4.0 Managing Your TRV Account................................................................................................................. 16
Logging Into Your TRV Account ............................................................................................................... 16
Changing Your Password ......................................................................................................................... 17
Forgot Your Password? ........................................................................................................................... 18
Change Password Question .................................................................................................................... 19
Changing Details on the Training Entity Identification Form (TEIF) ........................................................ 20
5.0 Technical Support................................................................................................................................. 21
Contact Us ............................................................................................................................................... 21

Unrestricted
3 Training Entity User Guide Unrestricted
1.0 Introduction The Training Registration Venue (TRV) is a tool for organizations authorized by the Private Security and
Investigative Services Branch (PSISB) of the Ministry of Community Safety and Correctional Services
(MCSCS) to deliver security guard and private investigator training. Once candidates have successfully
completed training, authorized training entities must enter candidates who have successfully completed
the training in the TRV system. Entering candidates into the TRV system signifies their eligibility to book
and sit the security guard and/or private investigator examination hosted by Serco Canada at DriveTest
offices across Ontario.
Candidates who have not been entered into the TRV system by an authorized training entity cannot
book a test, take a test, or obtain their security guard and/or private investigator licence. Once the
candidate passes a security guard and/or private investigator exam, some of the information entered
into the TRV is transferred securely, automatically and electronically to ServiceOntario and printed on
the licence card. It is very important that the information that training entities enter into the TRV is
verifiable (through appropriate documentation) and accurate.
Unrestricted
4 Training Entity User Guide Unrestricted
2.0 Registering for a TRV Account Registering for a TRV account is a fast, but multi-step process. Before you begin this process, please have
your agency number, business number, an email account, and someone who is authorized to sign
documents on behalf of your organization handy. Once you have registered for your TRV account online,
the Ministry of Community Safety and Correctional Services (MCSCS) will review your application. You
will be notified by email when your account application has been approved by the Ministry.
2.A Accessing the TRV 1. You can access the TRV at any time by clicking the Training Registration Venue link on the
OntarioSecurityTesting.com homepage, or by entering OntarioSecurityTesting.com/TRV in your
browser address bar.
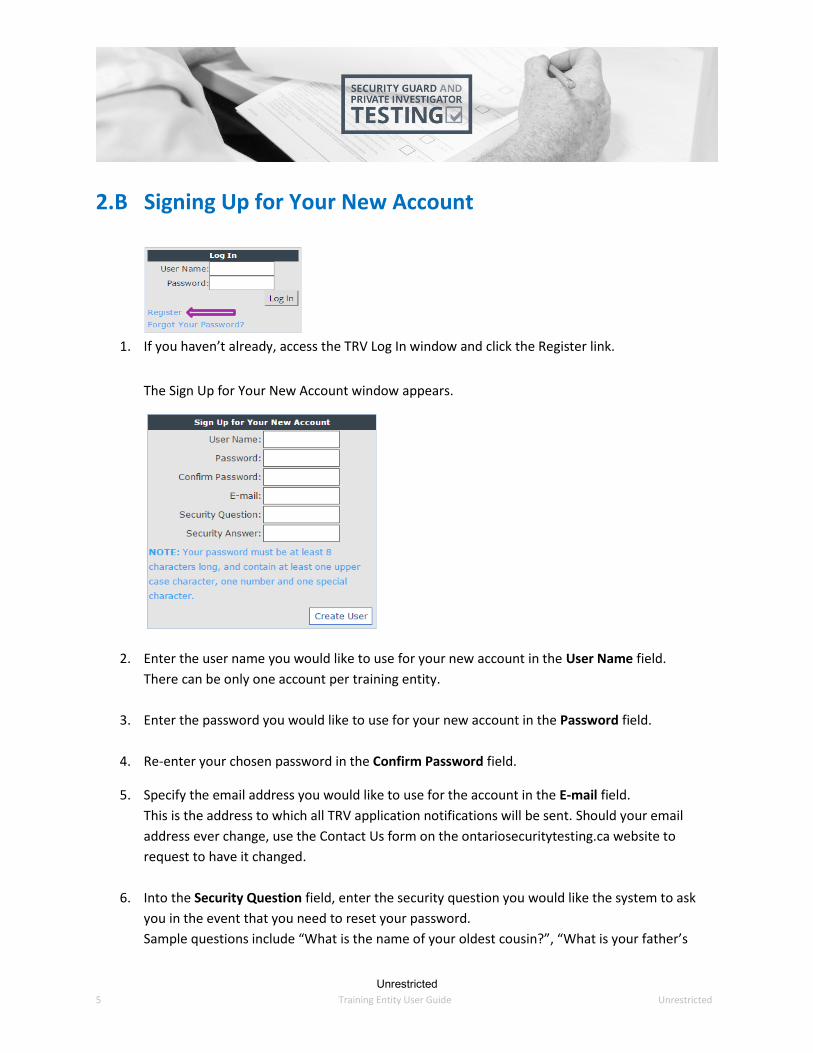
2. The TRV Log In page allows registered training entities to log into the system with their user
name and password.
New training entities can initiate the self-registration process by clicking the Register link on the
TRV Log In page.
Unrestricted
5 Training Entity User Guide Unrestricted
2.B Signing Up for Your New Account
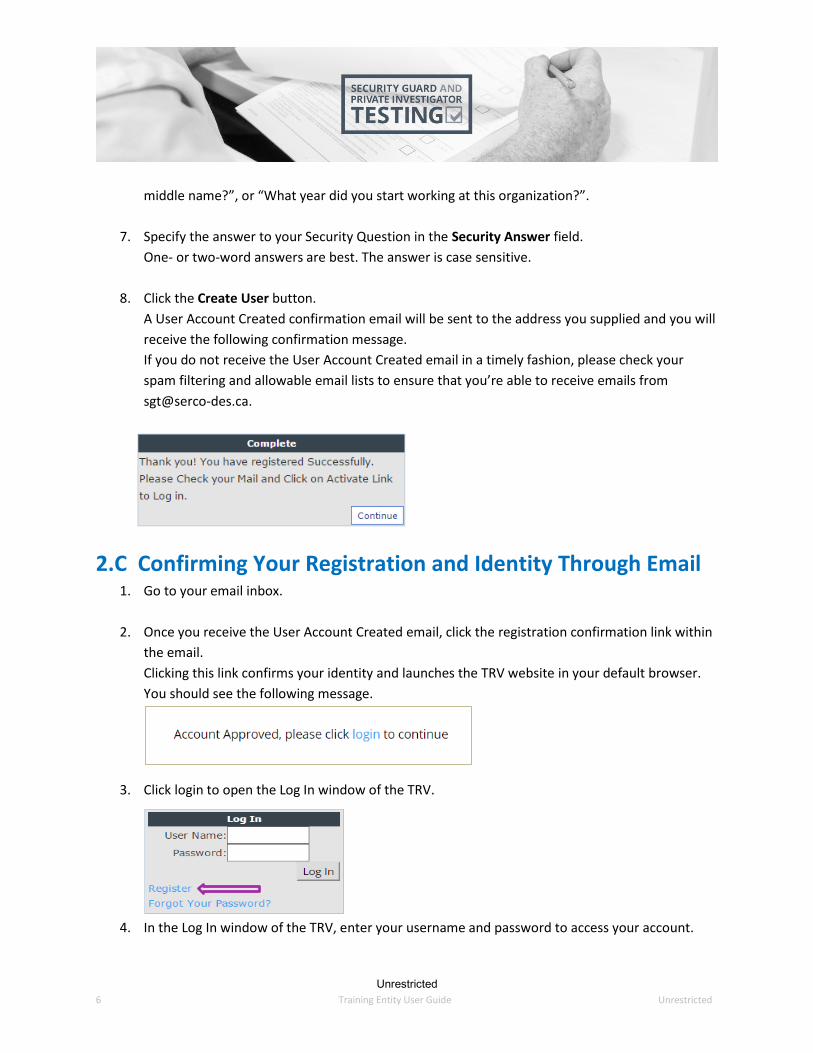
1. If you haven’t already, access the TRV Log In window and click the Register link.
The Sign Up for Your New Account window appears.
2. Enter the user name you would like to use for your new account in the User Name field.
There can be only one account per training entity.
3. Enter the password you would like to use for your new account in the Password field.
4. Re-enter your chosen password in the Confirm Password field.
5. Specify the email address you would like to use for the account in the E-mail field.
This is the address to which all TRV application notifications will be sent. Should your email
address ever change, use the Contact Us form on the ontariosecuritytesting.ca website to
request to have it changed.
6. Into the Security Question field, enter the security question you would like the system to ask
you in the event that you need to reset your password.
Sample questions include “What is the name of your oldest cousin?”, “What is your father’s
Unrestricted
6 Training Entity User Guide Unrestricted
middle name?”, or “What year did you start working at this organization?”.
7. Specify the answer to your Security Question in the Security Answer field.
One- or two-word answers are best. The answer is case sensitive.
8. Click the Create User button.
A User Account Created confirmation email will be sent to the address you supplied and you will
receive the following confirmation message.
If you do not receive the User Account Created email in a timely fashion, please check your
spam filtering and allowable email lists to ensure that you’re able to receive emails from
2.C Confirming Your Registration and Identity Through Email 1. Go to your email inbox.
2. Once you receive the User Account Created email, click the registration confirmation link within
the email.
Clicking this link confirms your identity and launches the TRV website in your default browser.
You should see the following message.
3. Click login to open the Log In window of the TRV.
4. In the Log In window of the TRV, enter your username and password to access your account.
Unrestricted
7 Training Entity User Guide Unrestricted
2.D Completing the Training Entity Identification Form (TEIF)
for Your TRV Account To become a registered training entity with the Private Security and Investigative Services Branch (PSISB)
of MCSCS, you must complete, sign and submit the Training Entity Identification Form (TEIF). The PSISB
will review the submitted TEIF and you will be notified by email if you meet the requirements to be a
registered training entity.
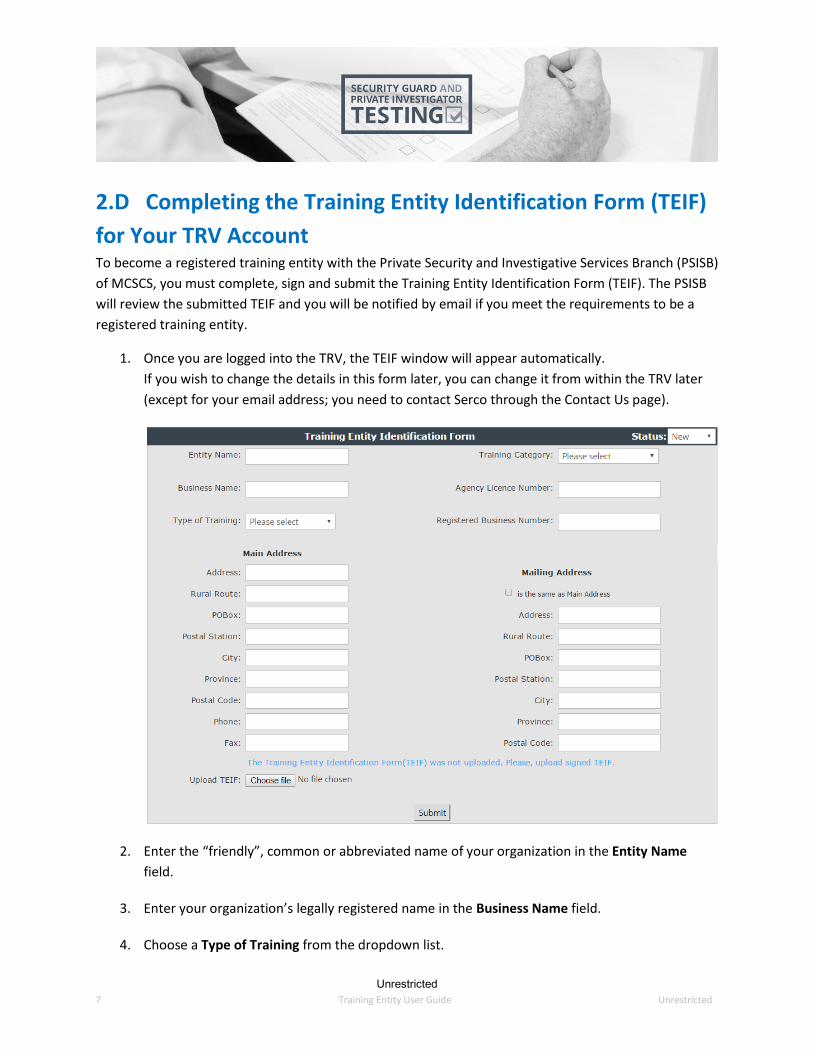
1. Once you are logged into the TRV, the TEIF window will appear automatically.
If you wish to change the details in this form later, you can change it from within the TRV later
(except for your email address; you need to contact Serco through the Contact Us page).
2. Enter the “friendly”, common or abbreviated name of your organization in the Entity Name
field.
3. Enter your organization’s legally registered name in the Business Name field.
4. Choose a Type of Training from the dropdown list.
Unrestricted
8 Training Entity User Guide Unrestricted
5. Choose a Training Category that best reflects the type of organization you represent from the
dropdown list.
6. If you indicated that you are a licensed agency in the Training Category dropdown field,
complete the Agency Licence Number field. Otherwise, you may ignore this field.
7. If you indicated that you are a Registered Employer in the Training Category dropdown,
complete the Registered Business Number field. Otherwise, you may ignore this field.
8. Enter your business contact information in the Main Address fields.
If your organization belongs to a much larger company or institution that has multiple locations
or campuses, enter your departmental/campus information in the Main Address fields.
9. Click the check box if the Mailing Address is the same as the Main Address or enter your
company’s or institution’s head office contact information in the respective Mailing Address
contact fields.
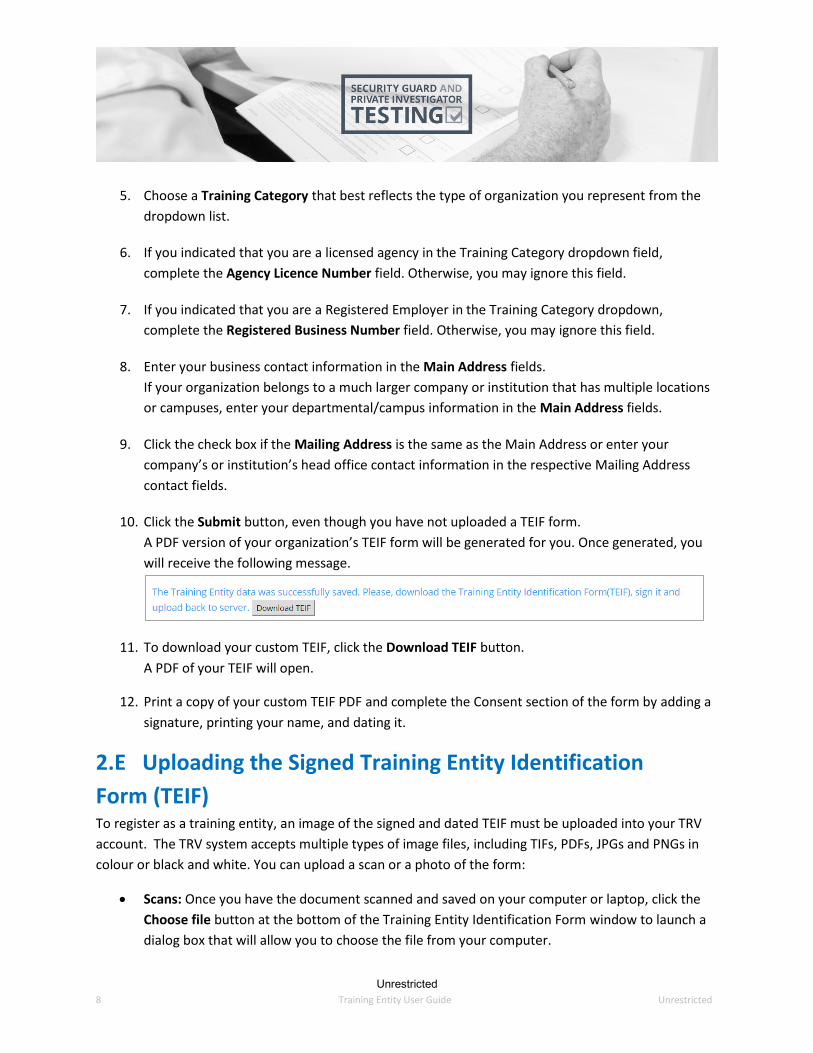
10. Click the Submit button, even though you have not uploaded a TEIF form.
A PDF version of your organization’s TEIF form will be generated for you. Once generated, you
will receive the following message.
11. To download your custom TEIF, click the Download TEIF button.
A PDF of your TEIF will open.
12. Print a copy of your custom TEIF PDF and complete the Consent section of the form by adding a
signature, printing your name, and dating it.
2.E Uploading the Signed Training Entity Identification
Form (TEIF) To register as a training entity, an image of the signed and dated TEIF must be uploaded into your TRV
account. The TRV system accepts multiple types of image files, including TIFs, PDFs, JPGs and PNGs in
colour or black and white. You can upload a scan or a photo of the form:
Scans: Once you have the document scanned and saved on your computer or laptop, click the
Choose file button at the bottom of the Training Entity Identification Form window to launch a
dialog box that will allow you to choose the file from your computer.
Unrestricted
9 Training Entity User Guide Unrestricted
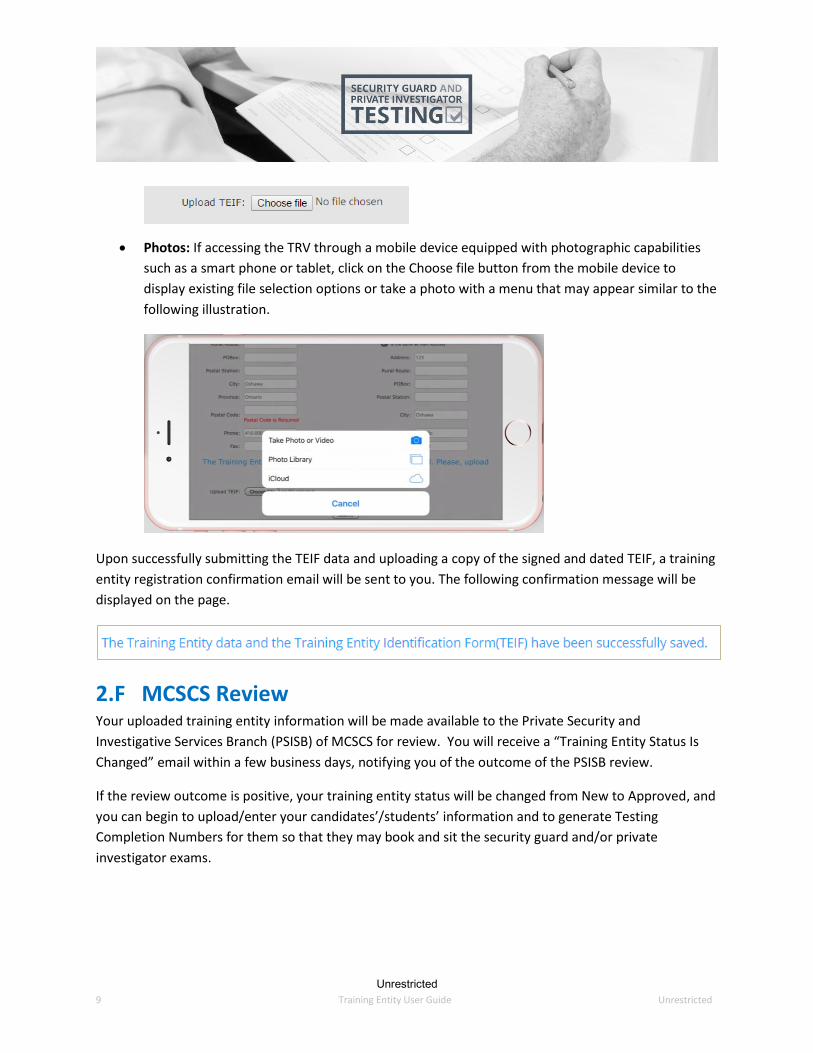
Photos: If accessing the TRV through a mobile device equipped with photographic capabilities
such as a smart phone or tablet, click on the Choose file button from the mobile device to
display existing file selection options or take a photo with a menu that may appear similar to the
following illustration.
Upon successfully submitting the TEIF data and uploading a copy of the signed and dated TEIF, a training
entity registration confirmation email will be sent to you. The following confirmation message will be
displayed on the page.
2.F MCSCS Review Your uploaded training entity information will be made available to the Private Security and
Investigative Services Branch (PSISB) of MCSCS for review. You will receive a “Training Entity Status Is
Changed” email within a few business days, notifying you of the outcome of the PSISB review.
If the review outcome is positive, your training entity status will be changed from New to Approved, and
you can begin to upload/enter your candidates’/students’ information and to generate Testing
Completion Numbers for them so that they may book and sit the security guard and/or private
investigator exams.
Unrestricted
10 Training Entity User Guide Unrestricted
3.0 Working with Candidate Records
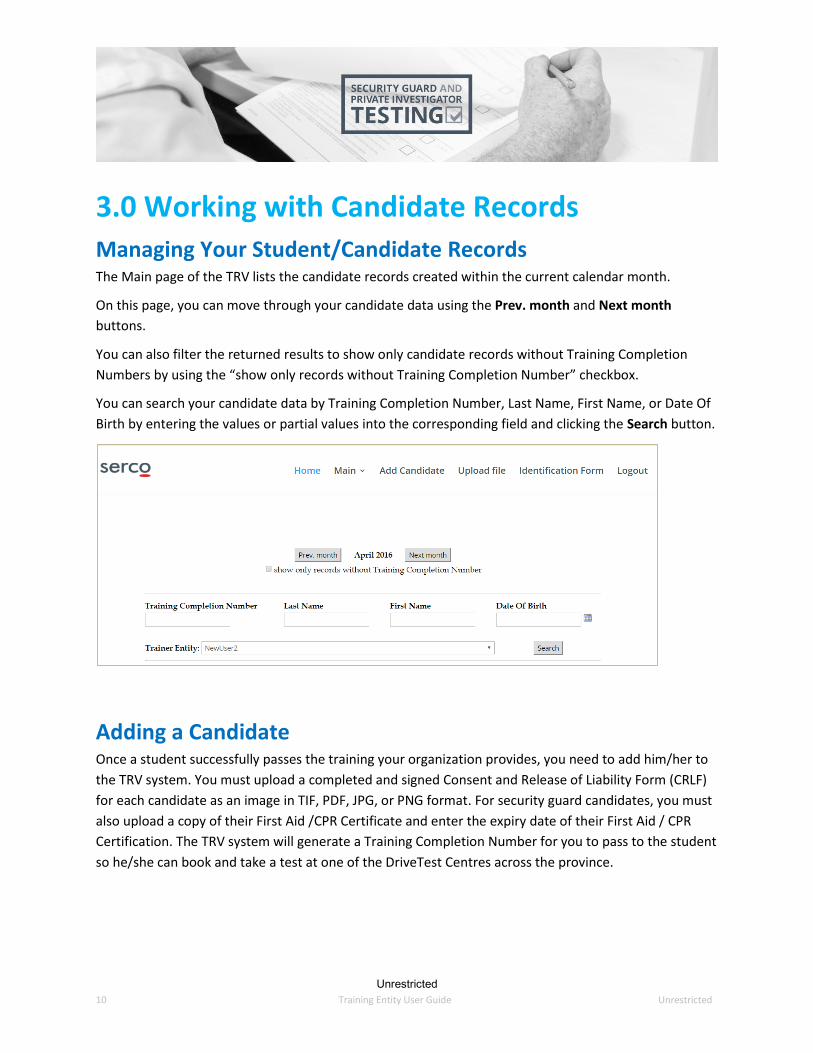
Managing Your Student/Candidate Records The Main page of the TRV lists the candidate records created within the current calendar month.
On this page, you can move through your candidate data using the Prev. month and Next month
buttons.
You can also filter the returned results to show only candidate records without Training Completion
Numbers by using the “show only records without Training Completion Number” checkbox.
You can search your candidate data by Training Completion Number, Last Name, First Name, or Date Of
Birth by entering the values or partial values into the corresponding field and clicking the Search button.
Adding a Candidate Once a student successfully passes the training your organization provides, you need to add him/her to
the TRV system. You must upload a completed and signed Consent and Release of Liability Form (CRLF)
for each candidate as an image in TIF, PDF, JPG, or PNG format. For security guard candidates, you must
also upload a copy of their First Aid /CPR Certificate and enter the expiry date of their First Aid / CPR
Certification. The TRV system will generate a Training Completion Number for you to pass to the student
so he/she can book and take a test at one of the DriveTest Centres across the province.

Unrestricted
11 Training Entity User Guide Unrestricted
1. Click the Add Candidate menu item.
The Candidate Data form appears.
2. Carefully enter the candidate’s legal surname, middle name, first name and gender in the
required fields.
Please ensure the legal name entered for your student is the exact name as it appears on their
government issued valid photo identification. This identification is required by the candidate at
the test venue and on their licence application upon successful completion of their test. If the
candidate arrives at the test venue with ID that matches these name entries, they will not be
able to attempt their test and will be required to pay the associated fee for their next booking.
3. Enter the candidate’s birth date as it appears on his/her ID in the Birth Date field.
Unrestricted
12 Training Entity User Guide Unrestricted
4. Enter the last day of training in the Training Date field.
5. In the Email Address field, enter the candidate’s preferred address for receiving
communications pertaining to their security guard or private investigator exam.
6. Choose the appropriate Training Category from the dropdown list.
7. In the Specialized field, enter specialization or leave blank.
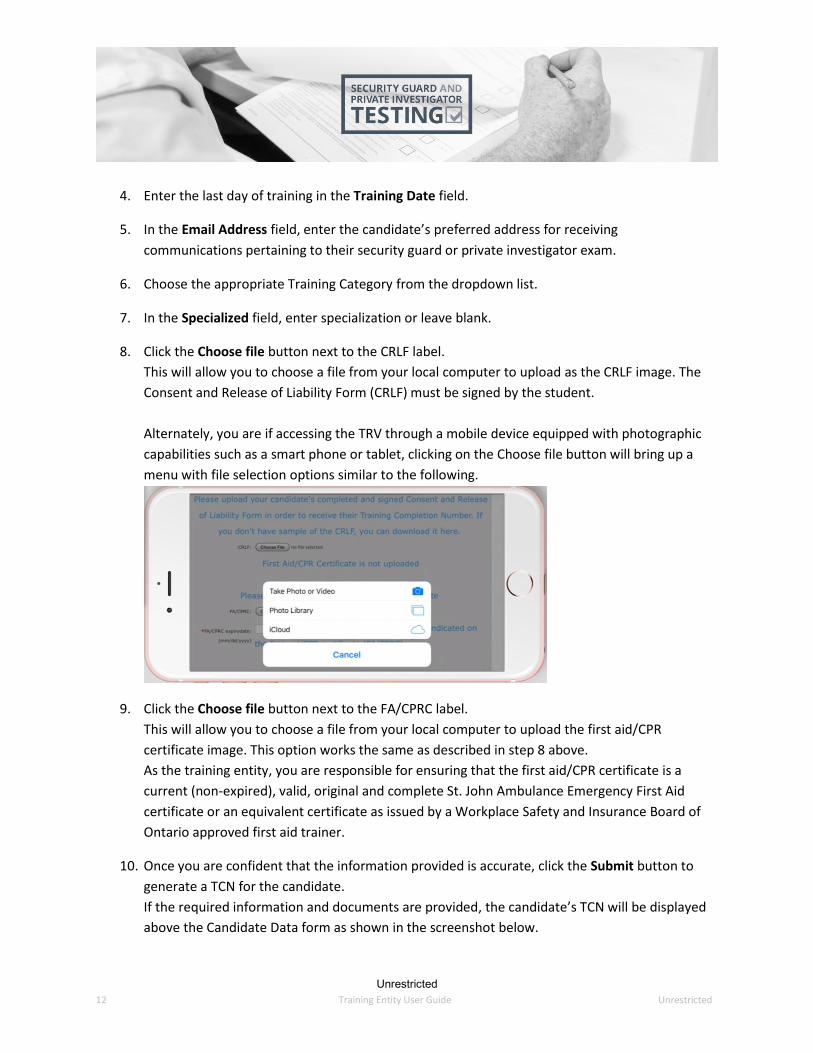
8. Click the Choose file button next to the CRLF label.
This will allow you to choose a file from your local computer to upload as the CRLF image. The
Consent and Release of Liability Form (CRLF) must be signed by the student.
Alternately, you are if accessing the TRV through a mobile device equipped with photographic
capabilities such as a smart phone or tablet, clicking on the Choose file button will bring up a
menu with file selection options similar to the following.
9. Click the Choose file button next to the FA/CPRC label.
This will allow you to choose a file from your local computer to upload the first aid/CPR
certificate image. This option works the same as described in step 8 above.
As the training entity, you are responsible for ensuring that the first aid/CPR certificate is a
current (non-expired), valid, original and complete St. John Ambulance Emergency First Aid
certificate or an equivalent certificate as issued by a Workplace Safety and Insurance Board of
Ontario approved first aid trainer.
10. Once you are confident that the information provided is accurate, click the Submit button to
generate a TCN for the candidate.
If the required information and documents are provided, the candidate’s TCN will be displayed
above the Candidate Data form as shown in the screenshot below.

Unrestricted
13 Training Entity User Guide Unrestricted
An email is also generated to the address provided for the candidate. The email contains the
candidate’s TCN, along with a link to the OntarioSecurityTesting.com website where they can
book an exam.
If required information or documents were missing from the candidate record, the TRV system
still saves the record and indicates only that the “Candidate’s data was successfully saved.” This
allows you to collect or correct the required data and add it to the candidate’s record without
having to re-enter everything.
Prior to a TCN being generated for a candidate, the Delete Record button allows you to remove
the record. After a TCN has been generated for a candidate, you are no longer able to modify it
or delete it. If changes or corrections need to be made to a candidate record, please use the
Contact Us form. A link to the Contact Us form is available in the footer of every page on the
website.
Unrestricted
14 Training Entity User Guide Unrestricted
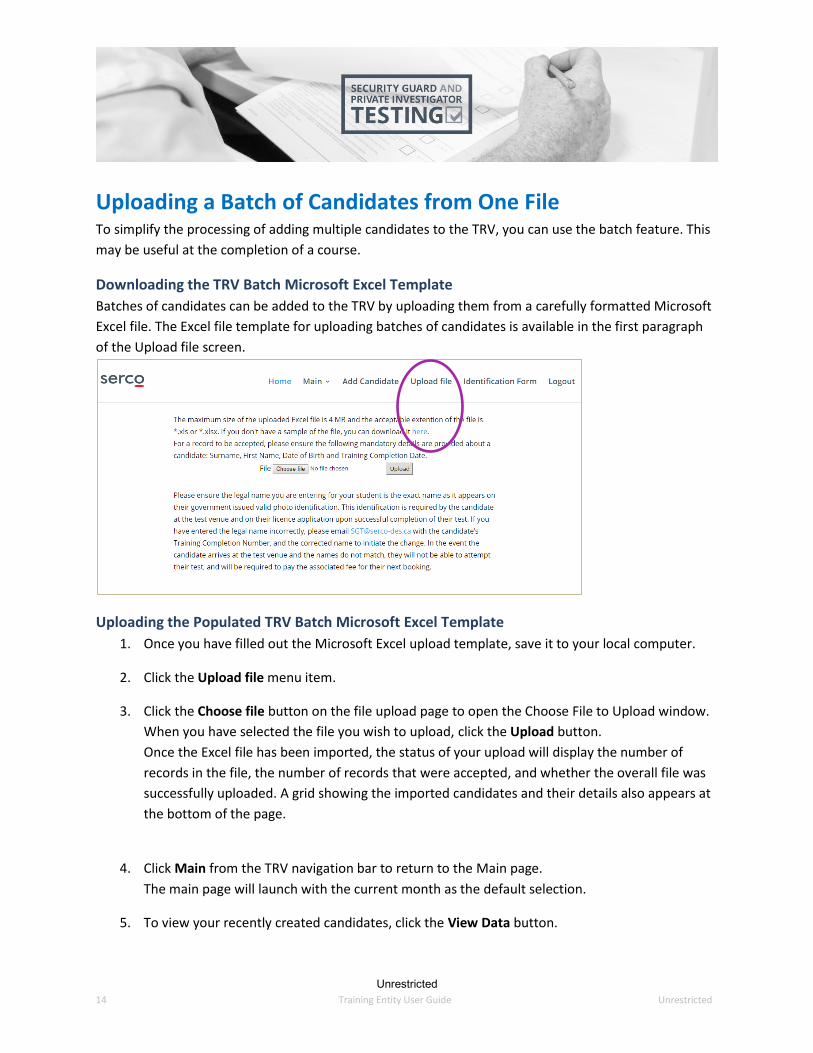
Uploading a Batch of Candidates from One File To simplify the processing of adding multiple candidates to the TRV, you can use the batch feature. This
may be useful at the completion of a course.
Downloading the TRV Batch Microsoft Excel Template
Batches of candidates can be added to the TRV by uploading them from a carefully formatted Microsoft
Excel file. The Excel file template for uploading batches of candidates is available in the first paragraph
of the Upload file screen.
Uploading the Populated TRV Batch Microsoft Excel Template
1. Once you have filled out the Microsoft Excel upload template, save it to your local computer.
2. Click the Upload file menu item.
3. Click the Choose file button on the file upload page to open the Choose File to Upload window.
When you have selected the file you wish to upload, click the Upload button.
Once the Excel file has been imported, the status of your upload will display the number of
records in the file, the number of records that were accepted, and whether the overall file was
successfully uploaded. A grid showing the imported candidates and their details also appears at
the bottom of the page.
4. Click Main from the TRV navigation bar to return to the Main page.
The main page will launch with the current month as the default selection.
5. To view your recently created candidates, click the View Data button.
Unrestricted
15 Training Entity User Guide Unrestricted
This will generate a grid that will contain all of the candidates you’ve created during the month
selected. You can filter this list to only show candidates without TCNs by checking the “show
only records without Training Completion Number” checkbox and then clicking the View Data
button.
6. The CRLF column (the last column in your candidate list) contains a button:
o For candidates whom a TCN has been generated the button is labeled View. Clicking View
will launch the Candidate Data window, where you can view but not change the candidate
details.
o For candidates without a TCN (because their records are incomplete), the button is labeled
Upload. Clicking Upload will launch the Candidate Data window so that you can complete,
edit, or delete the candidate record. Please refer to the Add Candidate section of this
manual to complete the candidate record and generate a TCN.
Unrestricted
16 Training Entity User Guide Unrestricted
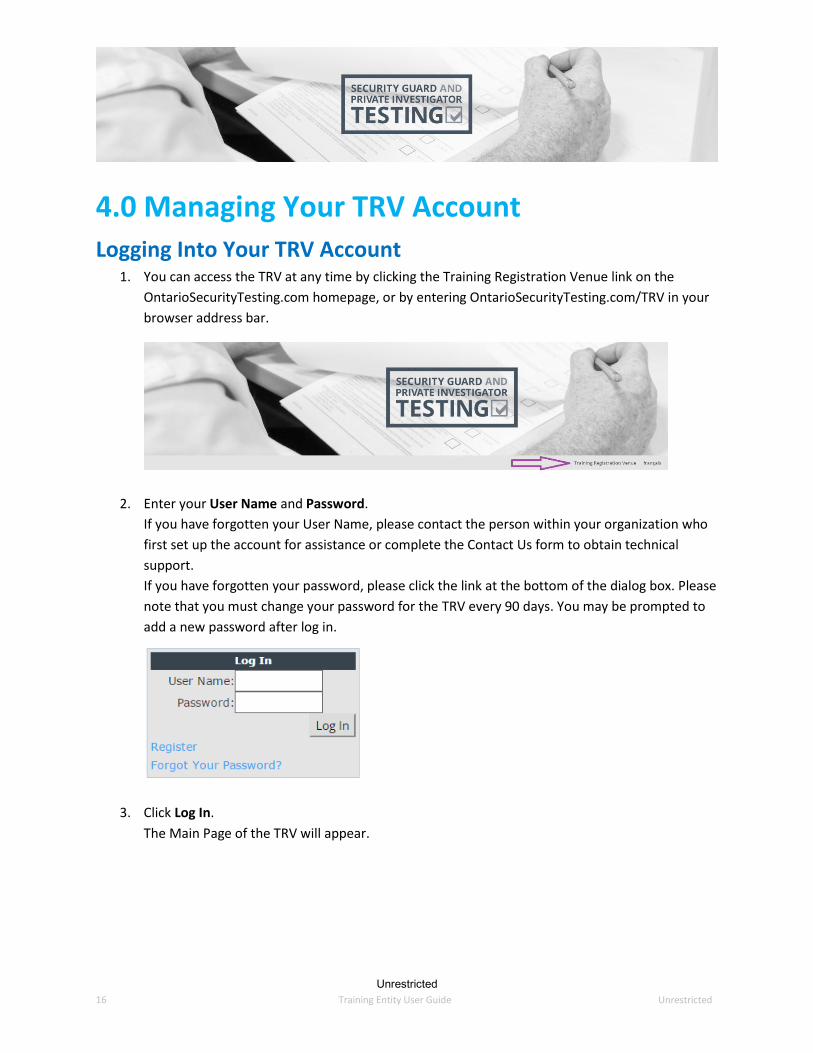
4.0 Managing Your TRV Account
Logging Into Your TRV Account 1. You can access the TRV at any time by clicking the Training Registration Venue link on the
OntarioSecurityTesting.com homepage, or by entering OntarioSecurityTesting.com/TRV in your
browser address bar.
2. Enter your User Name and Password.
If you have forgotten your User Name, please contact the person within your organization who
first set up the account for assistance or complete the Contact Us form to obtain technical
support.
If you have forgotten your password, please click the link at the bottom of the dialog box. Please
note that you must change your password for the TRV every 90 days. You may be prompted to
add a new password after log in.
3. Click Log In.
The Main Page of the TRV will appear.
Unrestricted
17 Training Entity User Guide Unrestricted
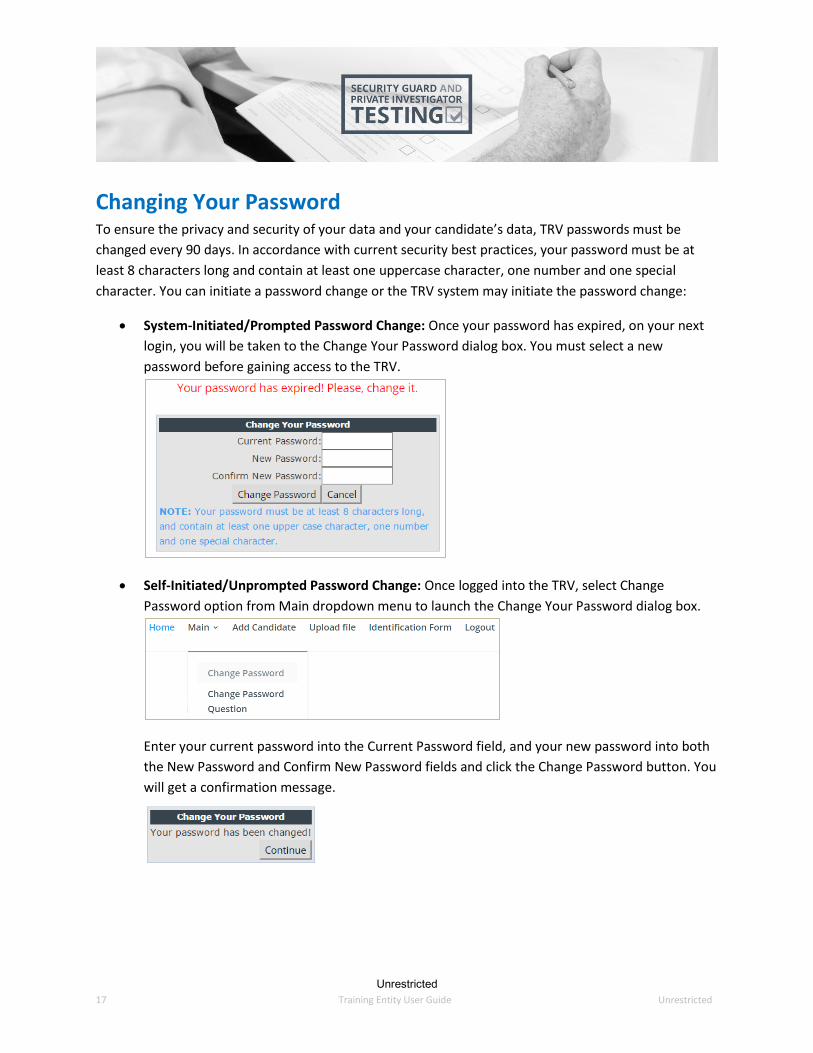
Changing Your Password To ensure the privacy and security of your data and your candidate’s data, TRV passwords must be
changed every 90 days. In accordance with current security best practices, your password must be at
least 8 characters long and contain at least one uppercase character, one number and one special
character. You can initiate a password change or the TRV system may initiate the password change:
System-Initiated/Prompted Password Change: Once your password has expired, on your next
login, you will be taken to the Change Your Password dialog box. You must select a new
password before gaining access to the TRV.
Self-Initiated/Unprompted Password Change: Once logged into the TRV, select Change
Password option from Main dropdown menu to launch the Change Your Password dialog box.
Enter your current password into the Current Password field, and your new password into both
the New Password and Confirm New Password fields and click the Change Password button. You
will get a confirmation message.
Unrestricted
18 Training Entity User Guide Unrestricted
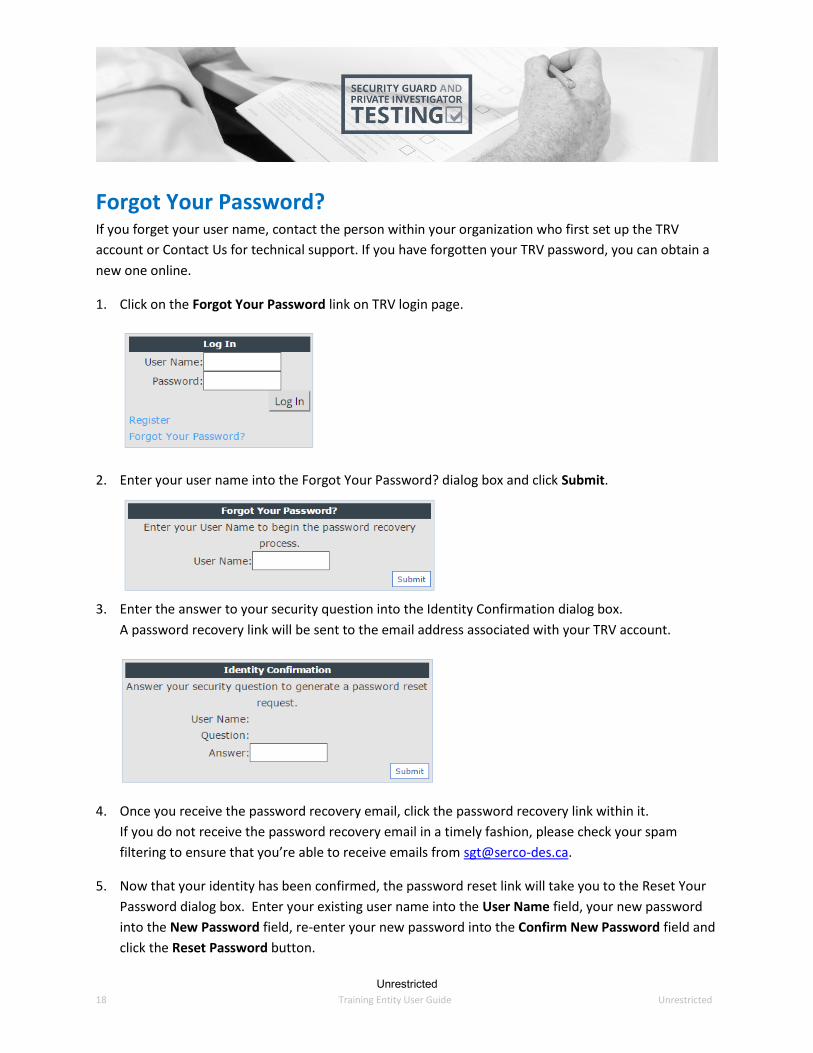
Forgot Your Password? If you forget your user name, contact the person within your organization who first set up the TRV
account or Contact Us for technical support. If you have forgotten your TRV password, you can obtain a
new one online.
1. Click on the Forgot Your Password link on TRV login page.
2. Enter your user name into the Forgot Your Password? dialog box and click Submit.
3. Enter the answer to your security question into the Identity Confirmation dialog box.
A password recovery link will be sent to the email address associated with your TRV account.
4. Once you receive the password recovery email, click the password recovery link within it.
If you do not receive the password recovery email in a timely fashion, please check your spam
filtering to ensure that you’re able to receive emails from [email protected].
5. Now that your identity has been confirmed, the password reset link will take you to the Reset Your
Password dialog box. Enter your existing user name into the User Name field, your new password
into the New Password field, re-enter your new password into the Confirm New Password field and
click the Reset Password button.
Unrestricted
19 Training Entity User Guide Unrestricted
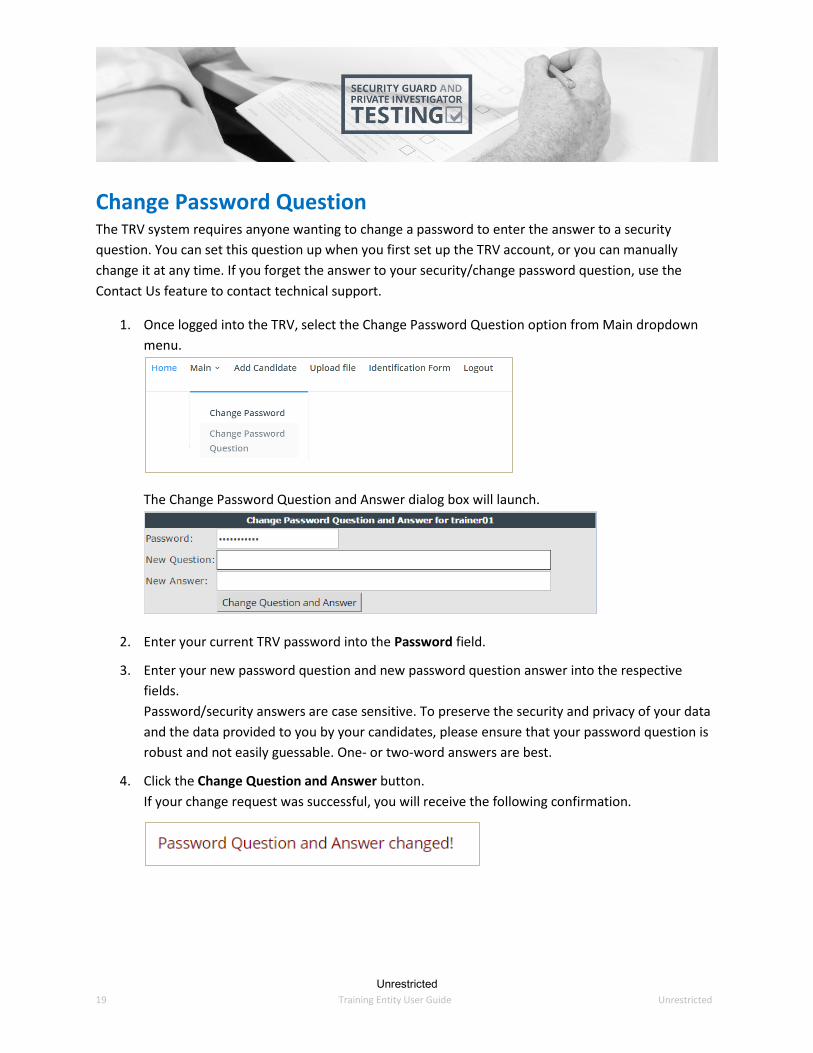
Change Password Question The TRV system requires anyone wanting to change a password to enter the answer to a security
question. You can set this question up when you first set up the TRV account, or you can manually
change it at any time. If you forget the answer to your security/change password question, use the
Contact Us feature to contact technical support.
1. Once logged into the TRV, select the Change Password Question option from Main dropdown
menu.
The Change Password Question and Answer dialog box will launch.
2. Enter your current TRV password into the Password field.
3. Enter your new password question and new password question answer into the respective
fields.
Password/security answers are case sensitive. To preserve the security and privacy of your data
and the data provided to you by your candidates, please ensure that your password question is
robust and not easily guessable. One- or two-word answers are best.
4. Click the Change Question and Answer button.
If your change request was successful, you will receive the following confirmation.
Unrestricted
20 Training Entity User Guide Unrestricted
Changing Details on the Training Entity Identification Form
(TEIF) The Identification Form link on the main TRV menu allows you to access the Training Entity Identification
Form to update your Training Entity details. If you need to change the email address of your TRV
account please use the Contact Us form to submit your request.
Unrestricted
21 Training Entity User Guide Unrestricted
5.0 Technical Support
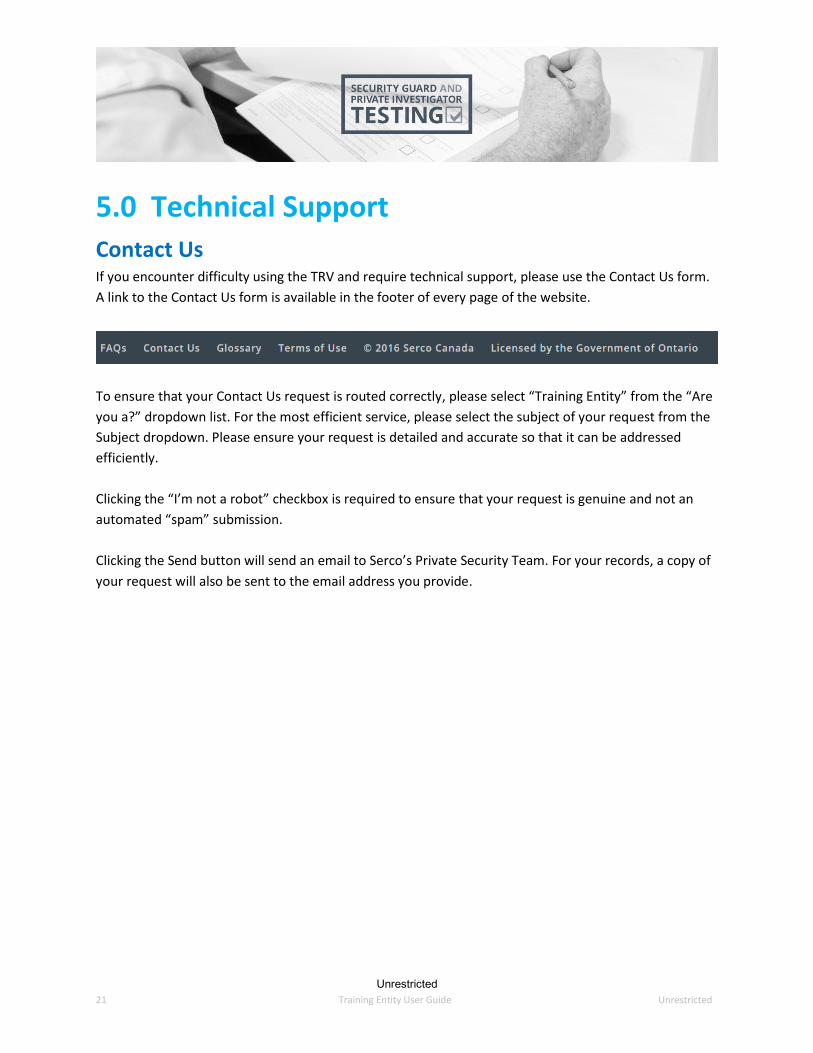
Contact Us If you encounter difficulty using the TRV and require technical support, please use the Contact Us form.
A link to the Contact Us form is available in the footer of every page of the website.
To ensure that your Contact Us request is routed correctly, please select “Training Entity” from the “Are
you a?” dropdown list. For the most efficient service, please select the subject of your request from the
Subject dropdown. Please ensure your request is detailed and accurate so that it can be addressed
efficiently.
Clicking the “I’m not a robot” checkbox is required to ensure that your request is genuine and not an
automated “spam” submission.
Clicking the Send button will send an email to Serco’s Private Security Team. For your records, a copy of
your request will also be sent to the email address you provide.