Embed Size (px)
Citation preview

One Piece Products Patent Pending
Series VI
2005-2009 Ford Mustang (S-197)
Power Qtr Glass Popout Kit
(888)One-Products 8 8 8 6 6 3 - 7 7 6 3
www.OnePieceProducts.com

2
Installation Manual
____________________________________________
One Piece Products
Conversion kit
Series VI
2005-2009 Ford Mustang (S-197)
Power Qtr Glass Popout Kit
3
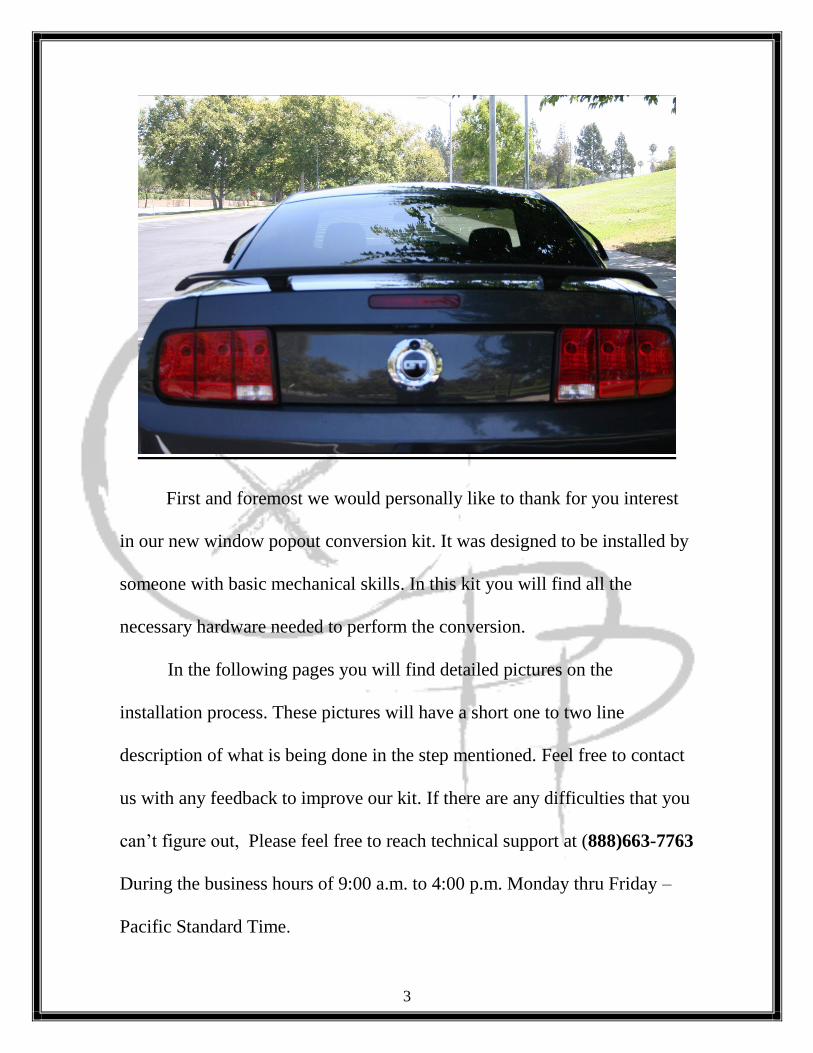
First and foremost we would personally like to thank for you interest
in our new window popout conversion kit. It was designed to be installed by
someone with basic mechanical skills. In this kit you will find all the
necessary hardware needed to perform the conversion.
In the following pages you will find detailed pictures on the
installation process. These pictures will have a short one to two line
description of what is being done in the step mentioned. Feel free to contact
us with any feedback to improve our kit. If there are any difficulties that you
can’t figure out, Please feel free to reach technical support at (888)663-7763
During the business hours of 9:00 a.m. to 4:00 p.m. Monday thru Friday –
Pacific Standard Time.

4
KIT CONTENTS
1. Brand New Qtr Glass with
mounting plate and spiral gear. Quantity(2) Left/Right
2. New Seals to prevent air
and water from getting into the cab. Quantity (2) Left/Right

5
3. New Motors with regulator
assembly (including mounting hardware) Quantity (2) Left/Right
4. New Switches including
wiring harness.( will need minor modification) Quantity (1)Pair
5. New Motor mount brackets
Quantity (2) Left/Right
6
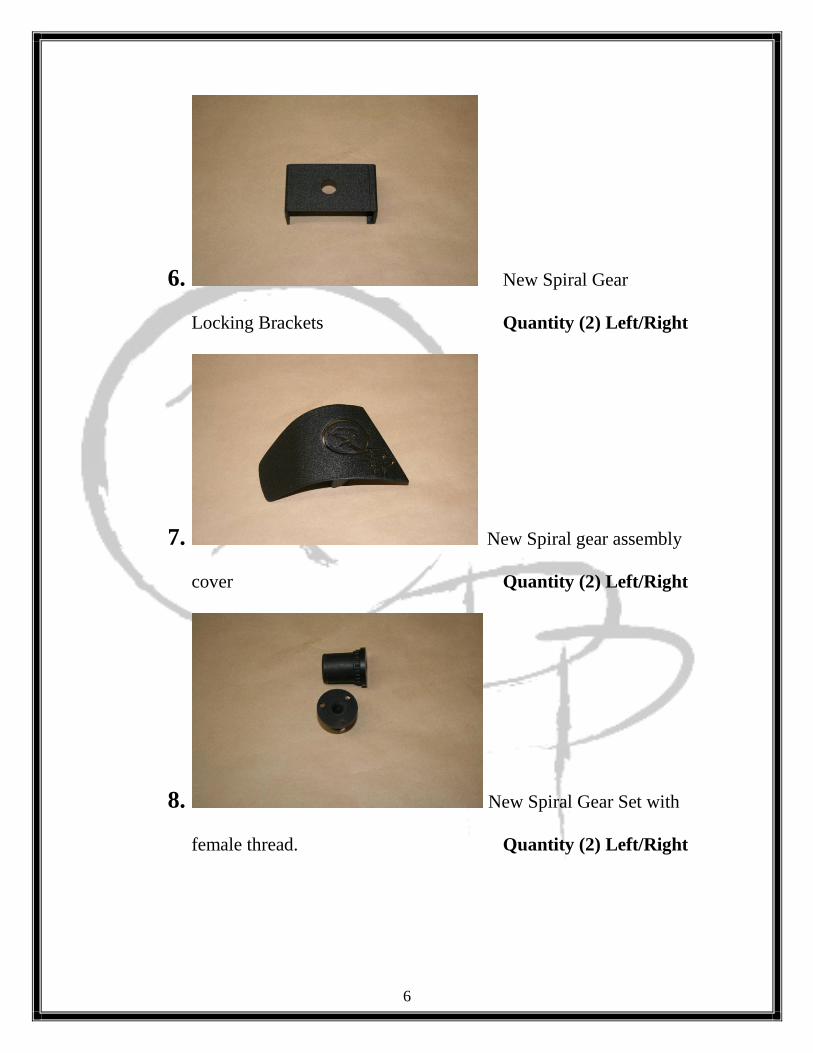
6. New Spiral Gear
Locking Brackets Quantity (2) Left/Right
7. New Spiral gear assembly
cover Quantity (2) Left/Right
8. New Spiral Gear Set with
female thread. Quantity (2) Left/Right
7
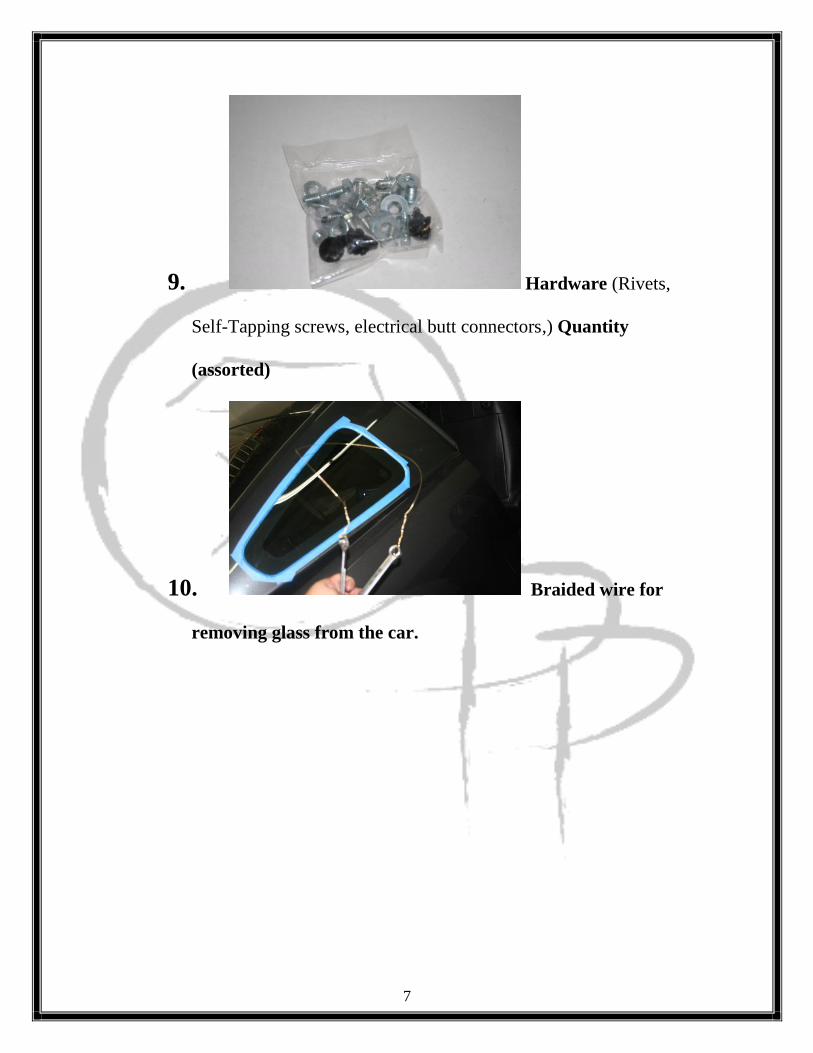
9. Hardware (Rivets,
Self-Tapping screws, electrical butt connectors,) Quantity
(assorted)
10. Braided wire for
removing glass from the car.

8
Tools required
Small hammer.
Electric Drill with phillips tip.
Flat thin screwdriver.
Pair of Closed end wrenches.
Blue masking tape
Water with sprayer.
Wire strippers
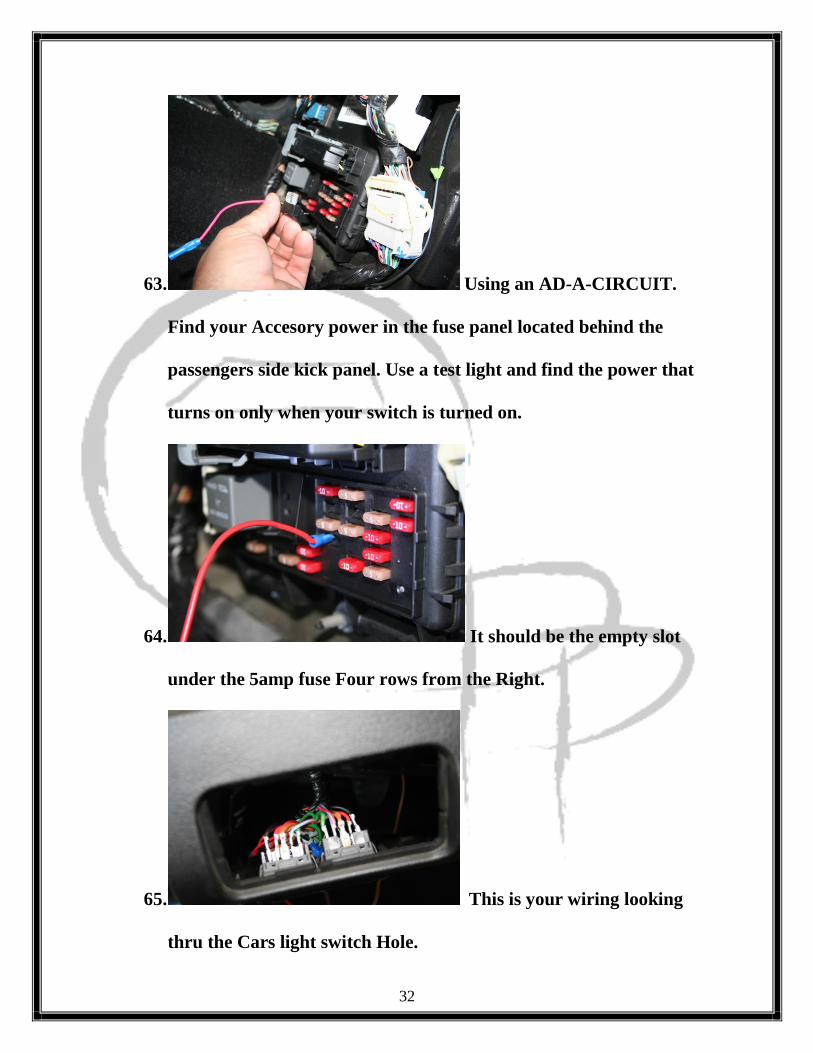
Butt Connector Crimpers
1/4” drill bit.
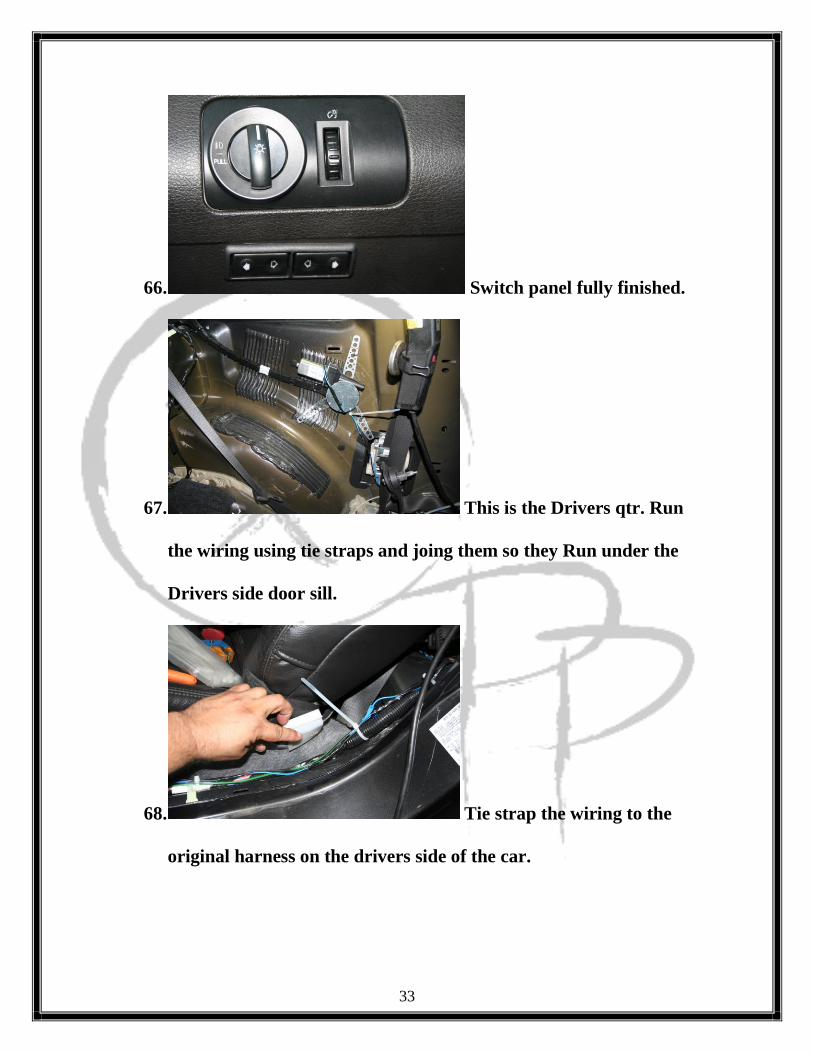
Tork bit set.
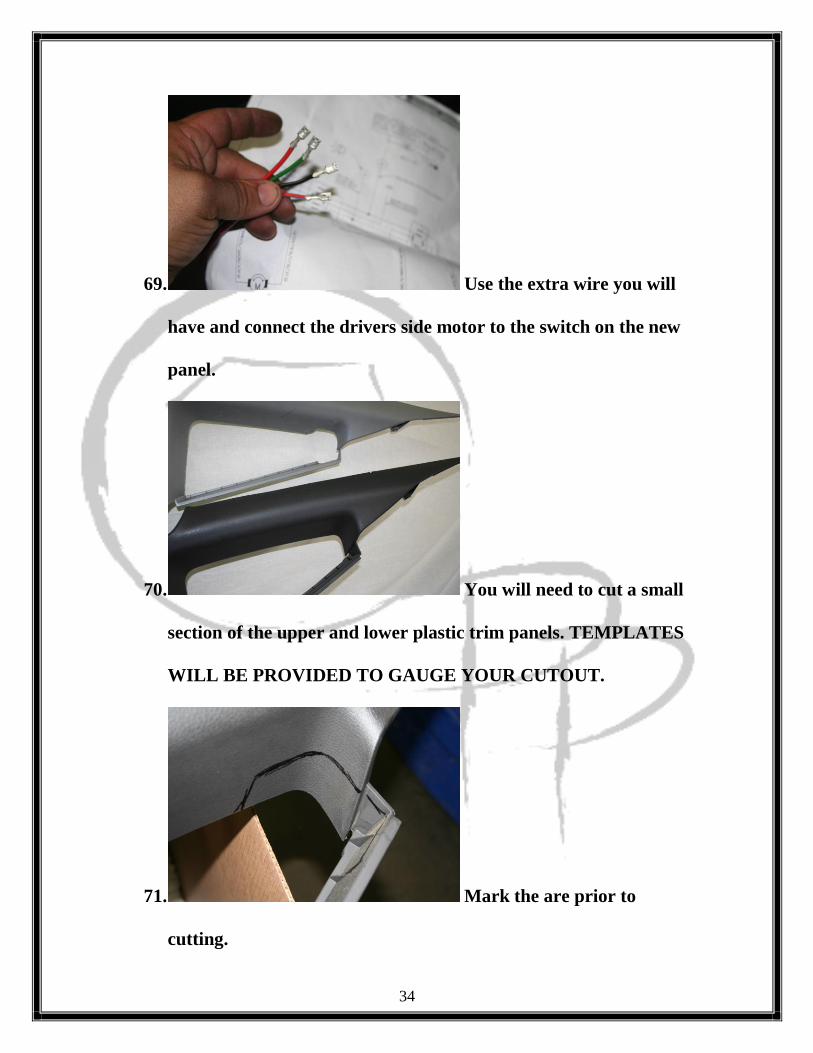
Standard socket set with ratchet.
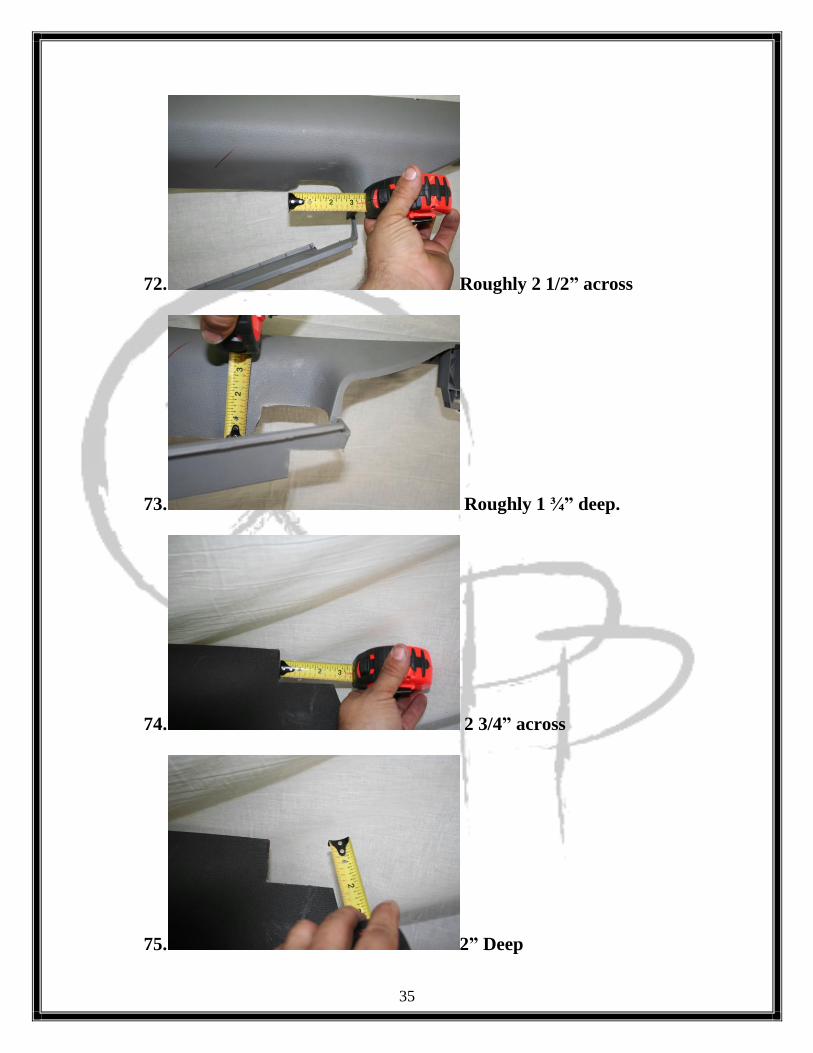
Hand rivet gun w/ various tips.
Super glue
Sheet metal shears
Utility knife w new blade
Glass cleaner with new rag.
Metal HackSaw
6-Pack – lawn chair optional for breaks.

9
Dissassembly steps
(Please remember to follow the steps carefully.)
Brief disassembling tips:
1. With both seats moved all the way forward you will need to remove
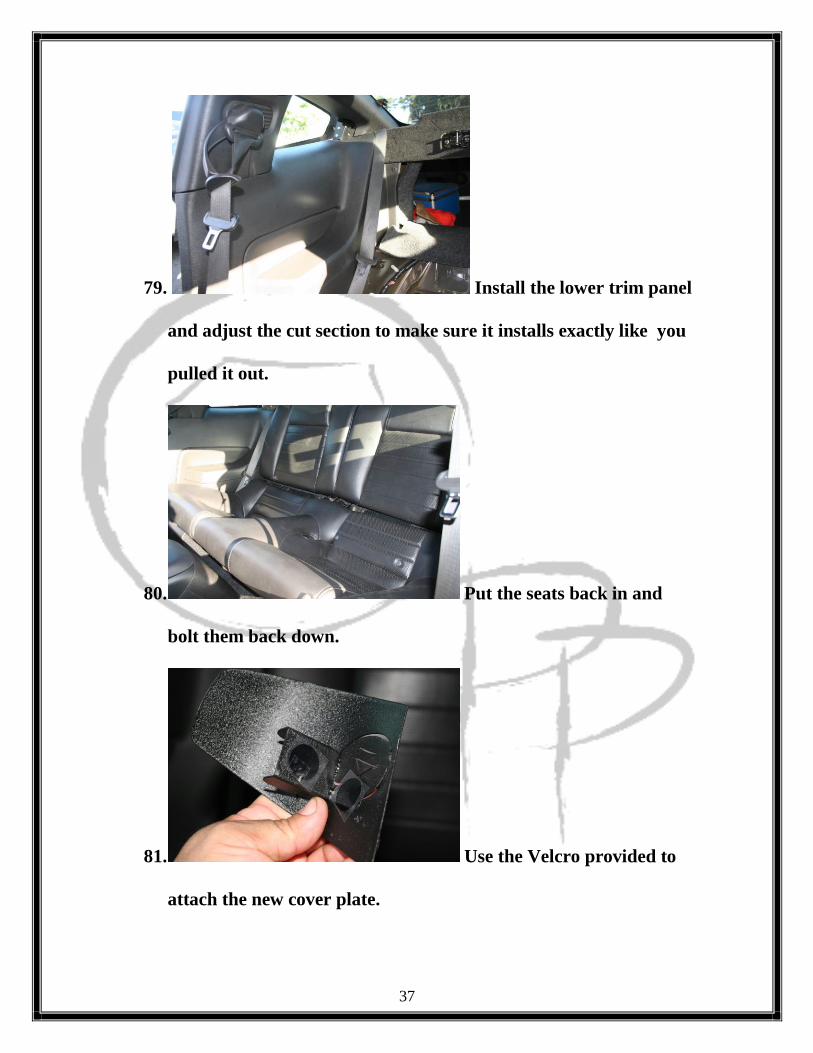
the rear interior Quarter panels, upper and lower including both back
rest and lower seat cushions. Along with the plastic door sills on both
sides of the car.
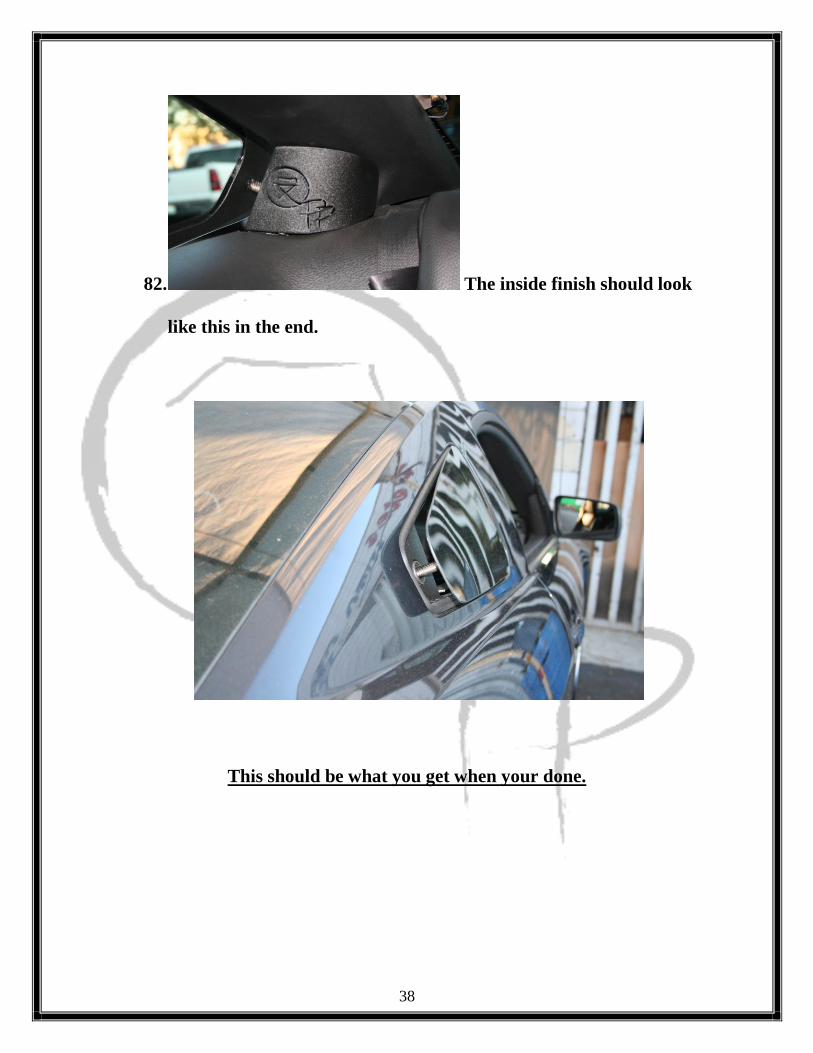
2. You will also need to remove the trim panel under the steering wheel
including the instrument cluster panel.
3. You will need to remove each original quarter glass using the braded
wire provided. ( DON’T FORGET TO USE PLENTY OF TAPE
SO AS NOT TO DAMAGE YOUR PAINT!!!)
4. Please keep in mind that if you keep the doors open for long periods
of time your battery might go dead(Keep a Battery Charger handy).

10
1. With the seat all the way
forward you can begin by removing the lower seat cushion.
2. There is a little plastic stem
under the seat press the center and pull up on the seat cushion.
There is one on each side.
3. Lift up on the seat cushion
and slide out of the car.

11
4. There are 3 bolts holding
the lower portion of the backrest.
5. Unlock the the upper rest
with the pull strap on the outside of each seat and remove back
rest from the car.
6. Using a small flat scredriver
pry back the seatbelt bolt cover.

12
7. Use your socket and ratchet
to remove seatbelt bolt.
8. Use panel removal tool to
remove Tree clips on the qtr panel located behind the backrest of
the seat and the other clip located near the foot area.
9. There is also another tree
clip under the carpet .
13
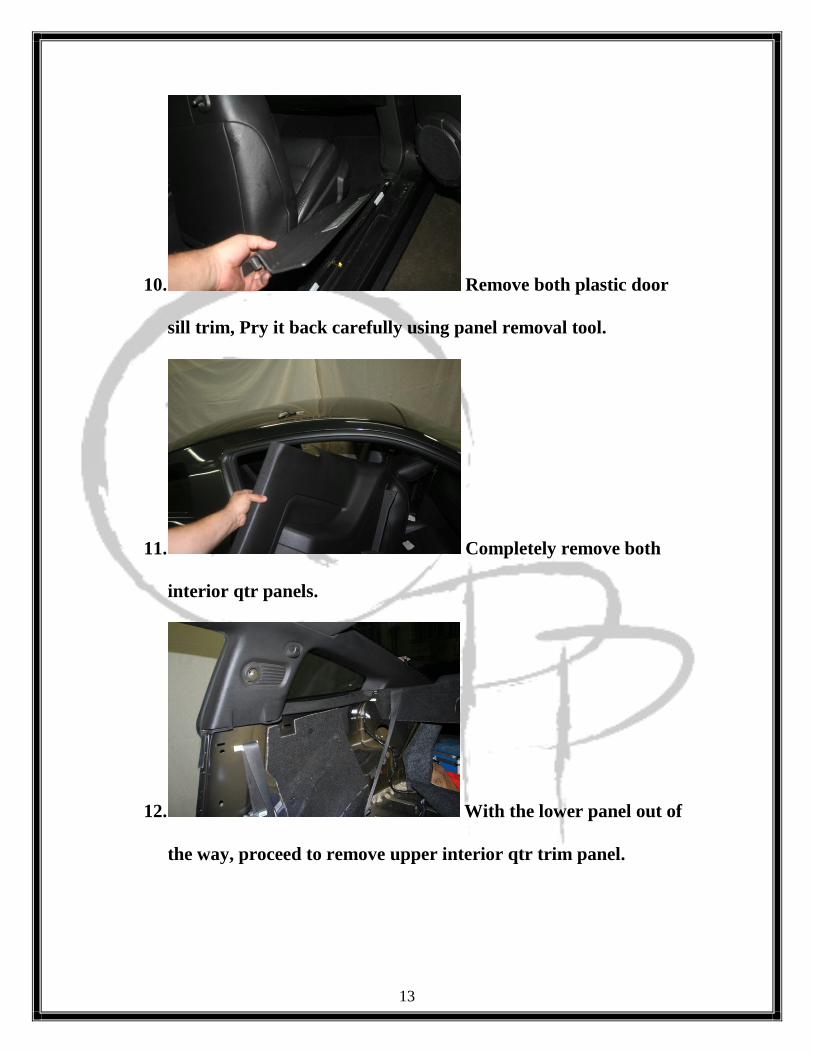
10. Remove both plastic door
sill trim, Pry it back carefully using panel removal tool.
11. Completely remove both
interior qtr panels.
12. With the lower panel out of
the way, proceed to remove upper interior qtr trim panel.

14
13. Use the small flat screwdrive
to flapdown the screw cover and remove the close hanger hook.
14. Using your hands or panel
tool pry back the clips and remove the panel.
15. Slide forward the upper
trim panel and out of the car.

15
16. Slide the masking tape into
the gap of the glass and body. Please make sure you cover all your
painted are around the glass. TAKE YOUR TIME ON THIS
STEP, YOU DON’T WANT TO SCRATCH YOUR PAINT!!!
17. Tape around the perimeter
of the glass on the body NOT ON THE GLASS.
16
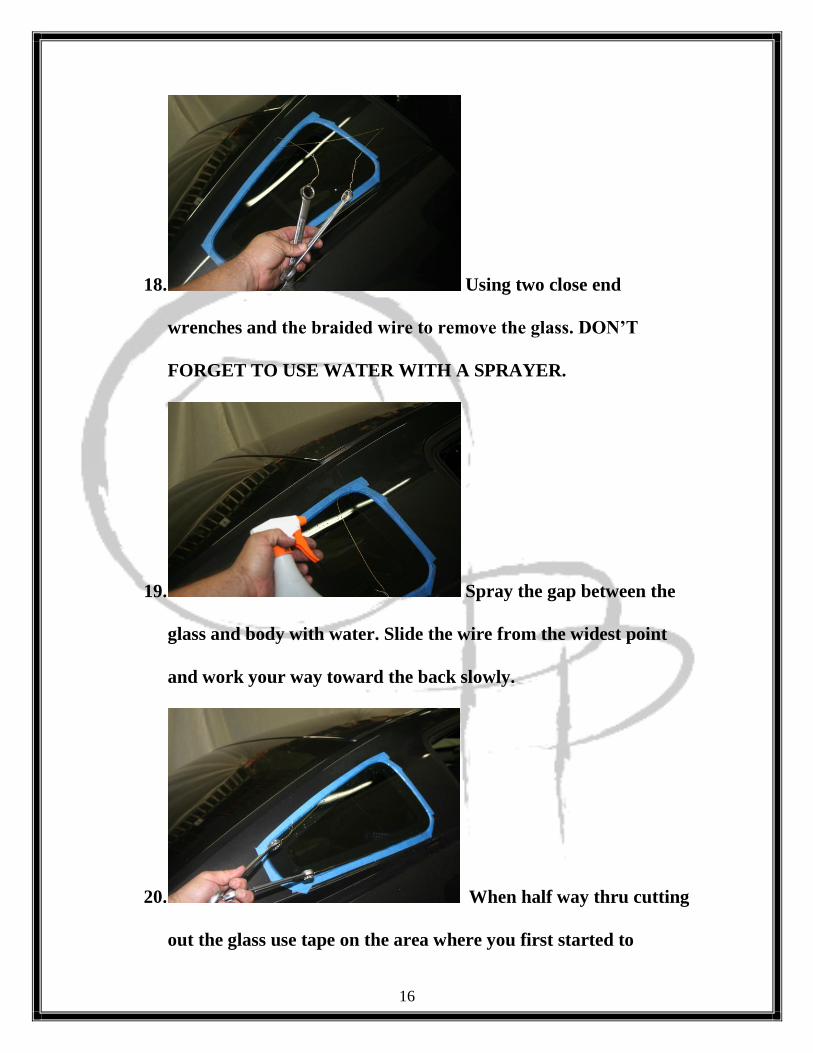
18. Using two close end
wrenches and the braided wire to remove the glass. DON’T
FORGET TO USE WATER WITH A SPRAYER.
19. Spray the gap between the
glass and body with water. Slide the wire from the widest point
and work your way toward the back slowly.
20. When half way thru cutting
out the glass use tape on the area where you first started to

17
prevent the glass from dropping when you finish the cutout
process.
21. Remove the glass.
22. Carefully scrape out all the
old glue that held the glass in place.
23. Use a brush to clean off the
residue and dirt left behind. Wipe down with rag, then use
pinchweld primer provided in the kit. Crush using your fingers
18
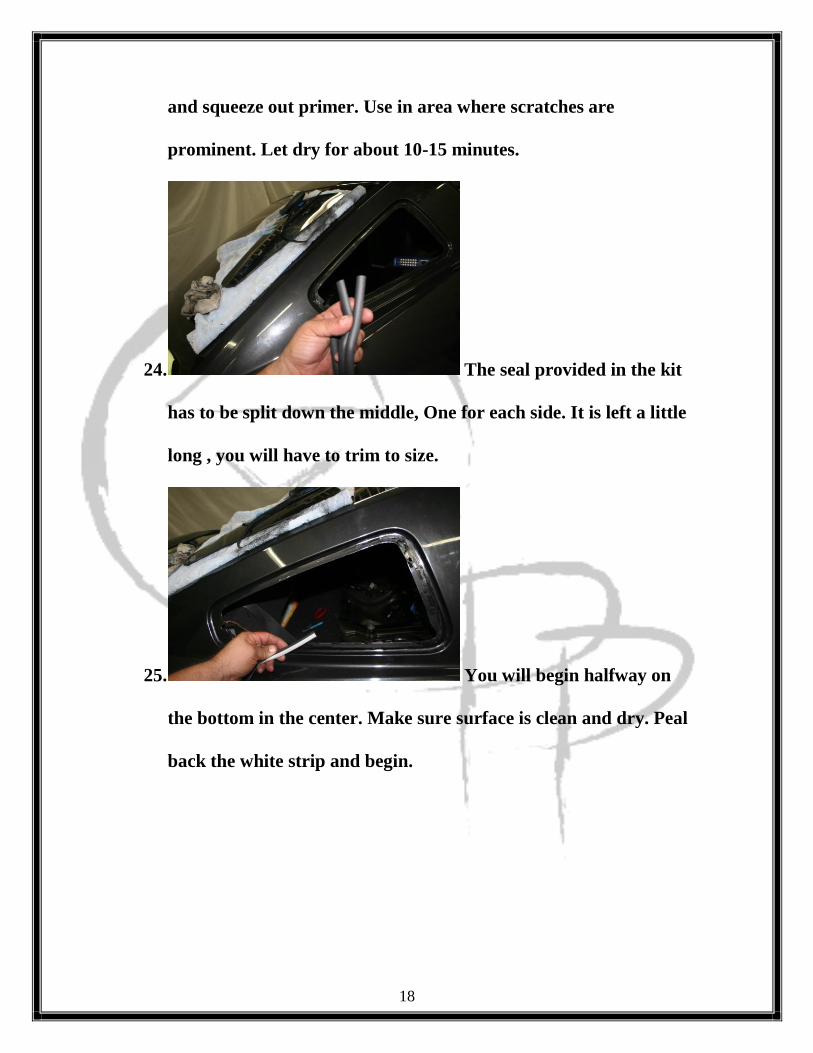
and squeeze out primer. Use in area where scratches are
prominent. Let dry for about 10-15 minutes.
24. The seal provided in the kit
has to be split down the middle, One for each side. It is left a little
long , you will have to trim to size.
25. You will begin halfway on
the bottom in the center. Make sure surface is clean and dry. Peal
back the white strip and begin.

19
26. Carefully roll around the
radius corners and continue until the meet again in the bottom
middle.
27. Using a razor blade
carefully cut the end roughly a 1/8-1/4” longer and line it up with
the beginning end.
28. You will be sliding the glass
into place.

20
29. You will need to slide the
glass into place , It will be snug so you have to slide with a little bit
of effort.
30. You will need to drill two ¼”
Holed for the new rivets.
31. Using your rivet gun,
Compress the new Rivets provided in the kit.

21
32. You will need to screw
together and preassemble the regulator using the mounting plates.
33. There are 6 screws to the
motor and 3 to the inside quarter panel sheet metal.
34. Take the Female spiral gear
and press it thru the regulator. (Outside view shown).

22
35. Screw down regulator with
center spiral gear in place for centering gear.
36. Mock fit the Spiral Gear
Lock and screw it in using 2 self tapping screws provided.
37. Screw it in to make sure it
fits and then remove it for installation later.

23
38. This step will be a little
tricky. Slide in the motor mounting bracket with regulator
screwed on thru the spiral metal gear coming from the glass. Then
Slowly Thread in the Plastic Sprial gear in place. DO NOT
SCREW DOWN YET TO QTR PANEL.
39. Using a small battery
jumper of DC POWER SOURCE. Turn the motor so that the
mounting bracket and spiral gear will self center into its
NATURAL CLOSED POSITION.
24
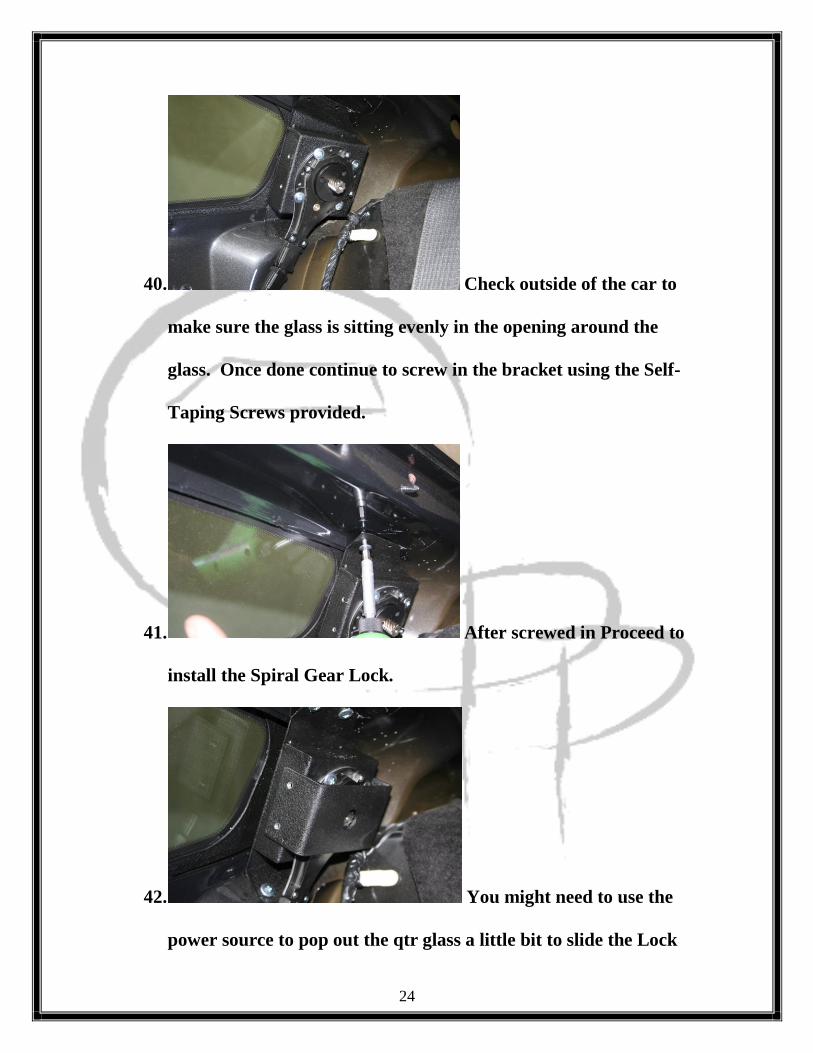
40. Check outside of the car to
make sure the glass is sitting evenly in the opening around the
glass. Once done continue to screw in the bracket using the Self-
Taping Screws provided.
41. After screwed in Proceed to
install the Spiral Gear Lock.
42. You might need to use the
power source to pop out the qtr glass a little bit to slide the Lock

25
into place.Screw it down and install the Center Long threaded
Stop into the Spiral gear using loctite to prevent from it coming
out.
43.
44. Find the natural position of
the motor and screw it down.
45. Use tie straps to run the
wiring down original wire loom.

26
46. Use a Nut Driver or your
socket set to remove the screws on the panel under the stearing wheel.
47. Use your trim panel removal
tool to remove the inside kick panels next to your E-Brake.
48. Pull it out the kick panel.

27
49. Pull out the instrument
panel cluster cover. With your plastic panel removal tool.
50. Remove the lower panel
cover and disconnect the electrical connectors behind the light
switchs.
51. Using the template provided
make sure you have a level cutting line to the light switch panel. Use a
Sharpie or marker to trace the cutout pattern for the new switchs.

28
52. Using a new utility knife or
another cutting tool, cutout the traced lines and remove it.
53. Your new cutout should look
like this.
54. The white arrow are
pointing out.
29
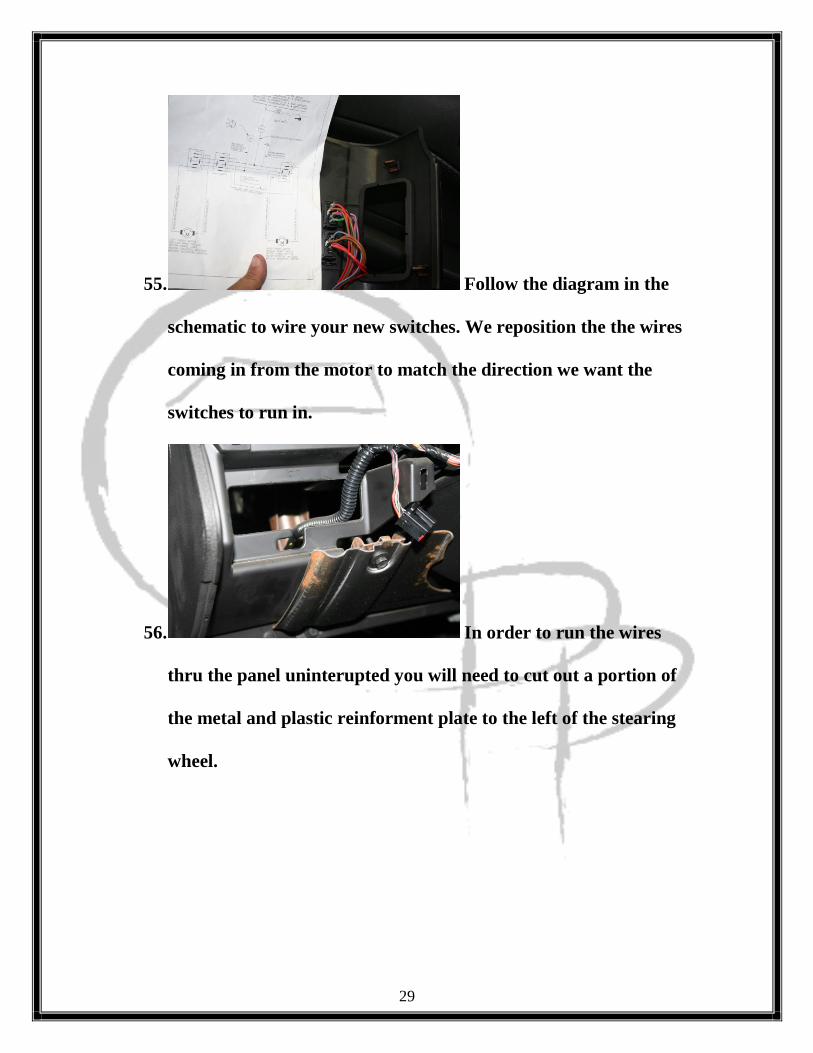
55. Follow the diagram in the
schematic to wire your new switches. We reposition the the wires
coming in from the motor to match the direction we want the
switches to run in.
56. In order to run the wires
thru the panel uninterupted you will need to cut out a portion of
the metal and plastic reinforment plate to the left of the stearing
wheel.

30
57. Use a hacksaw to cut this
portion. Cut to the first long vertical crease next to the mounting
hole.
58. This is how it should look.
MAKE SURE THE WIRES CLEAR COMPLETELY.
59. Cut the plastic aswell to
clear a path for the wiring andremove.
31
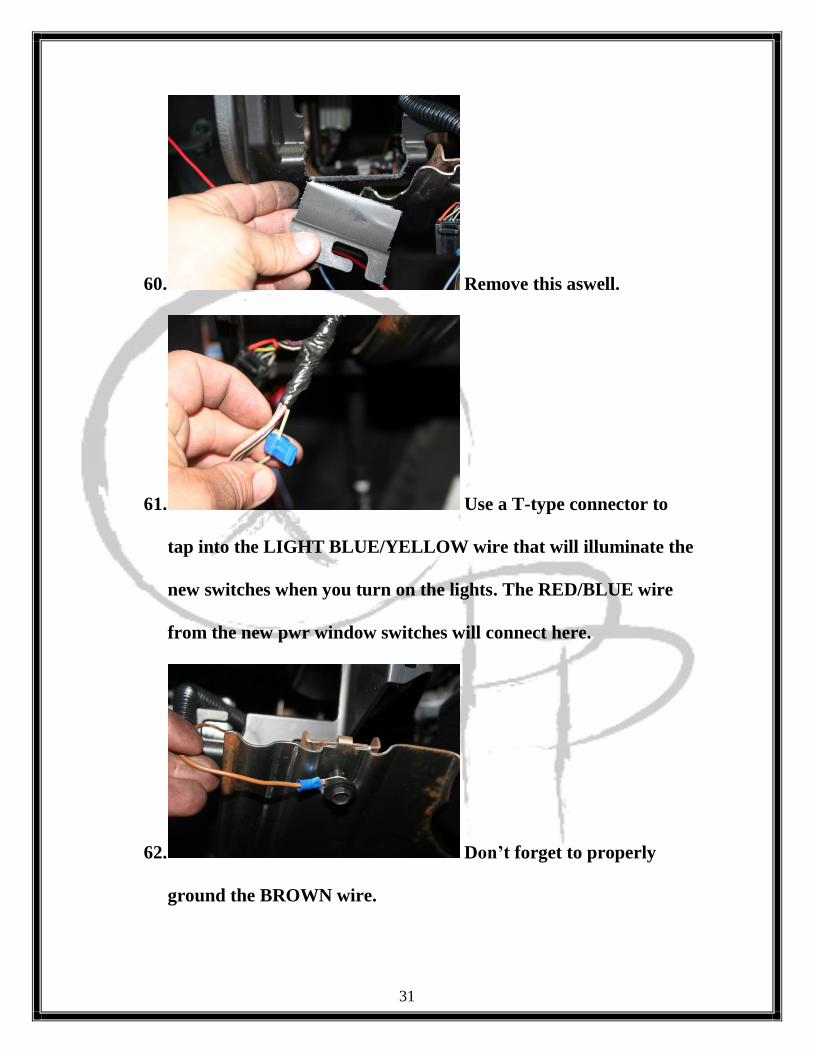
60. Remove this aswell.
61. Use a T-type connector to
tap into the LIGHT BLUE/YELLOW wire that will illuminate the
new switches when you turn on the lights. The RED/BLUE wire
from the new pwr window switches will connect here.
62. Don’t forget to properly
ground the BROWN wire.
32
63. Using an AD-A-CIRCUIT.
Find your Accesory power in the fuse panel located behind the
passengers side kick panel. Use a test light and find the power that
turns on only when your switch is turned on.
64. It should be the empty slot
under the 5amp fuse Four rows from the Right.
65. This is your wiring looking
thru the Cars light switch Hole.
33
66. Switch panel fully finished.
67. This is the Drivers qtr. Run
the wiring using tie straps and joing them so they Run under the
Drivers side door sill.
68. Tie strap the wiring to the
original harness on the drivers side of the car.
34
69. Use the extra wire you will
have and connect the drivers side motor to the switch on the new
panel.
70. You will need to cut a small
section of the upper and lower plastic trim panels. TEMPLATES
WILL BE PROVIDED TO GAUGE YOUR CUTOUT.
71. Mark the are prior to
cutting.
35
72. Roughly 2 1/2” across
73. Roughly 1 ¾” deep.
74. 2 3/4” across
75. 2” Deep

36
76. Cut out the foam that will
be directly in the way of the new motor if not taken out.
77. Use a long type blade to
make cutting this section easier.
78. Install the upper trim panel
and adjust the cuts if needed. YOU CAN INSTALL THE NEW
LONG TREADED PHILLIPS BOLT INTO THE SPIRAL GEAR
THAT SERVES AS A STOP FOR THE GLASS(USE LOCTITE).
37
79. Install the lower trim panel
and adjust the cut section to make sure it installs exactly like you
pulled it out.
80. Put the seats back in and
bolt them back down.
81. Use the Velcro provided to
attach the new cover plate.
38
82. The inside finish should look
like this in the end.
This should be what you get when your done.

39
CONGRATULATIONS!!
40
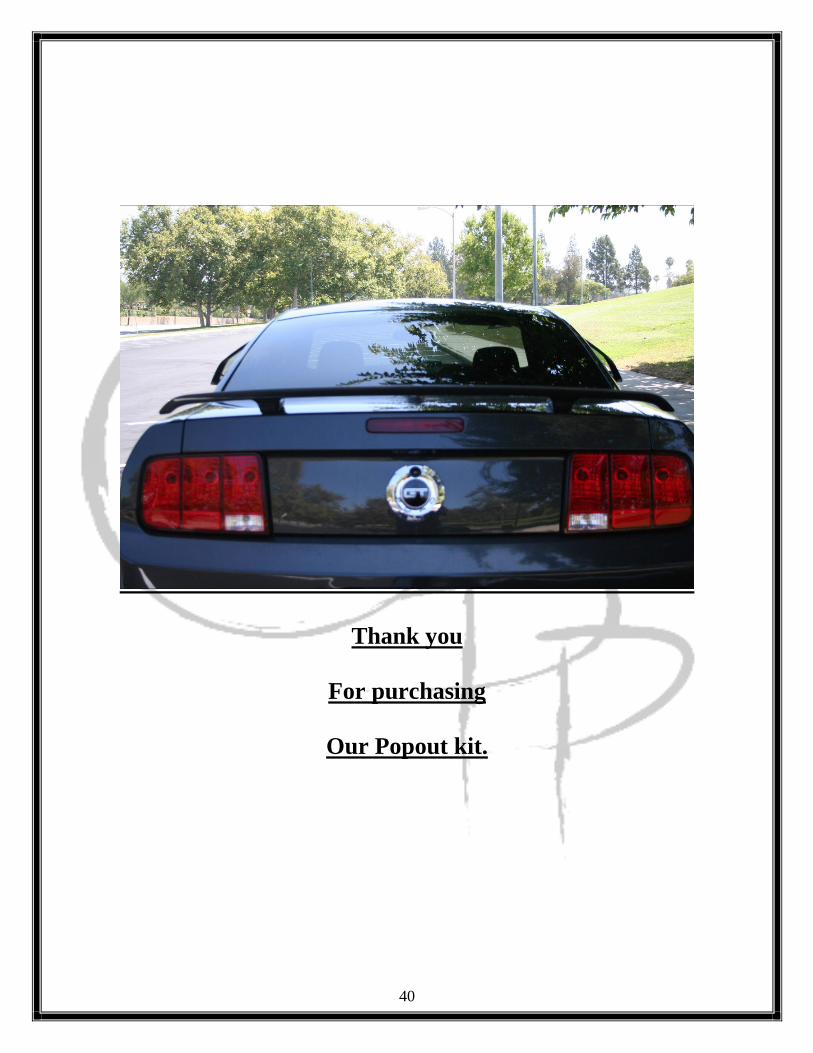
Thank you
For purchasing
Our Popout kit.

41