Embed Size (px)
Citation preview
1
oing It With Dough
Welcome to the world of dough sculpture!
If you’re new to this popular creative activity, you’ll find that dough sculptureis not only great fun, but easy and inexpensive, too.
If you’re an old hand at dough art, this handbook will provide you withhundreds of new ideas for decorating with dough.
Whether you’re a novice or pro, this book can show you and your family howto put together lots of useful decorations for home, holidays, and gift-giving. Thenyou can let your imagination go, and create your own original works of art.
When you’ve discovered the joys of doughing-it-yourself, you may want toorder the first book in this series, “The Dough-It-Yourself® Handbook.” An orderform can be found on the insert in this book.
But right now, let’s step into the kitchen. Probably everything you’ll need isalready there, just waiting to mold or shape your ideas.
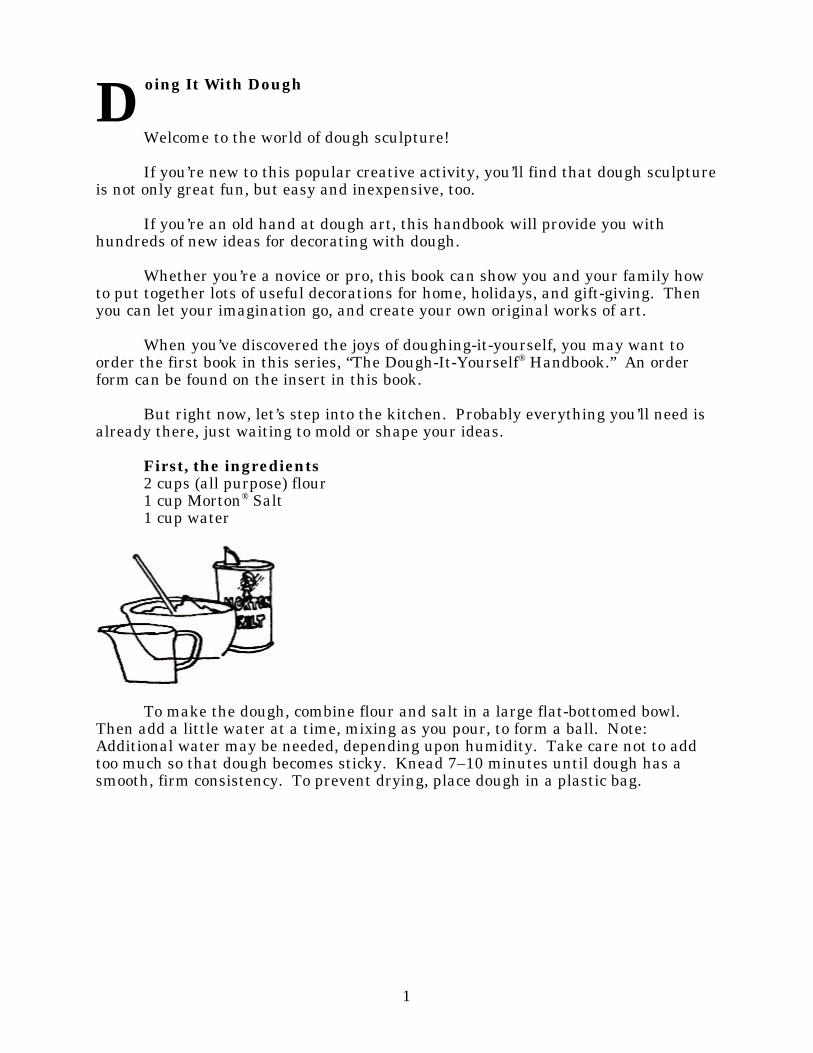
First, the ingredients2 cups (all purpose) flour1 cup Morton® Salt1 cup water
To make the dough, combine flour and salt in a large flat-bottomed bowl.Then add a little water at a time, mixing as you pour, to form a ball. Note:Additional water may be needed, depending upon humidity. Take care not to addtoo much so that dough becomes sticky. Knead 7–10 minutes until dough has asmooth, firm consistency. To prevent drying, place dough in a plastic bag.
D

2
Important: Before you begin, here’s a word to the wise. With this recipe fordough sculpture, you can make all sorts of dreamy creations that look good enough toeat. Let us remind you that these creations are art, not food. For that reason, weurge: “Please don’t eat the art.”
Now let’s go through the drawers and cupboards for the tools you’ll need foryour new creative pastime. Bet you’ll have most of these already:
Aluminum foil Melon ball shaperBasting brush Pizza cutterButter knife Rolling pinCandle, gelatin, and candy molds Skewers and nailsCookie and aspic cutters SpoonsCookie sheets ToothpicksForks Water color brushesGarlic press Wax paper
If you want to get fancy, you may pick up inexpensive clay modeling tools atlocal craft shops or hobby stores. (Please see that small children are alwayssupervised when using sharp or pointed objects.)
3
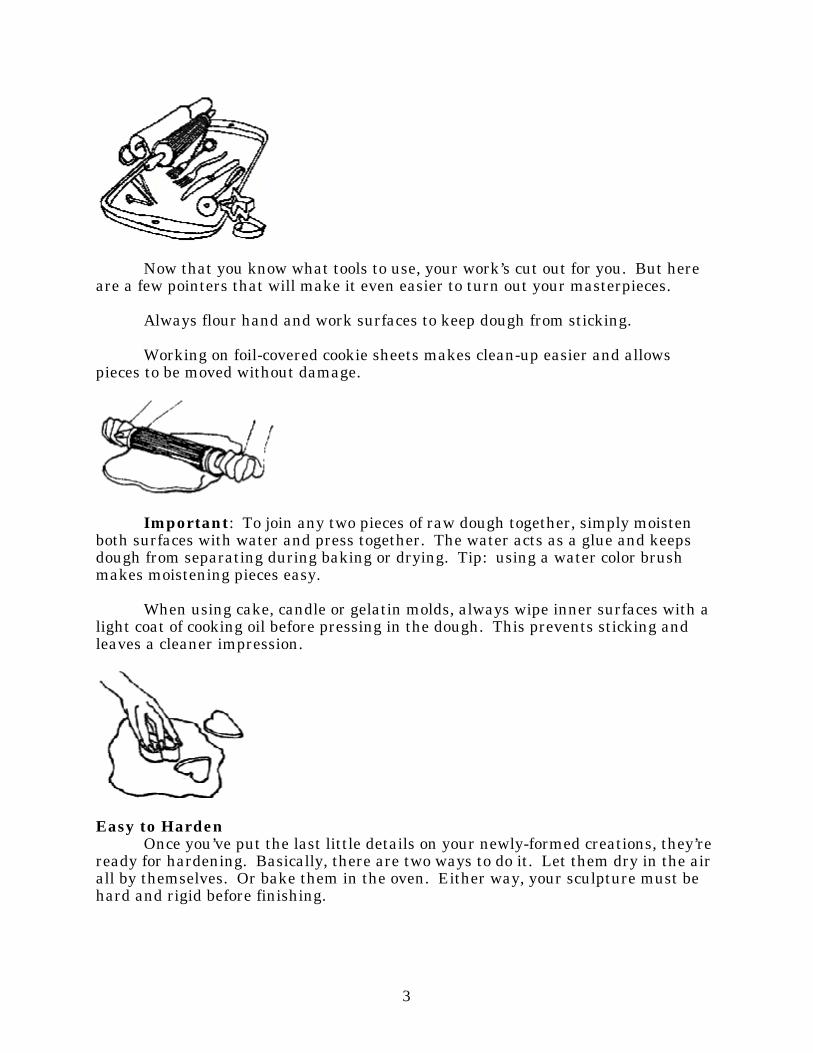
Now that you know what tools to use, your work’s cut out for you. But hereare a few pointers that will make it even easier to turn out your masterpieces.
Always flour hand and work surfaces to keep dough from sticking.
Working on foil-covered cookie sheets makes clean-up easier and allowspieces to be moved without damage.
Important: To join any two pieces of raw dough together, simply moistenboth surfaces with water and press together. The water acts as a glue and keepsdough from separating during baking or drying. Tip: using a water color brushmakes moistening pieces easy.
When using cake, candle or gelatin molds, always wipe inner surfaces with alight coat of cooking oil before pressing in the dough. This prevents sticking andleaves a cleaner impression.
Easy to HardenOnce you’ve put the last little details on your newly-formed creations, they’re
ready for hardening. Basically, there are two ways to do it. Let them dry in the airall by themselves. Or bake them in the oven. Either way, your sculpture must behard and rigid before finishing.
4
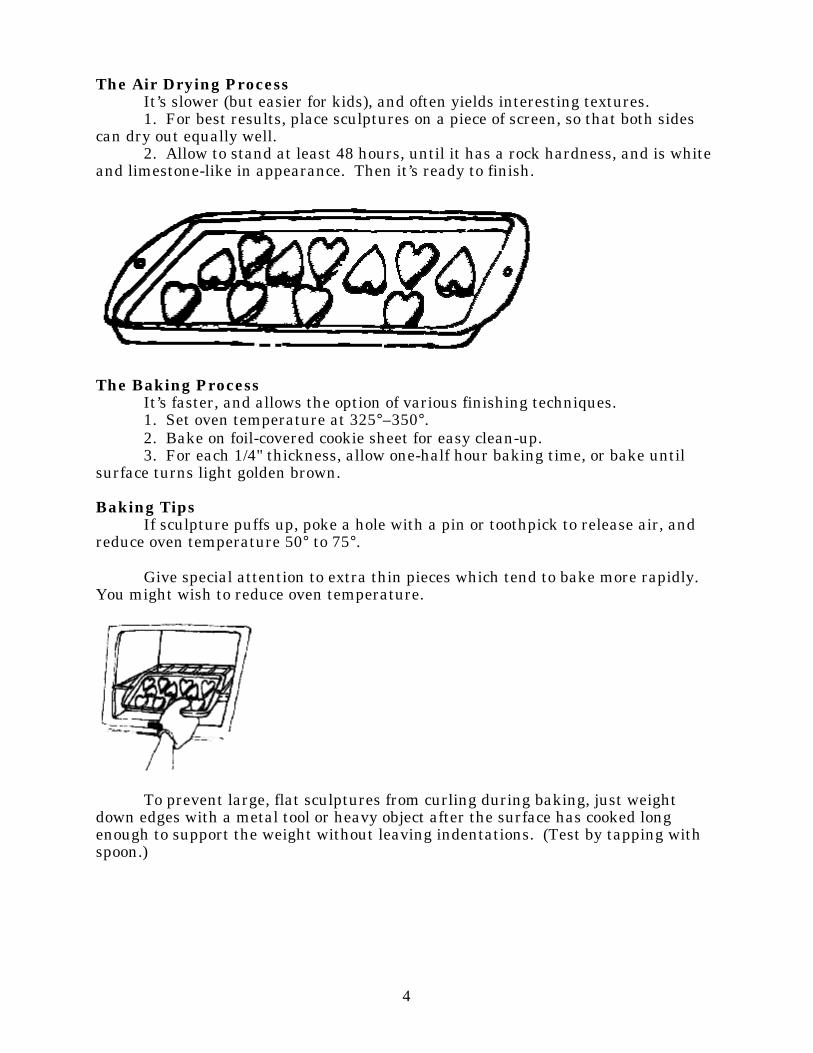
The Air Drying ProcessIt’s slower (but easier for kids), and often yields interesting textures.1. For best results, place sculptures on a piece of screen, so that both sides
can dry out equally well.2. Allow to stand at least 48 hours, until it has a rock hardness, and is white
and limestone-like in appearance. Then it’s ready to finish.
The Baking ProcessIt’s faster, and allows the option of various finishing techniques.1. Set oven temperature at 325°–350°.2. Bake on foil-covered cookie sheet for easy clean-up.3. For each 1/4" thickness, allow one-half hour baking time, or bake until
surface turns light golden brown.
Baking TipsIf sculpture puffs up, poke a hole with a pin or toothpick to release air, and
reduce oven temperature 50° to 75°.
Give special attention to extra thin pieces which tend to bake more rapidly.You might wish to reduce oven temperature.
To prevent large, flat sculptures from curling during baking, just weightdown edges with a metal tool or heavy object after the surface has cooked longenough to support the weight without leaving indentations. (Test by tapping withspoon.)
5
Now For the Big FinishAfter you’ve properly dried or baked your creation, it’s time to finish it off
right. There are several methods to choose from.Different types of paints each produce their own interesting effects. Try your
hand at water colors, spray paints, acrylics, or enamels. Want a marbled look? Justadd food coloring to the dough while you’re kneading it. For uniform color, applyfood coloring to the water. There are even some more types of finishes you canapply during the baking process (such as egg or canned milk glazes).
Note: All dough sculptures require protection against moisture. Most paints(except water colors) provide sufficient seal by themselves. Make sure that piecesare completely sealed with paint, or that both sides of all sculptures are coveredwith a coat of shellac, acrylic sealer, lacquer, or varnish.
Listed here are common finishing effects that you can produce.
1. Natural finish. Just air dry piece for 48 hours. Varnish.2. Antique finish. First give the piece two coats of acrylic lacquer, then
stain it with a commercial wood stain. After allowing the stain to dry a fewminutes, rub the surface with a soft cloth for a high-lighted effect. Finally, varnishit. (For glossier finishes, apply acrylic clear gloss.)
3. Water color finish. After painting a piece with water colors, dry piecethoroughly, then add a coat of varnish.
4. Acrylic paint finish. A base coat of white acrylic paint is applied to thepiece, followed by a second coat of any color of your choice. (If a transparent color isdesired, add small amounts of color to acrylic medium. The less color used, themore transparent the paint.) Since acrylic paint seals a sculpture, no final coat ofvarnish is needed.
5. Baked finish. Simply bake the piece until it’s golden brown. Then give ita coat of shellac or varnish.
6. Metallic finish. Use a rub-on metallic copper finish for an interestinghighlighted effect.
(Gold, silver and bronze finishes can also be used to achieve similar effects.)Afterward, give the piece a coat of varnish.
6
7. Egg finish. After baking a piece about 15 minutes, remove it from theoven and baste it with whole, beaten egg. Return the piece to the oven until it isdone. (For a darker finish, rebaste every 10 or 15 minutes.) Varnish when cool.Note: Canned milk can be used instead of, or even mixed with, egg to give a similardark brown finish.
After finishing, try a variety of final touches. By gluing on buttons,rhinestones, seeds, sequins, shells, or bits of pasta, you can achieve unusual andexciting effects. In fact, you can do just about anything to your dough sculpture,except eat it!
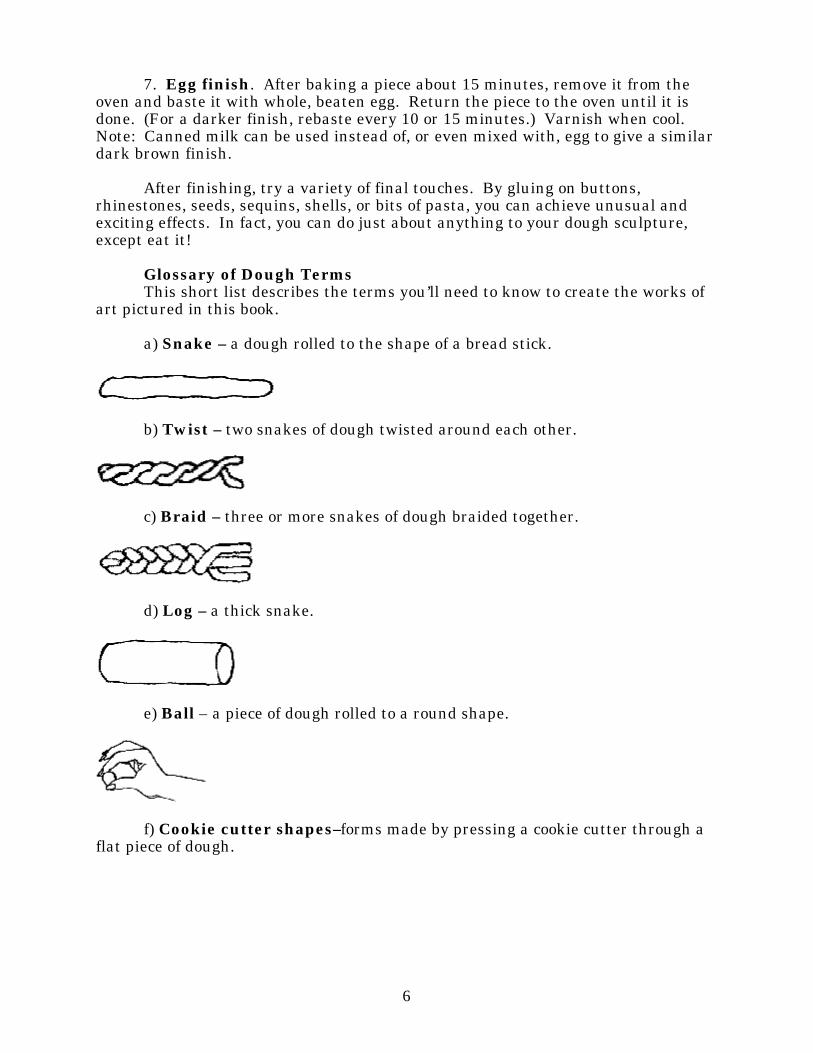
Glossary of Dough TermsThis short list describes the terms you’ll need to know to create the works of
art pictured in this book.
a) Snake – a dough rolled to the shape of a bread stick.
b) Twist – two snakes of dough twisted around each other.
c) Braid – three or more snakes of dough braided together.
d) Log – a thick snake.
e) Ball – a piece of dough rolled to a round shape.
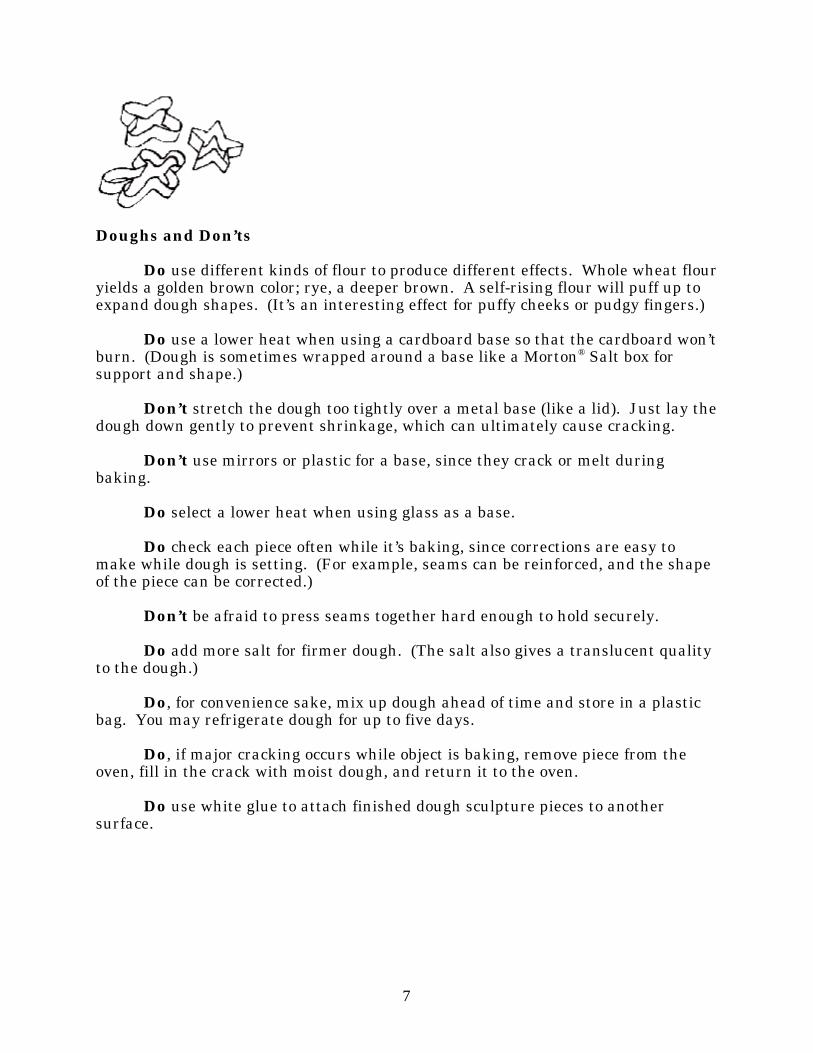
f) Cookie cutter shapes–forms made by pressing a cookie cutter through aflat piece of dough.
7
Doughs and Don’ts
Do use different kinds of flour to produce different effects. Whole wheat flouryields a golden brown color; rye, a deeper brown. A self-rising flour will puff up toexpand dough shapes. (It’s an interesting effect for puffy cheeks or pudgy fingers.)
Do use a lower heat when using a cardboard base so that the cardboard won’tburn. (Dough is sometimes wrapped around a base like a Morton® Salt box forsupport and shape.)
Don’t stretch the dough too tightly over a metal base (like a lid). Just lay thedough down gently to prevent shrinkage, which can ultimately cause cracking.
Don’t use mirrors or plastic for a base, since they crack or melt duringbaking.
Do select a lower heat when using glass as a base.
Do check each piece often while it’s baking, since corrections are easy tomake while dough is setting. (For example, seams can be reinforced, and the shapeof the piece can be corrected.)
Don’t be afraid to press seams together hard enough to hold securely.
Do add more salt for firmer dough. (The salt also gives a translucent qualityto the dough.)
Do, for convenience sake, mix up dough ahead of time and store in a plasticbag. You may refrigerate dough for up to five days.
Do, if major cracking occurs while object is baking, remove piece from theoven, fill in the crack with moist dough, and return it to the oven.
Do use white glue to attach finished dough sculpture pieces to anothersurface.
8
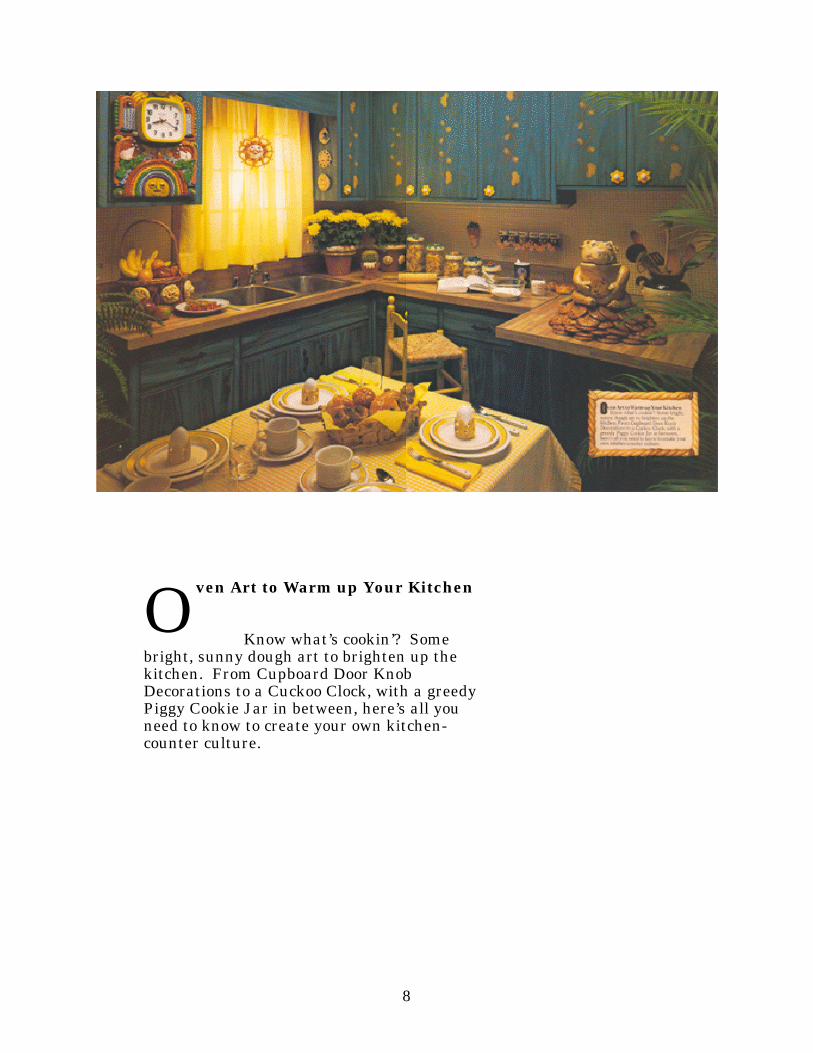
ven Art to Warm up Your Kitchen
Know what’s cookin’? Somebright, sunny dough art to brighten up thekitchen. From Cupboard Door KnobDecorations to a Cuckoo Clock, with a greedyPiggy Cookie Jar in between, here’s all youneed to know to create your own kitchen-counter culture.
O
9
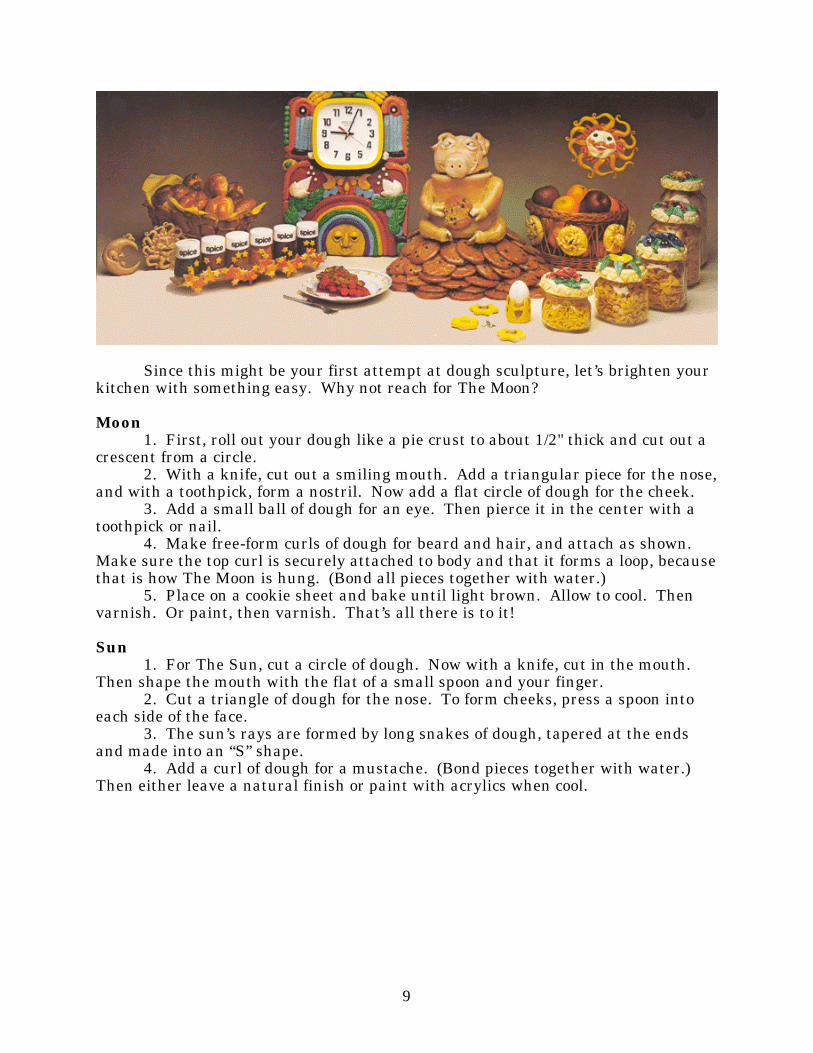
Since this might be your first attempt at dough sculpture, let’s brighten yourkitchen with something easy. Why not reach for The Moon?
Moon1. First, roll out your dough like a pie crust to about 1/2" thick and cut out a
crescent from a circle.2. With a knife, cut out a smiling mouth. Add a triangular piece for the nose,
and with a toothpick, form a nostril. Now add a flat circle of dough for the cheek.3. Add a small ball of dough for an eye. Then pierce it in the center with a
toothpick or nail.4. Make free-form curls of dough for beard and hair, and attach as shown.
Make sure the top curl is securely attached to body and that it forms a loop, becausethat is how The Moon is hung. (Bond all pieces together with water.)
5. Place on a cookie sheet and bake until light brown. Allow to cool. Thenvarnish. Or paint, then varnish. That’s all there is to it!
Sun1. For The Sun, cut a circle of dough. Now with a knife, cut in the mouth.
Then shape the mouth with the flat of a small spoon and your finger.2. Cut a triangle of dough for the nose. To form cheeks, press a spoon into
each side of the face.3. The sun’s rays are formed by long snakes of dough, tapered at the ends
and made into an “S” shape.4. Add a curl of dough for a mustache. (Bond pieces together with water.)
Then either leave a natural finish or paint with acrylics when cool.
10
Spice RackTo make The Spice Rack, roll your dough to about 1/4” thick, then cut out stars
from two sizes of cookie cutters. Moisten and assemble in a random pattern. Bakeflat on cookie sheet. Paint and varnish. Then use glue to attach the entire starassembly to the rack.
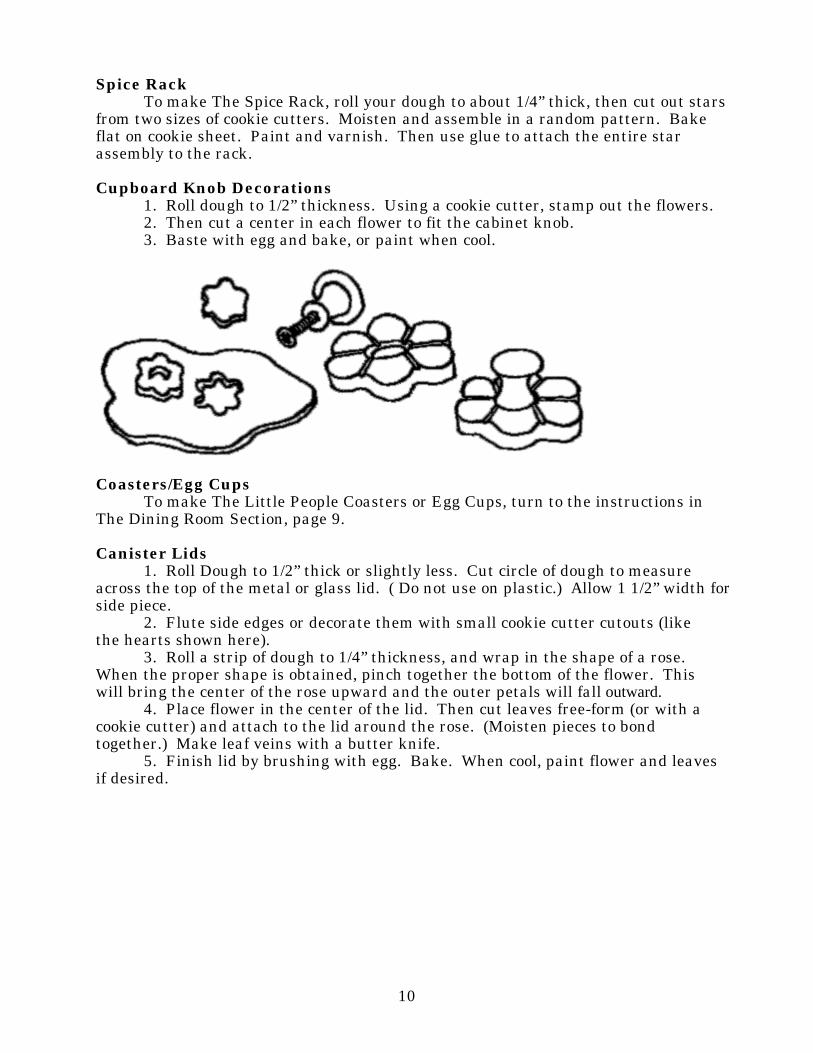
Cupboard Knob Decorations1. Roll dough to 1/2” thickness. Using a cookie cutter, stamp out the flowers.2. Then cut a center in each flower to fit the cabinet knob.3. Baste with egg and bake, or paint when cool.
Coasters/Egg CupsTo make The Little People Coasters or Egg Cups, turn to the instructions in
The Dining Room Section, page 9.
Canister Lids1. Roll Dough to 1/2” thick or slightly less. Cut circle of dough to measure
across the top of the metal or glass lid. ( Do not use on plastic.) Allow 1 1/2” width forside piece.
2. Flute side edges or decorate them with small cookie cutter cutouts (likethe hearts shown here).
3. Roll a strip of dough to 1/4” thickness, and wrap in the shape of a rose.When the proper shape is obtained, pinch together the bottom of the flower. Thiswill bring the center of the rose upward and the outer petals will fall outward.
4. Place flower in the center of the lid. Then cut leaves free-form (or with acookie cutter) and attach to the lid around the rose. (Moisten pieces to bondtogether.) Make leaf veins with a butter knife.
5. Finish lid by brushing with egg. Bake. When cool, paint flower and leavesif desired.
11
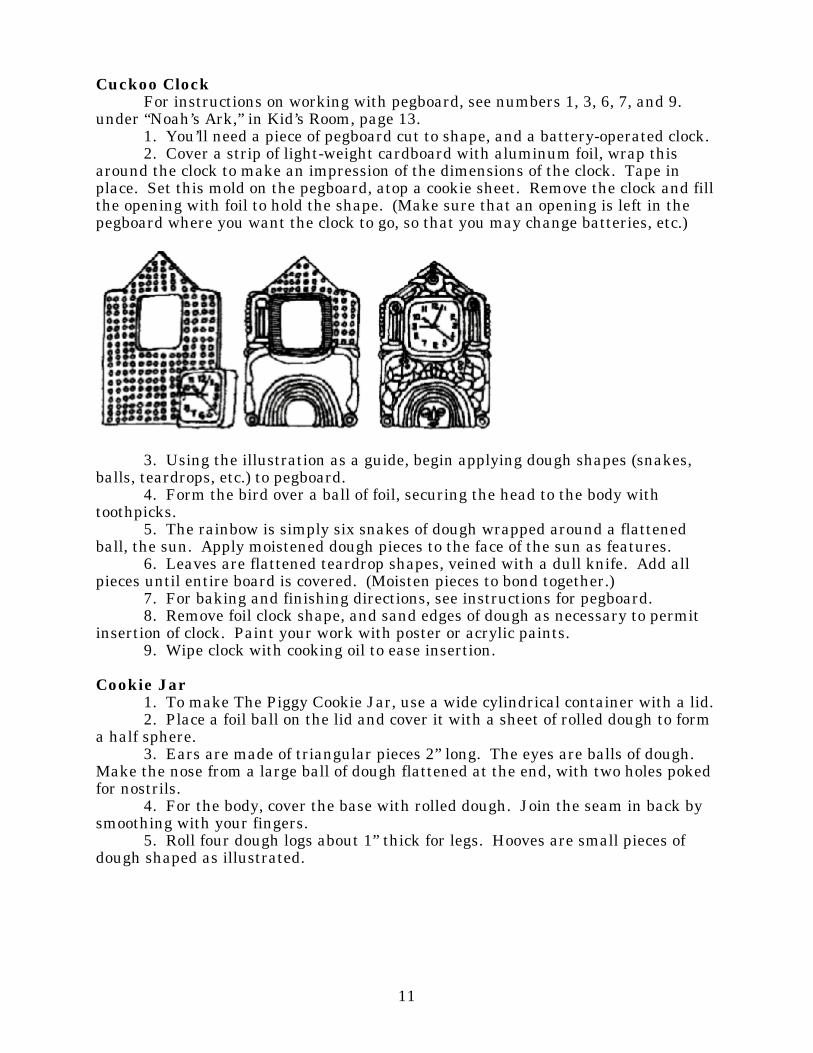
Cuckoo ClockFor instructions on working with pegboard, see numbers 1, 3, 6, 7, and 9.
under “Noah’s Ark,” in Kid’s Room, page 13.1. You’ll need a piece of pegboard cut to shape, and a battery-operated clock.2. Cover a strip of light-weight cardboard with aluminum foil, wrap this
around the clock to make an impression of the dimensions of the clock. Tape inplace. Set this mold on the pegboard, atop a cookie sheet. Remove the clock and fillthe opening with foil to hold the shape. (Make sure that an opening is left in thepegboard where you want the clock to go, so that you may change batteries, etc.)
3. Using the illustration as a guide, begin applying dough shapes (snakes,balls, teardrops, etc.) to pegboard.
4. Form the bird over a ball of foil, securing the head to the body withtoothpicks.
5. The rainbow is simply six snakes of dough wrapped around a flattenedball, the sun. Apply moistened dough pieces to the face of the sun as features.
6. Leaves are flattened teardrop shapes, veined with a dull knife. Add allpieces until entire board is covered. (Moisten pieces to bond together.)
7. For baking and finishing directions, see instructions for pegboard.8. Remove foil clock shape, and sand edges of dough as necessary to permit
insertion of clock. Paint your work with poster or acrylic paints.9. Wipe clock with cooking oil to ease insertion.
Cookie Jar1. To make The Piggy Cookie Jar, use a wide cylindrical container with a lid.2. Place a foil ball on the lid and cover it with a sheet of rolled dough to form
a half sphere.3. Ears are made of triangular pieces 2” long. The eyes are balls of dough.
Make the nose from a large ball of dough flattened at the end, with two holes pokedfor nostrils.
4. For the body, cover the base with rolled dough. Join the seam in back bysmoothing with your fingers.
5. Roll four dough logs about 1” thick for legs. Hooves are small pieces ofdough shaped as illustrated.

12
6. Place your Pig (head separate from body) on a cookie sheet and bake at325° from 1 1/2 to 2 hours or until hard. Varnish when cool.
7. If you wish, add a batch of real cookies as a base. Glue the cookies in placeand finish with decoupage varnish. Take a bite out of one cookie, and glue it intoyour finished Piggy’s hand.
Basket DecorationsIn order to make The Basket Decorations, simply follow directions for
Canister Lids. Improvise your own leaves and flowers.
13
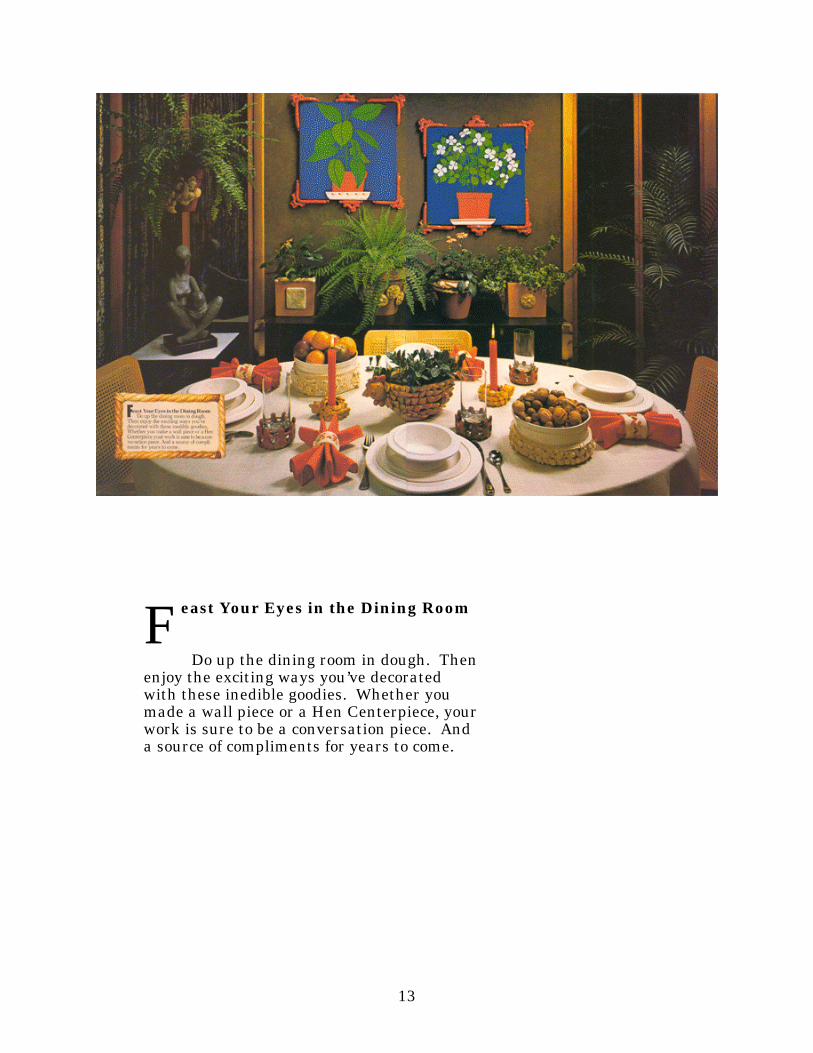
east Your Eyes in the Dining Room
Do up the dining room in dough. Thenenjoy the exciting ways you’ve decoratedwith these inedible goodies. Whether youmade a wall piece or a Hen Centerpiece, yourwork is sure to be a conversation piece. Anda source of compliments for years to come.
F
14
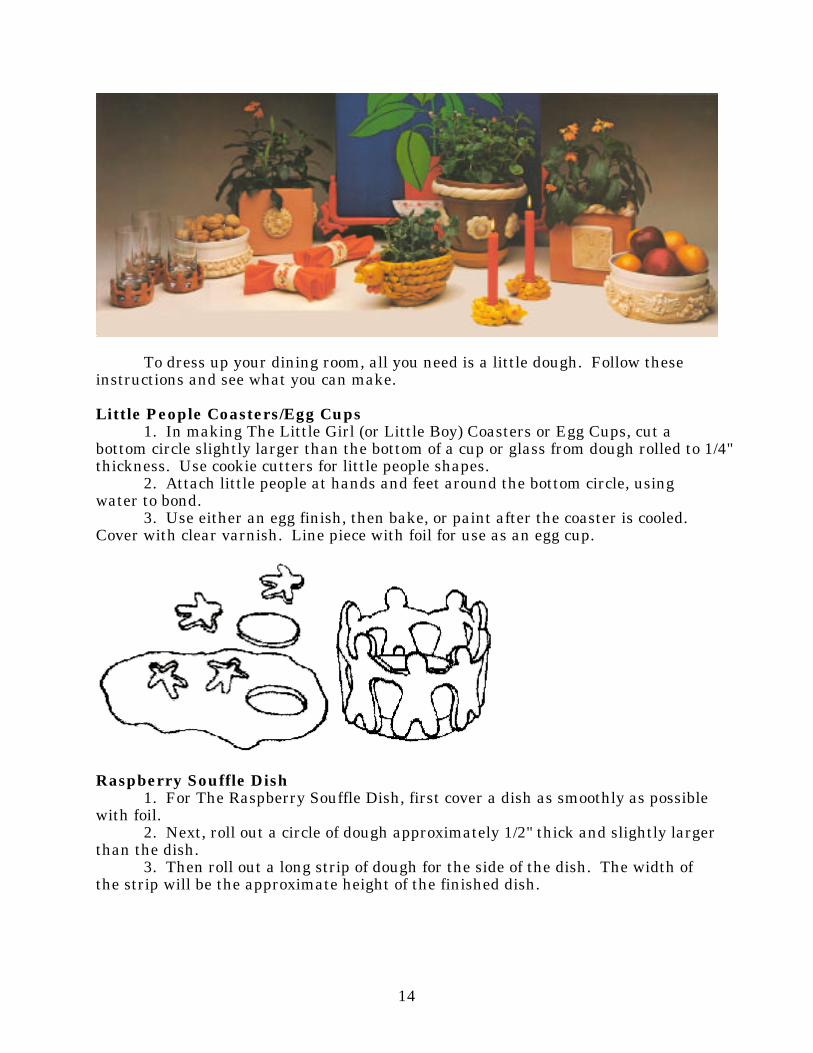
To dress up your dining room, all you need is a little dough. Follow theseinstructions and see what you can make.
Little People Coasters/Egg Cups1. In making The Little Girl (or Little Boy) Coasters or Egg Cups, cut a
bottom circle slightly larger than the bottom of a cup or glass from dough rolled to 1/4"thickness. Use cookie cutters for little people shapes.
2. Attach little people at hands and feet around the bottom circle, usingwater to bond.
3. Use either an egg finish, then bake, or paint after the coaster is cooled.Cover with clear varnish. Line piece with foil for use as an egg cup.
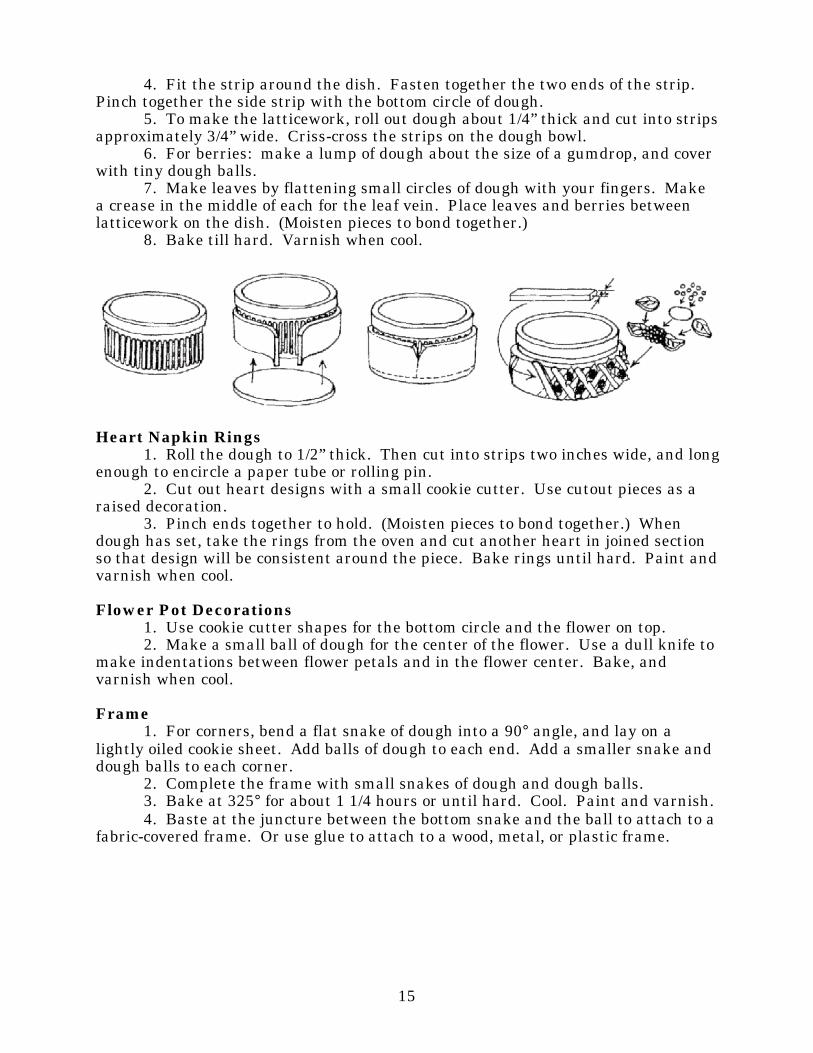
Raspberry Souffle Dish1. For The Raspberry Souffle Dish, first cover a dish as smoothly as possible
with foil.2. Next, roll out a circle of dough approximately 1/2" thick and slightly larger
than the dish.3. Then roll out a long strip of dough for the side of the dish. The width of
the strip will be the approximate height of the finished dish.
15
4. Fit the strip around the dish. Fasten together the two ends of the strip.Pinch together the side strip with the bottom circle of dough.
5. To make the latticework, roll out dough about 1/4” thick and cut into stripsapproximately 3/4” wide. Criss-cross the strips on the dough bowl.
6. For berries: make a lump of dough about the size of a gumdrop, and coverwith tiny dough balls.
7. Make leaves by flattening small circles of dough with your fingers. Makea crease in the middle of each for the leaf vein. Place leaves and berries betweenlatticework on the dish. (Moisten pieces to bond together.)
8. Bake till hard. Varnish when cool.
Heart Napkin Rings1. Roll the dough to 1/2” thick. Then cut into strips two inches wide, and long
enough to encircle a paper tube or rolling pin.2. Cut out heart designs with a small cookie cutter. Use cutout pieces as a
raised decoration.3. Pinch ends together to hold. (Moisten pieces to bond together.) When
dough has set, take the rings from the oven and cut another heart in joined sectionso that design will be consistent around the piece. Bake rings until hard. Paint andvarnish when cool.
Flower Pot Decorations1. Use cookie cutter shapes for the bottom circle and the flower on top.2. Make a small ball of dough for the center of the flower. Use a dull knife to
make indentations between flower petals and in the flower center. Bake, andvarnish when cool.
Frame1. For corners, bend a flat snake of dough into a 90° angle, and lay on a
lightly oiled cookie sheet. Add balls of dough to each end. Add a smaller snake anddough balls to each corner.
2. Complete the frame with small snakes of dough and dough balls.3. Bake at 325° for about 1 1/4 hours or until hard. Cool. Paint and varnish.4. Baste at the juncture between the bottom snake and the ball to attach to a
fabric-covered frame. Or use glue to attach to a wood, metal, or plastic frame.
16
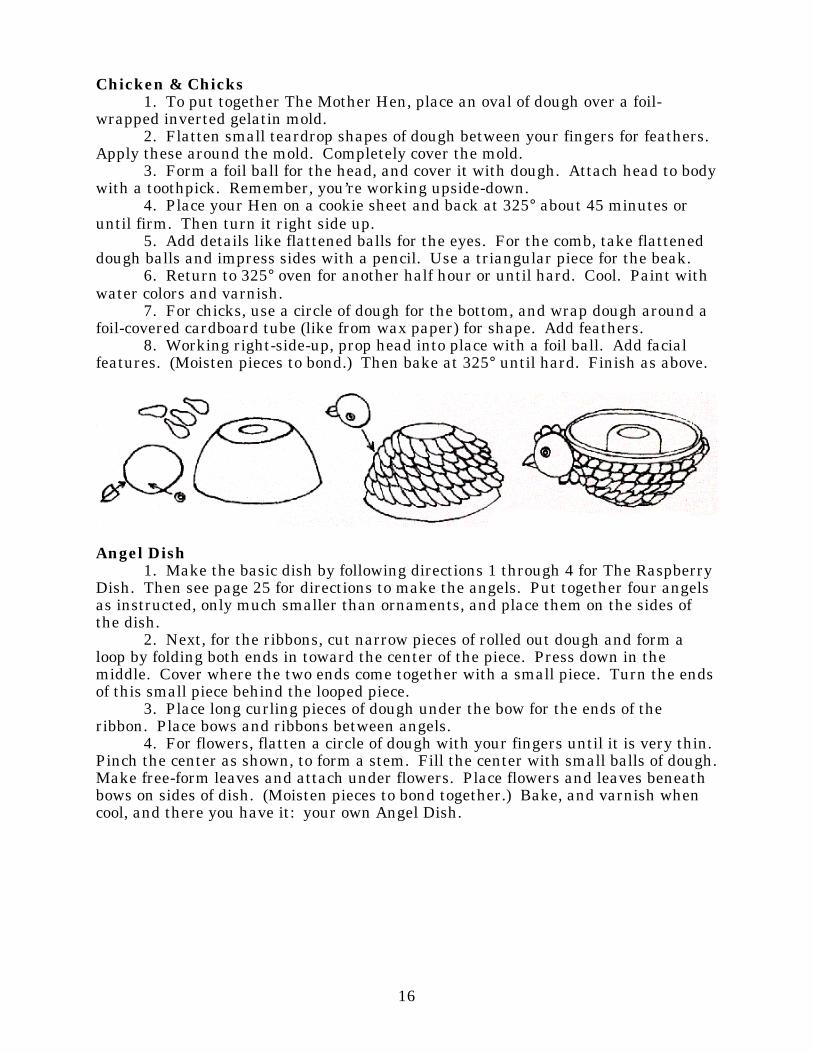
Chicken & Chicks1. To put together The Mother Hen, place an oval of dough over a foil-
wrapped inverted gelatin mold.2. Flatten small teardrop shapes of dough between your fingers for feathers.
Apply these around the mold. Completely cover the mold.3. Form a foil ball for the head, and cover it with dough. Attach head to body
with a toothpick. Remember, you’re working upside-down.4. Place your Hen on a cookie sheet and back at 325° about 45 minutes or
until firm. Then turn it right side up.5. Add details like flattened balls for the eyes. For the comb, take flattened
dough balls and impress sides with a pencil. Use a triangular piece for the beak.6. Return to 325° oven for another half hour or until hard. Cool. Paint with
water colors and varnish.7. For chicks, use a circle of dough for the bottom, and wrap dough around a
foil-covered cardboard tube (like from wax paper) for shape. Add feathers.8. Working right-side-up, prop head into place with a foil ball. Add facial
features. (Moisten pieces to bond.) Then bake at 325° until hard. Finish as above.
Angel Dish1. Make the basic dish by following directions 1 through 4 for The Raspberry
Dish. Then see page 25 for directions to make the angels. Put together four angelsas instructed, only much smaller than ornaments, and place them on the sides ofthe dish.
2. Next, for the ribbons, cut narrow pieces of rolled out dough and form aloop by folding both ends in toward the center of the piece. Press down in themiddle. Cover where the two ends come together with a small piece. Turn the endsof this small piece behind the looped piece.
3. Place long curling pieces of dough under the bow for the ends of theribbon. Place bows and ribbons between angels.
4. For flowers, flatten a circle of dough with your fingers until it is very thin.Pinch the center as shown, to form a stem. Fill the center with small balls of dough.Make free-form leaves and attach under flowers. Place flowers and leaves beneathbows on sides of dish. (Moisten pieces to bond together.) Bake, and varnish whencool, and there you have it: your own Angel Dish.
17
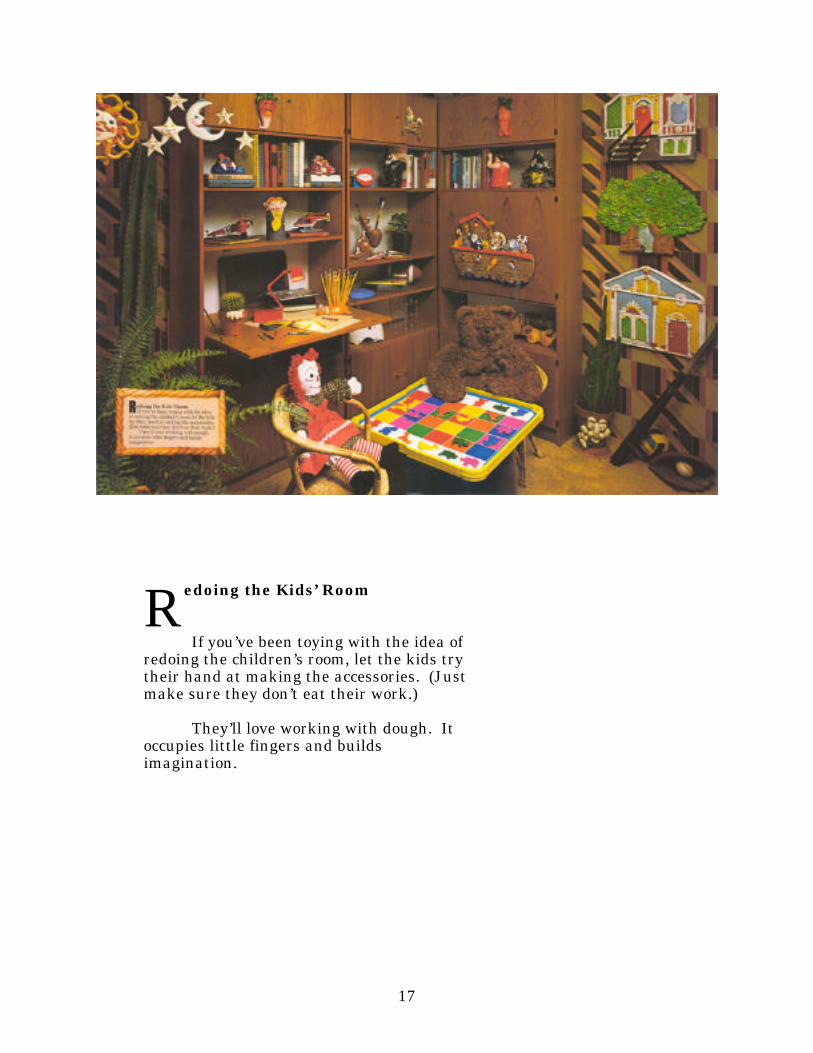
edoing the Kids’ Room
If you’ve been toying with the idea ofredoing the children’s room, let the kids trytheir hand at making the accessories. (Justmake sure they don’t eat their work.)
They’ll love working with dough. Itoccupies little fingers and buildsimagination.
R
18
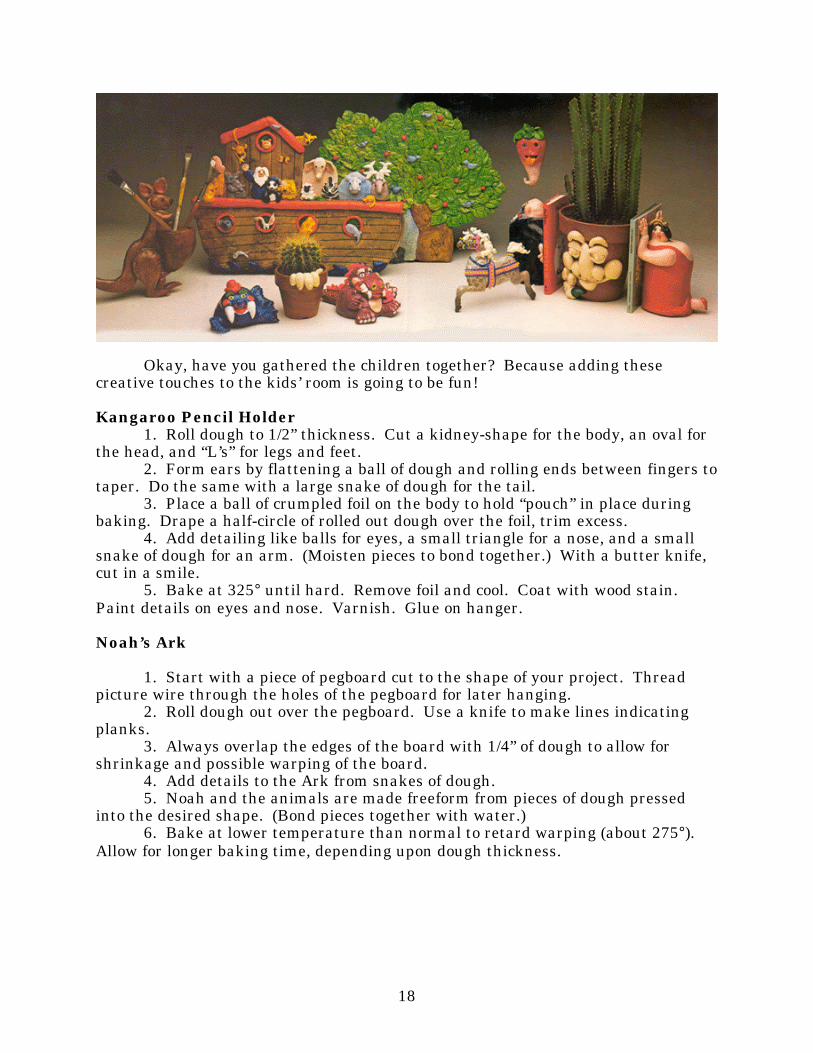
Okay, have you gathered the children together? Because adding thesecreative touches to the kids’ room is going to be fun!
Kangaroo Pencil Holder1. Roll dough to 1/2” thickness. Cut a kidney-shape for the body, an oval for
the head, and “L’s” for legs and feet.2. Form ears by flattening a ball of dough and rolling ends between fingers to
taper. Do the same with a large snake of dough for the tail.3. Place a ball of crumpled foil on the body to hold “pouch” in place during
baking. Drape a half-circle of rolled out dough over the foil, trim excess.4. Add detailing like balls for eyes, a small triangle for a nose, and a small
snake of dough for an arm. (Moisten pieces to bond together.) With a butter knife,cut in a smile.
5. Bake at 325° until hard. Remove foil and cool. Coat with wood stain.Paint details on eyes and nose. Varnish. Glue on hanger.
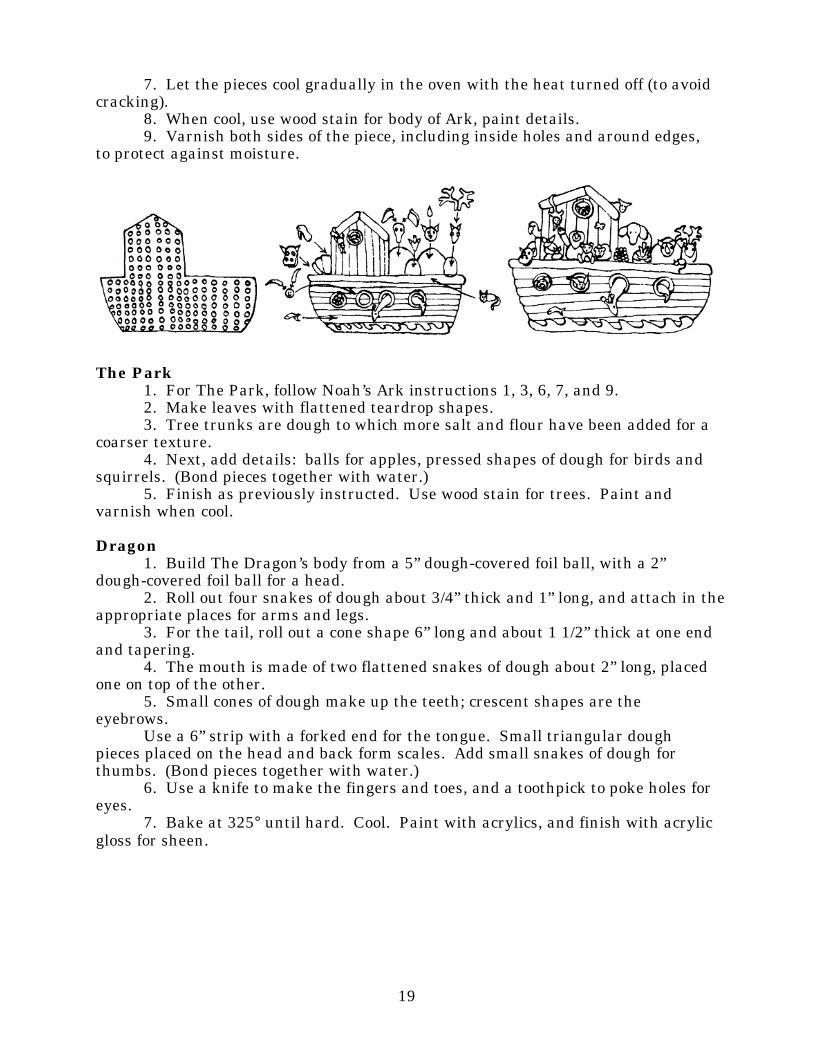
Noah’s Ark
1. Start with a piece of pegboard cut to the shape of your project. Threadpicture wire through the holes of the pegboard for later hanging.
2. Roll dough out over the pegboard. Use a knife to make lines indicatingplanks.
3. Always overlap the edges of the board with 1/4” of dough to allow forshrinkage and possible warping of the board.
4. Add details to the Ark from snakes of dough.5. Noah and the animals are made freeform from pieces of dough pressed
into the desired shape. (Bond pieces together with water.)6. Bake at lower temperature than normal to retard warping (about 275°).
Allow for longer baking time, depending upon dough thickness.
19
7. Let the pieces cool gradually in the oven with the heat turned off (to avoidcracking).
8. When cool, use wood stain for body of Ark, paint details.9. Varnish both sides of the piece, including inside holes and around edges,
to protect against moisture.
The Park1. For The Park, follow Noah’s Ark instructions 1, 3, 6, 7, and 9.2. Make leaves with flattened teardrop shapes.3. Tree trunks are dough to which more salt and flour have been added for a
coarser texture.4. Next, add details: balls for apples, pressed shapes of dough for birds and
squirrels. (Bond pieces together with water.)5. Finish as previously instructed. Use wood stain for trees. Paint and
varnish when cool.
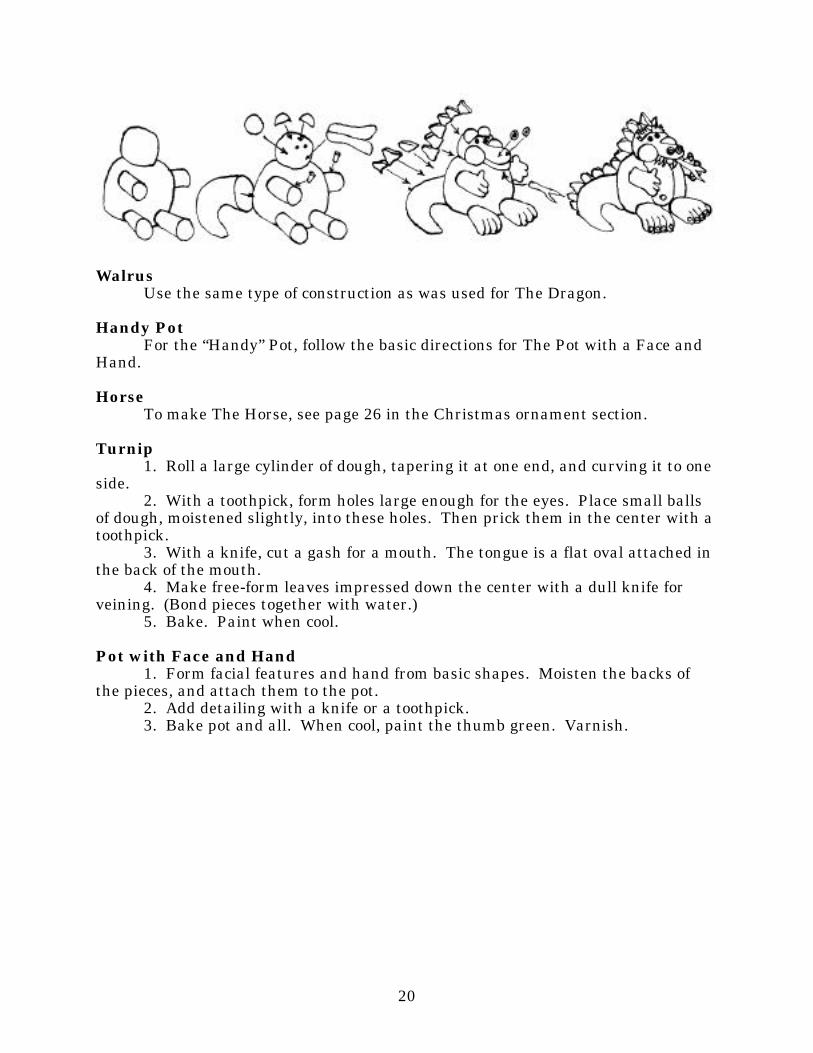
Dragon1. Build The Dragon’s body from a 5” dough-covered foil ball, with a 2”
dough-covered foil ball for a head.2. Roll out four snakes of dough about 3/4” thick and 1” long, and attach in the
appropriate places for arms and legs.3. For the tail, roll out a cone shape 6” long and about 1 1/2” thick at one end
and tapering.4. The mouth is made of two flattened snakes of dough about 2” long, placed
one on top of the other.5. Small cones of dough make up the teeth; crescent shapes are the
eyebrows.Use a 6” strip with a forked end for the tongue. Small triangular dough
pieces placed on the head and back form scales. Add small snakes of dough forthumbs. (Bond pieces together with water.)
6. Use a knife to make the fingers and toes, and a toothpick to poke holes foreyes.
7. Bake at 325° until hard. Cool. Paint with acrylics, and finish with acrylicgloss for sheen.
20
WalrusUse the same type of construction as was used for The Dragon.
Handy PotFor the “Handy” Pot, follow the basic directions for The Pot with a Face and
Hand.
HorseTo make The Horse, see page 26 in the Christmas ornament section.
Turnip1. Roll a large cylinder of dough, tapering it at one end, and curving it to one
side.2. With a toothpick, form holes large enough for the eyes. Place small balls
of dough, moistened slightly, into these holes. Then prick them in the center with atoothpick.
3. With a knife, cut a gash for a mouth. The tongue is a flat oval attached inthe back of the mouth.
4. Make free-form leaves impressed down the center with a dull knife forveining. (Bond pieces together with water.)
5. Bake. Paint when cool.
Pot with Face and Hand1. Form facial features and hand from basic shapes. Moisten the backs of
the pieces, and attach them to the pot.2. Add detailing with a knife or a toothpick.3. Bake pot and all. When cool, paint the thumb green. Varnish.
21
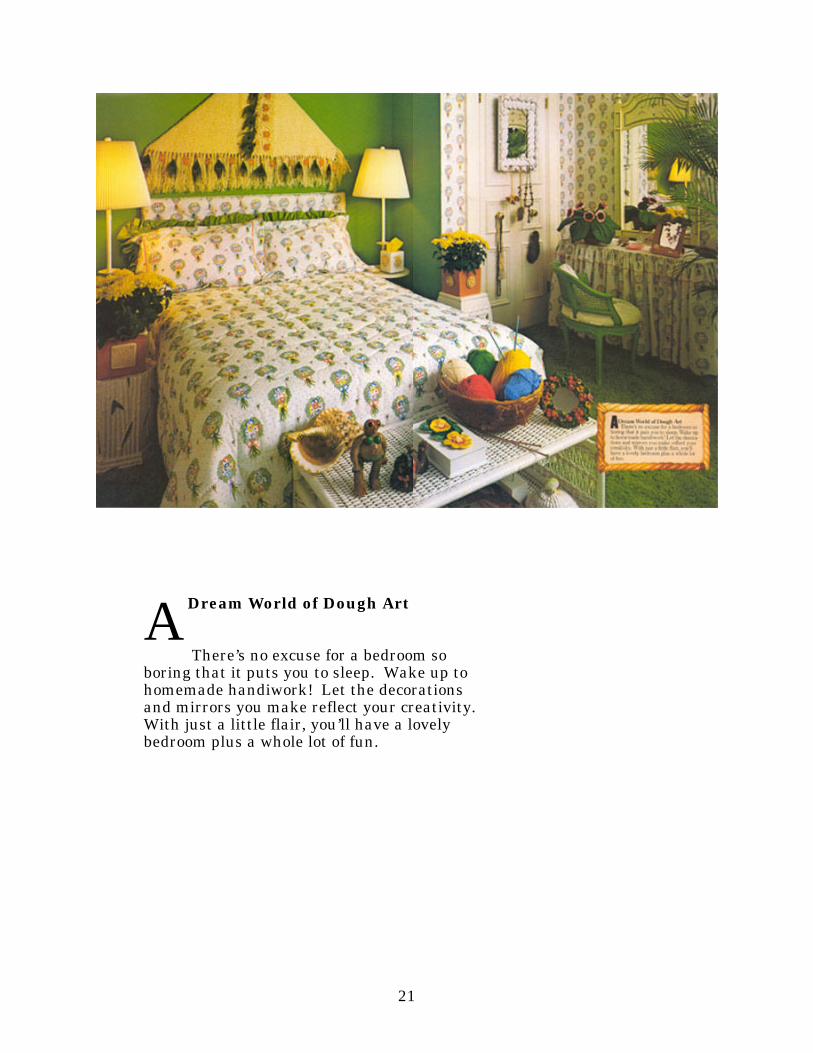
Dream World of Dough Art
There’s no excuse for a bedroom soboring that it puts you to sleep. Wake up tohomemade handiwork! Let the decorationsand mirrors you make reflect your creativity.With just a little flair, you’ll have a lovelybedroom plus a whole lot of fun.
A
22
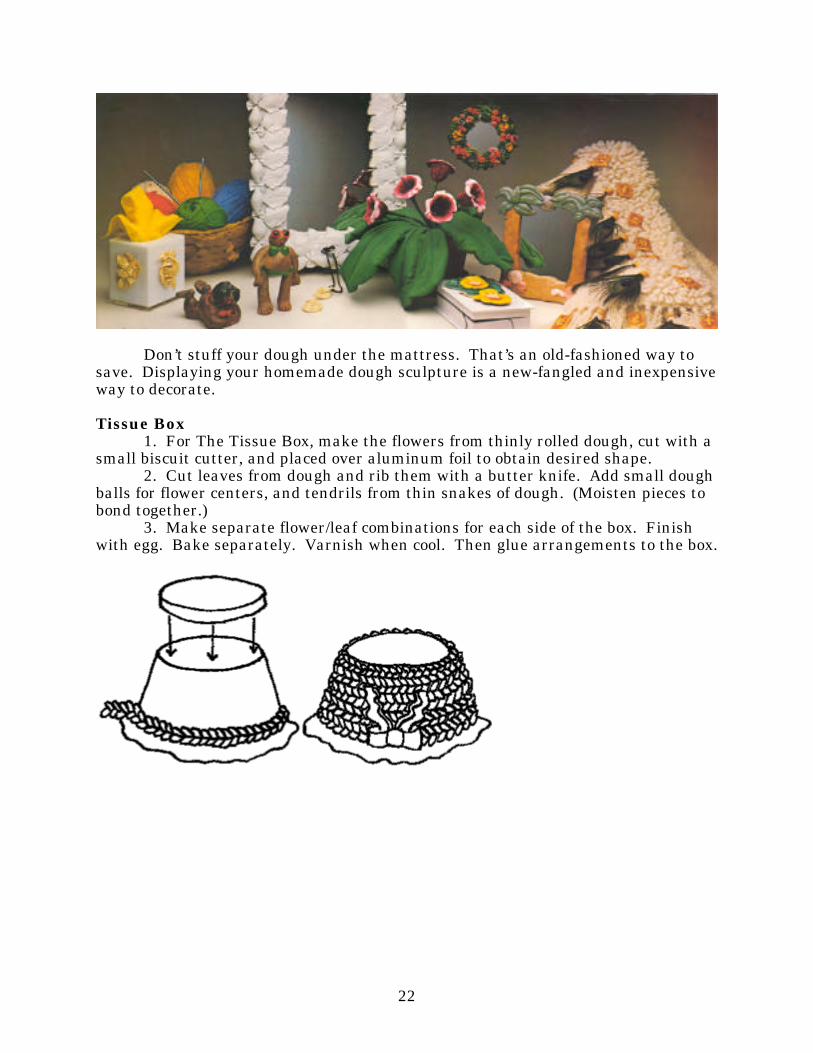
Don’t stuff your dough under the mattress. That’s an old-fashioned way tosave. Displaying your homemade dough sculpture is a new-fangled and inexpensiveway to decorate.
Tissue Box1. For The Tissue Box, make the flowers from thinly rolled dough, cut with a
small biscuit cutter, and placed over aluminum foil to obtain desired shape.2. Cut leaves from dough and rib them with a butter knife. Add small dough
balls for flower centers, and tendrils from thin snakes of dough. (Moisten pieces tobond together.)
3. Make separate flower/leaf combinations for each side of the box. Finishwith egg. Bake separately. Varnish when cool. Then glue arrangements to the box.
23
Dough Basket1. To build a Basket from dough, cover a large inverted mixing bowl tightly
with aluminum foil. Turn up the edge of the foil to make a shelf.2. Cut a circle from dough that has been rolled out to about 1/2” thick. Then
place this circle on top of the inverted bowl to form the base of the basket.3. The body of the basket is made of coils of braided dough.4. Starting at the circle of dough, place the braids around the bowl, pressing
each new row of braid into the row before it, dampening with water to make themstick.
5. To connect the ends of the braids, cut the ends straight and press togetheras pictured.
6. Coil braids around the bowl until you reach the aluminum foil rim. Thenfinish off with a single coil of dough around the top.
7. To make the bow, see directions in the Dining Room Section under “AngelDish.”
8. Bake upside down until firm, then remove the bowl. Return Basket to theoven, and bake until hard.
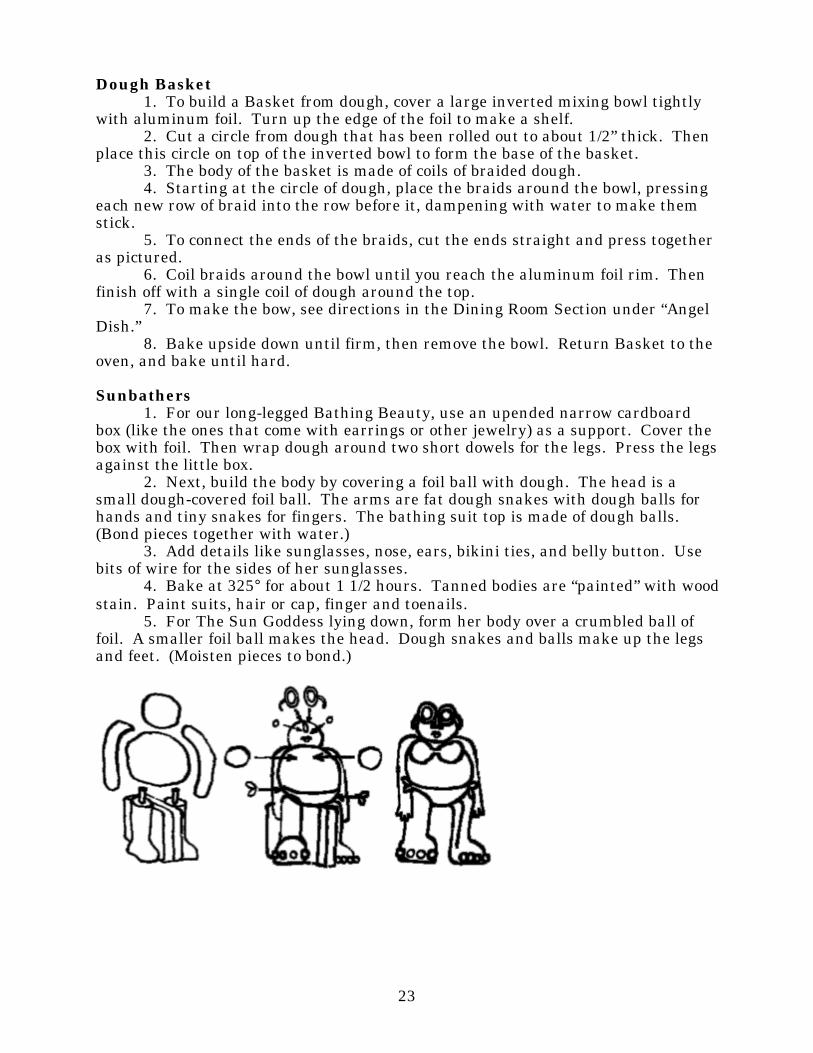
Sunbathers1. For our long-legged Bathing Beauty, use an upended narrow cardboard
box (like the ones that come with earrings or other jewelry) as a support. Cover thebox with foil. Then wrap dough around two short dowels for the legs. Press the legsagainst the little box.
2. Next, build the body by covering a foil ball with dough. The head is asmall dough-covered foil ball. The arms are fat dough snakes with dough balls forhands and tiny snakes for fingers. The bathing suit top is made of dough balls.(Bond pieces together with water.)
3. Add details like sunglasses, nose, ears, bikini ties, and belly button. Usebits of wire for the sides of her sunglasses.
4. Bake at 325° for about 1 1/2 hours. Tanned bodies are “painted” with woodstain. Paint suits, hair or cap, finger and toenails.
5. For The Sun Goddess lying down, form her body over a crumbled ball offoil. A smaller foil ball makes the head. Dough snakes and balls make up the legsand feet. (Moisten pieces to bond.)
24
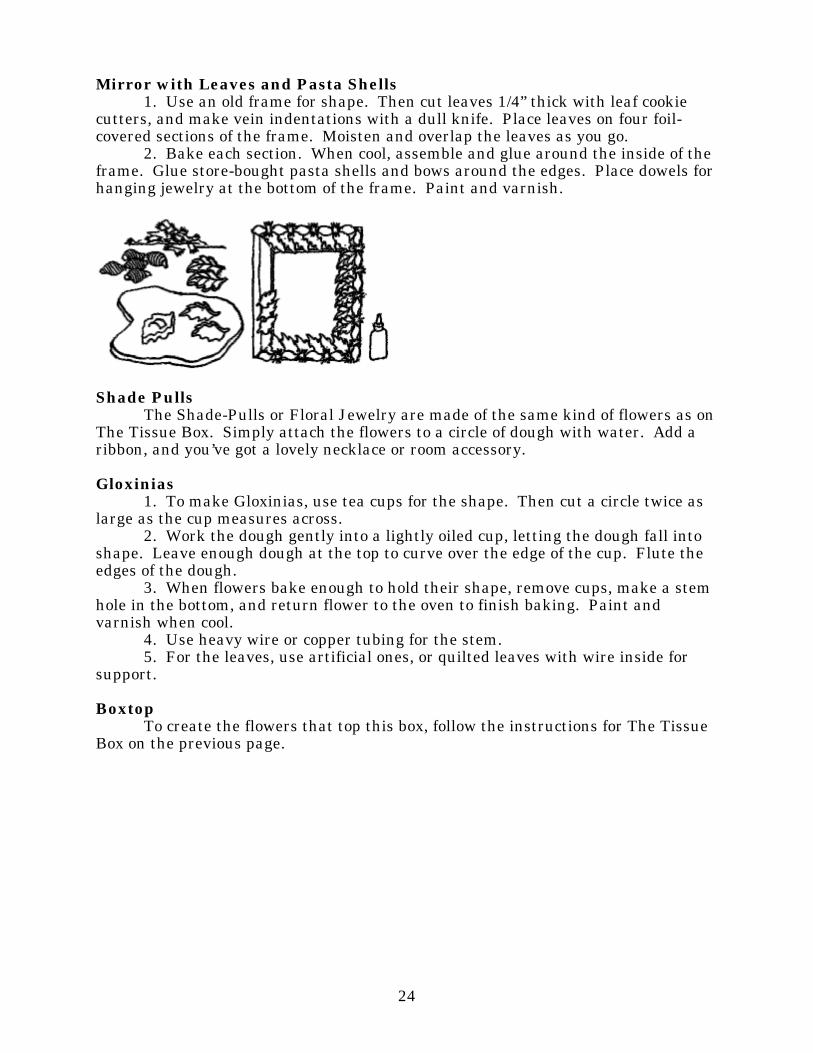
Mirror with Leaves and Pasta Shells1. Use an old frame for shape. Then cut leaves 1/4” thick with leaf cookie
cutters, and make vein indentations with a dull knife. Place leaves on four foil-covered sections of the frame. Moisten and overlap the leaves as you go.
2. Bake each section. When cool, assemble and glue around the inside of theframe. Glue store-bought pasta shells and bows around the edges. Place dowels forhanging jewelry at the bottom of the frame. Paint and varnish.
Shade PullsThe Shade-Pulls or Floral Jewelry are made of the same kind of flowers as on
The Tissue Box. Simply attach the flowers to a circle of dough with water. Add aribbon, and you’ve got a lovely necklace or room accessory.
Gloxinias1. To make Gloxinias, use tea cups for the shape. Then cut a circle twice as
large as the cup measures across.2. Work the dough gently into a lightly oiled cup, letting the dough fall into
shape. Leave enough dough at the top to curve over the edge of the cup. Flute theedges of the dough.
3. When flowers bake enough to hold their shape, remove cups, make a stemhole in the bottom, and return flower to the oven to finish baking. Paint andvarnish when cool.
4. Use heavy wire or copper tubing for the stem.5. For the leaves, use artificial ones, or quilted leaves with wire inside for
support.
BoxtopTo create the flowers that top this box, follow the instructions for The Tissue
Box on the previous page.
25
Palm Tree Mirror1. For The Palm Tree Mirror, you’ll need a mirror with an easel-back frame.
Then, cut a piece of cardboard to the size of the frame, cover it with foil, and workdirectly on it.
2. The palm trees are fat snakes for the trunks, with elongated tear dropshapes for leaves…all flattened.
3. Form a ball for the sun. Then pinch out shapes for shells. (Moisten piecesto bond together.)
4. Bake at 325° about an hour until it’s hard. Cool. Then paint and varnish.Glue the scene onto the mirror frame.
26
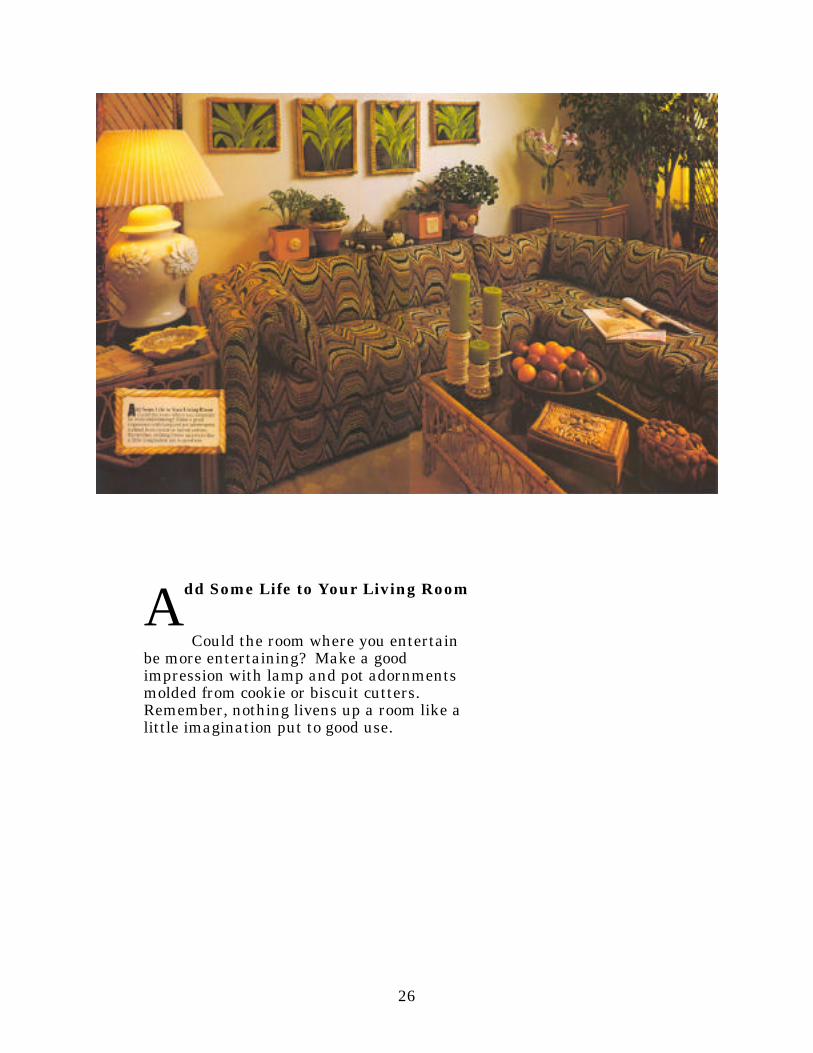
dd Some Life to Your Living Room
Could the room where you entertainbe more entertaining? Make a goodimpression with lamp and pot adornmentsmolded from cookie or biscuit cutters.Remember, nothing livens up a room like alittle imagination put to good use.
A
27
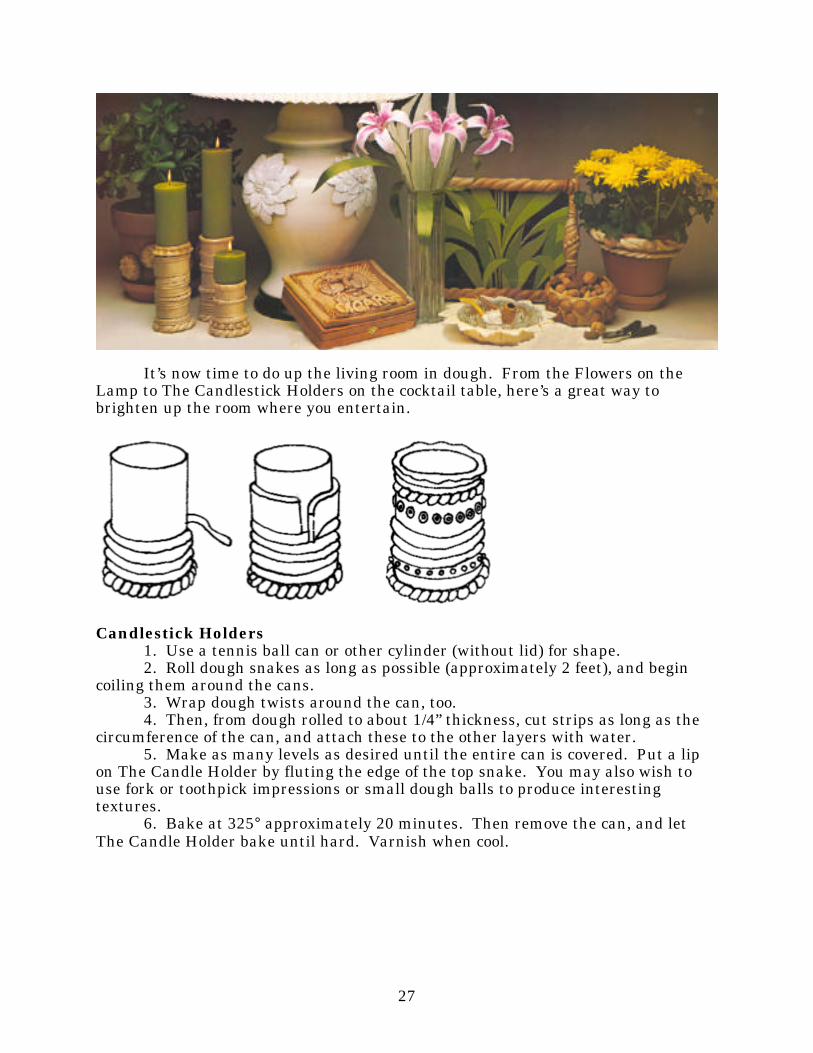
It’s now time to do up the living room in dough. From the Flowers on theLamp to The Candlestick Holders on the cocktail table, here’s a great way tobrighten up the room where you entertain.
Candlestick Holders1. Use a tennis ball can or other cylinder (without lid) for shape.2. Roll dough snakes as long as possible (approximately 2 feet), and begin
coiling them around the cans.3. Wrap dough twists around the can, too.4. Then, from dough rolled to about 1/4” thickness, cut strips as long as the
circumference of the can, and attach these to the other layers with water.5. Make as many levels as desired until the entire can is covered. Put a lip
on The Candle Holder by fluting the edge of the top snake. You may also wish touse fork or toothpick impressions or small dough balls to produce interestingtextures.
6. Bake at 325° approximately 20 minutes. Then remove the can, and letThe Candle Holder bake until hard. Varnish when cool.
28
Lamp Flowers1. Use a fluted-edge biscuit cutter on rolled-out dough to cut out the flower
petals.2. Overlap the petals.3. Use a garlic press to make the flower centers. (Moisten pieces with water
to bond.)4. Bake The Flowers over a slightly curved shape (like a bowl) that
resembles the shape of the lamp on which they will be used.
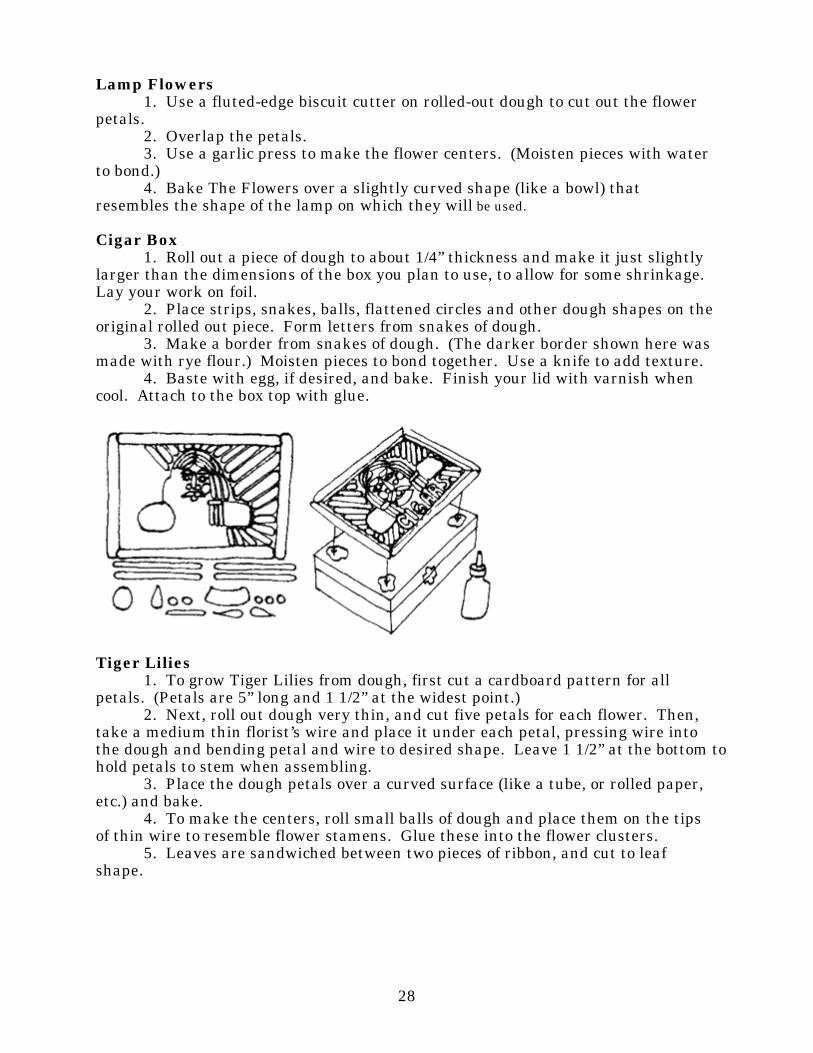
Cigar Box1. Roll out a piece of dough to about 1/4” thickness and make it just slightly
larger than the dimensions of the box you plan to use, to allow for some shrinkage.Lay your work on foil.
2. Place strips, snakes, balls, flattened circles and other dough shapes on theoriginal rolled out piece. Form letters from snakes of dough.
3. Make a border from snakes of dough. (The darker border shown here wasmade with rye flour.) Moisten pieces to bond together. Use a knife to add texture.
4. Baste with egg, if desired, and bake. Finish your lid with varnish whencool. Attach to the box top with glue.
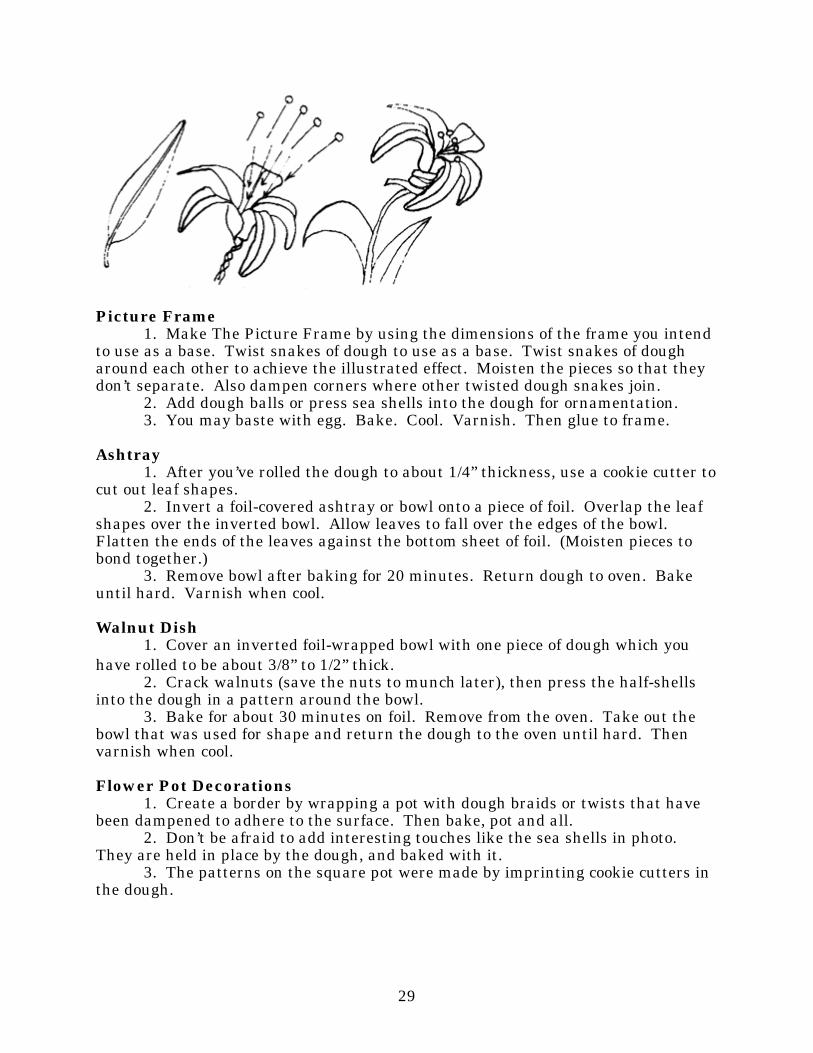
Tiger Lilies1. To grow Tiger Lilies from dough, first cut a cardboard pattern for all
petals. (Petals are 5” long and 1 1/2” at the widest point.)2. Next, roll out dough very thin, and cut five petals for each flower. Then,
take a medium thin florist’s wire and place it under each petal, pressing wire intothe dough and bending petal and wire to desired shape. Leave 1 1/2” at the bottom tohold petals to stem when assembling.
3. Place the dough petals over a curved surface (like a tube, or rolled paper,etc.) and bake.
4. To make the centers, roll small balls of dough and place them on the tipsof thin wire to resemble flower stamens. Glue these into the flower clusters.
5. Leaves are sandwiched between two pieces of ribbon, and cut to leafshape.
29
Picture Frame1. Make The Picture Frame by using the dimensions of the frame you intend
to use as a base. Twist snakes of dough to use as a base. Twist snakes of dougharound each other to achieve the illustrated effect. Moisten the pieces so that theydon’t separate. Also dampen corners where other twisted dough snakes join.
2. Add dough balls or press sea shells into the dough for ornamentation.3. You may baste with egg. Bake. Cool. Varnish. Then glue to frame.
Ashtray1. After you’ve rolled the dough to about 1/4” thickness, use a cookie cutter to
cut out leaf shapes.2. Invert a foil-covered ashtray or bowl onto a piece of foil. Overlap the leaf
shapes over the inverted bowl. Allow leaves to fall over the edges of the bowl.Flatten the ends of the leaves against the bottom sheet of foil. (Moisten pieces tobond together.)
3. Remove bowl after baking for 20 minutes. Return dough to oven. Bakeuntil hard. Varnish when cool.
Walnut Dish1. Cover an inverted foil-wrapped bowl with one piece of dough which you
have rolled to be about 3/8” to 1/2” thick.2. Crack walnuts (save the nuts to munch later), then press the half-shells
into the dough in a pattern around the bowl.3. Bake for about 30 minutes on foil. Remove from the oven. Take out the
bowl that was used for shape and return the dough to the oven until hard. Thenvarnish when cool.
Flower Pot Decorations1. Create a border by wrapping a pot with dough braids or twists that have
been dampened to adhere to the surface. Then bake, pot and all.2. Don’t be afraid to add interesting touches like the sea shells in photo.
They are held in place by the dough, and baked with it.3. The patterns on the square pot were made by imprinting cookie cutters in
the dough.
30
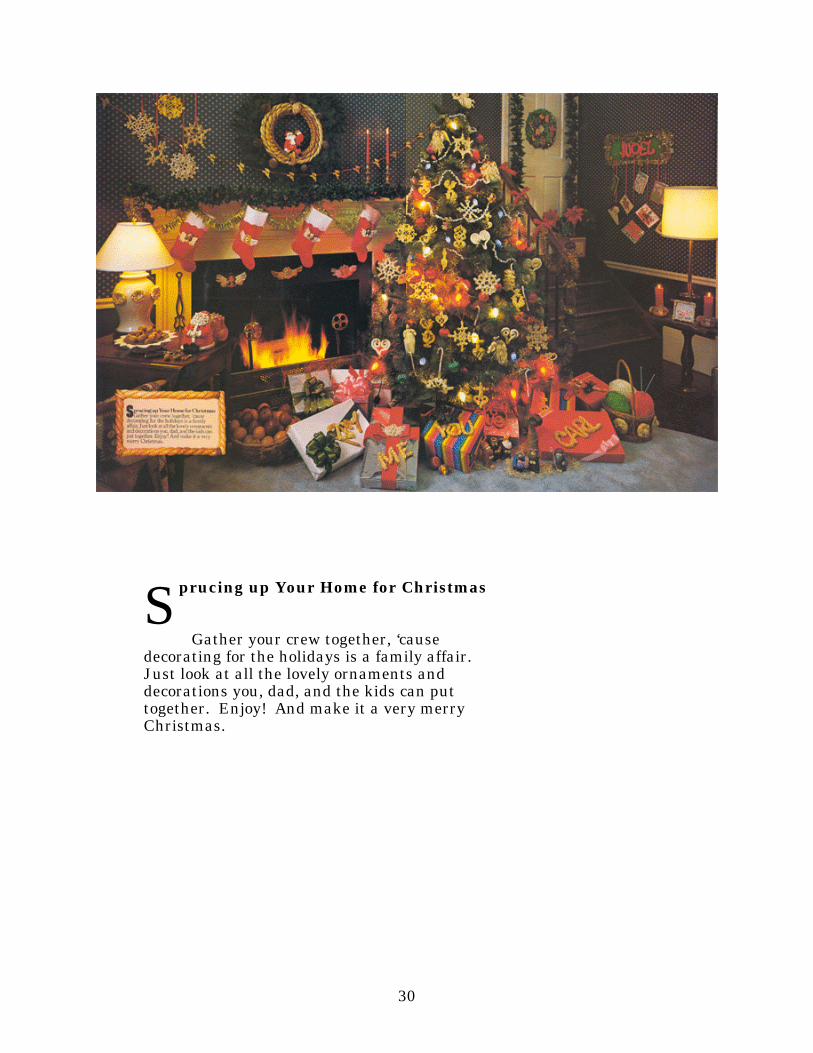
prucing up Your Home for Christmas
Gather your crew together, ‘causedecorating for the holidays is a family affair.Just look at all the lovely ornaments anddecorations you, dad, and the kids can puttogether. Enjoy! And make it a very merryChristmas.
S
31
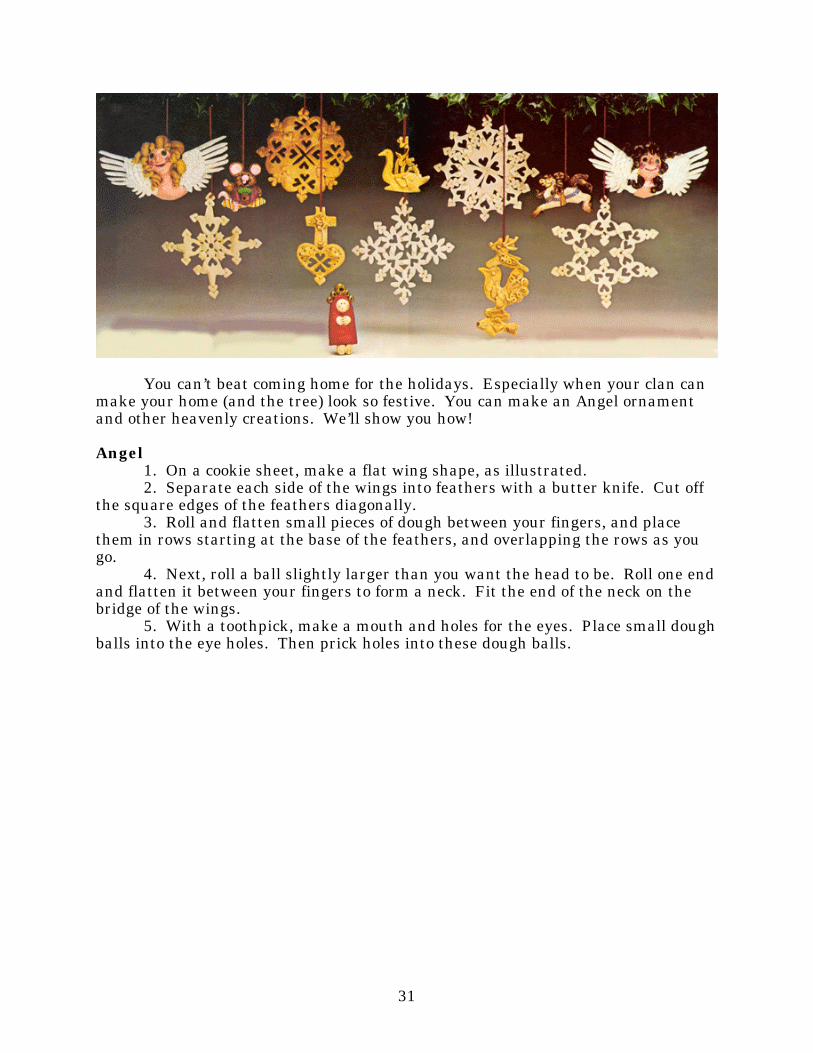
You can’t beat coming home for the holidays. Especially when your clan canmake your home (and the tree) look so festive. You can make an Angel ornamentand other heavenly creations. We’ll show you how!
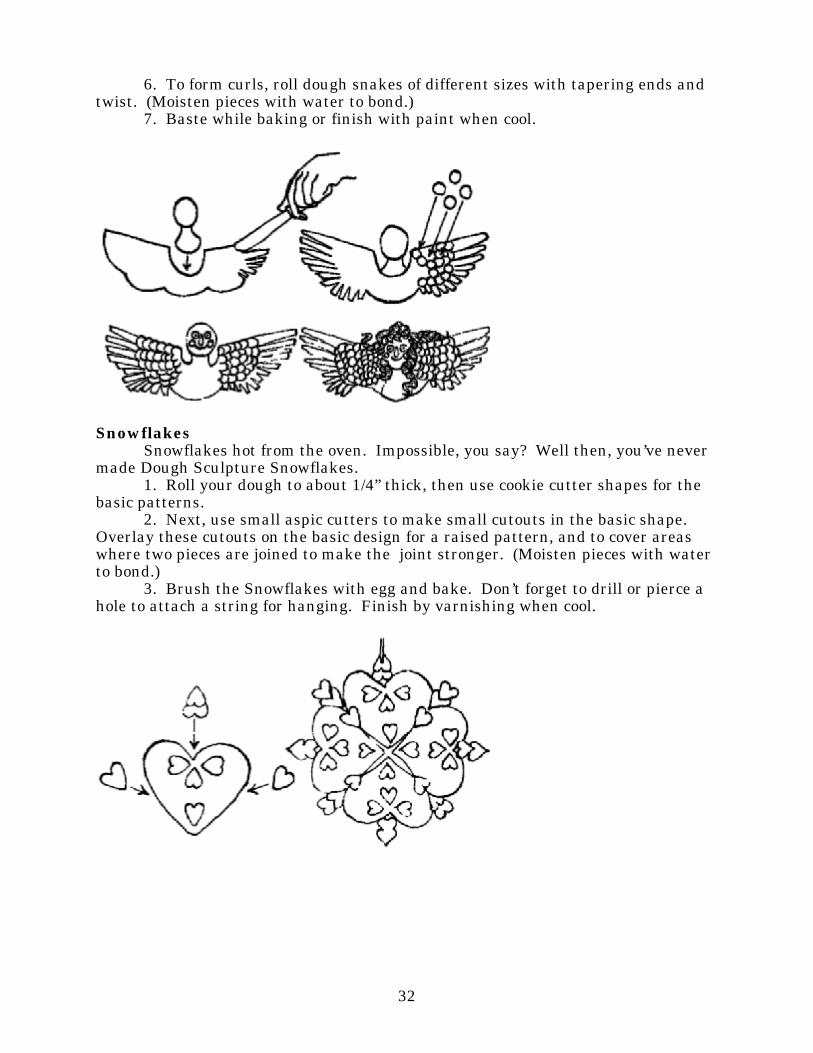
Angel1. On a cookie sheet, make a flat wing shape, as illustrated.2. Separate each side of the wings into feathers with a butter knife. Cut off
the square edges of the feathers diagonally.3. Roll and flatten small pieces of dough between your fingers, and place
them in rows starting at the base of the feathers, and overlapping the rows as yougo.
4. Next, roll a ball slightly larger than you want the head to be. Roll one endand flatten it between your fingers to form a neck. Fit the end of the neck on thebridge of the wings.
5. With a toothpick, make a mouth and holes for the eyes. Place small doughballs into the eye holes. Then prick holes into these dough balls.
32
6. To form curls, roll dough snakes of different sizes with tapering ends andtwist. (Moisten pieces with water to bond.)
7. Baste while baking or finish with paint when cool.
SnowflakesSnowflakes hot from the oven. Impossible, you say? Well then, you’ve never
made Dough Sculpture Snowflakes.1. Roll your dough to about 1/4” thick, then use cookie cutter shapes for the
basic patterns.2. Next, use small aspic cutters to make small cutouts in the basic shape.
Overlay these cutouts on the basic design for a raised pattern, and to cover areaswhere two pieces are joined to make the joint stronger. (Moisten pieces with waterto bond.)
3. Brush the Snowflakes with egg and bake. Don’t forget to drill or pierce ahole to attach a string for hanging. Finish by varnishing when cool.
33
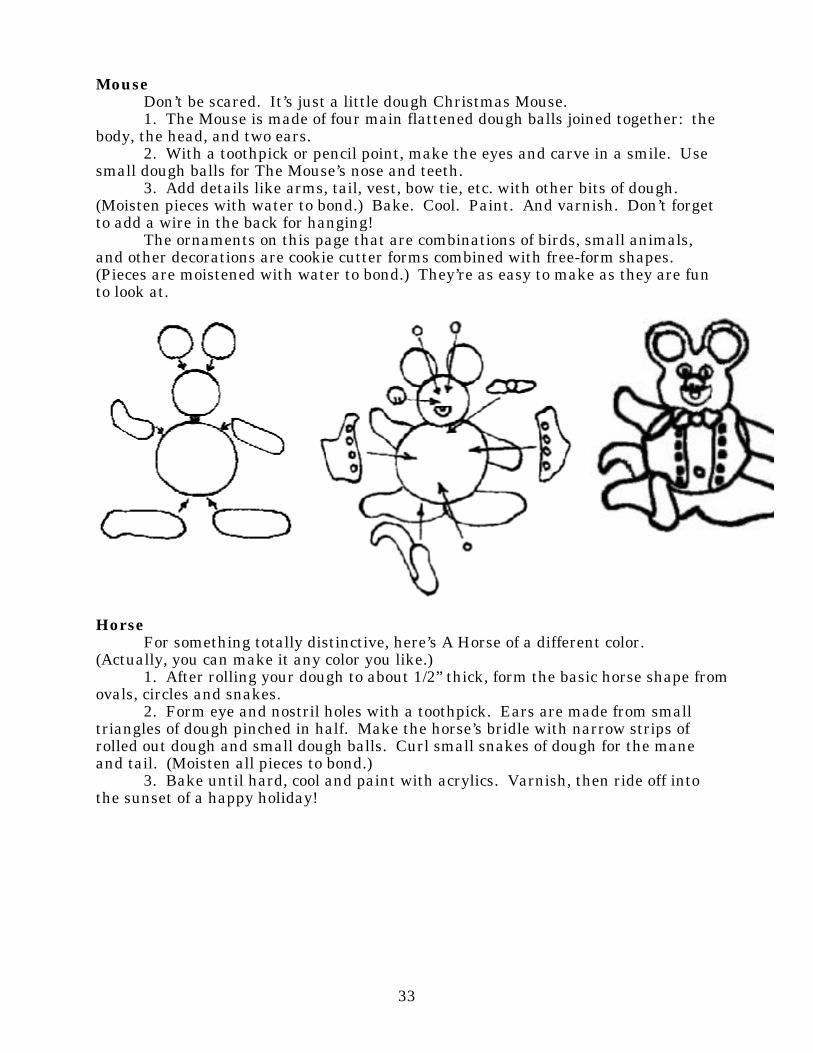
MouseDon’t be scared. It’s just a little dough Christmas Mouse.1. The Mouse is made of four main flattened dough balls joined together: the
body, the head, and two ears.2. With a toothpick or pencil point, make the eyes and carve in a smile. Use
small dough balls for The Mouse’s nose and teeth.3. Add details like arms, tail, vest, bow tie, etc. with other bits of dough.
(Moisten pieces with water to bond.) Bake. Cool. Paint. And varnish. Don’t forgetto add a wire in the back for hanging!
The ornaments on this page that are combinations of birds, small animals,and other decorations are cookie cutter forms combined with free-form shapes.(Pieces are moistened with water to bond.) They’re as easy to make as they are funto look at.
HorseFor something totally distinctive, here’s A Horse of a different color.
(Actually, you can make it any color you like.)1. After rolling your dough to about 1/2” thick, form the basic horse shape from
ovals, circles and snakes.2. Form eye and nostril holes with a toothpick. Ears are made from small
triangles of dough pinched in half. Make the horse’s bridle with narrow strips ofrolled out dough and small dough balls. Curl small snakes of dough for the maneand tail. (Moisten all pieces to bond.)
3. Bake until hard, cool and paint with acrylics. Varnish, then ride off intothe sunset of a happy holiday!
34
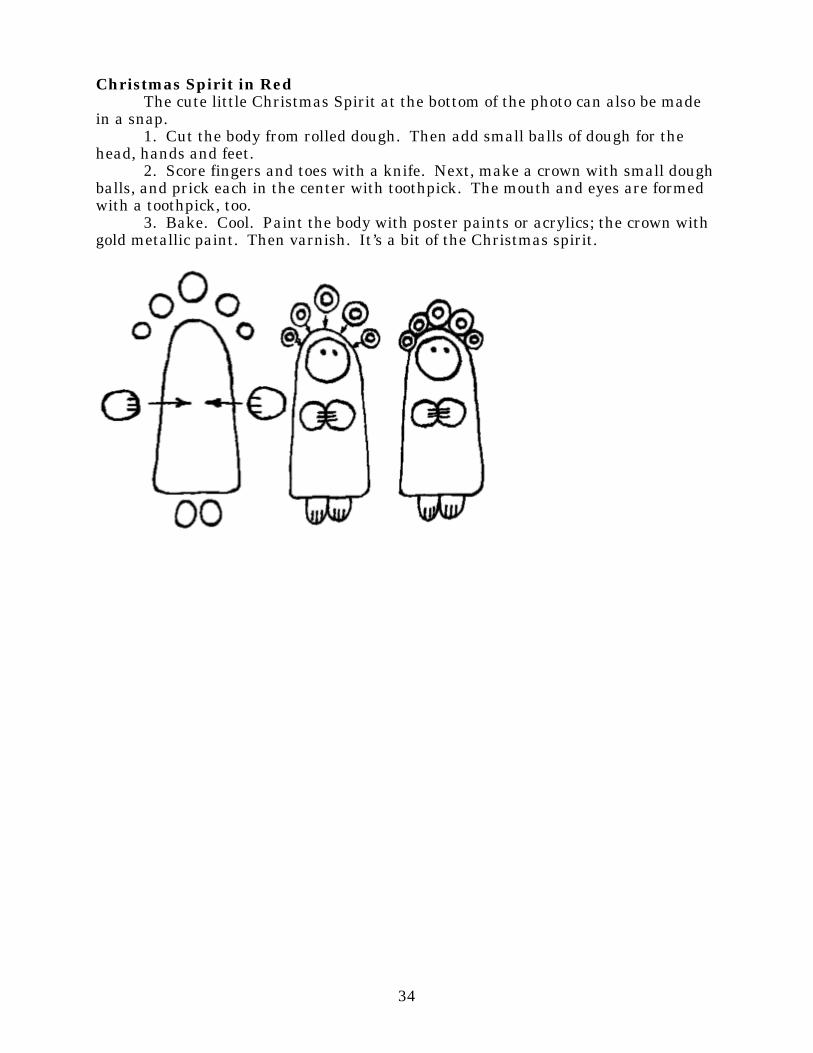
Christmas Spirit in RedThe cute little Christmas Spirit at the bottom of the photo can also be made
in a snap.1. Cut the body from rolled dough. Then add small balls of dough for the
head, hands and feet.2. Score fingers and toes with a knife. Next, make a crown with small dough
balls, and prick each in the center with toothpick. The mouth and eyes are formedwith a toothpick, too.
3. Bake. Cool. Paint the body with poster paints or acrylics; the crown withgold metallic paint. Then varnish. It’s a bit of the Christmas spirit.
35
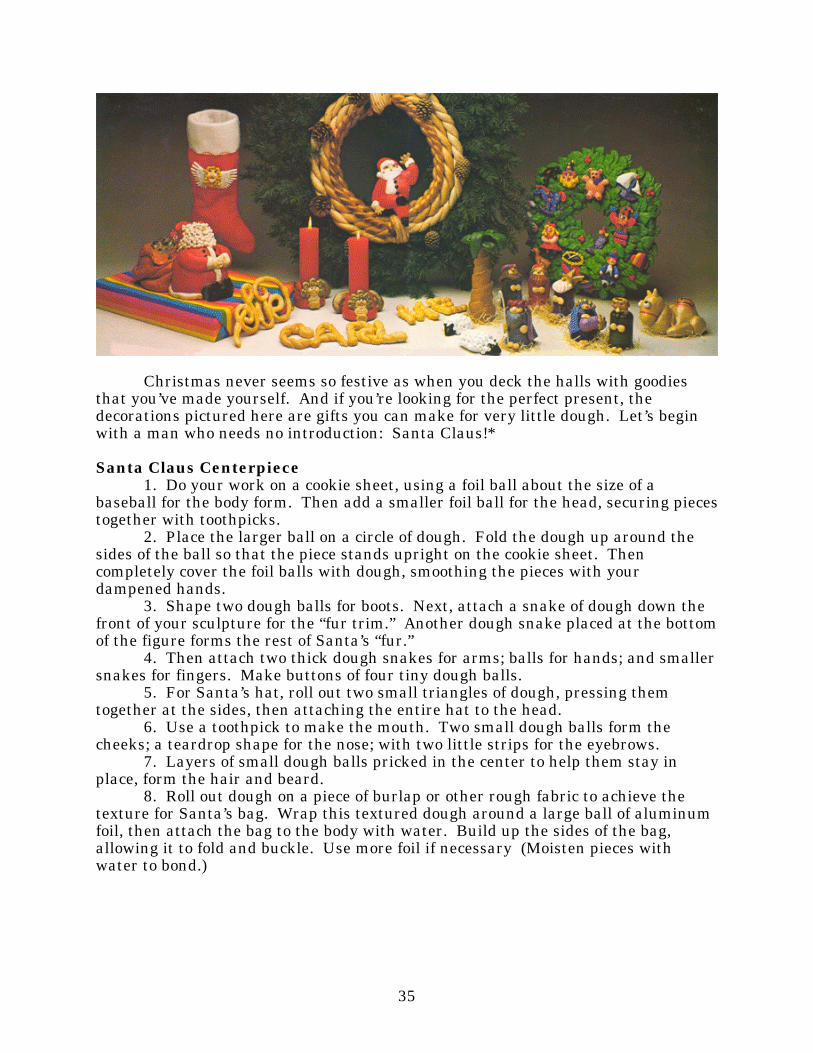
Christmas never seems so festive as when you deck the halls with goodiesthat you’ve made yourself. And if you’re looking for the perfect present, thedecorations pictured here are gifts you can make for very little dough. Let’s beginwith a man who needs no introduction: Santa Claus!*
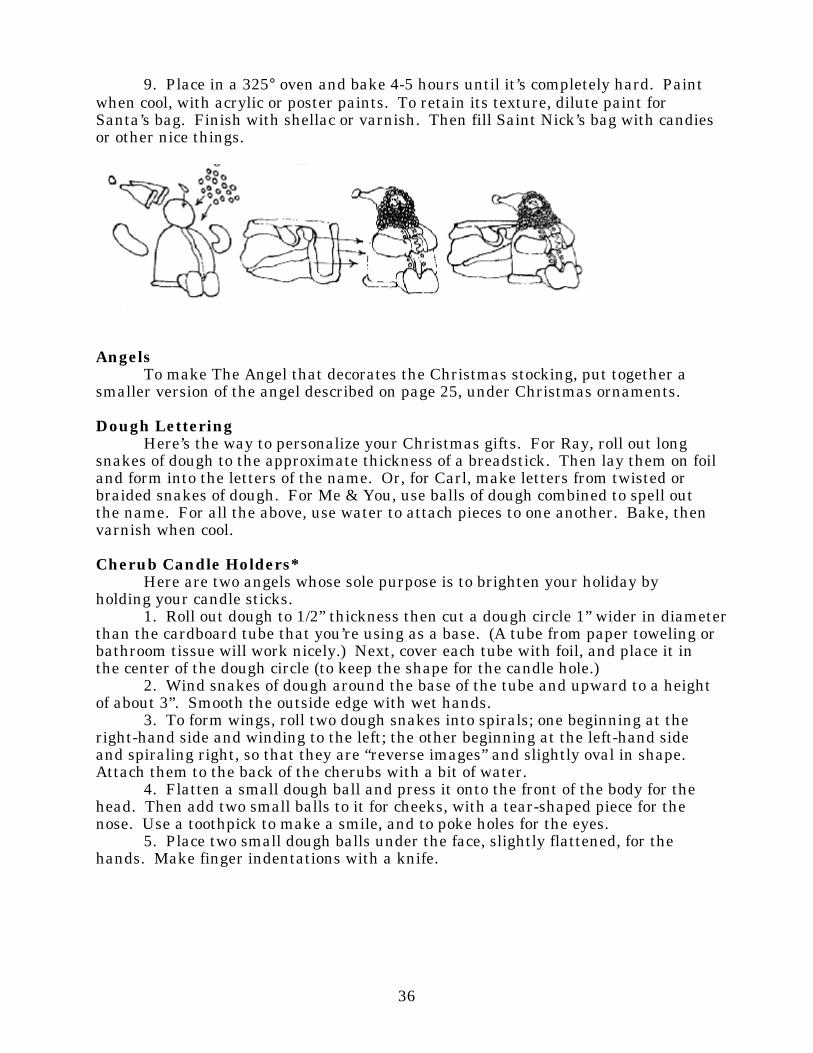
Santa Claus Centerpiece1. Do your work on a cookie sheet, using a foil ball about the size of a
baseball for the body form. Then add a smaller foil ball for the head, securing piecestogether with toothpicks.
2. Place the larger ball on a circle of dough. Fold the dough up around thesides of the ball so that the piece stands upright on the cookie sheet. Thencompletely cover the foil balls with dough, smoothing the pieces with yourdampened hands.
3. Shape two dough balls for boots. Next, attach a snake of dough down thefront of your sculpture for the “fur trim.” Another dough snake placed at the bottomof the figure forms the rest of Santa’s “fur.”
4. Then attach two thick dough snakes for arms; balls for hands; and smallersnakes for fingers. Make buttons of four tiny dough balls.
5. For Santa’s hat, roll out two small triangles of dough, pressing themtogether at the sides, then attaching the entire hat to the head.
6. Use a toothpick to make the mouth. Two small dough balls form thecheeks; a teardrop shape for the nose; with two little strips for the eyebrows.
7. Layers of small dough balls pricked in the center to help them stay inplace, form the hair and beard.
8. Roll out dough on a piece of burlap or other rough fabric to achieve thetexture for Santa’s bag. Wrap this textured dough around a large ball of aluminumfoil, then attach the bag to the body with water. Build up the sides of the bag,allowing it to fold and buckle. Use more foil if necessary (Moisten pieces withwater to bond.)
36
9. Place in a 325° oven and bake 4-5 hours until it’s completely hard. Paintwhen cool, with acrylic or poster paints. To retain its texture, dilute paint forSanta’s bag. Finish with shellac or varnish. Then fill Saint Nick’s bag with candiesor other nice things.
AngelsTo make The Angel that decorates the Christmas stocking, put together a
smaller version of the angel described on page 25, under Christmas ornaments.
Dough LetteringHere’s the way to personalize your Christmas gifts. For Ray, roll out long
snakes of dough to the approximate thickness of a breadstick. Then lay them on foiland form into the letters of the name. Or, for Carl, make letters from twisted orbraided snakes of dough. For Me & You, use balls of dough combined to spell outthe name. For all the above, use water to attach pieces to one another. Bake, thenvarnish when cool.
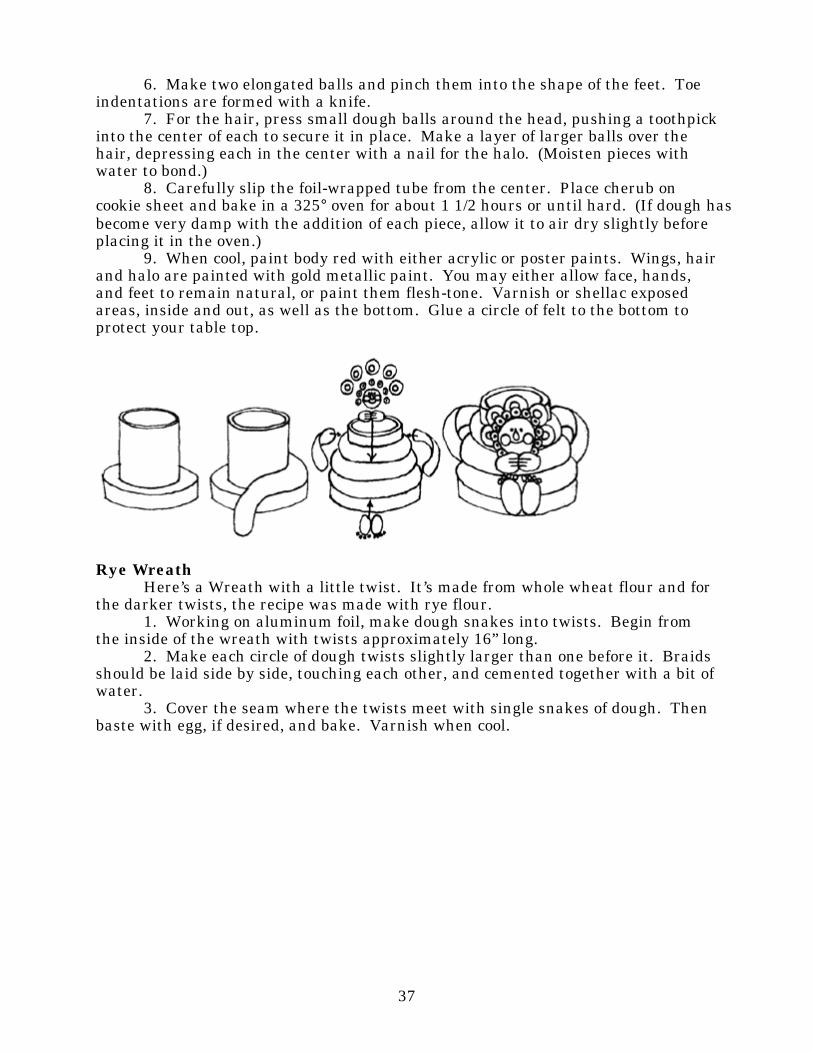
Cherub Candle Holders*Here are two angels whose sole purpose is to brighten your holiday by
holding your candle sticks.1. Roll out dough to 1/2” thickness then cut a dough circle 1” wider in diameter
than the cardboard tube that you’re using as a base. (A tube from paper toweling orbathroom tissue will work nicely.) Next, cover each tube with foil, and place it inthe center of the dough circle (to keep the shape for the candle hole.)
2. Wind snakes of dough around the base of the tube and upward to a heightof about 3”. Smooth the outside edge with wet hands.
3. To form wings, roll two dough snakes into spirals; one beginning at theright-hand side and winding to the left; the other beginning at the left-hand sideand spiraling right, so that they are “reverse images” and slightly oval in shape.Attach them to the back of the cherubs with a bit of water.
4. Flatten a small dough ball and press it onto the front of the body for thehead. Then add two small balls to it for cheeks, with a tear-shaped piece for thenose. Use a toothpick to make a smile, and to poke holes for the eyes.
5. Place two small dough balls under the face, slightly flattened, for thehands. Make finger indentations with a knife.
37
6. Make two elongated balls and pinch them into the shape of the feet. Toeindentations are formed with a knife.
7. For the hair, press small dough balls around the head, pushing a toothpickinto the center of each to secure it in place. Make a layer of larger balls over thehair, depressing each in the center with a nail for the halo. (Moisten pieces withwater to bond.)
8. Carefully slip the foil-wrapped tube from the center. Place cherub oncookie sheet and bake in a 325° oven for about 1 1/2 hours or until hard. (If dough hasbecome very damp with the addition of each piece, allow it to air dry slightly beforeplacing it in the oven.)
9. When cool, paint body red with either acrylic or poster paints. Wings, hairand halo are painted with gold metallic paint. You may either allow face, hands,and feet to remain natural, or paint them flesh-tone. Varnish or shellac exposedareas, inside and out, as well as the bottom. Glue a circle of felt to the bottom toprotect your table top.
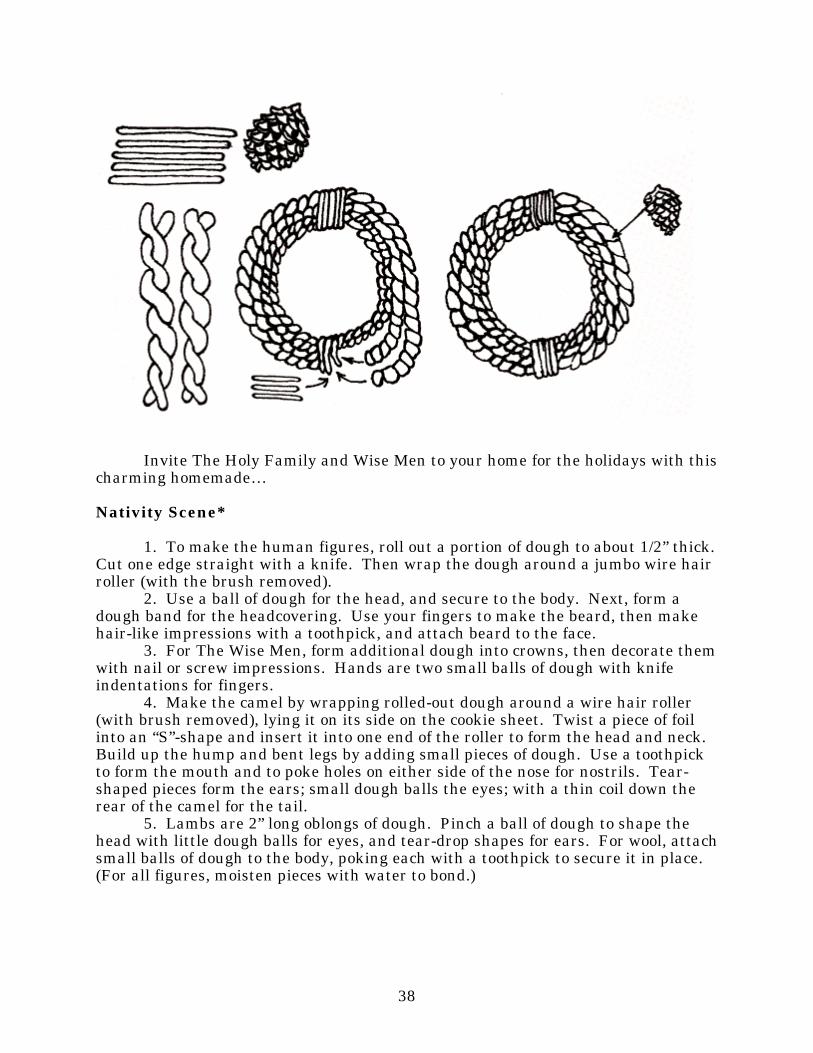
Rye WreathHere’s a Wreath with a little twist. It’s made from whole wheat flour and for
the darker twists, the recipe was made with rye flour.1. Working on aluminum foil, make dough snakes into twists. Begin from
the inside of the wreath with twists approximately 16” long.2. Make each circle of dough twists slightly larger than one before it. Braids
should be laid side by side, touching each other, and cemented together with a bit ofwater.
3. Cover the seam where the twists meet with single snakes of dough. Thenbaste with egg, if desired, and bake. Varnish when cool.
38
Invite The Holy Family and Wise Men to your home for the holidays with thischarming homemade…
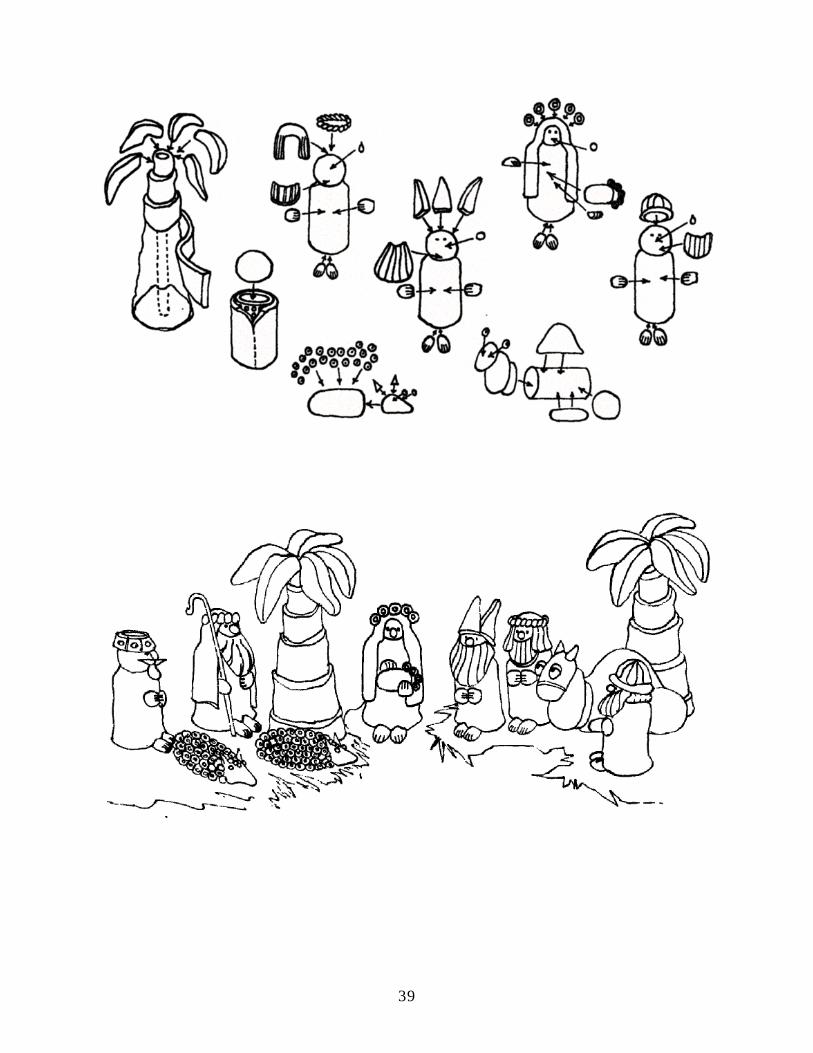
Nativity Scene*
1. To make the human figures, roll out a portion of dough to about 1/2” thick.Cut one edge straight with a knife. Then wrap the dough around a jumbo wire hairroller (with the brush removed).
2. Use a ball of dough for the head, and secure to the body. Next, form adough band for the headcovering. Use your fingers to make the beard, then makehair-like impressions with a toothpick, and attach beard to the face.
3. For The Wise Men, form additional dough into crowns, then decorate themwith nail or screw impressions. Hands are two small balls of dough with knifeindentations for fingers.
4. Make the camel by wrapping rolled-out dough around a wire hair roller(with brush removed), lying it on its side on the cookie sheet. Twist a piece of foilinto an “S”-shape and insert it into one end of the roller to form the head and neck.Build up the hump and bent legs by adding small pieces of dough. Use a toothpickto form the mouth and to poke holes on either side of the nose for nostrils. Tear-shaped pieces form the ears; small dough balls the eyes; with a thin coil down therear of the camel for the tail.
5. Lambs are 2” long oblongs of dough. Pinch a ball of dough to shape thehead with little dough balls for eyes, and tear-drop shapes for ears. For wool, attachsmall balls of dough to the body, poking each with a toothpick to secure it in place.(For all figures, moisten pieces with water to bond.)
39
40
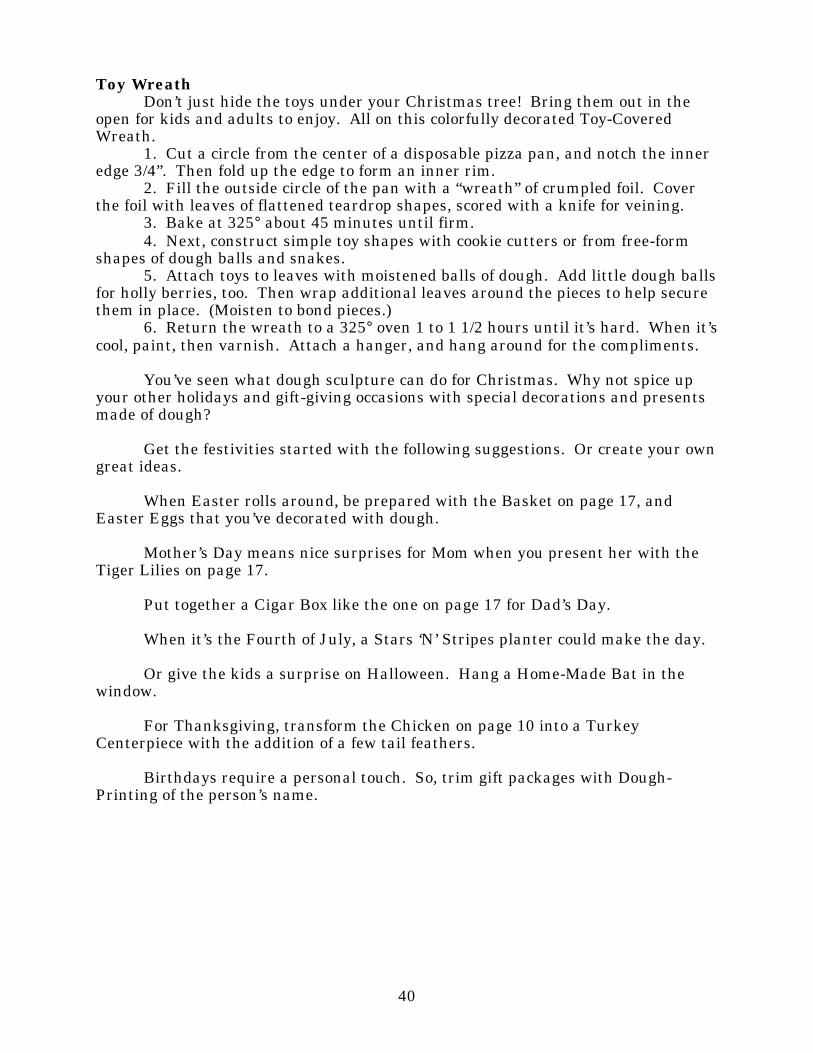
Toy WreathDon’t just hide the toys under your Christmas tree! Bring them out in the
open for kids and adults to enjoy. All on this colorfully decorated Toy-CoveredWreath.
1. Cut a circle from the center of a disposable pizza pan, and notch the inneredge 3/4”. Then fold up the edge to form an inner rim.
2. Fill the outside circle of the pan with a “wreath” of crumpled foil. Coverthe foil with leaves of flattened teardrop shapes, scored with a knife for veining.
3. Bake at 325° about 45 minutes until firm.4. Next, construct simple toy shapes with cookie cutters or from free-form
shapes of dough balls and snakes.5. Attach toys to leaves with moistened balls of dough. Add little dough balls
for holly berries, too. Then wrap additional leaves around the pieces to help securethem in place. (Moisten to bond pieces.)
6. Return the wreath to a 325° oven 1 to 1 1/2 hours until it’s hard. When it’scool, paint, then varnish. Attach a hanger, and hang around for the compliments.
You’ve seen what dough sculpture can do for Christmas. Why not spice upyour other holidays and gift-giving occasions with special decorations and presentsmade of dough?
Get the festivities started with the following suggestions. Or create your owngreat ideas.
When Easter rolls around, be prepared with the Basket on page 17, andEaster Eggs that you’ve decorated with dough.
Mother’s Day means nice surprises for Mom when you present her with theTiger Lilies on page 17.
Put together a Cigar Box like the one on page 17 for Dad’s Day.
When it’s the Fourth of July, a Stars ‘N’ Stripes planter could make the day.
Or give the kids a surprise on Halloween. Hang a Home-Made Bat in thewindow.
For Thanksgiving, transform the Chicken on page 10 into a TurkeyCenterpiece with the addition of a few tail feathers.
Birthdays require a personal touch. So, trim gift packages with Dough-Printing of the person’s name.
41
As a special treat for a wedding shower, an Upside-down Dough Umbrella setoff with flowers makes a dandy centerpiece.
And for a 25th anniversary celebration, place a photograph of the lovingcouple in a Dough Frame topped with a big dough “25.”
Think about it! The possibilities are endless. And so is the fun you can have.When it’s holiday time, just see what you can make of it!
Morton® Salt hopes that you enjoy dough sculpture as a creative pastime.For generations, people have been using our salt to make things taste better. It iswith great pleasure that we pass along these helpful ideas to make your home andholidays a little prettier.
* A Morton Creation as seen in Family Circle Great Ideas Christmas Helps.
![> dolphin on rock sculpture H.STUDIO BY SHI-OMI HAZIZAQTD Toad Sculpture 028 Ladybug Sculpture Q] O Frog Sculpture ORB Rabbit Sculpture QRS Rooster Sculpture BB36 Luminescent Pedestal](https://img.pdfslide.us/doc/110x75/6032aef78589860da265969c/-dolphin-on-rock-sculpture-hstudio-by-shi-omi-qtd-toad-sculpture-028-ladybug.jpg)