Embed Size (px)
Citation preview

Office 2003Advanced Concepts and
Techniques
M i c r o s o f t
Access Project 5
Enhancing Forms with OLE Fields, Hyperlinks, and
Subforms

2Access Project 5: Enhancing Forms with OLE Fields,Hyperlinks, and Subforms
Objectives
• Use date, memo, OLE, and hyperlink fields
• Use the Input Mask wizard
• Update fields and enter data
• Change row and column size

3Access Project 5: Enhancing Forms with OLE Fields,Hyperlinks, and Subforms
Objectives
• Create a form with a subform using the Form wizard
• Modify a subform design
• Modify a form design
• Move and resize fields and labels

4Access Project 5: Enhancing Forms with OLE Fields,Hyperlinks, and Subforms
Objectives
• Change label alignment and size
• Change the size mode of a picture
• Change special effects and colors of labels
• Add a form title and fine-tune the form

5Access Project 5: Enhancing Forms with OLE Fields,Hyperlinks, and Subforms
Objectives
• Change tab stops and tab order
• Use the form to view data and Web pages
• Use Date and Memo fields in a query
• View object dependencies

6Access Project 5: Enhancing Forms with OLE Fields,Hyperlinks, and Subforms
Opening a Database
• Start Microsoft Office Access and open the Ashton James College database, which should be stored in the Data folder on your C: drive

7Access Project 5: Enhancing Forms with OLE Fields,Hyperlinks, and Subforms
Adding Fields to a Table
• If necessary, click Tables on the Objects bar• Right-click Trainer• Click Design View on the shortcut menu, and
then maximize the Microsoft Access – [Trainer : Table] window by double-clicking its title bar
• Click the position for the new field• Type Start Date as the field name, press the
TAB key, select Date/Time as the data type, press the TAB key, type Start Date as the description, and then press the TAB key to move to the next field

8Access Project 5: Enhancing Forms with OLE Fields,Hyperlinks, and Subforms
Adding Fields to a Table
• Type Comment as the field name, press the TAB key, select Memo as the data type, press the TAB key, type Comment Concerning Trainer as the description, and then press the TAB key to move to the next field
• Type Picture as the field name, press the TAB key, select OLE Object as the data type, press the TAB key, type Picture of Trainer as the description, and then press the TAB key to move to the next field
• Type Web Page as the field name, press the TAB key, select Hyperlink as the data type, press the TAB key, and then type Address of Trainer’s Web Page as the description

9Access Project 5: Enhancing Forms with OLE Fields,Hyperlinks, and Subforms
Adding Fields to a Table

10Access Project 5: Enhancing Forms with OLE Fields,Hyperlinks, and Subforms
Using the Input Mask Wizard
• Click the row selector for the Hourly Rate field, and then press the INSERT key to insert a blank row
• Click the Field Name column for the new field• Type Phone Number as the field name and
then press the TAB key• Select the Text data type by pressing the TAB
key• Type Phone Number as the description

11Access Project 5: Enhancing Forms with OLE Fields,Hyperlinks, and Subforms
Using the Input Mask Wizard
• Click the Input Mask property box
• Click the Build button
• If a dialog box appears asking you to save the table, click the Yes button
• Ensure that Phone Number is selected
• Click the Next button
• You are then given the opportunity to change the input mask

12Access Project 5: Enhancing Forms with OLE Fields,Hyperlinks, and Subforms
Using the Input Mask Wizard
• Because you do not need to change the mask, click the Next button a second time
• Click the “With the symbols in the mask, like this” option button, click the Next button, and then click the Finish button
• Click the Close Window button on the Trainer : Table window title bar to close the window
• When the Microsoft Office Access dialog box appears, click the Yes button to save your changes

13Access Project 5: Enhancing Forms with OLE Fields,Hyperlinks, and Subforms
Using the Input Mask Wizard
14Access Project 5: Enhancing Forms with OLE Fields,Hyperlinks, and Subforms
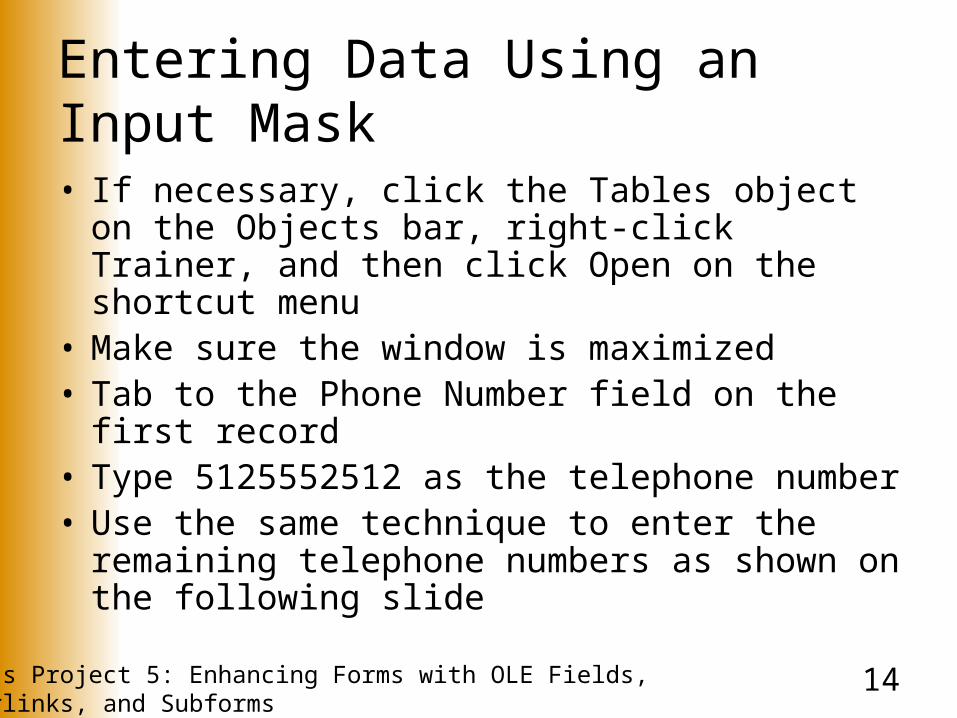
Entering Data Using an Input Mask
• If necessary, click the Tables object on the Objects bar, right-click Trainer, and then click Open on the shortcut menu
• Make sure the window is maximized• Tab to the Phone Number field on the first
record• Type 5125552512 as the telephone number• Use the same technique to enter the remaining
telephone numbers as shown on the following slide

15Access Project 5: Enhancing Forms with OLE Fields,Hyperlinks, and Subforms
Entering Data Using an Input Mask
16Access Project 5: Enhancing Forms with OLE Fields,Hyperlinks, and Subforms
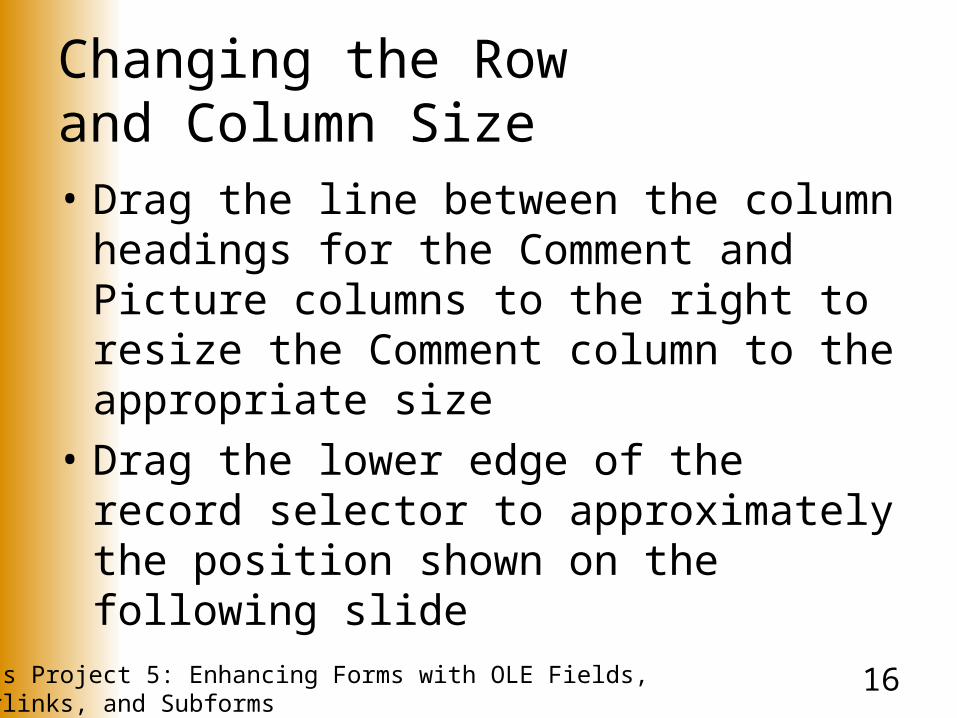
Changing the Row and Column Size• Drag the line between the column
headings for the Comment and Picture columns to the right to resize the Comment column to the appropriate size
• Drag the lower edge of the record selector to approximately the position shown on the following slide

17Access Project 5: Enhancing Forms with OLE Fields,Hyperlinks, and Subforms
Changing the Row and Column Size

18Access Project 5: Enhancing Forms with OLE Fields,Hyperlinks, and Subforms
Creating a Form with a Subform Using the Form Wizard• Click the Trainer table, and then click the New
Object button arrow on the Database toolbar• Click Form• Click Form Wizard and then click the OK button• With the Trainer Number field selected in the
Available Fields box, click the Add Field button• Select the First Name, Last Name, Phone
Number, Hourly Rate, YTD Earnings, Start Date, Web Page, Comment, and Picture fields by clicking the field and then clicking the Add Field button

19Access Project 5: Enhancing Forms with OLE Fields,Hyperlinks, and Subforms
Creating a Form with a Subform Using the Form Wizard• Click the Table/Queries box arrow
• Click Table: Client and then select the Client Number, Name, Amount Paid, and Current Due fields
• Click the Next button
• Click the Next button
• Be sure Datasheet is selected and then click the Next button

20Access Project 5: Enhancing Forms with OLE Fields,Hyperlinks, and Subforms
Creating a Form with a Subform Using the Form Wizard• Ensure Standard style is selected and click the
Next button• Type Trainer Master Form as the title of the
form• Click the Subform text box, erase the current
entry, and then type Clients as the name of the subform
• Click the Finish button• Close the form by clicking its Close Window
button

21Access Project 5: Enhancing Forms with OLE Fields,Hyperlinks, and Subforms
Creating a Form with a Subform Using the Form Wizard

22Access Project 5: Enhancing Forms with OLE Fields,Hyperlinks, and Subforms
Modifying the Subform Design
• With the Forms object selected, right-click Clients
• Click Design View on the shortcut menu
• If the field list appears, click its Close button
• Click the View button arrow on the Form Design toolbar

23Access Project 5: Enhancing Forms with OLE Fields,Hyperlinks, and Subforms
Modifying the Subform Design
• Click Datasheet View to display the subform in Datasheet view
• Resize each of the columns by pointing to the right edge of the field selector and double-clicking
• Close the subform by clicking its Close Window button

24Access Project 5: Enhancing Forms with OLE Fields,Hyperlinks, and Subforms
Modifying the Subform Design

25Access Project 5: Enhancing Forms with OLE Fields,Hyperlinks, and Subforms
Modifying the Form Design
• Right-click Trainer Master Form• Click Design View on the shortcut menu• Be sure the window is maximized• If the toolbox does not appear, click the
Toolbox button on the toolbar• Make sure the toolbox is docked at the
bottom of the screen. If it is not, drag its title bar to the bottom of the screen to dock it there

26Access Project 5: Enhancing Forms with OLE Fields,Hyperlinks, and Subforms
Modifying the Form Design

27Access Project 5: Enhancing Forms with OLE Fields,Hyperlinks, and Subforms
Moving and Resizing Fields
• Click the Picture control and then move the mouse pointer until the shape changes to a hand
• Drag the Picture control to approximately the position shown on the following slide
• Drag the lower-sizing handle to approximately the position shown on the following slide
• Move and resize the Comment control to the approximate position and size shown on the following slide

28Access Project 5: Enhancing Forms with OLE Fields,Hyperlinks, and Subforms
Moving and Resizing Fields

29Access Project 5: Enhancing Forms with OLE Fields,Hyperlinks, and Subforms
Moving a Label
• Be sure the Comment field is selected, and then drag the move handle for its label to the position shown

30Access Project 5: Enhancing Forms with OLE Fields,Hyperlinks, and Subforms
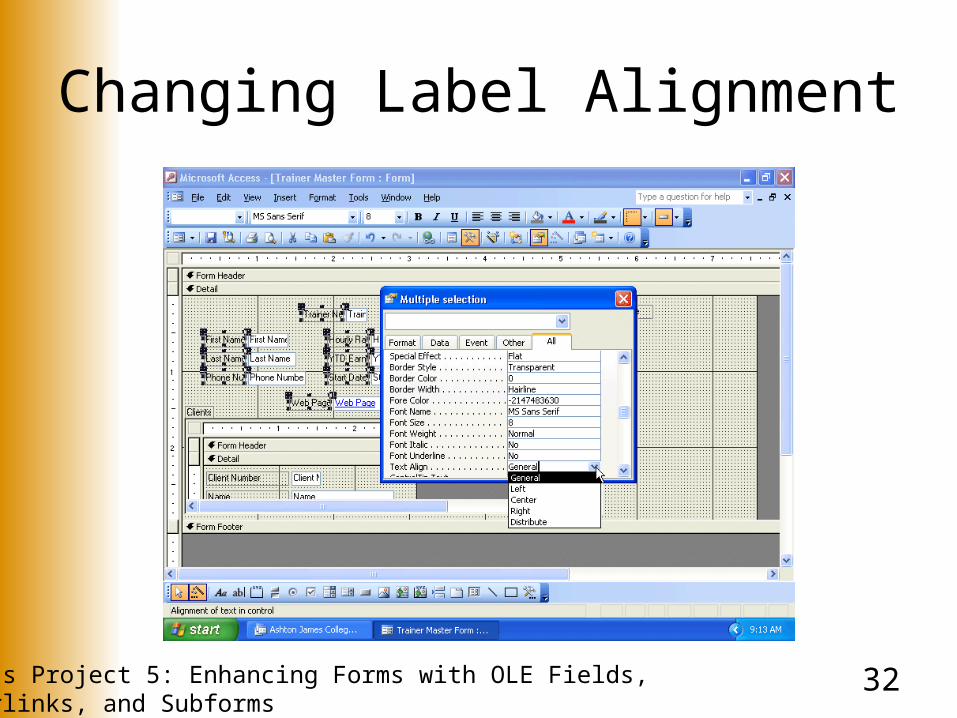
Changing Label Alignment
• Click the label for the Trainer Number field to select it
• Select the labels for the First Name, Last Name, Phone Number, Hourly Rate, YTD Earnings, Start Date, and Web Page fields by clicking them while holding down the SHIFT key
• Right-click any of the selected labels

31Access Project 5: Enhancing Forms with OLE Fields,Hyperlinks, and Subforms
Changing Label Alignment
• Click Properties, click the All tab if it is not selected already, and then click the down scroll arrow to display the Text Align property
• Click Text Align and then click the Text Align property box arrow
• Click Right to select right alignment for the labels• Close the Multiple selection property sheet by
clicking its Close button
32Access Project 5: Enhancing Forms with OLE Fields,Hyperlinks, and Subforms
Changing Label Alignment

33Access Project 5: Enhancing Forms with OLE Fields,Hyperlinks, and Subforms
Resizing a Label
• With all the labels selected, point to the handle on the left edge of the Trainer Number label
• Double-click the middle-sizing handle on the left edge of the Trainer Number label to resize all the labels

34Access Project 5: Enhancing Forms with OLE Fields,Hyperlinks, and Subforms
Changing the Size Mode
• Right-click the Picture control to produce its shortcut menu, and then click Properties on the shortcut menu
• Click the Size Mode property, and then click the Size Mode property box arrow
• Click Zoom and then close the property sheet by clicking its Close button

35Access Project 5: Enhancing Forms with OLE Fields,Hyperlinks, and Subforms
Changing Special Effects and Colors of Labels• Click the Trainer Number label to select it• Select each of the remaining labels by
holding down the SHIFT key while clicking the label. Be sure to include the Clients label for the subform
• Right-click one of the selected labels• Click Properties on the shortcut menu• Click the Special Effect property, and then
click the Special Effect property box arrow
36Access Project 5: Enhancing Forms with OLE Fields,Hyperlinks, and Subforms
Changing Special Effects and Colors of Labels• Click Chiseled• If necessary, click the down scroll arrow until the
Fore Color property appears, and then click the Fore Color property
• Click the Build button• Click the color blue and then click the OK button• Close the Multiple selection property sheet by
clicking its Close button, then click the View button to view the form

37Access Project 5: Enhancing Forms with OLE Fields,Hyperlinks, and Subforms
Changing Special Effects and Colors of Labels

38Access Project 5: Enhancing Forms with OLE Fields,Hyperlinks, and Subforms
Adding a Form Title
• Click the View button to return to Design view• Resize the Form Header section by dragging down the
line separating the Form Header section from the Detail section to the approximate position shown in Figure 5-59 on page AC 291
• Click the Label tool in the toolbox, and then position the mouse pointer as shown in Figure 5-60 on page AC 291. The shape of the mouse pointer has changed, indicating you are placing a label
• Click the position, and then type Trainer Master Form as the title
• Click outside the label to deselect it, and then click the label to select it a second time

39Access Project 5: Enhancing Forms with OLE Fields,Hyperlinks, and Subforms
Adding a Form Title
• Drag the handle in the lower-right corner to the approximate position shown in Figure 5-61 on page AC 292
• Right-click the label and then click Properties on the shortcut menu
• Click the Special Effect property, and then click the Special Effect property box arrow
• Click Chiseled• Click the down scroll arrow to display the Font
Size property
40Access Project 5: Enhancing Forms with OLE Fields,Hyperlinks, and Subforms
Adding a Form Title
• Select the 12 pt Font Size• Scroll down to display the Font Weight property• Click the Font Weight property, click the Font
Weight property box arrow, and then click Bold• Close the property sheet by clicking its Close
button• Resize the label to fit the title, and then move the
label so it is centered over the form

41Access Project 5: Enhancing Forms with OLE Fields,Hyperlinks, and Subforms
Adding a Form Title

42Access Project 5: Enhancing Forms with OLE Fields,Hyperlinks, and Subforms
Fine-Tuning the Form
• Click the Phone Number control, and then drag the right sizing handle to the right to expand the control
• Click the View button to display the form, examine the Phone Number control to see if it is the size you want, and then click the View button to return to the form design
• If the Phone Number control is not the desired size, repeat the first two steps until it is
• Use the previous three steps to resize the Web Page control to the size you want

43Access Project 5: Enhancing Forms with OLE Fields,Hyperlinks, and Subforms
Changing a Tab Stop
• Right-click the Picture control• Click Properties on the shortcut menu. Make
sure the All tab is selected, click the down scroll arrow until the Tab Stop property appears, click the Tab Stop property, click the Tab Stop property box arrow, and then click No
• Close the property sheet• With this change, tabbing through the controls
on the form will bypass the picture

44Access Project 5: Enhancing Forms with OLE Fields,Hyperlinks, and Subforms
Changing a Tab Stop

45Access Project 5: Enhancing Forms with OLE Fields,Hyperlinks, and Subforms
Changing the Tab Order
• Click View on the menu bar, click Tab Order on the View menu, and then click the Comment row to select it
• Drag the Comment field above the Web Page field
• Click OK• Close the window containing the form• When asked if you want to save the changes to
the design of the form, click Yes

46Access Project 5: Enhancing Forms with OLE Fields,Hyperlinks, and Subforms
Changing the Tab Order

47Access Project 5: Enhancing Forms with OLE Fields,Hyperlinks, and Subforms
Using the Form to View Data and Web Pages• If necessary, click Forms on the Objects bar• Right-click Trainer Master Form and then click
Open on the shortcut menu• Be sure the window containing the form is
maximized• Click the Next Record button to move to the
second trainer• Click the subform’s Next Record button twice

48Access Project 5: Enhancing Forms with OLE Fields,Hyperlinks, and Subforms
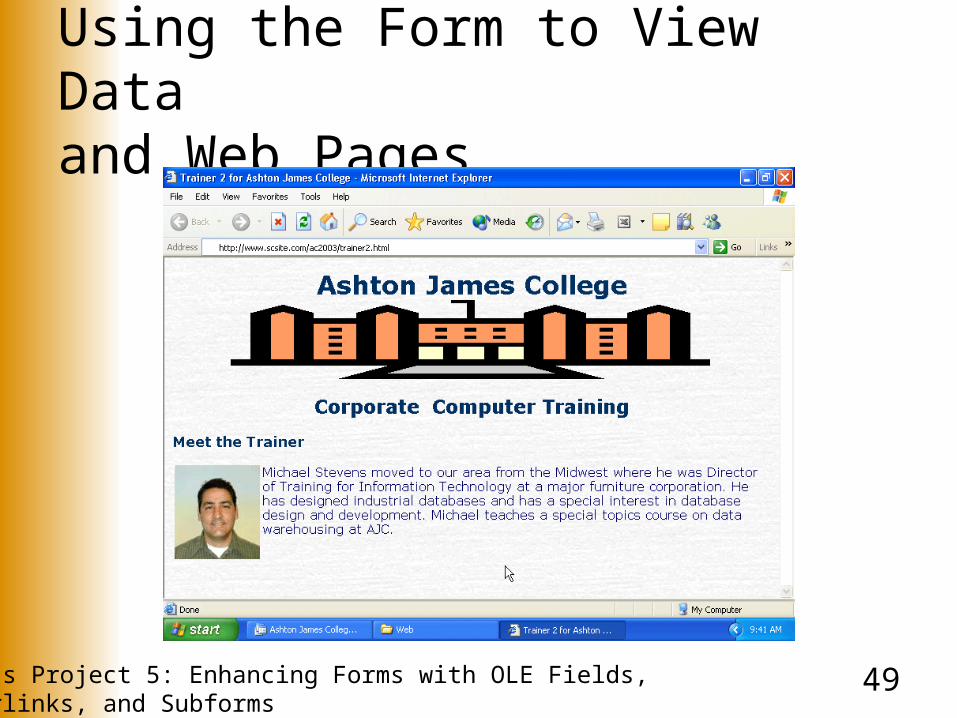
Using the Form to View Data and Web Pages• Click the Web Page control• If Access displays a dialog box in either this step
or the next, follow the directions given in the dialog box
• When you have finished viewing the trainer’s Web page, click the Close button for the Microsoft Internet Explorer window to return to the form
• Click the Close Window button to close the form
49Access Project 5: Enhancing Forms with OLE Fields,Hyperlinks, and Subforms
Using the Form to View Data and Web Pages

50Access Project 5: Enhancing Forms with OLE Fields,Hyperlinks, and Subforms
Viewing Object Dependencies
• If necessary, click Forms on the Objects bar and then click the Trainer Master Form
• Click View on the menu bar and then click Object Dependencies
• When the Microsoft Access dialog box appears stating that Access must update dependency information, click OK
• Click the “Objects that I depend on” option button

51Access Project 5: Enhancing Forms with OLE Fields,Hyperlinks, and Subforms
Using Date and Memo Fields in a Query• In the Database window, click Tables on the
Objects bar, and then, if necessary, select the Trainer table
• Click the New Object button arrow on the Database toolbar
• Click Query• Be sure Design View is highlighted, and then
click the OK button• Be sure the Microsoft Access [Query1 : Select
Query] window is maximized

52Access Project 5: Enhancing Forms with OLE Fields,Hyperlinks, and Subforms
Using Date and Memo Fields in a Query• Resize the upper and lower panes and the Trainer field
list so all fields in the Trainer table appear• Double-click the Trainer Number, First Name, Last
Name, Start Date, and Comment fields to include them in the query
• Click the Criteria row under the Comment field and then type *database* as the criterion
• Click the Run button on the Query Design toolbar to run toe query
• Click the View button to return to the Select Query window

53Access Project 5: Enhancing Forms with OLE Fields,Hyperlinks, and Subforms
Using Date and Memo Fields in a Query• Click the Criteria row under the Start Date
field, and then type <1/1/2003 as the criterion
• Click the Run button to run the query
• Close the Select Query window by clicking its Close Window button
• When asked if you want to save the query, click the No button

54Access Project 5: Enhancing Forms with OLE Fields,Hyperlinks, and Subforms
Using Date and Memo Fields in a Query

55Access Project 5: Enhancing Forms with OLE Fields,Hyperlinks, and Subforms
Summary
• Use date, memo, OLE, and hyperlink fields
• Use the Input Mask wizard
• Update fields and enter data
• Change row and column size

56Access Project 5: Enhancing Forms with OLE Fields,Hyperlinks, and Subforms
Summary
• Create a form with a subform using the Form wizard
• Modify a subform design
• Modify a form design
• Move and resize fields and labels
57Access Project 5: Enhancing Forms with OLE Fields,Hyperlinks, and Subforms
Summary
• Change label alignment and size
• Change the size mode of a picture
• Change special effects and colors of labels
• Add a form title and fine-tune the form

58Access Project 5: Enhancing Forms with OLE Fields,Hyperlinks, and Subforms
Summary
• Change tab stops and tab order
• Use the form to view data and Web pages
• Use Date and Memo fields in a query
• View object dependencies

Office 2003Advanced Concepts and
Techniques
M i c r o s o f t
Access Project 5 Complete