Embed Size (px)
Citation preview
October 1, 2013
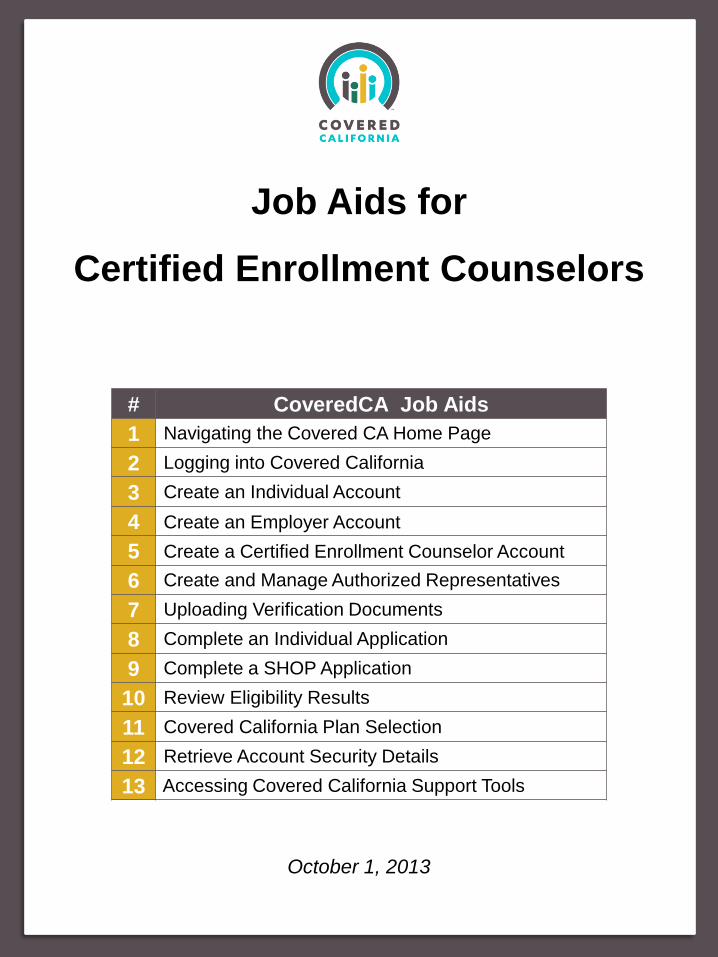
Job Aids for
Certified Enrollment Counselors
# CoveredCA Job Aids
1 Navigating the Covered CA Home Page
2 Logging into Covered California
3 Create an Individual Account
4 Create an Employer Account
5 Create a Certified Enrollment Counselor Account
6 Create and Manage Authorized Representatives
7 Uploading Verification Documents
8 Complete an Individual Application
9 Complete a SHOP Application
10 Review Eligibility Results
11 Covered California Plan Selection
12 Retrieve Account Security Details
13 Accessing Covered California Support Tools

Page 1 of 3
October 1, 2013
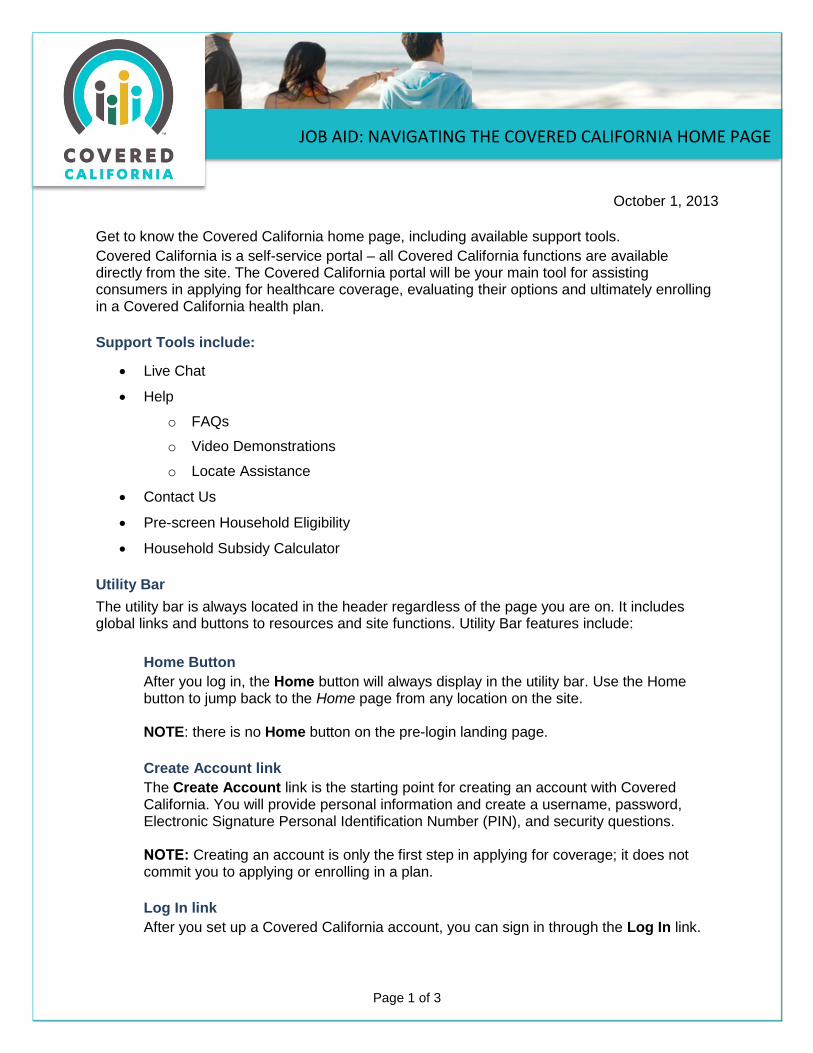
Get to know the Covered California home page, including available support tools.
Covered California is a self-service portal – all Covered California functions are available directly from the site. The Covered California portal will be your main tool for assisting consumers in applying for healthcare coverage, evaluating their options and ultimately enrolling in a Covered California health plan.
Support Tools include:
Live Chat
Help
o FAQs
o Video Demonstrations
o Locate Assistance
Contact Us
Pre-screen Household Eligibility
Household Subsidy Calculator
Utility Bar
The utility bar is always located in the header regardless of the page you are on. It includes global links and buttons to resources and site functions. Utility Bar features include:
Home Button
After you log in, the Home button will always display in the utility bar. Use the Home button to jump back to the Home page from any location on the site. NOTE: there is no Home button on the pre-login landing page.
Create Account link
The Create Account link is the starting point for creating an account with Covered California. You will provide personal information and create a username, password, Electronic Signature Personal Identification Number (PIN), and security questions. NOTE: Creating an account is only the first step in applying for coverage; it does not commit you to applying or enrolling in a plan.
Log In link
After you set up a Covered California account, you can sign in through the Log In link.
JOB AID: NAVIGATING THE COVERED CALIFORNIA HOME PAGE
JOB AID: NAVIGATING THE COVERED CALIFORNIA HOME PAGE
Page 2 of 3
Text Size Selector
The Text Size Selector lets you change the page text size. Medium is the default text size.
Click on largest “A” in the Text Size Selector link to increase the font size to large
Click on the smallest “A” in the Text Size Selector link decrease the font size to small
Click on the middle “A” in the Text Size Selector link return the font size to medium
Language Selector
The Language Selector link lets you switch between English content and Spanish
content.
Click on the Español link to view the page in Spanish
Once the page is in Spanish, the Language Selector link displays in English
Click on the English link to view the page in English
Online Chat
You can connect with a Service Center Representative (SCR) through live chat.
Click on the Online Chat link
The Live Chat popup displays
This dialog connects you to a Covered California Service Center employee who can answer your questions.
Click on the Español link in the upper left-hand corner of the Live Chat popup to get help from a Spanish speaking SCR.
Find Help Near You
Consumers will use the Find Help Near You link to find a Covered California Certified
Enrollment Counselor or Certified Insurance Agent in their area.
Help
The Help button gives you access to support resources. Announcements
The Announcements section displays messages about policy updates, deadlines, and events. Information
You can find more information about health care plans for an Individual or Family, an Employer, or an Employee.
Click on the Go button in the relevant panel to view additional information for that type of consumer
JOB AID: NAVIGATING THE COVERED CALIFORNIA HOME PAGE
Page 3 of 3
Contact Us
The Contact Us page displays various modes of communicating with Covered California.
Communicate with Covered California by:
Phone number
Online Chat
Consumers will use Locate Assistance to identify and contact an Assister in their area.
External Links
The External Links section contains links to Covered California partners. Explore any of these links to learn about the policies that drive Covered California. Footer
The footer area contains the following links:
About Us
The About Us link opens a page with general information about the purpose of Covered
California.
Mission Statement
The Mission Statement link takes you to Covered California’s Mission Statement.
Contact Us
The Contact Us page displays various modes of communicating with Covered
California. Communicate with Covered California by:
Phone number
Online Chat

Page 1 of 1
October 1, 2013
Log into your Covered California account
If you already have a Covered California account, here is how to log in:
Go to the Covered California home page at www.CoveredCA.com
Click the Log In link at the top of the page – the Log In page displays
Select the Username field, type in your username
Select the Password field, type in your password
Click the Login button
If you correctly entered your valid username and password, the Select Role page displays.
You may have one or more roles linked to your username. For example you have an account for yourself and your family, but you also act as an Authorized Representative for someone else, or perhaps you have an account as an Insurance Agent. The Select Role section allows you to select the role you use to log into Covered California.
Problems?
If you cannot remember your username or your password:
Click on the Forgot your username or password? link
The Retrieve Account Details: Your Information page will display
Enter your information, verify your identity and retrieve your information
Call Covered California Customer Service if you need assistance recovering your username or resetting your password
Multiple Attempts
Note that after three or more consecutive unsuccessful log in attempts, your account is automatically locked for 24 hours.
Click on the Forgot your username or password? link
The Retrieve Account Details: Your Information page will display
Call Covered California Customer Service for help unlocking your account, and with recovering your username or resetting your password, if needed
JOB AID: LOGGING INTO COVERED CALIFORNIA

Page 1 of 3
October 1, 2013
Your Covered California Account
If you are new to Covered California, you must first create an account before you can apply for health care coverage for your family or yourself. With your Covered California account you can start the process of comparing health insurance plans, seeing if you qualify for premium assistance, and applying for a plan for you and your family. Your account is where you will manage and keep track of your coverage once you’re enrolled in a plan.
Go to the Covered California home page at www.CoveredCA.com
Click the Create Account link at the top of the page – the Create a New User Account page displays
Click on the Continue button in the INDIVIDUAL OR FAMILY box
Account Creation Process
The left-side navigation panel shows five steps to create an account. After completing each section, a check mark replaces the step number. Fields that require information are marked with red asterisks.
1. Agree to the Terms and Conditions:
a. Click on the View the Terms and Conditions link and read the information that displays in the Terms and Conditions popup
b. Click on the Close button in the popup
c. Click on the Check this box to show you agree to the terms and conditions checkbox
d. Click Continue
2. Enter information about you (User Information):
a. Enter the First Name field
b. Enter the Last Name field
c. Enter the Date of Birth field
d. Enter the Social Security Number field (optional)
e. Covered California sends notifications to a personal secure mailbox that is part of
your account. You can also tell us how to let you know that a message is waiting
(note that we are required to send some information by mail). Tell us your
preferred method of communication, choosing either Email, Phone, or Mail:
i. Select the Preferred method of communication dropdown
ii. Select Email, Mail or Phone from the dropdown list
f. Click Continue
JOB AID: CREATE AN INDIVIDUAL ACCOUNT
JOB AID: CREATE AN INDIVIDUAL ACCOUNT
Page 2 of 3
System Check for Duplicates
At this point, the system checks what you have entered to see if you already have an
account. This prevents duplicate accounts. A popup will display advising you to log
into that account, continue and create a new account, or contact the Covered
California Service Center if you need help resolving the issue.
3. Enter your Contact Information:
a. Enter the Street Address 1 field
b. Enter the Street Address 2 field (optional)
c. Enter the City field
d. Confirm that CA displays in the State field, or select a different state if your address is in a different state
e. Enter the Zip Code field
f. Enter the Email field (optional)
g. Enter the Phone Number field (optional)
h. Click Continue
Postal Address Validation
Before moving on, we validate the address you entered against the United States Postal Service. A popup dialog appears showing any close or exact matches with your address. You may select an address presented from the USPS comparison or choose to keep your own entry.
4. Create your Username and Password – this is your first line of defense in keeping your information safe and confidential. To make it more difficult to break, your username must contain eight or more characters and your password must have eight or more characters, including at least one letter and one number. Your password cannot be the same as or similar to your username.
a. Type your chosen username into the Username field
b. Type your password into the Password field
c. Retype your password into the Re-enter Password field to confirm it
You are also asked to create an Electronic Signature Personal Identification Number. You use this PIN to sign documents electronically. Your PIN must have four numbers.
d. Type a 4-digit PIN of your choice into the Electronic Signature PIN field
e. Retype your PIN into the Re-enter Electronic Signature PIN field to confirm it
f. Click Continue
5. View your Account Summary – When you finish entering information for your account and there are check marks next to the first four steps in the left navigation panel, you can give your information one last review. The screen will show three sections – User Information, Contact Information, and Username & Password.
a. Click the Edit button within a section if you need to update any information
JOB AID: CREATE AN INDIVIDUAL ACCOUNT
Page 3 of 3
b. Otherwise, click Continue to save your information and create your account c. You’ll see a popup indicating that you successfully created an account. Click the
Log In button to go to the Log In page and get started.

Page 1 of 3
October 1, 2013
Your Covered California Employer Account
Before you can apply for the Small Business Health Options Program (SHOP) through Covered California and select health insurance plans to offer your employees, you must create an account. With an account you can start the SHOP application process, check your eligibility for tax credits, and compare Covered California plans. Your Employer account is where you submit your SHOP application, add your employee roster, select your contribution amount, and much more.
Go to the Covered California homepage at www.CoveredCA.com
Click the Create Account link at the top of the page – the Create an Account page displays
Click the Continue button in the Employer box
Account Creation Process
The left-side navigation panel shows six steps to create an account. After completing each section, a check mark replaces the step number. Fields that require information are marked with red asterisks.
1. Agree to the Terms and Conditions:
a. Click on the View the Terms and Conditions link and read the information that displays in the Terms and Conditions popup
b. Click on the Close button in the popup
c. Click on the Check this box to show you agree to the terms and conditions checkbox
d. Click Continue
2. Enter your Business Information on the next page
a. Enter your Business Legal Name
b. Enter your Federal Employer Identification Number
c. Enter your State Employer Identification Number
d. If necessary, check the box to indicate that one or both employer identification numbers are not available
e. Click Continue
JOB AID: CREATE AN EMPLOYER ACCOUNT
JOB AID: CREATE AN EMPLOYER ACCOUNT
Page 2 of 3
System Check for Duplicates
At this point, the system checks what you have entered to see if you already have an account. If so, a popup will display advising you to log into that account or contact the Covered California Service Center if you need help resolving the issue.
3. Enter information about you (User Information):
a. Enter the First Name field
b. Enter the Last Name field
c. Enter the Date of Birth field
d. Enter the Social Security Number field
e. Covered California sends notifications to a personal secure mailbox that is part of
your account. You can also tell us how to let you know that a message is waiting
(note that we are required to send some information by mail). Tell us your
preferred method of communication, choosing either Email, Phone, or Mail:
i. Select the Preferred method of communication dropdown
ii. Select Email, Mail or Phone from the dropdown list
f. Click Continue
4. Enter your Contact Information:
a. Enter the Street Address 1 field
b. Enter the Street Address 2 field (optional)
c. Enter the City field
d. Enter the Zip Code field
e. Enter the Email field
f. Enter the Phone Number field
g. Click Continue
Postal Address Validation
Before moving on, we validate the address you entered against the United States Postal Service. A popup dialog appears showing any close or exact matches with your address. You may select an address presented from the USPS comparison or choose to keep your own entry.
5. Create your Username and Password – this is your first line of defense in keeping your information safe and confidential. To make it more difficult to break, your username must contain eight or more characters and your password must have eight or more characters, including at least one letter and one number. Your password cannot be the same as or similar to your username. You are also asked to create an Electronic Signature Personal Identification Number (PIN). You use this PIN to sign documents electronically. Your PIN must have four numbers.
a. Type your chosen username into the Username field – 8 or more letters and numbers
JOB AID: CREATE AN EMPLOYER ACCOUNT
Page 3 of 3
b. Type your password into the Password field – 6 or more letters and numbers
c. Retype your password into the Re-enter Password field to confirm it
d. Type a 4-digit PIN of your choice into the Electronic Signature PIN field
e. Retype your PIN into the Re-enter Electronic Signature PIN field to confirm it
f. Click Continue
6. View your Account Summary – When you finish entering information for your account and there are check marks next to the first five steps in the left navigation panel, you can give your information one last review. The screen will show three sections – User Information, Contact Information, and Username & Password.
a. Click the Edit button within a section if you need to update any information
b. Otherwise, click Continue to save your information and create your account
c. You’ll see a popup indicating that you successfully created an account. Click the Log In button to go to the Log In page and get started.

Page 1 of 3
October 1, 2013
Your Covered California Certified Enrollment Counselor Account
When you complete and pass all the requirements of your Certified Enrollment Counselor training, that information is recorded in the Covered California Learning Management System (LMS). An Enrollment Counselor Manager for Covered California manually verifies this and changes your Certification Status to Certified. CalHEERS, the Covered California system, sends a notice to your Certified Enrollment Entity (your employer) that includes your certification number and delegation code. Your Certified Enrollment Entity then gives you your delegation code, certification number, and the Entity’s legal business name, which you use to create your Certified Enrollment Counselor Account on the portal. You may be employed by more than one Enrollment Entity. You will have only one Certification Number given to you by Covered California; however, you will receive a new Delegation Code and create a new account for each of your Enrollment Entities.
Go to the Covered California homepage at www.CoveredCA.com
Click the Create Account link at the top of the page – the Create a New User Account page displays
Click Continue in the Certified Enrollment Counselor box
Account Creation Process
The left-side navigation panel shows six steps to create an account. After completing each section, a check mark replaces the step number. Fields that require information are marked with red asterisks.
You must have a delegation code, your certification number and your Certified Enrollment Entity’s business legal name to create your Certified Enrollment Counselor account. If you do not have this information, contact your Certified Enrollment Entity.
1. After clicking Continue, the Set Up an Account – With Your Delegation Code page displays
a. Enter your delegation code in the first field labeled Delegation Code
b. Enter the legal Business Name (Legal) of the Enrollment Entity with which you are associated
c. Enter your Certification Number
d. Click Continue
JOB AID: CREATE A CERTIFIED ENROLLMENT COUNSELOR ACCOUNT
JOB AID: CREATE A CERTIFIED ENROLLMENT COUNSELOR ACCOUNT
Page 2 of 3
2. Agree to the Terms and Conditions:
a. Click on the View the Terms and Conditions link and read the information that displays in the Terms and Conditions popup
b. Click on the Close button in the popup
c. Click on the Check this box to show you agree to the terms and conditions checkbox
d. Click Continue
3. Enter information about you (User Information):
a. Enter the First Name field
b. Enter the Last Name field
c. Enter the Date of Birth field
d. Enter the Social Security Number field
e. Covered California sends notifications to a personal secure mailbox that is part of
your account. You can also tell us how to let you know that a message is waiting
(note that we are required to send some information by mail). Tell us your
preferred method of communication, choosing either Email, Phone, or Mail:
i. Select the Preferred method of communication dropdown
ii. Select Email, Mail or Phone from the dropdown list
f. Click Continue
4. Enter your Contact Information:
a. Enter the Street Address 1 field
b. Enter the Street Address 2 field (optional)
c. Enter the City field
d. Enter the Zip Code field
e. Enter the Email field
f. Enter the Phone Number field
g. Click Continue
Postal Address Validation
Before moving on, we validate the address you entered against the United States Postal Service. A popup dialog appears showing any close or exact matches with your address. You may select an address presented from the USPS comparison or choose to keep your own entry.
5. Create your Username and Password – this is your first line of defense in keeping your information safe and confidential. To make it more difficult to break, your username must contain eight or more characters and your password must have eight or more
JOB AID: CREATE A CERTIFIED ENROLLMENT COUNSELOR ACCOUNT
Page 3 of 3
characters, including at least one letter and one number. Your password cannot be the same as or similar to your username.
a. Type your chosen username into the Username field
b. Type your password into the Password field
c. Retype your password into the Re-enter Password field to confirm it
You are also asked to create an Electronic Signature Personal Identification Number. You use this PIN to sign documents electronically. Your PIN must have four numbers.
d. Type a 4-digit number of your choice into the Electronic Signature PIN field
e. Retype your PIN into the Re-enter Electronic Signature PIN field to confirm it
f. Click Continue
6. View your Account Summary – When you finish entering information for your account and there are check marks next to the first five steps in the left navigation panel, you can give your information one last review. The screen will show three sections – User Information, Contact Information, and Username & Password.
a. Click the Edit button within a section if you need to update any information
b. Otherwise, click Continue to save your information and create your account
c. You’ll see a popup indicating that you successfully created an account. Click the Log In button to go to the Log In page and get started.

Page 1 of 2
October 1, 2013
Authorized Representatives
An Authorized Representative is someone you’ve asked to perform functions on your behalf with Covered California, and whom you give full access to your Covered California account. This job aid covers creating and managing an Authorized Representative, and creating a new delegation code.
Requesting an Authorized Representative
After logging into your Covered California homepage, click on the Manage Delegates link in the
Resources panel.
The Manage Delegates page displays. The Users List table will show any existing
Authorized Representatives for your account.
Click Delegate Access
The Authorized Representative Information page displays. Enter the contact information
(name, address, and phone numbers) for the person you wish to act on your behalf. All
required fields are marked with a red asterisk
Next, identify the communication and language preferences of your Authorized
Representative
Indicate whether you want the Authorized Representative to receive notices on your
behalf
To add another Authorized Representative, click on the Add Another button
If you are finished adding representatives, to confirm your request click on the Continue
button
o If you get an address confirmation popup, confirm that the correct address is
selected, then click OK.
o A popup message titled Delegate Access Confirmation appears, explaining that
you are delegating authority for full access to your account and for making plan
selections on your behalf
o The popup asks you to confirm by clicking the Delegate Access button, or return
to the previous screen
JOB AID: CREATE AND MANAGE AUTHORIZED REPRESENTATIVES
JOB AID: CREATE AND MANAGE AUTHORIZED REPRESENTATIVES
Page 2 of 2
If you confirm your action, the system displays another popup message showing you a
Delegation Code to give to your Authorized Representative
o The code is a six character string of letters and numbers and is case sensitive
Now your Authorized Representative must create his or her own account with Covered
California. On creating the account, the system asks your Authorized Representative for the
delegation code you provide. When the Authorized Rep logs in using their Authorized Rep
username and password they will be able to act on your behalf.
Manage Authorized Representatives
To manage your Authorized Representative(s), select Manage Delegates from your homepage.
The Manage Delegates page displays your list of Authorized Representatives
To create a new delegation code or reset the existing delegation code associated with an
Authorized Representative, select the representative and click Delegate Access.
The Delegate Access popup displays the updated delegation code
Select a row to view details of an Authorized Representative. To take away a
representative’s access to your account and drop them from the list, click Remove
To update the Authorized Representative’s information, select Modify
As you delegate access to your account, it is important to remember that Authorized
Representatives have complete access to your account. Delegation codes should only be given
to those you trust.
Page 1 of 3
October 1, 2013
Verification Documents
Consumers applying for health coverage and financial assistance may need to upload
Verification Documents when their Eligibility Result is either Conditional or Pending. This
happens when Covered California needs additional information to determine eligibility, or when
the information provided by the applicant does not match information provided by our electronic
data sources, such as the Federal Data Services Hub (DSH) or the Employment Development
Department (EDD).
The applicant can upload verification documents immediately after receiving an Eligibility
Determination of Conditional Eligibility by clicking on the Submit Documents link on the
Eligibility Results page. However, the applicant may not immediately have access to the
required documentation. In that case, they can come back later to their Individual homepage
and navigate to the Manage Verifications page from there.
Below are instructions for how an applicant would upload documents to support verification. The
process is documented from the applicant’s viewpoint, so that in your particular role you can
better understand and support the procedure.
How to Upload Verification Documents
Uploading verification documents in Covered California is a simple process:
1. Navigate to the Manage Verifications page from the Individual homepage
2. Complete the Submit Verifications page
3. Upload and categorize the Verification Document(s)
4. Submit the verification document for Service Center Representative review
Once you have submitted the Verification Document, a Service Center Representative will
review the document to finalize Eligibility. They may request additional documentation or
otherwise contact you about the documents provided. They can communicate with you through
the Comments on the Manage Verification page or through your Preferred Communication
Method.
Navigating to the Manage Verifications Page
After Logging into the Covered California website, you begin on your homepage.
1. If you are an Certified Enrollment Counselor or Certified Insurance Agent:
JOB AID: UPLOADING VERIFICATION DOCUMENTS

JOB AID: UPLOADING VERIFICATION DOCUMENTS
Page 2 of 3
a. Navigate to your Active Individuals Page
b. Select the Individual who needs to upload Verifications
c. Click on the View Account button to navigate to their homepage
d. Click on the Manage Verifications link in the Actions bar
2. If you are a Service Center Representative:
a. Click on the Search Individual link
b. Search for the Individual by Social Security Number, Combination Search, or
other criteria
c. Select the Individual or Case
d. Click on the View Home button
e. Click on the Manage Verifications link in the Actions bar
The Manage Verifications Page
This page is only available for cases that have uploaded or need to upload verifications.
Information will only be available for household members who have a status of Conditionally
Eligible or Pending Eligible.
Complete the Submit Verifications Page
Access the Submit Verifications page by clicking on the Submit Verifications tab on the left side of the Manage Verifications page, or by clicking the Submit Documents link on the Eligibility Results page.
1. Review the Household Information section to confirm it is the correct case
2. Review the Required Documents section
a. The Required Documents section will display for every household member who
needs to provide additional verification documents
b. Only Household Members with a Required Documents section need to provide
the documents listed
c. For each document category, click on the Upload button
Upload and Categorize the Verification document(s)
On the Upload Documents page you can submit one or more documents for each required verification.
1. Select a document type
a. Select the relevant Document Type from the dropdown
JOB AID: UPLOADING VERIFICATION DOCUMENTS
Page 3 of 3
2. Browse for the document
a. Click on the Browse button
b. Browse your computer for the document to upload
c. Double-click that document
3. Upload the document
a. Click the Upload button
b. The document appears in the Documents Uploaded table
i. View the uploaded document by clicking the View link
ii. Remove the uploaded document by clicking the Remove link
4. Repeat these steps for each additional verification related to this document category
5. Click on the Back button to return to the Submit Verifications page
Submit the Verification Document for Service Center Representative review
Review the Required Documents section for each household member. You should see the
uploaded documents for each one displayed as links. These links will open copies of the
uploaded document. You can also see the status of the document.
1. Before submitting the verification, add comments about the documents uploaded in the
Comments section
2. If you are not prepared to submit these documents at this time, click on the Save and
Exit button
3. If you do not wish to save these uploaded documents, click on the Close button
4. When you are ready to submit these uploaded documents for Service Center
Representative review, click on the Submit button
Next Steps
A Service Center Representative reviews the verification documents and may need to follow up
for questions or clarifications. If Covered California determines that an uploaded document is
incorrect or otherwise does not address the required verification, the applicant or assister can
use the Withdraw button to remove it.
The applicant can now view these uploaded documents from the Manage Verifications page.
The applicant may click on Edit to edit the submission while it is unverified, or click on
Withdraw to cancel submission of a document. The applicant can also click on View to display
the document.

Page 1 of 5
October 1, 2013
The Individual Application for Health Coverage
Training courses cover all you need to know about how to complete the Individual Application in
Covered California, but this job aid also provides an overview of the process for completing the
online application for an individual, family, or employee applicant.
Completing the Individual Application
Completing the Application in Covered California is a simple process:
1. The applicant must create an account on the Covered California portal
2. Begin the application process – You can initiate the application on behalf of the
applicant and tell us about the members of the applicant’s household
3. Add personal Information – Complete the Demographic, Tax, Health Care, and
Optional Data pages
4. Add income – Complete the Employment, Self-Employment, Other Income, and
Deductions pages.
5. Review and eSign – Review the information entered and eSign the application
Creating a Covered California Account
You can view a different Job Aid covering the details of how to create a Covered California
account.
Begin the Application Process
The left-side navigation panel shows the steps for beginning the application. After completing
each section, a check mark replaces the step number. Fields that require information are
marked with red asterisks.
1. Tell us about the type of application on the Apply for Benefits page
a. Tell us if the applicant wants to apply for Financial Assistance
b. Tell us how many Household Members are in the applicant’s home
c. Tell us how the applicant heard about the Exchange
2. Agree to our verification process on the Consent to Verification page
3. Identify the Primary Contact for this household:
JOB AID: COMPLETE AN INDIVIDUAL APPLICATION
JOB AID: COMPLETE AN INDIVIDUAL APPLICATION
Page 2 of 5
a. Complete the Primary Contact – Name fields
b. Complete the Primary Contact – Address fields
c. If the Primary Contact has a separate address, complete the Primary Contact –
Mailing Address fields
d. Complete the Communication and Language Preferences fields
e. Click Continue
Page and Field-Level Validation
When you click the Continue button, we check each field to confirm that the
information entered meets the requirements regarding the types of Characters and
selections that have been entered. If a field includes invalid characters or formatting,
it will be highlighted for you to correct before navigating further through the
application.
4. Enter any Authorized Representative Information:
a. If an Authorized Representative is desired for this case, add one on this page
i. Enter Contact information for the Authorized Representative
ii. If the Authorized Representative should receive Notices for the
household, indicate that
iii. If there is more than one Authorized Representative, click on the Add
Another button and repeat these steps
5. Add Household Members
a. Complete the Name, Date of Birth, and Gender fields for each Household
Member
b. If they are applying for Coverage, click on the Applying for Coverage radio
button
c. Enter a Social Security Number for all applicants who have one; enter optional
Social Security Numbers for non-applicants to make the eligibility process go
faster
d. If someone is not a US citizen or national, enter the document type and other
information for all members with Eligible Immigration Status
e. Confirm the name as it appears on their document
f. Click Continue
6. Add Relationships
JOB AID: COMPLETE AN INDIVIDUAL APPLICATION
Page 3 of 5
a. Enter a relationship for each household member in the case
Add Demographic Information
The left-side navigation panel shows the steps for beginning the application. After completing
each section, a check mark replaces the step number. Fields that require information are
marked with red asterisks.
1. Add Address and Contact Information for the Household Members
a. If a household member lives somewhere different than the Primary Contact, list
their address. They can also receive mail in a separate location.
b. Add additional phone numbers and email addresses for household members
2. Review offers from a Small Employer
a. The Small Employer section displays Small Employers who have plans available
to this household
b. If a Small Employer is not present, the applicant may need to ask their employer
to include their name on an Employee Roster so they can obtain one of their
plans. You can still check the availability of Subsidized and Unsubsidized plans
from Covered California for the applicant.
Postal Address Validation
Before moving on, we validate the address you entered against the United States
Postal Service. A popup dialog appears showing any close or exact matches with
your address. You may select an address presented from the USPS comparison or
choose to keep your own entry.
3. Add Demographic Information
a. Different questions will display based on the Application type and the age,
gender, and addresses of the applicants. Enter an answer for each question
b. If a household member is pregnant, enter the number of babies and the expected
date of delivery
c. If the applicant is under 26, additional questions may be asked, such as
i. Is this person temporarily out of the home?
ii. Is this person a full time student?
iii. Was this person in the Foster Care System on their 18th Birthday?
iv. Who is the primary caretaker of this child?
JOB AID: COMPLETE AN INDIVIDUAL APPLICATION
Page 4 of 5
4. Add Tax Information
a. If a household is applying for a Subsidy or Medi-Cal, provide information about
their previous year’s tax filing status and upcoming filing status
b. If they filed taxes, identify the filing status
c. If they are a dependent, identify who claims them
Tax Filing Status Impacts Available Programs
Tax Filing Status will impact the available programs for each Household Member. In
order to receive the Premium Tax Credit program, married couples have to file
jointly. A dependent claimed by a non-custodial Parent can only receive a Premium
Tax Credit on an application with that non-custodial Parent, but they can receive
Medi-Cal with the parent they live with.
5. Add Health Care Information
a. Certain types of Health Coverage meet the requirements of “Minimum Essential
Coverage.” If the applicant has any of these, they do not need subsidy help from
Covered California.
b. If the applicant needs Long Term Care or receive Medicare, there are programs
available through the Medi-Cal program to help pay for these services. Covered
California will refer the applicant to their County Social Services department to
determine if they qualify for these programs.
6. Add Optional Data
a. Optional Data is used to improve the services offered by Covered California. The
applicant may answer these questions as they feel comfortable
Add Income Information
1. Employment
a. Tell us about any money the applicant gets from work for an Employer
2. Self-Employment
a. Tell us about the net income the applicant earned this month from self-
employment
3. Other Income
a. Enter any of the other sources of income listed on this page
4. Deductions
JOB AID: COMPLETE AN INDIVIDUAL APPLICATION
Page 5 of 5
a. Enter any deductions the applicant claims on the first page of a regular tax
reform (i.e., a 1040)
5. Summary
a. Review the information that is listed for income
b. If the projected annual income is incorrect, enter the Projected Amount the
applicant expects to get
Review and eSign
1. Before Submitting the application, review the information entered for the household.
2. Click Continue
3. Choose a period during which Covered California will use the applicant’s Tax Return
during Renewal and Periodic Verification. You can choose zero years.
4. Applicants must agree to report changes to us.
5. Applicants must agree that the information they have provided is accurate.
6. Submit the application
a. If an individual is completing the application, enter the applicant’s full name and
PIN.
b. If a Service Center Representative is completing the application, check the box
indicating they have obtained a signature from the applicant.
c. Click Submit

Page 1 of 5
October 1, 2013
The SHOP Application
This job aid covers the process of applying for Covered California’s Small Business Health
Options Program, known as SHOP. We will look at how the application is completed from the
point of view of the employer, although Certified Insurance Agents and California Health Benefit
Exchange personnel will also need to know the process.
The steps in the application process we will show here include:
1. Beginning the application
2. Entering company information
3. Primary contact information
4. Review and submit
5. Eligibility determination and verifications
6. Adding the employee roster
Before starting the application, sign into Covered California, which takes you to the SHOP
homepage. You'll need the following for the application process:
Company name, key addresses, and Tax Identification Number
Primary contact name and contact details
Number of employees and average annual salary
You can start the Application process by clicking Begin Application.
1. Beginning the Application
a. Introduction – The first page of the application is Introduction and Consent. It provides
summary information about the SHOP application process. You need to respond to
questions about your organization to determine your eligibility.
b. Agent – If a Certified Insurance Agent is helping with the SHOP application, type the
Agent’s name into the appropriate field. If you are completing the application on your
own, leave that field blank.
c. How did you hear about SHOP – Next, tell us how you heard about the Exchange and
the Small Business Health Options Program.
JOB AID: COMPLETE A SHOP APPLICATION

JOB AID: COMPLETE A SHOP APPLICATION
Page 2 of 5
d. Terms & Conditions – Finally, select the I agree to the terms and conditions checkbox
and click Continue
2. Company Information
The Company Information page displays where you enter company data that the system
needs to determine SHOP eligibility. Some of this information may be prepopulated from
information the Employer provided in creating the company’s account, although that
information can be edited here. Required fields include:
Business Legal Name
Organization type
Average employee salary
Total number of employees
Number of full-time employees
Options on the page include going Back to the previous page, Save and Exit, which keeps this
information available for the next time you log in, or Continue, which saves your information,
validates what you have entered, and takes you to the next page in the application.
3. Primary Contact
Next is the Primary Contact page. Enter information about the person who will receive all official
communications from Covered California. Enter a first and last name, phone number and or e-
mail address, and select the preferred method of communication (other than the default Secure
Mailbox that is part of your account). Click Continue to proceed with the application.
4. Review and Submit
The Review and Submit page shows you the information you entered in the application process.
If anything is incorrect or incomplete, you can click the Edit button next to the appropriate
section. This returns you to the page where you entered that data so you can make changes.
To submit your application, you have to sign it by typing in your name on the Electronic
Signature field, and then enter your PIN in the Electronic Signature PIN field.
At this point in the application process you can:
Save & Exit – save the application without submitting it
Save as PDF – generate and save a PDF file of the page
Print PDF – print the summary information
Submit – complete the application and submit it for eligibility determination
JOB AID: COMPLETE A SHOP APPLICATION
Page 3 of 5
5. Eligibility Determination, Verification
a. Eligibility Determination
After submitting the application, the Eligibility Results page comes up and shows your eligibility
status and determination factors. The system checks the information you entered on the
application and determines whether your company is ‘Eligible’, ‘Contingent Eligible’, or
‘Ineligible’.
Contingent Eligible usually means that more information is needed or that information on the
Application does not match data from other systems we check against when you submit your
application. If you are Contingent Eligible, submit a verification request to provide additional
information or to clear up any discrepancies in the Application.
b. Verification
On the Eligibility Results page, click on the Verify button
The Submit Verification page displays – you can submit an employer’s verification
documents through the Submit Verifications page, but review and confirm the
company information that automatically displays here
Scroll down to the Verifications Category dropdown list, which displays SHOP
Eligibility Determination and cannot be changed
Use the Comments field to enter any information or comments about what is being
verified
If you do not have any supporting documents to upload, select the Submit button to
create the verification request.
c. Upload Documents
If you need to submit supporting documentation, select the Upload Documents
button, and the Upload Documents page displays
In the Documents Uploaded section, you can view or remove any previously
uploaded documents
In the Upload Document section, the Document Category dropdown is pre-
populated with SHOP Verification, and that value cannot be changed.
In the Document Type dropdown, select the type of verification for which you are
uploading a document – choose from Business Address, Employer Workforce
Size, Employer EIN, or Other
Select a file from your computer using the Browse functionality
o Click on the Open button in the Choose File to Upload popup
o the Document Name field is filled with the name of the file you selected
JOB AID: COMPLETE A SHOP APPLICATION
Page 4 of 5
Click on the Upload button to submit the document to support your verification
Click Back to return to the Submit Verification page and complete your submission
Finally, click the Submit button – the Verification popup appears
When you click OK on the Verification popup, the verification request is sent to Covered California and you are returned to the Eligibility Results page.
Your verification request and any documents uploaded to support it will be reviewed by a SHOP Manager, and you will receive notification of the final eligibility determination for your company.
Click Continue to proceed to submitting your Employee Roster
6. Employee Roster
Once an Employer is determined eligible for SHOP, you need to prepare and enter or upload the company’s Employee Roster. This is a crucial part of the SHOP process for several reasons:
1. The number of employees is an eligibility factor for SHOP
2. In order to remain eligible, at least 70% of the employees must enroll in a plan through
Covered California
3. An employee must be on the Roster in order to enroll in a Covered California Plan
through his or her employer
You can add the Employee Roster manually, or you can upload it directly to the system.
The Employees – Introduction page displays
Review the information and instructions here, then click Continue
To add an employee manually, click Add/Edit an Employee on the left navigation
panel
The Add/Edit Employee page displays – enter information about the employee in the
fields provided, including
o First and last name
o Address (including county)
o Social security number
o Date of birth
o Annual salary
o Whether the employee is full-time or part-time
o Hire date
o Email address, if available
JOB AID: COMPLETE A SHOP APPLICATION
Page 5 of 5
When you have supplied the required information, click Continue
Repeat this process for the employees that need to be added to your roster
If it is more practical, you can upload a spreadsheet with the same information you would enter manually. The Covered California portal supplies a spreadsheet template you can download, fill out with your employees, and then upload to Covered California.
Click the Upload Spreadsheet left navigation link, the Upload Employee
Spreadsheet page displays
Click the Download Roster Template link, a popup displays
Click the Open button in the popup
Once the download finishes, a read-only copy of the employee roster spreadsheet template opens automatically in Microsoft Excel. Save your spreadsheet to your local drive. Include your company name in the spreadsheet’s filename (for example, Ramos Builders Employee Roster.xlsx).
The columns in the spreadsheet mirror the fields we just reviewed on the Add/Edit Employee page. Fill out a row for each of your employees. When you have added all your employees, save and close the file to your local computer’s drive so you then find and upload it to the Covered California portal.
When you complete the roster spreadsheet and are ready to upload, navigate the
Upload Employee Spreadsheet page and click the Browse button
In the File dialog that displays, find and select your employee roster spreadsheet file
where you saved it on your computer and click the Open button to select it
Now click Upload to move the file to Covered California’s portal
The Upload Employee Spreadsheet page displays again, showing the Roster Total –
a count of the number of records successfully added, and also a number of records
with errors
The Upload Errors section displays the records from the roster template that have errors. Any errors must be fixed before these records will display in the Employee Roster table.
Click on the Edit link for any record showing in the Upload Errors section
Correct any errors you find in the record and click Save, then repeat for any other
records in the section
Click Continue once you have cleared any errors from the upload of the employee
roster spreadsheet
At this point the SHOP Application and the Company Roster are complete. You have cleared up any eligibility problems and have an “Eligible” status, and your employees have all been entered, either manually or by uploading the employee roster spreadsheet. You are now ready to start Plan Selection.

Page 1 of 3
October 1, 2013
Reviewing Eligibility Results
Once an Application is complete, you will see the Eligibility Results page. This page explains
the programs available to each applicant and their next steps.
Features of the Eligibility Results page
The Eligibility Results page has the following features:
1. Eligibility Results for each applicant
2. More Information and Options section for each Eligibility Result
3. View Submitted Application
4. View Eligibility Confirmation
5. View/Choose a Health Plan
Eligibility Results for each household member
The eligibility results displayed are based on the information entered for each applicant. There
are four main categories of eligibility.
1. Covered California Plan:
a. If a household member is Covered California Plan eligible, they will not receive
financial assistance paying their premium, but will still benefit from the quality of
benefits and guaranteed issue provided by the plans under Covered California.
2. Advance Payment of the Premium Tax Credit (APTC):
a. If a household member is APTC eligible, the government will help them pay their
monthly premium based on their household income.
b. If a household member is Conditionally eligible, they need to provide additional
Verifications. Refer to the Uploading Verifications Job Aid for details on how to
process Conditional Eligibility.
3. Cost Sharing Reduction (CSR):
a. If a household member is CSR eligible, the government can help reduce their
out-of-pocket costs for things like doctor’s visits and copays.
JOB AID: REVIEW ELIGIBILITY RESULTS

JOB AID: REVIEW ELIGIBILITY RESULTS
Page 2 of 3
b. If a household member is Conditionally eligible, they need to provide additional
Verifications. Refer to the Uploading Verifications Job Aid for details on how to
process Conditional Eligibility.
4. MAGI Medi-Cal
a. If a household member is MAGI Medi-Cal eligible, they can print out their benefits
confirmation page and immediately visit a doctor. They will receive information
on how to select a Managed Care Organization if one is available in their County.
b. If a household member is Pending eligible, they need to provide additional
Verifications. Refer to the Uploading Verifications Job Aid for details on how to
process Conditional Eligibility. They will also receive communication from their
County to provide these documents.
5. Small Business Health Options Program (SHOP)
a. If a household member is SHOP eligible, they have been offered a plan by their
Small Employer. The Small Employer may contribute some amount to the cost
of their monthly premium, and may cover some dependent costs as well.
b. A SHOP Plan may be determined Unaffordable if it exceeds 9.5% of a single
Employee’s income from that Employer, or 8% of the total household income if
the Employer includes dependent coverage. In this event, the Employee has the
option to decline coverage, and may be able to see their eligibility for the APTC
and CSR programs (see above).
More Information and Options
The More Information and Options section provides additional details and actions. In it you
can:
1. Review the Eligibility Determination Factors for each applicant
2. Submit Documents if Conditionally or Pending Eligible
a. This action is available only if that status is present for an applicant
3. Appeal Decision
a. If you think an Eligibility Result is incorrect, you can appeal it within 90 days
4. Request a Referral to Other Programs
a. All applicants can request a full Medi-Cal determination
b. MAGI Medi-Cal recipients can also request CalFresh and CalWORKS referrals
5. Decline SHOP Coverage
JOB AID: REVIEW ELIGIBILITY RESULTS
Page 3 of 3
a. If you are a SHOP applicant, you may Decline SHOP Coverage if it is
unaffordable. An Agent, Employer, and the Employee may work together to see
if the coverage can be made affordable. If not, the Employee may seek
coverage on the Individual Market.
View Submitted Application
The View Submitted Application button will display a PDF version of the submitted application
for you to print or save locally.
View Eligibility Confirmation
If an applicant is MAGI Medi-Cal, clicking this button will display their Eligibility Confirmation.
This page includes the information the applicant needs to go to a doctor immediately. A
permanent benefits card will be mailed with this information as well.
Preview/Choose a Health Plan
Applicants eligible to select a Covered California Plan, with APTC or CSR, or an eligible SHOP
Employee, can continue on to the plan selection process. You can also shop anonymously for
plans in your area if you are Pending Eligible or if a SHOP Employer does not cover
dependents.

Page 1 of 5
October 1, 2013
Plan Selection
This Job Aid shows how to assist individuals and employees with reviewing, selecting, and
enrolling in a Covered California health insurance plan. Individuals may choose the most
appropriate plan for their needs, choosing from all plans offered by Covered California.
Individuals and employees may call on Certified Enrollment Counselors, Certified Insurance
Agents, and Exchange employees for help, so people acting in these roles need a solid
understanding of this process.
Individuals
The process outlined in this Job Aid illustrates how individual consumers shop for, select, and
enroll in a Covered California plan. Individuals may select any plan from any tier, limited only by
their ability to afford the coverage. If an individual applying for coverage is eligible for subsidized
coverage based on their income or other factors, the plan pricing presented to them will include
the financial assistance they may be eligible for. Determining the individual’s or family’s eligibility
for subsidized health coverage is covered in another Job Aid and in other training courses.
The SHOP Program and Employees
The SHOP program helps small businesses provide affordable insurance to their employees.
The employer selects a list of plans to offer employees. The employee selects a plan from this
list, which is then tested for affordability based on the employee’s income, if the employee is the
only person covered. If the employer has set up coverage that includes dependents in the
employee’s household, the income of the employee’s entire household is assessed for
affordability of the selected plan.
Employees of a SHOP-eligible employer may choose a Covered California health insurance
plan from the employer’s pre-selected list. If any of these plans are affordable, the employee is
required to accept coverage under the plan instead of receiving subsidized coverage. The
opportunity for the employee to select and enroll in a plan is limited to the Open Enrollment
timeframe set up by the employer.
The Plan Selection Process
To start, click on the Choose a Health Plan button and the Getting Started page for
plan selection displays
JOB AID: COVERED CALIFORNIA PLAN SELECTION
JOB AID: COVERED CALIFORNIA PLAN SELECTION
Page 2 of 5
The Getting Started page provides an overview of the plan selection and enrollment process.
The plan selection process includes asking for information about consumers’ healthcare needs,
matching them with a plan to suit those needs, and enrolling them in their chosen plan.
After reviewing information on the Getting Started page, click on the Next button and
the User Preferences page displays
User Preferences
The User Preferences page is the place to add a variety of preferences on the consumer’s
behalf. These preferences are gathered on separate pages that are all linked to the User
Preferences page.
The Estimate Costs link lets you enter information about the consumer’s basic healthcare
needs in order to filter down to the most cost-effective plans.
If the consumer has an existing relationship with a doctor or medical facility, use the Find Your
Doctor or Facility link to search for plans that support that relationship.
Children’s dental coverage can be purchased separately or bundled with a regular health plan.
Use the Shop for Children’s Dental link to add a dental plan if the Consumer you are assisting
needs dental coverage for his or her children.
After inputting the consumer’s preferences, the plans displayed in the selection process are
filtered to match those preferences.
You can also skip entering preferences and go directly to clicking on the Next – Plan Selection
button at the bottom of the page to view the complete list of plans – without filtering for
preferences – available to the consumer, whether in the Individual market or through the
employee’s workplace.
Estimate Costs
Click the Estimate Costs link to display the Estimate Costs page
Enter information about the consumer’s projected medical and prescription usage
o Low means 1-2 doctor visits per year; 1-2 lab tests per year; 1 prescription per
year
o Moderate: 5-6 doctor visits; several lab tests; 1-2 prescriptions
o High: Monthly doctor visits; regular/ongoing lab tests; outpatient care; 2-3
ongoing prescriptions
o Very High: 20 or more doctor visits; multiple ongoing lab tests; other needs such
as a hospital stay or having a baby; 3 or more ongoing prescriptions
Medical use and prescription use are captured separately, so a Consumer may fall
into different categories for each area.

JOB AID: COVERED CALIFORNIA PLAN SELECTION
Page 3 of 5
Plan Comparison
The Plan Comparison page allows you to see side-by-side the details of up to three available
health plans at a time. If there are more than three plans available to the consumer, more plans
can be viewed by clicking on the left or right arrows on either side of the plan logo panel.
Each plan’s price is displayed along with a summary of the plan details. For employees, the
plans available for comparison are limited to those within the metal tier that the employer
selected during SHOP Employer Plan Selection. The monthly premium cost listed on this page
represents the net cost to the consumer, after their financial assistance or employer premium
contribution.
The sub-sections below are initially collapsed but can be expanded to display details of the
following plan characteristics:
Quality Ratings
Deductibles & Out of Pocket Max
Office or Clinic Visit
Tests
Drugs
Outpatient Surgery
Need immediate attention
Hospital Stay
Mental Health, Behavioral Health, or Substance Abuse needs
Pregnancy
Help recovering or other special health needs
Children’s Vision
Children’s Dental (if applicable)
Clicking on the arrow next to each plan feature expands to show the cost information for various
visits, procedures, and products.
Plan Details
You can view in-depth plan information by clicking on the plan logo. This will take you out of
plan comparison to view details for a single plan. The Plan Details page displays the Consumer
costs at the top of the page.
For employees, the information here includes the base Monthly Premium, the Employer
Contribution, and the employee’s personal Monthly Payroll Deduction after the Employer
contribution.
You can also view the plan’s Annual Payroll Deduction, Out-of-Pocket Estimate, Product Type,
and Overall Quality rating.
The Summary section displays high level information about the plan, including Estimated Total
Costs, Quality, availability of any preferred Doctors, Facilities, or Dentists, and the Product
Type.

JOB AID: COVERED CALIFORNIA PLAN SELECTION
Page 4 of 5
You can scroll down the Plan Details page to review the different sections:
Quality Rating
Deductible & Out-of-Pocket costs
Doctor Visits
Tests
Drugs
Outpatient
ER & Urgent Care
Hospital
Mental/Behavioral Health
Pregnancy
Other Special Needs
Children’s Vision
Children’s Dental
Once you have reviewed the plan details, you can click Back to return to the Plan Comparison
page to select another plan to view in detail. You can repeat this process as often as needed
until the Consumer finds a plan that meets their needs.
Once you are ready to select a plan, you will do so by clicking on the Add button on the Plan
Details page.
Your Cart
The Your Cart page lists the plan that the Consumer wants to purchase. The Consumer’s name
and coverage Effective Date display across the top of the page.
In the next panel, you can view the plan logo, plan name, the total Monthly Premium, and the
Employer Contribution. The Consumer’s Payroll Deduction (Monthly Premium minus Employer
Contribution) displays in the next row.
If the Consumer is purchasing plan(s) for a spouse and/or dependents, those plans and their
related Monthly Premium, Employer Contribution, and Consumer Payroll Deduction will also
display.
Review the information on the Your Cart page, the click on Checkout, the
eSignature page displays
The last step of the plan selection process is to confirm the Consumer’s plan selection and sign
electronically on behalf of the Consumer. You do this on the eSignature page.
Click on the I have read and agree to the terms of service in the Exchange
Agreement checkbox
Click on the Submit button, the Enrollment Confirmation page displays

JOB AID: COVERED CALIFORNIA PLAN SELECTION
Page 5 of 5
Enrollment Confirmation
The Enrollment Confirmation page displays a summary of the consumer’s household members
enrolled in the plan. You can view the person(s) covered, the coverage period, the selected
plan, the gross premium, and the net premium to the consumer.
Click on the Done button, the consumer’s homepage displays
At this point, all of the steps have been taken to enroll the consumer in a plan. The consumer
will be contacted soon by the health insurance company offering their selected plan. The health
insurance company will send their Enrollment Confirmation and Benefits Package.

Page 1 of 2
October 1, 2013
Retrieve Your Username
Click the Log In link at the top of the page – the Log In page displays
Click on the Forgot your username or password? link. The Retrieve Account Details: Your Information page displays.
Select the First Name field, type in your first name
Select the Last Name field, type in your last name
Select the Date of Birth field, type in your date of birth
Click the Continue button. The Retrieve Account Details - Verify Identity page displays.
Select three security questions and provide answers
Click the Continue button. The Retrieve Account Details – Retrieve Username page
displays.
Your username displays
Retrieve Your Password
Click the Log In link at the top of the page – the Log In page displays
Click on the Forgot your username or password? link. The Retrieve Account Details:
Your Information page displays.
Select the Username field, type in your username
Click the Continue button. The Retrieve Account Details - Verify Identity page displays.
Select three security questions and provide answers
Click the Continue button. The Retrieve Account Details – Reset Password page
displays.
Select the New Password field, type in your new password
Select the Reenter Password field, retype your new password
Click the Continue button. The Sign In page displays.
JOB AID: RETRIEVE ACCOUNT SECURITY DETAILS
JOB AID: RETRIEVE ACCOUNT SECURITY DETAILS
Page 2 of 2
If your account is locked, retrieving your password removes the lock on the account.
Problems?
If you cannot remember your security questions:
Click on the Contact Us link
The Contact Us page will display
Call Covered California Customer Service for assistance with recovering your username
or resetting your password

Page 1 of 3
October 1, 2013
Covered California support tools are essential in assisting consumers in applying for healthcare
coverage, evaluating their options and ultimately enrolling in a Covered California health plan.
Support Tools include:
Online Chat
Help
Find Help Near You
Contact Us
Preview Plans
Online help
Announcements
Learn Tab
Online Chat
Through Online Chat, you will connect with a Service Center Representative (SCR).
Click on the Online Chat link
The Live Chat popup displays
This dialog connects you to a Covered California Service Center employee who can
answer your questions. If Spanish is your selected language, a Spanish-speaking
Service Center representative will help you.
Help
The Help button gives you access to contact information for customer service support
resources.
JOB AID: ACCESSING COVERED CALIFORNIA SUPPORT TOOLS

JOB AID: ACCESSING COVERED CALIFORNIA SUPPORT TOOLS
Page 2 of 3
Find Help Near You
Consumers can use Find Help Near You to request in-person support from an
Enrollment Counselor or Agent.
Click the Find Help Near You link. The Locate Assistance popup displays
Select Find Certified Enrollment Counselor, Find Agents, or Find County
Office
o If searching for a County Office:
Page is redirected to The California Department of Health Care Services
County Offices to Apply for Medi-Cal page
o If searching for an Assister:
Enter your Zip Code, select the Distance, and indicate your preferred
Language, then click Search
OR, if you want assistance from a specific organization:
Enter the Organization Name and click Search
The system will return organizations that meet your search criteria
Click the Show Assisters link
Select an Assister, the Designate Assister page displays
o If searching for an Agent:
Enter your Zip Code, select the Distance, and indicate your preferred
Language, then click Search
OR, if you want assistance from a specific Agent:
Enter the Agent’s First Name, Business Name, and Last Name and
click Search
Select an insurance agent from the search results, the Designate Agent
page displays
Click the Continue button on the Designate Assister or Designate Agent page.
The Designation eSignature page displays
The Designate eSignature page displays attestation statements the Consumer
must accept before designating an Assister or Agent. Click the Confirm button to
submit the request
A notification window confirms the request
Requests are sent to the Assister or Agent. They may choose to accept or decline the
designation request.

JOB AID: ACCESSING COVERED CALIFORNIA SUPPORT TOOLS
Page 3 of 3
Contact Us
The Contact Us page displays various modes of communicating with Covered California:
Phone number
Online Chat
Preview Plans
By answering a few short questions consumers can find out which coverage programs or
discounts on cost of insurance their household may qualify for.
Online Help
Every page displays a blue “i” online help button which provides information about the
functionality and components specific to that page.
Announcements
The Announcements section displays messages about policy updates, deadlines, and events.
Learn Tab
The Learn tab takes you to a page with links to Tutorials and FAQs.