Embed Size (px)
Citation preview
Oak Ledged Doors Installation
For further information call 0114 247 2534 or visit www.JoineryStore.com
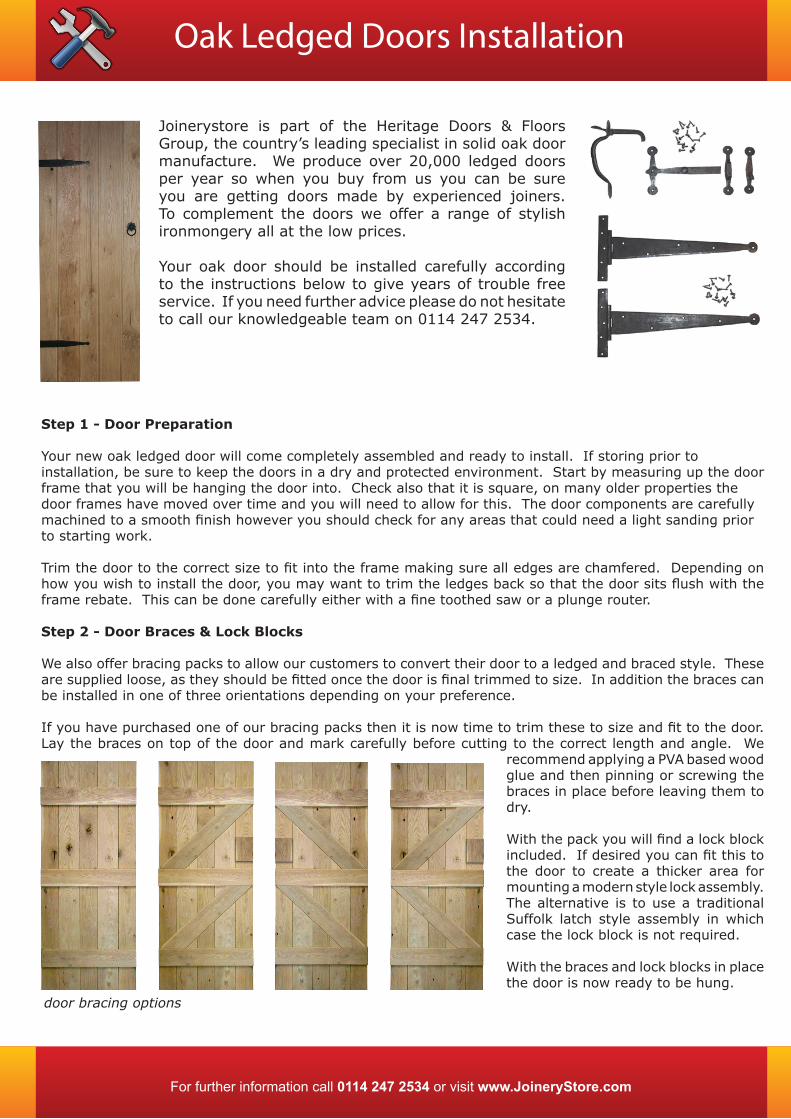
Joinerystore is part of the Heritage Doors & Floors Group, the country’s leading specialist in solid oak door manufacture. We produce over 20,000 ledged doors per year so when you buy from us you can be sure you are getting doors made by experienced joiners. To complement the doors we offer a range of stylish ironmongery all at the low prices.
Your oak door should be installed carefully according to the instructions below to give years of trouble free service. If you need further advice please do not hesitate to call our knowledgeable team on 0114 247 2534.
Step 1 - Door Preparation
Your new oak ledged door will come completely assembled and ready to install. If storing prior to installation, be sure to keep the doors in a dry and protected environment. Start by measuring up the door frame that you will be hanging the door into. Check also that it is square, on many older properties the door frames have moved over time and you will need to allow for this. The door components are carefully machined to a smooth finish however you should check for any areas that could need a light sanding prior to starting work.
Trim the door to the correct size to fit into the frame making sure all edges are chamfered. Depending on how you wish to install the door, you may want to trim the ledges back so that the door sits flush with the frame rebate. This can be done carefully either with a fine toothed saw or a plunge router.
Step 2 - Door Braces & Lock Blocks
We also offer bracing packs to allow our customers to convert their door to a ledged and braced style. These are supplied loose, as they should be fitted once the door is final trimmed to size. In addition the braces can be installed in one of three orientations depending on your preference.
If you have purchased one of our bracing packs then it is now time to trim these to size and fit to the door. Lay the braces on top of the door and mark carefully before cutting to the correct length and angle. We
recommend applying a PVA based wood glue and then pinning or screwing the braces in place before leaving them to dry.
With the pack you will find a lock block included. If desired you can fit this to the door to create a thicker area for mounting a modern style lock assembly. The alternative is to use a traditional Suffolk latch style assembly in which case the lock block is not required.
With the braces and lock blocks in place the door is now ready to be hung.
door bracing options
Oak Ledged Doors Installation
For further information call 0114 247 2534 or visit www.JoineryStore.com
Step 3 - Door Hanging
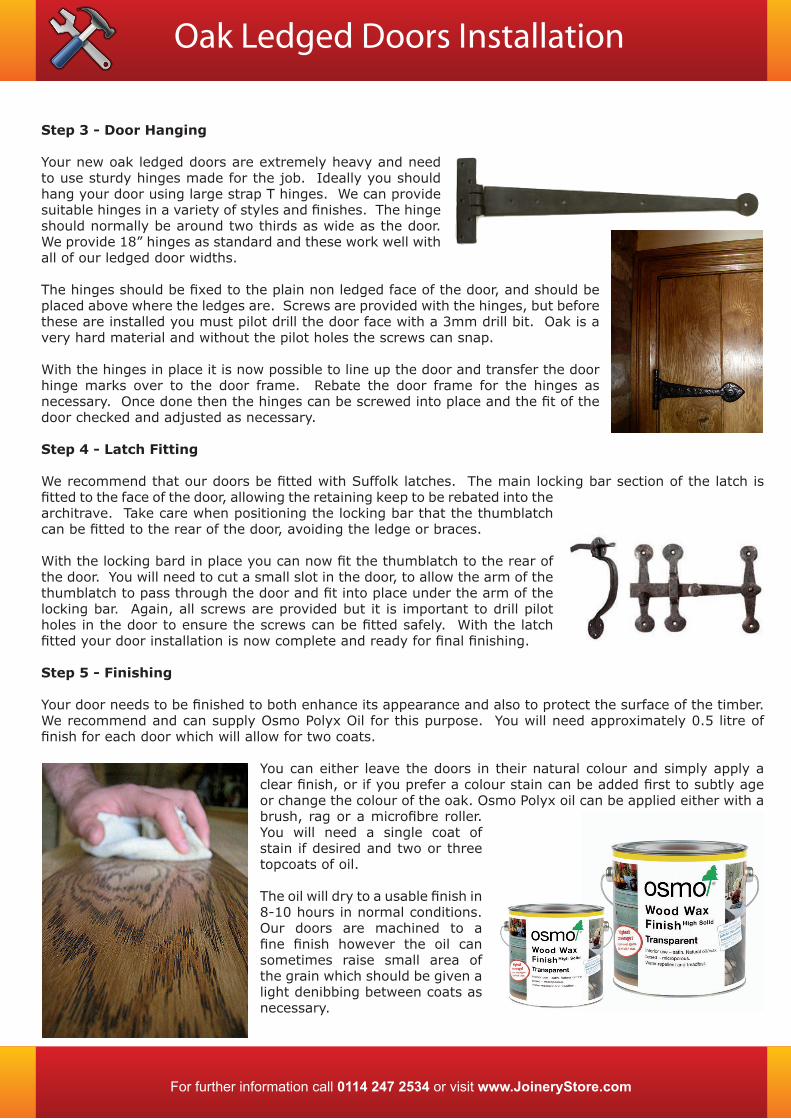
Your new oak ledged doors are extremely heavy and need to use sturdy hinges made for the job. Ideally you should hang your door using large strap T hinges. We can provide suitable hinges in a variety of styles and finishes. The hinge should normally be around two thirds as wide as the door. We provide 18” hinges as standard and these work well with all of our ledged door widths.
The hinges should be fixed to the plain non ledged face of the door, and should be placed above where the ledges are. Screws are provided with the hinges, but before these are installed you must pilot drill the door face with a 3mm drill bit. Oak is a very hard material and without the pilot holes the screws can snap.
With the hinges in place it is now possible to line up the door and transfer the door hinge marks over to the door frame. Rebate the door frame for the hinges as necessary. Once done then the hinges can be screwed into place and the fit of the door checked and adjusted as necessary.
Step 4 - Latch Fitting
We recommend that our doors be fitted with Suffolk latches. The main locking bar section of the latch is fitted to the face of the door, allowing the retaining keep to be rebated into the architrave. Take care when positioning the locking bar that the thumblatch can be fitted to the rear of the door, avoiding the ledge or braces.
With the locking bard in place you can now fit the thumblatch to the rear of the door. You will need to cut a small slot in the door, to allow the arm of the thumblatch to pass through the door and fit into place under the arm of the locking bar. Again, all screws are provided but it is important to drill pilot holes in the door to ensure the screws can be fitted safely. With the latch fitted your door installation is now complete and ready for final finishing.
Step 5 - Finishing
Your door needs to be finished to both enhance its appearance and also to protect the surface of the timber. We recommend and can supply Osmo Polyx Oil for this purpose. You will need approximately 0.5 litre of finish for each door which will allow for two coats.
You can either leave the doors in their natural colour and simply apply a clear finish, or if you prefer a colour stain can be added first to subtly age or change the colour of the oak. Osmo Polyx oil can be applied either with a brush, rag or a microfibre roller. You will need a single coat of stain if desired and two or three topcoats of oil.
The oil will dry to a usable finish in 8-10 hours in normal conditions. Our doors are machined to a fine finish however the oil can sometimes raise small area of the grain which should be given a light denibbing between coats as necessary.