Embed Size (px)
Citation preview
Novell
m
Novell Confidential Manual (ENU) 15 April 2004
w w w . n o v e l l . c o
NsureTM Identity ManagerFan-Out Driver
3 . 1O c t o b e r 2 7 , 2 0 0 4
P L A T F O R M S E R V I C E S A D M IN I S T R A T I O NG U ID E FO R M VS *
Novell Confidential Manual (ENU) 15 April 2004
Legal NoticesNovell, Inc. and Omnibond Systems LLC. make no representations or warranties with respect to the contents or use of this documentation, and specifically disclaim any express or implied warranties of merchantability or fitness for any particular purpose. Further, Novell, Inc. and Omnibond Systems LLC. reserve the right to revise this publication and to make changes to its content, at any time, without obligation to notify any person or entity of such revisions or changes.
Further, Novell, Inc. and Omnibond Systems LLC. make no representations or warranties with respect to any software, and specifically disclaim any express or implied warranties of merchantability or fitness for any particular purpose. Further, Novell, Inc. and Omnibond Systems LLC. reserve the right to make changes to any and all parts of the software, at any time, without any obligation to notify any person or entity of such changes.
You may not export or re-export this product in violation of any applicable laws or regulations including, without limitation, U.S. export regulations or the laws of the country in which you reside.
Copyright © 2004 Omnibond Systems, LLC. All Rights Reserved. Licensed to Novell, Inc. Portions Copyright © 2004 Novell, Inc. All rights reserved. No part of this publication may be reproduced, photocopied, stored on a retrieval system, or transmitted without the express written consent of the publisher.
The Solaris* standard IO library has kernel limitations that interfere with the operation of the Provisioning Manager. Therefore, components for Solaris use the AT&T* SFIO library. Use of this library requires the following notice:
The authors of this software are Glenn Fowler, David Korn and Kiem-Phong Vo.
Copyright (c) 1991, 1996, 1998, 2000, 2001, 2002 by AT&T Labs - Research.
Permission to use, copy, modify, and distribute this software for any purpose without fee is hereby granted, provided that this entire notice is included in all copies of any software which is or includes a copy or modification of this software and in all copies of the supporting documentation for such software.
This software is being provided as is, without any express or implied warranty. in particular, neither the authors nor AT&T Labs make any representation or warranty of any kind concerning the merchantability of this software or its fitness for any particular purpose.
Novell, Inc.404 Wyman Street, Suite 500Waltham, MA 02451U.S.A.
www.novell.com
Nsure Identity Manager Fan-Out Driver 3.1 Platform Services Administration Guide for MVSOctober 27, 2004
Online Documentation: To access the online documentation for this and other Novell products, and to get updates, see www.novell.com/documentation.

Novell Confidential Manual (ENU) 15 April 2004
Novell TrademarkseDirectory is a trademark of Novell, Inc.NetWare is a registered trademark of Novell, Inc. in the United States and other countries.Novell is a registered trademark of Novell, Inc. in the United States and other countries.Nsure is a trademark of Novell, Inc.
Third-Party TrademarksAll third-party trademarks are the property of their respective owners.

Novell Confidential Manual (ENU) 15 April 2004
4 Nsure Identity Manager Fan-Out Driver 3.1 Platform Services Administration Guide for MVS
Novell Confidential Manual (ENU) 15 April 2004
Contents
About This Guide 7
1 Installing Platform Services 9MVS Platform System Requirements. . . . . . . . . . . . . . . . . . . . . . . . . . . . . . . . . . . . . . . . . . . 10About Platform Services for MVS. . . . . . . . . . . . . . . . . . . . . . . . . . . . . . . . . . . . . . . . . . . . . 10
The MVS Platform Services Samples Library. . . . . . . . . . . . . . . . . . . . . . . . . . . . . . . . . . . . . 10The MVS Platform Services Load Library. . . . . . . . . . . . . . . . . . . . . . . . . . . . . . . . . . . . . . . 10The Platform Services Process . . . . . . . . . . . . . . . . . . . . . . . . . . . . . . . . . . . . . . . . . . . . 11The MVS System Intercept . . . . . . . . . . . . . . . . . . . . . . . . . . . . . . . . . . . . . . . . . . . . . . 12The MVS Platform Receiver . . . . . . . . . . . . . . . . . . . . . . . . . . . . . . . . . . . . . . . . . . . . . 12Receiver Scripts. . . . . . . . . . . . . . . . . . . . . . . . . . . . . . . . . . . . . . . . . . . . . . . . . . . . 12
Platform Services Installation Procedure . . . . . . . . . . . . . . . . . . . . . . . . . . . . . . . . . . . . . . . . . 14Obtaining and Setting Up the Distribution Files . . . . . . . . . . . . . . . . . . . . . . . . . . . . . . . . . . . . 14Installing the Platform Services Process . . . . . . . . . . . . . . . . . . . . . . . . . . . . . . . . . . . . . . . 15Installing and Configuring the System Intercept . . . . . . . . . . . . . . . . . . . . . . . . . . . . . . . . . . . 16Installing the Platform Receiver . . . . . . . . . . . . . . . . . . . . . . . . . . . . . . . . . . . . . . . . . . . . 16Customizing the Receiver Scripts . . . . . . . . . . . . . . . . . . . . . . . . . . . . . . . . . . . . . . . . . . . 17Integrating Platform Services into Your Routine Operation . . . . . . . . . . . . . . . . . . . . . . . . . . . . . . 17
Obtaining Platform Services for MVS Files . . . . . . . . . . . . . . . . . . . . . . . . . . . . . . . . . . . . . . . . 18The ASCTEST Command . . . . . . . . . . . . . . . . . . . . . . . . . . . . . . . . . . . . . . . . . . . . . . . . 19
ASCTEST Requirements . . . . . . . . . . . . . . . . . . . . . . . . . . . . . . . . . . . . . . . . . . . . . . . 19ASCTEST Functions . . . . . . . . . . . . . . . . . . . . . . . . . . . . . . . . . . . . . . . . . . . . . . . . . 19
RACF Exit Installation . . . . . . . . . . . . . . . . . . . . . . . . . . . . . . . . . . . . . . . . . . . . . . . . . . 21About the RACF Exits . . . . . . . . . . . . . . . . . . . . . . . . . . . . . . . . . . . . . . . . . . . . . . . . . 21Installing the RACF Exits . . . . . . . . . . . . . . . . . . . . . . . . . . . . . . . . . . . . . . . . . . . . . . . 21Updating RACF Options . . . . . . . . . . . . . . . . . . . . . . . . . . . . . . . . . . . . . . . . . . . . . . . 22Uninstalling the RACF Exits. . . . . . . . . . . . . . . . . . . . . . . . . . . . . . . . . . . . . . . . . . . . . . 22
CA-ACF2 Exit Installation. . . . . . . . . . . . . . . . . . . . . . . . . . . . . . . . . . . . . . . . . . . . . . . . . 23About the CA-ACF2 Exits . . . . . . . . . . . . . . . . . . . . . . . . . . . . . . . . . . . . . . . . . . . . . . . 23Installing the CA-ACF2 Exits . . . . . . . . . . . . . . . . . . . . . . . . . . . . . . . . . . . . . . . . . . . . . 23Updating CA-ACF2 Options. . . . . . . . . . . . . . . . . . . . . . . . . . . . . . . . . . . . . . . . . . . . . . 24Uninstalling the CA-ACF2 Exits . . . . . . . . . . . . . . . . . . . . . . . . . . . . . . . . . . . . . . . . . . . . 26
CA-Top Secret Exit Installation . . . . . . . . . . . . . . . . . . . . . . . . . . . . . . . . . . . . . . . . . . . . . . 27Installing the CA-Top Secret Exit . . . . . . . . . . . . . . . . . . . . . . . . . . . . . . . . . . . . . . . . . . . 27Considerations Checklist for Sites with a Pre-existing PREINIT Function . . . . . . . . . . . . . . . . . . . . . . 28
2 Configuring and Administering Platform Services 29Platform Certificate Management. . . . . . . . . . . . . . . . . . . . . . . . . . . . . . . . . . . . . . . . . . . . . 29DES Key Management . . . . . . . . . . . . . . . . . . . . . . . . . . . . . . . . . . . . . . . . . . . . . . . . . . 29Password Replication for MVS . . . . . . . . . . . . . . . . . . . . . . . . . . . . . . . . . . . . . . . . . . . . . . 30Administering Platform Services for MVS . . . . . . . . . . . . . . . . . . . . . . . . . . . . . . . . . . . . . . . . 30
Managing the MVS Platform Services Process . . . . . . . . . . . . . . . . . . . . . . . . . . . . . . . . . . . . 30Managing the MVS Platform Receiver . . . . . . . . . . . . . . . . . . . . . . . . . . . . . . . . . . . . . . . . 32
3 Troubleshooting Platform Services 35Obtaining Debugging Output . . . . . . . . . . . . . . . . . . . . . . . . . . . . . . . . . . . . . . . . . . . . . . . 35
Contents 5

Novell Confidential Manual (ENU) 15 April 2004
MVS Platform Services Process . . . . . . . . . . . . . . . . . . . . . . . . . . . . . . . . . . . . . . . . . . . . 35MVS Platform Receiver . . . . . . . . . . . . . . . . . . . . . . . . . . . . . . . . . . . . . . . . . . . . . . . . 36
Troubleshooting Authentication Services . . . . . . . . . . . . . . . . . . . . . . . . . . . . . . . . . . . . . . . . . 36Troubleshooting Identity Provisioning . . . . . . . . . . . . . . . . . . . . . . . . . . . . . . . . . . . . . . . . . . . 36Troubleshooting Network Issues . . . . . . . . . . . . . . . . . . . . . . . . . . . . . . . . . . . . . . . . . . . . . 36
A Password Migration Component 39Migration Procedure . . . . . . . . . . . . . . . . . . . . . . . . . . . . . . . . . . . . . . . . . . . . . . . . . . . . 39Migration Mode Password Configuration Parameter . . . . . . . . . . . . . . . . . . . . . . . . . . . . . . . . . . . 40
Index 41
6 Nsure Identity Manager Fan-Out Driver 3.1 Platform Services Administration Guide for MVS
Novell Confidential Manual (ENU) 15 April 2004
About This Guide
This guide provides you with the information you need to install, configure, administer, and troubleshoot Novell® NsureTM Identity Manager Fan-Out driver Platform Services on IBM* MVS (OS/390* and z/OS*) platforms. This guide assumes that you have knowledge of eDirectoryTM and MVS, and that you are familiar with the concepts and facilities of the driver. It is also assumed that you have reviewed the Platform Services Planning Guide and Reference and have completed the planning phase described therein.
This guide contains the following sections:
Chapter 1, “Installing Platform Services,” on page 9
Chapter 2, “Configuring and Administering Platform Services,” on page 29
Chapter 3, “Troubleshooting Platform Services,” on page 35
Appendix A, “Password Migration Component,” on page 39
Additional Documentation
The following publications contain information about the Identity Manager Fan-Out driver. These publications are available at the Identity Manager Driver Web site (http://www.novell.com/documentation/dirxmldrivers).
Concepts and Facilities GuideCore Driver Administration GuidePlatform Services Planning Guide and ReferencePlatform Services Administration Guide for Linux and UNIXPlatform Services Administration Guide for MVSPlatform Services Administration Guide for OS/400NetWare Intercept and API Administration GuideAPI Developer GuideMessages ReferenceCore Driver Quick Start Guide for Linux and SolarisCore Driver Quick Start Guide for NetWareCore Driver Quick Start Guide for WindowsPlatform Services Quick Start Guide for AIXPlatform Services Quick Start Guide for FreeBSD, HP-UX, Linux, and SolarisPlatform Services Quick Start Guide for MVS CA-ACF2Platform Services Quick Start Guide for MVS CA-Top SecretPlatform Services Quick Start Guide for MVS RACFPlatform Services Quick Start Guide for OS/400NetWare Intercept and API Quick Start Guide
About This Guide 7
Novell Confidential Manual (ENU) 15 April 2004
Documentation for related products, such as Identity Manager and eDirectory, is available at the Novell Documentation Web site (http://www.novell.com/documentation).
Documentation Updates
For the most recent versions of the Identity Manager Fan-Out driver documentation, see the Identity Manager Driver Web site (http://www.novell.com/documentation/dirxmldrivers).
Documentation Conventions
In this documentation, a greater-than symbol (>) is used to separate actions within a step and items within a cross-reference path.
A trademark symbol (®, TM, etc.) denotes a Novell trademark. An asterisk (*) denotes a third-party trademark.
When a single pathname can be written with a backslash for some platforms or a forward slash for other platforms, the pathname is presented with a backslash. Users of platforms that require a forward slash, such as UNIX*, should use forward slashes as required by your software.
User Comments
We want to hear your comments and suggestions about this manual and the other documentation included with the driver. To contact us, send e-mail to [email protected].
8 Nsure Identity Manager Fan-Out Driver 3.1 Platform Services Administration Guide for MVS
Novell Confidential Manual (ENU) 15 April 2004
1 Installing Platform Services
The installation and setup of Novell® NsureTM Identity Manager Fan-Out driver Platform Services includes tasks performed on the platform, and core driver administration tasks. This section describes the installation tasks that are performed on the platform system. For details about platform configuration and administration tasks, see Chapter 2, “Configuring and Administering Platform Services,” on page 29.
The core driver tasks include defining UID/GID Sets, defining Platform Sets, and defining Platform objects. These tasks must be completed before you can use Platform Services. For more information about these tasks, see the Core Driver Administration Guide.
An experienced MVS system programmer familiar with the local environment and the Identity Manager Fan-Out driver should install MVS Platform Services. After the planning process has been completed, installation of Platform Services for MVS should take about a day to complete. An IPL is required.
Topics in this section are
“MVS Platform System Requirements” on page 10
“About Platform Services for MVS” on page 10
“The MVS Platform Services Samples Library” on page 10
“The MVS Platform Services Load Library” on page 10
“The Platform Services Process” on page 11
“The MVS System Intercept” on page 12
“The MVS Platform Receiver” on page 12
“Receiver Scripts” on page 12
“Platform Services Installation Procedure” on page 14
“Obtaining Platform Services for MVS Files” on page 18
“The ASCTEST Command” on page 19
“RACF Exit Installation” on page 21
“CA-ACF2 Exit Installation” on page 23
“CA-Top Secret Exit Installation” on page 27
Installing Platform Services 9
Novell Confidential Manual (ENU) 15 April 2004
MVS Platform System RequirementsAny OS/390 or z/OS release supported by IBM
IBM OS/390 eNetwork Communications Server V2R6 or later, or any 100% compatibleTCP/IP product.
One of the following security systems:
RACF* version 1.9 or later
CA-ACF2* version 6.2 or later
CA-Top Secret* version 5.2 SP3 or later
About Platform Services for MVSPlatform Services for MVS consists of three major components.
Platform Services Process: The Platform Services Process, known in MVS as ASCLIENT, receives requests from other MVS address spaces and manages communications with one or more core drivers for Authentication Services.
System Intercept: The System Intercept is implemented in MVS as security system exits. These exits communicate with ASCLIENT for password verification and password changes.
Platform Receiver: The Platform Receiver, known in MVS as PLATRCVR, requests provisioning events from Event Journal Services and runs a Receiver script to carry out the appropriate action for each event as it is received.
The MVS Platform Services Samples LibraryThe MVS Platform Services Samples Library (SAMPLIB) contains sample JCL and configuration members that are useful for installing and running Platform Services. Comments in the individual members describe their function and how they should be customized for your installation. Member $CONTENT describes the contents.
For information about setting up your MVS Platform Services Samples Library, see “Obtaining Platform Services for MVS Files” on page 18.
The MVS Platform Services Load LibraryThe MVS Platform Services Load Library contains the executable programs and related files for Platform Services.
MVS Platform Services uses several MVS services that require APF authorization and manages a small amount of storage in MVS ECSA that requires a system key. Therefore, the Platform Services Load Library must be APF-authorized. We recommend that you do not add this library to your linklist. The load library can be cataloged in any catalog in the normal MVS catalog search order.
For information about setting up your MVS Platform Services Load Library, see “Obtaining Platform Services for MVS Files” on page 18.
10 Nsure Identity Manager Fan-Out Driver 3.1 Platform Services Administration Guide for MVS
Novell Confidential Manual (ENU) 15 April 2004
The Platform Services ProcessThe Platform Services Process for MVS provides an interface between the native security system on an OS/390 or z/OS system and one or more core drivers for Authentication Services. This interface is transparent to end users and applications. The only difference visible to users is that passwords are consistent across MVS, NetWare®, and other systems that use Identity Manager Fan-Out driver Platform Services.
The Platform Services Process is called whenever a user attempts to enter the system using a user ID and password, or when a user attempts to change the password. Such a request is redirected from the security system (RACF, CA-ACF2, or CA-Top Secret) through an installation exit to the Platform Services Process, which then communicates with a core driver and returns a response.
If no core driver can be reached, or if the Platform Services Process is not running, the user’s password is verified locally against the native security system database. In this case, password changes are disallowed, because the core driver cannot be instructed to change the user’s password in eDirectoryTM. To ensure that the user can log on with the existing (perhaps expired) password, the password’s expiration date is extended temporarily and is reset to its true value from eDirectory during a later authentication when a core driver can be reached.
If a password check or change is successful, the contents of the native security system database are updated to reflect the validated or new password. This allows the user to log on using the last password that worked on an MVS system if the driver, eDirectory, or the network is not available.
The MVS Platform Services Process is implemented as a started task. This started task, usually named ASCLIENT, performs the following tasks:
Handles all password check and password change requests from users logging on to the MVS system
Communicates with the core drivers for Authentication Services
Redirects requests to other core drivers if a core driver is unreachable or returns an unexpected error
Provides the AS Client API for the MVS system
Gathers and logs performance statistics
ASCLIENT communicates with core drivers using DES encryption.
Member ASCLIENT of the SAMPLIB data set contains sample JCL for the Platform Services Process. Copy this member to SYS1.PROCLIB or its equivalent, and customize it to match your MVS Platform Load Library and MVS Platform Configuration Member library data set names.
Start ASCLIENT during MVS startup and stop ASCLIENT during MVS shutdown. Because Platform Services uses the native security system to authenticate users if ASCLIENT is unavailable, ASCLIENT can be shut down and restarted if necessary without disrupting normal authentication. Password changes are disabled while ASCLIENT is not active.
ASCLIENT reads its configuration information from a PDS allocated to ddname ASCPARMS. ASCLIENT can update its configuration without a restart. For further information, see “ASCLIENT Operation” on page 30 and the Platform Services Planning and Reference Guide.
ASCLIENT logs transactions and other messages to ddname ASCLOG. If ddname ASCLOG is not defined in the ASCLIENT started procedure JCL, ASCLIENT dynamically allocates ASCLOG as SYSOUT=*, which uses the default MSGCLASS for started tasks. If ddname ASCLOG exists in the ASCLIENT procedure, ASCLIENT uses the existing DD statement. If ASCLOG is dynamically allocated, you can use the LOGSWITCH command to close the log file
Installing Platform Services 11
Novell Confidential Manual (ENU) 15 April 2004
and start a new one. For details about the LOGSWITCH command, see “ASCLIENT Operation” on page 30.
If the Platform Services Process is installed and started but the security system exits are not installed, ASCLIENT is not called for user logons and other authentications, but can be tested using ASCTEST to ensure that it is configured properly. For details about using ASCTEST, see “The ASCTEST Command” on page 19.
The MVS System InterceptThe System Intercept is implemented in MVS as RACF, CA-ACF2, or CA-Top Secret exits. These exits communicate with ASCLIENT for password verification and password changes.
The MVS Platform ReceiverThe MVS Platform Receiver is implemented as a started task that runs under the TSO terminal monitor program. It calls REXX execs that add, modify, or delete users or groups. If configured to do so, the MVS Platform Receiver replicates password change information from eDirectory into the local security system. For details about password replication for MVS, see “Password Replication for MVS” on page 30.
Member PLATRCVR of the SAMPLIB data set contains sample JCL for the Platform Receiver. Copy this member to SYS1.PROCLIB or its equivalent, and customize it to match your MVS Platform Load Library and Receiver script data set names.
The Platform Receiver communicates with Event Journal Services using Secure Sockets Layer (SSL).
Start and stop PLATRCVR on a schedule that is appropriate for your requirements. For details about Platform Receiver operation, see the Platform Services Planning Guide and Reference.
By default, PLATRCVR reads its configuration information from the sequential file allocated to ddname ASAMCONF. You can use a JCL EXEC statement PARM to specify another source.
PLATRCVR processes events and logs the event status to the core driver. Log entries can be viewed using the Web interface. Receiver script messages issued by the REXX SAY verb appear in ddname SYSTSPRT of the PLATRCVR started procedure. If external programs are called by Platform Receiver scripts, their output appears under the ddname or file name that they normally write to.
Receiver ScriptsReceiver scripts for the MVS Platform are implemented using REXX execs. The Platform Services installation process stores the base scripts in the library that you specify. PLATRCVR accesses these scripts through ddname SYSPROC.
The base scripts contain detailed descriptions about their operation. The scripts provided are fully functional, although they require at least minimal customization to work in your environment.
For more information about Receiver scripts, see the Platform Services Planning Guide and Reference and the scripts themselves.
12 Nsure Identity Manager Fan-Out Driver 3.1 Platform Services Administration Guide for MVS
Novell Confidential Manual (ENU) 15 April 2004
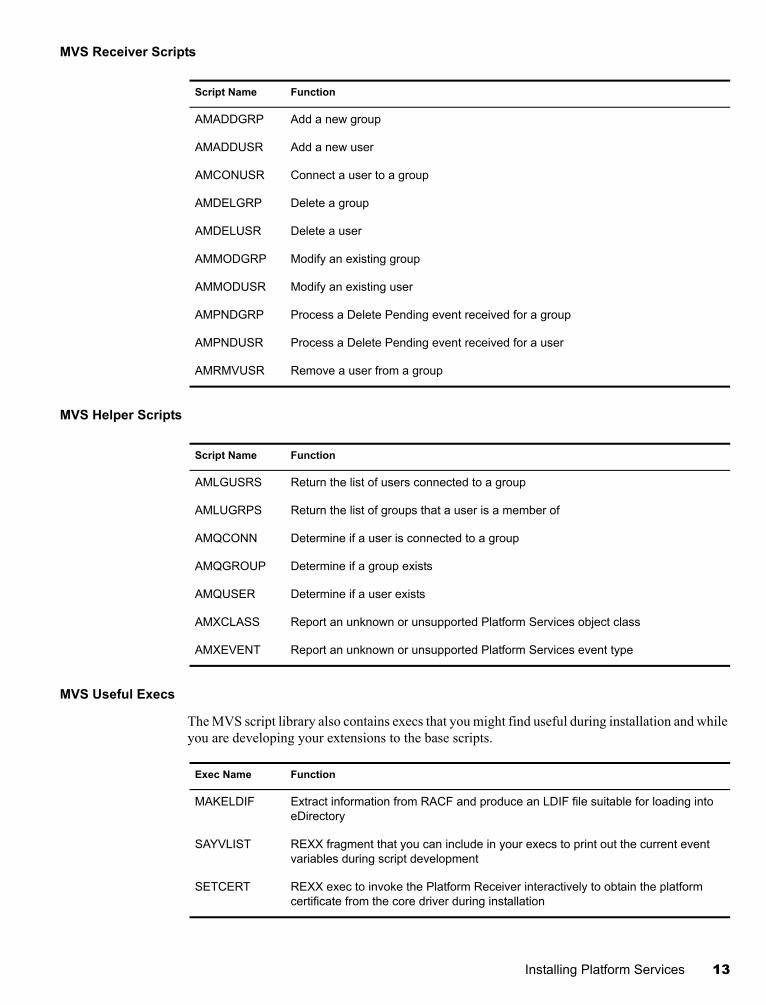
MVS Receiver Scripts
MVS Helper Scripts
MVS Useful Execs
The MVS script library also contains execs that you might find useful during installation and while you are developing your extensions to the base scripts.
Script Name Function
AMADDGRP Add a new group
AMADDUSR Add a new user
AMCONUSR Connect a user to a group
AMDELGRP Delete a group
AMDELUSR Delete a user
AMMODGRP Modify an existing group
AMMODUSR Modify an existing user
AMPNDGRP Process a Delete Pending event received for a group
AMPNDUSR Process a Delete Pending event received for a user
AMRMVUSR Remove a user from a group
Script Name Function
AMLGUSRS Return the list of users connected to a group
AMLUGRPS Return the list of groups that a user is a member of
AMQCONN Determine if a user is connected to a group
AMQGROUP Determine if a group exists
AMQUSER Determine if a user exists
AMXCLASS Report an unknown or unsupported Platform Services object class
AMXEVENT Report an unknown or unsupported Platform Services event type
Exec Name Function
MAKELDIF Extract information from RACF and produce an LDIF file suitable for loading into eDirectory
SAYVLIST REXX fragment that you can include in your execs to print out the current event variables during script development
SETCERT REXX exec to invoke the Platform Receiver interactively to obtain the platform certificate from the core driver during installation
Installing Platform Services 13
Novell Confidential Manual (ENU) 15 April 2004
Platform Services Installation ProcedureThe general steps for installing Platform Services for MVS are
1. Create the Platform object for your MVS platform. For details, see the Core Driver Administration Guide.
2. Obtain and set up the distribution files.
3. Install the Platform Services Process.
4. Install and configure the System Intercept.
5. Install the Platform Receiver.
6. Customize the Receiver scripts.
7. Integrate Platform Services into your routine operation.
Obtaining and Setting Up the Distribution Files1 Obtain the Platform Services for MVS distribution files.
For details, see “Obtaining Platform Services for MVS Files” on page 18.
2 Add the Platform Services Load Library to the APF list for your system.
Use SYS1.PARMLIB member IEAAPF00 or PROG00 as appropriate. If you are using the dynamic APF facility, you can add the Platform Services Load Library to the active APF list immediately and use the console SET PROG command to activate your changes. Otherwise, you must IPL your MVS system to make the load library APF-authorized. The Platform Services Load Library can be cataloged in any catalog in the normal search order. We recommend that you do not add this library to your linklist.
3 Add ASCTEST as an APF-authorized TSO command.
3a Add ASCTEST to the AUTHCMD NAMES(...) statement in member IKJTSOxx of SYS1.PARMLIB or its equivalent.
Example:
AUTHCMD NAMES( +...other commands... +ASCTEST)
For more information about IKJTSOxx, see the IBM Initialization and Tuning Reference for your system.
3b Use the TSO PARMLIB command to activate your changes.
Example:
PARMLIB CHECK(00)PARMLIB UPDATE(00)
For more information about the PARMLIB command, see the IBM TSO/E System Programming Command Reference for your system.
14 Nsure Identity Manager Fan-Out Driver 3.1 Platform Services Administration Guide for MVS
Novell Confidential Manual (ENU) 15 April 2004
Installing the Platform Services Process1 Add the JCL procedure for ASCLIENT to your started task procedure library
(SYS1.PROCLIB or its equivalent).
Use member ASCLIENT in SAMPLIB as a model, and customize it to use your own data set names.
2 Verify that the ASCLIENT user ID is defined as a UNIX user. For more information, see the IBM UNIX System Services Planning book for your system.
3 Set up the configuration member for ASCLIENT.
The ASCLIENT procedure contains ddname ASCPARMS, which must point to an LRECL=80 RECFM=FB PDS. Configuration members in ASCPARMS are named ASCPRMxx, where xx defaults to 00. Use SAMPLIB member ASCPRMXX as a model. For details about platform configuration, see the Platform Services Planning Guide and Reference.
4 Assign a DES encryption key for the platform.
Use the KEY statement in the configuration member to set the key for ASCLIENT. For details about the KEY statement, see the Platform Services Planning Guide and Reference.
Use the Web interface to set the same key in the Platform object for the platform. For details about setting Platform object attributes, see the Core Driver Administration Guide.
For details about managing DES encryption keys, see “DES Key Management” on page 29.
5 Give ASCLIENT performance characteristics appropriate for its role in user logon.
Review your Workload Manager definitions to ensure that ASCLIENT is assigned to SYSSTC or a similar Service Class.
6 Start the Platform Services Process.
At this point, ASCLIENT is running and can accept requests, but no security system exits are in place to call it yet.
7 Perform preliminary testing using ASCTEST.
You can use ASCTEST under TSO, or you can use the JCL in SAMPLIB member ASCTEST to send Authentication Services requests through ASCLIENT to a core driver. For information about using ASCTEST, see “The ASCTEST Command” on page 19.NOTE: The core driver treats these requests as real authentications and acts accordingly. For example, a series of consecutive invalid passwords against one user ID can cause intruder detection to be tripped for that user. If you set up test cases in eDirectory, keep in mind that if your replicas exist on multiple servers, it can take a few minutes for a change (resetting a password, disabling a user, etc.) to be communicated to the other replicas. This can cause such updates to appear to be delayed.
8 Establish Include/Exclude lists for testing Authentication Services.
Before installing the exits and IPLing with them for the first time, you might want to establish Include/Exclude lists in ASCPRMxx to restrict the users that ASCLIENT handles authentications for. User IDs in the Exclude list are processed by the native security system without calling the driver.
For details about using the Include/Exclude lists, see the Platform Services Planning Guide and Reference.
Installing Platform Services 15
Novell Confidential Manual (ENU) 15 April 2004
Installing and Configuring the System Intercept1 Install the security system exits and update security system options.
For details, see “RACF Exit Installation” on page 21, “CA-ACF2 Exit Installation” on page 23, or “CA-Top Secret Exit Installation” on page 27 as appropriate.
2 IPL with the CLPA option.
After the security system exits are installed, you need to IPL the system that they were installed on. Authentication requests that include a password (for users that are not excluded) cause message “ASC0071I Userid userid will be authenticated locally” to be issued if ASCLIENT is not running.
When ASCLIENT is started, requests that it processes are logged to ddname ASCLOG. (Requests for excluded users do not appear in ASCLOG.) You can review these with any spool-viewing product (IOF*, SDSF, or equivalent). Note, however, that the last message is buffered and is not written until another message is issued.
Installing the Platform Receiver1 Customize and run job PAXRST0A from SAMPLIB.
This job creates and populates the ASAM directory in the HFS.
2 Add the JCL procedure for PLATRCVR to your started task procedure library (SYS1.PROCLIB or its equivalent).
Use member PLATRCVR in SAMPLIB as a model, and customize it to use your own data set names. If your Receiver scripts call programs or other scripts that write to other than standard TSO output, add the appropriate DD statements to your PLATRCVR procedure.
3 Verify that the PLATRCVR user ID is defined as a UNIX user. For more information, see the IBM UNIX System Services Planning book for your system.
4 Assign PLATRCVR the appropriate security system authority (such as RACF SPECIAL) to manage users and groups.
5 Set up the platform configuration file for PLATRCVR.
The PLATRCVR procedure contains ddname ASAMCONF, which must point to a sequential file containing the configuration statements. Use SAMPLIB member ASAMCONF as a model. Specify the FilePath value of the ASAMDIR statement to be the same as the value you used for the ASAM directory in the PAXRST0A job run in Step 1. For details about the platform configuration file, see the Platform Services Planning Guide and Reference.
6 Obtain a security certificate for the platform.
Run the Platform Receiver interactively with the -s parameter to obtain a security certificate. You can use the SETCERT script in the exec library to do this. Customize the script to set the ASAMLOAD and ASAMHOME variables to the names of your Platform Services Load Library and your ASAM directory respectively. If you are using a PDS member instead of an HFS file for your ASAMCONF file, set the PDS variable to TRUE and set the ASAMHOME variable to point to your ASAMCONF PDS member.
Respond to the prompts.
Common name of the Platform object (specified in the Web interface when the object was created)
16 Nsure Identity Manager Fan-Out Driver 3.1 Platform Services Administration Guide for MVS
Novell Confidential Manual (ENU) 15 April 2004
Fully distinguished name and password of an eDirectory user with Read and Create object rights to the ASAM System container
7 Establish Include/Exclude lists for testing Identity Provisioning.
Before you run PLATRCVR to process provisioning events, you might want to establish an Include/Exclude list in ASAMCONF to restrict the users and groups that Identity Provisioning manages. Users and groups in the Exclude list are not managed by Identity Provisioning.
For details about using the Include/Exclude lists, see the Platform Services Planning Guide and Reference.
Customizing the Receiver ScriptsExtend the base Receiver scripts in accordance with your installation plan. For more information, see “MVS Receiver Scripts” on page 13.
Integrating Platform Services into Your Routine OperationAt this point, Platform Services is installed and running on one system. If you have multiple systems sharing a security system database, users on the systems that you have installed Platform Services on might be affected if they try to use other systems. In addition, if you disable the password syntax rules and history from one system, this affects all systems that share the same security system database. As a result, you might decide not to disable password restrictions until Platform Services is deployed on all systems in your complex.
Systematically introduce Platform Services into your routine production environment.
1 When you’re satisfied that Platform Services is installed and running correctly, install Platform Services on all remaining systems in your complex.
2 Add ASCLIENT and PLATRCVR operation into routine system startup and shutdown scheduling procedures.
When Platform Services is fully deployed, ASCLIENT must be active on every MVS image in the complex. PLATRCVR must be active on only one system in the complex that is sharing the security database.
Unlike ASCLIENT, whose outages should be kept to a minimum, PLATRCVR can be inactive for a reasonable period without adverse effects. When PLATRCVR is started, it receives backlogged provisioning events.
3 After testing to your satisfaction, change the Include/Exclude lists to match your production environment.
Installing Platform Services 17
Novell Confidential Manual (ENU) 15 April 2004
Obtaining Platform Services for MVS FilesIMPORTANT: Before you install Platform Services, check the Novell Support Web Site (http://support.novell.com) for the latest support pack and product update information, and review the Release Notes and Readme files.
Installation packages are provided on the distribution media in the mvsplatformservices directory.
MVS Platform Services is packaged as TRANSMIT unloaded MVS PDSs.
Samples Library: ASCSAMP.XMT
Load Library: ASCLOAD.XMT
RACF Receiver Scripts exec Library: RACFEXEC.XMT
CA-ACF2 Receiver Scripts exec Library: ACF2EXEC.XMT
CA-Top Secret Receiver Scripts exec Library: TSSEXEC.XMT
These files can be uploaded to your MVS system from a PC or file server.
1 If you are using line-mode FTP, open a command prompt window, change to the mvsplatformservices directory, and use the following commands to transfer the files to MVS. If you are using a graphical FTP client, use the equivalent commands. IMPORTANT: The BINARY and the QUOTE SITE commands are required. If the .XMT files are not sent to MVS correctly, the subsequent steps will fail.
1a FTP MVS-hostname
1b Authenticate to MVS using your user ID and password.
1c QUOTE SITE LRECL=80 RECFM=FB
1d If you need the files to be stored on a specific disk volume, enterQUOTE SITE VOL=volser
1e BINARY
1f PUT ASCSAMP.XMT
1g PUT ASCLOAD.XMT
1h PUT RACFEXEC.XMT
or
PUT ACF2EXEC.XMT
or
PUT TSSEXEC.XMT
1i QUIT
2 Log on to MVS using the same user ID that you used for the FTP session. The names of the files that you sent begin with your user ID unless you have changed your TSO profile prefix.
3 EnterRECEIVE INDATASET(ASCSAMP.XMT)
4 When RECEIVE prompts you for parameters, enterDSNAME('hlq.platserv.samplib') VOLUME(volser)where: hlq.platserv.samplib is the SAMPLIB data set for Platform Services, and volser is the disk volume where the samples library is to be created.
18 Nsure Identity Manager Fan-Out Driver 3.1 Platform Services Administration Guide for MVS
Novell Confidential Manual (ENU) 15 April 2004
5 EnterRECEIVE INDATASET(ASCLOAD.XMT)
6 When RECEIVE prompts you for parameters, enterDSNAME('hlq.platserv.load') VOLUME(volser)where: hlq.platserv.load is the load library for Platform Services, and volser is the disk volume where the load library is to be created.
7 Enter the appropriate command to receive your security system scripts library.
RECEIVE INDATASET(RACFEXEC.XMT)
or
RECEIVE INDATASET(ACF2EXEC.XMT)
or
RECEIVE INDATASET(TSSEXEC.XMT)
8 When RECEIVE prompts you for parameters, enterDSNAME('hlq.platserv.execlib') VOLUME(volser)where: hlq.platserv.execlib is the Receiver script exec library for Platform Services, and volser is the disk volume where the Receiver script exec library is to be created.
The ASCTEST CommandThe ASCTEST command allows you to check MVS Platform Services Process functions from an MVS TSO session. SAMPLIB member ASCTEST can be used to run this command as a batch job.
You can use ASCTEST for
Ensuring that the platform is configured correctly before installing security system exits
Checking the current state of Platform Services
Spot-checking Platform Services Process performance
Troubleshooting the Platform Services ProcessNOTE: If you set up test cases in eDirectory, keep in mind that if your replicas exist on multiple servers, it can take a few minutes for a change (resetting a password, disabling a user, etc.) to be propagated to the other replicas. This can cause such updates to appear to be delayed.
ASCTEST RequirementsASCTEST is provided in the MVS Platform Load Library as part of the Platform Services distribution. Two functions of ASCTEST require APF authorization: CHKPSWD and CHGPSWD. To APF-authorize ASCTEST, add ASCTEST as an authorized TSO command to SYS1.PARMLIB(IKJTSOxx) on the AUTHCMD NAMES(...) statement. For details, see Step 3 on page 14.
ASCTEST FunctionsYou can run any of these functions at any time. If the Platform Services Process is not running, you receive a message to that effect. The results of CHKPSWD and CHGPSWD requests appear in ASCLIENT’s log as well.
Installing Platform Services 19
Novell Confidential Manual (ENU) 15 April 2004
Status
ASCTEST STATUS
STATUS returns information about an active Platform Services Process. STATUS does not call the Platform Services Process but finds its environment data and reports it.
Exclude Test
ASCTEST EXCTEST(userid)
EXCTEST checks a user ID against the active exclude list and reports whether the user ID would be excluded from Authentication Services or not. EXCTEST does not call the Platform Services Process, but finds the its exclude list and checks the specified user ID against it.
Check Password
ASCTEST CHKPSWD(userid/password) [ LOOP(count) ]
CHKPSWD calls the Platform Services Process with a user ID and password to be validated and reports the results and the elapsed time of the request. To repeat a request, use the LOOP parameter.NOTE: The core driver treats these requests as real authentications and acts accordingly. For example, a series of consecutive invalid passwords against one user ID can cause intruder detection to be tripped for that user.
Change Password
ASCTEST CHGPSWD(userid/oldpswd/newpswd)
CHGPSWD calls the Platform Services Process with a user ID, a current password, and a new password, then reports the results and elapsed time for the request. The password rules that apply to the user ID’s corresponding User object are applied so that the new password is rejected if it does not satisfy the rules defined to eDirectory.
20 Nsure Identity Manager Fan-Out Driver 3.1 Platform Services Administration Guide for MVS
Novell Confidential Manual (ENU) 15 April 2004
RACF Exit Installation
About the RACF ExitsPlatform Services for RACF uses two standard RACF exits: the RACINIT pre-process exit (ICHRIX01) and the RACF new password exit (ICHPWX01). They are provided in the Platform Services Load Library and are named ASCRIX01 and ASCPWX01 respectively.
These two exits are used to intercept all requests in which a user ID and password (and perhaps a new password) are supplied to RACF. Note, however, that these exits can only intercept password check and change requests that are sent through a standard RACF interface. If you have applications that access the RACF database directly using the RACF internal macros (ICHEINTY, etc.), their requests are not intercepted by the driver.
Platform Services provides an exit router that calls multiple exit modules in sequence. You can use this router if your installation already uses either exit.
Installing the RACF ExitsThese instructions assume that you have already installed the Platform Services Process, configured it, started it successfully, and tested it using ASCTEST.
Follow your normal procedure for applying such changes to your MVS system. We recommend that you
Install and test the exits on a test system or partition first.
Make a copy of your system volumes before applying any changes.
Consider packaging the exits as SMP/E usermods.
To install the RACF exits:
1 Install ICHRIX01, the RACINIT pre-process exit.
If you do not have an existing ICHRIX01 exit, run the job in SAMPLIB member RACRIX0A. This job uses SMP/E to linkedit ASCRIX01 into SYS1.LPALIB as exit ICHRIX01.
If you have an existing ICHRIX01 exit, update SAMPLIB member RACRIX0B as appropriate. RACRIX0B installs a router that calls the Platform Services RACINIT exit and your existing exit.
2 Install ICHPWX01, the new password exit.
If you do not have an existing ICHPWX01 exit, run the job in SAMPLIB member RACPWX0A. This job uses SMP/E to linkedit ASCPWX01 into SYS1.LPALIB as exit ICHPWX01.
If you have an existing ICHPWX01 exit, update SAMPLIB member RACPWX0B as appropriate. RACPWX0B installs a router that calls the Platform Services new password exit and your existing exit.
3 IPL the MVS system with the CLPA option.
Installing Platform Services 21
Novell Confidential Manual (ENU) 15 April 2004
Updating RACF OptionsWhen you have installed the exits into SYS1.LPALIB and IPLed your system, RACF calls the driver exits for every authentication request that provides a password. If ASCLIENT is not running, the message “ASC0071I Userid user will be authenticated locally” is issued to the MVS console as a ROUTCDE=11 WTO. This is normal and will probably be a regular occurrence if logons occur early during an IPL before TCP/IP and ASCLIENT are up.
At this point, RACF users that have not been excluded are authenticating using Authentication Services. If you are phasing in the conversion to the driver, ensure that your RACF and eDirectory password rules (minimum length, etc.) are the same. Otherwise, users can find themselves in a situation where one product accepts the new password and the other doesn’t. If the two sets of rules cannot be made the same, then make the RACF rules less restrictive than the eDirectory rules. This way, eDirectory rejects incorrect new passwords before RACF has an opportunity to.
After you have migrated most or all of your user base to the driver, turn off all RACF-related password rules, because they are enforced by the corresponding rules in eDirectory. A RACF SPECIAL user can use the RACF administrator panels to set the options listed in the table that follows, or enter the following command:
setropts password( nohistory interval(254) norevoke norules )
This command affects RACF as follows:
Record the existing values before you change them, and save them in a safe place. You will want to refer to them if you should ever remove the driver.
Uninstalling the RACF Exits1 Make a copy of your running system before applying any changes.
2 Use SMP/E to RESTORE the usermods for ICHRIX01 and ICHPWX01.
3 IPL the updated system specifying CLPA.
4 Using the RACF administrator panels or the SETROPTS command, reestablish the password rules that you disabled when you installed the RACF interface.
Option Description
NoHistory RACF does not keep a list of previously used passwords for each user. eDirectory does this if configured to do so.
Interval(254) This is the maximum interval for a RACF password’s expiration interval. (RACF interprets 255 as nonexpiring.) Password expiration is controlled by eDirectory through the driver.
NoRevoke RACF does not revoke a user ID for excessive invalid passwords. If intruder detection is enabled in eDirectory, eDirectory temporarily disables a user if the user enters too many consecutive invalid passwords.
NoRules RACF does not apply any restrictions to the syntax of new passwords. The password restrictions defined in eDirectory are used instead.
22 Nsure Identity Manager Fan-Out Driver 3.1 Platform Services Administration Guide for MVS
Novell Confidential Manual (ENU) 15 April 2004
CA-ACF2 Exit Installation
About the CA-ACF2 ExitsPlatform Services for CA-ACF2 uses two standard ACF2 exits: the System Entry Validation exit (SEVPRE) and the New-Password exit (NEWPXIT). They are provided in the Platform Services Load Library and are named ASCSVPRE and ASCNPXIT respectively. These two exits are used to intercept all requests in which a user ID and password (and perhaps a new password) are supplied to ACF2. Note, however, that these exits can only intercept password check and change requests that are sent through a standard ACF2 interface. If you have applications that use internal ACF2 services, such as ACFSVC ACALT, their requests are not intercepted by the driver.
Platform Services provides an exit router that calls multiple exit modules in sequence. You can use this router if your installation already uses either exit.
Installing the CA-ACF2 ExitsThese instructions assume that you have already installed the Platform Services Process, configured it, started it successfully, and tested it using ASCTEST.
Follow your normal procedure for applying system-level changes to your MVS system. We recommend that you
Install and test the exits on a test system or partition first.
Make a copy of applicable libraries before applying any changes.
Plan an uninstallation procedure. For guidelines, see “Uninstalling the CA-ACF2 Exits” on page 26.
ACF2 allows you to call the SEVPRE and NEWPXIT exits by any name. By default, the jobs in SAMPLIB name the exits ASCSVPRE and ASCNPXIT. If you need to name the exits something different, edit the JCL as appropriate. ACF2 requires that both of these exits reside in SYS1.LPALIB or another library in the LPA list.
If you have an existing ACF2 exit (SEVPRE or NEWPXIT) and don’t have storage constraints in PLPA, consider leaving your existing exits in PLPA under a different name from the exit name used by Platform Services. This way, you can reinstall your old exit without an IPL.
To install the CA-ACF2 exits:
1 Install SEVPRE, the system entry validation exit.
If you do not have an existing SEVPRE exit, run the job in SAMPLIB member ACFSVP0A. This job linkedits ASCSVPRE into SYS1.LPALIB as exit ASCSVPRE. If you prefer not to use SYS1.LPALIB, change the SYSLMOD DD statement in ACFSVP0A to a different LPA list library.
If you have an existing SEVPRE exit, update SAMPLIB member ACFSVP0B as appropriate. ACFSVP0B linkedits the Platform Services SEVPRE exit and your existing exit with a router that can call multiple SEVPRE exits in succession. ACFSVP0B contains detailed instructions for setting this up.
2 Install NEWPXIT, the new password exit.
If you do not have an existing NEWPXIT exit, run the job in SAMPLIB member ACFNPX0A. This job linkedits ACFNPXIT into SYS1.LPALIB. If you prefer not to use
Installing Platform Services 23
Novell Confidential Manual (ENU) 15 April 2004
SYS1.LPALIB, change the SYSLMOD DD statement in ACFNPX0A to a different LPA list library.
If you have an existing NEWPXIT exit, update SAMPLIB member ACFNPX0B as appropriate. ACFNPX0B linkedits the Platform Services NEWPXIT exit and your existing exit with a router that can call multiple NEWPXIT exits in succession. ACFNPX0B contains detailed instructions for setting this up.
3 IPL the MVS system with the CLPA option.NOTE: You can package the ACF2 exits as SMP/E usermods. ACF2 installations customarily do not install ACF2 exits with SMP/E. Therefore, the ACF2 exits shipped with Platform Services are not set up for SMP/E. If you want to install the exits as SMP/E usermods, you can use the SAMPLIB members ASCRIX0A/B and ASCPWX0A/B, which install the RACF version of the exits, as models.
Updating CA-ACF2 Options
Setting CA-ACF2 to Call the Exits
When you have linked the exits into an LPA library and IPLed your system with CLPA, set ACF2 to start calling the exits.
An ACF2 administrator must perform these steps.
1 If you do not already have a GSO EXITS record, use the ACF2 ISPF panels to add the exits or enter the following TSO commands:
READYacf ACFset control(gso) sysid(<system>) CONTROLinsert sysid(<system>) exits sevpre(ascsvpre) newpxit(ascnpxit)
Substitute your system ID for <system>. If you chose to use other names for these exits, substitute your names. If you only have one system using your ACF2 database, or you want to affect all systems at once, you can omit the sysid operand. However, if you have multiple ACF2 systems, we recommend that you convert them one at a time.
2 If you already have a GSO EXITS record, do the following:
2a From the main ACF2 panel, select the GSO option.
2b From the GSO panel, select CHANGE.
2c From the Change A GSO Record panel, enter a change type of ADD, the system ID you want the change to affect, and a RECID of EXITS.
2d Specify a value of ASCSVPRE for exit SEVPRE and a value of ASCNPXIT for exit NEWPXIT. If you chose to use other names for these exits, substitute your names here.
3 Install the new values.
From an MVS console, enterMODIFY ACF2,REFRESH
When you do this, ACF2 begins calling the Platform Services SEVPRE and NEWPXIT exits. If ASCLIENT is not running, users attempting to log on are authenticated locally. When this happens, ASCSVPRE issues the message “ASC0071I Userid user will be authenticated locally” to the MVS console as a ROUTCDE=11 WTO. This is normal and will probably be a regular occurrence if logons occur early during an IPL before TCP/IP and ASCLIENT are up.
24 Nsure Identity Manager Fan-Out Driver 3.1 Platform Services Administration Guide for MVS
Novell Confidential Manual (ENU) 15 April 2004
Removing CA-ACF2 Password Rules
At this point, ACF2 users that have not been excluded are authenticating using Authentication Services. Set the ACF2 password-related parameters to disable ACF2 password controls. The eDirectory parameters are used instead. For full descriptions of these parameters, see your CA-ACF2 Administrator Guide.
Record the existing values before you change them, and save them in a safe place. You will want to refer to them if you should ever remove the driver.
An ACF2 administrator must perform these steps.
1 If you do not already have a GSO EXITS record, use the ACF2 ISPF panels to set the values listed in the table that follows this procedure, or enter the following TSO commands:
READYacf ACFset control(gso) sysid(<system>) CONTROLinsert sysid(<system>) pswd <values>
Substitute the system ID for <system>. If you only have one system using your ACF2 database or you want to affect all systems at once, you can omit the sysid operand. However, if you have multiple ACF2 systems, we recommend that you convert them one at a time.
Substitute the values shown in the table that follows this procedure for <values>.
2 If you already have a GSO EXITS record, use the ACF2 ISPF panels to change the pswd record, or enter the following TSO commands.
READYacf ACFset control(gso) sysid(<system>) CONTROLchange sysid(<system>) pswd <values>
Substitute the system ID for <system>. If you only have one system using your ACF2 database or you want to affect all systems at once, you can omit the sysid operand. However, if you have multiple ACF2 systems, we recommend that you convert them one at a time.
Substitute the values shown in the table that follows this procedure for <values>.
3 Install the new rule values.
From an MVS console, enterMODIFY ACF2,REFRESH
Installing Platform Services 25
Novell Confidential Manual (ENU) 15 April 2004
The following table describes the ACF2 password-related parameters:
Uninstalling the CA-ACF2 Exits1 If you linked the Platform Services SEVPRE exit or NEWPXIT exit with exits of your own,
reinstall your original exits, then IPL with CLPA to load the relinked exits into the active LPA. If you changed the exits’ names as you relinked them, you must also update the GSO EXITS record with the changed exit names.
2 If you are using ASCSVPRE or ASCNPXIT by themselves, update the GSO EXITS record to remove the exit names.
2a Enter the following TSO commands:
READYacf ACFset control(gso) sysid(<system>) CONTROLinsert sysid(<system>) exits sevpre() newpxit()
2b Install the new values.
From an MVS console, enterMODIFY ACF2,REFRESH
3 Delete the exit modules from the LPA library containing them. Then IPL with CLPA at a convenient time.
Parameter Description
MAXTRY(255) The maximum number of password attempts before ACF2 suspends the user ID. The driver uses eDirectory intruder detection parameters instead.
MINPSWD(1) The minimum length of an ACF2 password.
PASSLMT(255) The maximum number of invalid password attempts allowed in one day.
PSWDALT Allow users to change their password at logon time.
NOPWDHIST Disable ACF2 password history.
PSWDNUM Allow a new password to be all numeric.
WRNDAYS(0) Warn the user when the password is about to expire. This is controlled by the ACF2.EXPIREWARN parameter in the ASCLIENT configuration file.
26 Nsure Identity Manager Fan-Out Driver 3.1 Platform Services Administration Guide for MVS
Novell Confidential Manual (ENU) 15 April 2004
CA-Top Secret Exit Installation
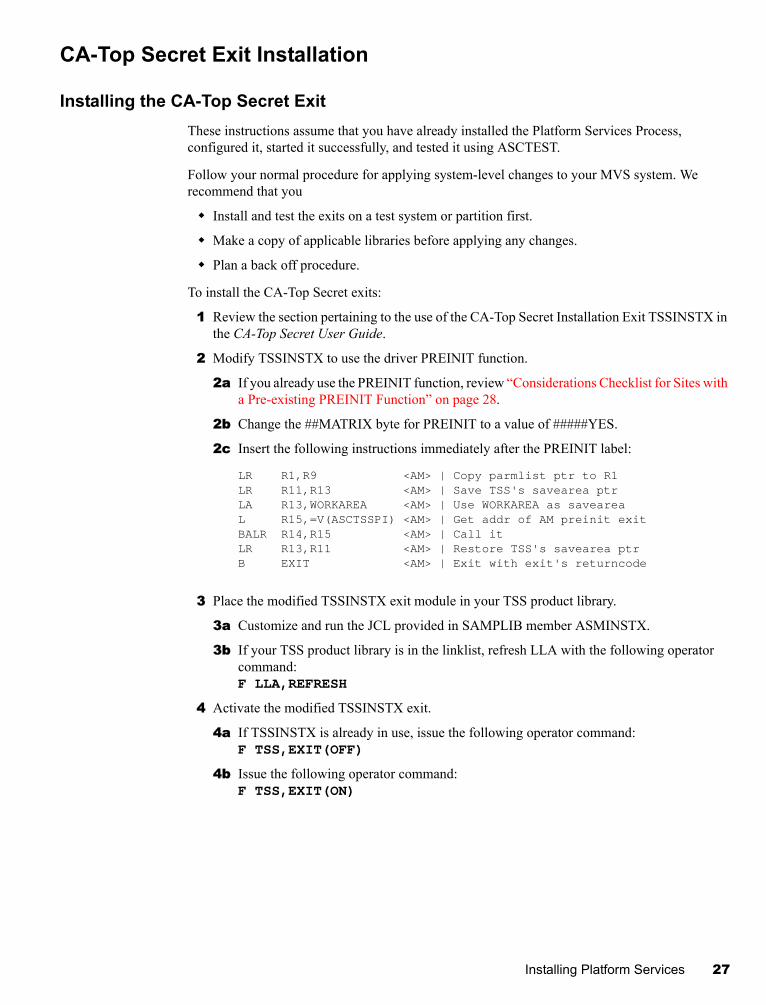
Installing the CA-Top Secret ExitThese instructions assume that you have already installed the Platform Services Process, configured it, started it successfully, and tested it using ASCTEST.
Follow your normal procedure for applying system-level changes to your MVS system. We recommend that you
Install and test the exits on a test system or partition first.
Make a copy of applicable libraries before applying any changes.
Plan a back off procedure.
To install the CA-Top Secret exits:
1 Review the section pertaining to the use of the CA-Top Secret Installation Exit TSSINSTX in the CA-Top Secret User Guide.
2 Modify TSSINSTX to use the driver PREINIT function.
2a If you already use the PREINIT function, review “Considerations Checklist for Sites with a Pre-existing PREINIT Function” on page 28.
2b Change the ##MATRIX byte for PREINIT to a value of #####YES.
2c Insert the following instructions immediately after the PREINIT label:
LR R1,R9 <AM> | Copy parmlist ptr to R1LR R11,R13 <AM> | Save TSS's savearea ptrLA R13,WORKAREA <AM> | Use WORKAREA as saveareaL R15,=V(ASCTSSPI) <AM> | Get addr of AM preinit exitBALR R14,R15 <AM> | Call itLR R13,R11 <AM> | Restore TSS's savearea ptrB EXIT <AM> | Exit with exit's returncode
3 Place the modified TSSINSTX exit module in your TSS product library.
3a Customize and run the JCL provided in SAMPLIB member ASMINSTX.
3b If your TSS product library is in the linklist, refresh LLA with the following operator command:F LLA,REFRESH
4 Activate the modified TSSINSTX exit.
4a If TSSINSTX is already in use, issue the following operator command:F TSS,EXIT(OFF)
4b Issue the following operator command:F TSS,EXIT(ON)
Installing Platform Services 27
Novell Confidential Manual (ENU) 15 April 2004
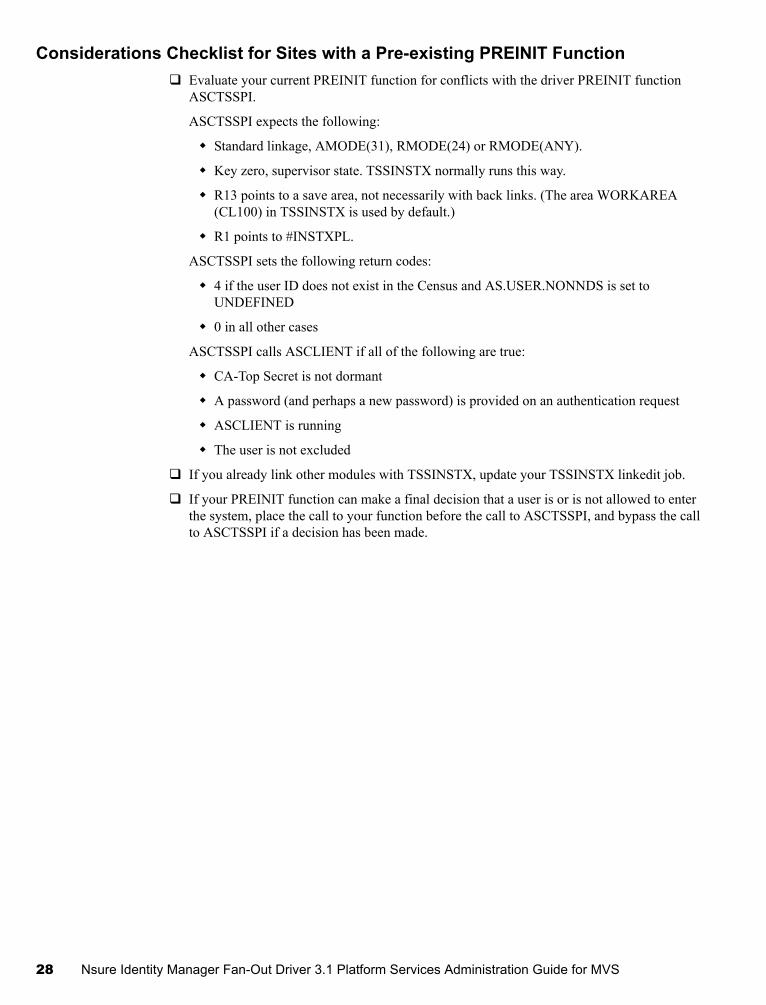
Considerations Checklist for Sites with a Pre-existing PREINIT FunctionEvaluate your current PREINIT function for conflicts with the driver PREINIT function ASCTSSPI.
ASCTSSPI expects the following:
Standard linkage, AMODE(31), RMODE(24) or RMODE(ANY).
Key zero, supervisor state. TSSINSTX normally runs this way.
R13 points to a save area, not necessarily with back links. (The area WORKAREA (CL100) in TSSINSTX is used by default.)
R1 points to #INSTXPL.
ASCTSSPI sets the following return codes:
4 if the user ID does not exist in the Census and AS.USER.NONNDS is set to UNDEFINED
0 in all other cases
ASCTSSPI calls ASCLIENT if all of the following are true:
CA-Top Secret is not dormant
A password (and perhaps a new password) is provided on an authentication request
ASCLIENT is running
The user is not excluded
If you already link other modules with TSSINSTX, update your TSSINSTX linkedit job.
If your PREINIT function can make a final decision that a user is or is not allowed to enter the system, place the call to your function before the call to ASCTSSPI, and bypass the call to ASCTSSPI if a decision has been made.
28 Nsure Identity Manager Fan-Out Driver 3.1 Platform Services Administration Guide for MVS
Novell Confidential Manual (ENU) 15 April 2004
2 Configuring and Administering Platform Services
The topics in this section provide information about managing Novell® NsureTM Identity Manager Fan-Out driver Platform Services.
“Platform Certificate Management” on page 29
“DES Key Management” on page 29
“Administering Platform Services for MVS” on page 30
Platform Certificate ManagementThe connection between the MVS Platform Receiver and Event Journal Services uses Secure Sockets Layer (SSL). SSL connections are authenticated through the use of certificates.
The certificates used by the Identity Manager Fan-Out driver are minted by the Certificate Services component of the core driver. When you install and configure Platform Services, you obtain a certificate.
To obtain a new certificate, run the Platform Receiver with the -s command line parameter.
Platform certificates are stored in the HFS asam/data/platformservices/certs directory. Ensure that access to the certs directory is limited to the appropriate users.
DES Key ManagementThe MVS Platform Services Process uses DES encryption for communication with core drivers.
A given transaction between the Platform Services Process and a core driver is encrypted using a single use session key. The key is assigned by the core driver and consists of a pseudo-random number encrypted with the key of the platform.
Core drivers obtain the DES key for a given platform from its Platform object in the ASAM System container. You use the Web interface to enter this information. For details about using the Web interface to set the attributes of a Platform object, see the Core Driver Administration Guide.
The Platform Services Process obtains the DES key from the platform configuration file KEY statement. For information about the platform configuration file, see the Platform Services Planning Guide and Reference.
If the DES key used by a core driver for a given platform and the DES key used by the platform are not identical, communication attempts fail.
So that you can change the DES key for a platform, core drivers can use the previous key within a time interval that you specify. Core drivers always try the current key first. If that attempt is unsuccessful and the time interval has not expired, the core driver tries the previous key.
Configuring and Administering Platform Services 29
Novell Confidential Manual (ENU) 15 April 2004
To change the DES key for a platform:
1 Use the Web interface to specify the new key for the platform. Specify a sufficient time before the old key expires for you to change the key on the platform. For details about how to specify the encryption key that core drivers use for a given platform, see the Core Driver Administration Guide.
2 Update the KEY statement in the platform configuration file of the platform with the new key value. For details about the platform configuration file, see the Platform Services Planning Guide and Reference.
Password Replication for MVSIf a password check or change operation is successful, the Platform Services process for MVS updates the contents of the native security system database to reflect the validated or new password. This allows the user to log on using the last password that worked on an MVS system if the driver, eDirectoryTM, or the network is not available.
The MVS Platform Receiver updates passwords in the security system database when password synchronization information is received from a core driver for password change events in eDirectory. To configure core drivers to send password synchronization information to the MVS platform, use the Web interface to set Permit Password Replication to Yes or If Available for the Platform object. For details about using the Web interface, see the Core Driver Administration Guide.
Both the Authentication Services Include/Exclude list and the Identity Provisioning Include/Exclude list affect aspects of password replication on MVS. Consider the need for symmetry between the two Include/Exclude lists if you use password replication.
Administering Platform Services for MVS“Managing the MVS Platform Services Process” on page 30
“Managing the MVS Platform Receiver” on page 32
Managing the MVS Platform Services Process
ASCLIENT Operation
Start the MVS Platform Services Process (ASCLIENT) during system IPL. When message ASC0001I is issued, ASCLIENT is ready to process requests and commands. Requests are handled by a subtask. ASCLIENT creates additional subtasks if needed to handle concurrent requests.
ASCLIENT requires TCP/IP to communicate with the core drivers. Start ASCLIENT afterTCP/IP has been started and before user processing begins.
The MVS Platform Services Process supports several commands to control its operation. Enter these at an MVS Operator Console. (If you have named your Platform Services Process something other than ASCLIENT, substitute your procedure name as appropriate.)
To start ASCLIENT, enterSTART ASCLIENT
30 Nsure Identity Manager Fan-Out Driver 3.1 Platform Services Administration Guide for MVS
Novell Confidential Manual (ENU) 15 April 2004
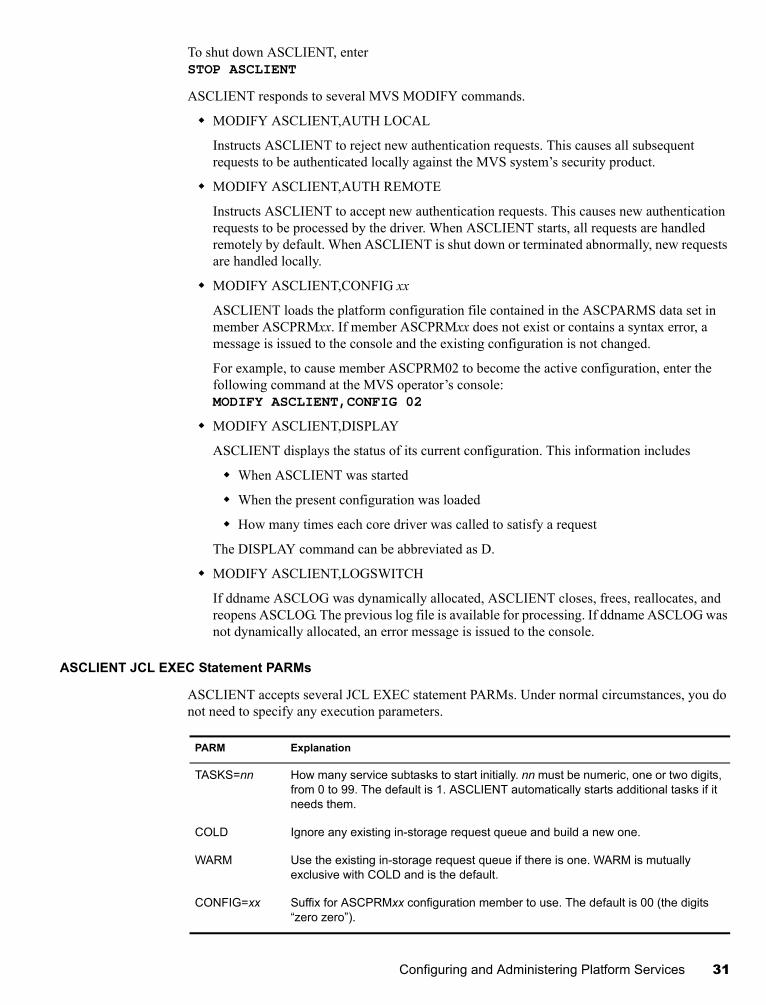
To shut down ASCLIENT, enterSTOP ASCLIENT
ASCLIENT responds to several MVS MODIFY commands.
MODIFY ASCLIENT,AUTH LOCAL
Instructs ASCLIENT to reject new authentication requests. This causes all subsequent requests to be authenticated locally against the MVS system’s security product.
MODIFY ASCLIENT,AUTH REMOTE
Instructs ASCLIENT to accept new authentication requests. This causes new authentication requests to be processed by the driver. When ASCLIENT starts, all requests are handled remotely by default. When ASCLIENT is shut down or terminated abnormally, new requests are handled locally.
MODIFY ASCLIENT,CONFIG xx
ASCLIENT loads the platform configuration file contained in the ASCPARMS data set in member ASCPRMxx. If member ASCPRMxx does not exist or contains a syntax error, a message is issued to the console and the existing configuration is not changed.
For example, to cause member ASCPRM02 to become the active configuration, enter the following command at the MVS operator’s console:MODIFY ASCLIENT,CONFIG 02
MODIFY ASCLIENT,DISPLAY
ASCLIENT displays the status of its current configuration. This information includes
When ASCLIENT was started
When the present configuration was loaded
How many times each core driver was called to satisfy a request
The DISPLAY command can be abbreviated as D.
MODIFY ASCLIENT,LOGSWITCH
If ddname ASCLOG was dynamically allocated, ASCLIENT closes, frees, reallocates, and reopens ASCLOG. The previous log file is available for processing. If ddname ASCLOG was not dynamically allocated, an error message is issued to the console.
ASCLIENT JCL EXEC Statement PARMs
ASCLIENT accepts several JCL EXEC statement PARMs. Under normal circumstances, you do not need to specify any execution parameters.
PARM Explanation
TASKS=nn How many service subtasks to start initially. nn must be numeric, one or two digits, from 0 to 99. The default is 1. ASCLIENT automatically starts additional tasks if it needs them.
COLD Ignore any existing in-storage request queue and build a new one.
WARM Use the existing in-storage request queue if there is one. WARM is mutually exclusive with COLD and is the default.
CONFIG=xx Suffix for ASCPRMxx configuration member to use. The default is 00 (the digits “zero zero”).
Configuring and Administering Platform Services 31
Novell Confidential Manual (ENU) 15 April 2004
Example:
//ASCLIENT EXEC PGM=ASCMAIN,PARM=’TASKS=1,CONFIG=01’
This causes ASCLIENT to start with one service subtask and read configuration member ASCPRM01.
The MVS Platform Configuration File
Member ASCPRMxx defines ASCLIENT’s configuration. This member must be unnumbered and must reside in an LRECL=80 RECFM=FB partitioned data set allocated to ddname ASCPARMS in the ASCLIENT JCL. SAMPLIB can be used if desired.
For details about the platform configuration file, see the Platform Services Planning Guide and Reference.
ASCLIENT uses member ASCPRM00 by default and can reload the configuration dynamically. For further information, see “ASCLIENT Operation” on page 30.
A model for the MVS Platform Services Process platform configuration file is provided in SAMPLIB member ASCPRMXX.
The MVS Platform SMF Record
The SMF record, written hourly and at shutdown by the MVS Platform Services Process, contains information detailing counts and response time for activity. This information is also written in report form to ddname SYSMAIN of ASCLIENT.
The SMF record number used is specified by the SMF statement in the platform configuration file. For details about the platform configuration file, see the Platform Services Planning Guide and Reference.
An assembler DSECT mapping the SMF record and a SAS* example for using it are contained in SAMPLIB members ASCSMF and SASSMF respectively.
Managing the MVS Platform Receiver
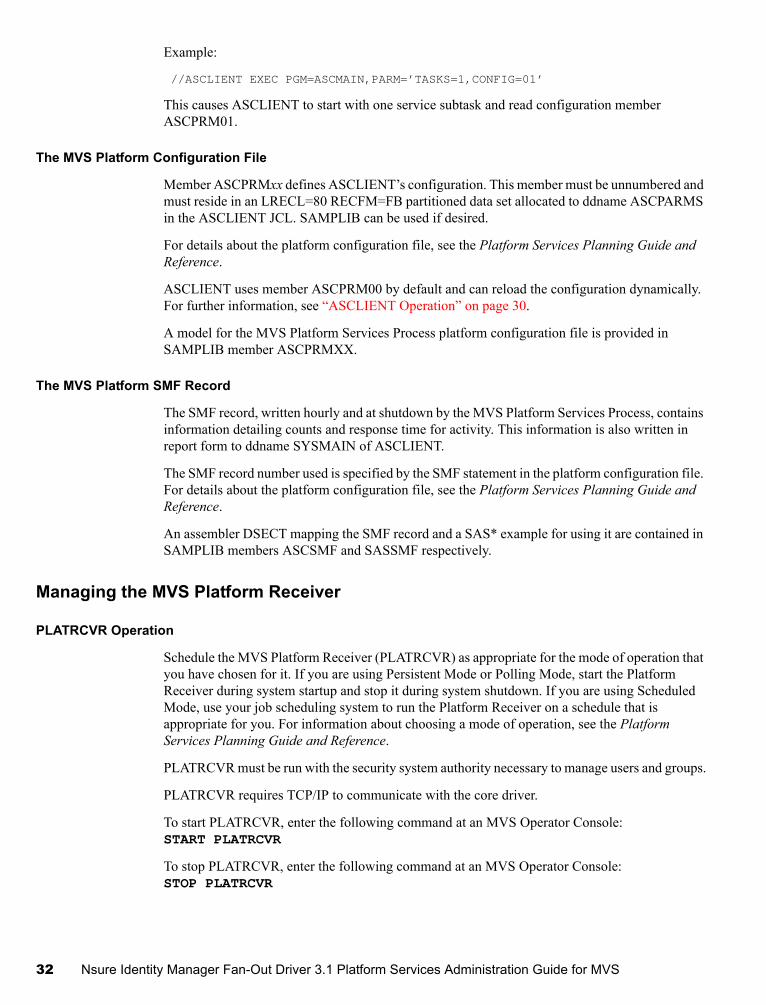
PLATRCVR Operation
Schedule the MVS Platform Receiver (PLATRCVR) as appropriate for the mode of operation that you have chosen for it. If you are using Persistent Mode or Polling Mode, start the Platform Receiver during system startup and stop it during system shutdown. If you are using Scheduled Mode, use your job scheduling system to run the Platform Receiver on a schedule that is appropriate for you. For information about choosing a mode of operation, see the Platform Services Planning Guide and Reference.
PLATRCVR must be run with the security system authority necessary to manage users and groups.
PLATRCVR requires TCP/IP to communicate with the core driver.
To start PLATRCVR, enter the following command at an MVS Operator Console:START PLATRCVR
To stop PLATRCVR, enter the following command at an MVS Operator Console:STOP PLATRCVR
32 Nsure Identity Manager Fan-Out Driver 3.1 Platform Services Administration Guide for MVS
Novell Confidential Manual (ENU) 15 April 2004
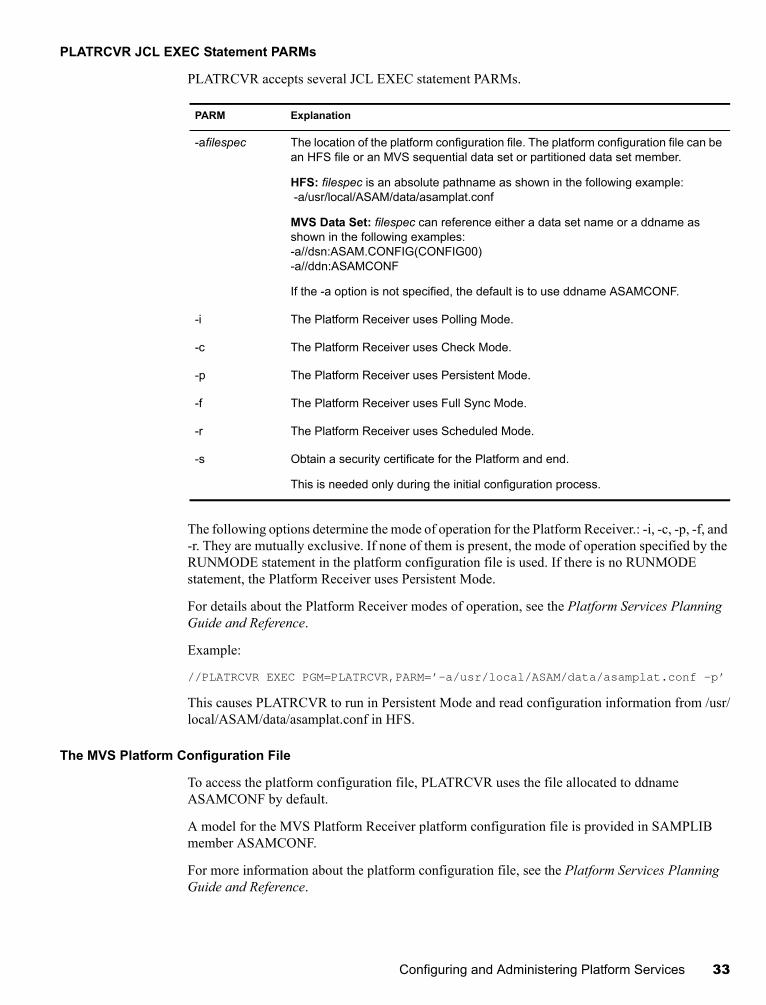
PLATRCVR JCL EXEC Statement PARMs
PLATRCVR accepts several JCL EXEC statement PARMs.
The following options determine the mode of operation for the Platform Receiver.: -i, -c, -p, -f, and -r. They are mutually exclusive. If none of them is present, the mode of operation specified by the RUNMODE statement in the platform configuration file is used. If there is no RUNMODE statement, the Platform Receiver uses Persistent Mode.
For details about the Platform Receiver modes of operation, see the Platform Services Planning Guide and Reference.
Example:
//PLATRCVR EXEC PGM=PLATRCVR,PARM=’-a/usr/local/ASAM/data/asamplat.conf -p’
This causes PLATRCVR to run in Persistent Mode and read configuration information from /usr/local/ASAM/data/asamplat.conf in HFS.
The MVS Platform Configuration File
To access the platform configuration file, PLATRCVR uses the file allocated to ddname ASAMCONF by default.
A model for the MVS Platform Receiver platform configuration file is provided in SAMPLIB member ASAMCONF.
For more information about the platform configuration file, see the Platform Services Planning Guide and Reference.
PARM Explanation
-afilespec The location of the platform configuration file. The platform configuration file can be an HFS file or an MVS sequential data set or partitioned data set member.
HFS: filespec is an absolute pathname as shown in the following example: -a/usr/local/ASAM/data/asamplat.conf
MVS Data Set: filespec can reference either a data set name or a ddname as shown in the following examples:-a//dsn:ASAM.CONFIG(CONFIG00)-a//ddn:ASAMCONF
If the -a option is not specified, the default is to use ddname ASAMCONF.
-i The Platform Receiver uses Polling Mode.
-c The Platform Receiver uses Check Mode.
-p The Platform Receiver uses Persistent Mode.
-f The Platform Receiver uses Full Sync Mode.
-r The Platform Receiver uses Scheduled Mode.
-s Obtain a security certificate for the Platform and end.
This is needed only during the initial configuration process.
Configuring and Administering Platform Services 33

Novell Confidential Manual (ENU) 15 April 2004
34 Nsure Identity Manager Fan-Out Driver 3.1 Platform Services Administration Guide for MVS
Novell Confidential Manual (ENU) 15 April 2004
3 Troubleshooting Platform Services
Novell® NsureTM Identity Manager Fan-Out driver components record messages to their Audit Log, Operational Log, and their host system log. Examining these should be foremost in your troubleshooting efforts.
The Audit and Operational logs of core driver components are maintained in their logs directory.
The MVS Platform Services Process (ASCLIENT) and Platform Receiver (PLATRCVR) write log messages to the ASCLOG DD statement.
By its very nature, the Identity Manager Fan-Out driver is highly dependent upon the proper operation of your network and eDirectoryTM. If you are having problems with the driver, ensure that the various driver components are able to communicate with one another and that eDirectory is functioning properly.
For information pertaining to Identity Manager Fan-Out driver performance issues, see Planning in the Core Driver Administration Guide.IMPORTANT: Make sure you upgrade the driver, including all of your platforms, when new versions or support packs become available.
Obtaining Debugging OutputIdentity Manager Fan-Out driver components support the option to produce extensive debugging output. Although this output is intended primarily for use by Novell Technical Support, you might find it useful for your own troubleshooting efforts.
Because debugging mode adversely affects performance, it should not be used for routine operations.
MVS Platform Services ProcessTo start debugging output from ASCLIENT, enterMODIFY ASCLIENT,TRACE ON
To stop debugging output, enterMODIFY ASCLIENT,TRACE OFF
You can also start ASCLIENT with PARM='TRACE' to obtain debugging output.
ASCLIENT debugging output is written to ddname ASCLOG.
Troubleshooting Platform Services 35
Novell Confidential Manual (ENU) 15 April 2004
MVS Platform ReceiverTo produce debugging output from the MVS Platform Receiver, start PLATRCVR with PARM='d*'.
PLATRCVR debugging output is written to ddname SYSDEBUG.
Troubleshooting Authentication ServicesIf a user cannot authenticate through the driver but can log in through eDirectory, ensure that the user is present in the Census and is not marked as being inactive. If the user is not present and active in the Census, review your Census Search object specifications.
You can use the ASCTEST utility to check on the health of MVS Platform Services functions. For more information about ASCTEST, see “The ASCTEST Command” on page 19.
MVS enforces restrictive rules on the character set that can be used for user IDs and passwords. It requires that user IDs not exceed seven characters and that passwords not exceed eight characters. Each must consist of:
The letters A-Z
The numerals 0-9
The national characters @ # $
User IDs must not begin with a numeral.
Users whose IDs and passwords do not adhere to these rules are not able to use MVS.
Ensure that your IBM TCP/IP implementation for MVS is at the latest maintenance level.
Troubleshooting Identity ProvisioningMVS enforces restrictive rules on the character set that can be used for user IDs and Group names. It requires that user IDs not exceed seven characters and that Group names not exceed eight characters. Each must consist of:
The letters A-Z
The numerals 0-9
The national characters @ # $
User IDs and Group names must not begin with a numeral.
Troubleshooting Network IssuesAlthough the details of network troubleshooting are beyond the scope of this document and depend on a number of factors particular to your environment, the purpose of this section is to determine if the various Identity Manager Fan-Out driver components can communicate with one another.
To verify IP connections between driver platforms and core drivers using the ping command:
1 From a command prompt on MVS, OS/400*, UNIX, or Windows*, enter ping ipaddr, where ipaddr is the IP address of the remote computer.
36 Nsure Identity Manager Fan-Out Driver 3.1 Platform Services Administration Guide for MVS

Novell Confidential Manual (ENU) 15 April 2004
2 From a NetWare® console, enter LOAD TPING ipaddr, where ipaddr is the IP address of the remote computer.
If your installation uses router filters to prevent the use of ping, consult with those responsible for managing your network for information on how to verify connectivity.
You can use other NetWare utilities, such as MONITOR, CONFIG, INETCFG, and TCPCON to examine and change other aspects of server status that pertain to networking. Refer to your NetWare documentation for further details. The Utilities Reference, Basic Protocol Configuration Guide, and Advanced Protocol Configuration and Management Guide provide detailed information on using these and other NetWare utilities.
Troubleshooting Platform Services 37

Novell Confidential Manual (ENU) 15 April 2004
38 Nsure Identity Manager Fan-Out Driver 3.1 Platform Services Administration Guide for MVS
Novell Confidential Manual (ENU) 15 April 2004
A Password Migration Component
If the user accounts that you want to participate in the Novell® NsureTM Identity Manager Fan-Out driver do not exist in eDirectoryTM, you can import them from the system where they are currently located. You can use tools, such as UIMPORT or LDIF, to accomplish this.
If you cannot extract the passwords of the affected user accounts, you must either give all of these users a new password, or find some way to synchronize the passwords of the new user accounts in eDirectory with the passwords of their pre-existing accounts.
If these pre-existing accounts are located on an MVS system, you can use the Password Migration component to accomplish a smooth migration to eDirectory-based user accounts. The Password Migration component updates a migration user’s password in eDirectory from the MVS system when a user logs on.
Deploy the driver on only that MVS system until the migration period is complete. Then you can add other platforms.
The migration requires a cooperative effort between the MVS system administrator and the driver administrator. For information related to the steps in the following procedure that involve the core driver, see the Core Driver Administration Guide.
Migration Procedure1 Install the core driver.
2 Create an extract file with the user names and attributes from their present location.
3 Agree upon a special Migration Mode Password.
You will use this password in Step 4 and Step 7. This password must conform to the password limitations of MVS.
4 Prepare the extract file as appropriate for use with the utility you will use in Step 5.
If desired, remove users who already exist in eDirectory. Set the initial password of all of the users to the special Migration Mode Password determined in Step 3. Set the Login Disabled attribute of all of the user accounts to True. This places the users into the migration state.
5 Use a utility, such as UIMPORT or LDIF, to import the user accounts and attributes into eDirectory.
6 Use the Web interface to define a Platform object for the MVS system.
7 Specify the Migration Mode Password configuration parameter with the special Migration Mode Password determined in Step 3, for each core driver.
For details about the Migration Mode Password configuration parameter, see “Migration Mode Password Configuration Parameter” on page 40.
8 Install Platform Services on the MVS system, and activate the Platform Services Process.
Password Migration Component 39
Novell Confidential Manual (ENU) 15 April 2004
The next time a user successfully authenticates to the MVS system, the password is updated in the corresponding User object in eDirectory.
The password in eDirectory is only updated for users in the migration state. A user is in the migration state if the account is disabled and the password is set to the special Migration Mode Password. After the password in eDirectory has been updated, the user is no longer in the migration state.
9 After a suitable period of time, remove the Migration Mode Password configuration parameter from all of the core drivers.
10 Enable those users who are still in the migration state.
11 Deploy the Identity Manager Fan-Out driver to other platforms as appropriate.IMPORTANT: If there are multiple MVS images that share the same RACF database or synchronize passwords using RRSF, you must perform Step 6 and Step 8 for each image.
A RACF administrator can use the search command as shown in the following example to gauge the progress of the migration. Specify age as the number of days since migration began. This produces a list of users who have not logged on since the migration period began.
search class(user) age(45)
When an MVS user in the migration state logs on, eDirectory imposes a three-second delay. If these logons occur at a significant rate in an address space that single-threads logon activity, backlogs can develop. In this case, you can use the Include/Exclude facility to limit the number of users involved in migration at any one time.
Migration Mode Password Configuration ParameterThe Migration Mode Password configuration parameter is used to run core drivers in Migration Mode. For details about driver configuration parameters, see the Core Driver Administration Guide.
In Migration Mode, a core driver performs special processing for User objects in the migration state. User objects are in the migration state if they are disabled and their password is set to the value specified in the Migration Mode Password configuration parameter.
40 Nsure Identity Manager Fan-Out Driver 3.1 Platform Services Administration Guide for MVS
Novell Confidential Manual (ENU) 15 April 2004
Index
Symbols##MATRIX byte 27
Numerics3-second delay 40
AACF2
See CA-ACF2ACF2EXEC.XMT 18ACFNPX0A 23ACFNPX0B 24ACFSVP0A 23ACFSVP0B 23administering Platform Services 29, 30APF 10, 14, 19ASAM directory 16ASAMCONF DD 12, 16, 33ASAMCONF SAMPLIB member 16, 33ASC0001I 30ASC0071I 16, 22, 24ASCLIENT 10, 11
JCL PARMs 31operation 30SMF record 32starting 30stopping 31troubleshooting 36
ASCLOAD.XMT 18ASCLOG DD 11, 35
processing 31ASCNPXIT 23, 24, 26ASCPARMS DD 11, 15, 32ASCPRM00 32ASCPRMxx member 15, 32ASCPRMXX SAMPLIB member 15, 32ASCPWX01 21ASCRIX01 21ASCSAMP.XMT 18ASCSMF 32ASCSVPRE 23, 24, 26ASCTEST 19
APF authorize 14CHGPSWD 20CHKPSWD 20EXCTEST 20preliminary testing 15
STATUS 20ASCTSSPI 28ASMINSTX 27AUTH command 31AUTHCMD 14AVFSVC 23
Bbibliography 7
CCA-ACF2 12
installing exits 23options 24password rules 25Receiver scripts exec library 18uninstalling exits 26
CA-Top Secret 12installing exits 27Receiver scripts exec library 18
certificatemanagement 29obtaining 16, 29
certs directory 29changing DES key 29CLPA 16, 21, 24CONFIG command 31configuring password replication 30configuring Platform Services 29
Ddebugging output 35DES
assigning key 15changing key 29key management 29Platform Services Process 11
DISPLAY command 31
EECSA 10examples
ASCLIENT PARM 32Configuration file 32MVS operator command 31PLATRCVR PARM 33
Index 41
Novell Confidential Manual (ENU) 15 April 2004
SAS program to process ASCLIENT SMF record 32using ASCTEST 20
EXEC statement PARMs 31, 33exec, REXX 12exit router 21, 23exits 12
CA-ACF2 23CA-Top Secret 27RACF 21
GGSO EXITS 24, 25, 26
HHFS 16, 33
IICHEINTY 21ICHPWX01 21, 22ICHRIX01 21, 22IEAAPF00 14IKJTSOxx 14Include/Exclude lists for testing 15, 17installation package 18installing
CA-ACF2 exits 23CA-Top Secret exits 27Platform Services 9, 14RACF exits 21
IPL 9, 14, 16, 21, 24, 30
JJCL 10, 15, 16, 31, 33
KKEY statement 30
Lload library 10, 18, 19loading a new ASCLIENT Configuration member 31local authentication 31log
Platform Receiver 12Platform Services Process 11Platform Services Process processing 16
LOGSWITCH command 11, 31LPA 21, 23
Mmanaging
certificates 29DES key 29Platform Receiver 32Platform Services 29Platform Services Process 30
manuals 7
Migration Mode Password configuration parameter 40migration, password 39MODIFY ASCLIENT command 31
Nnetwork troubleshooting 36NEWPXIT 23, 24
Ooperator commands
Platform Receiver 32Platform Services Process 30
OS390PlatformServices directory 18
PPARMLIB command 14PARMs
ASCLIENT 31PLATRCVR 33
passwordACF2 rules 25migration 39RACF rules 22redirection 11replication 12replication configuration 30storing in local security system 11
PAXRST0A 16performance 15platform certificate
management 29obtaining 16, 29
platform configuration file 32Platform Receiver 12, 33Platform Services Process 11, 32
Platform Receiver 12JCL PARMs 33managing 32platform configuration file 33
Platform Servicesadministering 30installing 9requirements 10
Platform Services Process 11JCL PARMs 31managing 30operator commands 30platform configuration file 32SMF record 32troubleshooting 36
PLATRCVR 10, 12JCL PARMs 33operation 32operator commands 32starting 32stopping 32
PLPA 23PREINIT function 27
42 Index
Novell Confidential Manual (ENU) 15 April 2004
PREINIT label 27previous key 29PROG00 14publications 7
RRACF 12
installing exits 21options 22Receiver scripts exec library 18uninstalling exits 22
RACFEXEC.XMT 18RACPWX0A 21RACPWX0B 21RACRIX0A 21RACRIX0B 21RECEIVE 18, 19Receiver scripts 12
distribution 18Receiver scripts exec library 18, 19related publications 7reloading the ASCLIENT Configuration member 31remote authentication 31requirements 10REXX exec 12REXX SAY verb 12run mode 33
Ssamples library 10SAMPLIB 10, 18SAS program to process ASCLIENT SMF record 32SASSMF 32SAY verb, REXX 12Secure Sockets Layer (SSL)
See SSLsecurity certificate
See certificatesecurity system exits 16Service Class 15session key 29SETCERT script 16setropts command 22SEVPRE 23, 24, 26single use session key 29SMF record 32SMP/E 21, 22, 24SSL
connection security 29Platform Receiver 12
started task 11, 12starting
ASCLIENT 30Platform Receiver 32Platform Services Process 30PLATRCVR 32
stoppingASCLIENT 31Platform Receiver 32
Platform Services Process 31storing passwords locally 11, 12SYS1.LPALIB 21, 23SYS1.PARMLIB 14SYS1.PROCLIB 11, 12, 15, 16SYSDEBUG DD 36SYSMAIN DD 32SYSPROC DD 12SYSSTC 15System Intercept 12SYSTSPRT DD 12
TTCP/IP 10, 30, 32testing Platform Services with ASCTEST 19three-second delay 40Top Secret
See CA-Top SecretTRACE command 35TRANSMIT 18troubleshooting
ASCLIENT 36Authentication Services 36Identity Provisioning 36network issues 36obtaining debugging output 35
TSO ASCTEST command 19TSO PARMLIB command 14TSSEXEC.XMT 18TSSINSTX 27
Uuninstalling
CA-ACF2 exits 26RACF interface 22
unloading MVS distribution 18using ASCTEST 19
WWorkload Manager 15WTO 22
Index 43

Novell Confidential Manual (ENU) 15 April 2004
44 Index