Embed Size (px)
Citation preview
n
Novell iManager 2.5 Installation GuideNovell
m
ovdocx (EN
U) 01 February 2006
www . n o v e l l . c o
iManager
2 . 5
M a r c h 1 5 , 2 0 0 6
I N S T A L L A T I O N G U I D E
novdocx (EN
U) 01 February 2006
Legal Notices
Novell, Inc. makes no representations or warranties with respect to the contents or use of this documentation, and specifically disclaims any express or implied warranties of merchantability or fitness for any particular purpose. Further, Novell, Inc. reserves the right to revise this publication and to make changes to its content, at any time, without obligation to notify any person or entity of such revisions or changes.
Further, Novell, Inc. makes no representations or warranties with respect to any software, and specifically disclaims any express or implied warranties of merchantability or fitness for any particular purpose. Further, Novell, Inc. reserves the right to make changes to any and all parts of Novell software, at any time, without any obligation to notify any person or entity of such changes.
You may not use, export, or re-export this product in violation of any applicable laws or regulations including, without limitation, U.S. export regulations or the laws of the country in which you reside.
Copyright © 2002-2005 Novell, Inc. All rights reserved. No part of this publication may be reproduced, photocopied, stored on a retrieval system, or transmitted without the express written consent of the publisher.
Novell, Inc. has intellectual property rights relating to technology embodied in the product that is described in this document. In particular, and without limitation, these intellectual property rights may include one or more of the U.S. patents listed at http://www.novell.com/company/legal/patents/ and one or more additional patents or pending patent applications in the U.S. and in other countries.
Novell, Inc.404 Wyman Street, Suite 500Waltham, MA 02451U.S.A.www.novell.com
Online Documentation: To access the online documentation for this and other Novell products, and to get updates, see www.novell.com/documentation.
novdocx (EN
U) 01 February 2006
Novell Trademarks
eDirectory is a trademark of Novell, Inc.NetWare is a registered trademark of Novell, Inc. in the United States and other countries.Novell is a registered trademark of Novell, Inc. in the United States and other countries.NMAS is a trademark of Novell, Inc. SUSE is a registered trademark of SUSE LINUX AG, a Novell company.Novell Technical Services is a service mark of Novell, Inc. in the United States and other countries.Novell Client is a trademark of Novell, Inc. in the United States and other countries.iChain is a registered trademark of Novell, Inc. in the United States and other countries.DirXML Novell is a registered trademark of Novell, Inc. in the United States and other countries.Novell Certificate Server is a registered trademark of Novell, Inc. in the United States and other countries.
Third-Party Materials
All third-party trademarks are the property of their respective owners.

novdocx (EN
U) 01 February 2006
novdocx (EN
U) 01 February 2006
About This Guide
This guide describes how to install Novell® iManager 2.5. It is intended for network administrators and includes the following sections:
• Chapter 1, “Installing iManager,” on page 7• Chapter 2, “Upgrading to iManager 2.5,” on page 21• Chapter 3, “Accessing iManager,” on page 23• Chapter 4, “Installing, Using, and Uninstalling Novell Plug-In Modules,” on page 25
Documentation Updates
For the most current documentation, see iManager 2.5 (http://www.novell.com/documentation/imanager25/index.html).
Additional Documentation
• Novell iManager 2.5 Administration Guide (http://www.novell.com/documentation/imanager25/imanager_admin_25/data/am1ox4u.html#am1ox4u)
• Novell Knowledge Base (http://support.novell.com/cgi-bin/search/searchtid.cgi?/10097429.htm)
• Apache HTTP server (http://httpd.apache.org)• Tomcat servlet container (http://jakarta.apache.org/tomcat)• Java* Web site (http://java.sun.com)• Microsoft* Windows* Web Services (http://www.microsoft.com/technet/treeview/
default.asp?url=/technet/prodtechnol/iis/default.asp)• Novell eDirectoryTM product home page (http://www.novell.com/products/edirectory)• Novell eDirectory product documentation (http://www.novell.com/documentation/
edirectory.html)• Novell eDirectory Cool Solutions community (http://www.novell.com/coolsolutions/nds)• Novell NetWare® documentation home page (http://www.novell.com/documentation/
netware.html).• Novell Technical ServicesSM (http://support.novell.com)
Documentation Conventions
In this documentation, a greater-than symbol (>) is used to separate actions within a step and items within a cross-reference path.
A trademark symbol (®, TM, etc.) denotes a Novell trademark. An asterisk (*) denotes a third-party trademark.
When a single pathname can be written with a backslash for some platforms or a forward slash for other platforms, the pathname is presented with a backslash. Users of platforms that require a forward slash, such as Linux* or UNIX*, should use forward slashes as required by your software.
5

6 Novell iMan
novdocx (EN
U) 01 February 2006
ager 2.5 Installation Guide
1novdocx (E
NU
) 01 February 2006
1Installing iManager
Novell® iManager provid es a global view of your network from one browser-based tool, allowing you to proactively assess and respond to changing network demands. Using iManager, you can administer Novell eDirectory and many other Novell products and services from a Web browser.
1.1 OverviewiManager is a centralized, Web-based management system that eliminates administrative redundancy and unnecessary overhead, saving you both time and money.
This section discusses the following:
• Section 1.2, “What's New in Version 2.5,” on page 7• Section 1.3, “Server-Based and Client-Based Versions of iManager 2.5,” on page 7• Section 1.4, “Prerequisites,” on page 8• Section 1.5, “Self-Signed Certificates,” on page 10• Section 1.6, “Installing a New Version of iManager,” on page 10• Section 1.7, “Uninstalling iManager,” on page 18
1.2 What's New in Version 2.5Novell iManager 2.5 contains the following new features:
• Improved installation programs• Enhanced group management capabilities• Backwards compatibility with iManager 2.0.x plug-ins• Enhanced Role-Based Services (RBS) management and reporting• Improved interface customizing options• Auditing of iManager logins and plug-in modifications• Mobile iManager software that lets you run iManager locally on a workstation
1.3 Server-Based and Client-Based Versions of iManager 2.5The server-based version of iManager 2.5 is called iManager and it is installed on a server that can access an eDirectory tree. The client-based version is called Mobile iManager and is installed on a client workstation rather than a server. Use the following guidelines to decide which version fits best in your environment or whether your eDirectory management policies would benefit from installing both versions:
• If you have a single administrator who always manages eDirectory from the same client workstation, you can take advantage of Mobile iManager. It requires little setup, and the resources it uses are started and stopped with the launching and shutdown of Mobile iManager. If Mobile iManager is installed on a laptop, it is always available wherever the administrator is.
Installing iManager 7
8 Novell iMan
novdocx (EN
U) 01 February 2006
iManager plug-ins do not synchronize between iManager instances automatically. If you have multiple administrators and use customized plug-ins, Mobile iManager and these plug-ins must be installed on each administrator's client workstation.
• If you manage eDirectory from multiple client workstations and have multiple administrators, you would probably want iManager installed on a server so that it is available from any connected workstation. You need to install customized plug-ins only once.
• If you have multiple administrators and your administrators are mobile, they might find benefits from being able to access iManager both ways.
IMPORTANT: If iManager 2.5 is installed before eDirectory, the iManager login might fail and Tomcat might crash. To fix this problem, delete the following directory and restart Tomcat.
• Linux: /var/novell/nici/100/• Solaris: /var/novell/nici/60001/• HP-UX: /var/novell/nici/30/
Restart Tomcat:
• Linux: /etc/init.d/novell-tomcat4 start• Solaris: /etc/init.d/imgr start• HP-UX: JAVA_HOME=/opt/java1.4 su www /opt/hpws/tomcat/bin/startup.sh
1.4 PrerequisitesiManager 2.5 can be installed on a server (with or without eDirectory) or on a client workstation (Linux* or Windows*).
Before upgrading to iManager 2.5, delete any iManager 2.0.2 field patches from the iManager 2.0.2 packages directory. The following are platform-specific locations of this directory:
• NetWare: sys:\tomcat\4\webapps\nps\packages• Windows: C:\Program Files\Novell\Tomcat\webapps\nps\packages• Linux: /var/opt/novell/iManager/nps/packages• Solaris: /var/opt/novell/tomcat4/webapps/nps/packages/• HP-UX: /opt/hpws/tomcat/webapps/nps/packages
The npm file that you must delete is similar in name to iMan202_x.npm, where x is the field patch number.
NOTE: When installing iManager 2.5 on Novell Linux Desktop (NLD), review the following TIDs for additional information:
iManager 2.5 crashes on NLD (http://support.novell.com/cgi-bin/search/searchtid.cgi?10097777.htm)
Segmentation fault running Mobile iManager on Linux (http://support.novell.com/cgi-bin/search/searchtid.cgi?10099293.htm)
ager 2.5 Installation Guide
novdocx (EN
U) 01 February 2006
1.4.1 Server-Based iManagerThe following prerequisites apply to all server platforms. Additional platform-specific prerequisites are listed by platform in “Installing a New Version of iManager of iManager, p 11.
Supported Browsers: To run iManager, you need a workstation with Microsoft Internet Explorer 6.0 SP1, Mozilla 1.7, or Mozilla* Firefox* 1.0.
IMPORTANT: Although you might be able to access iManager via a Web browser not listed, we do not guarantee or support full functionality.
eDirectory Management: iManager 2.5 can manage any server running Novell eDirectory 8.6.2 or later. eDirectory Coexistence: iManager 2.5 can coexist on a server with eDirectory 8.7.3 or later installed.Admin-Equivalent Rights: For the creation of a Role-Based Services (RBS) collection in the eDirectory tree and to run the iManager RBS Configuration Wizard, you must have admin-equivalent rights.Server Memory: You must have a minimum of 512 MB of RAM in the server where you are installing or running iManager. 1024 MB is recommended. Specific hardware requirements are listed under each individual server platform in “Installing iManager, p 11.Port Setup: To avoid port conflicts, find out which ports are in use on the server where you will install iManager and determine whether they will conflict with ports used by iManager. Versions of Apache and Tomcat installed with iManager attempt to use ports 80, 443, 8009, 8080, and 8005. If these ports are in use by another service, such as eDirectory, a problem is likely to occur. Installation instructions for each platform are located on page 11.
1.4.2 Mobile iManagerMobile iManager is a standalone application for Novell Linux Desktop, Linux (SUSE®Linux 9.0, 9.1; SUSE Linux Enterprise Server 9.0; or Red Hat* AS 3.0, 8.0, or 9.0) and Microsoft Windows (Windows 2000 Professional, Windows 2000 Advanced Server, Windows 2000 Server, Windows 2003 Server, Windows 2003 Advanced Server, or Windows XP Professional) client workstations.
Mobile iManager provides all of the same functionality as the server-based iManager and has the following features:
• Is self-contained and installs and runs on various Linux or Windows client workstations.• Has no dependencies on the server-based iManager and can coexist with any and all versions of
iManager installed on your network. However, the client workstation can have only Mobile iManager installed on it.
The following prerequisite applies to all clients. Additional platform-specific prerequisites are listed in “Installing iManager on page 11.
Admin-Equivalent Rights: For the creation of a Role-Based Services (RBS) collection in the eDirectory tree and to run the iManager RBS Configuration Wizard, you must have admin-equivalent rights.
Installing iManager 9

10 Novell iMan
novdocx (EN
U) 01 February 2006
1.5 Self-Signed CertificatesNovell deliberately created a temporary, self-signed certificate that you use when installing Apache with iManager on any platform except NetWare®. It has an expiration date of one year.
This was never intended to be a long term implementation, only a stop-gap measure to get your system up and running so you can use iManager securely immediately after installation.You should obtain a valid certificate from a Certificate Authority and replace the temporary one as soon as possible. OpenSSL does not recommend using self-signed certificates except for testing purposes.
1.6 Installing a New Version of iManagerNovell iManager 2.5 can be installed on the platforms listed below. In general, you should apply the latest Service Packs for your platform and meet the prerequisites listed in “Prerequisites” before installing iManager.
• Section 1.6.1, “HP-UX,” on page 10• Section 1.6.2, “Linux,” on page 12• Section 1.6.3, “Linux Clients,” on page 13• Section 1.6.4, “NetWare 6.5,” on page 14• Section 1.6.5, “Solaris,” on page 15• Section 1.6.6, “Windows,” on page 16• Section 1.6.7, “Windows Clients,” on page 17
1.6.1 HP-UXRoot access is required for installation.
Prerequisites
In addition to the general prerequisites listed in Section 1.4, “Prerequisites,” on page 8, the following prerequisites also apply to iManager on HP*-UX*:
HP-UX 11i operating system with the latest patches installed
Ensure that the OS is updated with patch PHSS_26560. You can download this patch from the HP IT Resource Center Web site (http://www.itrc.hp.com).Previous versions of iManagerIf you have installed iManager 2.0.x, you do not need to uninstall it. The iManager 2.5 installation can overwrite the files. The uninstall process does not remove custom-created content such as tasks.PA-RISC 2.0 processor400 MB of disk spacegettext-0.12 installedYou can download the gettext-0.12 depot from the HP-UX Porting and Archive Centre Web site (http://hpux.connect.org.uk/hppd/hpux/Gnu/gettext-0.12).libiconv-1.9 installed
ager 2.5 Installation Guide
novdocx (EN
U) 01 February 2006
You can download the libiconv-1.9 depot from the HP-UX Porting and Archive Centre Web site (http://hpux.connect.org.uk/hppd/hpux/Development/Libraries/libiconv-1.9).Java* 2 SDK for HP-UX version 1.4.1.x as a minimum (1.4.2.x is recommended)
Procedure
1 Install the HP-UX Web Server Suite version 2.08 from the HP Software Depot Web site (http://www.software.hp.com/cgi-bin/swdepot_parser.cgi/cgi/displayProductInfo.pl?productNumber=HPUXWSSUITE).
The suite contains the official versions of Apache and Tomcat that are supported for HP-UX.
Select the download with all components:
HP-UX Apache-based Web ServerHP-UX Tomcat-based Servlet EngineHP-UX Webmin-based Admin
2 Install Java 1.4.2_04 or later from the HP Java for HP-UX Web site (http://www.hp.com/go/java) and update your path to find the new Java.
3 Add the JAVA_HOME environment variable to the Tomcat setenv.sh file located in /opt/hpws/tomcat/bin. For example:JAVA_HOME=/opt/java
4 Install a new certificate for Apache and then copy it to the following directories:/opt/hpws/apache/conf/ssl.crt/ and /opt/hpws/apache/conf/ssl.key/The certificate that is installed with Apache on HP-UX does not have the correct information for your server. You can install a self-signed certificate or a certificate that you purchase from a trusted authority.The Webmin administration tool can generate keys, certificates, and certificate requests for Apache. Webmin is installed with the HP-UX Web Server Suite. For more information, see the HP-UX Web Server Suite documentation, which is accessible from your Apache installation (http://ip_address). For information on using Webmin to generate keys, certificates, and certificate requests, go to http://ip_address/hp_docs/faq/#security11.
IMPORTANT: Make sure you use the correct DNS name or IP address for the common name when you create a new certificate.
5 At the Novell download site (http://download.novell.com), search for iManager products, select iManager 2.5, and then download iMan_25_hp.tgz to a directory on your server.
6 Extract the iMan_25_hp.tgz file. For example:gzip -dc iMan_25_hp.tgz | tar xvf -
7 Log out or close the terminal session to load your PATH settings.8 Use one of these commands to install iManager at the location you extracted the install files to:
For a regular install, enter the following command:./iManagerInstallHPUX.bin
or
Installing iManager 11
12 Novell iMan
novdocx (EN
U) 01 February 2006
sh iManagerInstallHPUX.bin
For a text-only install, enter the following command:./iManagerInstallHPUX.bin -i console
For a silent install, enter the following command: ./iManagerInstallHPUX.bin -i silent
IMPORTANT: The iManager installer detects the HP-UX Web Server Suite. Do not change the install path for iManager.
After the installation completes, wait several seconds for iManager to initialize before you can access iManager. To access iManager, see Chapter 3, “Accessing iManager,” on page 23.
If you have installed a previous version of iManager and created RBS or custom content, you must upgrade them to version 2.5. See Chapter 2, “Upgrading to iManager 2.5,” on page 21.
1.6.2 LinuxRoot access is required for installation.
Prerequisites
In addition to the general prerequisites listed in Section 1.4, “Prerequisites,” on page 8, the following prerequisites also apply to iManager on Linux:
SUSE LINUX 9.0 or later, SUSE LINUX Enterprise Server 8.0, SUSE LINUX Enterprise Server 9.0, Red Hat Linux 8.0 or 9.0, Red Hat Advanced Server 3.0 or later installedThe following packages installed:
• gettext• python• compat (SUSE)• compat-libstdc++ (Red Hat)
If you are missing any of these packages, you must obtain them from the vendor of your Linux distribution and install them before installing iManager. They should be on your installation CDs.Previous versions of iManagerIf you have installed iManager 1.5.x on the server, you must uninstall this version before proceeding to install iManager 2.5. If you have installed iManager 2.0.x, you do not need to uninstall it. The iManager 2.5 installation can overwrite the files. The uninstall process does not remove custom-created content such as tasks.Pentium* III 800 MHz or higher processor360 MB of disk spaceeDirectory setupIf you are installing iManager on a server with eDirectory already installed on it, the eDirectory version needs to be 8.7.3 or later for iManager 2.5.If you are installing iManager on a server without eDirectory, you must have eDirectory 8.6.2 or later installed on another available server.
ager 2.5 Installation Guide
novdocx (EN
U) 01 February 2006
Port setupBe aware of possible port conflicts. Apache, Tomcat, and JVM* are installed with the iManager installation program, which determines whether the default ports are in use. If they are in use, the install prompts you for different ports for Apache to run on. By default, Apache uses ports 80 and 443, and Tomcat uses ports 8080, 8005, and 9009.
IMPORTANT: On Linux, iManager is supported with the versions of Apache and Tomcat that are installed with iManager only.
Procedure
1 At the Novell download site (http://download.novell.com), search for iManager products, select iManager 2.5, and then download iMan_25_linux.tgz to a directory on your server.
2 Extract the file using the following command:tar -zxvf iMan_25_linux.tgz
3 Open a shell and change to the install_directory/iManager_linux directory.This path is relative to the directory where you copied or extracted the iManager files.
4 Enter one of the following commands while logged in as root or root-equivalent:For a regular install, enter the following command:./install.sh
After a successful install, the installer generates a configuration file (/etc/opt/novell/ imanager_install.conf) with values based upon the questions asked during the install. This file can then be modified and used for a silent install. To perform a silent install, enter the following command:sh install.sh --silent --c-file=path_to_conf_file
To see a list of all the install options (local/remote) issue the following command:sh install.sh --help
This command runs the pre-install and then touches the python script that displays the help menu.
5 Follow the on-screen prompts.To accept the defaults, press Enter. The text within the brackets at the prompt is the default selection. To accept the default, press Enter.
After the installation completes, you might need to wait several seconds for iManager to initialize before you can access iManager. To access iManager, see Chapter 3, “Accessing iManager,” on page 23.
If you have installed a previous version of iManager and created RBS or custom content, you need to upgrade them to version 2.5. See Chapter 2, “Upgrading to iManager 2.5,” on page 21.
1.6.3 Linux ClientsRoot access is required for installation.
Installing iManager 13
14 Novell iMan
novdocx (EN
U) 01 February 2006
Prerequisites
GTK2 InstalledGLIBC 2.3 installedSUSE Linux 9.0, 9.1; Novell Linux Desktop 9.0; SUSE Linux Enterprise Server 9.0; or Red Hat AS 3.0, 8.0, or 9.0 (and updated with the latest available packages)
Procedure
1 At the Novell download site (http://download.novell.com), search for iManager products, select iManager 2.5, and then download iMan_25_Mobile_iManager_linux.tar.bz2 to a directory on your server.
2 Extract the file using the following command:tar -xjvf iMan_25_Mobile_iManager_linux.tar.bz2
3 Install the Novell International Cryptography Infrastructure (NICI) software located in the NICI directory of the expanded iMan_25_Mobile_iManager_linux.tar directory.
4 From the NICI directory, execute the following command.You must be logged in as root to install or upgrade NICI. On desktops where NICI is not installed, this command installs NICI. On desktops where NICI is already installed, this command upgrades NICI.rpm -Uvh nici-2.6.4-0.05.i386.rpm
To access iManager after NICI is installed, see Chapter 3, “Accessing iManager,” on page 23.
If you have installed a previous version of iManager and created RBS or custom content, you need to upgrade them to version 2.5. See Chapter 2, “Upgrading to iManager 2.5,” on page 21.
1.6.4 NetWare 6.5Administrator access is required for installation.
Prerequisites
In addition to the general prerequisites listed in Section 1.4, “Prerequisites,” on page 8, the following prerequisites also apply to iManager on NetWare 6.5:
NetWare 6.5 SP2 or laterPentium III 600 MHz or higher processor200 MB of hard disk space required for a local installation512 MB RAM required (1 GB recommended)eDirectory 8.7.3 or later (if it is on the same server as iManager)
Procedure
1 At the Novell download site (http://download.novell.com), search for iManager products, select iManager 2.5, and from the list, download and extract iMan_25_NW65_Standalone.zip to the sys volume.
2 In the NetWare 6.5 GUI, click the Novell button, and then click Install > Add.
ager 2.5 Installation Guide
novdocx (EN
U) 01 February 2006
3 Browse to the extracted location, select the product.ini file, then click OK.4 Follow the on-screen instructions.
After the installation completes, wait several seconds for iManager to initialize before you can access iManager. To access iManager, see Chapter 3, “Accessing iManager,” on page 23.
If your server had iManager 2.0.x installed and you created RBS or custom content, you must upgrade them to version 2.5. See Chapter 2, “Upgrading to iManager 2.5,” on page 21.
1.6.5 SolarisRoot access is required for installation.
Prerequisites
In addition to the general prerequisites listed in Section 1.4, “Prerequisites,” on page 8, the following prerequisites also apply to iManager on Solaris*:
Sun* Solaris 8 or 9 (SPARC* processors only) with the latest required patches installed from the SunSolve* Web site (http://sunsolve.sun.com).Verify that you have a random device installed. If you are using Solaris 8, make sure that you have installed the optional patch 112438.02 and that the OS version is dated October 2001 or later. See the iManager Readme for a sample script that sets up a random device.Previous versions of iManagerIf you have installed iManager 1.5.x on the server, you must uninstall this version before proceeding to install iManager 2.5. If you have installed iManager 2.0.x, you do not need to uninstall it. The iManager 2.5 installation can overwrite the files. The uninstall process does not remove custom-created content such as tasks. eDirectory setupIf you are installing iManager on a server with eDirectory already installed on it, the eDirectory version needs to be 8.7.3 or later to avoid conflicts with packages that are shared between both eDirectory and iManager.If you are installing iManager on a server without eDirectory, you must have eDirectory 8.6.2 or later installed on another available server.Port setupBe aware of possible port conflicts. Apache, Tomcat, and JVM are installed with the iManager installation program. The iManager installation program checks to see if port 80 or 443 are in use. (For example, eDirectory uses port 80 by default with its HTTP stack.) If they are in use, the install prompts you for different ports for Apache to run on.400 MB of disk space
Procedure
1 At the Novell download site (http://download.novell.com), search for iManager products, select iManager 2.5, and then download iMan_25_sol.tzg.
2 Extract iMan_25_sol.tzg using the following command:gzip -dc iMan_25_sol.tgz | tar xvf-
3 Open a shell and change to the install_directory/installs/unix directory.
Installing iManager 15
16 Novell iMan
novdocx (EN
U) 01 February 2006
This path is relative to the directory where you copied or extracted the iManager files.4 Enter the following command:./iManagerInstallSolaris.bin
5 Follow the prompts.
After the installation completes, wait several seconds for iManager to initialize before you can access iManager. To access iManager after the install completes, see Chapter 3, “Accessing iManager,” on page 23.
If you have installed a previous version of iManager and created RBS or custom content, you must upgrade them to version 2.5. See Chapter 2, “Upgrading to iManager 2.5,” on page 21.
1.6.6 WindowsYou must log in as an administrator to install iManager.
Prerequisites
In addition to the general prerequisites listed in Section 1.4, “Prerequisites,” on page 8, the following prerequisites also apply to iManager on Windows:
Windows 2000 Advanced Server SP4, 2000 Professional SP4, 2000 Server SP4, XP Professional SP1, or 2003 Server/2003 Advanced Server with the latest Service Pack installedPentium III 600 MHz or higher processor300 MB of disk space for a local installation512 MB of RAM (1 GB recommended)eDirectory 8.6.2 or later installed on your Windows server or another available serverWeb servicesWindows servers can use either Apache and Tomcat or Windows Web Services (IIS) and Tomcat. The iManager installation program determines which Web services are already installed. If the Windows server is using IIS and you want to use Apache and Tomcat, you must remove IIS before installing Apache and Tomcat with the iManager installation program. The iManager installation program does not configure IIS to use SSL.Previous versions of iManager do not need to be uninstalled. If iManager 2.5 detects version 1.5.x, it uninstalls it before proceeding. If iManager detects version 2.0.x, it overwrites the files. The uninstall process does not remove custom-created content such as tasks.
The iManager 2.5 installation program installs and configures the following items if it does not detect a compatible version:
• Apache 2.0.49 (installed if Apache and IIS are not detected)• Tomcat 4.1.30• Sun JVM 1.4.2_04• Novell International Cryptographic Infrastructure (NICI) 2.7.0• NMASTM Client 2.7
ager 2.5 Installation Guide
novdocx (EN
U) 01 February 2006
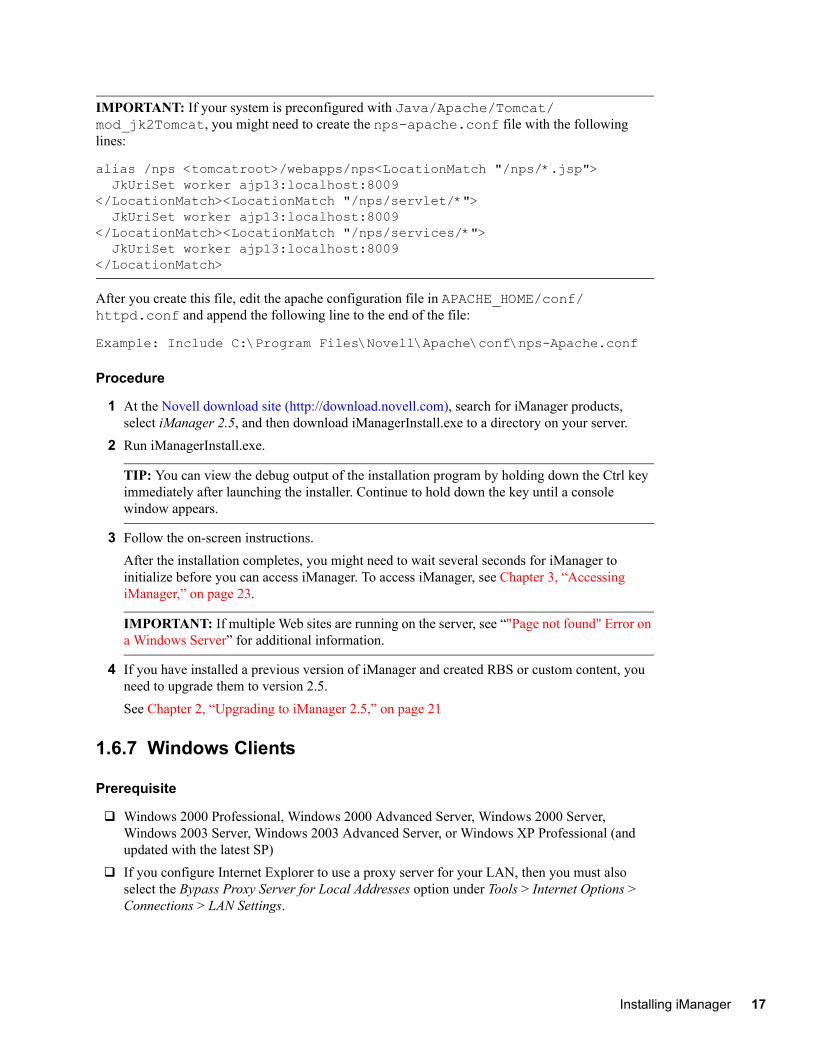
IMPORTANT: If your system is preconfigured with Java/Apache/Tomcat/mod_jk2Tomcat, you might need to create the nps-apache.conf file with the following lines:
alias /nps <tomcatroot>/webapps/nps<LocationMatch "/nps/*.jsp"> JkUriSet worker ajp13:localhost:8009</LocationMatch><LocationMatch "/nps/servlet/*"> JkUriSet worker ajp13:localhost:8009</LocationMatch><LocationMatch "/nps/services/*"> JkUriSet worker ajp13:localhost:8009</LocationMatch>
After you create this file, edit the apache configuration file in APACHE_HOME/conf/httpd.conf and append the following line to the end of the file:
Example: Include C:\Program Files\Novell\Apache\conf\nps-Apache.conf
Procedure
1 At the Novell download site (http://download.novell.com), search for iManager products, select iManager 2.5, and then download iManagerInstall.exe to a directory on your server.
2 Run iManagerInstall.exe.
TIP: You can view the debug output of the installation program by holding down the Ctrl key immediately after launching the installer. Continue to hold down the key until a console window appears.
3 Follow the on-screen instructions.After the installation completes, you might need to wait several seconds for iManager to initialize before you can access iManager. To access iManager, see Chapter 3, “Accessing iManager,” on page 23.
IMPORTANT: If multiple Web sites are running on the server, see “"Page not found" Error on a Windows Server” for additional information.
4 If you have installed a previous version of iManager and created RBS or custom content, you need to upgrade them to version 2.5. See Chapter 2, “Upgrading to iManager 2.5,” on page 21
1.6.7 Windows Clients
Prerequisite
Windows 2000 Professional, Windows 2000 Advanced Server, Windows 2000 Server, Windows 2003 Server, Windows 2003 Advanced Server, or Windows XP Professional (and updated with the latest SP)If you configure Internet Explorer to use a proxy server for your LAN, then you must also select the Bypass Proxy Server for Local Addresses option under Tools > Internet Options > Connections > LAN Settings.
Installing iManager 17
18 Novell iMan
novdocx (EN
U) 01 February 2006
IMPORTANT: Mobile iManager requires that the NMAS client be installed on the workstation. If you are running a Novell ClientTM earlier than version 4.9.1, you must make sure that the NMAS client is already installed on the workstation before launching Mobile iManager. If the 4.9.1 Client is already installed or if the Novell Client is not installed at all, Mobile iManager auto-installs the NMAS client for you.
Procedure
1 At the Novell download site (http://download.novell.com), search for iManager products, select iManager 2.5, and then download iMan_25_Mobile_iManager_win.zip.
2 Extract the file.
To access iManager, see Chapter 3, “Accessing iManager,” on page 23.
If you have installed a previous version of iManager and created RBS or custom content, you must upgrade them to version 2.5. See Chapter 2, “Upgrading to iManager 2.5,” on page 21.
1.7 Uninstalling iManagerThis section explains how to uninstall iManager on the following platforms:
• HP-UX• Linux• NetWare• Solaris• Windows
WARNING: Before uninstalling iManager, make sure to back up any custom content or other special iManager files that you would like to preserve. Custom content is usually stored in the webapps\nps\packages directory and is called custom.npm.
There is no specific sequence in which iManager or the associated third-party components must be uninstalled.
There are, of course, ramifications to uninstalling any of these components. For example, if you uninstall either the Web server or the servlet container, you will not be able to run iManager. Also, on all platforms except NetWare, the uninstall removes only files that it installed in the first place. If there are files that were created by the application (for example, the log files and auto-generated configuration files that are created while Tomcat runs), these will not be deleted by the uninstall because it did not install them.
Likewise, if you have created new files or modified existing files within the directory structure that was originally laid down during the install, these files are not removed by the uninstall. This is a safeguard so that data is not unintentionally deleted when a product is uninstalled.
Uninstalling iManager does not affect any of the RBS configurations that you have set in your tree.
ager 2.5 Installation Guide
novdocx (EN
U) 01 February 2006
1.7.1 HP-UXRoot access is required for uninstalling.
1 Open a shell and execute the following command:
/opt/hpws/tomcat/webapps/nps/UninstallerData/UninstalliManager
1.7.2 LinuxRoot access is required for uninstalling.
1 Open a shell and go to the iManager_linux directory created when you extracted the installation files from the iMan_25_linux.tgz file.
2 Execute the installation script:./uninstall.sh
3 When the script pauses to display the products to uninstall, enter a to uninstall all.
NOTE: The uninstall procedure does not remove configuration, log files, and custom content.
1.7.3 NetWare 6.51 In the NetWare GUI, click Novell > Install.2 From the installed products list, select iManager 2.5 and then click Remove.
1.7.4 SolarisRoot access is required for uninstalling.
1 Open a shell and execute the following command:
/var/opt/novell/tomcat4/nps/UninstallerData/UninstalliManager
2 Click Uninstall.
1.7.5 WindowsiManager can be uninstalled from Windows using the Add or Remove Programs applet in the Control Panel. If the iManager installation installed Apache, Tomcat, or NICI, they are listed separately in Add or Remove Programs. If you are no longer using them, you can uninstall each program separately, in any order, using the Add or Remove Programs applet.
IMPORTANT: If eDirectory is installed on the same server as iManager, NICI might be required to continue to run eDirectory.
When you remove iManager 2.5, only a portion of the files in the file system are removed. You are asked if you want to remove all iManager files. If you select Yes, all iManager files are removed, including all custom content. However, the 2.5 RBS objects are not removed from the eDirectory tree, and the schema remains in the same state.
Installing iManager 19
20 Novell iMan
novdocx (EN
U) 01 February 2006
1.7.6 Mobile iManagerTo uninstall Mobile iManager, delete the directory where you extracted the files. NMAS and NICI files remain on the server.
1.7.7 Open Enterprise ServerDo not use the iManager 2.5 uninstall script to uninstall iManager 2.5 if it was installed with Open Enterprise Server (OES). Rather, use existing OES mechanisms to uninstall the iManager component for the relevant OES platform.
NetWare: Use the OES product removal process to uninstall iManager.
Linux: Use YAST to uninstall iManager. When uninstalling iManager with YaST, you will receive a dependency conflict that states that the novell-imanager package is required by the following:
• novell-iPrint
• novell-netstorage
Unless you really want to remove these products, ignore these dependencies and continue.
Subsequently, you will receive a second dependency conflict that states that novell-imanager is required by some or all of the following:
• novell-plugin-netstorage
• novell-usermanagement-imanager-plugin
• novell-plugin-qfsearch
• novell-plugin-life-health-imanager
These are iManager plug-ins and should be removed with iManager. Choose to remove these packages when uninstalling iManager from OES Linux.
ager 2.5 Installation Guide
2novdocx (E
NU
) 01 February 2006
2Upgrading to iManager 2.5
If you currently have a version of Novell® iManager installed on a server, you need to either upgrade or migrate to iManager 2.5, depending on whether you are running iManager 2.0.x or 1.5.x. This section explains the following procedures:
• Section 2.1, “Migrating Role-Based Services,” on page 21• Section 2.2, “Upgrading from iManager 2.0.x,” on page 22• Section 2.3, “Upgrading from iManager 2.0.2b to 2.5 on the Solaris Platform,” on page 22
2.1 Migrating Role-Based ServicesMaking the move from iManager 1.5.x to iManager 2.5 is more accurately described as a migration rather than an upgrade. You must migrate Role-Based Services (RBS) objects and tasks.
After installing iManager 2.5 on your server or Mobile iManager (see Chapter 1, “Installing iManager,” on page 7), the RBS objects in your eDirectoryTM tree need to be migrated to the iManager 2.5 format. You accomplish this by using the new RBS Configuration task in iManager 2.5.
To access the migration task:
1 Create a 2.5 collection. You must do this before you can migrate the 1.5.x collection to it.2 In iManager, select the Configure view, then click Role Based Service > RBS Configuration.
If no collections are listed on the 2.x Collections tabbed page, click New > Collection and Setup, then follow the online instructions.
3 Click the 1.x Collections tab.The 1.x Collections page displays all of your 1.5.x collections that can be migrated to 2.5.
4 Select the collection you want to migrate, then click Migrate at the top of the table. 5 Select the 2.x collection you want to migrate to, then click Start.
After the migration is complete, the 1.x collection is still intact in your eDirectory tree. If you have no further use for it, you can delete it from within iManager 2.5.
6 (Optional) To delete a 1.x collection, click the 1.x Collections tab, select the collection you want to delete, and then click Delete at the top of the table.
The RBS migration wizard does not migrate custom tasks created in iManager 1.x to version 2.5 tasks. You have two options for moving your 1.5.x custom tasks into iManager 2.5:
• You can re-create them by using the Plug-in Studio in iManager 2.5. In the Configure view, click Role Based Services > Plug-in Studio > New.
• You can use the Custom Task Migration Utility to migrate your 1.5.x tasks to 2.5 tasks. The custom task migration utility can be downloaded from the Novell Technical Services Web site (http://support.novell.com/cgi-bin/search/searchtid.cgi?/2969968.htm). A Readme file inside the download explains how to use it. If you have no custom tasks or content, you do not need to run the custom task migration utility.
Upgrading to iManager 2.5 21
22 Novell iMan
novdocx (EN
U) 01 February 2006
2.2 Upgrading from iManager 2.0.xThe first time you use iManager 2.5 to log in to an eDirectory tree that contains an iManager 2.0.2 RBS Collection, it is possible that not all of the roles and tasks will be displayed. This is working as expected because some of the iManager 2.0.2 plug-ins require updates so that iManager 2.5 can fully utilize them. Go to the RBS Configuration page which lists which RBS modules are out of date. We recommend that you update your RBS modules to the latest version so that you can see and use all of the installed modules on both iManager 2.0.2 and iManager 2.5.
Be aware in this situation of possibly having multiple roles with the same name. Some plug-in developers, when they updated their plug-ins for iManager 2.5, changed task IDs or module names but retained the same display names, thus causing the roles to appear to be duplicated when, in fact, one instance is from one version and the other is from a newer version.
NOTE: Because different installations of iManager 2.0.x or 2.5 might have a different number of plug-ins locally installed, you might see discrepancies in the module report for any given collection from the Role Based Services > RBS Configuration page. In order for the numbers to match between iManager installations, make sure that the same subset of plug-ins is installed on each iManager instance in the tree.
To check whether you have outdated RBS objects:
1 Select the Configure view, then click Role Based Services > RBS Configuration task.
The table on the 2.x Collections tabbed page displays any out of date modules.2 To update them, select the number in the Out-Of-Date column for the Collection you want to
update. The list of outdated modules is displayed.
3 Select the module you want to update and then click Update at the top of the table.
Upgrades from iManager 2.0.x to 2.5 are supported by the install program. When you run the iManager 2.5 installation program on a server that is running iManager 2.0.x, the existing 2.0.x directory structure is backed up to the TOMCAT_HOME directory. This assures the preservation of any custom content created in iManager 2.0.x. The Novell Plug-in Modules (NPMs) located in the backed-up 2.0.x directory are then compared to the NPMs included with iManager 2.5. NPMs that either don’t exist or are newer than those in the 2.5 packages directory are copied to the iManager 2.5 TOMCAT_HOME\webapps\nps\packages directory and installed.
2.3 Upgrading from iManager 2.0.2b to 2.5 on the Solaris PlatformDuring the upgrade process, the iManager 2.5 installer removes the Tomcat4 directory if it cannot detect that Tomcat is already installed. The 2.0.2 installer installs enough Apache files for the 2.5 installer to determine that Apache is installed, so that it does not try to reinstall Tomcat.
The upgrade is seamless in that the Tomcat setup from 2.0.2b remains the same: Tomcat functions as both Web server and servlet container. The installation displays Apache as being installed on the detection summary screen, when, in fact, it is not. Simply ignore this and continue through installation.
ager 2.5 Installation Guide
3novdocx (E
NU
) 01 February 2006
3Accessing iManager
Novell® iManager is accessed via a Web browser. This section includes the following procedures:
• Section 3.1, “Using a Supported Web Browser,” on page 23• Section 3.2, “Accessing iManager (Server-Based),” on page 23• Section 3.3, “Starting Mobile iManager on Linux,” on page 24• Section 3.4, “Mobile iManager Desktop Launcher on a SUSE or Novell Linux Desktop,” on
page 24• Section 3.5, “Starting Mobile iManager on Windows,” on page 24• Section 3.6, “Accessing iManager with a Screen Reader and Other Accessibility Options,” on
page 24
3.1 Using a Supported Web BrowserTo access iManager and for complete use of all iManager features, you must use a computer running one of the following Web browsers:
• Microsoft* Internet Explorer 6 SP1• Mozilla* 1.7 • Mozilla Firefox* 1.0
Although you might be able to access iManager via a Web browser not listed, we do not guarantee or support full functionality.
NOTE: Accessing iManager 2.5 through an iChain® server, with a path-based multihoming accelerator and the Remove Sub Path from URL option enabled, is not supported.
3.2 Accessing iManager (Server-Based)1 In a supported Web browser, type the following in the Address (URL) field:
http://server_IP_address/nps/iManager.html
For example:
http://127.0.0.1/nps/iManager.html
You might be redirected to an HTTPS secure page.
IMPORTANT: URLs are case sensitive.
2 Log in using your username, password, and eDirectoryTM tree name.You can substitute the IP address of an eDirectory server for the tree name.To have full access to all Novell iManager features, you must log in as a user with admin-equivalent rights to the tree.
Accessing iManager 23
24 Novell iMan
novdocx (EN
U) 01 February 2006
3.3 Starting Mobile iManager on Linux1 From the bin directory of the expanded iMan_25_Mobile_iManager_linux.tar
directory, run imanager.sh.2 Log in using your username, password, and eDirectory tree name.
3.4 Mobile iManager Desktop Launcher on a SUSE or Novell Linux DesktopTo create a desktop launcher for Mobile iManager on a SUSE Linux desktop, you must edit the iManager.sh script. For example, if you extracted the Mobile iManager .bz2 file to the /opt/novell directory, locate the iManager.sh script in the /opt/novell/imanager/bin directory and add the following line at the beginning of the script, just below the #!/bin/sh line:
cd /opt/novell/imanager/bin
3.5 Starting Mobile iManager on Windows1 From the bin directory of the unzipped iMan_25_Mobile_iManager_win directory, run imanager.bat.
2 Log in using your username, password, and eDirectory tree name.
3.6 Accessing iManager with a Screen Reader and Other Accessibility OptionsiManager includes a “simple” display that can be effectively used with screen readers, in Internet Explorer, on a Windows* platform (client side).
1 In a supported Web browser, enter the following in the Address (URL) field:
http://server_IP_address/nps/Simple.html
For example:
http://127.0.0.1/nps/Simple.html
2 Log in using your username, context, password, and eDirectory tree name.To have full access to all Novell iManager features, you must log in as a user with admin-equivalent rights to the tree.
Complete accessibility statements are available on the Novell Web site (http://www.novell.com/accessibility).
ager 2.5 Installation Guide
4novdocx (E
NU
) 01 February 2006
4Installing, Using, and Uninstalling Novell Plug-In Modules
There are two types of Modules used in iManager: Novell® Plug-in Modules (NPMs) and RBS Modules.
• Novell Plug-in Modules (NPMs)
Novell Plug-in Modules (NPMs) are archives that contain the files for plug-ins to iManager. When you install an NPM using the Module Installation task you are installing a plug-in to iManager to add to its functonality.
• RBS ModulesRBS Modules are objects in eDirectoryTM that contain RBS Tasks and RBS Book objects. When Role Based Services has been configured in an eDirectory tree, the RBS Module must be installed after the NPM for the new tasks associated with the plug-in, to become available to use.
Both types of modules are sometimes referred to simply as “modules” when working with iManager. This chapter addresses Novell Plug-in Modules.
Novell iManager 2.5 ships with a core set of Novell plug-in modules (NPMs), including eDirectory Administration, Group, and Schema, etc. Many Novell products also have their own product-specific NPMs that are used in iManager. For example, Identity Manager/DirXML® includes iManager plug-in modules that let you manage and configure all of your Identity Manager/DirXML objects in Novell eDirectory.
An NPM version must be compatible with the version of iManager it is running with. Refer to the specific product documentation for info about iManager version requirements for a particular NPM.
Typically, plug-in modules are installed with the base iManager installation or product-specific installation programs. You can also download and install plug-in modules separately. For more information, see Section 4.2, “Downloading and Installing an NPM,” on page 26.
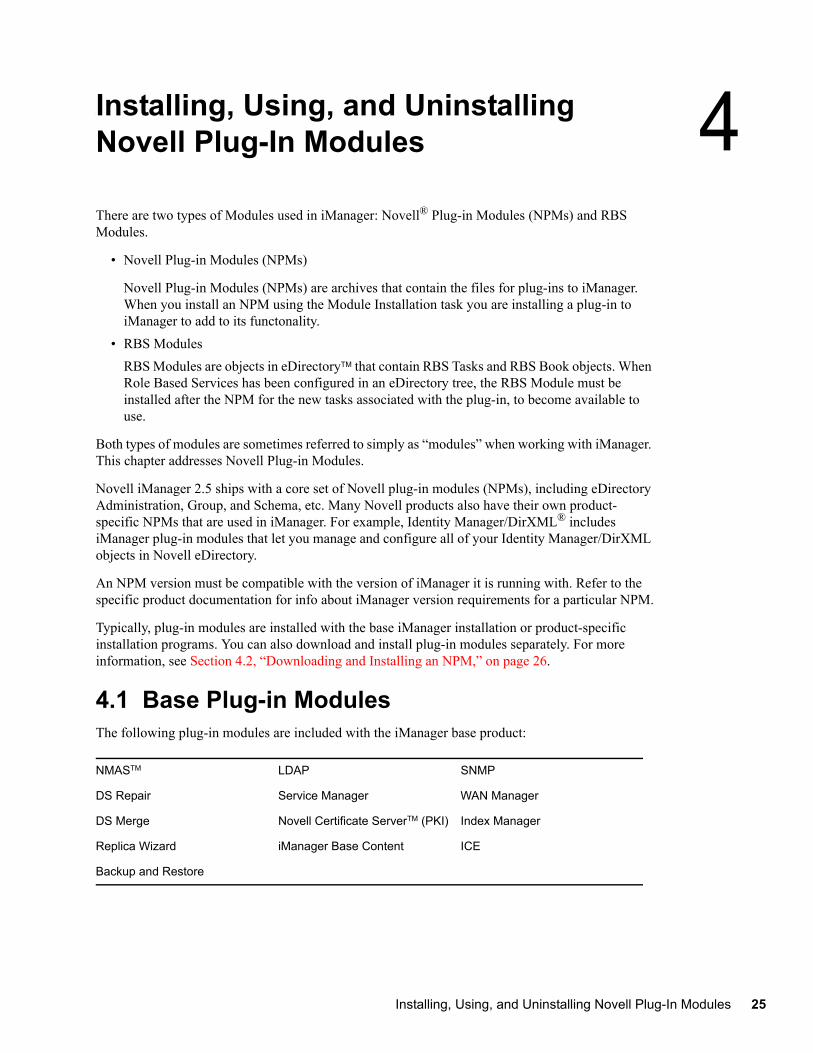
4.1 Base Plug-in ModulesThe following plug-in modules are included with the iManager base product:
NMASTM LDAP SNMP
DS Repair Service Manager WAN Manager
DS Merge Novell Certificate ServerTM (PKI) Index Manager
Replica Wizard iManager Base Content ICE
Backup and Restore
Installing, Using, and Uninstalling Novell Plug-In Modules 25
26 Novell iMan
novdocx (EN
U) 01 February 2006
4.2 Downloading and Installing an NPMNovell plug-in modules (NPMs) are available for download on the Novell Product Downloads Web site. For more information on where and how to download plug-ins, see TID#10095332 (http://support.novell.com/cgi-bin/search/searchtid.cgi?/10095332.htm).
NOTE: By default, the plug-in modules are not replicated between iManager servers. We recommend that you install the plug-in modules you want on each iManager server.
The process you use to download and install plug-in modules varies depending on whether or not you have RBS configured. For more information about RBS, see “Roles and Tasks” in the iManager 2.5 Administration Guide.
• If RBS is not configured, all tasks appear in the Contents Panel regardless of your access rights, and no additional setup is required beyond plug-in module installation. See Section 4.2.1, “Installing a Plug-In When RBS Is Not Configured,” on page 26.
• If RBS is configured, the new plug-in module is not available for use until you upgrade your collections. See Section 4.2.2, “Installing a Plug-In When RBS Is Configured,” on page 27.
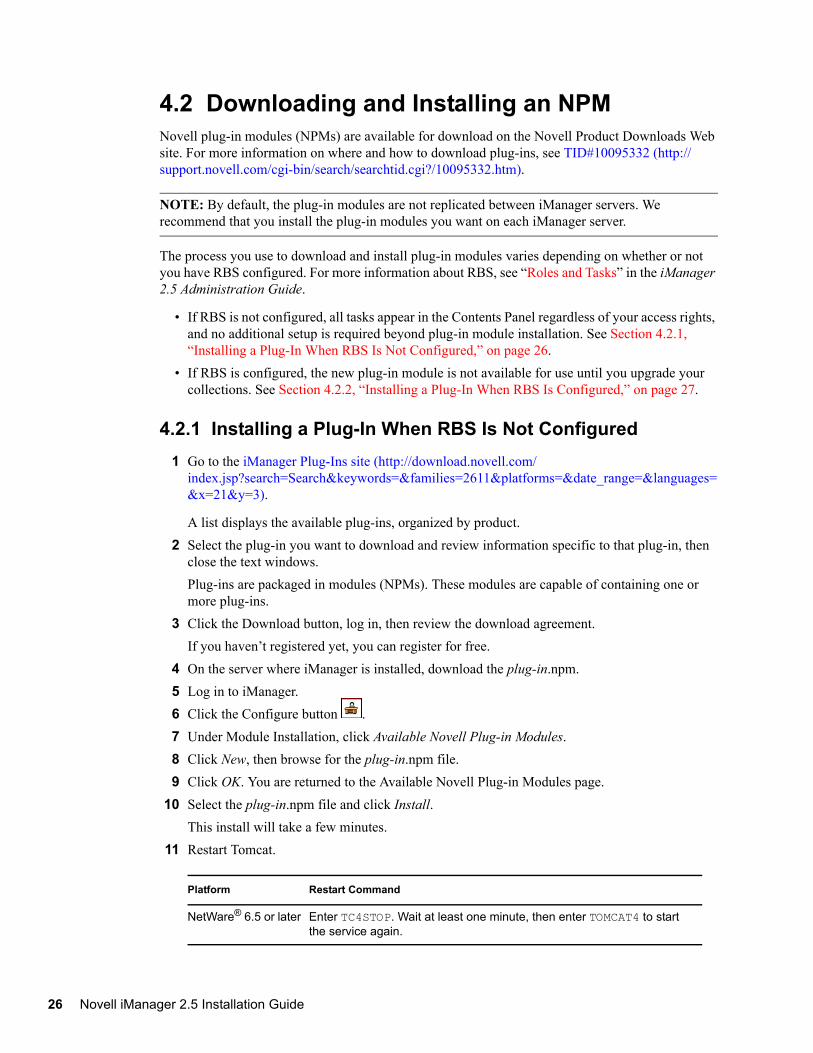
4.2.1 Installing a Plug-In When RBS Is Not Configured1 Go to the iManager Plug-Ins site (http://download.novell.com/
index.jsp?search=Search&keywords=&families=2611&platforms=&date_range=&languages=&x=21&y=3).
A list displays the available plug-ins, organized by product.2 Select the plug-in you want to download and review information specific to that plug-in, then
close the text windows. Plug-ins are packaged in modules (NPMs). These modules are capable of containing one or more plug-ins.
3 Click the Download button, log in, then review the download agreement.If you haven’t registered yet, you can register for free.
4 On the server where iManager is installed, download the plug-in.npm.5 Log in to iManager. 6 Click the Configure button .7 Under Module Installation, click Available Novell Plug-in Modules.8 Click New, then browse for the plug-in.npm file. 9 Click OK. You are returned to the Available Novell Plug-in Modules page.
10 Select the plug-in.npm file and click Install.This install will take a few minutes.
11 Restart Tomcat.
Platform Restart Command
NetWare® 6.5 or later Enter TC4STOP. Wait at least one minute, then enter TOMCAT4 to start the service again.
ager 2.5 Installation Guide
novdocx (EN
U) 01 February 2006
Tomcat sometimes requires several minutes to fully initialize. Wait at least 5 minutes before trying to log in to iManager.
12 Restart Apache.13 Verify that the new Role appears in the Roles and Tasks page.
To add members to the new Role, use the Modify Member Association task.
4.2.2 Installing a Plug-In When RBS Is Configured
IMPORTANT: In order to reinstall an existing plug-in, you must first delete the rbsModule object for that plug-in from eDirectory using the Module Configuration > Delete RBS Module task.
1 Go to the iManager Plug-Ins site (http://download.novell.com/index.jsp?search=Search&keywords=&families=2611&platforms=&date_range=&languages=&x=21&y=3).
A list displays the available plug-ins, organized by product.2 Select the plug-in you want to download and review information specific to that plug-in, then
close the text windows.Plug-ins are packaged in modules (NPMs). Those modules are capable of containing one or more plug-ins.
3 Click the Download button, log in, then review the download agreement.If you haven’t registered yet, you can register for free.
4 On the system where iManager is installed, download the plug-in.npm.5 Log in to iManager. 6 Click the Configure button .7 Click iManager Configuration > Modules, then click Install to install the module package.8 Select the plug-in.npm file to install.
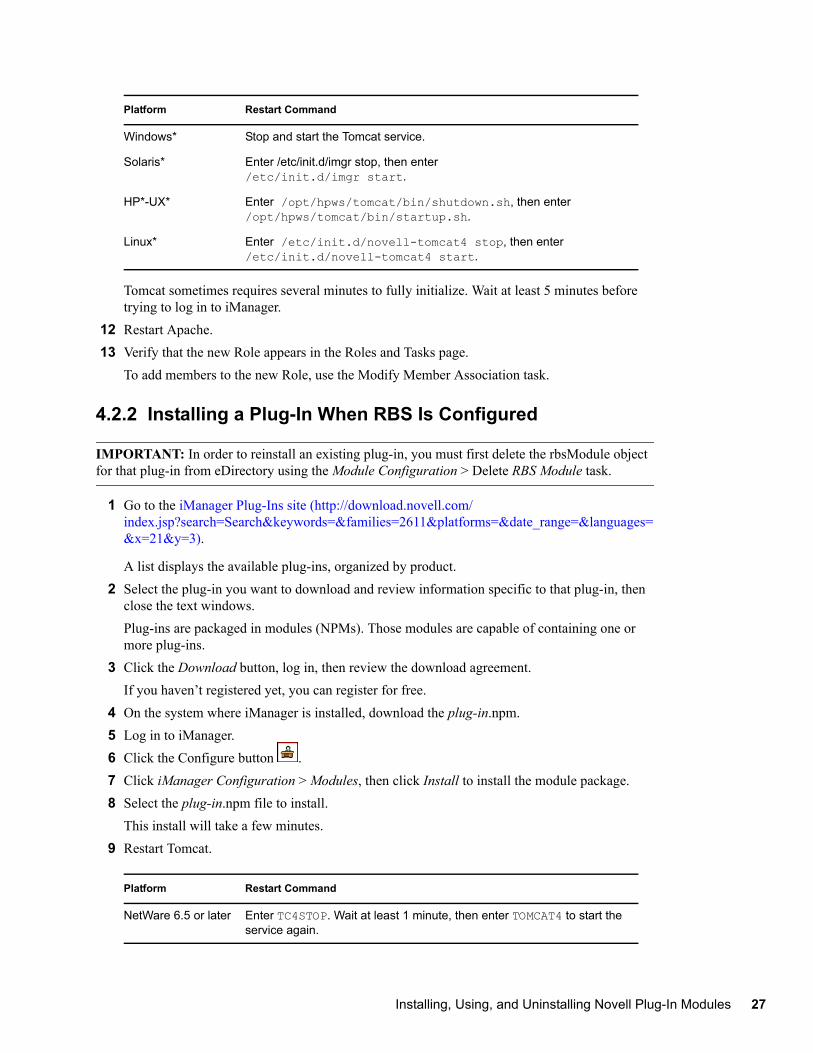
This install will take a few minutes.9 Restart Tomcat.
Windows* Stop and start the Tomcat service.
Solaris* Enter /etc/init.d/imgr stop, then enter /etc/init.d/imgr start.
HP*-UX* Enter /opt/hpws/tomcat/bin/shutdown.sh, then enter /opt/hpws/tomcat/bin/startup.sh.
Linux* Enter /etc/init.d/novell-tomcat4 stop, then enter /etc/init.d/novell-tomcat4 start.
Platform Restart Command
NetWare 6.5 or later Enter TC4STOP. Wait at least 1 minute, then enter TOMCAT4 to start the service again.
Platform Restart Command
Installing, Using, and Uninstalling Novell Plug-In Modules 27
28 Novell iMan
novdocx (EN
U) 01 February 2006
Tomcat sometimes requires several minutes to fully initialize. Wait at least 5 minutes before trying to log in to iManager.
10 Restart Apache.11 Log in to iManager, then click the Configure button.12 Select Role-Based Services > RBS Configuration.
The table on the 2.x Collections tabbed page displays any out-of-date modules. 13 To update them, select the number in the Out-of-Date column for the Collection you want to
update.The list of outdated modules is displayed.
14 Select the module you want to update and then click Update at the top of the table.
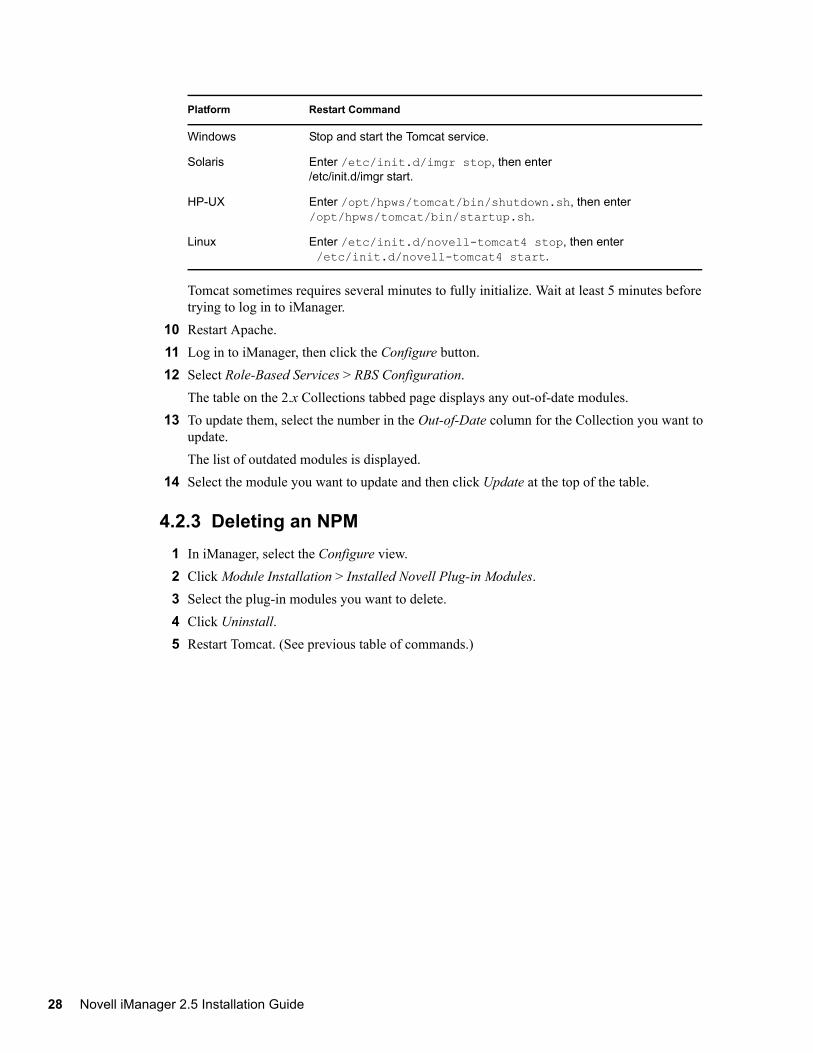
4.2.3 Deleting an NPM1 In iManager, select the Configure view.2 Click Module Installation > Installed Novell Plug-in Modules.3 Select the plug-in modules you want to delete.4 Click Uninstall.5 Restart Tomcat. (See previous table of commands.)
Windows Stop and start the Tomcat service.
Solaris Enter /etc/init.d/imgr stop, then enter /etc/init.d/imgr start.
HP-UX Enter /opt/hpws/tomcat/bin/shutdown.sh, then enter /opt/hpws/tomcat/bin/startup.sh.
Linux Enter /etc/init.d/novell-tomcat4 stop, then enter /etc/init.d/novell-tomcat4 start.
Platform Restart Command
ager 2.5 Installation Guide