Embed Size (px)
Citation preview

© 2012 NovaStor, all rights reserved. All trademarks are the property of their respective owners. Features and specifications are subject to change without notice. The information provided herein is provided for informational and planning purposes only.
NovaBACKUP®
xSP
Version 13.1 Upgrade Guide
NovaStor® / July 2012
Copyright NovaStor 2012 1
Contents
NovaBACKUP Upgrade Information ............................................................ 2
Intended Audience ....................................................................................... 2
Upgrade Paths .............................................................................................. 2
License Keys ................................................................................................ 2
NovaBACKUP xSP Modules ........................................................................ 2
Preparing for the Upgrade ........................................................................... 3
Prepare the NovaBACKUP® xSP Storage Server ...................................... 3
Prepare the Database ................................................................................... 3
Clean up the Existing Storage Server InstallationError! Bookmark not defined.
Performing the Upgrade ............................................................................... 4
Upgrade the Storage Server ........................................................................ 4
Upgrade the Remote Manager ................................................................... 11
Upgrade the Commerce Server ................................................................. 18
Copyright NovaStor 2012 2
NovaBACKUP Upgrade Information
The following upgrade processes use the default names of installed databases and associated components. If you have renamed any of the databases or web components, please ensure you are substituting your naming conventions during this upgrade process.
INTENDED AUDIENCE
This document is intended for existing administrators of NovaBACKUP® xSP Storage Server environments running version 12.0 and above who have experience in administering and trouble-shooting SQL and IIS in a Microsoft Windows Server environment.
UPGRADE PATHS
NovaBACKUP® xSP version 13.0 can be upgraded from NovaBACKUP® xSP version 12.0 or greater.
LICENSE KEYS
You will need to acquire a NovaBACKUP® xSP version 13 license key in order to active your new Storage Server implementation. A license key can be obtained through your NovaBACKUP® xSP sales representative.
NOVABACKUP XSP MODULES
The NovaBACKUP xSP solution has multiple modules that can be installed. For the purpose of this document, we will be upgrading the Storage Server, the Remote Manager, and the Commerce Server. For additional modules, please see the respective installation/upgrade guides.

Copyright NovaStor 2012 3
Preparing for the Upgrade
When preparing to perform the upgrade, make sure you perform or ensure the following tasks below are completed. If these items are not verified you may not be able to complete the upgrade process successfully.
PREPARE THE NOVABACKUP® XSP STORAGE SERVER
1. Obtain your NovaBACKUP® xSP Version 13 License Key.
2. Download the NovaBACKUP® xSP Storage Server installation file from the link provided to
you by NovaStor and save this file to a location you will be able to access.
3. Close/block the incoming TCP port for the Storage Server (Default Port = 308).
4. Stop the Backup Server service.
5. Backup the User Data and log directories.
PREPARE THE DATABASE
Note 1: If your database is not on the same server as the Storage Server, make sure you:
Enable “Named Pipes” for all protocols in the SQL Configuration Manager
On your firewall open/forward ports 1433 and 445.
Note 2: If you have any custom scripts, views, or functions saved as part of the BackupServer database, please remove them before attempting the upgrade.
1. Attach to the database using SQL Management Studio.
2. Make sure the SA administrator account is enabled on the database.
3. Verify the SQL Server Agent and SQL Browser services are running (can also be checked
in the services.mmc).
4. Backup the BackupServer, Remote Manager, and Commerce Server databases.

Copyright NovaStor 2012 4
Performing the Upgrade
Please read through the entire upgrade process before beginning the upgrade. It is important that you follow this process closely.
UPGRADE THE STORAGE SERVER
Locate and run the installation file for the Storage Server. The installer will check to ensure the prerequisites are already installed before beginning the upgrade.
Please note that the Microsoft SQL Server 2008 prerequisite will show up as needed if it is not installed on the local machine, this is NOT needed and should only be installed for fresh installs where there is no existing SQL infrastructure.
Once the prerequisite components are verified, the installer will present the option to “Install” the Storage Server. Click [Install]. The NovaBACKUP Storage Server Setup Wizard will launch. Click [Next].
Copyright NovaStor 2012 5
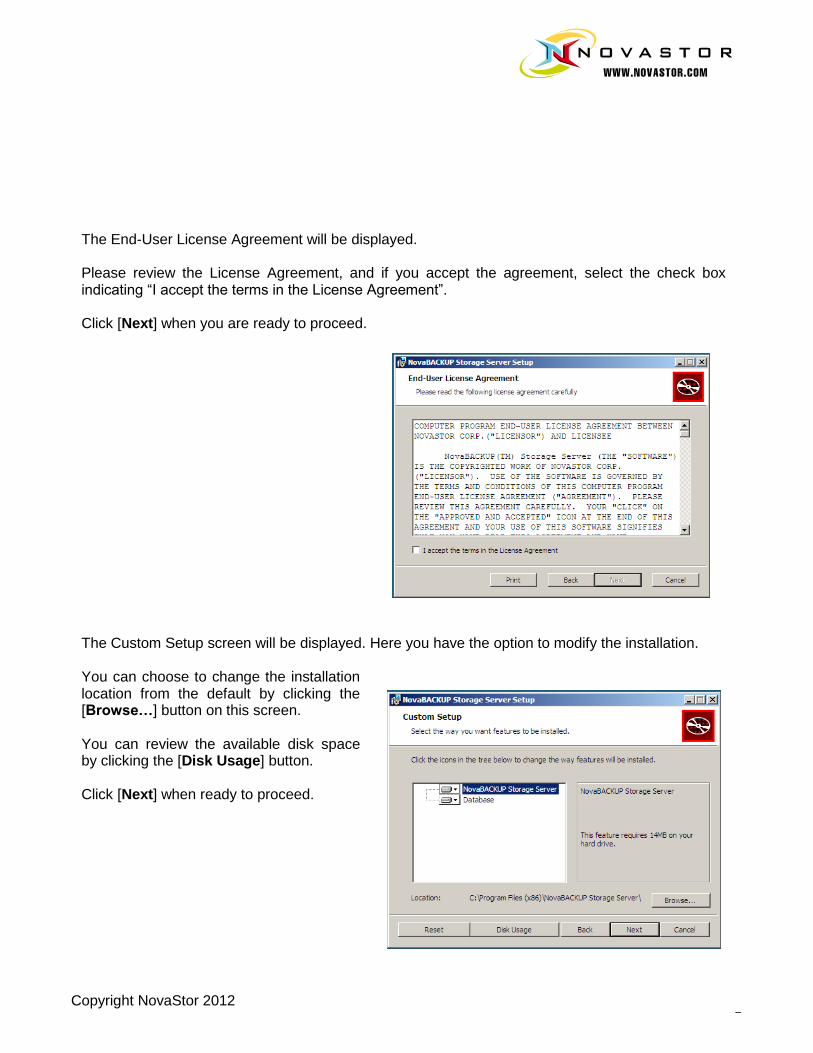
The End-User License Agreement will be displayed. Please review the License Agreement, and if you accept the agreement, select the check box indicating “I accept the terms in the License Agreement”. Click [Next] when you are ready to proceed. The Custom Setup screen will be displayed. Here you have the option to modify the installation. You can choose to change the installation location from the default by clicking the [Browse…] button on this screen. You can review the available disk space by clicking the [Disk Usage] button. Click [Next] when ready to proceed.
Copyright NovaStor 2012 6
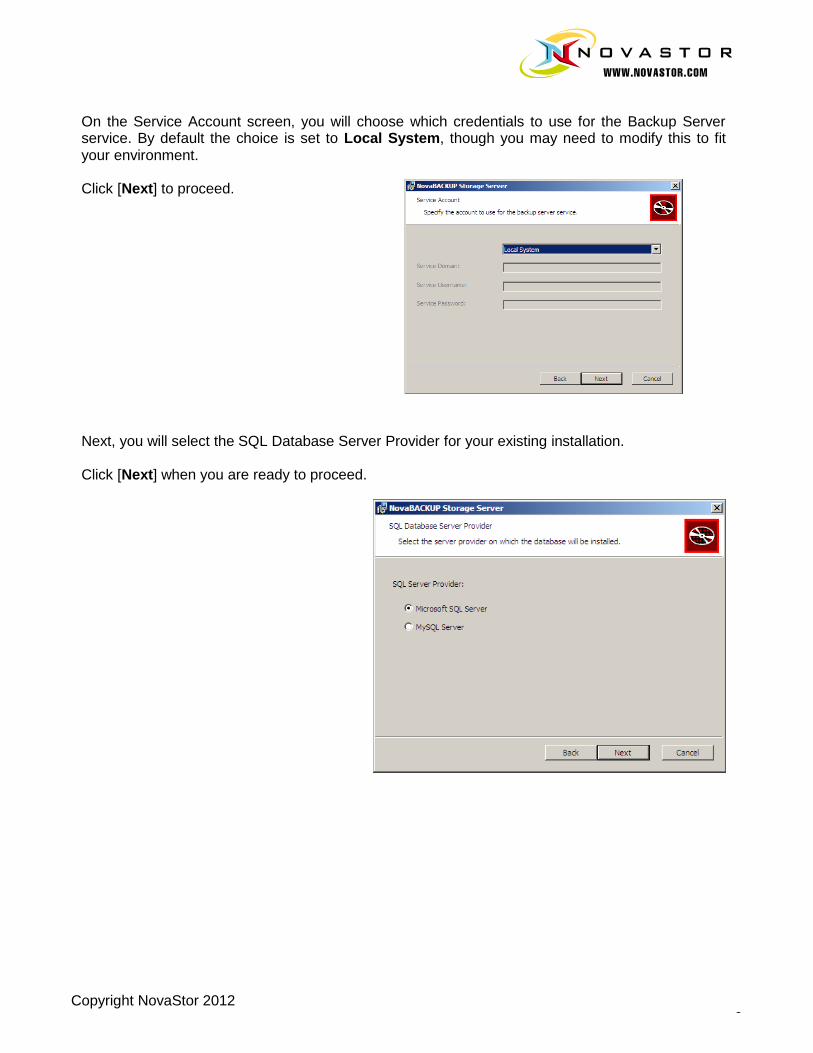
On the Service Account screen, you will choose which credentials to use for the Backup Server service. By default the choice is set to Local System, though you may need to modify this to fit your environment. Click [Next] to proceed. Next, you will select the SQL Database Server Provider for your existing installation. Click [Next] when you are ready to proceed.
Copyright NovaStor 2012 7
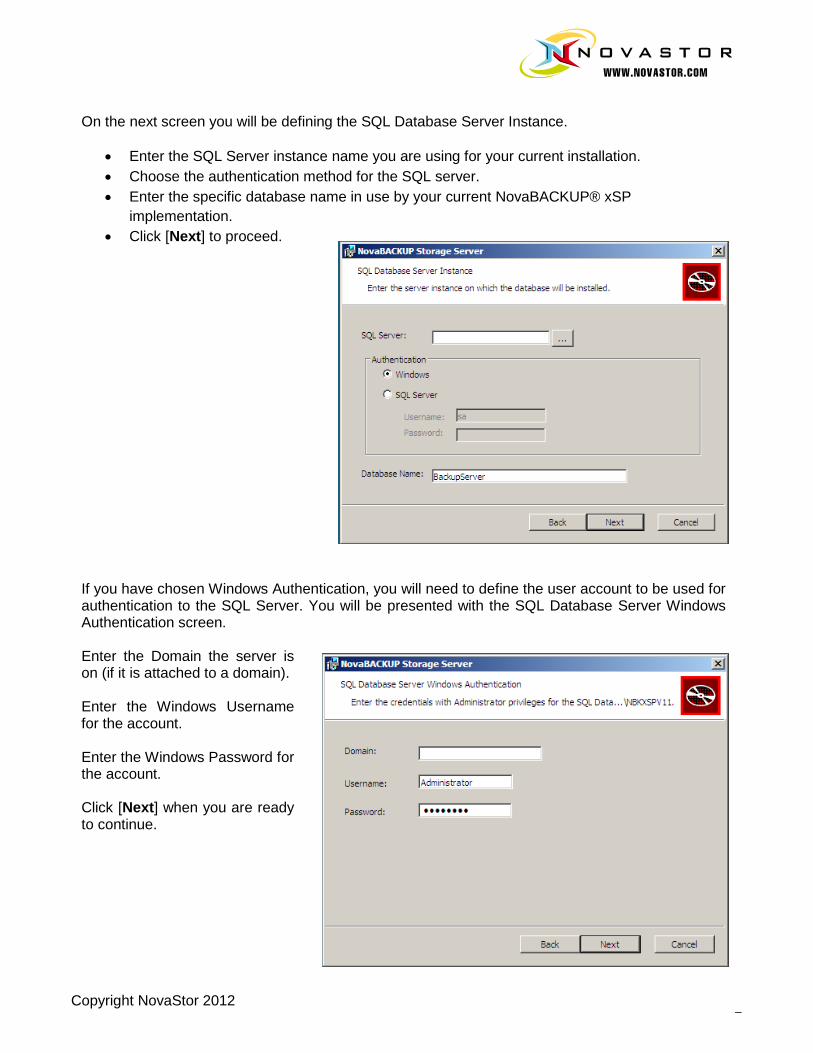
On the next screen you will be defining the SQL Database Server Instance.
Enter the SQL Server instance name you are using for your current installation.
Choose the authentication method for the SQL server.
Enter the specific database name in use by your current NovaBACKUP® xSP
implementation.
Click [Next] to proceed.
If you have chosen Windows Authentication, you will need to define the user account to be used for authentication to the SQL Server. You will be presented with the SQL Database Server Windows Authentication screen. Enter the Domain the server is on (if it is attached to a domain). Enter the Windows Username for the account. Enter the Windows Password for the account. Click [Next] when you are ready to continue.

Copyright NovaStor 2012 8
The Installer will attempt to validate the credentials that were supplied. If successful, the installer will continue and prompt for you to install the Storage Server application. Click the [Install] button to continue. During the installation you will be presented with a status window showing you the status of the upgrade. In the event the installer needs to close any running applications, you will be shown a dialog box indicating which files or applications need to be shut down. It is recommended to allow the installer to attempt to close the files in order for the installation to proceed.
Click [OK] to continue.
Copyright NovaStor 2012 9
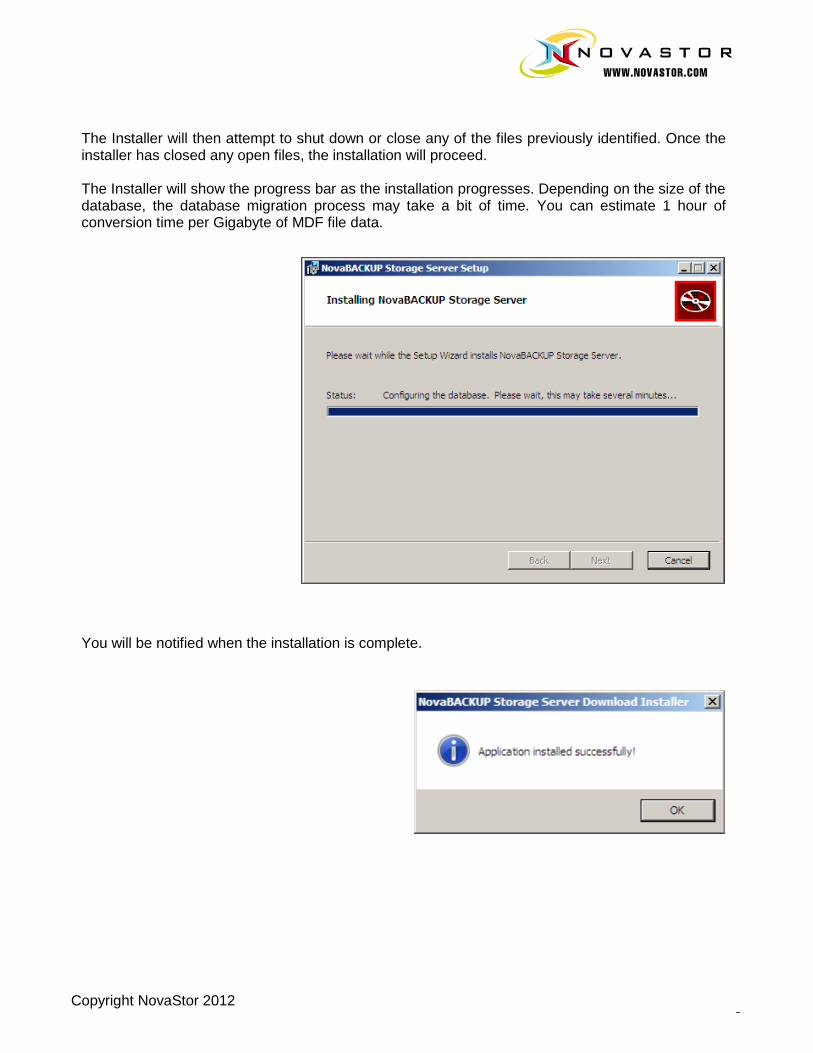
The Installer will then attempt to shut down or close any of the files previously identified. Once the installer has closed any open files, the installation will proceed. The Installer will show the progress bar as the installation progresses. Depending on the size of the database, the database migration process may take a bit of time. You can estimate 1 hour of conversion time per Gigabyte of MDF file data. You will be notified when the installation is complete.

Copyright NovaStor 2012 10
Once the installation has completed, you will be presented with the options to Start the Backup Server Service and to Launch the Backup Server Configuration Utility. Click [Finish]. If you chose to launch the Configuration Manager, it will display with the default Accounts tab showing. Clicking on the Licensing tab will display the updated server version, at this time you should enter your Product key.
Copyright NovaStor 2012 11
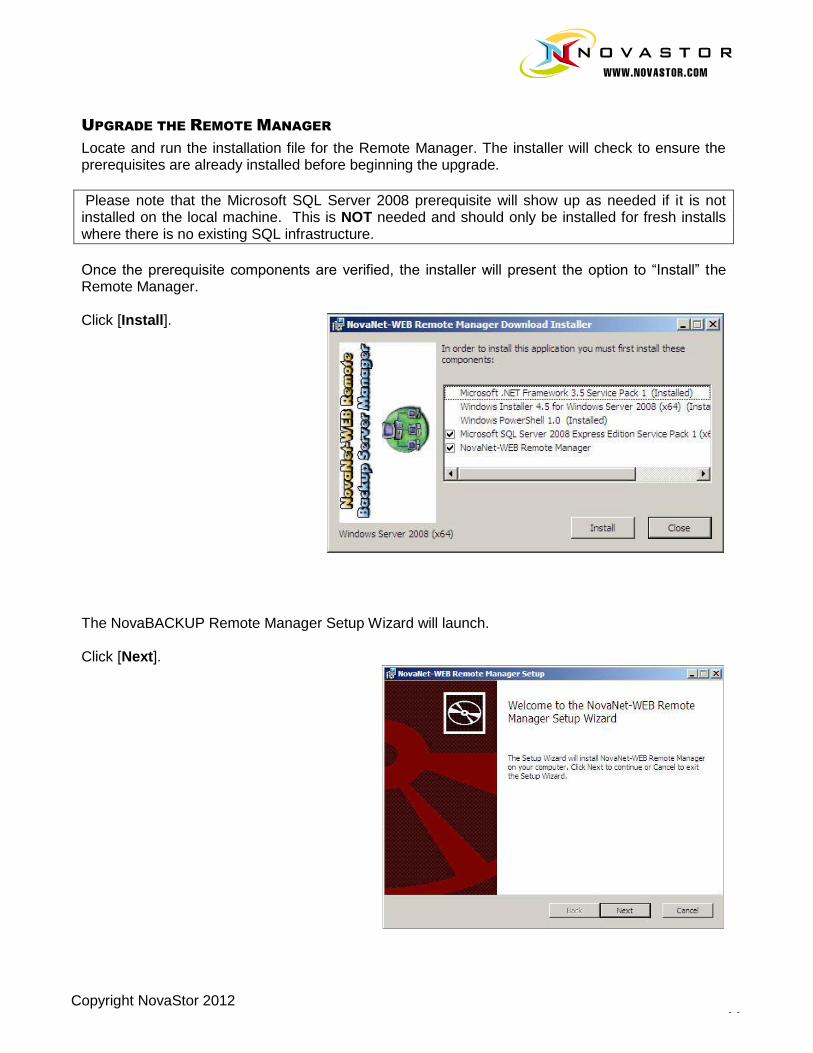
UPGRADE THE REMOTE MANAGER
Locate and run the installation file for the Remote Manager. The installer will check to ensure the prerequisites are already installed before beginning the upgrade.
Please note that the Microsoft SQL Server 2008 prerequisite will show up as needed if it is not installed on the local machine. This is NOT needed and should only be installed for fresh installs where there is no existing SQL infrastructure.
Once the prerequisite components are verified, the installer will present the option to “Install” the Remote Manager. Click [Install]. The NovaBACKUP Remote Manager Setup Wizard will launch. Click [Next].
Copyright NovaStor 2012 12
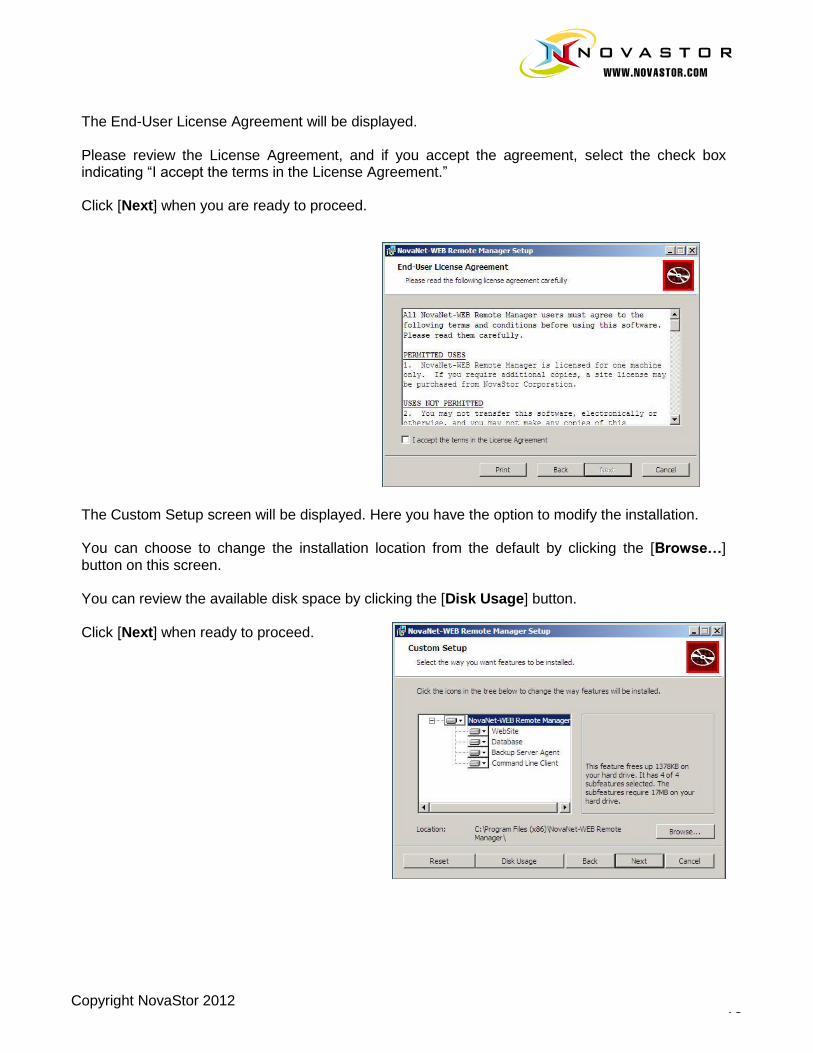
The End-User License Agreement will be displayed. Please review the License Agreement, and if you accept the agreement, select the check box indicating “I accept the terms in the License Agreement.” Click [Next] when you are ready to proceed.
The Custom Setup screen will be displayed. Here you have the option to modify the installation. You can choose to change the installation location from the default by clicking the [Browse…] button on this screen. You can review the available disk space by clicking the [Disk Usage] button. Click [Next] when ready to proceed.
Copyright NovaStor 2012 13
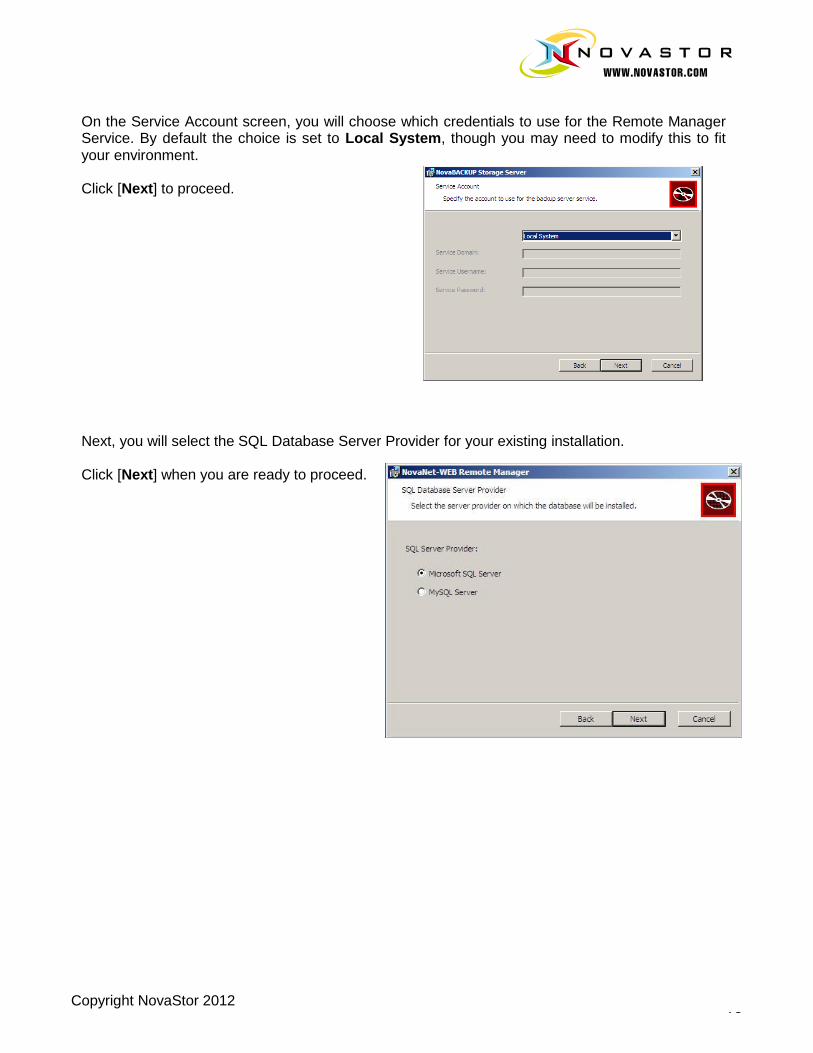
On the Service Account screen, you will choose which credentials to use for the Remote Manager Service. By default the choice is set to Local System, though you may need to modify this to fit your environment. Click [Next] to proceed. Next, you will select the SQL Database Server Provider for your existing installation. Click [Next] when you are ready to proceed.

Copyright NovaStor 2012 14
On the next screen you will be defining the SQL Database Server Instance. Enter the SQL Server instance name you are using for your current installation. Choose the authentication method for the SQL server. Enter the specific database name currently in use by your NovaBACKUP xSP instance. Click [Next] to proceed. If you have chosen Windows Authentication, you will need to define the user account to be used for authentication to the SQL Server. You will be presented with the SQL Database Server Windows Authentication screen. Enter the Domain the server is on (if it is attached to a domain). Enter the Windows Username for the account. Enter the Windows Password for the account. Click [Next] when you are ready to continue.
Copyright NovaStor 2012 15
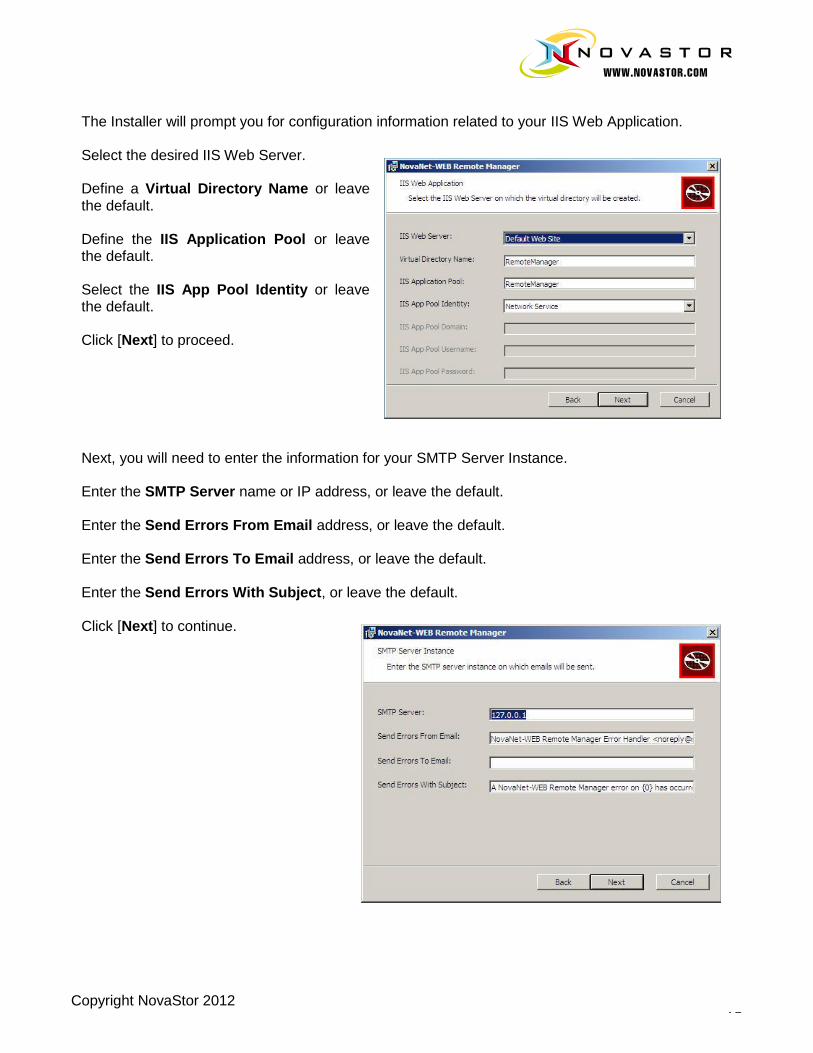
The Installer will prompt you for configuration information related to your IIS Web Application. Select the desired IIS Web Server. Define a Virtual Directory Name or leave the default. Define the IIS Application Pool or leave the default. Select the IIS App Pool Identity or leave the default. Click [Next] to proceed. Next, you will need to enter the information for your SMTP Server Instance. Enter the SMTP Server name or IP address, or leave the default. Enter the Send Errors From Email address, or leave the default. Enter the Send Errors To Email address, or leave the default. Enter the Send Errors With Subject, or leave the default. Click [Next] to continue.
Copyright NovaStor 2012 16
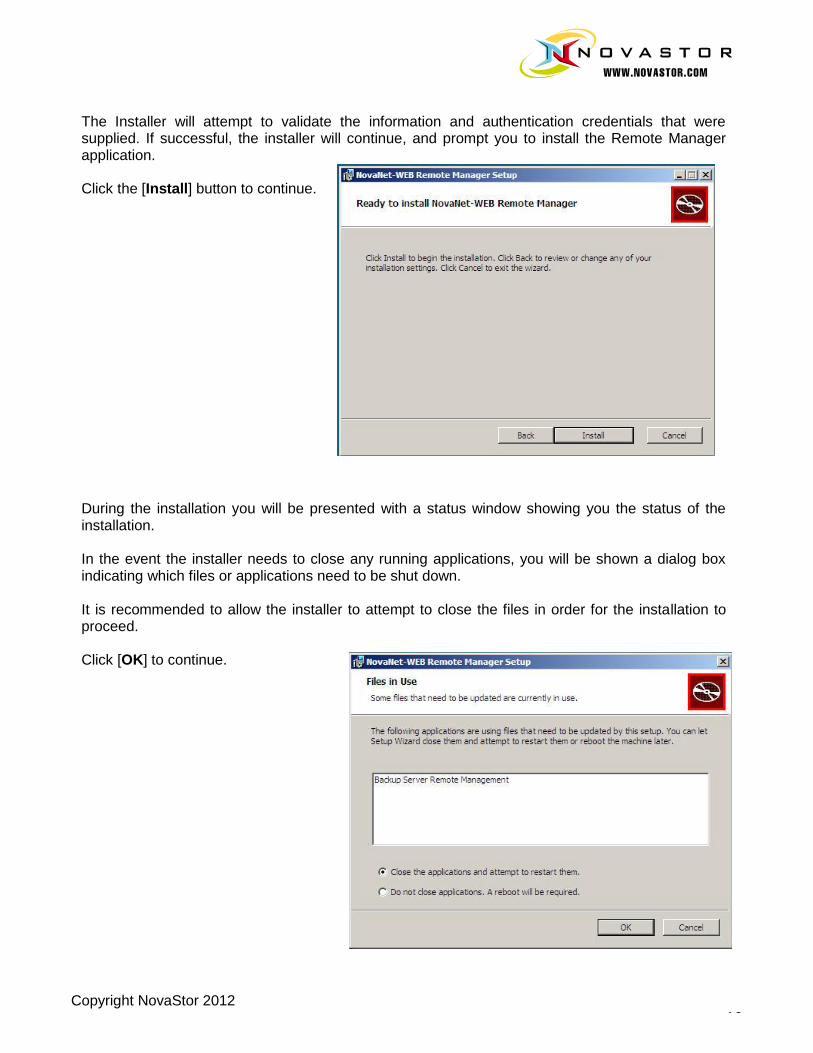
The Installer will attempt to validate the information and authentication credentials that were supplied. If successful, the installer will continue, and prompt you to install the Remote Manager application. Click the [Install] button to continue. During the installation you will be presented with a status window showing you the status of the installation. In the event the installer needs to close any running applications, you will be shown a dialog box indicating which files or applications need to be shut down. It is recommended to allow the installer to attempt to close the files in order for the installation to proceed. Click [OK] to continue.

Copyright NovaStor 2012 17
The Installer will then attempt to shut down or close any of the files previously identified. Once the installer has closed any open files, the installation will proceed. The Installer will show the progress bar as the installation progresses. Depending on the size of the database, the database migration process may take a bit of time. You will be notified when the installation is complete. If you wish to start the Remote Manager Agent Service, select that option and click [Finish].
Copyright NovaStor 2012 18
UPGRADE THE COMMERCE SERVER
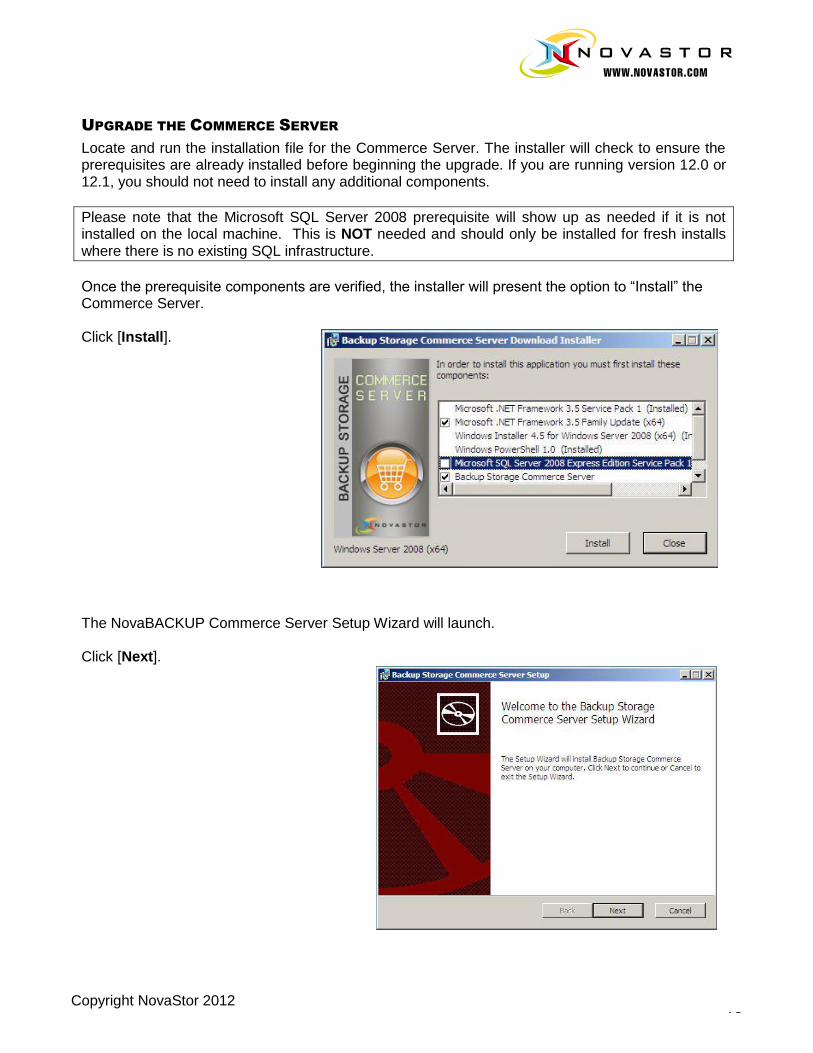
Locate and run the installation file for the Commerce Server. The installer will check to ensure the prerequisites are already installed before beginning the upgrade. If you are running version 12.0 or 12.1, you should not need to install any additional components.
Please note that the Microsoft SQL Server 2008 prerequisite will show up as needed if it is not installed on the local machine. This is NOT needed and should only be installed for fresh installs where there is no existing SQL infrastructure.
Once the prerequisite components are verified, the installer will present the option to “Install” the Commerce Server. Click [Install]. The NovaBACKUP Commerce Server Setup Wizard will launch. Click [Next].
Copyright NovaStor 2012 19
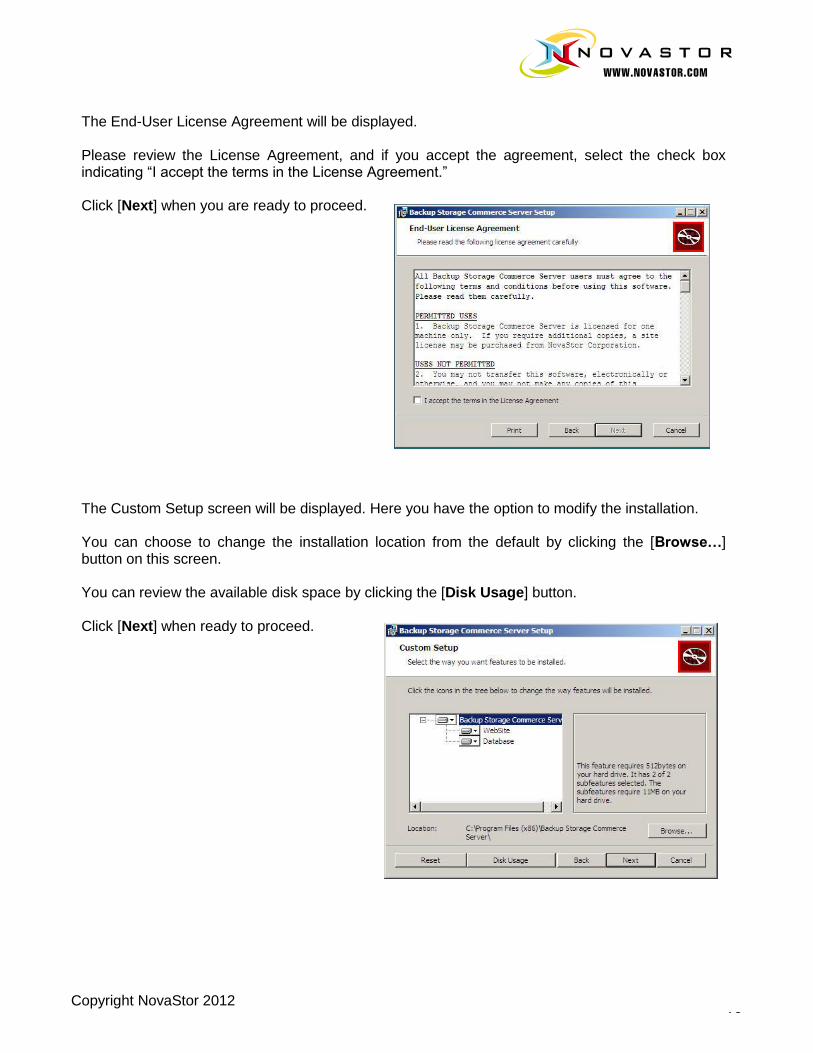
The End-User License Agreement will be displayed. Please review the License Agreement, and if you accept the agreement, select the check box indicating “I accept the terms in the License Agreement.” Click [Next] when you are ready to proceed. The Custom Setup screen will be displayed. Here you have the option to modify the installation. You can choose to change the installation location from the default by clicking the [Browse…] button on this screen. You can review the available disk space by clicking the [Disk Usage] button. Click [Next] when ready to proceed.
Copyright NovaStor 2012 20
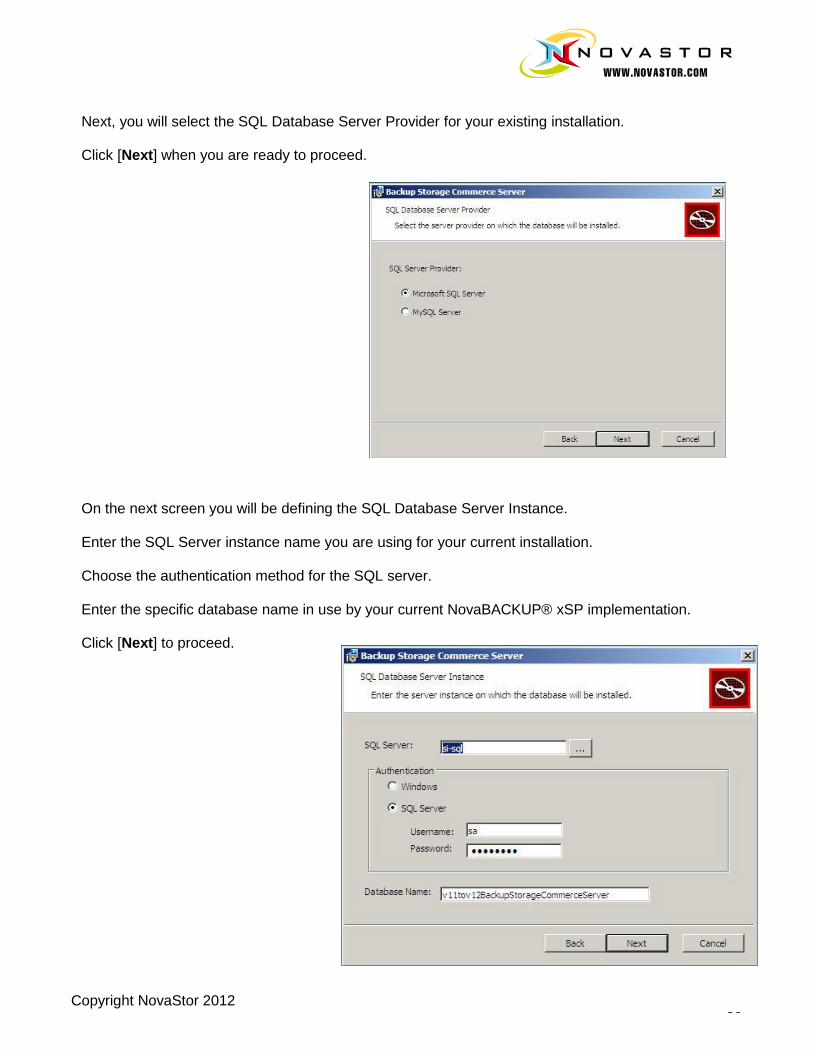
Next, you will select the SQL Database Server Provider for your existing installation. Click [Next] when you are ready to proceed. On the next screen you will be defining the SQL Database Server Instance. Enter the SQL Server instance name you are using for your current installation. Choose the authentication method for the SQL server. Enter the specific database name in use by your current NovaBACKUP® xSP implementation. Click [Next] to proceed.
Copyright NovaStor 2012 21
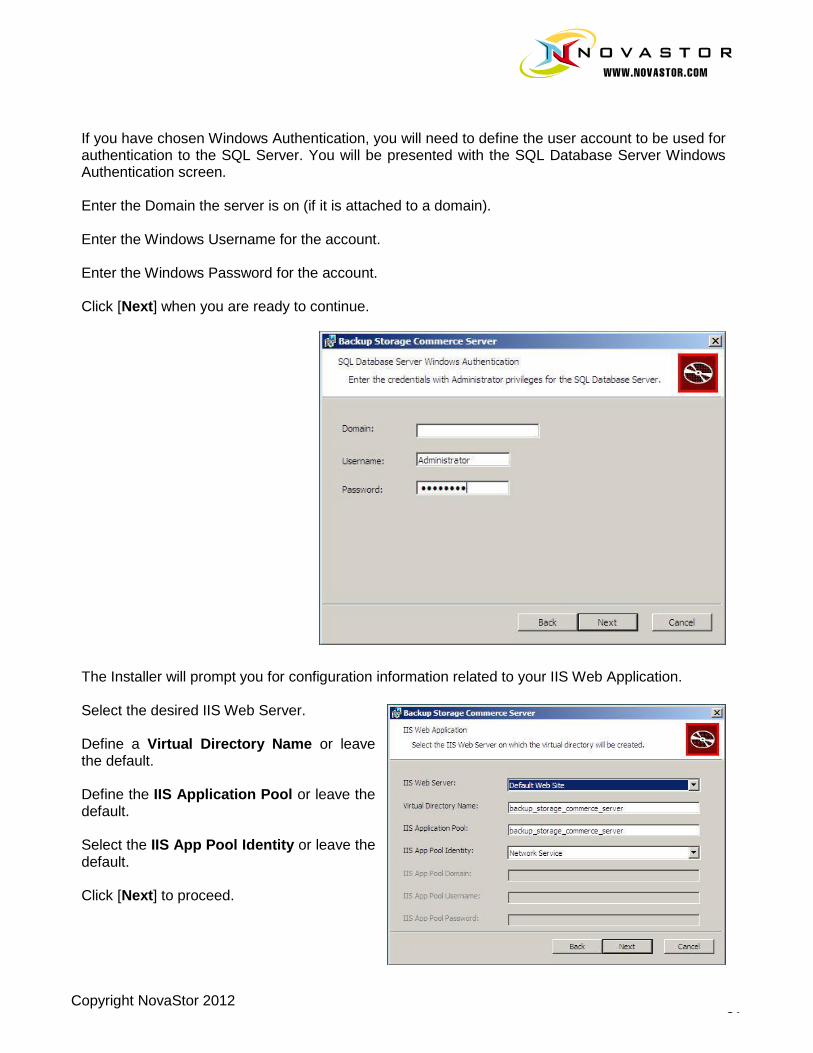
If you have chosen Windows Authentication, you will need to define the user account to be used for authentication to the SQL Server. You will be presented with the SQL Database Server Windows Authentication screen. Enter the Domain the server is on (if it is attached to a domain). Enter the Windows Username for the account. Enter the Windows Password for the account. Click [Next] when you are ready to continue. The Installer will prompt you for configuration information related to your IIS Web Application. Select the desired IIS Web Server. Define a Virtual Directory Name or leave the default. Define the IIS Application Pool or leave the default. Select the IIS App Pool Identity or leave the default. Click [Next] to proceed.

Copyright NovaStor 2012 22
The Installer will attempt to validate the information and authentication credentials that were supplied. If successful, the installer will continue, and prompt for you to now install the Commerce Server application. Click the [Install] button to continue. During the installation you will be presented with a status window showing you the status of the installation. The Installer will show the progress bar as the installation progresses. Depending on the size of the database, the database migration process may take a bit of time.
Copyright NovaStor 2012 23
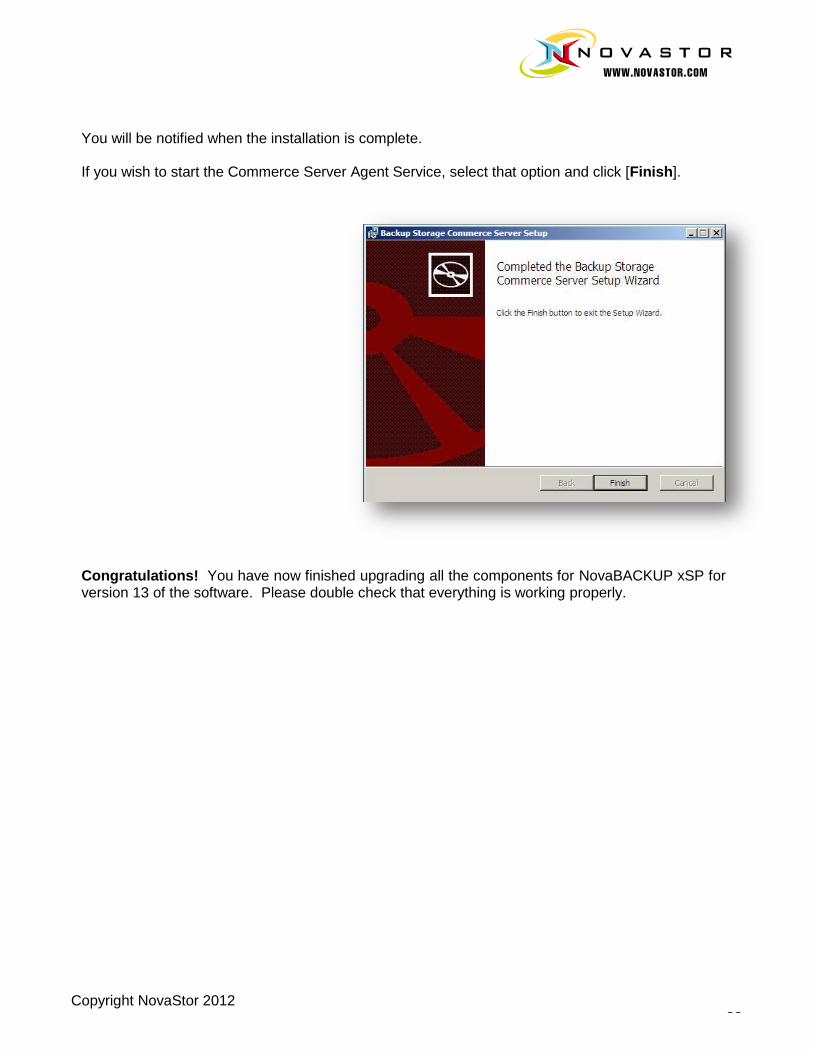
You will be notified when the installation is complete. If you wish to start the Commerce Server Agent Service, select that option and click [Finish]. Congratulations! You have now finished upgrading all the components for NovaBACKUP xSP for version 13 of the software. Please double check that everything is working properly.