Embed Size (px)
Citation preview

Salmon
NORTHERN WILDERNESS

From the background fabric,
cut one strip 1-5/8” wide.
Square off one end.
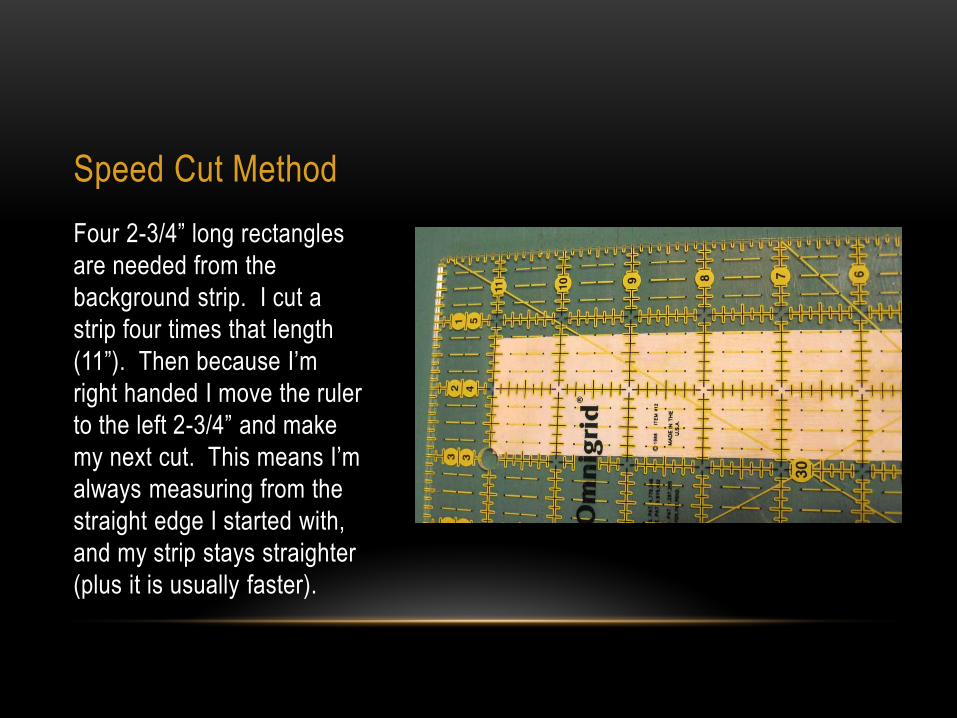
Speed Cut Method
Four 2-3/4” long rectangles
are needed from the
background strip. I cut a
strip four times that length
(11”). Then because I’m
right handed I move the ruler
to the left 2-3/4” and make
my next cut. This means I’m
always measuring from the
straight edge I started with,
and my strip stays straighter
(plus it is usually faster).
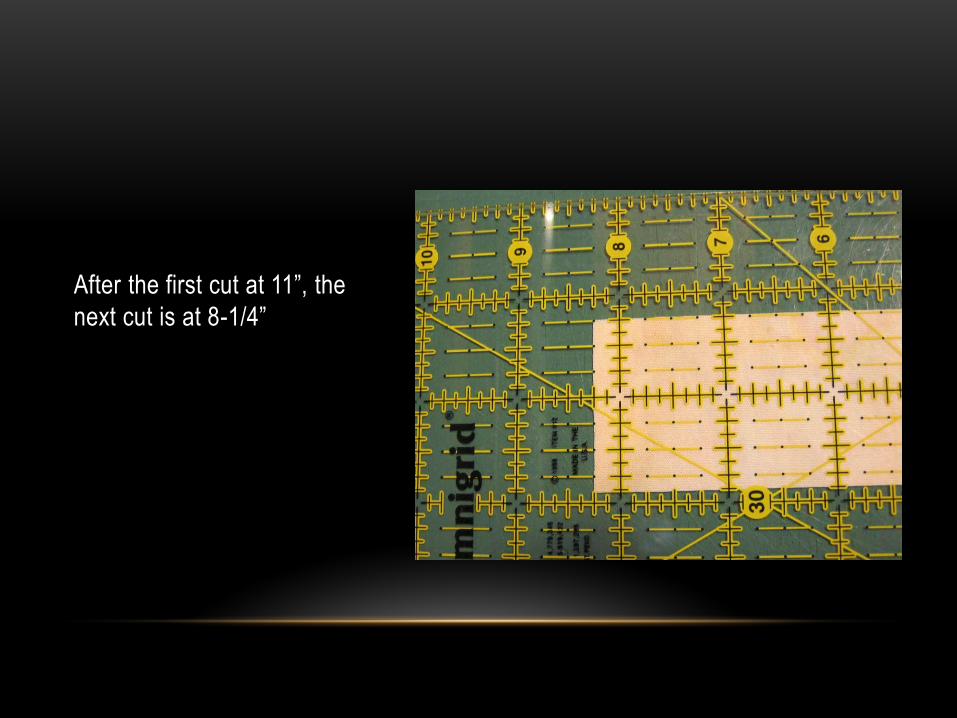
After the first cut at 11”, the
next cut is at 8-1/4”
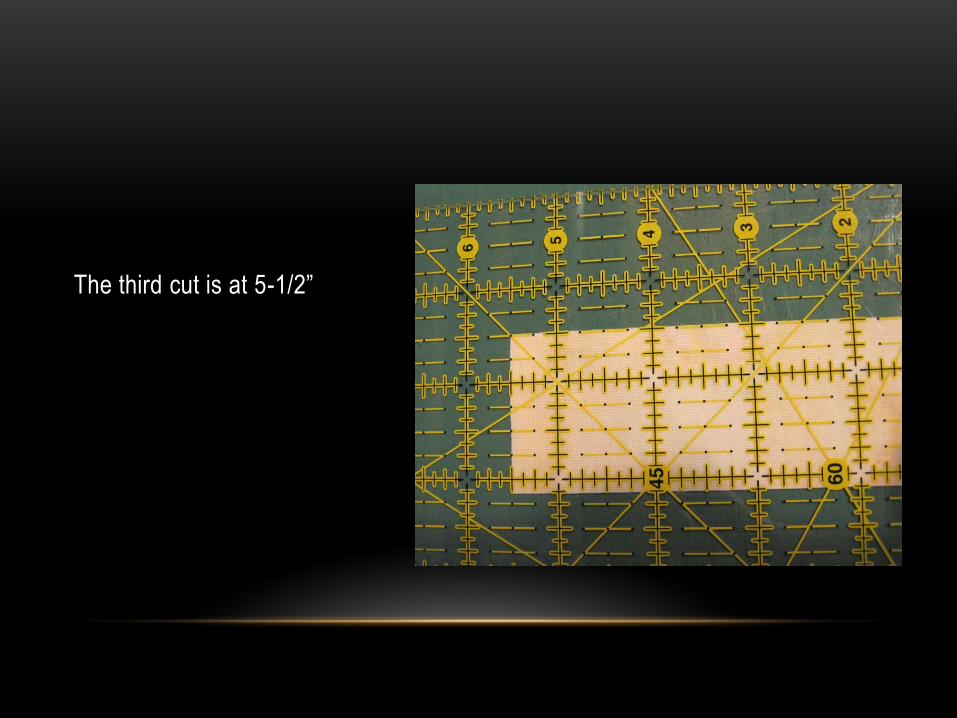
The third cut is at 5-1/2”
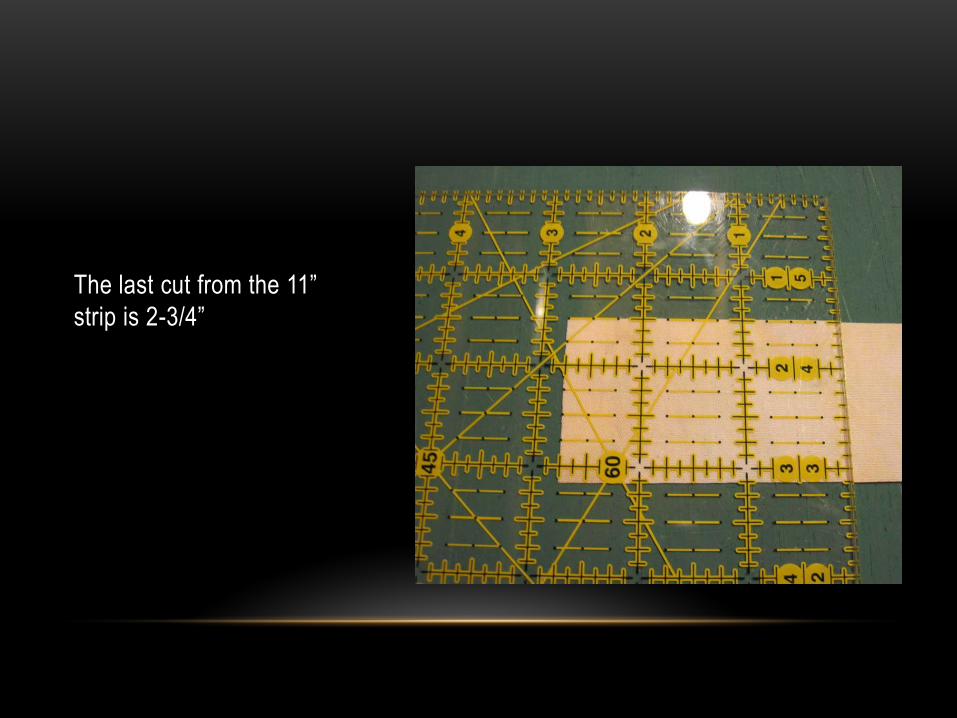
The last cut from the 11”
strip is 2-3/4”

And I’m left with four
rectangles that are 1-5/8” x
2-3/4”. I haven’t had to pick
them up and move them as
I’m cutting and all my edges
have stayed straighter.
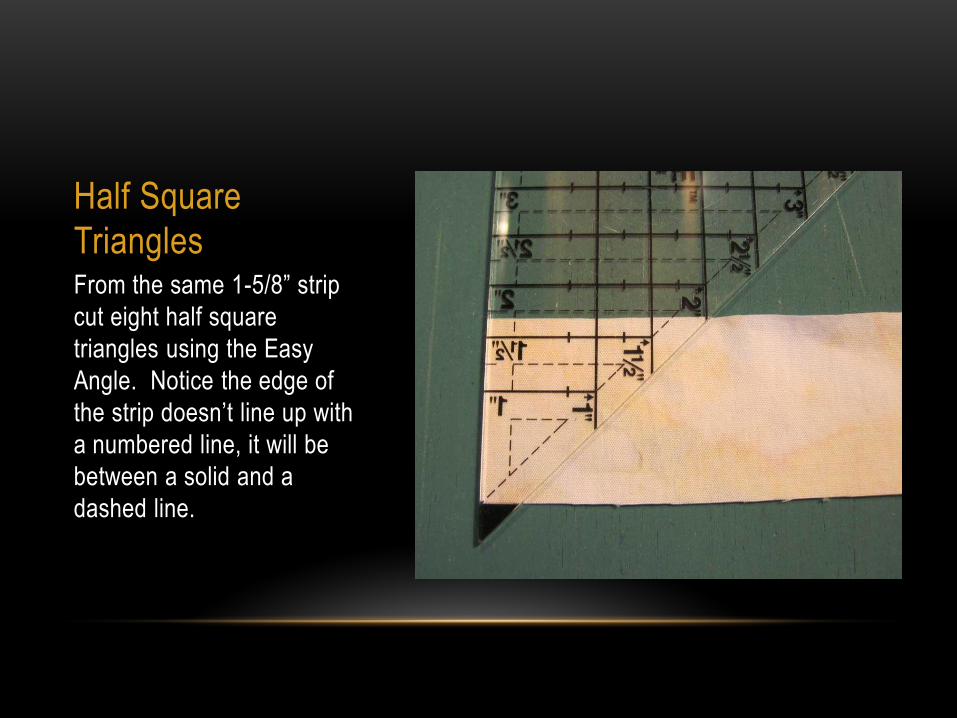
Half Square
Triangles From the same 1-5/8” strip
cut eight half square
triangles using the Easy
Angle. Notice the edge of
the strip doesn’t line up with
a numbered line, it will be
between a solid and a
dashed line.

Just keep rotating the ruler
180º to cut additional
triangles. Lining up with
either the cut off tip of the
ruler or the bottom of the
blacked out triangle tip and
between a solid and dashed
line.
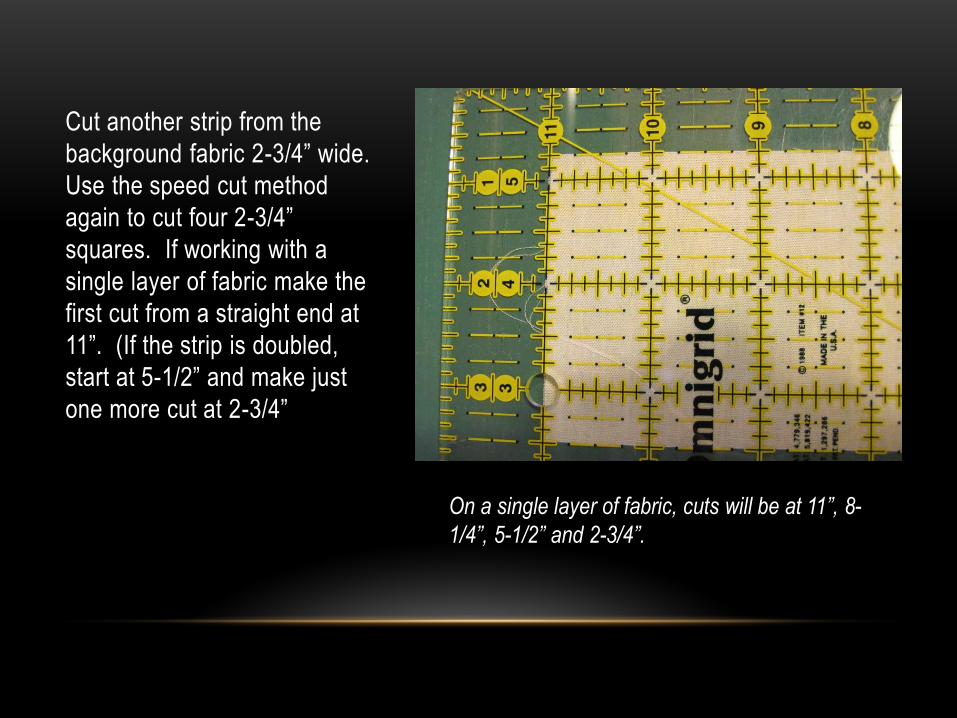
Cut another strip from the
background fabric 2-3/4” wide.
Use the speed cut method
again to cut four 2-3/4”
squares. If working with a
single layer of fabric make the
first cut from a straight end at
11”. (If the strip is doubled,
start at 5-1/2” and make just
one more cut at 2-3/4”
On a single layer of fabric, cuts will be at 11”, 8-
1/4”, 5-1/2” and 2-3/4”.

From the lighter blue fabric,
cut one square 2-3/4”.
In this picture I’ve
straightened one edge and
one end before cutting the
square. I’ll use that straight
edge to cut my next strip as
well.

From the same lighter blue
fabric cut a 1-5/8” strip. (13”
is exactly the length
needed.)
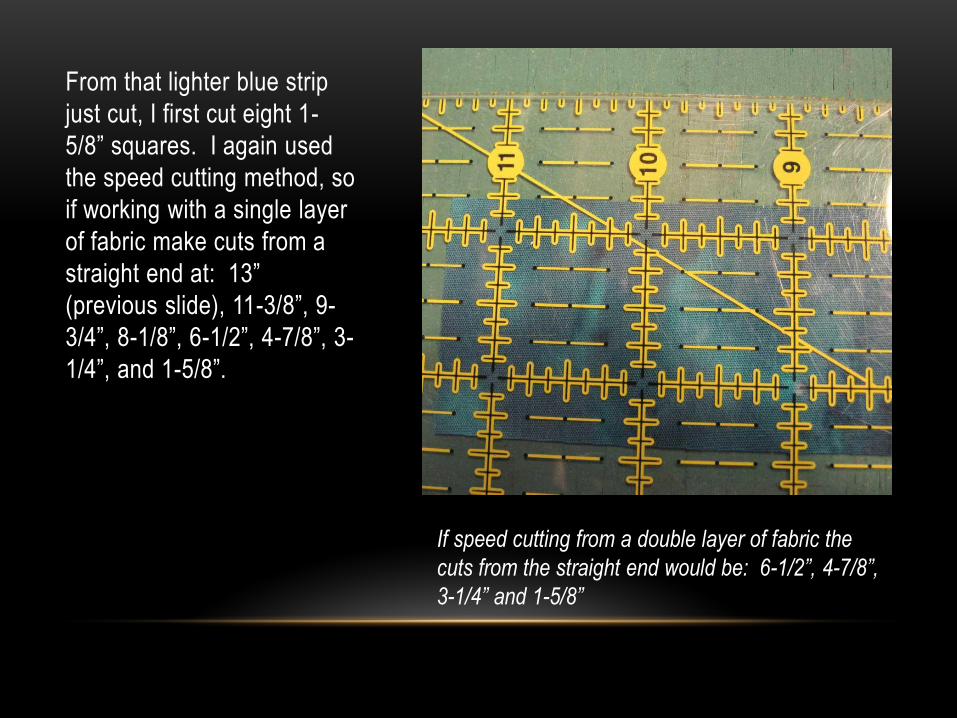
From that lighter blue strip
just cut, I first cut eight 1-
5/8” squares. I again used
the speed cutting method, so
if working with a single layer
of fabric make cuts from a
straight end at: 13”
(previous slide), 11-3/8”, 9-
3/4”, 8-1/8”, 6-1/2”, 4-7/8”, 3-
1/4”, and 1-5/8”.
If speed cutting from a double layer of fabric the
cuts from the straight end would be: 6-1/2”, 4-7/8”,
3-1/4” and 1-5/8”

From the dark blue fabric cut
a strip 2-3/4” wide (it doesn’t
need to be the width of the
fabric)

Use the Easy Angle to cut
four half square triangles.
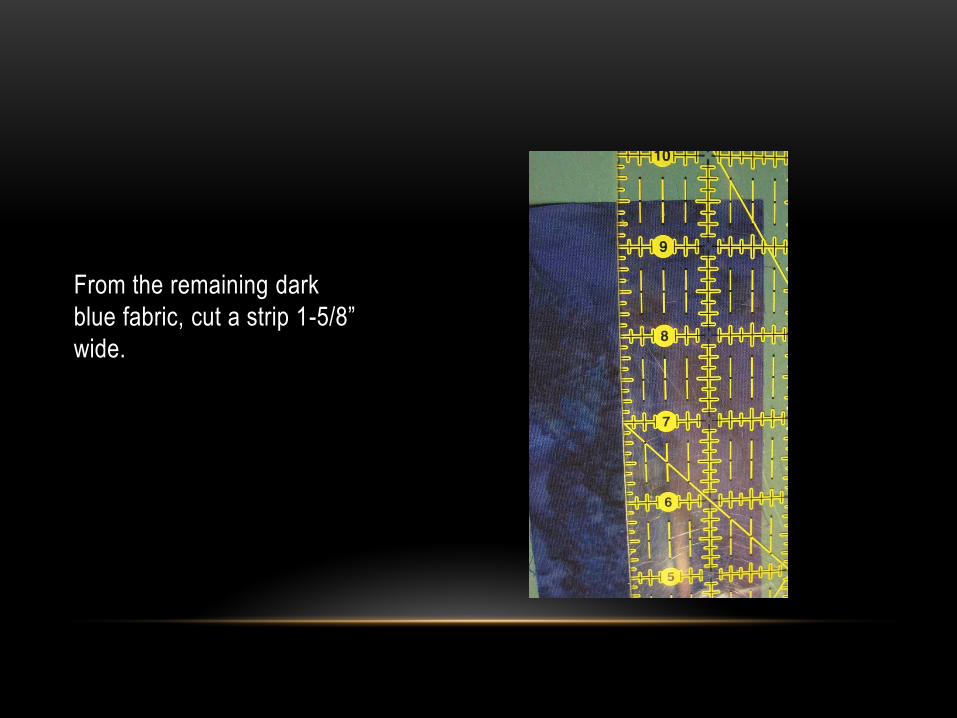
From the remaining dark
blue fabric, cut a strip 1-5/8”
wide.
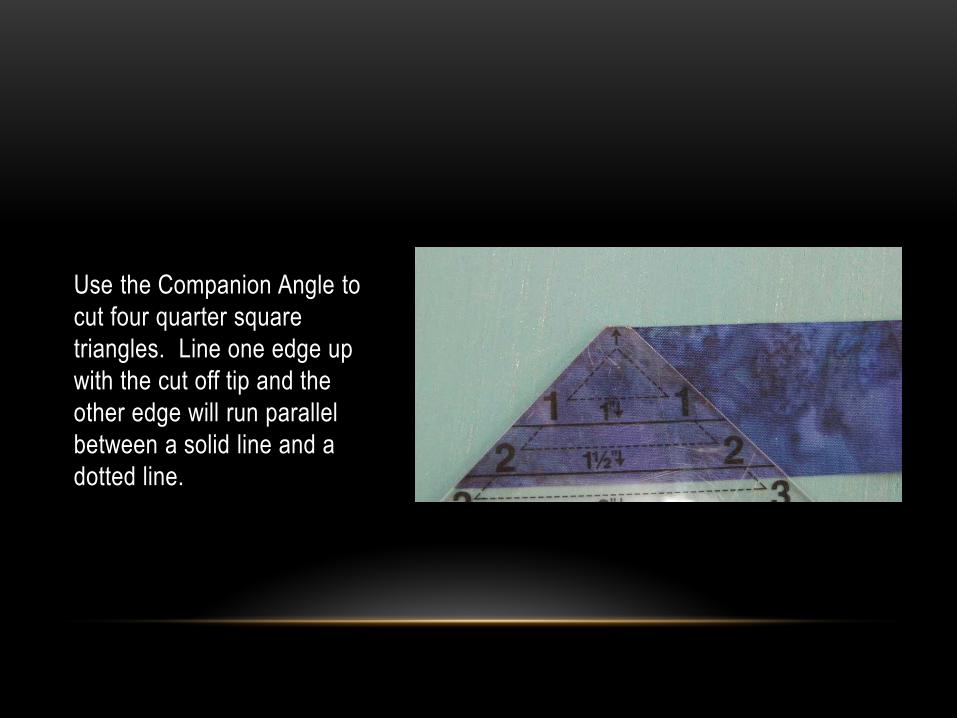
Use the Companion Angle to
cut four quarter square
triangles. Line one edge up
with the cut off tip and the
other edge will run parallel
between a solid line and a
dotted line.

Whew!
All the units for the pieced
block should be cut and
ready to be sewn together.

Flying Geese Units
Four flying geese units are
made from the dark blue
quarter square triangles
(Unit D) and the background
half square triangles (Unit C)
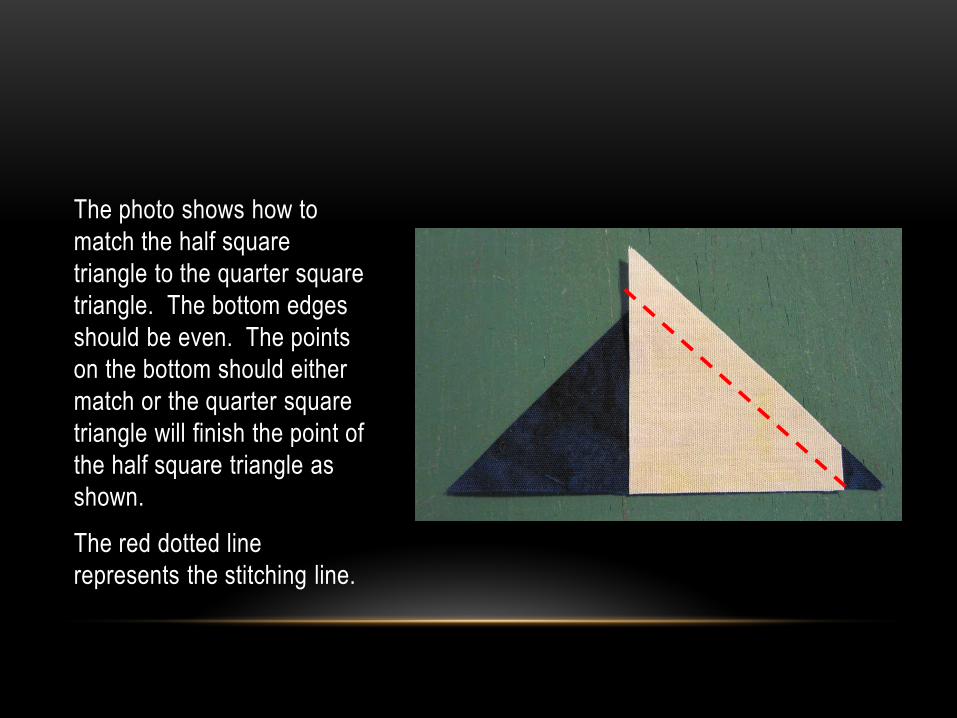
The photo shows how to
match the half square
triangle to the quarter square
triangle. The bottom edges
should be even. The points
on the bottom should either
match or the quarter square
triangle will finish the point of
the half square triangle as
shown.
The red dotted line
represents the stitching line.
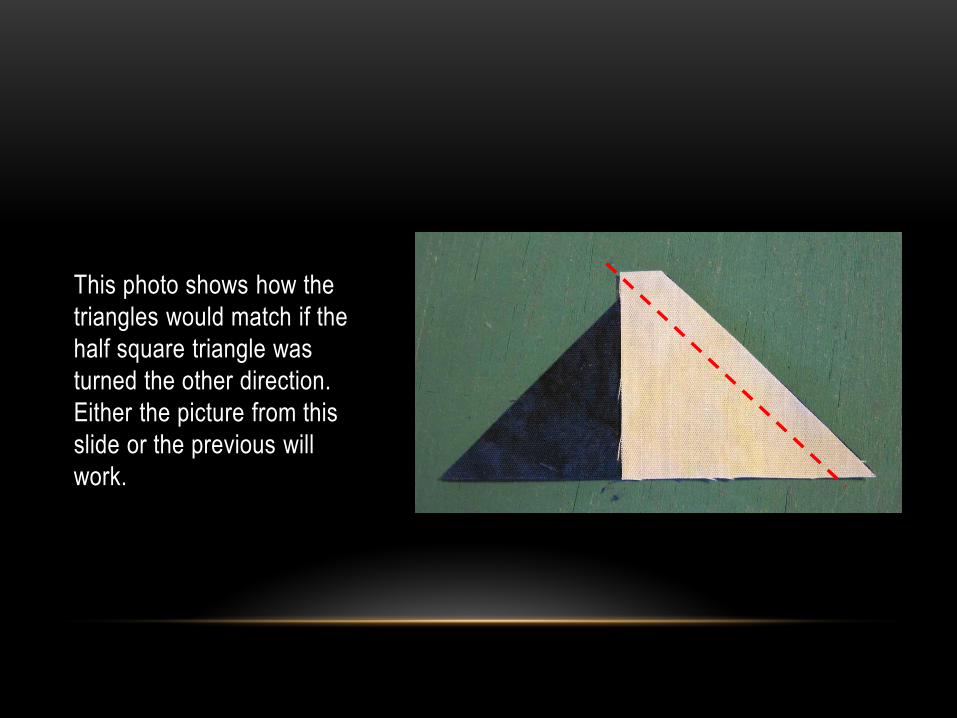
This photo shows how the
triangles would match if the
half square triangle was
turned the other direction.
Either the picture from this
slide or the previous will
work.

Stitch the seam and finger
press it toward the
background triangle.
Then add the half square
triangle to the other side.

Photo shows how to match
the half square triangle to
the quarter square triangle.
The half square triangle
could be flipped so the sharp
point goes off the top and
the point off the quarter
square triangle finishes the
point on the half square
triangle as shown 3 slides
ago.

Finger press seam toward
background piece. This is a
good time to trim off the dog
ears.
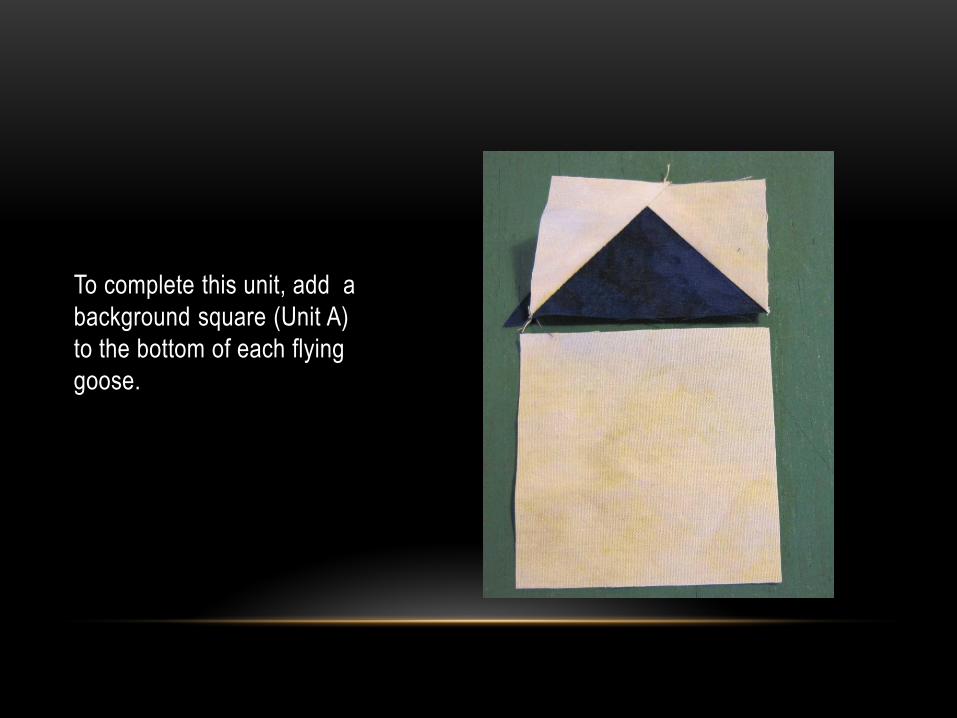
To complete this unit, add a
background square (Unit A)
to the bottom of each flying
goose.

The flying geese units
should be the same width as
the squares so the edges
can be matched. If they
aren’t quite the same, find
the centers and match
those.
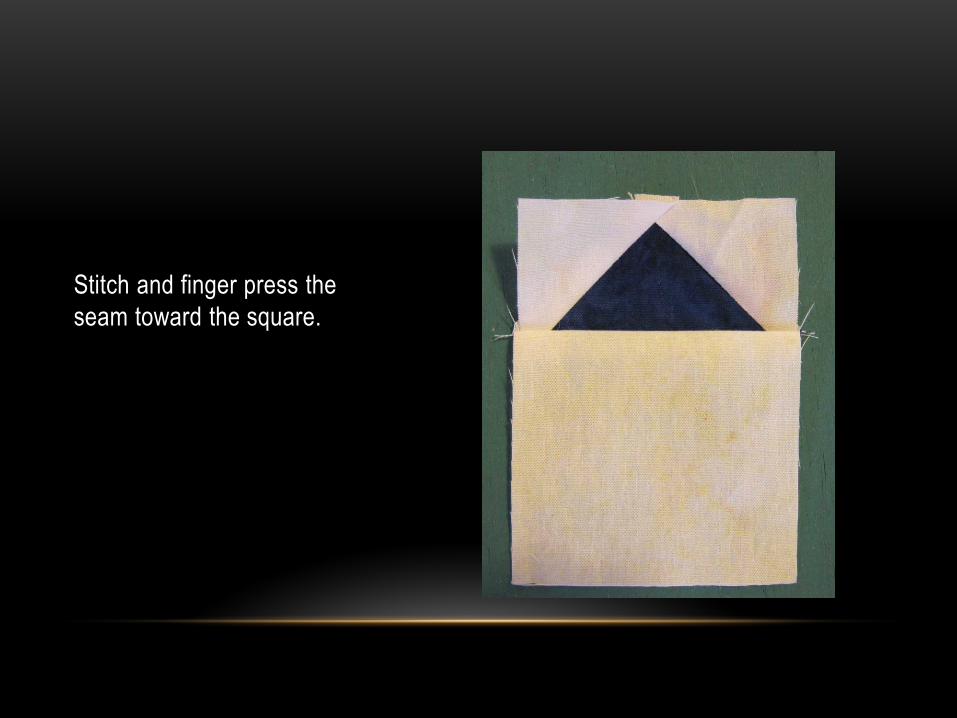
Stitch and finger press the
seam toward the square.

The next unit is the pieced
portion of the half square
triangle units. There will be
four of these units.

Match two edges and stitch.
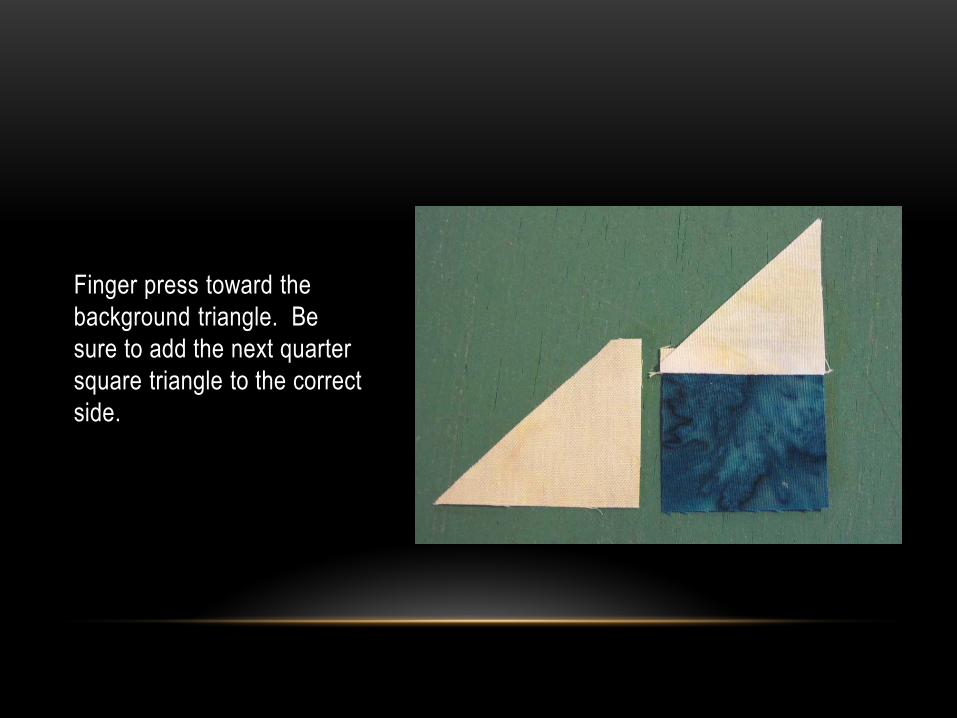
Finger press toward the
background triangle. Be
sure to add the next quarter
square triangle to the correct
side.

When right sides are
together this is how the unit
should look and where the
stitching line should be.

Finger press toward the
background triangle.

To finish the unit, add the
dark blue half square
triangle (Unit E).
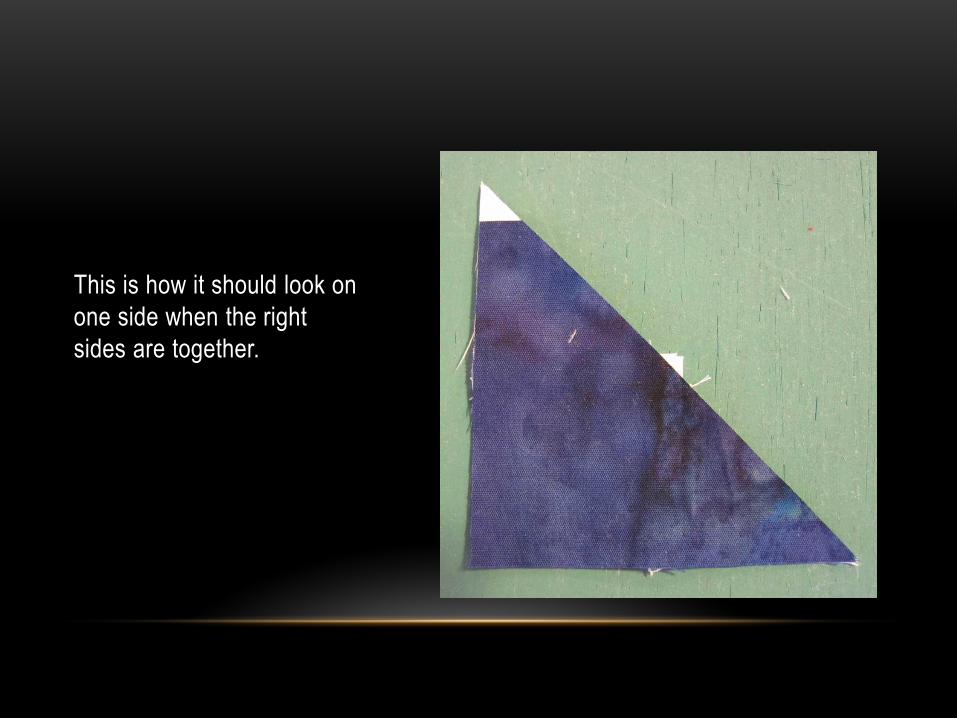
This is how it should look on
one side when the right
sides are together.
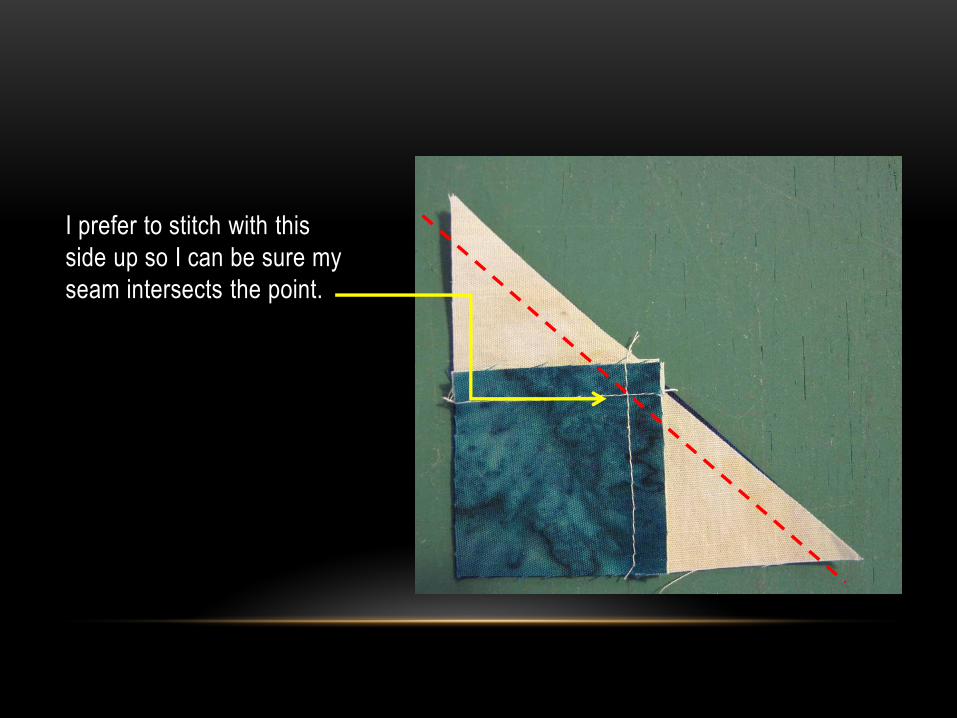
I prefer to stitch with this
side up so I can be sure my
seam intersects the point.

Finger press toward the
large dark triangle, and trim
dog ears.
My unit is more square than it looks in
the picture.
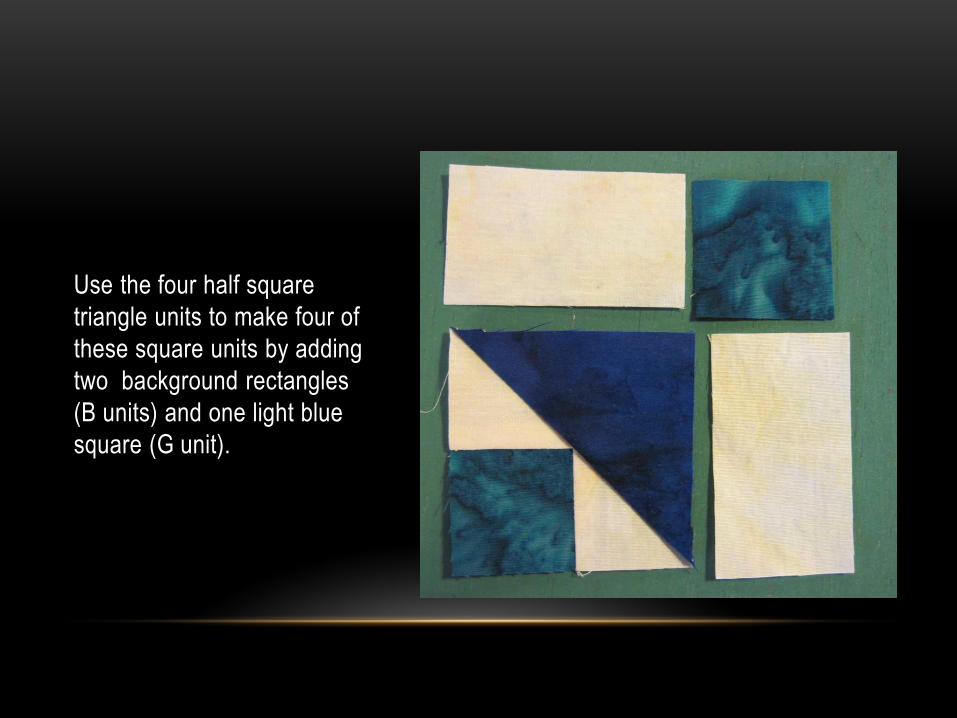
Use the four half square
triangle units to make four of
these square units by adding
two background rectangles
(B units) and one light blue
square (G unit).
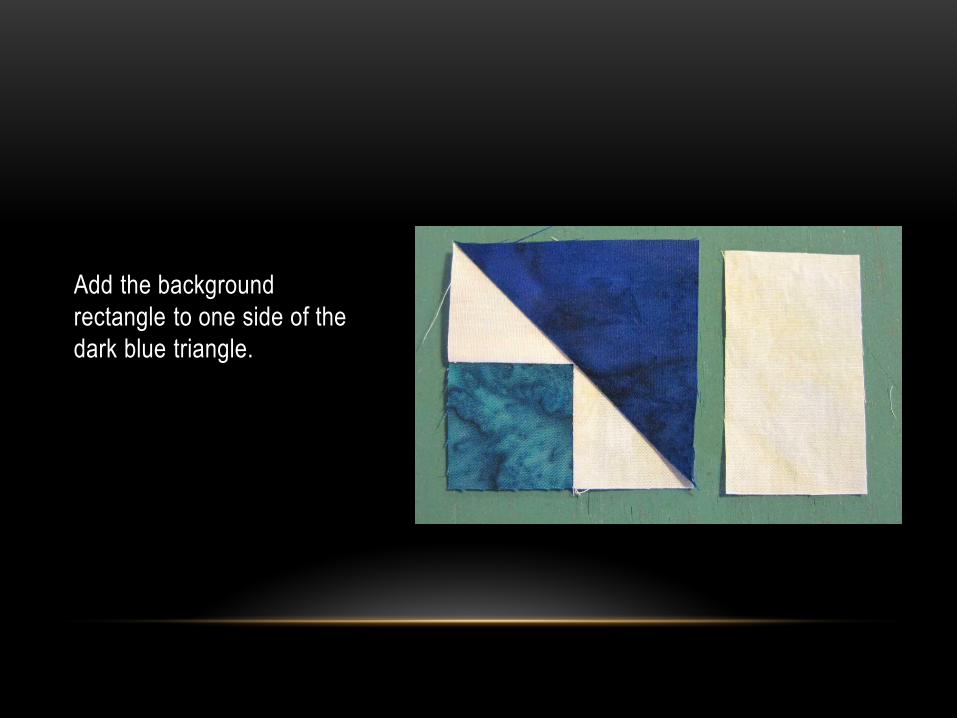
Add the background
rectangle to one side of the
dark blue triangle.

The length of the rectangle
should match the length of
the square.
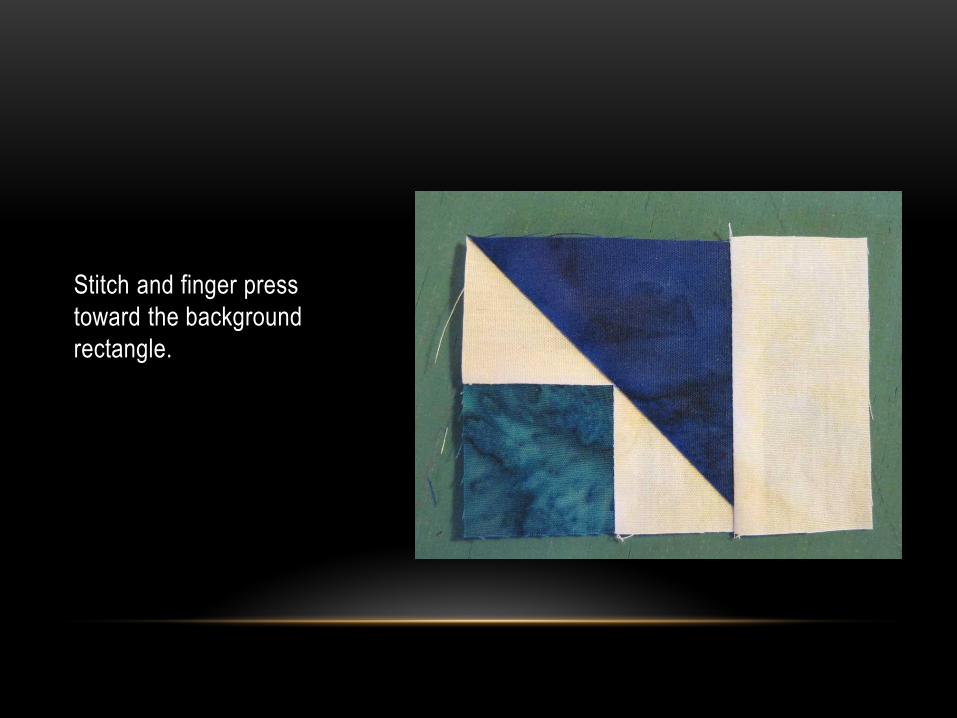
Stitch and finger press
toward the background
rectangle.

Stitch the light blue square
to the end of a rectangle.
Finger press toward the
background rectangle.
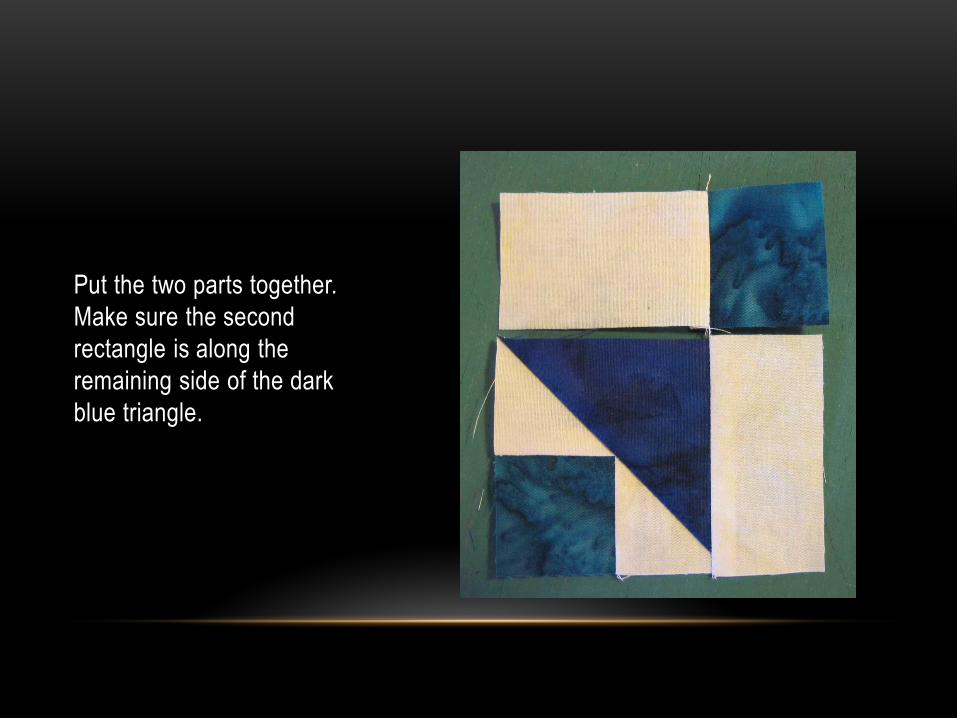
Put the two parts together.
Make sure the second
rectangle is along the
remaining side of the dark
blue triangle.

The seams in the
background rectangles are
finger pressed in opposite
directions so they should
nest together for stitching
and make pins unnecessary.

Finger press the seam away
from the dark blue triangle.
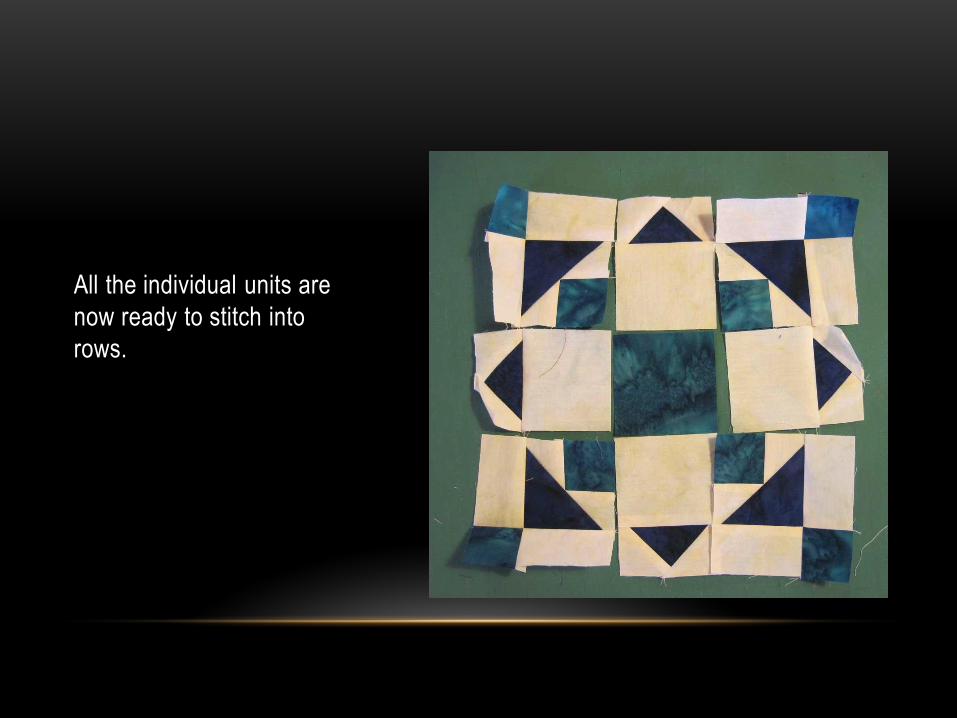
All the individual units are
now ready to stitch into
rows.
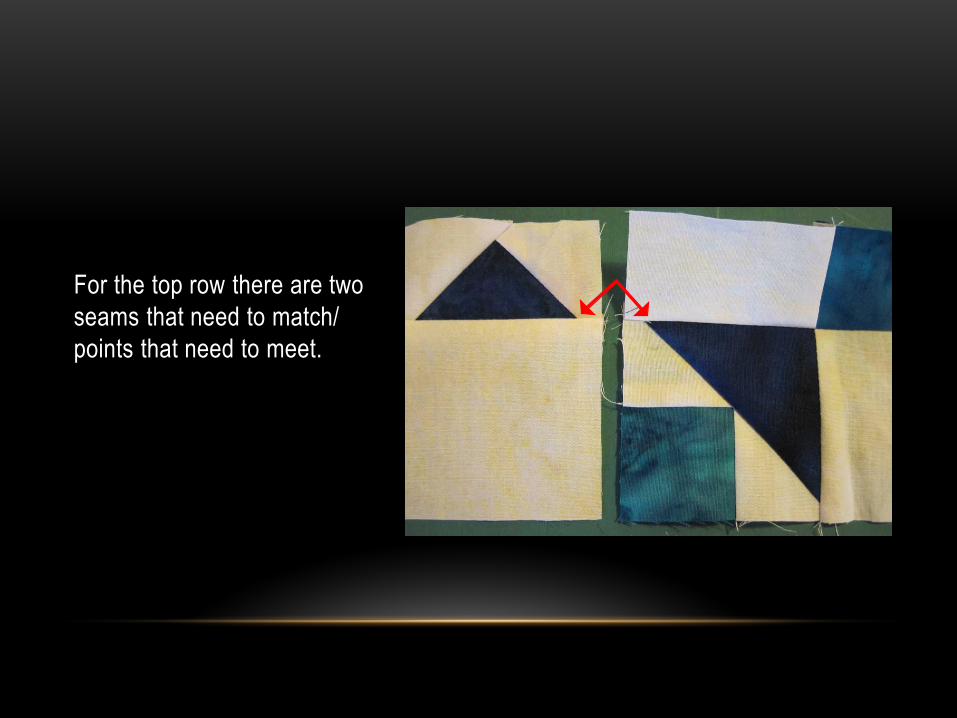
For the top row there are two
seams that need to match/
points that need to meet.
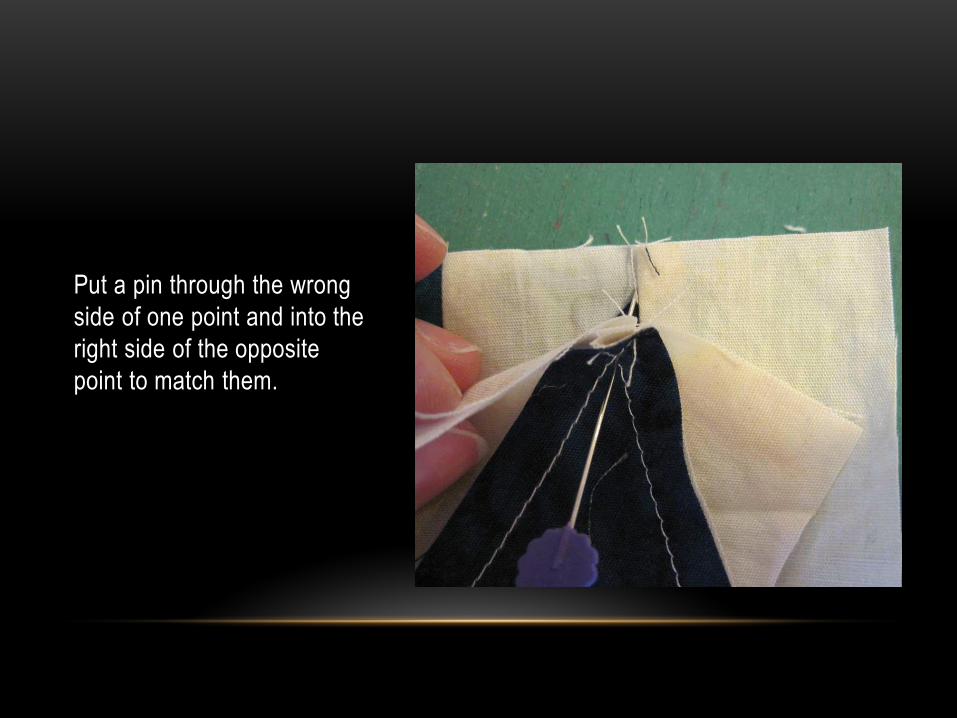
Put a pin through the wrong
side of one point and into the
right side of the opposite
point to match them.

With the first pin going
vertically through the points,
pin the layers together with
pins on both sides of where
the points intersect.
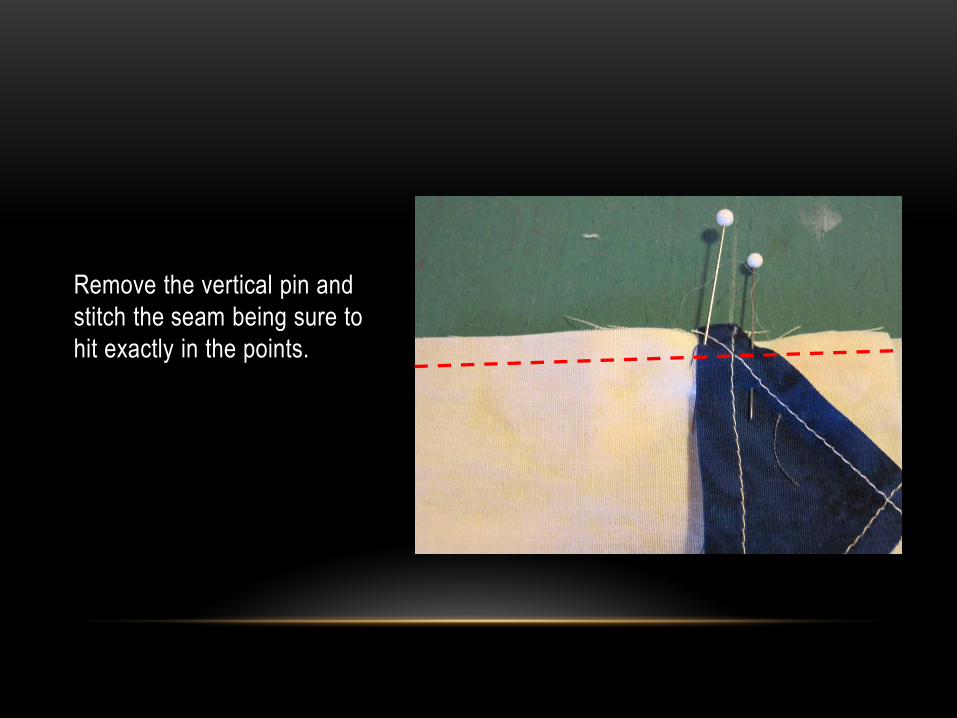
Remove the vertical pin and
stitch the seam being sure to
hit exactly in the points.

After sewing together the
three individual rows, finger
press the seams in the top
and bottom rows toward the
center and in the middle row
away from the center.
Stitch the rows together,
there will be the same points
to match as shown in the
last step, plus the seams
that will nest at the center of
the block.
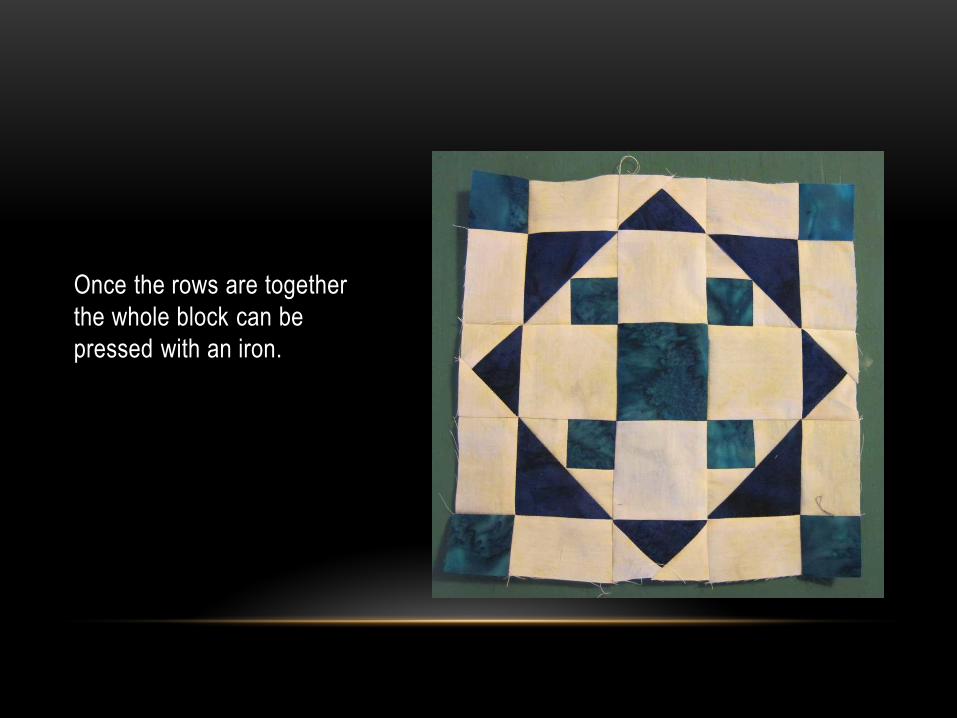
Once the rows are together
the whole block can be
pressed with an iron.

This photo shows the back
of the pressed block.
Add the block borders as
shown in a previous
presentation.

When working with the
applique pieces, don’t be
concerned when you can’t
find #14 and #20. They
don’t exist, just skip them.

The Salmon bodies are
numbered with #6, #6A, #11,
#11A, #17 and #17A. The
numbers without the A are
applied first. They have
underlap added to them
while the piece with the A’s
are the exact size.

You may notice that fins #12
and #18 are applied after the
body so you can’t see the
outline through the applique
pressing sheet. I traced the
fin outline onto the paper I
removed from the fusible
web on the body piece and
used it as an overlay.

Here the fin has been
slipped under the overlay
and positioned. It can now
be fused.

After the overlay is removed.
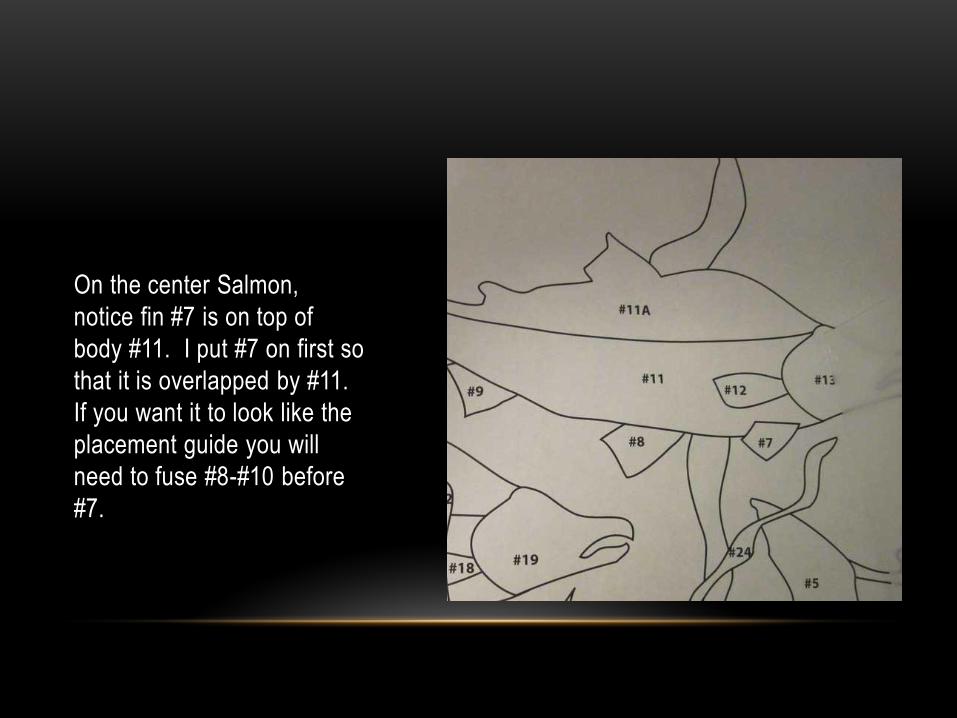
On the center Salmon,
notice fin #7 is on top of
body #11. I put #7 on first so
that it is overlapped by #11.
If you want it to look like the
placement guide you will
need to fuse #8-#10 before
#7.