Embed Size (px)
Citation preview

Nokia 3720 classic User Guide
4444444Issue 1
CyanCyan MagentaMagentaYellowYellow BlackBlack
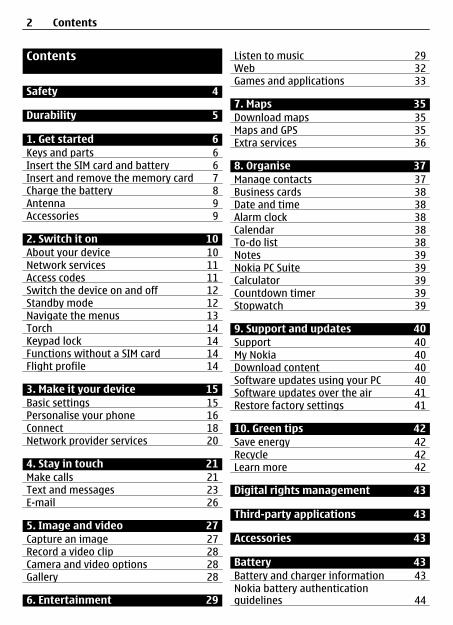
Contents
Safety 4
Durability 5
1. Get started 6Keys and parts 6Insert the SIM card and battery 6Insert and remove the memory card 7Charge the battery 8Antenna 9Accessories 9
2. Switch it on 10About your device 10Network services 11Access codes 11Switch the device on and off 12Standby mode 12Navigate the menus 13Torch 14Keypad lock 14Functions without a SIM card 14Flight profile 14
3. Make it your device 15Basic settings 15Personalise your phone 16Connect 18Network provider services 20
4. Stay in touch 21Make calls 21Text and messages 23E-mail 26
5. Image and video 27Capture an image 27Record a video clip 28Camera and video options 28Gallery 28
6. Entertainment 29
Listen to music 29Web 32Games and applications 33
7. Maps 35Download maps 35Maps and GPS 35Extra services 36
8. Organise 37Manage contacts 37Business cards 38Date and time 38Alarm clock 38Calendar 38To-do list 38Notes 39Nokia PC Suite 39Calculator 39Countdown timer 39Stopwatch 39
9. Support and updates 40Support 40My Nokia 40Download content 40Software updates using your PC 40Software updates over the air 41Restore factory settings 41
10. Green tips 42Save energy 42Recycle 42Learn more 42
Digital rights management 43
Third-party applications 43
Accessories 43
Battery 43Battery and charger information 43Nokia battery authenticationguidelines 44
2 Contents
CyanCyan MagentaMagentaYellowYellow BlackBlack
Care and maintenance 44Recycle 45
Additional safety information 45Magnets and magnetic fields 45Small children 45Operating environment 45Medical devices 45Vehicles 46Potentially explosive environments 46Emergency calls 46Certification information (SAR) 46
Index 48
Contents 3
CyanCyan MagentaMagentaYellowYellow BlackBlack
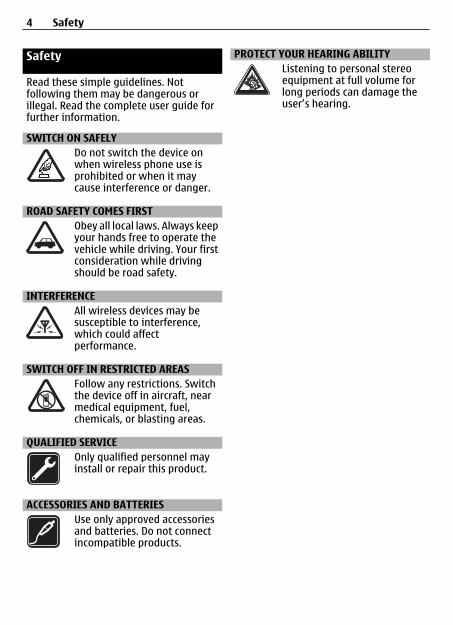
Safety
Read these simple guidelines. Notfollowing them may be dangerous orillegal. Read the complete user guide forfurther information.
SWITCH ON SAFELYDo not switch the device onwhen wireless phone use isprohibited or when it maycause interference or danger.
ROAD SAFETY COMES FIRSTObey all local laws. Always keepyour hands free to operate thevehicle while driving. Your firstconsideration while drivingshould be road safety.
INTERFERENCEAll wireless devices may besusceptible to interference,which could affectperformance.
SWITCH OFF IN RESTRICTED AREASFollow any restrictions. Switchthe device off in aircraft, nearmedical equipment, fuel,chemicals, or blasting areas.
QUALIFIED SERVICEOnly qualified personnel mayinstall or repair this product.
ACCESSORIES AND BATTERIESUse only approved accessoriesand batteries. Do not connectincompatible products.
PROTECT YOUR HEARING ABILITYListening to personal stereoequipment at full volume forlong periods can damage theuser’s hearing.
4 Safety
CyanCyan MagentaMagentaYellowYellow BlackBlack
Durability
Your device is made for rough ambientconditions. It is tested and certifiedaccording to the international standardIEC 60529/level IP54 regarding water anddust protection and according to IEC60068-2-27 regarding shock protection.
Accessories to be used with this device donot meet the same durability, dust-resistance, or water-resistancespecifications as the device itself. Forexample, all the chargers are only to beused in dry conditions. They should neverbe used when damp or wet.
Using your device in wet or dustyconditions
• Water-resistance means resistanceagainst clean freshwater only. Do notexpose the device to any other type ofliquid. For example, do not expose thedevice to ocean water, drinks, mud, orliquid chemicals or detergents.
• Do not submerge the device in water.• Do not expose the device to hot water.• If the device has been exposed to
water, wipe it off with a dry cloth. If ithas been exposed to salt water orother liquid, splash immediatelysome clean freshwater on the device.The device must be carefully wipeddry.
• Never connect anything to the bottomconnectors if they are dusty, wet ordamp. For example, never charge thedevice when the bottom connectorsare wet or damp. Never try to connectanything to the connectors by usingforce as this may break the device.
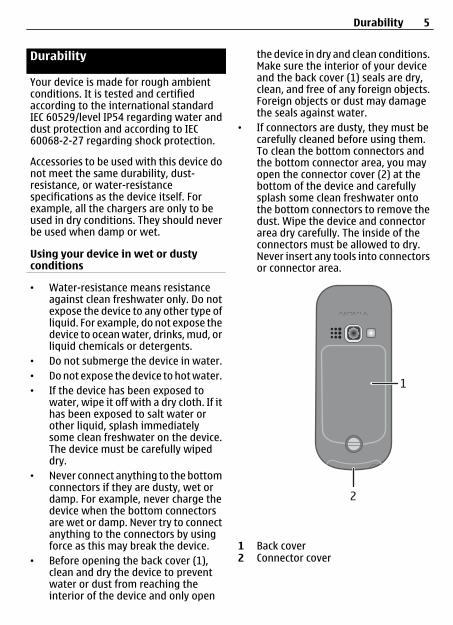
• Before opening the back cover (1),clean and dry the device to preventwater or dust from reaching theinterior of the device and only open
the device in dry and clean conditions.Make sure the interior of your deviceand the back cover (1) seals are dry,clean, and free of any foreign objects.Foreign objects or dust may damagethe seals against water.
• If connectors are dusty, they must becarefully cleaned before using them.To clean the bottom connectors andthe bottom connector area, you mayopen the connector cover (2) at thebottom of the device and carefullysplash some clean freshwater ontothe bottom connectors to remove thedust. Wipe the device and connectorarea dry carefully. The inside of theconnectors must be allowed to dry.Never insert any tools into connectorsor connector area.
1 Back cover2 Connector cover
Durability 5
CyanCyan MagentaMagentaYellowYellow BlackBlack
Want to get your deviceready to use? Rely onrobustness and durabilityeven if ambient conditionsare rough.1. Get started
Get to know your device, insert thebattery, SIM card, and memory card, andlearn some important information.
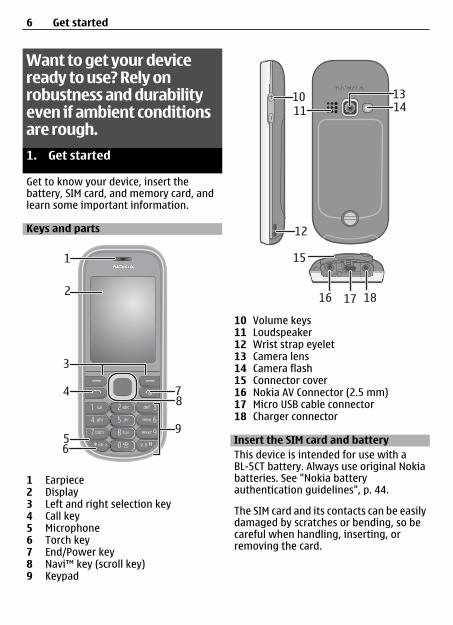
Keys and parts
1 Earpiece2 Display3 Left and right selection key4 Call key5 Microphone6 Torch key7 End/Power key8 Navi™ key (scroll key)9 Keypad
10 Volume keys11 Loudspeaker12 Wrist strap eyelet13 Camera lens14 Camera flash15 Connector cover16 Nokia AV Connector (2.5 mm)17 Micro USB cable connector18 Charger connector
Insert the SIM card and batteryThis device is intended for use with aBL-5CT battery. Always use original Nokiabatteries. See "Nokia batteryauthentication guidelines", p. 44.
The SIM card and its contacts can be easilydamaged by scratches or bending, so becareful when handling, inserting, orremoving the card.
6 Get started
CyanCyan MagentaMagentaYellowYellow BlackBlack

1
To release and replace the back cover, turnthe screw with a coin or screwdriver.
1 To release the back cover, turn thescrew anticlockwise as far as it goes(1, 2). Do not screw too tightly.
2 Remove the back cover and battery (3,4).
3 Open the SIM card holder. Insert theSIM card into the holder with the
contact surface facing down (5). Closethe SIM card holder.
4 Line up the battery contacts, andinsert the battery (6). Replace theback cover (7). The back cover fitstightly. Press the back cover downuntil it locks into place.
5 Ensure that the back cover is properlyin place. Lock the back cover byturning the screw clockwise as far asit goes (8, 9). Do not screw too tightly.
Insert and remove the memory card
Get started 7
CyanCyan MagentaMagentaYellowYellow BlackBlack
Use only compatible microSD cardsapproved by Nokia for use with thisdevice. Nokia uses approved industrystandards for memory cards, but somebrands may not be fully compatible withthis device. Incompatible cards maydamage the card and the device andcorrupt data stored on the card.
Your device supports microSD cards witha capacity of up to 8 GB.
The size of a single file must not exceed 2GB.
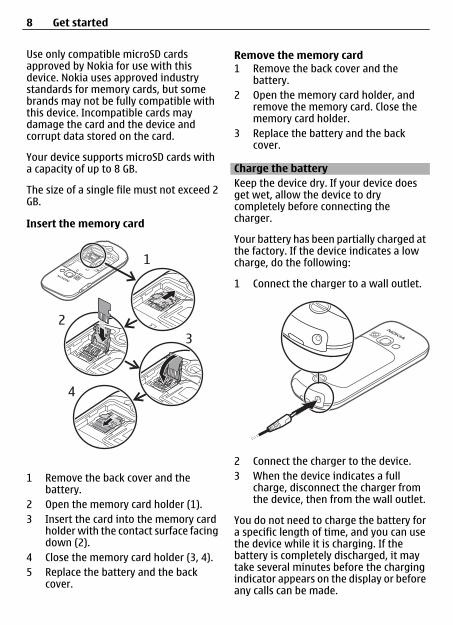
Insert the memory card
1 Remove the back cover and thebattery.
2 Open the memory card holder (1).3 Insert the card into the memory card
holder with the contact surface facingdown (2).
4 Close the memory card holder (3, 4).5 Replace the battery and the back
cover.
Remove the memory card1 Remove the back cover and the
battery.2 Open the memory card holder, and
remove the memory card. Close thememory card holder.
3 Replace the battery and the backcover.
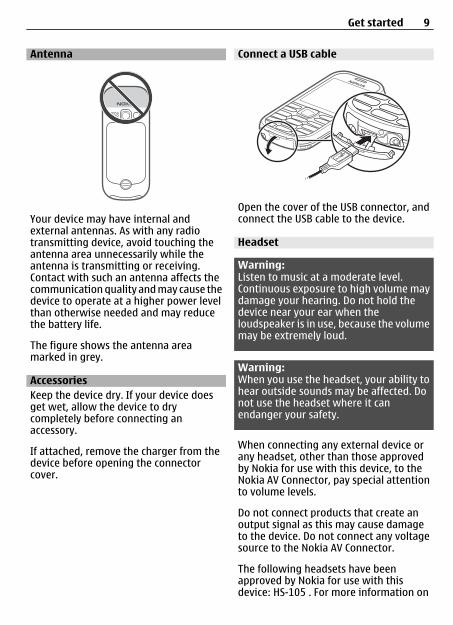
Charge the batteryKeep the device dry. If your device doesget wet, allow the device to drycompletely before connecting thecharger.
Your battery has been partially charged atthe factory. If the device indicates a lowcharge, do the following:
1 Connect the charger to a wall outlet.
2 Connect the charger to the device.3 When the device indicates a full
charge, disconnect the charger fromthe device, then from the wall outlet.
You do not need to charge the battery fora specific length of time, and you can usethe device while it is charging. If thebattery is completely discharged, it maytake several minutes before the chargingindicator appears on the display or beforeany calls can be made.
8 Get started
CyanCyan MagentaMagentaYellowYellow BlackBlack
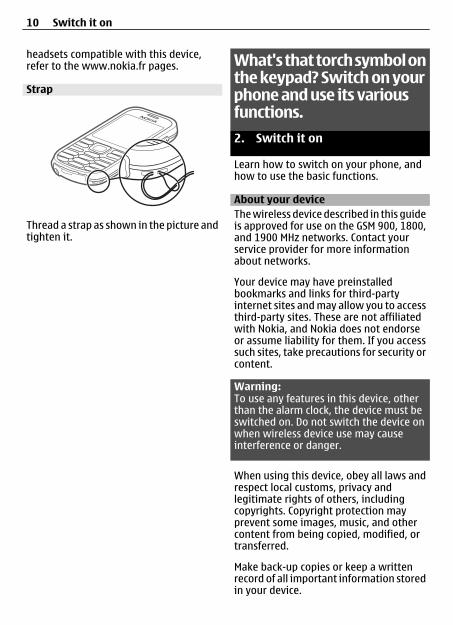
Antenna
Your device may have internal andexternal antennas. As with any radiotransmitting device, avoid touching theantenna area unnecessarily while theantenna is transmitting or receiving.Contact with such an antenna affects thecommunication quality and may cause thedevice to operate at a higher power levelthan otherwise needed and may reducethe battery life.
The figure shows the antenna areamarked in grey.
AccessoriesKeep the device dry. If your device doesget wet, allow the device to drycompletely before connecting anaccessory.
If attached, remove the charger from thedevice before opening the connectorcover.
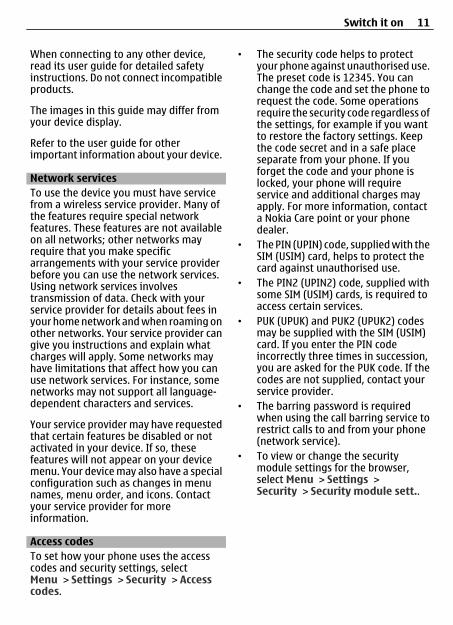
Connect a USB cable
Open the cover of the USB connector, andconnect the USB cable to the device.
Headset
Warning:Listen to music at a moderate level.Continuous exposure to high volume maydamage your hearing. Do not hold thedevice near your ear when theloudspeaker is in use, because the volumemay be extremely loud.
Warning:When you use the headset, your ability tohear outside sounds may be affected. Donot use the headset where it canendanger your safety.
When connecting any external device orany headset, other than those approvedby Nokia for use with this device, to theNokia AV Connector, pay special attentionto volume levels.
Do not connect products that create anoutput signal as this may cause damageto the device. Do not connect any voltagesource to the Nokia AV Connector.
The following headsets have beenapproved by Nokia for use with thisdevice: HS-105 . For more information on
Get started 9
CyanCyan MagentaMagentaYellowYellow BlackBlack
headsets compatible with this device,refer to the www.nokia.fr pages.
Strap
Thread a strap as shown in the picture andtighten it.
What's that torch symbol onthe keypad? Switch on yourphone and use its variousfunctions.2. Switch it on
Learn how to switch on your phone, andhow to use the basic functions.
About your deviceThe wireless device described in this guideis approved for use on the GSM 900, 1800,and 1900 MHz networks. Contact yourservice provider for more informationabout networks.
Your device may have preinstalledbookmarks and links for third-partyinternet sites and may allow you to accessthird-party sites. These are not affiliatedwith Nokia, and Nokia does not endorseor assume liability for them. If you accesssuch sites, take precautions for security orcontent.
Warning:To use any features in this device, otherthan the alarm clock, the device must beswitched on. Do not switch the device onwhen wireless device use may causeinterference or danger.
When using this device, obey all laws andrespect local customs, privacy andlegitimate rights of others, includingcopyrights. Copyright protection mayprevent some images, music, and othercontent from being copied, modified, ortransferred.
Make back-up copies or keep a writtenrecord of all important information storedin your device.
10 Switch it on
CyanCyan MagentaMagentaYellowYellow BlackBlack
When connecting to any other device,read its user guide for detailed safetyinstructions. Do not connect incompatibleproducts.
The images in this guide may differ fromyour device display.
Refer to the user guide for otherimportant information about your device.
Network servicesTo use the device you must have servicefrom a wireless service provider. Many ofthe features require special networkfeatures. These features are not availableon all networks; other networks mayrequire that you make specificarrangements with your service providerbefore you can use the network services.Using network services involvestransmission of data. Check with yourservice provider for details about fees inyour home network and when roaming onother networks. Your service provider cangive you instructions and explain whatcharges will apply. Some networks mayhave limitations that affect how you canuse network services. For instance, somenetworks may not support all language-dependent characters and services.
Your service provider may have requestedthat certain features be disabled or notactivated in your device. If so, thesefeatures will not appear on your devicemenu. Your device may also have a specialconfiguration such as changes in menunames, menu order, and icons. Contactyour service provider for moreinformation.
Access codesTo set how your phone uses the accesscodes and security settings, selectMenu > Settings > Security > Accesscodes.
• The security code helps to protectyour phone against unauthorised use.The preset code is 12345. You canchange the code and set the phone torequest the code. Some operationsrequire the security code regardless ofthe settings, for example if you wantto restore the factory settings. Keepthe code secret and in a safe placeseparate from your phone. If youforget the code and your phone islocked, your phone will requireservice and additional charges mayapply. For more information, contacta Nokia Care point or your phonedealer.
• The PIN (UPIN) code, supplied with theSIM (USIM) card, helps to protect thecard against unauthorised use.
• The PIN2 (UPIN2) code, supplied withsome SIM (USIM) cards, is required toaccess certain services.
• PUK (UPUK) and PUK2 (UPUK2) codesmay be supplied with the SIM (USIM)card. If you enter the PIN codeincorrectly three times in succession,you are asked for the PUK code. If thecodes are not supplied, contact yourservice provider.
• The barring password is requiredwhen using the call barring service torestrict calls to and from your phone(network service).
• To view or change the securitymodule settings for the browser,select Menu > Settings >Security > Security module sett..
Switch it on 11
CyanCyan MagentaMagentaYellowYellow BlackBlack
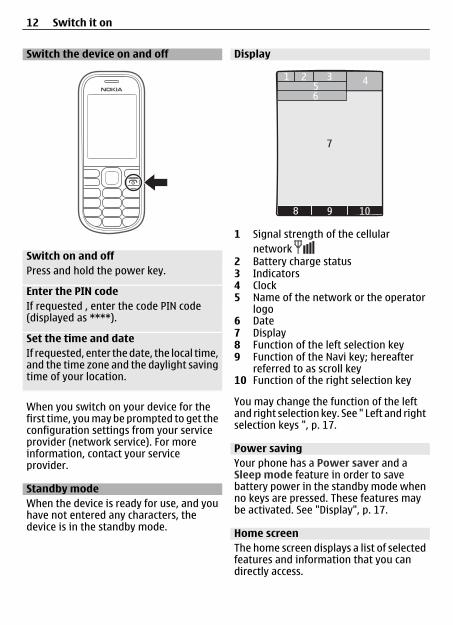
Switch the device on and off
Switch on and offPress and hold the power key.
Enter the PIN codeIf requested , enter the code PIN code(displayed as ****).
Set the time and dateIf requested, enter the date, the local time,and the time zone and the daylight savingtime of your location.
When you switch on your device for thefirst time, you may be prompted to get theconfiguration settings from your serviceprovider (network service). For moreinformation, contact your serviceprovider.
Standby modeWhen the device is ready for use, and youhave not entered any characters, thedevice is in the standby mode.
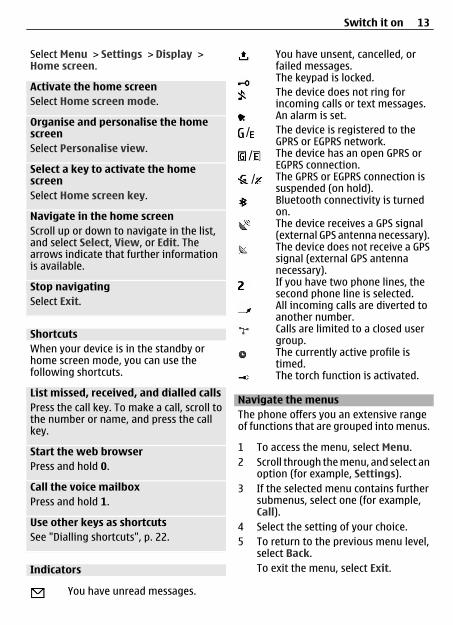
Display
7
6
10
1 Signal strength of the cellularnetwork
2 Battery charge status3 Indicators4 Clock5 Name of the network or the operator
logo6 Date7 Display8 Function of the left selection key9 Function of the Navi key; hereafter
referred to as scroll key10 Function of the right selection key
You may change the function of the leftand right selection key. See " Left and rightselection keys ", p. 17.
Power savingYour phone has a Power saver and aSleep mode feature in order to savebattery power in the standby mode whenno keys are pressed. These features maybe activated. See "Display", p. 17.
Home screenThe home screen displays a list of selectedfeatures and information that you candirectly access.
12 Switch it on
CyanCyan MagentaMagentaYellowYellow BlackBlack
Select Menu > Settings > Display >Home screen.
Activate the home screenSelect Home screen mode.
Organise and personalise the homescreenSelect Personalise view.
Select a key to activate the homescreenSelect Home screen key.
Navigate in the home screenScroll up or down to navigate in the list,and select Select, View, or Edit. Thearrows indicate that further informationis available.
Stop navigatingSelect Exit.
ShortcutsWhen your device is in the standby orhome screen mode, you can use thefollowing shortcuts.
List missed, received, and dialled callsPress the call key. To make a call, scroll tothe number or name, and press the callkey.
Start the web browserPress and hold 0.
Call the voice mailboxPress and hold 1.
Use other keys as shortcutsSee "Dialling shortcuts", p. 22.
Indicators
You have unread messages.
You have unsent, cancelled, orfailed messages.The keypad is locked.The device does not ring forincoming calls or text messages.An alarm is set.
/ The device is registered to theGPRS or EGPRS network.
/ The device has an open GPRS orEGPRS connection.
/ The GPRS or EGPRS connection issuspended (on hold).Bluetooth connectivity is turnedon.The device receives a GPS signal(external GPS antenna necessary).The device does not receive a GPSsignal (external GPS antennanecessary).If you have two phone lines, thesecond phone line is selected.All incoming calls are diverted toanother number.Calls are limited to a closed usergroup.The currently active profile istimed.The torch function is activated.
Navigate the menusThe phone offers you an extensive rangeof functions that are grouped into menus.
1 To access the menu, select Menu.2 Scroll through the menu, and select an
option (for example, Settings).3 If the selected menu contains further
submenus, select one (for example,Call).
4 Select the setting of your choice.5 To return to the previous menu level,
select Back.To exit the menu, select Exit.
Switch it on 13
CyanCyan MagentaMagentaYellowYellow BlackBlack

To change the menu view, selectOptions > Main menu view. Scroll right,and select from the available options.
To rearrange the menu, select Options >Organise. Scroll to the menu item to bemoved, and select Move. Scroll to whereyou want to move the menu item, andselect OK. To save the change, selectDone > Yes.
TorchThe camera flash can be used as a torch.
Switch the torch onIn the standby or home screen mode,press and hold the key. The keypadneeds to be unlocked.
Do not direct the torch on eyes at closerange.
The torch switches off automatically in thefollowing cases:
• The battery is low• After 30 minutes• During incoming or outgoing calls• When you activate the camera
After the call, or after you deactivate thecamera, the torch is not automaticallyswitched back on.
Keypad lockTo lock the keypad to prevent accidentalkeypresses, select Menu, and press *within 3.5 seconds.
To unlock the keypad, select Unlock, andpress * within 1.5 seconds. If requested,enter the lock code.
To answer a call when the keypad islocked, press the call key. When you end
or reject the call, the keypad locksautomatically.
Further features are automatic keyguardand security keyguard. See"Phone", p. 15.
When the device or keypad is locked, callsmay be possible to the official emergencynumber programmed into your device.
Functions without a SIM cardSome functions of your phone may beused without inserting a SIM card, such asOrganiser functions and games. Somefunctions appear dimmed in the menusand cannot be used.
Flight profileUse the Flight profile in radio sensitiveenvironments to deactivate all radiofrequency functions. You still have accessto offline games, the calendar, and phonenumbers. When the Flight profile is active,
is displayed.
Activate the Flight profileSelect Menu > Settings > Profiles >Flight > Activate or Personalise.
Deactivate the Flight profileSelect any other profile.
14 Switch it on
CyanCyan MagentaMagentaYellowYellow BlackBlack
Warning:With the flight profile you cannot make orreceive any calls, including emergencycalls, or use other features that requirenetwork coverage. To make calls, youmust first activate the phone function bychanging profiles. If the device has beenlocked, enter the lock code.
If you need to make an emergency callwhile the device is locked and in the flightprofile, you may be also able to enter anofficial emergency number programmedin your device in the lock code field andselect 'Call'. The device will confirm thatyou are about to exit flight profile to startan emergency call.
Looking for a little self-expression? Give yourdevice its own look and feelby choosing your ownringtones, displaybackground and theme.3. Make it your device
Set up your device, personalise it, andconnect it in several ways.
Basic settingsPhoneSelect Menu > Settings > Phone andfrom the following:Language settings — to set thelanguage of your phone, select Phonelanguage and a language. To set thelanguage of your phone according to theinformation on the SIM card, select Phonelanguage > Automatic.Memory status — to check the memoryconsumptionAutomatic keyguard — to lock thekeypad automatically after a preset timedelay when the phone is in the homescreen mode and no function has beenusedSecurity keyguard — to ask for thesecurity code when you unlock thekeyguardVoice recognition — See "Voicecommands", p. 18.Flight query — to be asked whether touse the flight mode when you switch thephone on. With flight mode, all radioconnections are switched off.Phone updates — to receive softwareupdates from your service provider(network service). The available options
Make it your device 15
CyanCyan MagentaMagentaYellowYellow BlackBlack
may vary. See "Software updates over theair", p. 41.Operator selection — to set a cellularnetwork available in your areaHelp text activation — to set the phoneto show help textsStart-up tone — to play a tone when youswitch the phone on
SecurityWhen security features that restrict callsare in use (such as call barring, closed usergroup, and fixed dialling), calls may bepossible to the official emergency numberprogrammed into your device.
Select Menu > Settings > Security andfrom the following:PIN code request or UPIN coderequest — to request for your PIN or UPINcode every time the phone is switched on.Some SIM cards do not allow the coderequest to be turned off.Call barring service — to restrictincoming calls to and outgoing calls fromyour phone (network service). A barringpassword is required.Fixed dialling — to restrict youroutgoing calls to selected phone numbersif supported by your SIM card. When thefixed dialling is on, GPRS connections arenot possible except while sending textmessages over a GPRS connection. In thiscase, the recipient’s phone number andthe message centre number must beincluded in the fixed dialling list.Closed user group — to specify a groupof people whom you can call and who cancall you (network service)Security level — to request the securitycode whenever a new SIM card is insertedinto the phone, select Phone.
Access codes — to change the securitycode, PIN code, UPIN code, PIN2 code, orbarring passwordPIN2 code request — to select whetherthe PIN2 code is required when using aspecific phone feature which is protectedby the PIN2 code. Some SIM cards do notallow the code request to be turned off.This option may not be availabledepending on your SIM card. For details,contact your network operator.Code in use — to select the type of PINcodeAuthority certificates or Usercertificates — to view the list of theauthority or user certificates downloadedinto your phone. See "Browsersecurity", p. 33.Security module sett. — to view Secur.module details, activate Module PINrequest, or change the module PIN andsigning PIN. See "Access codes", p. 11.
Personalise your phoneGive your phone a personal touch withringing tones, display backgrounds, andthemes. Add shortcuts for your preferredfeatures, and attach enhancements.
ProfilesYour phone has various setting groupscalled profiles, which you can customisewith ringing tones for different eventsand environments.
Select Menu > Settings > Profiles, thedesired profile, and from the followingoptions:Activate — to activate the selectedprofilePersonalise — to change the profilesettingsTimed — to set the profile to be active fora certain time. When the time set for the
16 Make it your device
CyanCyan MagentaMagentaYellowYellow BlackBlack
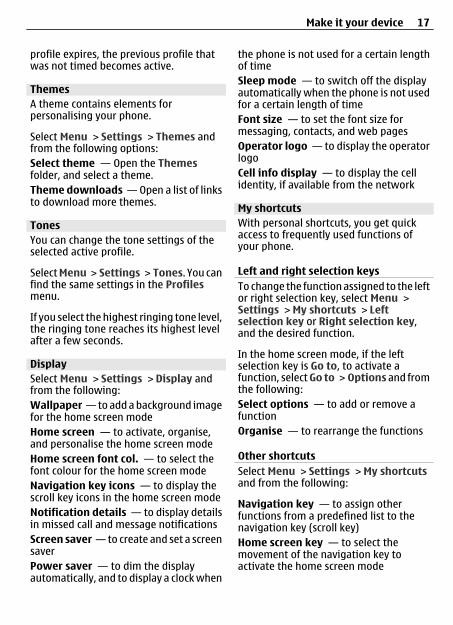
profile expires, the previous profile thatwas not timed becomes active.
ThemesA theme contains elements forpersonalising your phone.
Select Menu > Settings > Themes andfrom the following options:Select theme — Open the Themesfolder, and select a theme.Theme downloads — Open a list of linksto download more themes.
TonesYou can change the tone settings of theselected active profile.
Select Menu > Settings > Tones. You canfind the same settings in the Profilesmenu.
If you select the highest ringing tone level,the ringing tone reaches its highest levelafter a few seconds.
DisplaySelect Menu > Settings > Display andfrom the following:Wallpaper — to add a background imagefor the home screen modeHome screen — to activate, organise,and personalise the home screen modeHome screen font col. — to select thefont colour for the home screen modeNavigation key icons — to display thescroll key icons in the home screen modeNotification details — to display detailsin missed call and message notificationsScreen saver — to create and set a screensaverPower saver — to dim the displayautomatically, and to display a clock when
the phone is not used for a certain lengthof timeSleep mode — to switch off the displayautomatically when the phone is not usedfor a certain length of timeFont size — to set the font size formessaging, contacts, and web pagesOperator logo — to display the operatorlogoCell info display — to display the cellidentity, if available from the network
My shortcutsWith personal shortcuts, you get quickaccess to frequently used functions ofyour phone.
Left and right selection keys To change the function assigned to the leftor right selection key, select Menu >Settings > My shortcuts > Leftselection key or Right selection key,and the desired function.
In the home screen mode, if the leftselection key is Go to, to activate afunction, select Go to > Options and fromthe following:Select options — to add or remove afunctionOrganise — to rearrange the functions
Other shortcutsSelect Menu > Settings > My shortcutsand from the following:
Navigation key — to assign otherfunctions from a predefined list to thenavigation key (scroll key)Home screen key — to select themovement of the navigation key toactivate the home screen mode
Make it your device 17
CyanCyan MagentaMagentaYellowYellow BlackBlack
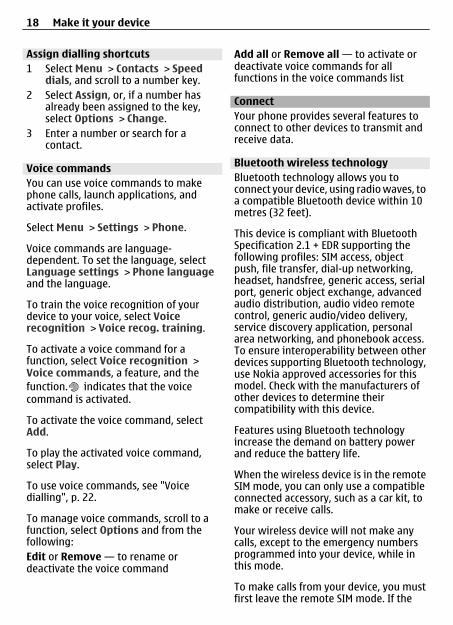
Assign dialling shortcuts1 Select Menu > Contacts > Speed
dials, and scroll to a number key.2 Select Assign, or, if a number has
already been assigned to the key,select Options > Change.
3 Enter a number or search for acontact.
Voice commandsYou can use voice commands to makephone calls, launch applications, andactivate profiles.
Select Menu > Settings > Phone.
Voice commands are language-dependent. To set the language, selectLanguage settings > Phone languageand the language.
To train the voice recognition of yourdevice to your voice, select Voicerecognition > Voice recog. training.
To activate a voice command for afunction, select Voice recognition >Voice commands, a feature, and thefunction. indicates that the voicecommand is activated.
To activate the voice command, selectAdd.
To play the activated voice command,select Play.
To use voice commands, see "Voicedialling", p. 22.
To manage voice commands, scroll to afunction, select Options and from thefollowing:Edit or Remove — to rename ordeactivate the voice command
Add all or Remove all — to activate ordeactivate voice commands for allfunctions in the voice commands list
ConnectYour phone provides several features toconnect to other devices to transmit andreceive data.
Bluetooth wireless technologyBluetooth technology allows you toconnect your device, using radio waves, toa compatible Bluetooth device within 10metres (32 feet).
This device is compliant with BluetoothSpecification 2.1 + EDR supporting thefollowing profiles: SIM access, objectpush, file transfer, dial-up networking,headset, handsfree, generic access, serialport, generic object exchange, advancedaudio distribution, audio video remotecontrol, generic audio/video delivery,service discovery application, personalarea networking, and phonebook access.To ensure interoperability between otherdevices supporting Bluetooth technology,use Nokia approved accessories for thismodel. Check with the manufacturers ofother devices to determine theircompatibility with this device.
Features using Bluetooth technologyincrease the demand on battery powerand reduce the battery life.
When the wireless device is in the remoteSIM mode, you can only use a compatibleconnected accessory, such as a car kit, tomake or receive calls.
Your wireless device will not make anycalls, except to the emergency numbersprogrammed into your device, while inthis mode.
To make calls from your device, you mustfirst leave the remote SIM mode. If the
18 Make it your device
CyanCyan MagentaMagentaYellowYellow BlackBlack
device has been locked, enter the lockcode to unlock it first.
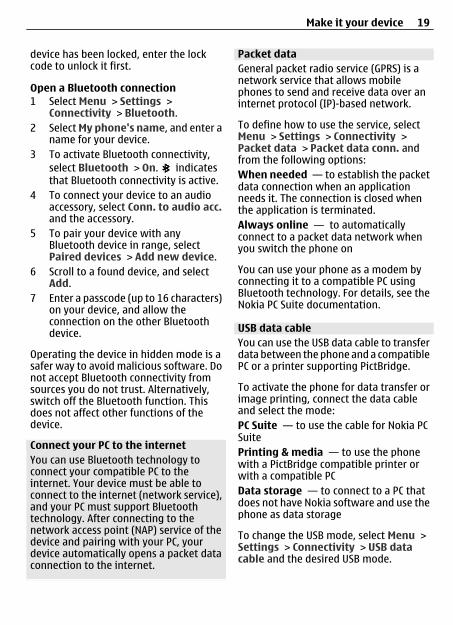
Open a Bluetooth connection1 Select Menu > Settings >
Connectivity > Bluetooth.2 Select My phone's name, and enter a
name for your device.3 To activate Bluetooth connectivity,
select Bluetooth > On. indicatesthat Bluetooth connectivity is active.
4 To connect your device to an audioaccessory, select Conn. to audio acc.and the accessory.
5 To pair your device with anyBluetooth device in range, selectPaired devices > Add new device.
6 Scroll to a found device, and selectAdd.
7 Enter a passcode (up to 16 characters)on your device, and allow theconnection on the other Bluetoothdevice.
Operating the device in hidden mode is asafer way to avoid malicious software. Donot accept Bluetooth connectivity fromsources you do not trust. Alternatively,switch off the Bluetooth function. Thisdoes not affect other functions of thedevice.
Connect your PC to the internetYou can use Bluetooth technology toconnect your compatible PC to theinternet. Your device must be able toconnect to the internet (network service),and your PC must support Bluetoothtechnology. After connecting to thenetwork access point (NAP) service of thedevice and pairing with your PC, yourdevice automatically opens a packet dataconnection to the internet.
Packet dataGeneral packet radio service (GPRS) is anetwork service that allows mobilephones to send and receive data over aninternet protocol (IP)-based network.
To define how to use the service, selectMenu > Settings > Connectivity >Packet data > Packet data conn. andfrom the following options:When needed — to establish the packetdata connection when an applicationneeds it. The connection is closed whenthe application is terminated.Always online — to automaticallyconnect to a packet data network whenyou switch the phone on
You can use your phone as a modem byconnecting it to a compatible PC usingBluetooth technology. For details, see theNokia PC Suite documentation.
USB data cableYou can use the USB data cable to transferdata between the phone and a compatiblePC or a printer supporting PictBridge.
To activate the phone for data transfer orimage printing, connect the data cableand select the mode:PC Suite — to use the cable for Nokia PCSuitePrinting & media — to use the phonewith a PictBridge compatible printer orwith a compatible PCData storage — to connect to a PC thatdoes not have Nokia software and use thephone as data storage
To change the USB mode, select Menu >Settings > Connectivity > USB datacable and the desired USB mode.
Make it your device 19
CyanCyan MagentaMagentaYellowYellow BlackBlack
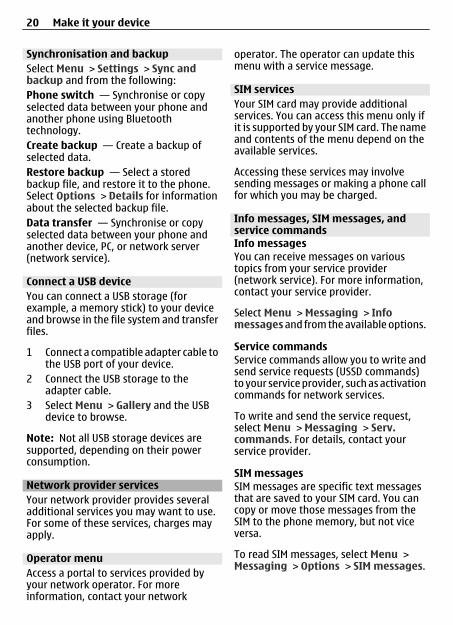
Synchronisation and backupSelect Menu > Settings > Sync andbackup and from the following:Phone switch — Synchronise or copyselected data between your phone andanother phone using Bluetoothtechnology.Create backup — Create a backup ofselected data.Restore backup — Select a storedbackup file, and restore it to the phone.Select Options > Details for informationabout the selected backup file.Data transfer — Synchronise or copyselected data between your phone andanother device, PC, or network server(network service).
Connect a USB deviceYou can connect a USB storage (forexample, a memory stick) to your deviceand browse in the file system and transferfiles.
1 Connect a compatible adapter cable tothe USB port of your device.
2 Connect the USB storage to theadapter cable.
3 Select Menu > Gallery and the USBdevice to browse.
Note: Not all USB storage devices aresupported, depending on their powerconsumption.
Network provider servicesYour network provider provides severaladditional services you may want to use.For some of these services, charges mayapply.
Operator menuAccess a portal to services provided byyour network operator. For moreinformation, contact your network
operator. The operator can update thismenu with a service message.
SIM servicesYour SIM card may provide additionalservices. You can access this menu only ifit is supported by your SIM card. The nameand contents of the menu depend on theavailable services.
Accessing these services may involvesending messages or making a phone callfor which you may be charged.
Info messages, SIM messages, andservice commandsInfo messagesYou can receive messages on varioustopics from your service provider(network service). For more information,contact your service provider.
Select Menu > Messaging > Infomessages and from the available options.
Service commandsService commands allow you to write andsend service requests (USSD commands)to your service provider, such as activationcommands for network services.
To write and send the service request,select Menu > Messaging > Serv.commands. For details, contact yourservice provider.
SIM messagesSIM messages are specific text messagesthat are saved to your SIM card. You cancopy or move those messages from theSIM to the phone memory, but not viceversa.
To read SIM messages, select Menu >Messaging > Options > SIM messages.
20 Make it your device
CyanCyan MagentaMagentaYellowYellow BlackBlack
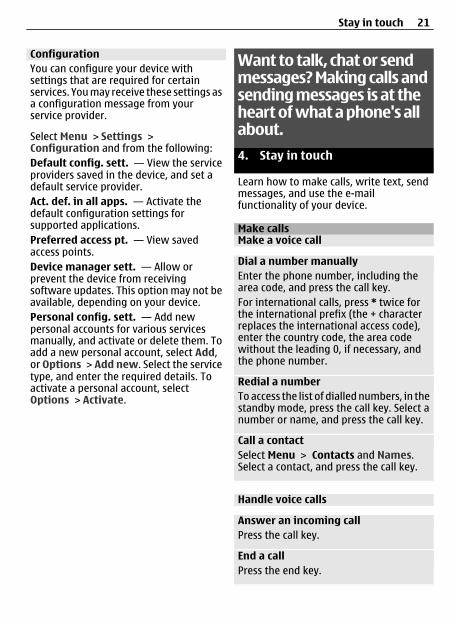
ConfigurationYou can configure your device withsettings that are required for certainservices. You may receive these settings asa configuration message from yourservice provider.
Select Menu > Settings >Configuration and from the following:Default config. sett. — View the serviceproviders saved in the device, and set adefault service provider.Act. def. in all apps. — Activate thedefault configuration settings forsupported applications.Preferred access pt. — View savedaccess points.Device manager sett. — Allow orprevent the device from receivingsoftware updates. This option may not beavailable, depending on your device.Personal config. sett. — Add newpersonal accounts for various servicesmanually, and activate or delete them. Toadd a new personal account, select Add,or Options > Add new. Select the servicetype, and enter the required details. Toactivate a personal account, selectOptions > Activate.
Want to talk, chat or sendmessages? Making calls andsending messages is at theheart of what a phone's allabout.4. Stay in touch
Learn how to make calls, write text, sendmessages, and use the e-mailfunctionality of your device.
Make callsMake a voice call
Dial a number manuallyEnter the phone number, including thearea code, and press the call key.For international calls, press * twice forthe international prefix (the + characterreplaces the international access code),enter the country code, the area codewithout the leading 0, if necessary, andthe phone number.
Redial a numberTo access the list of dialled numbers, in thestandby mode, press the call key. Select anumber or name, and press the call key.
Call a contactSelect Menu > Contacts and Names.Select a contact, and press the call key.
Handle voice calls
Answer an incoming callPress the call key.
End a callPress the end key.
Stay in touch 21
CyanCyan MagentaMagentaYellowYellow BlackBlack
Mute the ringing toneSelect Silence.
Reject an incoming callPress the end key.
Adjust the volume in a callUse the volume keys.
Dialling shortcutsUse a dialling shortcut to make a call inone of the following ways:
• Press a number key, then the call key.• If Menu > Settings > Call > Speed
dialling > On is selected, press andhold a number key.
Voice diallingMake a phone call by saying the name thatis saved in Contacts.
As voice commands are language-dependent, before voice dialling, youmust select Menu > Settings > Phone >Language settings > Phone languageand your language.
Note: Using voice tags may be difficult ina noisy environment or during anemergency, so you should not rely solelyupon voice dialling in all circumstances.
1 In the home screen mode, press andhold the right selection key.A shorttone sounds, and Speak after thetone is displayed.
2 Say the name of the contact you wantto dial. If the voice recognition issuccessful, a list with matches isshown. The phone plays the voicecommand of the first match on thelist. If it is not the correct command,scroll to another entry.
Options during a callMany of the options that you can useduring a call are network services. Foravailability, contact your service provider.
During a call, select Options and from theavailable options.
Some of the network options are Hold,New call, Add to conference, End allcalls, and the following:
Send DTMF — to send tone stringsSwap — to switch between the active calland the call on holdTransfer — to connect a call on hold toan active call and disconnect yourselfConference — to make a conference callPrivate call — to have a privatediscussion in a conference call
Warning:Do not hold the device near your ear whenthe loudspeaker is in use, because thevolume may be extremely loud.
Voice messagesThe voice mailbox is a network service towhich you may need to subscribe. Formore information, contact your serviceprovider.
Call your voice mailboxPress and hold 1.
Edit your voice mailbox numberSelect Menu > Messaging > Voicemessages > Voice mailbox no..
Call log To view the information on your calls,messages, data, and synchronisation,select Menu > Log and from the availableoptions.
22 Stay in touch
CyanCyan MagentaMagentaYellowYellow BlackBlack
Note: The actual invoice for calls andservices from your service provider mayvary, depending on network features,rounding off for billing, taxes, and soforth.
Call settingsSelect Menu > Settings and Call andfrom the following:Call divert — Divert your incoming calls(network service). You may not be able todivert your calls if some call barringfunctions are active. Anykey answer — Answer an incomingcall by briefly pressing any key, except thepower key, the left and right selectionkeys, or the end key.Automatic redial — The device redialsthe number automatically if a call fails.The device tries to call the number 10times.Voice clarity — Improve speechintelligibility, especially in noisyenvironments.Speed dialling — Dial the names andphone numbers assigned to the numberkeys (2-9) by pressing and holding thecorresponding number key.Call waiting — The network notifies youof an incoming call while you have a callin progress (network service).Call duration display — Display theduration of the call in progress.Summary after call — Briefly display theapproximate duration after each call.Send my caller ID — Show your phonenumber to the person you are calling(network service). To use the settingagreed upon with your service provider,select Set by network.Outgoing call line — Select the phoneline for making calls, if your SIM cardsupports multiple phone lines (networkservice).
Text and messagesWrite text, and create messages andnotes.
Write textText modesTo enter text (for example, when writingmessages) you can use traditional orpredictive text input.
When you write text, press and holdOptions to switch between traditionaltext input, indicated by , andpredictive text input, indicated by .Not all languages are supported bypredictive text input.
The character cases are indicated by ,, and .
To change the character case, press #. Tochange from the letter to number mode,indicated by , press and hold #, andselect Number mode. To change from thenumber to the letter mode, press and hold#.
To set the writing language, selectOptions > Writing language.
Traditional text inputPress a number key, 2-9, repeatedly untilthe desired character appears. Theavailable characters depend on theselected writing language.
If the next letter you want is located onthe same key as the present one, wait untilthe cursor appears, and enter the letter.
To access the most common punctuationmarks and special characters, press 1repeatedly. To access the list of specialcharacters, press *. To insert a space, press0.
Stay in touch 23
CyanCyan MagentaMagentaYellowYellow BlackBlack
Predictive text inputPredictive text input is based on a built-indictionary to which you can also add newwords.
1 Start writing a word, using the keys2 to 9. Press each key only once forone letter.
2 To confirm a word, scroll right or adda space.
• If the word is not correct, press *repeatedly, and select the wordfrom the list.
• If the ? character is displayed afterthe word, the word you intendedto write is not in the dictionary.To add the word to the dictionary,select Spell. Enter the word usingtraditional text input, and selectSave.
• To write compound words, enterthe first part of the word, andscroll right to confirm it. Write thelast part of the word, and confirmthe word.
3 Start writing the next word.
Text and multimedia messagesYou can create a message and optionallyattach, for example, a picture. Your phoneautomatically changes a text message toa multimedia message when a file isattached.
Text messagesYour device supports text messagesbeyond the limit for a single message.Longer messages are sent as two or moremessages. Your service provider maycharge accordingly. Characters withaccents or other marks, and charactersfrom some language options, take upmore space, and limit the number of
characters that can be sent in a singlemessage.
The total number of characters left andthe number of messages needed forsending are displayed.
To send messages, the correct messagecentre number must be stored in yourdevice. Normally, this number is set bydefault through your SIM card. To set thenumber manually, select Menu >Messaging > Message settings > Textmessages > Message centres > Addcentre, and enter a name and the numberfrom the service provider.
Multimedia messagesA multimedia message can contain text,pictures, and sound or video clips.
Only devices that have compatiblefeatures can receive and displaymultimedia messages. The appearance ofa message may vary depending on thereceiving device.
The wireless network may limit the size ofMMS messages. If the inserted pictureexceeds this limit the device may make itsmaller so that it can be sent by MMS.
Important: Exercise caution whenopening messages. Messages may containmalicious software or otherwise beharmful to your device or PC.
For availability and subscription to themultimedia messaging service (MMS),contact your service provider.
Create a text or multimedia message1 Select Menu > Messaging > Create
message > Message.2 To add recipients, scroll to the To:
field, and enter the recipient’snumber or e-mail address, or select
24 Stay in touch
CyanCyan MagentaMagentaYellowYellow BlackBlack
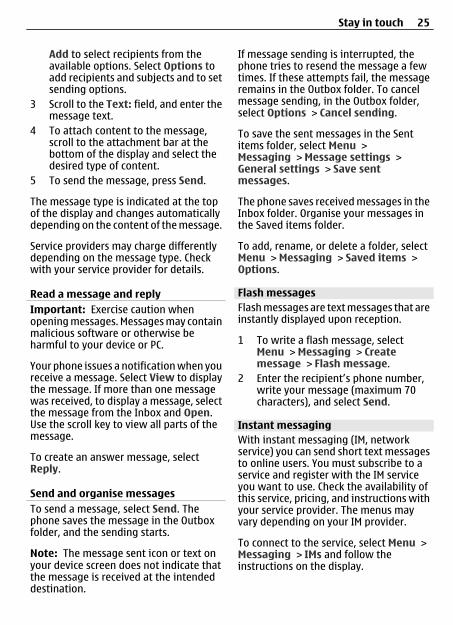
Add to select recipients from theavailable options. Select Options toadd recipients and subjects and to setsending options.
3 Scroll to the Text: field, and enter themessage text.
4 To attach content to the message,scroll to the attachment bar at thebottom of the display and select thedesired type of content.
5 To send the message, press Send.
The message type is indicated at the topof the display and changes automaticallydepending on the content of the message.
Service providers may charge differentlydepending on the message type. Checkwith your service provider for details.
Read a message and replyImportant: Exercise caution whenopening messages. Messages may containmalicious software or otherwise beharmful to your device or PC.
Your phone issues a notification when youreceive a message. Select View to displaythe message. If more than one messagewas received, to display a message, selectthe message from the Inbox and Open.Use the scroll key to view all parts of themessage.
To create an answer message, selectReply.
Send and organise messagesTo send a message, select Send. Thephone saves the message in the Outboxfolder, and the sending starts.
Note: The message sent icon or text onyour device screen does not indicate thatthe message is received at the intendeddestination.
If message sending is interrupted, thephone tries to resend the message a fewtimes. If these attempts fail, the messageremains in the Outbox folder. To cancelmessage sending, in the Outbox folder,select Options > Cancel sending.
To save the sent messages in the Sentitems folder, select Menu >Messaging > Message settings >General settings > Save sentmessages.
The phone saves received messages in theInbox folder. Organise your messages inthe Saved items folder.
To add, rename, or delete a folder, selectMenu > Messaging > Saved items >Options.
Flash messagesFlash messages are text messages that areinstantly displayed upon reception.
1 To write a flash message, selectMenu > Messaging > Createmessage > Flash message.
2 Enter the recipient’s phone number,write your message (maximum 70characters), and select Send.
Instant messagingWith instant messaging (IM, networkservice) you can send short text messagesto online users. You must subscribe to aservice and register with the IM serviceyou want to use. Check the availability ofthis service, pricing, and instructions withyour service provider. The menus mayvary depending on your IM provider.
To connect to the service, select Menu >Messaging > IMs and follow theinstructions on the display.
Stay in touch 25
CyanCyan MagentaMagentaYellowYellow BlackBlack
Nokia Xpress audio messagesCreate and send an audio message usingMMS in a convenient way.
1 Select Menu > Messaging > Createmessage > Audio message. Thevoice recorder opens.
2 Record your message. See "Voicerecorder", p. 31.
3 Enter one or more phone numbers inthe To: field, or select Add to retrievea number.
4 To send the message, select Send.
Message settingsSelect Menu > Messaging > Messagesettings and from the following:
General settings — to save copies of sentmessages in your phone, to overwrite oldmessages if the message memorybecomes full, and to set up otherpreferences related to messagesText messages — to allow deliveryreports, to set up message centres for SMSand SMS e-mail, to select the type ofcharacter support, and to set up otherpreferences related to text messagesMultimedia messages — to allowdelivery reports, to set up the appearanceof multimedia messages, to allow thereception of multimedia messages andadvertisements, and to set up otherpreferences related to multimediamessagesE-mail messages — to allow e-mailreception, to set the image size in e-mail,and to set up other preferences related toe-mailService messages — to activate servicemessages and to set up preferencesrelated to service messages
E-mailAccess your POP3 or IMAP4 e-mail accountwith your phone to read, write, and sende-mail. This e-mail application is differentfrom the SMS e-mail function.
Before you can use e-mail, you must havean e-mail account and the correct settings.For availability and the correct settings,contact your e-mail service provider.
E-mail setup wizardThe e-mail setup wizard startsautomatically if no e-mail settings aredefined in the phone. To start the setupwizard for an additional e-mail account,select Menu > Messaging and theexisting e-mail account. Select Options >Add mailbox to start the e-mail setupwizard. Follow the instructions on thedisplay.
Write and send an e-mailYou may write your e-mail beforeconnecting to the e-mail service.
1 Select Menu > Messaging > Createmessage > E-mail message.
2 Enter the recipient’s e-mail address,the subject, and the e-mail message.To attach a file, select Options >Insert and from the available options.
3 If more than one e-mail account isdefined, select the account fromwhich you want to send the e-mail.
4 To send the e-mail, select Send.
Read an e-mail and replyImportant: Exercise caution whenopening messages. Messages may containmalicious software or otherwise beharmful to your device or PC.
1 To download e-mail messageheaders, select Menu > Messagingand your e-mail account.
26 Stay in touch
CyanCyan MagentaMagentaYellowYellow BlackBlack
2 To download an e-mail and itsattachments, select the e-mail andOpen or Retrieve.
3 To reply to or forward the e-mail,select Options and from the availableoptions.
4 To disconnect from your e-mailaccount, select Options >Disconnect. The connection to the e-mail account automatically ends aftersome time without activity.
New e-mail notificationsYour phone can automatically check youre-mail account in time intervals and issuea notification when new e-mail isreceived.
1 Select Menu > Messaging >Message settings > E-mailmessages > Edit mailboxes.
2 Select your e-mail account,Downloading sett., and thefollowing options:
Mailbox upd. interval — to set howoften your phone checks your e-mailaccount for new e-mailAutomatic retrieval — to retrievenew e-mail automatically from youre-mail account
3 To enable the new e-mail notification,select Menu > Messaging >Message settings > E-mailmessages > New e-mail notif. >On.
Where’s that picture? Storeyour high-resolutionpictures and video clips inthe device’s gallery, or sharethem via the new imageupload service.5. Image and video
Capture an image
Activate the cameraSelect Menu > Media > Camera; or, if invideo mode, scroll left or right.
Zoom in or outIn camera mode, scroll up and down, oruse the volume keys.
Capture an imageSelect Capture.The device saves the images in Gallery.
Activate the camera flashTo capture all images using the cameraflash, select Options > Flash > Flash on,or to set the device to use the flashautomatically in dim lighting conditions,select Automatic.
Keep a safe distance when using the flash.Do not use the flash on people or animalsat close range. Do not cover the flash whiletaking a picture.
Preview an imageTo display an image immediately afteryou capture it, select Options >Settings > Image preview time and thepreview time. During the preview time,select Back to capture another image, or
Image and video 27
CyanCyan MagentaMagentaYellowYellow BlackBlack
Send to send the image as a multimediamessage.
Your device supports an image captureresolution of up to 1200x1600 pixels.
Record a video clip
Activate video modeSelect Menu > Media > Video recorder,or, if in image mode, scroll left or right.
Start recording a video clipTo start and control recording, selectRecord, Pause, and Continue.
Stop recordingSelect Stop.
The video clips are saved in Gallery.
Camera and video optionsIn the camera or video mode, selectOptions and from the following:Effects — Apply different effects (forexample, greyscale and false colour) tothe captured image.White balance — Adapt the camera tothe current light conditions.
Settings — Change other camera andvideo settings, and select the image andvideo storage.
GalleryManage images, video clips, music files,themes, graphics, tones, recordings, andreceived files. These files are stored in thephone memory or on a memory card andmay be arranged in folders.
Folders and files1 To view the list of folders, select
Menu > Gallery.
2 To view the list of files in a folder,select a folder and Open.
3 To view the folders of the memorycard when moving a file, scroll to thememory card, and press the scroll keyright.
Print imagesYour phone supports Nokia XpressPrint toprint images that are in the jpeg format.
1 To connect your phone to acompatible printer, use a data cableor send the image by Bluetooth to aprinter supporting Bluetoothtechnology. See "Bluetooth wirelesstechnology", p. 18.
2 Select the image you want to printand Options > Print.
Share images and videos onlineShare images and video clips incompatible online sharing services on theweb.
To use online sharing, you must subscribeto an online sharing service (networkservice).
To upload an image or a video clip to anonline sharing service, select the file fromGallery, Options > Send > Upload toweb, and an online sharing service.
For more information on online sharingand compatible service providers, see theNokia product support pages or your localNokia website.
You can view uploads on the internetpages of the online sharing service onyour device. See "Web uploads", p. 32.
Memory cardUse a memory card to store yourmultimedia files, such as video clips,
28 Image and video
CyanCyan MagentaMagentaYellowYellow BlackBlack
songs, sound files, images, and messagingdata.
Some of the folders in Gallery with contentused by the phone (for example, Themes)may be stored on the memory card.
Format the memory cardSome supplied memory cards are pre-formatted; others require formatting.When you format a memory card, all dataon the card is permanently lost.
1 To format a memory card, selectMenu > Gallery or Applications, thememory card folder, and Options >Format memory card > Yes.
2 When formatting is complete, enter aname for the memory card.
Lock the memory cardTo set a password (maximum 8characters) to lock your memory cardagainst unauthorised use, select thememory card folder and Options > Setpassword.
The password is stored in your phone, andyou do not have to enter it again while youare using the memory card in the samephone. If you want to use the memorycard in another device, you are asked forthe password.
To remove the password, selectOptions > Delete password.
Check memory consumptionTo check the memory consumption ofdifferent data groups and the availablememory to install new software to yourmemory card, select the memory card andOptions > Details.
Want a little relaxation atthe end of the day? Simplytransfer your favouritemusic and MP3 files to yourdevice’s music player.6. Entertainment
Listen to musicListen to music with the music player orradio, and record sounds or voice with thevoice recorder. Download music from theinternet, or transfer music from your PC.
Media playerYour phone includes a media player forlistening to songs and viewing video clips.Music and video files stored in the musicfolder in the phone memory or on thememory card are automatically detectedand added to the music library.
To open the media player, select Menu >Media > Media player.
Music menuAccess your music and video files stored inthe device memory or on the memorycard, download music or video clips fromthe web, or view compatible videostreams from a network server (networkservice).
Listen to music or play a video clipSelect a file from the available folders andPlay.
Download files from the webSelect Options > Downloads and adownload site.
Entertainment 29
CyanCyan MagentaMagentaYellowYellow BlackBlack
Update music library after you haveadded filesSelect Options > Update library.
Create a playlist1 Select Playlists > Create playlist,
and enter the name of the playlist.2 Add music or video clips from the
displayed lists.3 Select Done to store the playlist.
Configure a streaming service(network service)You may receive the streaming settings asa configuration message from yourservice provider. You can also enter thesettings manually. See"Configuration", p. 21.
1 Select Options > Downloads >Streaming settings >Configuration.
2 Select a service provider, Default, orPersonal config. for streaming.
3 Select Account and a streamingservice account from the activeconfiguration settings.
Play songs
Warning:Listen to music at a moderate level.Continuous exposure to high volume maydamage your hearing. Do not hold thedevice near your ear when theloudspeaker is in use, because the volumemay be extremely loud.
To adjust the volume level, press thevolume keys.
Operate the player with the virtual keys onthe display.
To start playing, select .
To pause playing, select .
To skip to the next song, select . Toskip to the beginning of the previoussong, select twice.
To fast-forward the current song, selectand hold . To rewind the current song,select and hold . Release the key at theposition you want to continue the musicplayback.
To switch to the music menu, select .
To switch to the current playlist, select.
To close the media player menu, and tocontinue music playback in thebackground, press the end key.
To stop the media player, press and holdthe end key.
Change the media player lookYour phone provides several themes tochange the look of the media player.
Select Menu > Media > Media player >Go to Media player > Options >Settings > Media player theme and oneof the listed themes. The virtual keys maychange depending on the theme.
RadioThe FM radio depends on an antenna otherthan the wireless device antenna. Acompatible headset or accessory needs tobe attached to the device for the FM radioto function properly.
30 Entertainment
CyanCyan MagentaMagentaYellowYellow BlackBlack
Warning:Listen to music at a moderate level.Continuous exposure to high volume maydamage your hearing. Do not hold thedevice near your ear when theloudspeaker is in use, because the volumemay be extremely loud.
Select Menu > Media > Radio.
To adjust the volume, use the volumekeys.
Use the graphical keys on the displayScroll up, down, left, or right.
Close the radio menuBriefly press the end key. The radiocontinues playing in the background.
Switch the radio offPress and hold the end key.
Tune radio stations1 To start the search, press and hold the
scroll key left or right. To change theradio frequency in 0.05 MHz steps,briefly press the scroll key left or right.
2 To save a station to a memorylocation, select Options > Savestation.
3 To enter the name of the radiostation, select Options > Stations >Options > Rename.
Select Options and from the following:Search all stations — to automaticallysearch for the available stations at yourlocationSet frequency — to enter the frequencyof the desired radio stationStations — to list and rename or deletesaved stations
Change stationsScroll up or down, or press the numberkeys corresponding to the number of thestation in the station list.
Radio settingsSelect Options > Settings and from thefollowing:
RDS — to select whether to displayinformation from the radio data systemAuto-frequency — to enable theautomatic switch to a frequency with thebest reception of the tuned in station(available when RDS is activated)Play via — to select the headset or theloudspeakerOutput — to switch between stereo andmono outputRadio theme — to select a radio theme
Voice recorderRecord speech, sound, or an active call,and save the recordings in Gallery.
Select Menu > Media > Voice recorder.
The recorder cannot be used when a datacall or GPRS connection is active.
To use the graphical keys , , or ,scroll left or right.
Start recordingSelect , or, during a call, selectOptions > Record. While recording a call,all parties to the call hear a faint beeping.
Pause recordingSelect .
Entertainment 31
CyanCyan MagentaMagentaYellowYellow BlackBlack
Stop recordingSelect . The recording is saved in theRecordings folder in Gallery.
To play or send the last recording, toaccess the list of recordings, or to selectthe memory and the folder to store therecordings, select Options and theappropriate option.
EqualiserAdjust the sound when using the musicplayer.
Select Menu > Media > Equaliser.
To activate a predefined equaliser set,scroll to one of the sets, and selectActivate.
Create a new equaliser set1 Select one of the last two sets in the
list and Options > Edit.2 Scroll left or right to access the virtual
sliders and up or down to adjust theslider.
3 To save the settings and create aname for the set, select Save andOptions > Rename.
Stereo wideningStereo widening creates a wider stereosound effect when you are using a stereoheadset.
To activate, select Menu > Media >Stereo widening.
Web You can access various internet serviceswith your device browser (networkservice). The appearance of the internetpages may vary due to screen size. Youmay not be able to see all the details onthe internet pages.
Important: Use only services that youtrust and that offer adequate security andprotection against harmful software.
For the availability of these services,pricing, and instructions, contact yourservice provider.
You may receive the configurationsettings required for browsing as aconfiguration message from your serviceprovider.
To set up the service, select Menu >Web > Web settings > Configurationsett., a configuration, and an account.
Connect to a serviceTo make a connection to the service, selectMenu > Web > Home; or in the standbymode, press and hold 0.
To select a bookmark, select Menu >Web > Bookmarks.
To select the last visited URL, selectMenu > Web > Last web addr..
To enter the address of a service, selectMenu > Web > Go to address. Enter theaddress, and select OK.
After you make a connection to theservice, you can start browsing its pages.The function of the phone keys may varyin different services. Follow the textguides on the phone display. For moreinformation, contact your serviceprovider.
Web uploadsOpen the web page of your online sharingservice to view uploaded images andvideos and to change settings (networkservice).
32 Entertainment
CyanCyan MagentaMagentaYellowYellow BlackBlack
Open an online sharing service1 Select Menu > Web > Web uploads
and an online sharing service.2 Select from the links offered by the
service.
Change settings of an online sharingservice1 Select Menu > Web > Web uploads
and an online sharing service.2 Select Options > Settings to open
the settings page of the service.
Appearance settingsWhile browsing the web, selectOptions > Settings and from thefollowing:Display — Select the font size, whetherimages are shown, and how the text isdisplayed.General — Select whether web addressesare sent as Unicode (UTF-8), the encodingtype for the contents, and whetherJavaScript™ is enabled.
The available options may vary.
Cache memoryA cache is a memory location that is usedto store data temporarily. If you have triedto access or have accessed confidentialinformation requiring passwords, emptythe cache after each use. The informationor services you have accessed are storedin the cache.
A cookie is data that a site saves in thecache memory of your phone. Cookies aresaved until you clear the cache memory.
To clear the cache while browsing, selectOptions > Tools > Clear the cache.
To allow or prevent the phone fromreceiving cookies, select Menu > Web >Web settings > Security > Cookies; or,
while browsing, select Options >Settings > Security > Cookies.
Browser securitySecurity features may be required forsome services, such as banking services oronline shopping. For such connectionsyou need security certificates and possiblya security module, which may be availableon your SIM card. For more information,contact your service provider.
To view or change the security modulesettings, or to view a list of authority oruser certificates downloaded to yourdevice, select Menu > Settings >Security > Security module sett.,Authority certificates, or Usercertificates.
Important: Even if the use of certificatesmakes the risks involved in remoteconnections and software installationconsiderably smaller, they must be usedcorrectly in order to benefit fromincreased security. The existence of acertificate does not offer any protectionby itself; the certificate manager mustcontain correct, authentic, or trustedcertificates for increased security to beavailable. Certificates have a restrictedlifetime. If "Expired certificate" or"Certificate not valid yet" is shown, even ifthe certificate should be valid, check thatthe current date and time in your deviceare correct.
Before changing any certificate settings,you must make sure that you really trustthe owner of the certificate and that thecertificate really belongs to the listedowner.
Games and applicationsYou can manage applications and games.Your phone may have some games orapplications installed. These files are
Entertainment 33
CyanCyan MagentaMagentaYellowYellow BlackBlack
stored in the phone memory or anattached memory card and may bearranged in folders.
Launch an applicationSelect Menu > Applications > Games,Memory card, or Collection. Scroll to agame or an application, and select Open.
To set sounds, lights, and shakes for agame, select Menu > Applications >Options > Application settings.
Other available options may include thefollowing:
Update version — to verify that a newversion of the application is available fordownload from the web (network service)Web page — to provide furtherinformation or additional data for theapplication from an internet page(network service), if availableApplication access — to restrict theapplication from accessing the network
Download an applicationYour phone supports J2ME™ Javaapplications. Ensure that the applicationis compatible with your phone beforedownloading it.
Important: Only install and useapplications and other software fromtrusted sources, such as applications thatare Symbian Signed or have passed theJava Verified™ testing.
You can download new applications andgames in different ways.
• Select Menu > Applications >Options > Downloads > App.downloads or Game downloads;the list of available bookmarks isshown.
• Use the Nokia Application Installerfrom PC Suite to download theapplications to your phone.
For the availability of different servicesand pricing, contact your service provider.
34 Entertainment
CyanCyan MagentaMagentaYellowYellow BlackBlack

Looking up a route? Checkout points of interest alongthe way, and select 2D or 3Ddisplay.7. Maps
You can browse maps for different citiesand countries, search for addresses andpoints of interest, plan routes from onelocation to another, save locations aslandmarks, and send them to compatibledevices.
Almost all digital cartography isinaccurate and incomplete to someextent. Never rely solely on thecartography that you download for use inthis device.
Note: Downloading maps may involvethe transmission of large amounts of datathrough your service provider’s network.Contact your service provider forinformation about data transmissioncharges.
Traffic and guide information and relatedservices are generated by third partiesindependent of Nokia. The informationmay be inaccurate and incomplete tosome extent and is subject to availability.Never rely solely on the aforementionedinformation and related services.
Find detailed information about Maps onwww.nokia.com/maps
To use the Maps application, selectMenu > Organiser > Maps and from theavailable options.
Download mapsYour phone may contain pre-installedmaps on the memory card. You candownload a new set of maps through the
internet using the Nokia Map Loader PCsoftware.
Nokia Map LoaderTo download the Nokia Map Loader onyour PC and for further instructions, seewww.maps.nokia.com.
Before you download new maps for thefirst time, ensure that you have a memorycard inserted in the phone.
Select Menu > Organiser > Maps to doan initial configuration.
To change the selection of maps on yourmemory card, use the Nokia Map Loaderto delete all maps on the memory card anddownload a new selection, to ensure thatall maps are from the same release.
Network map serviceYou can set your phone to automaticallydownload maps that you do not have inyour phone when needed.
Select Menu > Organiser > Maps >Settings > Network settings > Allownetwork usage > Yes or In homenetwork.
To prevent automatic download of maps,select No.
Note: Downloading maps may involvethe transmission of large amounts of datathrough your service provider’s network.Contact your service provider forinformation about data transmissioncharges.
Maps and GPSYou can use the Global Positioning System(GPS) to support the Maps application.Find out your location, or measuredistances and plot coordinates.
Maps 35
CyanCyan MagentaMagentaYellowYellow BlackBlack
Before you can use the GPS function withyour phone, you must pair your phonewith a compatible external GPS receiverusing Bluetooth wireless technology. Formore information, see the user guide foryour GPS device.
After pairing the Bluetooth GPS devicewith the phone, it may take severalminutes for the phone to display thecurrent location. Subsequent connectionsshould be faster, but if you have not usedGPS for several days, or are very far awayfrom the last place you used it, it may takeseveral minutes to detect and display yourlocation.
The Global Positioning System (GPS) isoperated by the government of the UnitedStates, which is solely responsible for itsaccuracy and maintenance. The accuracyof location data can be affected byadjustments to GPS satellites made by theUnited States government and is subjectto change with the United StatesDepartment of Defense civil GPS policy andthe Federal Radionavigation Plan.Accuracy can also be affected by poorsatellite geometry. Availability andquality of GPS signals may be affected byyour location, buildings, naturalobstacles, and weather conditions. TheGPS receiver should only be used outdoorsto allow reception of GPS signals.
Any GPS should not be used for preciselocation measurement, and you shouldnever rely solely on location data from theGPS receiver and cellular radio networksfor positioning or navigation.
Extra servicesYou can upgrade Maps to fully voice-guided navigation, which requires aregional licence.
To use this service, you need a compatibleexternal GPS device that supportsBluetooth wireless technology.
To purchase a navigation service withvoice guidance, select Menu >Organiser > Maps > Extra services >Purchase navigation, and follow theinstructions.
To use navigation with voice guidance,you must allow the Maps application touse a network connection.
The navigation licence is connected toyour SIM card. If you insert another SIMcard in your phone, you are asked topurchase a licence when startingnavigation. During the purchaseprocedure, you are offered to transfer theexisting navigation licence to the new SIMcard without extra charge.
36 Maps
CyanCyan MagentaMagentaYellowYellow BlackBlack
Did you know that you canmanage your music,contacts and calendarsbetween your phone andyour PC with Nokia PC Suite?8. Organise
Let your phone help you to organise yourlife.
Manage contactsSave names, phone numbers, andaddresses as contacts in the phone and onthe SIM card.
Select Menu > Contacts.
Select the memory for contactsThe phone memory can save contacts withadditional details, such as various phonenumbers and text items. You can also savean image, a tone, or a video clip for alimited number of contacts.
The SIM card memory can save names withone phone number attached to them. Thecontacts saved in the SIM card memory areindicated by .
1 Select Settings > Memory in use toselect the SIM card, the phonememory, or both for your contacts.
2 Select Phone and SIM to recallcontacts from both memories. Whenyou save contacts, they are saved inthe phone memory.
Handle contacts
Search for a contactSelect Menu > Contacts > Names.
Scroll through the list of contacts, or enterthe first characters of the contact's name.
Save a name and phone numberSelect Menu > Contacts > Add new.
Add and edit detailsSelect a contact and Details > Options >Add detail.
Delete a detailSelect a contact and Details. Select adetail and Options > Delete.
Delete a contactSelect a contact and Options > Deletecontact.
Delete all contactsSelect Menu > Contacts > Del. allcontacts > From phone memory orFrom SIM card.
Copy or move contacts between thephone and SIM card memories
Copy single contactsSelect Options > Mark > Mark. Mark thecontacts you want to copy or move, andselect Options > Copy marked or Movemarked.
Copy all contactsSelect Menu > Contacts > Copycontacts or Move contacts.
Create a contact groupArrange contacts into caller groups withdifferent ringing tones and group images.
1 Select Menu > Contacts > Groups.2 Select Add or Options > Add new
group to create a new group.
Organise 37
CyanCyan MagentaMagentaYellowYellow BlackBlack
3 Enter the group name, optionallyselect an image and a ringing tone,and select Save.
4 Select the group and View > Add toadd contacts to the group.
Business cardsYou can send and receive a person’scontact information from a compatibledevice that supports the vCard standard.
To send a business card, search for thecontact, and select Details > Options >Send business card.
When you receive a business card, selectShow > Save to save the business card inthe phone memory.
Date and timeTo change the clock type, time, time zone,or date, select Menu > Settings > Dateand time.
When travelling to a different time zone,select Menu > Settings > Date andtime > Date & time settings > Timezone:, and scroll left or right to select thetime zone of your location. The time anddate are set according to the time zoneand enable your phone to display thecorrect sending time of received text ormultimedia messages.
For example, GMT -5 denotes the timezone for New York (USA), 5 hours west ofGreenwich, London (UK).
Alarm clockTo sound an alarm at a desired time.
Set the alarm1 Select Menu > Organiser > Alarm
clock.2 Set the alarm on, and enter the alarm
time.
3 To issue an alarm on selected days ofthe week, select Repeat: > On andthe days.
4 Select the alarm tone. If you select theradio as the alarm tone, connect theheadset to the phone.
5 Set the snooze time-out, and selectSave.
Stop the alarmTo stop the sounding alarm, select Stop.If you let the alarm sound for a minute orselect Snooze, the alarm stops for thesnooze time-out, then resumes.
CalendarSelect Menu > Organiser > Calendar.
The current day is framed. If there are anynotes set for the day, the day is in boldtype. To view the day notes, select View.To view a week, select Options > Weekview. To delete all notes in the calendar,select Options > Delete notes > Allnotes.
To edit settings related to date and time,select Options > Settings and from theavailable options. To delete old notesautomatically after a specified time, selectOptions > Settings > Auto-deletenotes and from the available options.
Make a calendar noteScroll to the date, and select Options >Make a note. Select the note type, and fillin the fields.
To-do listTo create a note for a task that you mustdo, select Menu > Organiser > To-dolist.
To create a note if no note is added, selectAdd; otherwise, select Options > Add.Fill in the fields, and select Save.
38 Organise
CyanCyan MagentaMagentaYellowYellow BlackBlack
To view a note, scroll to it, and selectView.
NotesTo write and send notes, select Menu >Organiser > Notes.
To make a note if no note is added, selectAdd; otherwise, select Options > Make anote. Write the note, and select Save.
Nokia PC SuiteWith Nokia PC Suite, you can manage yourmusic and synchronise contacts, calendarentries, notes, and to-do notes betweenyour device and a compatible PC or aremote internet server (network service).For more information, and to download PCSuite, see www.nokia.com/support.
CalculatorYour phone provides a standard, ascientific, and a loan calculator.
Select Menu > Organiser > Calculatorand, from the available options, thecalculator type and the operatinginstructions.
This calculator has limited accuracy and isdesigned for simple calculations.
Countdown timerNormal timer1 To activate the timer, select Menu >
Organiser > Countd. timer >Normal timer, enter a time, andwrite a note that is displayed whenthe time expires. To change the time,select Change time.
2 To start the timer, select Start.3 To stop the timer, select Stop timer.
Interval timer1 To have an interval timer with up to
10 intervals started, first enter theintervals.
2 Select Menu > Organiser > Countd.timer > Interval timer.
3 To start the timer, select Starttimer > Start.
To select how the interval timer shouldstart the next period, select Menu >Organiser > Countd. timer >Settings > Contin. to next period andfrom the available options.
StopwatchYou can measure time, take intermediatetimes, or take lap times using thestopwatch.
Select Menu > Organiser > Stopwatchand from the following options:Split timing — to take intermediatetimes. To reset the time without saving it,select Options > Reset.Lap timing — to take lap timesContinue — to view the timing that youhave set in the backgroundShow last — to view the most recentlymeasured time if the stopwatch is notresetView times or Delete times — to view ordelete the saved times
To set the stopwatch timing in thebackground, press the end key.
Organise 39
CyanCyan MagentaMagentaYellowYellow BlackBlack
Need support? Check out oursupport pages and keepyour device up-to-date.9. Support and updates
Nokia helps you in many ways to gain themost benefit from your device.
SupportWhen you want to learn more about howto use your product or you are unsure howyour device should function, see the userguide or see the support pages atwww.nokia.com/support or your localNokia website, or with a mobile device,www.nokia.mobi/support.
If this does not resolve your issue, do thefollowing:
• Restart the device: switch off thedevice, and remove the battery. Afterabout a minute, replace the battery,and switch on the device.
• With the Nokia Software Updaterapplication, update your devicesoftware regularly for optimumperformance and possible newfeatures. See www.nokia.com/softwareupdate or your local Nokiawebsite. Remember to back up yourdevice data before updating thedevice software.
• Restore the original factory settingsas explained in the user guide.
If the issue remains unsolved, contactNokia for repair options. Seewww.nokia.com/repair. Before sendingyour device for repair, always back up thedata in your device.
My NokiaReceive free tips, tricks, and support foryour Nokia phone, plus free trial content,interactive demonstrations, apersonalised web page, and news aboutthe latest Nokia products and services.
Get the most out of your Nokia phone andregister to My Nokia today! For moreinformation and availability in yourregion, see www.nokia.com/mynokia.
Download contentYou may be able to download new content(for example, themes) to your phone(network service).
Important: Use only services that youtrust and that offer adequate security andprotection against harmful software.
For the availability of different servicesand pricing, contact your service provider.
Software updates using your PCSoftware updates may include newfeatures and enhanced functions thatwere not available at the time of purchaseof your device. Updating the software mayalso improve the device performance.
Nokia Software Updater is a PC applicationthat enables you to update your devicesoftware. To update your device software,you need a compatible PC, broadbandinternet access, and a compatible USBdata cable to connect your device to thePC.
To get more information, to check therelease notes for the latest softwareversions, and to download the NokiaSoftware Updater application, seewww.nokia.com/softwareupdate or yourlocal Nokia website.
To update the device software, do thefollowing:
40 Support and updates
CyanCyan MagentaMagentaYellowYellow BlackBlack
1 Download and install the NokiaSoftware Updater application to yourPC.
2 Connect your device to the PC using aUSB data cable, and open the NokiaSoftware Updater application. TheNokia Software Updater applicationguides you to back up your files,update the software, and restore yourfiles.
Software updates over the airYour service provider may send phonesoftware updates over the air directly toyour phone (network service). This optionmay not be available, depending on yourphone.
Downloading software updates mayinvolve the transmission of large amountsof data through your service provider'snetwork. Contact your service provider forinformation about data transmissioncharges.
Make sure that the device battery hasenough power, or connect the chargerbefore starting the update.
Warning:If you install a software update, youcannot use the device, even to makeemergency calls, until the installation iscompleted and the device is restarted. Besure to back up data before acceptinginstallation of an update.
Software update settingsThis option may not be available,depending on your phone.
To allow or disallow software andconfiguration updates, select Menu >Settings > Configuration > Devicemanager sett. > Serv. softw. updates.
Request a software update1 Select Menu > Settings > Phone >
Phone updates to request availablesoftware updates from your serviceprovider.
2 Select Current softw. details todisplay the current software versionand check whether an update isneeded.
3 Select Downl. phone softw. todownload and install a softwareupdate. Follow the instructions on thedisplay.
4 If the installation was cancelled afterthe download, select Install softw.update to start the installation.
The software update may take severalminutes. If there are problems with theinstallation, contact your service provider.
Restore factory settingsTo restore the phone back to factoryconditions, select Menu > Settings >Rest. factory sett. and from thefollowing:Restore settings only — Reset allpreference settings without deleting anypersonal data.Restore all — Reset all preferencesettings and delete all personal data, suchas contacts, messages, media files, andactivation keys.
Support and updates 41
CyanCyan MagentaMagentaYellowYellow BlackBlack
10. Green tips
Here are tips on how you can contributeto protecting the environment.
Save energyWhen you have fully charged the batteryand disconnected the charger from thedevice, unplug the charger from the walloutlet.
You do not need to charge your battery sooften if you do the following:
• Close and disable applications,services, and connections when not inuse.
• Decrease the brightness of the screen.• Set the device to enter the power
saver mode after the minimum periodof inactivity, if available in yourdevice.
• Disable unnecessary sounds, such askeypad and ringing tones.
RecycleMost of the materials in a Nokia phone arerecyclable. Check how to recycle yourNokia products at www.nokia.com/werecycle, or with a mobile device,www.nokia.mobi/werecycle.
Recycle packaging and user guides at yourlocal recycling scheme.
Learn moreFor more information on theenvironmental attributes of your device,see www.nokia.com/ecodeclaration.
42 Green tips
CyanCyan MagentaMagentaYellowYellow BlackBlack
Digital rights managementContent owners may use different types of digital rightsmanagement (DRM) technologies to protect their intellectualproperty, including copyrights. This device uses various typesof DRM software to access DRM-protected content. With thisdevice you can access content protected with WMDRM 10,OMA DRM 1.0, OMA DRM 1.0 forward lock, and OMA DRM 2.0. Ifcertain DRM software fails to protect the content, contentowners may ask that such DRM software's ability to accessnew DRM-protected content be revoked. Revocation may alsoprevent renewal of such DRM-protected content already inyour device. Revocation of such DRM software does not affectthe use of content protected with other types of DRM or theuse of non-DRM-protected content.
Digital rights management (DRM) protected content comeswith an associated activation key that defines your rights touse the content.
If your device has OMA DRM-protected content, to back upboth the activation keys and the content, use the backupfeature of Nokia PC Suite. Other transfer methods may nottransfer the activation keys which need to be restored withthe content for you to be able to continue the use of OMA DRM-protected content after the device memory is formatted. Youmay also need to restore the activation keys in case the fileson your device get corrupted.
If your device has WMDRM-protected content, both theactivation keys and the content will be lost if the devicememory is formatted. You may also lose the activation keysand the content if the files on your device get corrupted.Losing the activation keys or the content may limit yourability to use the same content on your device again. For moreinformation, contact your service provider.
Some activation keys may be connected to a specific SIM card,and the protected content can be accessed only if the SIM cardis inserted in the device.
Third-party applicationsThe third-party applications provided with your device mayhave been created and may be owned by persons or entitiesnot affiliated with or related to Nokia. Nokia does not ownthe copyrights or intellectual property rights to the third-party applications. As such, Nokia does not take anyresponsibility for end-user support, functionality of theapplications, or the information in the applications or thesematerials. Nokia does not provide any warranty for the third-party applications.
BY USING THE APPLICATIONS YOU ACKNOWLEDGE THAT THEAPPLICATIONS ARE PROVIDED AS IS WITHOUT WARRANTY OFANY KIND, EXPRESS OR IMPLIED, TO THE MAXIMUM EXTENTPERMITTED BY APPLICABLE LAW. YOU FURTHER ACKNOWLEDGETHAT NEITHER NOKIA NOR ITS AFFILIATES MAKE ANYREPRESENTATIONS OR WARRANTIES, EXPRESS OR IMPLIED,INCLUDING BUT NOT LIMITED TO WARRANTIES OF TITLE,MERCHANTABILITY OR FITNESS FOR A PARTICULAR PURPOSE, OR
THAT THE APPLICATIONS WILL NOT INFRINGE ANY THIRD-PARTYPATENTS, COPYRIGHTS, TRADEMARKS, OR OTHER RIGHTS.
Accessories
Warning:Use only batteries, chargers, and accessories approved byNokia for use with this particular model. The use of any othertypes may invalidate any approval or warranty, and may bedangerous.
For availability of approved accessories, please check withyour dealer. When you disconnect the power cord of anyaccessory, grasp and pull the plug, not the cord.
BatteryBattery and charger informationYour device is powered by a rechargeable battery. The batteryintended for use with this device is BL-5CT. Nokia may makeadditional battery models available for this device. Thisdevice is intended for use when supplied with power fromthe following chargers: AC-8. The exact charger modelnumber may vary depending on the type of plug. The plugvariant is identified by one of the following: E, EB, X, AR, U, A,C, or UB.
The battery can be charged and discharged hundreds oftimes, but it will eventually wear out. When the talk andstandby times are noticeably shorter than normal, replace thebattery. Use only Nokia approved batteries, and rechargeyour battery only with Nokia approved chargers designatedfor this device. Use of an unapproved battery or charger maypresent a risk of fire, explosion, leakage, or other hazard.
If a battery is being used for the first time or if the battery hasnot been used for a prolonged period, it may be necessary toconnect the charger, then disconnect and reconnect it tobegin charging the battery. If the battery is completelydischarged, it may take several minutes before the chargingindicator appears on the display or before any calls can bemade.
Always switch the device off and disconnect the chargerbefore removing the battery.
Unplug the charger from the electrical plug and the devicewhen not in use. Do not leave a fully charged batteryconnected to a charger, since overcharging may shorten itslifetime. If left unused, a fully charged battery will lose itscharge over time.
Always try to keep the battery between 15°C and 25°C (59°Fand 77°F). Extreme temperatures reduce the capacity andlifetime of the battery. A device with a hot or cold battery maynot work temporarily. Battery performance is particularlylimited in temperatures well below freezing.
Digital rights management 43
CyanCyan MagentaMagentaYellowYellow BlackBlack

Do not short-circuit the battery. Accidental short-circuitingcan occur when a metallic object such as a coin, clip, or pencauses direct connection of the positive (+) and negative (-)terminals of the battery. (These look like metal strips on thebattery.) This might happen, for example, when you carry aspare battery in your pocket or purse. Short-circuiting theterminals may damage the battery or the connecting object.
Do not dispose of batteries in a fire as they may explode.Batteries may also explode if damaged. Dispose of batteriesaccording to local regulations. Please recycle when possible.Do not dispose as household waste.
Do not dismantle, cut, open, crush, bend, deform, puncture,or shred cells or batteries. In the event of a battery leak, donot allow the liquid to come in contact with the skin or eyes.In the event of such a leak, flush your skin or eyes immediatelywith water, or seek medical help.
Do not modify, remanufacture, attempt to insert foreignobjects into the battery, or immerse or expose it to water orother liquids.
Improper battery use may result in a fire, explosion, or otherhazard. If the device or battery is dropped, especially on ahard surface, and you believe the battery has been damaged,take it to a service centre for inspection before continuing touse it.
Use the battery only for its intended purpose. Never use anycharger or battery that is damaged. Keep your battery out ofthe reach of small children.
Nokia battery authentication guidelinesAlways use original Nokia batteries for your safety. To checkthat you are getting an original Nokia battery, purchase itfrom a Nokia authorised service centre or dealer, and inspectthe hologram label using the following steps:
Successful completion of the steps is not a total assurance ofthe authenticity of the battery. If you have any reason tobelieve that your battery is not an authentic, original Nokiabattery, you should refrain from using it, and take it to thenearest Nokia authorised service centre or dealer forassistance. If authenticity cannot be verified, return thebattery to the place of purchase.
Authenticate hologram1 When you look at the hologram on the label, you should
see the Nokia connecting hands symbol from one angleand the Nokia Original Enhancements logo whenlooking from another angle.
2 When you angle the hologram left, right, down and up,you should see 1, 2, 3 and 4 dots on each siderespectively.
What if your battery is not authentic?If you cannot confirm that your Nokia battery with thehologram on the label is an authentic Nokia battery, pleasedo not use the battery. Take it to the nearest Nokia authorisedservice centre or dealer for assistance. The use of a batterythat is not approved by Nokia may be dangerous and mayresult in poor performance and damage to your device andits accessories. It may also invalidate any approval orwarranty applying to the device.
To find out more about original Nokia batteries, seewww.nokia.com/battery.
Care and maintenanceYour device is a product of superior design and craftsmanshipand should be treated with care. The following suggestionswill help you protect your warranty coverage.
• Do not use or store the device in dusty, dirty areas. Itsmoving parts and electronic components can bedamaged.
• Do not store the device in hot areas. High temperaturescan shorten the life of electronic devices, damagebatteries, and warp or melt certain plastics.
44 Care and maintenance
CyanCyan MagentaMagentaYellowYellow BlackBlack
• Do not store the device in cold areas. When the devicereturns to its normal temperature, moisture can forminside the device and damage electronic circuit boards.
• Do not attempt to open the device other than asinstructed in this guide.
• Do not drop, knock, or shake the device. Roughhandling can break internal circuit boards and finemechanics.
• Do not use harsh chemicals, cleaning solvents, or strongdetergents to clean the device.
• Do not paint the device. Paint can clog the moving partsand prevent proper operation.
• Use only the supplied or an approved replacementantenna. Unauthorised antennas, modifications, orattachments could damage the device and may violateregulations governing radio devices.
• Use chargers indoors.• Always create a backup of data you want to keep, such
as contacts and calendar notes.• To reset the device from time to time for optimum
performance, power off the device and remove thebattery.
These suggestions apply equally to your device, battery,charger, or any accessory. If any device is not workingproperly, take it to the nearest authorised service facility forservice.
RecycleAlways return your used electronic products, batteries, andpackaging materials to a dedicated collection point. This wayyou help prevent uncontrolled waste disposal and promotethe recycling of materials. More detailed information isavailable from the product retailer, local waste authorities,national producer responsibility organisations, or your localNokia representative. Check how to recycle your Nokiaproducts at www.nokia.com/werecycle, or if browsing on amobile device, www.nokia.mobi/werecycle.
The crossed-out wheeled-bin symbol on your product,battery, literature, or packaging reminds you that allelectrical and electronic products, batteries, andaccumulators must be taken to separate collection at the endof their working life. This requirement applies in theEuropean Union. Do not dispose of these products as unsortedmunicipal waste. For more environmental information, seethe product Eco-Declarations at www.nokia.com/environment.
Additional safety informationNote: The surface of this device does not contain nickel inthe platings. The surface of this device contains stainlesssteel.
Magnets and magnetic fieldsKeep your device away from magnets or magnetic fields.
Small childrenYour device and its accessories may contain small parts. Keepthem out of the reach of small children.
Operating environmentThis device meets RF exposure guidelines when used eitherin the normal use position against the ear or when positionedat least 1.5 centimetres (5/8 inch) away from the body. Whena carry case, belt clip, or holder is used for body-wornoperation, it should not contain metal and should positionthe device the above-stated distance from your body.
To transmit data files or messages, this device requires aquality connection to the network. In some cases,transmission of data files or messages may be delayed untilsuch a connection is available. Ensure the above separationdistance instructions are followed until the transmission iscompleted.
Medical devicesOperation of any radio transmitting equipment, includingwireless phones, may interfere with the functionality ofinadequately protected medical devices. Consult a physicianor the manufacturer of the medical device to determine ifthey are adequately shielded from external RF energy or ifyou have any questions. Switch off your device in health carefacilities when any regulations posted in these areas instructyou to do so. Hospitals or health care facilities may be usingequipment that could be sensitive to external RF energy.
Implanted medical devicesManufacturers of medical devices recommend that aminimum separation of 15.3 centimetres (6 inches) should bemaintained between a wireless device and an implantedmedical device, such as a pacemaker or implantedcardioverter defibrillator, to avoid potential interferencewith the medical device. Persons who have such devicesshould:
• Always keep the wireless device more than 15.3centimetres (6 inches) from the medical device whenthe wireless device is turned on.
• Not carry the wireless device in a breast pocket.• Hold the wireless device to the ear opposite the medical
device to minimise the potential for interference.• Turn the wireless device off immediately if there is any
reason to suspect that interference is taking place.• Read and follow the directions from the manufacturer
of their implanted medical device.
Additional safety information 45
CyanCyan MagentaMagentaYellowYellow BlackBlack
If you have any questions about using your wireless devicewith an implanted medical device, consult your health careprovider.
Hearing aidsSome digital wireless devices may interfere with somehearing aids. If interference occurs, consult your serviceprovider.
VehiclesRF signals may affect improperly installed or inadequatelyshielded electronic systems in motor vehicles such aselectronic fuel injection systems, electronic antiskid(antilock) braking systems, electronic speed control systems,and air bag systems. For more information, check with themanufacturer, or its representative, of your vehicle or anyequipment that has been added.
Only qualified personnel should service the device or installthe device in a vehicle. Faulty installation or service may bedangerous and may invalidate any warranty that may applyto the device. Check regularly that all wireless deviceequipment in your vehicle is mounted and operatingproperly. Do not store or carry flammable liquids, gases, orexplosive materials in the same compartment as the device,its parts, or accessories. For vehicles equipped with an air bag,remember that air bags inflate with great force. Do not placeobjects, including installed or portable wireless equipment inthe area over the air bag or in the air bag deployment area.If in-vehicle wireless equipment is improperly installed andthe air bag inflates, serious injury could result.
Using your device while flying in aircraft is prohibited. Switchoff your device before boarding an aircraft. The use ofwireless teledevices in an aircraft may be dangerous to theoperation of the aircraft, disrupt the wireless telephonenetwork, and may be illegal.
Potentially explosive environmentsSwitch off your device when in any area with a potentiallyexplosive atmosphere, and obey all signs and instructions.Potentially explosive atmospheres include areas where youwould normally be advised to turn off your vehicle engine.Sparks in such areas could cause an explosion or fire resultingin bodily injury or even death. Switch off the device atrefuelling points such as near gas pumps at service stations.Observe restrictions on the use of radio equipment in fueldepots, storage, and distribution areas; chemical plants; orwhere blasting operations are in progress. Areas with apotentially explosive atmosphere are often, but not always,clearly marked. They include below deck on boats, chemicaltransfer or storage facilities and areas where the air containschemicals or particles such as grain, dust, or metal powders.You should check with the manufacturers of vehicles usingliquefied petroleum gas (such as propane or butane) todetermine if this device can be safely used in their vicinity.
Emergency callsImportant: This device operates using radio signals,wireless networks, landline networks, and user-programmedfunctions. If your device supports voice calls over the internet(internet calls), activate both the internet calls and thecellular phone. The device will attempt to make emergencycalls over both the cellular networks and through yourinternet call provider if both are activated. Connections in allconditions cannot be guaranteed. You should never relysolely on any wireless device for essential communicationslike medical emergencies.
To make an emergency call:
1 If the device is not on, switch it on. Check for adequatesignal strength. Depending on your device, you mayalso need to complete the following:
• Insert a SIM card if your device uses one.• Remove certain call restrictions you have
activated in your device.• Change your profile from offline or flight profile
mode to an active profile.2 Press the end key as many times as needed to clear the
display and ready the device for calls.3 Enter the official emergency number for your present
location. Emergency numbers vary by location.4 Press the call key.
When making an emergency call, give all the necessaryinformation as accurately as possible. Your wireless devicemay be the only means of communication at the scene of anaccident. Do not end the call until given permission to do so.
Certification information (SAR)This mobile device meets guidelines for exposure toradio waves.
Your mobile device is a radio transmitter and receiver. It isdesigned not to exceed the limits for exposure to radio wavesrecommended by international guidelines. These guidelineswere developed by the independent scientific organisationICNIRP and include safety margins designed to assure theprotection of all persons, regardless of age and health.
The exposure guidelines for mobile devices employ a unit ofmeasurement known as the Specific Absorption Rate or SAR.The SAR limit stated in the ICNIRP guidelines is 2.0 watts/kilogram (W/kg) averaged over 10 grams of tissue. Tests forSAR are conducted using standard operating positions withthe device transmitting at its highest certified power level inall tested frequency bands. The actual SAR level of anoperating device can be below the maximum value becausethe device is designed to use only the power required to reachthe network. That amount changes depending on a numberof factors such as how close you are to a network base station.
46 Additional safety information
CyanCyan MagentaMagentaYellowYellow BlackBlack
The highest SAR value under the ICNIRP guidelines for use ofthe device at the ear is 0.48 W/kg.
Use of device accessories may result in different SAR values.SAR values may vary depending on national reporting andtesting requirements and the network band. Additional SARinformation may be provided under product information atwww.nokia.com.
Additional safety information 47
CyanCyan MagentaMagentaYellowYellow BlackBlack
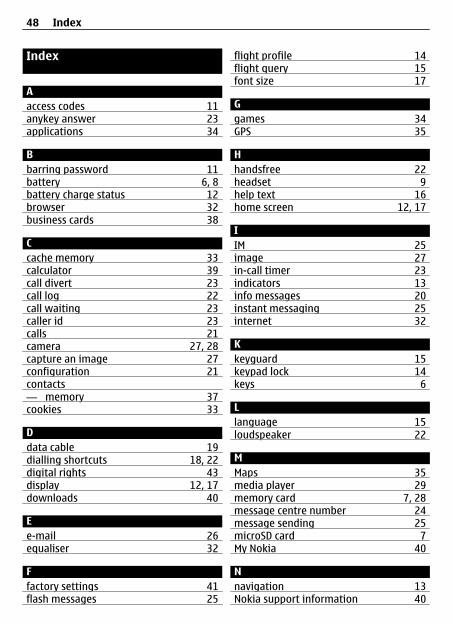
Index
Aaccess codes 11anykey answer 23applications 34
Bbarring password 11battery 6, 8battery charge status 12browser 32business cards 38
Ccache memory 33calculator 39call divert 23call log 22call waiting 23caller id 23calls 21camera 27, 28capture an image 27configuration 21contacts— memory 37cookies 33
Ddata cable 19dialling shortcuts 18, 22digital rights 43display 12, 17downloads 40
Ee-mail 26equaliser 32
Ffactory settings 41flash messages 25
flight profile 14flight query 15font size 17
Ggames 34GPS 35
Hhandsfree 22headset 9help text 16home screen 12, 17
IIM 25image 27in-call timer 23indicators 13info messages 20instant messaging 25internet 32
Kkeyguard 15keypad lock 14keys 6
Llanguage 15loudspeaker 22
MMaps 35media player 29memory card 7, 28message centre number 24message sending 25microSD card 7My Nokia 40
Nnavigation 13Nokia support information 40
48 Index
CyanCyan MagentaMagentaYellowYellow BlackBlack
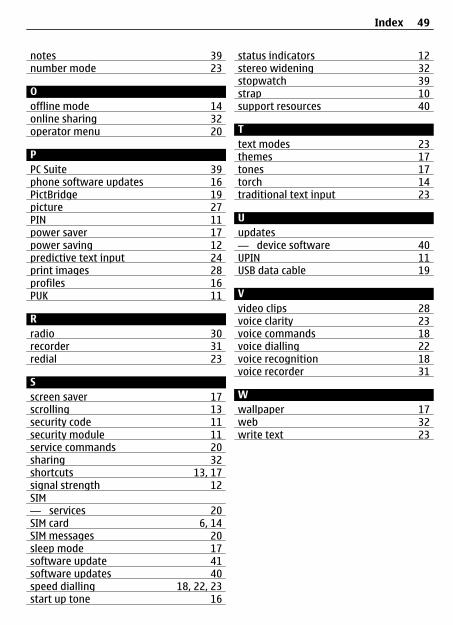
notes 39number mode 23
Ooffline mode 14online sharing 32operator menu 20
PPC Suite 39phone software updates 16PictBridge 19picture 27PIN 11power saver 17power saving 12predictive text input 24print images 28profiles 16PUK 11
Rradio 30recorder 31redial 23
Sscreen saver 17scrolling 13security code 11security module 11service commands 20sharing 32shortcuts 13, 17signal strength 12SIM— services 20SIM card 6, 14SIM messages 20sleep mode 17software update 41software updates 40speed dialling 18, 22, 23start up tone 16
status indicators 12stereo widening 32stopwatch 39strap 10support resources 40
Ttext modes 23themes 17tones 17torch 14traditional text input 23
Uupdates— device software 40UPIN 11USB data cable 19
Vvideo clips 28voice clarity 23voice commands 18voice dialling 22voice recognition 18voice recorder 31
Wwallpaper 17web 32write text 23
Index 49
CyanCyan MagentaMagentaYellowYellow BlackBlack

DECLARATION OF CONFORMITY
0434Hereby, NOKIA CORPORATION declares that this RM-518product is in compliance with the essential requirements andother relevant provisions of Directive 1999/5/EC. A copy of theDeclaration of Conformity can be found at www.nokia.com/phones/declaration_of_conformity/.
© 2009 Nokia. All rights reserved.
Nokia, Nokia Connecting People and Navi are trademarks orregistered trademarks of Nokia Corporation. Nokia tune is asound mark of Nokia Corporation. Other product andcompany names mentioned herein may be trademarks ortradenames of their respective owners.
Portions of the Nokia Maps software are ©1996-2008 TheFreeType Project. All rights reserved.
Reproduction, transfer, distribution, or storage of part or allof the contents in this document in any form without the priorwritten permission of Nokia is prohibited.
Includes RSA BSAFE cryptographic or security protocolsoftware from RSA Security.
Java and all Java-based marks are trademarks or registeredtrademarks of Sun Microsystems, Inc.
This product is licensed under the MPEG-4 Visual PatentPortfolio License (i) for personal and noncommercial use inconnection with information which has been encoded incompliance with the MPEG-4 Visual Standard by a consumerengaged in a personal and noncommercial activity and (ii) foruse in connection with MPEG-4 video provided by a licensedvideo provider. No license is granted or shall be implied forany other use. Additional information, including that relatedto promotional, internal, and commercial uses, may beobtained from MPEG LA, LLC. See http://www.mpegla.com
.
Nokia operates a policy of ongoing development. Nokiareserves the right to make changes and improvements to anyof the products described in this document without priornotice.
TO THE MAXIMUM EXTENT PERMITTED BY APPLICABLE LAW,UNDER NO CIRCUMSTANCES SHALL NOKIA OR ANY OF ITSLICENSORS BE RESPONSIBLE FOR ANY LOSS OF DATA OR INCOMEOR ANY SPECIAL, INCIDENTAL, CONSEQUENTIAL OR INDIRECTDAMAGES HOWSOEVER CAUSED.
THE CONTENTS OF THIS DOCUMENT ARE PROVIDED "AS IS".EXCEPT AS REQUIRED BY APPLICABLE LAW, NO WARRANTIES OFANY KIND, EITHER EXPRESS OR IMPLIED, INCLUDING, BUT NOTLIMITED TO, THE IMPLIED WARRANTIES OF MERCHANTABILITYAND FITNESS FOR A PARTICULAR PURPOSE, ARE MADE INRELATION TO THE ACCURACY, RELIABILITY OR CONTENTS OF THISDOCUMENT. NOKIA RESERVES THE RIGHT TO REVISE THISDOCUMENT OR WITHDRAW IT AT ANY TIME WITHOUT PRIORNOTICE.
The availability of particular products and applications andservices for these products may vary by region. Please checkwith your Nokia dealer for details, and availability oflanguage options.
Export controlsThis device may contain commodities, technology orsoftware subject to export laws and regulations from the USand other countries. Diversion contrary to law is prohibited.
Model number: 3720
4444444/Issue 1 EN
50
CyanCyan MagentaMagentaYellowYellow BlackBlackCyanCyan MagentaMagentaYellowYellow BlackBlack