Embed Size (px)
Citation preview
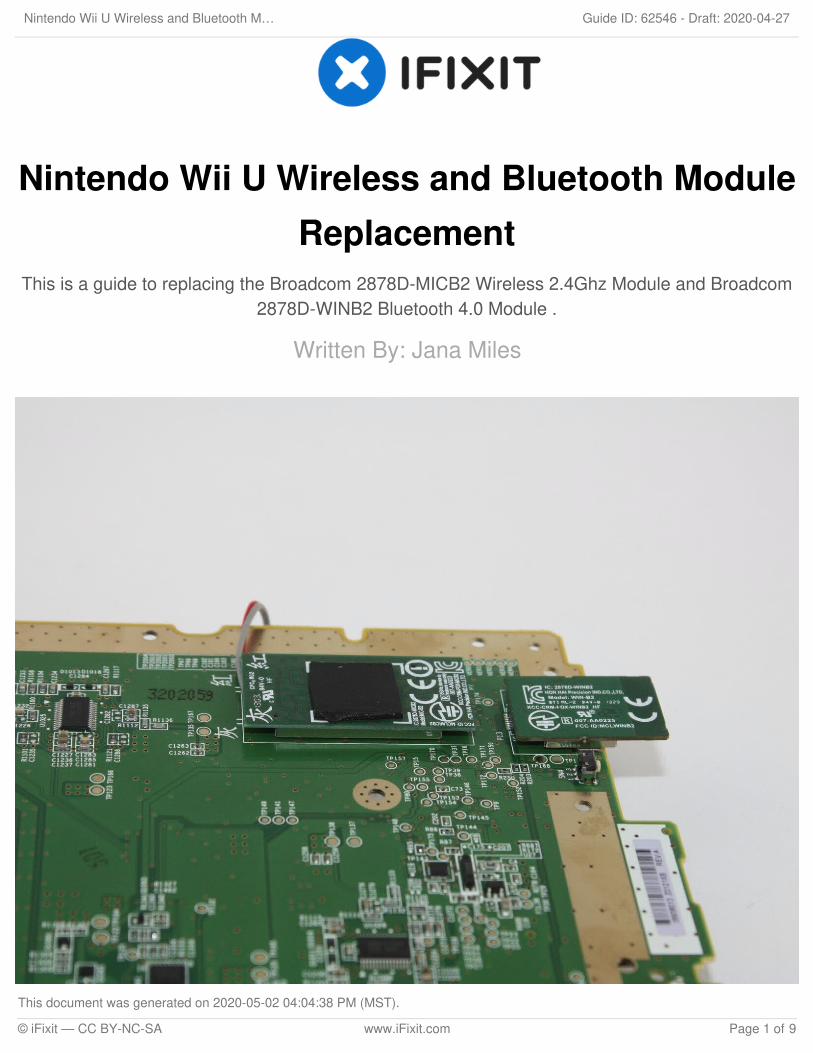
Nintendo Wii U Wireless and Bluetooth ModuleReplacement
This is a guide to replacing the Broadcom 2878D-MICB2 Wireless 2.4Ghz Module and Broadcom2878D-WINB2 Bluetooth 4.0 Module .
Written By: Jana Miles
Nintendo Wii U Wireless and Bluetooth M… Draft: 2020-04-27Guide ID: 62546 -
This document was generated on 2020-05-02 04:04:38 PM (MST).
© iFixit — CC BY-NC-SA www.iFixit.com Page 1 of 9
INTRODUCTION
Use this guide to learn how to replace the wireless Local Area Network (LAN) modules in theNintendo Wii U. This includes the Broadcom 2878D-MICB2 Wireless 2.4Ghz Module and Broadcom2878D-WINB2 Bluetooth 4.0 Module. This guide requires careful attention to the circuit boards,internal components, and adhesives during disassembly. Use of the tools listed will aid in this guide.
TOOLS:Spudger (1)Phillips #0 Screwdriver (1)Phillips #1 Screwdriver (1)Y1 Tri-point Screwdriver (1)
Nintendo Wii U Wireless and Bluetooth M… Draft: 2020-04-27Guide ID: 62546 -
This document was generated on 2020-05-02 04:04:38 PM (MST).
© iFixit — CC BY-NC-SA www.iFixit.com Page 2 of 9
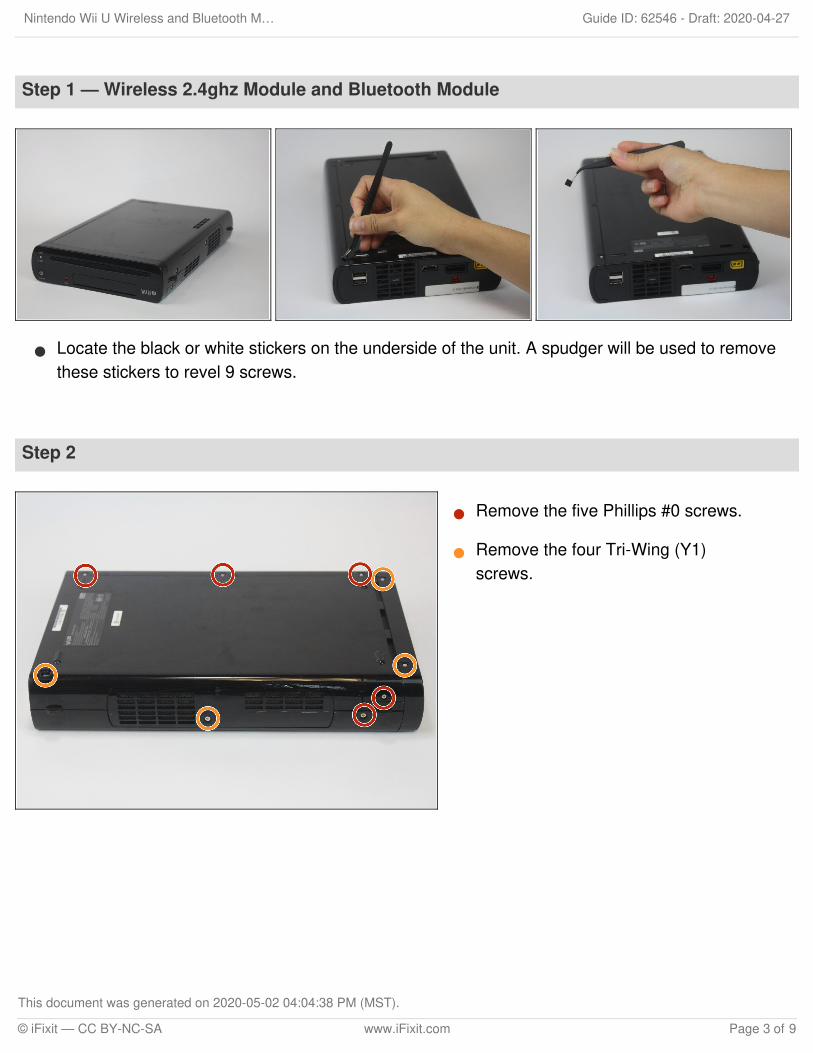
Step 1 — Wireless 2.4ghz Module and Bluetooth Module
Locate the black or white stickers on the underside of the unit. A spudger will be used to removethese stickers to revel 9 screws.
Step 2
Remove the five Phillips #0 screws.
Remove the four Tri-Wing (Y1)screws.
Nintendo Wii U Wireless and Bluetooth M… Draft: 2020-04-27Guide ID: 62546 -
This document was generated on 2020-05-02 04:04:38 PM (MST).
© iFixit — CC BY-NC-SA www.iFixit.com Page 3 of 9
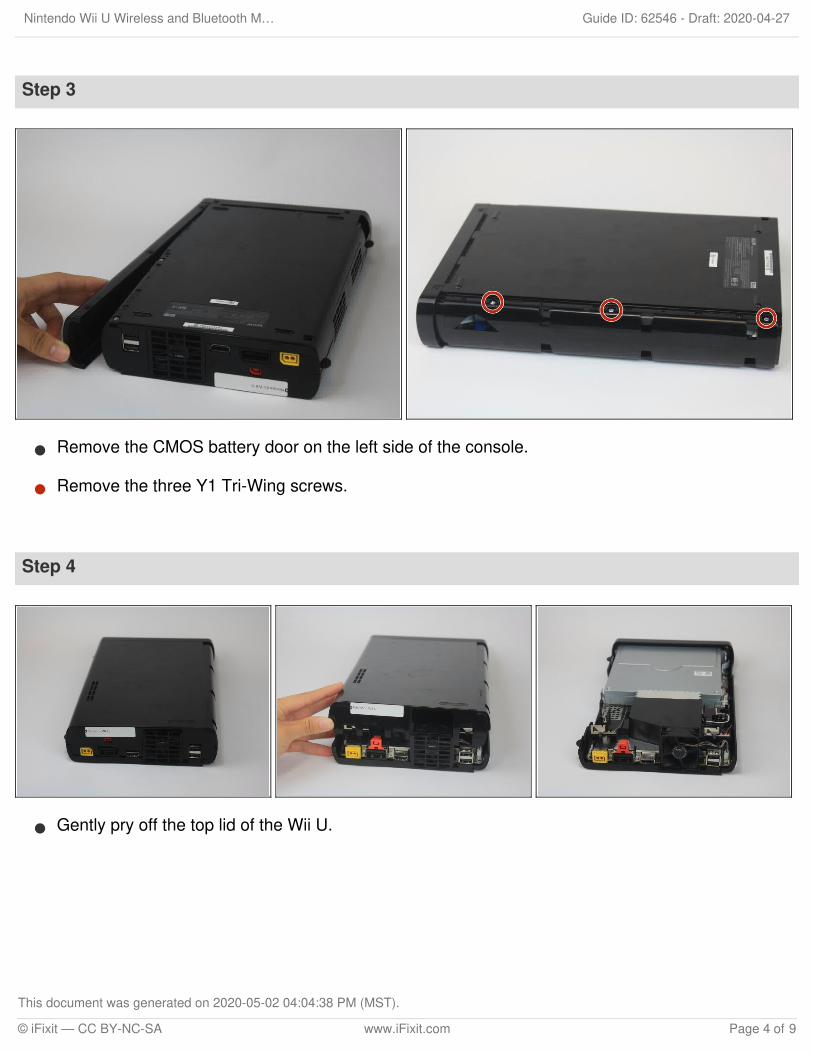
Step 3
Remove the CMOS battery door on the left side of the console.
Remove the three Y1 Tri-Wing screws.
Step 4
Gently pry off the top lid of the Wii U.
Nintendo Wii U Wireless and Bluetooth M… Draft: 2020-04-27Guide ID: 62546 -
This document was generated on 2020-05-02 04:04:38 PM (MST).
© iFixit — CC BY-NC-SA www.iFixit.com Page 4 of 9
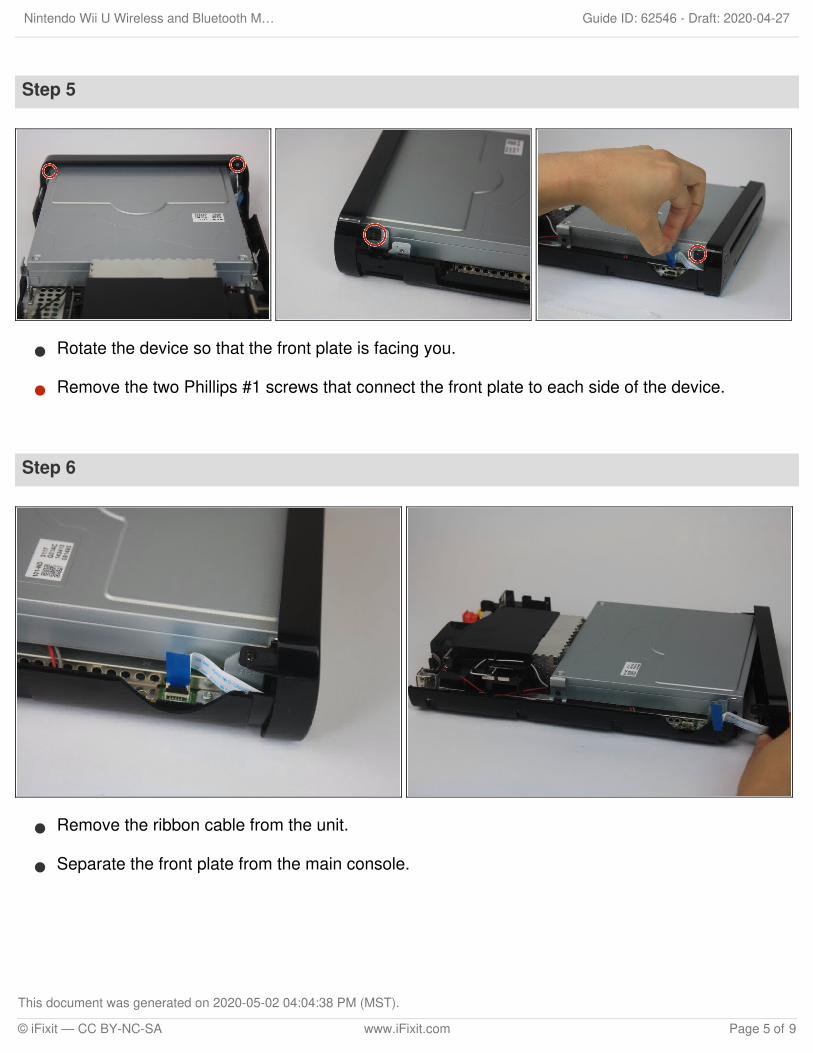
Step 5
Rotate the device so that the front plate is facing you.
Remove the two Phillips #1 screws that connect the front plate to each side of the device.
Step 6
Remove the ribbon cable from the unit.
Separate the front plate from the main console.
Nintendo Wii U Wireless and Bluetooth M… Draft: 2020-04-27Guide ID: 62546 -
This document was generated on 2020-05-02 04:04:38 PM (MST).
© iFixit — CC BY-NC-SA www.iFixit.com Page 5 of 9
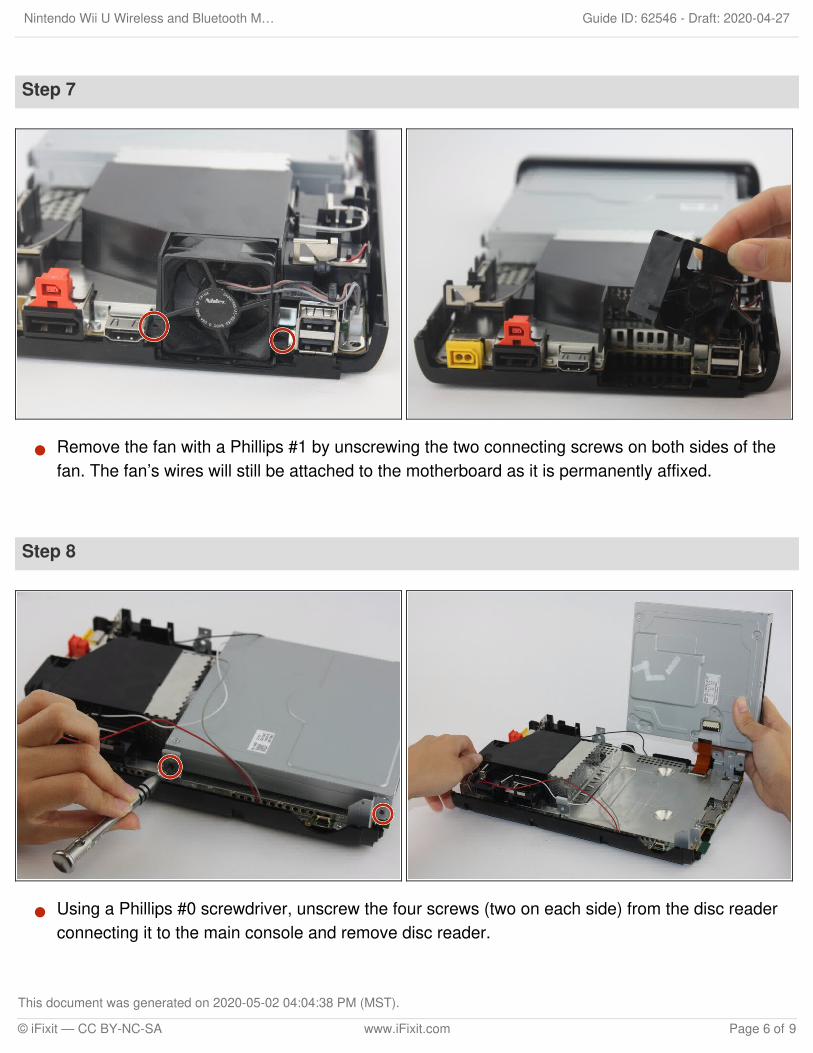
Step 7
Remove the fan with a Phillips #1 by unscrewing the two connecting screws on both sides of thefan. The fan’s wires will still be attached to the motherboard as it is permanently affixed.
Step 8
Using a Phillips #0 screwdriver, unscrew the four screws (two on each side) from the disc readerconnecting it to the main console and remove disc reader.
Nintendo Wii U Wireless and Bluetooth M… Draft: 2020-04-27Guide ID: 62546 -
This document was generated on 2020-05-02 04:04:38 PM (MST).
© iFixit — CC BY-NC-SA www.iFixit.com Page 6 of 9
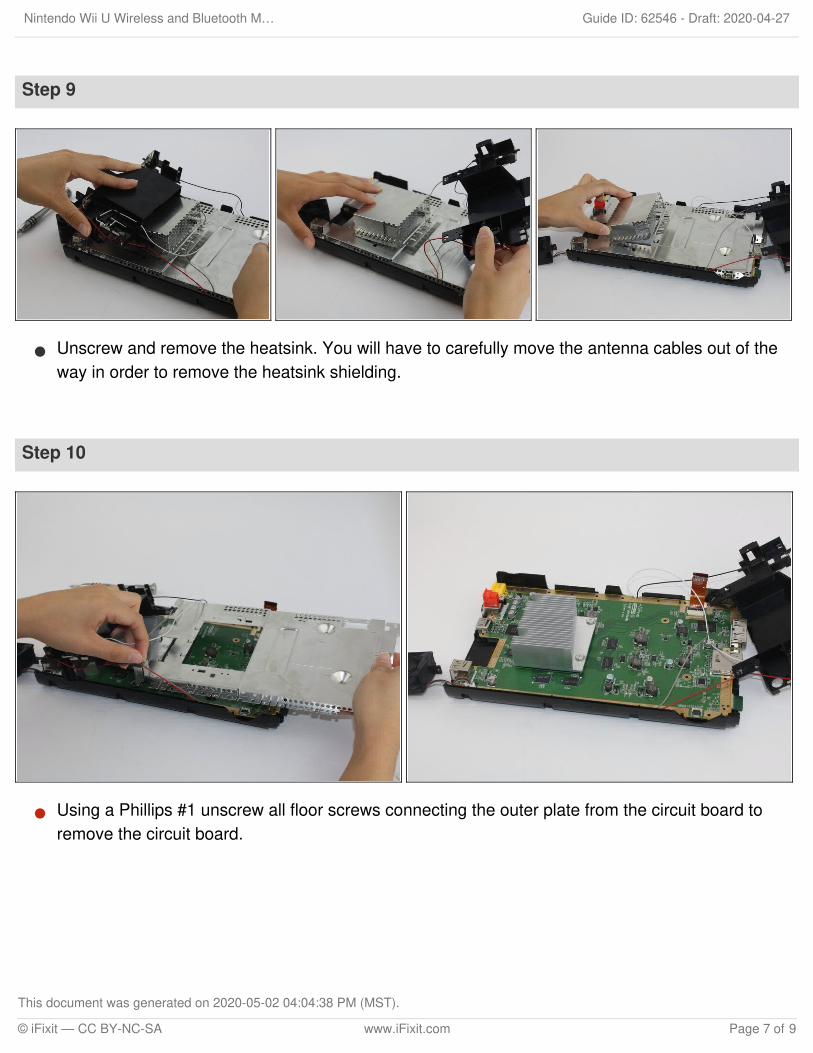
Step 9
Unscrew and remove the heatsink. You will have to carefully move the antenna cables out of theway in order to remove the heatsink shielding.
Step 10
Using a Phillips #1 unscrew all floor screws connecting the outer plate from the circuit board toremove the circuit board.
Nintendo Wii U Wireless and Bluetooth M… Draft: 2020-04-27Guide ID: 62546 -
This document was generated on 2020-05-02 04:04:38 PM (MST).
© iFixit — CC BY-NC-SA www.iFixit.com Page 7 of 9
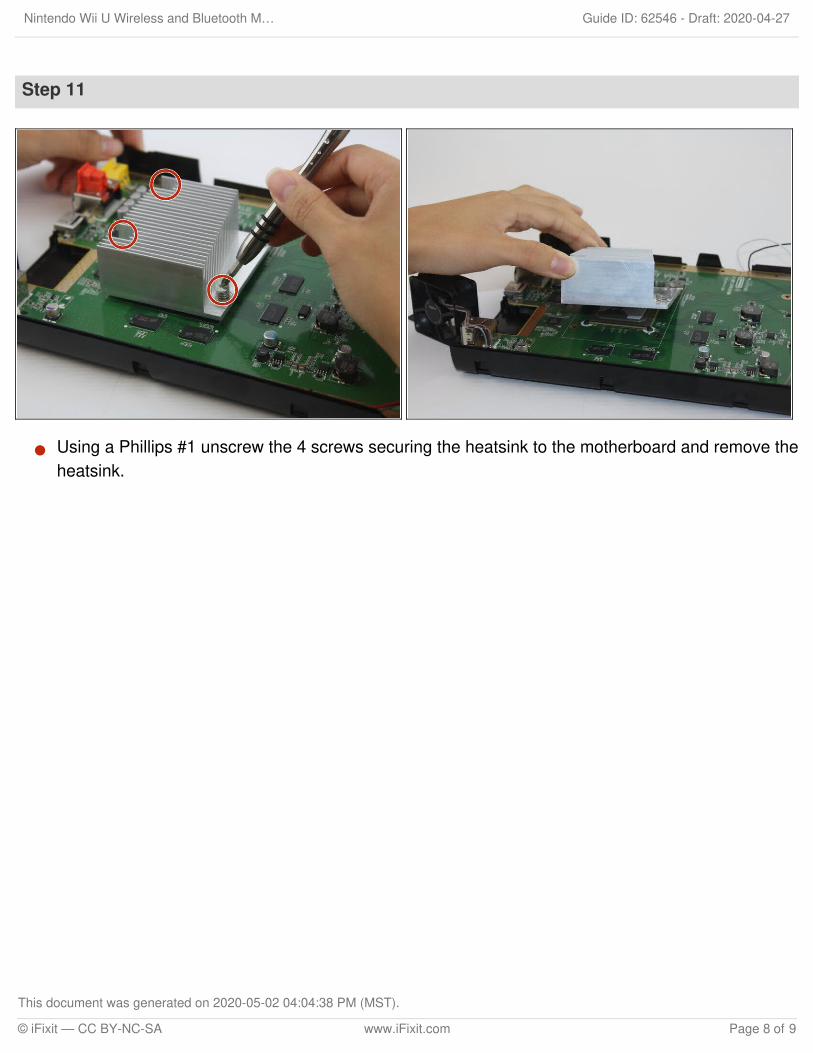
Step 11
Using a Phillips #1 unscrew the 4 screws securing the heatsink to the motherboard and remove theheatsink.
Nintendo Wii U Wireless and Bluetooth M… Draft: 2020-04-27Guide ID: 62546 -
This document was generated on 2020-05-02 04:04:38 PM (MST).
© iFixit — CC BY-NC-SA www.iFixit.com Page 8 of 9
To reassemble your device, follow these instructions in reverse order.
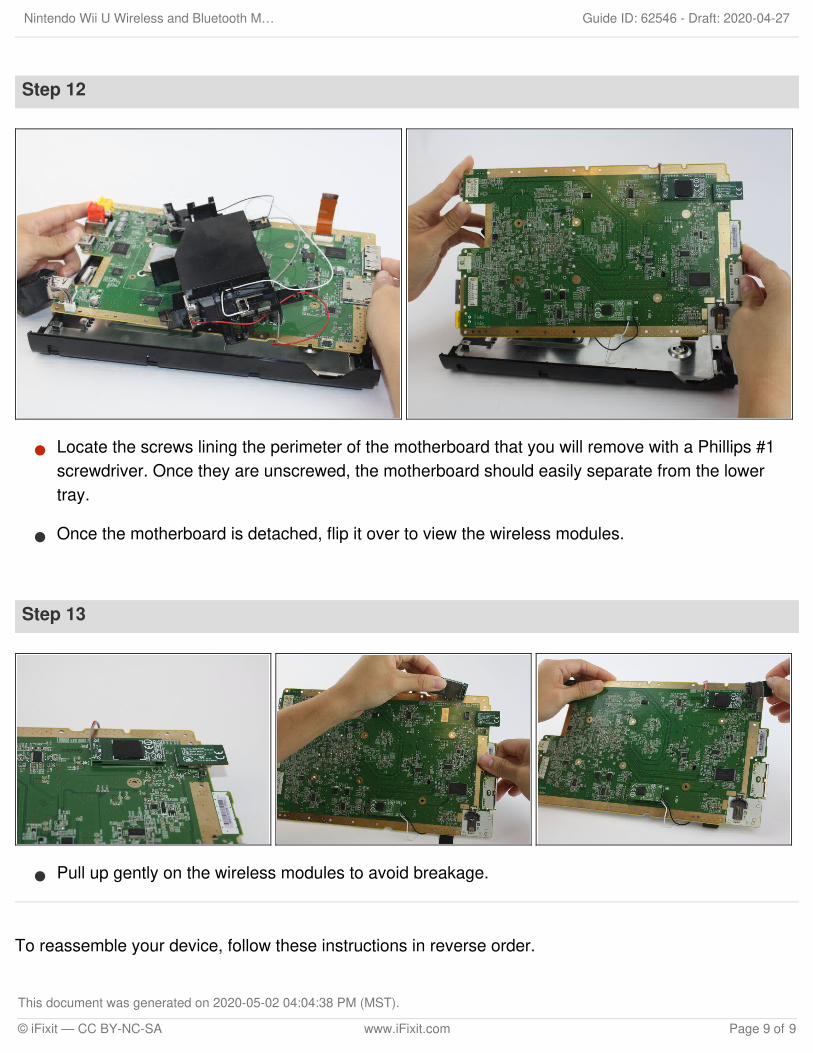
Step 12
Locate the screws lining the perimeter of the motherboard that you will remove with a Phillips #1screwdriver. Once they are unscrewed, the motherboard should easily separate from the lowertray.
Once the motherboard is detached, flip it over to view the wireless modules.
Step 13
Pull up gently on the wireless modules to avoid breakage.
Nintendo Wii U Wireless and Bluetooth M… Draft: 2020-04-27Guide ID: 62546 -
This document was generated on 2020-05-02 04:04:38 PM (MST).
© iFixit — CC BY-NC-SA www.iFixit.com Page 9 of 9