Embed Size (px)
Citation preview

1
NewerTech NuDriveThe NewerTech NuDrive is a formatting application built for Apple® Mac® and PC users who require a simple walk-through of the hard drive or SSD formatting process.
NuDrive uses standard OS X® and Windows® formatting options to create the volumes needed to store information on your new drive. The benefit is a standard format, created with steps that are easier for many users to understand.
STEP 1Connect your new drive to a power source if needed (consult your user guide if you are unsure), then connect the drive to your computer using the included data cable.
STEP 2After a few seconds an icon that says “Newer Setup” will appear -- by default the icon should appear on the OS X Desktop, or within “My Computer” for Windows. Double-click the icon to access the NuDrive application. A window will open displaying a new set of icons (shown at right).
NOTES: • All of the bundled software is stored in the “NewerTech Software” folder.• The screenshots in this guide depict the OS X operating system, but the steps are the same on a Mac or PC.

2
NewerTech NuDrive
STEP 4Verify under “Your New Drive” that your disk is available to NuDrive, then click the Continue button (shown at right).
STEP 3Double-click the NuDrive icon to open the first setup screen. You will have to enter the password for your OS X user account before the screen appears.
STEP 5Review the End User License Agreement (not pictured) and if you agree with the terms, click Accept to continue the process.
STEP 6If you intend to format your drive as a single volume, leave the “Easy Setup...” option intact and then click Continue.
If you intend to format your drive with multiple partitions or custom settings, please skip ahead to page 5.
3
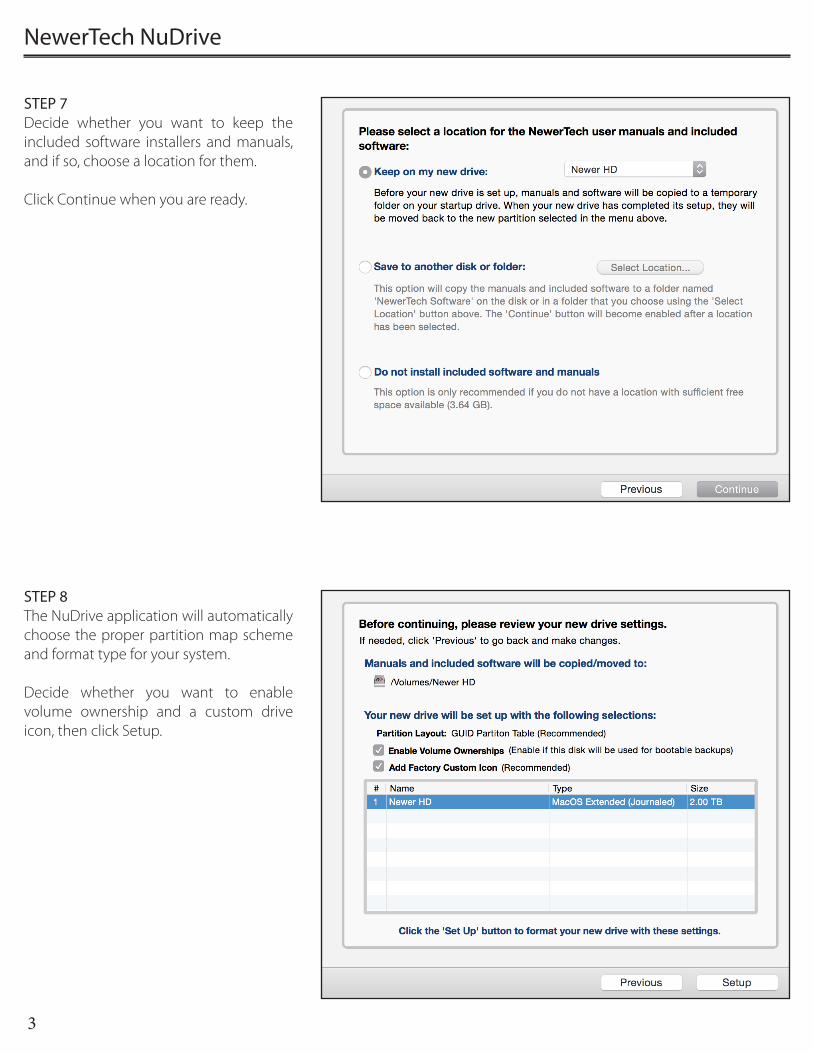
STEP 7Decide whether you want to keep the included software installers and manuals, and if so, choose a location for them.
Click Continue when you are ready.
STEP 8The NuDrive application will automatically choose the proper partition map scheme and format type for your system.
Decide whether you want to enable volume ownership and a custom drive icon, then click Setup.
NewerTech NuDrive

4
STEP 9While the drive is formatting you will see a progress meter screen. You do not need to do anything during this period of time.
STEP 10Once you see the “Setup Complete” screen, click the Quit button to exit the NuDrive application and begin using your newly formatted drive.
NewerTech NuDrive

5
STEP 6c - Custom SetupIf you need to use custom partition or formatting options, click the “Custom Setup” button.
For this example we’ll choose the option to create “2 Mac OS partitions”. On the Windows side this would list as “2 NTFS partitions”.
STEP 7cClick the pop-up menu to the right of the “Custom Setup” button and choose the number of partitions (volumes) you want to create. Example: you could create one to store photos, and another to store movies.
STEP 8cTo change the size of one volume relative to the other, drag the vertical divider(s) in the blue box to the left or right. As one volume is made larger, the other decreases in size by the same amount.
STEP 9cTo give each volume its own name, highlight each section of the blue box, then type into the “Name” field.
NewerTech NuDrive
6
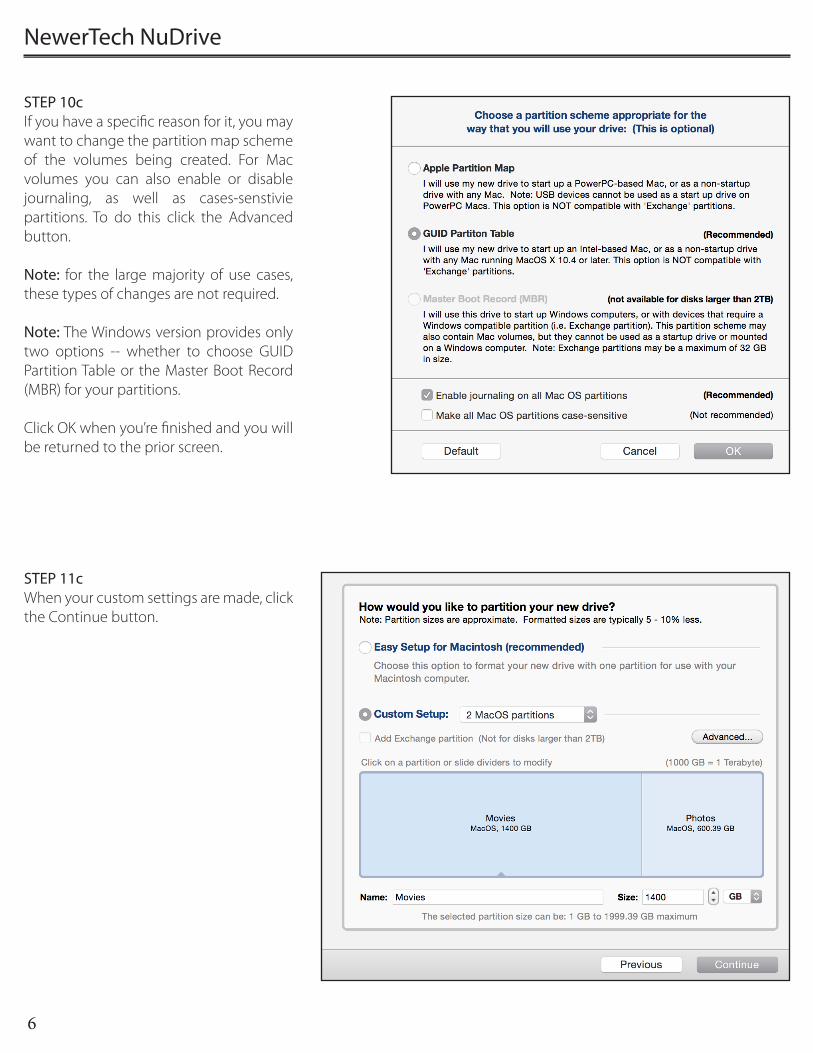
STEP 10cIf you have a specific reason for it, you may want to change the partition map scheme of the volumes being created. For Mac volumes you can also enable or disable journaling, as well as cases-senstivie partitions. To do this click the Advanced button.
Note: for the large majority of use cases, these types of changes are not required.
Note: The Windows version provides only two options -- whether to choose GUID Partition Table or the Master Boot Record (MBR) for your partitions.
Click OK when you’re finished and you will be returned to the prior screen.
STEP 11cWhen your custom settings are made, click the Continue button.
NewerTech NuDrive
7
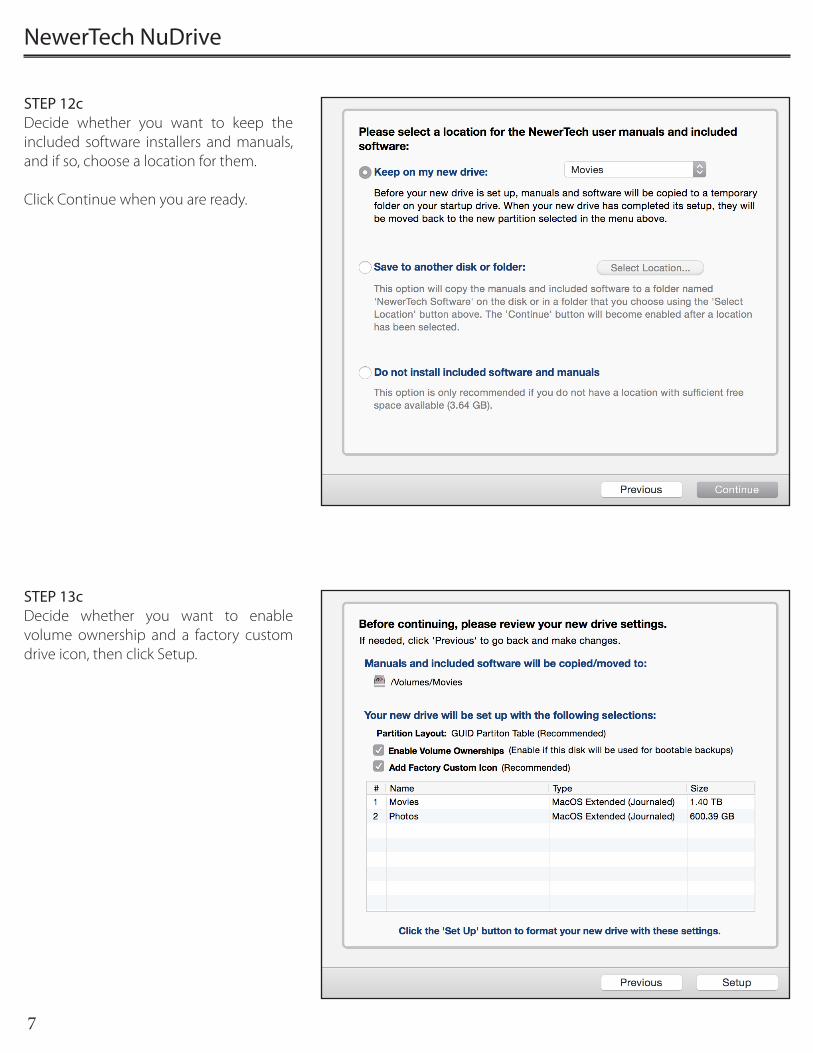
STEP 12cDecide whether you want to keep the included software installers and manuals, and if so, choose a location for them.
Click Continue when you are ready.
STEP 13cDecide whether you want to enable volume ownership and a factory custom drive icon, then click Setup.
NewerTech NuDrive

8
STEP 14cWhile the volumes are being created you will see a progress meter screen. You do not need to do anything during this period of time.
STEP 15cOnce you see the “Setup Complete” screen, simply click the Quit button to exit the NuDrive application and begin using your newly formatted volumes!
NewerTech NuDrive

9
ADDITIONAL RESOURCESIf you would like to like to learn about the settings that NuDrive uses, or about other methods to format your drives for Mac and PC, please visit the links below.
Mac:https://support.apple.com/kb/ph5845?locale=en_US
Windows:http://windows.microsoft.com/en-us/windows-vista/formatting-disks-and-drives
NWTQSNUDRIVER1 DM 10/07/2015