Embed Size (px)
Citation preview
6
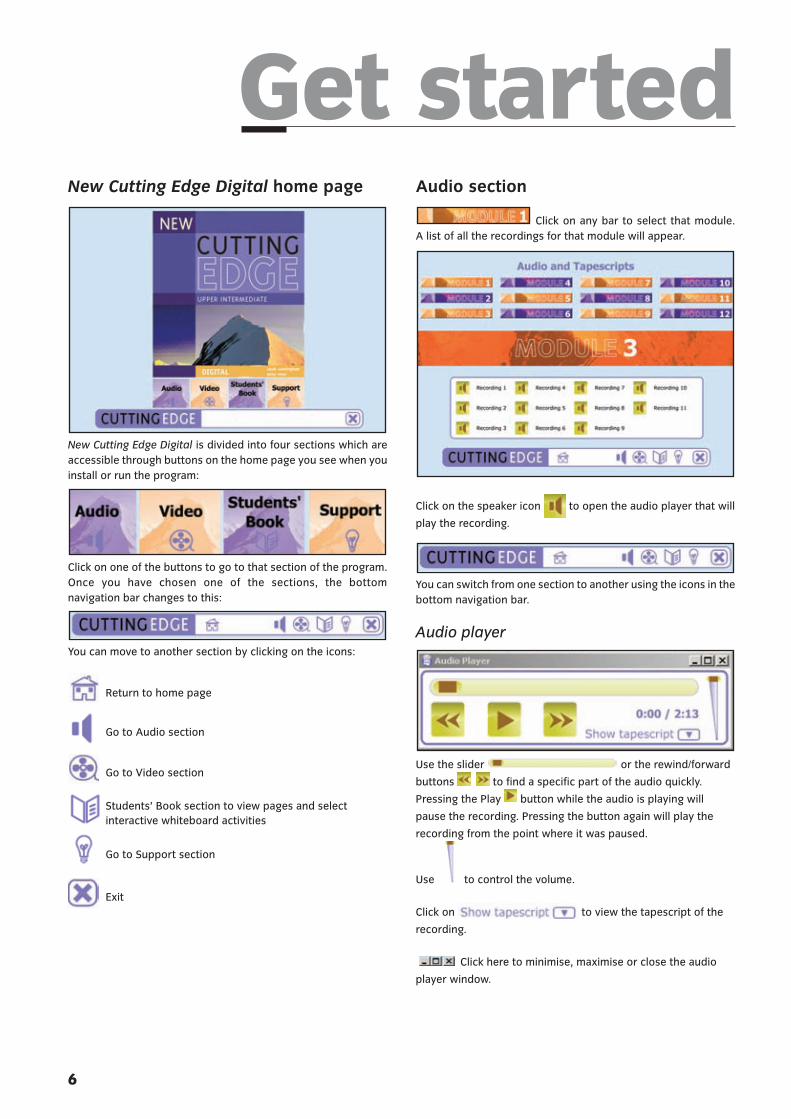
New Cutting Edge Digital home page
New Cutting Edge Digital is divided into four sections which are
accessible through buttons on the home page you see when you
install or run the program:
Click on one of the buttons to go to that section of the program.
Once you have chosen one of the sections, the bottom
navigation bar changes to this:
You can move to another section by clicking on the icons:
Return to home page
Go to Audio section
Go to Video section
Students’ Book section to view pages and select
interactive whiteboard activities
Go to Support section
Exit
Audio section
Click on any bar to select that module.
A list of all the recordings for that module will appear.
Click on the speaker icon to open the audio player that will
play the recording.
You can switch from one section to another using the icons in the
bottom navigation bar.
Audio player
Use the slider or the rewind/forward
buttons to find a specific part of the audio quickly.
Pressing the Play button while the audio is playing will
pause the recording. Pressing the button again will play the
recording from the point where it was paused.
Use to control the volume.
Click on to view the tapescript of the
recording.
Click here to minimise, maximise or close the audio
player window.
Get started
UI_Introduction_pp2_12.qxd 3/5/07 4:14 PM Page 6
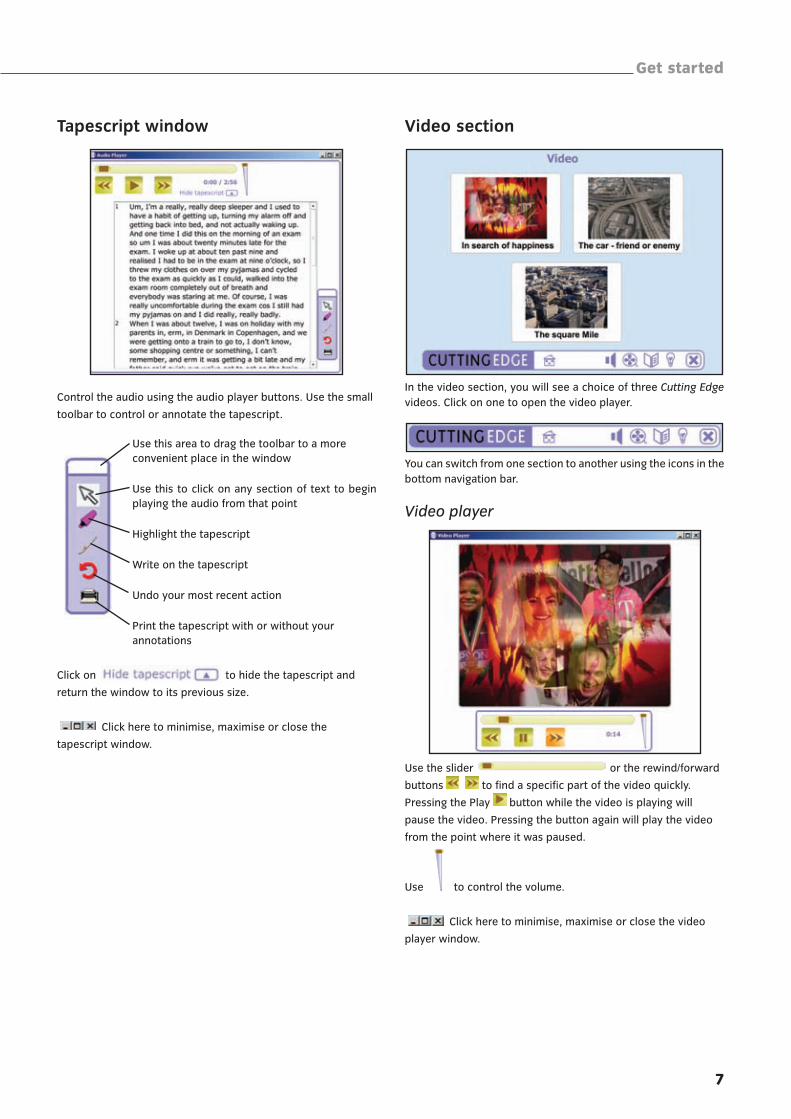
Tapescript window
Control the audio using the audio player buttons. Use the small
toolbar to control or annotate the tapescript.
Use this area to drag the toolbar to a more
convenient place in the window
Use this to click on any section of text to begin
playing the audio from that point
Highlight the tapescript
Write on the tapescript
Undo your most recent action
Print the tapescript with or without your
annotations
Click on to hide the tapescript and
return the window to its previous size.
Click here to minimise, maximise or close the
tapescript window.
Get started
7
Video section
In the video section, you will see a choice of three Cutting Edge
videos. Click on one to open the video player.
You can switch from one section to another using the icons in the
bottom navigation bar.
Video player
Use the slider or the rewind/forward
buttons to find a specific part of the video quickly.
Pressing the Play button while the video is playing will
pause the video. Pressing the button again will play the video
from the point where it was paused.
Use to control the volume.
Click here to minimise, maximise or close the video
player window.
UI_Introduction_pp2_12.qxd 3/5/07 4:14 PM Page 7
Get started
8
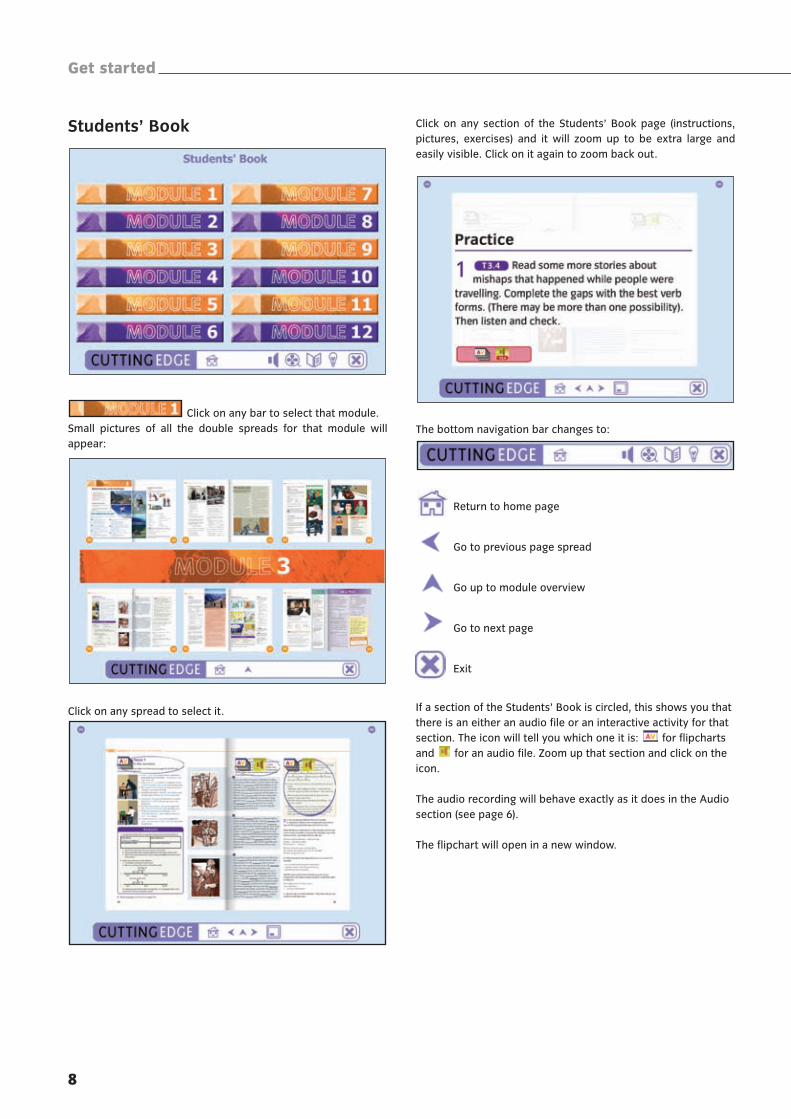
Students’ Book
Click on any bar to select that module.
Small pictures of all the double spreads for that module will
appear:
Click on any spread to select it.
Click on any section of the Students’ Book page (instructions,
pictures, exercises) and it will zoom up to be extra large and
easily visible. Click on it again to zoom back out.
The bottom navigation bar changes to:
Return to home page
Go to previous page spread
Go up to module overview
Go to next page
Exit
If a section of the Students’ Book is circled, this shows you that
there is an either an audio file or an interactive activity for that
section. The icon will tell you which one it is: for flipcharts
and for an audio file. Zoom up that section and click on the
icon.
The audio recording will behave exactly as it does in the Audio
section (see page 6).
The flipchart will open in a new window.
UI_Introduction_pp2_12.qxd 3/5/07 4:14 PM Page 8
Get started
9
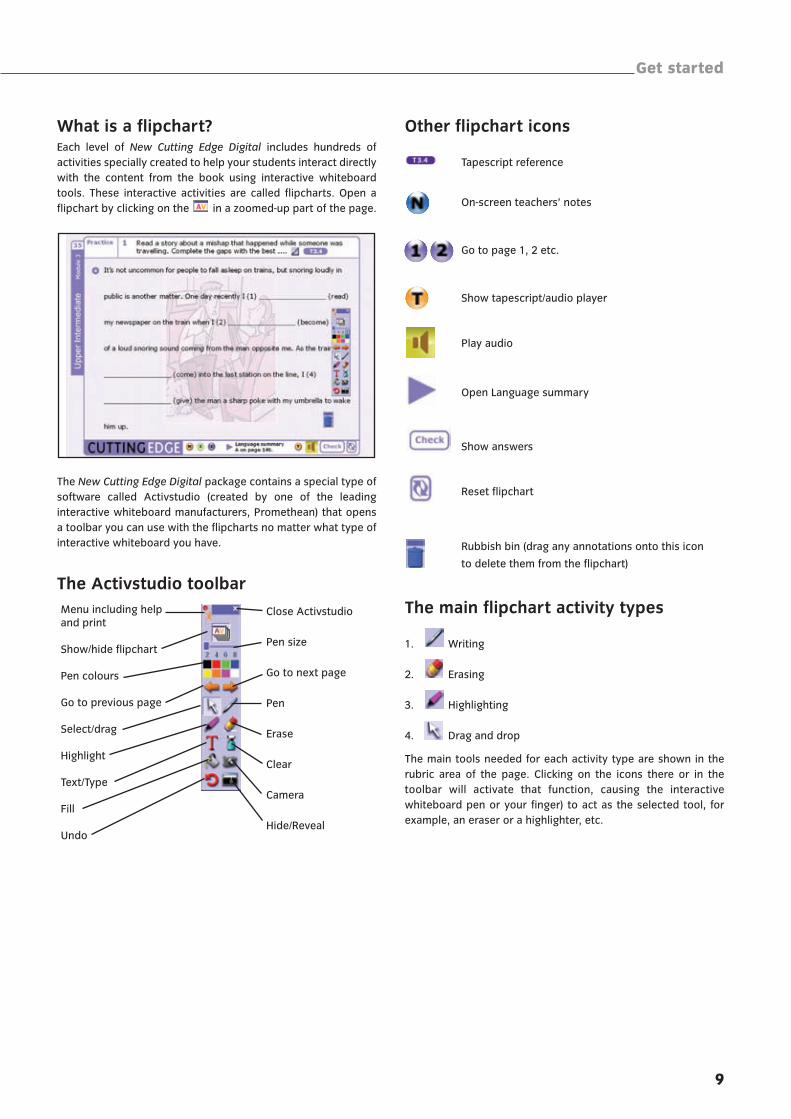
What is a flipchart?Each level of New Cutting Edge Digital includes hundreds of
activities specially created to help your students interact directly
with the content from the book using interactive whiteboard
tools. These interactive activities are called flipcharts. Open a
flipchart by clicking on the in a zoomed-up part of the page.
The New Cutting Edge Digital package contains a special type of
software called Activstudio (created by one of the leading
interactive whiteboard manufacturers, Promethean) that opens
a toolbar you can use with the flipcharts no matter what type of
interactive whiteboard you have.
The Activstudio toolbar
Other flipchart icons
Tapescript reference
On-screen teachers’ notes
Go to page 1, 2 etc.
Show tapescript/audio player
Play audio
Open Language summary
Show answers
Reset flipchart
Rubbish bin (drag any annotations onto this icon
to delete them from the flipchart)
The main flipchart activity types
1. Writing
2. Erasing
3. Highlighting
4. Drag and drop
The main tools needed for each activity type are shown in the
rubric area of the page. Clicking on the icons there or in the
toolbar will activate that function, causing the interactive
whiteboard pen or your finger) to act as the selected tool, for
example, an eraser or a highlighter, etc.
Menu including helpand print
Show/hide flipchart
Pen colours
Go to previous page
Select/drag
Highlight
Text/Type
Fill
Undo
Close Activstudio
Pen size
Go to next page
Pen
Erase
Clear
Camera
Hide/Reveal
UI_Introduction_pp2_12.qxd 3/5/07 4:14 PM Page 9
Within each activity type there are variations on how the tools
may be used.
1. Writing
The flipcharts may require you to use the pen in various ways:
– to write words, phrases or sentences;
– to choose an answer by circling or underlying items;
– to draw lines to match halves of sentences.
Use the slider to make the pen width thicker.
Use the colour squares to choose a different colour for
the ‘ink’.
2. Erasing
Activities that include the eraser will ask you to erase the wrong
answer (and leave the correct answer) or to erase a purple box
to reveal the answer.
3. Highlighting
Highlighting is used in flipchart activities to show stress during
pronunciation practice or to emphasize key points.
4. Drag and drop
The arrow tool is used in activities to drag words into the correct
category, to drag words to their matches or to drag the correct
answer into the gap. It is also used to drag a special ‘answer box’
down the page to reveal the correct answer.
Support section
The support section includes an on-screen user’s guide and
quick links to further information and support.
Get started
10
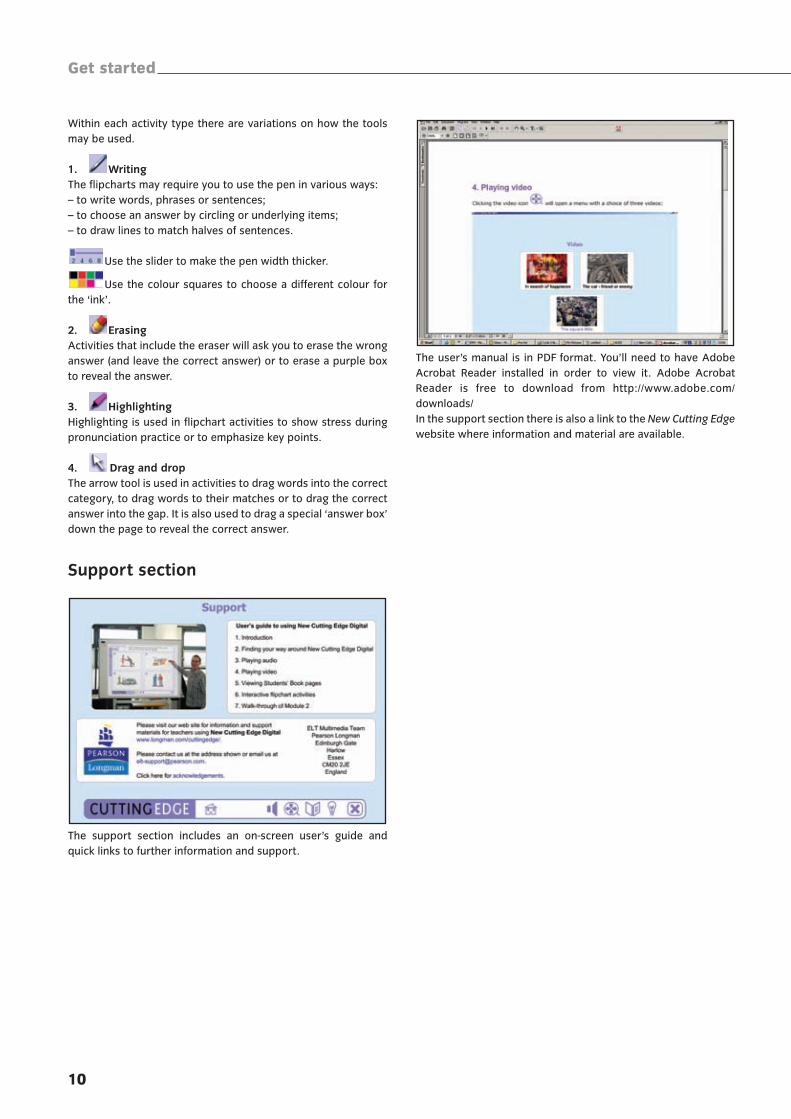
The user’s manual is in PDF format. You’ll need to have Adobe
Acrobat Reader installed in order to view it. Adobe Acrobat
Reader is free to download from http://www.adobe.com/
downloads/
In the support section there is also a link to the New Cutting Edge
website where information and material are available.
UI_Introduction_pp2_12.qxd 3/5/07 4:14 PM Page 10